When Denise and I sat down to discuss things we needed to learn to make, things we could not longer eat “normal” versions of, one of the things that popped to the top of the list was what my college roommate called “bar food” — fried foods that tasted great and had little or no nutritional value. I can still have french fries, which are my favorite of the genre, but Denise missed mozzarella sticks (to the point that I had dreams about them – D).
As anyone who is vegan, allergic to milk, lactose-intolerant knows, cheese is one of the harder flavors to replicate without actual dairy products. Many have tried, but the majority of “non-dairy” cheeses on the market actually contain some dairy, and therefore aren’t suitable for anyone vegan or with allergies. There is nothing on the market that really would work for a fried cheese product.
But we do have the wonder of Joanne Stepaniak’s The Uncheese Cookbook, which has an amazing variety of cheesy flavors (including the basis for the nacho cheese used in the Happy Layers Nacho Dip). We figured that if we made the mozzarella recipe, made sure it was structurally sound enough to batter and fry, and then figured out a breading, we’d be set. Easy, right?
Not exactly. We had no problems with the cheez, though we made three or four recipes before determining which worked best, and tried several different “egg wash” and breading options, too, before determining which worked best. But even our less perfect attempts were edible, and we’ve shared these with regular omnivorous eaters, and while they wouldn’t mistake them for mozzarella sticks, they did enjoy them. This recipe was our first resounding success, and it’s kept us going for a while.
This is NOT an every day recipe! And frankly, given that it’s fried “cheez,” it really shouldn’t be anyway. There is preparation involved, and then deep frying, but they taste good at room temperature and could easily be re-warmed or kept warm in a low oven.
Before we get started, you will need the proper equipment. You decide how much you can fudge this stuff, but remember you’ll be playing with oil.
For making cheez:
- 2 qt. saucepan
- whisk
- silicone ice cube trays or molds with a capacity of about 1 Tablespoon each (cubes are approximately 1 inch square)
- plastic wrap
- freezer space so they can set
For the frying:
- pot deep enough to accommodate about 3 inches of oil and the frying thermometer, a thick stainless steel or a enameled dutch oven would be best. You also want a pot that’s tall enough that the edge is 2 or more inches above the oil level. It’s safer and there’s less splatter all around. The pot we used was 5 inches tall and about 8 inches across. We do not recommend using anything with Teflon or nonstick coatings. Of course, if you have an actual deep fryer appliance, use that.
- frying thermometer (the link goes to the one we used)
- splatter screen (trust us, don’t go forth without this one)
- tongs and/or slotted frying spoon/spider (we used a silicone one rather than the traditional wire and bamboo, but I can’t find a picture of ours)
- cookie cooling rack and cookie sheet, lined with paper towels
- probe-style thermometer
- For recapturing the oil for re-use (with proper care, you can use this oil at least 6 times)
- Mason jars
- coffee filters
- funnel
Ingredients, all in one list:
- 2 cups rice milk
- ½ cup nutritional yeast flakes
- 7 Tablespoons oat flour (if you can’t get gluten free certified oat flour, grind gluten free certified rolled oats in a blender, food processor or coffee grinder until you have flour)
- ¼ cup tahini
- ¼ cup cornstarch
- 4 Tablespoons lemon juice
- 1 Tablespoon onion powder
- 1 teaspoon kosher salt
- 2 Tablespoons Ener-G egg replacer powder
- 1/2 cup warm rice milk
- one loaf of white rice bread, turned into bread crumbs, or about 1 1/2 cups of bread crumbs
- a large jug of canola oil, for frying
- marinara or tomato sauce for dipping (optional)
Miraculous Cheez Nuggets
There are two things you need to do in advance — make the cheez and make the bread crumbs. You could buy bread crumbs, but it may be easier to make your own and control the bread. For gluten-free bread crumbs, we suggest either Ener-G White Rice Bread or Food for Life White Rice Bread. In my opinion (MK), neither one is a fantastic sandwich bread, but the white rice breads do make excellent bread crumbs for frying.
For either one, lay the slices out on the oven rack and bake for about 2 hours at 200°F. Let cool completely, and then put through the food processor. You won’t use the whole loaf’s worth of crumbs, but why not keep the rest on hand? They keep well in a plastic bag or other sealed container.
Make cheez:
Place the following ingredients in the saucepan:
- 2 cups rice milk
- ½ cup nutritional yeast flakes
- 7 Tablespoons oat flour (if you can’t get gluten free certified oat flour, grind gluten free certified rolled oats in a blender, food processor or coffee grinder until you have flour)
- ¼ cup tahini
- ¼ cup cornstarch
- 4 Tablespoons lemon juice
- 1 Tablespoon onion powder
- 1 teaspoon kosher salt
Whisk all ingredients together until well combined.

Cook over medium-low heat, whisking occasionally until mixture starts to thicken. Turn heat to low, whisk constantly until mixture starts to pull together and away from sides of pan.

Spoon into silicone molds or ice cube trays, approximately 1 tablespoon per cube. Try your best to smooth out the tops.

Cool in fridge. Then cover with plastic wrap and freeze the cheez over night. The cheez must be frozen to hold up to frying without becoming a really nasty mess. The last batch we made we had intended to fry the the next day but couldn’t, so the cheez was in the freezer for a week or so with no ill effect. To save time, you could keep some cheez made ahead of time in the freezer and then just bread and fry when you want some.
Frying Fun!
Fill the frying pot (described above) with about 3 inches of canola oil, and put your frying thermometer in place. Start heat over medium-low and aim for 360ºF.

While waiting for your oil to heat, you will bread your cheez. Make an “egg” mix by mixing the following:
- 2 Tablespoons Ener-G egg replacer powder
- 1/2 cup warm rice milk
Place egg mix in a deep enough container or bowl that you can dip the cheez nuggets in it and coat them easily. Place bread crumbs in a low flat container so that you can easily roll the nuggets to coat them in the bread crumbs.
Remove cheez nuggets from silicone molds. One at a time, dip nuggets in egg mix, then in bread crumbs. Place on a tray to until you are ready to fry them.


Fry them! Drop nuggets (gently!) in the hot oil and then cover the pot with the splatter screen.


Our pot was about 8 inches in diameter, with 3 inches of oil, and we could fry 5 nuggets at a time. Each batch took approximately 5 minutes with the starting oil temperature at 360-370ºF. We were able to test the interior temperature (remember, these will still be frozen when you drop them in the oil) with the probe thermometer — anything over 70ºF is good (take a nugget out of the oil and test it on a plate. DO NOT TRY TO PROBE A NUGGET WHILE FRYING). You can also just cut one open and feel it.

If you put too many nuggets in the oil at once, you will drop the temperature too far down (don’t go below 330ºF), and you won’t get a golden brown outside with a warm cheezy center. If your oil drops more than 15 degrees, put fewer nuggets in the next time around. You can also adjust your stove temperature to try to keep the oil temperature consistent.
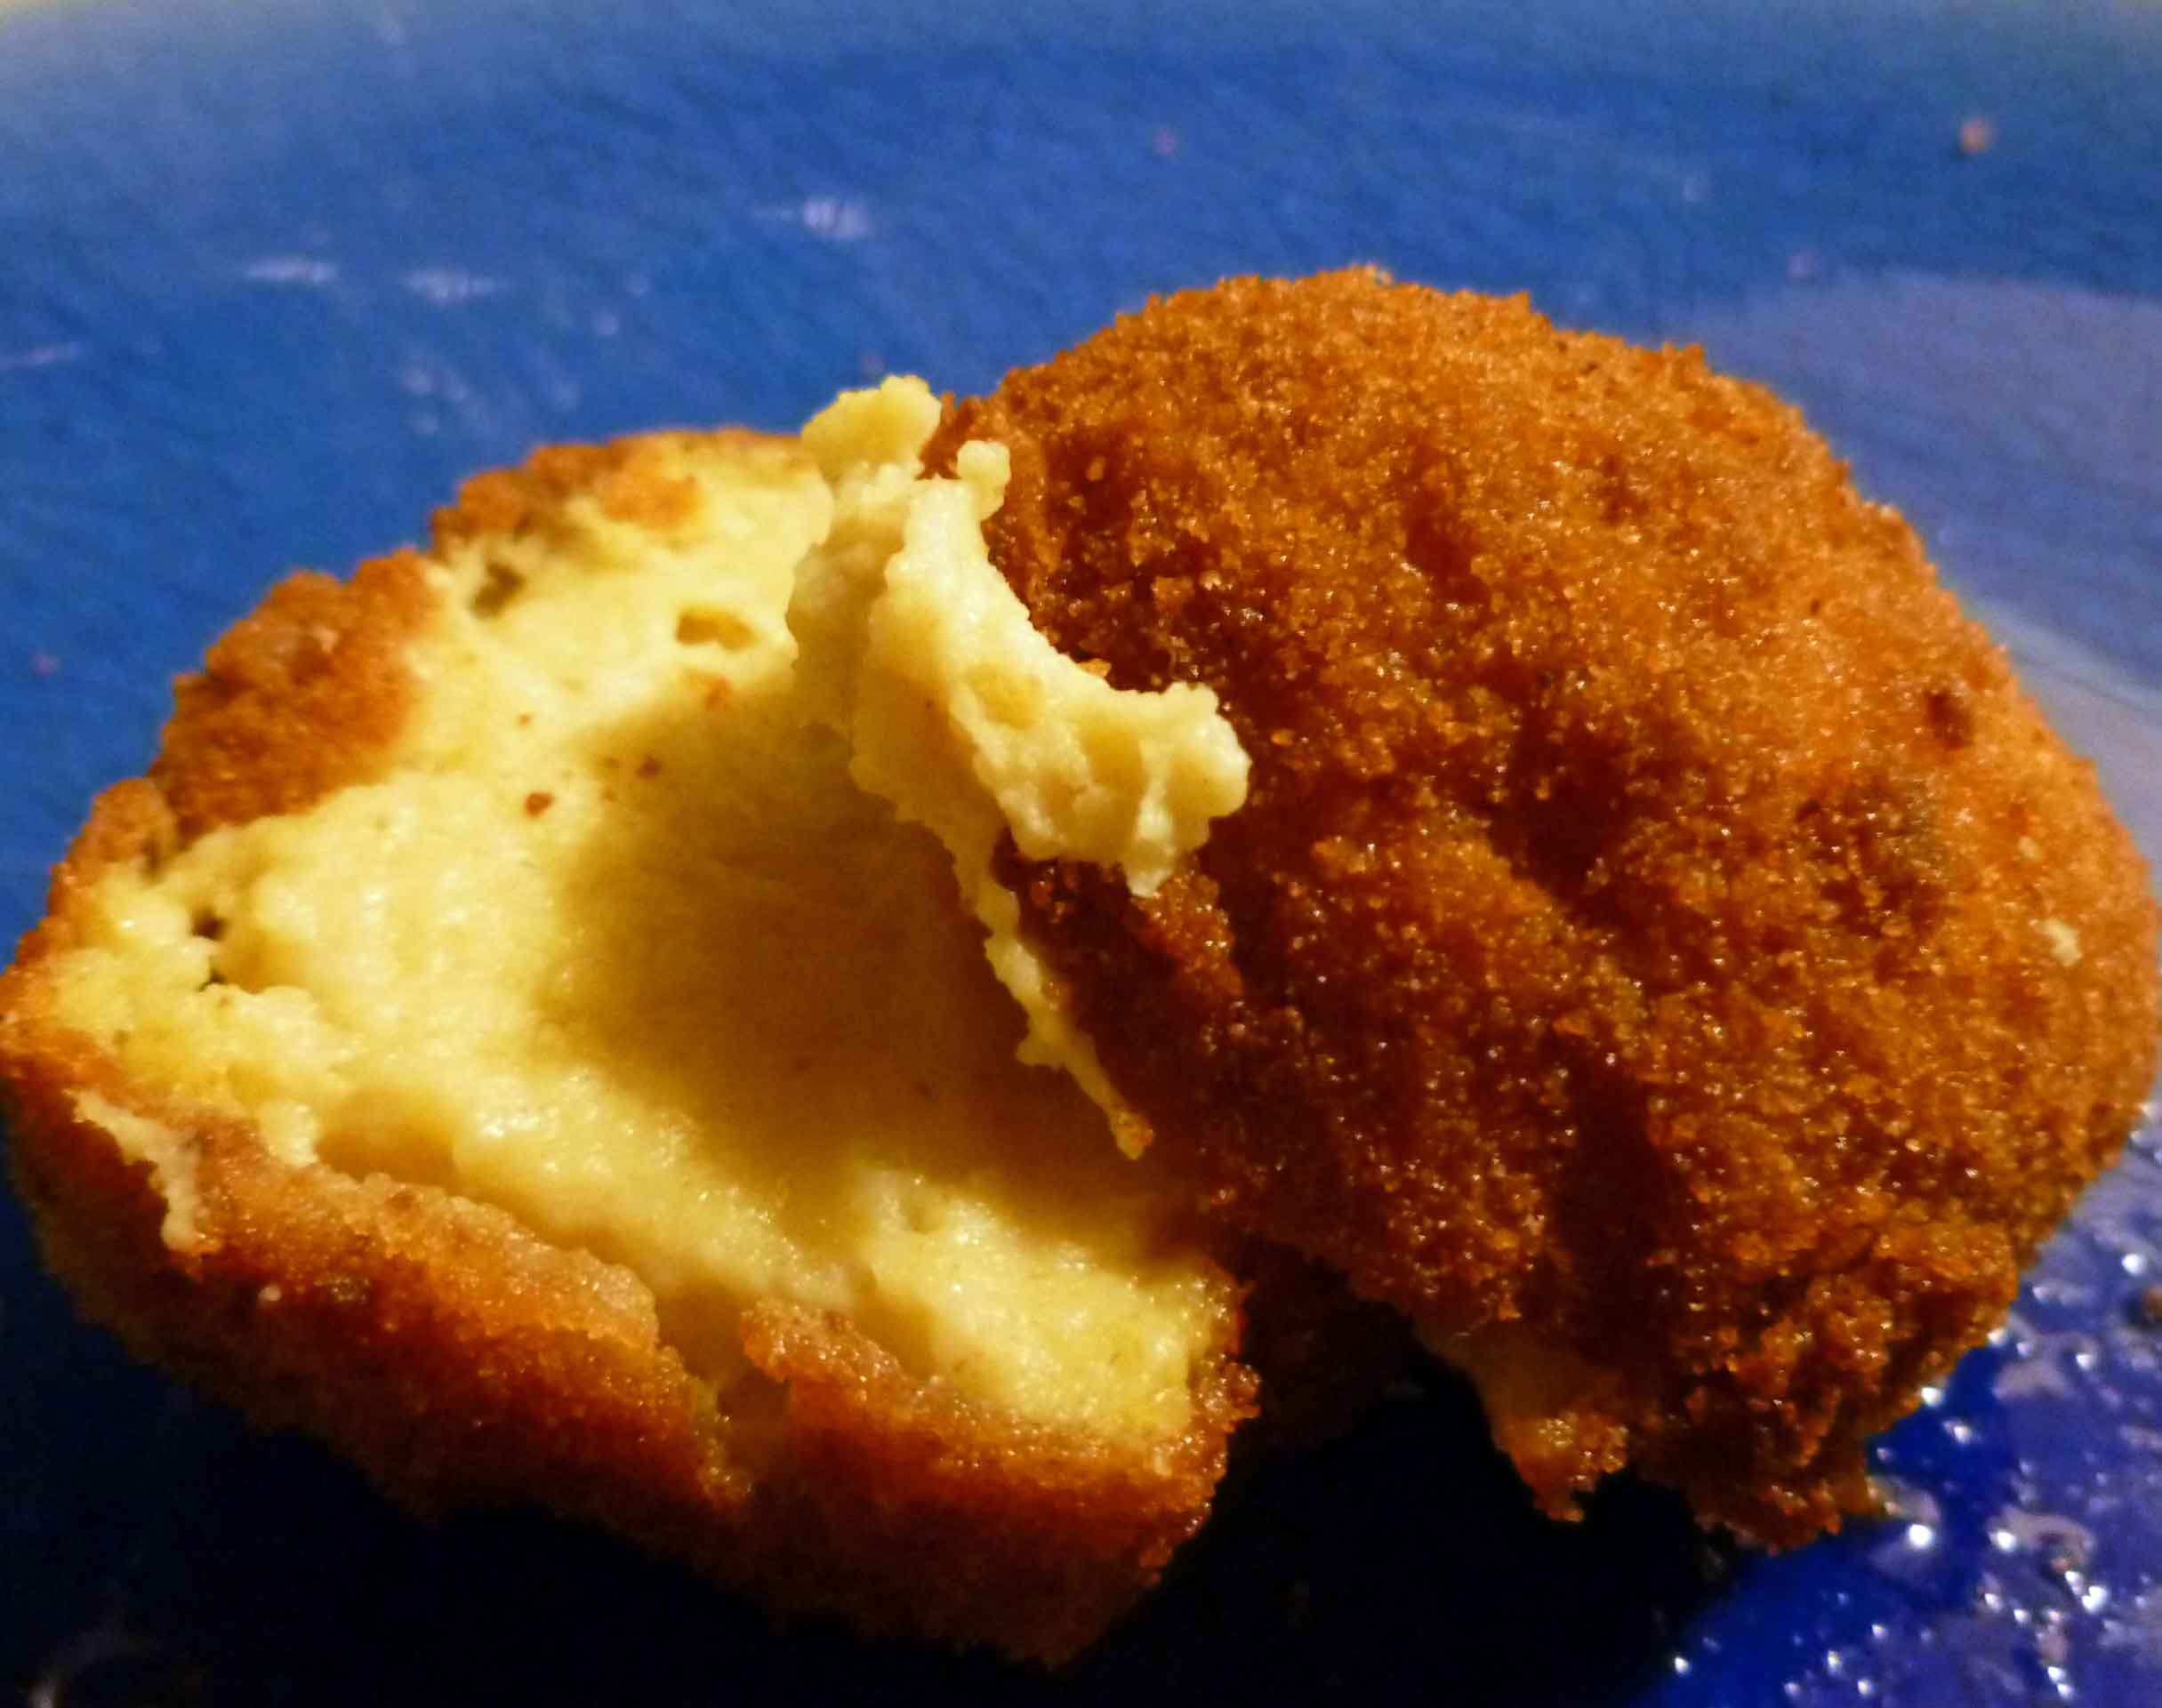
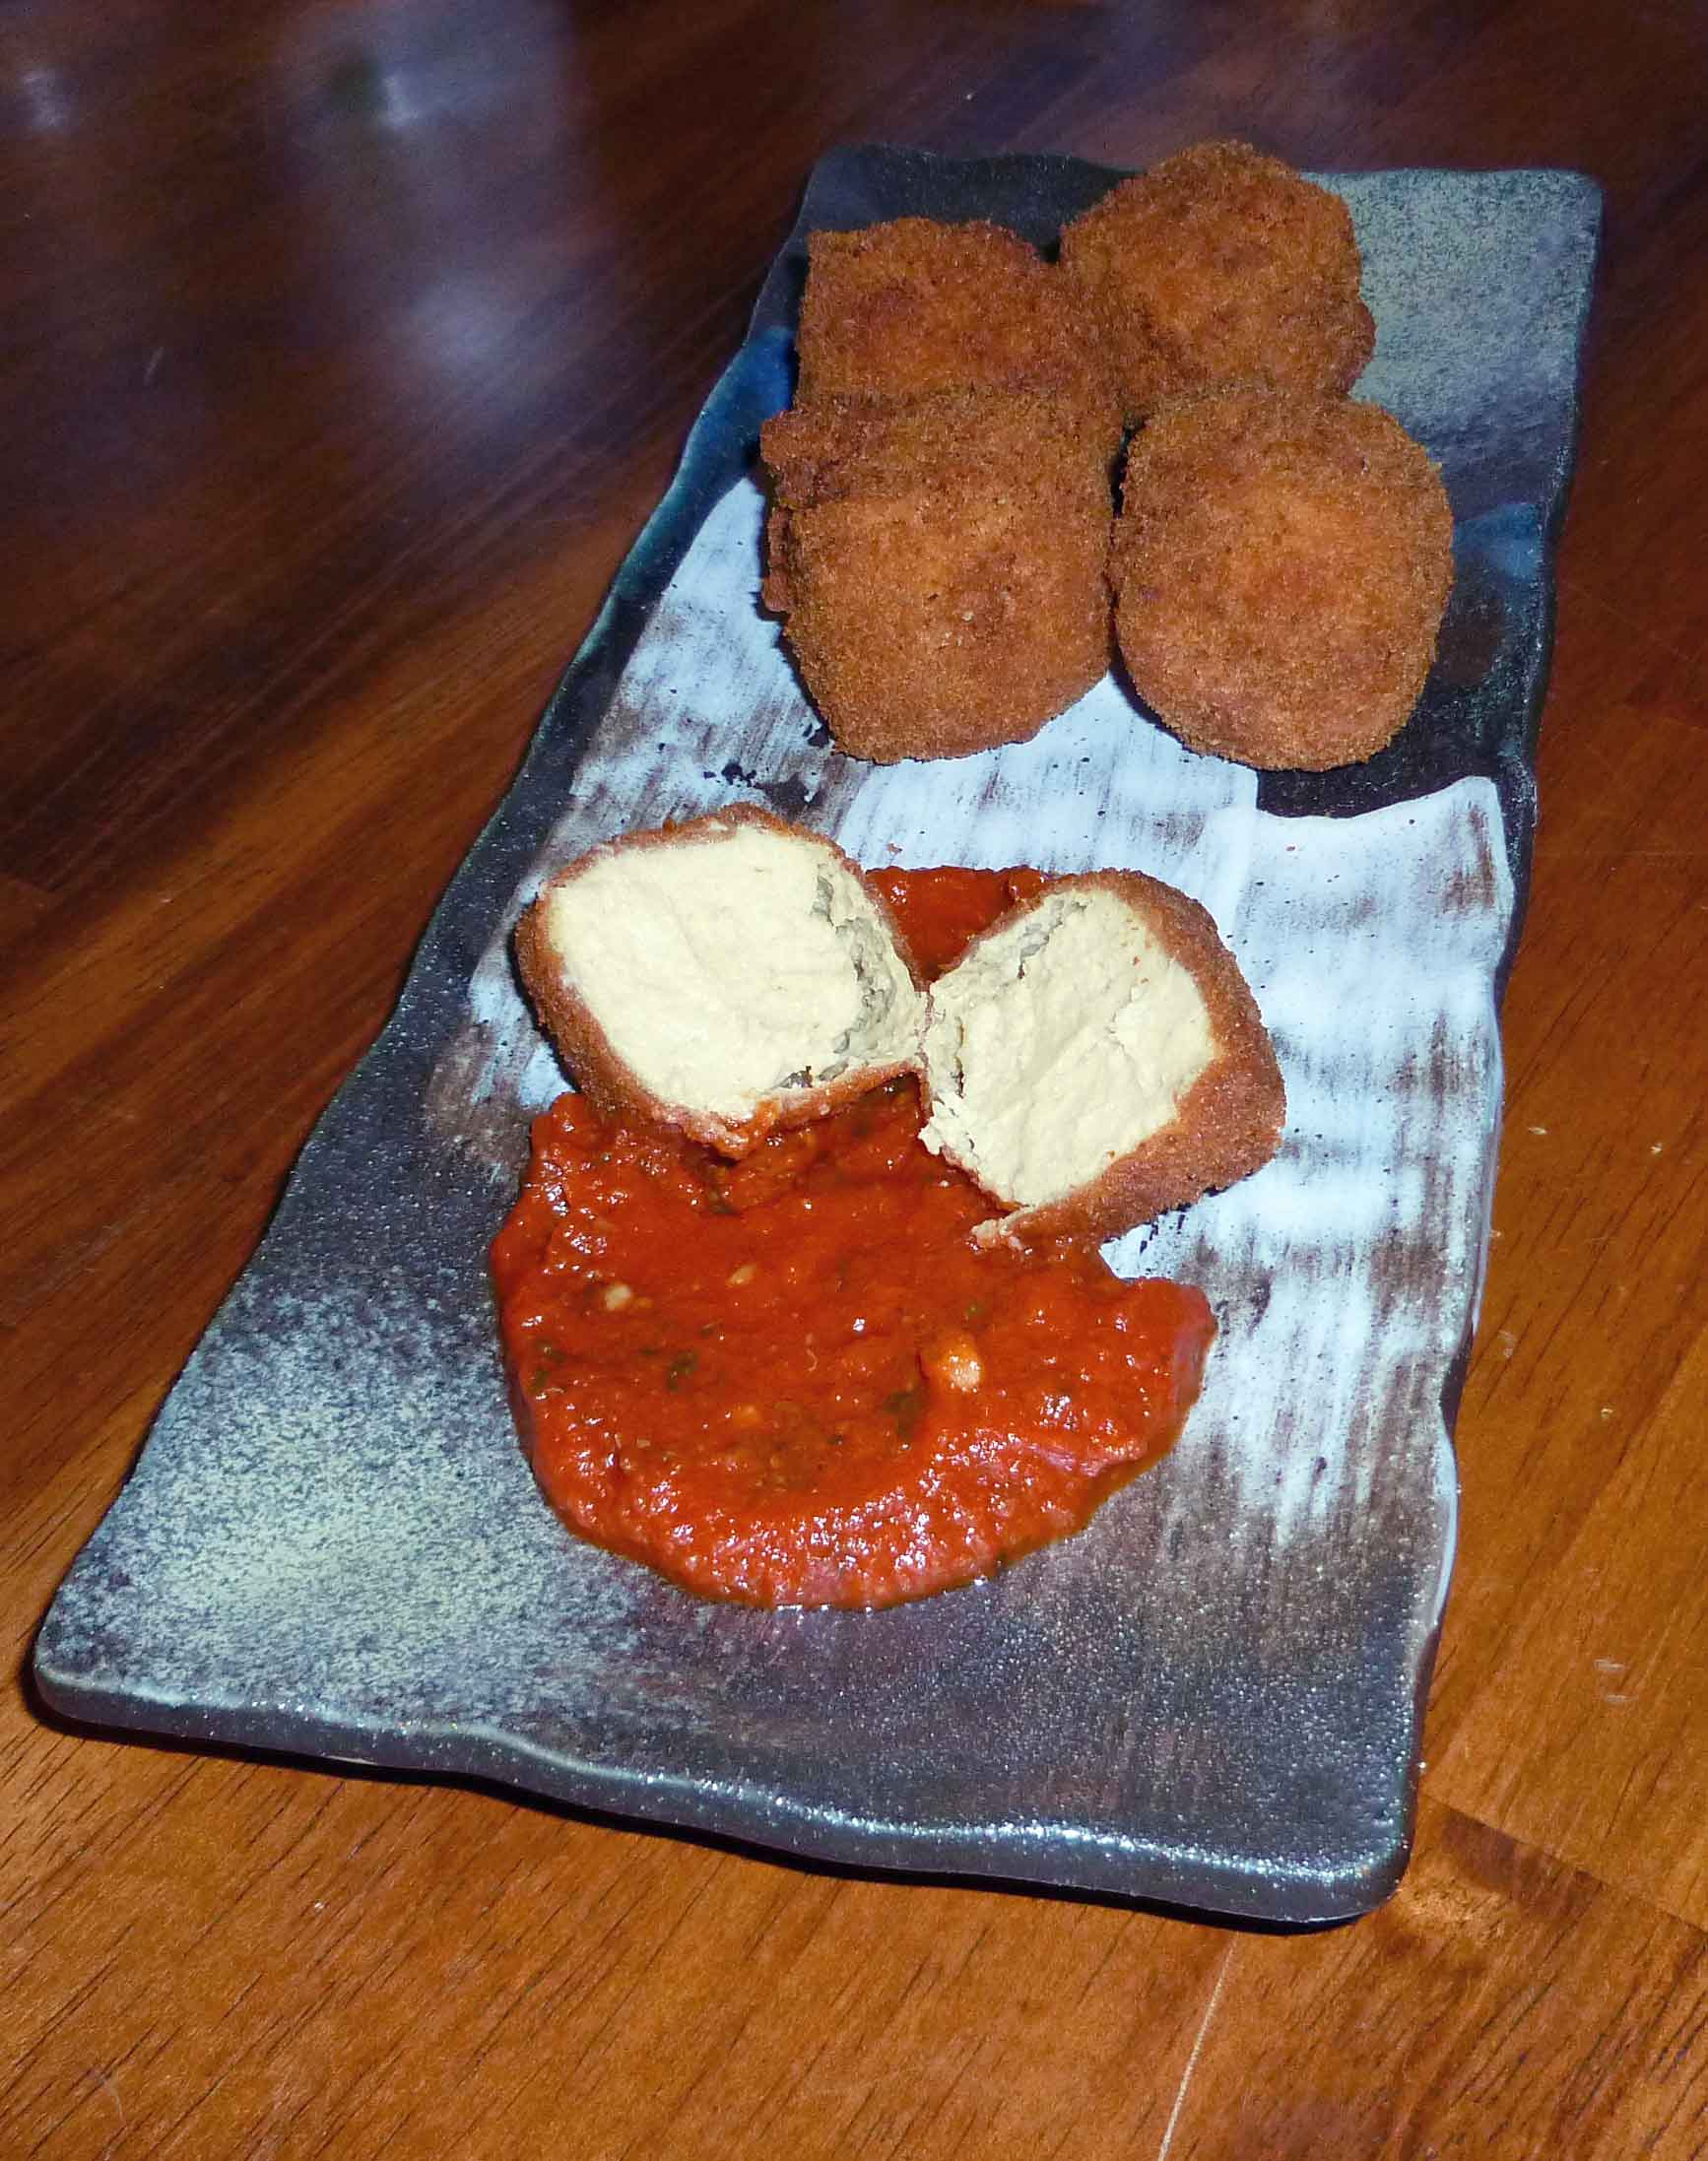
When the nuggets are done, lay them on the cookie sheet that you’ve prepared — cover the cookie sheet with paper towels and lay your cooling rack upside down on the paper towels. The fried nuggets will be kept up off the paper towels, and the towels will draw the oil down. These nuggets are NOT greasy if you’re doing all this right, and they are wonderful.


Serve while still warm, with marinara if you so wish.
You can freeze any leftovers, but reheat them low and slow — 250ºF for about 30 minutes seems to work. We only tested reheating them once, though, so if you do it, let us know how it goes!