Notice: Function _load_textdomain_just_in_time was called incorrectly. Translation loading for the wp-ultimate-recipe domain was triggered too early. This is usually an indicator for some code in the plugin or theme running too early. Translations should be loaded at the init action or later. Please see Debugging in WordPress for more information. (This message was added in version 6.7.0.) in /home/maryzahc/public_html/adultfoodallergies.com/wp-includes/functions.php on line 6121
MaryKate – Page 4 – surviving the food allergy apocalypse (archive)

Author: MaryKate

  • Eliza’s Breakfast Chili

    Eliza’s Breakfast Chili

    Breakfast Chili
    Breakfast Chili

    Welcome to BREAKFAST MONTH here at Surviving the Food Allergy Apocalypse. While Denise is generally up way before I am (and not just because she’s in a time zone that is three hours earlier), neither of us is big on cooking first thing in the morning. How do you cook before coffee? But we’re both big on eating first thing in the morning. Denise’s go-to is oatmeal. Mine is hash brown patties from the freezer, although when I find the time to make them, I love these Eat Your Veggies for Breakfast Patties). Most of the time, that’s fine, but I do occasionally get bored.

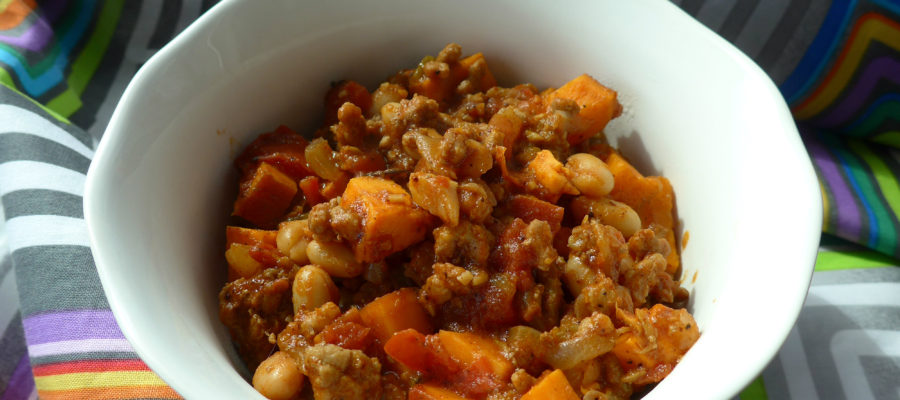
    This recipe was for Eliza, not from Eliza. One morning at work, while waiting for the coffee, she was considering whether or not to eat chili for breakfast, and we wondered why there wasn’t a thing that actually was breakfast chili. I spent the next three weeks thinking about it, and then I had to make breakfast chili. And it was good.

    This recipe uses ground pork, seasoned with molasses, garlic, onion, and fennel for a sausage-esque flavor. The chili part comes from ancho chili powder, tomatoes, and beans — though you could skip the beans if they aren’t your thing. I do highly suggest that you find plain chili powder. I guess that most people don’t know that “chili powder” is actually a blend of spices that usually includes onion, garlic, and oregano — ancho chili powder is just the chilis, which gives you more latitude on other seasonings. You can order if from Penzey’s if you can’t get it locally.

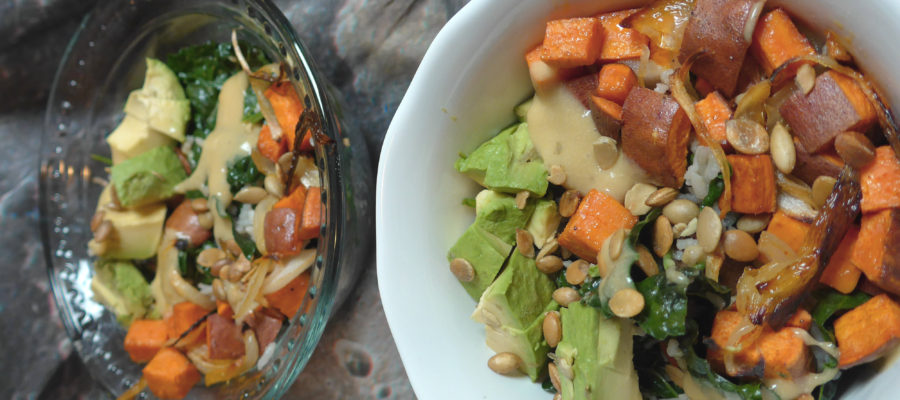
    I highly suggest serving this with hash browns if you’re like me. Toast would also work if you have some. Toppings could include the typical chili things — I think avocado would be particularly nice, though I haven’t tried it. It doesn’t NEED anything else, but feel free.


    Notice: Trying to access array offset on value of type bool in /home/maryzahc/public_html/adultfoodallergies.com/wp-content/plugins/wp-ultimate-recipe/helpers/models/recipe.php on line 254
    Eliza’s Breakfast Chili
    Print Recipe
    Servings
    6 servings
    Servings
    6 servings
    Eliza’s Breakfast Chili
    Print Recipe
    Servings
    6 servings
    Servings
    6 servings
    Ingredients
    • 1 large sweet onion chopped, about 2 cups
    • 1 lb ground pork
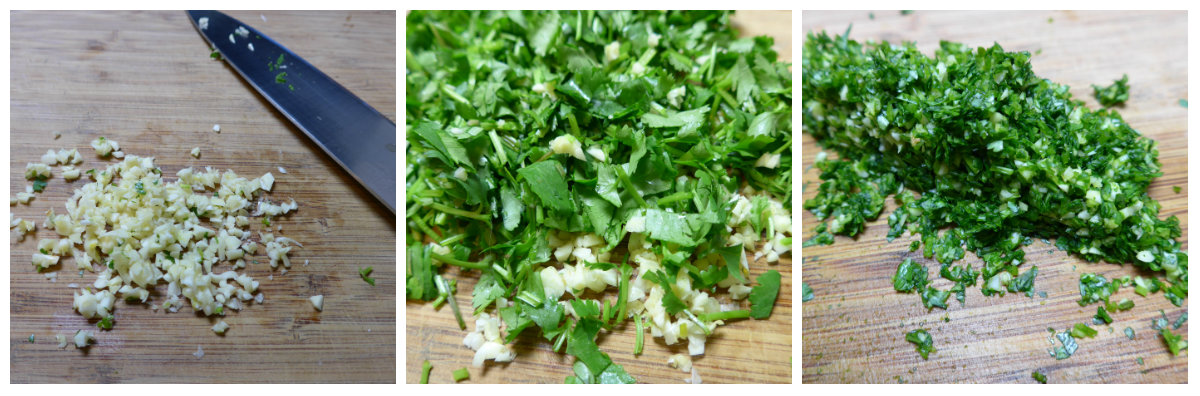
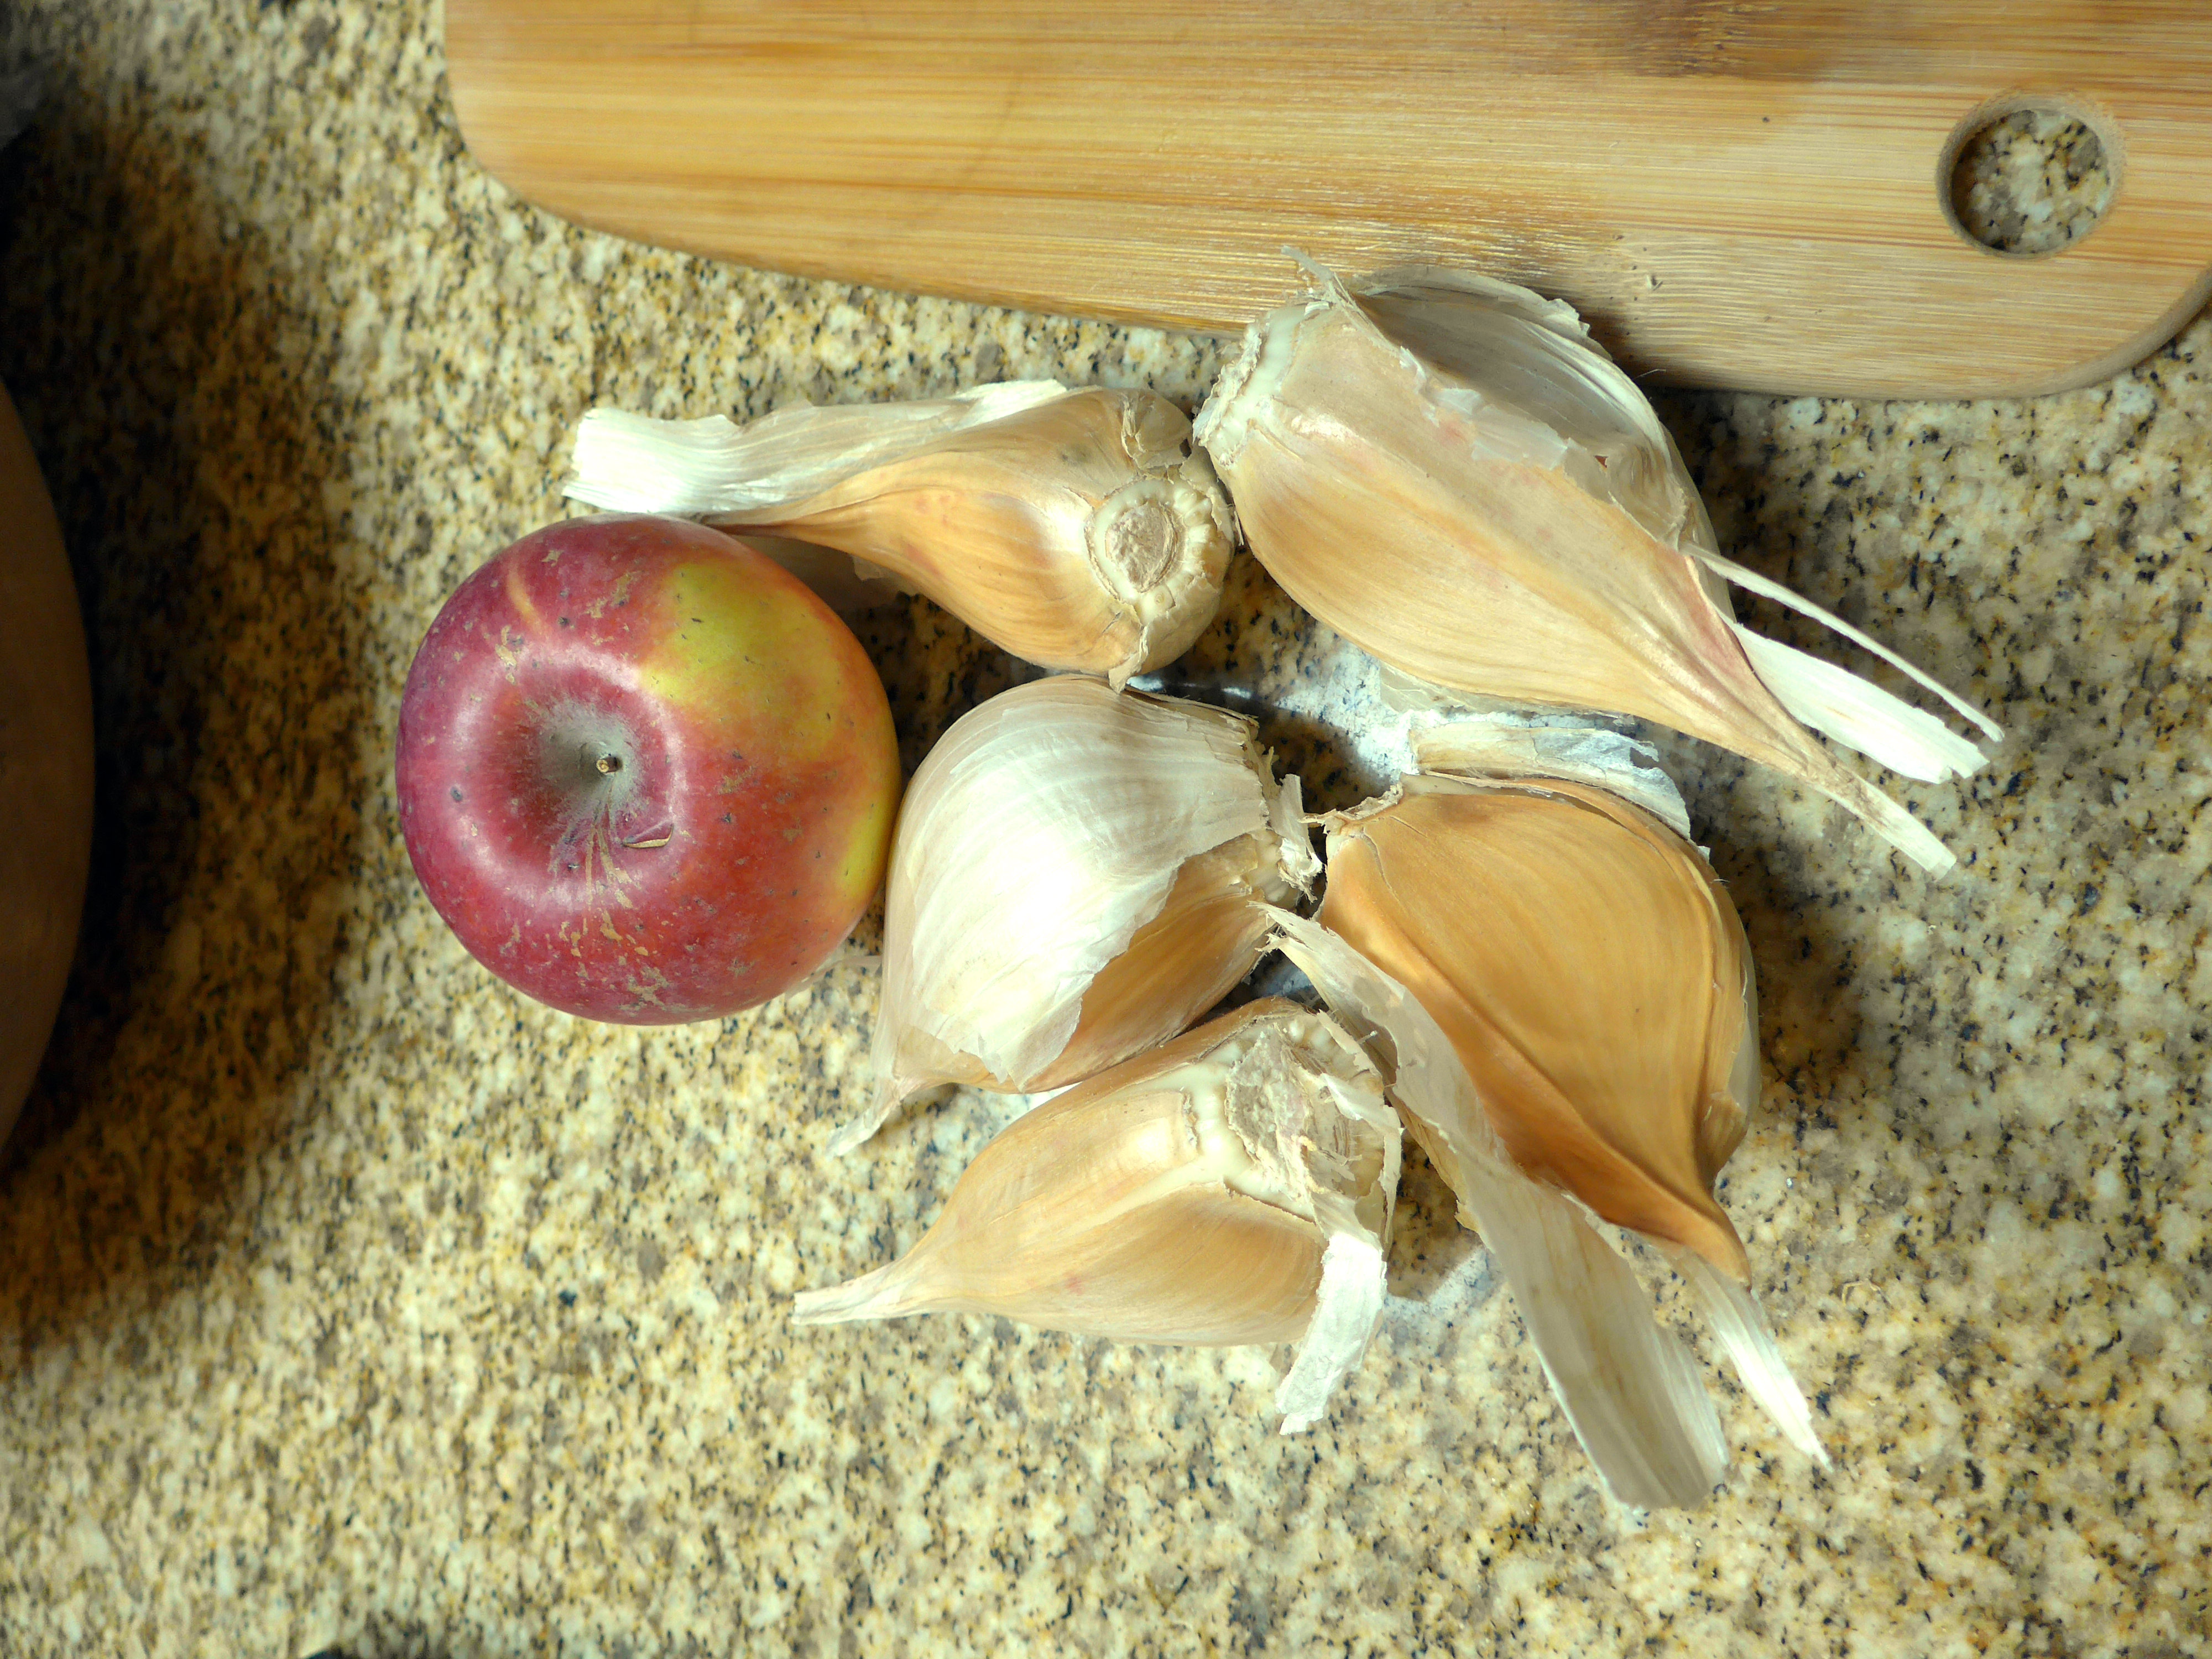
    • 2 teaspoon garlic minced (about 1 medium clove)
    • 4 oz can of green chiles
    • 2 teaspoons ancho chili powder NOT regular chili powder!
    • 1 teaspoon cinnamon
    • 1/4 teaspoon fennel seeds, crushed with mortar and pestle or flat side of large knive
    • 1 Tablespoon molasses
    • 15 oz can of diced tomatoes
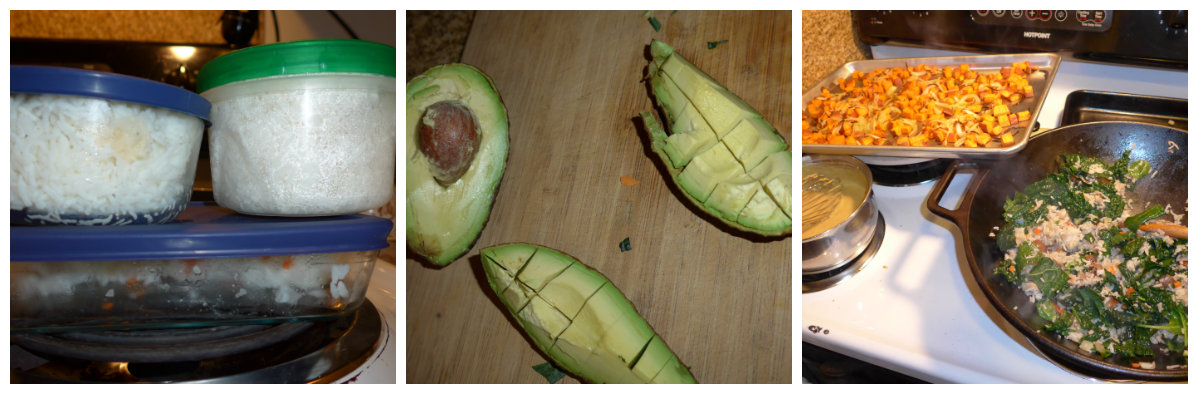
    • 1.5-2 lb sweet potatoes, cubed
    • 1/4 cup water
    • 1 can white beans if desired
    • 1 handful spinach per serving if desired
    Servings: servings
    Instructions
    1. Over medium heat, add onions to a large pan. If the pan is non-stick, don’t add any oil. If it isn’t non-stick, either add a bit of the pork or a bit of oil. Stir well and sautee for 2-3 minutes to get the onions started cooking.
    2. Add pork and stir frequently to break up the meat.
    3. When the pork is mostly cooked (there is little to no pink left, add the rest of the ingredients in the order listed, from garlic through the beans, if you’re using them. Don’t add the spinach. Stir well after each addition, and the cover until the pot begins to simmer.
    4. When your chili is simmering, turn the heat down to low and cook, covered but stirring regularly, until the sweet potato cubes are cooked. Depending on the size of your cubes, you’re looking at 20-45 minutes.
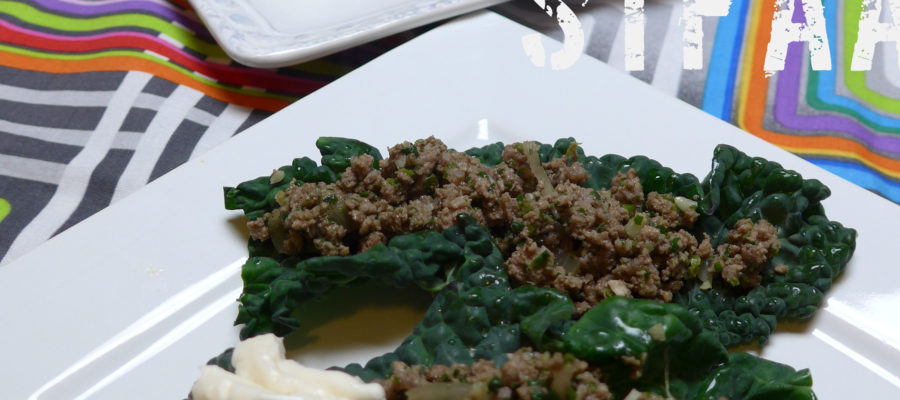
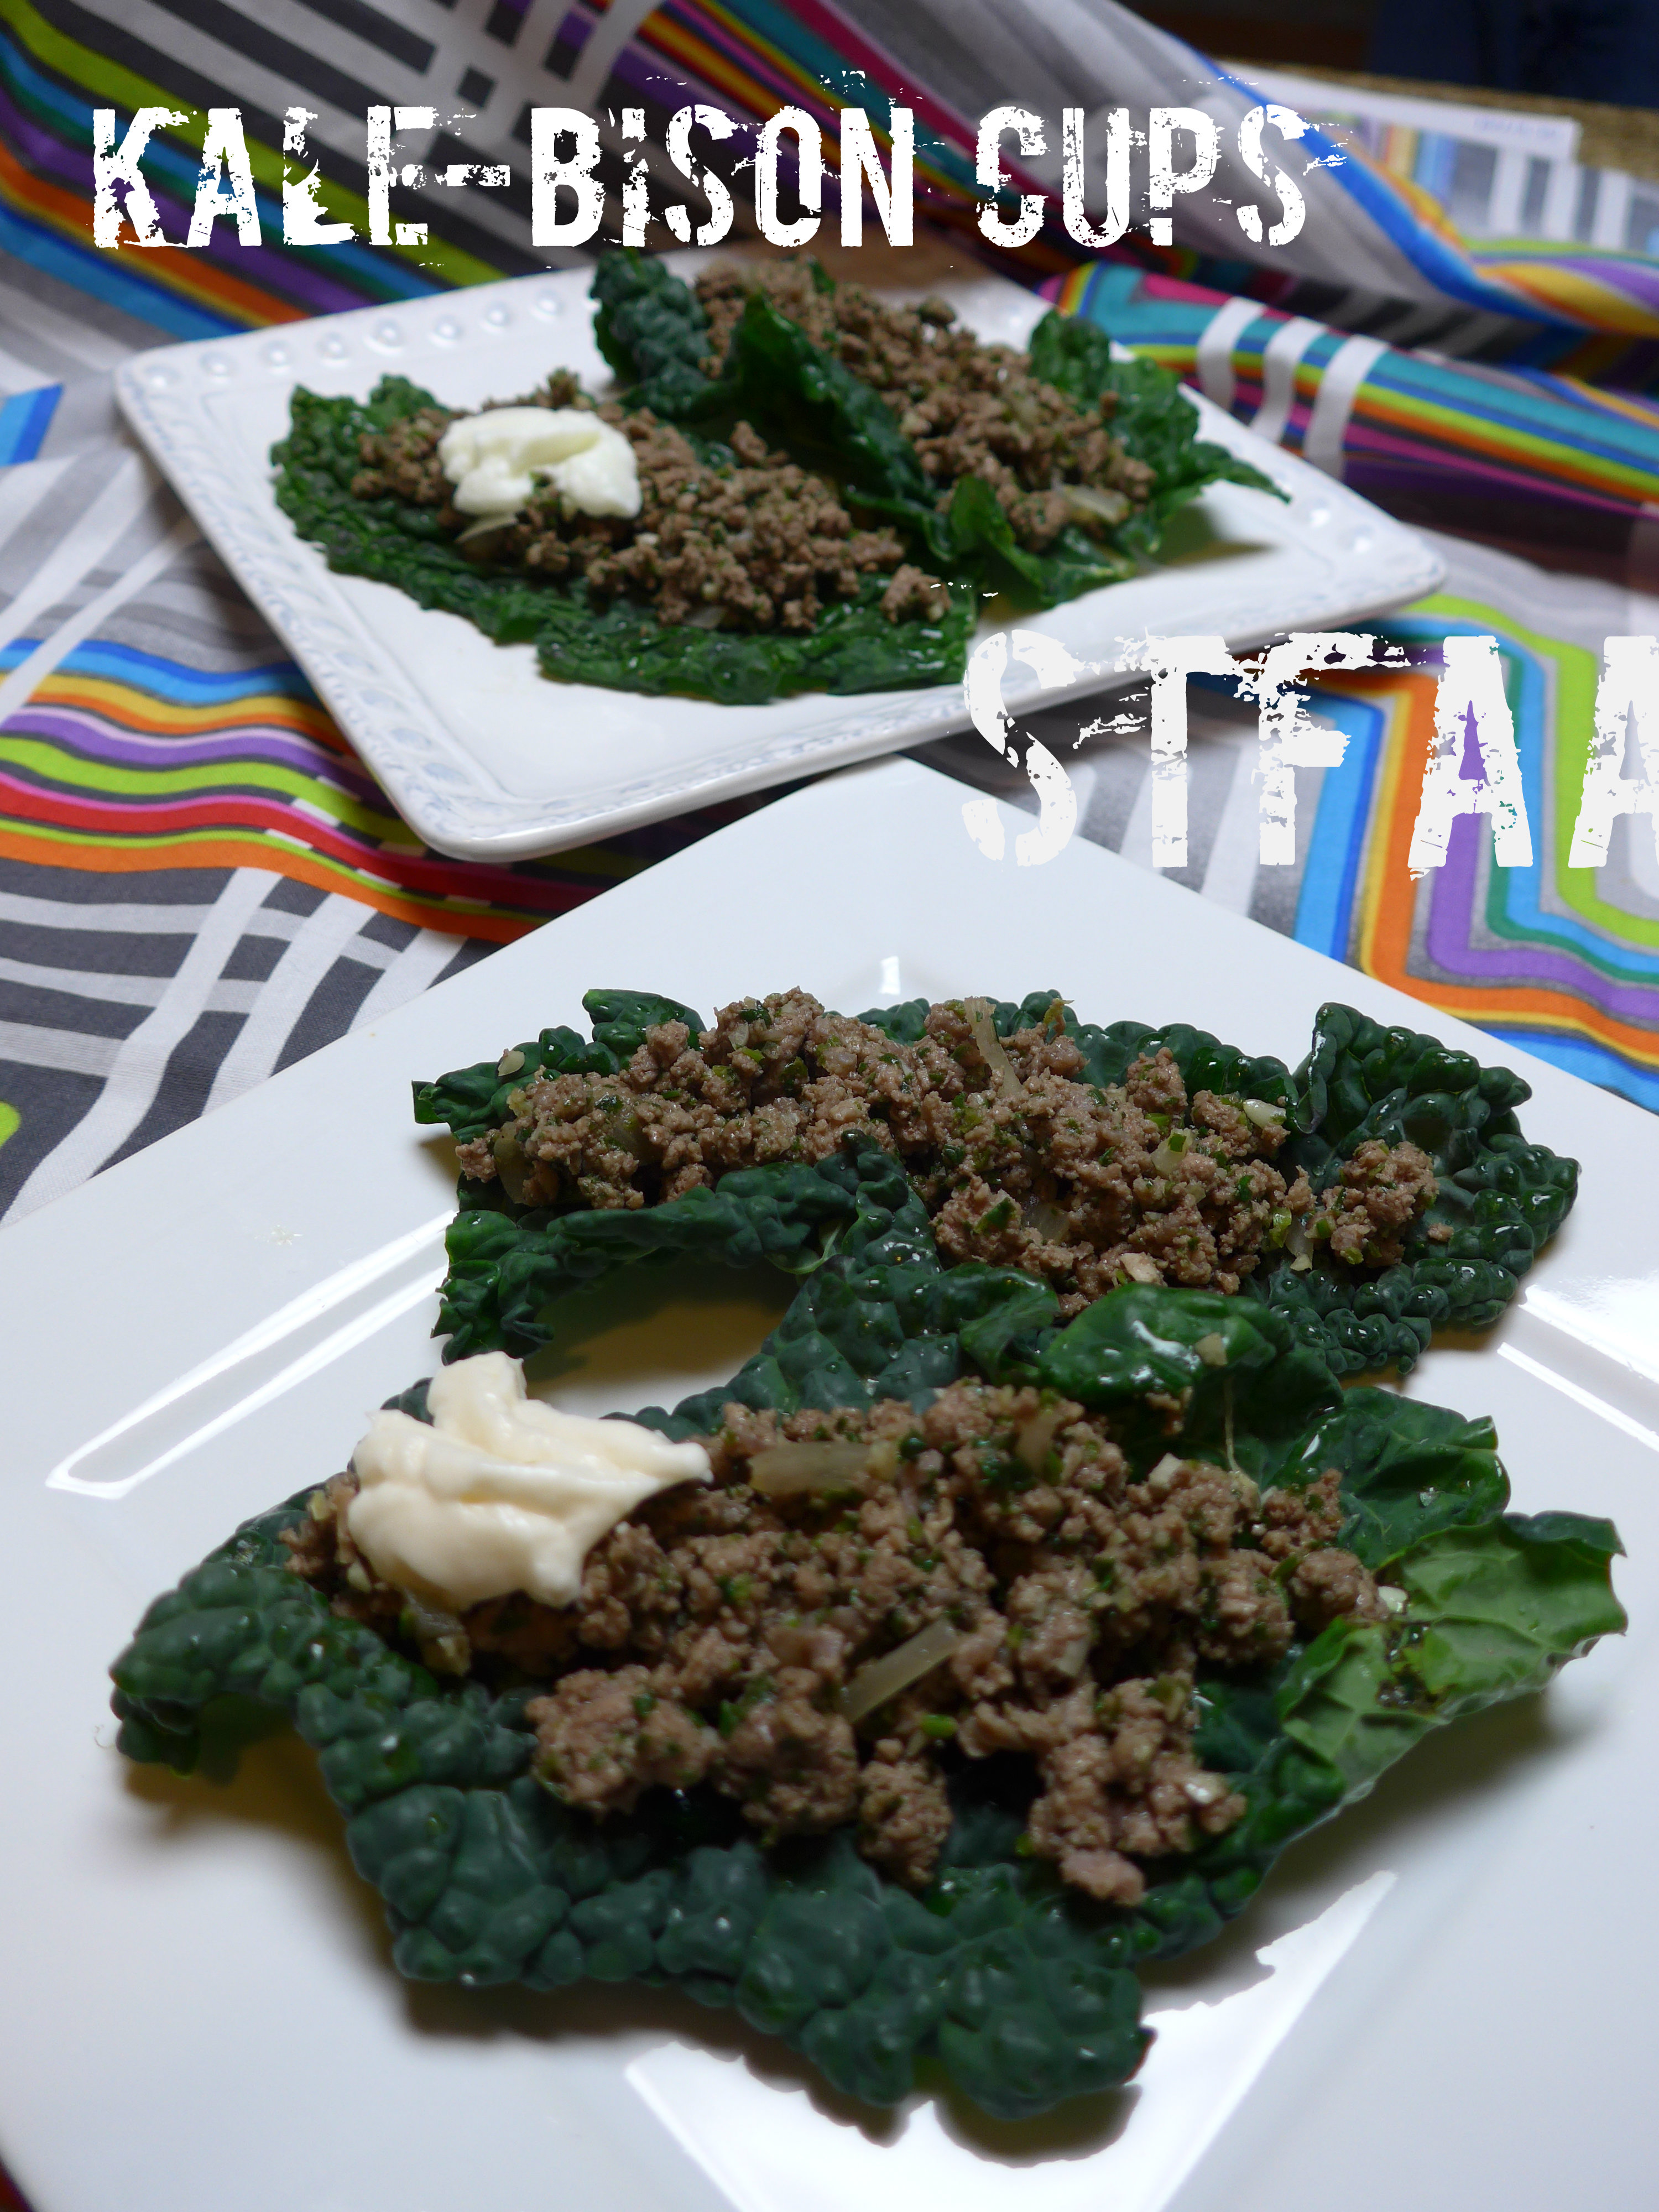
    5. For serving, I originally conceptualized this to be served with hashbrown patties, but I threw it over spinach to add more vegetables to the dish. Avocado on top would also be great. It’s your breakfast — top it up your way.
    Recipe Notes

    Peel the sweet potatoes if you want — I didn’t, as I like the texture of the peel.

    Share this Recipe
     
    Powered byWP Ultimate Recipe
  • Stir-fried Potatoes with pork and cabbage

    Stir-fried Potatoes with pork and cabbage

    Stir-fried Potatoes with pork and cabbage

    This recipe is very loosely inspired by northern Chinese Hunan province recipes for spicy potatoes. I think it was end of winter, but I just wanted hot potatoes and cabbage with pork, and this dish definitely fit the bill.

    Finding the right meat was harder than I thought it would be — pork was the proper meat for the taste I was going for, but it does need to be a fatty cut. At one of our local grocers, I can get what I call “not bacon” because it looks just like bacon but isn’t. Side pork is the right cut for bacon, but this is unprocessed. It’s just the meat before it is seasoned and brined and aged or smoked or whatever you do for bacon (This. This is how you make bacon.) This cut is fatty, chewy, and with the added saltiness from tamari (the naturally gluten-free soy sauce) or amino acids, it is the perfect contrast to crunchy cabbage and creamy potatoes. Adjust the amount of pepper to suit your tastes, but go as spicy as you’ll eat it, as that’s kind of the point of the dishes that inspired this one. 1 teaspoon is about right for us.


    Notice: Trying to access array offset on value of type bool in /home/maryzahc/public_html/adultfoodallergies.com/wp-content/plugins/wp-ultimate-recipe/helpers/models/recipe.php on line 254
    Stir-fried Potatoes with pork and cabbage
    Print Recipe
    Servings
    3 people
    Servings
    3 people
    Stir-fried Potatoes with pork and cabbage
    Print Recipe
    Servings
    3 people
    Servings
    3 people
    Ingredients
    • .5 lb. thin-sliced side pork cut into chunks
    • 1 lb. marble potatoes or larger potatoes cut into 1/4 inch dice
    • 3 cups chopped napa or Chinese cabbage
    • 1 bunch scallions chopped, white and greens separated
    • 1 teaspoon tamari or amino acids
    • 1 teaspoon red pepper flakes (or less if you would like it to be not spicy)
    • 1 Tablespoon oil may not need this
    Servings: people
    Instructions
    1. The meat in this dish is not-bacon. What I mean is that it’s side pork, and where I buy it, it comes sliced like bacon, but it hasn’t been processed into bacon. It’s just thin fatty pork, and that’s what you want for this dish. You’ll use the rendered fat, but the remaining pork is a bit chewy and wonderful.
    2. Pre-cook your potatoes. I did this in the microwave, cooking them on high until they were fork-tender, about 8 minutes. You can also boil and drain them. Be cautious and undercook them slightly if you’re using larger cubed potatoes, as you don’t want them to fall apart as you fry them.
    3. Chop your meat into small bite-sized pieces and cook over medium heat in a skillet or wok. When it is almost done, add the tamari and pepper flakes and stir well.
    4. Remove cooked meat from pan to a paper towel-lined plate to drain. Leave the fat in the pan. If needed, add up to another tablespoon of oil to make about 2 Tablespoons total of oil.
    5. Add potatoes to oil — be careful, as they are wet and will splatter a bit if you’re not careful. Stir well and then cook until they brown, 10-15 minutes.
    6. Add cabbage and scallion whites and cook until cabbage starts to wilt.
    7. Add the pork back, along with the scallion tops, and stir until everything is good and hot.
    8. Serve with additional hot sauce if desired.
    Share this Recipe
     
    Powered byWP Ultimate Recipe
  • WW: Why Hot Pot is the Allergy-Friendly, Interactive Meal You’ve Been Waiting For

    WW: Why Hot Pot is the Allergy-Friendly, Interactive Meal You’ve Been Waiting For

    Steamy hot Pot
    Steamy Hot Pot

    This past holiday season, my boss’ treat to our small staff was a trip to a local hot pot restaurant. With a little effort, we were able to work around my food allergy issues, and it was a really great staff lunch. Well, except for the being too full to walk afterwards part.

    I started thinking about how hot pot could be adapted and made at home. It’s not horribly hard, it turns out, and thanks to my need to packrat all of my parents’ 1970s entertaining supplies when I moved out, I had so equipment that could be adapted to home-style hot pot. I used a chafing dish, though I also have a fondue pot, and I think the latter might allow for more heat. Both the chafing dish and the fondue pot are designed for small cans of Sterno fuel. A portable electric burner is used at most of the local hot pot restaurants, though a few have tables with built-in burners. An electric wok or frying pan would also be an excellent option.

    But I’ve labeled this post “Kitchen Stories” because it includes this pot. My parents were very social people, and they were married for a good number of years before kids. All of the 1970s-era cookbooks I’ve collected feature things like my parents’ chip-and-dip set (white and gold grapes) and things like this chafing dish, in a less tarnished state. Those types of parties, with large spreads of food, are a feature of my early childhood. But while we got a bit of the food, we soon went off to bed. I remember the chafing dish primarily from Friday night dinners during Lent, when my mom would make cheese fondue for a meatless dinner.

    Like all of the outdated kitchen stuff that ended up in the basement, I scavenged this chafing dish when I left home (difference between the chafing dish and a fondue pot — the water pan between the heat and the food that spreads out the heat). It’s been used a few times, but mostly it has served as a decorative piece in my kitchen, and it’s rather terribly tarnished. Good tip — a paste of salt and white vinegar helps a ton to take the tarnish off copper). It felt really good to use something I just paid to move across the country, and the hot pot is an amazing use.

    Glass noodles, thinly-sliced squash (not thinly sliced enough), and mushrooms
    Glass noodles, thinly-sliced squash (not thinly sliced enough), and mushrooms

    The basic idea of hot pot, if you haven’t had the joy of the experience, is that a tasty broth is heated to boiling and then used as the vehicle for cooking a host of raw meats, seafoods, vegetables, and noodles, which are then eaten with a personalized dipping sauce. The remainder of the feast is soup. What’s awesome about this — well, actually, there are two things. First off, hot pot is an experience as well as a meal, and it’s fun. But the second thing, and what is moving me to write about it and post, is that if you make this all at home, you can customize it to suit you. Exclude your allergens, cater to your tastes, accommodate a variety of people’s needs.

    Napa cabbage and baby bok choy
    Napa cabbage and baby bok choy

    For my homemade hot pot, I started with homemade chicken stock. I think beef would be more traditional, but I had the chicken bones and veggies around. Because of the style of dipping sauce I wanted to use, I used roasted garlic and fresh ginger in the stock, as well as extra peppercorns. I did not use much salt. Your broth can be customized to your tastes!

    For hot pot dinner, I reheated the broth to a good boil before adding it to the chafing dish. I added the tomatoes to the broth, as that was an addition in our broth at the restaurant that I really liked, plus we had them in the house. In retrospect, I would have boiled the squash for a bit on the stove top, too.

    For table top cooking, we had thinly sliced pork butt and steak, which I can buy locally. Hot pot slicing is about a thick deli slice thickness. If you’re slicing at home, I’d suggest freezing the meat you’re using for 15-20 minutes and using a Very Sharp Knife. We had small mushrooms (enoki would be my recommendation), napa cabbage, baby bok choy, and some winter squash, though this didn’t cook through very well.

    Tamari (in our maple syrup crock), the little Nessie soup ladle, and gluten-free gochujang
    Tamari (in our maple syrup crock), the little Nessie soup ladle, and gluten-free gochujang

    Dipping sauces can be customized to your tastes, but for our use we had tamari (gluten-free soy sauce), scallions, minced garlic, sesame oil, cilantro, and red pepper flakes. Mix them up and figure out what suits your tastes! Or try any other dipping sauce you have on hand. It’s all about experimentation with flavors.

    The Hot Pot spread.
    The Hot Pot spread.


    Hot pot is fun and adaptable and is definitely worth a try. If you do try it — or if you go out to a place where you can find food that meets your needs, let us know about it in the comments!

  • Potato Corn Chowder

    Potato Corn Chowder

    Potato Corn Chowder
    Potato Corn Chowder

    We are definitely experiencing soup weather here in Seattle. I keep making the mistake of looking at the high temperature for the day and dressing as though it wouldn’t be cold and damp somehow. Seattle is more prone to wild swings of weather than I expected (thundersnow, anyone?), and I think soup weather might be around for a while. That works for me — soup is one of the easiest dishes to make ahead and eat all week. I have made a corn soup before, a brothy stew that capitalized on the end of summer fresh corn. This is an end-of-winter stew, hearty chowder, but using the breaking down potato starch and a can of creamed corn (which contains corn starch) to thicken up the soup and make it creamy.

    This soup is quick enough for a weeknight meal, but reheats amazingly well so it also makes good lunch leftovers. I’ve said the recipe makes 3 servings, as that seems to be how it works out for us, but if you’re lighter eaters, or if this is an appetizer or side, it might make 4.


    Notice: Trying to access array offset on value of type bool in /home/maryzahc/public_html/adultfoodallergies.com/wp-content/plugins/wp-ultimate-recipe/helpers/models/recipe.php on line 254
    Potato Corn Chowder
    Print Recipe
    An easy, creamy, dairy-free vegan chowder
    Servings Prep Time
    3 servings 10 minutes
    Cook Time Passive Time
    30 minutes 30 minutes
    Servings Prep Time
    3 servings 10 minutes
    Cook Time Passive Time
    30 minutes 30 minutes
    Potato Corn Chowder
    Print Recipe
    An easy, creamy, dairy-free vegan chowder
    Servings Prep Time
    3 servings 10 minutes
    Cook Time Passive Time
    30 minutes 30 minutes
    Servings Prep Time
    3 servings 10 minutes
    Cook Time Passive Time
    30 minutes 30 minutes
    Ingredients
    • 1 Tablespoon olive oil
    • 1 whole leek white and light green only
    • 4 cups red potatoes diced
    • 1 teaspoon dill
    • 1/2 teaspoon roasted garlic powder (or 1/4 teaspoon garlic powder)
    • 4 cups vegetable stock
    • 1 can (15oz) creamed corn
    • 1 cup corn fresh or frozen
    • scallion tops
    • freshly ground pepper
    Servings: servings
    Instructions
    1. Heat oil over medium heat in a large saucepan. When hot, add chopped leeks and sautee 5-10 minutes.
    2. Chop the potatoes unevenly. Cut about half of a cup of potatoes into a smaller dice so that they will start to break down by the time the larger potato cubes are cooked.
    3. Add potatoes and spices and stir well. Then add stock. Bring to a boil and then turn down to a simmer. Cook until potatoes are soft, and then another 5-10 minutes until the smaller ones start breaking down.
    4. Add the creamed corn and stir well. Then add the frozen or fresh corn. When the soup has returned to a boil, serve topped with scallion tops and pepper.
    Recipe Notes

    NOTE: In a pinch, you can replace the leek with the bottoms of the scallions with only a small difference in taste. I think the leek is a smoother taste, but the scallions were fine in a pinch. If you DO just use the tops, go ahead and regrow them by putting the root ends in a cup of water.

    Share this Recipe
     
    Powered byWP Ultimate Recipe
  • Kale-Bison Cups

    Kale-Bison Cups

    Kale-Bison Cups
    Kale-Bison Cups

    In this dish, I’ve taken a technique we got out of a Thai cookbook, where this was one of many ingredients and didn’t really shine, and made it the main flavor star of a completely different dish. What you do is chop garlic and cilantro together until it makes almost a paste, or alternately, you can grind them together in a mortar and pestle. The paste is then cooked into a dish. I’ve been messing with different iterations of this for about a month, trying to find the perfect way to feature it. I know this is a kind of odd way to feature garlic, but it is SO GOOD.

    Here, the garlic and cilantro, along with a bit of onion, flavor ground bison, which is then served in a take on the lettuce cup. I don’t like lettuce, but also, I think the earthiness of bison and kale suit each other. A little dab of something creamy — yogurt, if you can find a not-sweet one, mayo or mayo substitute, even a sour cream, if you have a safe one — brings the flavors out just a little more. This recipe is simple and straightforward, and if you’re anything like me, you might find all your recipes featuring cilantro and garlic for a while.

    cilantro garlic blending stages
    cilantro garlic blending stages

    Notice: Trying to access array offset on value of type bool in /home/maryzahc/public_html/adultfoodallergies.com/wp-content/plugins/wp-ultimate-recipe/helpers/models/recipe.php on line 254
    Kale-Bison Cups
    Print Recipe
    Servings
    9 “cups”
    Servings
    9 “cups”
    Kale-Bison Cups
    Print Recipe
    Servings
    9 “cups”
    Servings
    9 “cups”
    Ingredients
    • 1 bunch lacinto or dinosaur kale
    • 1 teaspoon oil
    • 1/4 cup onion rough chopped
    • 1/2 teaspoon kosher salt
    • 1 cup rough chopped cilantro (just chop off the top — stems and leaves)
    • 6 cloves garlic small cloves OR use less. Maybe think 2T volume of garlic cloves?
    • 1 lb. ground bison
    • freshly ground pepper to taste
    • creamy condiment, optional (e.g. mayo, sour cream, yogurt)
    Servings: “cups”
    Instructions
    1. Wash kale and shake leaves mostly dry. Microwave for 10 seconds, twice, moving the leaves around between cooking. You just want to soften and barely cook the kale leaves. Chop off the leaves where the leave starts to narrow towards the bottom, leaving the top 4 or so inches for the “cup.”
    2. Over medium heat, heat the oil, adding the onion and salt when it is hot. Stir well.
    3. Chop the garlic roughly. Add the cilantro. Keep chopping until you have a finely chopped mess where you can barely pick the garlic out of the cilantro. Alternately, you can grind these together in a mortar and pestle, but I like the chopping.
    4. Add the cilantro-garlic mess to your onion after the onion is translucent and beginning to brown. Stir well and cook for about 1 minute.
    5. Add the bison and chop/stir well, breaking up the meat. Cook until just not pink, but don’t overdo it. Drain on a paper towel lined plate. Season lightly with pepper.
    6. To serve, add the meat mixture and condiment to each kale “cup” and enjoy like a taco. For this recipe, we tried Earth Balance mayo and a Greek yogurt as condiments, and both worked well. Use whatever you like that is safe for you, or enjoy without the condiment.
    Share this Recipe
     
    Powered byWP Ultimate Recipe
  • Garlic Potato Scallion Snacks

    Garlic Potato Scallion Snacks

    Potato UFOs? Not quite crackers?
    Potato UFOs? Not quite crackers? Pardon the weird font — my computer’s acting weird.

    In February, we’ve decided to play with garlic. Mmmmm, garlic. It’ll keep the vampires away, but it’s also good for colds and such. I’m guessing, with the load of elephant garlic I just roasted, we’ll just keep people far enough away not to share germs? Garlic is such an excellent base flavor for so many things. I would guess that I use garlic, whether fresh or powder, in maybe 70% of the savory dishes in my kitchen? I love it so. Way back at the beginning of my food allergy journey, garlic was one of the foods I cut out, thinking it was an issue. Looking back, I figured out that it wasn’t — it was just heavily featured in many dishes that were also full of dairy, which is a problem. I know that garlic isn’t an easy or favored food for some people on restricted diets. I’m sorry! This isn’t your month here at Surviving the Food Allergy Apocalypse. I hope you learn something else, or, if it’s easier, come back on Fridays for links instead.

    This is elephant garlic. Each clove is about, what, half an apple or so? They are huge and mild and awesome.
    This is elephant garlic. Each clove is about, what, half an apple or so? They are huge and mild and awesome.

    Let me be honest — I do not know what to call this dish. I was fussing with the basic recipe, and I tried cooking it a variety of ways. The flavor is nice in all of them, but the “winning” version has the best texture, like a small flexible pancake snack, savory, not sweet. I’m sure you could top it with something, but it’s tasty all on its own. So is it okay if I call it just a snack? You could eat this while watching a game. Or just TV or a movie. I don’t advise eating it while playing a game, like a board or card game, as I think it would leave you with greasy fingers, leaving prints on the game bits.

    SO this is Garlic Potato Scallion Snacks. They are tasty and warm and not too labor intensive. Enjoy.


    Notice: Trying to access array offset on value of type bool in /home/maryzahc/public_html/adultfoodallergies.com/wp-content/plugins/wp-ultimate-recipe/helpers/models/recipe.php on line 254
    Garlic Potato Scallion Snacks
    Print Recipe
    Servings
    2 dozen “snacks”
    Servings
    2 dozen “snacks”
    Garlic Potato Scallion Snacks
    Print Recipe
    Servings
    2 dozen “snacks”
    Servings
    2 dozen “snacks”
    Ingredients
    • 1 head garlic
    • 1 Tablespoon olive oil
    • 1 pound potatoes yukon gold, peeled if you prefer
    • 1 Tablespoon salt
    • 2 Tablespoons vegan margarine, safe for you
    • 2 oz roasted garlic
    • 2 Tablespoons vegan cream cheese (I like Kite Hill, which is almond-based. Use what is safe for you.)
    • 2 Tablespoons glutinous rice flour (which does not actually contain gluten)
    • 2-4 Tablespoons vegetable stock
    • 1-2 Tablespoons olive oil
    Servings: dozen “snacks”
    Instructions
    1. Roast garlic. Chop off top of bulb, drizzle with olive oil, wrap in foil, and bake at 450º for 45 minutes. Let cool. If you are using elephant garlic, like in the photos, you can peel the cloves first, as I did.
    2. Boil potatoes in salted water until easily pierced with a fork. The time for this will depend on the size of the potatoes. I personally like to buy bigger potatoes and boil them whole, as I think I get the best texture this way
    3. Preheat oven to 350ºF. Line a baking sheet with parchment paper or a silicon baking sheet.
    4. When potatoes are done, drain and lightly mash. Add vegan margarine, vegan cream cheese, roasted garlic, and mash.
    5. Add rice flour and veggie stock and mash to completely combine. You should have a sticky mash when you are done, so don’t add too much veggie stock. I added it 1 Tablespoon at a time.
    6. Make approximately 1 Tablespoon drops onto your prepared baking sheet. Leave about 1 inch of space around each drop, as they will flatten out into pancakes. No need to flatten them yourself. Using the second tablespoon of olive oil, brush the top of each.
    7. Bake for approximately 25 minutes, until the edges have browned.
    Recipe Notes

    I’ve given a garlic measurement in ounces rather than cloves as garlic cloves differ drastically in size. Taste and adjust as you go, if you don’t have a kitchen scale.

    Share this Recipe
     
    Powered byWP Ultimate Recipe
  • Clean Fridge Grain Bowl

    Clean Fridge Grain Bowl

    Treat. Yo. Self.

    To a cleaner fridge and several healthy meals. I realize this might be a stretch in the “treat” category, but hear me out. I really LIKE vegetables, and I feel really good, both mentally and physically, when I eat a bunch of them. I’m not a fruit person, really. I love veg. But I’m also extremely lazy and sometimes don’t feel like cooking. I have the best of intentions when  I make a meal plan and go grocery shopping. At least once a week, I fail to execute the plan because: life. So when I go to make next week’s plan, there are a bunch of random leftovers to deal with.

    HERE’S HOW: grain bowls. I know these have been popular forever. Jack and I loved going to Life Alive, a Massachusetts-based, 1970s-style vegetarian restaurant that managed to stay current and super tasty, and that’s one of their specialties. Grain bowls let you use up everything in your fridge — extra rice included — so you get to feel virtuous about not wasting food AND eating your vegetables, and that is a treat for me. Your mileage may vary, but you should still try this out.

    The key to a good grain bowl is to vary your textures and add just the right amount of a good sauce. The sauce in this dish is a variation on the “Say Cheez” gravy from Jo Stepaniak’s “The Ultimate Uncheese Cookbook.” For a crunchy topper, I’ve used roasted salted pepitas. The grain is rice, the green is mostly kale, but also leftover spinach, and I’ve specifically added “1 cup of chopped vegetables” to use up anything you have on hand. If you don’t like something in this recipe? Don’t add it. Otherwise, go wild. Turn your fridge into a satisfying meal.

    All of this becomes dinner
    All of this becomes dinner

    Notice: Trying to access array offset on value of type bool in /home/maryzahc/public_html/adultfoodallergies.com/wp-content/plugins/wp-ultimate-recipe/helpers/models/recipe.php on line 254
    Clean Fridge Grain Bowls
    Print Recipe
    Servings
    4 servings
    Cook Time
    45 minutes
    Servings
    4 servings
    Cook Time
    45 minutes
    Clean Fridge Grain Bowls
    Print Recipe
    Servings
    4 servings
    Cook Time
    45 minutes
    Servings
    4 servings
    Cook Time
    45 minutes
    Ingredients
    Roasted Vegetables
    • 1 large sweet potato,
    • 1 small onion slivered*
    • 1 Tablespoon olive oil
    • 1/2 teaspoon berbere seasoning or hot spice of your choice
    Sauce
    • 1/4 cup gluten-free flour (glutinous rice flour or chickpea/gram flour recommended)
    • 1/4 cup nutritional yeast
    • 3/4 cup non-dairy milk (I use almond most of the time)
    • 1/2 cup broth or water
    • 1 Tablespoon balsamic vinegar (apple cider would be another good choice)
    • 1/2 cup white wine
    • 1/2 teaspoon garlic powder
    • 1/2 teaspoon mustard
    Sauteed Vegetables
    • 1 box mushrooms de-stemmed and broken into pieces
    • 1 teaspoon garlic minced
    • 1 cup diced random veg
    • 2 cups cooked grains (used rice here)
    • 1 bunch kale chopped (plus any leftover greens)
    Toppings
    • 1 whole avocado cut into chunks
    • 4 Tablespoons pepitas or other seed or nut of your choice
    Servings: servings
    Instructions
    1. Preheat oven to 425ºF.
    2. Toss chopped sweet potato and onion with olive oil and spicy seasoning — add more or less than I’ve called for depending on your tastes. Spread out on a baking sheet and cook for about 30 minutes.
    3. Prepare the sauce by whisking all the ingredients together. Cook over medium heat until boiling and thickened. Add more liquid if you need it to get the right consistency.
    4. With a little spritz of oil in a sautee pan, add mushrooms and cook until they release their liquid. Add the garlic and stir. Add the random vegetables, and do the same. Then add the leftover cooked grains (I used rice) to soak up that liquid as they reheat.
    5. When the rice or grain is hot, add the greens and stir until wilted.
    6. In a bowl, add the rice and veg, the roasted veg, the avocado, sauce, and nuts or seeds, if using. Stir and enjoy.
    Recipe Notes

    º

    Share this Recipe
     
    Powered byWP Ultimate Recipe
  • Coconut Milk Vegan Fudge

    Coconut Milk Vegan Fudge

    The first recipe I ever perfected was fudge. I admit, part of it had to do with the fact that fudge was something my mom had given up on making well. Starting in about middle school, to judge by the handwriting on the recipe card, I made many batches of fudge each winter. Teachers, family, and friends all got fudge as holiday gifts, and no one ever complained.

    But when I gave up dairy, some 10 or 12 years ago, I gave up on fudge. I tried making evaporated and sweetened condensed non-dairy milks a few times, never all that satisfied with the results. When I found a coconut milk-based sweetened condensed milk this year, I was thrilled! Until I realized that my amazing fudge recipe used evaporated milk. Darn it all.

    There is a conversion. It involved math. I did it. And the results are tasty. It’s not perfect — coconut milk is brilliant, but in almost every use, it still tastes of coconut, and fudge generally doesn’t taste of coconut, but the flavor isn’t too strong to get past here. Bonus: this recipe is easy. It takes less than 10 minutes of active work, and requires no specialized equipment. Plus, the way the chocolate just doesn’t look like it is going to blend in — and then it does? It’s like magic.

    Earth Balance vegan margarine, sweetened condensed coconut milk, dark chocolate chips


    Notice: Trying to access array offset on value of type bool in /home/maryzahc/public_html/adultfoodallergies.com/wp-content/plugins/wp-ultimate-recipe/helpers/models/recipe.php on line 254
    Coconut Milk Fudge
    Print Recipe
    Prep Time
    10 minutes
    Passive Time
    1 hour
    Prep Time
    10 minutes
    Passive Time
    1 hour
    Coconut Milk Fudge
    Print Recipe
    Prep Time
    10 minutes
    Passive Time
    1 hour
    Prep Time
    10 minutes
    Passive Time
    1 hour
    Ingredients
    • 1 can sweetened condensed coconut milk 7.5 oz was the only size out there
    • 1 Tablespoon non-dairy milk
    • 1.5 cups sugar
    • 1/2 cup butter or margarine PLUS
    • 2 Tablespoons butter or margarine
    • 1 1/4 cup chocolate chips check for allergens!
    Servings:
    Instructions
    1. In a saucepan over medium heat, bring non-dairy milks, sugar, and butter or margarine to a boil. Boil for one minute, stirring constantly.
    2. Remove from heat, and add chocolate chips. Beat with a wooden spoon for 3 minutes.
    3. Pour into lined baking dish at least 8×8 inches square.
    4. Cool completely and cut to desire serving sizes.
    Share this Recipe
     
    Powered byWP Ultimate Recipe