Notice: Function _load_textdomain_just_in_time was called incorrectly. Translation loading for the wp-ultimate-recipe domain was triggered too early. This is usually an indicator for some code in the plugin or theme running too early. Translations should be loaded at the init action or later. Please see Debugging in WordPress for more information. (This message was added in version 6.7.0.) in /home/maryzahc/public_html/adultfoodallergies.com/wp-includes/functions.php on line 6121
MaryKate – Page 16 – surviving the food allergy apocalypse (archive)

Author: MaryKate

  • Squash and Sprout Rice Platter

    Squash and Sprout Rice Platter. Photo by J. Andrews
    Squash and Sprout Rice Platter. Photo by J. Andrews

    I started working on this particular dish about a year ago when I discovered this branch of Brussels sprouts at a Trader Joe’s and had to buy it. How do you not buy that?

    Sprouts!
    Sprouts!

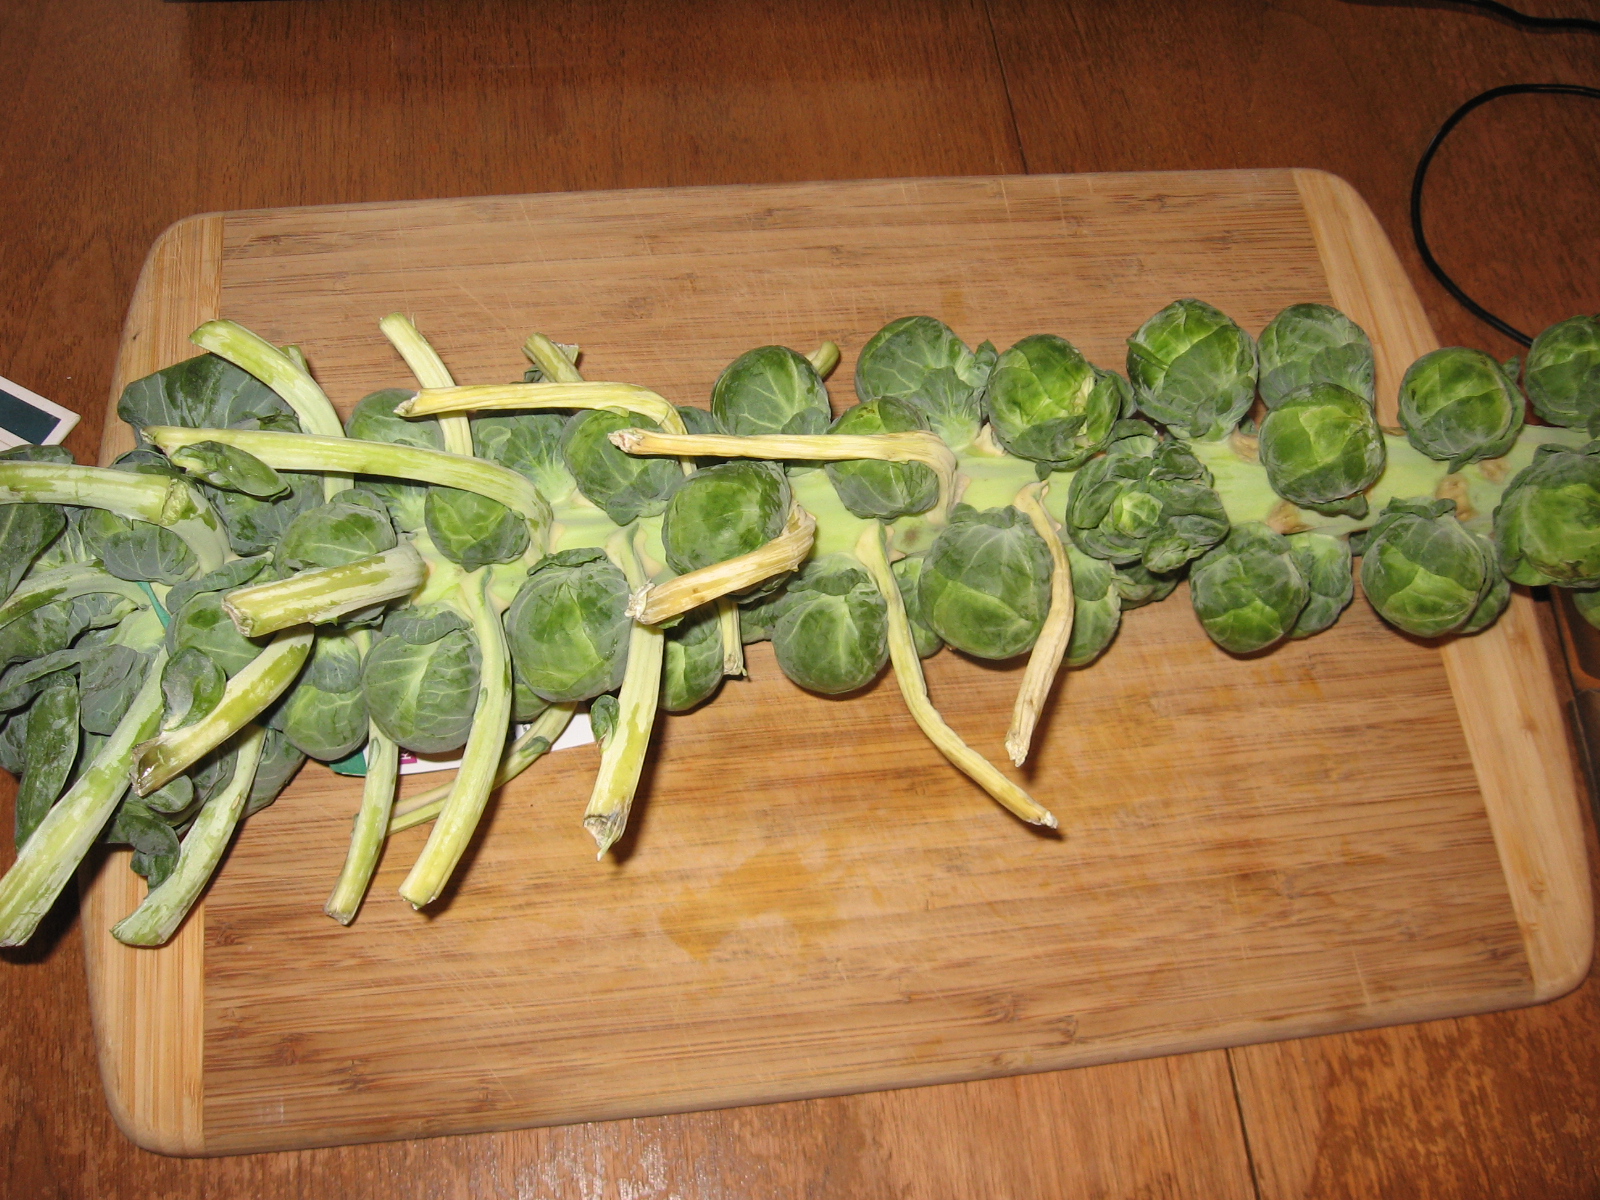
    I made a lot of different Brussels sprouts recipes to use them all up, but most of them involved roasting the sprouts. There is no better way. Roasting is also really the only way to cook butternut squash, and I thought maybe these things would go together well, maybe with some rice and a sauce. I made a dressing using a magical mustard I’d brought back from Paris that was curried apricot mustard, and I’ve been trying to reproduce that flavor since. It took more than a few tries, but it was still cheaper than going back to Paris (where, I need to tell you, there is a whole store that just sells mustard. They have mustard on tap. That was absolutely a highlight of my trip.)

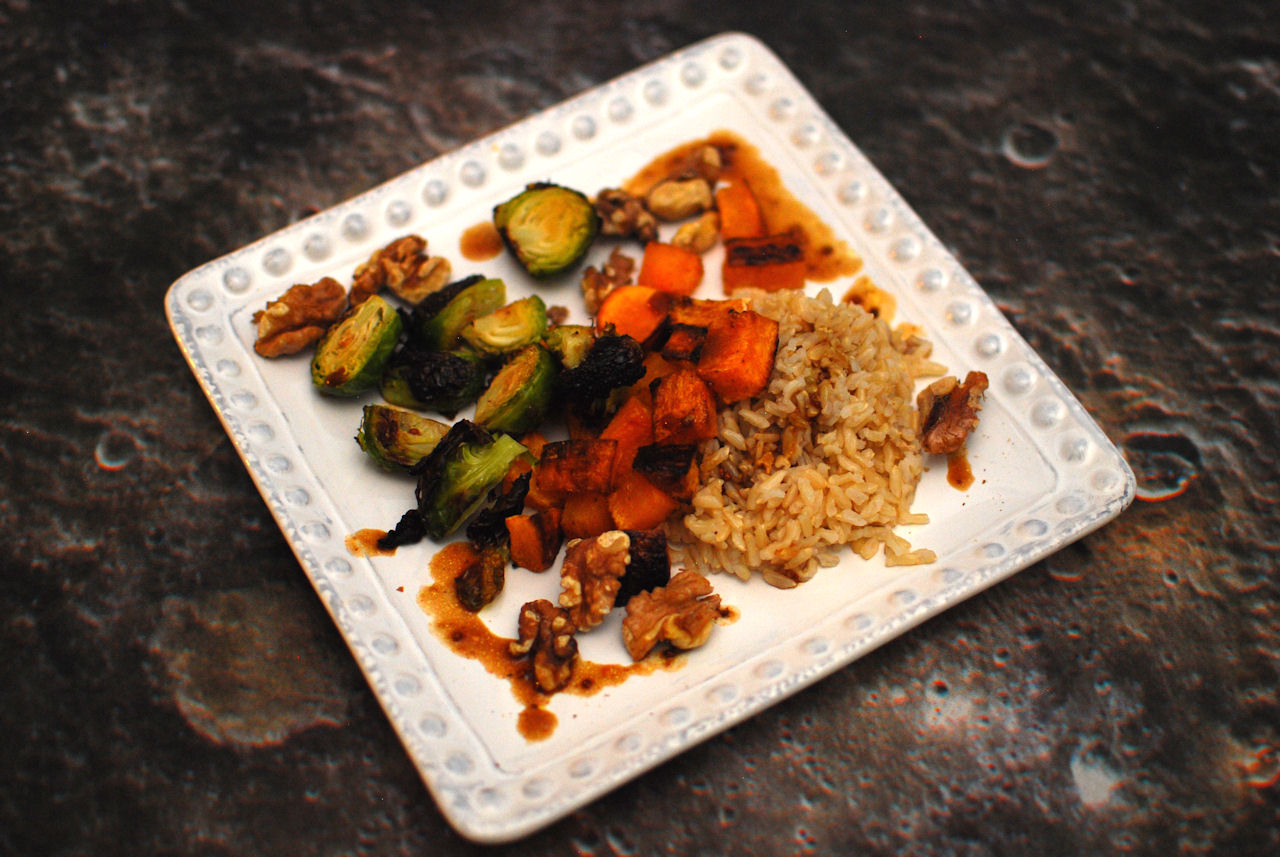
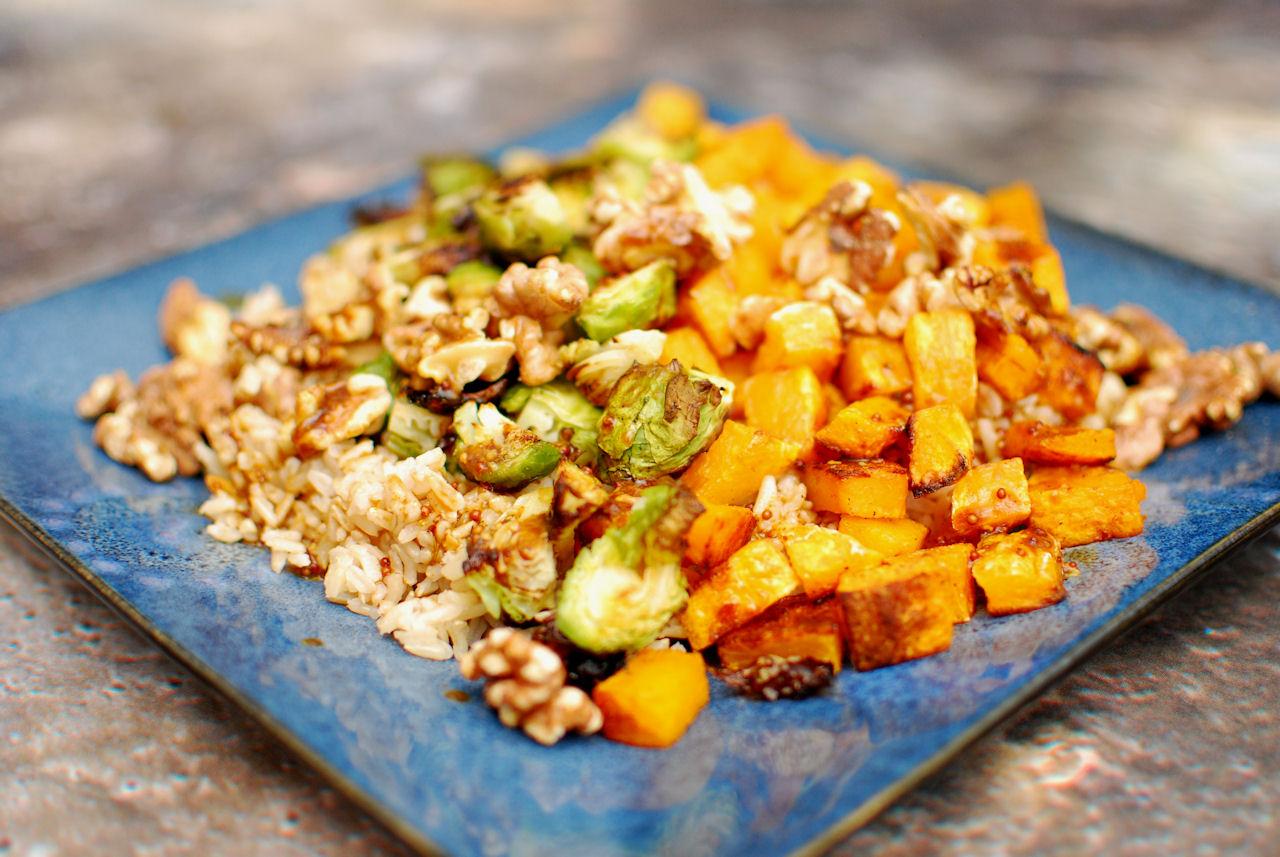
    I wanted to call this a pilaf, but apparently a pilaf requires the rice to be cooked in a flavored broth. This dish calls for brown rice cooked in very exciting water, but the dressing you toss everything with at the end adds plenty of flavor, and the vegetables have their own flavors — plus carmelization (i.e. oxidization of the sugars) because of the roasting. Tasty.

    Squash and Sprout Rice Platter

    Preheat oven to 450F.

    • 3/4 cup brown rice
    • 1/4 cup wild rice
    • 2 1/4 cups water

    OR

    • 1 cup brown rice
    • 2 1/4 cups water

    Cook rice however you normally cook rice. I throw it in my rice cooker. This takes about 40 minutes, and so will your vegetables, so start the rice first and then move on.

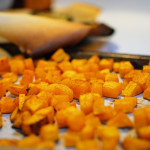
    • 1/2 lb. butternut squash, peeled* and cut into 1/2 inch cubes — about the size of playing dice
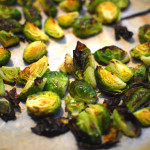
    • 1/2 lb. Brussels sprouts, ends trimmed off and any weird outer leaves removed, halved or quartered depending on your preference — make them bite-sized
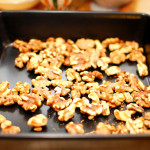
    • 1 cup raw walnut halves or pieces (optional)
    • 2 Tablespoons to 1/4 cup oil of your choice (I use olive oil or safflower oil)
    • 1 teaspoon seasoned salt (I use a spicy seasoned salt, but you can use regular — whatever is your favorite)
    • 1/2 teaspoon salt

    Line three separate baking sheets with parchment paper (or don’t, but this makes clean up easier).

    Toss the squash with 1-2 Tablespoons of oil, lay out in a single layer on a baking sheet, and sprinkle with either salt, seasoned salt, or spicy seasoned salt. I prefer the latter. Throw them in the oven and set the time for 25 minutes.

    Toss the sprouts with another 1 Tablespoon of oil, lay out on the second sheet, and sprinkle with about 1/2 teaspoon salt. When the time goes off for the squash, throw the sprouts in (don’t remove the squash!) and reset the timer for 10 minutes.

    Spread the walnuts out on the third sheet. When the time goes off again, add the walnut pan to the oven and check the sprouts — remove if necessary. Set the timer for 5 minutes.

    A note for the nut allergic: The walnuts are optional in this dish!  If you aren’t allergic but just don’t like whole walnuts, chop them up some, as they do add a great flavor to this dish.

    Your total cooking time is 45 minutes. The squash gets the full amount, the sprouts about 15, and the walnuts 5. This works out perfectly in my oven, but keep an eye out, especially for the nuts.

    For the sauce:Bottles

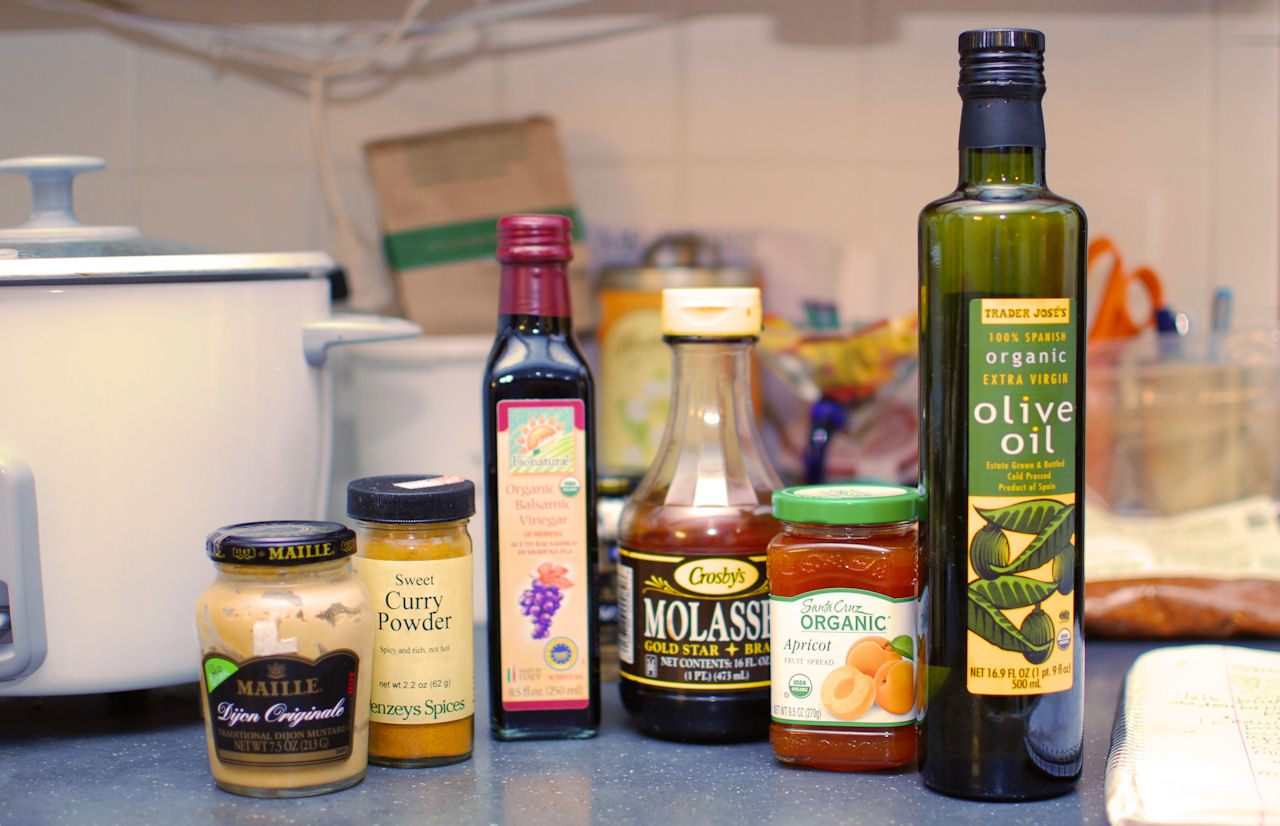
    • 4 Tablespoons balsamic vinegar
    • 1 1/2 teaspoon molasses
    • 2 teaspoons apricot jam
    • 1/2 teaspoon curry powder (again, if you like the spice, get the spicy one)
    • 3 1/2 teaspoons Dijon mustard — grainy if you wish, but smooth works best here
    • 1 1/2 Tablespoons high-quality olive oil

    Whisk all ingredients together.

    Plate the rice, add the veggies, drizzle on the sauce, and sprinkle walnuts over the top. Dig in and enjoy.

    Squash and Sprout Rice Platter. Photo by J. Andrews
    Squash and Sprout Rice Platter. Photo by J. Andrews
  • End-of-Summer Garbanzo Chili

    End of Summer Chili
    End of Summer Chili

    Yes, I know, it’s about a week late for the end of summer, but then, the zucchini is still around, isn’t it? The zucchini lasts through the end of summer, garbanzo beans always remind me of summer salads and hummus, and the adobo seasoning and fire-roasted tomatoes taste of grilling season. This quick hot meal has some of the great flavors of summer, but is warm and filling (and made indoors).

    Adobo seasoning is one of my recent favorites, as there is a ton of flavor in it, but it’s not really spicy. There are varieties of adobo, but the one I’m referring to appears to be Puerto Rican in origin — a dry spice mix, often used to rub on meats, that consists of onion, garlic, Tellicherry black pepper, Mexican oregano, cumin, and cayenne pepper. My version is from Penzey’s Spices, but I have seen it at the grocery store, so I’m assuming it’s not too hard to find in the US. It makes almost everything better.

    End-of-Summer Garbanzo Chili

    Makes 3-4 servings, depending on how hungry you are.

    • 2 teaspoons oil
    • 3 Tablespoons chopped onion
    • 2 small zucchini, grated (“small” being about 6 inches long, 1 inch diameter — the most common size found in your average US grocery store. Honestly, a little more or less won’t hurt here.)
    • 2 oz. (1/2 half a small can) of diced jalapeños OR one fresh, diced jalapeño pepper OR a small can of green chiles (or if you’re Denise, all of the above, possibly)
    • 1 can (15 oz.) garbanzo beans, drained and rinsed
    • 1 can (15 oz.) diced tomatoes, fire-roasted if you wish
    • 1 Tablespoon adobo seasoning
    • 1/4 cup + 2 Tablespoons millet
    • 3 Tablespoons water
    • salt to taste
    Zucchini and Beans
    Zucchini and Beans

    In a pan heated over medium-low heat, add your oil to the warmed pan. When it shimmers, add the onions. I always chop whole onions, even when I need only half for a recipe, and the rest goes into a bag in the freezer just for meals like this. Add it straight from the freezer to the hot oil, but be careful of the splatters.

    Cook onion until translucent, then add the zucchini and stir until fully coated with oil and integrated with onions, a minute or two. Then add the beans, tomatoes, and adobo, stirring each into the dish. Bring to a low boil, then reduce heat and simmer 5 minutes uncovered.

    Add the millet and water, and cover, simmering another 20 minutes, covered. Check the millet to see if it’s done, and if needed, add a bit more water (go 1 Tablespoon at a time) and time (say, 5 minutes at a go). Millet should be firm, but not crunchy, when done.

    This is also good with a sprinkle of shredded Daiya mozarella on top, if you have it, but you don’t need it.

    End of Summer Chili
    End of Summer Chili
  • Pasta e Fagioli

    pasta e fagioli
    pasta e fagioli, photo by j.andrews

    Growing up, we didn’t eat a lot of pasta. Every few months, there was spaghetti and meatballs, but mostly, we had potatoes. It turns out, the rest of my cohort were eating a lot more pasta than I was, and it seems to be something of a comfort food for many people. Personally, I like it because it’s easy.

    We served a pasta e fagioli soup at a sandwich restaurant I worked at, but years ago, someone gave me a recipe for a pasta dish, not soup, that was mostly a can each of beans and tomatoes. It was easy, but kind of boring, and it seemed like something that could take on a ton more vegetables, both for health and nutrition and for color. So I started tinkering. I’ve put off putting this up on the blog since last fall, primarily because I’m still tinkering. Because of that, I’m going to give you some options and ranges on amounts of ingredients. But as we move into cooler weather (well, in New England — I guess it was 90-something in Bismarck on Friday), I am thinking of heartier meals that are still quick and make enough for leftovers.

    So here you go. If you have dried pasta, a can of beans, and a can of tomatoes, and garlic, you can make a version of this happen in about 40 minutes. The longer cooking time is because the beans begin to break down and make the sauce creamy. If you make the sauce a day or so ahead, you have an even quicker meal with a creamier sauce. If you come up with a variation you like, please share it in the comments!

    simmering bean sauce photo by j.andrews
    simmering bean sauce, photo by j.andrews

    Pasta e fagioli

    • 2 Tablespoons of olive oil, cooking grade (generally not extra virgin)
    • 1 teaspoon (2 cloves) minced garlic
    • 2 Tablespoons chopped sweet onion (optional)
    • 2-4 stalks celery, chopped
    • 1/4-1/2 of a bell pepper chopped finely (optional)
    • 1 8 oz. package of white button mushrooms, washed and broken (optional, I guess)
    • 1 8 oz can of cannellini beans, drained and rinsed
    • 1 1/2 cups of canned tomatoes, diced or roughly chopped, and their juice
    • 5-8 oz. baby spinach, roughly chopped (optional, but really good in this)
    • 1-3 Tablespoons good quality olive oil (the fancier kind you’d use for salad dressing, if you have it)
    • salt and pepper to taste
    • Pasta of your choice (I used Ancient Harvest quinoa and corn shells)

    In a large skillet, heat up your first 2 T of olive oil over medium heat. When it is shimmering hot, add the garlic and the onion (if using). Stir frequently.

    As those aromatics become translucent, add the celery and bell pepper. Stir to completely coat with oil, then add the mushrooms. You’ve broken instead of chopping the mushrooms because they hold their shape and shrink less, and this gives them more texture. Yes, I suppose these are optional, too, if you really hate mushrooms. I just find that hard to imagine (sorry, Denise).

    When the mushrooms are thoroughly wilted (that’s what they will look like), add the beans and the tomatoes, but reserve most of the tomato juice. I just scoop the tomatoes out with a slotted spoon. Stir these in will, and lower the heat to a simmer. Cook this for 15-20 minutes, stirring occasionally, then add the tomato juice, and cook another 15-20 minutes. The beans will start to break down, and this gives the “sauce” a great texture — it is very thick and chunky at this stage.

    Assuming your pasta takes about 10 minutes, start it now. Cook according to package directions, making sure to reserve some of the water when you drain it for the step below.

    At this point, add the spinach to the bean mixture, and cook until all the spinach is wilted. Decide if you want your sauce a bit thinner at this stage. If so, add from 1T to 1/4 cup of your pasta water, adding slowly and stirring until you get the desired consistency. If not, go directly to adding another 1-3 Tablespoons of good quality olive oil (the more you add, the richer it gets, just like hummus), stirring it in thoroughly. Taste your sauce and add salt (if needed) and a bit of fresh ground pepper.

    Serve sauce over pasta.

    pasta e fagioli photo by j.andrews
    pasta e fagioli, photo by j.andrews
  • Moveable Feast — the week-long salad

    Salad, weekend iteration
    Salad, weekend iteration

    This summer hasn’t been brilliant for me and cooking. Let’s be honest — it was brutally hot and often humid, and I’ve been busy. But hey, since when is that just a summer thing? Here’s a second “idea” recipe of the summer — the “idea” part being that you can change up almost all of the ingredients and the concept will still work. Actually, that’s also the whole point of this recipe.

    You know those weeks where you have a lot of random leftovers around? Or ingredients you didn’t use quite all of? Last week, that was me — a fridge full of random, and a planned long weekend vacation at the end of the week. So I shopped strategically and left my empty fridge alone over the weekend.

    With half a bag of shredded carrots, most of a cucumber, some broccoli, leftover brown rice pasta, half an avocado, and a packet of tuna, I managed four meals by adding one key ingredient — ranch dressing (check out our cashew-based recipe, but you can also try the Earth Balance mayo version). I know that you likely come here for new and fresh recipes, and this isn’t exactly a recipe. But occasionally, I need a reminder that good, healthy, tasty food is not hard and does not need to take forever to make.

    This kind of salad is one of my favorite things to eat for lunches, but I make a few, get a bit tired of them, and then seem to forget that they exist. Does anyone else do that?

    Meal The First

    4 stalks celery, chopped

    1 cucumber, sliced in half and thinly sliced

    1/2 bag of shredded carrots

    2 cups of broccoli florets, broken into smaller florets

    1/4 cup slivered almonds

    Cashew ranch, to your level of dressing needs

    • Feeds two or makes two meals, with leftovers, so plate and then put the dressing on your servings
    Salad, version 2
    Salad, version 2

    Meal the Second

    To the leftover vegetables, and with the leftover ranch, add:

    1 packet of tuna, drained

    1/2 avocado, cubed

    1 small tomato, sliced

    1 cup of leftover pasta

    • Again, feeds two or makes two meals

    Other Possible Additions

    Leftover chicken/canned chicken

    Canned beans

    Any other vegetables you may have around

    Leftover rice or other grains

    Do you make salads like this? If so, what would you add? Any good ideas for exciting or unexpected ingredients?

  • Brown Rice “Couscous” Veggie Bowl

    IMG_0652Generally those of us with multiple food allergies can rely on very little in the way of packaged or convenience foods. Given that both Denise and I also work full-time, sometimes feeding oneself on a serious time budget becomes, well, problematic.  When I still ate wheat, couscous was something I always had on hand because it cooked quickly and was a good neutral base for an easy saute of whatever was in the fridge at the time. I operated on the easy model of “beans, greens, and grain.”

    This is a version of that — using a Lundberg brown rice couscous with roasted garlic flavor as the “grain” base for a nice stir fry of Swiss chard from my friend Mary’s garden. Add in a leftover sweet potato and a caramelized Vidalia onion and I had a good dinner with three lunch portions leftover. Add a can of white beans or some leftover meat for a protein boost, serve this as a side dish, or think up your own variation — this is more of a formula than a recipe, really, and one I honestly repeat over and over throughout the year for easy weeknight meals.

    IMG_0654

    Gluten-free Veggie Couscous Bowl

    Makes 4 servings

    • 1 large Vidalia onion, halved and sliced thin
    • 1 Tablespoon some form of fat
    • I box Lundberg brown rice couscous
    • 1 bunch of Swiss chard, washed, rolled, sliced, and then chopped
    • 1-2 teaspoons olive oil
    • 1-3 cloves garlic, chopped
    • 1 sweet potato, cooked
    • salt and pepper to taste

    Melt shortening/butter/margarine/bacon fat/olive oil in large skillet over medium low heat. When sizzling hot, add onions. Stir thoroughly to coat with oils, and cook low and slow until well-browned, about 45 minutes or so. Stir occasionally.

    If you need to cook the sweet potato, throw it in the oven at 375F after washing it and poking vent holesIMG_0655 in the skin. I’d personally suggest making more than one and use the leftovers in another dish later in the week.

    In a separate stockpot, bring water to a boil as directed on the box of the couscous. When the water is boiling, add the seasonings (if you can have them) and the couscous. Cover, reduce heat, and set the timer — again, basically follow the directions on the box, omitting the seasoning if you cannot have them.

    While these things cook, wash and drain the chard leaves. Chop off the stems. Slice these thinly like celery and set aside. Stack the leaves, and then roll them up tightly to slice thinly to create small ribbons of chard. Cut lengthwise along the leaves next, to make the ribbons shorter.

    When the onions are finished cooking, remove them from the skillet. Add a tiny amount of olive oil to the fat left in the pan, if needed, and then add the garlic and chard in quick succession. Stir thoroughly, and cook until the chard is fully wilted (4-8 minutes).

    In a large serving bowl, mix all ingredients — couscous, chard, sweet potato, and onion. Taste, and then season appropriately with salt and pepper.

  • Summer Strawberry Spinach Salad

    Summer Strawberry Spinach Salad, photo by J. Andrews
    Summer Strawberry Spinach Salad, photo by J. Andrews

    So far this summer in New Hampshire, we’ve had sweltering heat interspersed with rainy cool weather. Given the quick changes, it’s been hard to grocery shop effectively — who knows when it’s going to be way too hot to cook? Part of my solution has been to buy things that I can cook ahead, sometime when the heat isn’t too bad, and then use in multiple dishes. Like grilling a bunch of chicken on the indoor grill (which is relatively cool). Or roasting a bunch of veggies to eat all week. Or, sometimes, just buying something someone at the co-op made (they are good about listing ingredients).

    This salad started as a “this is what’s left in the fridge” kind of meal, but I loved it and spent some time refining the elements for what I think is a pretty perfect flavor profile. The particular combination of fresh baby spinach, ripe sweet summer strawberries, crisp and fresh cucumbers, and a honey mustard dressing just works for me.

    Summer Strawberry Spinach Salad

    Make ahead, if you want to:

    Grilled spicy chicken

    • 1 lb. chicken tenders (or boneless, skinless chicken breasts, cut into strips)
    • 1 teaspoon chili powder
    • 1/2 teaspoon celery salt
    • 1/4 teaspoon onion powder
    • pinch or more of cayenne pepper — adjust to suit your tastes, but probably no more than 1/4 t, even if you’re Denise

    Mix up the spices, and then sprinkle evenly over the chicken strips, both sides. You may have leftovers, which you can bag and save for another meal. Grill chicken until done. Cut the strips into cubes. You can use this hot, if you’ve just grilled it, or grill ahead and chill it for an even quicker weeknight meal.

    Honey Dijon Dressing

    • 1 Tablespoon Dijon mustard (I used this), (Denise has made this)
    • 1 Tablespoon honey
    • 1 teaspoon dried dill
    • 1/8 teaspoon garlic powder
    • 1 Tablespoon red wine vinegar
    • 2 Tablespoons high-quality olive oil

    Whisk first four ingredients together until the mustard and honey are smoothly blended. Then whisk in the vinegar, followed by the olive oil.

    Salad Base

    • Two large handfuls of baby spinach, roughly chopped
    • 1 medium cucumber, chopped
    • 1/2 lb. strawberries, stemmed and chopped

    Compose your salad by creating a bed of spinach topped by the chopped cucumber, strawberries, and chicken, drizzled with the dressing.

    This amount of ingredients makes two generous salads or three slightly smaller salads, with a good bit of leftover chicken that you can use for another meal.

  • Lazy Summer Classic Smoothies: Creamsicle

    Dreamy Smoothie Goodness
    Dreamy Smoothie Goodness

    It’s summer. It’s too hot to cook, but you need a mid-afternoon snack to get you through until dinner. Or it’s breakfast time but it’s 90 degrees in your apartment and food seems, well, heavy. There is a super simple solution to this cooking dilemma: Smoothies, people, smoothies.

    I go through smoothie phases. I make them for a while, then get stuck in a rut, and then rediscover them. I’m personally a fan of really simple smoothies that rely primarily on actual fruit, maybe with some yogurt or milk (non-dairy, of course), and generally as few ingredients as possible. I’ve done the green smoothie thing occasionally, and I’ve followed recipes and master recipes. Mostly, though, it’s a way to dump all the stuff in the fridge into a simple healthy creation that just requires a blender.

    With this ridiculously simple recipe, a little prep work will give you a snack that taste like the ice cream truck of your childhood just stopped by.

    The MANY ingredients
    The MANY ingredients

    Creamsicle Smoothie

    PREPARE AHEAD: Freeze some of your favorite vanilla non-dairy milk* in ice cube trays.**

    *Note 1: You can use any non-dairy milk. You can probably even use cow’s milk, but frankly, then, go buy yourself a creamsicle! I have used almond milk, primarily, in the vanilla, unsweetened variety. I am sure soy or rice will work, too. This recipe can be nut-free and soy-free, if you want.

    **Note 2: Measure your ice cube trays. I freeze a lot of ingredients in ice cube trays for ease of use later — tiny amounts of leftover broth or stock, sometimes herbs or pastes, fresh lemon or lime juice. All of my ice cube trays hold approximately 1 Tablespoon of liquid. It’s good to measure yours so that you know for the future recipes you’ll make with those ingredients.

    In a blender, combine:

    4 Tablespoons (4 cubes) of frozen vanilla almond or other non-dairy milk

    1 1/4 cup of orange juice

    Blend.

    Yes, seriously, that’s it. It’s really that easy and that good.

    Lazy Creamsicle Smoothie
    Lazy Creamsicle Smoothie
  • Red Lentil Dal Burger

    Red Lentil Dal Burger
    Red Lentil Dal Burger

    I LOVE dal.  It’s almost a perfect food — cheap, easy to make, adaptable, tasty…  But it can be difficult, like so many other things, to order out at a restaurant with allergies.  Dal is one of those dishes that seems to have a thousand and one “family recipes” so you never know what you might encounter when you order it out, though ghee is the most common questionable ingredient, cream is sometimes used.

    The real question is why it took so long for me to learn to make my own.

    When we were talking veggie burgers that would be grillable, this was the one of the first things that came to mind.  It would be different from your standard Boca (which is soy-based), but wouldn’t even attempt to be like a meat burger.  Flavor would be the key.  In this case, rather than even attempt to interpret multiple recipes and see what might sound good, I went on instinct, with flavors I knew I liked that I thought would stand up to grilling in a patty shape.  The mustard seeds and the chia seeds add a nice bit of texture and crunch, but the key is the counter-intuitive practice of blooming the spices in hot oil and adding them to the beans at the end of cooking.

    You will need to cool down the dal and then briefly (an hour or so) refrigerate the burgers, so plan ahead or make these the day before.

    Lentil Burgers with Authentic Grill Marks
    Lentil Burgers with Authentic Grill Marks

    Red Lentil Dal Burgers

    In medium saucepan, mix:

    • 1 cup red lentils, washed and sorted
    • 3 cups water

    Bring to boil and simmer 20-30 minutes, stirring occasionally, until the lentils no longer retain structural integrity.  Remove from heat.

    Spice mix to add to dal:

    • 1 Tablespoon olive oil
    • 1/2 teaspoon whole mustard seeds
    • 1/2 cup finely minced onion
    • 3/4 t salt
    • 2 Tablespoons microplaned ginger
    • 1 Tablespoon chopped garlic
    • 2 teaspoons minced cilantro

    Heat a small skillet over medium low heat until hot.  Add the oil.  Let it heat up a minute, until it shimmers.  Add the mustard AND COVER THE PAN (ask me how I know this).  When the mustard seeds have popped some, quickly add the onion and cover for another 30 seconds or so.  Otherwise, you will be finding popped mustard seeds when you move out.  When the onion is nicely browned, add the rest of the spices and cook until the garlic is fragrant and cooked, stirring very frequently so as not to burn anything.

    Add the spice mix to the lentils along with

    • 2 Tablespoons chia seeds, whole (use maybe 1-1/4 T if ground, but you’ll miss the crunch in here)

    Mix well and then taste — adjust the seasonings (particularly salt) if necessary.

    Chill this mixture until completely cool, and then use an ice cream scoop or large spoon to make patties — keep these no larger than, say, an average coffee mug’s opening, and they will stay together even on a regular grill — go bigger at your own risk.

    These are fully cooked, so just singe and warm them on the grill, and serve with lime wedges.  I wouldn’t necessarily recommend a bun, but if you need one, maybe check out the not pitas I originally made to go with them.

    Summer perfection -- the veggie burger
    Summer perfection — the veggie burger