Notice: Function _load_textdomain_just_in_time was called incorrectly. Translation loading for the wp-ultimate-recipe domain was triggered too early. This is usually an indicator for some code in the plugin or theme running too early. Translations should be loaded at the init action or later. Please see Debugging in WordPress for more information. (This message was added in version 6.7.0.) in /home/maryzahc/public_html/adultfoodallergies.com/wp-includes/functions.php on line 6131 Soups & Stews – Page 4 – surviving the food allergy apocalypse (archive)
Soup [soop], noun: a liquid food made by boiling or simmering meat, fish, or vegetables with various added ingredients. Stew [stoo, styoo], noun: a preparation of meat, fish, or other food cooked by stewing, especially a mixture of meat and vegetables. These recipes will not contain dairy, eggs, gluten, wheat or hazelnuts. If we use a top 8 allergen, we will use a tag warning of its use.
It’s winter, so it’s already dark when you get home, late, hungry. and cold. There’s probably some sandwich stuff in the fridge, and there’s cereal, but again, it’s cold. And you’re hungry. NOW.
You need this soup.
In about 15 minutes, with very minimal effort, you have fresh wondrous HOT satisfying soup.
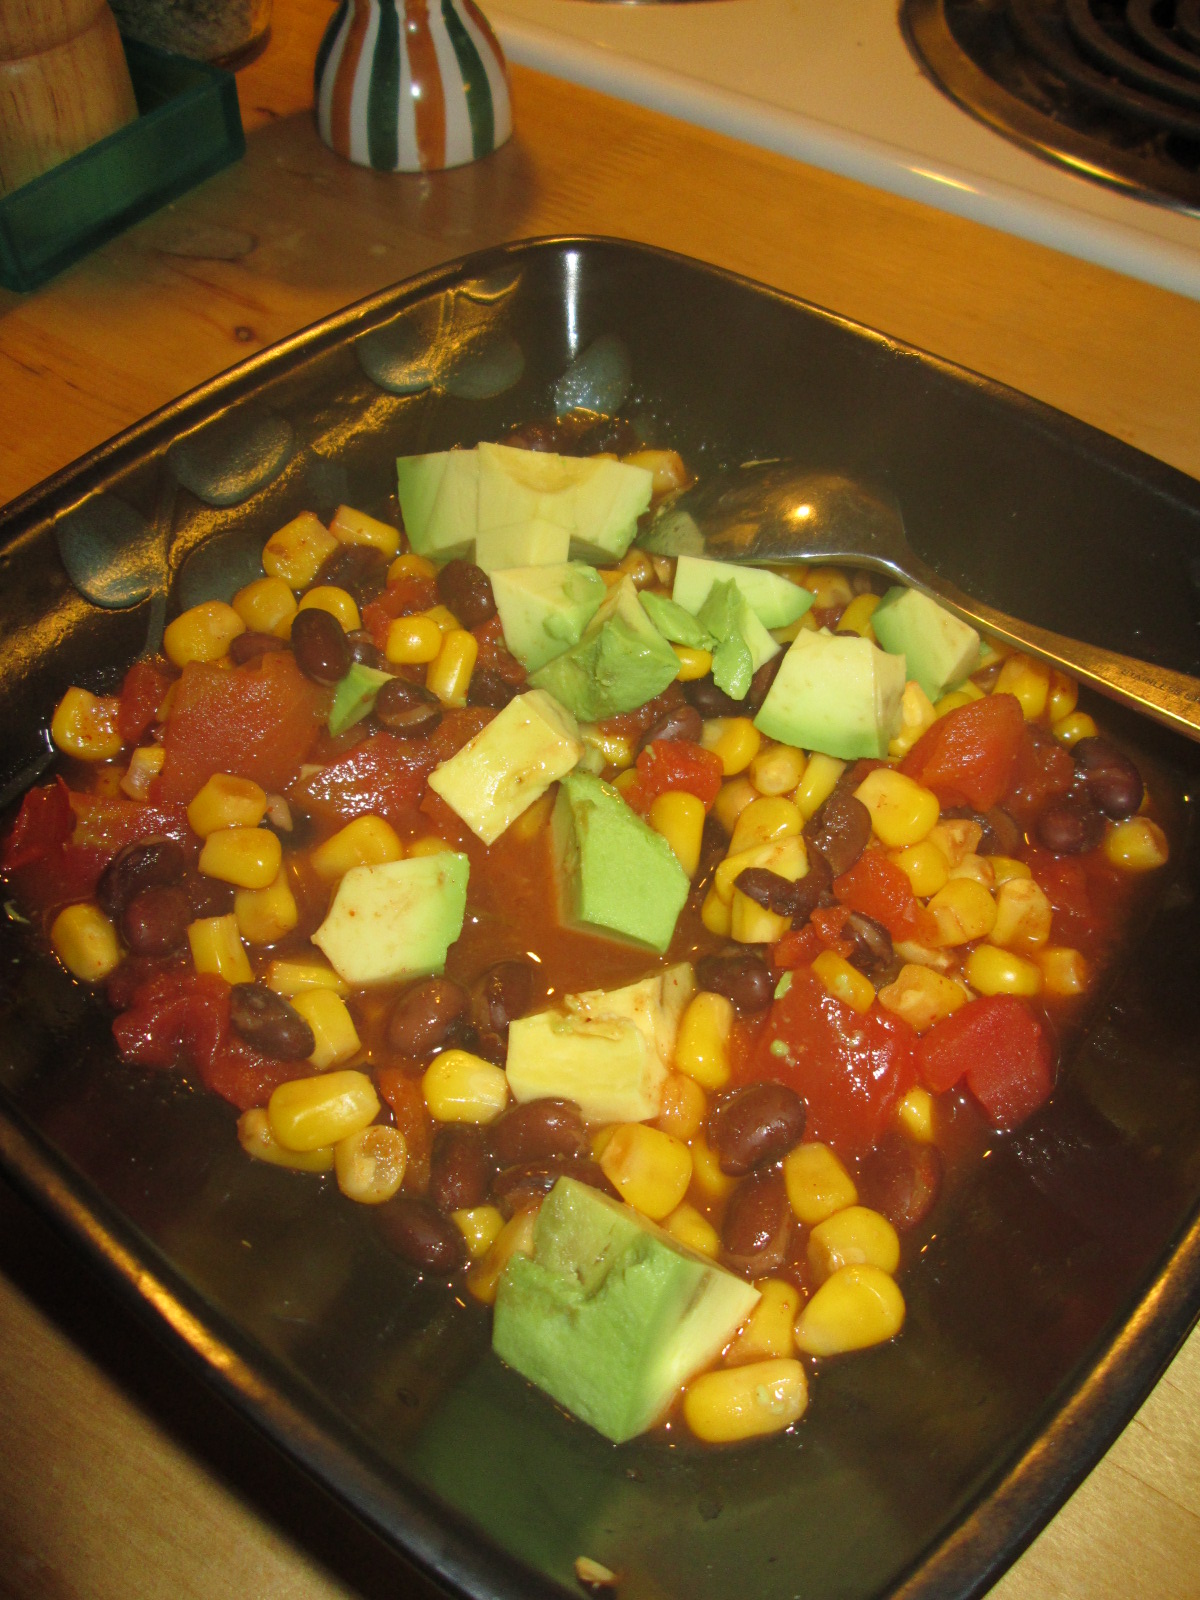
This Is How Easy Dinner Can Be
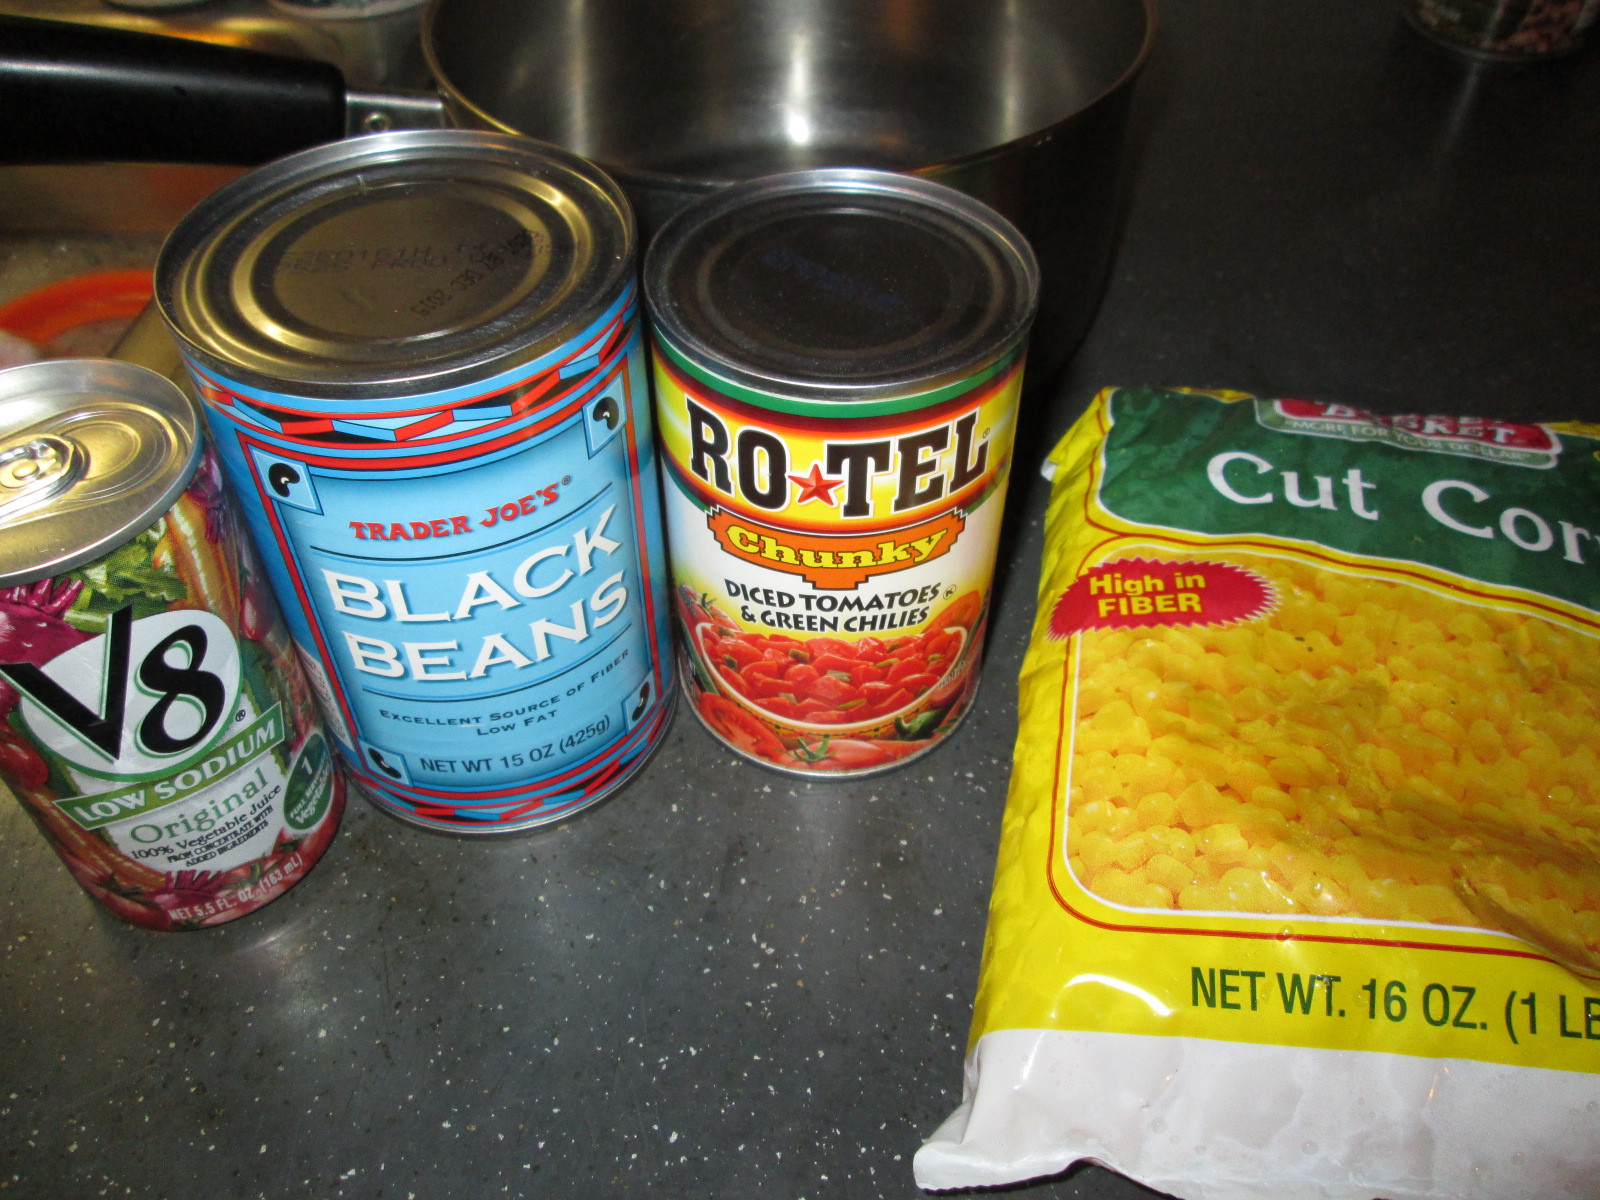
Black Bean Soup
1 can of black beans, drained and rinsed
1 can of tomatoes, either chopped or crushed, with seasonings if you like
1 cup of frozen corn
1 small can of tomato juice or V8 (I use low sodium V8) OR about 6 oz of water
1-2 teaspoons chili powder
1/2 teaspoon cumin
pinch of cayenne or dash of hot sauce
Mix in sauce pan, heat. That takes about 10 minutes. Eat.
The basic recipe is so easy that it’s possible to easily dress this up, but the basic recipe is excellent and all the ingredients are shelf-stable, so you can always have them on hand.
Other potential add-ins before cooking: 1/4 teaspoon oregano, a cube or two of frozen cilantro (or fresh, if you have it), leftover cooked rice, leftover cooked sweet potato, leftover shredded or cubed chicken.
Potential toppers for after cooking: crush a handful of tortilla chips on top, add some sliced avocado before serving, add some fresh chopped cilantro, or sprinkle on some shredded cheese, vegan or not.
I’ve been working on this recipe a while and this is another one of my fire breather recipes. This is really, really spicy chili. If you don’t want really, really spicy chili, I’ll make notes about how to turn it down a notch, and how to turn it down 10 notches (*see asterisk below ingredients), just in case you all don’t have stomachs lined with asbestos. Also, in case your stomach is lined with asbestos, I’ll give you notes about how to take it up to super octane, the way I make it when my husband and I are not sharing with others (**see double asterisks below ingredients, I will also note the Scoville units for each pepper so you can decide what to leave in and what to leave out if you wish). I like the cocoa powder in it because it gives the sauce a richer feel and color. Also, be aware that this recipe makes about 3 quarts of chili. It freezes incredibly well, so we freeze it in single serve containers and then just take one out and bring it to work to nuke for lunch. The pictures show me making a double batch, because it’s a bit more work than I like to do to make it, so I do it once and put the rest in our chest freezer until we want to eat it.
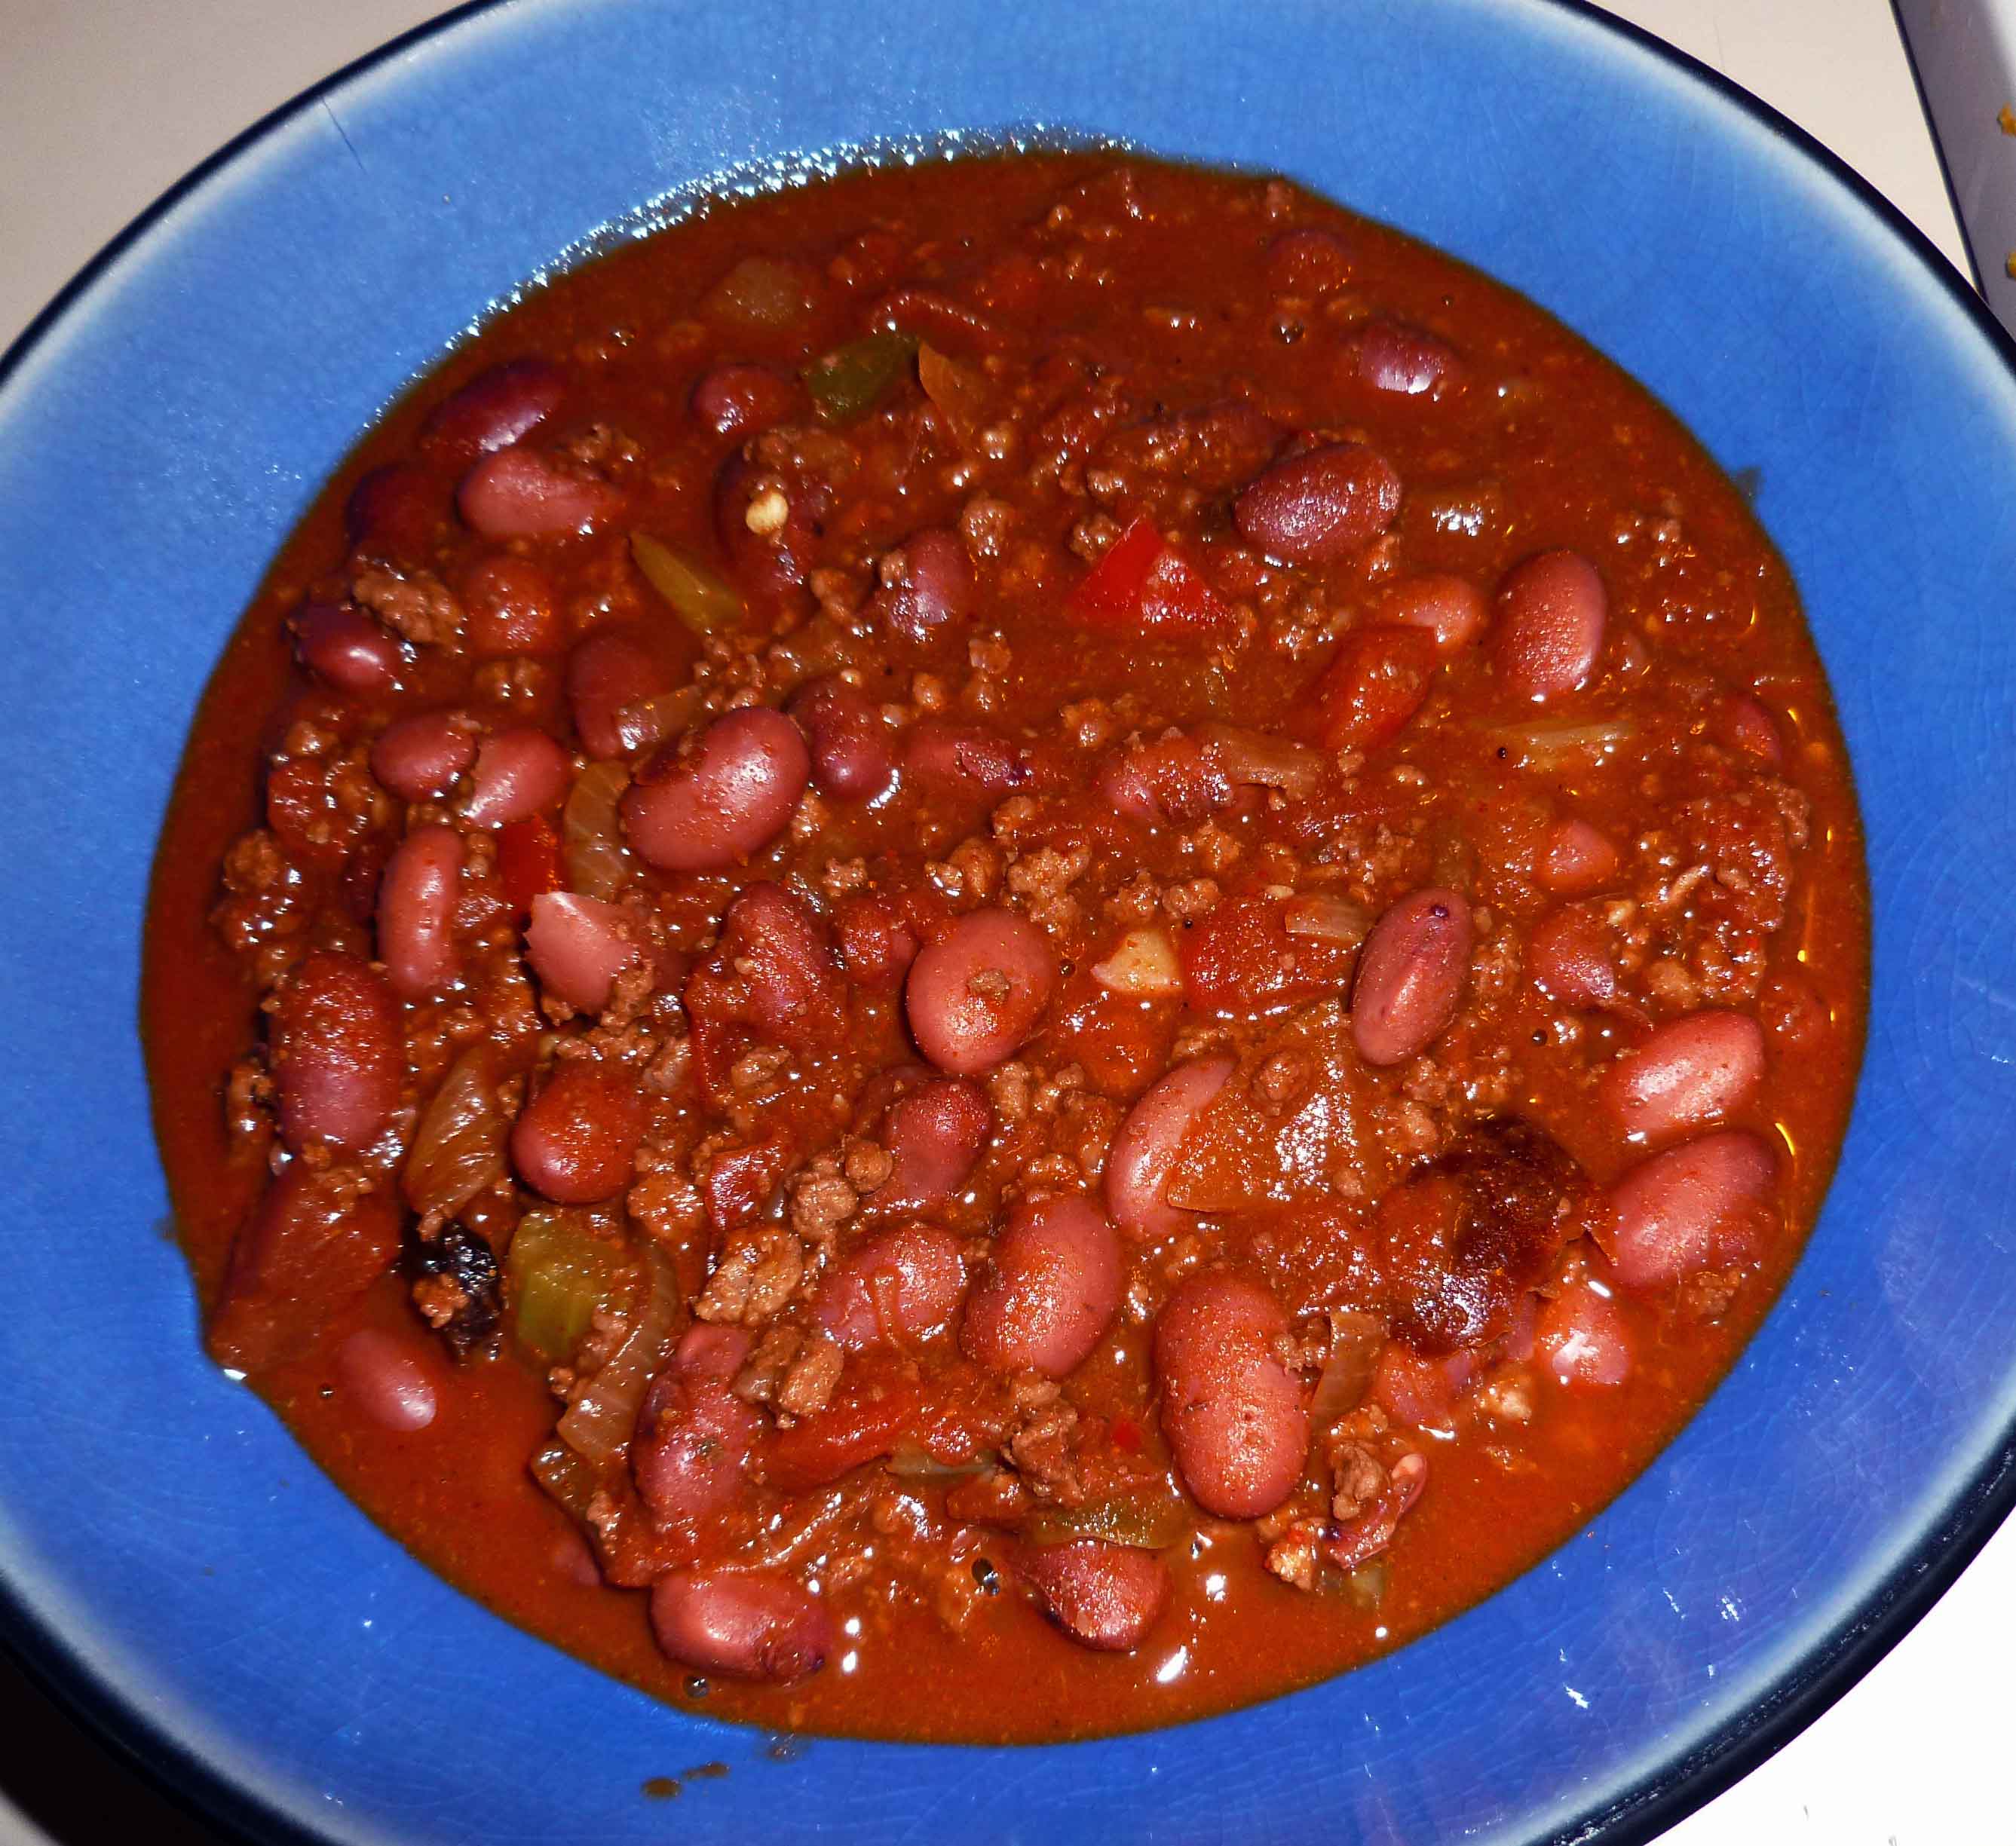
It’s Winter, Warm Yourself Up Chili
1 lb bags of small red beans (or kidney beans or any other bean of your choice. Mix it up!)
1 Tablespoon of Epazote (Mexican herb used in bean dishes to reduce gas, you can skip this if you don’t have any on hand. It doesn’t have much flavor, think dried parsley.)
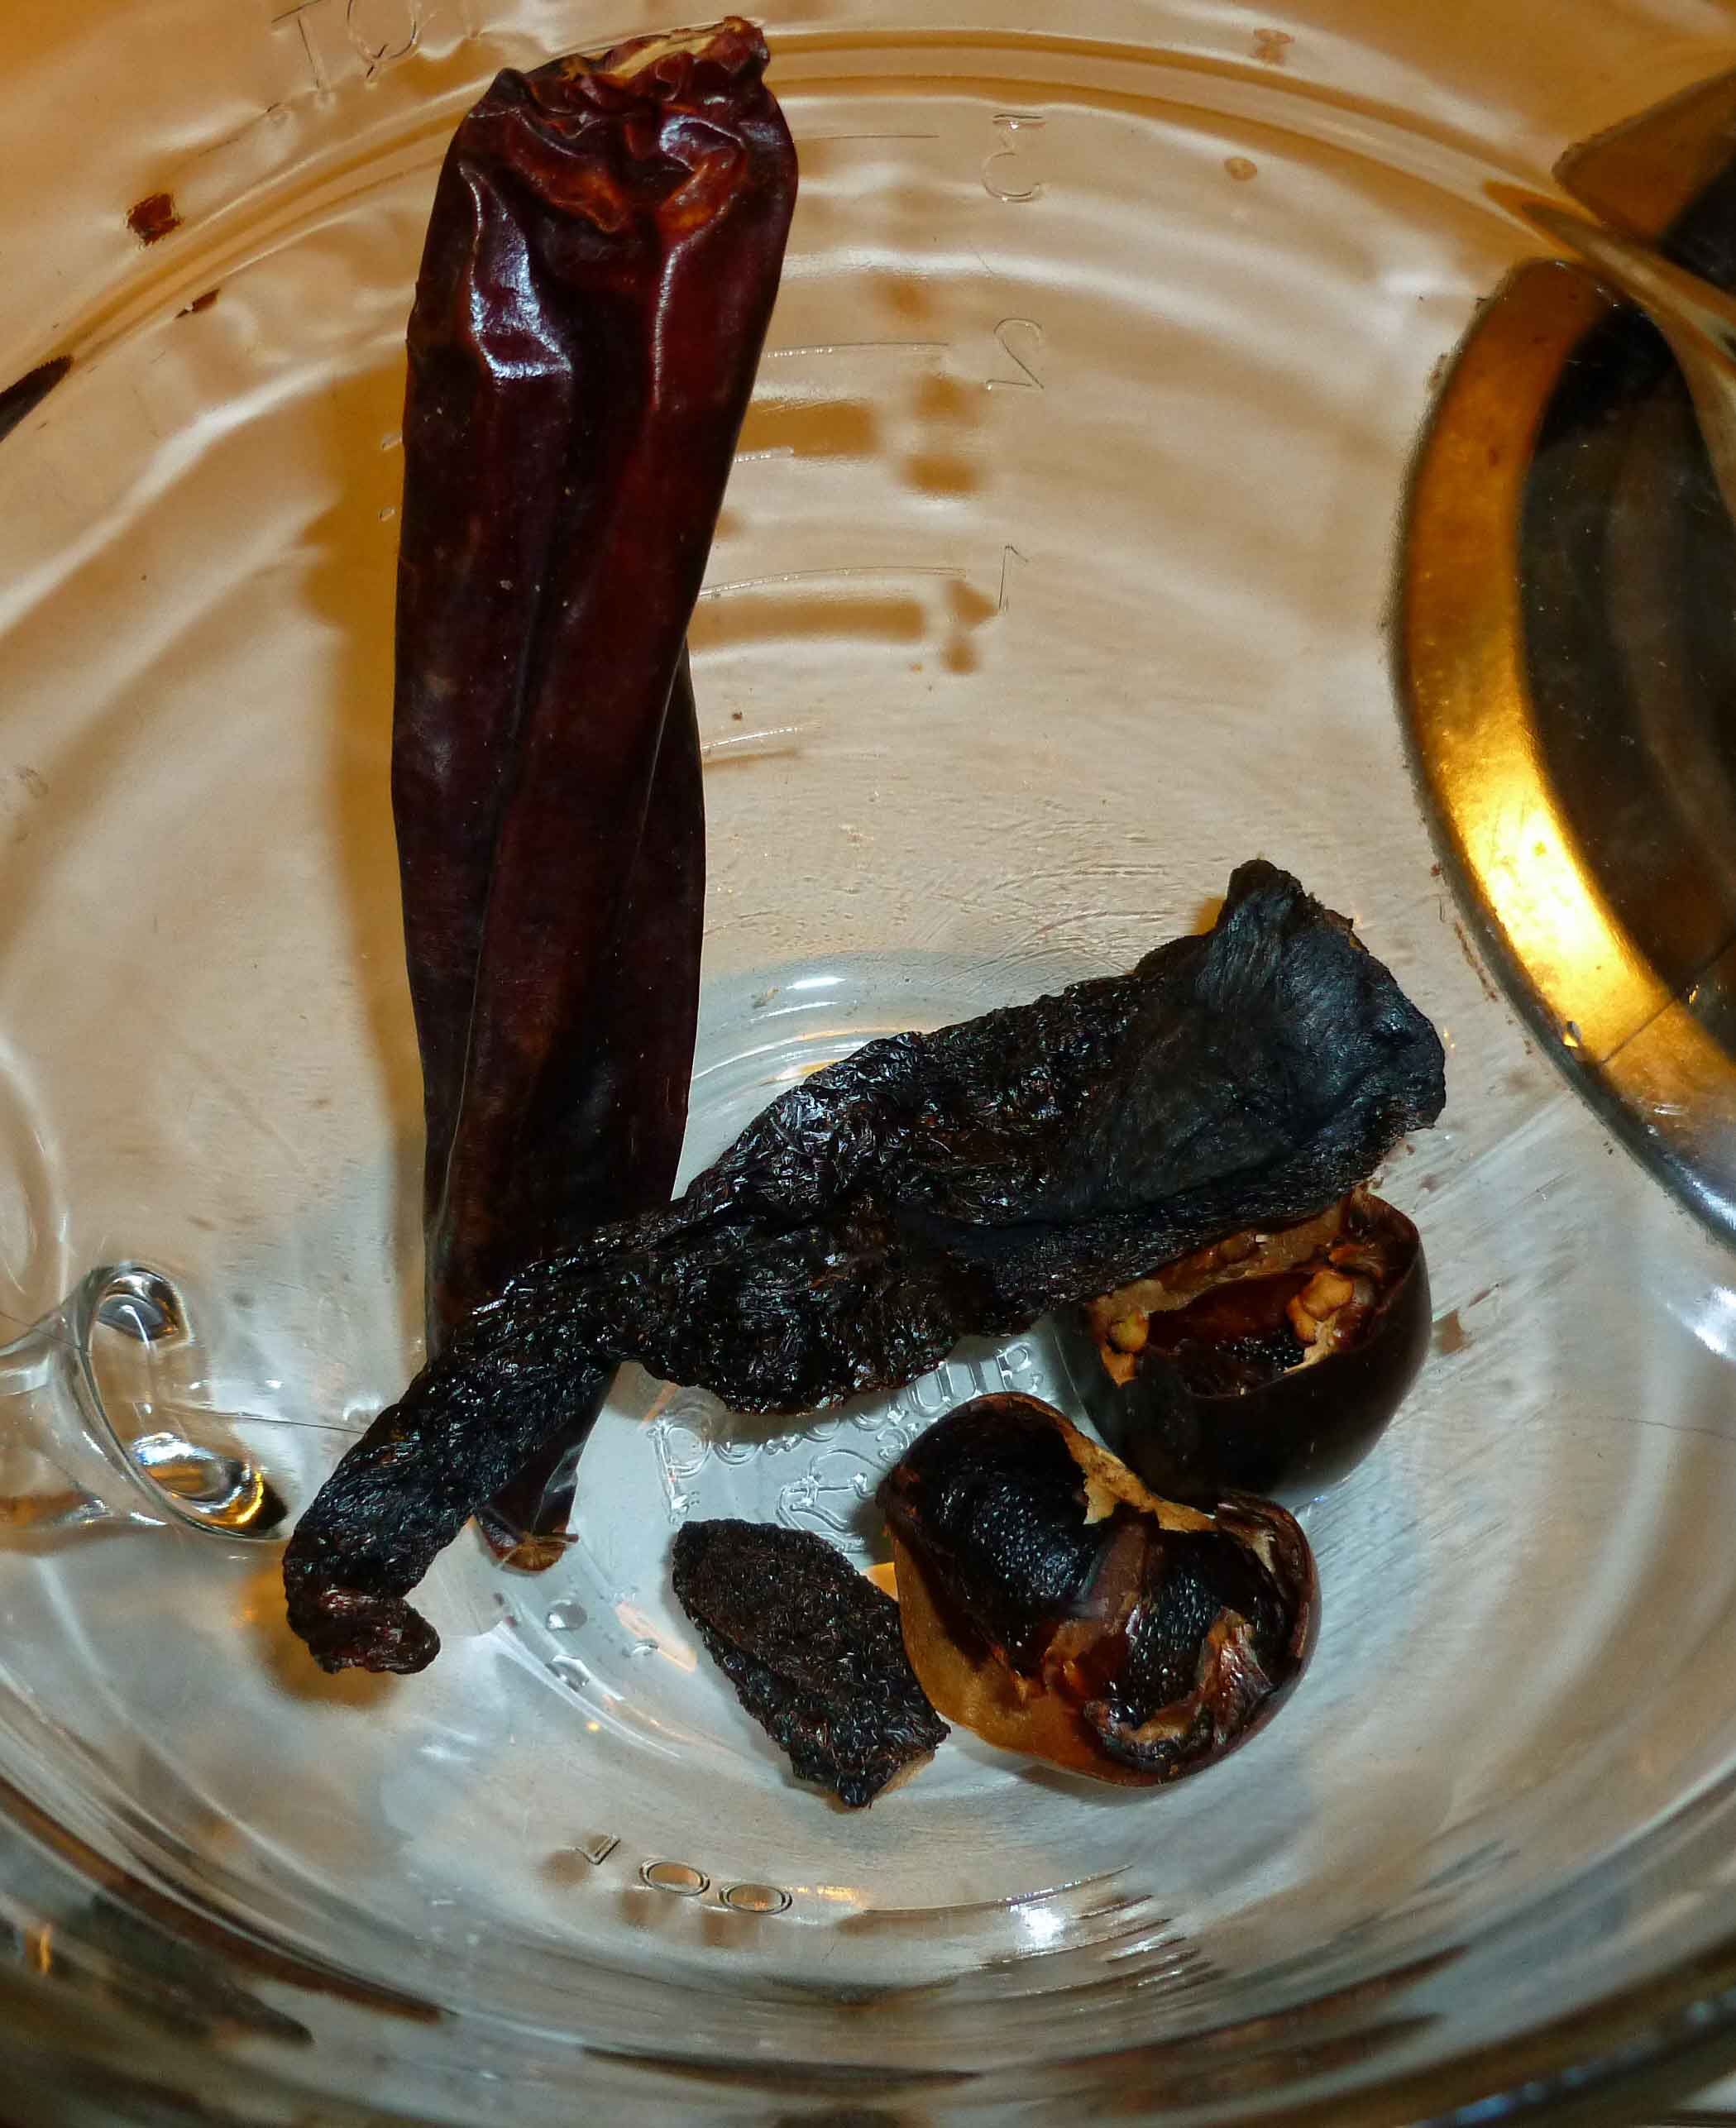
1 whole dried red chipotle pepper – 15,000 Scoville units (omit or use a quarter teaspoon of ground chipotle instead if worried about spice)
1/2 of a dried Guajillo pepper -6,000 Scoville units (omit if worried about spice)
1/2 of a dried Ancho chili pepper – 3,000 Scoville units (omit or use a quarter teaspoon of ground ancho instead if worried about spice)
1 whole dried Cascabel chili pepper – 11,000 Scoville units (omit if worried about spice)
1 lb package of ground beef
2 medium onions, chopped
2-3 stalks of celery, chopped
2-3 cloves of garlic, minced
1 Tablespoon of canola oil
1 28 ounce can of diced tomatoes
1/2 of a green bell pepper, seeded and chopped – 0 Scoville units (the other half you can just throw in a freezer ziploc bag and put in the freezer to use for next time, I don’t even bother to chop it up first and peppers freeze beautifully whole)
1/2 of a red bell pepper, seeded and chopped – 0 Scoville units
1/4 of a Habanero pepper, seeded and diced into very, very small pieces – 100,000 to 350,000 Scoville units (USE RUBBER GLOVES to chop and seed or you may be very, very sorry. Ask me how I know, and how long it took my hands to stop burning the time I was dumb enough not to wear gloves. Pop the rest in the freezer in a ziploc for next time. Also, omit entirely if you are worried about spice)
3 Tablespoons of chili powder (I used Penzey’s Hot Chili Powder, but you could use regular chili powder and knock it back to 2 Tablespoons)
1 1/2 Tablespoons of cocoa powder
1/2 to 1 teaspoon of salt, or to taste.
*How to turn it down 10 notches – If you can’t eat anything with spice, omit all the peppers except for the red and green bell pepper, and the chili powder, and knock the chili powder back to 2 Tablespoons.
**How to turn it up to super octane – To your dried peppers, add the following: 1 whole dried Dundicut chili pepper -60,000 Scoville units; 1 whole dried Piquin chili pepper – 70,000 Scoville units; and 1 whole dried Sanaam chili pepper – 40,000 Scoville units; use the entire Guajillo and Ancho dried peppers instead of half, and use the whole Habanero. Add Sriracha sauce – 2200 Scoville units, to taste after cooking. Seriously, this is a really, really beyond hot chili, and is not for casual consumption.
Choose one of the two methods below to re-hydrate your beans.
Overnight soaking method: Sort through the beans, looking for rocks (yes, it’s happened), other things that are not beans, and any discolored beans and hulls, and remove them. Wash the beans in a colander, and put them in a stock pot (the one I use is an 8 quart size), with enough water to cover beans by 2 inches. Let soak overnight or at least 6 to 8 hours.
Beans after Overnight Soak Method
Quick soak method: Again, sort and wash the beans as described above. Put the beans in a stock pot (the one I use is an 8 quart size), with enough water to cover beans by 2 inches. Bring to a boil, then boil for 2 minutes. Remove from heat, cover and let stand for an hour.
If you used the overnight soak, drain the beans out in a colander, and rinse them and the stock pot. Put the beans back in the stock pot, with enough water to cover and the epazote, and cook on medium low, mixing occasionally and adding water as needed, until the beans are tender and the skins split. If you used the quick soak method, make sure there’s enough water in the pot, add the epazote and cook on medium low, mixing occasionally and adding water as needed, until the beans are tender and the skins split.
Beans and Epazote at beginning of cooking process
While the beans are cooking you need to re-hydrate your dried peppers. Take the stems off, remove the seeds, and cut them into small pieces, putting them in a microwave safe container. I used kitchen shears to cut them into pieces. Add about a quarter cup of water to the container and nuke it in the microwave for 1-2 minutes to re-hydrate them a bit. Set them aside.
Dried Peppers before chopping and re-hydratingDried Peppers after re-hydrating
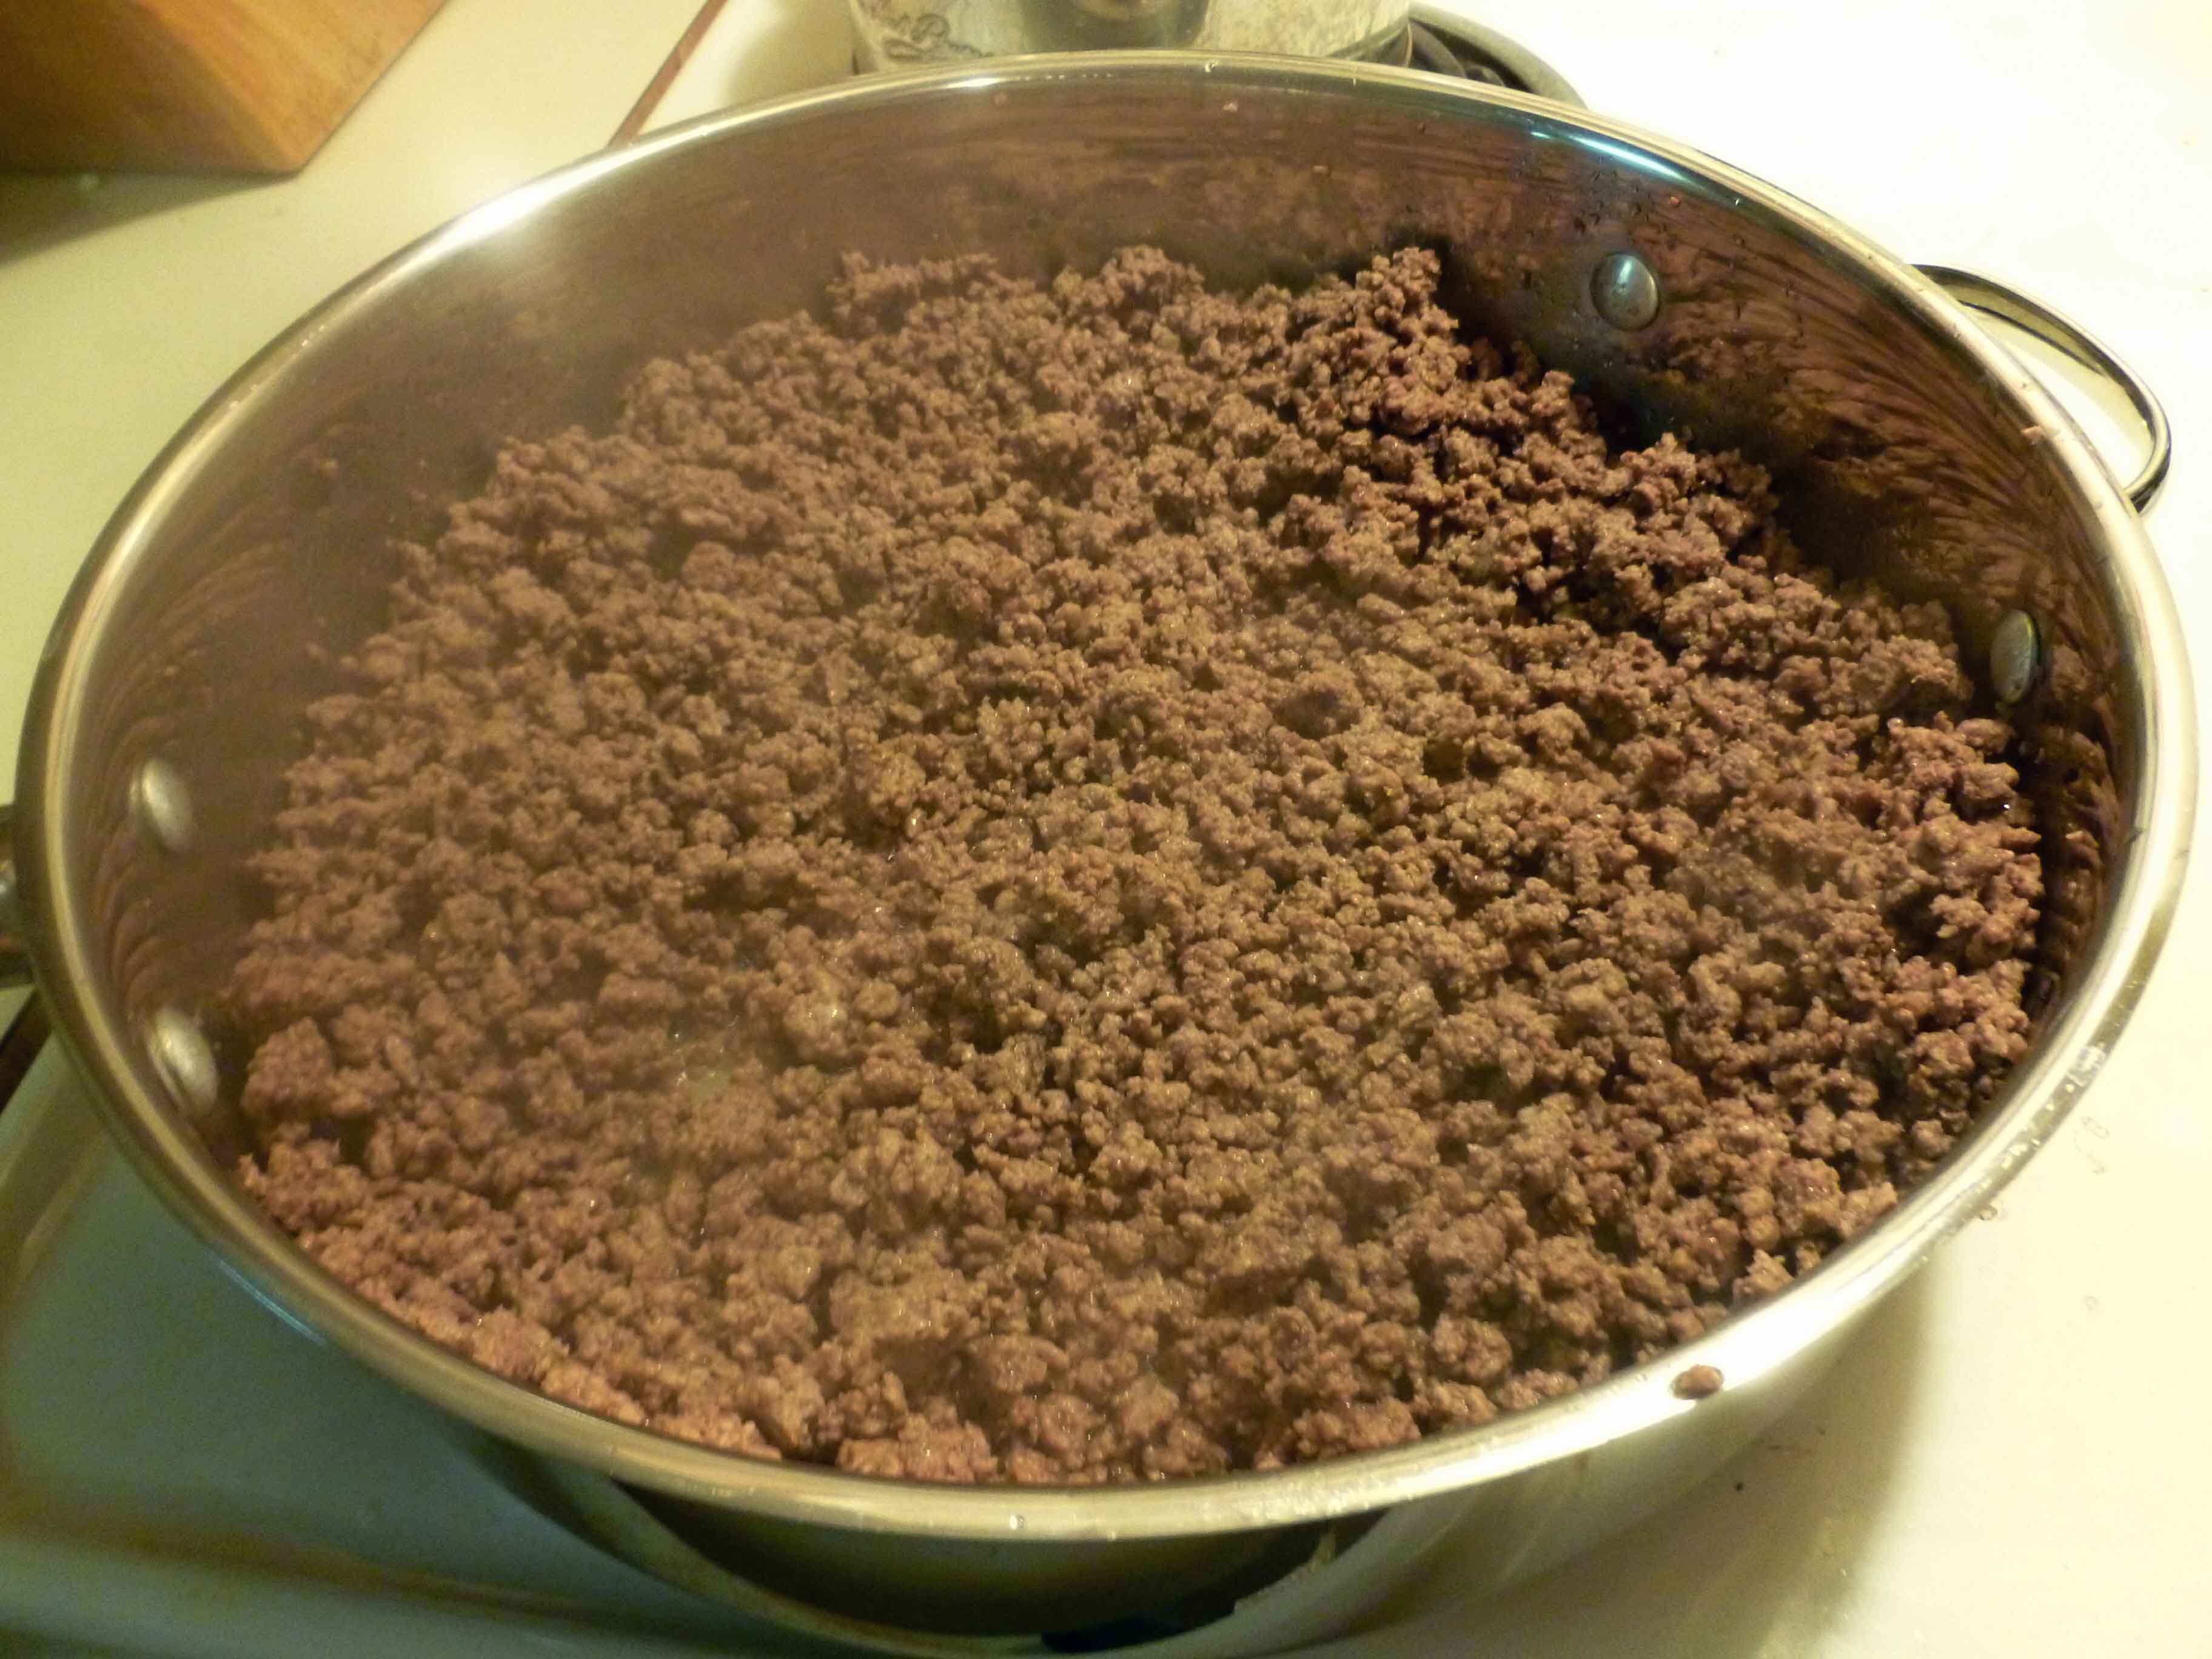
In a frypan, brown and drain your ground beef, drain off the fat and discard it, and set the ground beef aside.
Browned Ground Beef
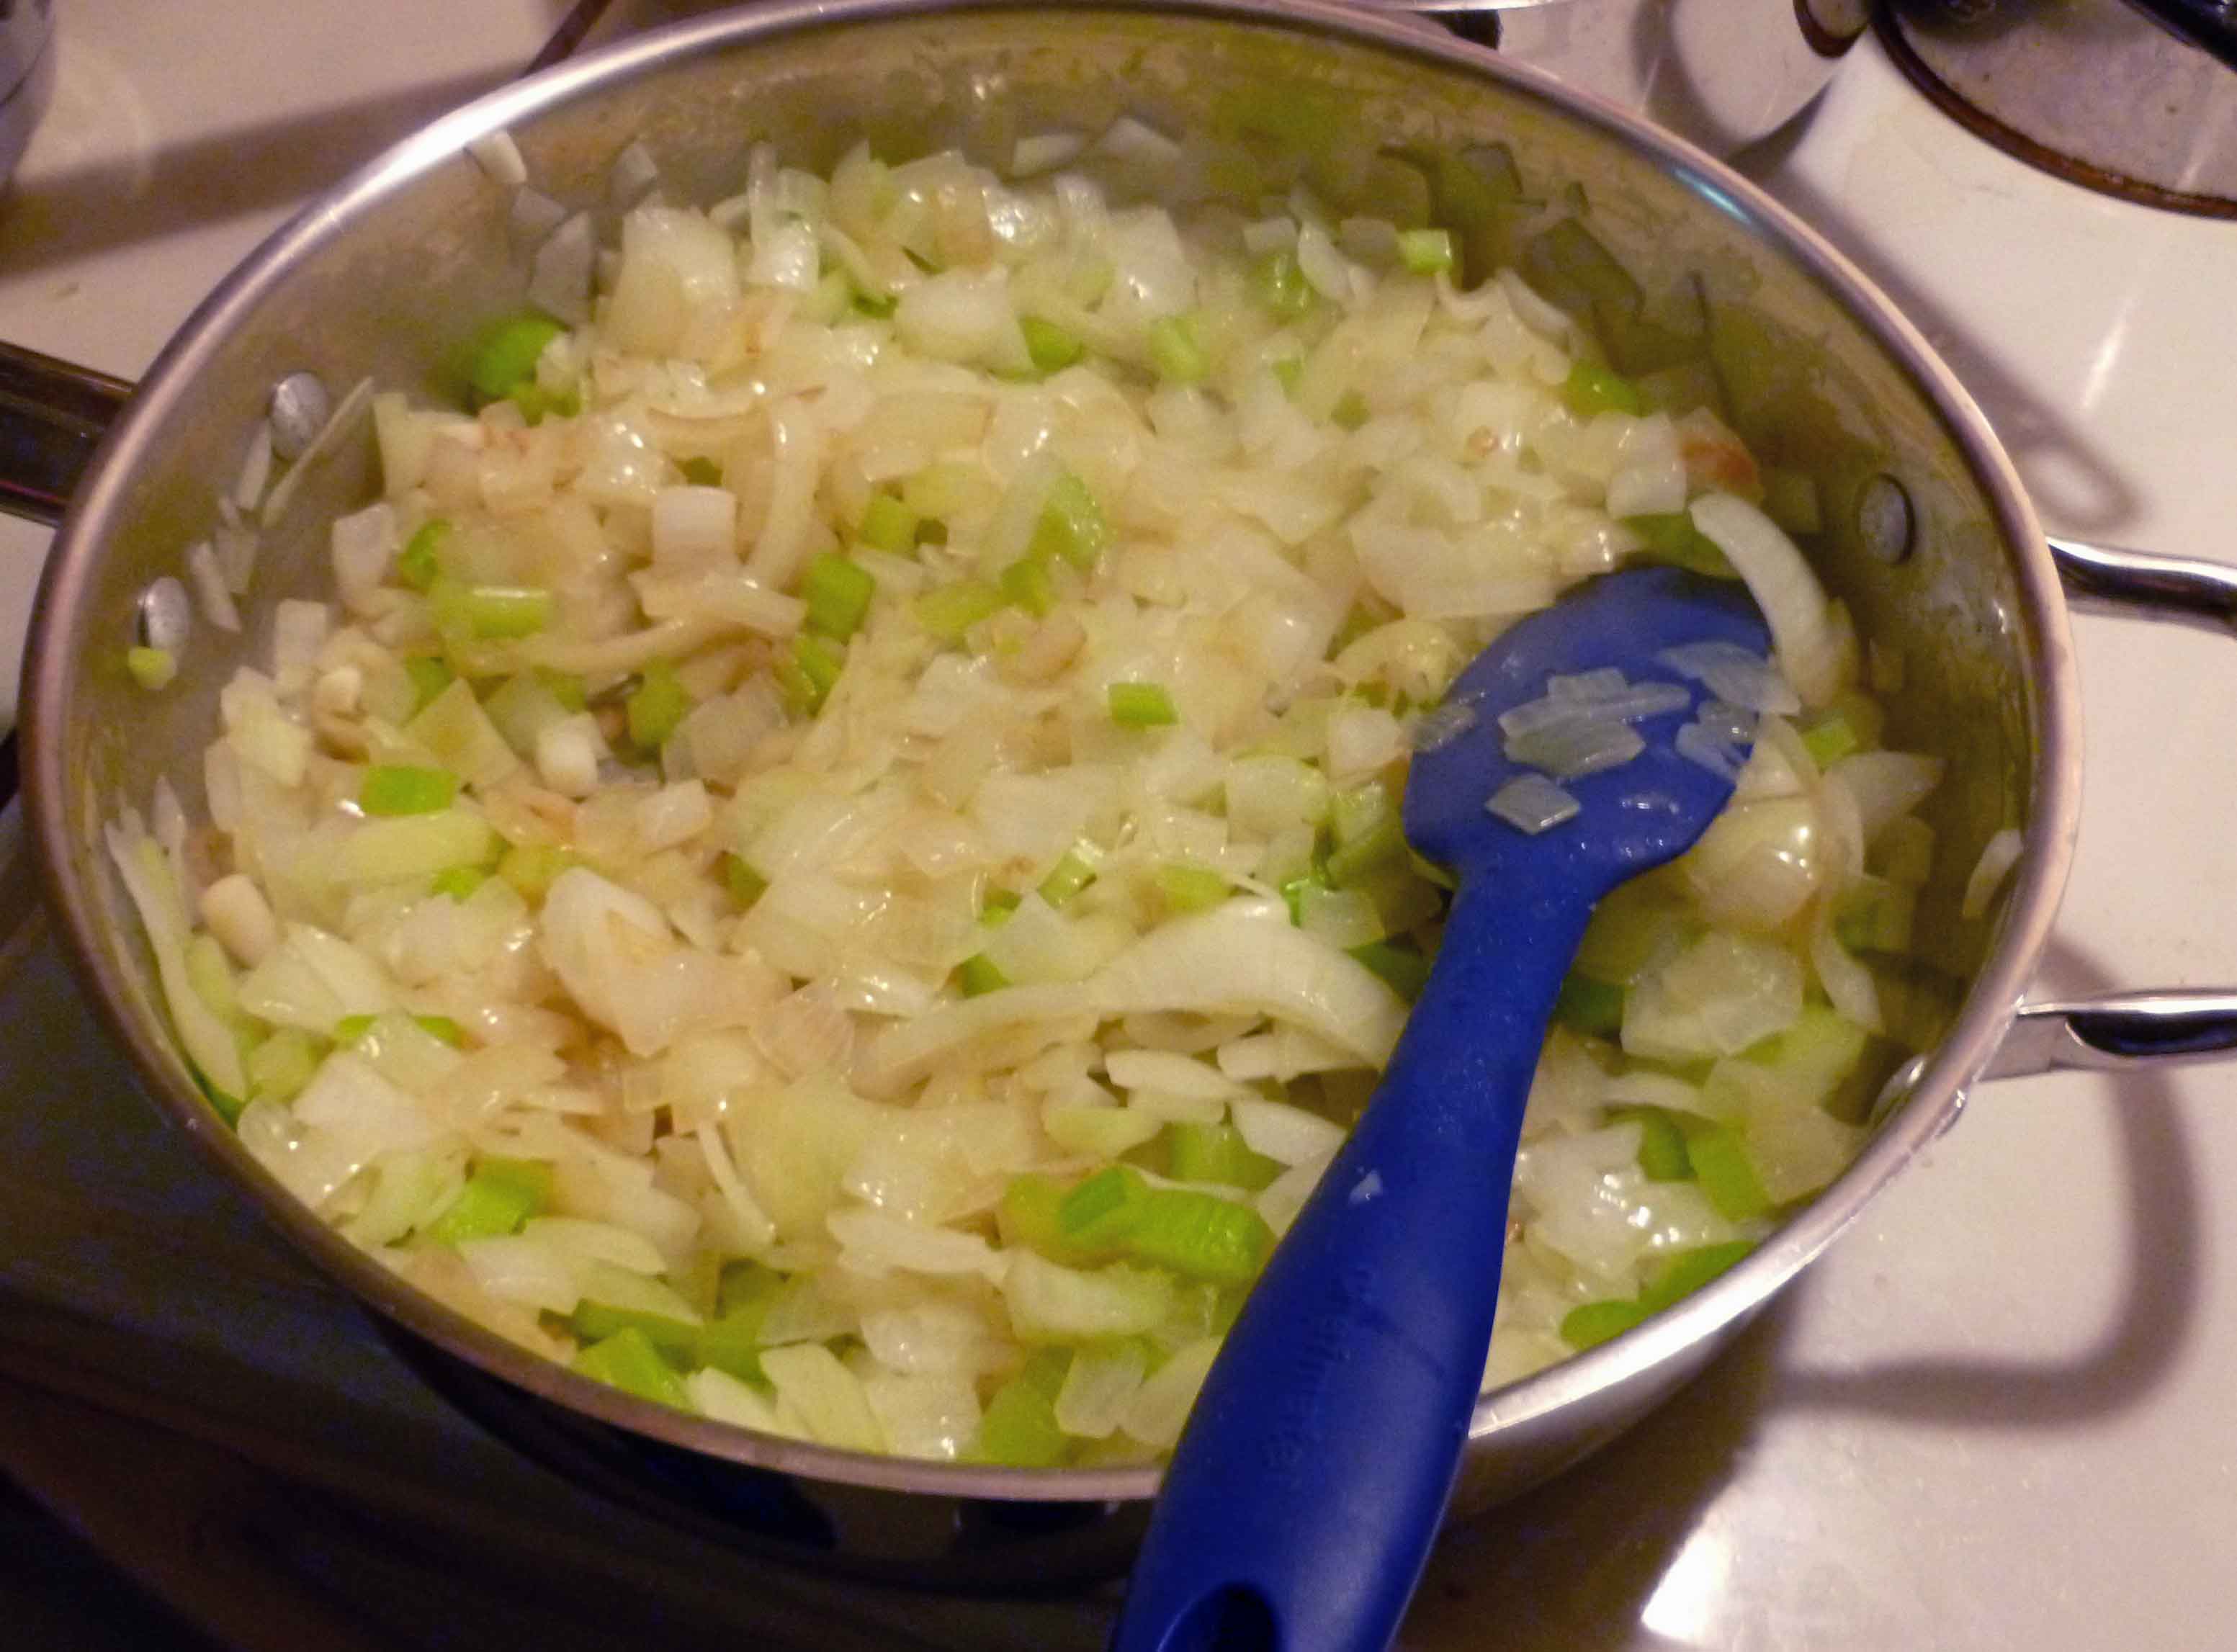
In another frypan, or the same one if you moved your beef to another container, saute onions, celery and garlic in the canola oil until they are translucent.
Onions, Celery and Garlic after sauteing
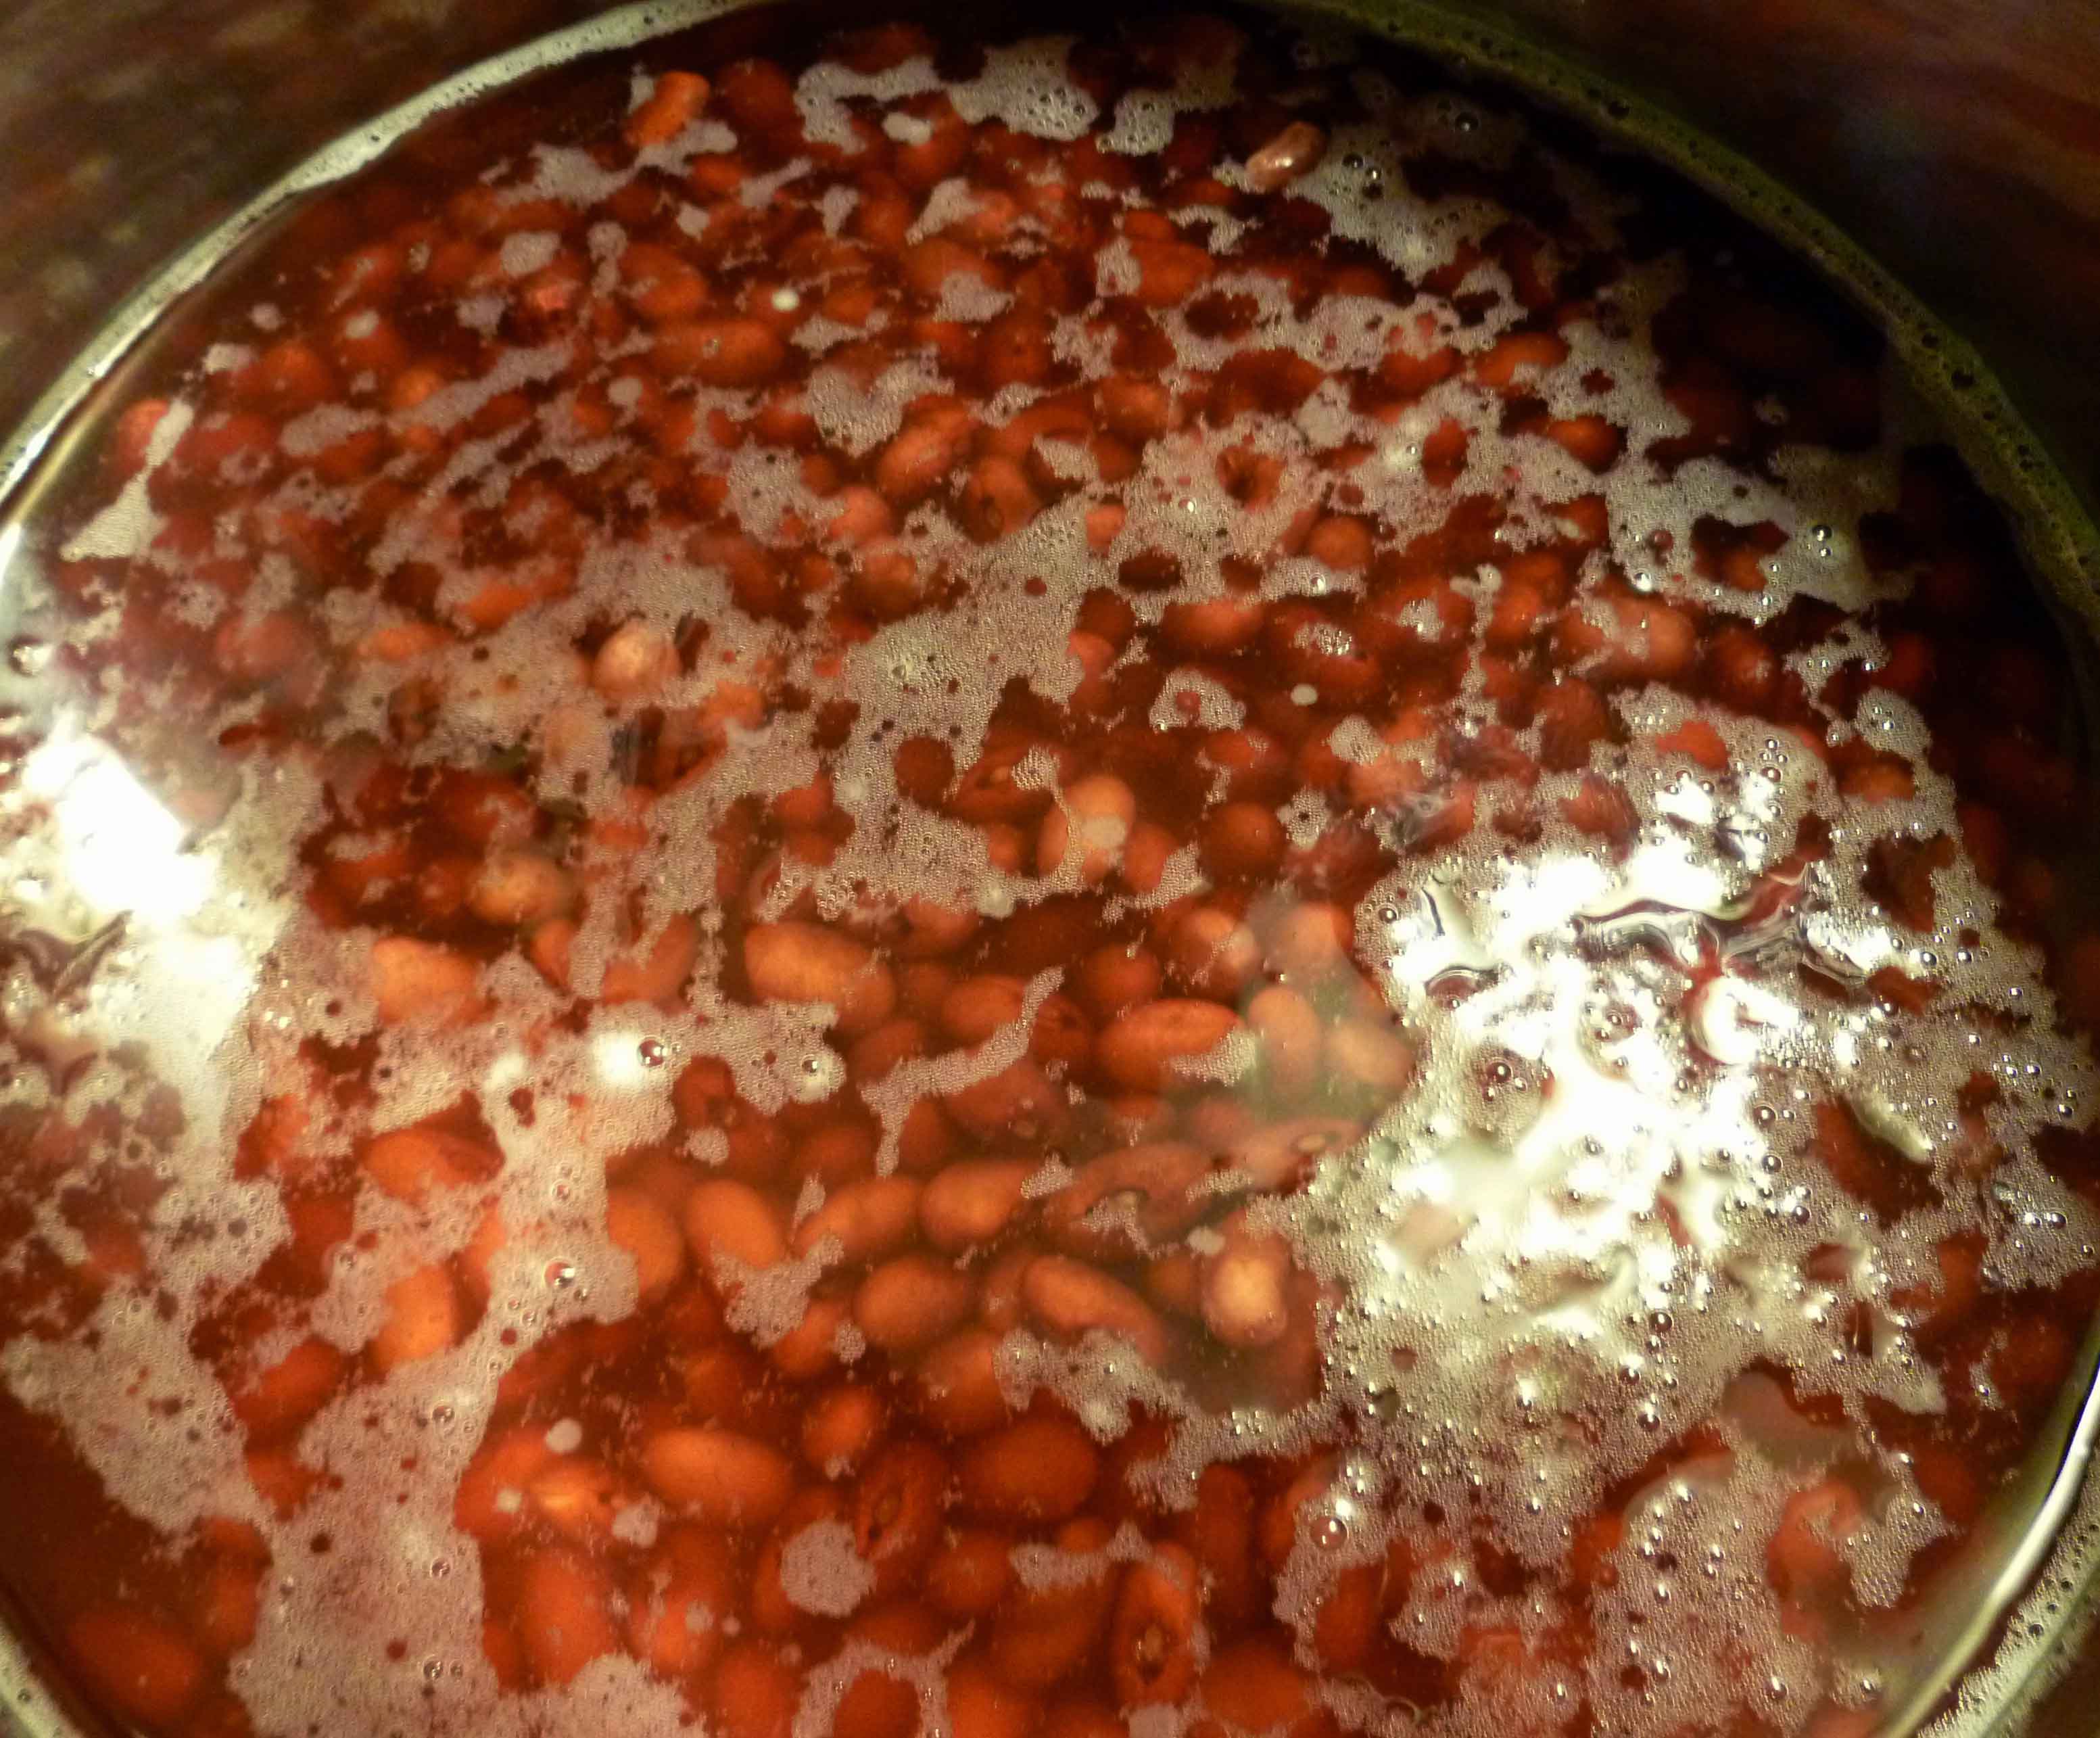
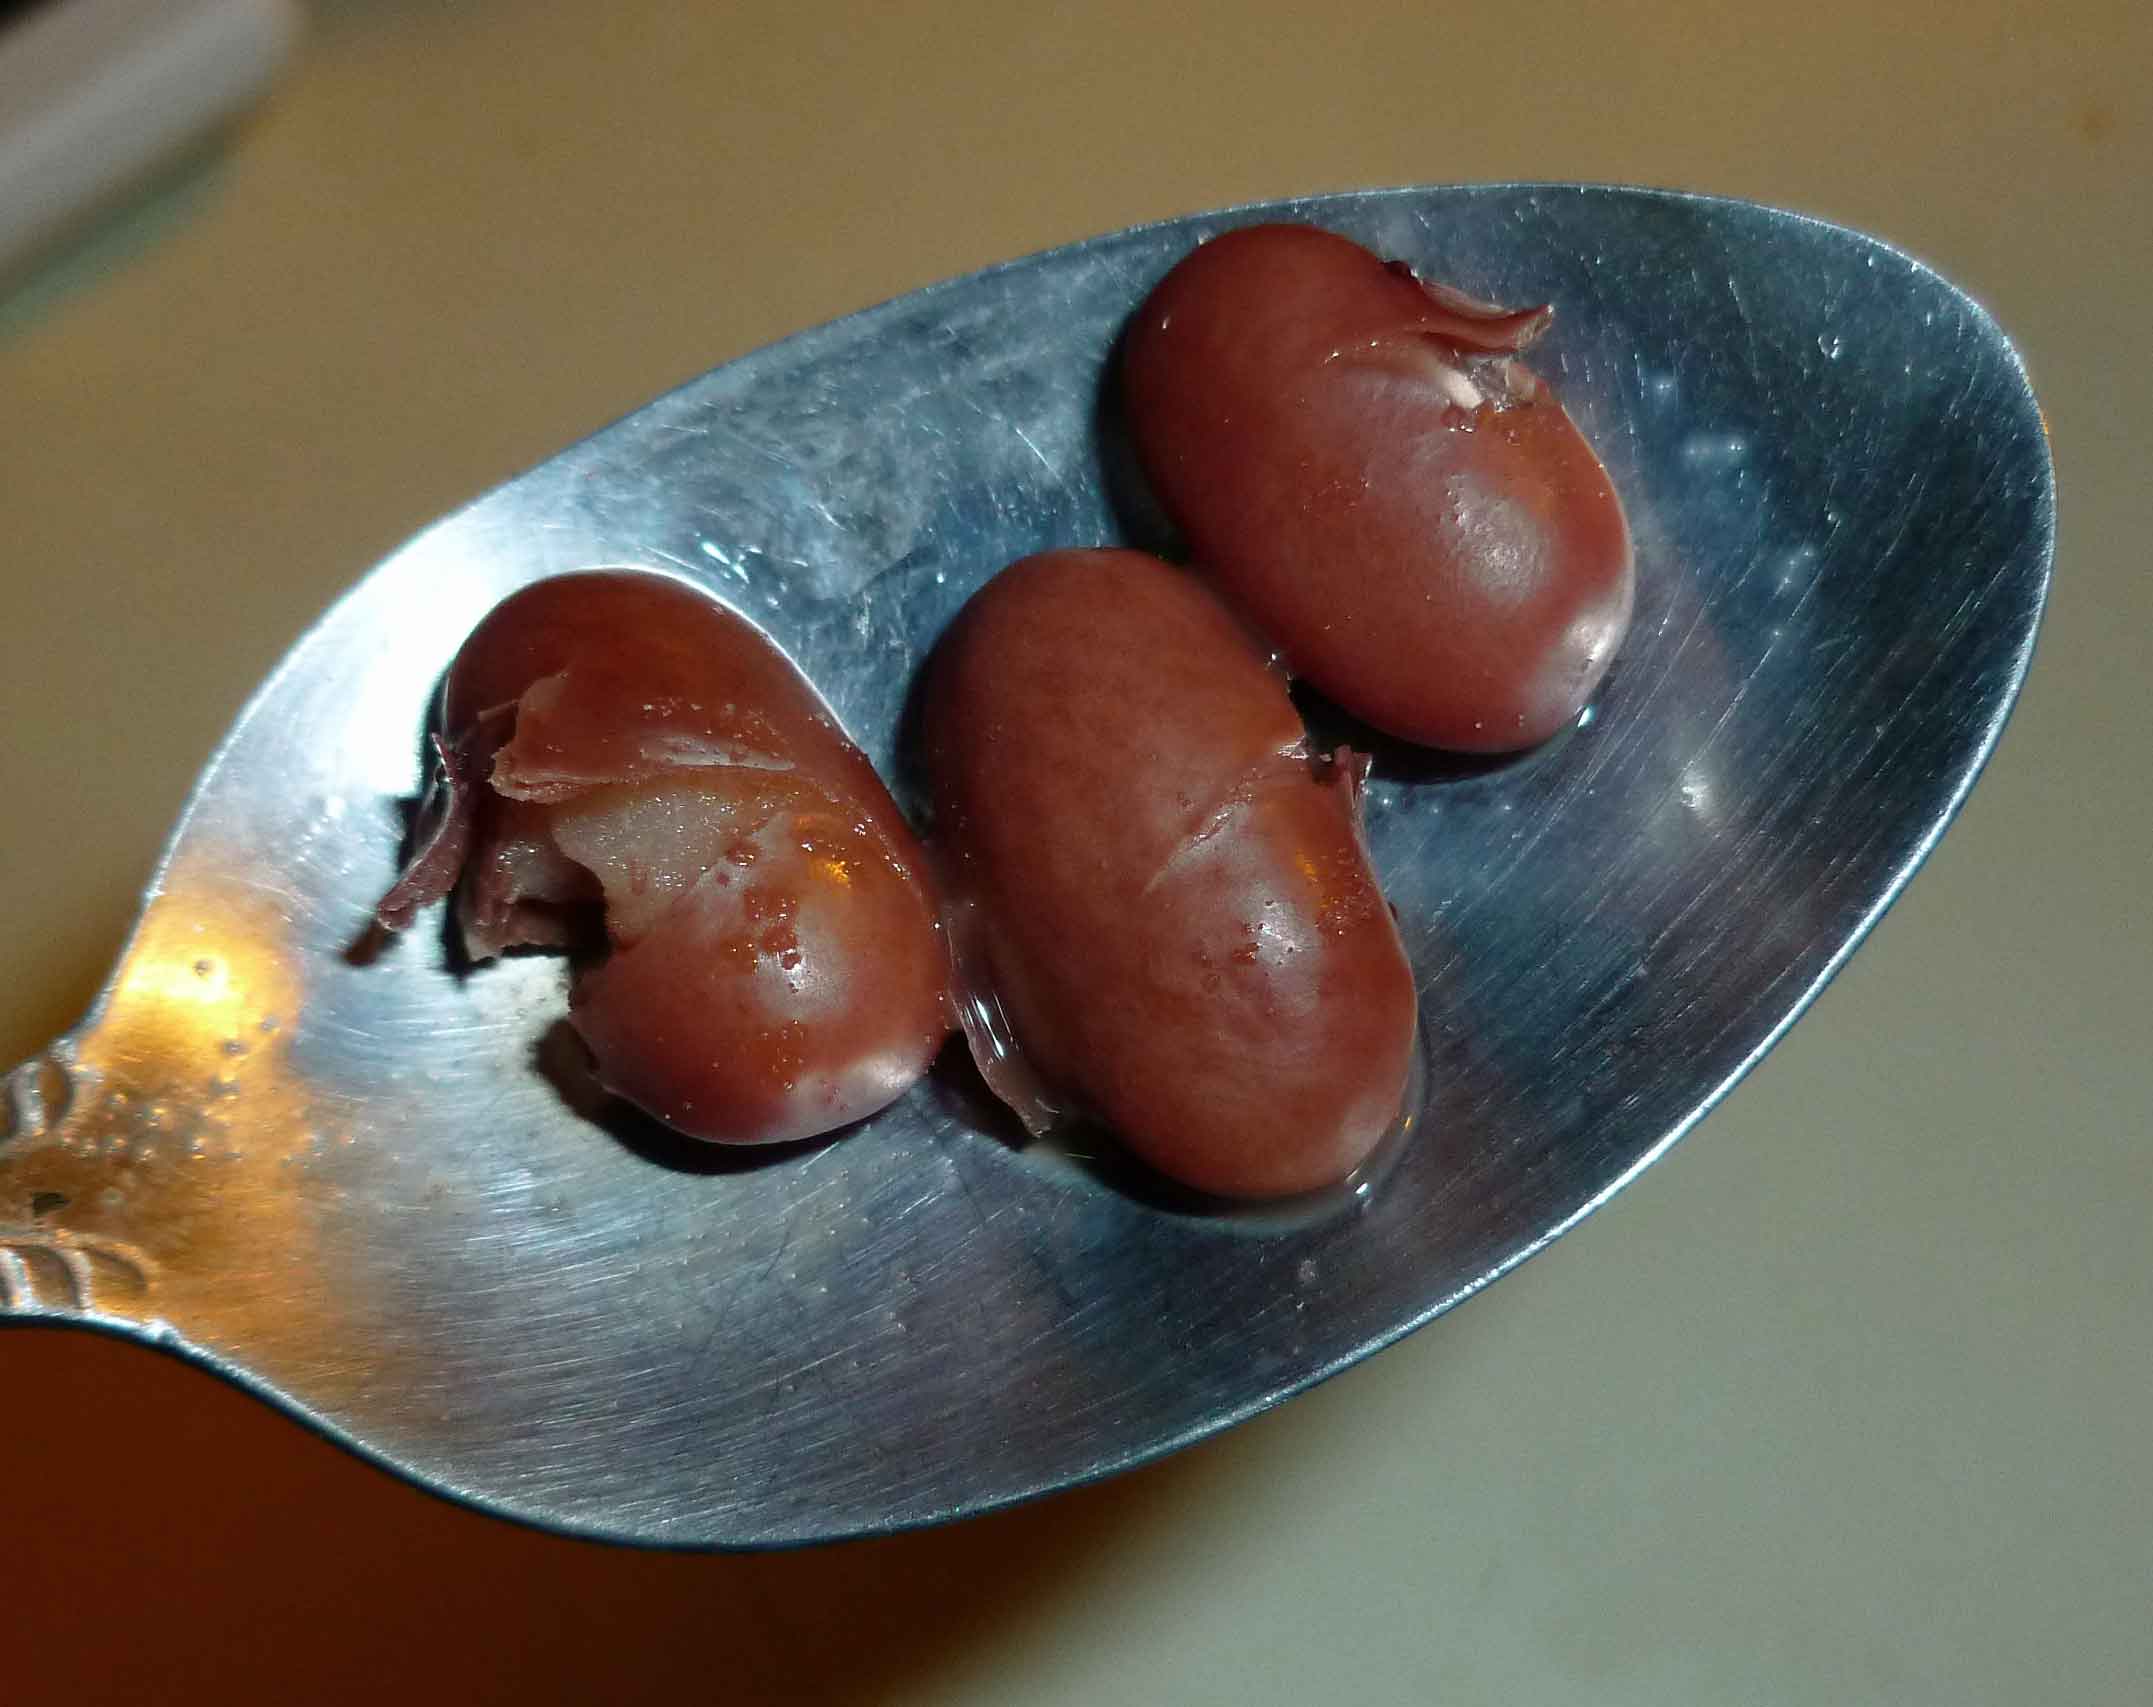
Your beans will be ready when they look like this:
Properly Cooked Beans
Once the beans are ready, add the ground beef, and the onion, celery and garlic mixture to the pot, scraping down carefully. Then add your re-hydrated dried peppers, the diced tomatoes (do not drain), the Habanero, red and green bell peppers, the chili powder and the cocoa powder. Mix until thoroughly combined.
Simmer for about an hour and a half, stirring occasionally. When chili is cooked, taste and add salt as necessary.
Thanksgiving makes me slightly insane. Somehow I channel my grandmother, who is still among the living so I’m not even sure if that’s possible metaphysically speaking, and I make vast quantities of food that bear no rational relation to the actual number of people for whom I am cooking. Our Thanksgiving dinners when I was a kid could have anywhere from 30 to 50 people attending, and I apparently cook for that many people for Thanksgiving no matter what. I’ve been known to do a turkey and a ham for 4-5 people, not to mention several appetizers, squash, turnip, mashed potatoes, my grandmother’s meat stuffing, boiled onions, a couple of kinds of cranberry sauce, gravy and several desserts. This always results in boatloads of leftovers, obviously. I will pack up full meals in containers and freeze them for later, but that doesn’t take care of all of it. So I always make a vat of soup, using the turkey carcass to make stock. This recipe is a bit involved. But you’ll get a good amount of soup that you can put in individual containers and freeze, and nuke later when it’s convenient.
First things first. You have to make the turkey. I use Alton Brown’s Good Eats Roast Turkey recipe with some modifications. You can follow his ingredients if you like his flavor profile better. Rather than me repeating his directions, please go to the link to read how to actually brine, stuff the cavity with the aromatics, and then cook the turkey. If you want to follow my modifications, I’ve listed the changes in the ingredients below:
For the brine:
1 cup of kosher salt
1/2 cup of light brown sugar
1 gallon of chicken stock (glutenfree and dairyfree)
1 1/2 Tablespoons of black peppercorns
1 1/2 Tablespoons of white peppercorns
1 1/2 teaspoons of allspice berries
1 1/2 teaspoons of chopped candied ginger
1 teaspoon of rubbed sage
1 gallon of heavily iced water
Completed Brine in Container to CoolTurkey in Brine, Breast DownTurkey in Brine after Adding Iced Water
For the aromatics:
2 small onions, quartered
1 celery stalk, cut into 4 pieces
4-5 fresh garlic cloves, sliced in half
4 springs of fresh rosemary
6-8 fresh sage leaves
Turkey Cavity Aromatics in Bowl Before Steeping
Another way in which I deviate from Alton Brown’s recipe is that I baste my turkey every half hour as it cooks. My basting method uses the giblets and is somewhat old fashioned, but it makes wonderful drippings for soup and for gravy.
For the basting liquid:
Giblets from cavity of turkey (take out of the paper or plastic wrapping)
1 onion, minced as finely as possible
1 celery stalk, minced as finely as possible
3 cups of chicken stock (glutenfree and dairyfree)
2 Tablespoons of Earth Balance Soy Free Vegan margarine
1/2 teaspoon of crushed garlic (crush it yourself with a mortar and pestle, or buy some)
1/2 teaspoon of rubbed sage
1/2 teaspoon of thyme
1/2 teaspoon cracked rosemary
several shakes or grinds of pepper
Basting Liquid and Giblets Simmering
Place all basting ingredients in a small sauce pan. It should be of a size that the chicken stock covers the giblets. Bring to a low boil and then turn the heat down to simmer. Every half hour, use a turkey baster to baste the turkey. As liquid/drippings build up in the bottom of the turkey roasting pan, you may be able to use those to baste the turkey as well. If you do not use all the basting liquid, you can use this to build up your stock later as well. Drain out the solids and reserve the liquid. (I grew up in Maine on a farm, so I generally eat the giblets. They need to have been simmered for quite some time to be tender, so I leave them on the stove simmering in the liquid while my turkey cooks.)
Turkey in Pan with Drippings
Once your turkey is cooked, a la Alton Brown’s instructions, have at it. Eat some turkey, have dinner, have a great time!
Make sure you reserve the turkey drippings, or leave half of them if you’re making gravy. Remove the turkey from the pan, placing it on a platter or cutting board (both should be able to catch drippings).
Turkey on Cutting Board
Once you’re ready to think about making turkey stock, you need to strip the turkey meat from the carcass. Save some breast meat and some dark meat aside to put in the soup, cubing it.
Turkey Meat Removed from Carcass
Take all the bones, any fat and skin remaining, and the aromatics from the turkey cavity (onion, celery, garlic, sage and rosemary) and put them in a 9″ x 13″ roasting pan, along with:
1 onion, sliced
4-5 cloves of garlic, sliced in half
2 carrot, cut in one inch pieces
3 stalks of celery, cut in one inch pieces
Turkey Bones and Veggies
Roast these ingredients in the oven at 375° until the bones brown a bit and the vegetables are roasted. (This will vary depending on the size of the turkey and the size of the pan, but it took about an hour or so for the remains of my 21 pound turkey this year).
Roasted Turkey Bones and Veggies
Now you have two choices, which will depend on the size of the turkey. You can do this on a stove top, or you can do it in a 7 quart Crock-Pot over night. I wanted do this in a Crock-Pot because it’s easier and I think you get better stock, but I’m the idiot that bought a 21 pound turkey.
If using stove top:Put the contents of your roasting pan into a stock pot that’s large enough (I’m using a 20-quart because, again, I’m the idiot that bought a 21 pound turkey) that you can cover the bones and roasted vegetables with the drippings, the leftover basting liquid, and any additional water needed. Add the drippings, leftover basting liquid, and enough water to cover. Bring to a medium boil over medium-high heat and then once you’ve reached boiling, turn the heat down to medium-low. This needs to simmer for at least two hours, but preferably three.
Roasted Bones and Veggies with Drippings in Stock Pot
If using a Crock-Pot: Even if you had the world’s smallest turkey, you’re going to need the 7 quart Crock-Pot. Put the contents of the roasting pan into the Crock-Pot, add your drippings, leftover basting liquid, and any additional water. Do not overfill the Crock-Pot. If using the low heat setting, cook for 8-10 hours. If using the high heat setting, cook for 4-5 hours. (I like to do this late evening so I can just leave it on overnight).
Once your stock mixture has simmered for the right amount of time, regardless of your method of cooking, you will need to strain out the bones and vegetables. I like to use a spider cooking utensil to get all the large pieces out. Then I strain through a colander, and then through a fine mesh strainer until I have nothing but stock left. Now on top of that stock you’re going to have a nice thick layer of fat, I know, I can hear you saying “Is it supposed to look like that?” The answer is yes. But we don’t want that fat (or at least most of it) in our soup. So put the stock in a lidded container in the fridge over night. The next morning you can take a spoon and peel the congealed layer of fat off and put it in the garbage. Now you just have lovely turkey stock. Yay! Sometimes I end up with so much that I freeze half of it so I can use it later when I don’t want to make a whole turkey again.
Strained Turkey Stock in container to cool
Now for the actual soup! Yay!The amounts of ingredients will depend on how much stock you’re using and whether you prefer a thicker soup with more stuff in it, or a soup with more broth. Also, if you want to skip the whole making stock from scratch thing, buy chicken stock at the store that’s dairy and gluten free, or get some Better than Bouillon in the chicken and vegetable flavors and mix them in equal proportions according to the amount of stock you need. I measure all my ingredients so you can get a sense of proportions to change yours up based on what you have.
For Soup:
14 cups of turkey stock
1 1/2 cups of brown rice (My husband is diabetic so we use brown rice, but you could use white or wild rice, or if you can have gluten, you could use pasta. If you use pasta add it much later in the cooking process about 10 minutes before you add the kale and peas.)
2 medium onions, diced
5-6 medium carrots, peeled and chopped
5-6 stalks of celery, chopped
1/2 teaspoon rubbed sage
1/2 teaspoon thyme
1/2 teaspoon rosemary
2 bay leaves
5 cups of chopped turkey (bite size pieces of white and dark meat)
4 cups of kale leaves, stems removed and broken into bite size pieces
1 cup frozen peas
Salt and pepper to taste
3 shakes of Tabasco sauce (You won’t be able to taste it, but it brightens up the other flavors)
Put turkey stock, rice, onions, carrots, celery, sage, thyme, rosemary and bay leaves in stockpot. Bring to a boil and then turn down to simmer until rice is cooked and onions, carrots and celery are tender.
Turkey in bite size pieces
Add turkey, frozen peas, and kale. Continue to simmer until kale and peas are cooked. Add 3 shakes of Tabasco sauce, and salt and pepper to taste. Enjoy!
This is a recipe that I began developing when I was younger and finally got it exactly where I wanted it somewhere between the ages of 16 or 17 years old. My parents do not like spicy food at all, and in typical teenage rebellion, I became a fire breather. Of course, back then, I could eat dairy, and all of the other myriad things that I can’t now. (If you can eat dairy, this soup is absolutely fabulous with a slice of smoked gouda on top melting into it, but I digress.) So when I was diagnosed I needed to make it dairy free, which is relatively simple in this case – use vegan margarine and don’t put cheese on it. When Mary Kate and I began discussing the idea of developing allergy free recipes, I decided to see if I could make it gluten free as well. Turns out I could, and it’s nearly indistinguishable from the original. (Except for the smoked gouda, did I mention that? Sigh).
Remember, this is a really spicy soup, and I toned it down a bit for you guys, just in case you all don’t have stomachs lined with asbestos. (I’ll also be making notes in the ingredients on how to turn it down further in the ingredients, just in case some of you aren’t into really spicy). Also be aware that this recipe makes a VAT of soup. Luckily, it freezes incredibly well, and seems to have no effect on the soup at all. We freeze it in single serve containers and then just take one out and bring it to work to nuke for lunch. The last batch I made fit in about 5 or 6 pieces of Gladware that held between 3-4 cups each.
Denise’s Really, Really Spicy Pea Soup
2 – 1 lb bags of split green peas
4 quarts of water
3-4 onions, chopped (4 if they are kind of small to medium, 3 if large).
1 entire bulb or 12-15 cloves of garlic, minced (to tone down spice, cut this down to 6-8 cloves)
1 – 1 lb package of hot Italian sausage (use regular Italian sausage if you want to tone down the spice)
6-7 stalks of celery, chopped
1 – 1 lb bag of carrots, chopped
2 bay leaves
2 Tablespoons of Italian Seasoning spice mix
1/2 teaspoon of black pepper
1/2 teaspoon of salt
1 teaspoon of Better than Bouillion Chicken Low Sodium (low sodium version doesn’t have milk in it, the regular does)
1 Tablespoon of Sriracha (cut this to 1 1/2 teaspoons to tone down the spice)
2-3 Tablespoons of rice flour (I’ve used brown rice flour and white rice flour and it’s made no appreciable difference – something about cooking the flour in oil when doing the roux gets rid of the gritty-ness of brown rice flour)
2-3 Tablespoons of Earth Balance Soy Free vegan margarine
1/2 teaspoon of seasoned salt (such as the Lawry’s or Penzey’s versions)
1/2 teaspoon of Tabasco hot sauce (You add the Tabasco at the end because it has a vinegar-y note and brightens up the soup at the end, plus, hey more spice. But if you wanted to avoid more spice, try 1/2 teaspoon of cider vinegar)
Sort through the split green peas, looking for rocks (yes, it’s happened), other things that are not peas, and any discolored peas and hulls, and remove them. Wash the peas in a colander, and put them in a stock pot (the one I use is an 8 quart size), with about 4 quarts of water.
Peas cooked until soft
Bring peas to a boil, then reduce heat to a low simmer for about an hour, until the peas are soft and beginning to fall apart.
Pureed Peas
Once peas are soft, use a hand or stick blender or a real blender in batches to puree the peas and cooking water together. Once all the peas have been pureed, leave the mixture in the stock pot on very low heat.
Sausage, Onions, Garlic and Spices
If your sausage has casings, take the sausage out of the casings and break it up into pieces, placing them in a skillet. Bring the skillet to medium heat and brown the sausage, along with the onions, garlic, spices (except for bouillon), and Sriracha. Once the sausage is cooked and the onions are translucent, add the mixture to the stock pot, scraping down the skillet to get all the contents and spices into the stock pot with the pureed peas.
Almost done, but not quite!
Add celery, carrots and bouillion to the pureed peas in the stock pot. Mix well and simmer for about an hour on low medium heat, or until carrots and celery are cooked. Stir mixture often as it will want to stick to the bottom and burn, which is not good.
Rice Flour and Earth Balance Roux
Once the carrots and the celery are cooked, we’re going to do a “roux” to thicken the soup. Obviously, this isn’t a traditional roux because we won’t be using real butter or wheat flour, but it works the same way. In a medium sauce pan, melt the Earth Balance Soy Free vegan margarine, and then add the rice flour, mixing it into a paste, and cooking it for a minute or two.
After adding first cup of broth
Slowly ladle in a cup or so of the pea soup broth to the small saucepan, mixing it in. It will form a nearly solid paste as it thickens.
Completed Roux and Pea Soup Broth Mix
Keep adding broth until the mixture in the sauce pan is the consistency of a very thick gravy and the mixture is easy to stir.
Once you reach this point, add contents of the saucepan to the stock pot with the rest of the soup and stir well. This should thicken the rest of the soup. Adjust your spices by adding the seasoned salt and the Tabasco at this point if you think it necessary.
Finished Pea Soup
If you wish, you may simmer it a little longer to let it thicken further, but be careful to stir it often so that it doesn’t stick to the bottom and burn.
Serve in bowls. You might want to sprinkle a dairy free cheese replacement product on the top, but I haven’t found one that I like that works with my particular hit list of allergens (Sigh.) This is a great soup to enjoy on a chilly damp fall day, or a snowy winter day, the spices will keep you warm! (P.S. Feel free to adjust the amount of Sriracha and Tabasco if this isn’t hot enough for you. I’ve also been known to add a pinch of cayenne and some crushed red pepper flakes as well.)
Note (note 1): This post seems to have a lot of notes.
My last year of grad school, my two roommates and I hosted somewhere in the neighborhood of 20 people for Thanksgiving. We added all the leaves of my drop-leaf table (I’m the last of the grandkids to get it, and it seats 12), plus several desks and side tables and created this huge banquet table that took up our whole living room. It was honestly possibly the best Thanksgiving dinner ever. There was SO MUCH food, and it was all amazing — and all done on grad school food budgets.
[Vaguely related side-note (note 2): It did not hurt the situation that apparently, people don’t love pumpkin pie as much as I do, and leftovers consisted of an entire pie that no one else in my house wanted. I ate it. All of it. To our lovely readers: if anyone knows of a gluten-free, dairy-free, egg-free, SOY-free pumpkin pie recipe that works, please please please please share. I will be forever in your debt.]
This amazing recipe was made by my friends Amanda and Ken (who also brought something else reasonably gourmet for grad school. It involved fancy cheese and mushrooms, I think.) Neither of them remembers where the recipe came from, and apparently neither one has a copy anymore. This isn’t the original anyway, but it’s still perfect — thick and creamy, smoky and sweet, and possibly the most perfect welcome to fall soup ever.
Note about measurements (note 3): This is not a recipe in which all ingredients must be precisely measured. It’s more about proportions. If you get stuck buying a threesome of leeks (like I did) and can’t see where the left-out leek will get used in your weekly meals, add it and cut back the onion a bit. Adjust the seasonings to your preferences (For example, I often double the amount of nutmeg in this soup, but when making it for other people, who find that overpowering, this is the recipe I use).
Amanda & Ken’s Smoky Sweet Potato Soup
In large sauce pan over medium heat, melt:
3 tablespoons olive oil
1 tablespoon soy-free Earth Balance
Add:
1 ⅓ cup chopped sweet onion (about 1 medium onion)
2 ¼ cup chopped leek, white and light green only (about 2)*
1 teaspoon chopped garlic (about 2 cloves)
¼ teaspoon thyme, crushed
½ teaspoon freshly grated nutmeg
Nutmegs
Cover and cook about 15 minutes, stirring occasionally, until vegetables are tender.
**(note 5): Leeks. If you’ve used them before, skip this mini-tutorial. If you’ve never used them before, I think you may love them. But know before hand that they are dirty dirty vegetables, full of grittiness. Here’s how I prep them.
Leeks cut up.
Cut off the tops and bottoms. Anything above the light green is really tough.
Sliced lengthwise.
Slice them lengthwise.
Washing leeks.
Soak them in the sink. If you have any doubt if this is necessary, look at the grit left in the sink when you drain it.
Proceed by draining the leeks (or just shaking them over the sink if you have little patience) and slice thinly.
**Spice (note 4): chipotle peppers in adobo sauce come in a can, usually from the Mexican foods section of the grocery store. Chipotle are smoked jalapeño peppers and adobo sauce is a smoky, spicy tomato and vinegar sauce. This stuff has a good kick to it, so if you haven’t used it before, start conservatively and add more as needed.
What you add from this can will depend on your taste and dining companions, but if you like things a bit spicy (or more than a bit), add one chipotle chili from the can — the chilis vary in size, so root around in there and find one that’s about your current level of courage. If you like things a little less hot, add 1-2 tablespoons of just the adobo sauce. If you have a mix of spice needs in your audience, serve the adobo sauce on the side.
Even if you like things crazy hot, you will have leftovers! I often store the sauce and peppers separately — the sauce can go in the fridge for about 4 or 5 days (it’s got vinegar in it, but usually no other preservatives). It also freezes well. I lay the chilis themselves out on wax paper or parchment over a plate, and throw it in the freezer. When the peppers are frozen, throw them in a plastic bag.