Notice: Function _load_textdomain_just_in_time was called incorrectly. Translation loading for the wp-ultimate-recipe domain was triggered too early. This is usually an indicator for some code in the plugin or theme running too early. Translations should be loaded at the init action or later. Please see Debugging in WordPress for more information. (This message was added in version 6.7.0.) in /home/maryzahc/public_html/adultfoodallergies.com/wp-includes/functions.php on line 6121
Vegetarian/Vegan – Page 9 – surviving the food allergy apocalypse (archive)

Tag: Vegetarian/Vegan

Recipes contain no animal products or by-products. Consider the sourcing of your ingredients if purity is important to you.

  • White Bean Pizza Hummus

    White Bean Pizza Hummus
    White Bean Pizza Hummus

    Being allergic to foods that are staples of the Standard American Diet can mean that road trips are, well, a little sad. But not going on a road trip would be more sad. So thinking about road trips like setting out for the western frontier (or, in this case, Vermont, which is to the west) means that with a plan and a cooler (and a hotel chosen partly for the microwaves and mini-fridges in each room), means “yay! Road trip!” I admit that I really miss finding awesome, off-beat restaurants in new cities. Now, if I plan to eat out, I check ahead and carefully read menus. That’s hard to do when you don’t know where you’ll be for lunch. So, again, the cooler and the meal plan.

    Hummus is a great road trip food. I’m a little bored of chickpea hummus, the standard, and I had time (and a plan) to make my own. I was going to make a black bean hummus I’d forgotten about — but in planning the grand meal plan, I forgot to see if I had black beans in the house. Oops.

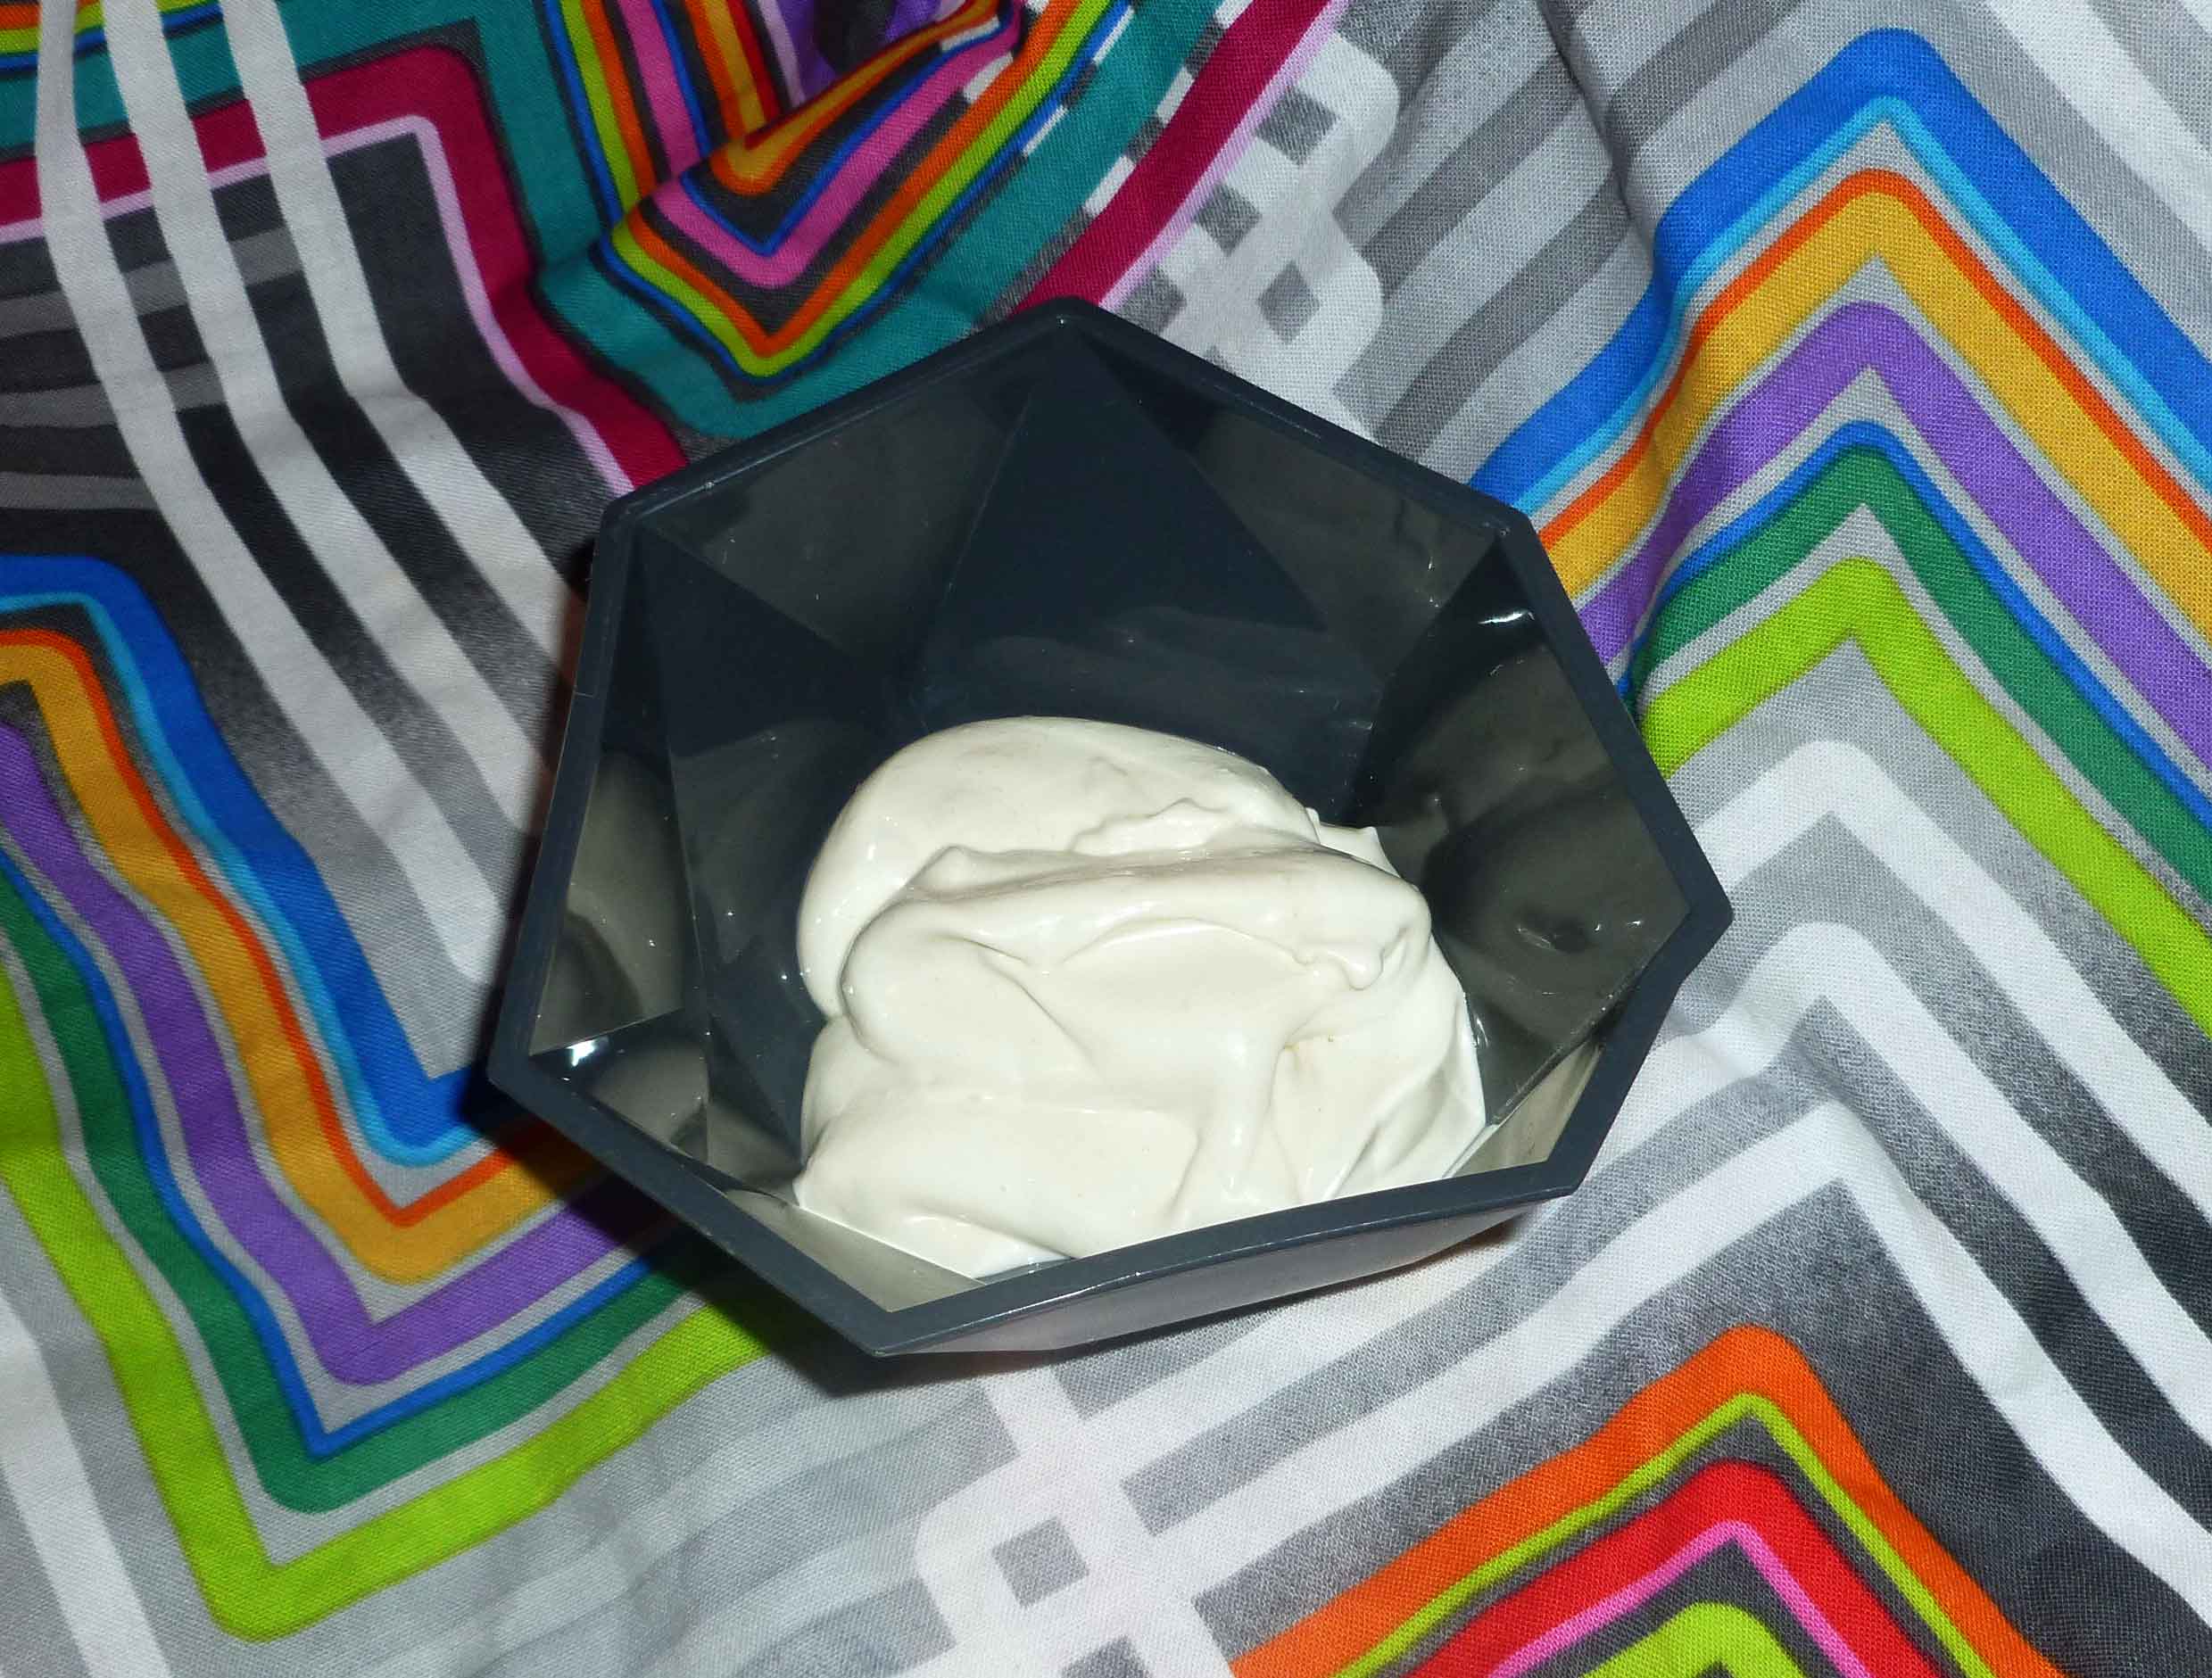
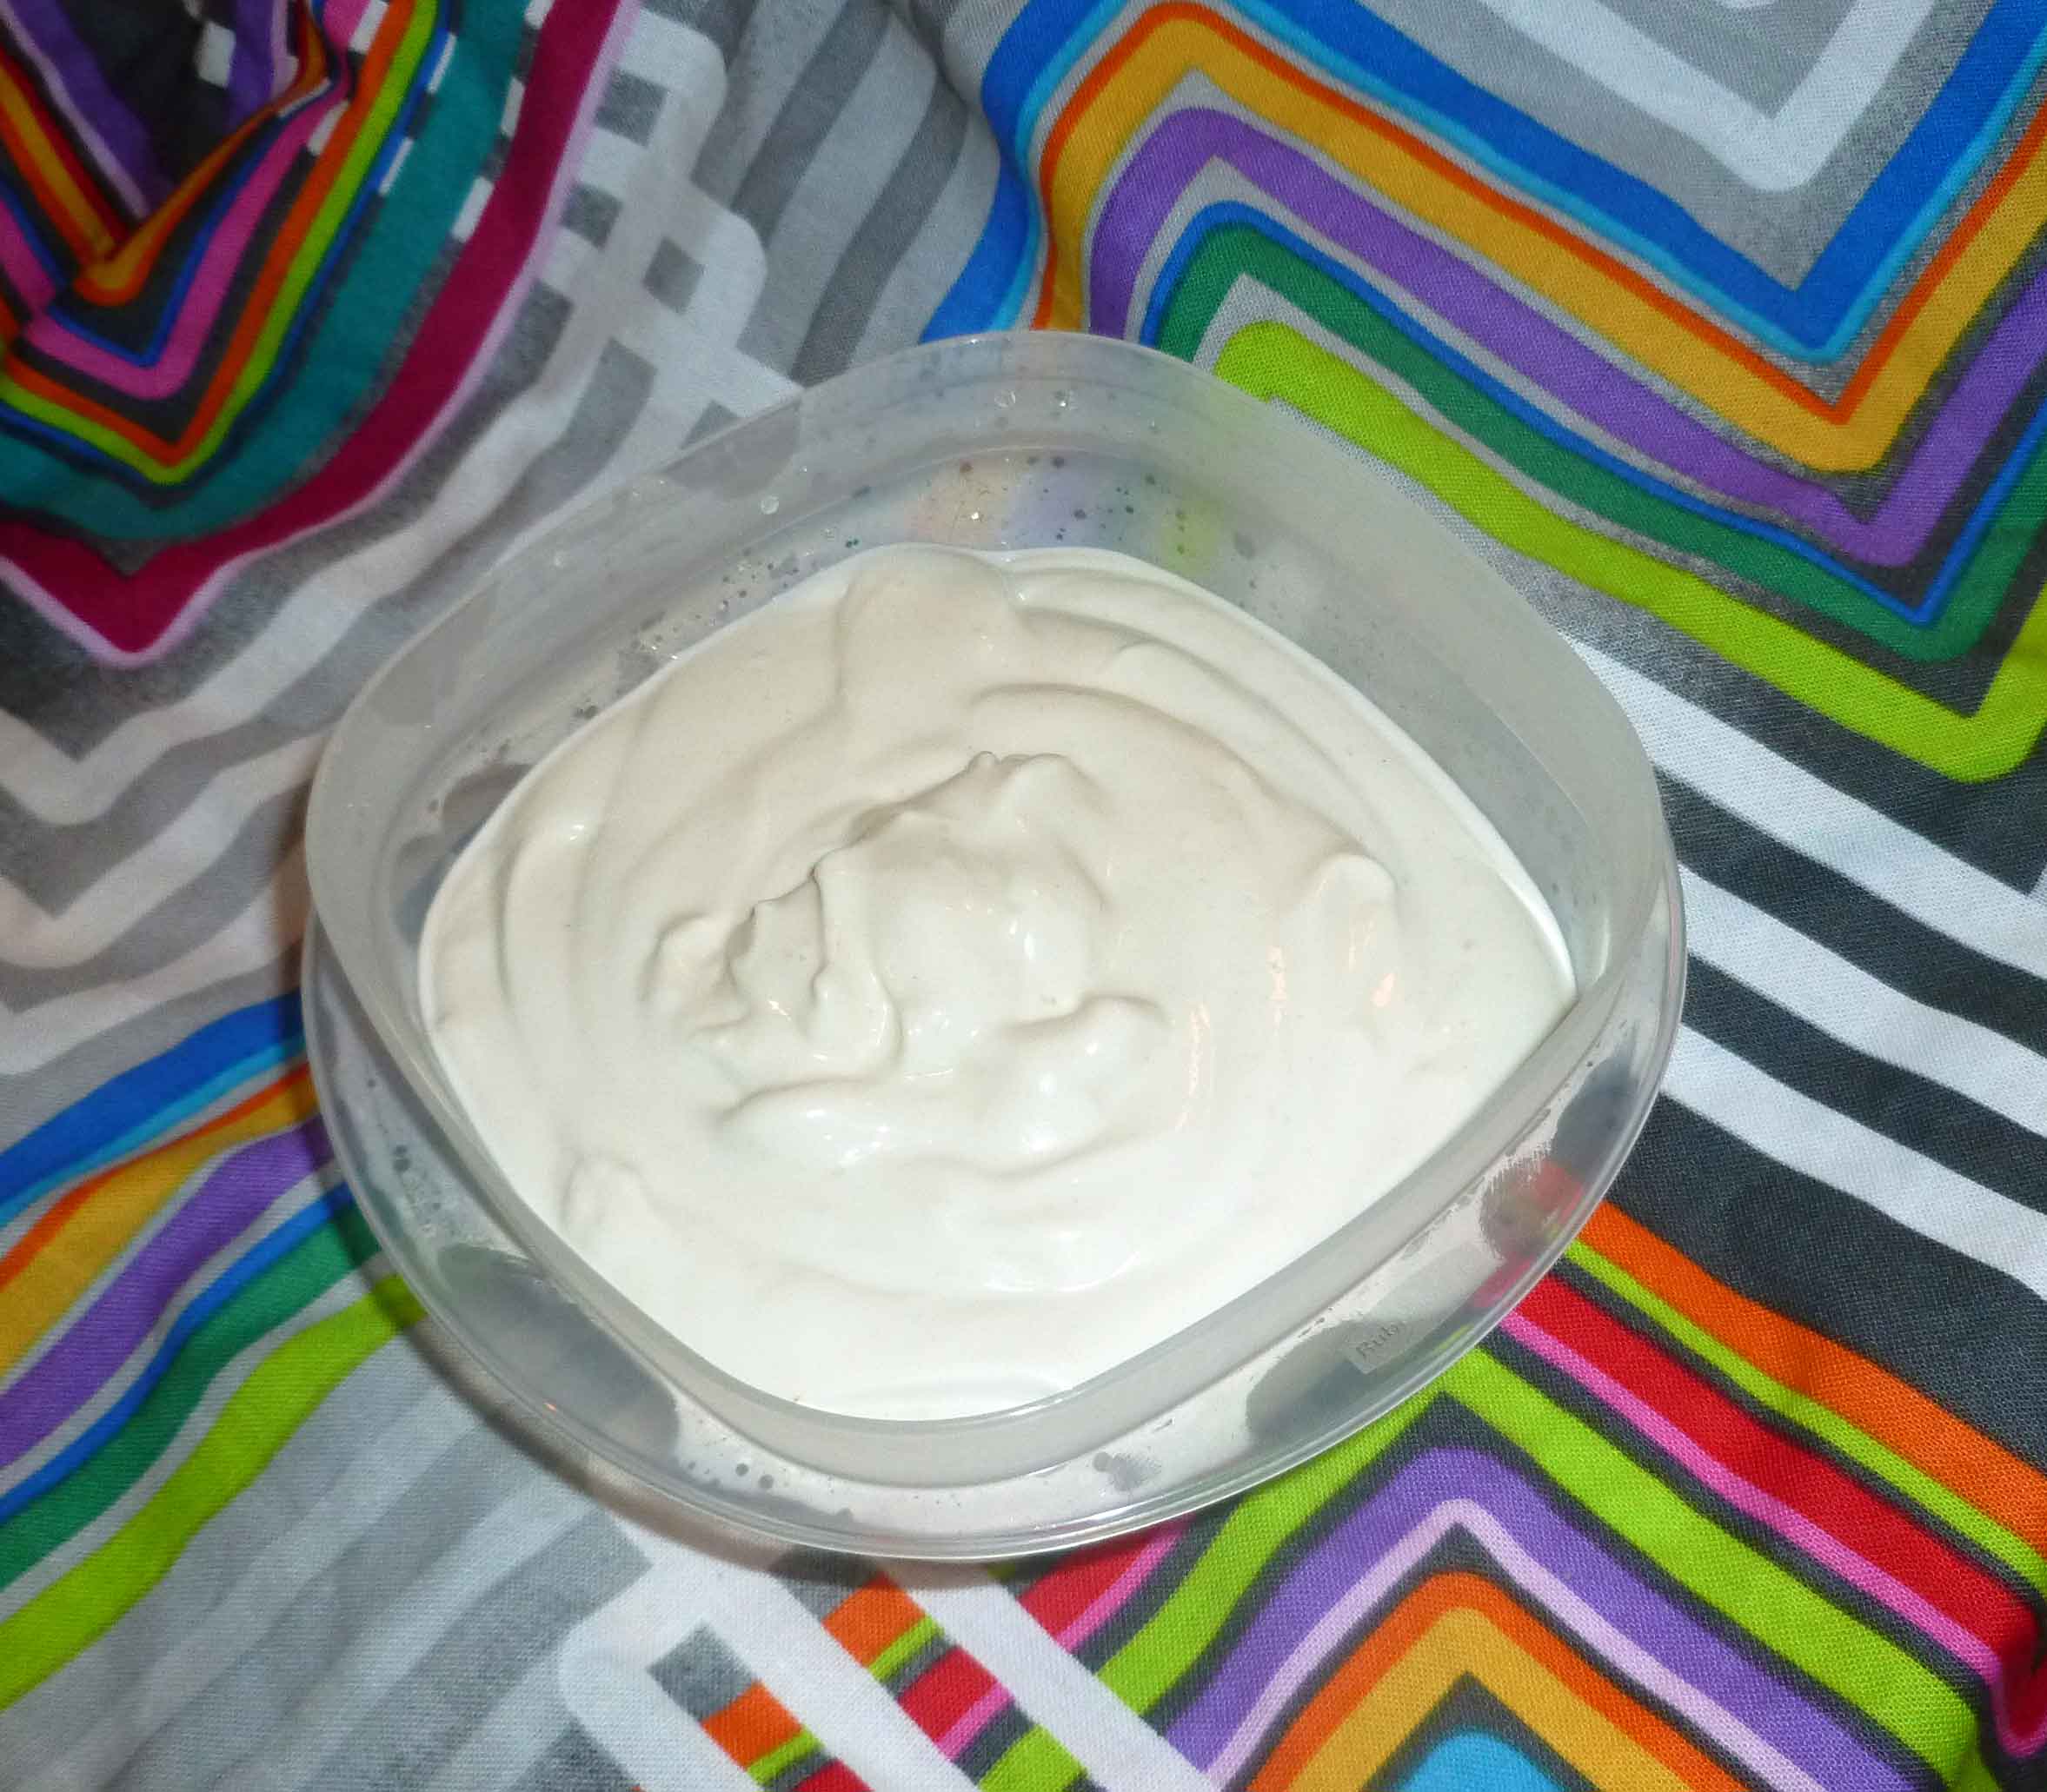
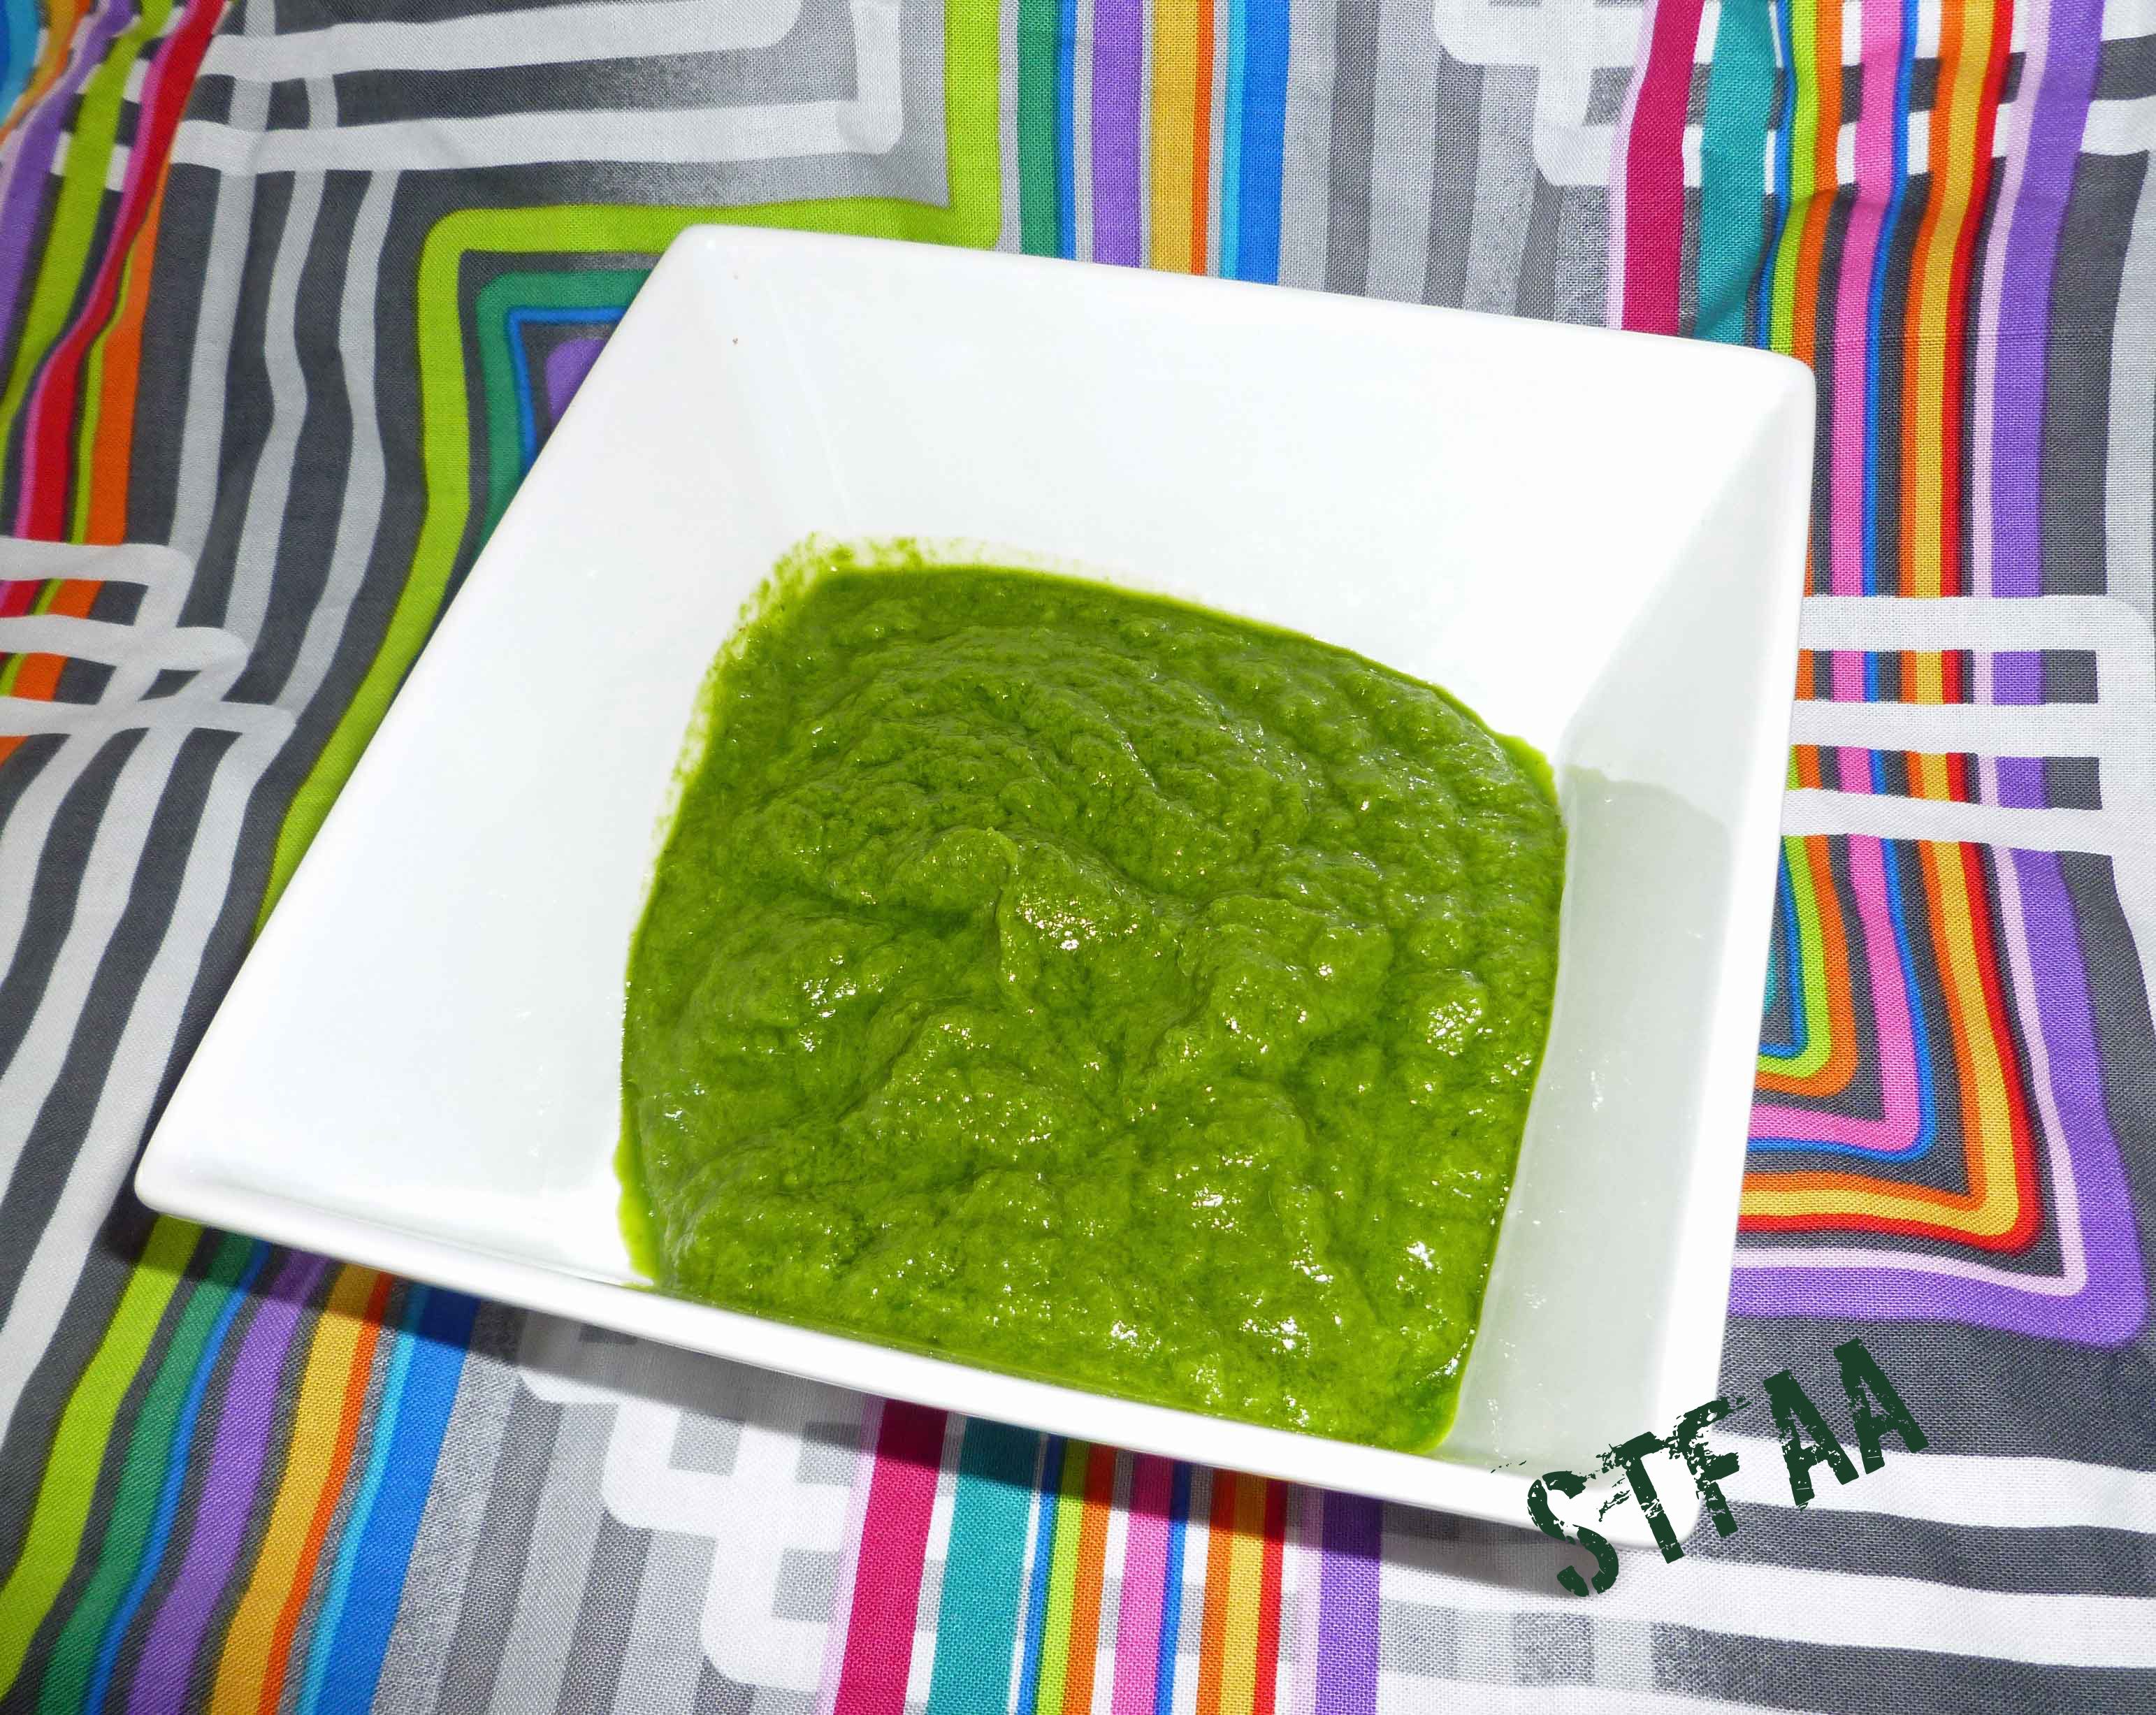
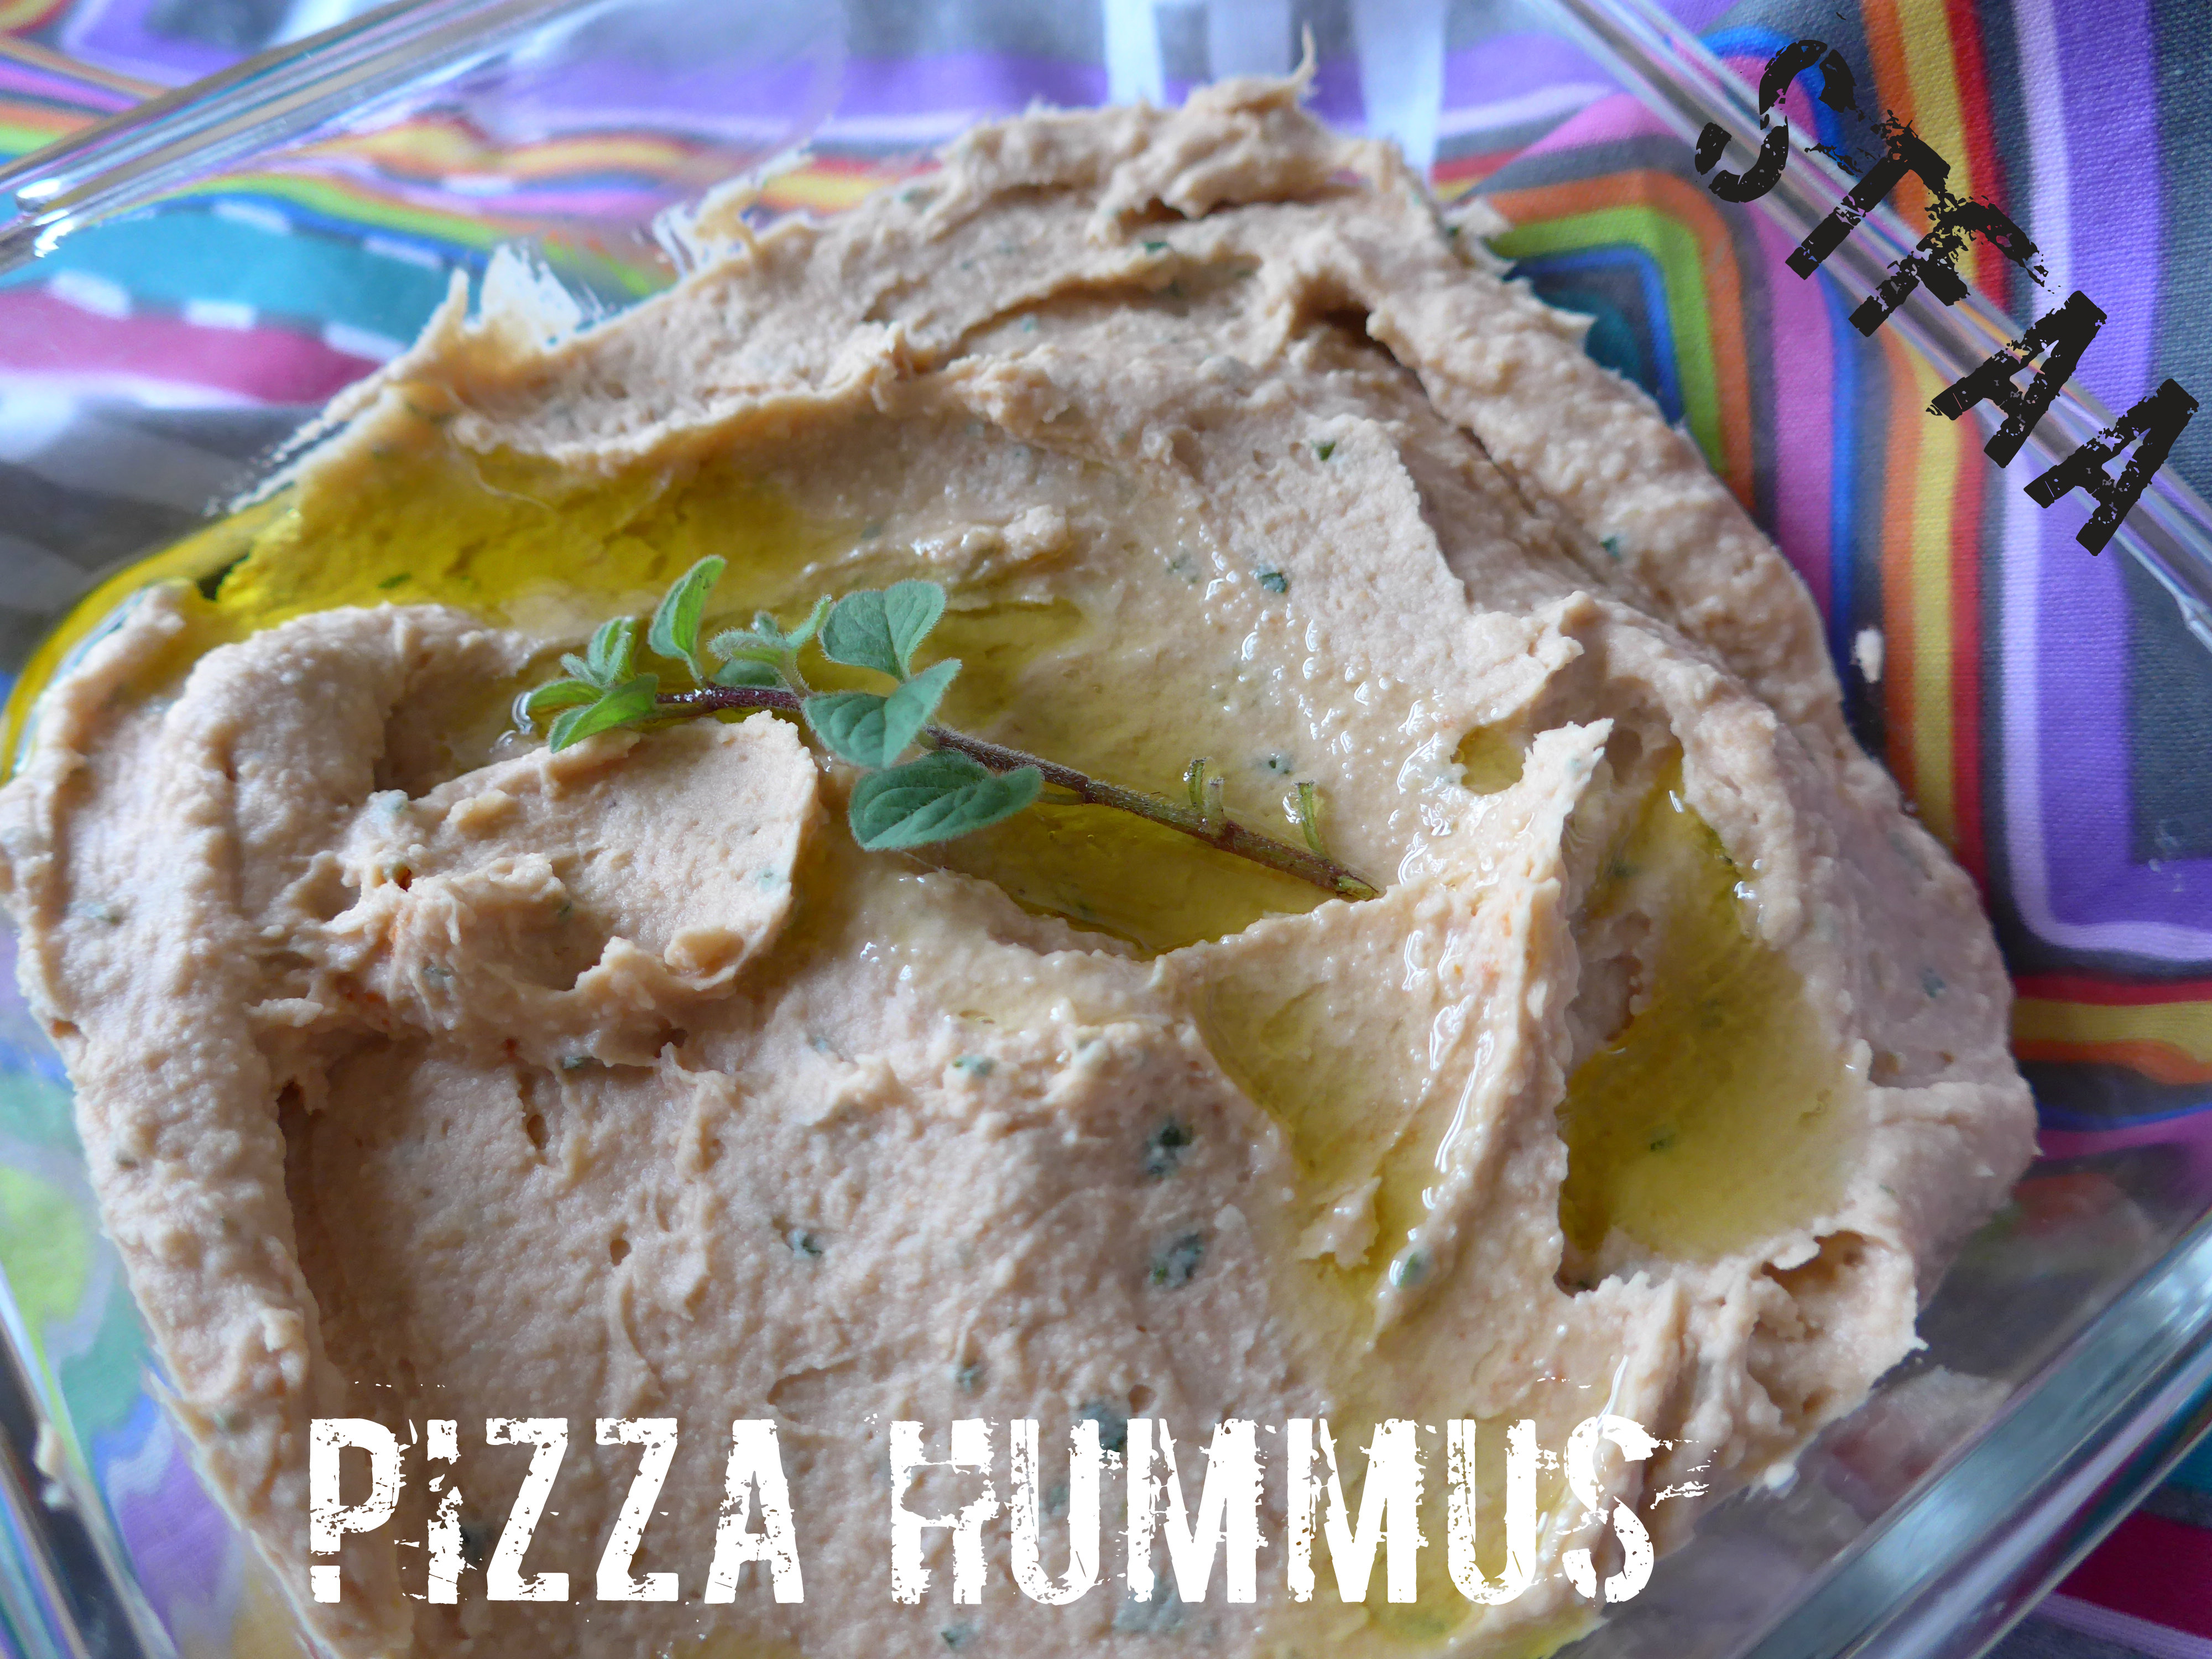
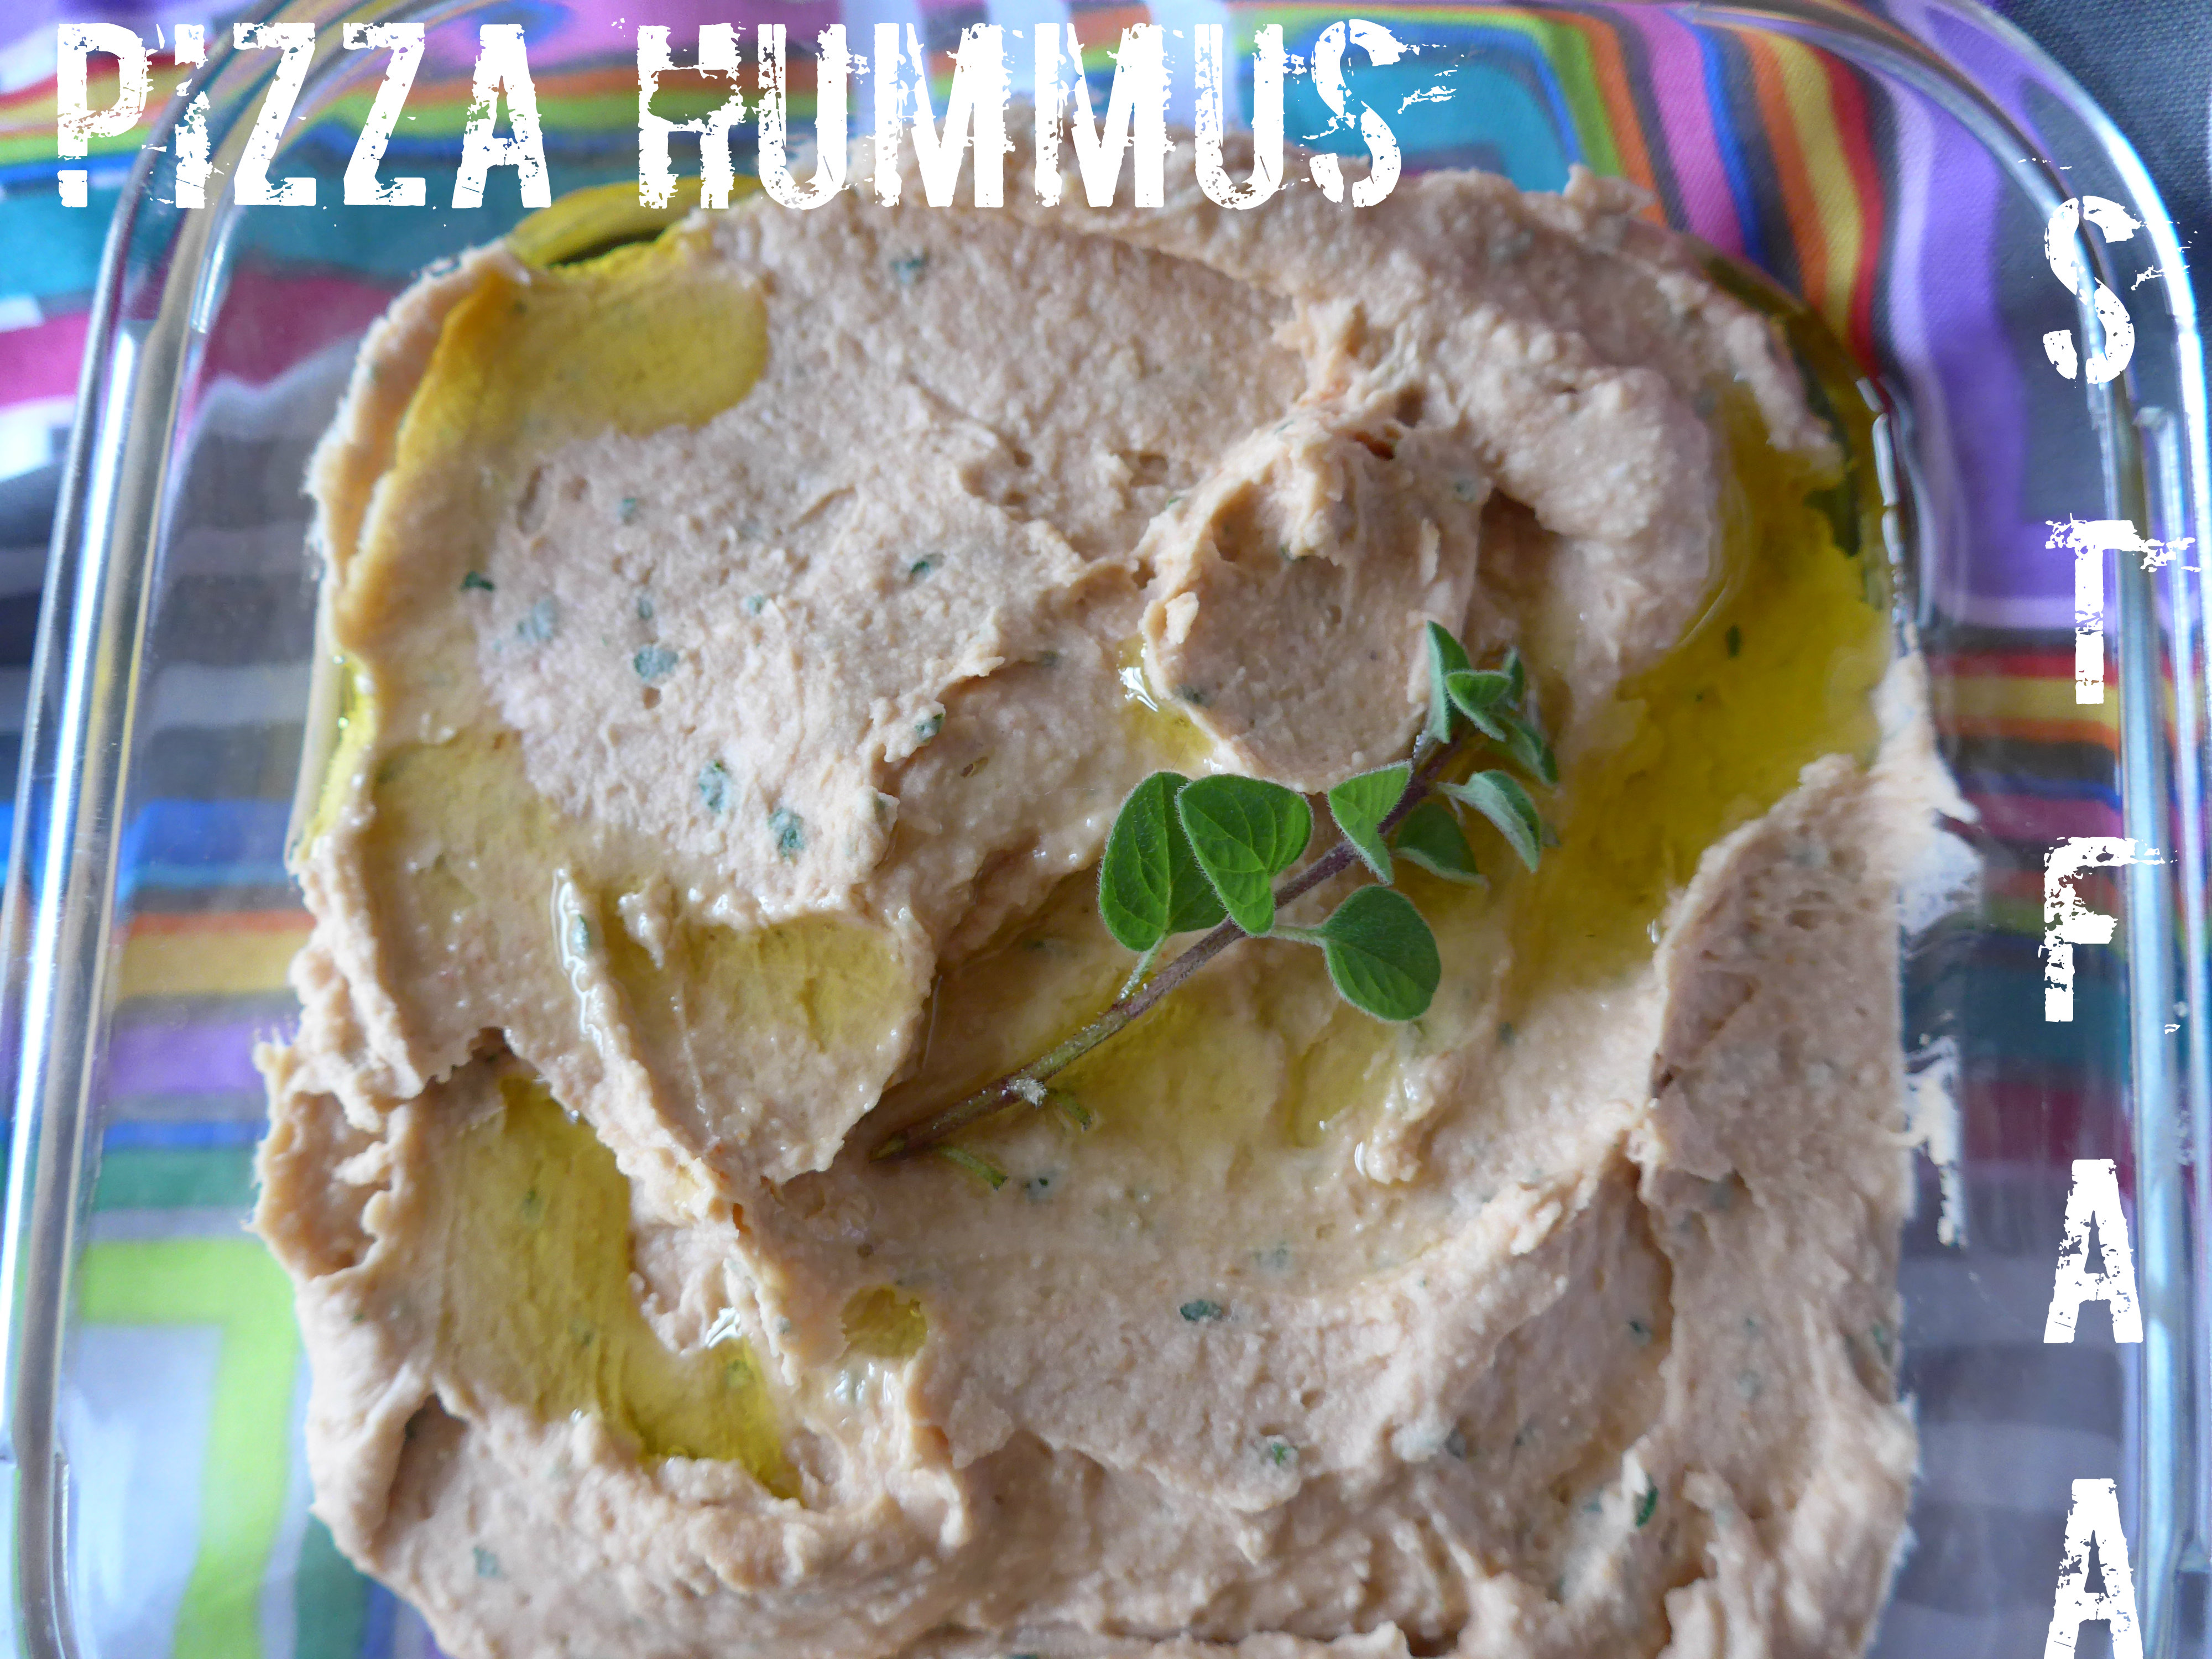
    I did have cannellini beans. And I have not yet killed my fresh herbs on the deck — I have chocolate mint, thyme, and oregano, and my neighbor is growing basil. Oregano and basil made me think of pizza, so I went that direction. Instead of tahini, I’ve used cashews, as I thought their more neutral flavor would be good with this combination. I think tahini would likely be okay (and make it nut-free), so if you make it that way, let us know in the comments how it turned out.

    White Bean Pizza Hummus
    White Bean Pizza Hummus

    White Bean Pizza Hummus

    • 1/4 cup raw cashew pieces (yes, you can use whole. The pieces are usually cheaper, though.)
    • 1/2 teaspoon chopped garlic (more, up to 1 teaspoon, if you want a prominent garlic flavor. Roasted garlic would also be excellent here, but I’m currently out.)
    • 1 Tablespoon tomato paste
    • 1 can (15 oz.) cannellini beans, drained and rinsed (Save the liquid!)
    • 5 large fresh basil leaves, rinsed
    • about 1 Tablespoon of fresh oregano leaves, rinsed
    • pinch of fennel seeds, crushed
    • 2 Tablespoons good quality olive oil, plus more to drizzle on top

    In a food processor fitted with the S-blade, add the cashews and puree. They will not quite turn into nut butter (you’d need a little oil), but let them go until they are almost there.

    Add the garlic and tomato paste and pulse it in.

    Add the beans and puree the mix.

    Add the basil, oregano, fennel seed, and olive oil and run until everything is smooth, scraping down the sides of the bowl as needed.

    Transfer to a serving bowl or storage container and drizzle olive oil over the top — just a bit will help keep the hummus from drying out. Unlike in the photos, swirl it around so that it coats the top — I just wanted better photos, so I didn’t do that until I was done.

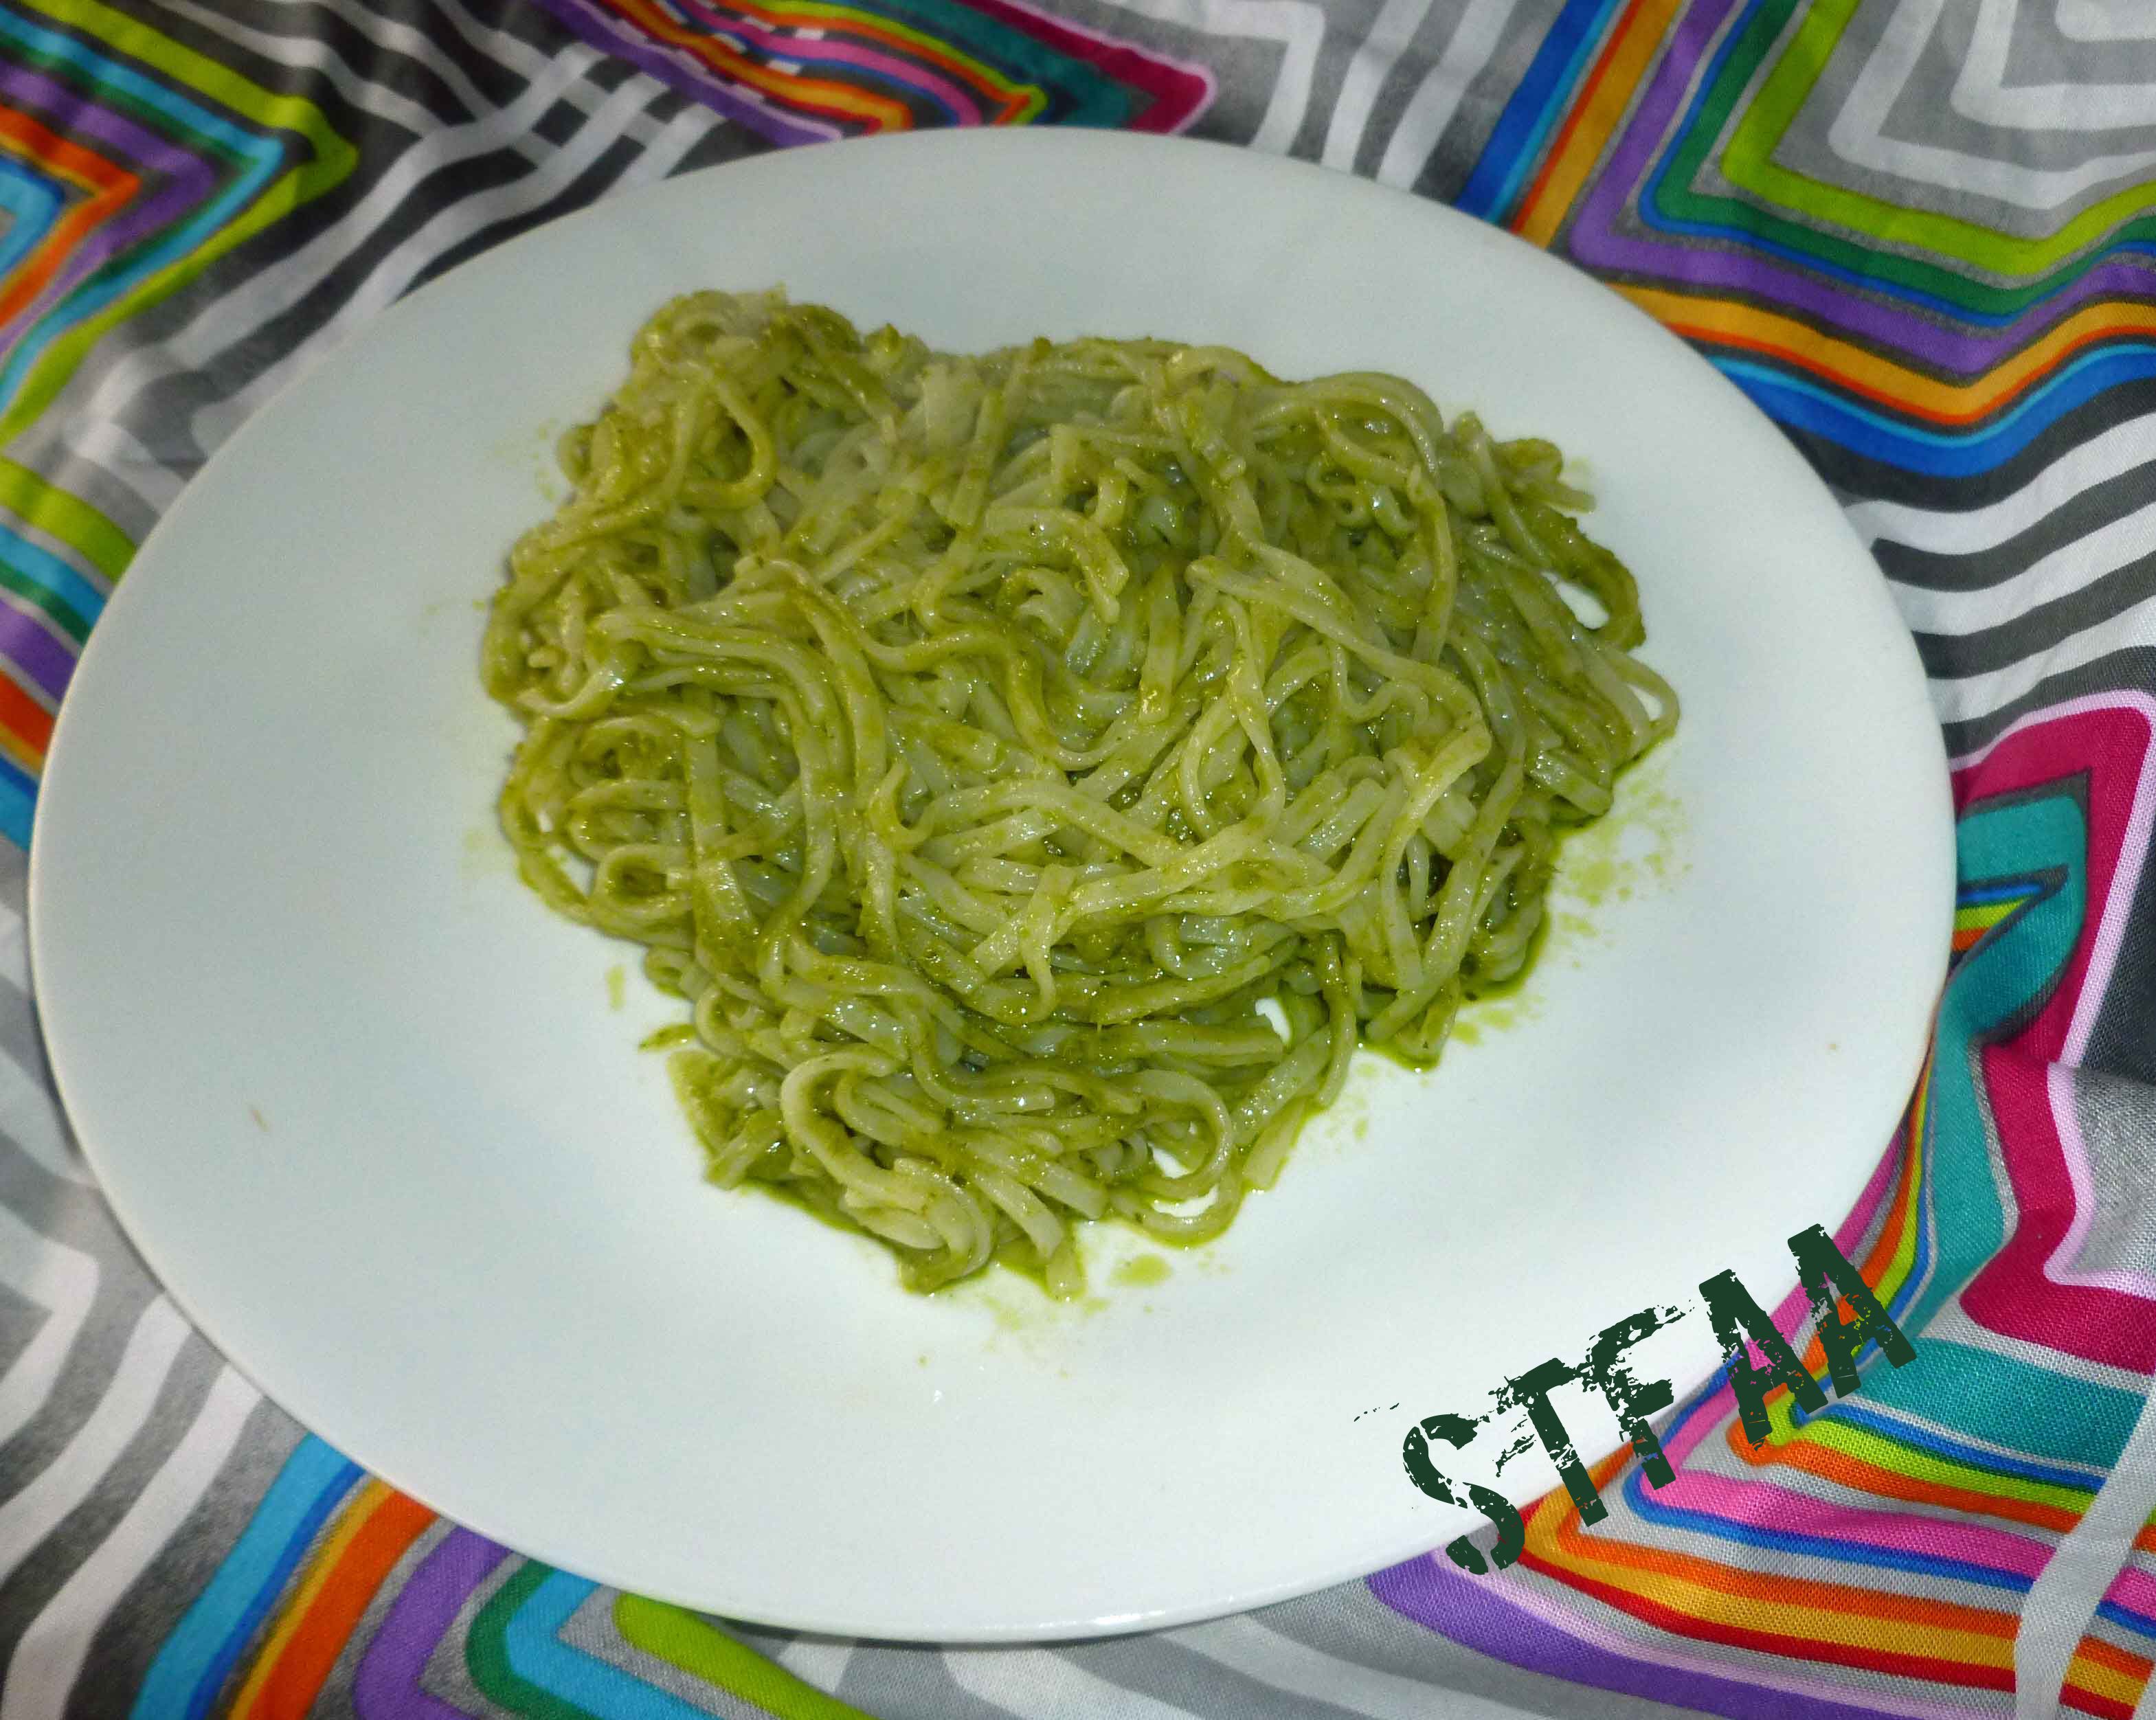
    Serve with crackers, chips, or veggies of your choice.

  • Aquafaba Vegan Salad Dressing

    Aquafaba Vegan Salad Dressing
    Aquafaba Vegan Salad Dressing

    So with the corn allergy all of the vegan mayonnaise products are a big no-no for me, as canola is notoriously cross-contaminated with corn, and I started to react to my favorite product. I haven’t had a safe mayonnaise in over a year. When I saw the aquafaba experiments with mayo, it rang a bell as a lot of the vegan products have pea protein, so I thought I’d give it a go. Only problem was, in order to get some aquafaba, I had to find time to pressure can some garbanzo beans at home, as I don’t really have a safe commercial garbanzo bean product I can buy. A few weeks ago I canned some garbanzo beans, but I just managed to find time to do the experiment recently. I used this recipe to start, but I modified it a bit because I was looking for a flavor that was more like Miracle Whip, as that was my mayo/salad dressing product of choice when I could still eat eggs, milk, and corn (I have more allergies, but those are the problem children for commercial mayo products). When I think of all the things I can make again, I seriously want to cry. Many thanks to Peanut Butter & Vegan for the post on using aquafaba for mayo to get me started. As suggested by the original post, I used an immersion (stick) blender, but if you try it in a regular blender, let me know how that goes.

    Aquafaba Vegan Salad Dressing 

    Makes about 1 cup.

    • about 1/4 cup of aquafaba (the liquid from a can of garbanzo beans)
    • 1/2 Tablespoon of lime or lemon juice (I used lime because I had limes in the house, but no lemons)
    • 1/2 Tablespoon and 1/2 teaspoon of apple cider vinegar (I used Bragg’s as it is generally safest for people with corn allergies)
    • 3/4 teaspoon of salt
    • 1/2 teaspoon of ground mustard
    • 1/4 teaspoon of sugar
    • dash of paprika
    • 3/4 cup of safe for you, neutral tasting oil (I used grapeseed oil)

    In a small bowl or measuring cup that isn’t much bigger in circumference than your immersion blender, add the aquafaba, lime juice, apple cider vinegar, salt, mustard, sugar and paprika. Mix with the immersion blender for a few seconds so that the ingredients are all combined. Slowly drizzle in the oil, while the immersion blender is running, moving the immersion blender around when the mixture becomes thick to make sure all the oil gets incorporated. Once the mixture is nice and thick, place the salad dressing in a container and place it in the fridge, where it will continue to thicken.

    Aquafaba Vegan Salad Dressing
    Aquafaba Vegan Salad Dressing

    Yay!! You have salad dressing! Go forth and make yummy dishes that require mayo/salad dressing like substances!

  • Chili Flavored Russet and Sweet Potato Chips

    Chili Flavored Sweet Potato Chips
    Chili Flavored Sweet Potato Chips
    Chili Flavored Russet Potato Chips
    Chili Flavored Russet Potato Chips

    I’ve been meaning to fry stuff for sometime, because I miss fried food and the last time Mary Kate and I had a fry-a-palooza was this past Thanksgiving. And I wanted potato chips. I tried a recipe where you baked them, but it took two hours of prep, and seriously, I can fry them faster than that, with less aggravation. This is one of those recipes where having good tools helps. I used a mandoline to slice the russet potato and sweet potato, and I used a Thermopop thermometer to keep track of the temperature of the oil.  Also, I used a cast iron wok to fry in, because I like it and it uses less oil, but you can use a regular skillet or stock pot if you use enough oil.

    Chili Flavored Russet and Sweet Potato Chips:

    Serves 1 (let’s be realistic about this…I ate them all in 10 minutes).

    • 1 Russet Potato, sliced extremely thin
    • 1 Sweet Potato, sliced extremely thin
    • a pinch of DIY Chili Powder
    • a pinch of salt
    • safe oil for frying enough to fill the pot about 3 to 4 inches deep

    For the frying:

    • A pot deep enough to accommodate about 3 inches of oil and the frying thermometer, a thick stainless steel stock pot or an enameled dutch oven would be best, although I used a cast iron wok and just fried less chips at a time. You also want a pot that’s tall enough that the edge is 4 or more inches above the oil level. It’s safer and there’s less splatter all around. We do not recommend using anything with Teflon or nonstick coatings. Of course, if you have an actual deep fryer appliance, use that.
    • frying thermometer (but you can’t use this one with a wok, in case you planned use a wok instead, I used this one and just stuck it in the oil periodically to check.)
    • tongs and/or slotted frying spoon/spider  (we used a silicone one rather than the traditional wire and bamboo, but I can’t find a picture of ours)
    • plate or cookie sheet, lined with paper towels

    Set up your frying pot, add your safe oil, and set up your thermometer. Start heating your oil over medium heat, as it will take some time to reach the right temperature.  You are aiming for about 380ºF.

    I used a mandoline, shown below, to slice my potatoes, but you can slice them with a knife if your knife skills are that good.

    Mandoline
    Mandoline

    The slices of your Russet potato will be wet and starchy. Place them in a bowl and water and agitate them a bit to rinse the starch off.

    Rinsing off the starch from the Russet potato slices
    Rinsing off the starch from the Russet potato slices

    Place the rinsed slices in between the folds of a clean kitchen towel to dry them off.

    Rinsed slices on clean kitchen towel
    Rinsed slices on clean kitchen towel
    Fold towel over slices to dry both sides
    Fold towel over slices to dry both sides

    The sweet potato slices should be dry enough after slicing as there is less water content than a Russet potato.

    Sweet Potato Slices
    Sweet Potato Slices

    When the oil temperature is 380°F, carefully add some of the potato slices to the pot. You don’t want to overcrowd them.

    Russet Potato frying
    Russet Potato frying
    Sweet Potato frying
    Sweet Potato frying

    Fry the potatoes, turning them occasionally with tongs until they are golden brown. They should be fried a bit darker in color than normal potato chips so that they are crispy. The mandoline does not quite cut the potatoes as thinly as a commercial potato chip, and in order to get some crisp, you need to cook them a little longer. The potatoes will start to wave and distort when they are close. if the potato chip seems pretty flat still, keep frying a bit.  When the potato slices are fried, place them on the plate or cookie sheet lined with paper towels to drain.

    Sweet Potato Chips
    Sweet Potato Chips
    Russet Potato Chips
    Russet Potato Chips

    Once the chips have cooled a little, place them in a bowl and sprinkle the salt and chili powder on them to taste and toss them a bit to coat them and distribute the seasoning.

    Chili Flavored Sweet Potato Chips
    Chili Flavored Sweet Potato Chips
    Chili Flavored Russet Potato Chips
    Chili Flavored Russet Potato Chips

    Enjoy!

  • Caramelized Onion & Balsamic Dressing over White Beans, Mushrooms, and Spinach Salad

    Caramelized Onion & Balsamic Dressing over White Beans, Mushrooms, and Spinach
    Caramelized Onion & Balsamic Dressing over White Beans, Mushrooms, and Spinach

    I am not a big eater of salads. Mostly, that’s because “salad” to me equals lettuce, and I don’t eat lettuce. I don’t like it that much and my body hates digesting it. But the thing is, salad doesn’t need to be lettuce at all. I love chopped salads, and I’ve been experimenting lately with meal salads that are spinach (which I do like) with something warm and cooked over top. Putting something hot on spinach slightly wilts the spinach, which I love, and somehow makes the salad seem more like a hearty meal. This salad is one of those.

    Actually, this salad is several of those. The point of this salad is the dressing, which I originally whipped up to go over a grilled steak salad. But as I was getting ready to make it again for better photos, I really didn’t feel like steak. So I made a white bean, dill, and mushroom saute, instead, and it was really good. Again, the point is the dressing. Make that, and then put it over whatever you think will taste good with caramelized onions on it (so, basically, anything up to dessert). The salad is the vehicle for the dressing. It keeps in the fridge overnight, but I’ve never had it around longer than that.

    Overall, this recipe makes 2-4 servings, depending on how hungry you are. It’s about 2 servings for me.

    Caramelized Onion & Balsamic Dressing over White Beans, Mushrooms, and Spinach
    Caramelized Onion & Balsamic Dressing over White Beans, Mushrooms, and Spinach

    Caramelized Onion Balsamic Dressing

    • 3 Tablespoons olive oil (cooking quality, not finish quality — you’re heating this)
    • 1 cup of onions, halved, then quarter each half and slice thinly. This is about one baseball-sized onion
    • 1/2 – 3/4 teaspoon salt (how salty do you like your dressing? I like the high end of this range, but to just get good flavor, 1/2 teaspoon is enough)
    • 1 1/2 teaspoon chopped garlic (about one largish clove)
    • 1-2 Tablespoons balsamic vinegar (again, adjust for your preferred tanginess)
    • 1 teaspoon Dijon mustard
    • 1 Tablespoon faux tamari, or 1/2 Tablespoon tamari and 1 teaspoon maple syrup or other liquid sweetener

    Place a large skillet (I always use my cast iron) over medium heat. When hot, add olive oil and let it heat until shimmering.

    Add onions, and stir well. Cook until translucent, stirring frequently.

    Add salt. Stir well, and turn heat to medium low. Cook until caramelization begins (golden browning), stirring infrequently, knowing that this will take up to 45 minutes. It’s worth it.

    When the browning has begun across the pan of onions, add the garlic, Dijon, balsamic, and tamari, stirring well after each addition. Stir this over the heat until everything has really incorporated (2-4 minutes), and then remove from heat.

    Bonus Salad Recipe: Mushrooms, White Beans, and Dill over Spinach

    • 2 -3 teaspoons of oil
    • 1 package (8 oz) mushrooms, washed and chopped roughly
    • 1 can (15 oz) small white beans, drained and rinsed
    • 1 packed Tablespoon of fresh dill, chopped
    • 5 oz of spinach, washed and torn (if big)

    Heat a large skillet over medium heat — since you’re combining everything, feel free to use the skillet you made the dressing in without washing it. When hot, add the mushrooms and oil. I always add these two together since I “measure” the oil by adding just a little to the pan, adding the mushrooms, and stirring well. I keep adding little bits of oil while stirring until the mushrooms are all lightly coated. This is probably less than you’d imagine, or less than you would start out with, so it keeps the mushrooms from sticking but also keeps them from being greasy.

    Cook over medium heat as the mushrooms release their liquid. Stir frequently. When they’ve shrunk and look cooked, add the beans. Stir well, and add the dill. Cook another 2-3 minutes, until all the beans are hot.

    Place the spinach in a large bowl. Pour beans and mushrooms over spinach, then dressing. Let sit for about 5 minutes to wilt the spinach, then toss. Let it sit again, if you like, for further wilting, and then serve.

  • Garlic Scape Pesto Sauce

    Garlic Scape Pesto Sauce
    Garlic Scape Pesto Sauce

    My friend Mary S, of the green thumb, has been gifting me garlic scapes. Since her garlic was planted in the fall and is almost as tall as me, her garlic has lots of scapes, whereas my garlic was planted in the spring, and the tallest plant might be, oh, six inches high, and there are no scapes to be seen. Since I had some basil leftover from another dish, I decided to make a sauce. You will need a blender for this recipe.

    Garlic Scape Pesto Sauce

    • 1 cup of tightly packed basil leaves
    • 1 cup of garlic scapes, chopped into 1 to 2 inch pieces
    • 1 cup of olive oil (make sure it’s safe for you, I do well with California Olive Ranch)
    • 1/4 cup of white wine vinegar (make sure it’s safe for you)
    • 1/2 teaspoon of salt

    Roughly chop up the basil leaves. Add the basil, garlic scapes, olive oil, and vinegar to the blender.  Process until the sauce is pulverized to your liking. I like mine pretty smooth.

    This is a pretty versatile sauce. It can be used mixed into cooked hot rice noodles or even just brown rice to use as a savory side dish. You can use it as a dipping sauce for grilled meat, or toss it with steamed veggies. You can thin it down with a little more vinegar and use it as a salad dressing.  If you come up with other ways to use it, please let us know.

    Enjoy!

    Garlic Scape Pesto Sauce mixed with rice noodles
    Garlic Scape Pesto Sauce mixed with rice noodles
  • DIY Chili Powder

    DIY Chili Powder
    DIY Chili Powder

    If you’re like me (okay, probably not, as I have issues as outlined in my post, WW Kitchen Stories: Rosemary or Denise’s Spice Issues), you might have a few dried chiles kicking around. Or more than a few. Since I have so many, and since I was running low on chili powder, I started looking into how to make it. Although Mary S. of the green thumb gave me some chili powder that I tolerate after I mentioned I might do a Penzey’s order, it’s good to be able to make your own so that you know that there’s no anti-caking agents, disclosed or undisclosed, and less chance for cross contamination. Plus, I really have a crap ton of whole dried chiles, thanks in part to the harvest I got from Mary S. last year that I dehydrated.

    Although this might be a bit spicier than your normal chili powder, I tried to keep it in the realm of reasonable for those of you who are not fire breathers. Feel free to switch out dried peppers based on your own tastes and/or what you have on hand. You will need a blender or a food processor.

    DIY Chili Powder

    Makes 1 cup.

    • 2 dried, whole chipotle chiles
    • 2 dried, whole guajillo chiles
    • 2 dried, whole New Mexico chiles
    • 2 dried, whole ancho chiles
    • 2 dried, whole cascabel chiles
    • 2 dried, whole arbol chiles
    • 2 dried, whole habanero chiles
    • 2 Tablespoons of cumin seed
    • 2 Tablespoons of garlic powder
    • 1 Tablespoon of Mexican dried oregano (you can use plain oregano if you don’t have Mexican)
    • 1 Tablespoon of smoked paprika (you can use plain paprika if you don’t have smoked, but the smoked is nice)
    Whole Dried Chiles before prep
    Whole Dried Chiles before prep

    Destem, seed, and slice the dried chiles.

    Destemmed, deseeded, and sliced dried chiles
    Destemmed, deseeded, and sliced dried chiles
    Stems and seeds removed from chiles to be discarded
    Stems and seeds removed from chiles to be discarded

    Place the dried chiles and the cumin seed in a skillet over medium high heat.

    Dried chiles and cumin seed before toasting
    Dried chiles and cumin seed before toasting

    Move the skillet around constantly to shift the cumin seed and chiles until you smell the cumin seed toasting.

    Dried chiles and cumin seed after toasting
    Dried chiles and cumin seed after toasting

    Remove the chiles and the cumin seed from the skillet, and allow them to cool completely.

    Once cool, place the chiles, cumin seed, garlic powder, oregano and paprika into a blender or food processor.

    Dried chiles, cumin seed, garlic powder, oregano and paprika in blender
    Dried chiles, cumin seed, garlic powder, oregano and paprika in blender

    Blend or process until you have a fine powder. Before opening the blender or food processor, let the powder settle for a few minutes. You really don’t want to gas yourself.

    DIY Chili Powder after blending
    DIY Chili Powder after blending
    DIY Chili Powder after blending
    DIY Chili Powder after blending

    Store your chili powder in an airtight container, and use as you would normally use chili powder.

    Enjoy!

  • Strawberry Mojito Fruit Leather (non-alcoholic!)

    Strawberry Mojito Fruit Leather
    Strawberry Mojito Fruit Leather

    I have a dehydrator! One of Denise’s friends is clearing things out, I guess, and when she asked if I wanted a dehydrator, I jumped on it. I’ve tried some straight up fruit so far, but I was most excited about making jerky and home-made fruit rollups, as well as drying some of my herbs this summer.

    I really like fruit leather as a snack. It’s almost as good as candy, and I had some ideas. First up: strawberry mojito. This is a super easy recipe — IF you have a dehydrator. If you don’t and want to try making these, ask around and see if you can borrow one. It takes about 8 hours to dehydrate these. You will need the liquid trays. This recipe is scaleable — I’m writing it for ONE dehydrator tray, but you’ll run it with four trays (at a minimum). Try other flavors, increase it by 4, or add other food to the other trays.

    AGAIN: THIS MAKES ONE TRAY. Scale up as needed, or try your own flavors.

    Strawberry Mojito Fruit Leather
    Strawberry Mojito Fruit Leather

    Strawberry Mojito Fruit Leather

    • 1 pound of strawberries, washed, with hulls and stems removed
    • 1/4 cup lime juice, fresh squeezed
    • 1 Tablespoon, packed, mint leaves, chopped finely

    Puree all ingredients in a blender or food processor. Pour slowly into dehydrator tray and tilt, if needed to spread it out. Dehydrate at medium (140ºF) for 8-10 hours (it may take longer if it’s humid.)

    Peel and eat. Will keep for about 2 weeks in airtight containers, maybe slightly longer. I wrapped mine in plastic wrap so that I’d get the experience of peeling them off the wrap — part of the remembered joys of fruit rollups.

    My apologies for the rather dull photos. I didn’t check them this time around and by the time I noticed all my “pretty” photos were blurry, I’d eaten all the fruit leather. They tasted great.

  • Chocolate Cinnamon Hard Candy

    Chocolate Cinnamon Hard Candy
    Chocolate Cinnamon Hard Candy

    Because I like transparency, you should know that this recipe was the result of a mistake. Yay serendipity!

    I wanted to make crunchy granola bars like the Nature Valley ones I liked before the food allergy apocalypse hit. But I wanted to make them not so breakfast-y and more of a treat or a snack. So I found a recipe for a crunchy granola bar and decided to add cocoa powder to the sticky mixture sticking it together. The recipe called for honey, but I don’t have a safe honey or maple syrup, so I made a cane sugar syrup used that instead.

    Well, I threw all the ingredients for the sticky stuff, i.e., the cane sugar syrup, brown sugar, cocoa powder, vanilla and cinnamon, all the saucepan and began heating it. But then it didn’t want to melt. So I thought that maybe the cocoa powder was too dry and I added a bit of grape seed oil. And the mixture still looked sugary, and I began to worry that the cocoa powder would burn. It was at this point that I read the actual directions for the mixture from the recipe I was trying to modify. It said to cook the sugar and sugar syrup first and then add the vanilla and cinnamon after. Oops. So I decided that I had enough sugar syrup to do it over, but I decided to see if I could get it to melt, and as I did that, I realized that it wouldn’t be accurate if I wrote it up without the do-over and I didn’t want anyone else to risk burning chocolate. So I quickly greased a small baking sheet and dumped the mixture on it so I could start over again with the sticky stuff for the granola bars. I thought it might end up like tootsie rolls, but when I came back to it after finishing the granola bar attempt (which also didn’t really work as it didn’t set up into bars, but might make a great cereal if I had a safe non-dairy milk, sigh), it was hard as a rock. I pried it off the cookie sheet and then put it in a zip top bag in the freezer for bit and then dropped the bag on the floor a couple of times to break it up into pieces. If you were smarter than me, which you are, you’d use a metal spatula or turner to divide the candy into smaller pieces when it’s cooled a bit but is still warm and pliable. Or put them into silicone candy molds.

    Chocolate Cinnamon Hard Candy

    • 3/4 cup of cane sugar syrup (You will need to make it ahead of time – there are two good recipes and I’ve used both before. The one from thekitchn.com makes about a quart, and the one from justapinch.com makes about two cups.) 
    • 3/4 cup of brown sugar (make sure it’s safe for you)
    • 4 Tablespoons of cocoa powder (make sure it’s safe for you)
    • 2 teaspoons of ground cinnamon
    • 1 Tablespoon of vanilla extract  (Here’s a bunch of recipes for vanilla extract, make sure to use safe alcohol if corn or wheat are an issue for you. I use either Vikingfjord  or Luksusowa Vodka because they are made only from potatoes, where some vodkas may also use grain or corn.)
    • 1/2 teaspoon of grape seed oil (or other safe oil for you)
    • enough grape seed oil to grease cookie sheet

    Grease small to medium cookie sheet with grape seed oil. I used a mister.

    Place all the ingredients in a saucepan over medium heat and stir constantly with a silicone spatula, so that you can scrape the bottom of the saucepan really well. Make sure that all ingredients get combined really well.

    Candy mixture well combined in saucepan
    Candy mixture well combined in saucepan

    Cook over medium heat until the brown sugar begins melting into the cane sugar syrup. I didn’t measure the temperatures, but if you’re using a candy thermometer, you’re probably aiming for somewhere between 250°F and 300°F.  Once the brown sugar is melting into the sugar syrup, pour the mixture onto your cookie sheet or into silicone candy molds.

    Chocolate Cinnamon Hard Candy cooling on cookie sheet
    Chocolate Cinnamon Hard Candy cooling on cookie sheet

    Once it is cooler, but still somewhat pliable, use a metal spatula or turner to cut the candy into pieces and let it cool. Or resort to the zip top bag method as described above.

    Large pieces of Chocolate Cinnamon Hard Candy about to be broken into smaller pieces
    Large pieces of Chocolate Cinnamon Hard Candy about to be broken into smaller pieces

    Enjoy! Also, it’s great with coffee.

    Chocolate Cinnamon Hard Candy
    Chocolate Cinnamon Hard Candy