Notice: Function _load_textdomain_just_in_time was called incorrectly. Translation loading for the wp-ultimate-recipe domain was triggered too early. This is usually an indicator for some code in the plugin or theme running too early. Translations should be loaded at the init action or later. Please see Debugging in WordPress for more information. (This message was added in version 6.7.0.) in /home/maryzahc/public_html/adultfoodallergies.com/wp-includes/functions.php on line 6121
Meatless/Veg*n – surviving the food allergy apocalypse (archive)

Category: Meatless/Veg*n

Meatless/Veg*n – Savory recipes which do not contain any meat or which may fall into either the vegetarian (no meat or fish) or vegan (no animal products of any kind) categories. Dishes generally feature beans or vegetables as the central ingredients. We will not be putting baked goods and desserts in this category, although most of our baking will be vegan (and will be tagged as such). These recipes will not contain dairy, eggs, gluten, wheat or hazelnuts. If we use a top 8 allergen, we will use a tag warning of its use.

  • Mango Slaw

    Mango Slaw

    Orange mango, purple and green Thai basil, purple cabbage, and other green herbs in a slaw on a white plate, with a "tree" sprig of Thai basil in the center.
    Mango Slaw, photo by J.Andrews

    I just spent a week in Hawai’i, the Big Island, and came home to cold and dreary weather. We hit avocado season there, which was amazing, but also found lots of fresh papaya, some passion fruit, and some interesting varieties of dragon fruit. But back here on the mainland, the tropical fruit variety is less exciting. The grocery store did have some rather sad-looking papaya, but the mangoes looked pretty good. The smaller honey mangoes were ripe and ready to eat.

    Beyond that, I have a recipe on my menu plan this week that required 1/4 of a head of red cabbage. I swear, recipes either require a whole cabbage or just a bit, and I hate wasting things. So I pulled this slaw together to go with several other meals and use up a bit more of the cabbage (that still only gets me to half the head, but I’ll stir-fry the rest).

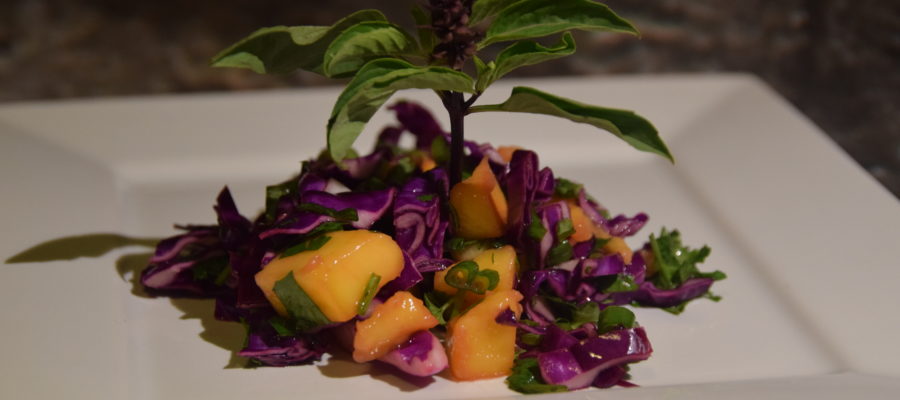
    This is a TART slaw, not creamy, and the only “dressing” is lime juice and the juice from the mangoes — this is why it needs to rest a bit. My mangoes were super sweet, and the dinner that this was a side dish for was rich enough that this made a good accompaniment as it was. You may want to adjust a bit — a pinch or two of salt or sugar or a drizzle of olive oil may be needed to perfect this crunchy tart dish. Adjust as needed, and enjoy.


    Notice: Trying to access array offset on value of type bool in /home/maryzahc/public_html/adultfoodallergies.com/wp-content/plugins/wp-ultimate-recipe/helpers/models/recipe.php on line 254
    Mango Slaw
    Print Recipe
    Servings Prep Time
    6 slaw servings 20 minutes
    Passive Time
    60 minutes
    Servings Prep Time
    6 slaw servings 20 minutes
    Passive Time
    60 minutes
    Mango Slaw
    Print Recipe
    Servings Prep Time
    6 slaw servings 20 minutes
    Passive Time
    60 minutes
    Servings Prep Time
    6 slaw servings 20 minutes
    Passive Time
    60 minutes
    Ingredients
    Proper Measurements
    • 2 cups red/purple cabbage shredded
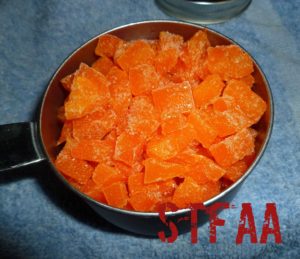
    • 2/3 cup honey mango cubed
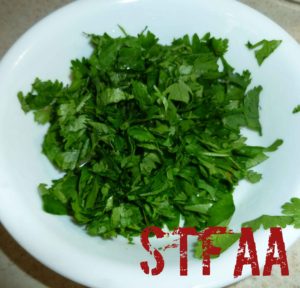
    • 1/4 cup cilantro thick stems removed, rough chopped
    • 2 Tablespoons Thai basil leaves chopped
    • 1 Tablespoon lime juice
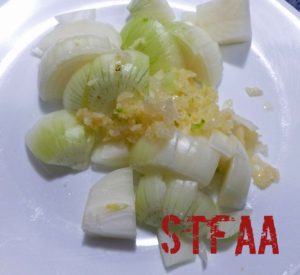
    • 1/4 cup scallions thinly sliced
    Rough Measurements
    • 1/4 head cabbage shredded
    • 1 small honey mango cubed
    • 1/2 bunch cilantro thick stems removed, rough chopped
    • 2 stems Thai basil leaves only, chopped
    • 1/2 lime juiced
    • 4 small scallions thinly sliced
    Servings: slaw servings
    Instructions
    1. Prepare all ingredients and mix thoroughly. Let flavors meld for at least an hour, stirring occasionally.
    2. Before serving, taste and adjust — add a pinch of salt, sugar, or a drizzle of olive oil if needed.
    Share this Recipe
     
    Powered byWP Ultimate Recipe
  • Corn & Black Bean Casserole (vegan & gluten-free)

    Corn & Black Bean Casserole (vegan & gluten-free)

    Casserole dish holding a cheese-topped meal with black beans
    Corn & Black Bean Casserole

    So this post needs to be quick, as I’ve spent the past two weeks moving and I’m exhausted. But this dinner was also quick — and hot and comforting. Well, the prep work is quick. It does take about an hour to bake. Keep that in mind. This is the first thing I made in the oven of our new apartment, in the midst of trying to figure out where everything goes.

    This casserole is based on a vegan corn casserole I made for Thanksgiving this year. Jack’s family makes some interesting corn dish for Thanksgiving based on ingredients that we don’t get out here on the west coast, but frozen corn is easy enough to find. I tweaked the original recipe only to use almond milk instead of soy. For a non-holiday, I’m too lazy to make a fancy side dish (by “fancy,” I mean something that takes an hour to bake and still requires a main course). But I thought it might be easy enough to turn this into a main dish with a few tweaks. Corn goes well with black beans, and that combination sort of screams chili powder to me, so that’s what I’ve added, along with a black bean, lime juice, and vegan cheese shred “topping” added at the end.

    So this is a casserole approved for weeknight making, but not for nights you get home late or starving. Plan on maybe 15 minutes prep and an hour ten minutes baking. But your whole meal is done (feel free to add a salad on the side, of course).

    (I hope I don’t need to say it, but this one is obviously not appropriate for the corn-allergic.)

    A white plate holds a browned casserole serving with black beans, corn, and cheese


    Notice: Trying to access array offset on value of type bool in /home/maryzahc/public_html/adultfoodallergies.com/wp-content/plugins/wp-ultimate-recipe/helpers/models/recipe.php on line 254
    Corn & Black Bean Casserole (vegan & gluten-free)
    Print Recipe
    Servings Prep Time
    4 people 15 minutes
    Cook Time Passive Time
    75 minutes 55 minutes
    Servings Prep Time
    4 people 15 minutes
    Cook Time Passive Time
    75 minutes 55 minutes
    Corn & Black Bean Casserole (vegan & gluten-free)
    Print Recipe
    Servings Prep Time
    4 people 15 minutes
    Cook Time Passive Time
    75 minutes 55 minutes
    Servings Prep Time
    4 people 15 minutes
    Cook Time Passive Time
    75 minutes 55 minutes
    Ingredients
    • 1 Tablespoon arrowroot powder
    • 1/4 cup non-dairy milk (I usually use almond)
    • 3 cups frozen corn (I will divide this below into 2 cups defrosted, one cup left frozen)
    • 1 Tablespoon chili powder
    • 1 Tablespoon neutral oil (I use safflower — just not olive or coconut here)
    • 2 teaspoons baking powder
    • 2 Tablespoons corn meal
    • 2-3 Tablespoons non-dairy milk (yes, this will be used separately later)
    • 1 can black beans drained and rinsed
    • 1-2 teaspoons lime juice
    • 1/4-1/3 cup shredded vegan cheese (I used Daiya brand cheddar style shreds)
    Servings: people
    Instructions
    1. First, PREPARE: Preheat oven to 350ºF. Grease a 1.5 quart baking dish (you do not need a lid for this recipe). Get out your blender. Defrost 2 cups of your corn. I do this by rinsing it with hot water for a minute in a colander — I’m going to use the colander to drain black beans as well, and this is quicker than the microwave.
    2. Add to the blender the arrowroot and non-dairy milk. Pulse this until mixed. I find adding the arrowroot first keeps it IN the milk.
    3. Add the chili powder and 2 cups of defrosted corn. Pulse this down into a rough puree.
    4. Then add the oil, baking powder, and corn meal. Blend well. Add the extra few tablespoons of non-dairy milk to get a pourable consistency. I want to say “like pudding,” but that’s wrong, as you want pudding to be smooth and you want this to be “sandy,” which sounds unappetizing until it’s baked.
    5. Pour this into your prepared dish. Take 1/2 cup of the black beans and set them aside. Add the rest of them, along with the last cup of corn, and mix that into your corn mush. Now into the oven, uncovered.
    6. Bake 60 minutes.
    7. Meanwhile, mix that last half cup of black beans with the lime juice. Let it sit, but you will pour out any extra lime juice before adding.
    8. At 60 minutes, you should have a nicely baked top (and probably still need a few minutes in the center, which is fine). Drain the lime juice (the beans needn’t be dry, just don’t pour lime juice on your casserole) and spread the beans out on top. Then add a good sprinkle of the vegan cheese shreds — the range is because you want cheese everywhere, but not too thick, and the size of the casserole makes a difference here. Back into the oven for another 10-15 minutes, until the cheese is nice and melted. Then serve and enjoy!
    Share this Recipe
     
    Powered byWP Ultimate Recipe


  • Instant Pot Black Beans and Rice

    Instant Pot Black Beans and Rice

    Instant Pot Black Beans and Rice
    Instant Pot Black Beans and Rice

    Since this week’s theme is quick work-night dinners, I thought it might be time to introduce my use of the Instant Pot since I’ve had it for about a year and half now. I know that I’m a kitchen gadget junkie, but I love this thing and I’m considering getting a second one as they just came out with a 8 quart version (mine is the Instant Pot DUO60 6 Quart 7-in-1). I love my crock pots too, but they take advance planning and being around to babysit them. And despite all my food prep during harvest season, advance planning is not something that I’m good at when it comes to work night dinners. I come home from work, read my mail, change out of my work clothes, dub around with some other task, and then I decide somewhere between 5:30 p.m. and 7:30 p.m. that I ought to think about what I might want for dinner. I basically decide what to eat about 5 minutes before I start making it. What I love about the Instant Pot is that I can make things that would normally take a lot longer and a lot of babysitting on the stove by throwing things in the Instant Pot, sealing it up, setting a timer, and walking away to go do something else while it cooks. There’s a lot less spilling and a lot less potential for me to burn myself or my potholders. If you don’t have an Instant Pot, you can do this in a rice cooker just saute the onions, garlic and peppers in a skillet instead and then add them to the cooker. Or you can do the whole thing on the stove top, as you would normally cook rice but you’ll have to watch it carefully and you may need more water as it cooks.

    You can use this as a main dish, adding some tomatoes, avocados, and cucumbers on top with some cashew cream if you want. If you have some safe tortillas, you could also wrap in it in a tortilla with whatever fixings you’d like. Or you can use it as a side dish and the leftovers as a quick lunch.

    The only warning I will impart is that if you’re cooking for friends who may not have the spice tolerance you do, watch your salsa choice. I used a home canned Roasted Tomatillo Chipotle Salsa which had a good bite, but was a bit much for some of my friends who attended a pot luck I recently hosted.

    Instant Pot Black Beans and Rice

    I did a slide show of my “mise en place” just for fun, and to take up less space:

    Instant Pot DUO60 6 Quart 7-in-1 buttons
    Instant Pot DUO60 6 Quart 7-in-1 buttons
    Onions and garlic sauteing in Instant Pot
    Onions and garlic sauteing in Instant Pot
    Onions, garlic and orange bell pepper sauteing in Instant Pot
    Onions, garlic and orange bell pepper sauteing in Instant Pot
    Mixture after adding all other ingredients but before cooking
    Mixture after adding all other ingredients but before cooking
    Instant Pot Black Beans and Rice after cooking in the Instant Pot
    Instant Pot Black Beans and Rice after cooking in the Instant Pot
    Instant Pot Black Beans and Rice
    Instant Pot Black Beans and Rice
    Instant Pot Black Beans and Rice
    Instant Pot Black Beans and Rice
    Print Recipe
    An easy weeknight meal on its own or wrap in safe for you tortillas with lettuce and tomatoes.
    Servings Prep Time
    4-5 people 5 minutes
    Cook Time Passive Time
    5 minutes 35 minutes
    Servings Prep Time
    4-5 people 5 minutes
    Cook Time Passive Time
    5 minutes 35 minutes
    Instant Pot Black Beans and Rice
    Instant Pot Black Beans and Rice
    Print Recipe
    An easy weeknight meal on its own or wrap in safe for you tortillas with lettuce and tomatoes.
    Servings Prep Time
    4-5 people 5 minutes
    Cook Time Passive Time
    5 minutes 35 minutes
    Servings Prep Time
    4-5 people 5 minutes
    Cook Time Passive Time
    5 minutes 35 minutes
    Ingredients
    • 2 Tablespoons grape seed oil (or other safe for you oil)
    • 1 large onion, peeled and chopped
    • 4 cloves garlic, minced
    • 1 cup bell pepper, seeded and chopped (optional – I often have chopped bell peppers in my freezer as I chop up the extras from recipes and freeze them so they don’t go to waste.)
    • 2 cups brown rice (rinsed well)
    • 2 cups water
    • 2 cups salsa (I used my home canned salsa)
    • 1 can black beans, drained and rinsed (I used my home canned beans)
    • 1 teaspoon cumin
    • 1/2 teaspoon sea salt
    • 1/4 cup cilantro, chopped
    • Instant Pot
    Servings: people
    Instructions
    1. Place oil in Instant Pot. Press the “Saute” button and wait until it says hot. Add onion and garlic and saute until onions begin to become translucent. Stir often being careful not to burn garlic. Add bell pepper and saute for a minute or so. (If frozen, saute until it softens a bit).
    2. Add rice, water, salsa, black beans, cumin, and salt and stir well.
    3. Make sure your silicon ring is in the lid properly, and place lid on Instant Pot and turn the steam release handle to sealing. Press the Manual button and press the plus button for high pressure, and set the time to 28 minutes.
    4. Once the clock has run down, you can either use natural cool down release or you can turn the steam release handle to venting to release the pressure. Once the pressure has been released, remove the lid and stir in the cilantro. At this point, you’re all set to serve!
    Share this Recipe
    Powered byWP Ultimate Recipe
  • Quick Work-night Meals: Rice Salad

    Quick Work-night Meals: Rice Salad

    White square plate with dots on the edges, with a green salad topped with a rice mixture and bright mandarin oranges
    Rice Salad

    December’s theme is “food for all those days between Thanksgiving and New Year’s that aren’t holidays.” Or, to be less wordy (never my strong suit): quick work-night meals. Meals that you can prepare after a long day at work or doing whatever it is you do that makes you tired. You still have to eat, right?

    Today’s recipe is more of a “recipe.” This is salad for people who want to eat more vegetables, maybe even specifically more greens, but also really want hot food. Who has time to make food AND a salad? Well, honestly, with salad boxes, I guess anyone, but I don’t actually really like salad. So in this dish, I have topped some mixed greens (spinach and baby chard mixed with some arugula) with a hot rice skillet using leftover rice mixed with black beans, earthy mushrooms, crunchy veg (either water chestnuts or jicama — you pick) just a touch of onion, olive oil, vinegar, and cilantro — and topped all of that with oranges.

    What you get is a simple one skillet (assuming you have rice already — if not, it’s two pots. Sorry.) meal heavy on the vegetables, low on the salt, with straightforward flavors. It’s hearty and satisfying but not heavy. Perfect for between food-heavy holidays, right?

    White square plate with dots on the edges, with a green salad topped with a rice mixture and bright mandarin oranges


    Notice: Trying to access array offset on value of type bool in /home/maryzahc/public_html/adultfoodallergies.com/wp-content/plugins/wp-ultimate-recipe/helpers/models/recipe.php on line 254
    Rice Salad
    Print Recipe
    Servings
    4-5 servings
    Servings
    4-5 servings
    Rice Salad
    Print Recipe
    Servings
    4-5 servings
    Servings
    4-5 servings
    Ingredients
    • 2 Tablespoons olive oil divided
    • 2 Tablespoons onion chopped, optional
    • 1 cup mushrooms chopped
    • 16 oz black beans cooked (rinsed if canned)
    • 1 1/2 cups cooked rice
    • 1-2 Tablespoon vinegar I liked white wine vinegar for this
    • 1 cup water chestnuts or jicama chopped
    • 1 cup cilantro roughly chopped
    • 1 can mandarin oranges or 2 segmented oranges
    • 5 cups mixed greens of your choice
    Servings: servings
    Instructions
    1. If you don’t have cooked rice, make some. You don’t really need leftover rice for this. I just like to cook a large pot and use it during the week.
    2. In a skillet, heat 1 tablespoon of olive oil over medium heat. You’ll use the other in a few minutes. When the oil is hot, add the onions. Cook until translucent.
    3. Add the chopped mushrooms, and stir well to coat with oil. Cook until they shrink and give up their moisture.
    4. Add the black beans. Stir well. Then add the rice. Add the second tablespoon of oil and mix until the rice and beans are well incorporated. Add the vinegar.
    5. Stir in the water chestnuts/jicama and cilantro. Remove from heat and let the mixture sit for about 5 minutes, until the crunchy vegetables are warmed.
    6. Taste the mixture and adjust the seasoning if necessary — salt, pepper, more oil and vinegar, whatever appeals.
    7. Serve the rice mixture over your mixed greens with the oranges on top. If needed, you can add an oil and vinegar dressing or a bit of orange juice, but I don’t find this needs it.
    Share this Recipe
     
    Powered byWP Ultimate Recipe
  • Garlic Potato Scallion Snacks

    Garlic Potato Scallion Snacks

    Potato UFOs? Not quite crackers?
    Potato UFOs? Not quite crackers? Pardon the weird font — my computer’s acting weird.

    In February, we’ve decided to play with garlic. Mmmmm, garlic. It’ll keep the vampires away, but it’s also good for colds and such. I’m guessing, with the load of elephant garlic I just roasted, we’ll just keep people far enough away not to share germs? Garlic is such an excellent base flavor for so many things. I would guess that I use garlic, whether fresh or powder, in maybe 70% of the savory dishes in my kitchen? I love it so. Way back at the beginning of my food allergy journey, garlic was one of the foods I cut out, thinking it was an issue. Looking back, I figured out that it wasn’t — it was just heavily featured in many dishes that were also full of dairy, which is a problem. I know that garlic isn’t an easy or favored food for some people on restricted diets. I’m sorry! This isn’t your month here at Surviving the Food Allergy Apocalypse. I hope you learn something else, or, if it’s easier, come back on Fridays for links instead.

    This is elephant garlic. Each clove is about, what, half an apple or so? They are huge and mild and awesome.
    This is elephant garlic. Each clove is about, what, half an apple or so? They are huge and mild and awesome.

    Let me be honest — I do not know what to call this dish. I was fussing with the basic recipe, and I tried cooking it a variety of ways. The flavor is nice in all of them, but the “winning” version has the best texture, like a small flexible pancake snack, savory, not sweet. I’m sure you could top it with something, but it’s tasty all on its own. So is it okay if I call it just a snack? You could eat this while watching a game. Or just TV or a movie. I don’t advise eating it while playing a game, like a board or card game, as I think it would leave you with greasy fingers, leaving prints on the game bits.

    SO this is Garlic Potato Scallion Snacks. They are tasty and warm and not too labor intensive. Enjoy.


    Notice: Trying to access array offset on value of type bool in /home/maryzahc/public_html/adultfoodallergies.com/wp-content/plugins/wp-ultimate-recipe/helpers/models/recipe.php on line 254
    Garlic Potato Scallion Snacks
    Print Recipe
    Servings
    2 dozen “snacks”
    Servings
    2 dozen “snacks”
    Garlic Potato Scallion Snacks
    Print Recipe
    Servings
    2 dozen “snacks”
    Servings
    2 dozen “snacks”
    Ingredients
    • 1 head garlic
    • 1 Tablespoon olive oil
    • 1 pound potatoes yukon gold, peeled if you prefer
    • 1 Tablespoon salt
    • 2 Tablespoons vegan margarine, safe for you
    • 2 oz roasted garlic
    • 2 Tablespoons vegan cream cheese (I like Kite Hill, which is almond-based. Use what is safe for you.)
    • 2 Tablespoons glutinous rice flour (which does not actually contain gluten)
    • 2-4 Tablespoons vegetable stock
    • 1-2 Tablespoons olive oil
    Servings: dozen “snacks”
    Instructions
    1. Roast garlic. Chop off top of bulb, drizzle with olive oil, wrap in foil, and bake at 450º for 45 minutes. Let cool. If you are using elephant garlic, like in the photos, you can peel the cloves first, as I did.
    2. Boil potatoes in salted water until easily pierced with a fork. The time for this will depend on the size of the potatoes. I personally like to buy bigger potatoes and boil them whole, as I think I get the best texture this way
    3. Preheat oven to 350ºF. Line a baking sheet with parchment paper or a silicon baking sheet.
    4. When potatoes are done, drain and lightly mash. Add vegan margarine, vegan cream cheese, roasted garlic, and mash.
    5. Add rice flour and veggie stock and mash to completely combine. You should have a sticky mash when you are done, so don’t add too much veggie stock. I added it 1 Tablespoon at a time.
    6. Make approximately 1 Tablespoon drops onto your prepared baking sheet. Leave about 1 inch of space around each drop, as they will flatten out into pancakes. No need to flatten them yourself. Using the second tablespoon of olive oil, brush the top of each.
    7. Bake for approximately 25 minutes, until the edges have browned.
    Recipe Notes

    I’ve given a garlic measurement in ounces rather than cloves as garlic cloves differ drastically in size. Taste and adjust as you go, if you don’t have a kitchen scale.

    Share this Recipe
     
    Powered byWP Ultimate Recipe
  • Clean Fridge Grain Bowl

    Clean Fridge Grain Bowl

    Treat. Yo. Self.

    To a cleaner fridge and several healthy meals. I realize this might be a stretch in the “treat” category, but hear me out. I really LIKE vegetables, and I feel really good, both mentally and physically, when I eat a bunch of them. I’m not a fruit person, really. I love veg. But I’m also extremely lazy and sometimes don’t feel like cooking. I have the best of intentions when  I make a meal plan and go grocery shopping. At least once a week, I fail to execute the plan because: life. So when I go to make next week’s plan, there are a bunch of random leftovers to deal with.

    HERE’S HOW: grain bowls. I know these have been popular forever. Jack and I loved going to Life Alive, a Massachusetts-based, 1970s-style vegetarian restaurant that managed to stay current and super tasty, and that’s one of their specialties. Grain bowls let you use up everything in your fridge — extra rice included — so you get to feel virtuous about not wasting food AND eating your vegetables, and that is a treat for me. Your mileage may vary, but you should still try this out.

    The key to a good grain bowl is to vary your textures and add just the right amount of a good sauce. The sauce in this dish is a variation on the “Say Cheez” gravy from Jo Stepaniak’s “The Ultimate Uncheese Cookbook.” For a crunchy topper, I’ve used roasted salted pepitas. The grain is rice, the green is mostly kale, but also leftover spinach, and I’ve specifically added “1 cup of chopped vegetables” to use up anything you have on hand. If you don’t like something in this recipe? Don’t add it. Otherwise, go wild. Turn your fridge into a satisfying meal.

    All of this becomes dinner
    All of this becomes dinner

    Notice: Trying to access array offset on value of type bool in /home/maryzahc/public_html/adultfoodallergies.com/wp-content/plugins/wp-ultimate-recipe/helpers/models/recipe.php on line 254
    Clean Fridge Grain Bowls
    Print Recipe
    Servings
    4 servings
    Cook Time
    45 minutes
    Servings
    4 servings
    Cook Time
    45 minutes
    Clean Fridge Grain Bowls
    Print Recipe
    Servings
    4 servings
    Cook Time
    45 minutes
    Servings
    4 servings
    Cook Time
    45 minutes
    Ingredients
    Roasted Vegetables
    • 1 large sweet potato,
    • 1 small onion slivered*
    • 1 Tablespoon olive oil
    • 1/2 teaspoon berbere seasoning or hot spice of your choice
    Sauce
    • 1/4 cup gluten-free flour (glutinous rice flour or chickpea/gram flour recommended)
    • 1/4 cup nutritional yeast
    • 3/4 cup non-dairy milk (I use almond most of the time)
    • 1/2 cup broth or water
    • 1 Tablespoon balsamic vinegar (apple cider would be another good choice)
    • 1/2 cup white wine
    • 1/2 teaspoon garlic powder
    • 1/2 teaspoon mustard
    Sauteed Vegetables
    • 1 box mushrooms de-stemmed and broken into pieces
    • 1 teaspoon garlic minced
    • 1 cup diced random veg
    • 2 cups cooked grains (used rice here)
    • 1 bunch kale chopped (plus any leftover greens)
    Toppings
    • 1 whole avocado cut into chunks
    • 4 Tablespoons pepitas or other seed or nut of your choice
    Servings: servings
    Instructions
    1. Preheat oven to 425ºF.
    2. Toss chopped sweet potato and onion with olive oil and spicy seasoning — add more or less than I’ve called for depending on your tastes. Spread out on a baking sheet and cook for about 30 minutes.
    3. Prepare the sauce by whisking all the ingredients together. Cook over medium heat until boiling and thickened. Add more liquid if you need it to get the right consistency.
    4. With a little spritz of oil in a sautee pan, add mushrooms and cook until they release their liquid. Add the garlic and stir. Add the random vegetables, and do the same. Then add the leftover cooked grains (I used rice) to soak up that liquid as they reheat.
    5. When the rice or grain is hot, add the greens and stir until wilted.
    6. In a bowl, add the rice and veg, the roasted veg, the avocado, sauce, and nuts or seeds, if using. Stir and enjoy.
    Recipe Notes

    º

    Share this Recipe
     
    Powered byWP Ultimate Recipe
  • Gluten-free Vegan Dressing (aka “stuffing”)

    Gluten-free Vegan Dressing (aka “stuffing”)

    Gluten-free vegan dressing
    Gluten-free vegan dressing

    So years ago, Denise and I posted a poll (which no longer works) as we disagree about whether the bread dish served with large birds is properly called “dressing” or “stuffing.” Denise argues that it’s stuffing. I argue that it’s stuffing IF it is stuffed into something (bird or vegetable, I don’t mind which) and it’s dressing if it isn’t. So, by that logic, this is a dressing. But by other people’s reckoning, this is a stuffing. No matter what you call it, it’s quite tasty and makes a great side dish that reheats well. I realize the timing of this might seem weird — most people think of stuffing/dressing as a Thanksgiving dish. But I was trying to make more space in the freezer and using up gluten-free breads that I didn’t love as toast, plus an excess of certain other ingredients in the house.

    And that’s a key — you will need bread. Whether you make your own gluten-free bread, buy a packaged product, or are lucky enough to have a local bakery that accommodates your allergy needs, you will need bread. The lucky thing is that this is actually a great dish to use up edible but slightly disappointing bread experiments! For the right texture for dressing, bread must be thoroughly dried out and then rehydrated, and gluten-free bread is awesome at drying out, isn’t it? I remember my mom laying out bread slices on a clean towel on top of the dryer about a week before Thanksgiving, but I just threw mine in the oven at 250ºF for about an hour. Keep this in mind — you can either prep ahead and dry your bread out, or you can build in extra time the day you make your dressing. Everything else in this dish is a pantry staple in my house.

    Like our Mini Thanksgiving casserole version of dressing, this one also contains celery and chestnuts, but unlike with that one, you could leave the chestnuts out here and make a nut-free version, if that’s your need. This one also has dried cranberries, which are really awesome, and uses veggie broth to stay vegan. If you like it, I’d suggest mushroom broth for the best flavor.


    Notice: Trying to access array offset on value of type bool in /home/maryzahc/public_html/adultfoodallergies.com/wp-content/plugins/wp-ultimate-recipe/helpers/models/recipe.php on line 254
    Gluten-free Vegan Dressing (aka “stuffing”)
    Print Recipe
    Servings Prep Time
    6 servings 20 minutes
    Cook Time Passive Time
    60 minutes 45 minutes
    Servings Prep Time
    6 servings 20 minutes
    Cook Time Passive Time
    60 minutes 45 minutes
    Gluten-free Vegan Dressing (aka “stuffing”)
    Print Recipe
    Servings Prep Time
    6 servings 20 minutes
    Cook Time Passive Time
    60 minutes 45 minutes
    Servings Prep Time
    6 servings 20 minutes
    Cook Time Passive Time
    60 minutes 45 minutes
    Ingredients
    • 2 cups gluten-free bread cubes dried out. Check for other allergens.
    • 2 Tablespoon fat of choice
    • 1 1/2 cups celery chopped
    • 1 1/2 cups onion chopped
    • 1/2 cup dried cranberries, rehydrated by soaking in hot water 15 minutes
    • 5 oz chestnuts, chopped (optional)
    • 1 whole apple, cored and chopped, peeled if you prefer
    • ~1 cup vegetable broth
    Servings: servings
    Instructions
    1. If you need to dry out your bread crumbs, you have a few options. 1. Set the bread out on a rack and leave it out for a few days. 2. Bake at 250ºF for about an hour, directly on the rack. 3. Toast on low and let cool completely standing up (don’t let it steam against a plate). Choose based on the amount of time you have now. Cut the bread into cubes.
    2. Preheat oven to 350ºF.
    3. In the oil/margarine/fat (I use vegan margarine), cook the onions until translucent. Add the celery, cook for a few minutes. Then add the cranberries, chestnuts, and apple, cooking for 2-3 minutes between each addition.
    4. In a bowl, mix the bread and vegetables. Mix well. Slowly add the broth, stirring, until there is just a tiny bit more than what the dried bread absorbs — maybe a tablespoon or so. Pour into a greased baking dish. You can do this round casserole style (deep) or in a 9×13 pan (shallow), which will change the texture. The deep dish will be more casserole-like and the shallow dish will be more bread-y and crispy.
    5. Cover and bake 30 minutes. Remove the cover and bake another 15 minutes, until top of bread bites are crisp. Serve hot.
    Recipe Notes

    º

    Share this Recipe
     
    Powered byWP Ultimate Recipe
  • Roasted Yam Soup

    Roasted Yam Soup

    Roasted Yam Soup
    Roasted Yam Soup

    IMPORTANT CONTENT NOTE: Those of you who hate cilantro, sorry. Please go Google one of the 100,000 other root vegetable soups out there. I know, your condition is genetic, and I’m sorry for you. This soup lives and breathes cilantro, and if you leave it out, there will be no point in making this particular soup recipe. Come again?

    For those of you still here, hi. Welcome to another edition of “MaryKate made soup, and it’s not very pretty, but I swear it tastes good anyway.” I’m your host, MaryKate, and, yes. I made soup. In my first months here in Seattle, I’m exploring new grocery stores and new ingredients, and as it is fall, there are so many root vegetables out. Most of them I know, but I’m seeing so many different things beyond just “sweet potatoes” and “yams.” To be honest, I don’t care which they are — I buy and bake any of them. But recently, I’ve found myself with 1 or 2 each of 4 different kinds of tubers all labeled “yam” with no other identifying information. In order to compare them, I’ve roasted them — and they are different! Starchier, sweeter, more mild. And all the colors! Yam love. Honestly, the most impressive flavor were the boring white ones — a bit sweeter and starchier than regular sweet potatoes, and really tasty.

    Blending these into soup was a great decision. The cilantro lightens the earthy flavor of the tubers and really makes it something different — hearty, but not heavy, and somehow, fresh.

    yams-collage
    Notice: Trying to access array offset on value of type bool in /home/maryzahc/public_html/adultfoodallergies.com/wp-content/plugins/wp-ultimate-recipe/helpers/models/recipe.php on line 254

    Roasted Yam Soup
    Print Recipe
    Servings Prep Time
    6 servings 60 minutes
    Cook Time Passive Time
    60 minutes 30 minutes
    Servings Prep Time
    6 servings 60 minutes
    Cook Time Passive Time
    60 minutes 30 minutes
    Roasted Yam Soup
    Print Recipe
    Servings Prep Time
    6 servings 60 minutes
    Cook Time Passive Time
    60 minutes 30 minutes
    Servings Prep Time
    6 servings 60 minutes
    Cook Time Passive Time
    60 minutes 30 minutes
    Ingredients
    • 3.5 lbs. yams and sweet potatoes Get everything you can find — why not?
    • 1/2 lb. rutabega
    • 1-2 Tablespoons olive oil
    • 1 teaspoon kosher salt
    • 3/4 cup onion
    • 6 cups vegetable stock
    • 1 cup cilantro chopped + more for garnish
    Servings: servings
    Instructions
    1. Preheat oven to 450ºF.
    2. Peel and chop yams, sweet potatoes, rutabega, and onion. Go for about 1/2 inch cubes, but really, just try to get them all about the same size.
    3. Put all chopped vegetables into a bowl. Add the olive oil and salt and stir to coat. Start with the smaller amount of olive oil, but add more if you need it. You don’t want greasy, but you do want everything fully coated.
    4. Bake for 30-45 minutes, until all the vegetables begin to brown. This is where so much flavor is born.
    5. When you have about 15 minutes left of cooking, heat your stock and cilantro in a large soup pot over medium-low heat.
    6. When the roasted vegetables are done and the soup stock is simmering, add the veg to the stock. Stir well, and then puree. A stick blender is the easiest way to do this, but use a blender if that’s what you’ve got. When you have a nice thick puree, heat thoroughly (takes only a few minutes) and stir well.
    7. Serve with an added sprinkle of cilantro for extra flavor.
    Share this Recipe
     
    Powered byWP Ultimate Recipe