Notice: Function _load_textdomain_just_in_time was called incorrectly. Translation loading for the wp-ultimate-recipe domain was triggered too early. This is usually an indicator for some code in the plugin or theme running too early. Translations should be loaded at the init action or later. Please see Debugging in WordPress for more information. (This message was added in version 6.7.0.) in /home/maryzahc/public_html/adultfoodallergies.com/wp-includes/functions.php on line 6121
Main Dishes/Entrées – Page 11 – surviving the food allergy apocalypse (archive)

Category: Main Dishes/Entrées

Main Dishes/Entrée [ahn-trey] noun: a dish served as the main course of a meal. These recipes will not contain dairy, eggs, gluten, wheat or hazelnuts. If we use a top 8 allergen, we will use a tag warning of its use.

  • Chicken Primavera Alfredo

    Chicken Primavera Alfredo
    Chicken Primavera Alfredo

    Okay, first things first.  My good camera’s battery hit the skids half way through cooking this recipe, so I had to resort to my cell phone camera. Which means that some of these pictures are more terrible than they usually are. Now on to the subject at hand.

    Alfredo sauce. Seriously, before the food allergy apocalypse, this was one of my very favorite things. When I was first diagnosed, I tried to make a soy based Alfredo sauce, and I took one bite, and dumped the rest of it down the sink. I may have also spit the bite I took in the sink. (Yes, I’m that classy.) You may remember that I have mentioned that I’m not a fan of soy milk. So when Mary Kate and I decided to do this blog, Alfredo sauce was one of the first things that I put on the infamous spreadsheet for us to find a solution to. I think I’m finally there. Even my husband, who can still eat dairy, says that this is amazingly close. This recipe will not help those of you with a nut allergy, as the base is made of cashews. Although the sauce itself is gluten free, I did use regular pasta, which is not. So if you want to make this recipe gluten free, just use gluten free pasta (MK suggests Schar pasta (I’ve only had the penne), Quinoa pasta (here, only had the macaroni), and Trader Joe’s corn pastas).  This recipe will probably feed about 4-6 people depending on portion size.

    Alfredo Sauce:

    • 1 cup of raw cashews or cashew pieces (pieces are cheaper, buy those) 
    • 4 teaspoons of lemon juice (fresh is better but the bottled will work in a pinch)
    • 1 teaspoon of roasted minced garlic (you can get it in a jar at the grocery store)
    • 1 teaspoon of salt
    • 1/2 teaspoon of fresh ground black pepper
    • 1/4 teaspoon of nutritional yeast
    • dash of nutmeg
    • dash of paprika
    • dash of sage
    • 1 1/2 cups of boiling water
    • 1 tablespoon of Earth Balance Natural Buttery Spread Soy-free
    • 2 teaspoons of cool water
    • 2 teaspoons of corn starch

    Chicken Primavera Ingredients:

    • 1 to 1 1/2 pounds of chicken breast, sliced into strips
    • seasoned salt
    • black pepper
    • 2 tablespoons of canola oil
    • 2 cups of pasta (small shells, macaroni, etc.)
    • 1 – 16 ounce bag of frozen mixed vegetables
    • enough water to cook the pasta

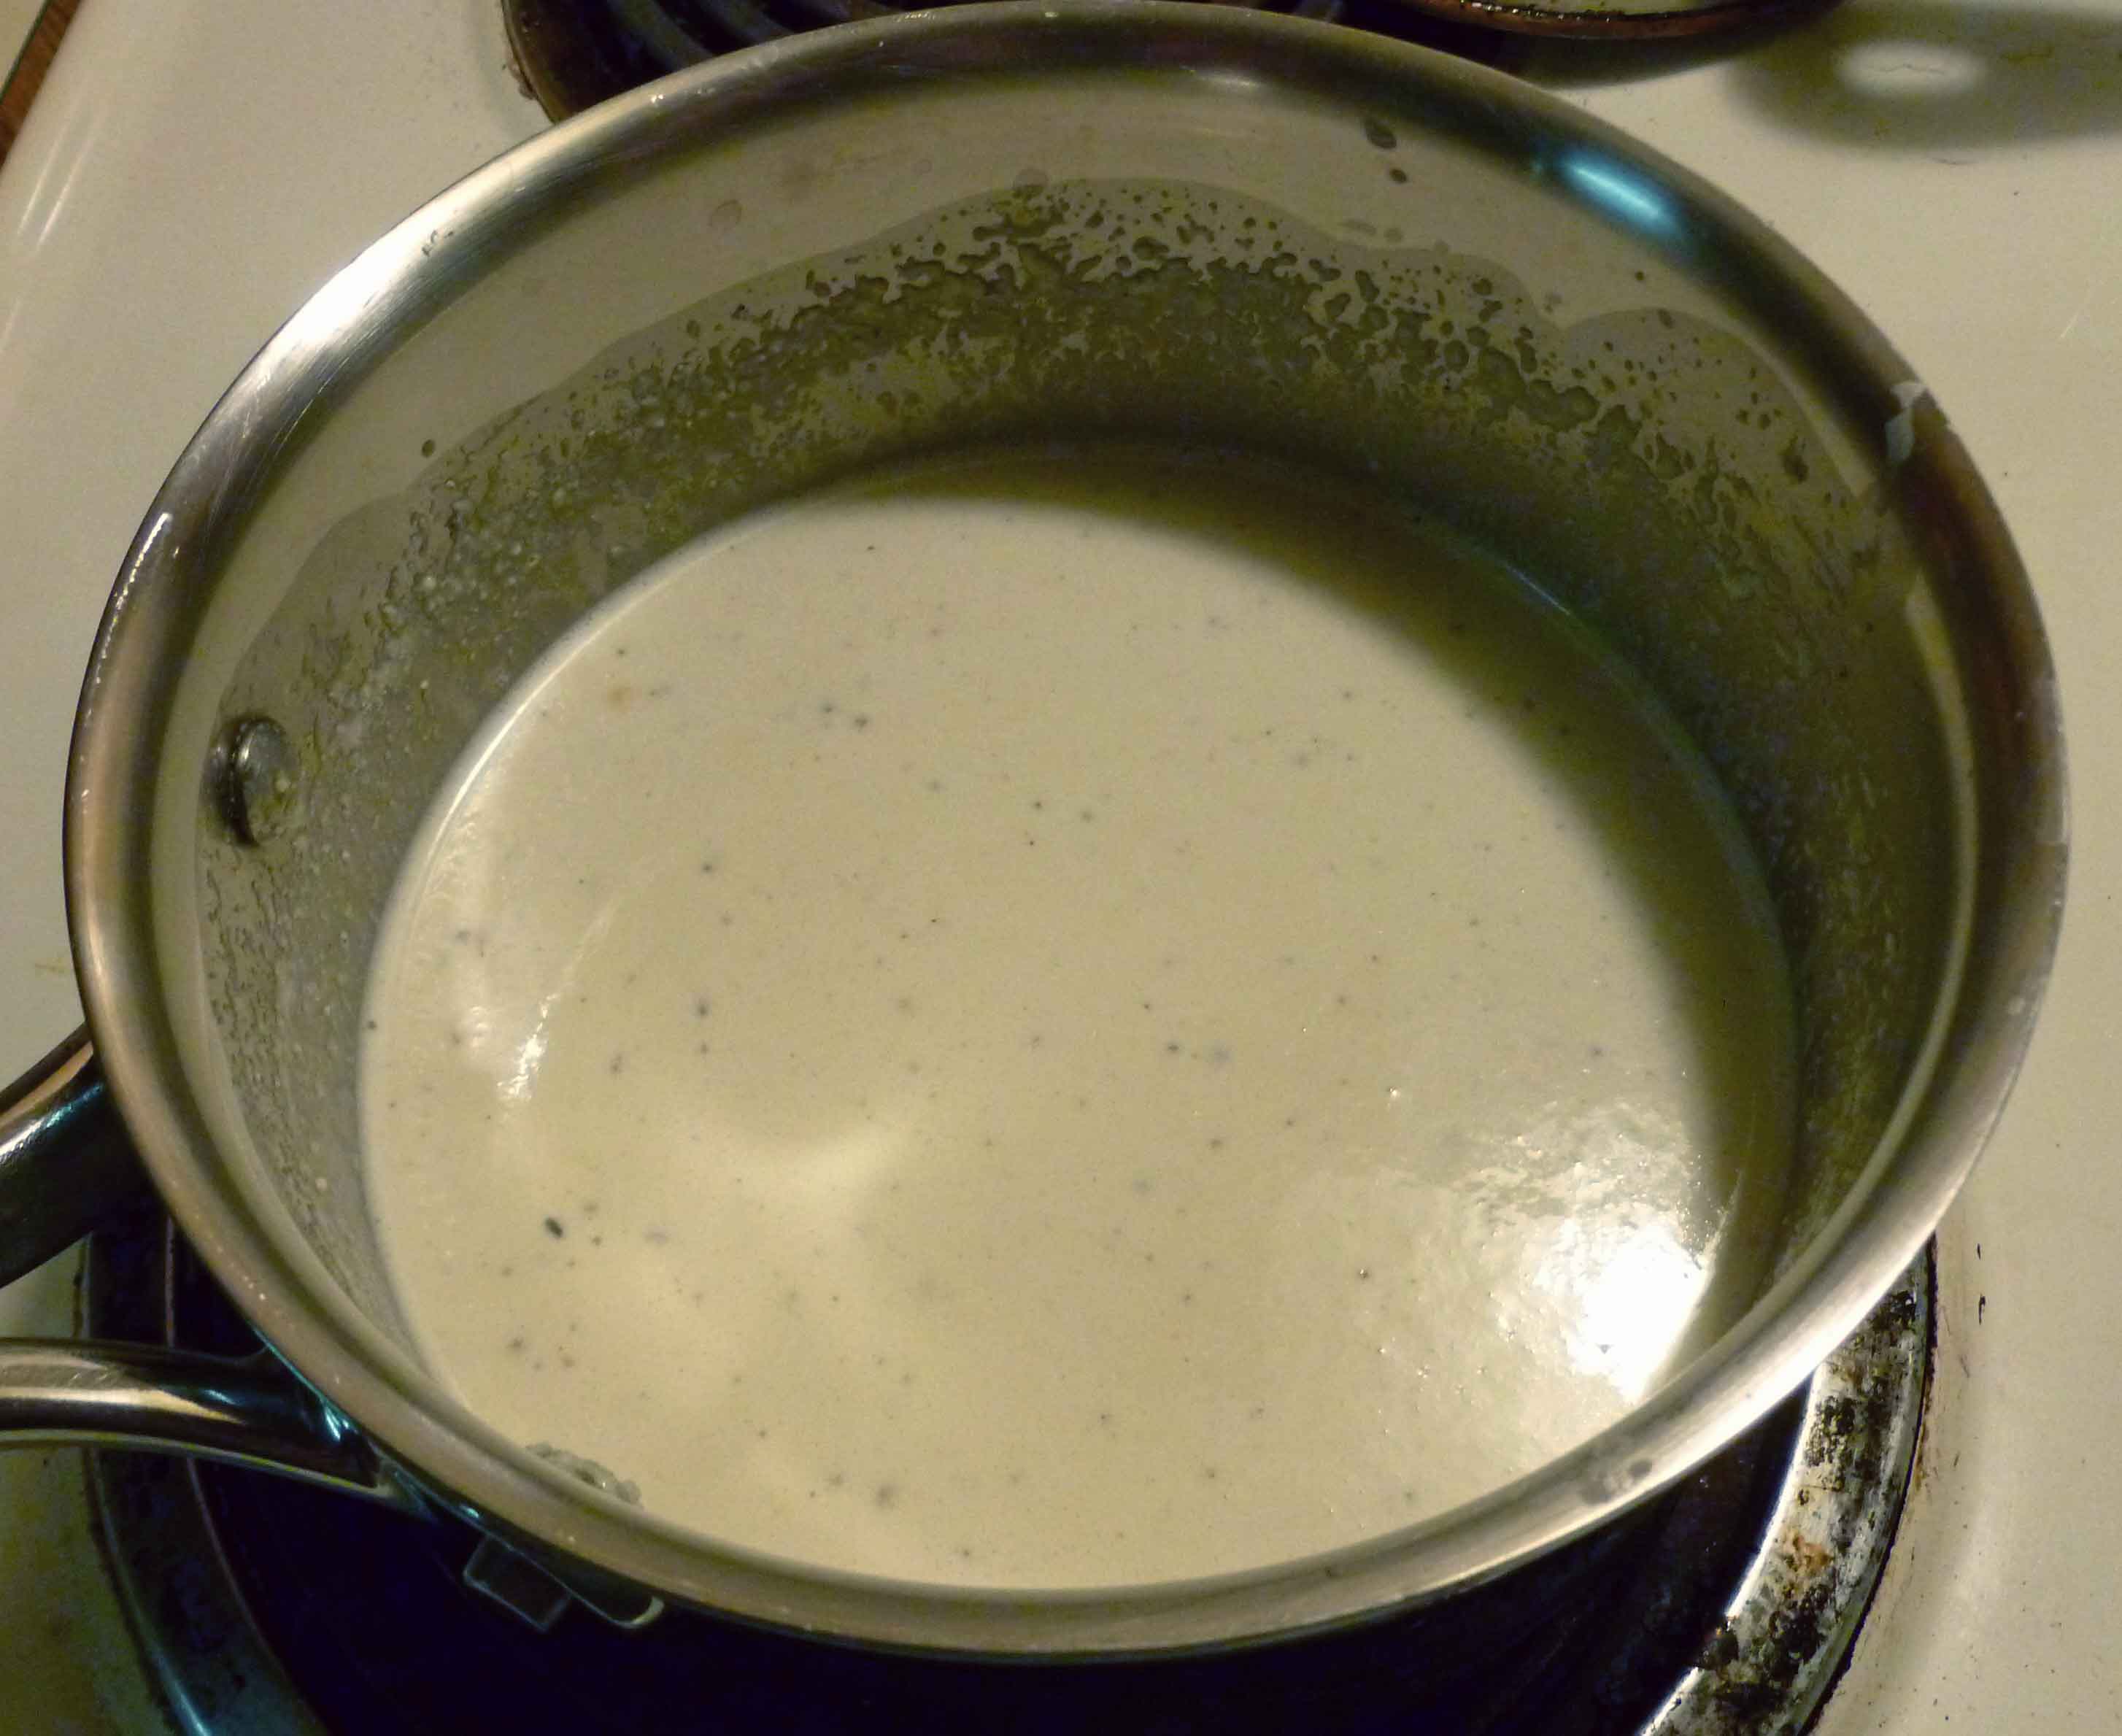
    First, make the Alfredo sauce:

    Put the tea kettle on to boil your 1 1/2 cups of water first.  You will need your blender. Take your 1 cup of cashews and grind them into a fine powder.  You can do this in the blender, but I like to grind them in a coffee grinder that I use specifically food and spices.

    Finely Ground Cashews
    Finely Ground Cashews

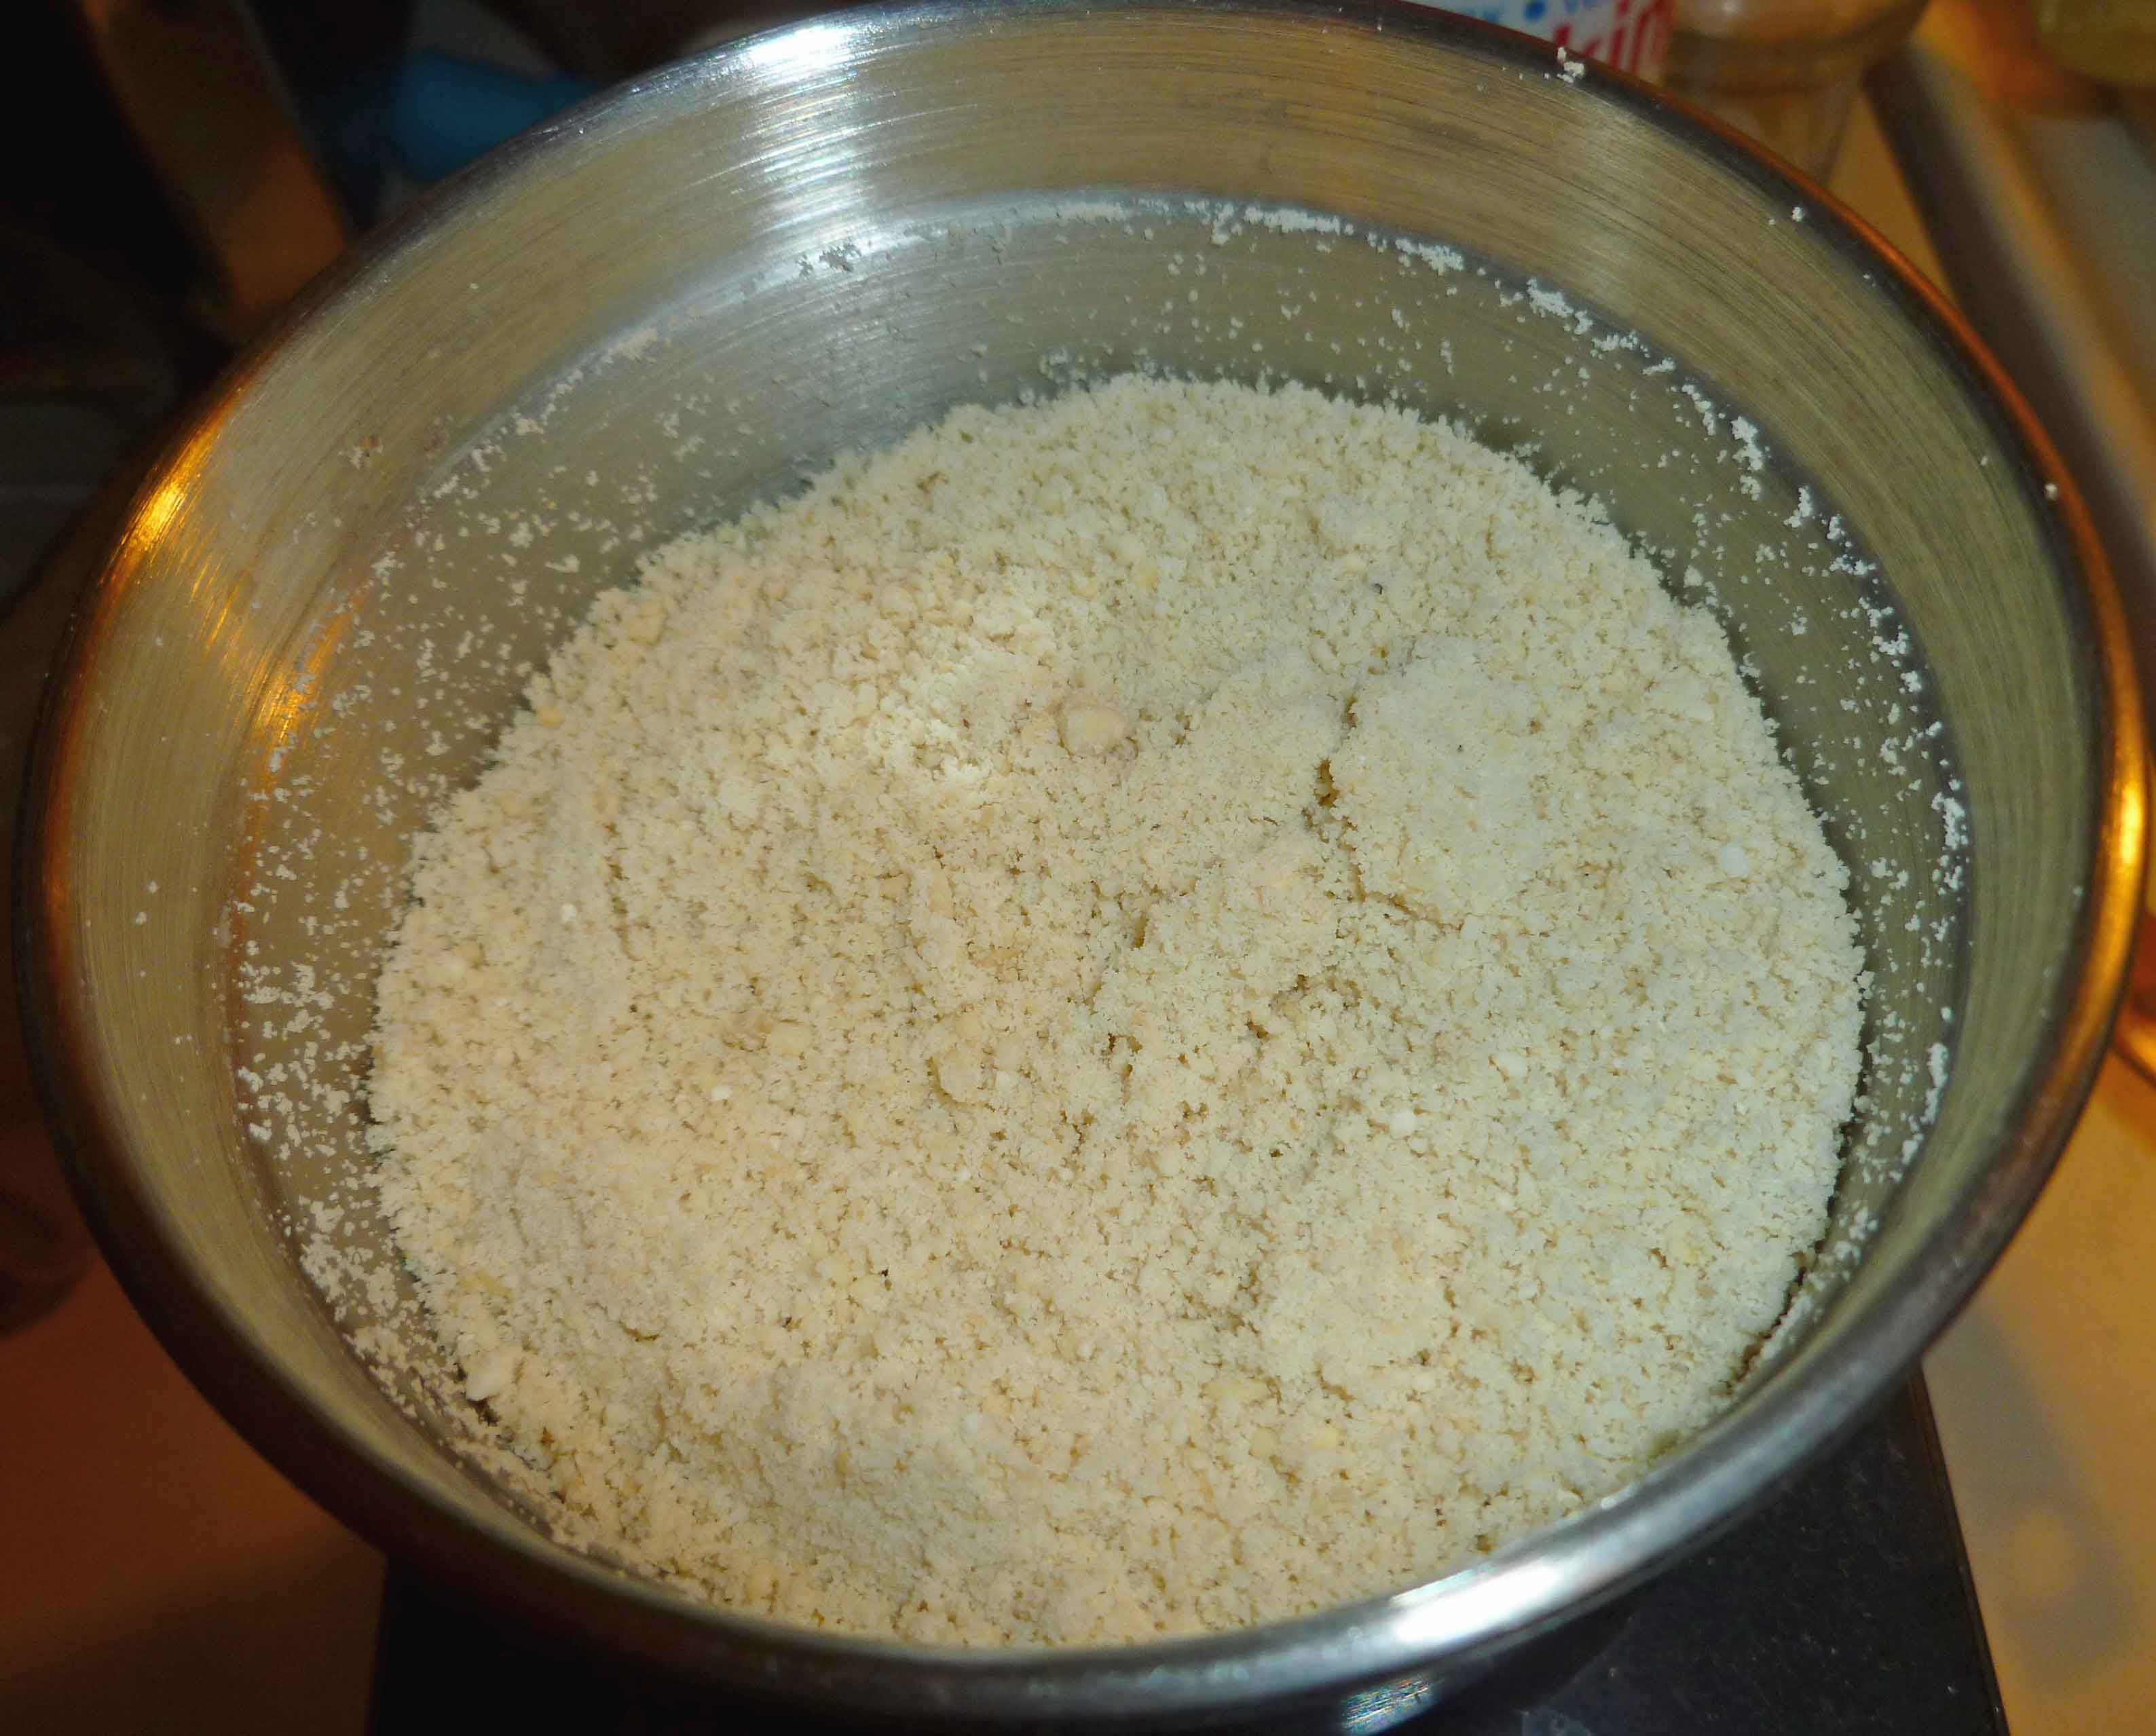
    It’s easier if you grind them in batches if you’re using the coffee grinder. Once they are finely ground, put the cashews in the blender. (If you’re grinding them up in the blender, put the cashews in blender and process them until they are finely ground before adding any other ingredients.)  Add the lemon, garlic, salt, black pepper, nutritional yeast, nutmeg, paprika, sage, and the boiling water in the blender with the cashews.  Put the cover on the blender and blend until smooth.  Let it blend for a while, the smoother the better.

    Once you think it’s blended enough, pour the mixture into a sauce pan, and put it on medium low.  Add the Earth Balance and let it melt into the mixture, while you mix the cornstarch and 2 teaspoons of cool water together in a small container.  Once the Earth Balance is melted, stir the mixture to incorporate the Earth Balance and then pour in the cornstarch mixture, while continually stirring (if you don’t stir continuously, you’ll have lumps). Put the sauce on the back burner on the lowest setting while you get everything else ready.

    Alfredo Sauce
    Alfredo Sauce

    Now it’s time to cook the chicken.  Slice the chicken breast into strips if you haven’t already done so, and season them with the seasoned salt and pepper (just sprinkle some over it).  Put the canola oil in a skillet and turn the burner onto medium high.  Put the chicken into the pan but don’t crowd the pieces.

    Chicken properly spaced in frypan
    Chicken properly spaced in frypan

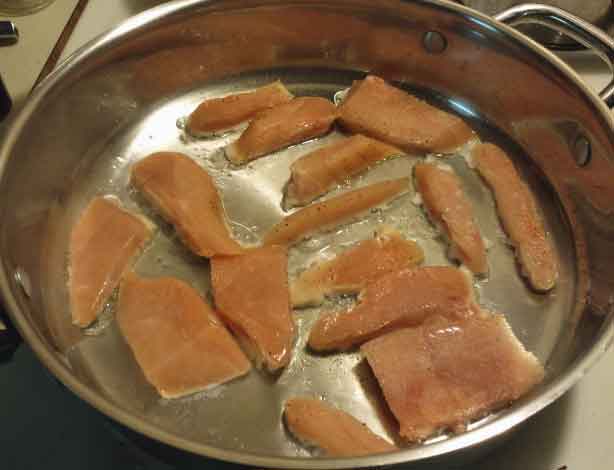
    Sear the chicken so you get a nice golden brown on the outside, and make sure your pieces get cooked without being overcooked. Easy for me to say right? I prefer to use dark meat, because it’s really hard to over cook dark meat, and because I like it better.  But, since my husband likes the breast meat, and I got a wicked deal on some chicken breast, that’s what we’re using here.  However, next time I’d probably use boneless chicken thighs.  Anyway, the picture below shows what you’re trying to get for a nicely seared outside, as it’ll add flavor to the dish.

    Properly Seared Chicken
    Properly Seared Chicken

    Put the chicken aside once it is cooked.

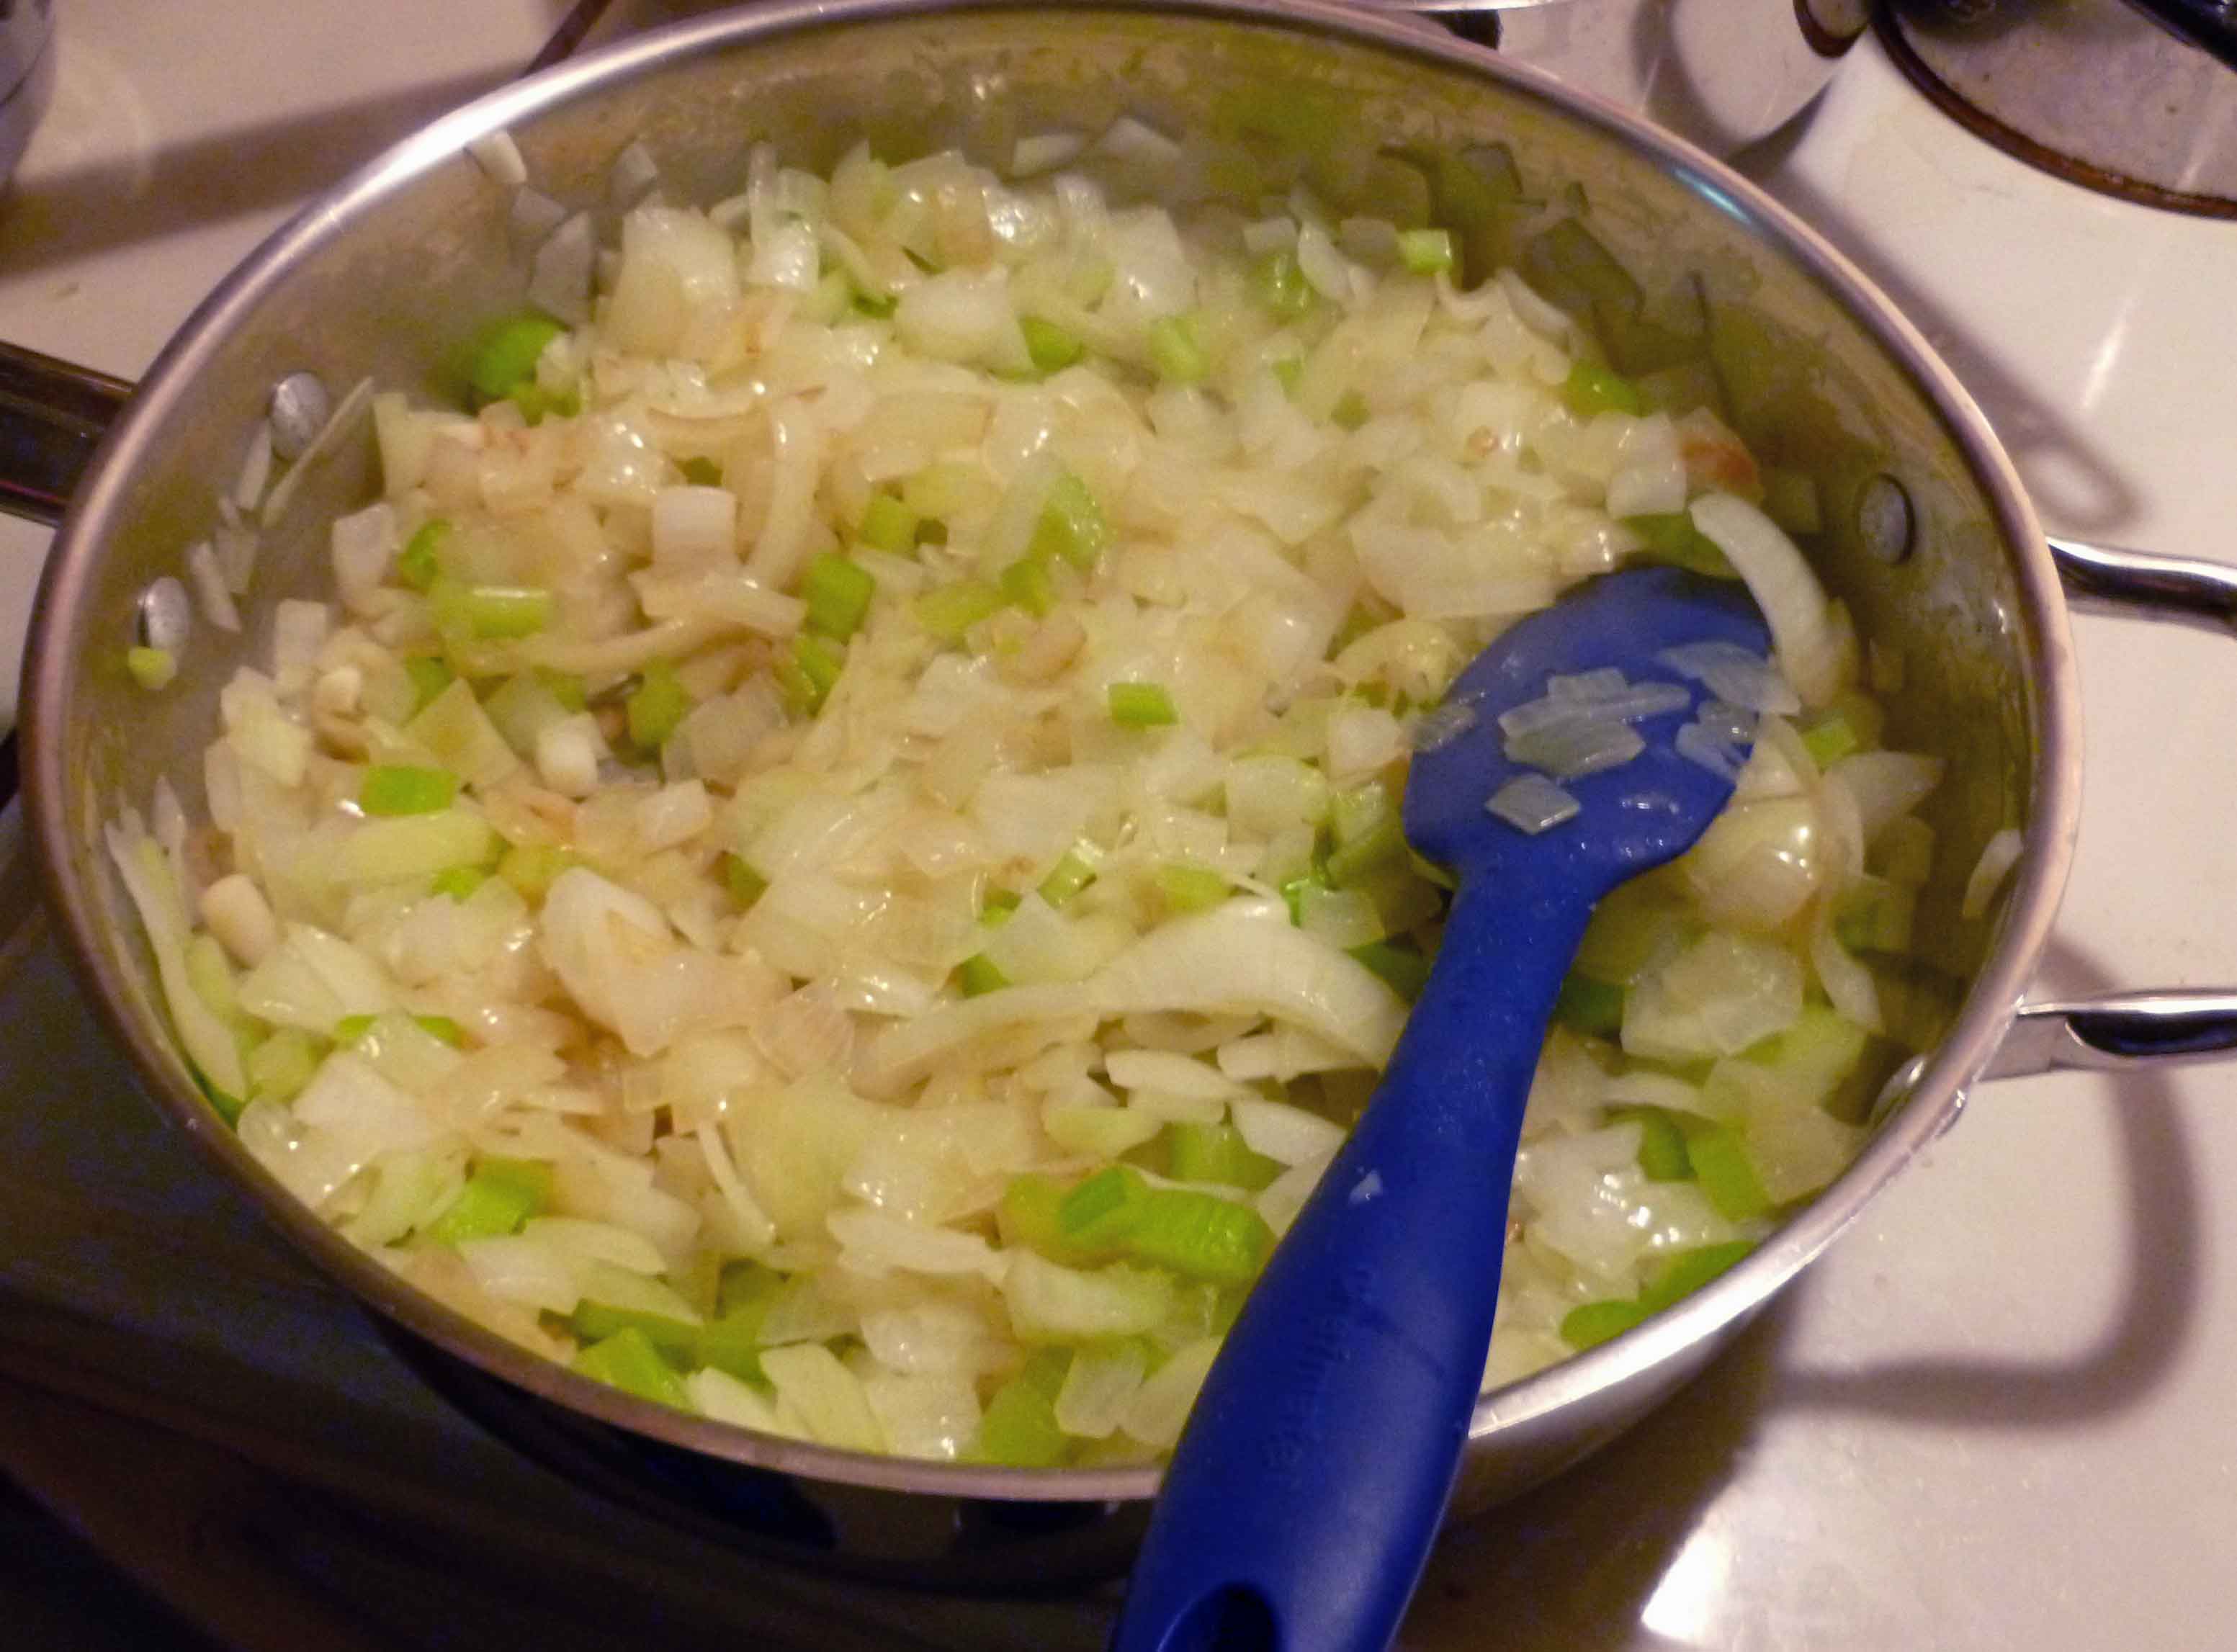
    Now we need to cook the pasta and vegetables. Using a large pan, put enough water in to cook 2 cups of pasta, and a couple of dashes of salt. Bring the water to a boil, and add the two cups of pasta to the water.  When the pasta is almost ready but not quite tender enough to be considered done, pour the bag of frozen mixed vegetables into the pan with the pasta.

    Pasta and Vegetables Cooking
    Pasta and Vegetables Cooking

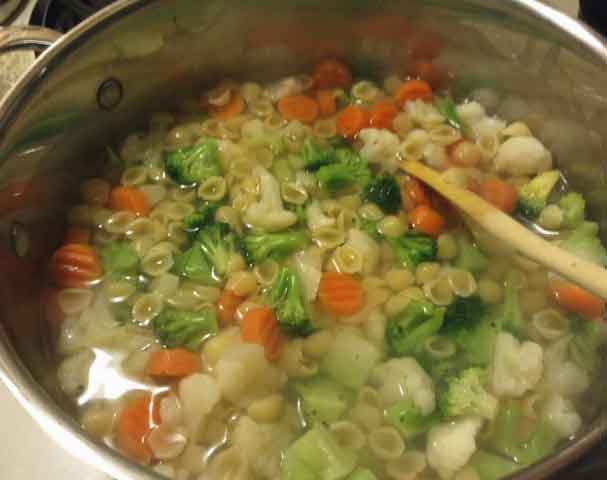
    Bring the water back to a boil and let it cook for two or three minutes after that.  Once the vegetables are done, the pasta should also be ready.  Drain the water.

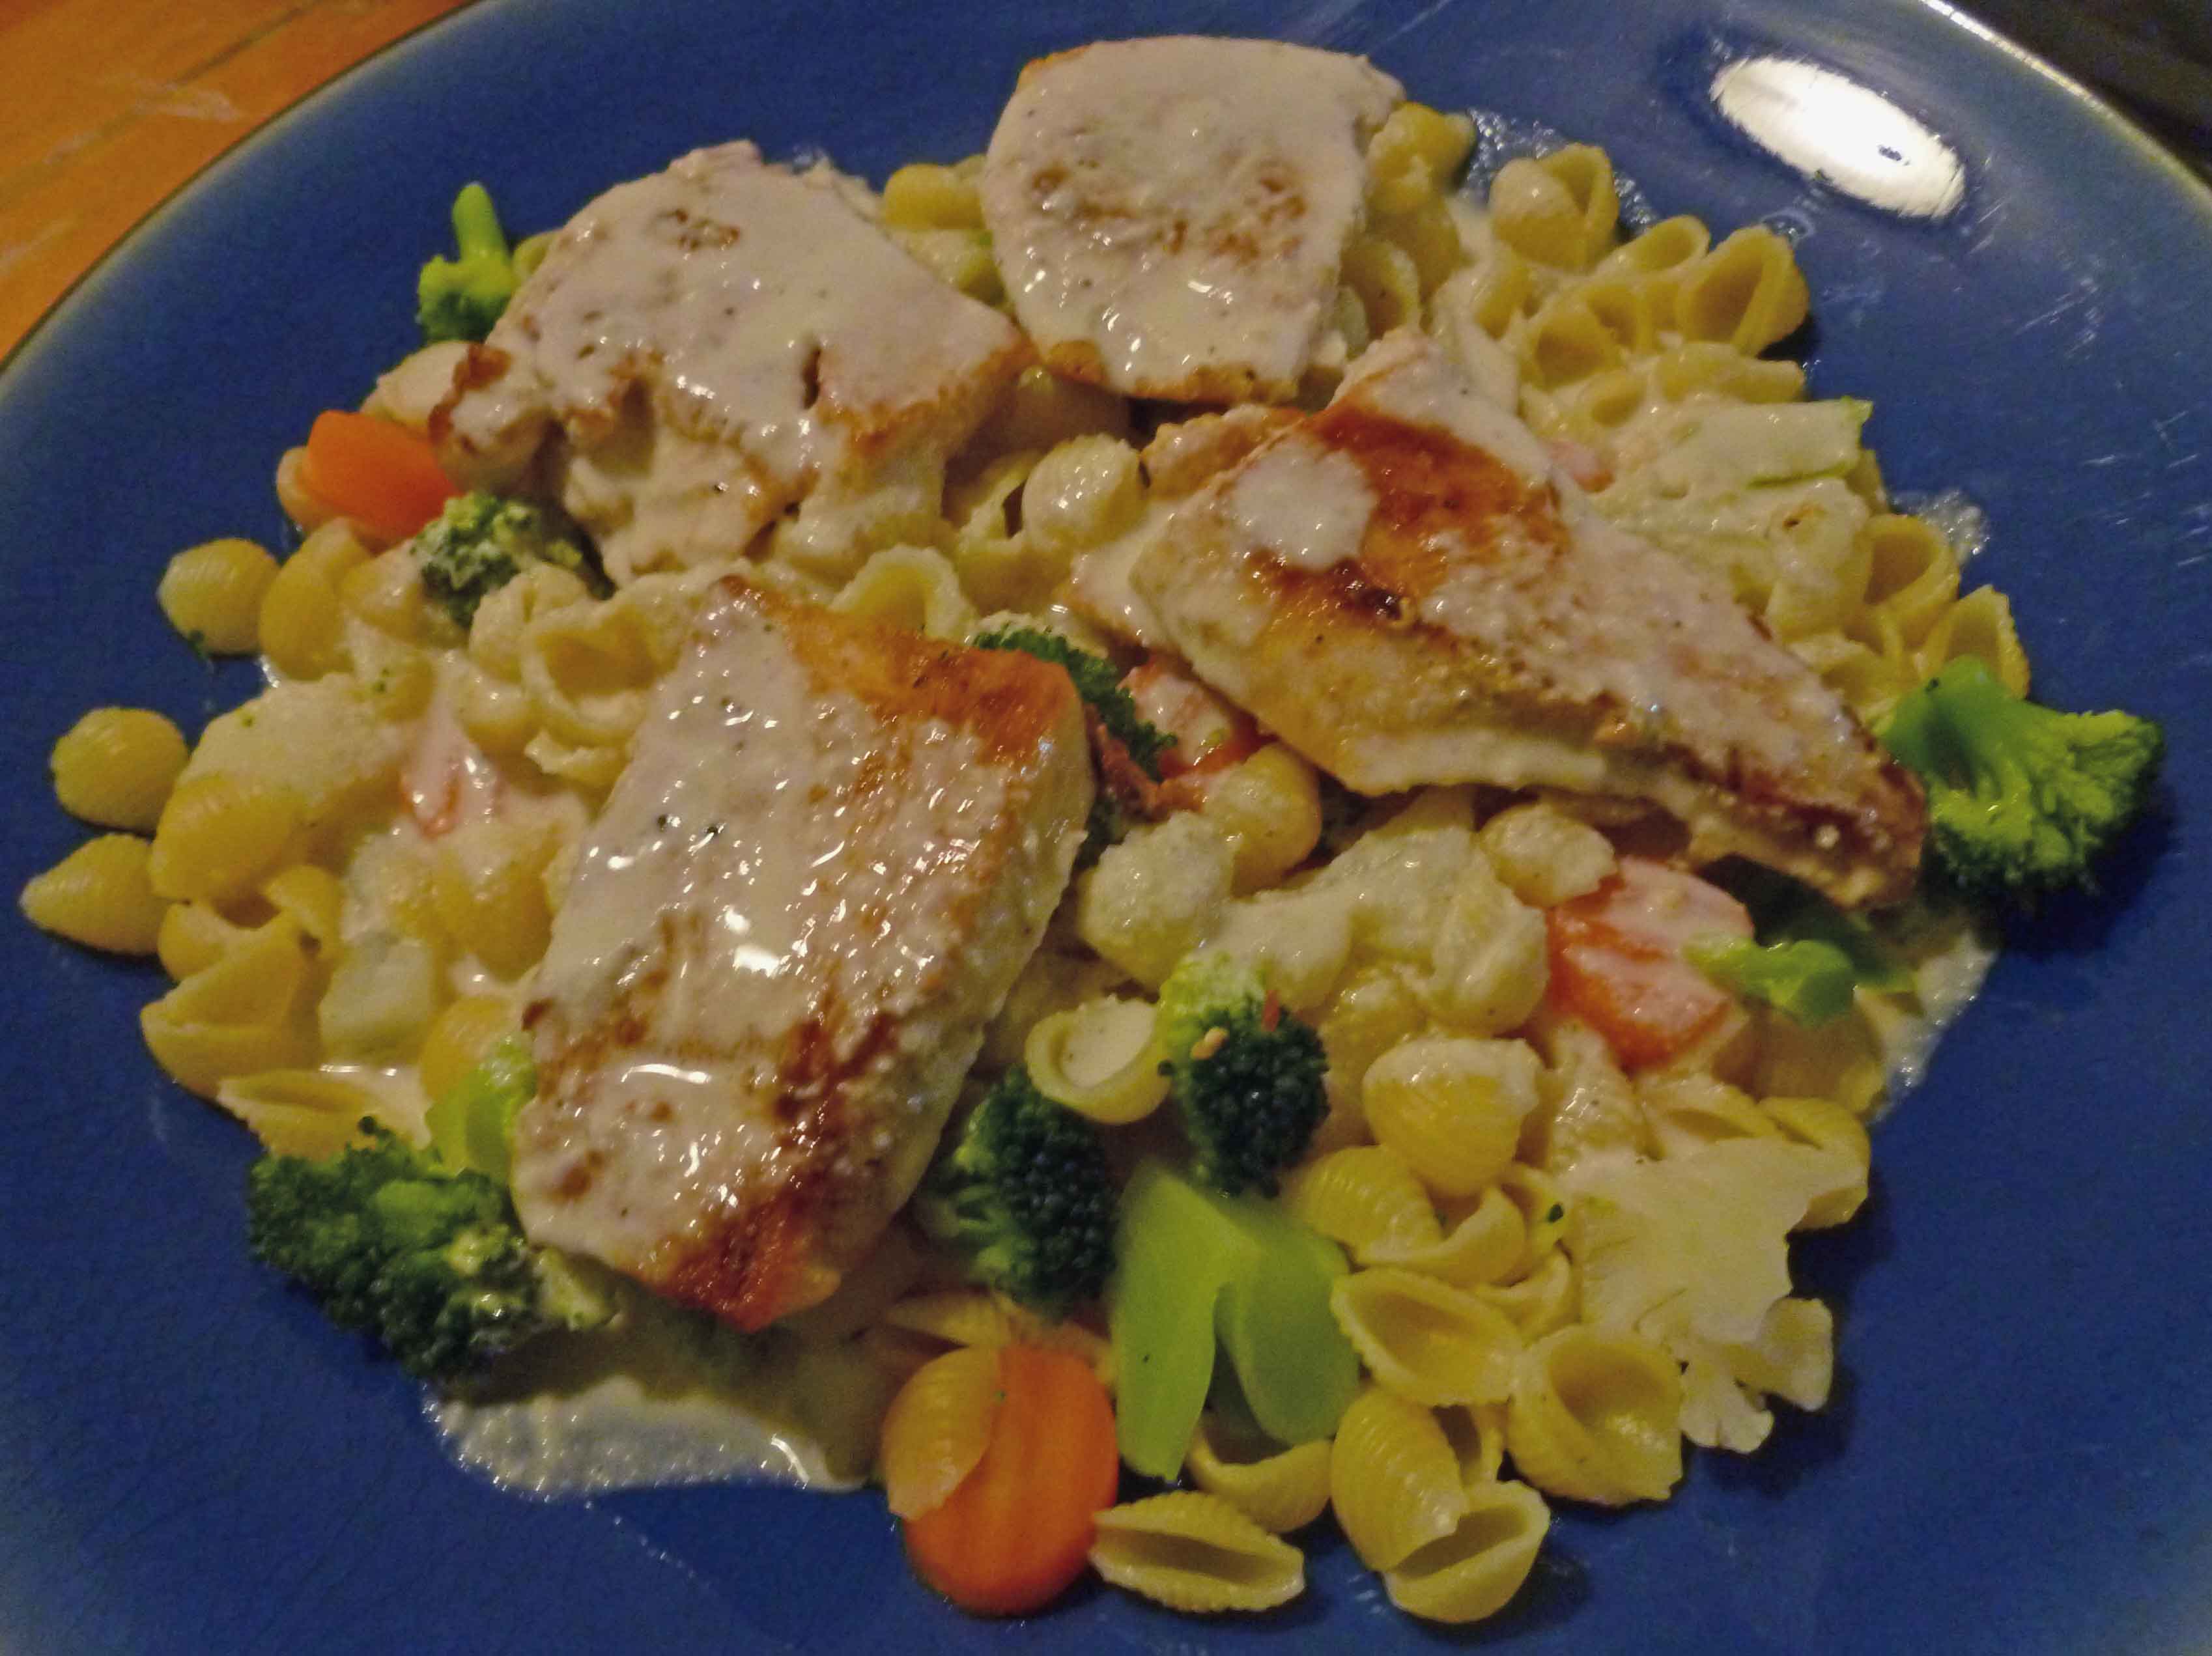
    Spoon some of the pasta and vegetables onto a plate, and place some chicken on top of the pasta and vegetables.

    Chicken, Pasta and Vegetables on a plate
    Chicken, Pasta and Vegetables on a plate

    Then ladle some of the Alfredo sauce over your chicken, pasta and vegetables.  And Voila! Yay Alfredo Sauce!!

    Chicken Primavera Alfredo
    Chicken Primavera Alfredo
  • It’s Winter, Warm Yourself Up Chili

    It's Winter, Warm Yourself Up Chili
    It’s Winter, Warm Yourself Up Chili

    I’ve been working on this recipe a while and this is another one of my fire breather recipes.  This is really, really spicy chili.  If you don’t want really, really spicy chili, I’ll make notes about how to turn it down a notch, and how to turn it down 10 notches (*see asterisk below ingredients), just in case you all don’t have stomachs lined with asbestos. Also, in case your stomach is lined with asbestos, I’ll give you notes about how to take it up to super octane, the way I make it when my husband and I are not sharing with others (**see double asterisks below ingredients, I will also note the Scoville units for each pepper so you can decide what to leave in and what to leave out if you wish). I like the cocoa powder in it because it gives the sauce a richer feel and color. Also, be aware that this recipe makes about 3 quarts of chili. It freezes incredibly well, so we freeze it in single serve containers and then just take one out and bring it to work to nuke for lunch. The pictures show me making a double batch, because it’s a bit more work than I like to do to make it, so I do it once and put the rest in our chest freezer until we want to eat it.

    It’s Winter, Warm Yourself Up Chili

    • 1 lb bags of small red beans (or kidney beans or any other bean of your choice. Mix it up!)
    • 1 Tablespoon of Epazote (Mexican herb used in bean dishes to reduce gas, you can skip this if you don’t have any on hand.  It doesn’t have much flavor, think dried parsley.)
    • 1 whole dried red chipotle pepper – 15,000 Scoville units (omit or use a quarter teaspoon of ground chipotle instead if worried about spice)
    • 1/2 of a dried Guajillo pepper -6,000 Scoville units (omit if worried about spice)
    • 1/2 of a dried Ancho chili pepper – 3,000 Scoville units (omit or use a quarter teaspoon of ground ancho instead if worried about spice)
    • 1 whole dried Cascabel chili pepper – 11,000 Scoville units (omit if worried about spice)
    • 1 lb package of ground beef
    • 2 medium onions, chopped
    • 2-3 stalks of celery, chopped
    • 2-3 cloves of garlic, minced
    • 1 Tablespoon of canola oil
    • 1 28 ounce can of diced tomatoes
    • 1/2 of a green bell pepper, seeded and chopped – 0 Scoville units (the other half you can just throw in a freezer ziploc bag and put in the freezer to use for next time, I don’t even bother to chop it up first and peppers freeze beautifully whole)
    • 1/2 of a red bell pepper, seeded and chopped – 0 Scoville units
    • 1/4 of a Habanero pepper, seeded and diced into very, very small pieces – 100,000 to 350,000 Scoville units (USE RUBBER GLOVES to chop and seed or you may be very, very sorry. Ask me how I know, and how long it took my hands to stop burning the time I was dumb enough not to wear gloves. Pop the rest in the freezer in a ziploc for next time. Also, omit entirely if you are worried about spice)
    • 3 Tablespoons of chili powder (I used Penzey’s Hot Chili Powder, but you could use regular chili powder and knock it back to 2 Tablespoons)
    • 1 1/2 Tablespoons of cocoa powder
    • 1/2 to 1 teaspoon of salt, or to taste.

    *How to turn it down 10 notches – If you can’t eat anything with spice, omit all the peppers except for the red and green bell pepper, and the chili powder, and knock the chili powder back to 2 Tablespoons.

    **How to turn it up to super octane – To your dried peppers, add the following: 1 whole dried Dundicut chili pepper -60,000 Scoville units; 1 whole dried Piquin chili pepper – 70,000 Scoville units; and 1 whole dried Sanaam chili pepper – 40,000 Scoville units; use the entire Guajillo and Ancho dried peppers instead of half, and use the whole Habanero. Add Sriracha sauce – 2200 Scoville units, to taste after cooking. Seriously, this is a really, really beyond hot chili, and is not for casual consumption.

    Choose one of the two methods below to re-hydrate your beans.

    Overnight soaking method: Sort through the beans, looking for rocks (yes, it’s happened), other things that are not beans, and any discolored beans and hulls, and remove them.  Wash the beans in a colander, and put them in a stock pot (the one I use is an 8 quart size), with enough water to cover beans by 2 inches.  Let soak overnight or at least 6 to 8 hours.

    Beans after Overnight Soak Method
    Beans after Overnight Soak Method

    Quick soak method: Again, sort and wash the beans as described above. Put the beans in a stock pot (the one I use is an 8 quart size), with enough water to cover beans by 2 inches. Bring to a boil, then boil for 2 minutes.  Remove from heat, cover and let stand for an hour.

    If you used the overnight soak, drain the beans out in a colander, and rinse them and the stock pot. Put the beans back in the stock pot, with enough water to cover and the epazote, and cook on medium low, mixing occasionally and adding water as needed, until the beans are tender and the skins split. If you used the quick soak method, make sure there’s enough water in the pot, add the epazote and cook on medium low, mixing occasionally and adding water as needed, until the beans are tender and the skins split.

    Beans and Epazote at beginning of cooking process
    Beans and Epazote at beginning of cooking process

    While the beans are cooking you need to re-hydrate your dried peppers. Take the stems off, remove the seeds, and cut them into small pieces, putting them in a microwave safe container. I used kitchen shears to cut them into pieces.  Add about a quarter cup of water to the container and nuke it in the microwave for 1-2 minutes to re-hydrate them a bit.  Set them aside.

    Dried Peppers before chopping and re-hydrating
    Dried Peppers before chopping and re-hydrating
    Dried Peppers after rehydrating
    Dried Peppers after re-hydrating


    In a frypan, brown and drain your ground beef, drain off the fat and discard it, and set the ground beef aside.

    Browned Ground Beef
    Browned Ground Beef

    In another frypan, or the same one if you moved your beef to another container, saute onions, celery and garlic in the canola oil until they are translucent.

    Onions, Celery and Garlic after sauteing
    Onions, Celery and Garlic after sauteing

    Your beans will be ready when they look like this:

    Properly Cooked Beans
    Properly Cooked Beans

    Once the beans are ready, add the ground beef, and the onion, celery and garlic mixture to the pot, scraping down carefully.  Then add your re-hydrated dried peppers, the diced tomatoes (do not drain), the Habanero, red and green bell peppers, the chili powder and the cocoa powder.  Mix until thoroughly combined.

    Simmer for about an hour and a half, stirring occasionally. When chili is cooked, taste and add salt as necessary.

    Hope you like it, let me know what you think!

    It's Winter, Warm Yourself Up Chili
    It’s Winter, Warm Yourself Up Chili
  • Turkey, Turkey Stock, and Turkey Rice Soup with Kale – Denise’s Annual Insanity

    Turkey Rice Soup with Kale

    Thanksgiving makes me slightly insane. Somehow I channel my grandmother, who is still among the living so I’m not even sure if that’s possible metaphysically speaking, and I make vast quantities of food that bear no rational relation to the actual number of people for whom I am cooking. Our Thanksgiving dinners when I was a kid could have anywhere from 30 to 50 people attending, and I apparently cook for that many people for Thanksgiving no matter what. I’ve been known to do a turkey and a ham for 4-5 people, not to mention several appetizers, squash, turnip, mashed potatoes, my grandmother’s meat stuffing, boiled onions, a couple of kinds of cranberry sauce, gravy and several desserts. This always results in boatloads of leftovers, obviously. I will pack up full meals in containers and freeze them for later, but that doesn’t take care of all of it. So I always make a vat of soup, using the turkey carcass to make stock. This recipe is a bit involved. But you’ll get a good amount of soup that you can put in individual containers and freeze, and nuke later when it’s convenient.

    First things first.  You have to make the turkey.  I use Alton Brown’s Good Eats Roast Turkey recipe with some modifications. You can follow his ingredients if you like his flavor profile better. Rather than me repeating his directions, please go to the link to read how to actually brine, stuff the cavity with the aromatics, and then cook the turkey.  If you want to follow my modifications, I’ve listed the changes in the ingredients below:

    For the brine:

    • 1 cup of kosher salt
    • 1/2 cup of light brown sugar
    • 1 gallon of chicken stock (glutenfree and dairyfree)
    • 1 1/2 Tablespoons of black peppercorns
    • 1 1/2 Tablespoons of white peppercorns
    • 1 1/2 teaspoons of allspice berries
    • 1 1/2 teaspoons of chopped candied ginger
    • 1 teaspoon of rubbed sage
    • 1 gallon of heavily iced water
    Completed Brine in Container to Cool
    Turkey in Brine, Breast Down
    Turkey in Brine after Adding Iced Water


    For the aromatics:

    • 2 small onions, quartered
    • 1 celery stalk, cut into 4 pieces
    • 4-5 fresh garlic cloves, sliced in half
    • 4 springs of fresh rosemary
    • 6-8 fresh sage leaves
    Turkey Cavity Aromatics in Bowl Before Steeping


    Another way in which I deviate from Alton Brown’s recipe is that I baste my turkey every half hour as it cooks. My basting method uses the giblets and is somewhat old fashioned, but it makes wonderful drippings for soup and for gravy.

    For the basting liquid:

    • Giblets from cavity of turkey (take out of the paper or plastic wrapping)
    • 1 onion, minced as finely as possible
    • 1 celery stalk, minced as finely as possible
    • 3 cups of chicken stock (glutenfree and dairyfree)
    • 2 Tablespoons of Earth Balance Soy Free Vegan margarine
    • 1/2 teaspoon of crushed garlic (crush it yourself with a mortar and pestle, or buy some)
    • 1/2 teaspoon of rubbed sage
    • 1/2 teaspoon of thyme
    • 1/2 teaspoon cracked rosemary
    • several shakes or grinds of pepper
    Basting Liquid and Giblets Simmering

    Place all basting ingredients in a small sauce pan.  It should be of a size that the chicken stock covers the giblets.  Bring to a low boil and then turn the heat down to simmer.  Every half hour, use a turkey baster to baste the turkey.  As liquid/drippings build up in the bottom of the turkey roasting pan, you may be able to use those to baste the turkey as well.  If you do not use all the basting liquid, you can use this to build up your stock later as well.  Drain out the solids and reserve the liquid.  (I grew up in Maine on a farm, so I generally eat the giblets.  They need to have been simmered for quite some time to be tender, so I leave them on the stove simmering in the liquid while my turkey cooks.)

    Turkey in Pan with Drippings


    Once your turkey is cooked, a la Alton Brown’s instructions, have at it.  Eat some turkey, have dinner, have a great time!


    Make sure you reserve the turkey drippings, or leave half of them if you’re making gravy. Remove the turkey from the pan, placing it on a platter or cutting board (both should be able to catch drippings).

    Turkey on Cutting Board


    Once you’re ready to think about making turkey stock, you need to strip the turkey meat from the carcass. Save some breast meat and some dark meat aside to put in the soup, cubing it.

    Turkey Meat Removed from Carcass


    Take all the bones, any fat and skin remaining, and the aromatics from the turkey cavity (onion, celery, garlic, sage and rosemary) and put them in a 9″ x 13″ roasting pan, along with:

    • 1 onion, sliced
    • 4-5 cloves of garlic, sliced in half
    • 2 carrot, cut in one inch pieces
    • 3 stalks of celery, cut in one inch pieces
    Turkey Bones and Veggies


    Roast these ingredients in the oven at 375° until the bones brown a bit and the vegetables are roasted. (This will vary depending on the size of the turkey and the size of the pan, but it took about an hour or so for the remains of my 21 pound turkey this year).

    Roasted Turkey Bones and Veggies

    Now you have two choices, which will depend on the size of the turkey.  You can do this on a stove top, or you can do it in a 7 quart Crock-Pot over night.  I wanted do this in a Crock-Pot because it’s easier and I think you get better stock, but I’m the idiot that bought a 21 pound turkey.


    If using stove top: Put the contents of your roasting pan into a stock pot that’s large enough (I’m using a 20-quart because, again, I’m the idiot that bought a 21 pound turkey) that you can cover the bones and roasted vegetables with the drippings, the leftover basting liquid, and any additional water needed.  Add the drippings, leftover basting liquid, and enough water to cover.  Bring to a medium boil over medium-high heat and then once you’ve reached boiling, turn the heat down to medium-low. This needs to simmer for at least two hours, but preferably three.

    Roasted Bones and Veggies with Drippings in Stock Pot


    If using a Crock-Pot:  Even if you had the world’s smallest turkey, you’re going to need the 7 quart Crock-Pot.  Put the contents of the roasting pan into the Crock-Pot, add your drippings, leftover basting liquid, and any additional water. Do not overfill the Crock-Pot.  If using the low heat setting, cook for 8-10 hours.  If using the high heat setting, cook for 4-5 hours. (I like to do this late evening so I can just leave it on overnight).

    Once your stock mixture has simmered for the right amount of time, regardless of your method of cooking, you will need to strain out the bones and vegetables.  I like to use a spider cooking utensil to get all the large pieces out.  Then I strain through a colander, and then through a fine mesh strainer until I have nothing but stock left.  Now on top of that stock you’re going to have a nice thick layer of fat, I know, I can hear you saying “Is it supposed to look like that?”  The answer is yes.  But we don’t want that fat (or at least most of it) in our soup.  So put the stock in a lidded container in the fridge over night.  The next morning you can take a spoon and peel the congealed layer of fat off and put it in the garbage.  Now you just have lovely turkey stock. Yay!  Sometimes I end up with so much that I freeze half of it so I can use it later when I don’t want to make a whole turkey again.

    Strained Turkey Stock in container to cool

    Now for the actual soup! Yay!  The amounts of ingredients will depend on how much stock you’re using and whether you prefer a thicker soup with more stuff in it, or a soup with more broth. Also, if you want to skip the whole making stock from scratch thing, buy chicken stock at the store that’s dairy and gluten free, or get some Better than Bouillon in the chicken and vegetable flavors and mix them in equal proportions according to the amount of stock you need. I measure all my ingredients so you can get a sense of proportions to change yours up based on what you have.

    For Soup:

    • 14 cups of turkey stock
    • 1 1/2 cups of brown rice (My husband is diabetic so we use brown rice, but you could use white or wild rice, or if you can have gluten, you could use pasta.  If you use pasta add it much later in the cooking process about 10 minutes before you add the kale and peas.)
    • 2 medium onions, diced
    • 5-6 medium carrots, peeled and chopped
    • 5-6 stalks of celery, chopped
    • 1/2 teaspoon rubbed sage
    • 1/2 teaspoon thyme
    • 1/2 teaspoon rosemary
    • 2 bay leaves
    • 5 cups of chopped turkey (bite size pieces of white and dark meat)
    • 4 cups of kale leaves, stems removed and broken into bite size pieces
    • 1 cup frozen peas
    • Salt and pepper to taste
    • 3 shakes of Tabasco sauce (You won’t be able to taste it, but it brightens up the other flavors)

    Put turkey stock, rice, onions, carrots, celery, sage, thyme, rosemary and bay leaves in stockpot.  Bring to a boil and then turn down to simmer until rice is cooked and onions, carrots and celery are tender.

    Turkey in bite size pieces


    Add turkey, frozen peas, and kale.  Continue to simmer until kale and peas are cooked.  Add 3 shakes of Tabasco sauce, and salt and pepper to taste.  Enjoy!

    Turkey Soup in stock pot
  • Mini-Thanksgiving, Casserole Style

    Mini-Thanksgiving Casserole
    Mini-Thanksgiving Casserole

    This past summer, one of my co-workers went through a phase of making Thanksgiving dinners — I don’t think she was cooking a whole turkey, but part of it, plus dressing and cranberries.  I think it happened more than once, and the craving turned out to be transferable.

    But for me?  Turkey, eh, whatever.  I don’t like it or dislike it, but I don’t feel excited enough to cook one if I don’t have to.  What I love about Thanksgiving are the side dishes, and while most of my family’s traditional foods are not allergen-free in their original formats, it is truly easy to make most of them safe with dairy alternatives (although, personally, I prefer vegetable broth to most non-dairy milks in mashed potatoes — less chance for an odd sweet flavor to happen).

    For my mid-summer Thanksgiving, I decided to do a casserole of all my favorite flavors, and since there is just one of me, I did individual casseroles so that I could freeze some of them.  If you wanted turkey, you could make it on the side.  If you wanted a full vegan meal and you’re not gluten-free, add diced seitan with the mushrooms in the gravy portion, but  be sure to leave some extra room for it at the top of your casseroles. Some sort of cranberries on the side?  Why not?  This can be the main dish, the centerpiece, the only dish, or a side.  Nothing but versatile, right?

    This casserole has a base of mashed rutabaga, a center of vegan, gluten-free chestnut and celery dressing, and a rich mushroom gravy, all baked in one lovely personal-sized casserole.  I’ve never made this as one large casserole, but I think doubling each layer and increasing the cooking time would work.

    Mini-Thanksgiving, Casserole Style

    3 servings

    Pre-heat oven to 350F, and spray three 1/2 cup mini-casserole dishes with cooking spray (note on cooking spray — the only one I’ve found free of all allergens including soy is Pam for Grilling).

    First, make the rutabaga:

    • 2 cups stock (veg or chicken) or 2 cups water and 2 bouillon cubes (watch for hidden gluten and soy in stock and especially bouillon — look for natural brands for boxed stock for the best selection of options)
    • about 2 cups of cubed rutabaga (look for it frozen and bagged)

    Boil rutabaga in stock until cooked through.  Takes 20-30 minutes for fresh rutabaga, but 10 or so for frozen.

    Drain rutabaga, and mash with:

    • 1+ Tablespoon soy-free Earth Balance
    • salt and pepper to taste — be generous with the pepper here.

    Spoon into bottom of dishes and press down with the back of the spoon.  Should be about 1/4 to 1/3 an inch at the bottom of each dish.  If you have leftovers, pack them in or eat them.

    Rutabaga base
    Rutabaga base

    Next, make the dressing.  In large skillet, over medium heat, heat

    • 1 Tablespoon olive oil.  When shimmery hot,

    Add:

    • 1 cup of diced onion.  Cook until translucent.
    • Add 1 cup celery, chopped, cook until hot, 3-4 minutes
    • Add one package of chestnuts, chopped (my package was 5.2 oz, and was about 15 chestnuts)
    • Heaping 1/2 teaspoon thyme, crushed as you add it.
    Chestnut-Celery Dressing
    Chestnut-Celery Dressing

    Cook everything about 5 minutes.  Onions should be entirely clear, celery should still retain a bit of crisp, the chestnuts don’t appear to change.

    • Stir in 1/3 cup gluten-free bread crumbs (I make my own from the leftover pieces of bread from each loaf, but if you need to buy some, the Ener-G loaves make good bread crumbs).

    Spoon over rutabaga, leaving just a bit of room (1/4 inch or so) at the top.  Scrape all the bits out of the skillet.

    Chestnut-Celery Dressing, stage 2
    Chestnut-Celery Dressing, stage 2

    Finally, make the gravy.  Into the same skillet you just used (really no need to wash it out), still over medium heat, add

    • 2 Tablespoons olive oil. When shimmery hot,
    • Add 1/4 cup onion, diced small.  Cook until translucent.
    • Add 1 3.5 oz package of shitaki mushrooms, washed, stemmed, and diced.  Cook until the liquid comes out of the mushrooms (watch, if you don’t know what I’m talking about — you’ll see it).  2-5 minutes.  Then add
    • 2 Tablespoons nutritional yeast
    • 2 Tablespoons garbanzo bean flour
    • 2 Tablespoons of soy sauce, gluten-free tamari, or coconut aminos

    Whisk these until you’ve made a slurry, good and thick.  Let it cook for a minute.  Begin to slowly drizzle in water, about 1 Tablespoon at a time, stirring and letting each addition thicken before adding the next drizzle.  Add at least 1 cup of water, and not more than 1.5 cups.

    Spoon gravy over casseroles.  At this point, you can cover the casseroles and refrigerate overnight, or you can bake them immediately.  If immediately, cover with foil and bake for 15 minutes.  If you are taking them out of the fridge, let them sit 15 minutes or so to come up towards room temperature, and then bake 25-30 minutes.  These freeze okay, but let them thaw thoroughly and then bake.

    Mmmmm, casserole
    Mmmmm, casserole

    Mini-Thanksgiving, Casserole Style, Ingredients only.

    • 2 cups stock (veg or chicken) or 2 cups water and 2 bouillon cubes
    • about 2 cups of cubed rutabaga
    • 1+ Tablespoon soy-free Earth Balance
    • salt and pepper to taste — be generous with the pepper here.
    • 1 Tablespoon olive oil
    • 1 cup of diced onion
    • 1 cup celery, chopped
    • 1 5.2 oz package of chestnuts, chopped (15 chestnuts)
    • Heaping 1/2 teaspoon thyme
    • 1/3 cup gluten-free bread crumbs
    • 2 Tablespoons olive oil
    • 1/4 cup onion, diced small
    • 1 3.5 oz package of shitaki mushrooms, washed, stemmed, and diced
    • 2 Tablespoons nutritional yeast
    • 2 Tablespoons garbanzo bean flour
    • 2 Tablespoons of soy sauce, gluten-free tamari, or coconut aminos

    (Final note — it seems to me that chestnuts are tree nuts, but did not confirm this.  Assuming this is so, this recipe is not nut-free. MK, and readers, I checked this morning and confirmed they are tree nuts -Denise)


  • Winter Is Coming Chicken and Kale

    Winter is Coming Chicken and Kale
    Winter is Coming Chicken and Kale

    This recipe featuring lovely tasty kale is posted, in part, in honor of the last day of G.I.S.H.W.H.E.S. (the Greatest International Scavenger Hunt the World Has Ever Seen), which everyone who knows me has heard way too much about (and has likely been asked to participate in).  I am not sure why GISHWHES is obsessed with kale, except that kale is truly wonderful and tasty if you cook it right.  I think this one is pretty good.

    Our friend Mary has, this year, become the Great Kale Whisperer, and has been providing bags and bags of kale to any takers.  Now that I know you can freeze kale, I’ve stocked up, but this recipe is rapidly depleting my stash.  This is so warming and tasty that the Starks could find comfort in it (and go read or watch Game of Thrones if you want to get the reference.  Everyone else is doing it.).

    A note on cleaning kale — I wash kale, especially if not from the supermarket (i.e. there may be bugs) in the manner I learned from my friend Linda a few years ago for broccoli — run a sink full of cold water, add a handful of salt, soak veg for about 10 minutes, then drain.  The salt shrivels any cling-on creatures, and you’re good to go.

    More Chicken and Kale!
    More Chicken and Kale!

    Winter Is Coming Chicken and Kale

    2 T olive oil
    1 baseball-sized onion, chopped
    1/2 t salt
    pepper to taste
    3 boneless, skinless chicken thighs, cut into bite-sized chunks
    2 t dried thyme, crushed
    16 oz. (1 large) package baby bella mushrooms, washed, de-stemmed*, and broken into 2 or 4 pieces each — breaking mushrooms rather than chopping them seems to make them shrink less, and I like the size better for this dish.
    3 cloves garlic, minced (is best to mince fresh, not use jarred, here)
    3-4 cups kale, washed, stemmed, and chopped finely
    1 t shallot pepper blend

    1 tube of prepared polenta (sundried-tomato and garlic is nice for this)

    Heat olive oil over medium heat in large skillet with cover (or large soup pot, if you don’t have a covered skillet).  When shiny and hot, add chopped onion, salt and pepper.  Cook until onion is translucent.

    Add chicken and stir every few minutes until chicken starts to brown at the edges.

    In separate skillet, heat just a sheen of olive oil over medium heat for the polenta.  Slice polenta into slightly smaller than 1/2″ rounds, and pan fry.  If you heat your polenta through and leave it soft, the juices of the dish will soak into it.  My personal preference is to cook it until golden brown on either side, giving it a crunchy edge.

    Add thyme, mushrooms, and garlic to large pot, and cook, stirring often, until mushrooms have shrunk and given off most their moisture.

    Add kale, sprinkle with shallot pepper and cover, without stirring for 2-3 minutes, until kale has wilted.  Then stir, cooking 3-5 minutes more.  Turn off heat and cover if polenta isn’t done yet.  Serve chicken mixture over polenta.

    *If you ever make your own soup stock — veg or meat — it’s useful to throw things like mushroom stems in a container in the freezer to use for stock.  The mushroom stems add a nice depth to stock.

    (P.S. Thanks to my mother’s friend Barb for being a test cook for this recipe and helping me to improve it!)

  • Denise’s Crock-Pot Pulled Pork

    Denise’s Crock-Pot Pulled Pork

    I love pulled pork. Although generally pulled pork is not rife with potential allergens when I eat out, you never know. By making it at home, I control the ingredients and I know what’s in it, and I have leftovers. Woo hoo! This is an incredibly easy version. Basically you dump the stuff in the Crock-Pot and walk away for six to ten hours depending on whether you put the temperature on low or high. When it’s done, you shred the pork, mix in your sauce, and serve. I’ve also frozen this in containers with no ill effects. When you’re a household of two, you either make small batches and eat it immediately, or you make a vat and freeze it in small batches. I find the first approach to be way too much work. If you don’t have a Crock-Pot, you can have one specially made with your own pictures on it here. How cool is that? I prefer the classic Classic Crock-Pots. I have two Classics, and one with Digital controls. The Digital runs too hot for me and everything I make in it is overcooked. So I only use the Digital to warm stuff up when I make things in advance at Thanksgiving. The Classics are also much cheaper and you can pick them up on sale if you don’t need one with your own pictures. (I’m trying to figure out how to justify the purple polka dot one, but I’m not sure I can with three already. I’ll take suggestions for justifications if you can work that out for me.)

    Denise’s Crock-Pot Pulled Pork

    • 2-3 onions, peeled and quartered
    • 2 Tablespoons brown sugar
    • 1 Tablespoon paprika
    • 2 teaspoons of seasoning salt (Lawry’s or Penzey’s)
    • 1/2 teaspoon black pepper
    • 1 4-6 lb boneless pork butt or shoulder roast
    • 3/4 cup of cider vinegar
    • 4 teaspoons balsamic vinegar (if you can have wheatand soy, you can use Worcestershire sauce instead if you prefer)
    • 1 1/2 teaspoons of crushed red pepper flakes
    • 1 1/2 teaspoons of sugar
    • 1/2 teaspoon of dry mustard
    • 1/2 teaspoon of garlic salt
    • 1/4 teaspoon of cayenne pepper
    • 1/4 cup of Frank’s Red Hot (or Barbecue sauce of your choice)
    Quartered Onions in Crock-Pot

    Place peeled and quartered onions in the bottom of the Crock-Pot.

    Spice Rub in Bowl

    Put brown sugar, paprika, salt and pepper in bowl and mix thoroughly.

    Spice Rub on Pork

    Place pork on a cutting board and rub with mixture, covering completely.  Place pork in Crock-Pot on top of the onions.

    Vinegar Mixture in Bowl

    Place cider vinegar, Balsamic vinegar, red pepper flakes, sugar, mustard, garlic salt, and cayenne pepper in a bowl and mix thoroughly.  Pour mixture over the pork in the Crock-pot.  Cover Crock-Pot with lid and cook on Low for 10 hours or on High for 6 hours.

    Shredded Pork
    Shredded Pork

    At the end of the cooking time, check to see if pork is fork tender.  If so, remove meat and onions, and reserve 1 cup of the cooking liquid.  Chop/shred meat and chop onions, placing in a large mixing bowl.

    Add Frank’s Red Hot and mix.  If the pork needs a bit more liquid, mix in as much of the reserved cooking liquid as needed.

    Serve pulled pork on hamburger style buns fitting your dietary restrictions; serve over rice; serve over mashed potatoes; in lettuce leaf wraps; or on nachos.  Have fun with it.