Notice: Function _load_textdomain_just_in_time was called incorrectly. Translation loading for the wp-ultimate-recipe domain was triggered too early. This is usually an indicator for some code in the plugin or theme running too early. Translations should be loaded at the init action or later. Please see Debugging in WordPress for more information. (This message was added in version 6.7.0.) in /home/maryzahc/public_html/adultfoodallergies.com/wp-includes/functions.php on line 6131 Baked Goods – Page 3 – surviving the food allergy apocalypse (archive)
Baked goods, noun: Recipes which would normally contain wheat flour, eggs, and dairy, which would be especially problematic for those with multiple food allergies. These recipes will not contain dairy, eggs, gluten, wheat or hazelnuts. If we use a top 8 allergen, we will use a tag warning of its use.
You know, if you have a good list of allergies, as Denise and I both do, breakfast can be one of the worst meals. If you eat meat, bacon is usually safe, though sausage might or might not be. Take out eggs, gluten for pancakes and waffles… well, you get the picture. I miss going out for breakfast. And as much as I love them, I’m actually getting bored of cereal and hash browns for breakfast.
So why not polenta? I have eaten leftover corn polenta for breakfast (the kind that comes in a nice tube at the grocery store), and it’s great as a savory breakfast, but I started thinking of the millet polenta in Vegan with a Vengeance — that was the first polenta I ever made and the first time I’d eaten millet. We used to buy it for the parakeets we had growing up, and I still sort of think of it as bird food. But it’s really tasty!
This recipe easily doubles into a 9×11 pan, but for one breakfast or one person who doesn’t want to eat it for 9 days, do this in an 8×8 pan. My favorite part is that all the work is done ahead of time, with maybe 10 minutes of work in the morning — and most of those are what some recipes call “inactive” time. I am not a morning person.
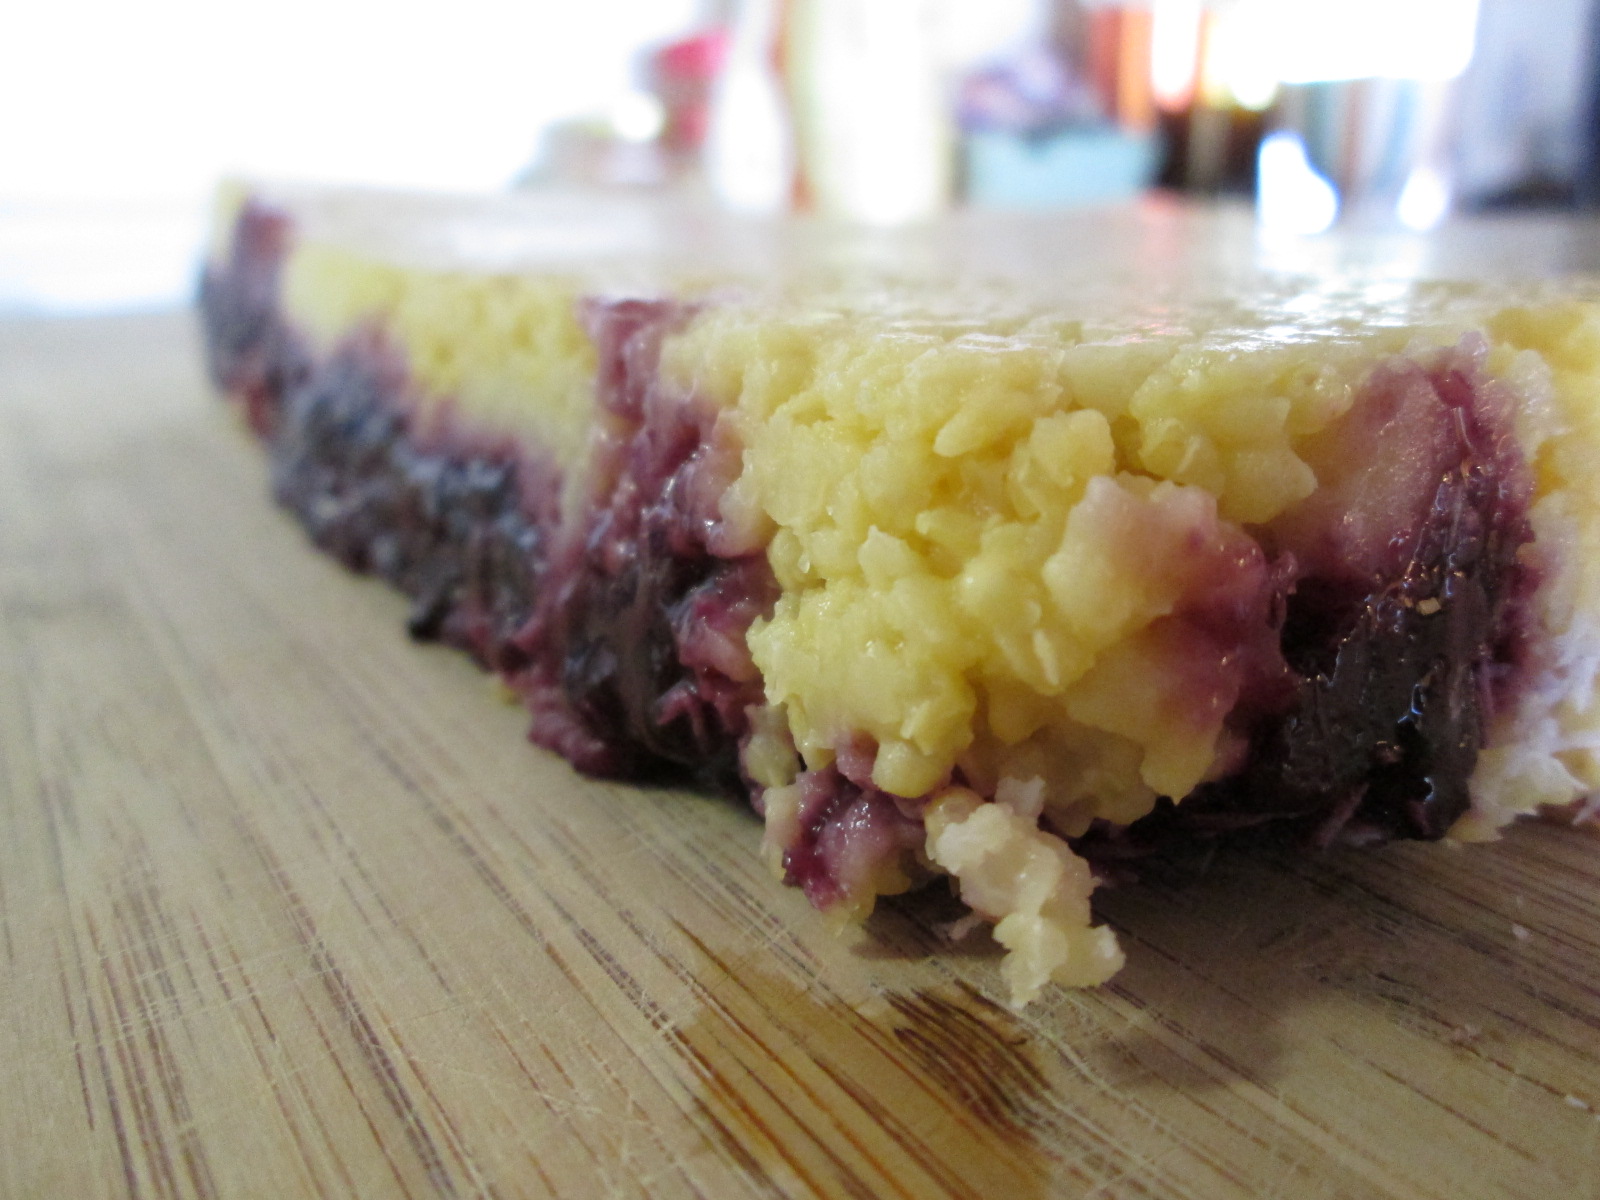
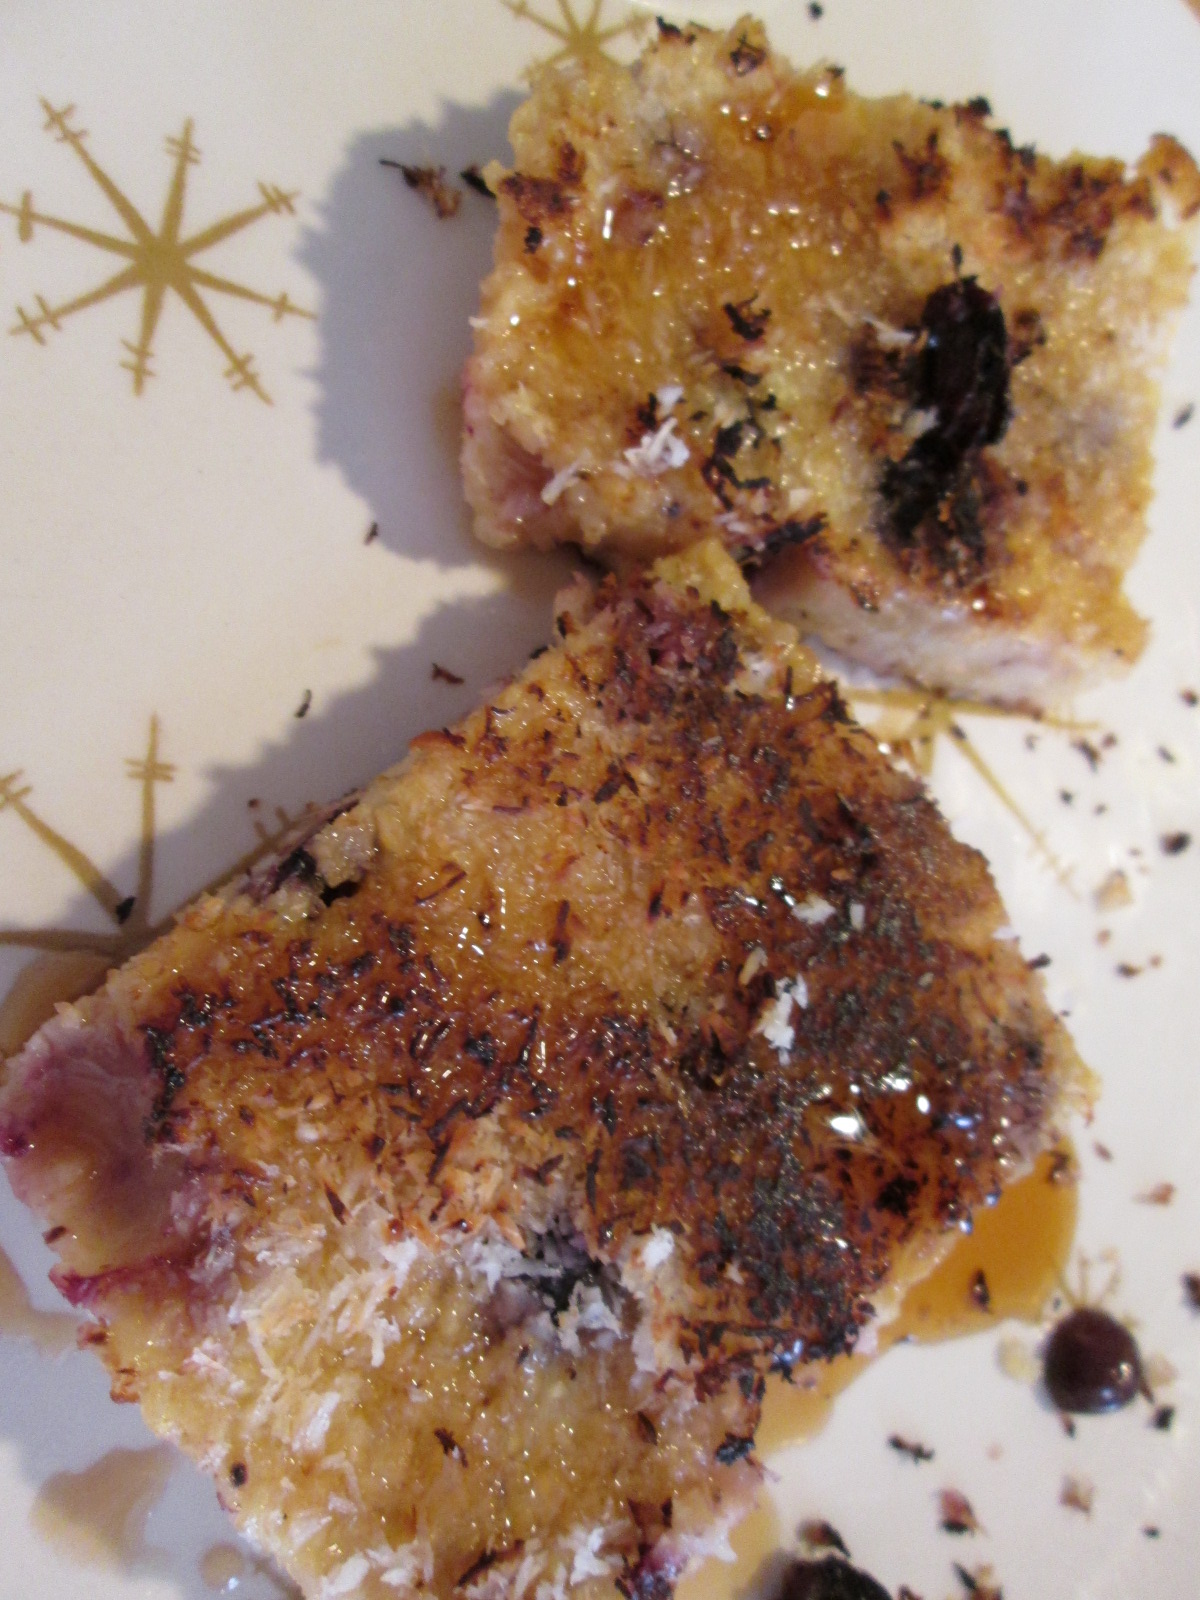
Millet polenta with blueberries and maple syrup
Breakfast Polenta
Make-ahead preparation:
In a sauce pan, mix
1 cup millet, rinsed
1 1/2 cups orange juice
1 1/2 cups water
1 Tablespoon oil, shortening, or Earth Balance (use coconut oil if you can)
1 or 2 cinnamon sticks
Bring this mixture to a boil, turn it down, and let it simmer for 30-35 minutes.
In a separate small pan, heat
1/2 cup frozen blueberries
1 Tablespoon orange juice
1/4 cup unsweetened shredded coconut (optional)
When the blueberries are soft, mash them with a fork or potato masher, just until you have a rough jelly.
Into a greased 8×8 pan, put half the millet mixture in the pan, smooth down, spread the blueberry mix on top, and then add the second half of millet mix and smooth it out.
Allow it to cool at room temperature and then refrigerate.
Morning preparation:
You will need
1 teaspoon to 1 Tablespoon of coconut oil, Earth Balance, or other oil of your choosing (just enough to coat the bottom of your skillet)
In the morning, heat a skillet over medium heat. Add your oil — this isn’t absolutely necessary, but it will promote a good browning, which really makes the polenta to me. Pan fry on both sides, 5-7 minutes per side.
Plate and drizzle with maple syrup. Pour it on slowly to allow it to soak in. Oh, and get the real stuff — you’re worth it.
What do you eat for breakfast? Do you rely on the same standards, over and over, or do you mix it up?
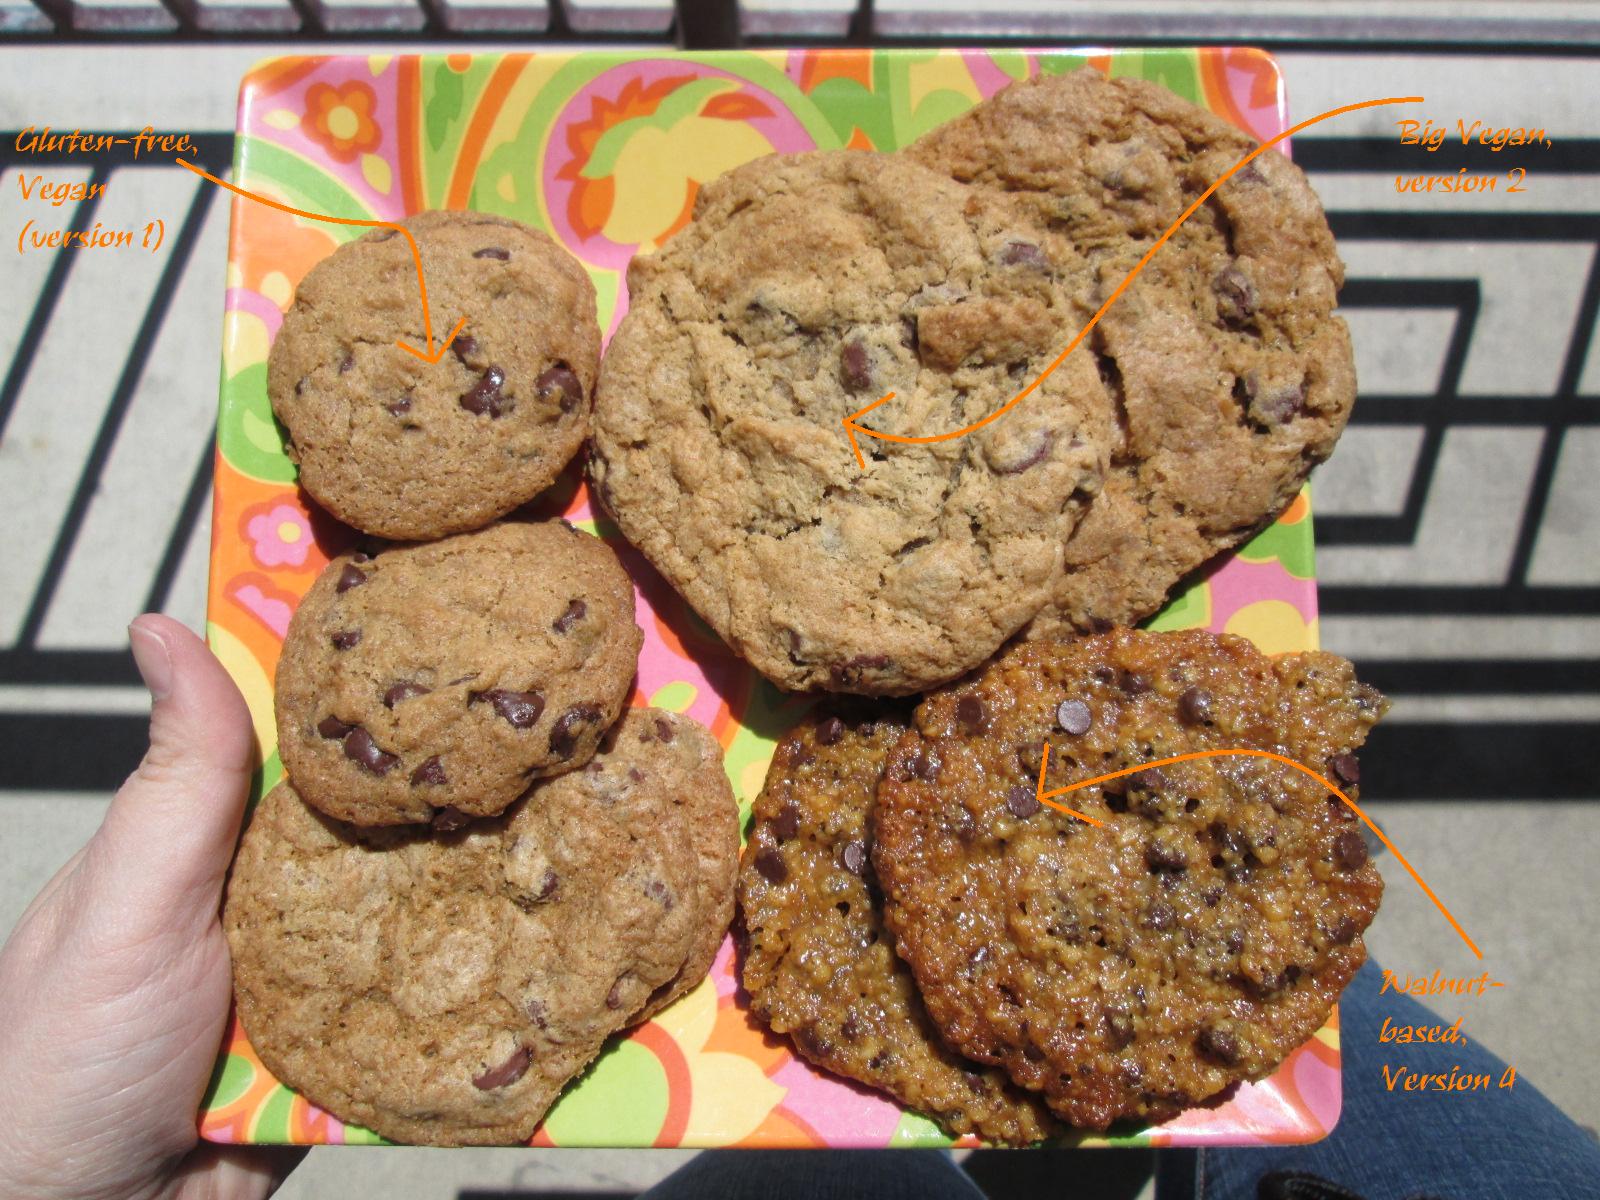
Plate of Chocolate Chipped Goodness — from top left, vegan GF, vegan, walnut
Because it’s Earth Day, and it’s our 100th post, we thought we should make cookies. Because cookies are round, like the Earth. And because making cookies and giving them to people makes you a hero. Or just sharing — you don’t have to give them all away, promise. You can eat them, too. Cookies are happiness, right?
Well, cookies are often not even close to happiness when you’re an allergen sufferer. If you have adult-onset allergies, you might remember making the classic Tollhouse cookie — wheat flour, eggs, butter, chocolate chips that contain milk. The recipe itself is almost a list of allergens. But it doesn’t have to be! We’re here to show you a few ways (but not quite 100).
The following recipes — there are 4 — are all variations on the chocolate chip cookie. The first two are classic; the very first is completely allergen-free — gluten-free, egg-free, dairy-free, nut-free, vegan. The rest are also vegan (no dairy, no eggs), but the second recipe contains gluten, and the last two contain nuts. One of these is bound to work for you. Read on for the details.
Vegan Gluten-free Chocolate Chip Cookies
Gluten-Free and Allergen-Free Chocolate Chip Cookies, Version 1
allergen-free.
Makes about 50-60 cookies using approximately 1 Tablespoon of dough for each cookie.
2 Tablespoons of ground chia seed meal
6 Tablespoons of water
315 grams of the Glutenfreegirl’s All Purpose Gluten Free Flour Mix for Cookies (see recipe here, I made a half batch and it was enough for this with 185 grams left over – I don’t know if this would work with other commercial gluten free mixes but if you want to try it, I’m using 140 grams to the cup so if you’re using cups because your mix is a 1:1 ratio, it’s 2 1/4 cups)
1 teaspoon of baking soda
1 teaspoon salt
1 cup of Soy-free Earth Balance (if you can have soy, 2 sticks Earth Balance buttery spread)
3/4 cup of brown sugar, packed
3/4 cup of granulated sugar
1 Tablespoon of vanilla extract
2 cups of allergen-free chocolate chips (Enjoy Life chocolate chips recommended)
Preheat your oven to 375°F.
In a small container mix ground chia seed meal and water thoroughly. Set aside until needed to let it gel.
Then measure out the Gluten Free Flour Mix for Cookies, salt, and baking soda and place in a bowl. Whisk ingredients together until they are well incorporated into each other, and set aside until its needed.
Using your mixer (preferably a stand mixer) beat the Earth Balance, sugar, brown sugar, and vanilla in a large bowl until it’s creamy, scraping down the sides as needed to make sure that all the ingredients are completely mixed together. The reason that you are using cold Earth Balance right out of the fridge is that (a) if you have a KitchenAid or other stand mixer it’ll take the punishment and beat the Earth Balance when it’s cold anyway, and I am way too impatient to wait to soften anything and doing it in the microwave is always a disaster, (b) Earth Balance seems to have a much lower melting point that regular margarine or butter, so you’re giving yourself a fighting chance to have your dough stay doughy when you’re waiting to bake cookies in multiple batches in the oven, and (c) I think it makes the cookies crispier, but I have no empirical evidence for that really.
Add one half of the chia mixture and beat it well to mix it in completely, again scraping down the sides as needed. Add the second half of the chia mixture and do the same.
Gradually add the Gluten Free Flour Mix for Cookies while beating well, again scraping down the sides as needed, until all of it is incorporated into the dough. Using a spoon, mix in the chocolate chips. (You don’t want to use the mixer because it’ll mash the chocolate chips into little bits.)
Drop dough (I used a scoop that holds one tablespoon) onto ungreased baking sheets. I used Pampered Chef stoneware so if you’re using a metal pan you may need to adjust the baking time. Gluten free baking takes longer than regular baking so even though these cookies are 1/3 the size of the other recipe I did with regular flour, they take just as long or longer to cook. Bake for 15-17 minutes (using the stoneware, I baked them for 17 minutes for the best results, with metal sheet pans, try the lower end of the range, but watch your cookies).
Once you have taken them out of the oven, let them cool on the baking sheet for 2-4 minutes or so to let them set up a bit, and then using a spatula, remove the cookies to a cooling rack to finish cooling. Enjoy!
Chocolate Chip Cookies – Vegan (not GF)
Classic Vegan Chocolate Chip Cookies, Version 2
contains gluten.
Makes about 20 three inch cookies using approximately 3 Tablespoons of dough for each cookie. (I like big cookies. If you like smaller cookies, use 1 Tablespoon of dough and adjust the cooking time to about 10 minutes, and you’ll get 5 dozen cookies).
2 Tablespoons of ground chia seed meal
6 Tablespoons of water
2 1/4 cups of all purpose flour
1 teaspoon of baking soda
1 teaspoon salt
1 cup of Earth Balance Natural Buttery Spread Soy Free or 2 sticks of Earth Balance Vegan Buttery Sticks, COLD
3/4 cup of brown sugar, packed
3/4 cup of granulated sugar
1 Tablespoon of vanilla extract
2 cups of vegan or allergy free for you chocolate chips (Enjoy Life chocolate chips recommended)
Preheat your oven to 375°F.
In a small container mix ground chia seed meal and water thoroughly. Set aside until needed to let it gel.
Then measure out flour, salt, and baking soda and place in a bowl. Whisk ingredients together until they are well incorporated into each other, and set aside until its needed.
Using your mixer (preferably a stand mixer) beat the Earth Balance, sugar, brown sugar, and vanilla in a large bowl until it’s creamy, scraping down the sides as needed to make sure that all the ingredients are completely mixed together. The reason that you are using cold Earth Balance right out of the fridge is that (a) if you have a KitchenAid or other stand mixer it’ll take the punishment and beat the Earth Balance when it’s cold anyway, and I am way too impatient to wait to soften anything and doing it in the microwave is always a disaster, (b) Earth Balance seems to have a much lower melting point that regular margarine or butter, so you’re giving yourself a fighting chance to have your dough stay doughy when you’re waiting to bake cookies in multiple batches in the oven, and (c) I think it makes the cookies crispier, but I have no empirical evidence for that really.
Add one half of the chia mixture and beat it well to mix it in completely, again scraping down the sides as needed. Add the second half of the chia mixture and do the same.
Gradually add the flour mixture while beating well, again scraping down the sides as needed, until all the flour is incorporated into the dough. Using a spoon, mix in the chocolate chips. (You don’t want to use the mixer because it’ll mash the chocolate chips into little bits.)
Drop dough (I used a scoop that holds three tablespoons) onto ungreased baking sheets. I used Pampered Chef stoneware so if you’re using a metal pan you may need to adjust the baking time. Bake for 15-17 minutes (using the stoneware, I baked them for 17 minutes for the best results, with metal sheet pans, try the lower end of the range, but watch your cookies).
Once you have taken them out of the oven, let them cool on the baking sheet for 2-4 minutes or so to let them set up a bit, and then using a spatula, remove the cookies to a cooling rack to finish cooling. Enjoy!
Almond-based Chocolate Chipper
Almond-based Chocolate Chip Cookies, Version 3
contains nuts. Makes about 16 cookies.
Preheat oven to 350F
1 1/4 cup almond meal/ground almonds
1/4 teaspoon salt
1/4 teaspoon cinnamon
1/2 cup allergen-free chocolate chips (Enjoy Life mini chocolate chips recommended — mini chips are best in this)
2 Tablespoons oil (I used canola — use what you like for baking, but if using coconut, melt it first)
1/4 cup agave syrup
2 teaspoons vanilla extract
Whisk almond meal, salt, cinnamon, chips, and coconut, if using, together in a medium bowl.
Whisk oil, agave, and vanilla together in a small bowl. It will be tempting to skip this step and just add the wet ingredients into the dry, but don’t. The oil mixed into the syrup will make it mix smoother in the end.
Mix the wet ingredients into the dry with a rubber spatula. You will have a pretty thick dough, but mix until there are no dry spots.
Drop by the tablespoon onto a cookie sheet lined with parchment paper. You don’t really need to space these, as they do not spread out. Bake for 12 minutes, until slightly browned on the bottom (baking time on a metal cookie sheet). Rest them on the cookie sheet for 3 minutes or so before CAREFULLY cooling completely on a wire rack. Be careful — these cookies are a little… loose. These cookies are MUCH better completely cooled — the flavors are muddled when warm. Enjoy!
Walnut-based Chocolate Chippers
Walnut-based Chocolate Chip Cookies, Version 4
contains nuts. Makes about 12-16 cookies.
Preheat oven to 350F.
1 1/4 cups ground walnuts (I have not seen walnut meal for sale. Pulse them in a food processor.)
1/4 teaspoon salt
1/2 cup mini chocolate chips (Enjoy Life recommended)
Whisk together the walnuts, salt, and chocolate chips.
Whisk together the oil, syrup, and vanilla. This will take a minute, as the brown rice syrup is thick, but it will come together. (A measuring tip — measure out the oil into the 1/3 cup measuring cup. Swirl it around before dumping it in the bowl, and then use that cup to measure the syrup, and it will come right out.)
Add the wet ingredients to the dry and mix with a rubber spatula.
Drop 1 Tablespoon scoops onto a baking sheet lined with parchment paper, about 1 inch apart. Bake 12-17 minutes or until cookies have spread and edges begin to brown (baking time on a metal sheet). Let rest only a few minutes on the cookie sheet before removing to a wire rack to cool. Unlike the almond-based cookies, these are even better warm. Enjoy!
Cookies from King Arthur GF box mix
If you are newly gluten-free, don’t want to buy 100 spendy new flours and want to make cookies, try the King Arthur box mix. It is a box mix, so it’s not as great as making them from scratch, but it is good. And early successes in gluten-free baking are worth it.
We hope that our happy 100th post has inspired you to venture up the cookie tree. You know, the tree that the elves live in? If you have no elves, you’ll have to bake your own cookies, but we promise, if we can do it, you can do it. Your friends will love you for it.
Got a favorite recipe? Tried one of ours and liked it? We’d love to hear from you.
And this is take two on cherries for our President’s day theme. Cherries go with chocolate. And there’s a place in Concord, New Hampshire that sells a pastry called Bread & Chocolate that I’ve been trying to replicate since the dairy allergy diagnosis, so I decided to add cherries to the mix this time. This is like a jelly roll, except instead of cake and jelly or cream, you have bread and chocolate and cherries. Although I’ve tagged a warning, just to be clear, this recipe contains wheat and gluten, and I’ve written it to be used with a bread machine.
Bread and Chocolate with Cherries
1/4 cup of warm water (between 70ºF and 85ºF)
3/4 cup of a milk alternative product of your choice (I used homemade oat milk)
1 Tablespoon of Ener-G egg replacer, mixed with 6 Tablespoons of warm water
1 1/4 teaspoons of salt
1/3 cup and 1 teaspoon of dark brown sugar, packed firmly
1/4 cup of shortening or Earth Balance Soyfree Natural Buttery Spreads
2 teaspoons of cinnamon
4 cups of bread flour
2 1/2 teaspoons of bread machine yeast
1 cup of Dole frozen Dark Sweet Cherries, chopped
1 cup of Enjoy Life Mini Chocolate chips
2 Tablespoons of melted Earth Balance Soyfree Natural Buttery Spreads
Sunbeam Bread Machine
Using my nicely inexpensive Sunbeam bread machine, add first three ingredients in order as listed to the bread machine pan. Then add the salt, brown sugar, shortening, cinnamon and flour to the bread machine pan, heaping the flour in a pile.
Using a spoon, make a little indentation that you can put the yeast in, and then add the yeast.
Ingredients in Bread Pan with Yeast in Indentation on Top
Set your bread machine menu to just make dough. When its ready it should look something like this:
Completed Dough in Bread Pan
Preheat oven to 375°F. Spread a little flour on your very clean counter top or on your dough mat, and dump dough on mat or counter. Make sure you remove the paddle if it falls out of the bread pan. Roll out dough using a rolling pin to a rectangular shape approximately 12 by 18 inches.
Dough rolled to a rectangular shape
Once you have rolled the dough to the correct shape, spread your chopped cherries over the surface.
Dough with Cherries Spread over Surface
Then sprinkle the mini chocolate chips over the surface of the dough.
Chocolate Chips and Cherries Spread over Surface of Dough
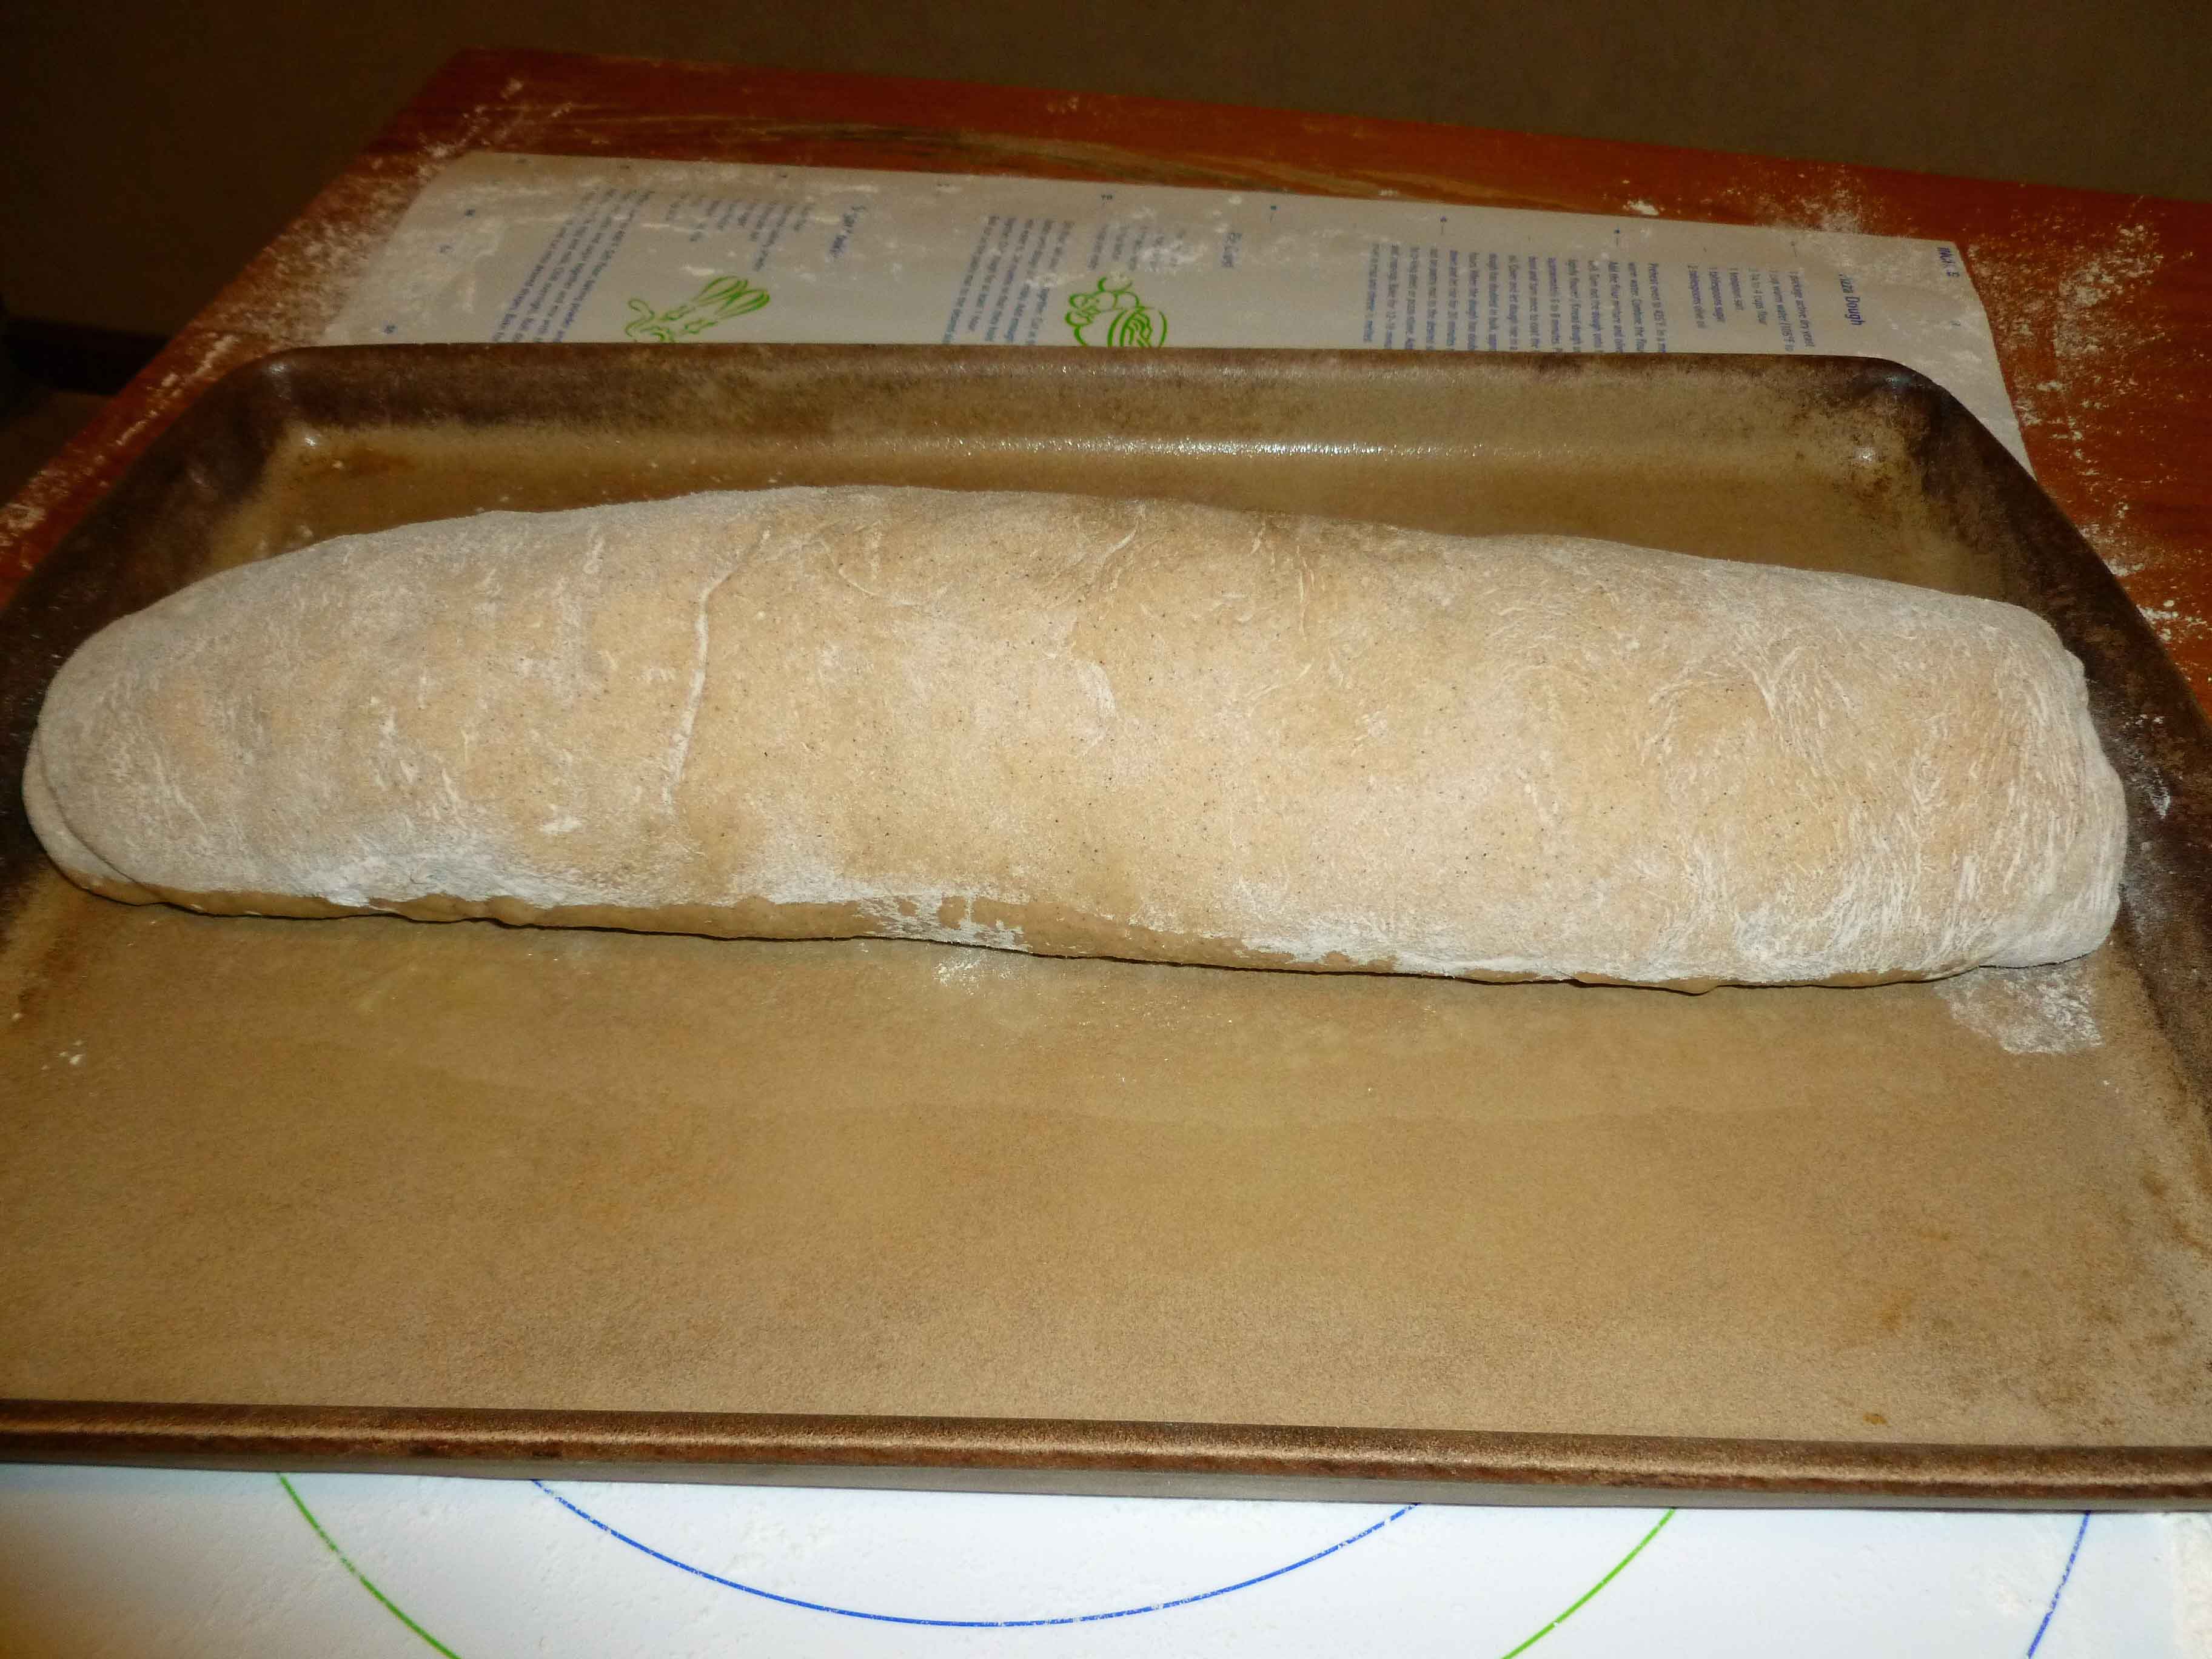
Taking a small amount of water, dip fingers in water and run them around the edges of the dough to help it seal when you roll it up. Take one edge of the shorter side and begin to roll it up, making sure that you seal up the edges as you go, and that the final seam is sealed by pressing the wet edges to the dough. Carefully place the roll with the seam on the bottom on the pan you will bake it on.
Completed Bread Roll
Taking the melted Earth Balance, brush it over the surface of the dough.
Brushing Melted Earth Balance over Bread Roll
Let dough rise for about an hour and half, until it nearly doubles in size.
Bread Roll After Rising
Place in oven preheated to 375°F, and bake for 30-35 minutes. If you rolled your rectangle out a bit too wide, you’ll get the bent shape I did after baking 🙂
Baked Bread Roll
Let cool for 30 minutes or more and then cut slices. Enjoy!
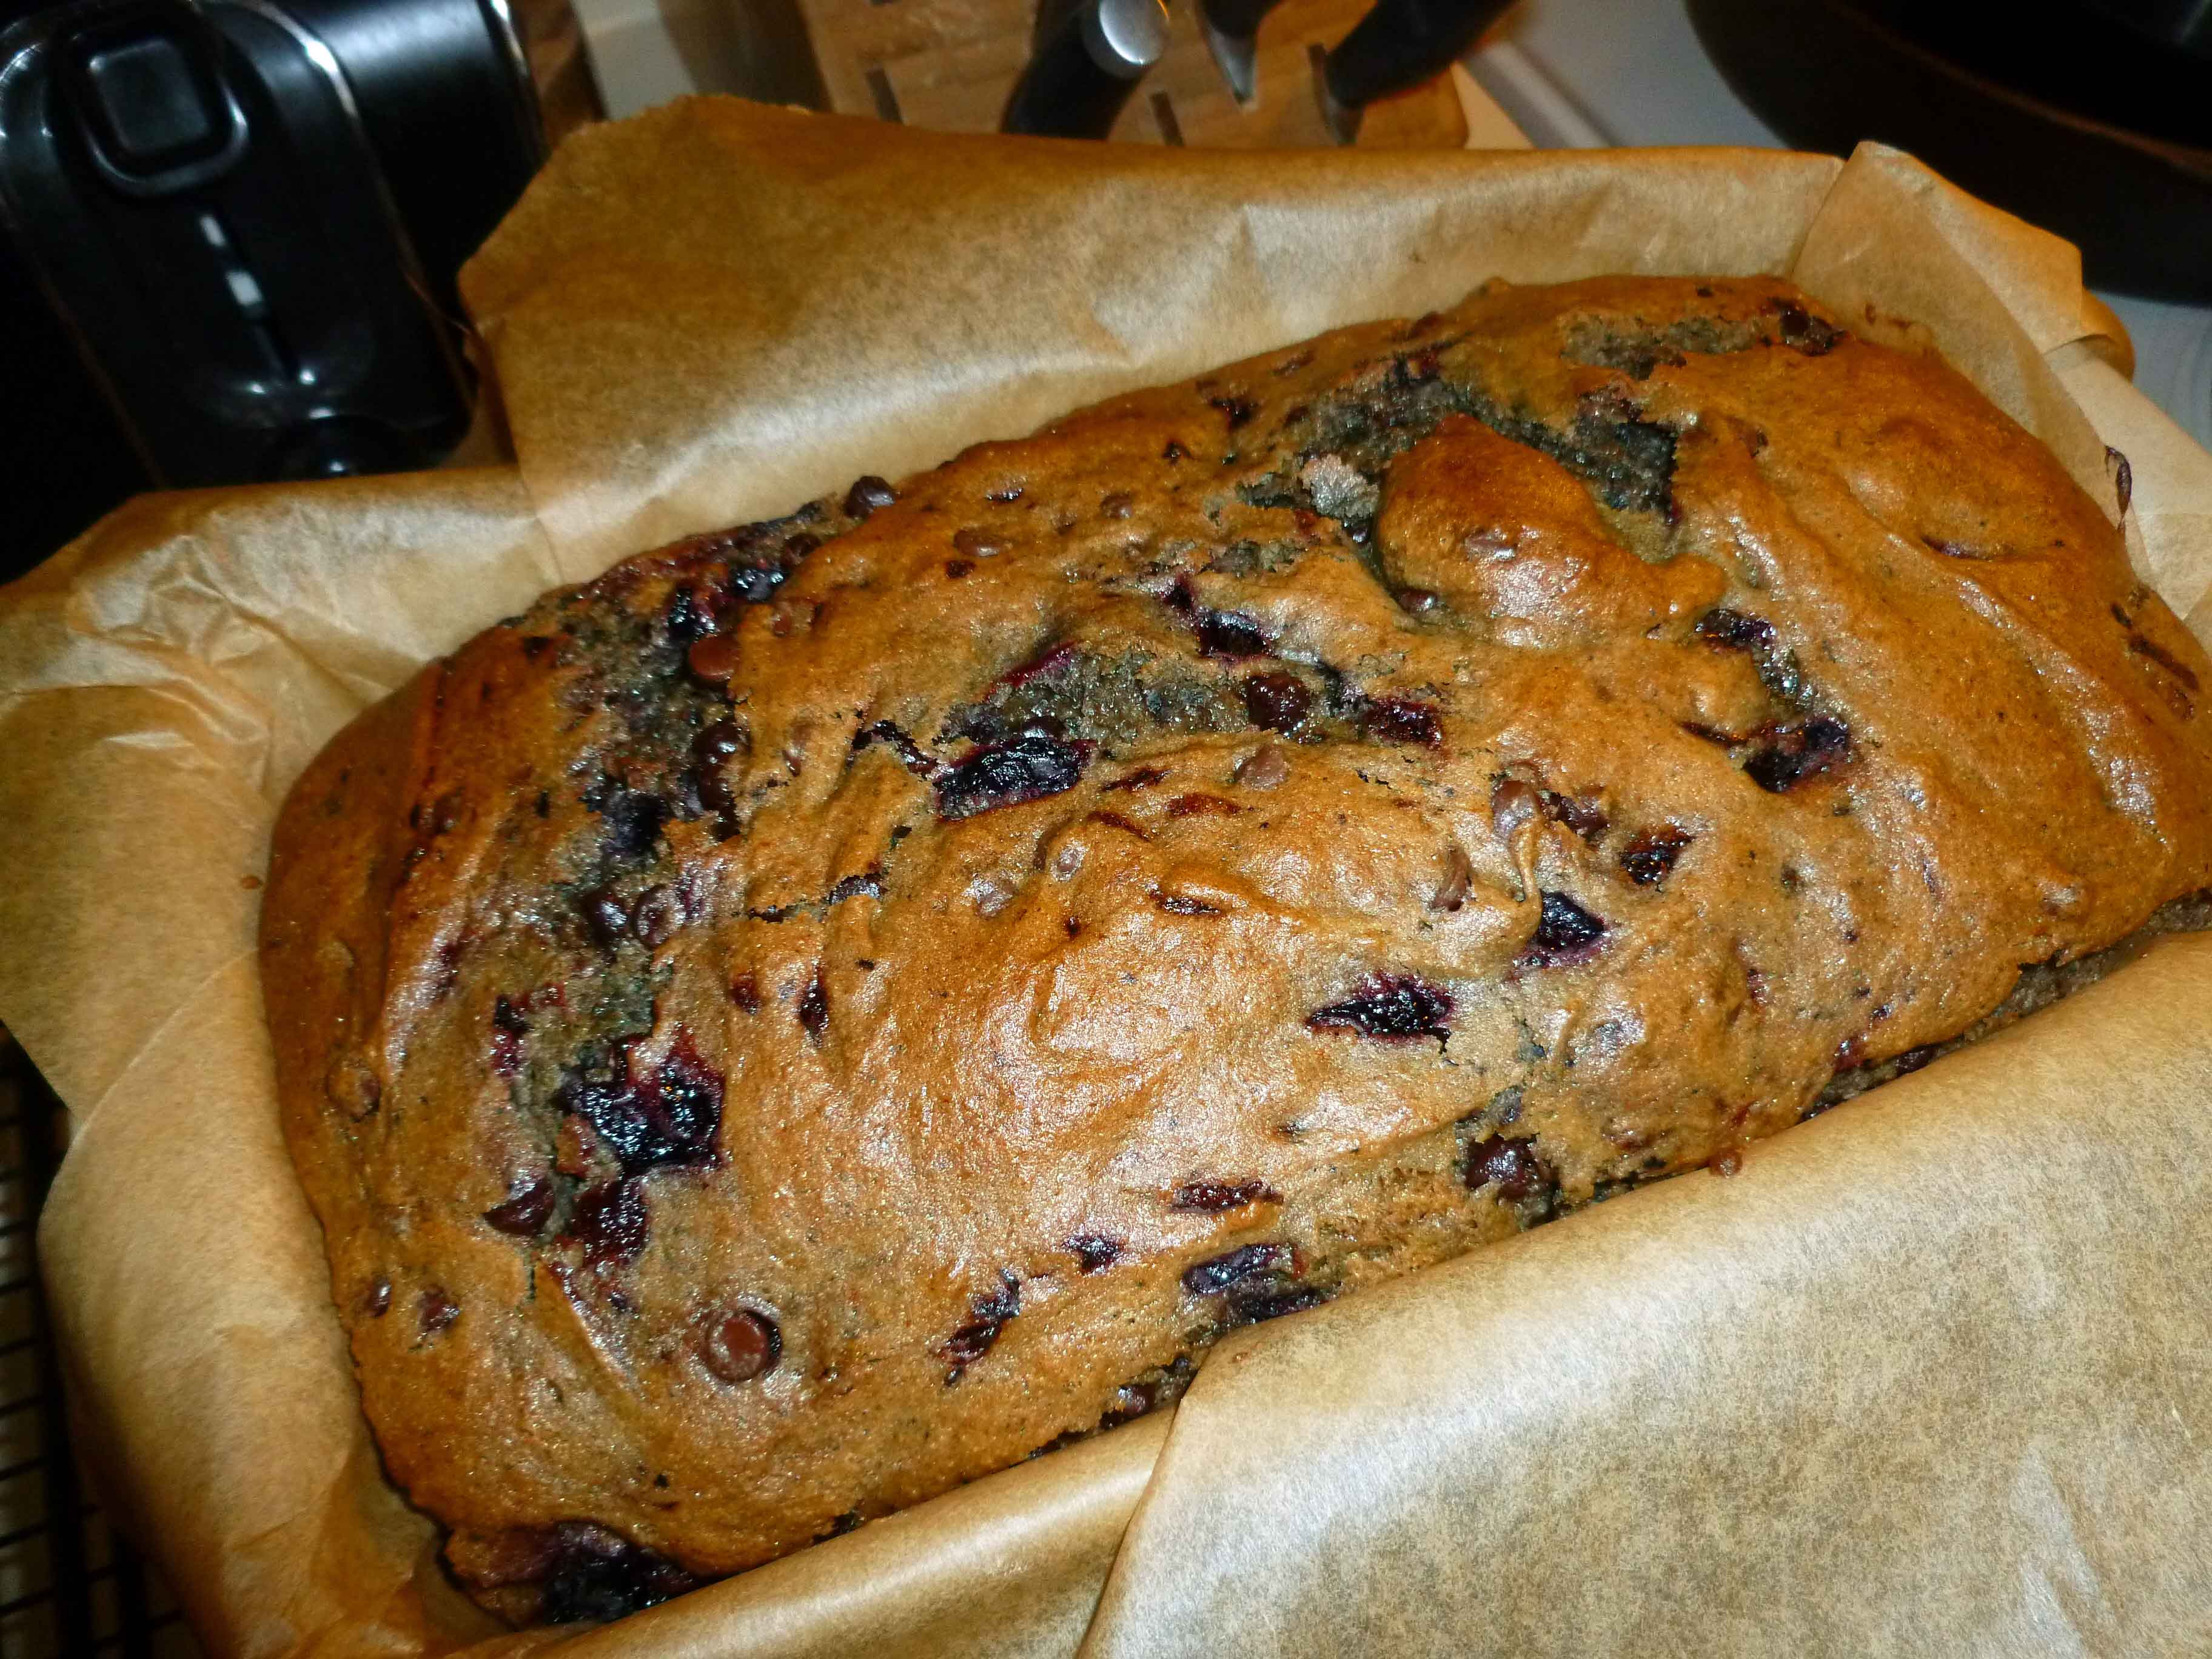
Can’t Tell a Lie Cherry and Chocolate Chip Quick Bread
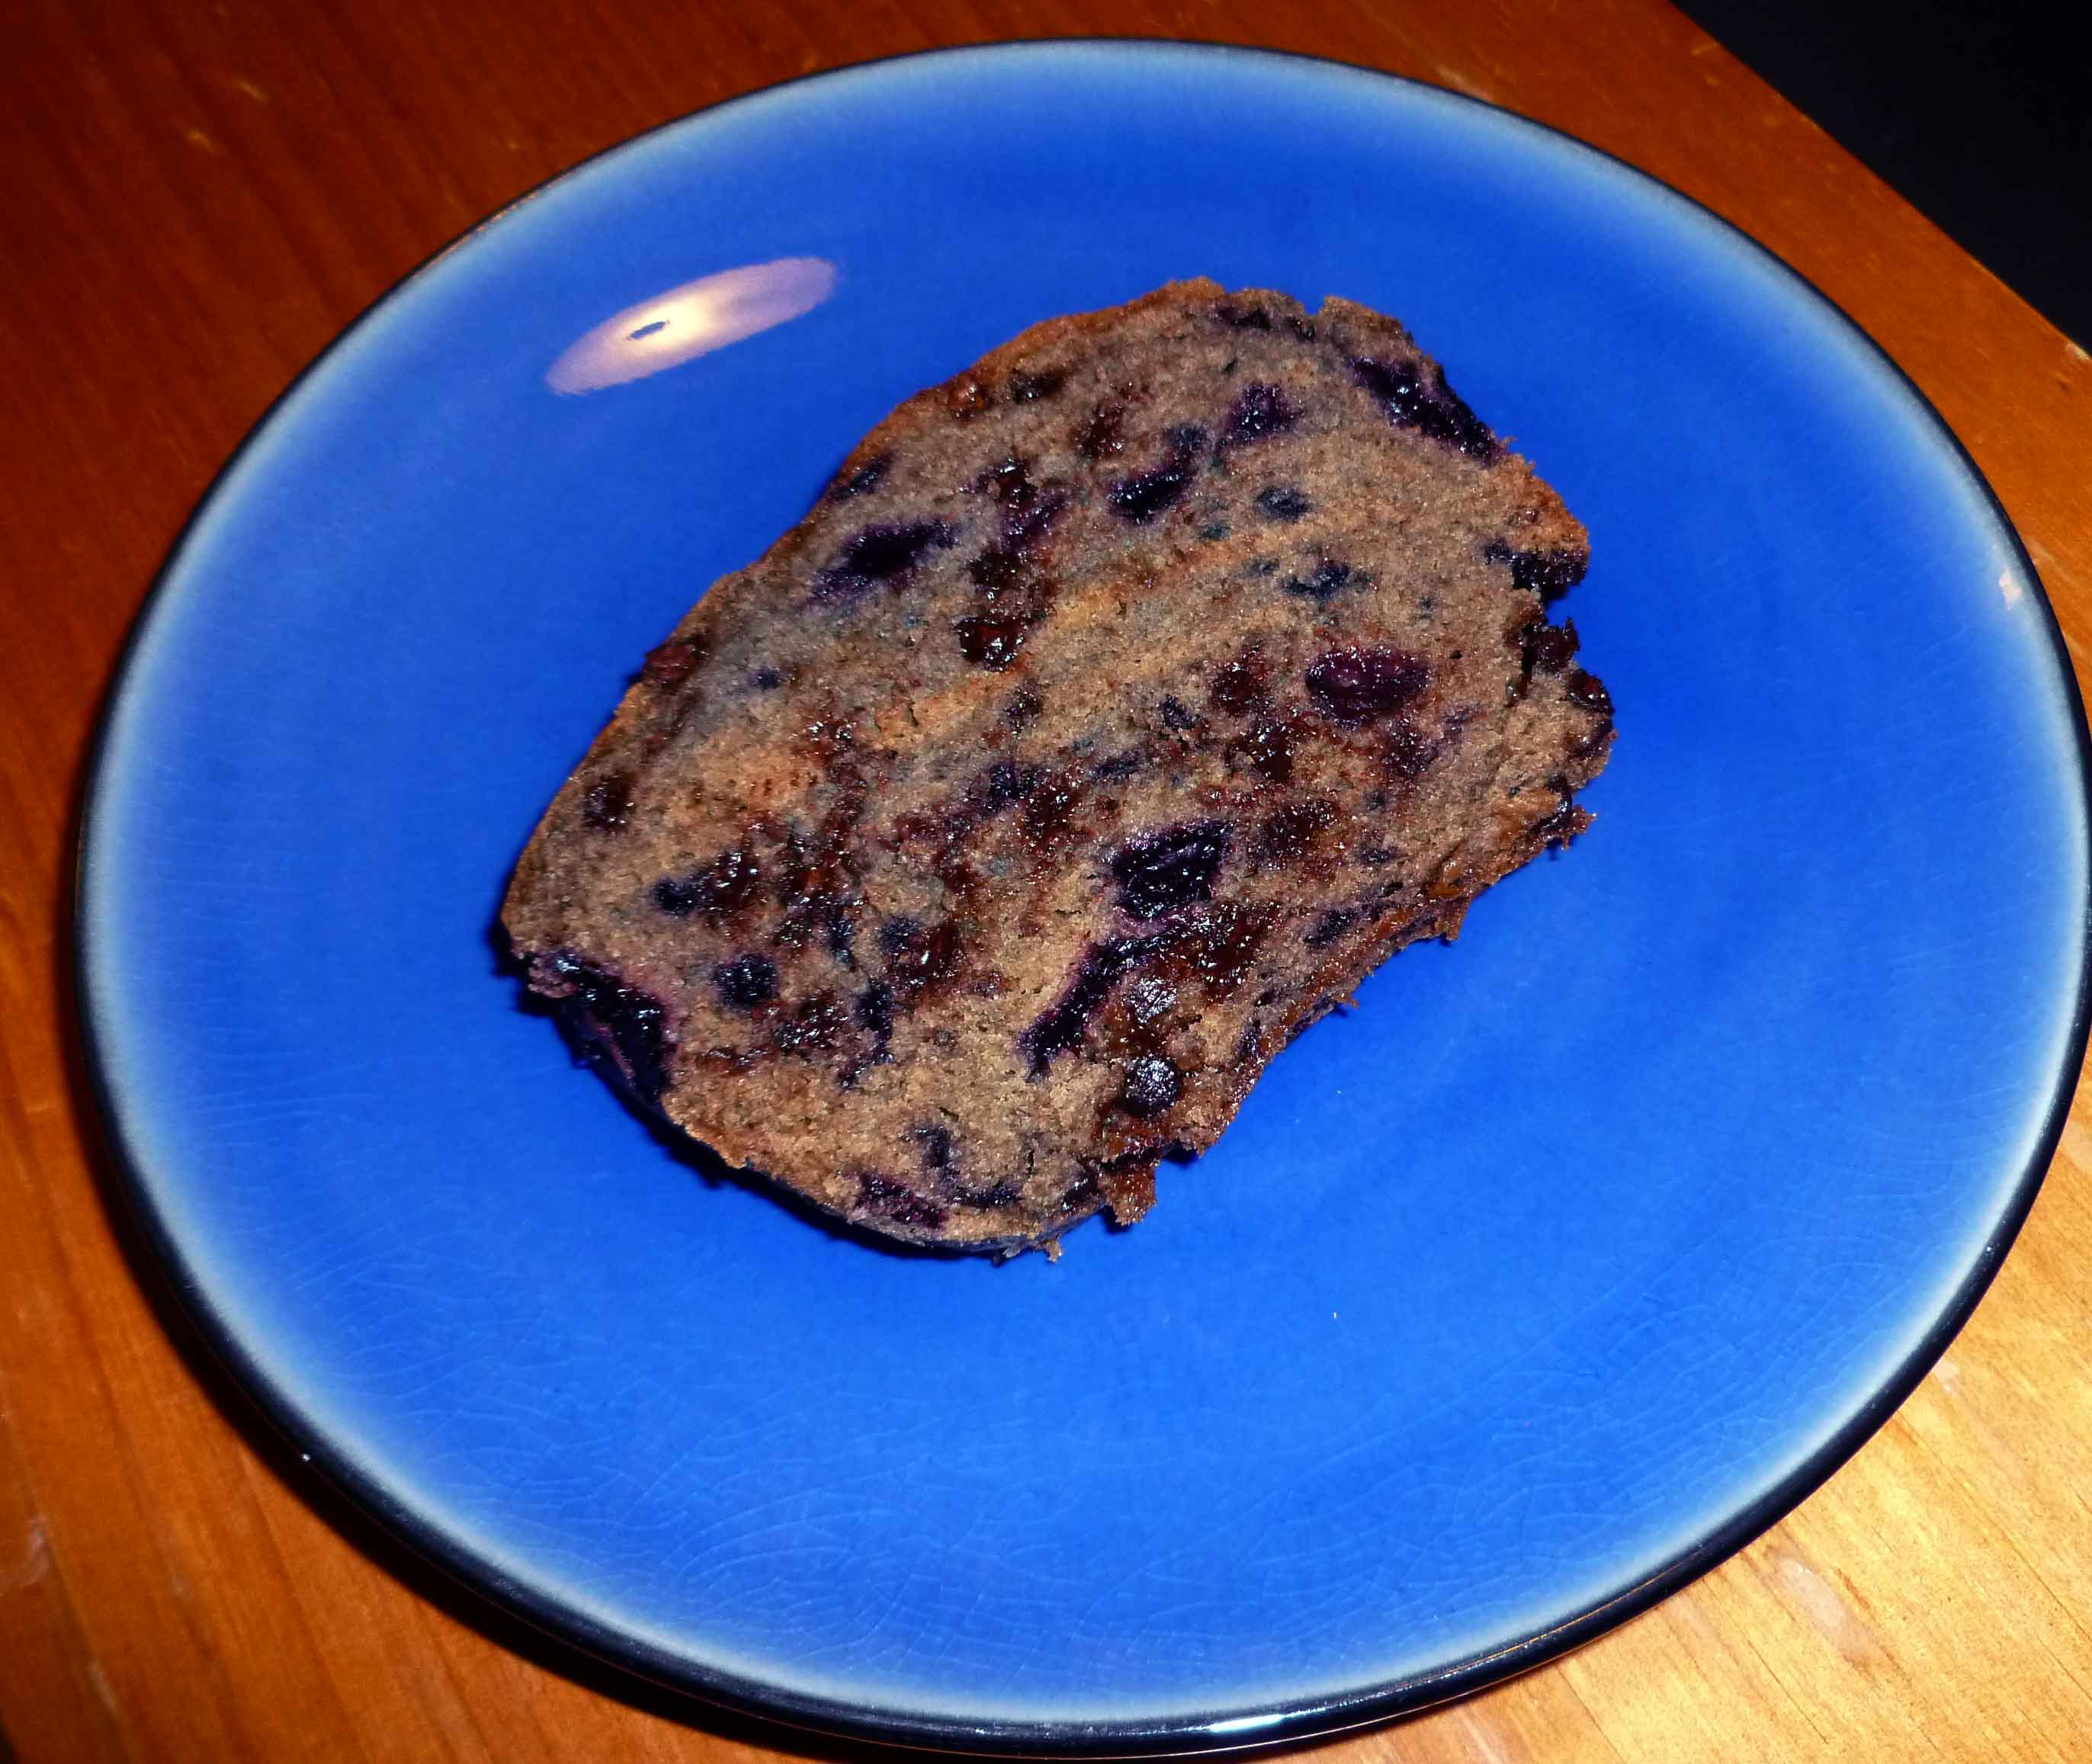
You know how hard it is to find a food theme for President’s Day? It’s hard. Which is why I’m using cherries out of desperation, even though I was a history major and I know that story about George Washington and the cherry tree is a crock. Despite that I decided to do it up, and make two versions of a chocolate and cherry bread dish that could be breakfast and dessert. This one is gluten free, and doesn’t have all that pesky rising and all that. I couldn’t find fresh cherries, so I used frozen ones, and was surprised at the blue tones I got in the finished dish. It’s almost like it had blueberries in it. In any case, since I’m not one who has to be gluten free, and since I’m not a gluten free baking genius, I started with a recipe from the gluten-free goddess®, and modified it a bit.
Can’t Tell a Lie Cherry and Chocolate Chip Quick Bread
1 cup of sorghum flour
1 cup of tapioca starch
1/2 cup of millet flour
2 teaspoons of baking powder
1/2 teaspoon of baking soda
3/4 teaspoon of xanthan gum
1/2 teaspoon of salt
2 teaspoons of cinnamon
1/4 teaspoon of nutmeg
1 cup of dark brown sugar, firmly packed.
1 cup of applesauce
1/3 cup of Canola oil
1 1/2 teaspoons of Ener-G egg replacer, mixed with 3 Tablespoons of water
2 teaspoons of vanilla
1 cup of Dole frozen Dark Sweet Cherries, chopped
1/2 cup of Enjoy Life Mini Chocolate chips
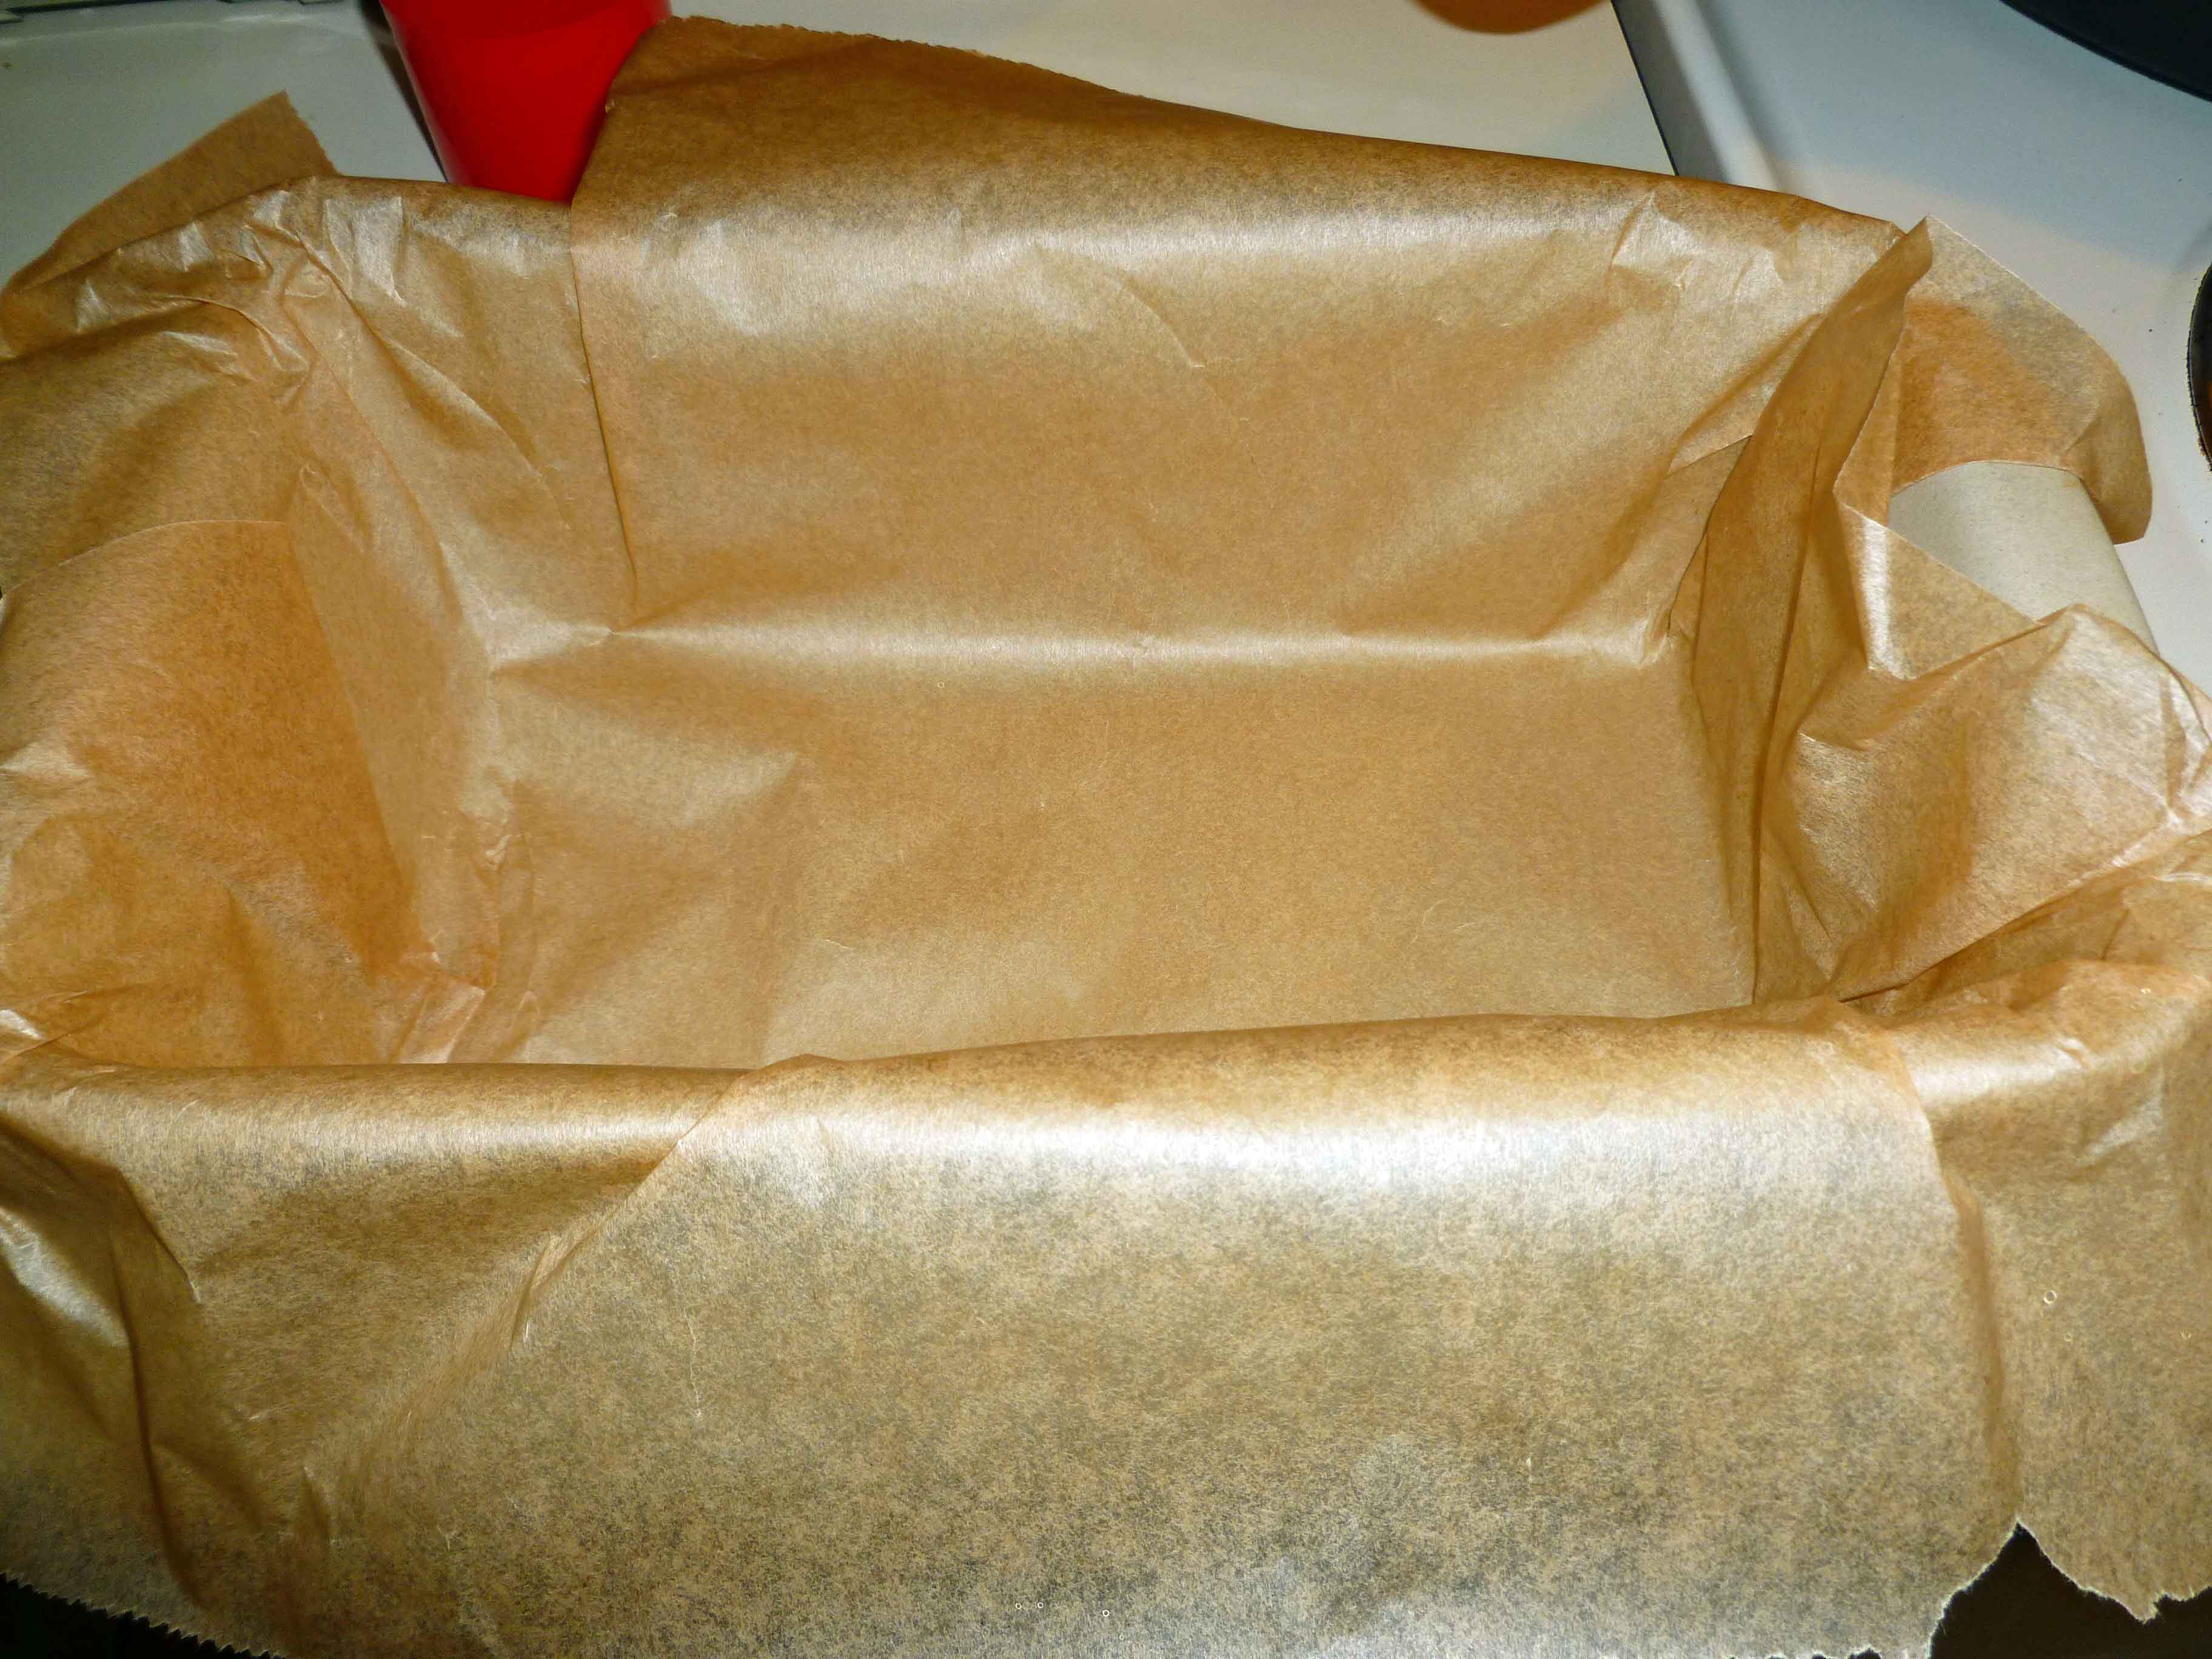
9 inch loaf pan
parchment paper
Preheat your oven to 350°, and line the loaf pan with parchment paper so that you can lift the loaf out of the pan in order to cool it.
Loaf Pan Lined with Parchment Paper
Place sorghum flour, tapioca starch, millet flour, baking powder, baking soda, xanthan gum, salt, cinnamon and nutmeg in a bowl (I used my KitchenAid stand mixer). Whisk together these ingredients until they are completely mixed. Add the brown sugar and whisk it into the other ingredients.
Now add the applesauce, oil, Ener-G mixture, and vanilla, and beat to combine and then continue beating the mixture on medium high until the batter is smooth.
Fold in the cherries and chocolate chips by hand with a spatula.
Folding in Cherries and Chocolate ChipsCompleted Batter
Pour batter into the parchment lined loaf pan, scraping down the sides of the bowl and smoothing out the top of the loaf.
Batter in Parchment Lined Loaf Pan
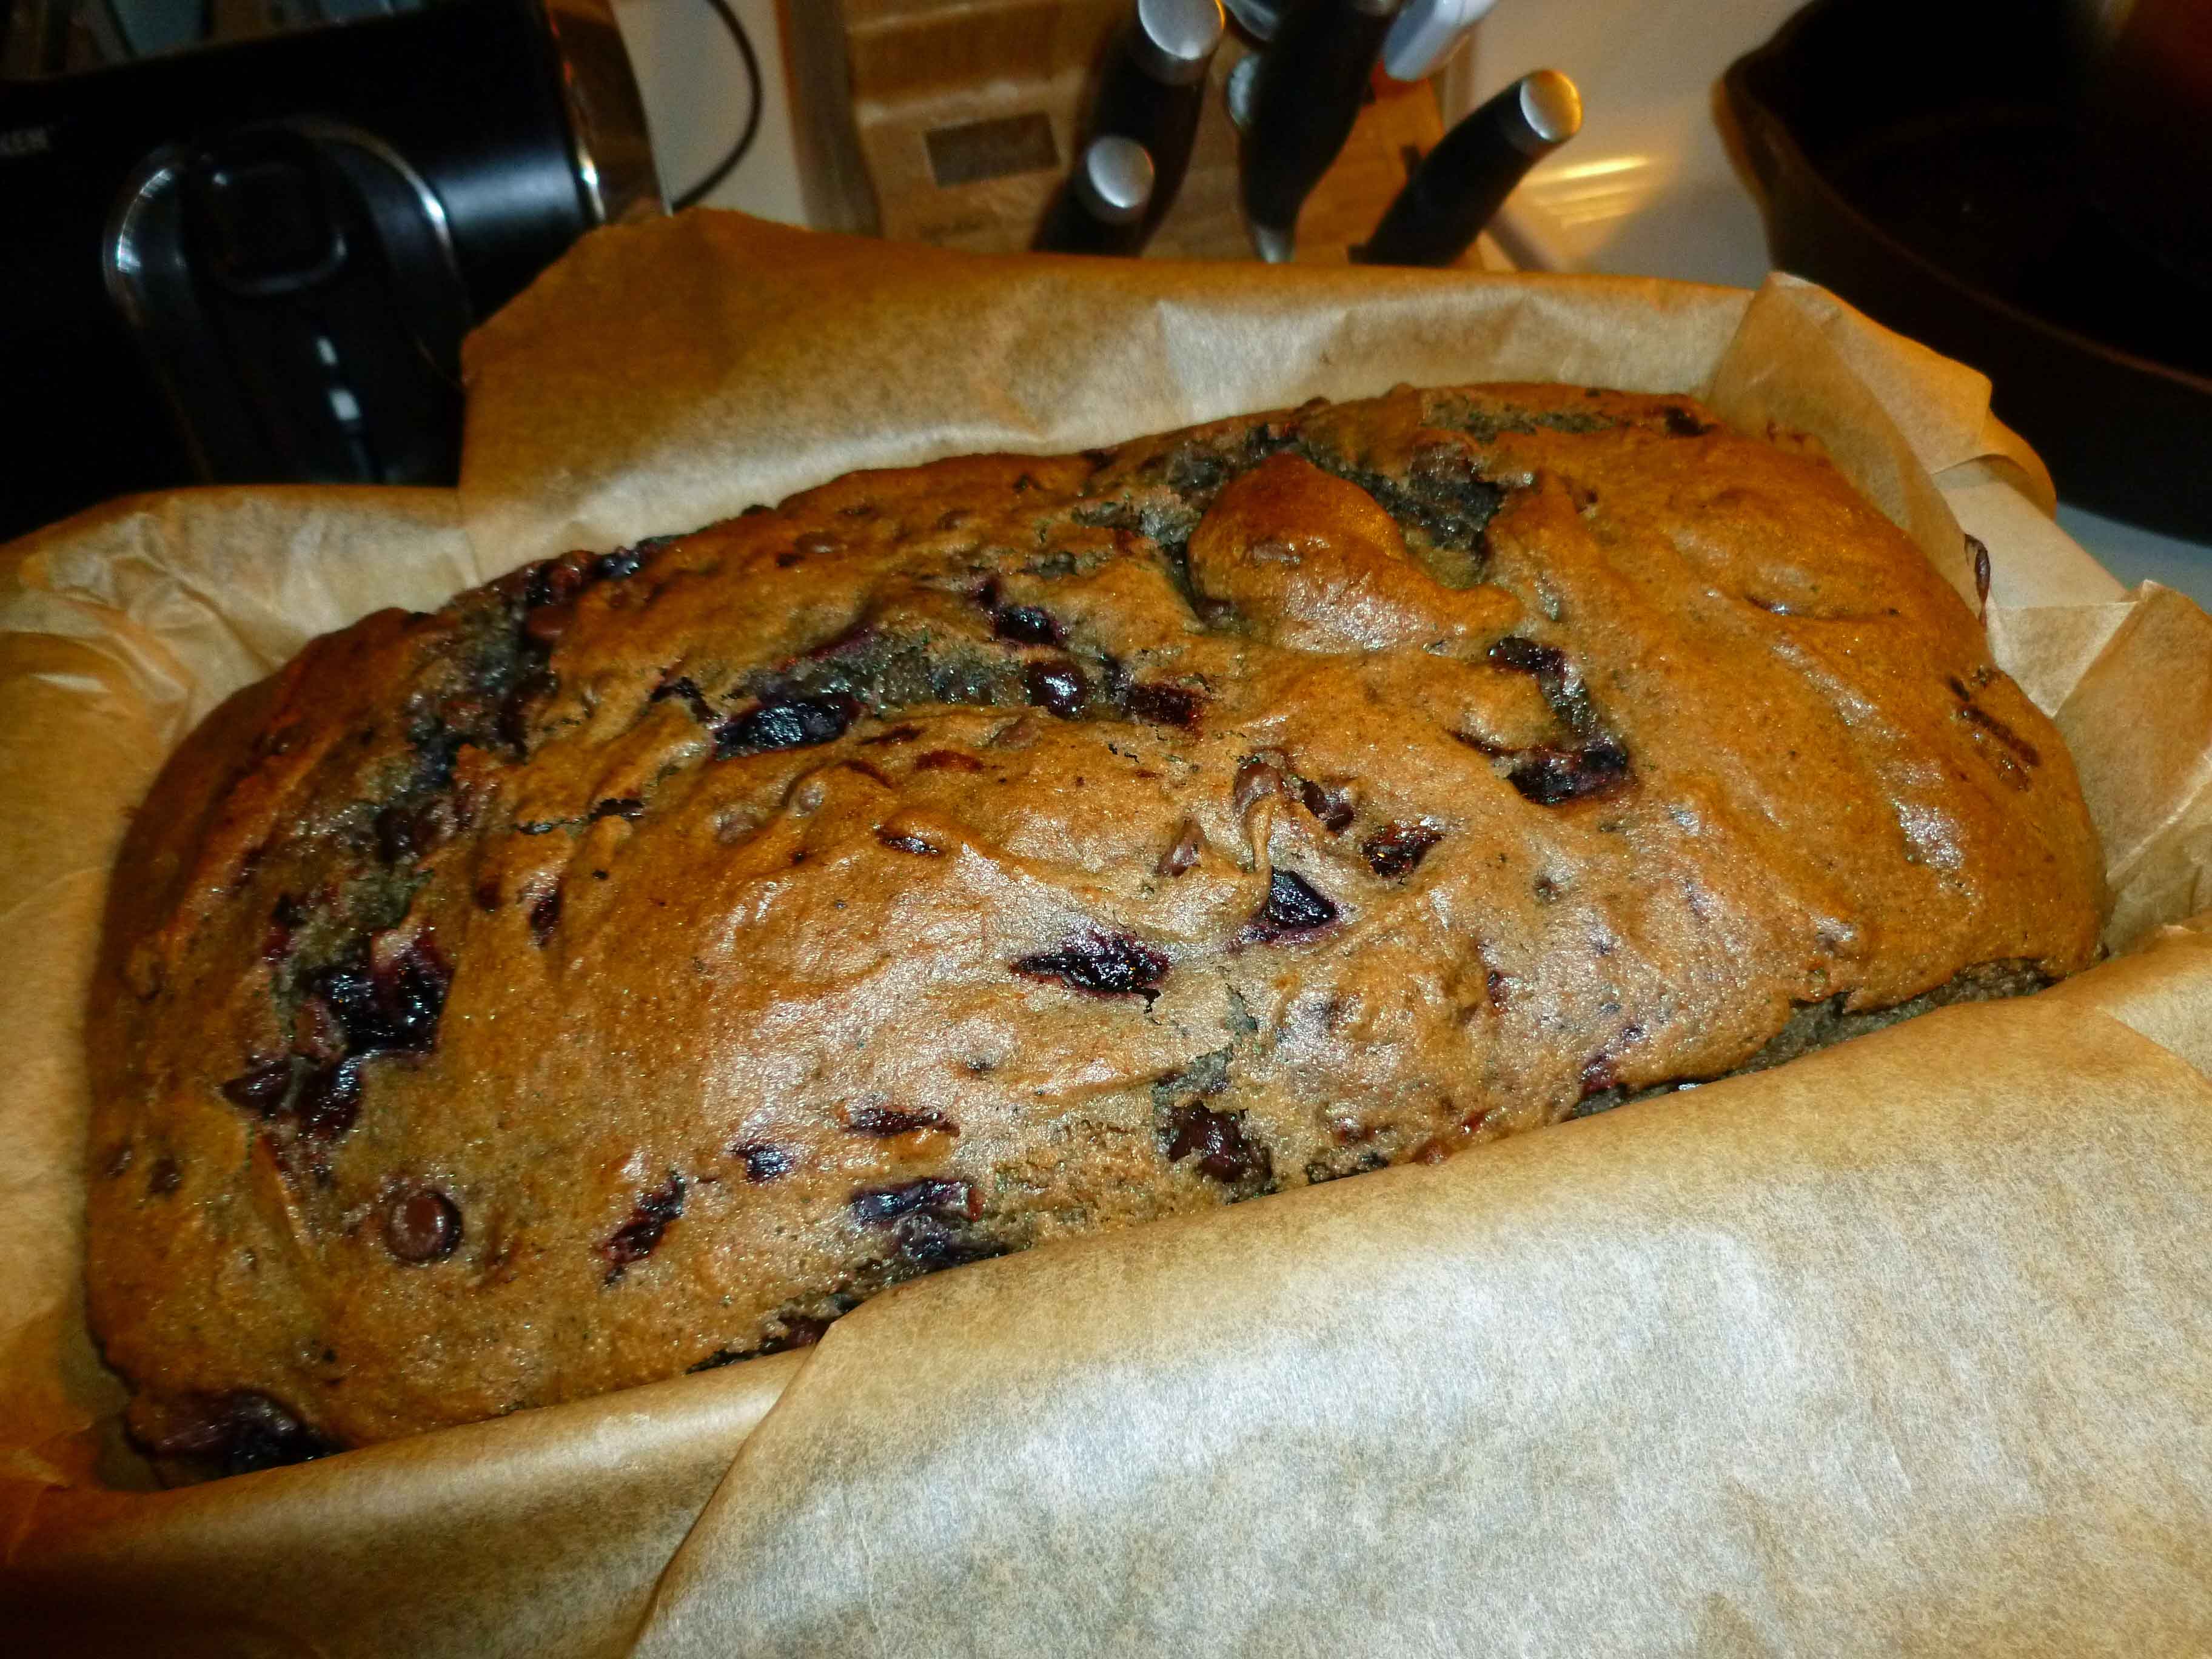
Bake for approximately 65 to 75 minutes or until you can insert a tooth pick and it comes back clean, except if you hit a chocolate chip and you have chocolate chip goo. If this happens, try again in a different place.
Baked Loaf in Parchment Lined Pan
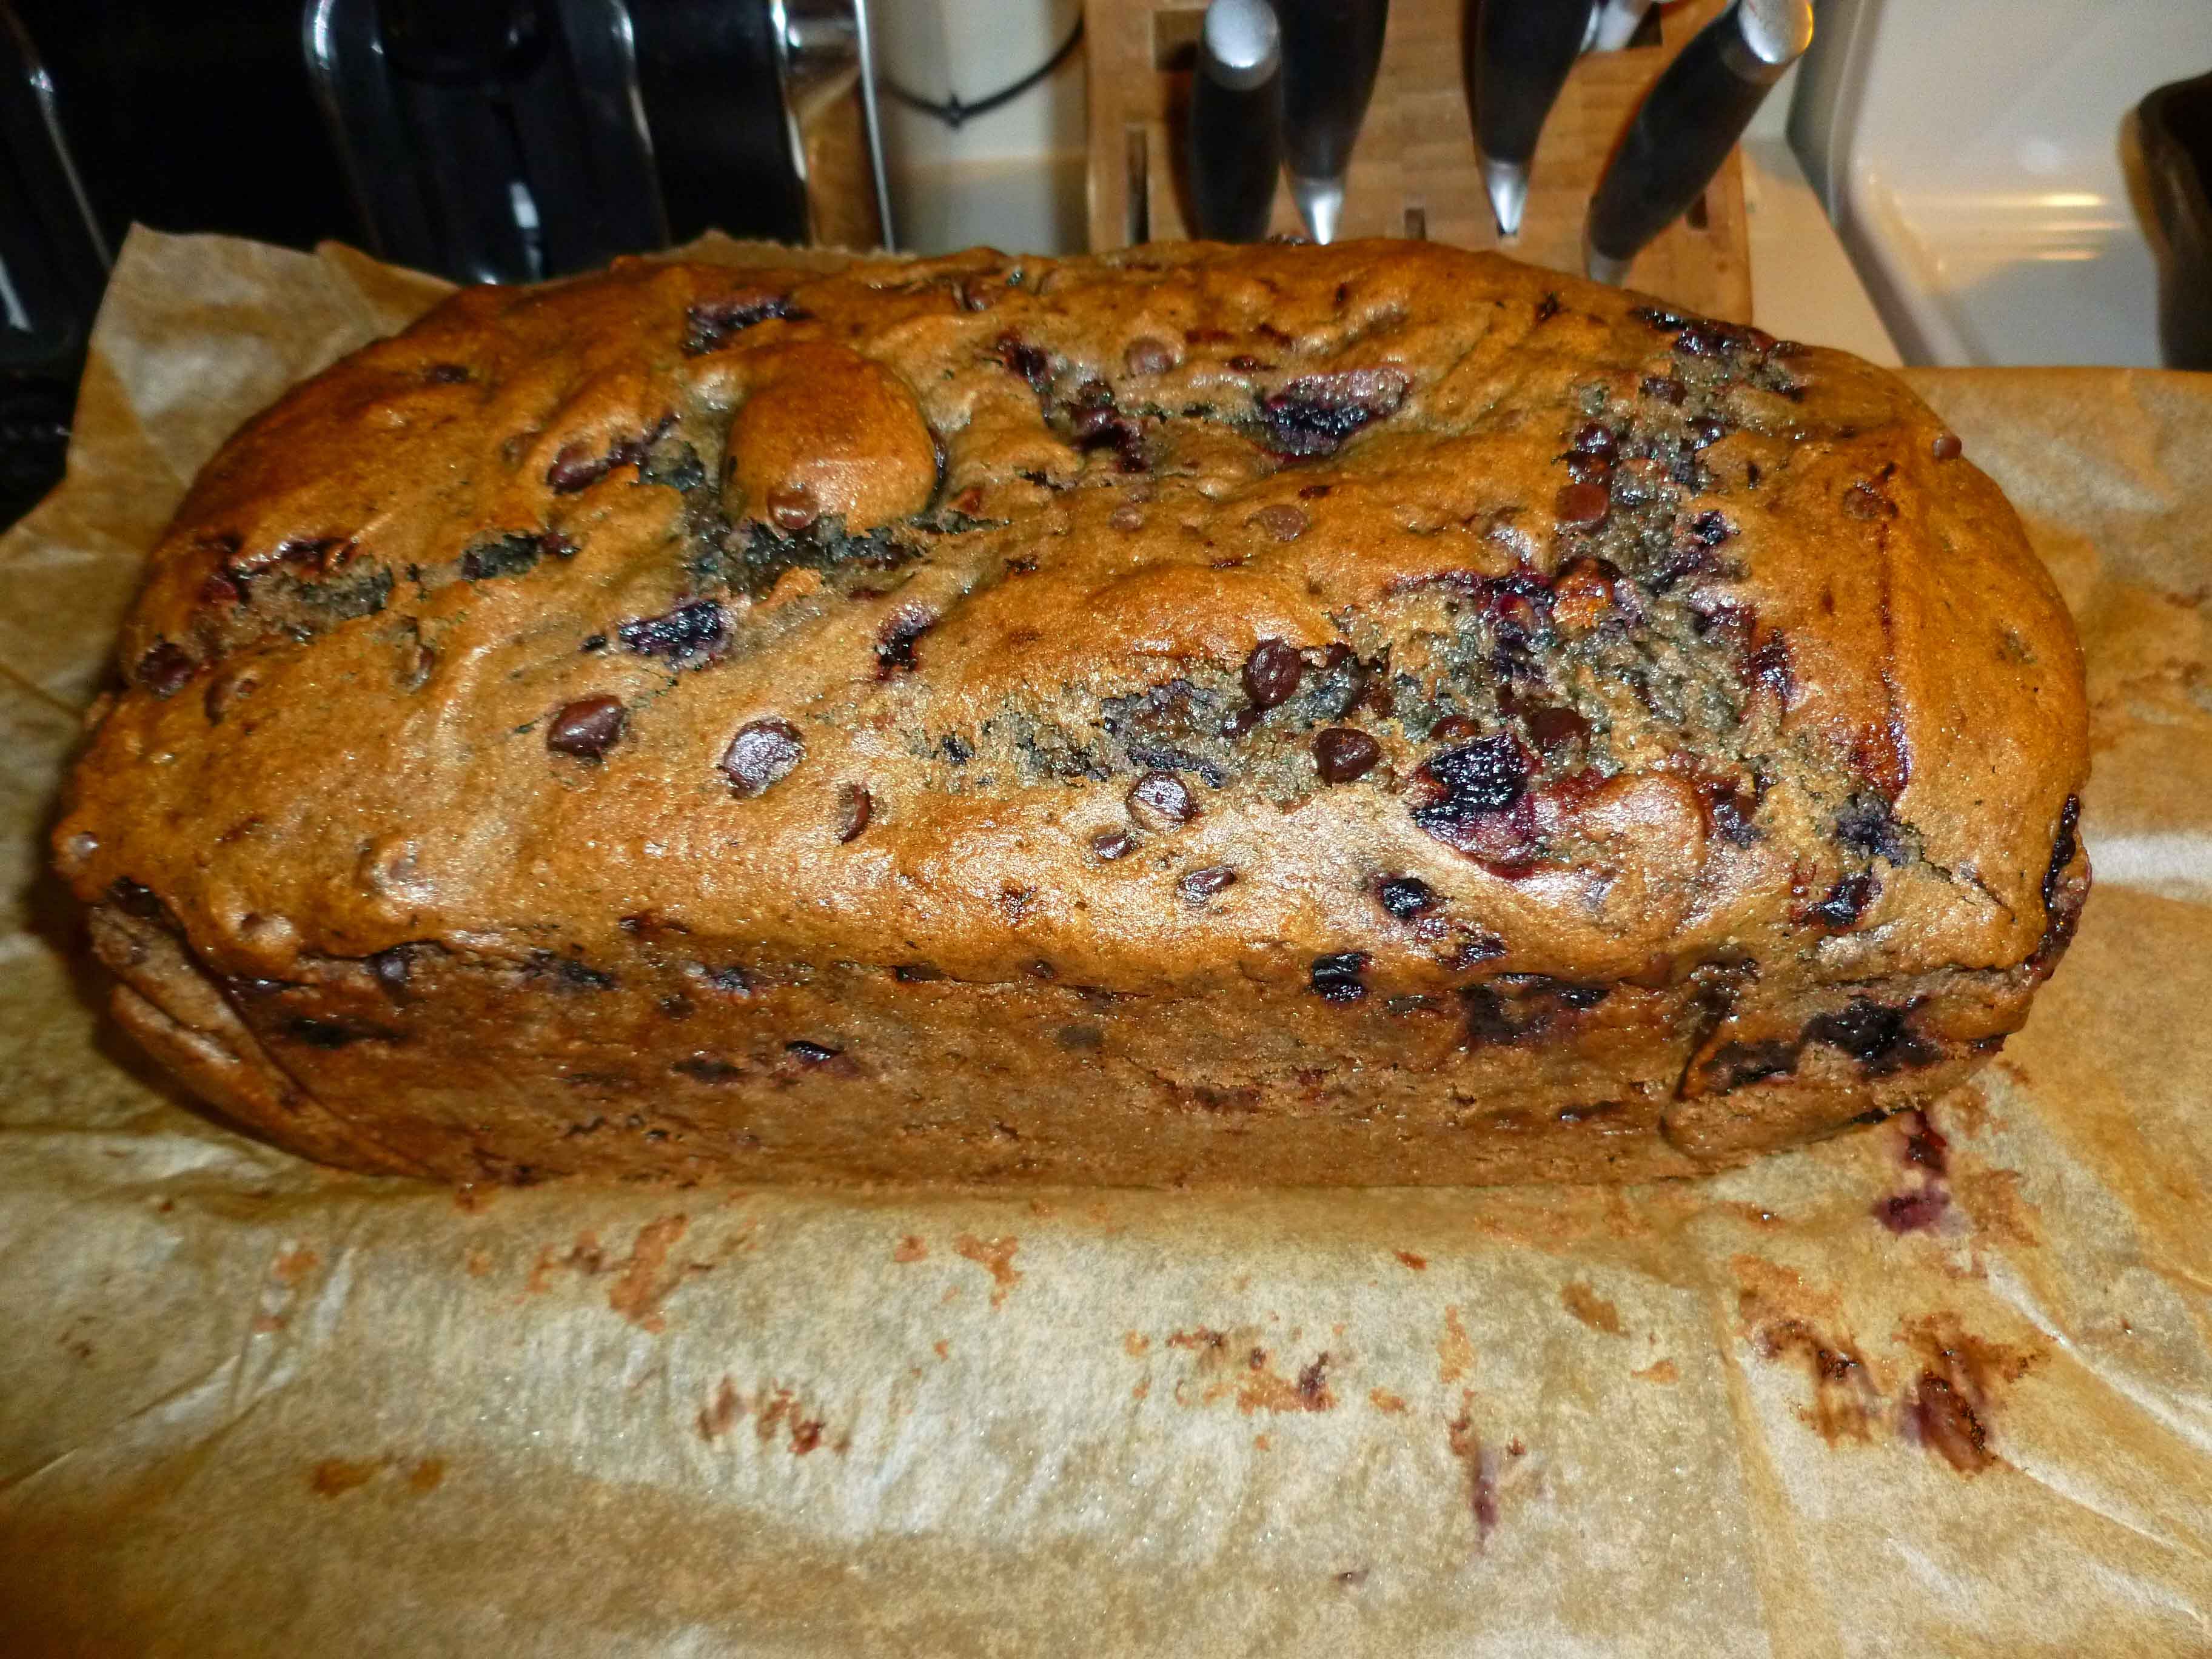
Once done, let the loaf cool for 15 minutes or so, and then use the parchment paper to lift the loaf out of the pan and onto a wire rack. Peel down the sides of the parchment paper and let the loaf cool.
Baked Loaf on Wire Rack with Parchment Peeled Down
Once cooled to down to slightly warm, slice yourself a piece and enjoy!
Slice of Can’t Tell a Lie Cherry and Chocolate Quick Bread
So the year before I got my allergy diagnoses, I spent time perfecting a brownie recipe. Which was, of course, based on wheat flours, and which did not, of course, translate well to gluten-free. It was my first attempt at my own gluten-free recipe — I replaced the flour in the recipe with a GF baking mix and made the first and only baked good that was not completely devoured by my office mates. It was sad; I was sad.
And yet, I kept trying because brownies are something that is almost universally loved. A very special group of my friends has cannonized my friend Michelle’s *special recipe* brownies, which I’ve added as a decadent alternative at the end of this recipe — “Book Club” Brownies should be reserved for very special occasions, and only for those who are worthy of such decadence.
And now, I bring you this recipe. I am sorry it’s not nut-free, but I have not yet found the right combination for nut AND gluten free.
I’d also like to introduce my new love, George, the best Christmas present ever. To clarify some confusion from my FB post — George is a girl, named in part after the Bugs Bunny Abominable Snowman cartoon and in part for George in the Nancy Drew books. Now that that’s cleared up, meet George!
GEORGE! I made a video, but it was really really boring.
At Last Gluten-Free Brownies
Line a square pan with parchment paper. Make sure you know if you have an 8×8 or 9×9 pan, as it will affect baking times below.
Pre-heat oven to 350F.
1 Tablespoon chia seeds, preferably white
4 Tablespoons water
Grind your chia seeds. I use a coffee grinder for spices, flax, and now chia — grind it good and fine. With a fork or small whisk, mix the ground seeds in a small bowl with 4 tablespoons of water. Set this aside — it will turn into a pretty stiff gel.
1/4 cup soy-free Earth Balance
2 Tablespoons coconut oil
Melt the oils together in a small pan. Because I wander off measuring other things, I always do this in my ad-hoc double boiler (small skillet on top of a saucepan). It’s safer for me, but feel free to do it in a pan directly on the heat or even in a microwave if you own one.
1.5 cups almond flour or almond meal (doesn’t seem to make a difference for this recipe)
1/2 cup gluten-free oat flour
1/4 cup coconut flour
2 Tablespoons quinoa flour
2 Tablespoons tapioca starch
1/2 cup cocoa powder
1/2 teaspoon salt
1/4 teaspoon baking soda
1 cup brown sugar, packed
Mix all your dry ingredients together well — yes, including the brown sugar. Now, to this, add your chia gel, the melted oils, and the following:
1/3 cup almond milk
3 teaspoons vanilla extract
Dry ingredients with melted oils and chia gel
Mix well, adding a little more almond milk if necessary. Dough should be stiff, but not dry — more like a cookie dough than a cake batter. It should stick to the beaters, but not make it hard for them to run.
Add your mix in ingredients. The chocolate chips are not, in my opinion, optional. The nuts absolutely are.
1/2 cup allergen-free chocolate chips
1/2 cup walnuts (optional)
Dump your batter into the lined brownie pan. It should not spread out on its own — so use your spatula to smash it down and spread it out, getting it into the corners. When it’s smooth, place a piece of parchment over the top and smooth it down onto the batter.
parchment paper topper
Bake at 350F. 8×8 pan — 35-40 minutes (my oven takes 37. It just does.) 9×9 pan — 25-35 minutes (again, 32.)
Now, and this is really really reallyimportant: DO NOT TRY TO EAT THESE BROWNIES HOT. They don’t have any structural integrity at all when they are warm. Peel the top sheet of parchment off. Cool them in the pan for 10-15 minutes, then use the parchment to lift out the brownies as a whole and set them on a cooling rack. Cool them completely. Then do your thing.
Bookclub Brownies variation
This is really guilding the lily, but it’s a tradition, so here you go.
In a double boiler (real, if you’ve got it, or fake it again), melt 2/3 cup of allergen-free chocolate chips with 3 Tablespoons of non-dairy milk. That’s it.
You could also make a frosting or even use a prepared frosting (many of Duncan Hines’ prepared frostings are allergen-free, though I don’t know about cross-contamination issues). But I find that to be more work than really necessary to get the good flavor here. Your mileage may vary.
While brownies are still warm and in the pan, pour this chocolate ganache over them and smooth it out. It won’t look like quite enough first, especially if you’re using a 9×9 pan, but it is. Taking two toothpicks, or better yet, wooden bbq skewers, poke holes all over the brownies, through the ganache. Follow through with the COMPLETE COOLING directive. Enjoy your extra fudgy magic brownies.
If you’d like to guild the guilding and make minty holiday brownies, top with crushed peppermint candies.
At Last Brownies, with “Book Club” variation
1 Tablespoon chia seeds, preferably white
4 Tablespoons water
1.5 cups almond flour or almond meal (doesn’t seem to make a difference for this recipe)
I think you’re an apple crisp person or an apple pie person. Or at least I am, and I fall squarely into the apple crisp camp. I can pass up apple pie anytime because unless the crust is perfect and amazing, which it rarely is, I don’t want it. It just seems like a waste of space in my stomach when I could be using that space for the good stuff. And a fruit crisp is all good stuff. And it’s a lot easier to make a crisp than a pie. So since it’s that time of year when you can get both cranberries, and lovely apples, I decided this would be a great time to post this recipe. This is also a lovely alternative to pie at Thanksgiving if you’re in a time squeeze or you just haven’t managed to perfect your pie crust technique yet, gluten free or otherwise.
Cortland Apples
As a side note, I have a problem with believing that 4 cups of cored, peeled and sliced apples can possibly equal 3-4 real apples. For some reason when I’m at the grocery store, I am compelled to buy twice as many apples as I need. So although there are 5 apples in this picture, it’s because I already cut up the 3 apples (three, count them, three) I needed to make this recipe, because I bought eight. (Eight!! What was I thinking?) So when I say 3-4 apples below, I really mean it. Good thing we like to just eat apples.
Apple Cranberry Crisp
12 oz bag of fresh cranberries (or frozen, I often pop a bag or two in the freezer at this time of year to have on hand later when you can’t get them)
4 cups of cored, peeled, and sliced apples (3-4 apples depending on size, I used Cortlands, but any baking apple will do. )
1 cup sugar
1 Tablespoon of lemon juice
¼ teaspoon of salt
1 cup brown sugar, packed
1 cup quick cooking oats
½ cup of oat flour (you may need additional flour depending on humidity and whether your crumble stays together, add it 1 Tablespoon at a time until it holds together)
6 Tablespoons of Earth Balance soy free margarine
1 teaspoon of Earth Balance soy free margarine
Quartered, Cored and Peeled ApplesCored, Peeled and Sliced Apples
When peeling apples, I prefer to use a vegetable peeler rather than a knife because it cuts a thinner peel off and I lose less apple to the garbage can. I like to do varying size pieces so that some get more mushy and some are larger so you get a varying mouth feel.
Rinse the cranberries and pick out any mushy, squashed, or icky-looking berries, as well as any leaves and stems left in the package.
Preheat your oven to 325 degrees.
Cranberries, Apples, Sugar, Salt and Lemon in BowlCranberry and Apple Mixture after mixing
Once all your apples are peeled and your cranberries are clean, combine the cranberries, apples, sugar, lemon juice and salt in a bowl. Mix the contents of the bowl well.
Cranberry Apple Mixture in Baking Dish
Grease the bottom and sides of an 8” x 8” baking dish with 1 teaspoon of Earth Balance soy free margarine. After greasing is complete, place place the cranberry apple mixture into the baking dish.
Brown Sugar, Oats, Oat Flour and Earth BalanceCutting in Earth Balance
In another bowl, combine the brown sugar, oats, and oat flour. Mix well, and then cut in the Earth Balance soy free margarine. I used a pastry blender, but you could use a fork if you don’t have one.
Apple Cranberry Crisp after baking
Cover the cranberry apple mixture in the baking pan with the brown sugar mixture. Bake at 325 degrees for 60 minutes (70-75 minutes if your cranberries are frozen) or until topping is crispy and fruit tender.
Serve with your favorite vanilla dairy free ice cream or dairy free whipped topping. Enjoy!
Now so far, gluten-free baking is still new to me. I’ve had some utter disasters, so I’m still sticking pretty close to the recipes of other people. So far, the majority of the recipes in this cookbook have been overwhelmingly winners. I can highly recommend it as a good starting cookbook for gluten-free baking — it doesn’t teach you all the science, but the recipes are straightforward and (best of all) WORK.
Doughnuts were one of the family food traditions that center on my dad, not my mom. No matter where we were for vacation, my father somehow managed to drive past a doughnut place on the way into town. Now, if you live in the Northeast where there’s a Dunkin’ Doughnuts at least every mile, that’s not all that impressive. We didn’t, and it was a skill. Incapable of moderation, he always bought at least a dozen doughnuts our first morning of vacation, for three people — because, again, my mother didn’t like them. We spent a lot of family vacations on a total sugar high.
Now, even if you aren’t gluten-free, if you have food allergies, most doughnuts are off the table. Most bakeries use nuts, eggs, and dairy, and don’t use allergen-safe food practices, so they’re danger zones. If you’re lucky, and live in NYC, LA, or Orlando, you have access to a Babycakes bakery. If you live elsewhere, you have their cookbooks, including Babycakes Covers the Classics, which includes doughnuts.
First: You MUST have doughnut pans for this! I have one large doughnut pan that makes 6, and a small one that makes 12. This is perfect for one recipe of doughnuts. The cookbook will tell you to grease your pans with melted coconut oil. I use Pam for Grilling (does not contain soy) for all my pan greasing needs, for lo, I am lazy. Also, I always miss spots otherwise.
Mise en place
Whisk dry ingredients together.
1 cup sugar
3/4 cup white rice flour
1/2 cup gar-fava flour (blend of garbanzo bean and fava bean flours — Bob’s makes this, and it is absolutely worth finding)
1/2 cup potato starch
1/4 cup arrowroot
1 1/2 teaspoons baking powder
1/2 teaspoon xanthan gum
1/2 teaspoon salt
1/8 teaspoon baking soda
Add wet ingredients and mix until just combined thoroughly. A note about measuring — Erin McKenna uses ONLY dry measuring cups for all recipes, so you might want to do the same.
1/2 cup melted coconut oil or canola oil (they both work, but if you can do coconut, do — it adds flavor)
1/4 cup vanilla (yes, 1/4 CUP)
1/2 cup hot water
Spoon batter into doughnut pans. This recipe makes 12 doughnuts, or 6 large and
Raw Doughnut Power
12 small. Which is perfect. Smooth out your batter, and bake for about 15 minutes, until doughnuts are golden. In my (not extensive) experience, browning is not a good sign of “done” for gluten-free baking, so use a toothpick to test.
Let them rest in the pan for 5-10 minutes and then cool. If you’re going to use a granulated sugar topping (like cinnamon sugar), do it when the doughnuts are still mostly hot.
Naked Doughnuts
I prefer powdered sugar, and it seems to stick best when the doughnuts are just barely warm. Chocolate ganache and sprinkles are also a big winner.
These are fine hot, but what makes this my favorite recipe is that I think they actually taste best if you make them the night before you want to eat them.
Do you feel you’re missing out on the sugar that makes Halloween special, given that everything is chock full of allergens? You won’t after these cupcakes.
This entire recipe is an excuse to play with marshmallow fondant, honestly, in my favorite baked goods format: the cupcake. Since gluten-free baking is still pretty new to me, I rely on other people’s recipes, and this is from one of my favorite cookbooks ever: Vegan Cupcakes Take Over the World (and well they could), by Isa Chandra Moscowitz and Terry Romero. The fondant is from sparecake — this version isn’t necessarily vegan, but can be — find vegan marshmallows, and check the sourcing of your powdered sugar.
Chocolate Gluten Freedom Cupcakes (from Vegan Cupcakes Take over the World)
Preheat oven to 350F and line a tin for 12 cupcakes.
In LARGE mixing bowl (trust me here), combine the following and mix on medium speed to combine
1 cup rice milk
1/3 cup canola oil
3/4 cup sugar
2 teaspoons vanilla extract
1/4 teaspoon almond extract (or more vanilla)
Add the following and mix until flour is dissolved and mixture is well emulsified:
1/4 cup tapioca flour
2 tablespoons ground flax seed
Add and mix on high for about 2 minutes — don’t worry about over-mixing gluten-free baked goods — there is no gluten!
1/3 cup unsweetened cocoa powder
1/2 cup white rice flour
1/2 cup quinoa flour
1 teaspoon baking powder
1/2 teaspoon baking soda
1/4 teaspoon salt
Fill tins about 3/4 full. Bake 20-25 minutes — test with a toothpick. Cool thoroughly on a rack.
Marshmallow Fondant
You need:
1/4 cup water
1 bag of marshmallows
2+ lbs. of powdered sugar
frosting dye (I used AmeriColor gels)
First, totally fail to read all these directions and go forth blindly. Or, if you want to be smarter than me… you can follow the link above for the easy way. I ended up buying regular marshmallows. I also don’t have a microwave. So the recipe as linked above isn’t quite how I ended up doing things. I did two batches, and I’m only telling you what worked below.
To a large sauce pan, add 1/4 cup water. Set heat at the high end of low.When the water is hot, add 1 bag of marshmallows (10 oz). Melt over low heat. A silicone spatula seems to work best for this.
When the marshmallow is fully melted, add your coloring. Go for darker than you intend, as you are about to add an unbelievable amount of powdered sugar to this. Mix the color in thoroughly.
Now add powdered sugar. Add a cup or so at a time (no real need to measure here, just dump it in — you’re likely to use the whole bag). Mix the powdered sugar in until you start to get a dough that pulls away from the sides of the pan.
Figure out what you’re going to knead on — I used a large pizza pan — and grease it GENEROUSLY (I’m serious, don’t skimp) and grease your hands. Dust your work surface with a good swath of powdered sugar, and dump your fondant dough in the middle of it. Now get in and knead. You will get a dough that isn’t (too) sticky, and that’s when you’re done. There are no pictures of this step. My camera is covered in enough powdered sugar.
Wrap your dough ball in plastic wrap and set it aside for half an hour. Now clean up your mess and, if you need another color, do it all over again!
When your dough is rested and your cake is at room temperature, roll out your dough, just like any other dough. My technique needs work, but it worked out. Dust your counter and rolling pin with powdered sugar, and pick up and unstick the dough several times. Then cut out fun things and “glue” them to your cake! Standard practice is to use a buttercream as glue, but there was no way I was making frosting just for glue, and a little bit of water seems to have done a great job.
And you have: Bat Signal cupcakes! Not perfect, not even close, but pretty good for a first try, I think. I would love to figure out how to get the powdered sugar “‘dust” off better — I brushed it off with a marinade brush, but it still looks a little dusty.