Notice: Function _load_textdomain_just_in_time was called incorrectly. Translation loading for the wp-ultimate-recipe domain was triggered too early. This is usually an indicator for some code in the plugin or theme running too early. Translations should be loaded at the init action or later. Please see Debugging in WordPress for more information. (This message was added in version 6.7.0.) in /home/maryzahc/public_html/adultfoodallergies.com/wp-includes/functions.php on line 6131 denisedaniel – Page 4 – surviving the food allergy apocalypse (archive)
Because Denise is busy planting the back 40 and dealing with some minor but annoying medical stuff, we’ve decided to take the month of June off.
We may do some tinkering around here in the meantime, so don’t be surprised if you check in and things change a bit. But please meet us back here on Monday, July 3rd, for a new recipe and we’ll be back to working on providing you with our links from poking around the internet for Fabulous Food Allergy Fridays on July 7th. In fact, sign up for emails and we’ll deliver our new posts directly to your inbox!
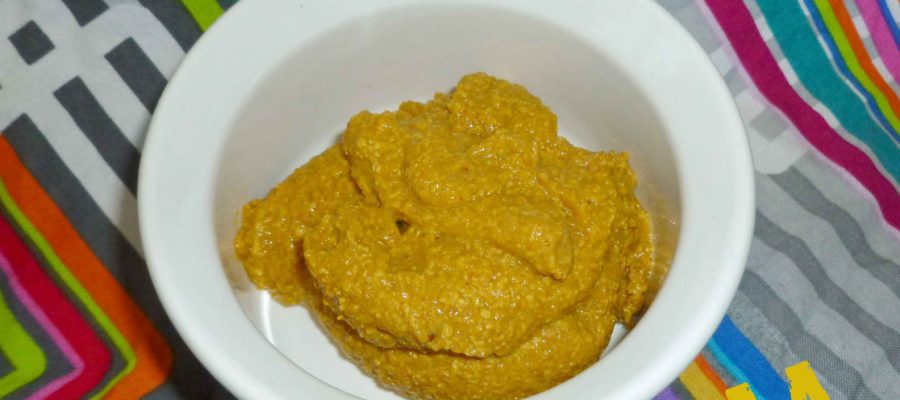
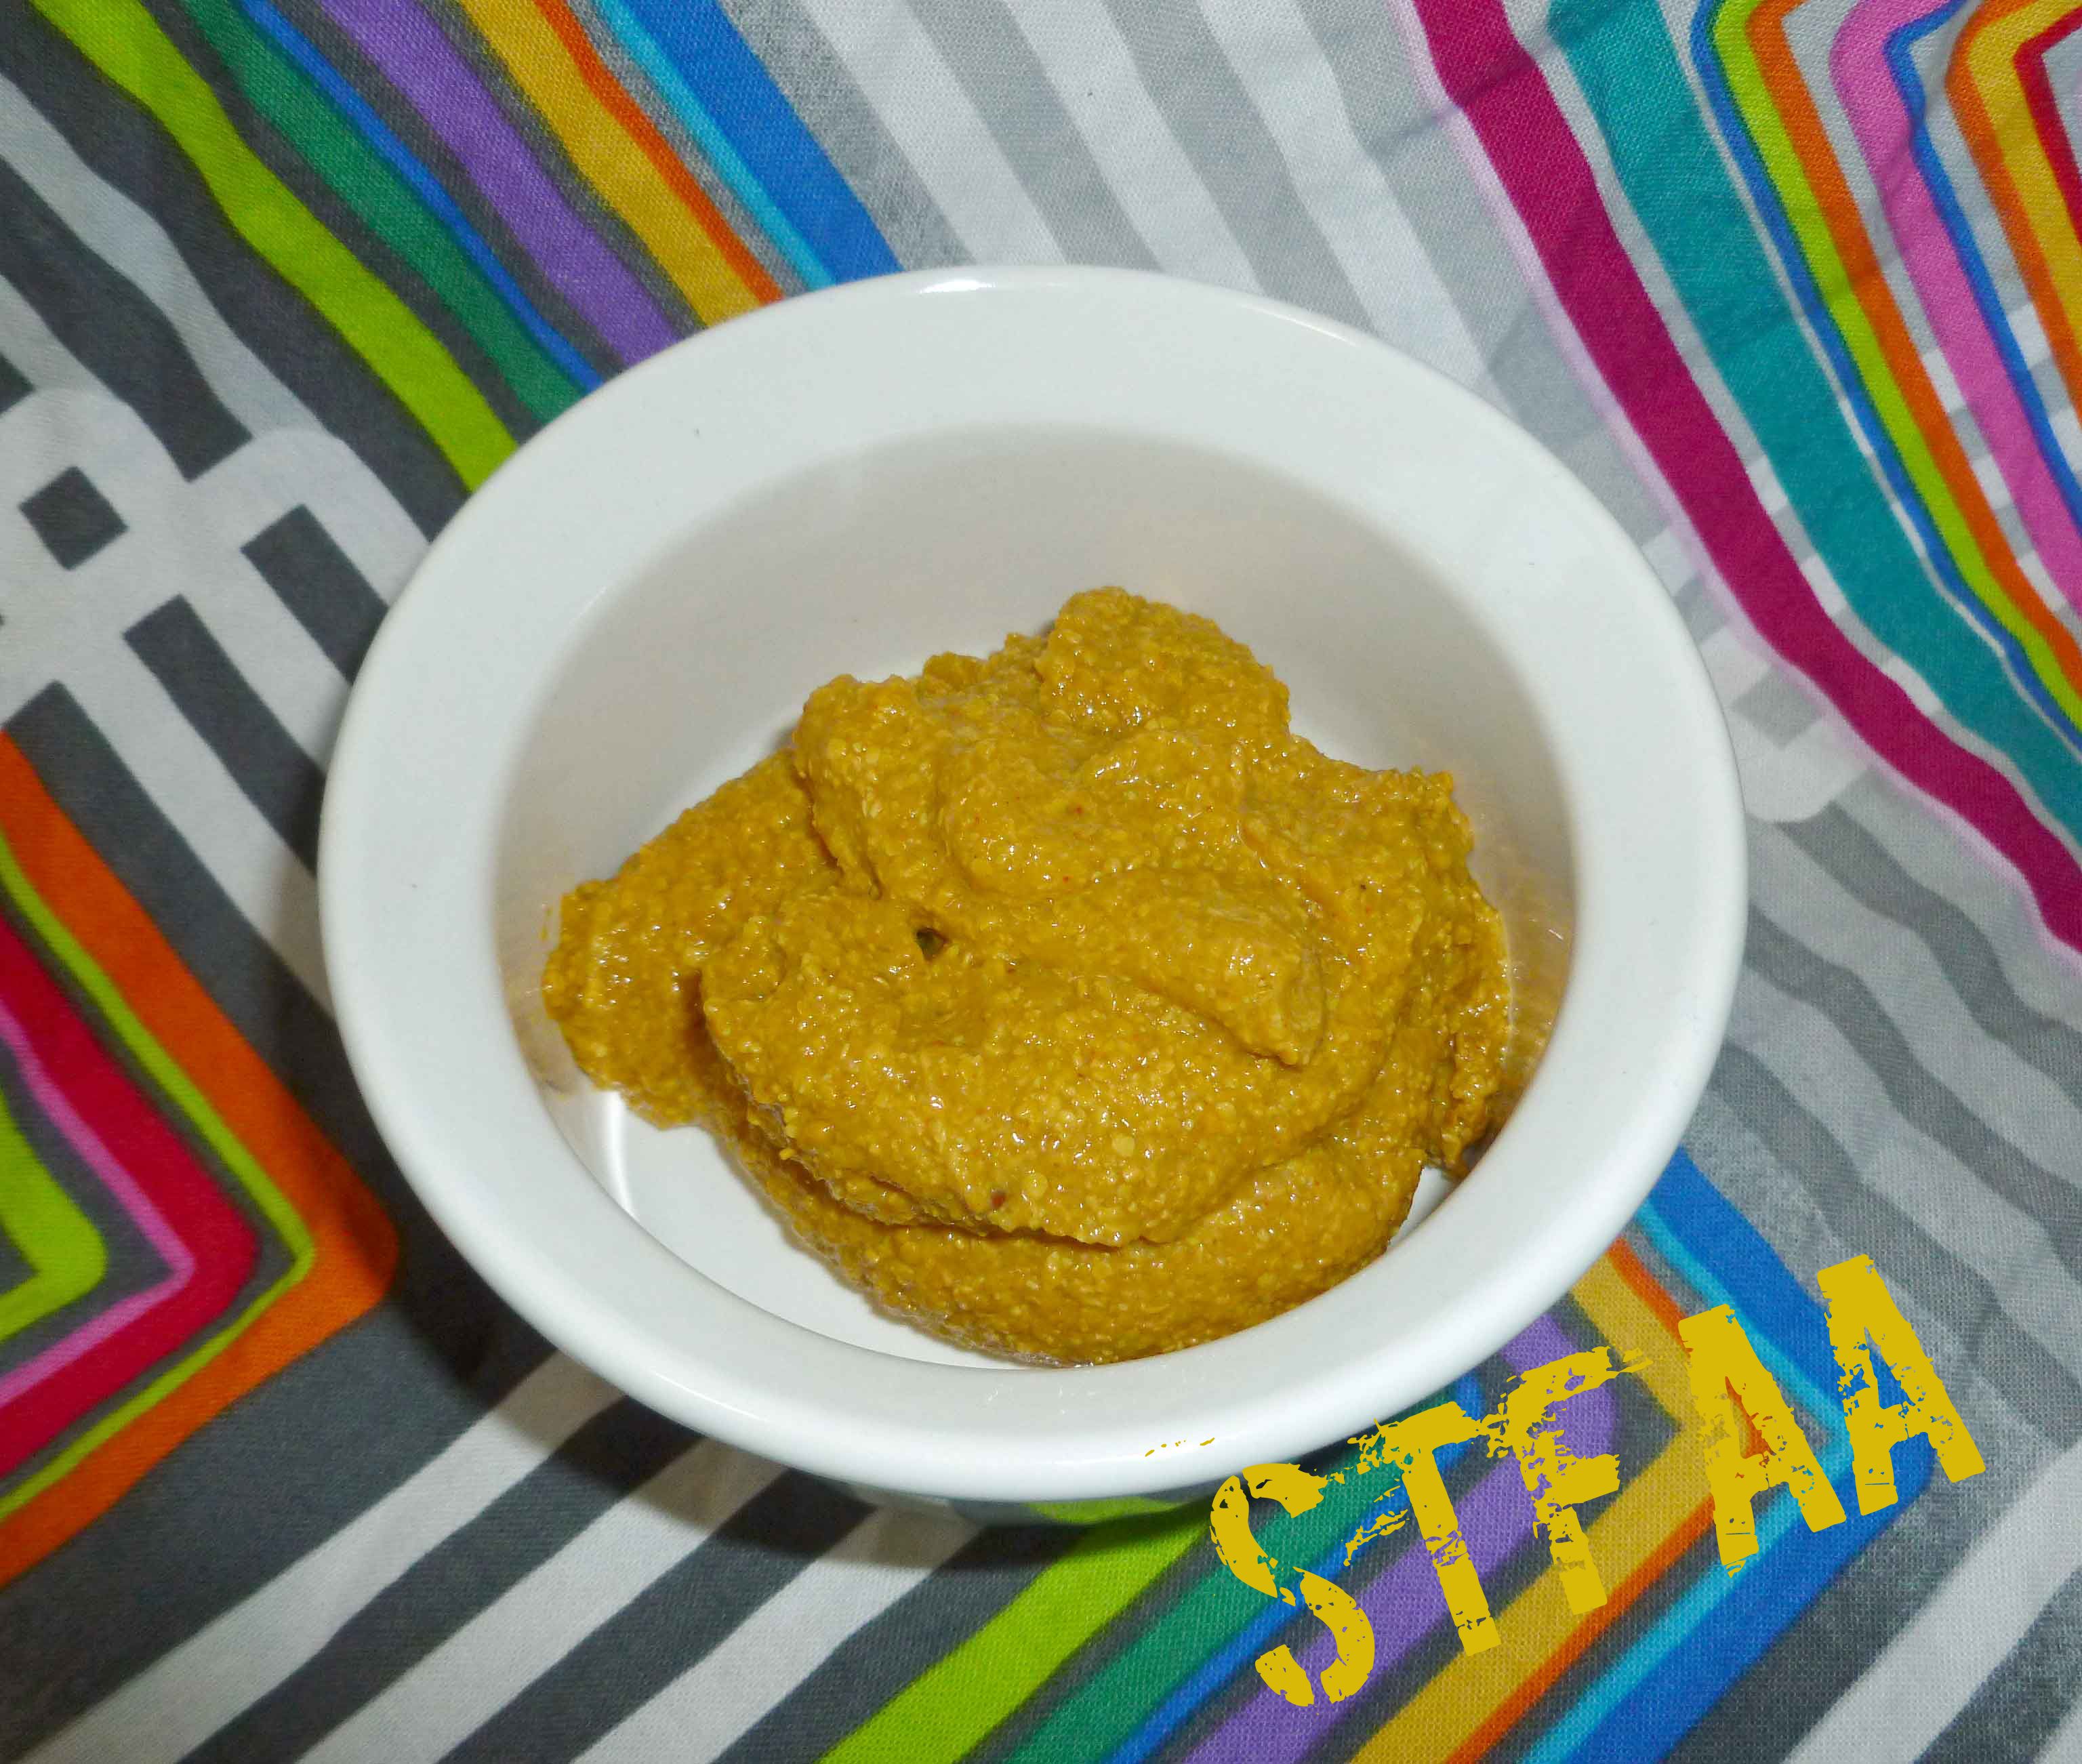
It’s summer. It’s grilling season finally in New Hampshire – Shawn hauled the grill out of the garage and the patio furniture out of the shed yesterday. We need condiments. This is a pretty basic and easy mustard recipe. I’ve modified it from a canning recipe and made it allergy safe for me, but it’s small enough that you can just throw it in a jar and put it in your fridge to use as you wish. However, you need to make this recipe 24 to 48 hours in advance, as freshly made mustard is awful and bitter, you have to wait for the flavors to mellow out. If you take out the turmeric, which is mostly there for coloring, you can also play around with the recipe to make more flavors. Try adding other spices like wasabi or chipotle peppers, some cranberries or raspberries, sundried tomatoes or roasted garlic, or hot sauces. Let us know what fabulousness you come up with.
You’ll need to sterilize your jar and keep it warm so that the glass doesn’t break when you put the hot mustard into it. Here are directions from the National Center for Home Food Preservation. If you don’t have a canning pot with a rack, use a large enough pot that you can place the jar in it with enough water to cover it by an inch, and place a folded tea towel in the bottom of the pot. The tea towel will prevent the direct heat from the bottom of the pot from weakening or breaking the jar while you sterilize it. The picture shows a 4 ounce jar because I canned a bunch of it, but if you use 4 ounce jars you’ll need two.
1/2cupground yellow mustard seed(I grind my own to prevent issues with anti-caking agents)
1/2cupwater
1/2cupapple cider vinegar(Bragg’s is safest for those with a corn allergy)
3/4teaspoonsea salt
1/4teaspoonground turmeric
1/8teaspoongarlic powder
1/8teaspoonground paprika
8 ounce jar
Servings: ounces
Instructions
Sterilize your jar and keep it warm.
Place all the ingredients in a small sauce pan, and whisk together until smooth. The mustard mixture will be very watery at this point.
Bring the mustard mixture to boil over medium-high heat. Boil for 7-8 minutes, stirring occasionally.
Remove the saucepan from the heat and let the mustard cool for 5 minutes. The mustard will thicken slightly during this time, but will probably not be as thick as you want it to be. It will continue to thicken over the the next 24 hours, so don’t worry.
Place the mustard in the sterilized jar. Place the lid on the jar and let it cool to room temperature before storing your mustard in the refrigerator.
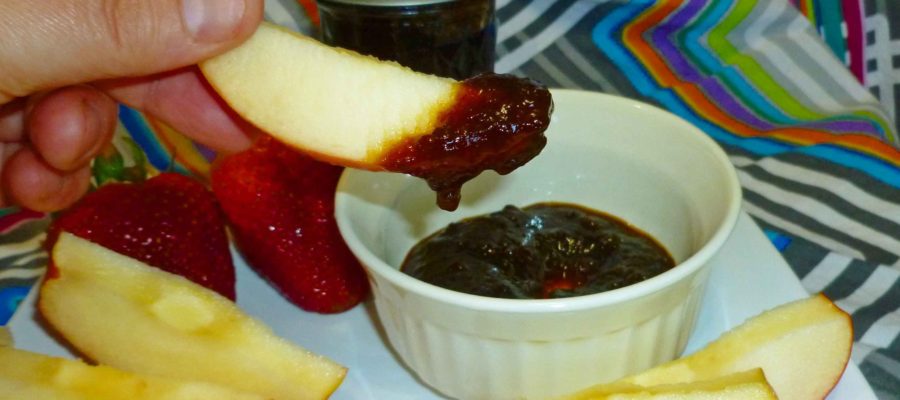
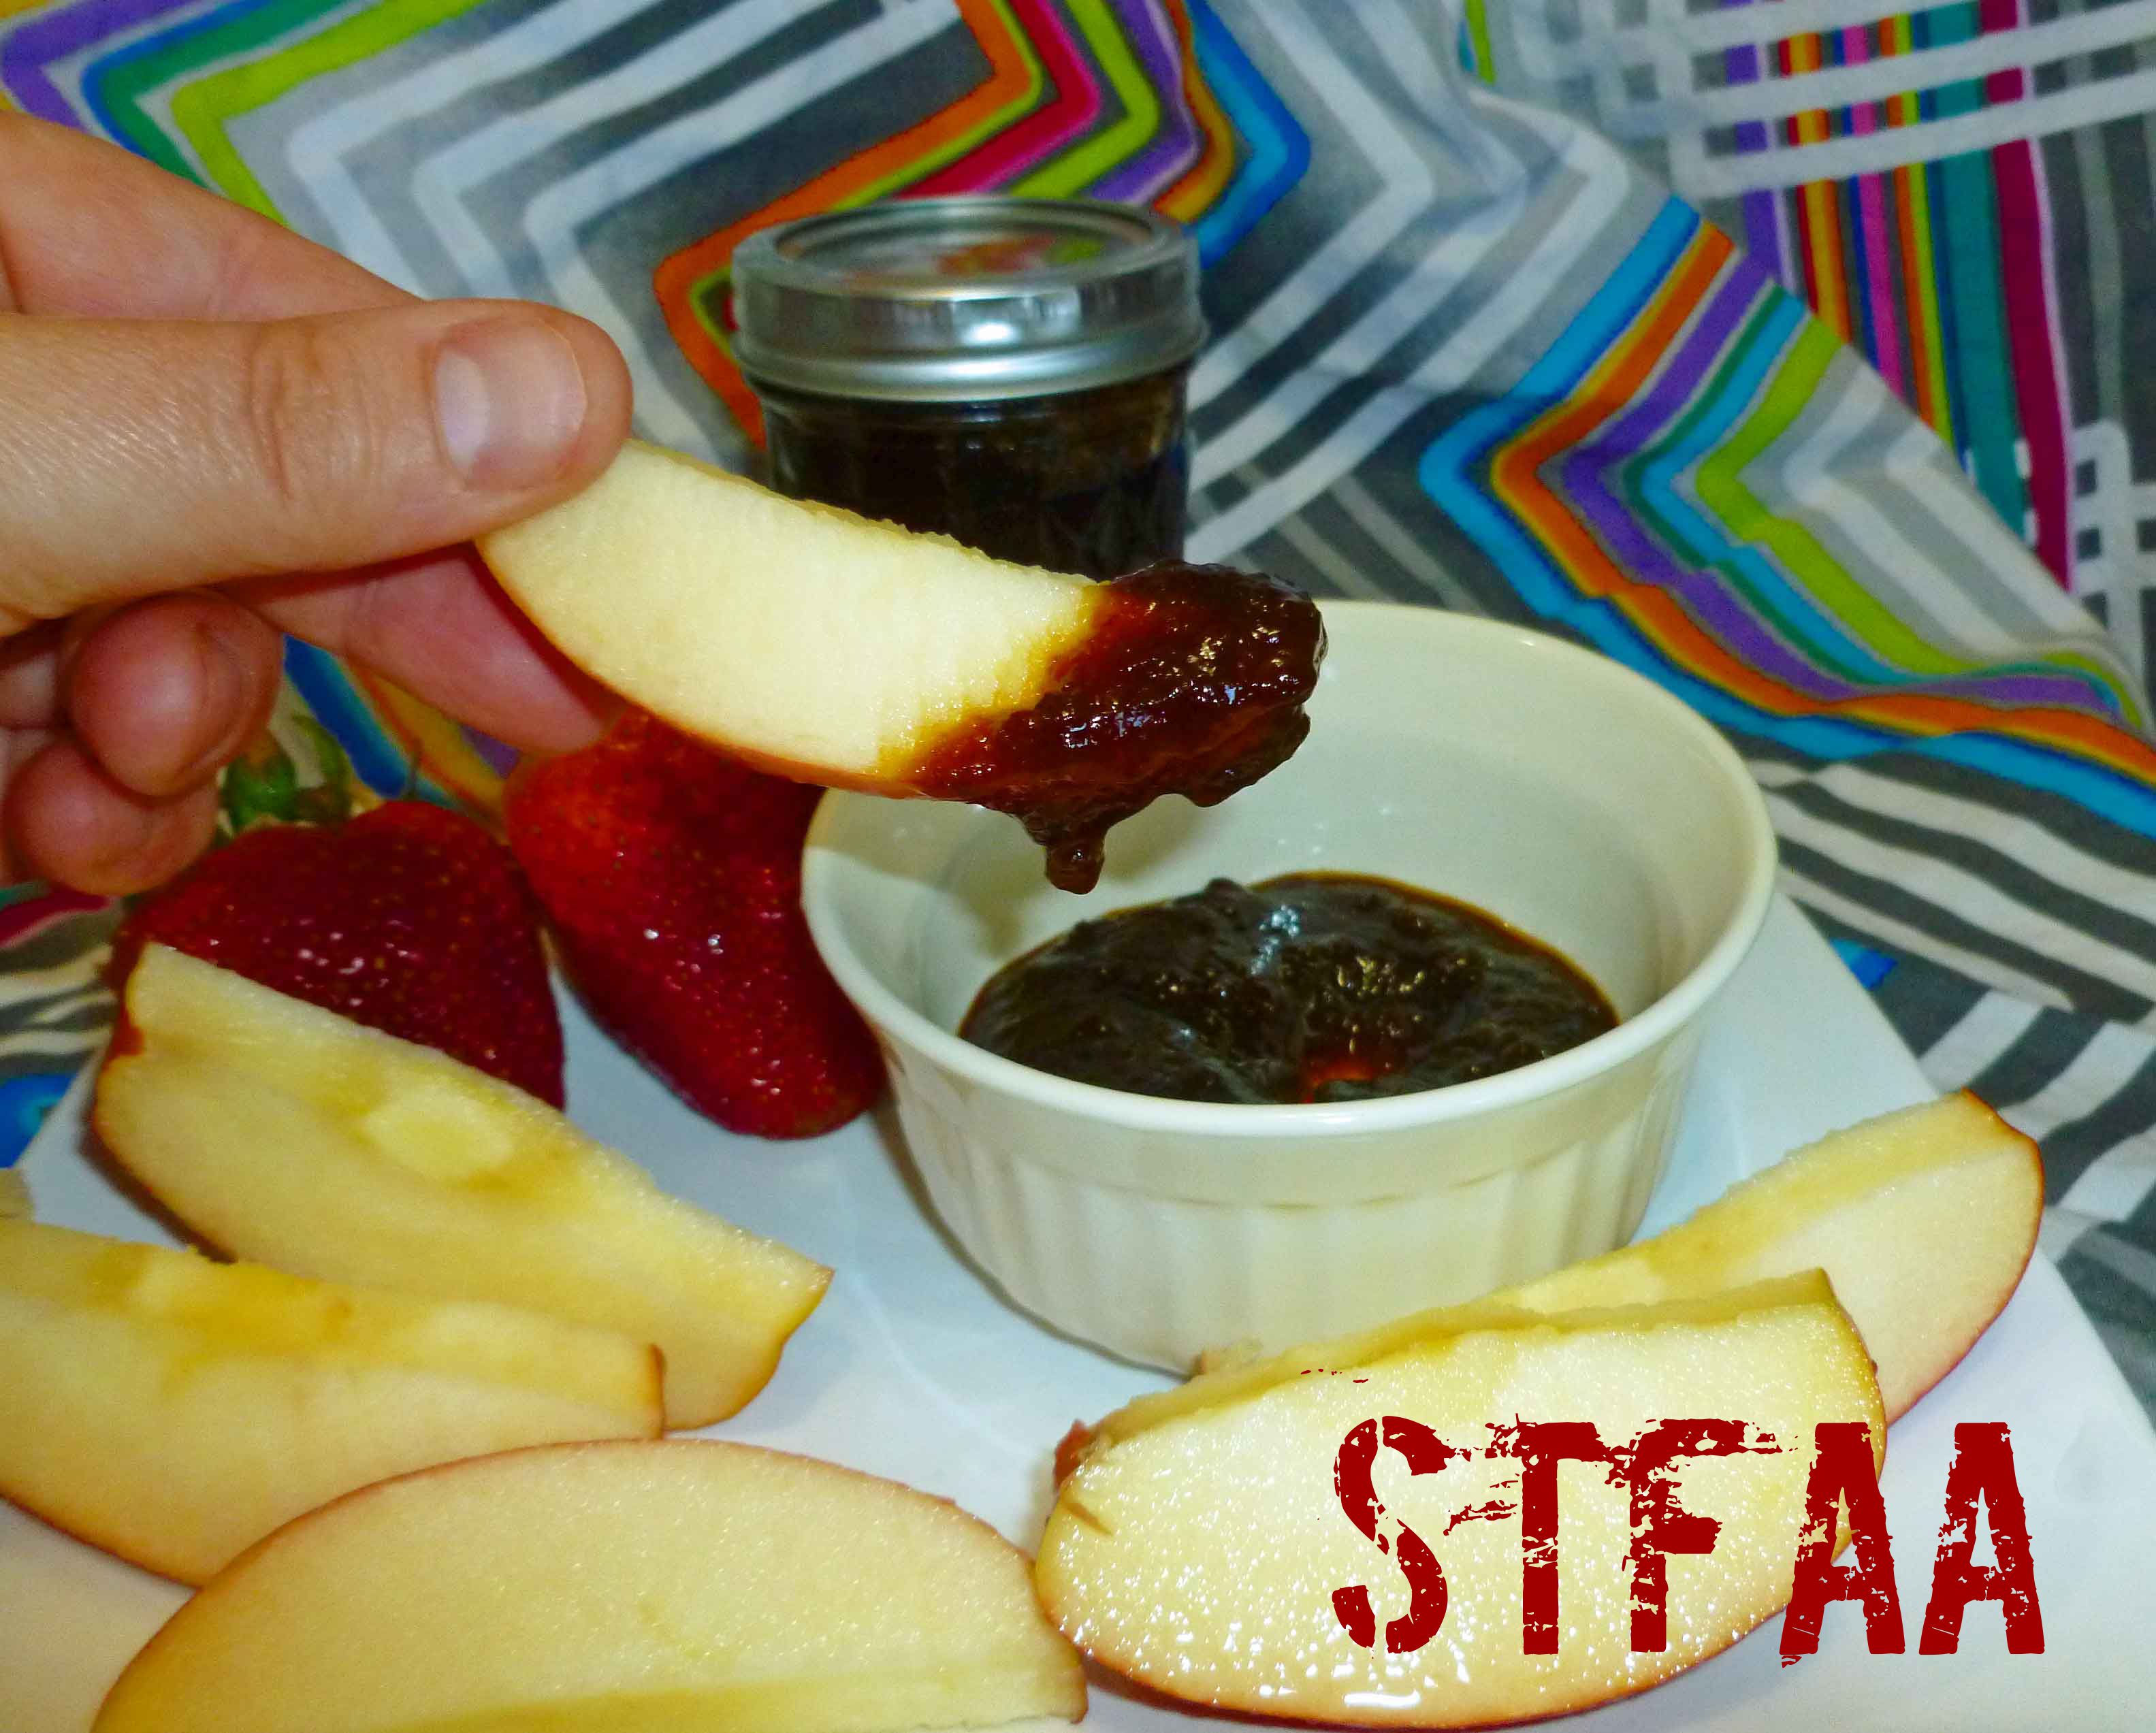
So, I’m still working on a corn-free, dairy-free, and coconut-free safe-for-me caramel that doesn’t have dates in it because (a) sourcing wheat-free dates can be hard, and (b) I freaking hate dates (I know, that’s weird). In the meantime, I’ve been making do with this Vanilla Pear Caramel Butter that I canned up in the fall. It’s amazingly amazing. However, for those of you who aren’t into canning, making 7 eight ounce jars of something that you need to store in your freezer may not be the way to go. So I’m cutting back the recipe for you, so that you can store it more easily, if you can keep from eating it that long. If I weren’t canning it, I’d freeze it up into some of those large silicone ice cube trays (no affiliation with Amazon) which hold about half a cup. That way, once they’ve frozen, you can pop them out into a safe-for-you zip top freezer bag and you can grab a cube to defrost whenever you need it.
It’s unbelievable on chocolate cake, or any other dessert that just needs a bit of caramel sauce. I may or may not have just eaten a couple of spoonfuls when I needed a treat, since candy is nonexistent for me unless I make it. I suppose I could make some claim about it being “healthier” because it’s fruit, but it’s still got a fair bit of sugar in it, so that negates that idea. Also, it’s for dessert. Live a little.
1teaspoonvanilla extract(I make my own with vanilla beans and vodka made from potatoes, as most commercial extract contains corn)
crock pot
Servings: pints
Instructions
Place pears, water, lemon zest, and lemon juice in a nonreactive stock pot. Bring to a boil over medium-high heat. Once you’ve reached a boil, reduce the heat and and simmer gently, stirring occasionally, until the pears are soft (about 20 minutes).
Using an immersion blender, blend until you have a texture like apple sauce. Don’t complete liquefy the pears.
Place the pear mixture into a slow cooker. Add the brown sugar, and mix until the sugar is dissolved. Prop the lid of the slow cooker open with a wooden spoon, and let the mixture reduce on low. Depending on the size of the slow cooker this will go faster or slower, it make take as long as 8 hours. Check it every two hours to see how it’s doing and stir it. The finished pear butter will be thick and hold its shape on a spoon. Stir in vanilla extract.
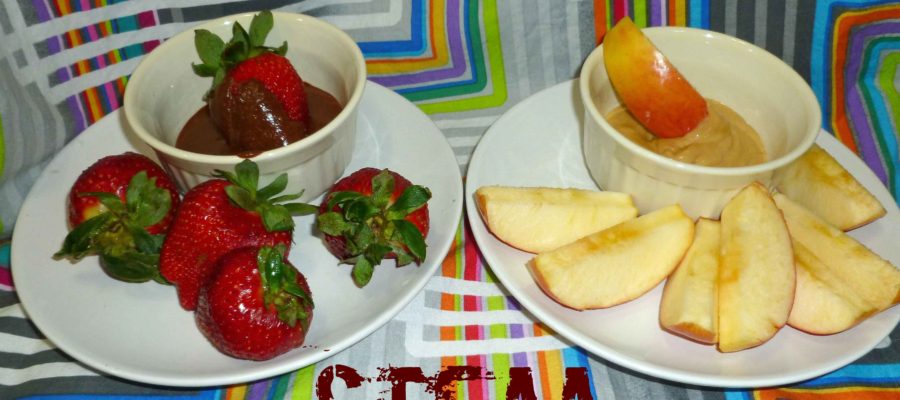
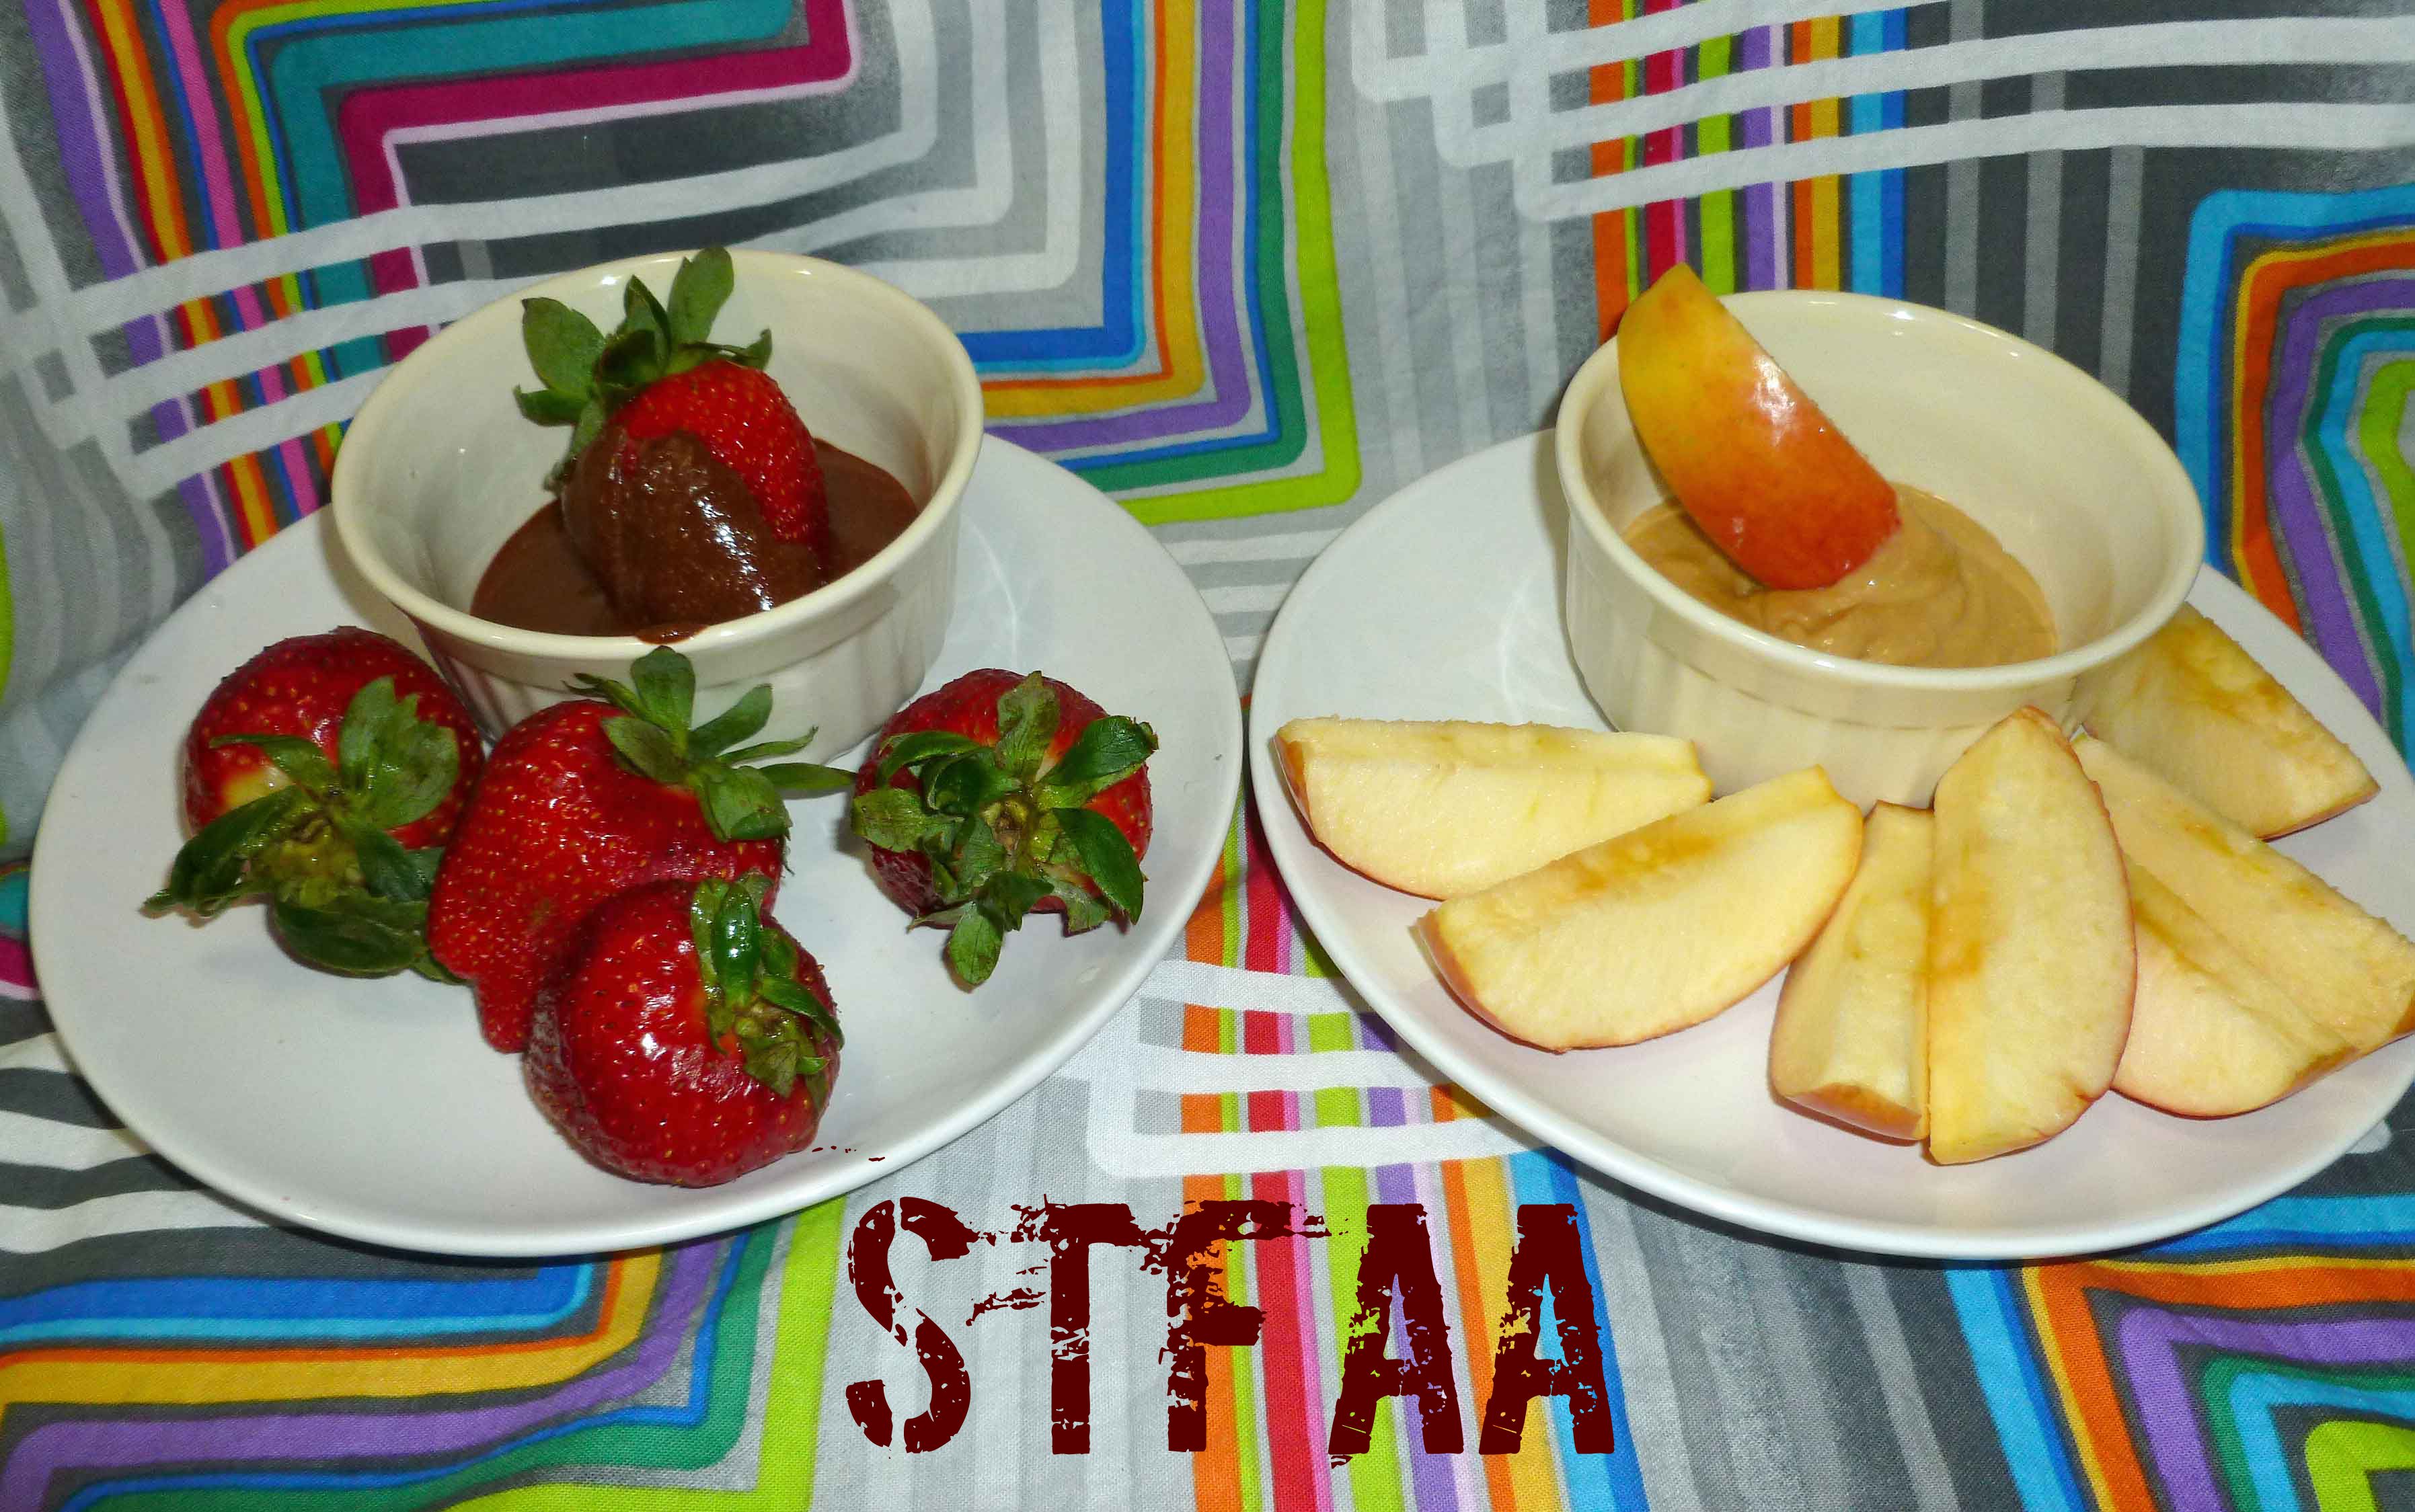
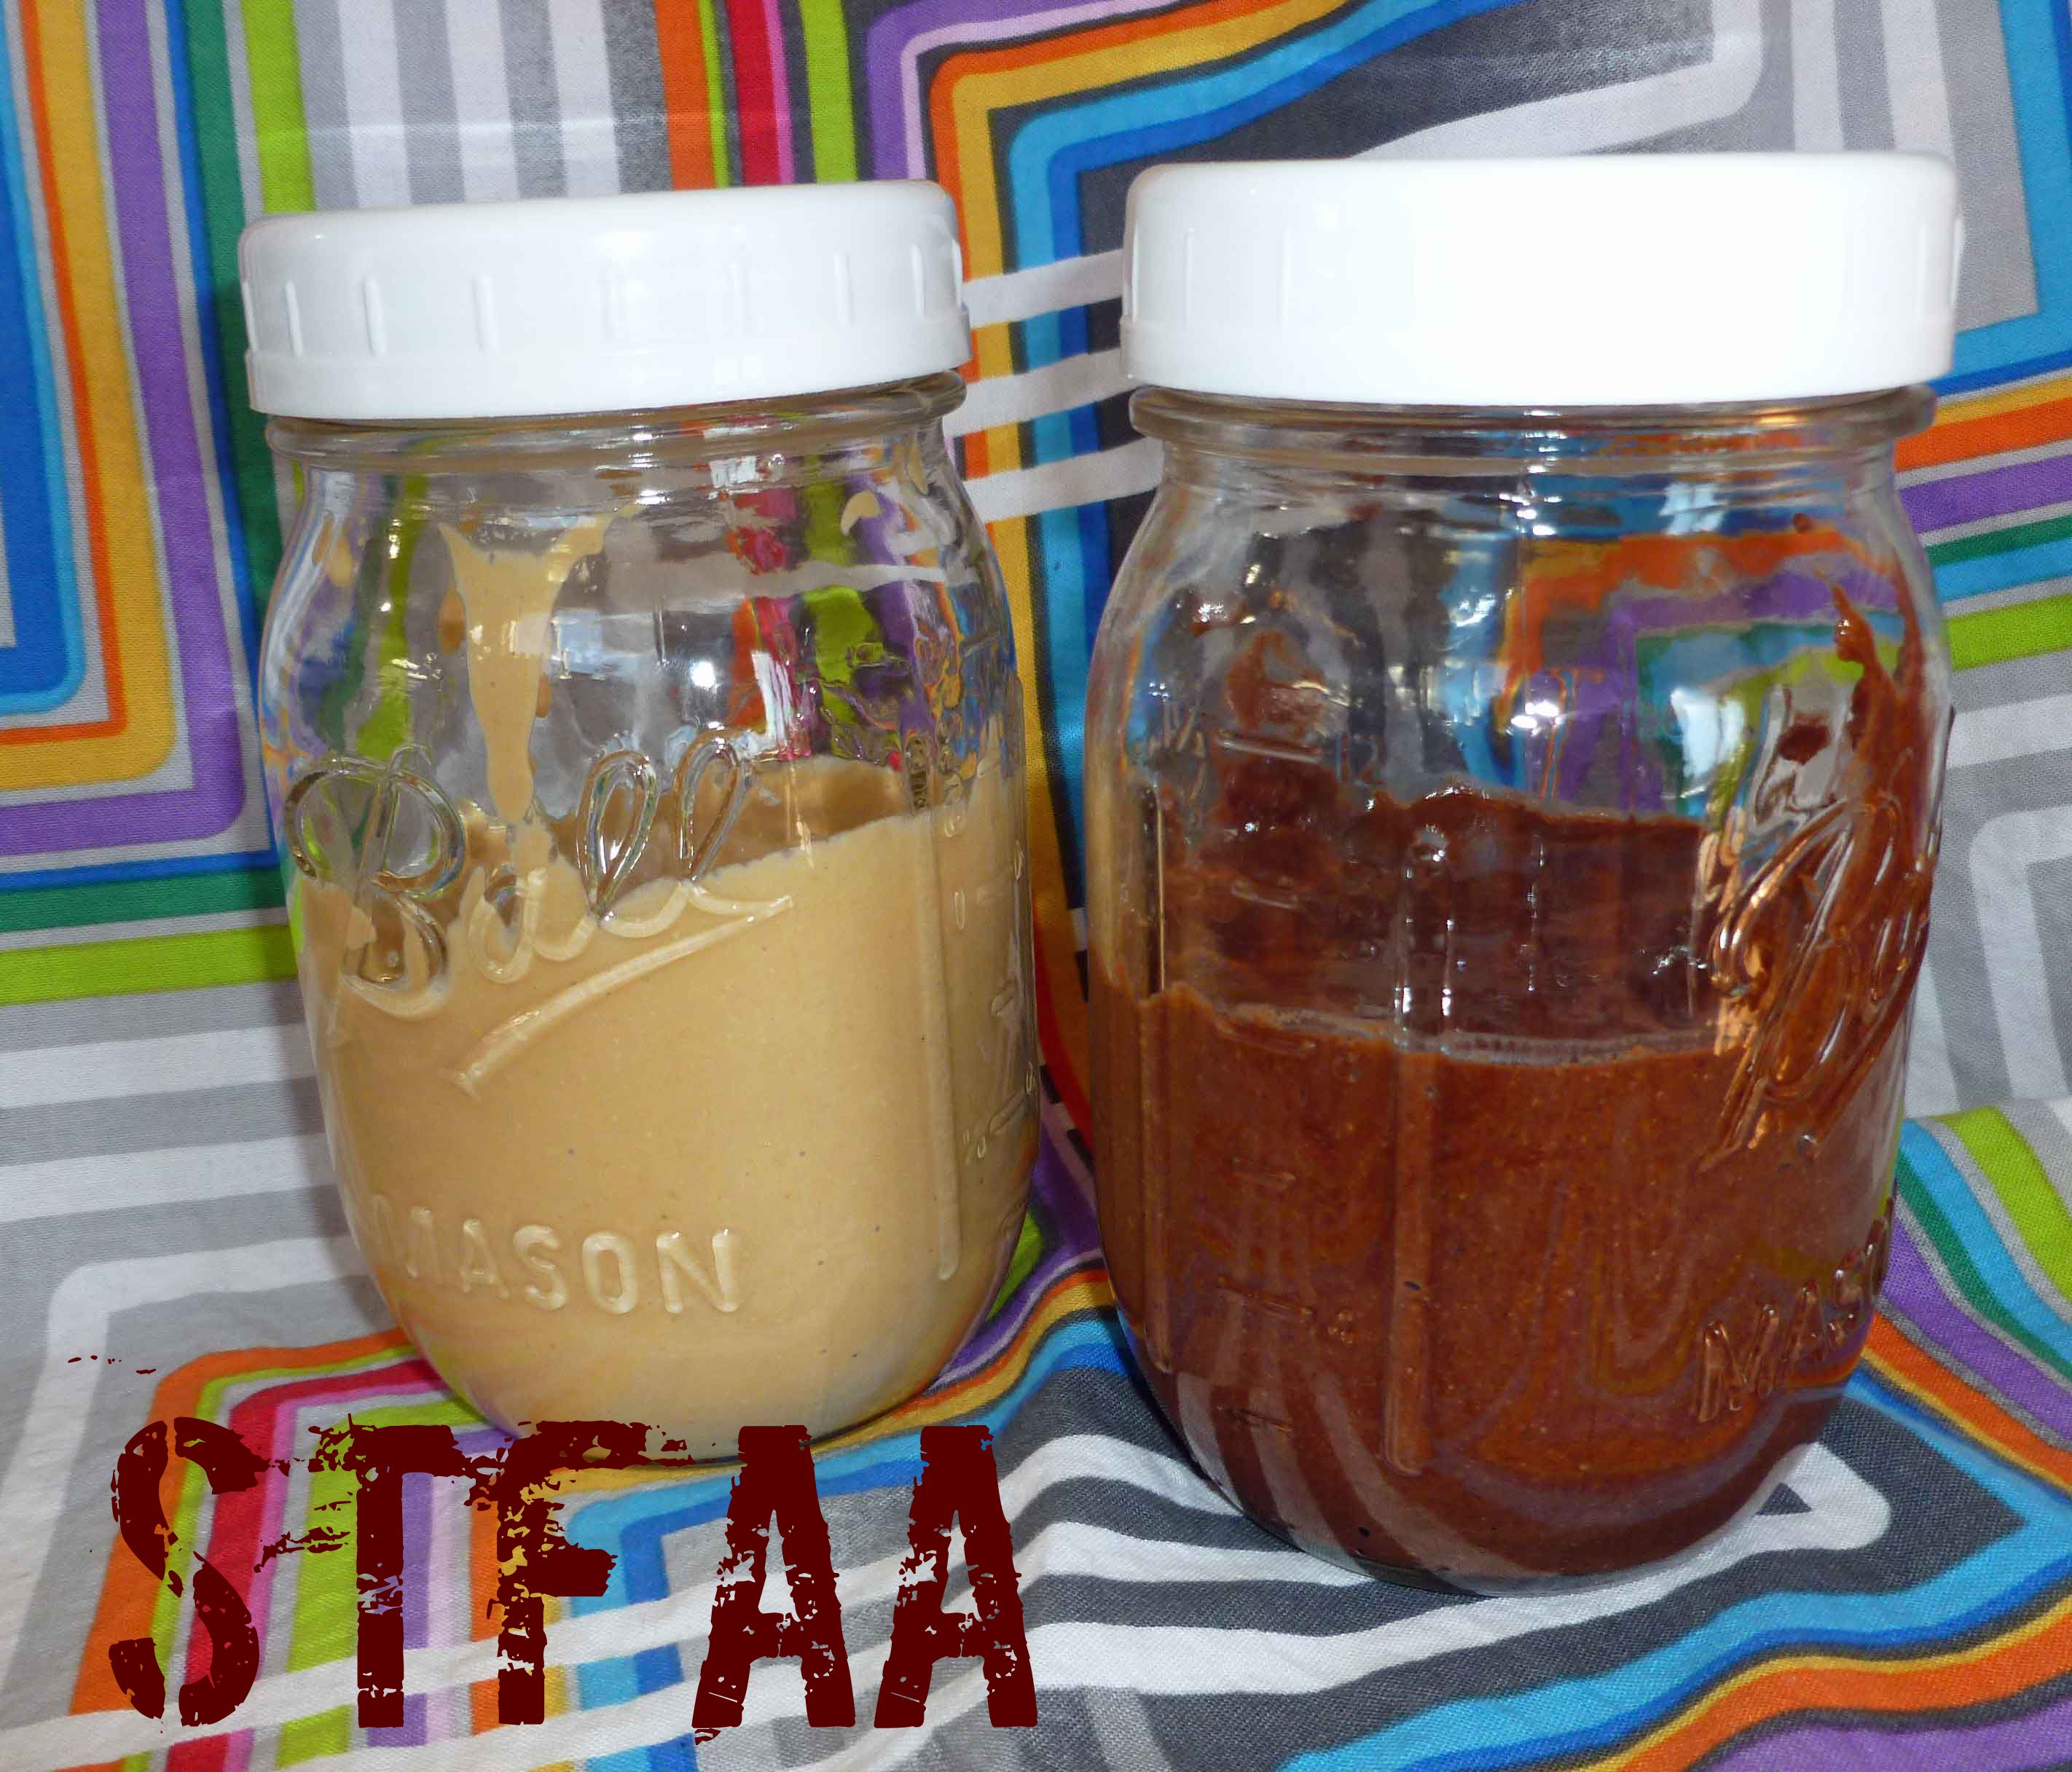
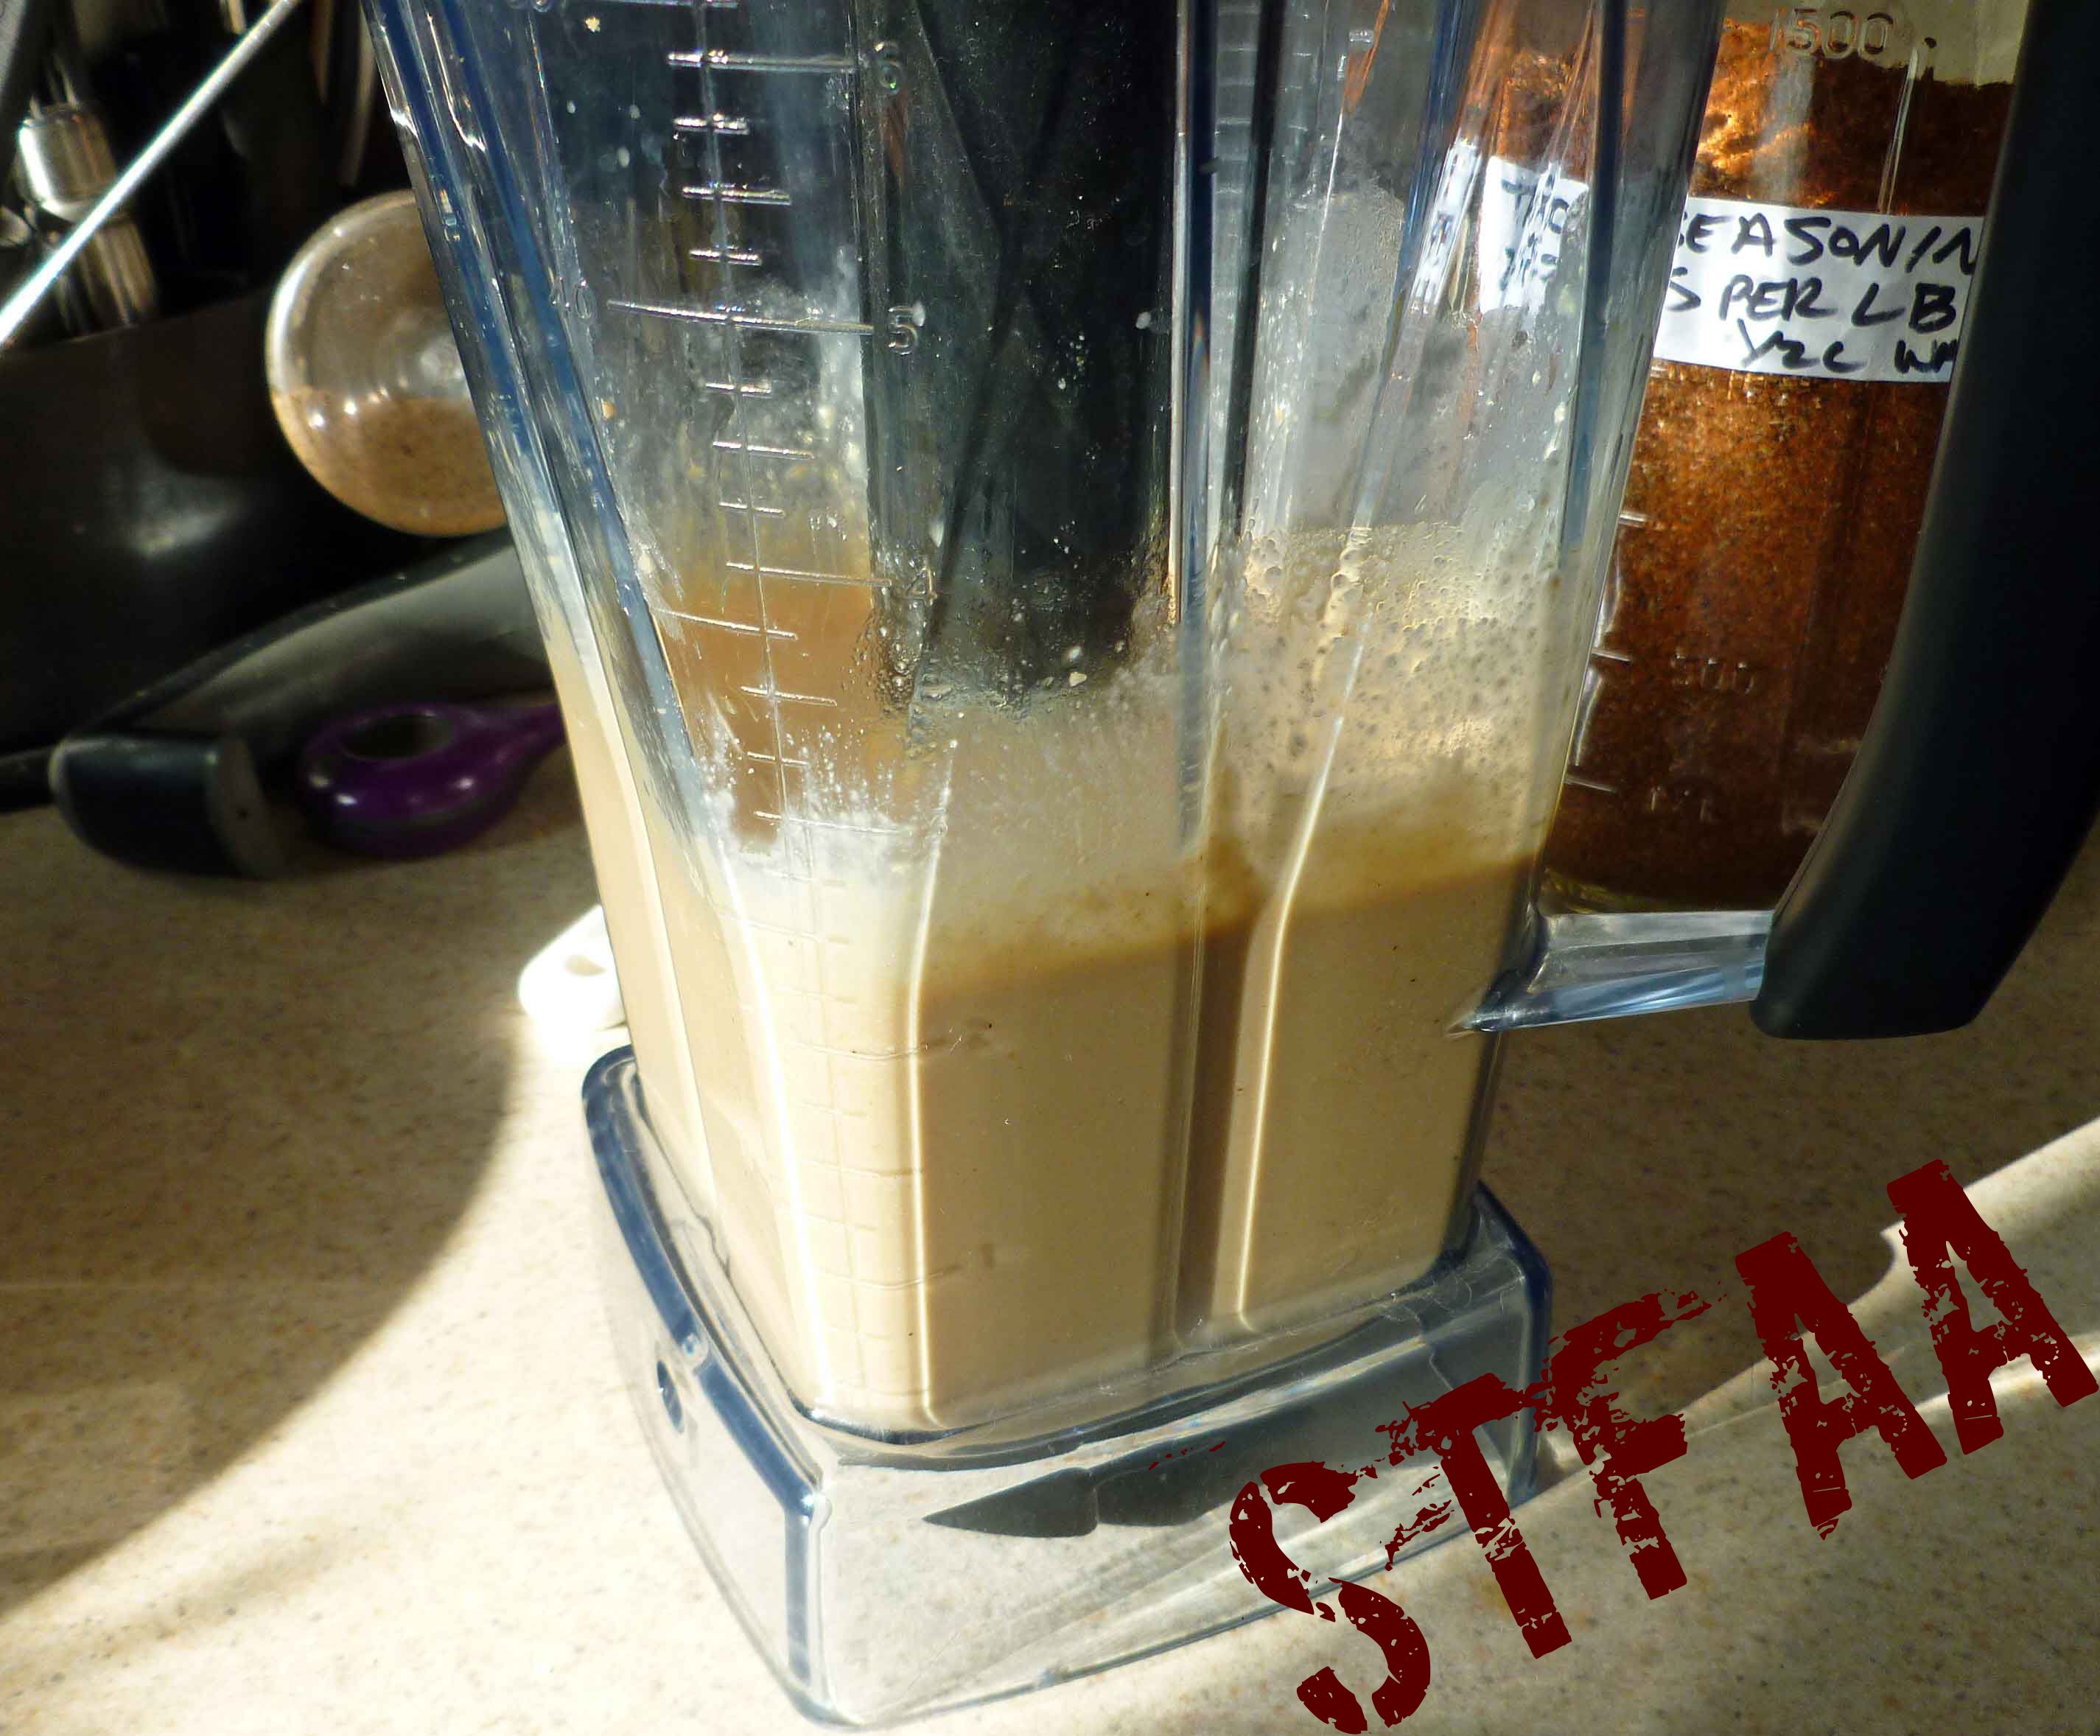
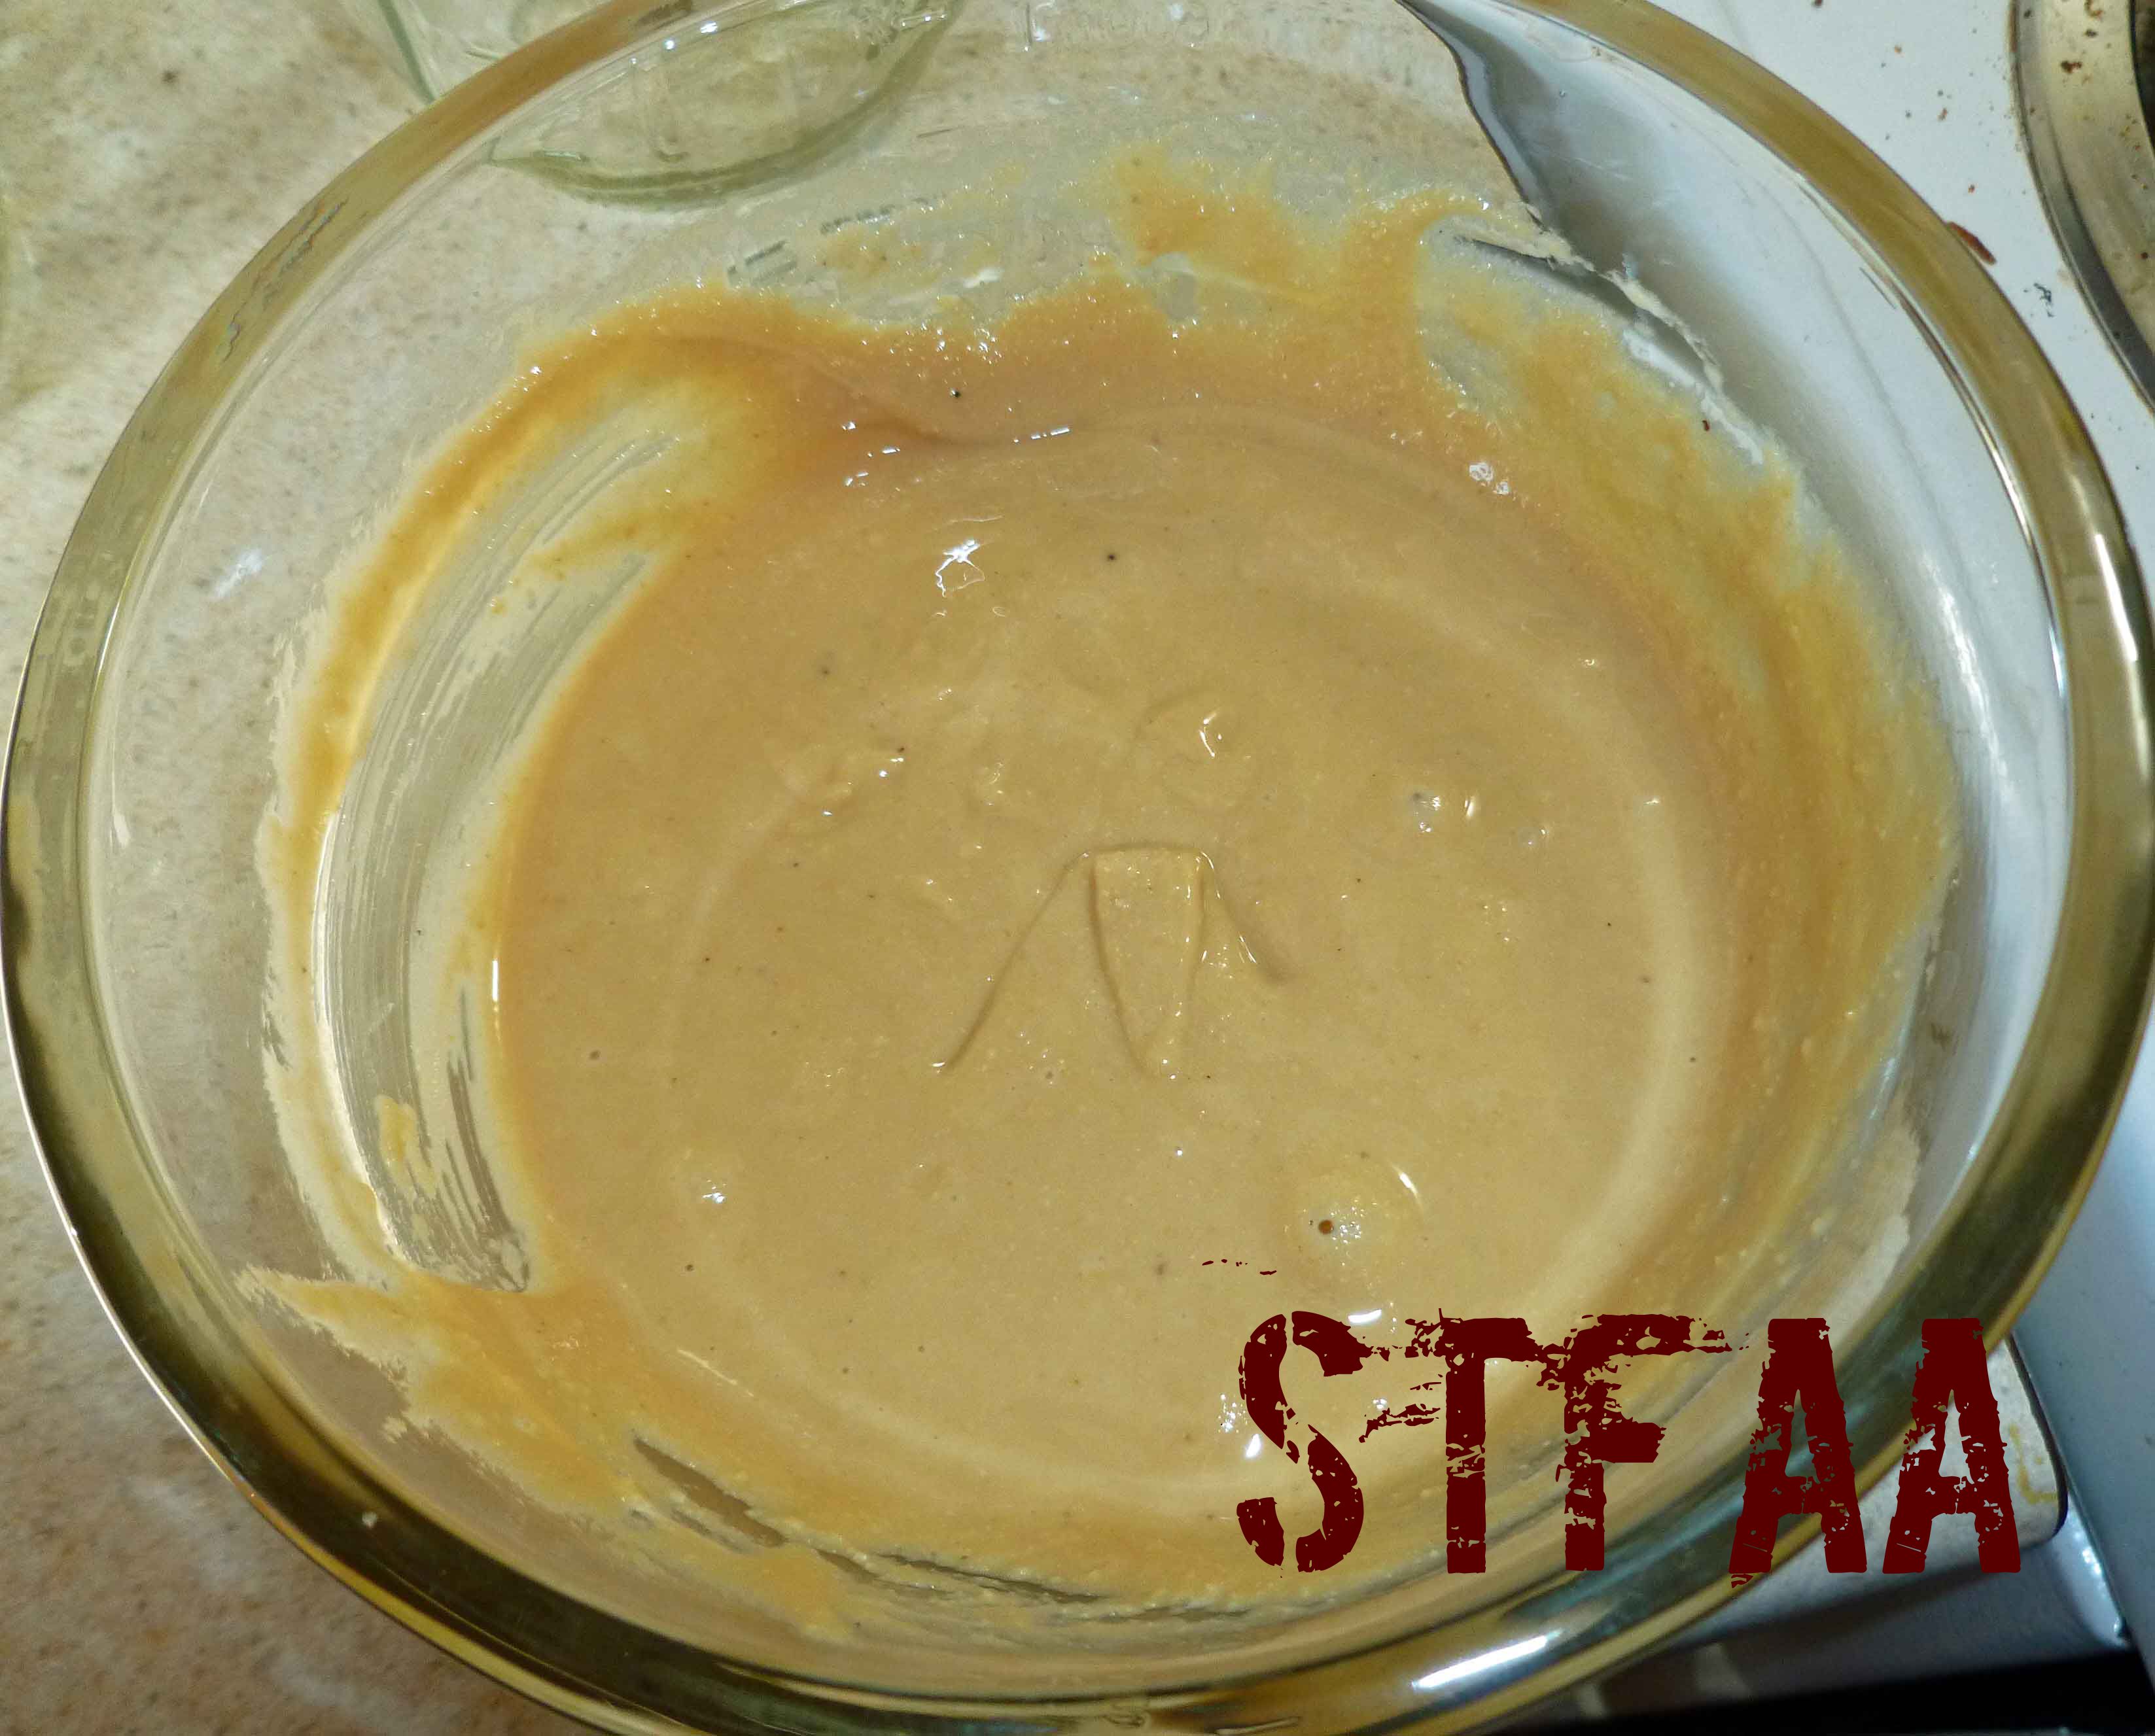
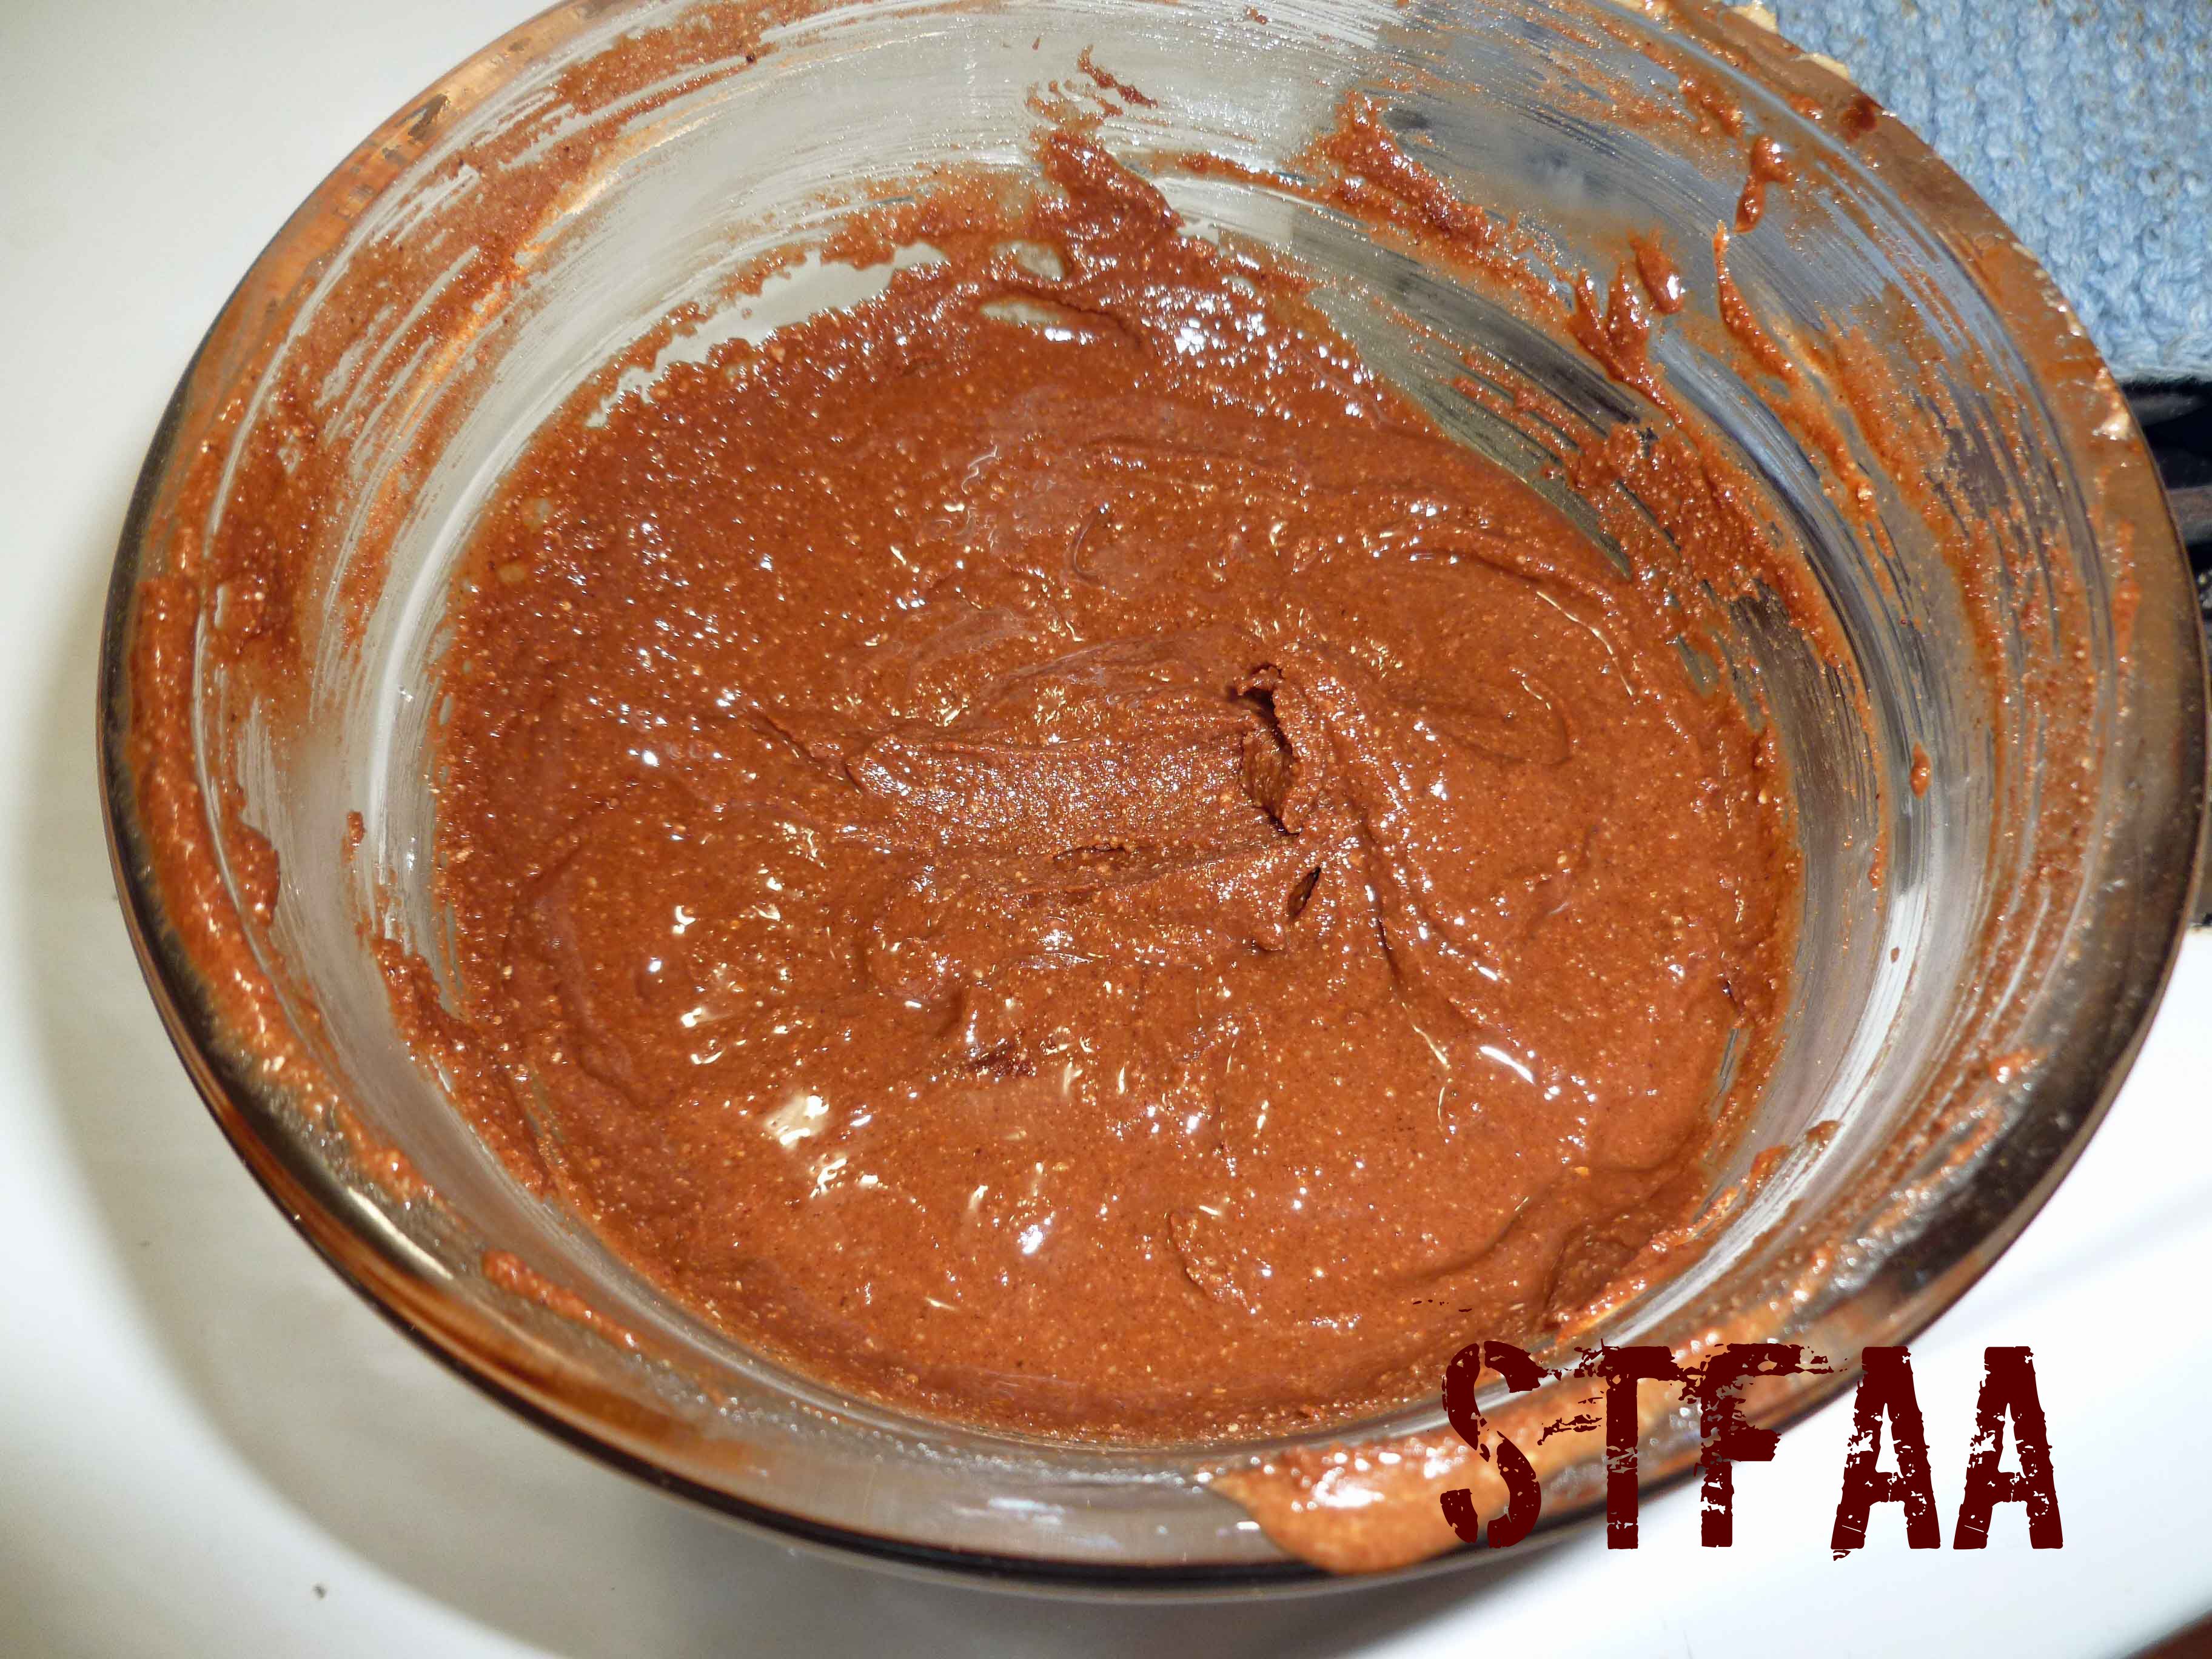
So this is the last recipe post of breakfast month. One of the things I miss having for breakfast is a toasted bagel or a toasted slice of bread with some thinly spread butter and some thickly spread peanut butter on top of that. The peanut butter gets all warm and gooey and it’s a quick filling breakfast. (Also, anyone who tells me I don’t need butter if I’m using nut butter is guilty of heresy, just saying.) Well, I haven’t managed a gluten-free, egg-free, dairy-free, and corn-free loaf of bread or bagels yet, but I’m one step closer to getting the ingredients I need. I already had a recipe for a margarine, Homemade Margarine, New and Improved, which works well on baked goods. I’m not allergic to peanuts, but I haven’t been able to buy a commercial peanut butter that’s safe for my cocktail of allergies or that I trust not to have issues with cross contamination in some time. I haven’t sourced safe raw peanuts yet, but I did have cashews I do well with, so I decided to go ahead and make cashew butter. And then I decided to mix some of it with cacao powder to try for something Nutella-esque (I’m allergic to hazelnuts and dairy, among other issues). I used this great tutorial from Tasty Yummies, but used my Vitamix to make the cashew butter.
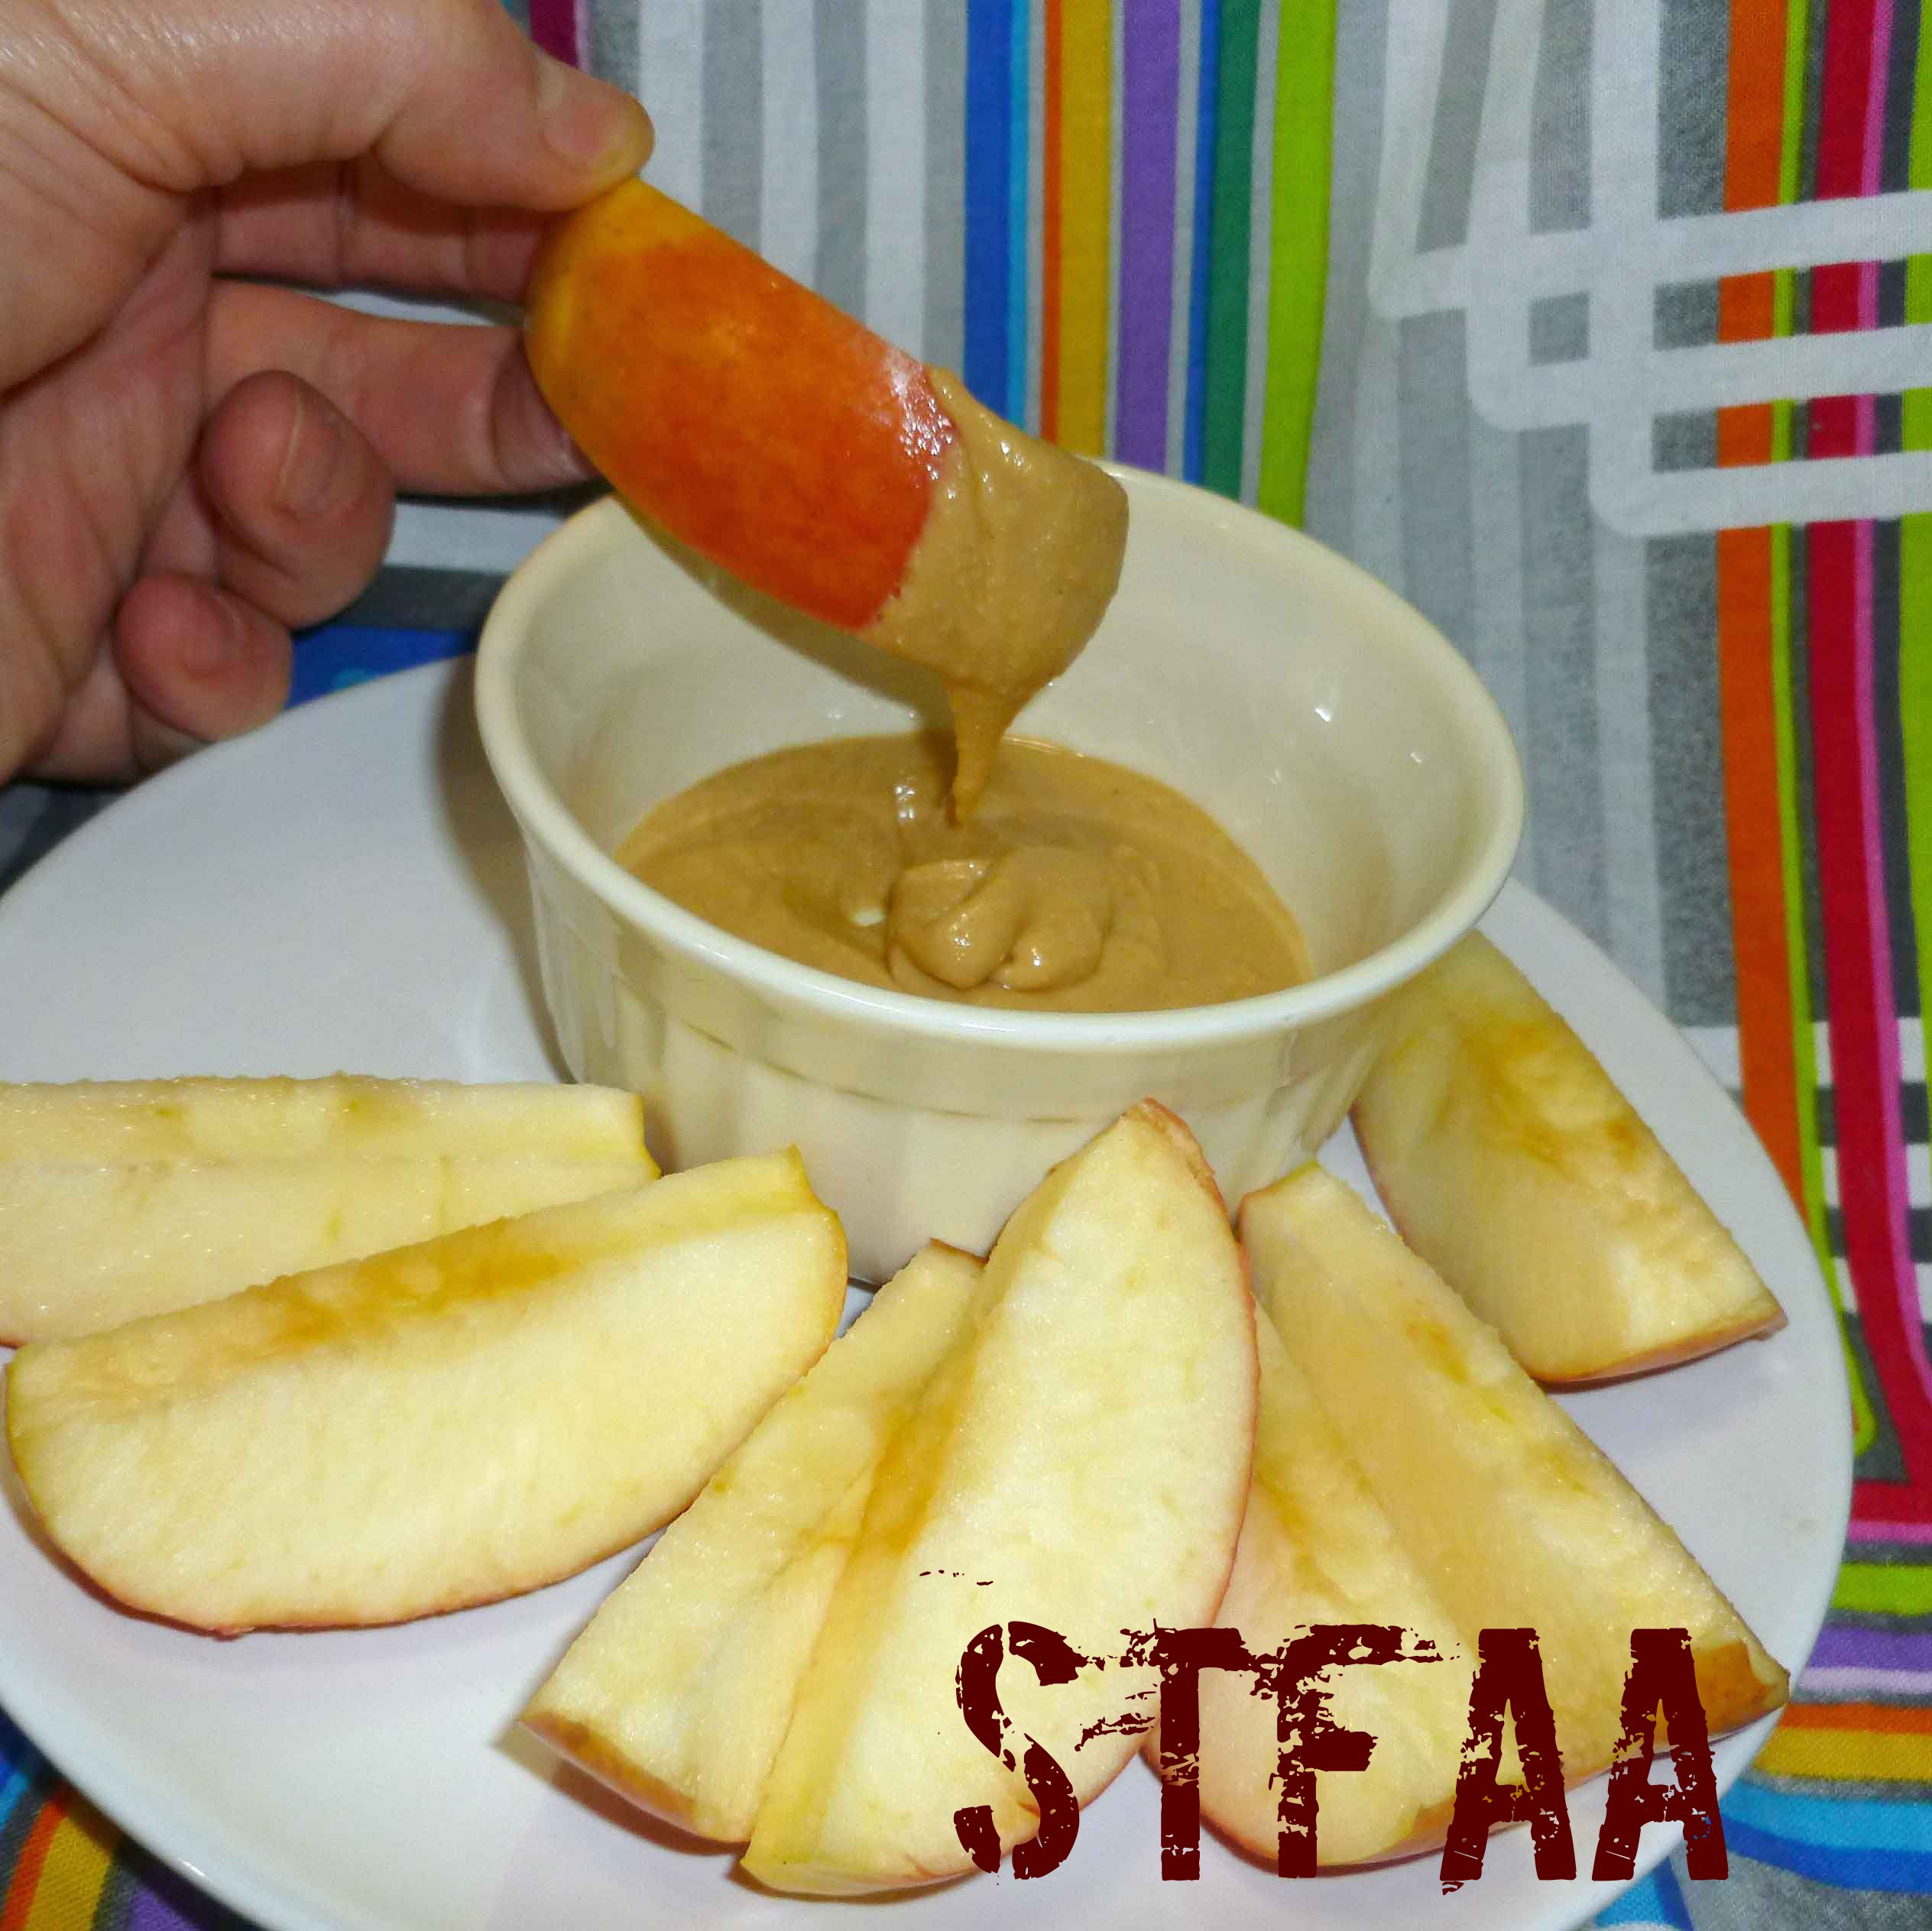
It’s good. The chocolate cashew butter is not as sweet as Nutella, but it’s nice. And once I manage to make myself bread that I wouldn’t be ashamed to put on the blog, I’ll be even happier. But for now, I ate the plain cashew butter with an apple, and the chocolate cashew butter with strawberries, which isn’t all that bad either.
Cashew Butter and Chocolate Cashew Butter Notice: Trying to access array offset on value of type bool in /home/maryzahc/public_html/adultfoodallergies.com/wp-content/plugins/wp-ultimate-recipe/helpers/models/recipe.php on line 254
3-5Tablespoonsgrapeseed oil(or other safe for you oil)
dash salt
Additions for Chocolate Cashew Butter
2-3Tablespoonscacao or cocoa powder
1teaspoonsugar
Equipment Needed
1high performance blender
Servings: cups
Instructions
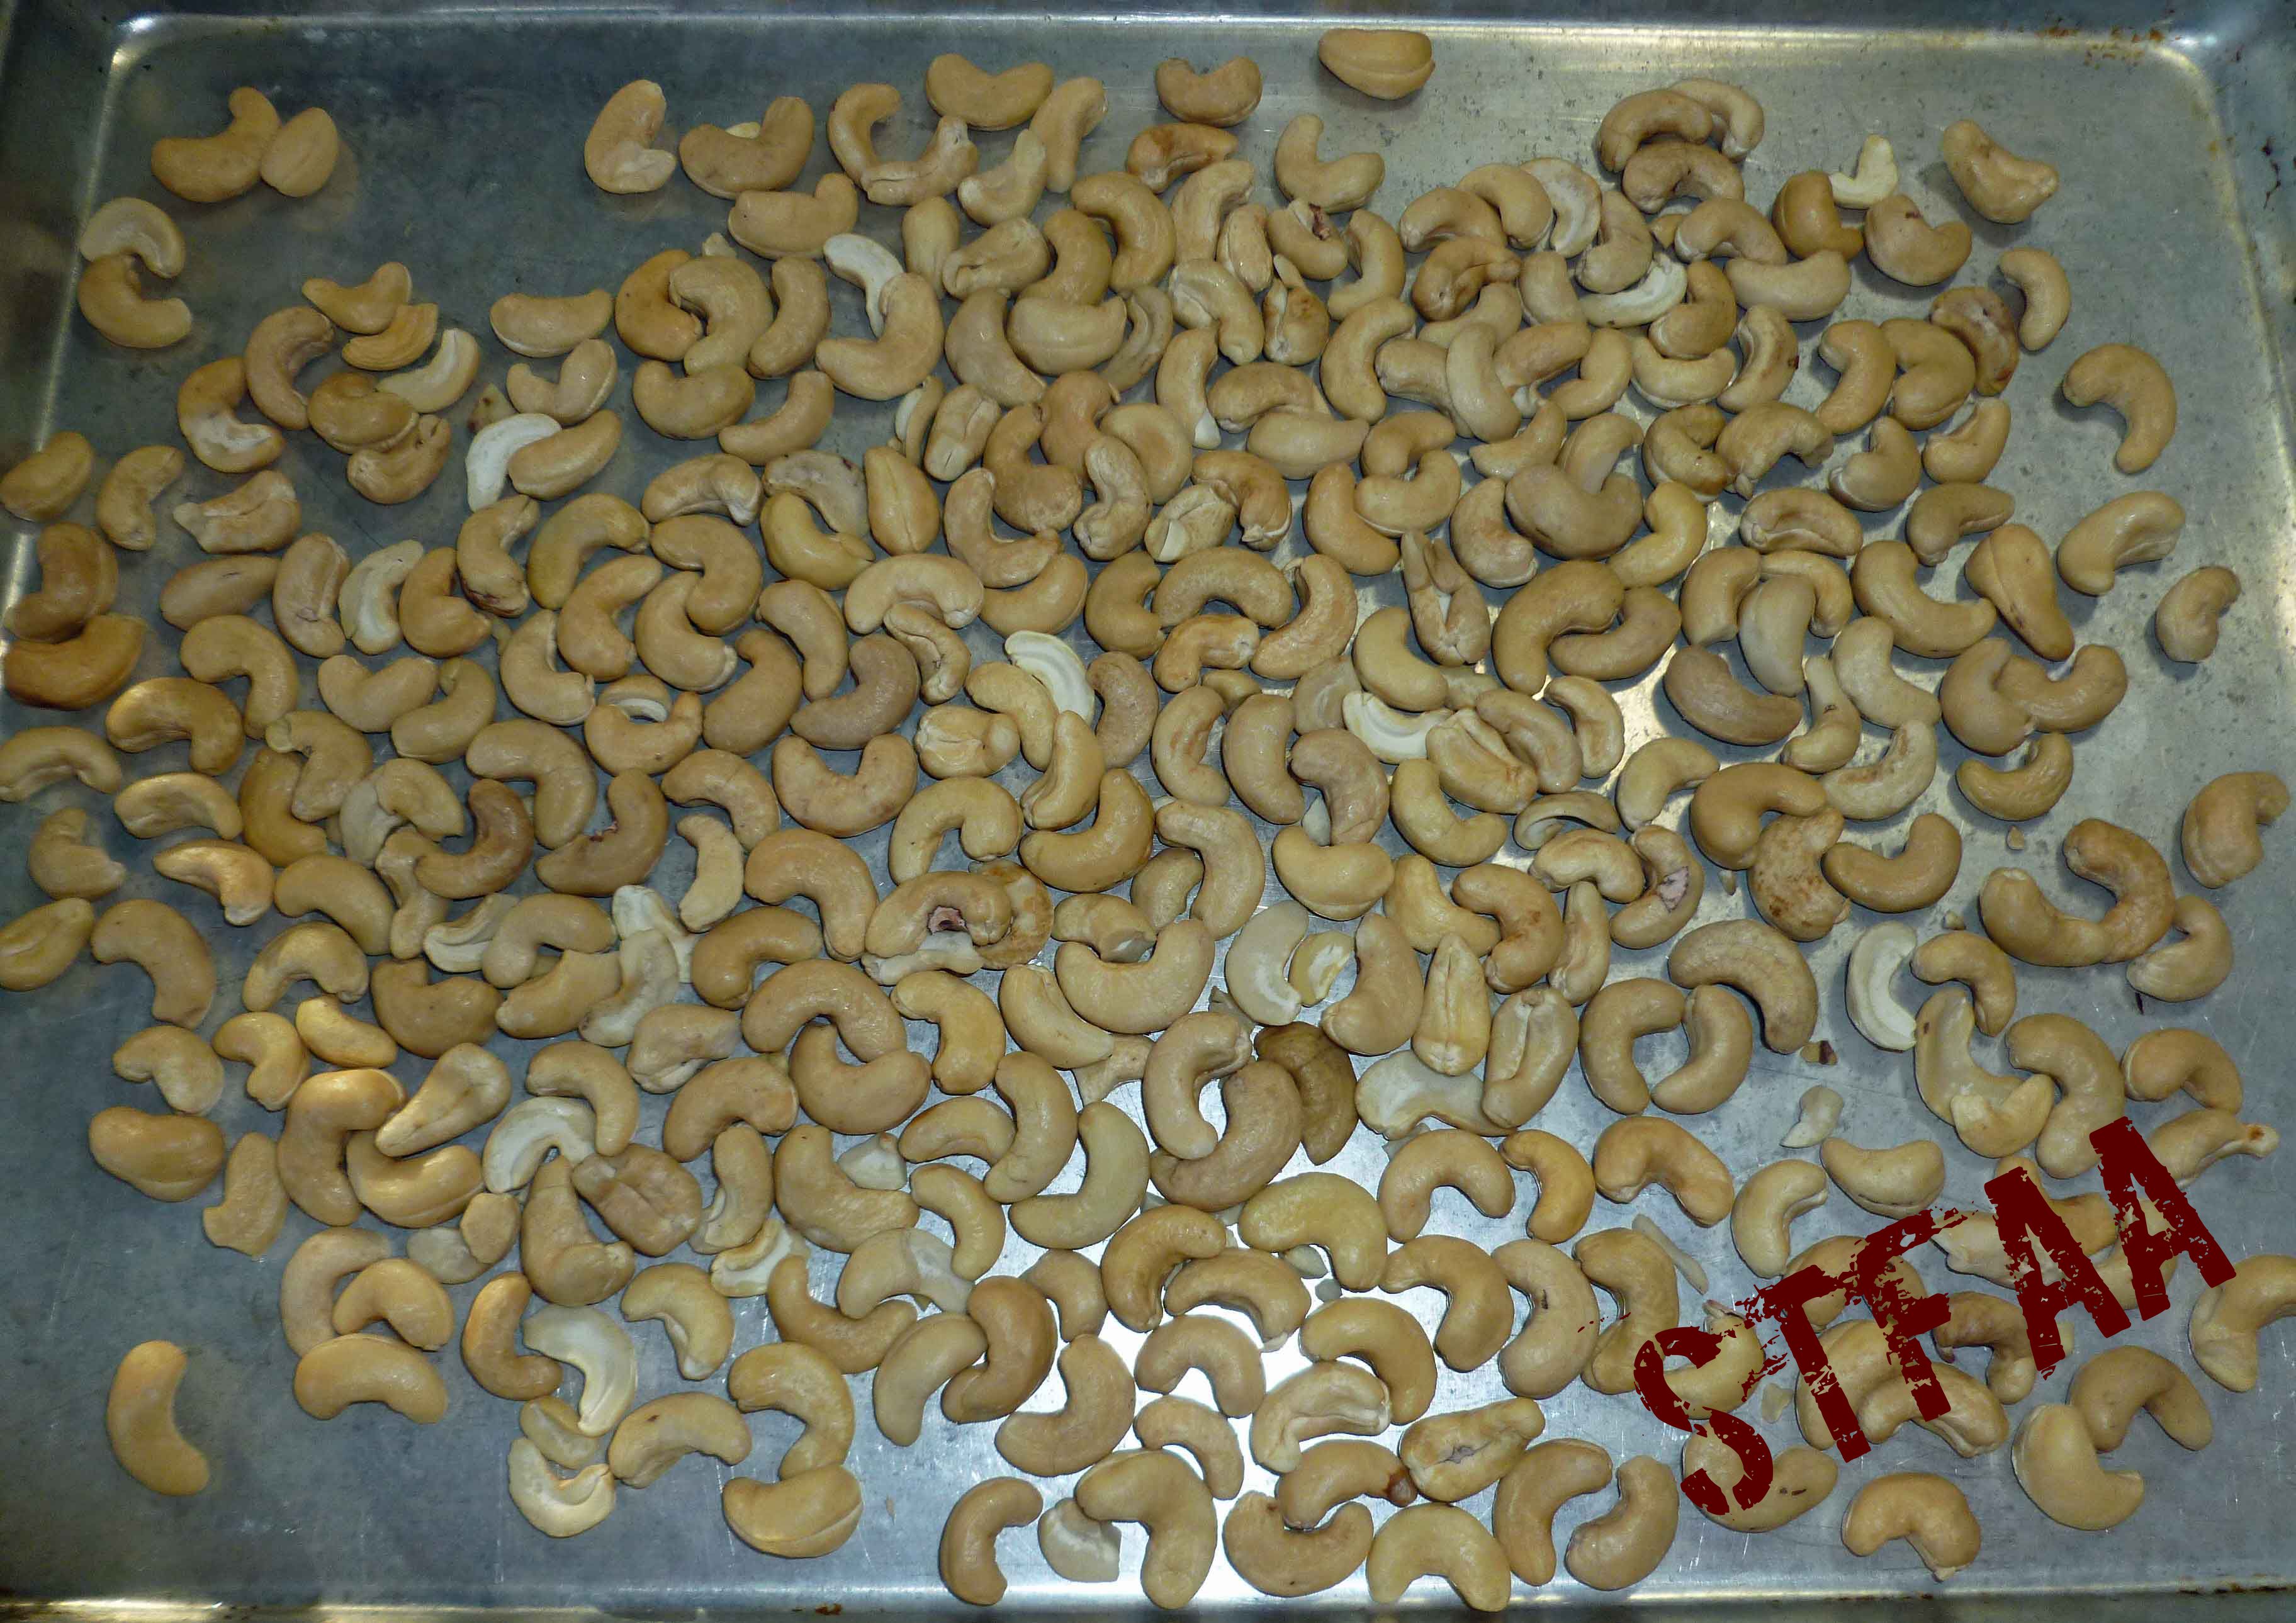
If you want to soak the cashews to clean them well, cover them with water in a bowl and soak for two hours. Drain cashews and dehydrate either in a dehydrator or a oven for 12 to 24 hours at 150°F or less, until dry or crisp. If you are not soaking your cashews, skip to the next step.
Once your cashews are dry, roast them in a 325°F oven for about 10-15 minutes, watching them carefully so that they do not burn. You want them to be golden brown.
Add your cashews to your blender, along with 3 Tablespoons of your safe oil. Start on the lowest speed, and slowly increase the speed to the highest speed, using the tamper if your blender comes with one. Add more oil if necessary. When the blender changes from a chugging sound to a low laboring machine, stop the blender.
Remove the cashew butter and place equal amounts into two bowls. Mix a dash of salt into each bowl mixing well. One bowl is your now completed plain Cashew Butter. To the second bowl, add 2-3 Tablespoons of cacao powder to taste and the sugar, whisking it in. You also may need to add more oil at this point. This bowl is your Chocolate Cashew butter.
Store in an air tight container or freeze it for longer storage.
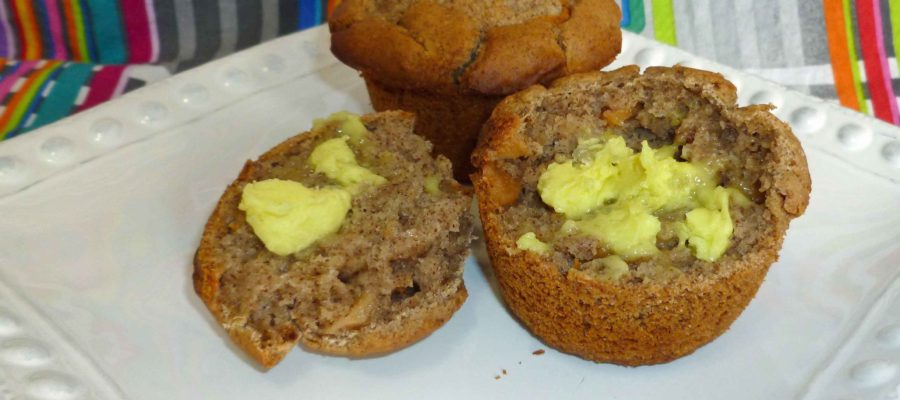
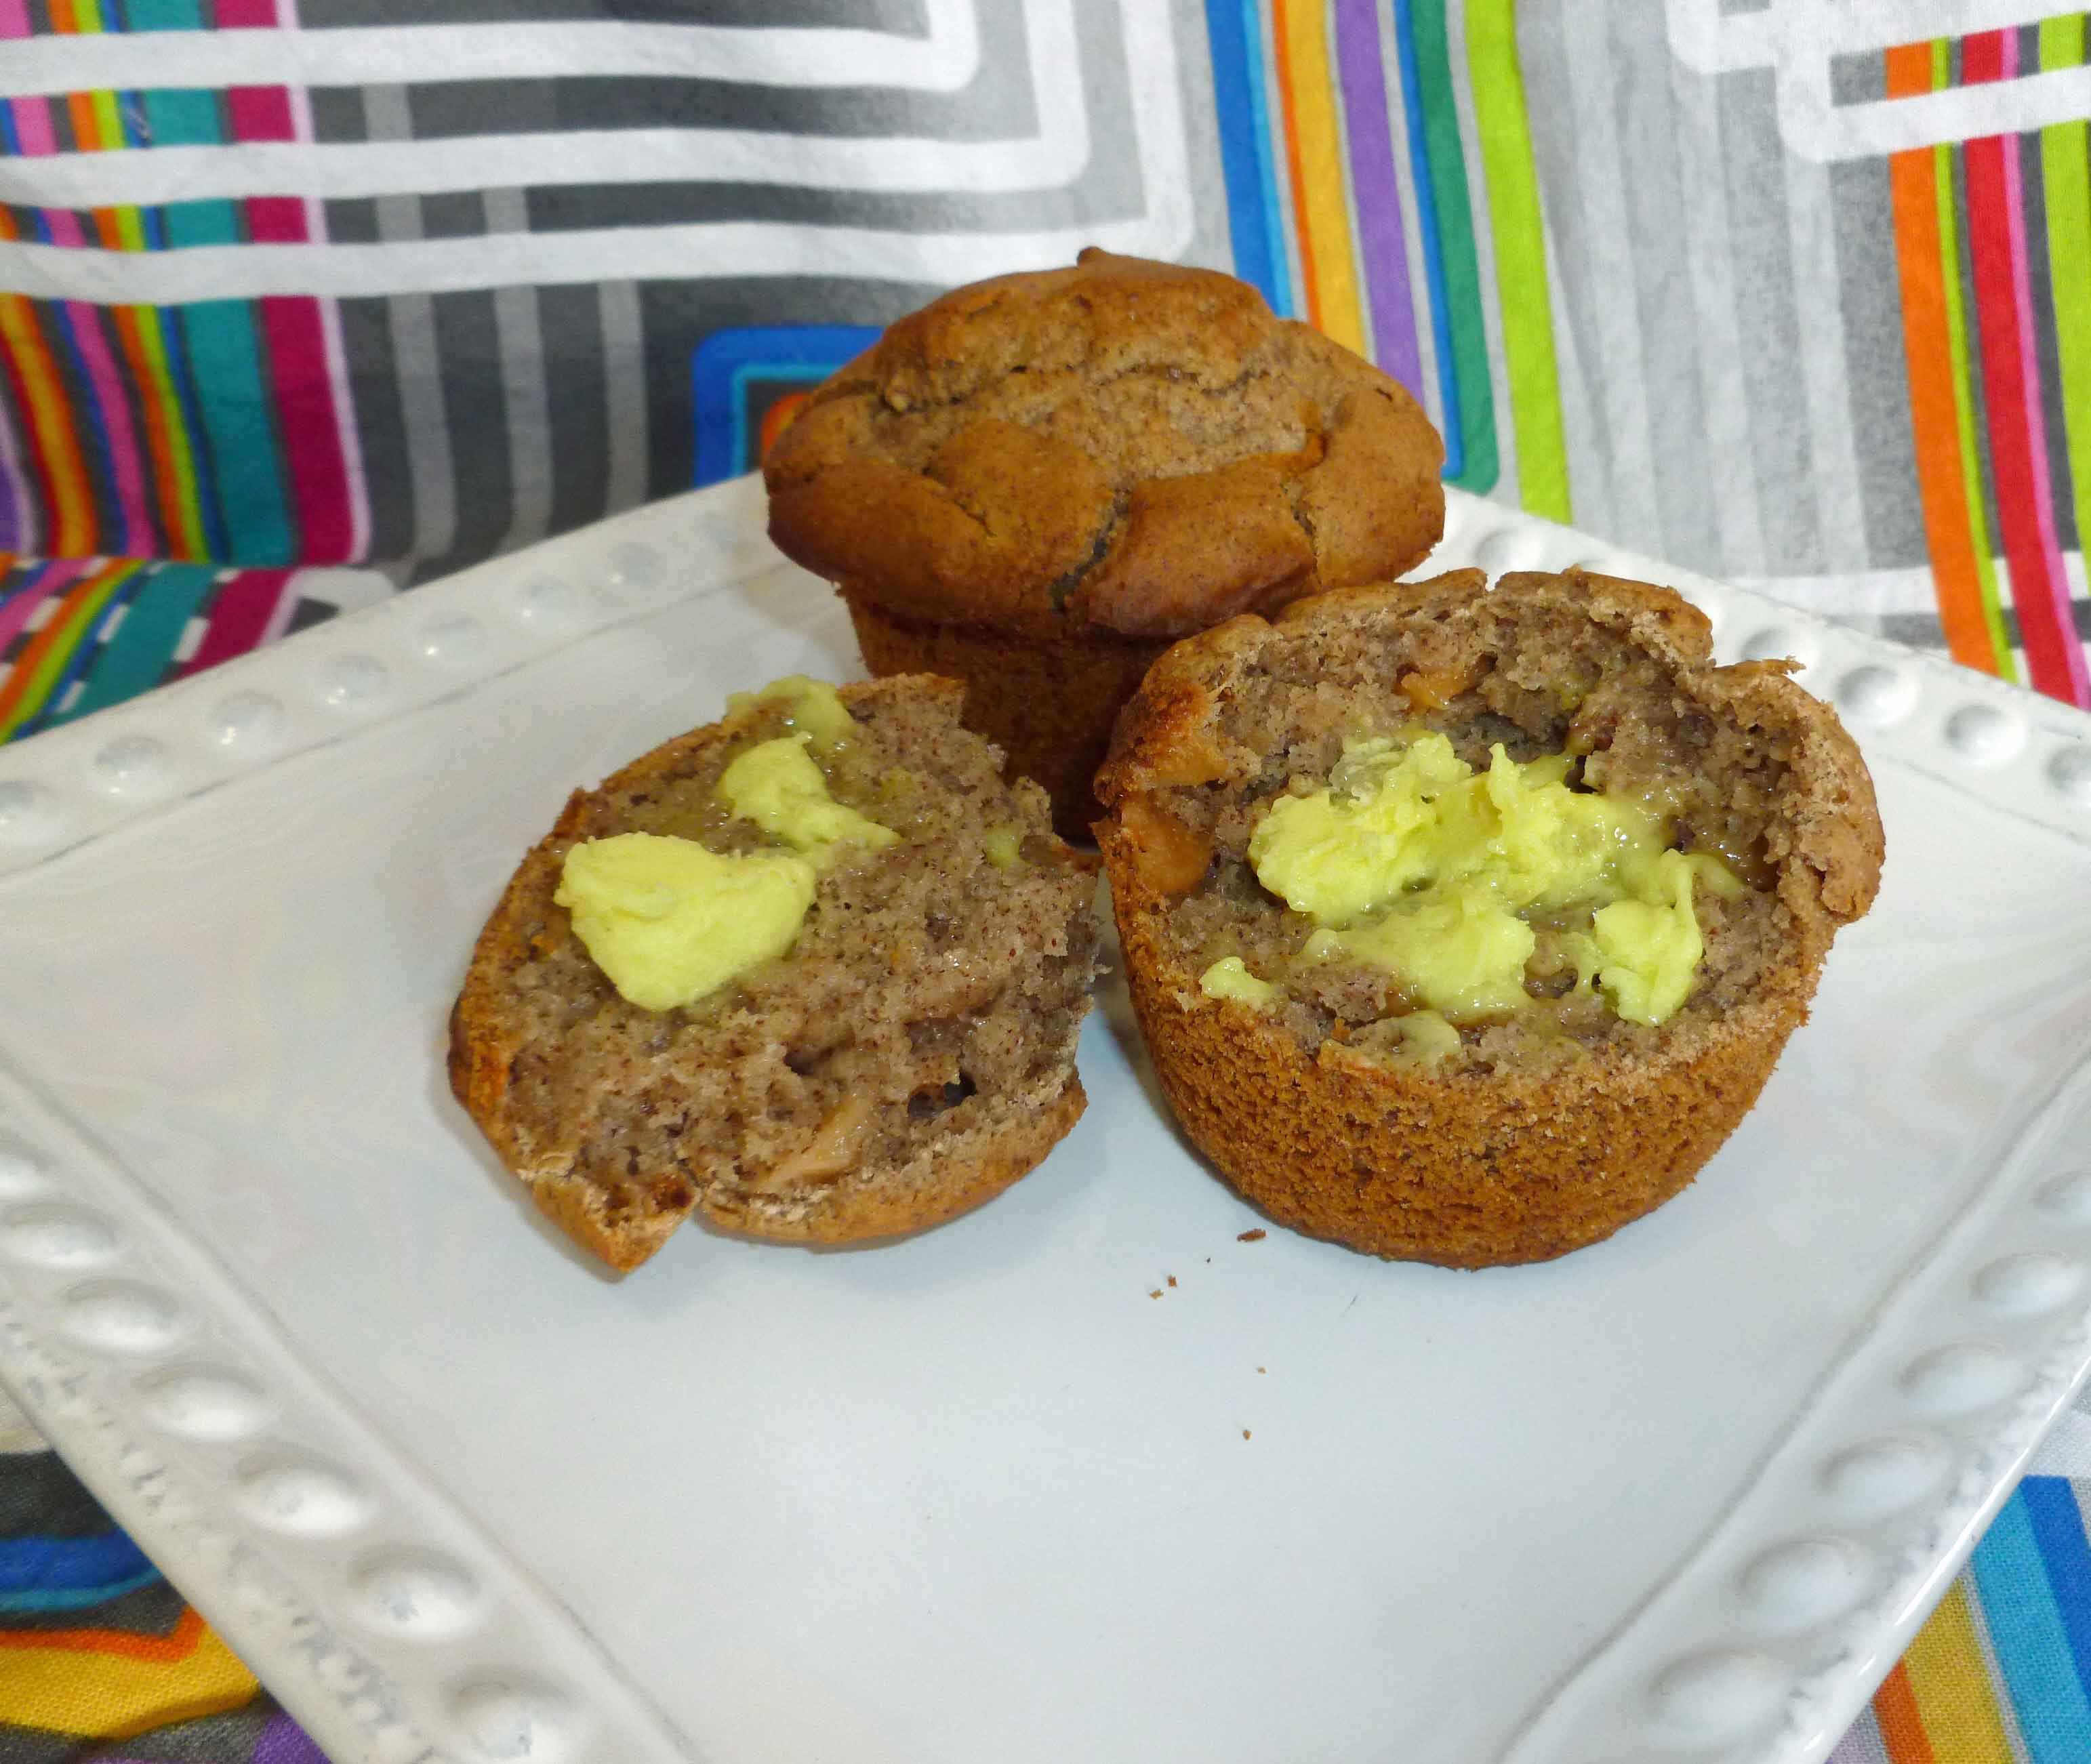
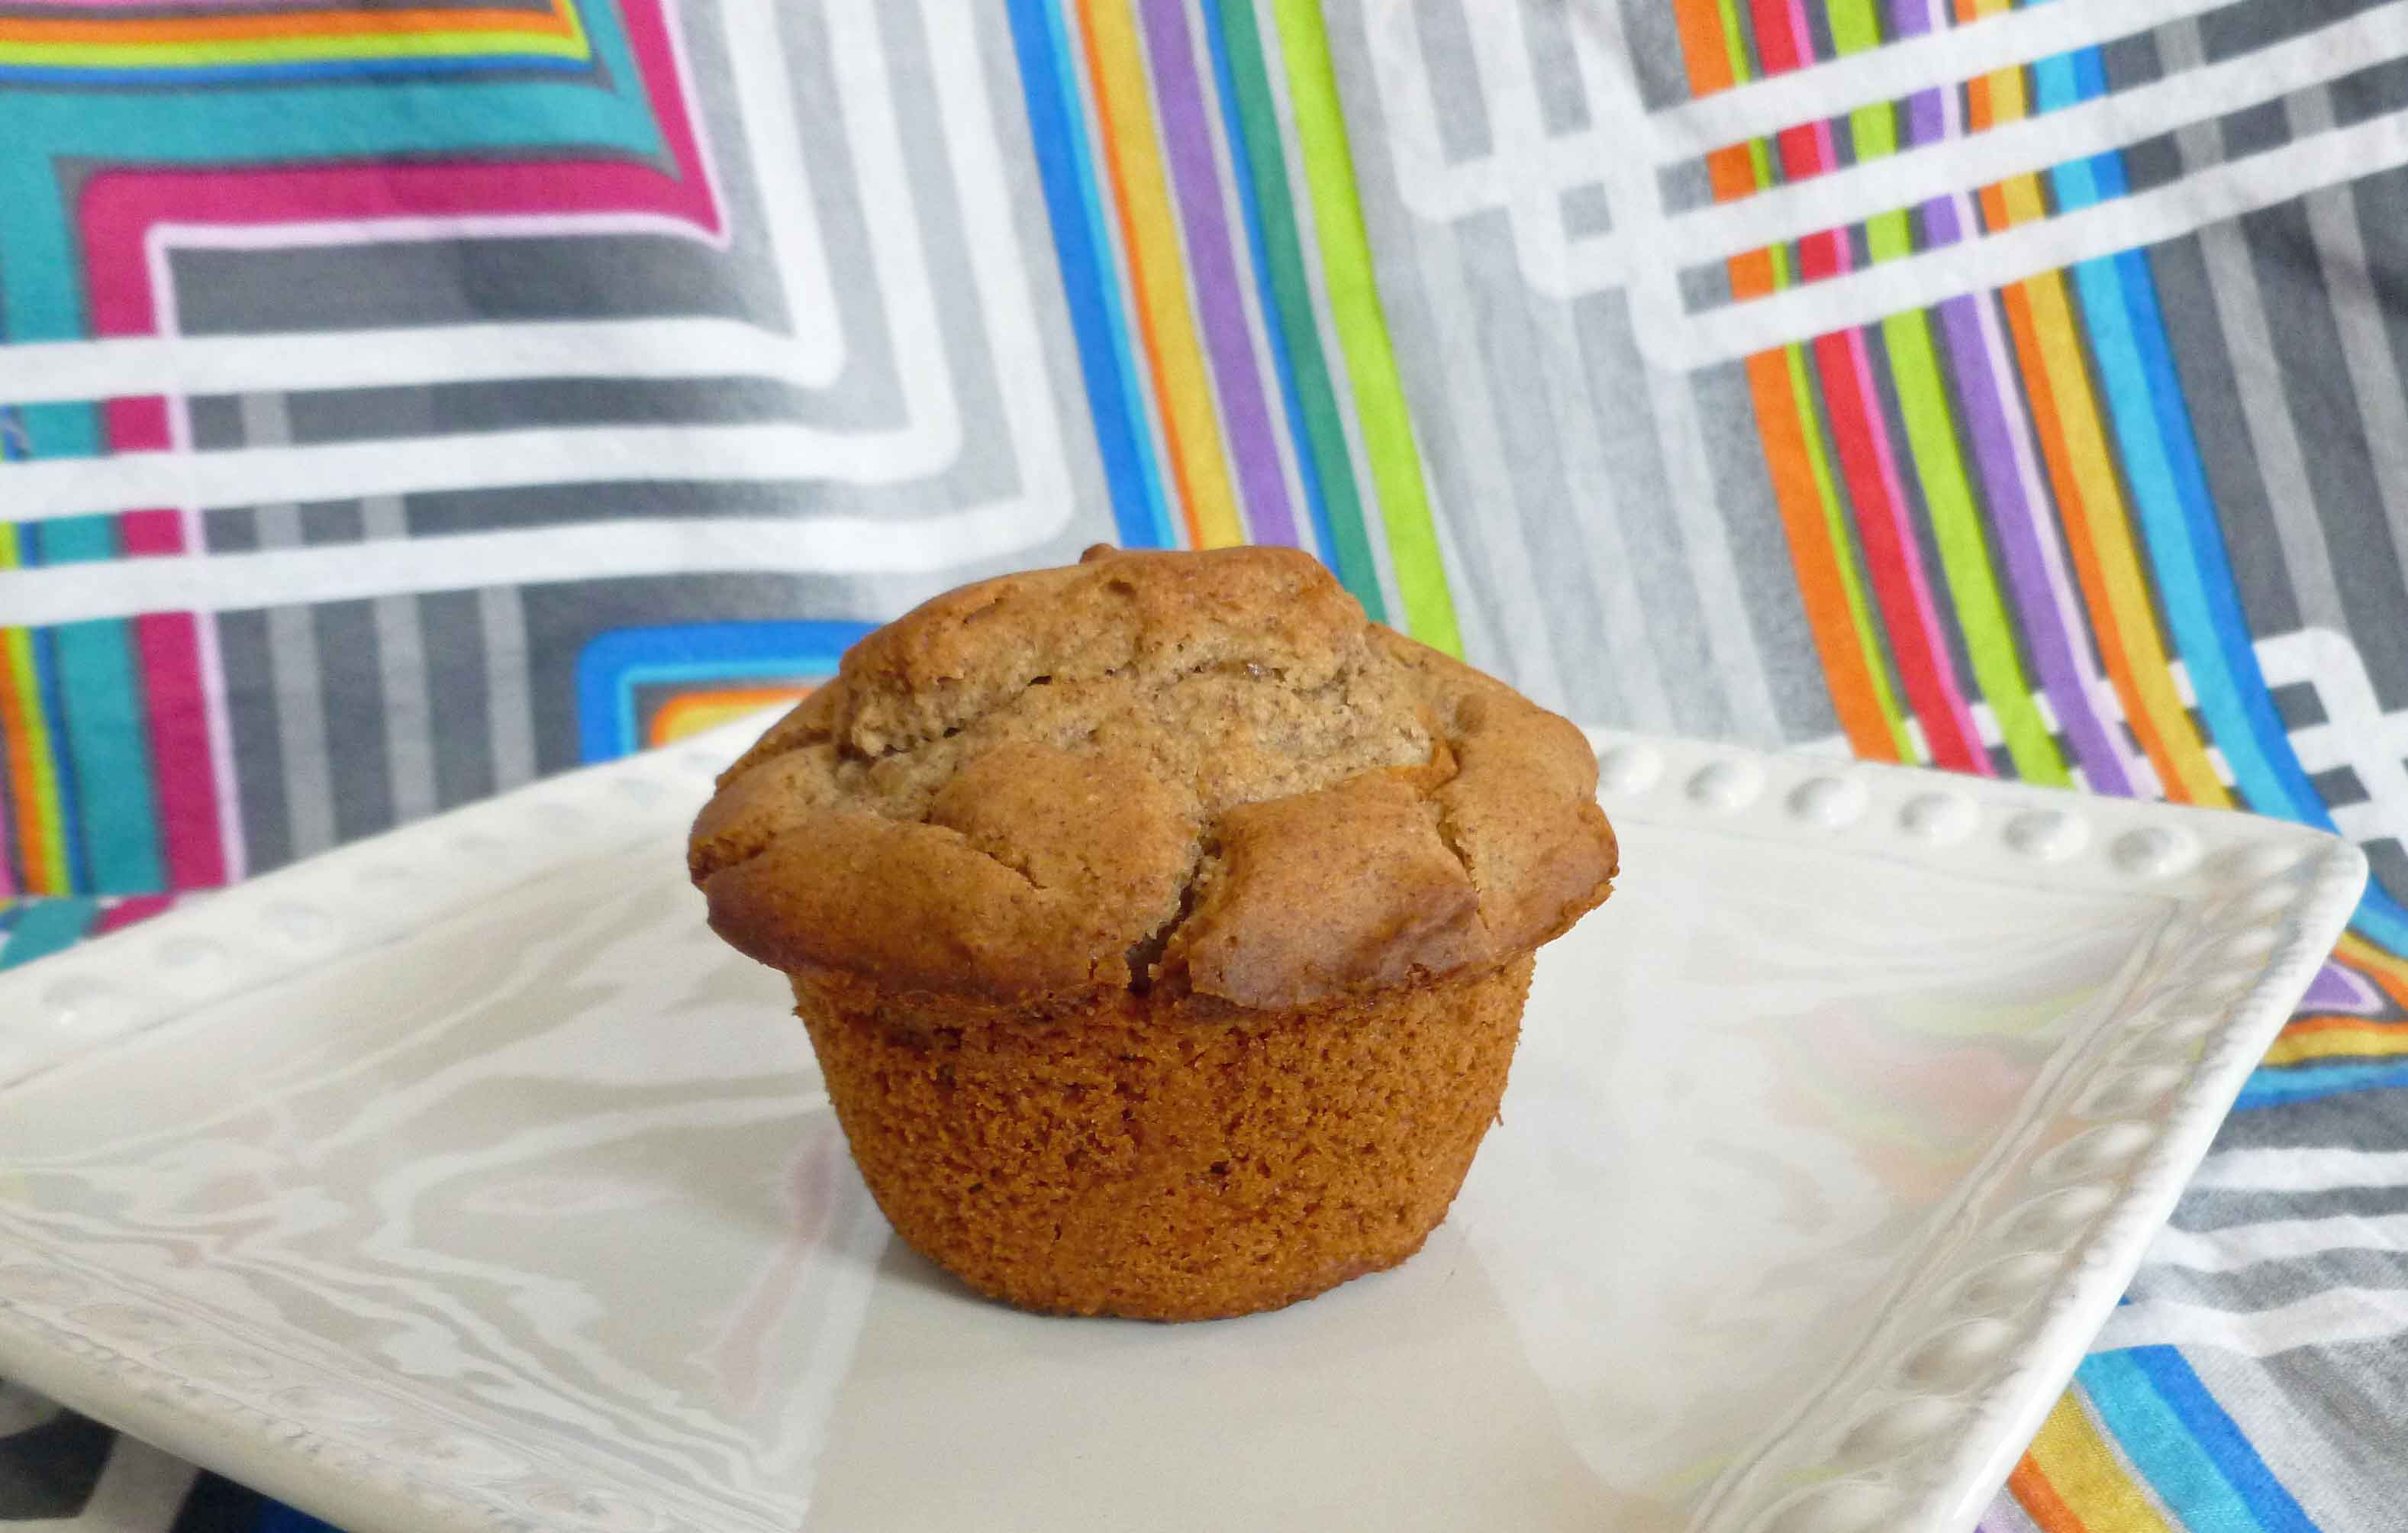
It’s breakfast month on the blog. And let’s face it, when you have multiple allergies (17 so far), and they include, dairy, eggs, wheat, and corn, breakfast can be a major problem. Many allergy peeps argue that it’s just better to get past the idea of breakfast food, and just eat safe food in the morning no matter what it is, but I still have a mental block about it–I just don’t want to eat dinner food or lunch for breakfast. This is kind of ridiculous given that I used to eat breakfast food for dinner or lunch all the time in the long, long ago before food allergies. But anyway, given the above constraints, my easy breakfast food has been cooked oatmeal, which I am frankly sick to death of at this point. So when we decided to make April be breakfast month, I decided I needed another easy breakfast that I could make ahead and carry with me.
I started with the Basic Muffin Recipe from King Arthur Flour, which is actually a real wheat, real dairy, real egg, and real butter recipe, and converted it to something safe for my allergies. I had to give it a couple of tries, but I have it where I want it now, and it rises and looks like real muffins instead of sadly deflated hockey puck looking things. I used my Homemade Margarine, New and Improved (which is not vegan for our vegan followers) on them, and it was bliss! Yay! Also they are really good cut in half and grilled on a cast iron skillet, diner style as well.
1 1/2cupsGluten-free, Rice-free, Potato-free flour mix(see our post here for the recipe – http://adultfoodallergies.com/whoopie-pies-gluten-free-with-vegan-option/
1/2 cupsorghum flour
1/2teaspoon cake spice(I use Penzey’s but blends are not always safe for all those allergic to corn. Use a blend of ground cinnamon, cloves, nutmeg, allspice, ginger, and star anise.)
1/4cup sugar
1/4cupbrown sugar
1/2teaspoonsea salt
1Tablespoonbaking powder(here’s a recipe for a corn-free one – http://wholenewmom.com/health-concerns/make-your-own-baking-powder/)
Wet Ingredients
1cupnon-dairy milk(I used homemade rice milk)
1/4cupsafe for you oil(I’ve used both olive and grapeseed oil)
1/4cupapplesauce(I use my homemade, home canned applesauce)
3Tablespoonsaquafaba(see http://aquafaba.com/)
1teaspoonvanilla extractvanilla extract (I make my own with vanilla beans and vodka made from potatoes, as most commercial extract contains corn)
Muffin additives
1applepeeled, cored, and diced(or 1/2 cup of dehydrated apples, soaked in water for half an hour and drained, or any other fruit or berry you want to use)
Servings: muffins
Instructions
Preheat oven to 425°F. Grease a 12 cup muffin pan with some of your safe oil.
Add all the dry ingredients to a large bowl and whisk together until well combined. In another bowl, add all the wet ingredients and whisk together until well combined.
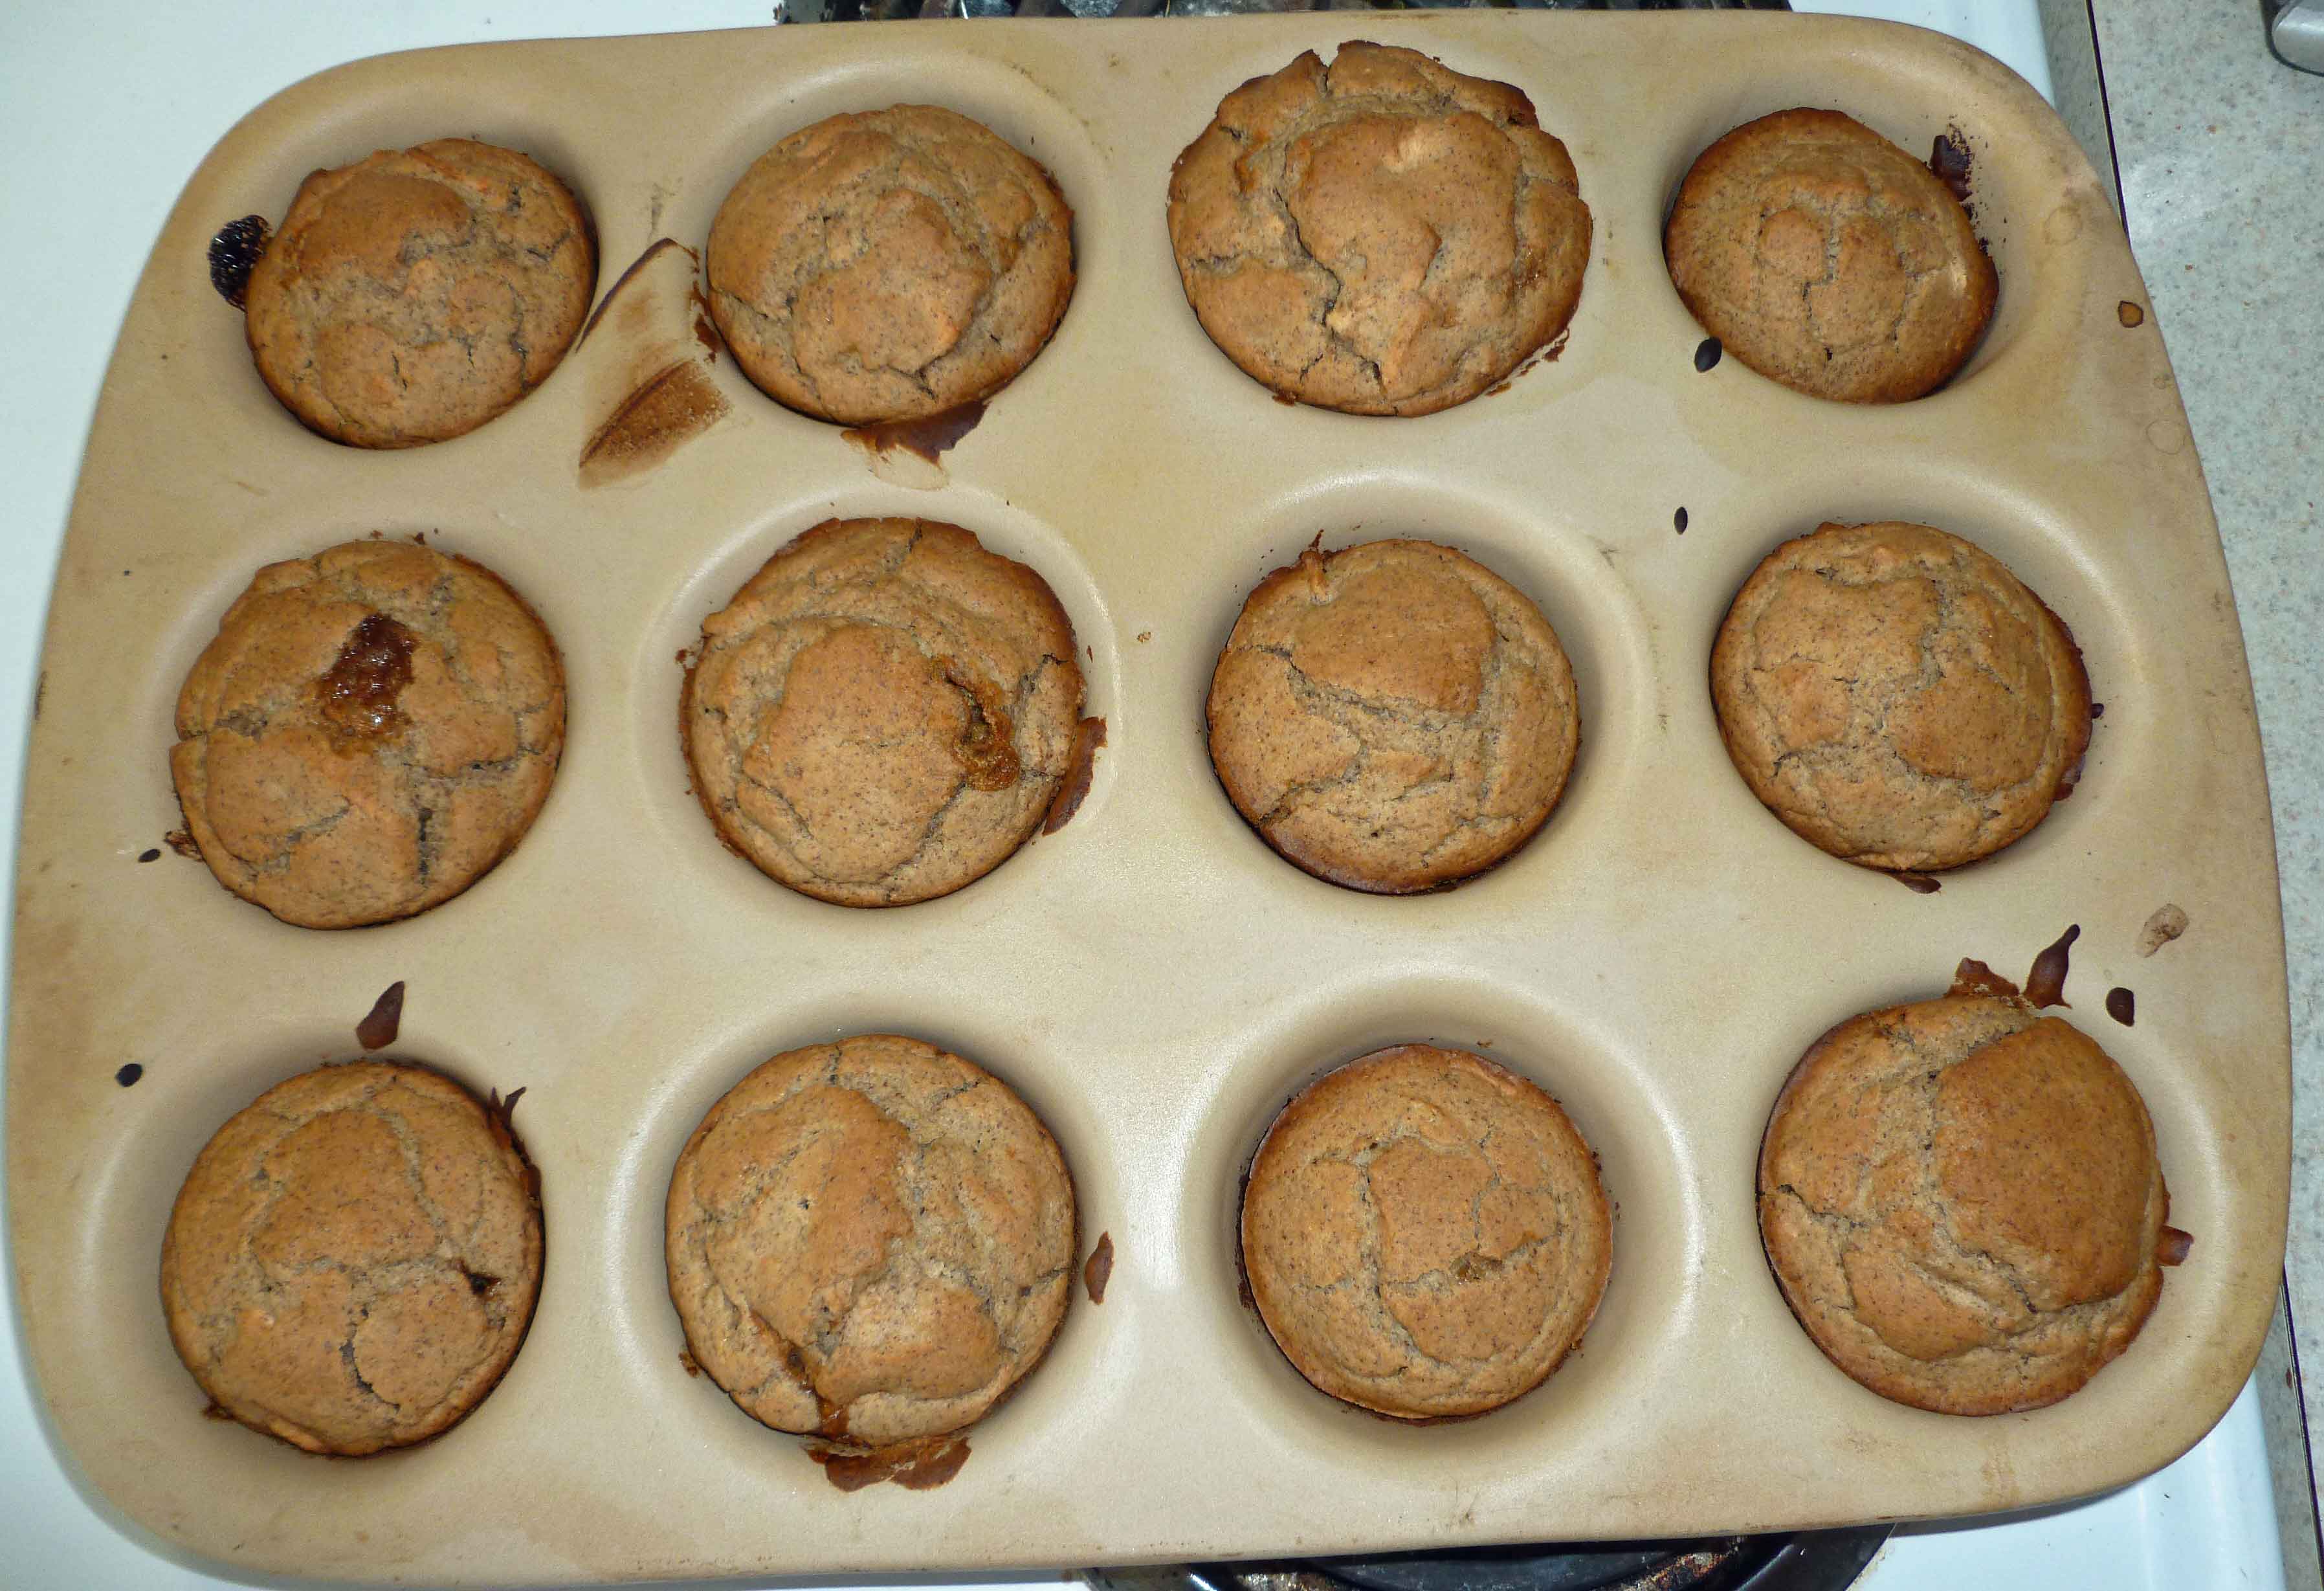
Pour the wet ingredients into the dry ingredients, and using a fork or a wire whisk, blend the two about 20 seconds or so, do not over mix. Add the apples, and fold in gently, don’t over mix. Fill the muffin cups about two thirds to three quarts full.
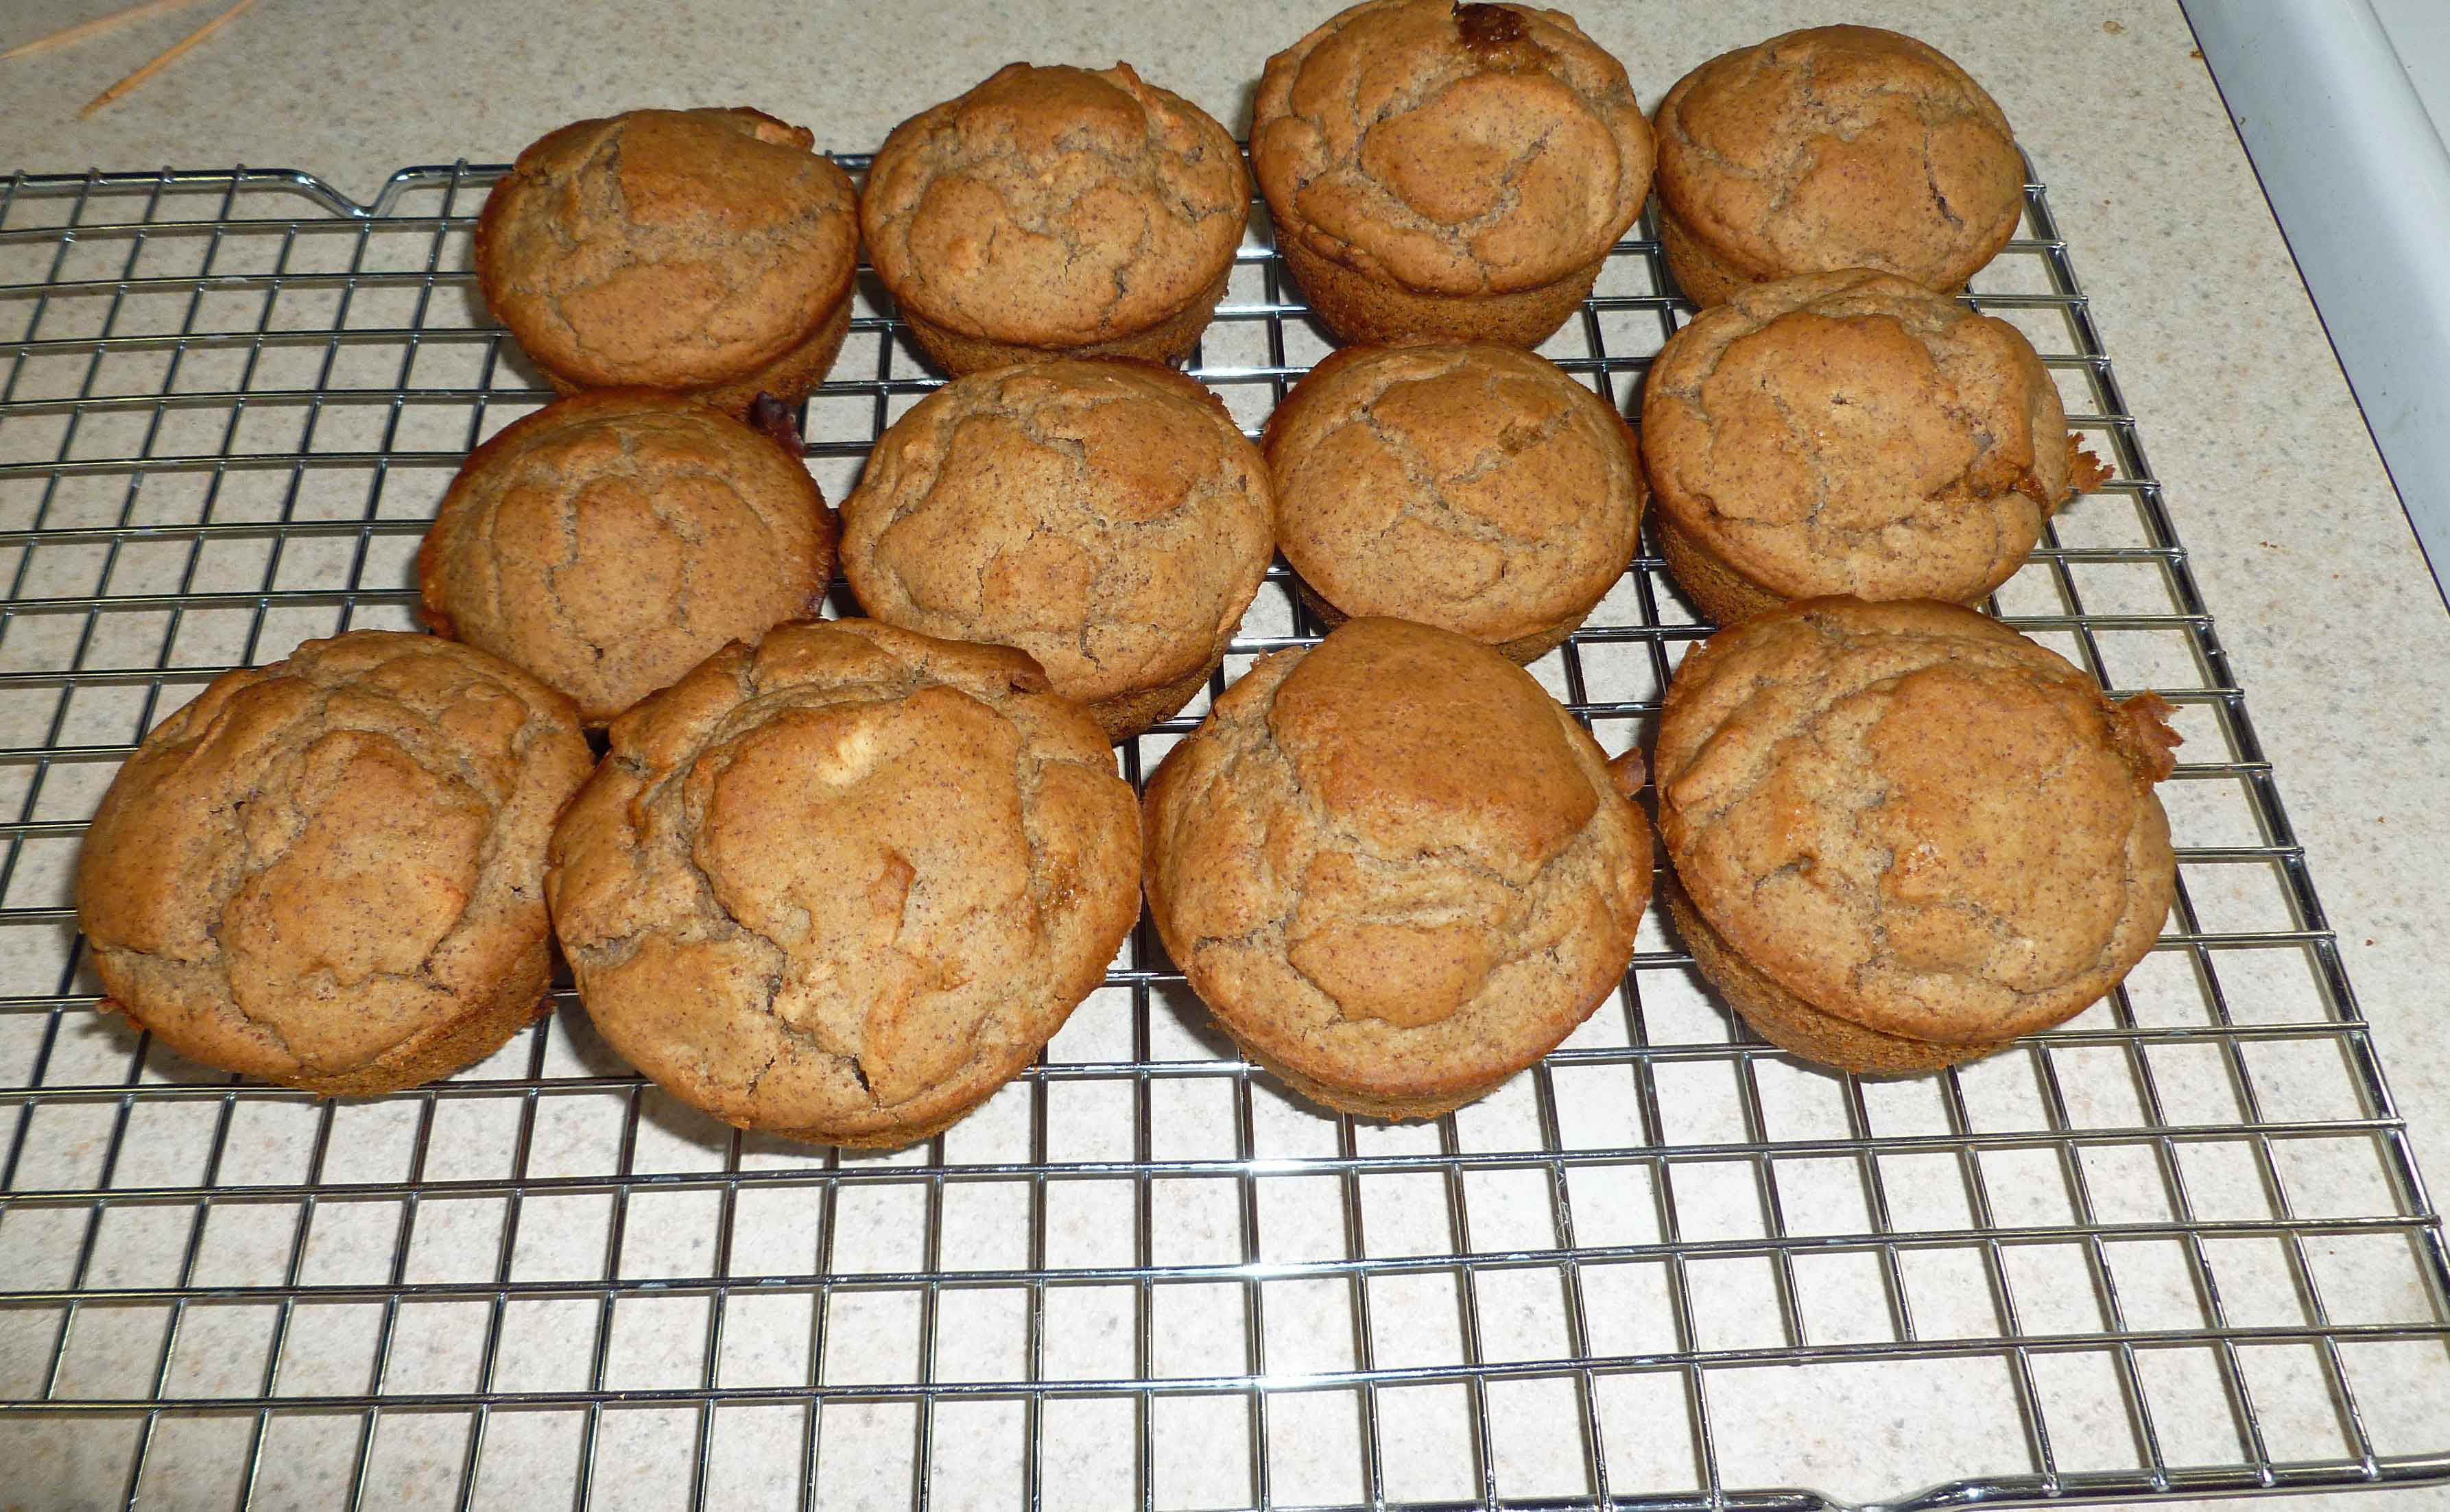
Bake 20-30 minutes depending on your pan (metal needs less time, stoneware needs more) or until a toothpick inserted into the middle of one of the center muffins comes out clean. Remove them from the oven, and as soon as they are cool enough to handle, turn them out of the pan onto a rack to cool.
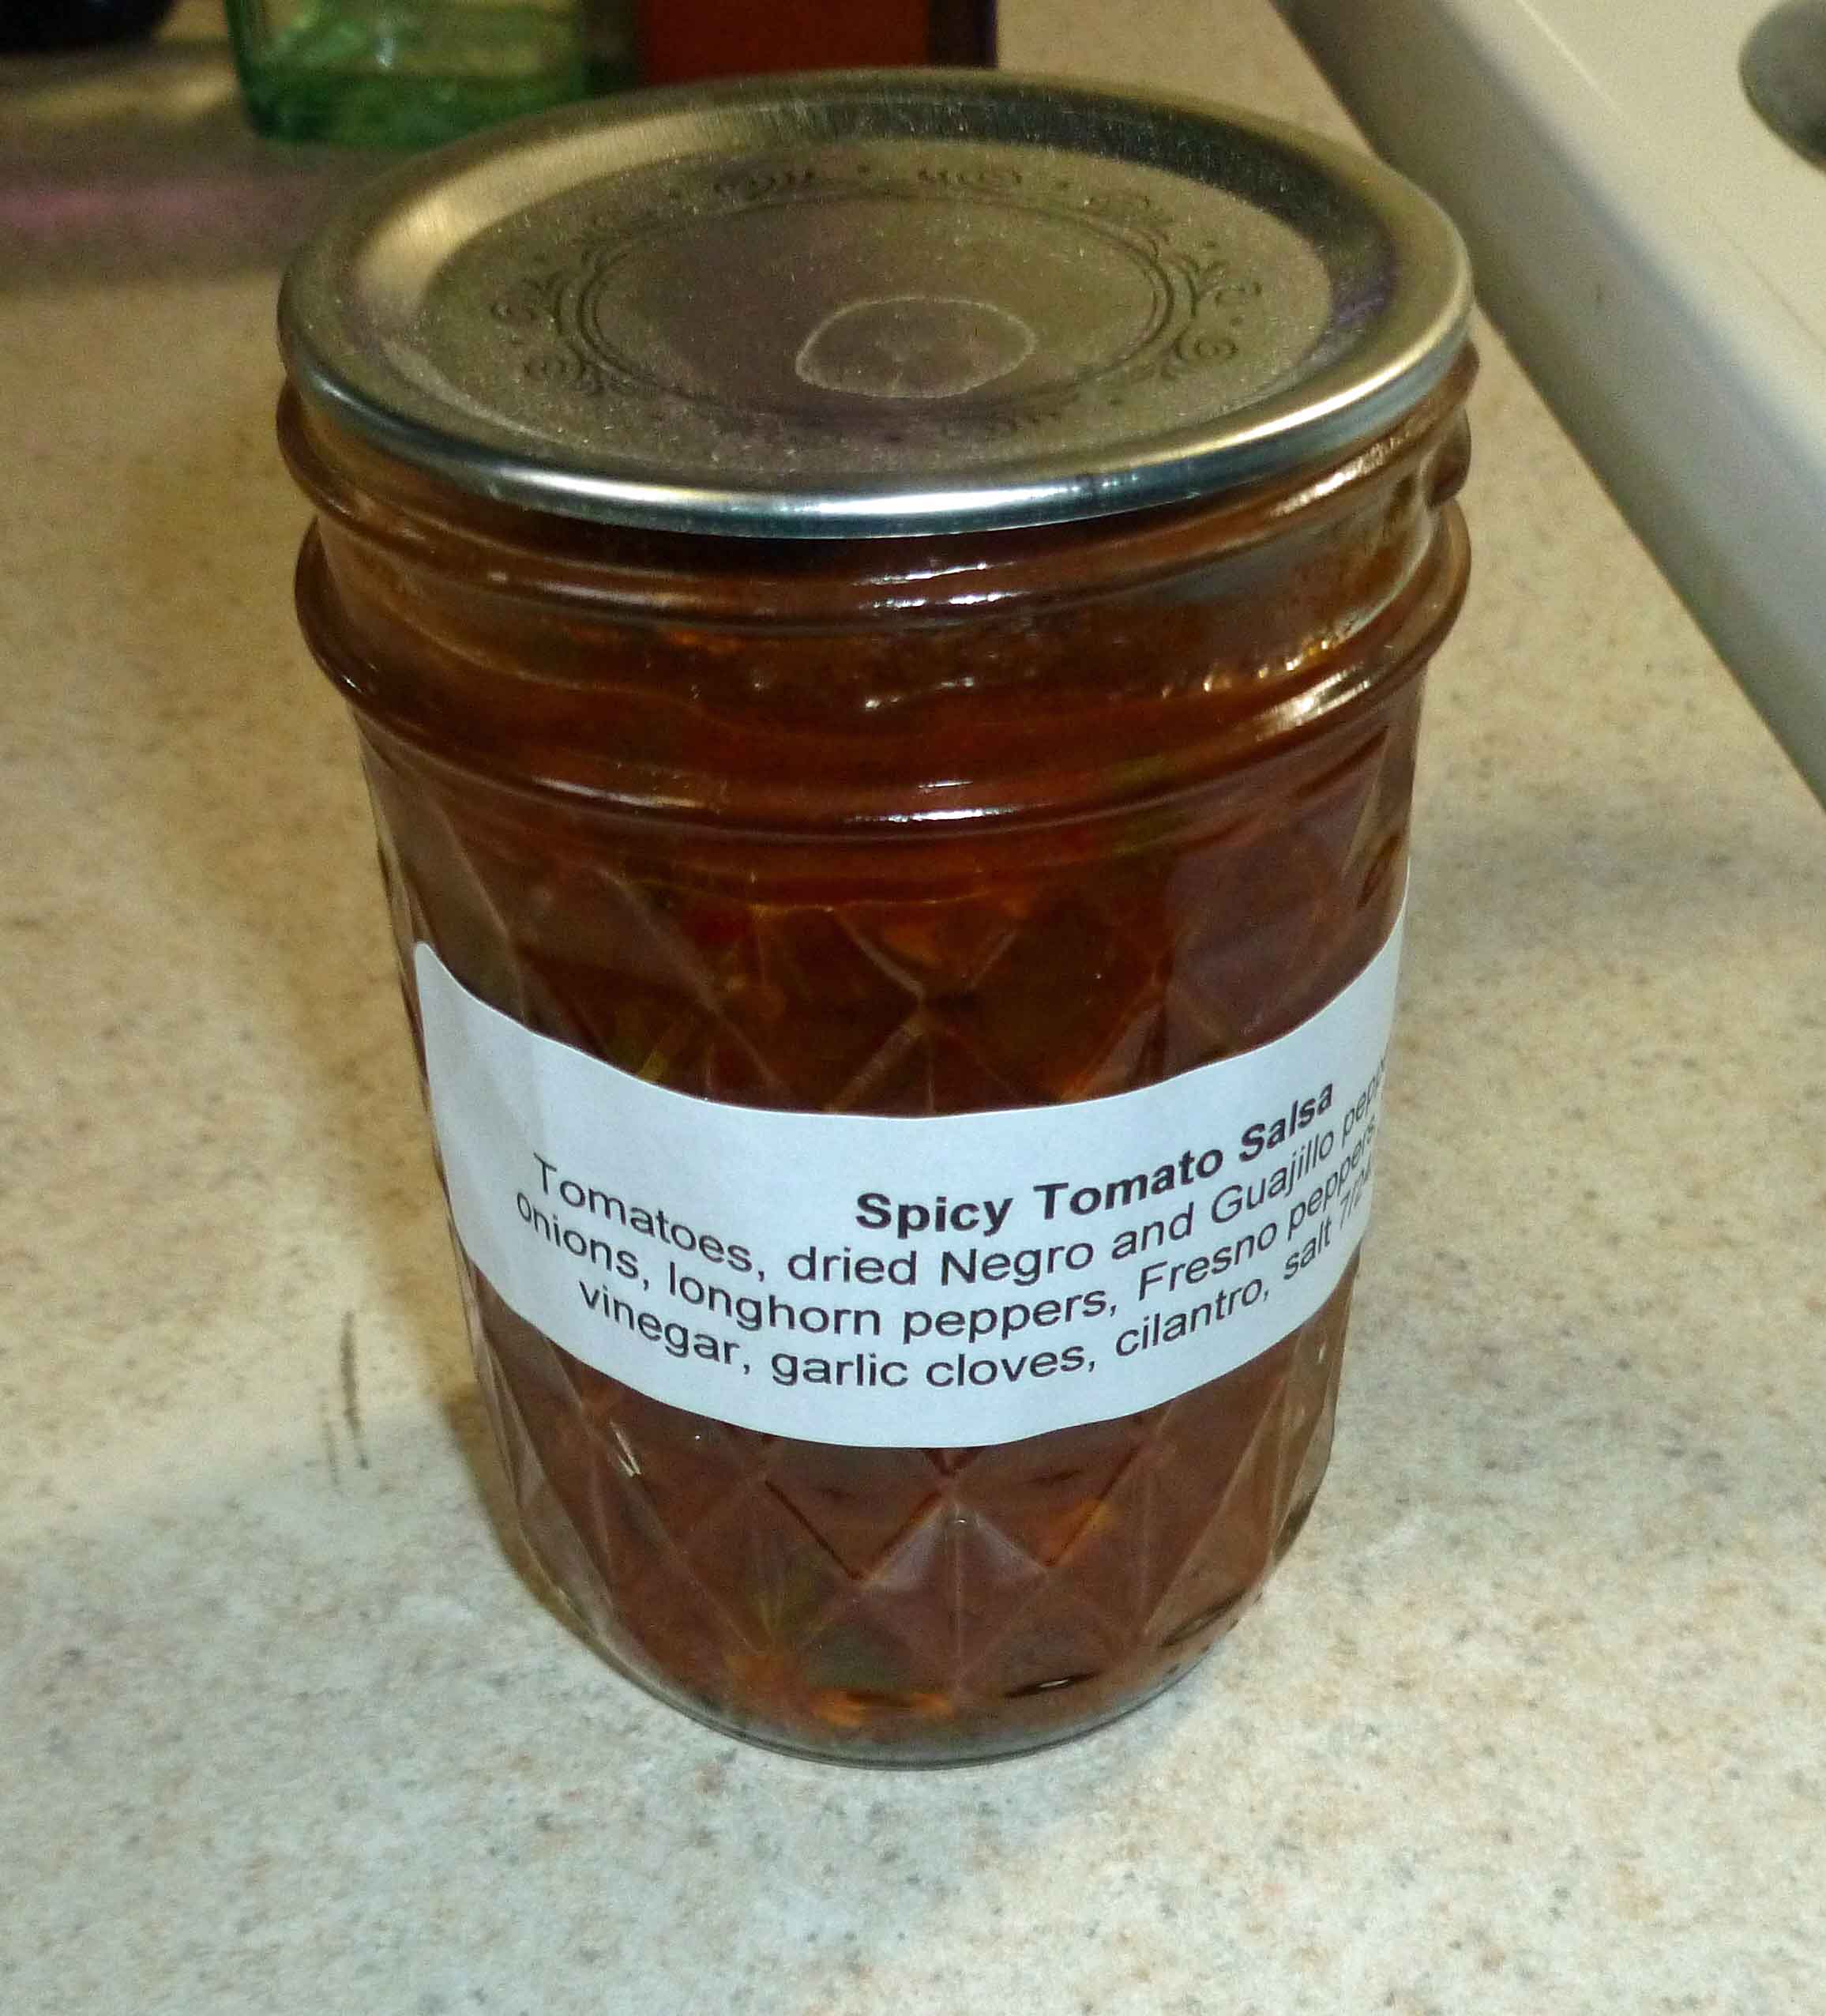
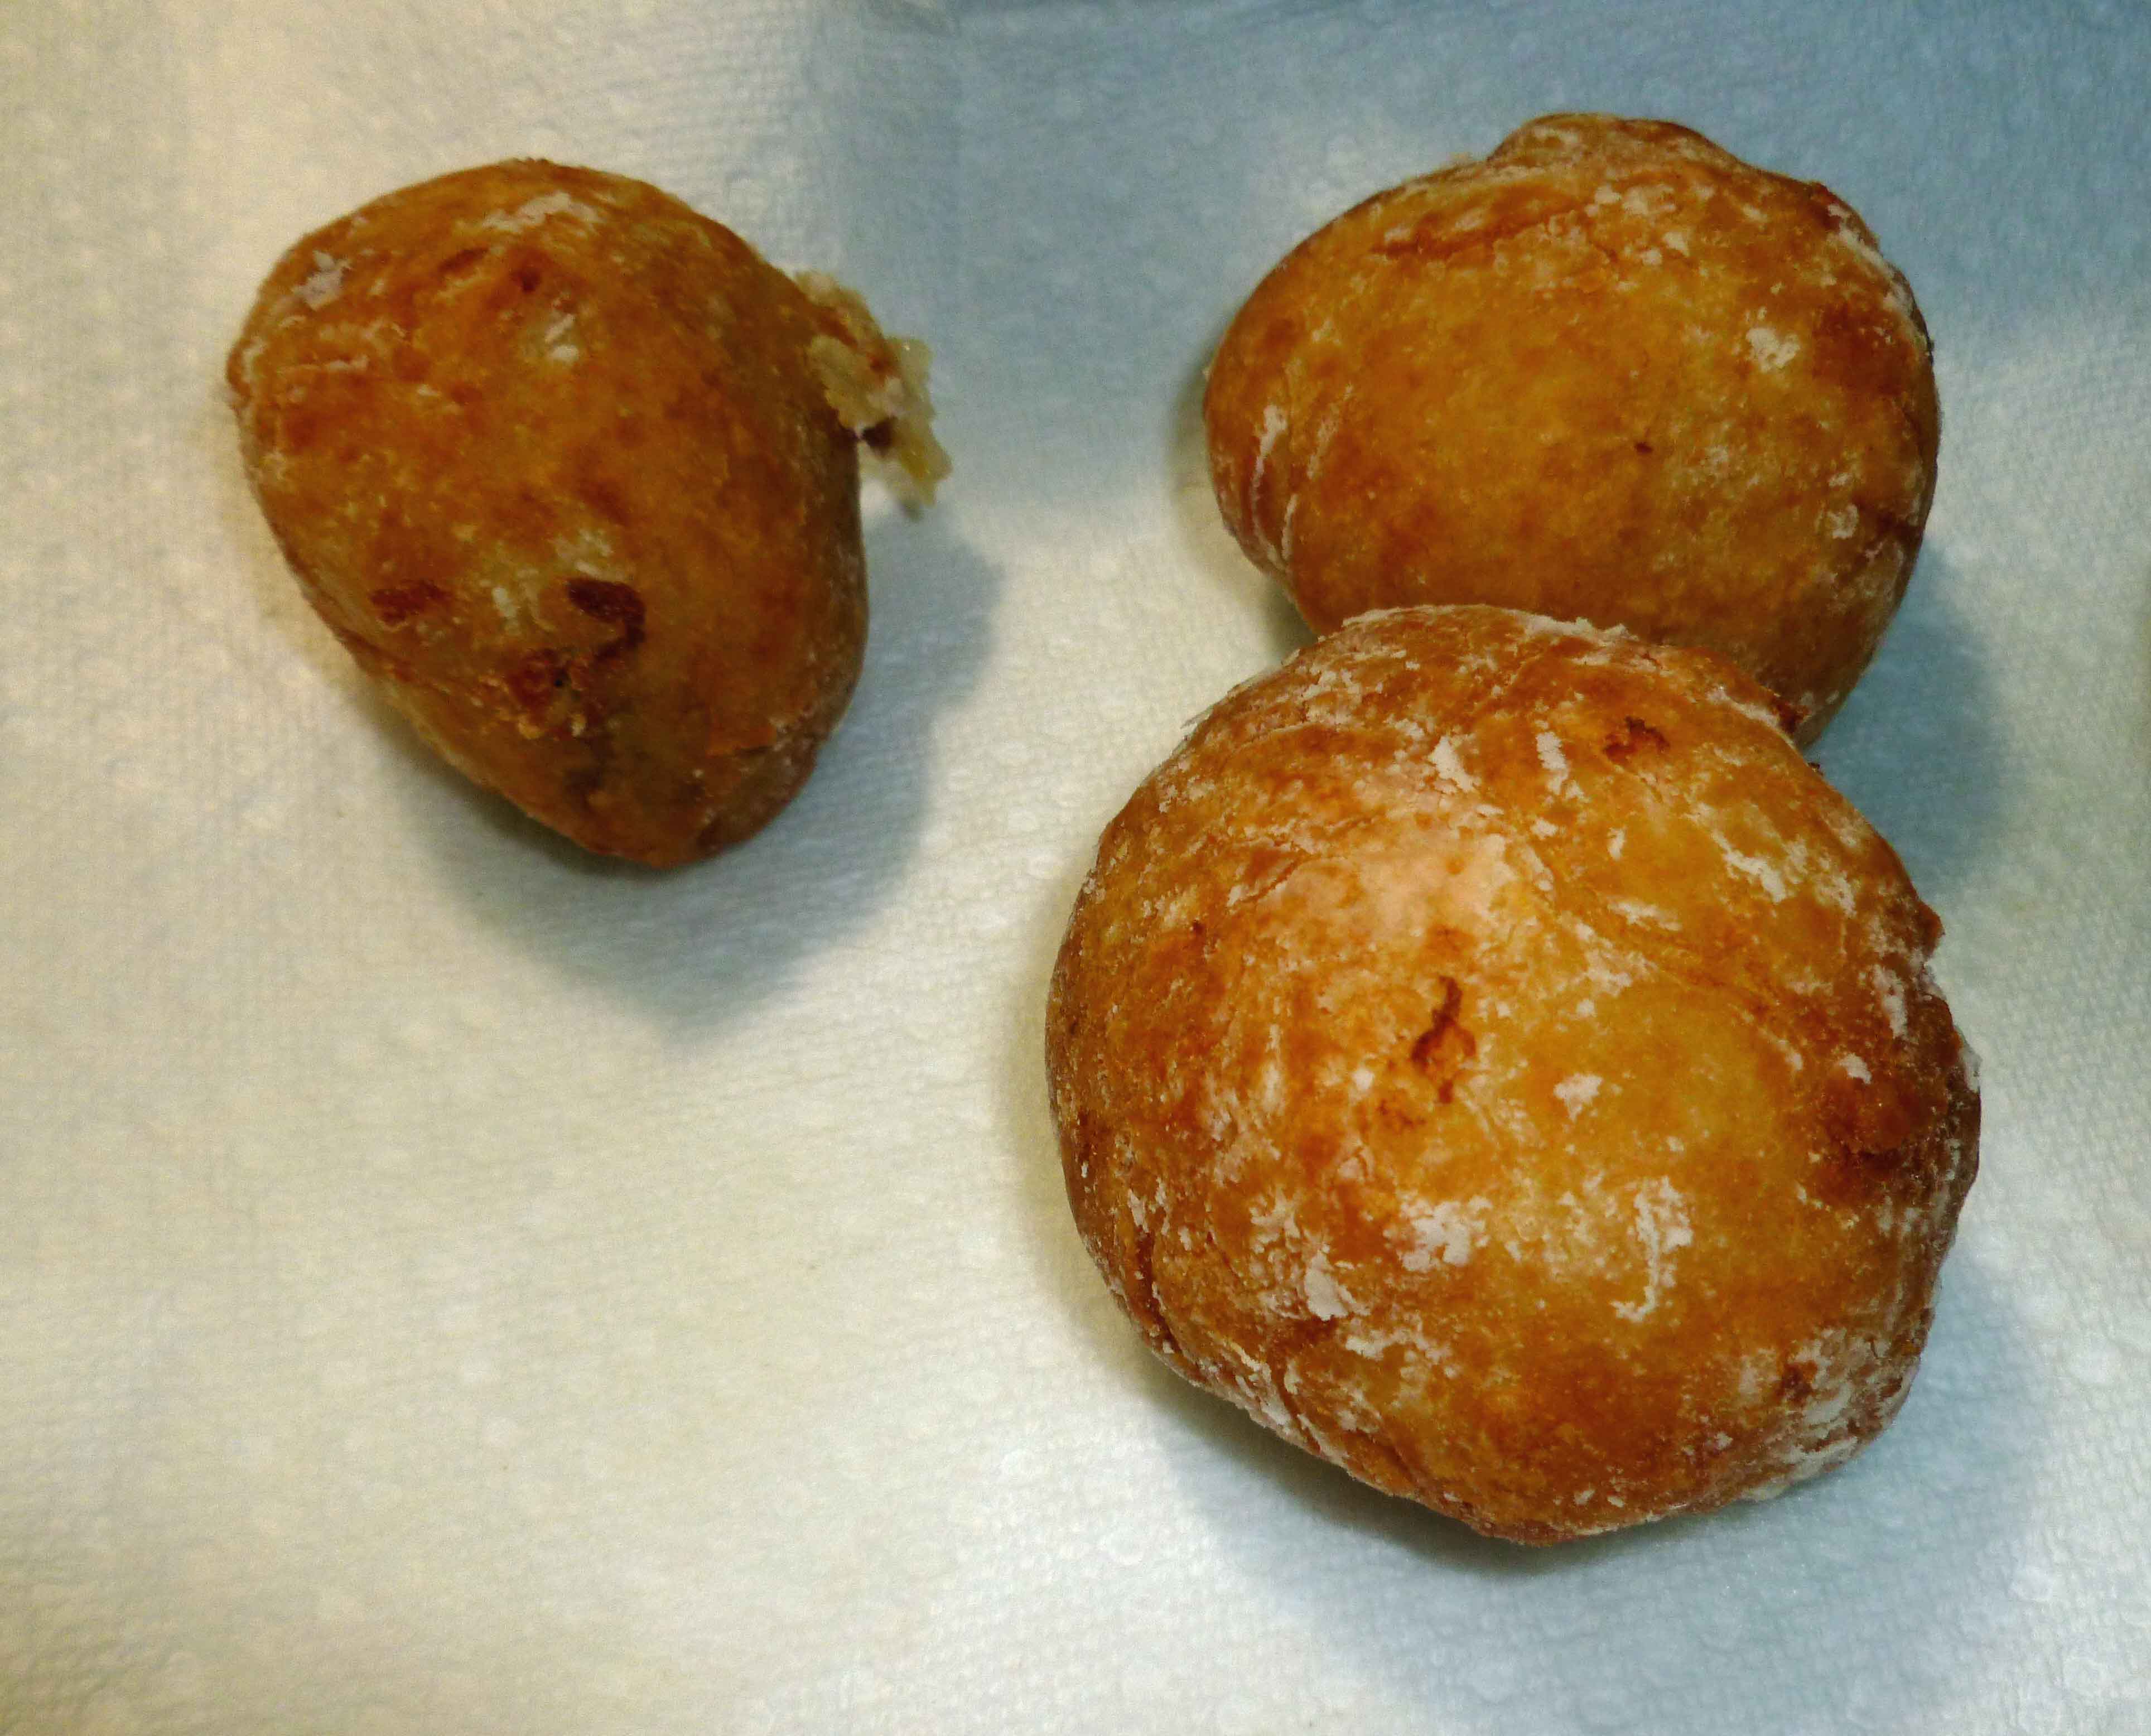
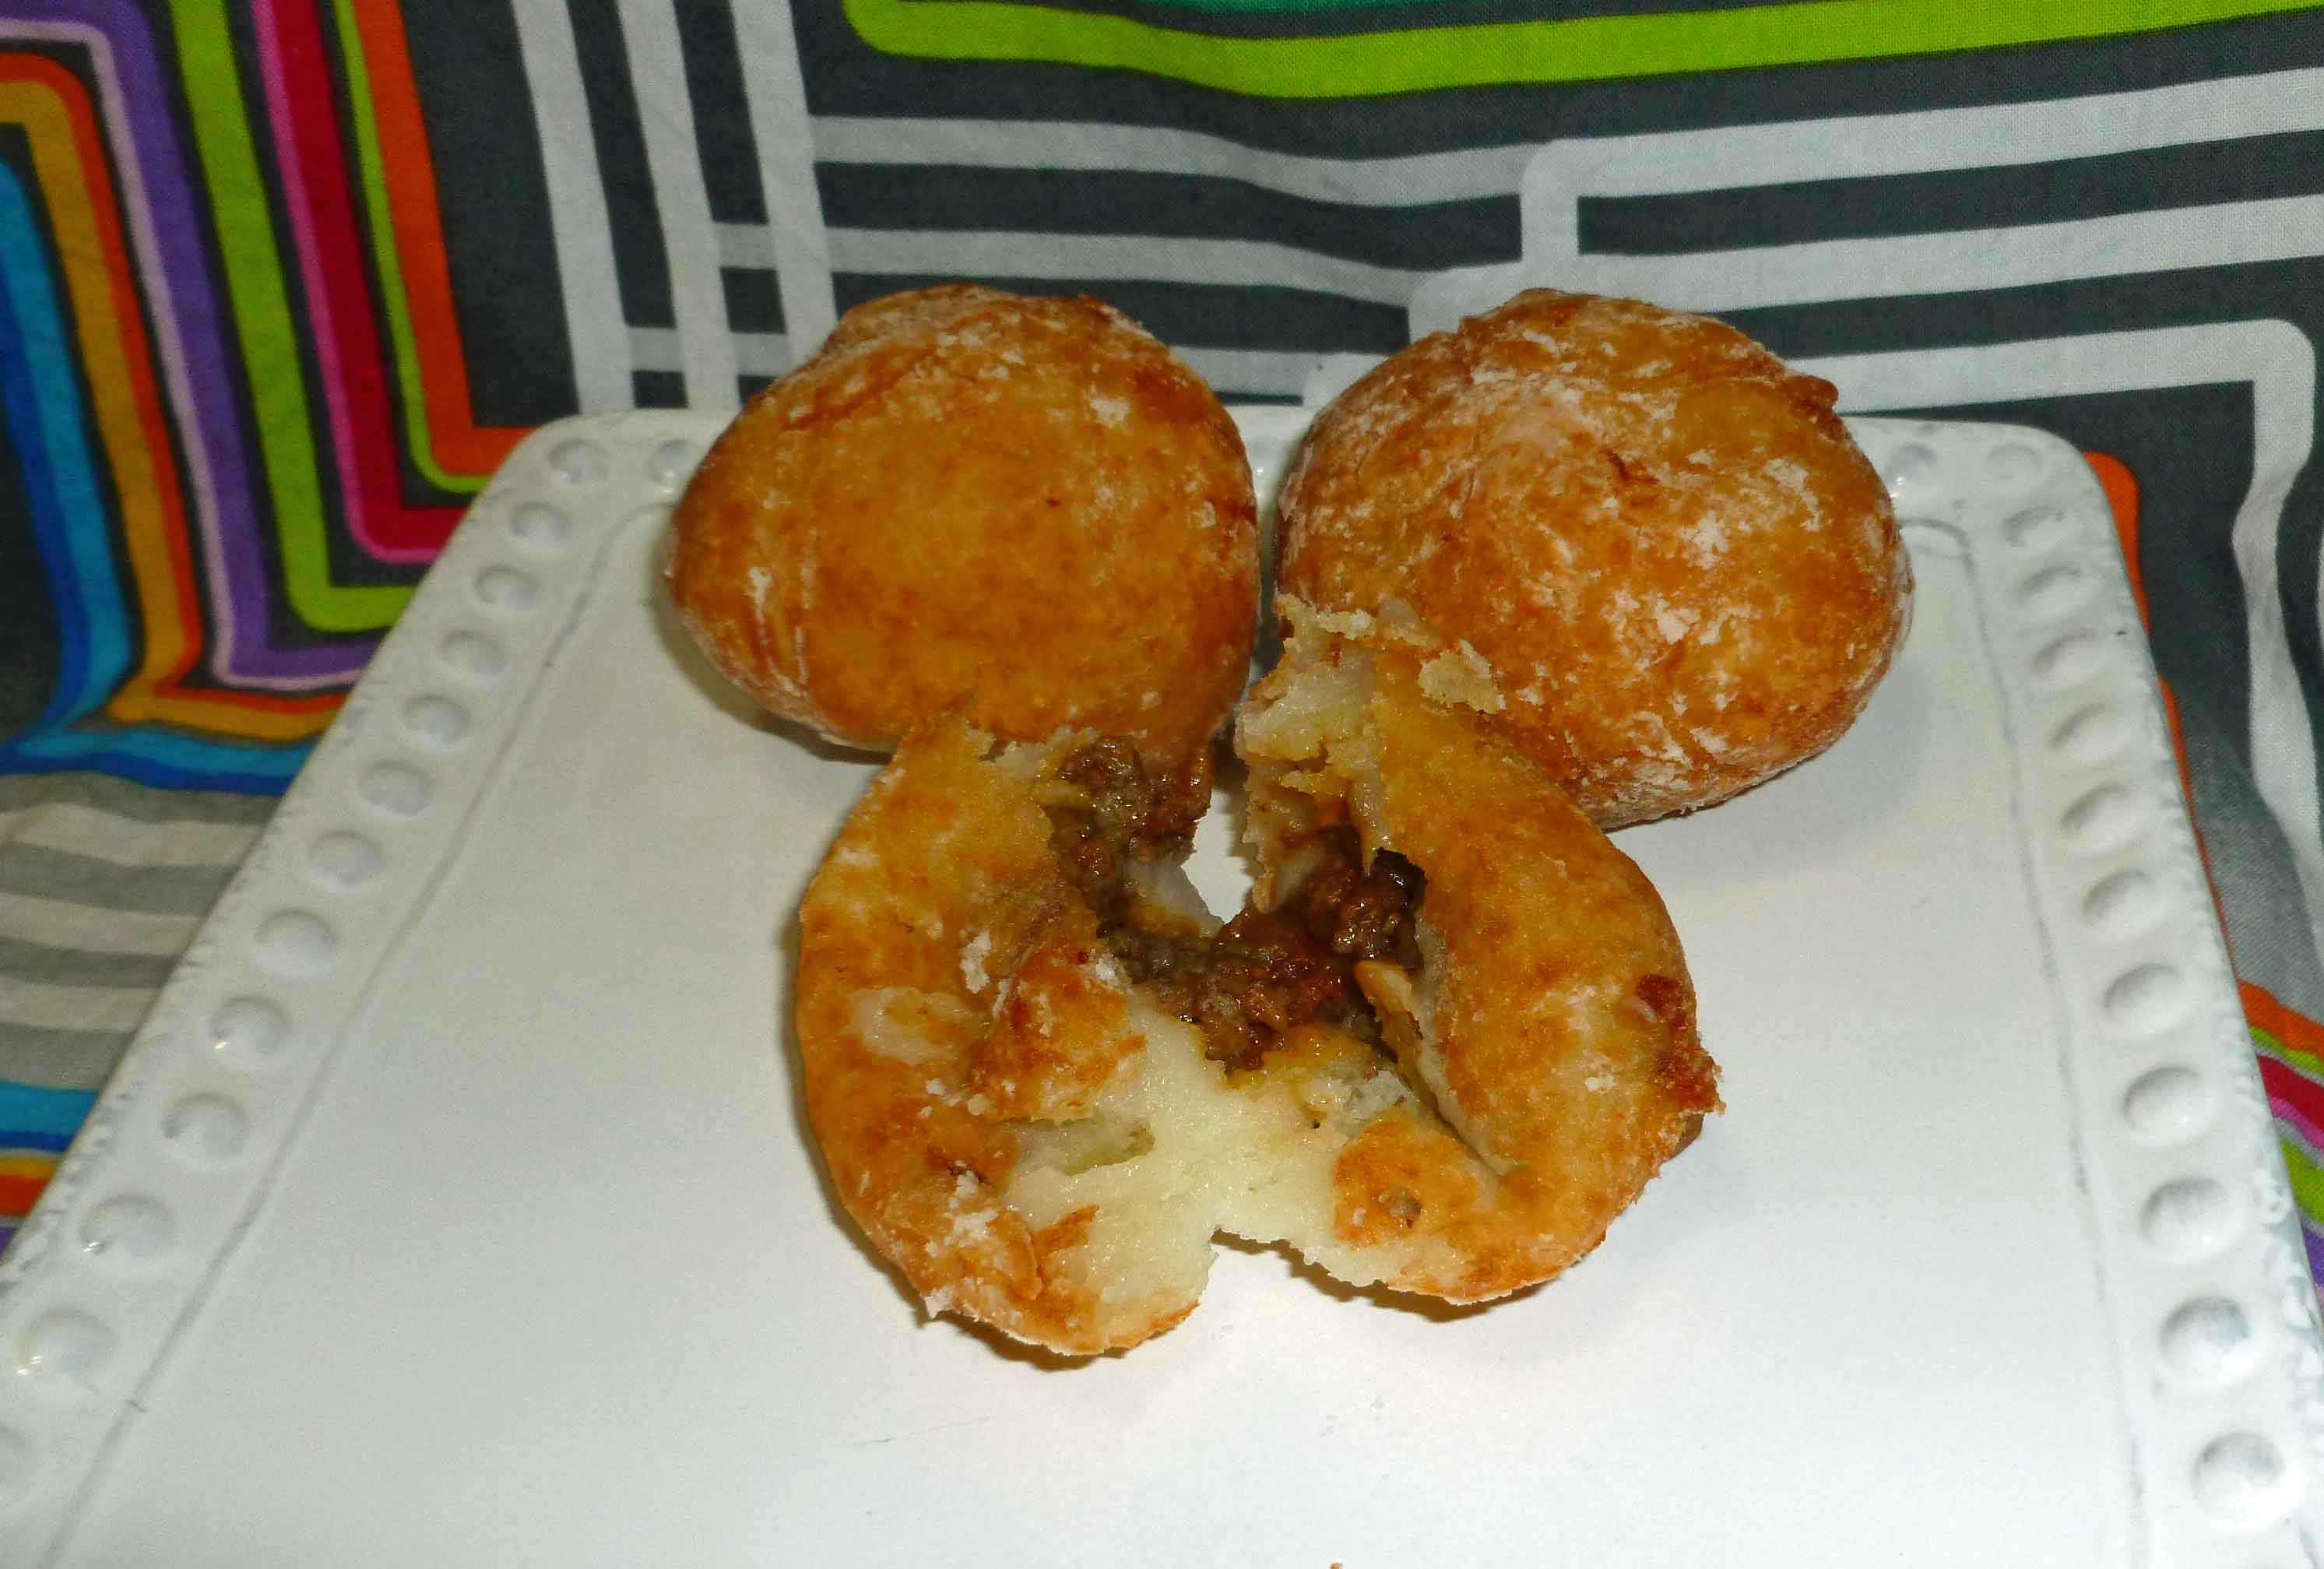
It’s the last recipe day of our potato themed month. And once again, I’m ignoring Irish cuisine despite my intent. I’ve taken inspiration from a Puerto Rican version of Papas Rellenas, but modified it to be safe for me, and cheated a bit by using salsa and taco seasoning for the ground beef mixture. But it still tastes really good. I’ve used my home canned salsa, but you can pick and choose your own salsa if you have a safe one you can purchase. I’ve also used my own home mixed taco seasoning, but again if you have a safe commercial one, have at it.
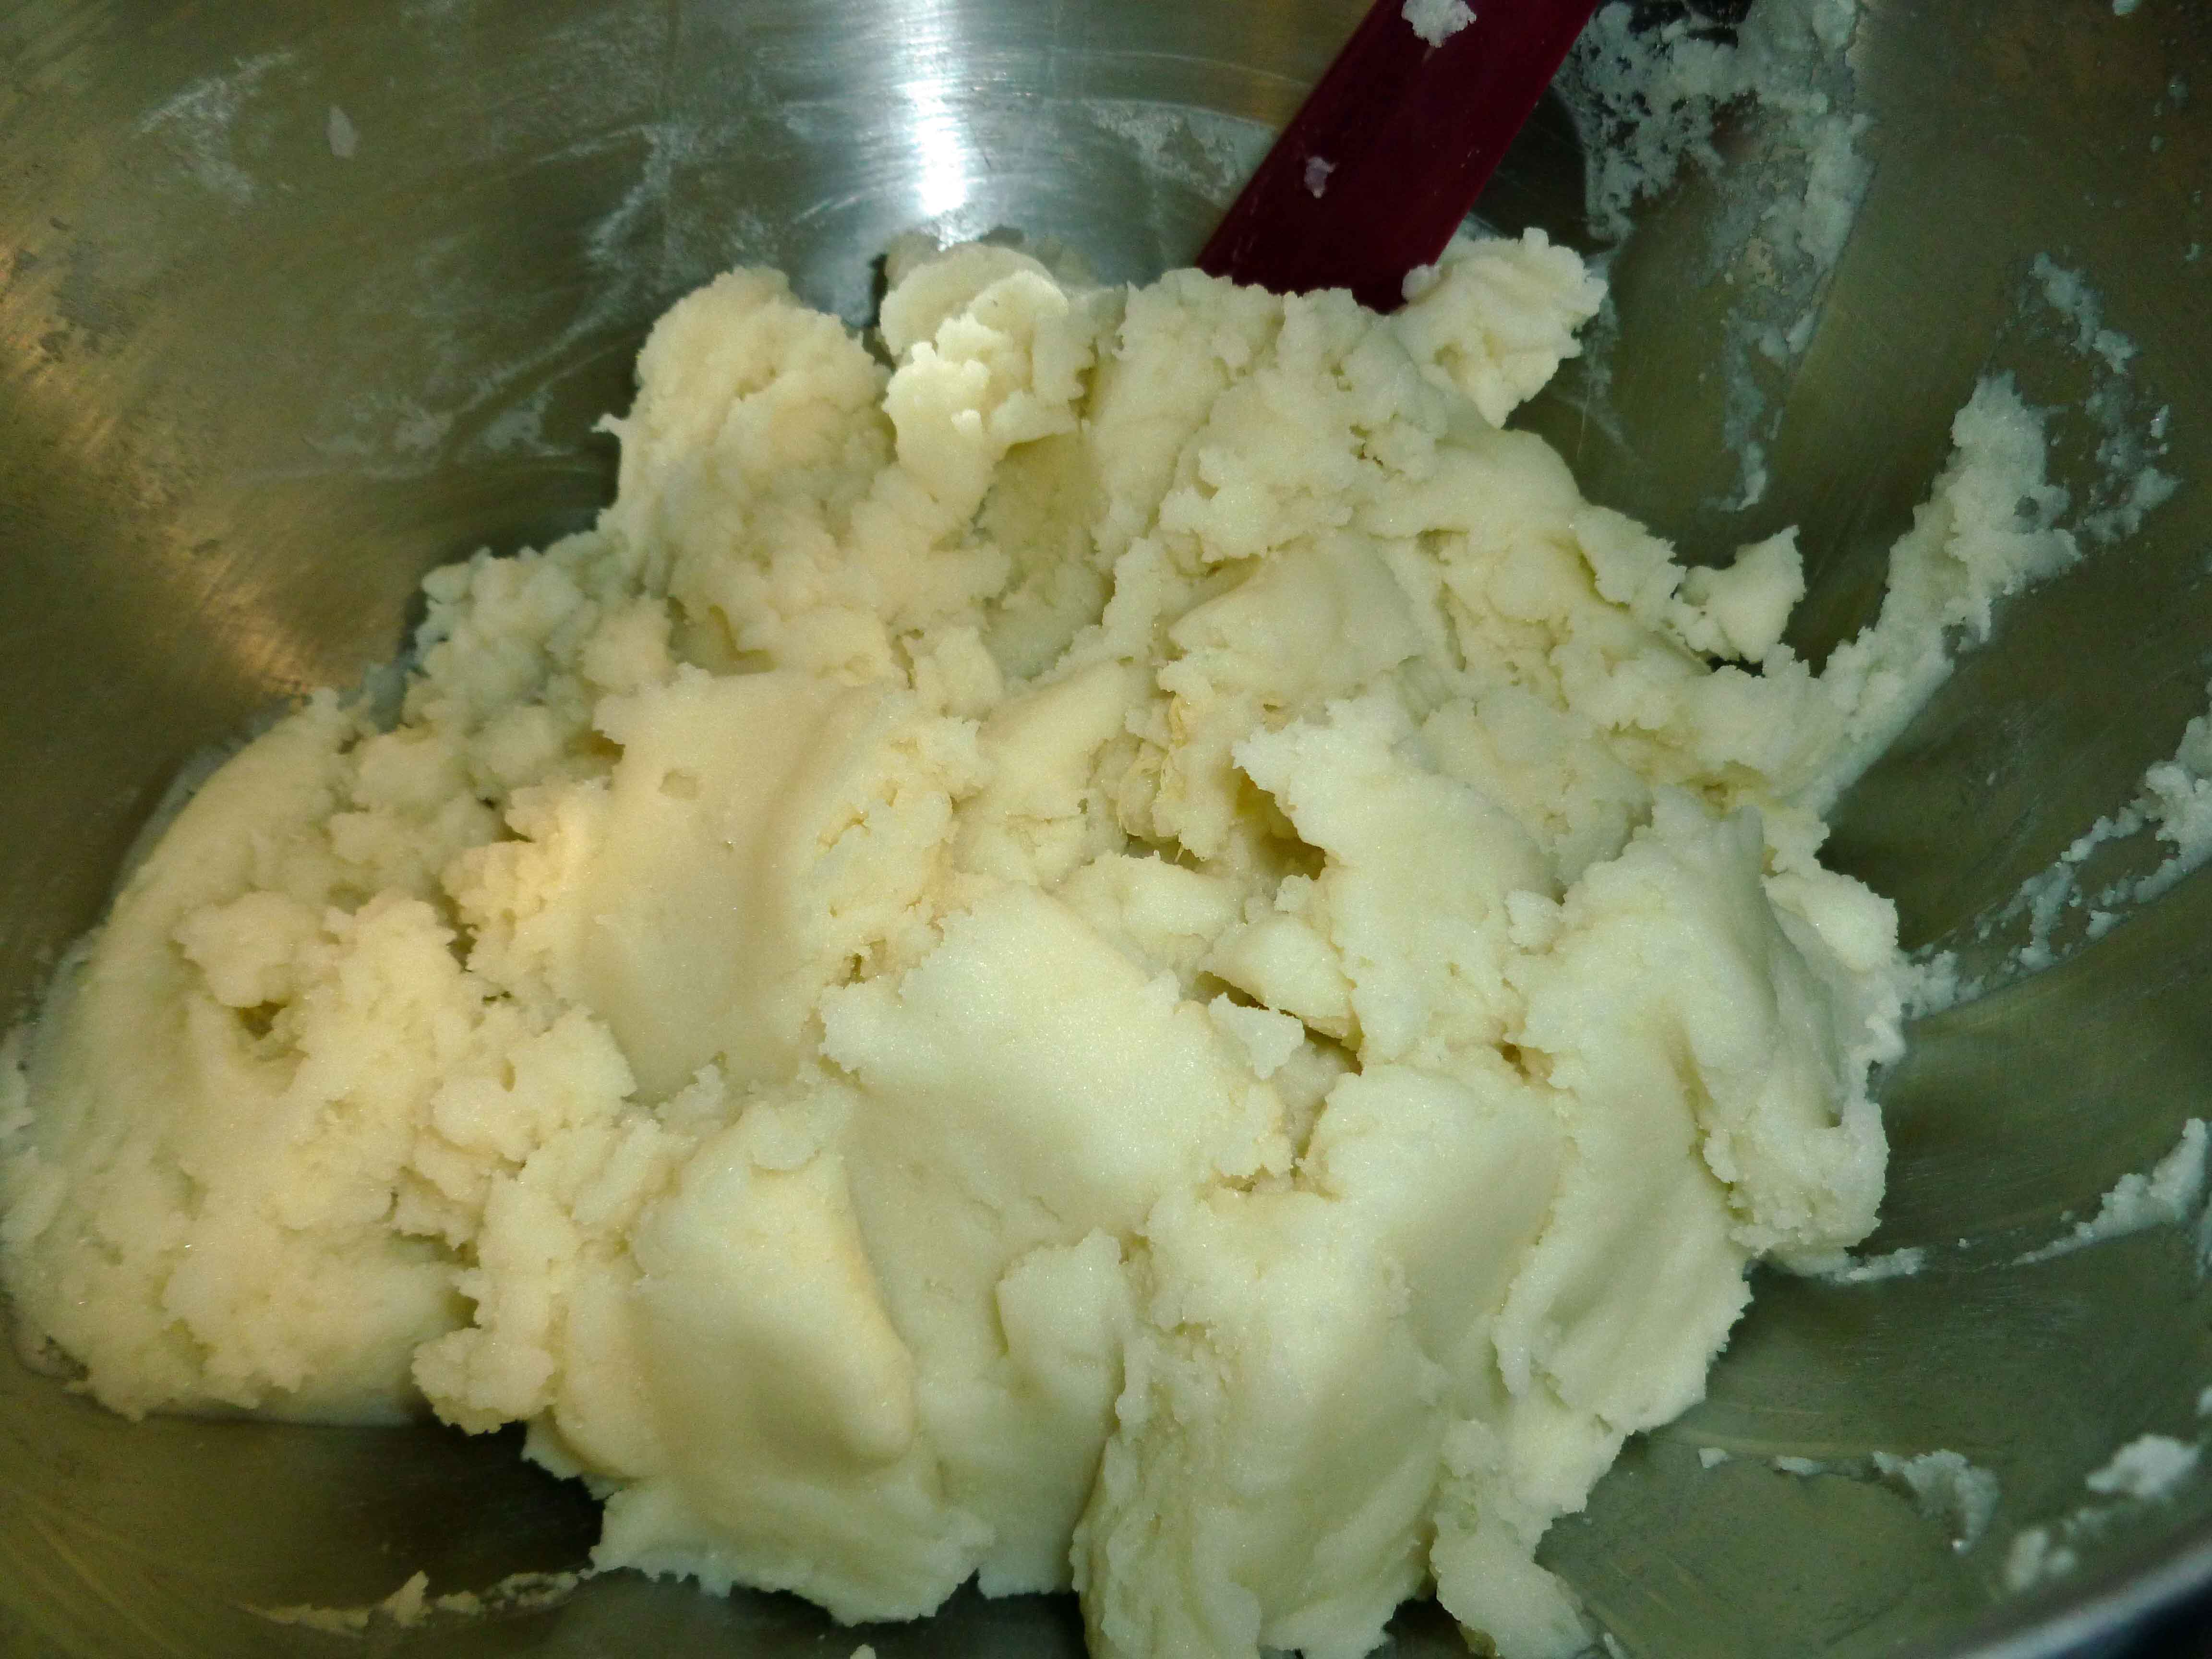
The potato mixture should be dough like. If you have to add a bit more tapioca starch to get there, add another tablespoon or two if necessary. Make sure that the potato balls are really sealed, if not, they will open when deep frying and make a good bit of mess in the oil (ask me how I know). Also, I think they would be really good pan fried if you want to flatten them a bit, and skip the deep frying. If you would like to make them vegan, you could use a can of pinto beans or black beans instead of the ground beef, which would work just as well and be just as yummy.
Stuffed Potatoes (Papas Rellenas inspired)
Print Recipe
A comfort food you can deep fry or pan fry. If you wish to make this vegetarian or vegan, use a can of pinto beans or black beans in place of the beef.
A comfort food you can deep fry or pan fry. If you wish to make this vegetarian or vegan, use a can of pinto beans or black beans in place of the beef.
1/2poundground beefor use one can of drained and rinsed pinto or black beans
1/2 cupsalsa(I used my homemade canned salsa)
1Tablespoontaco seasoning(see spice mix in our post on Taco Beef for Tacos, Salads, and Nachos) http://adultfoodallergies.com/taco-beef-for-tacos-salads-and-nachos/)
Frying Ingredients
1/2 cup tapioca starchto be used for flouring your hands while forming balls
oil for frying
stainless steel pot or skillet
thermometer
Servings: people
Instructions
Potato Mixture
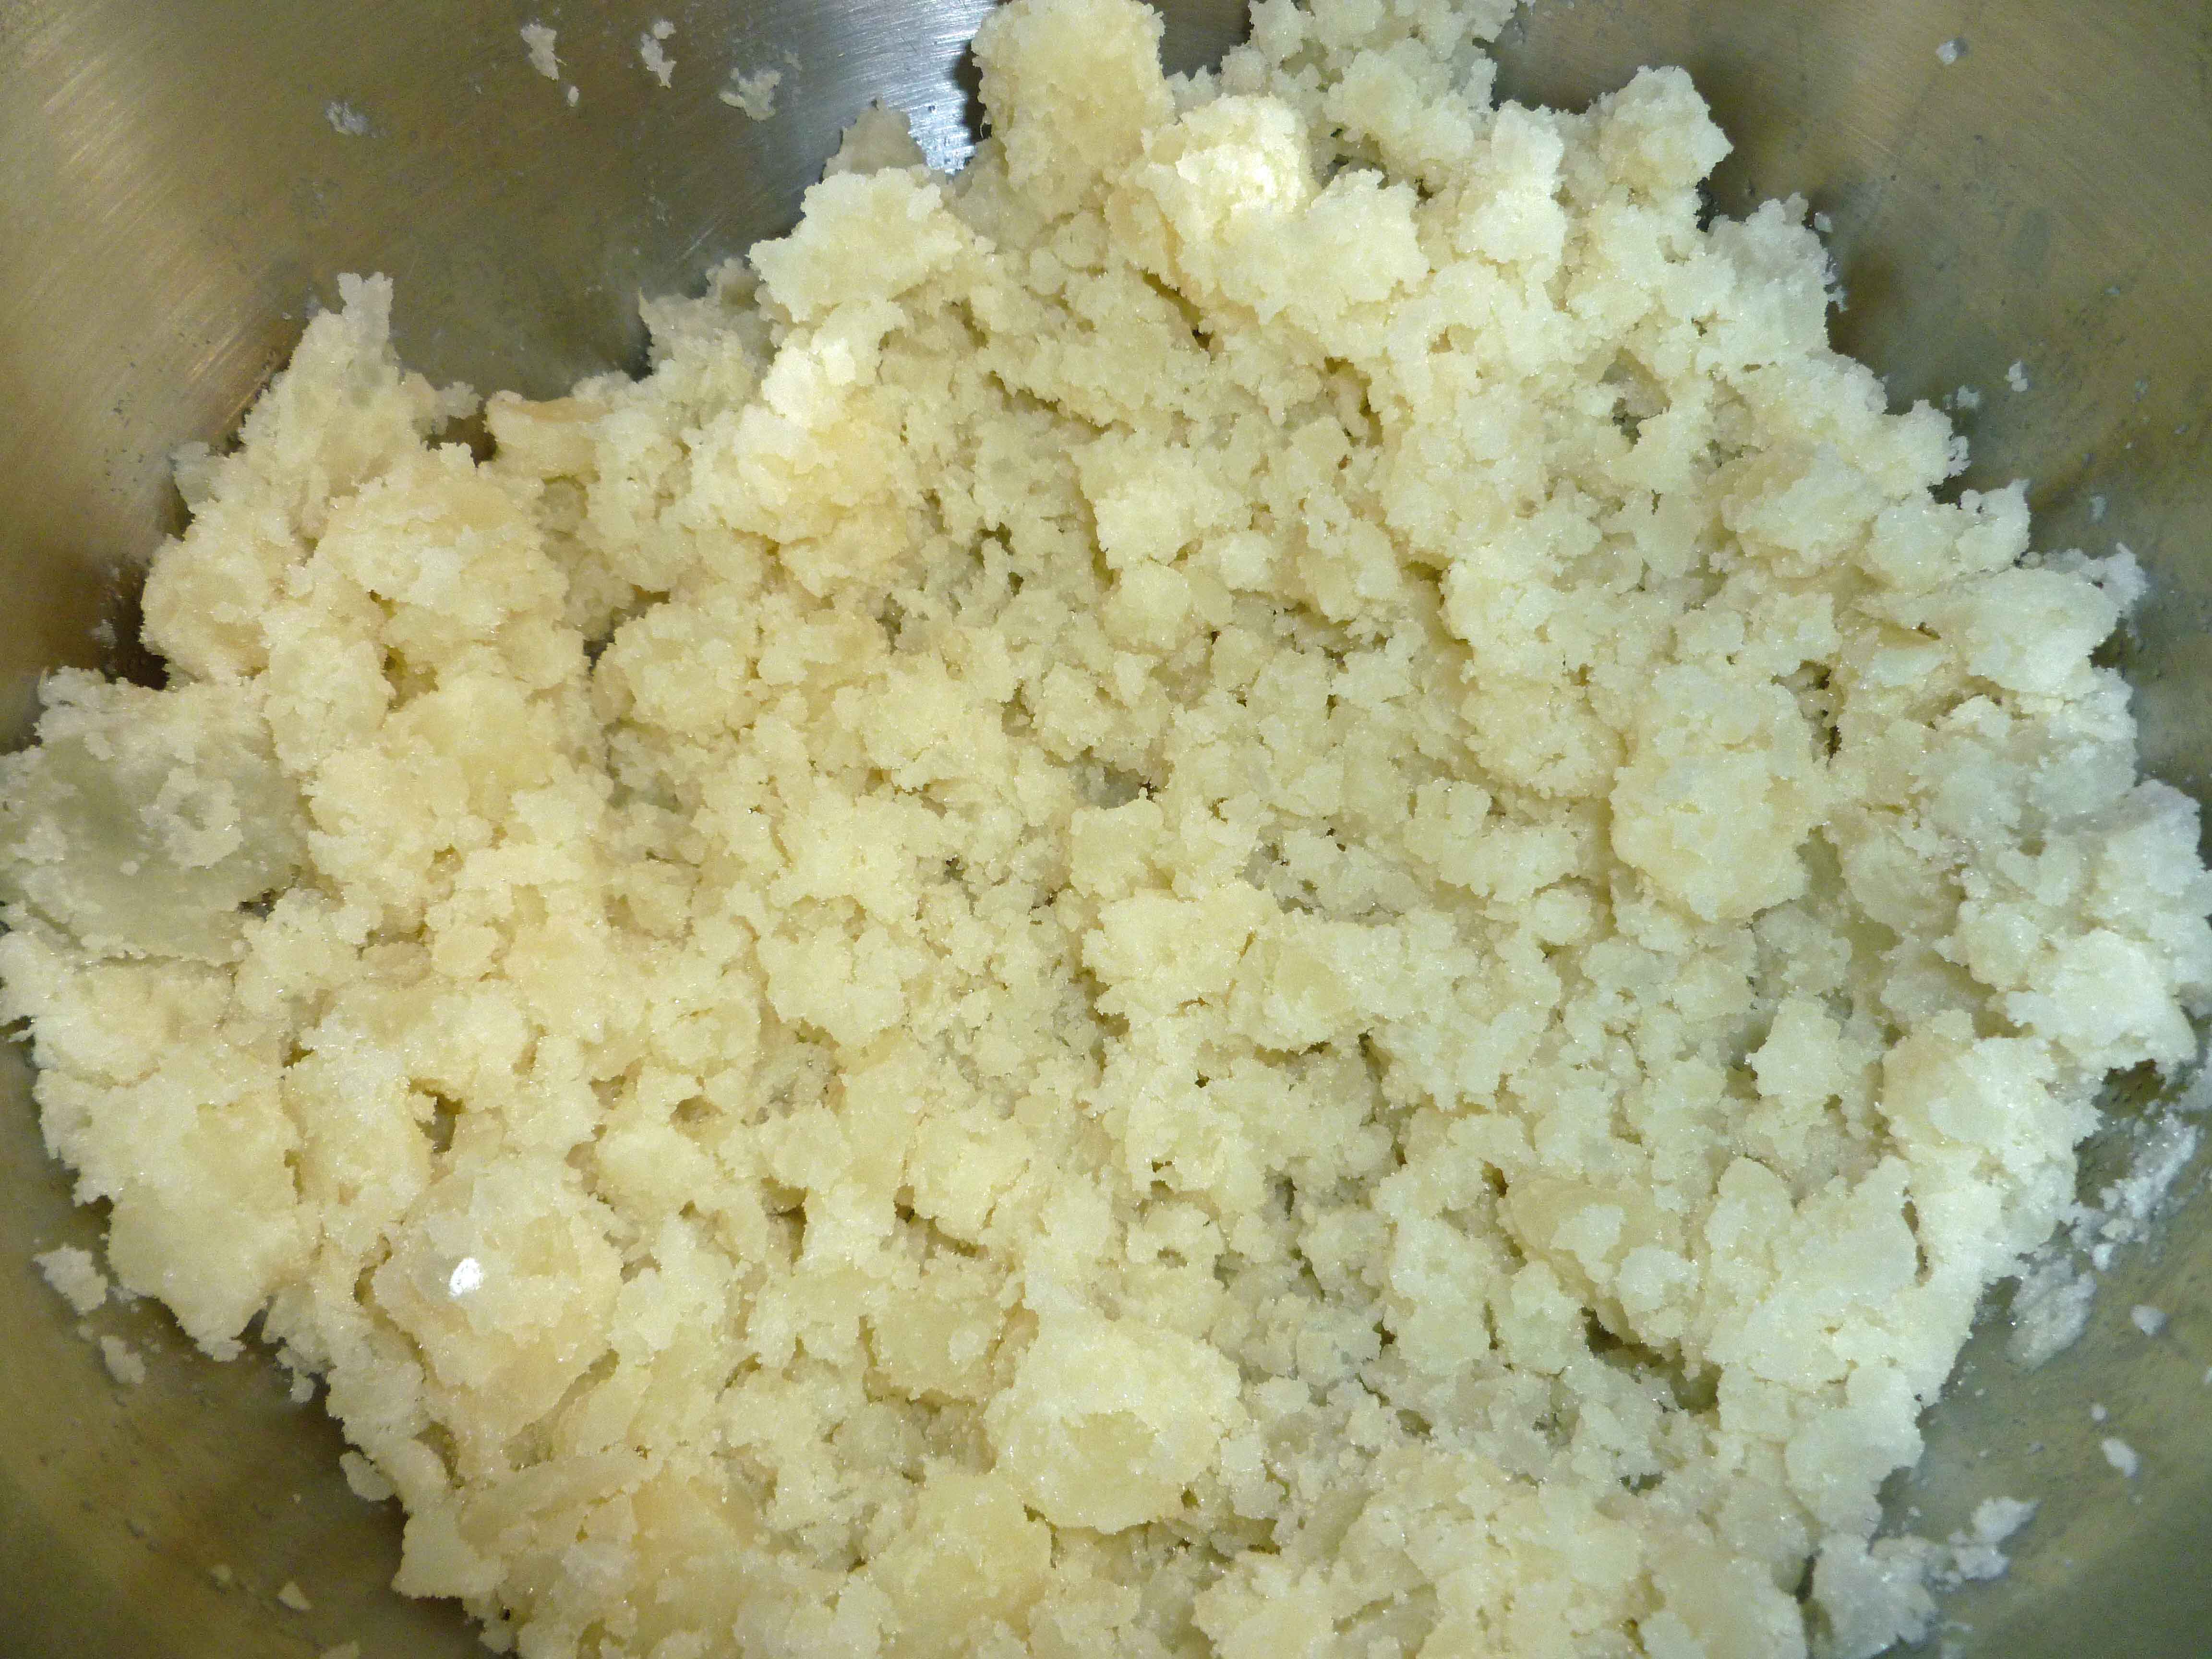
Place potatoes in a pot of lightly salted water. Cover the pot, bring to a boil, then reduce heat to a simmer for 15-20 minutes, or until potatoes are soft. Or use your Instant Pot to cook them if you have one, using a trivet and a bowl or a steamer, adding a cup of water, and cooking on high pressure for 9 minutes.
Mix 3 tablespoons of tapioca starch, salt, and aquafaba in a small bowl and set aside.
Drain potatoes. You can also mix ingredients together manually but I used a stand mixer. Add the potatoes and mash them a bit before using your mixer. Using your mixer and the beater blade, mix until smooth. Slowly add the tapioca starch, salt, and aquafaba mixture while mixing. Scrape down the bowl as needed and mix until well combined. Set aside
Beef Mixture
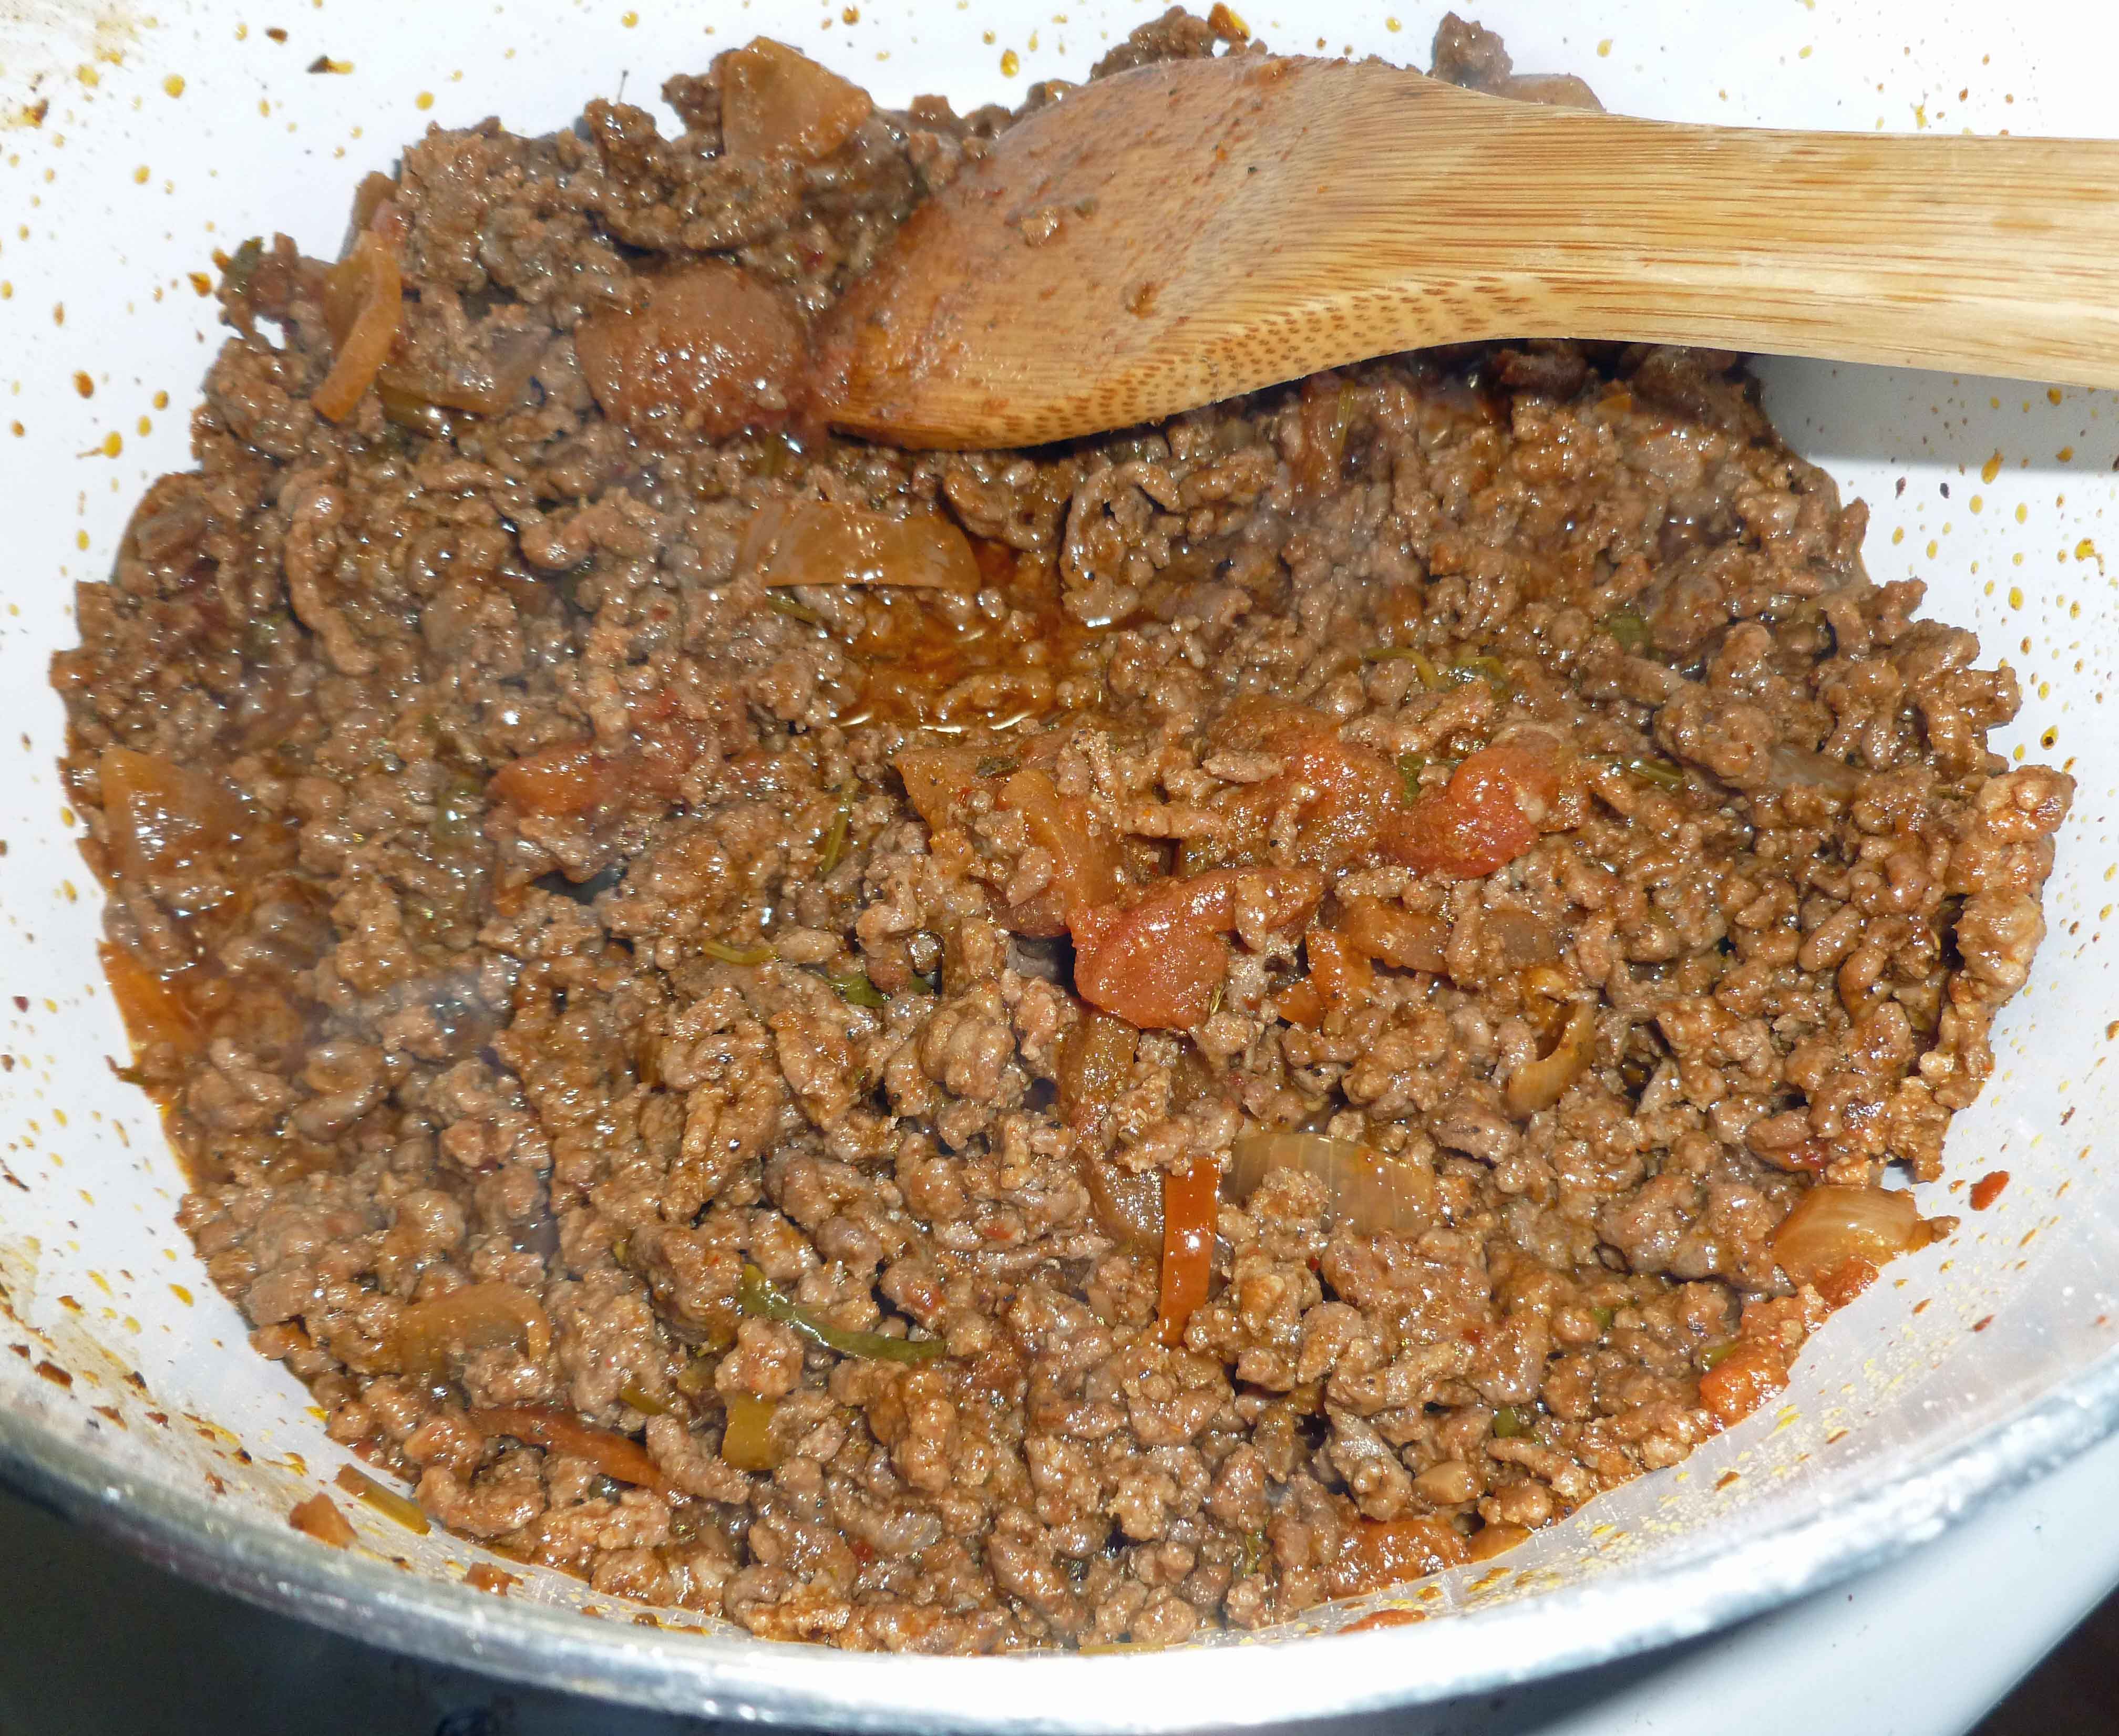
Brown ground beef in a skillet. When brown, drain fat, and then add the taco seasoning and salsa to the browned ground beef. Mix the ingredients well, simmering for a few minutes. Set aside.
Forming and Frying Stuffed Potatoes
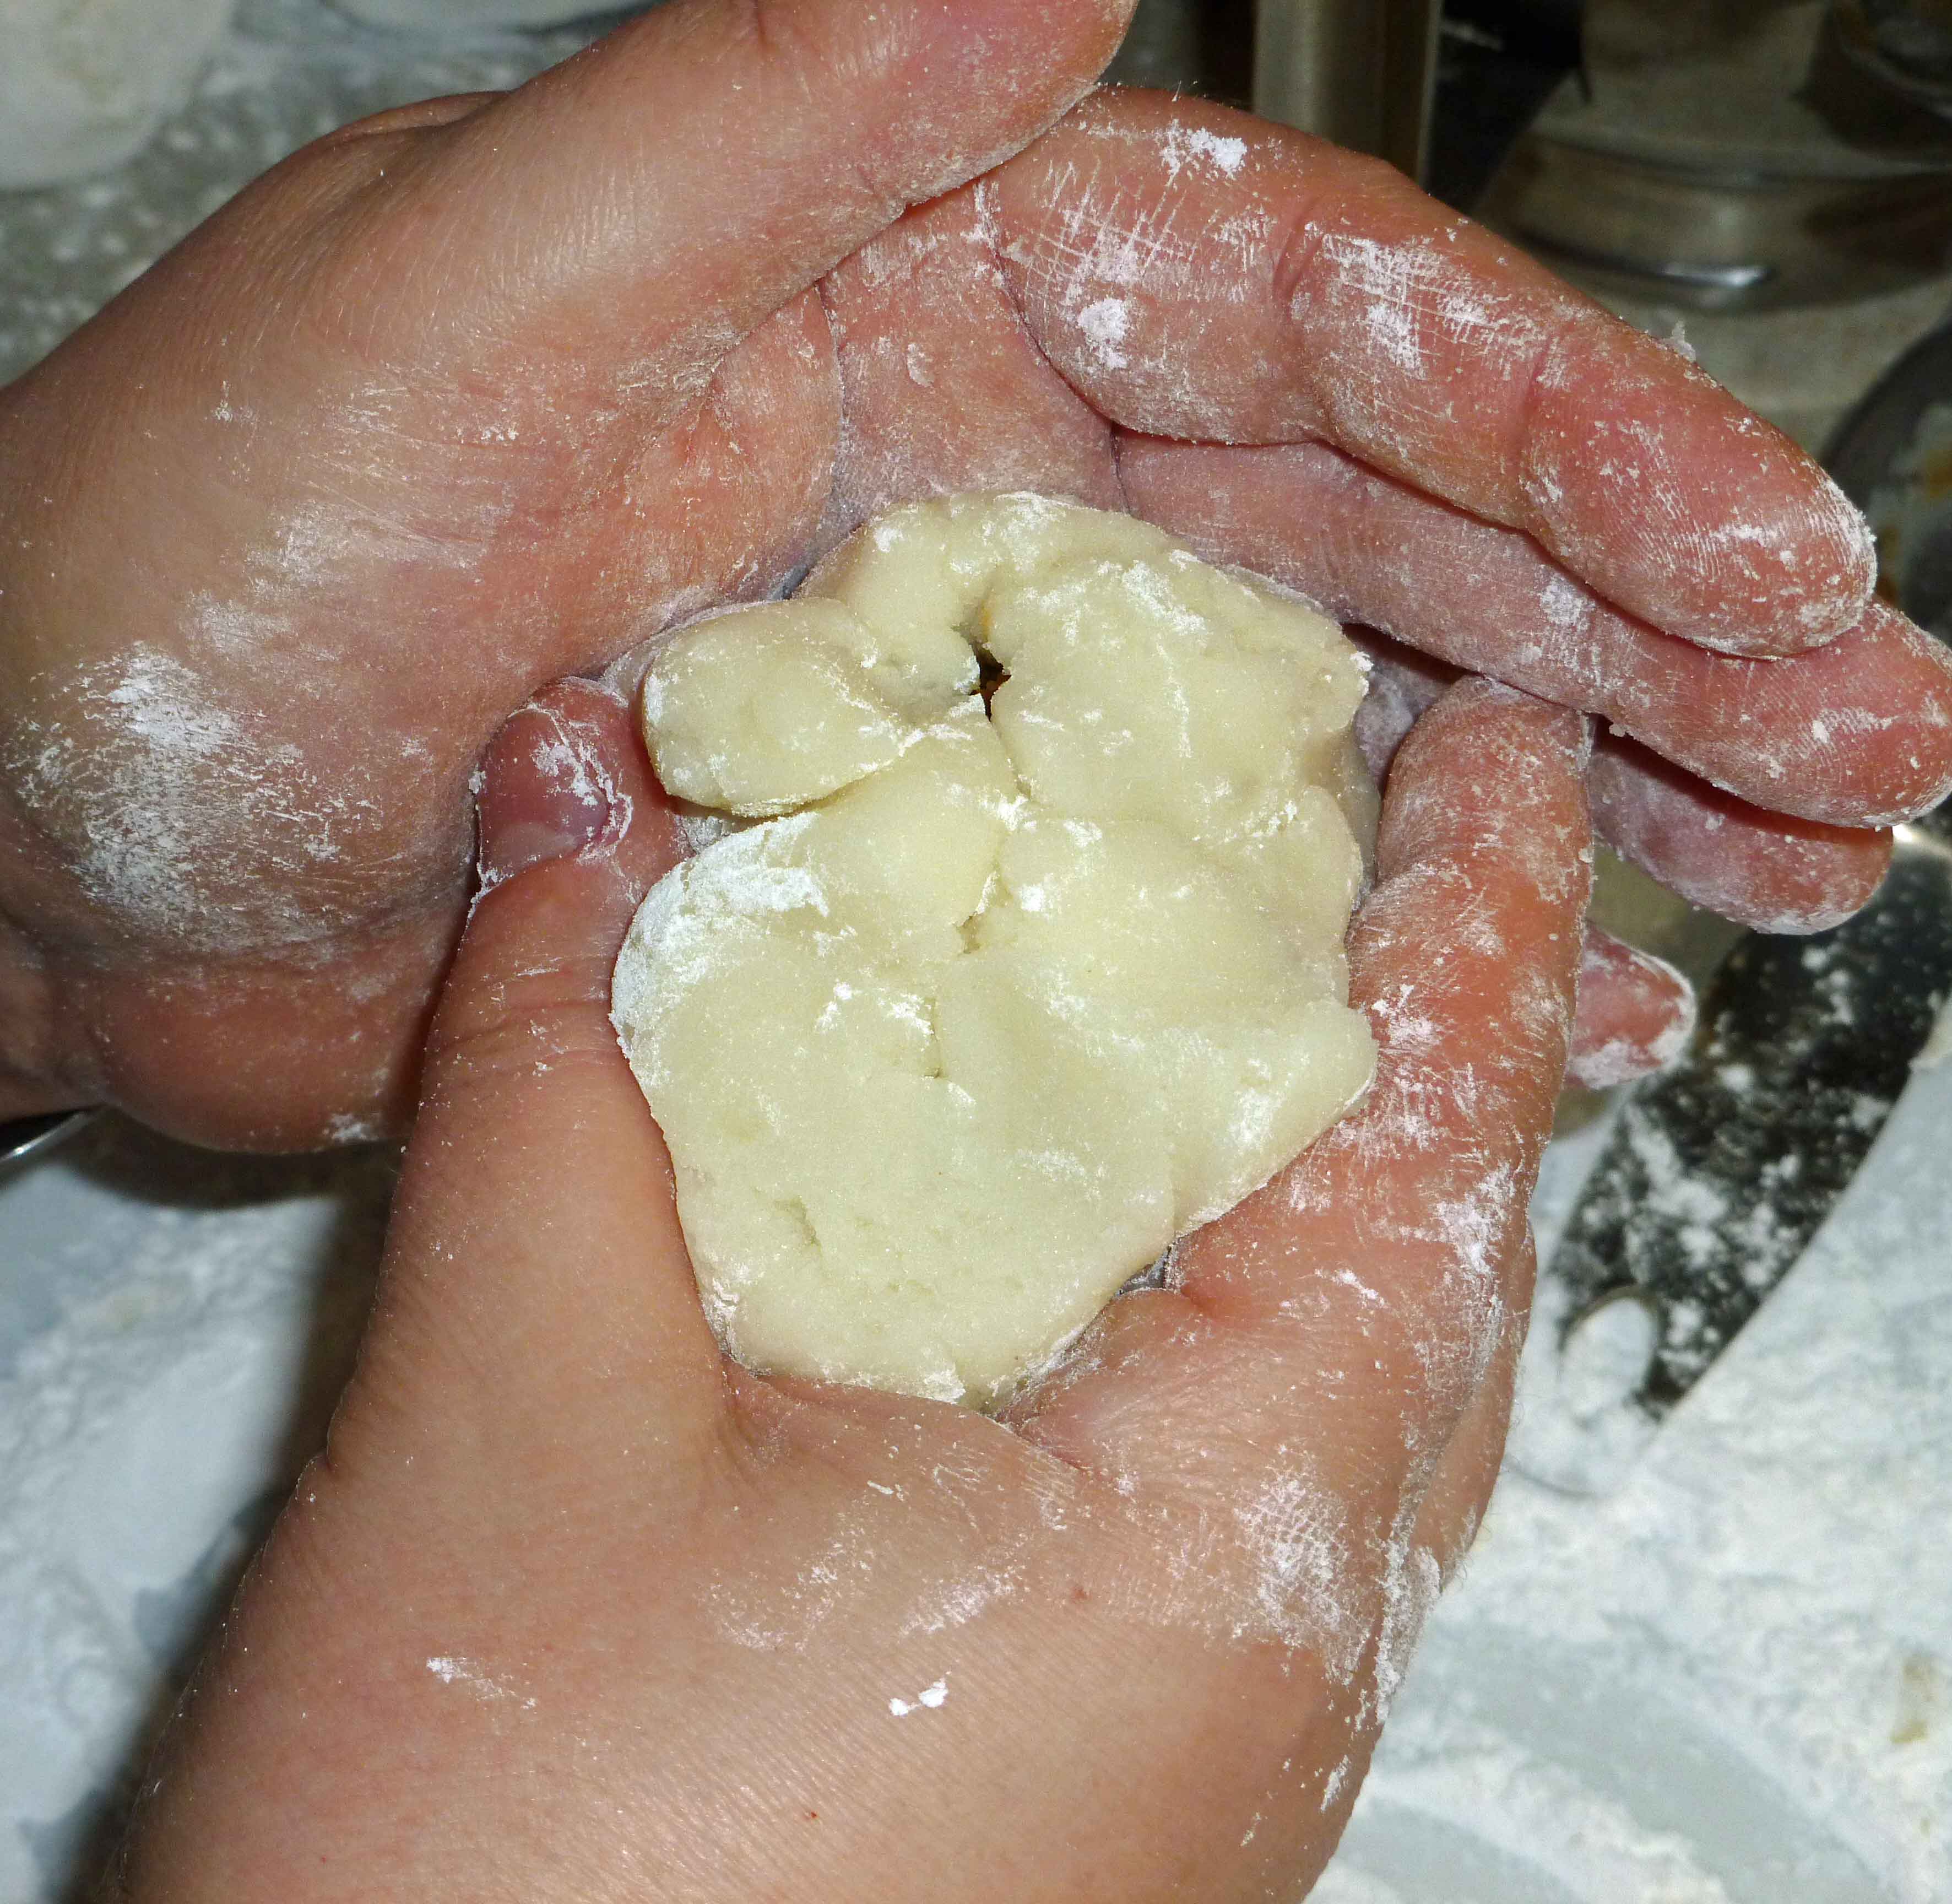
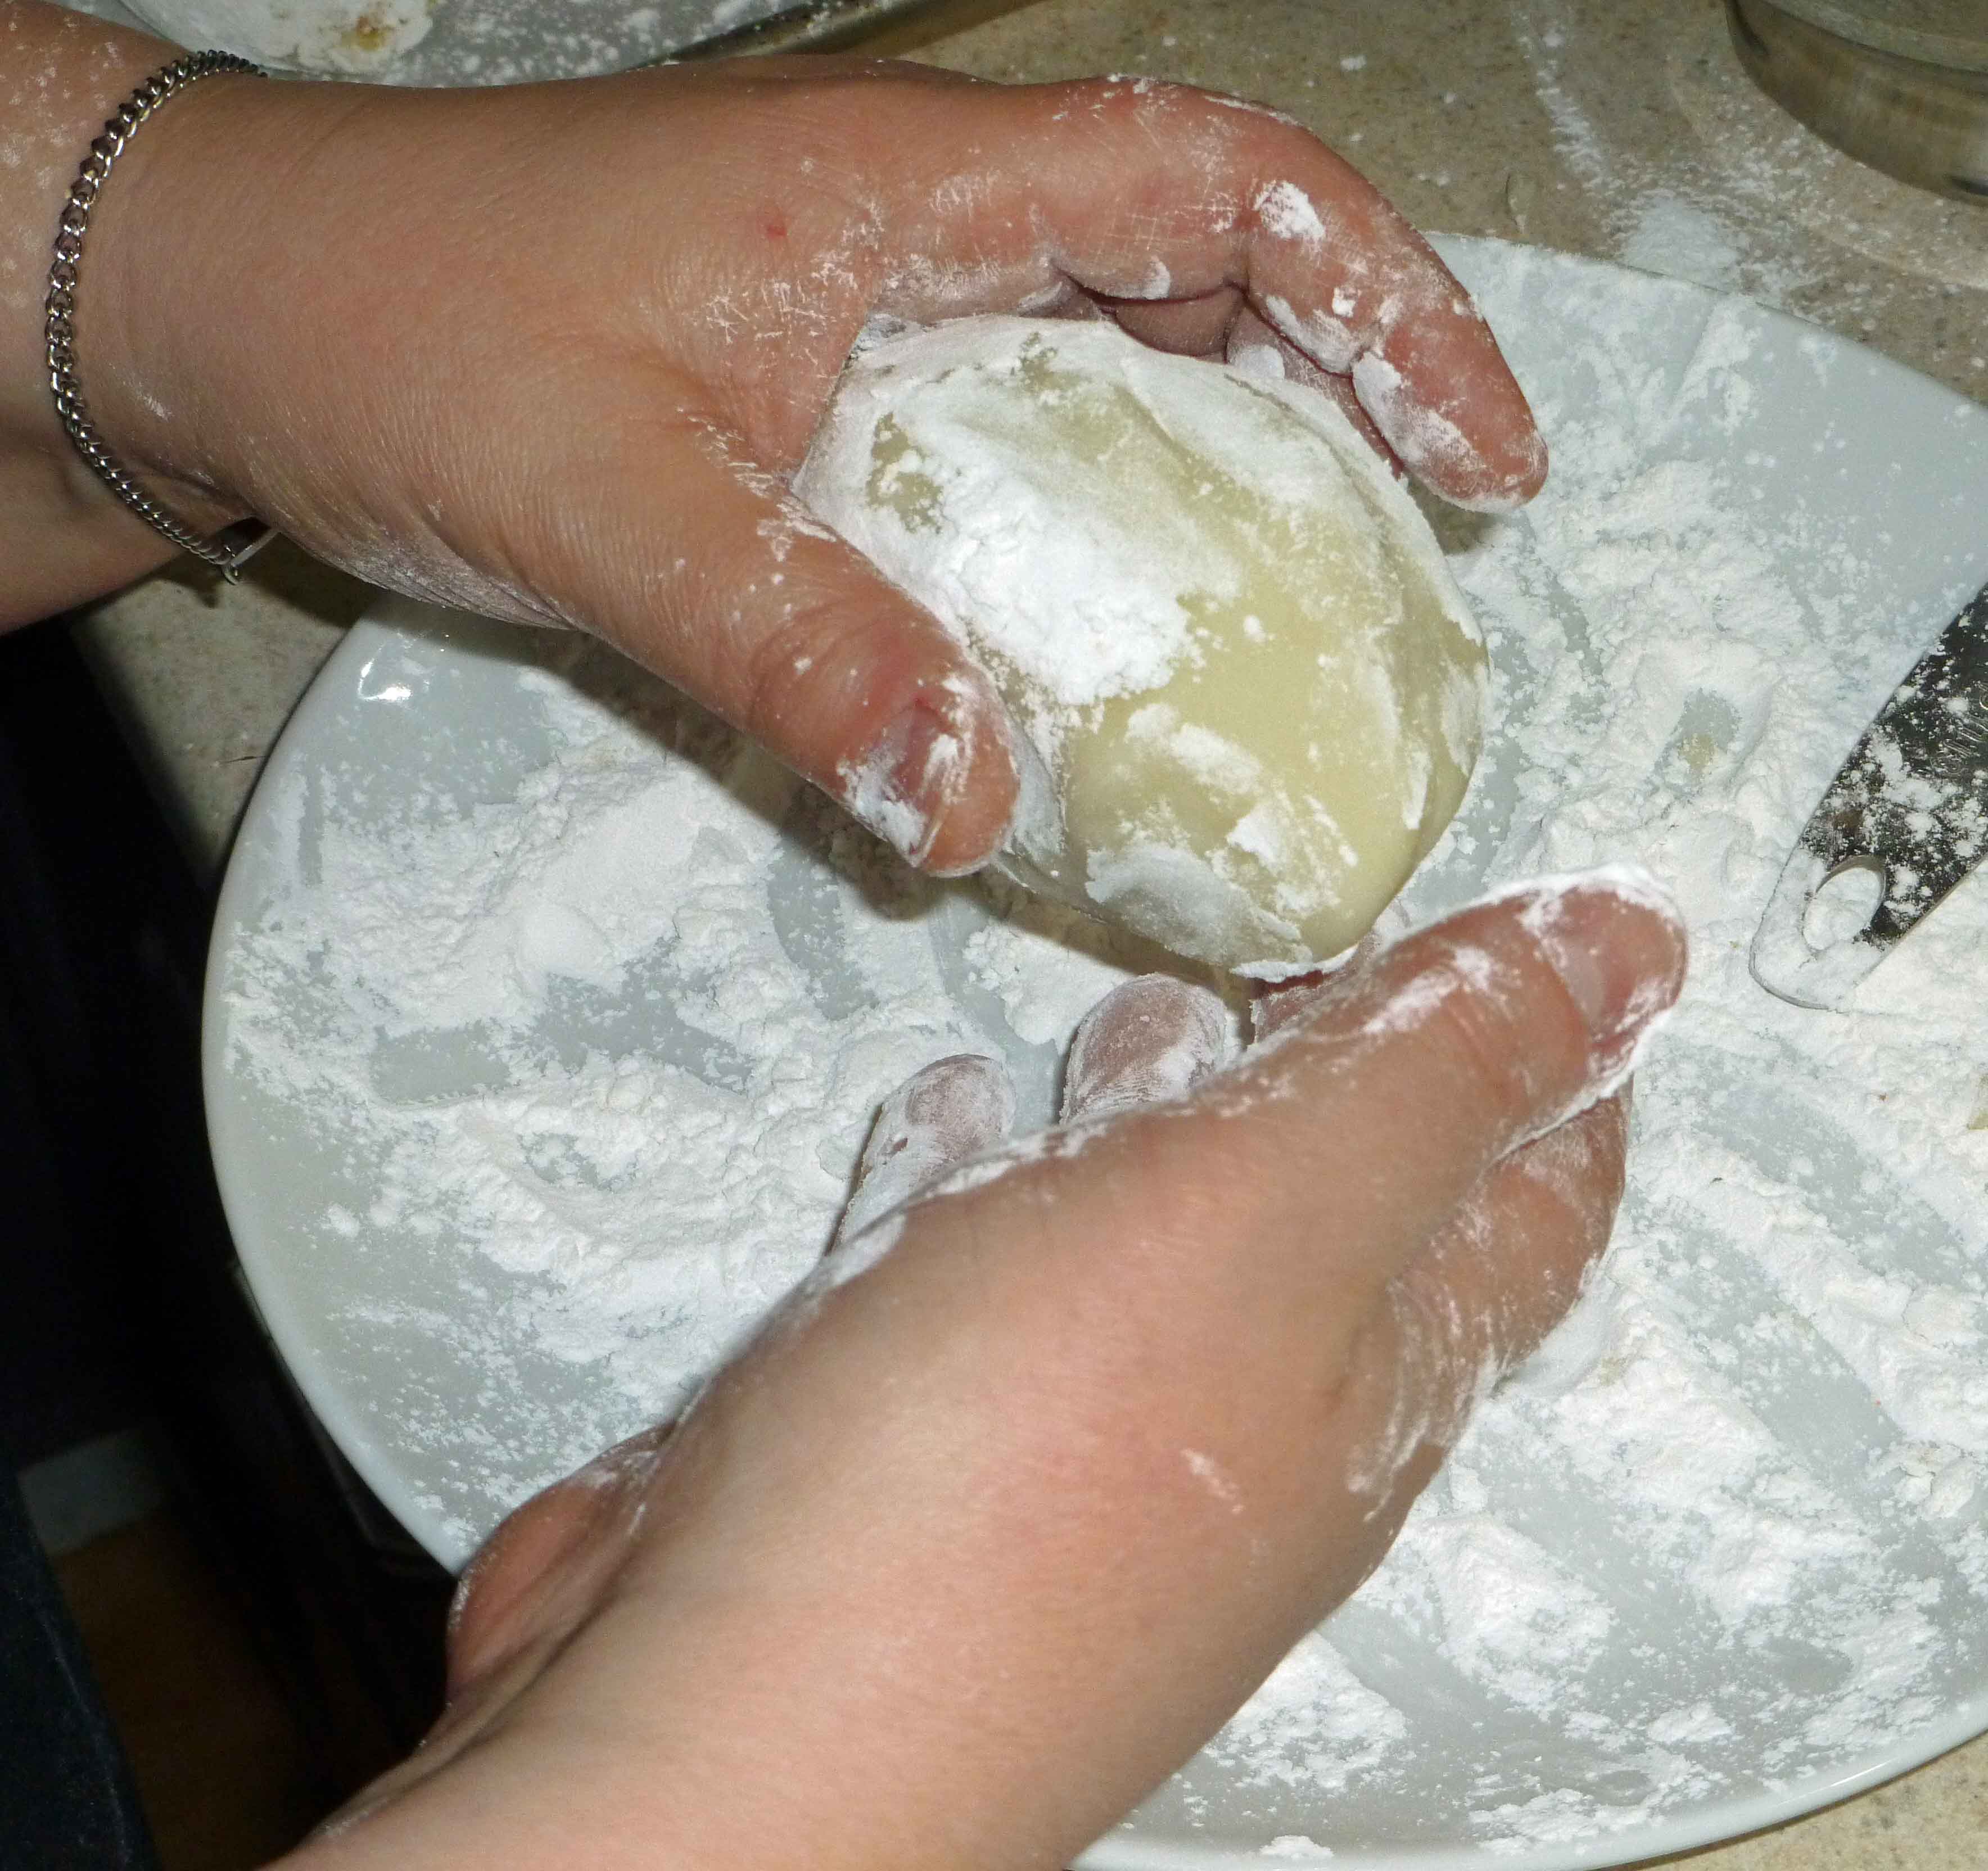
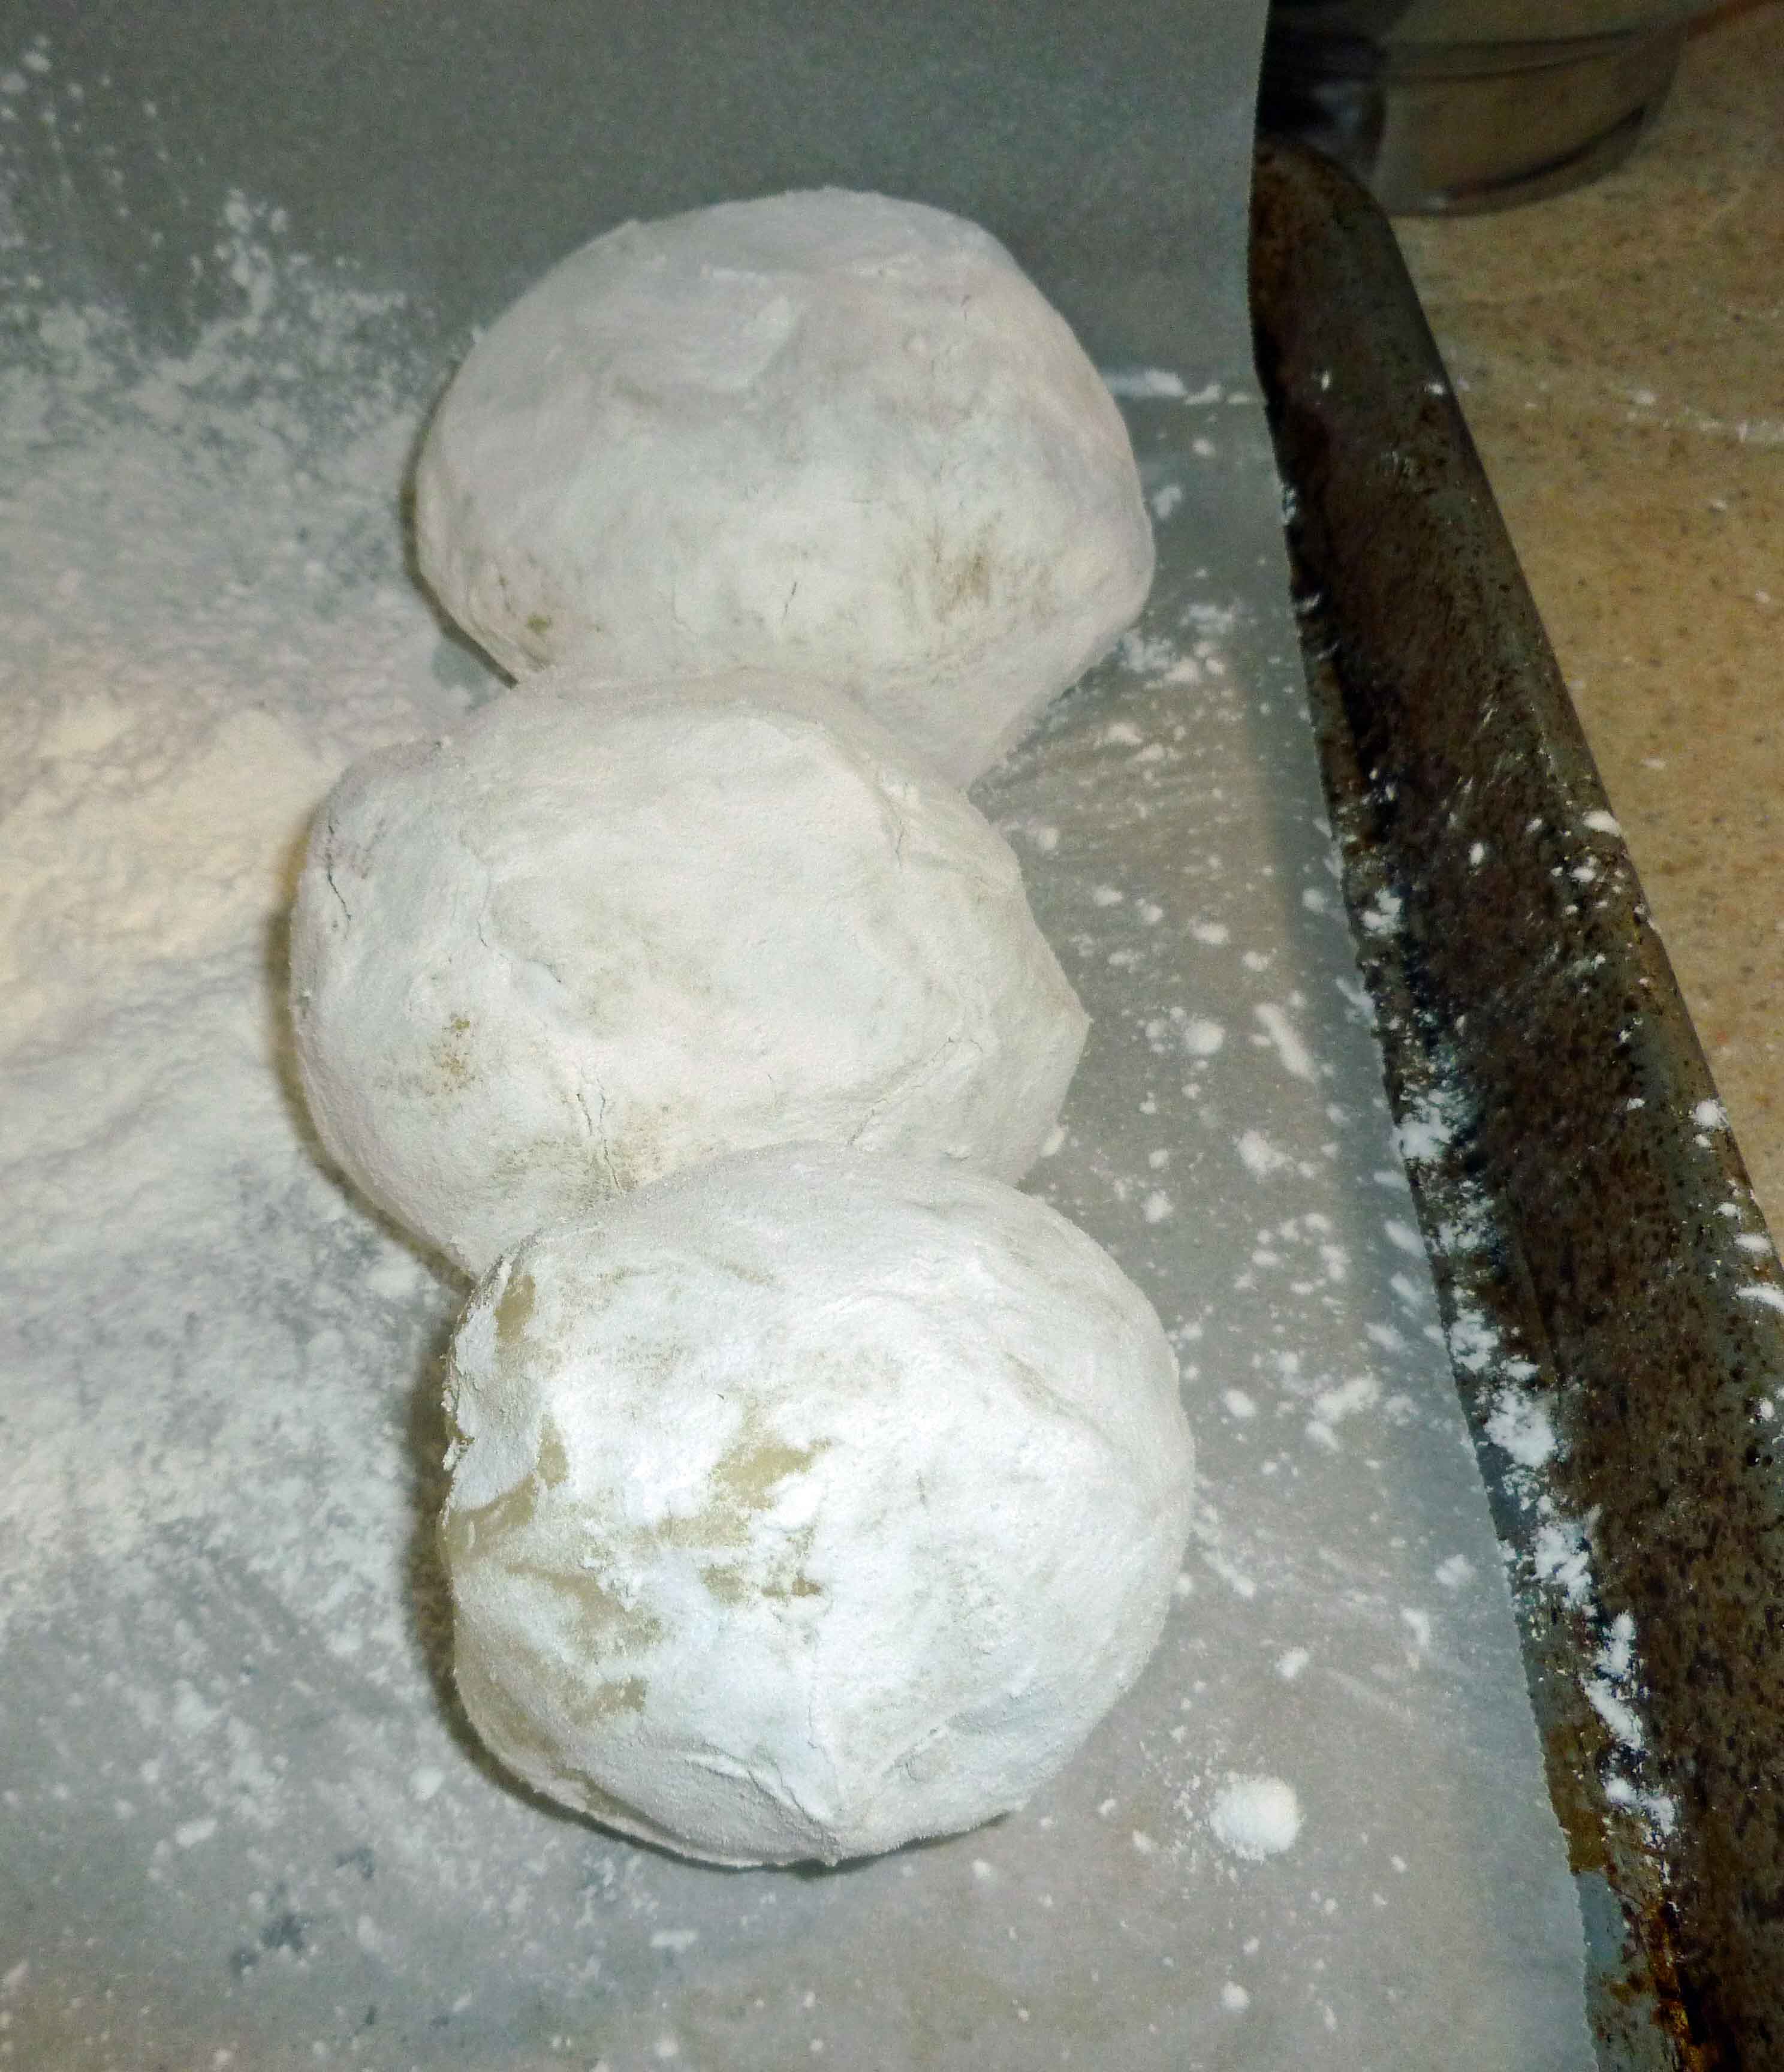
Dust your hands in tapioca starch, and flatten about 1/2 cup of the potato mixture into a disk in the palm of your hand. Add a heaping tablespoon of the beef mixture into the center of the disk, and bring the edges of the potato around the beef mixture. Seal the edges and roll into a smooth ball. Repeat until all the potato mixture has been used, making sure to keep your hands dusted in tapioca starch. Make sure that you seal them very well, if the seams open, it will be very messy.
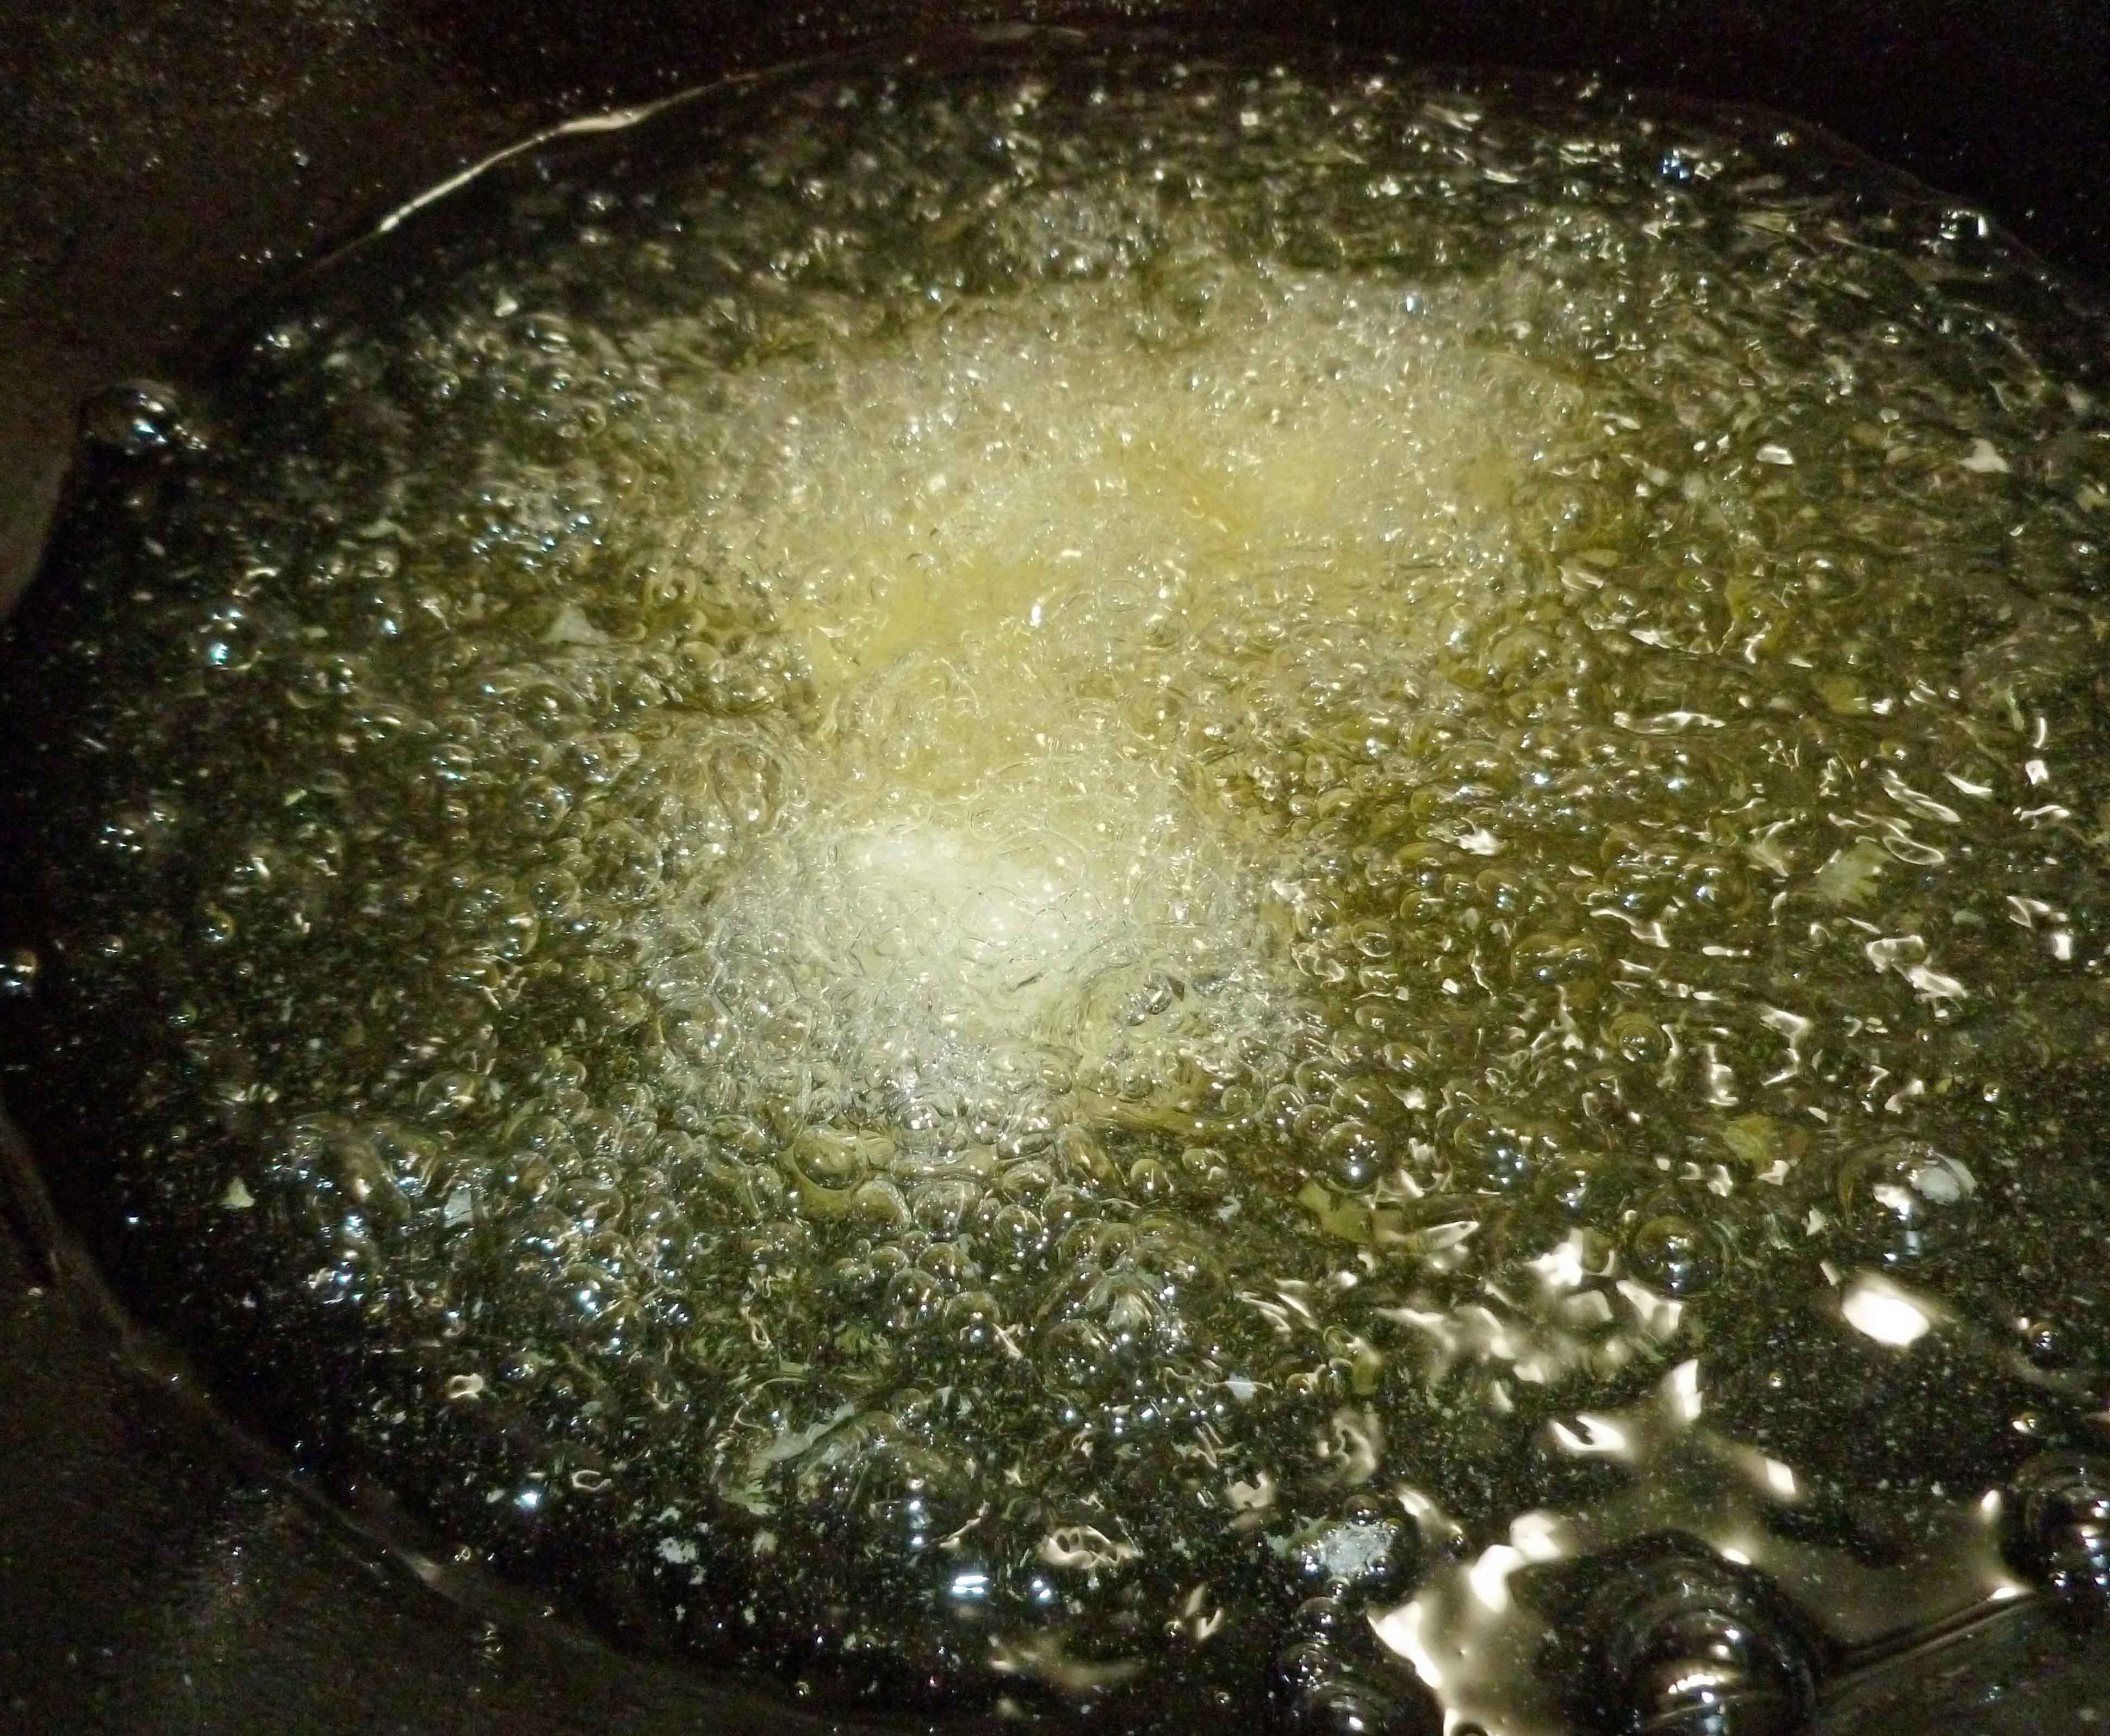
Heat oil to 375°F and deep fry the potato balls about 5 minutes, turning as needed until golden brown. You could also flatten them a bit and pan fry them.
Potatoes after quick mashing before mixingTapioca starch and aquafaba mixtureCompleted potato mixtureMy homemade salsa (ta da, haha!)Completed beef mixtureForming potato ballsForming potato ballsForming potato ballsCompleted potato ballsFrying the stuffed potatoesStuffed potatoes after fryingStuffed Potatoes (Papas Rellenas inspired)
These are great as an appetizer, as a snack or as bar food. You could serve them with a hot sauce spiked mayo, a mojo de ajo sauce, or a chili sauce. Enjoy!
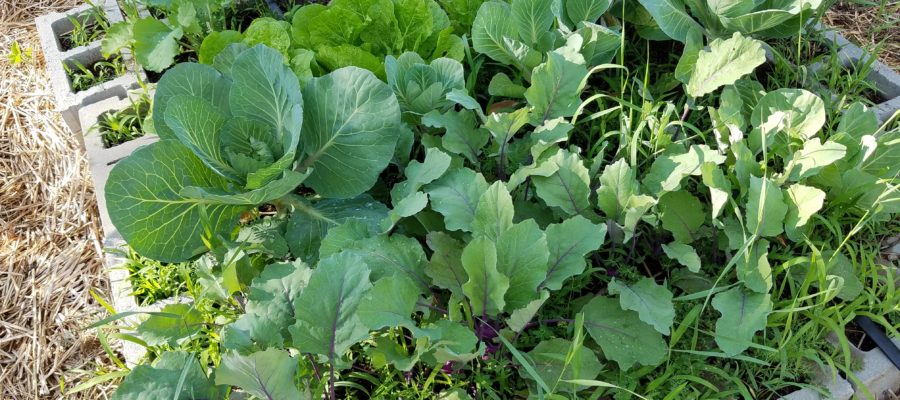
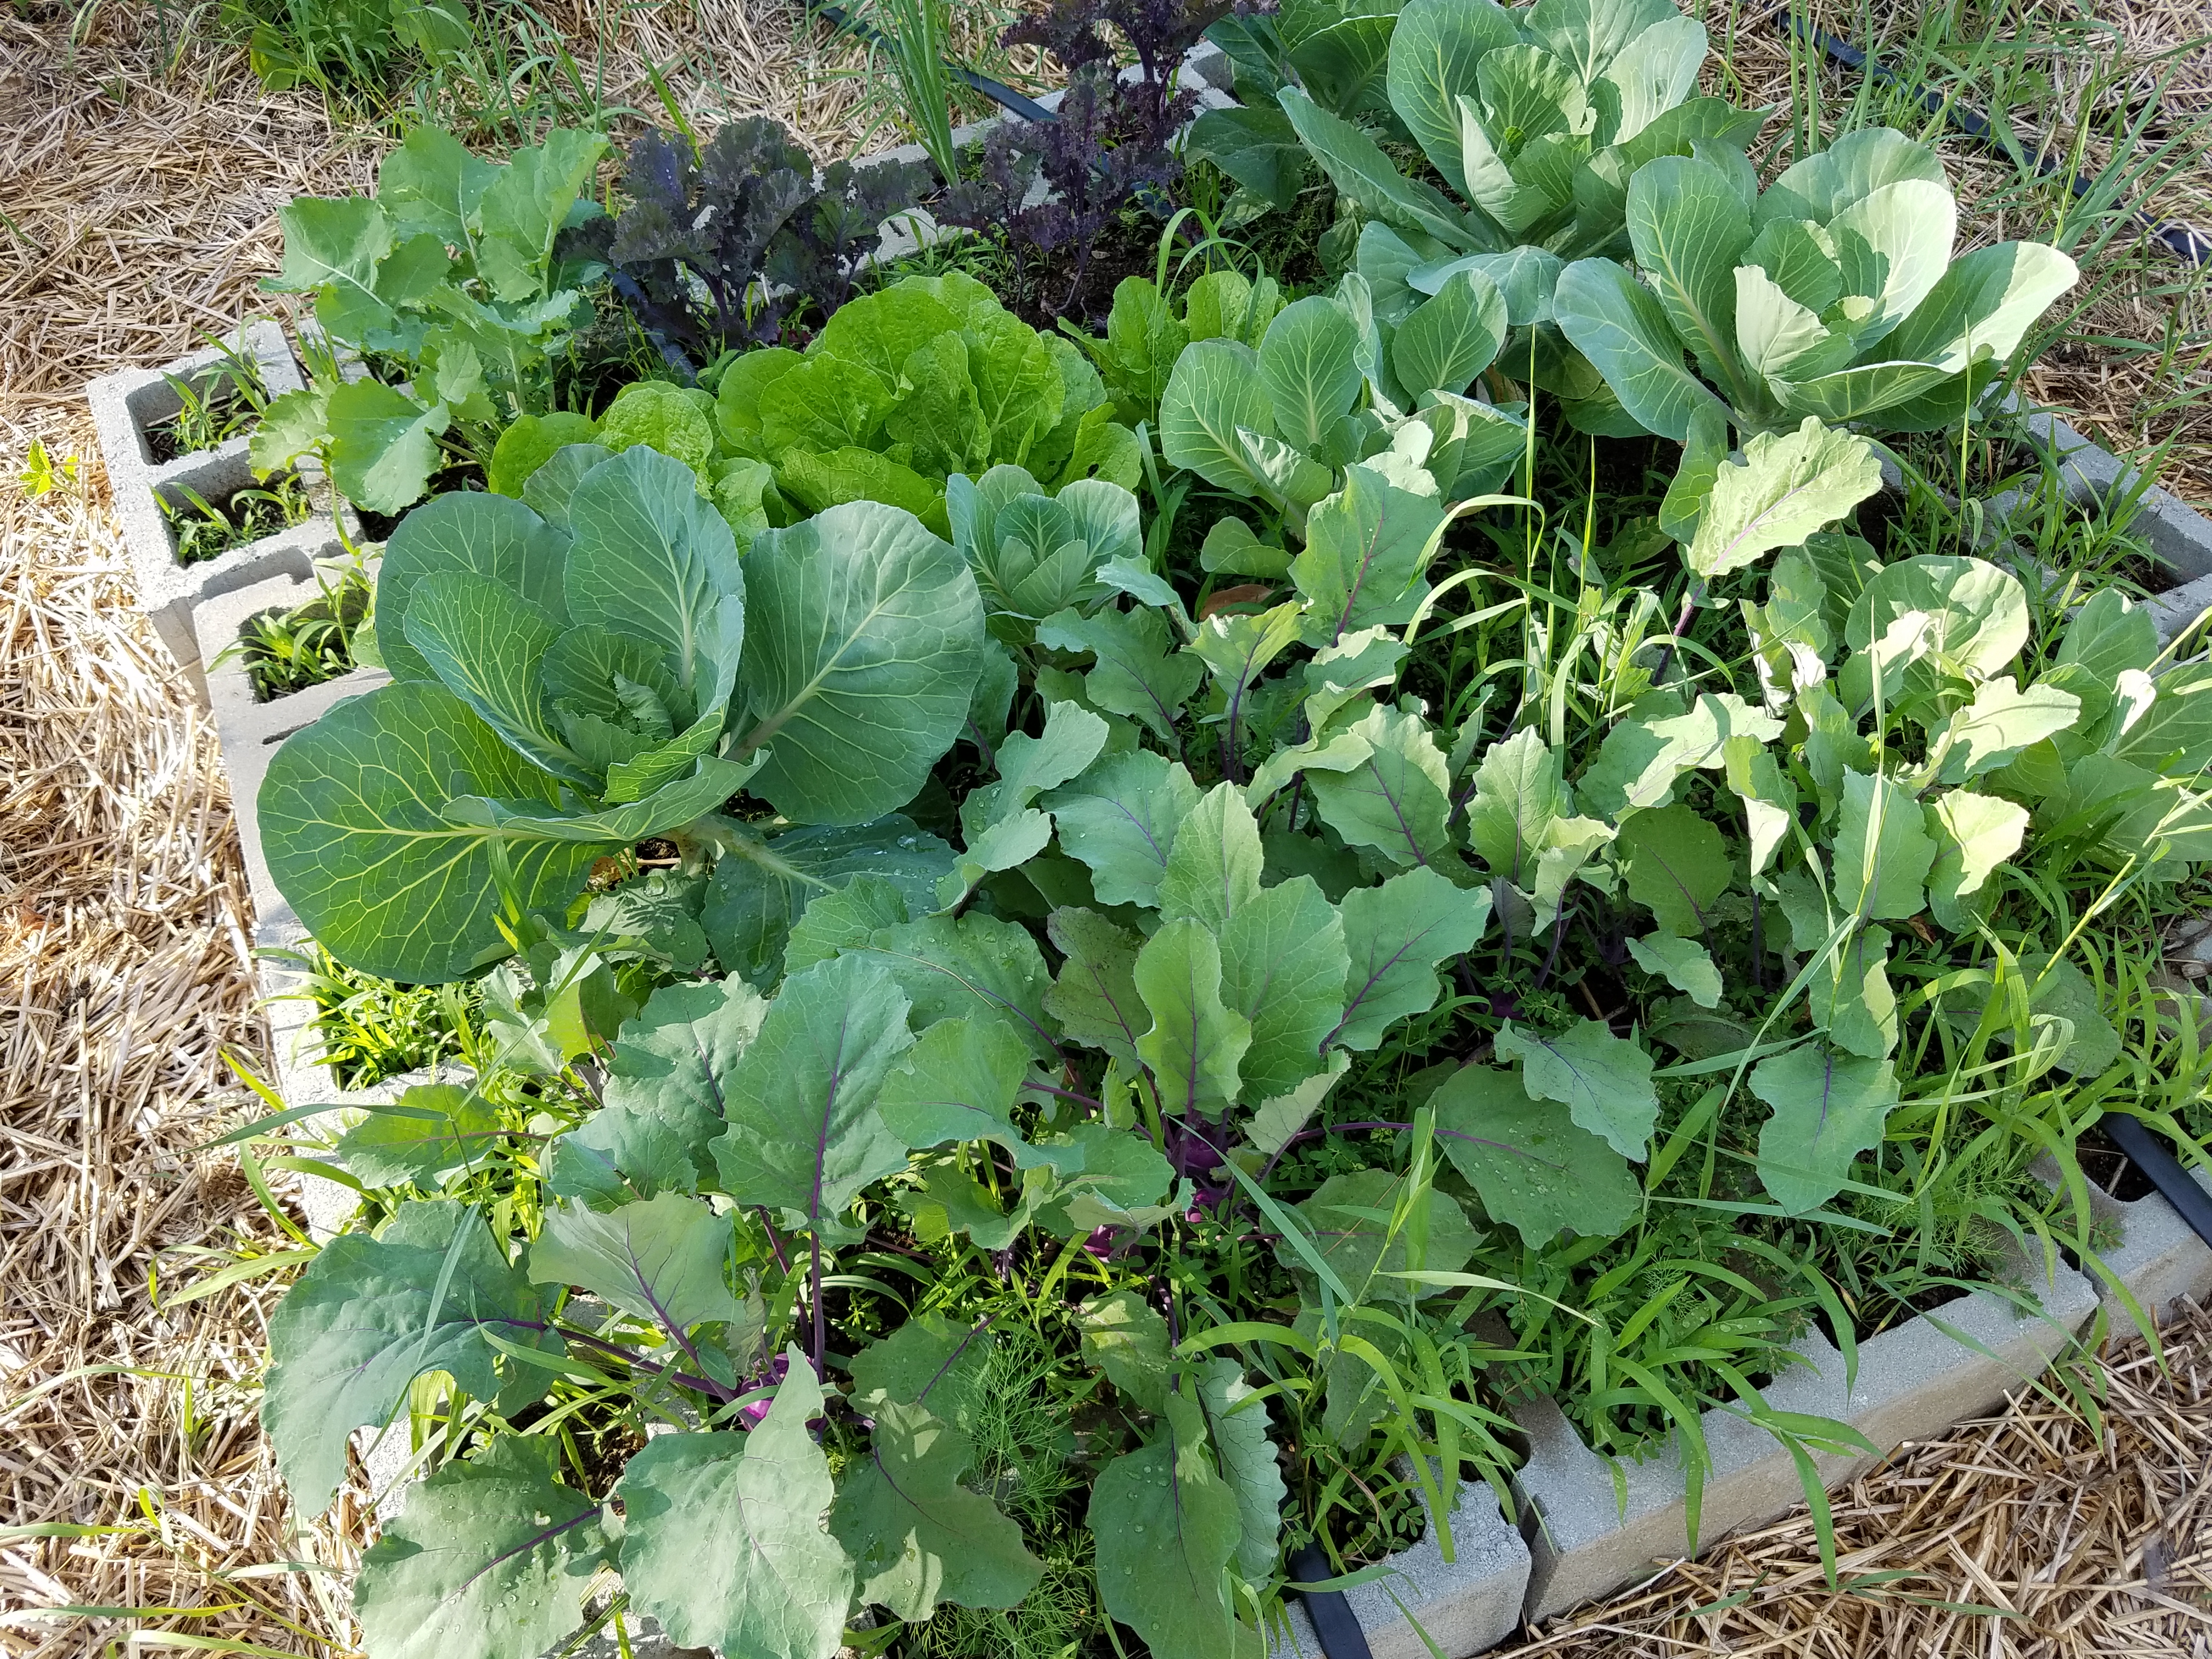
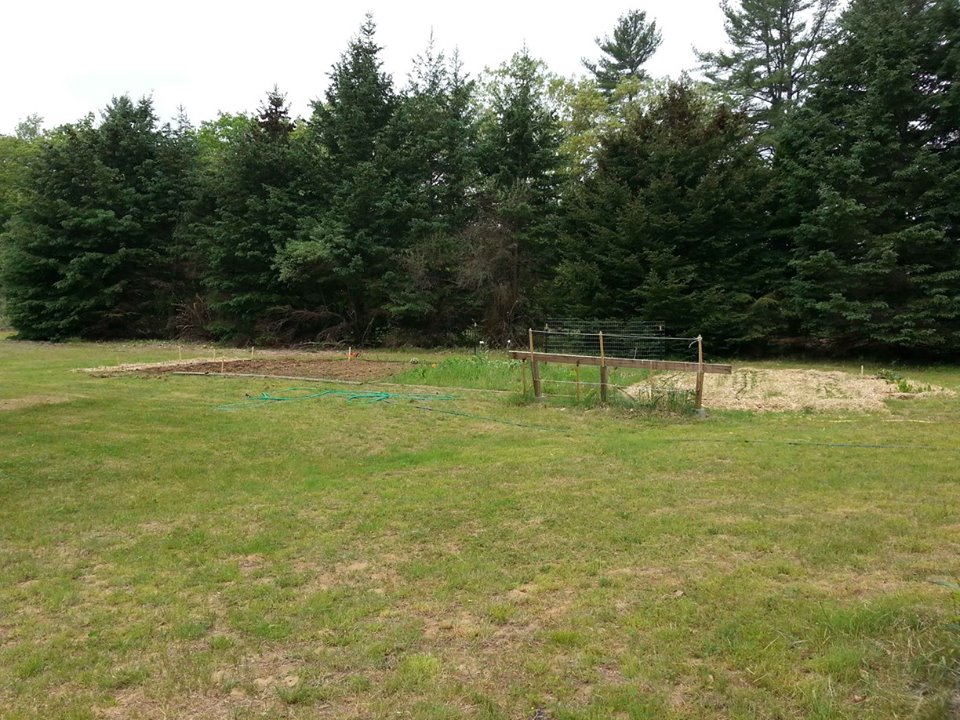
One of the raised garden beds made with cement blocks
Okay, I’ve been telling MaryKate that I was going to do this post for a Whatever Wednesday since we bought the house. Obviously, that hasn’t happened. But better late never, and I’m currently trying to ignore the blizzard raging outside while writing this post and dreaming of spring.
Depending on your cocktail of allergies (corn, I’m looking at you), growing some of your own food may become something that you want or need to try, based on your local food resources, your sensitivities, and the failures of the food industry to properly label ALL food ingredients. I won’t get into my diatribes about the food industry and regulatory concerns as they are unlikely to be addressed in the near future. Instead, let’s get to playing in the dirt, and planning to play in the dirt.
Here’s the original post about us deciding to buy the house – WW: Living with Food Allergies & Making Unexpected and/or Unwanted Lifestyle Changes. To summarize, due to the amount of food preservation I needed to do, the costs of purchasing vegetables, having to make my own personal care products, and our storage needs, we needed to buy a house so I had room to do all that and garden. We were lucky enough to be able to buy a house that has three acres of land, an established set of fruit trees (18 apple, 4 pear, 1 cherry), grapevines, blueberry bushes, and Nankin cherry bushes, as well as an established garden plot. Since we bought the house, we’ve expanded the garden plot from its original foot print, added a side garden with a perennial herb garden and a perennial garlic bed, established an asparagus bed, planted 150 strawberry plants, planted a bed of perennial Egyptian walking onions, added two more grapevines, and installed some drip irrigation.
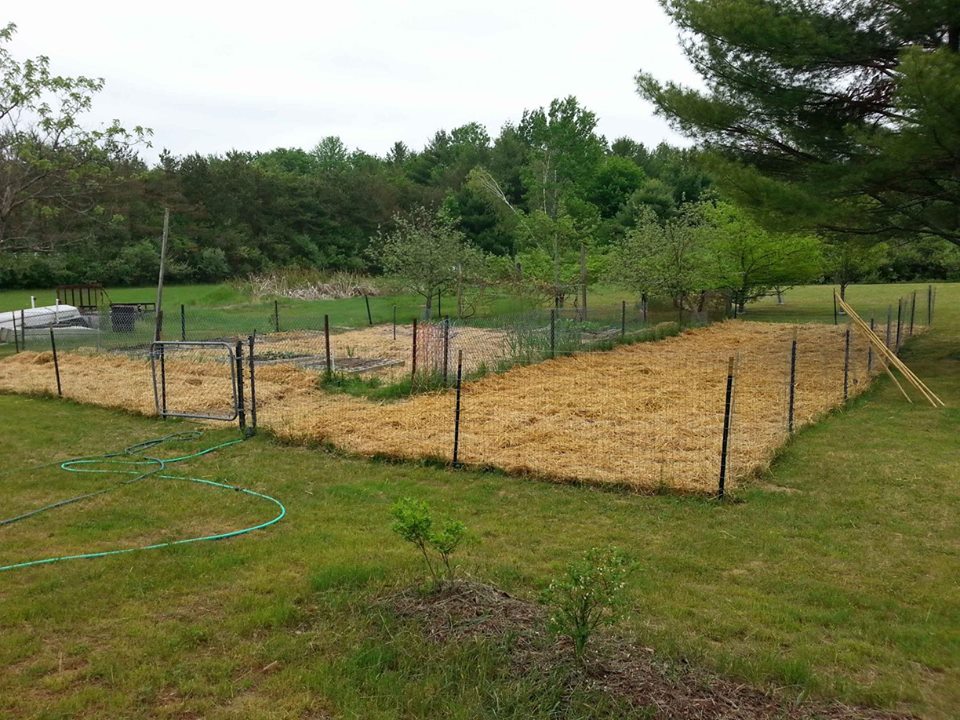
Main garden and expansionSide garden
This year, I’ll be adding another 100 asparagus plants, another 150 strawberry plants, 5 raspberry bushes, and 5 blackberry bushes. I’d like to add more blueberry bushes and a couple of fruit trees, but it depends on the budget – it may have to wait until next year.
If you’re thinking about starting a garden, your local cooperative extension may have great information for you. New Hampshire has great resources, and I’ve gone to a couple of their classes to learn how to prune my fruit trees, blueberry bushes and grapevines, and to learn about Integrative Pest Management. Your local cooperative extension may also have fact sheets and online resources that are helpful.
Unless you are container gardening, you should probably get your soil tested, so you know how to help your soil for particular crops. New Hampshire provides that service for a small fee, and your local cooperative extension may too. They give you recommendations for what to add to your soil for your particular crop. They also have fact sheets about growing various fruit and vegetable crops.
Guessing at how much to plant of what to get decent yields to preserve through canning, freezing or dehydrating is another whole ball of wax, and is something I don’t have a good handle on yet, given the turnip and daikon incidents. The weather will also play a key role. You can plan all you want, but some years you’re going to get a great harvest, and some years you’re going to get nothing of a particular crop. My first apple crop here was amazing, apples were coming out of my ears and I gave bushels away. Due to a killer frost last February, I lost nearly all of the second crop, and had enough from 18 trees to do an apple cranberry crisp. Based on the up and down temperatures this year, I’m guessing I’m likely to lose most of this coming year’s apple crop as well. Gardening is the closest natural thing you can do to gambling, I think. Here are some articles that may help though:
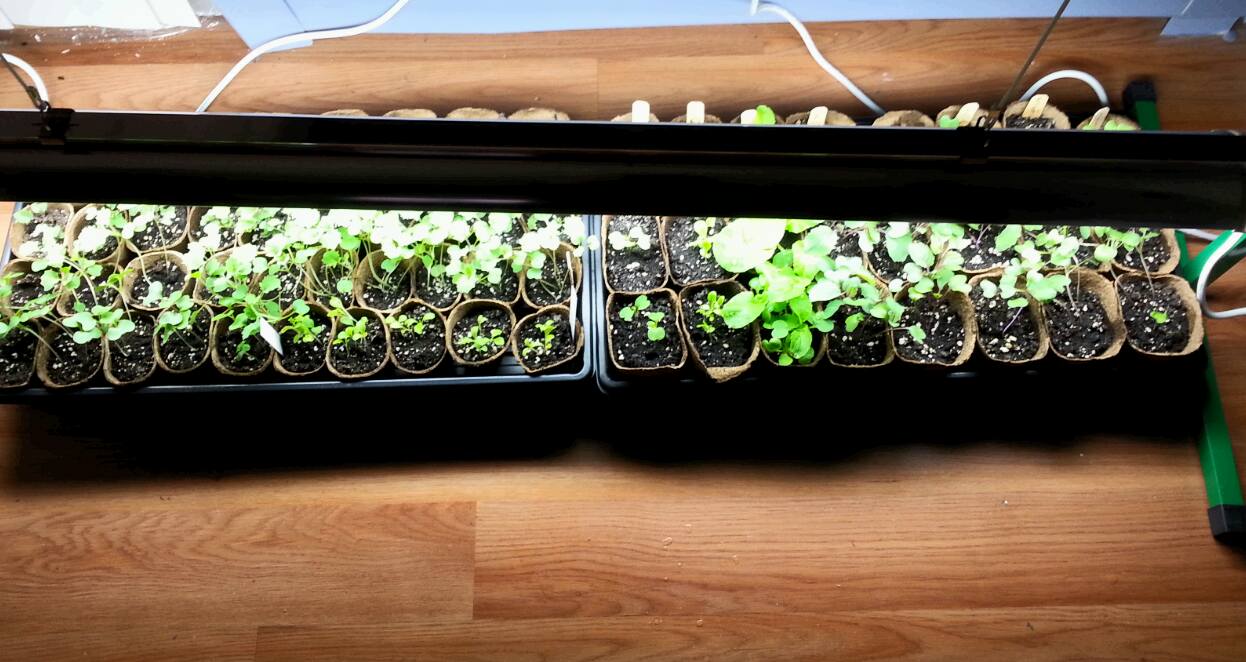
Once you’ve decided what you want to grow, and roughly how much of it, you need to decide when to plant and when to start seedlings. As New Hampshire has a short growing season, many vegetable plants must be started inside in order to get a harvest. You need to determine what zone you are in to determine when to start your seedlings and when to plant outside. I am in zone 5b. Once you know your zone, you can check out the Old Farmer’s Almanac Frost Calculator to determine your last spring frost. Although the last spring frost is listed as May 20th with a 50% probability, I use May 31st. And because I’m me, I plug that information into a spreadsheet and using cultivation information on the seed packet or the website where I got my seeds, and make a plan. I’m in the process of revamping my spreadsheet for this year, as I plan to consolidate some of my raised beds and I still have to plan where some of my plants are going. Since that’s not done, I’ll provide you with a copy of last year’s sheet here.
You’ll note that there are lots of pages to the spreadsheet. The first sheet is the Planting Schedule. The first column heading “Plant” is the name of the vegetable, fruit, herb or flower that I’m planting. The second column heading “When to Start Inside” has two sub columns, the “Earliest Date” and the “Latest Date”. Starting too early can be just as bad as starting too late, as plants may get spindly and root bound. The third column “Safe time to set out plants relative to frost free date” based on the information on the seed packet. This information is then translated to the actual dates for my growing area based on the frost free date, as contained in column 4 “Setting out dates”. Column 5, “Actual Planting Date” is the date I started my seeds. I tend to keep records to try to see what worked and what didn’t each year, which I might also note in the Column 9, “Notes”. Column 6 contains the number of seedlings planted, which we’ll discuss further later. I use a modified version of the square foot gardening method, and in Column 7, I’ve added the number of plants per square foot to help me plan the beds. Column 8 is the date I actually set out or transplanted the plants in my garden. As you go down the list of plants, you’ll also see that there’s some that say direct seed. That means I am not transplanting, but sowing directly into the soil, on the earliest date in Column 4, “Setting out dates”. All of the dates are based on the frost date for my area, and the information on the seed packet. You would need to change this information based on the frost free date for your zone.
The second sheet, titled “Bed Plan Numbers” is a place for me to calculate the total number of seedlings for each thing I’m growing so I know how many seedlings to plant. This is the place that I aggregate the number of plants, once I’ve completed the plans for the garden and the raised beds.
The next three sheets contain the plans for each garden (one square is a foot) area showing the larger plants that spread, and place holders for the raised beds. The following eleven sheets contain the plan for each raised bed. For example, if you look at the main garden plot plan, a blue hubbard squash plant requires a 3 foot by 3 foot area (9 square feet) and I have a big blue square denoting that in the upper left corner. In fact, the plan shows that I would plant 6 plants, although these are planted directly in the garden and are not started inside. If you looked at the following eleven raised bed plans, each contains a map of what I intend to plant in that bed that year. So if you looked at the first line of the Bed Plan Numbers sheet for Basil, Aroma variety, it shows that I intend to plant 10 in Bed 1, 5 each in Bed 6 and 7, and 10 in Bed 10, which means I need to start 30 plants inside as seedlings. I might add a few extra to account for seedlings that don’t make it, or don’t germinate, or to account for the damned voles that keep eating my seedlings. But this is basically how I get a place to start. I then enter the total number into Column 6, # of seedlings planted, of the Planting Schedule so I know how many I planted.
Each year I have to revamp the plans, because I rotate my crops. You don’t want to plant the same plants or family of plants in the same area each year because it can allow encourage plant diseases and pests. In addition, I use companion planting principles as much as I can to help deter pests and disease as well. Which is why I use a new spreadsheet each year and save the last so I can review what I had and where in determining where things will go the following year.
I buy my seeds and plants from a few sources, depending on what I’m looking for. The vast majority of my seeds and plants come from Johnny’s Selected Seeds. They also have a great grower’s library reference on their site. I also like Baker Creek Heirloom Seeds, for rare and interesting stuff. Occasionally I may pick up a thing or two from Burpee, but only if it looks interesting and I can’t get it from Johnny’s. I will also occasionally buy flower bulbs from various places, but we’re focusing on food here. Although I have my eye on some saffron crocuses…
It’s really important that you follow the hardening off directions in the NH Cooperative Extension guide for growing plants from seed, otherwise you may do a lot of work for plants that wilt and die once you get them in the ground, or suffer so much transplant shock that you never get anything from them. Here’s a nice guide on transplanting as well. You can also get plants from the nursery, but that gets really expensive for the number of plants I’m growing.
I’m not an expert gardener by any means, but I hope this helps a bit if you’re thinking about starting to growing more of your own food. Of course, there’s no reason that you have to be this crazy to start, you can just start with a couple of tomato plants and see how you do.
When I suggested to MaryKate when we were planning our theme months for the year (yes, we know we’re crazy) that we should do potatoes for March, I was kinda thinking potatoes fit with March because of St. Patrick’s Day. Somehow, instead of an Irish themed dish, I’ve managed to come up with an Indian inspired one instead.
This recipe’s got a lot of fiddly bits, but they would be nice as appetizers for a party, or as a side dish for dinner party if you’re trying to be all fancy. And they’re quite yummy.
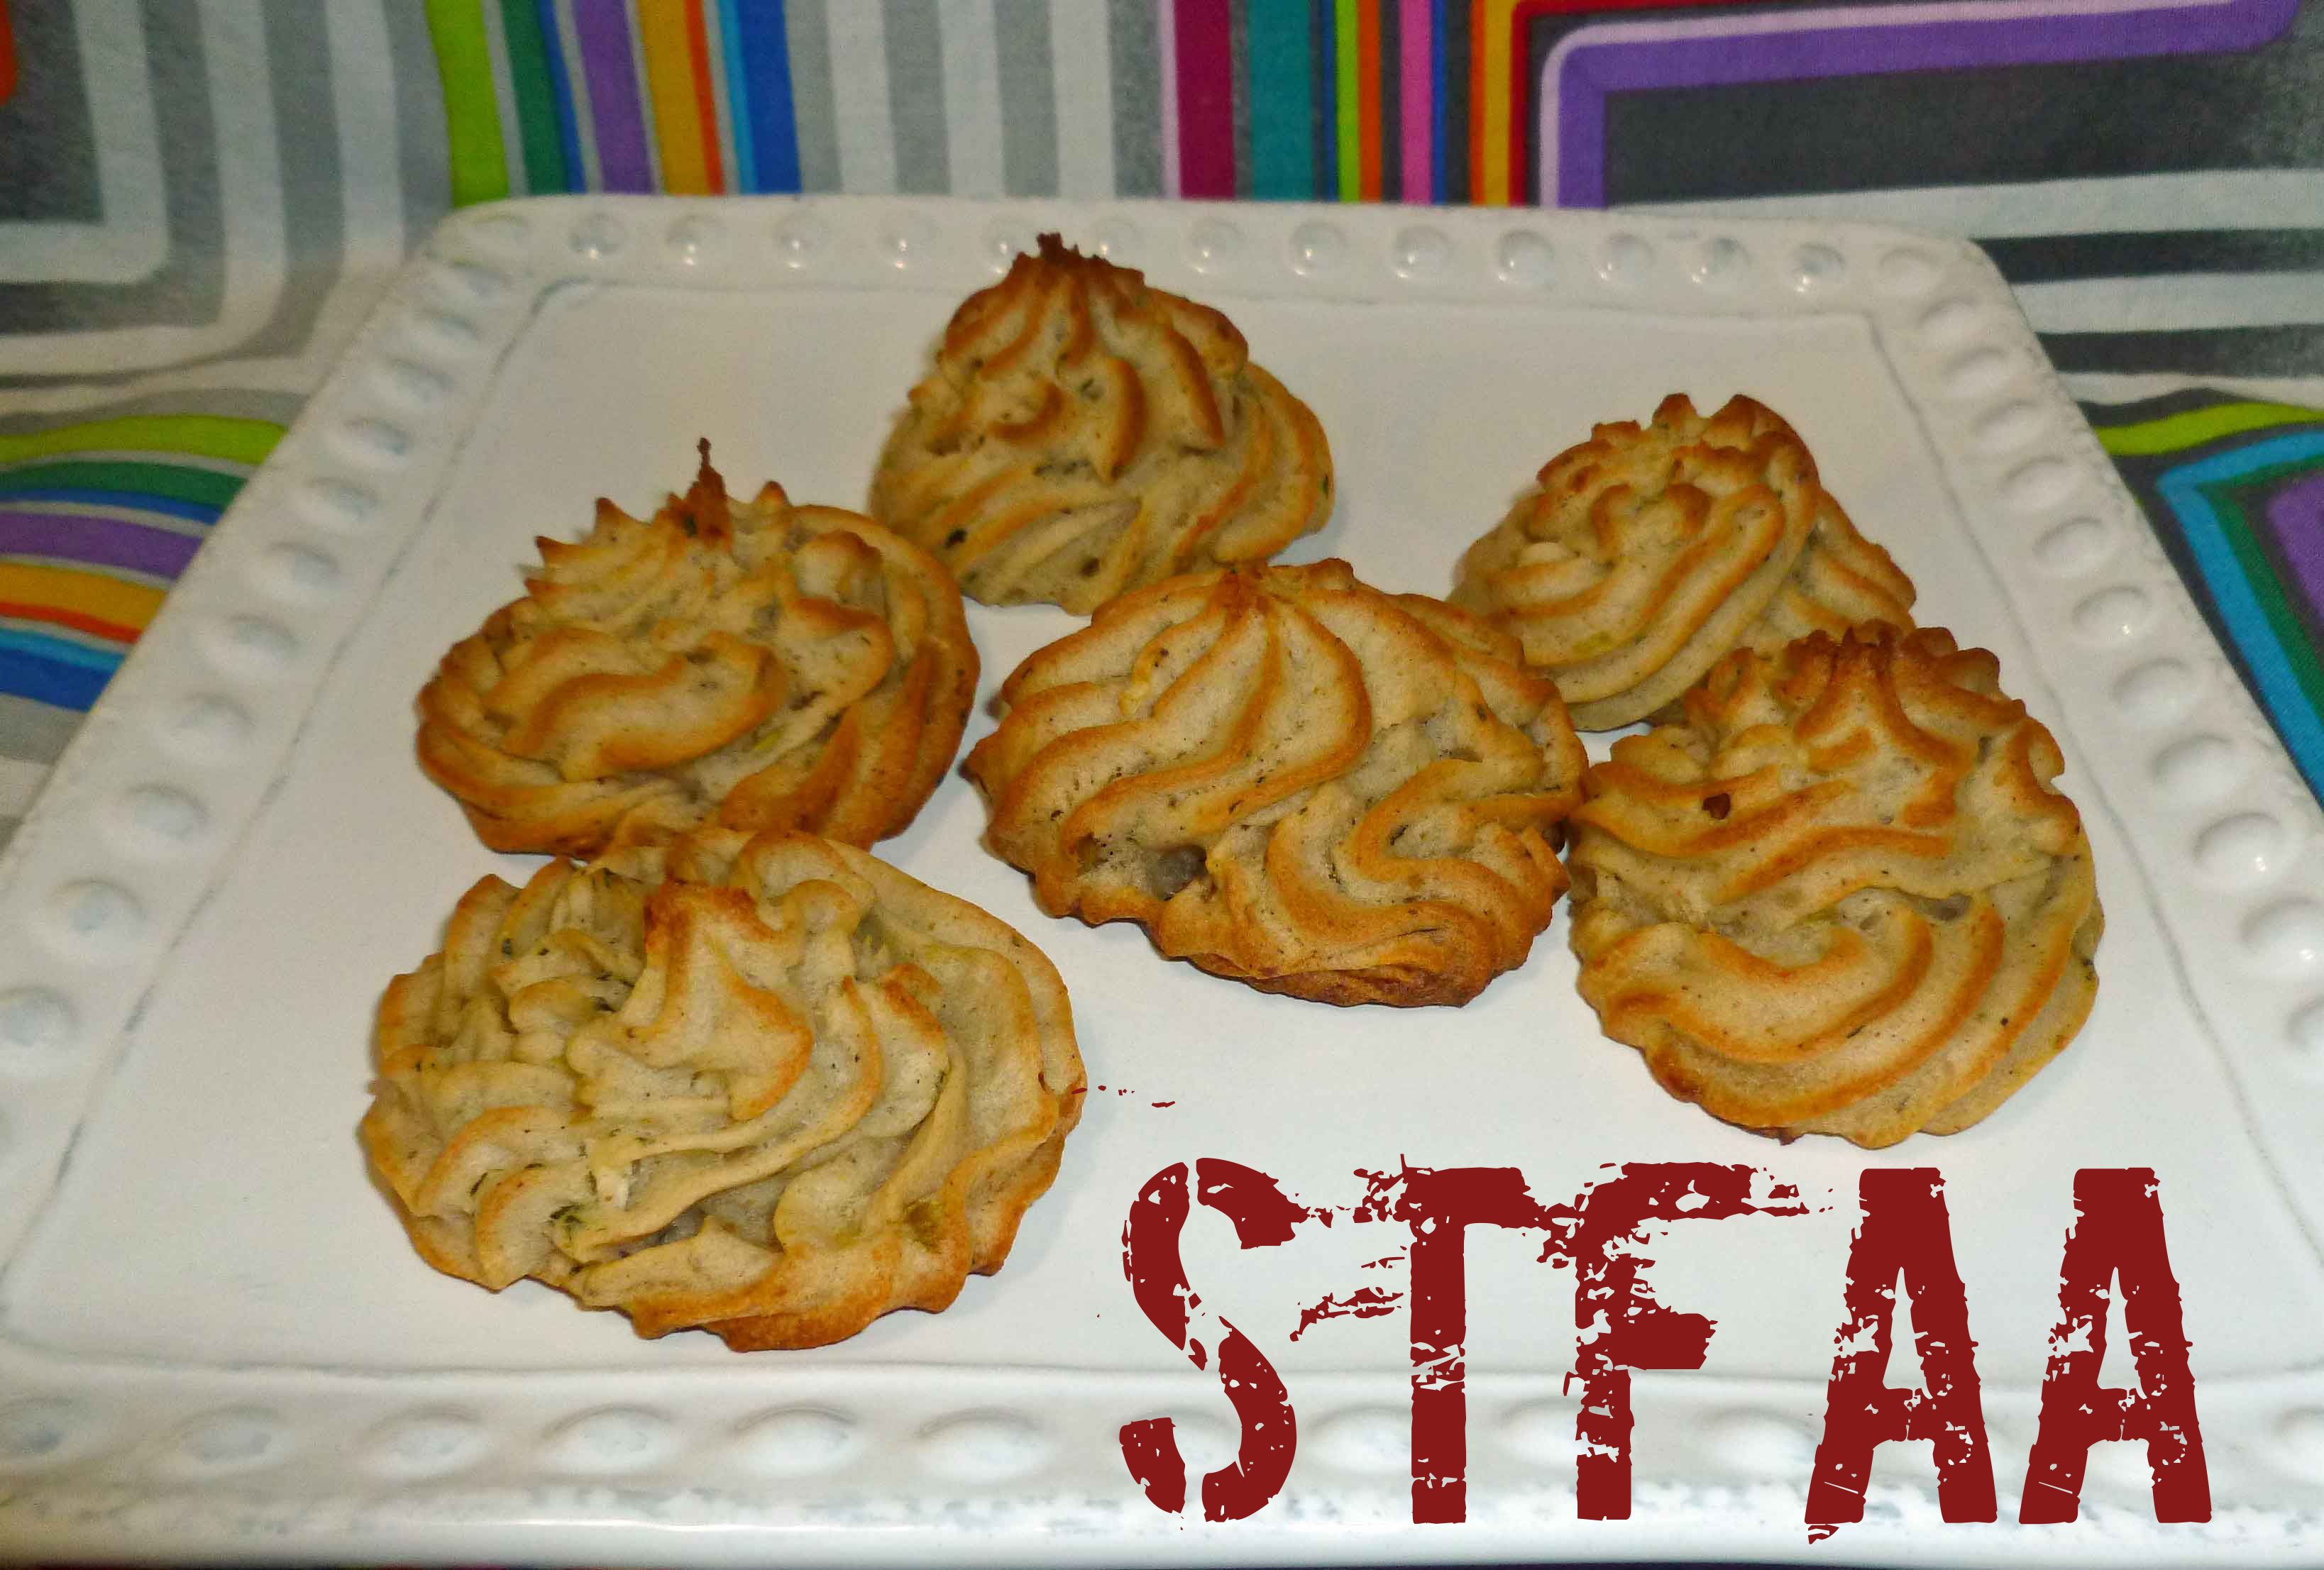
Samosa Spiced Potato Puffs
Print Recipe
Great as an appetizer or a side for a nice dinner party.
2poundsrusset potatoespeeled and cut into large pieces
1jalepeno or other hot green chileseeded and destemmed
1teaspoonfresh gingerfinely grated
3scallionstrimmed
1clovegarlic
2Tablespoonsolive oil(or other safe for you oil) and some extra to grease baking sheet
1Tablespoonlemon juice(I use fresh squeezed)
2Tablespoons aquafaba(see http://aquafaba.com/)
1teaspoonsea salt
1teaspoon coriander, dried or fresh cilantro(optional, if fresh, chop finely)
1teaspoongaram masala
1/2teaspoonground cumin
Servings: puffs
Instructions
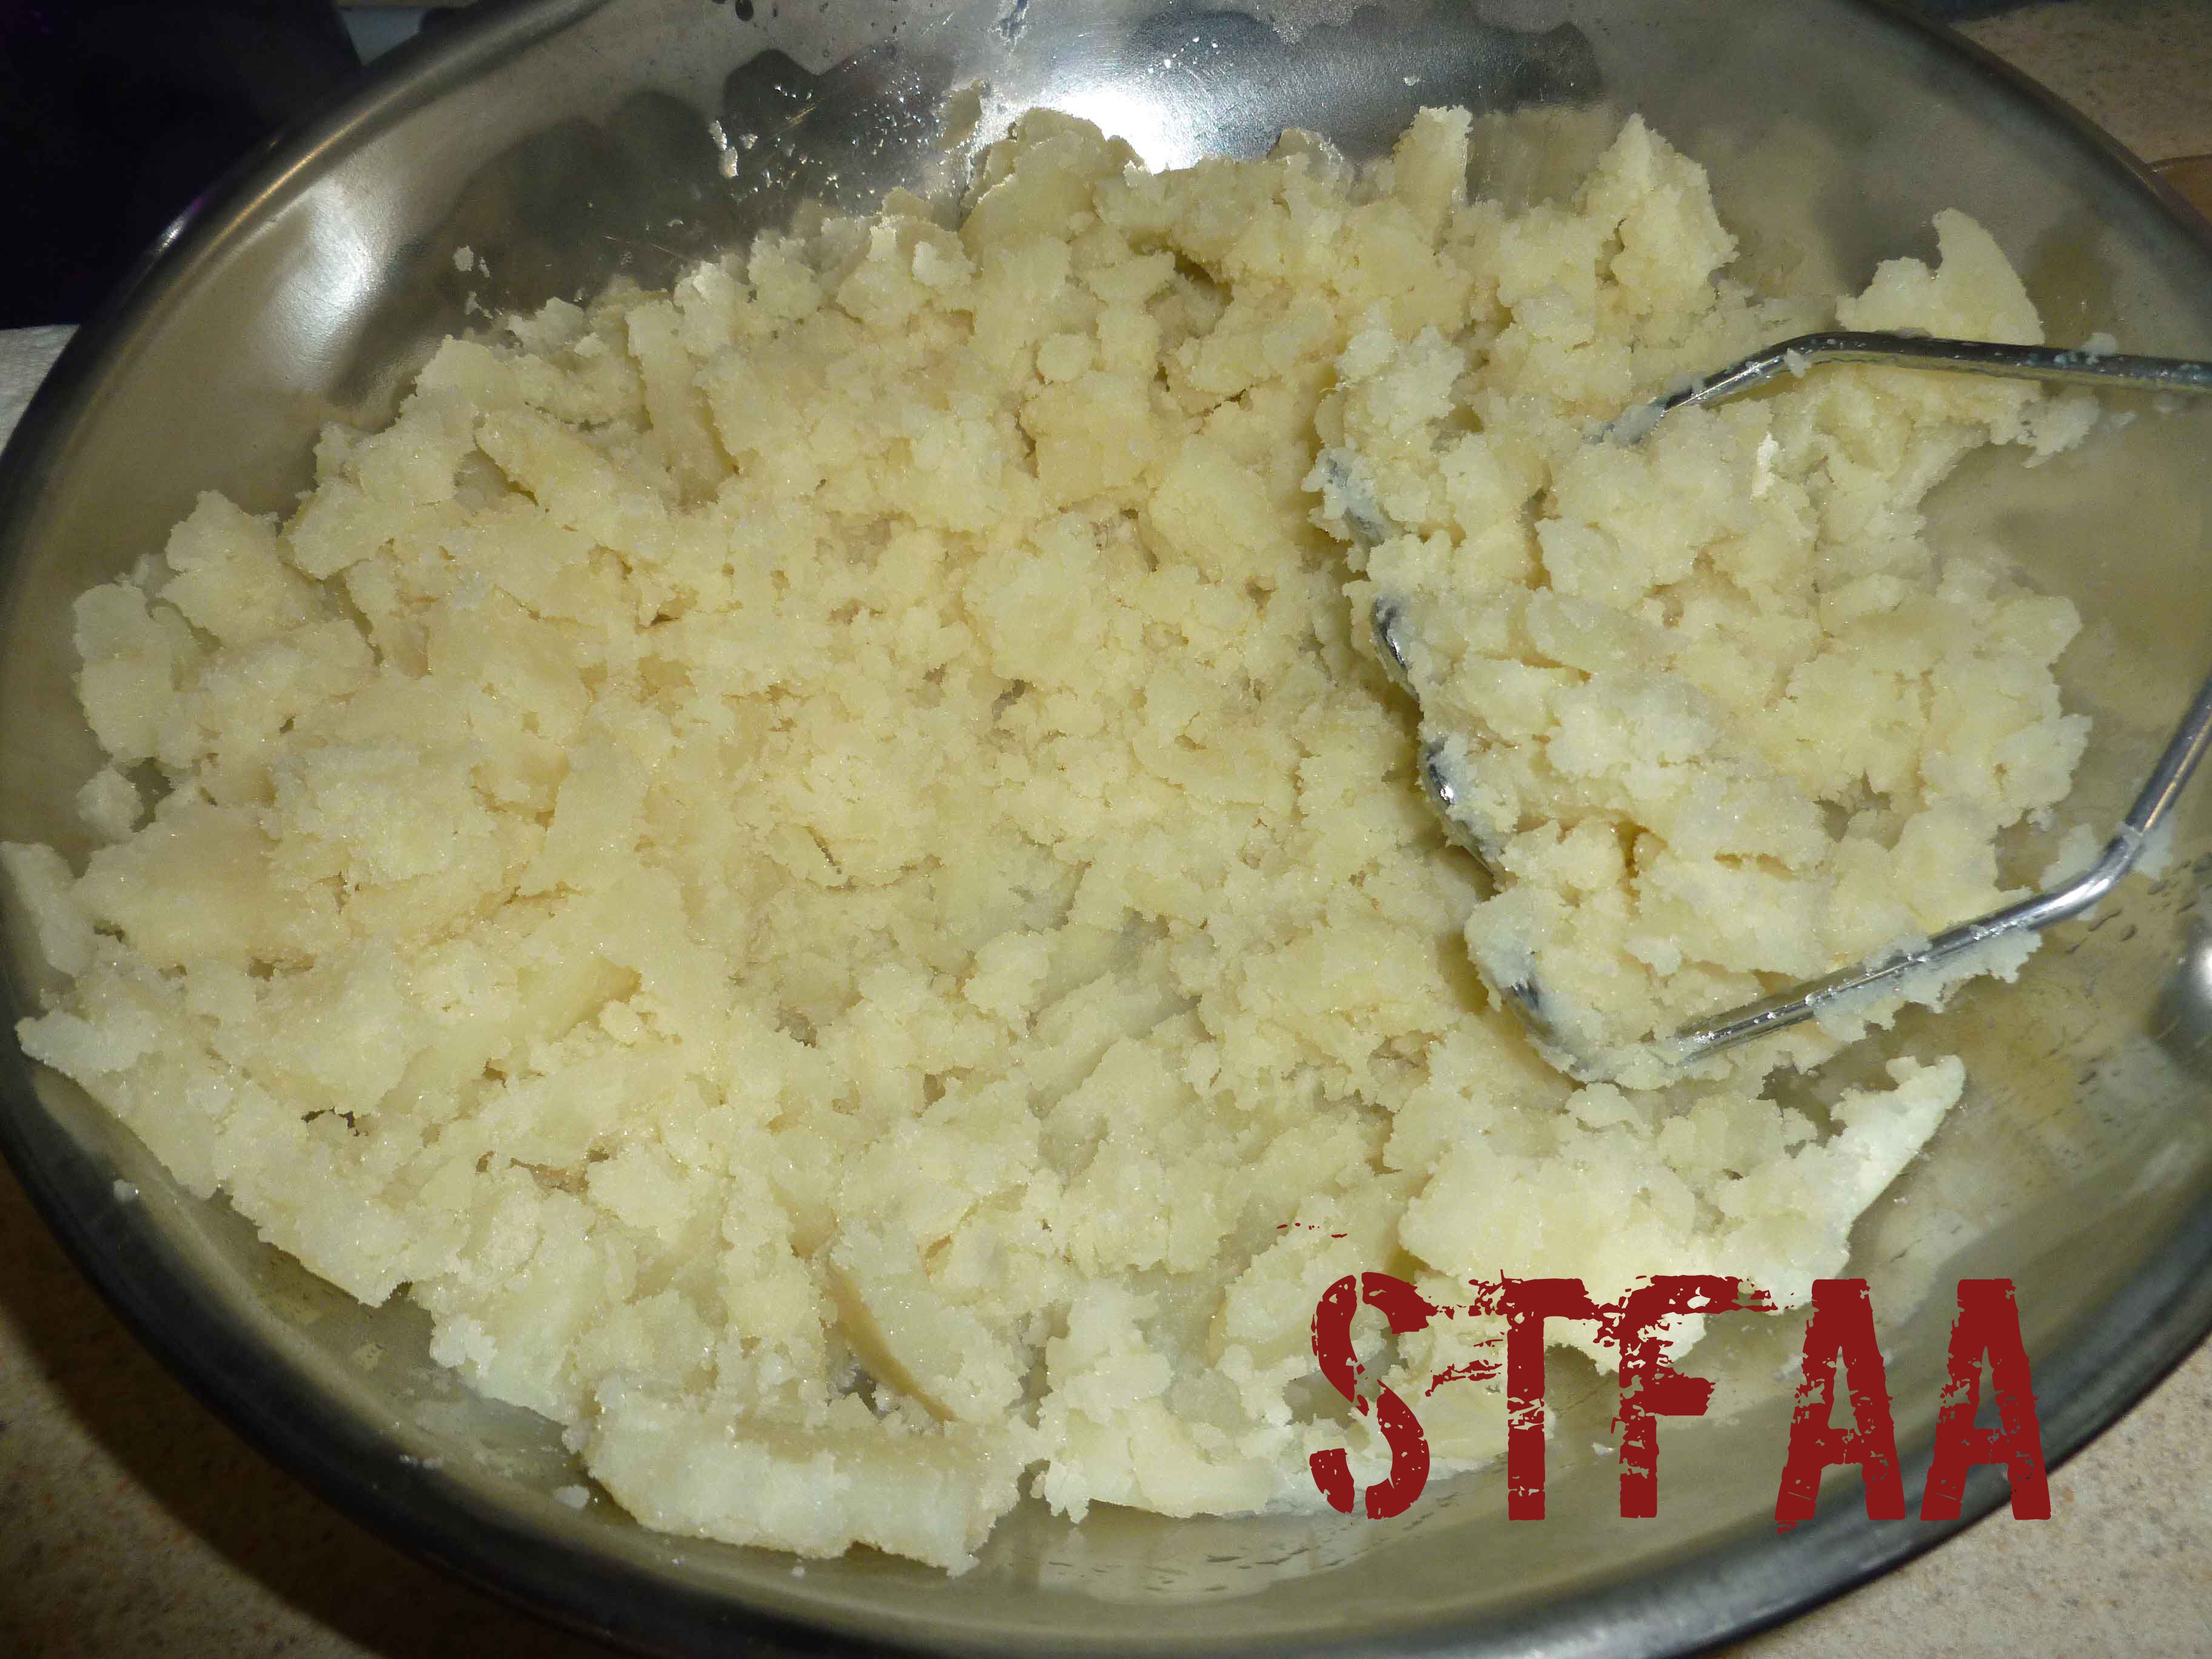
Place potatoes in a pot of lightly salted water. Cover the pot, bring to a boil, then reduce heat to a simmer for 15-20 minutes, or until potatoes are soft. Or use your Instant Pot to cook them if you have one, using a trivet and a bowl or a steamer, adding a cup of water, and cooking on high pressure for 9 minutes.
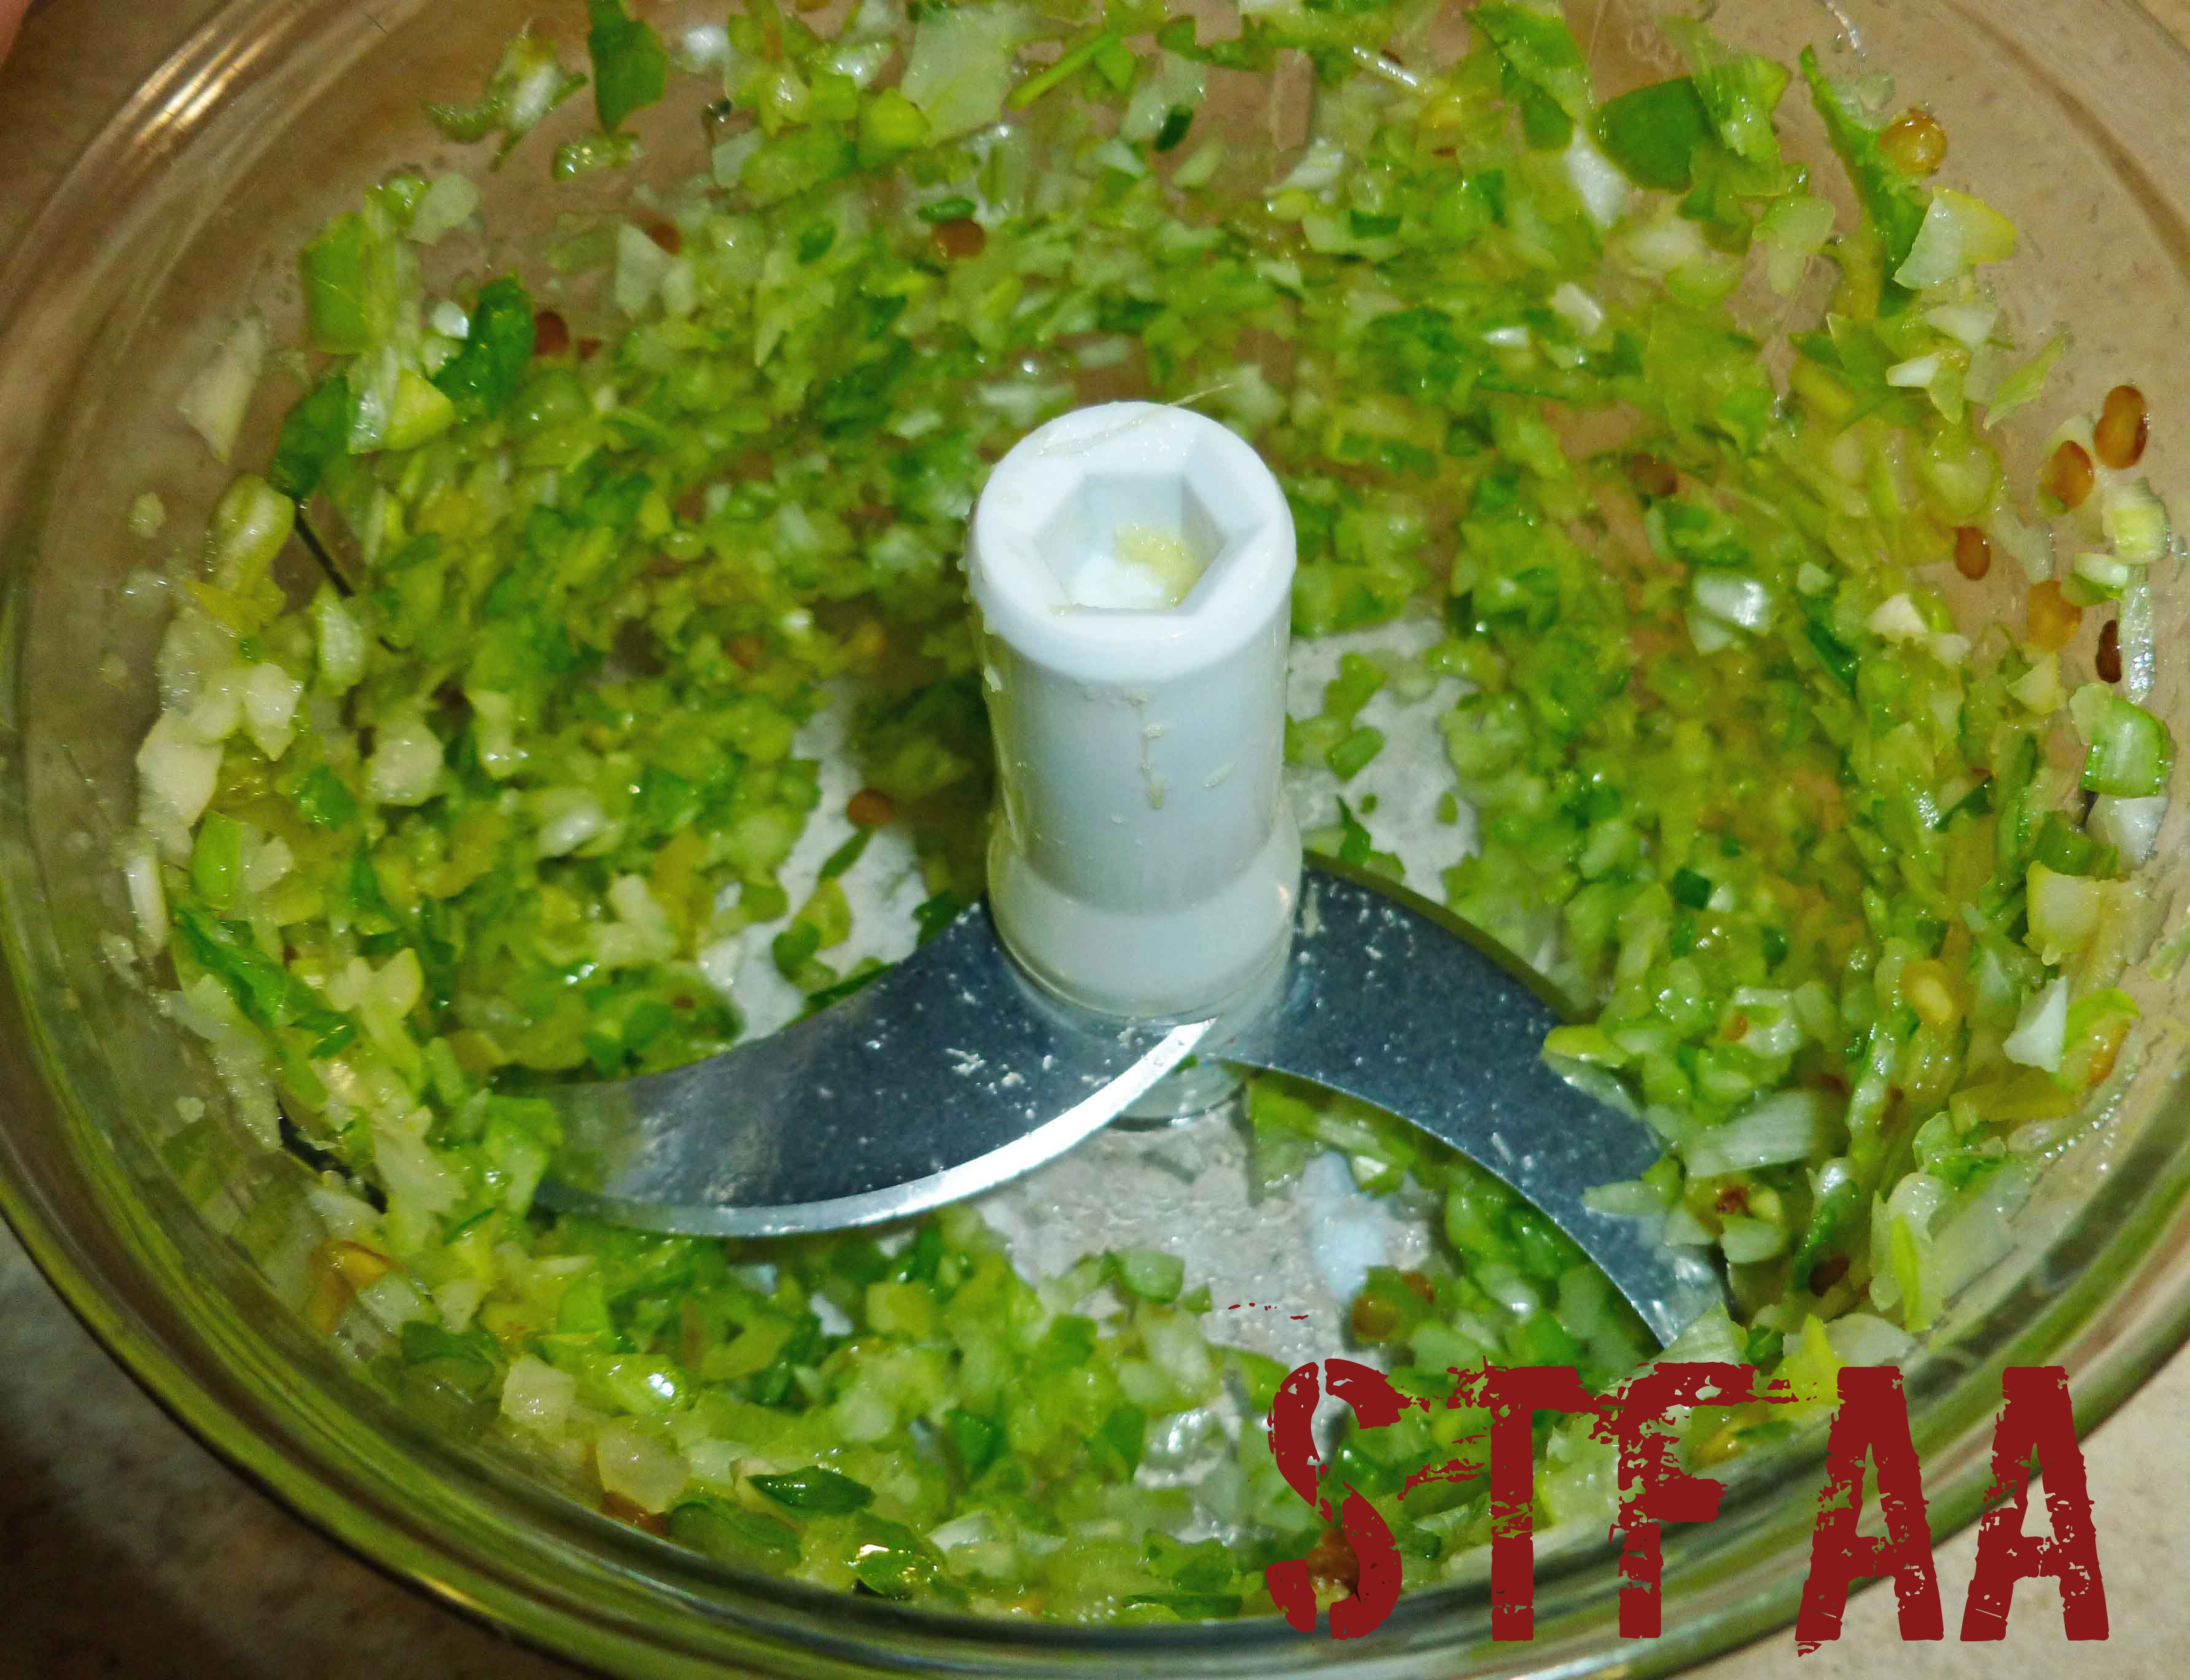
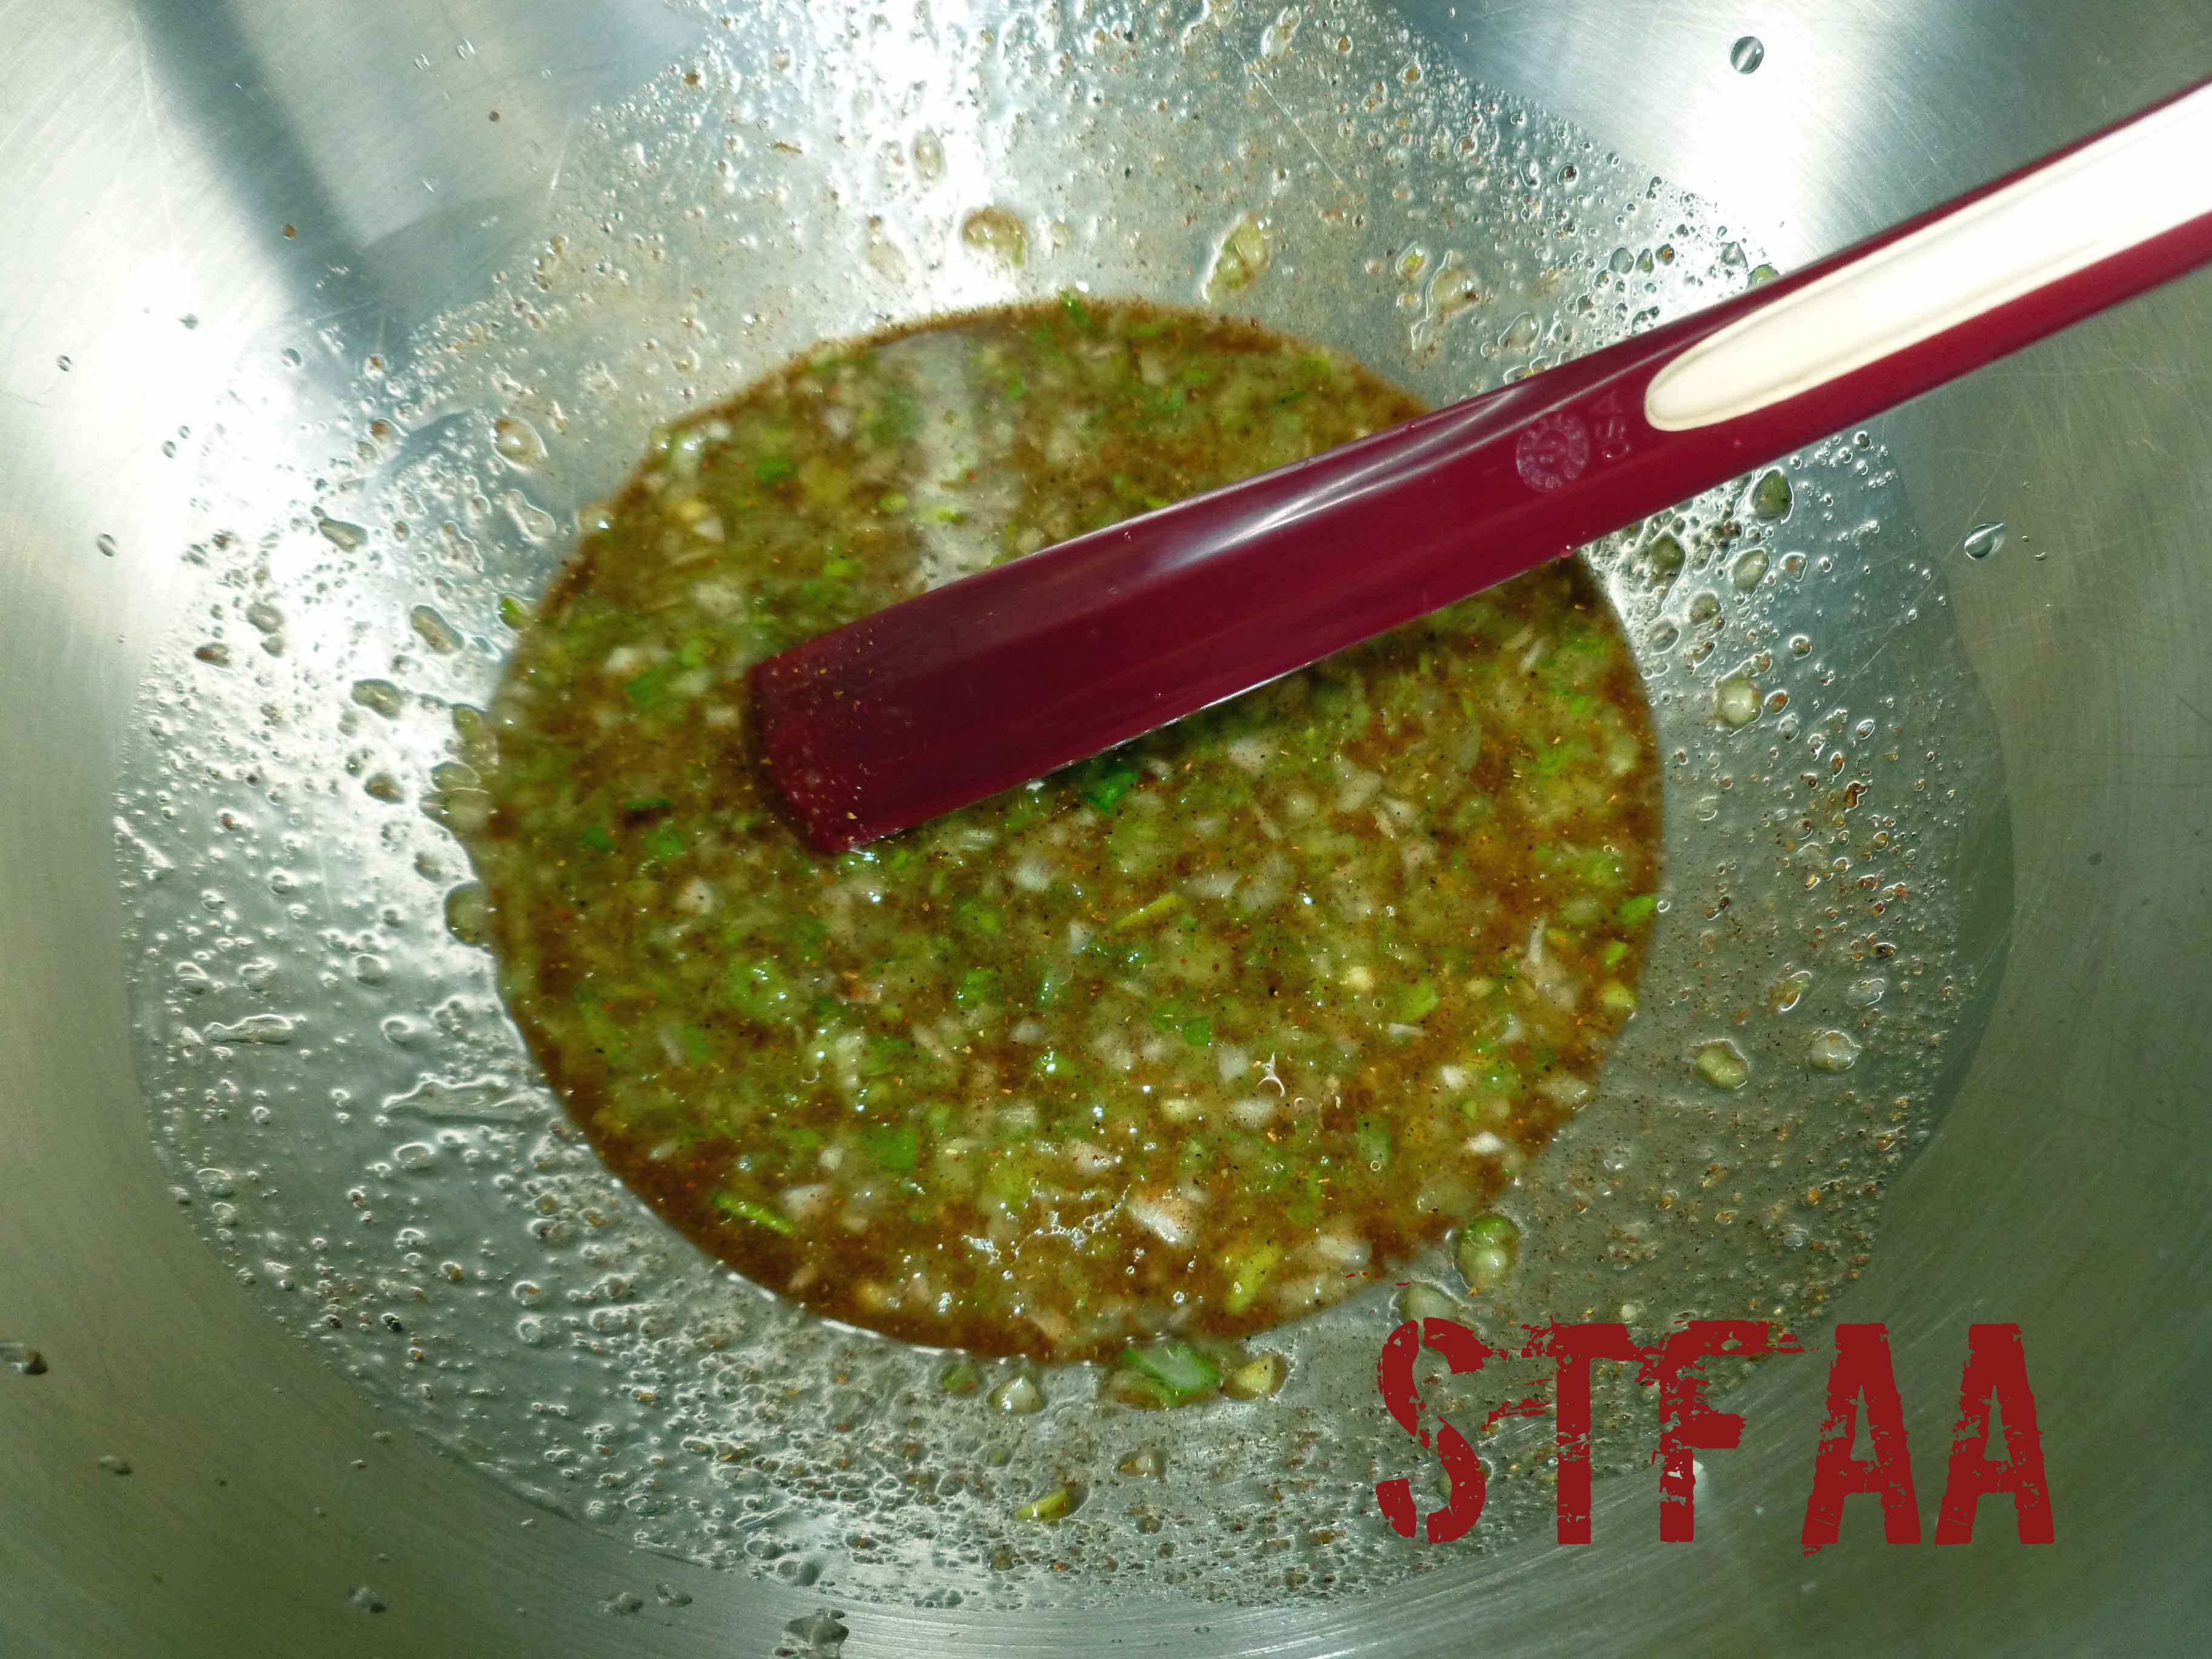
Preheat oven to 400°F. Chop scallions, garlic, and jalapeno pepper very finely. I used a Pampered Chef Manual food processor, but you can use a knife.
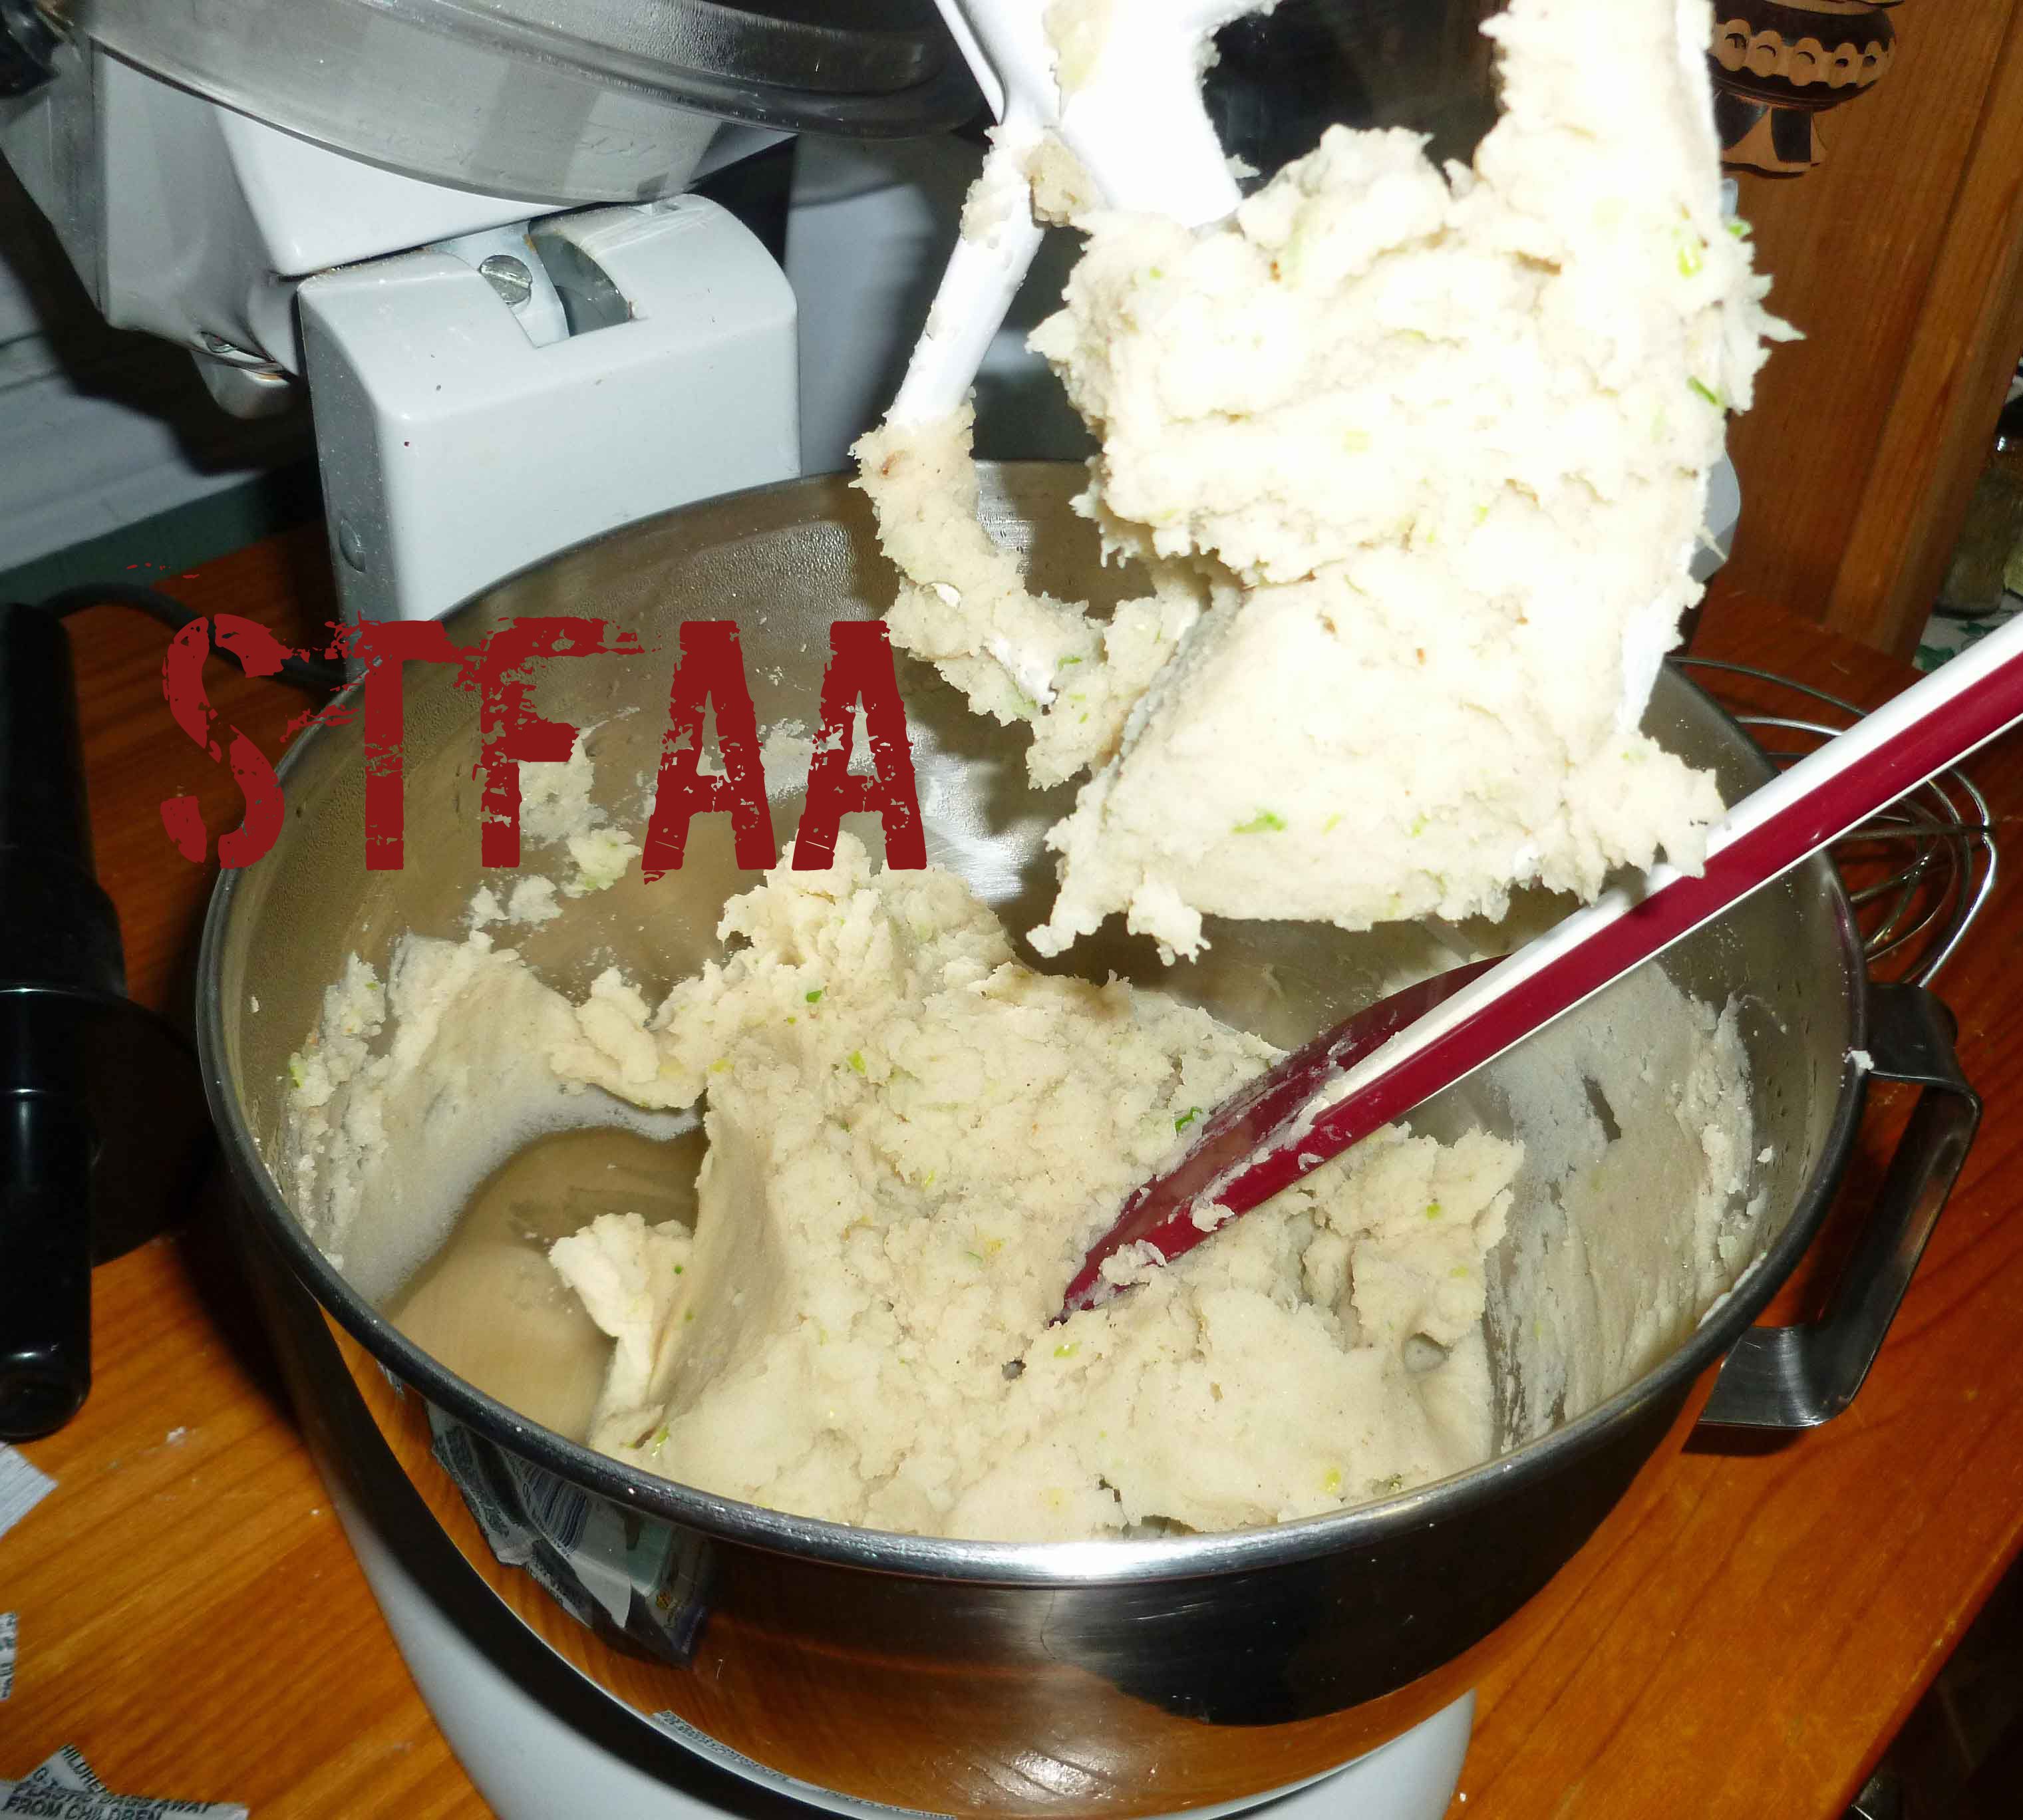
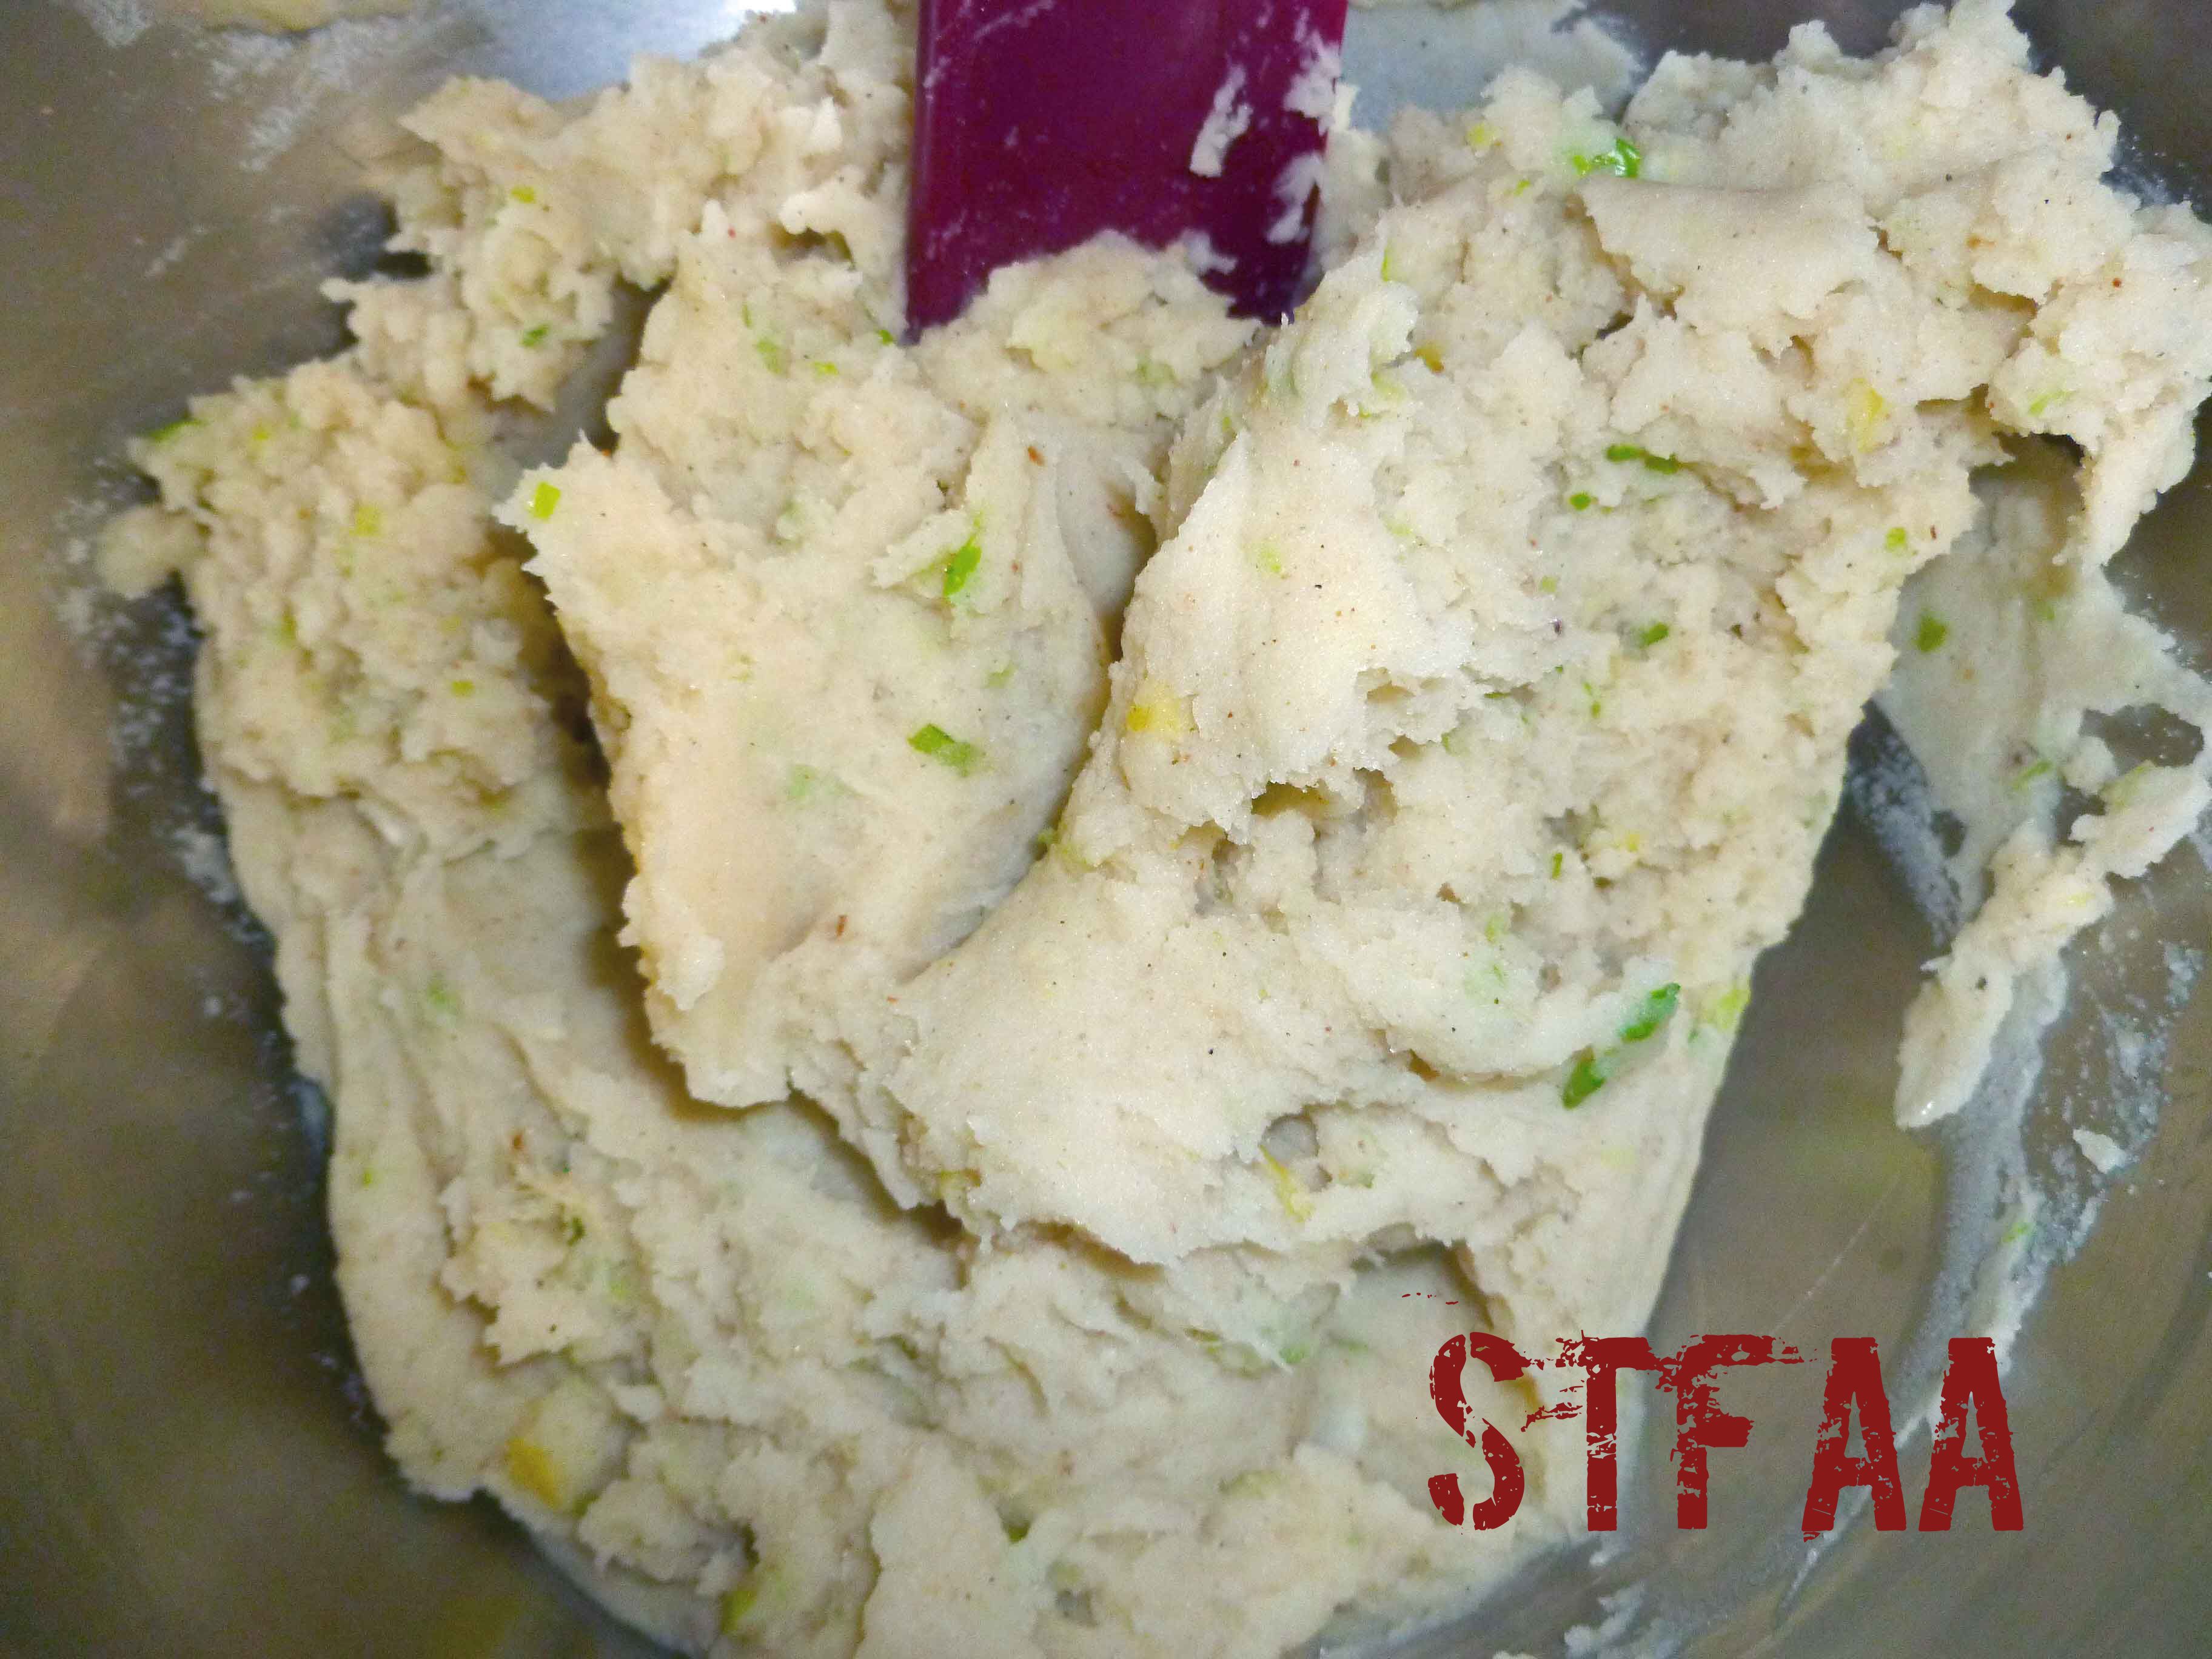
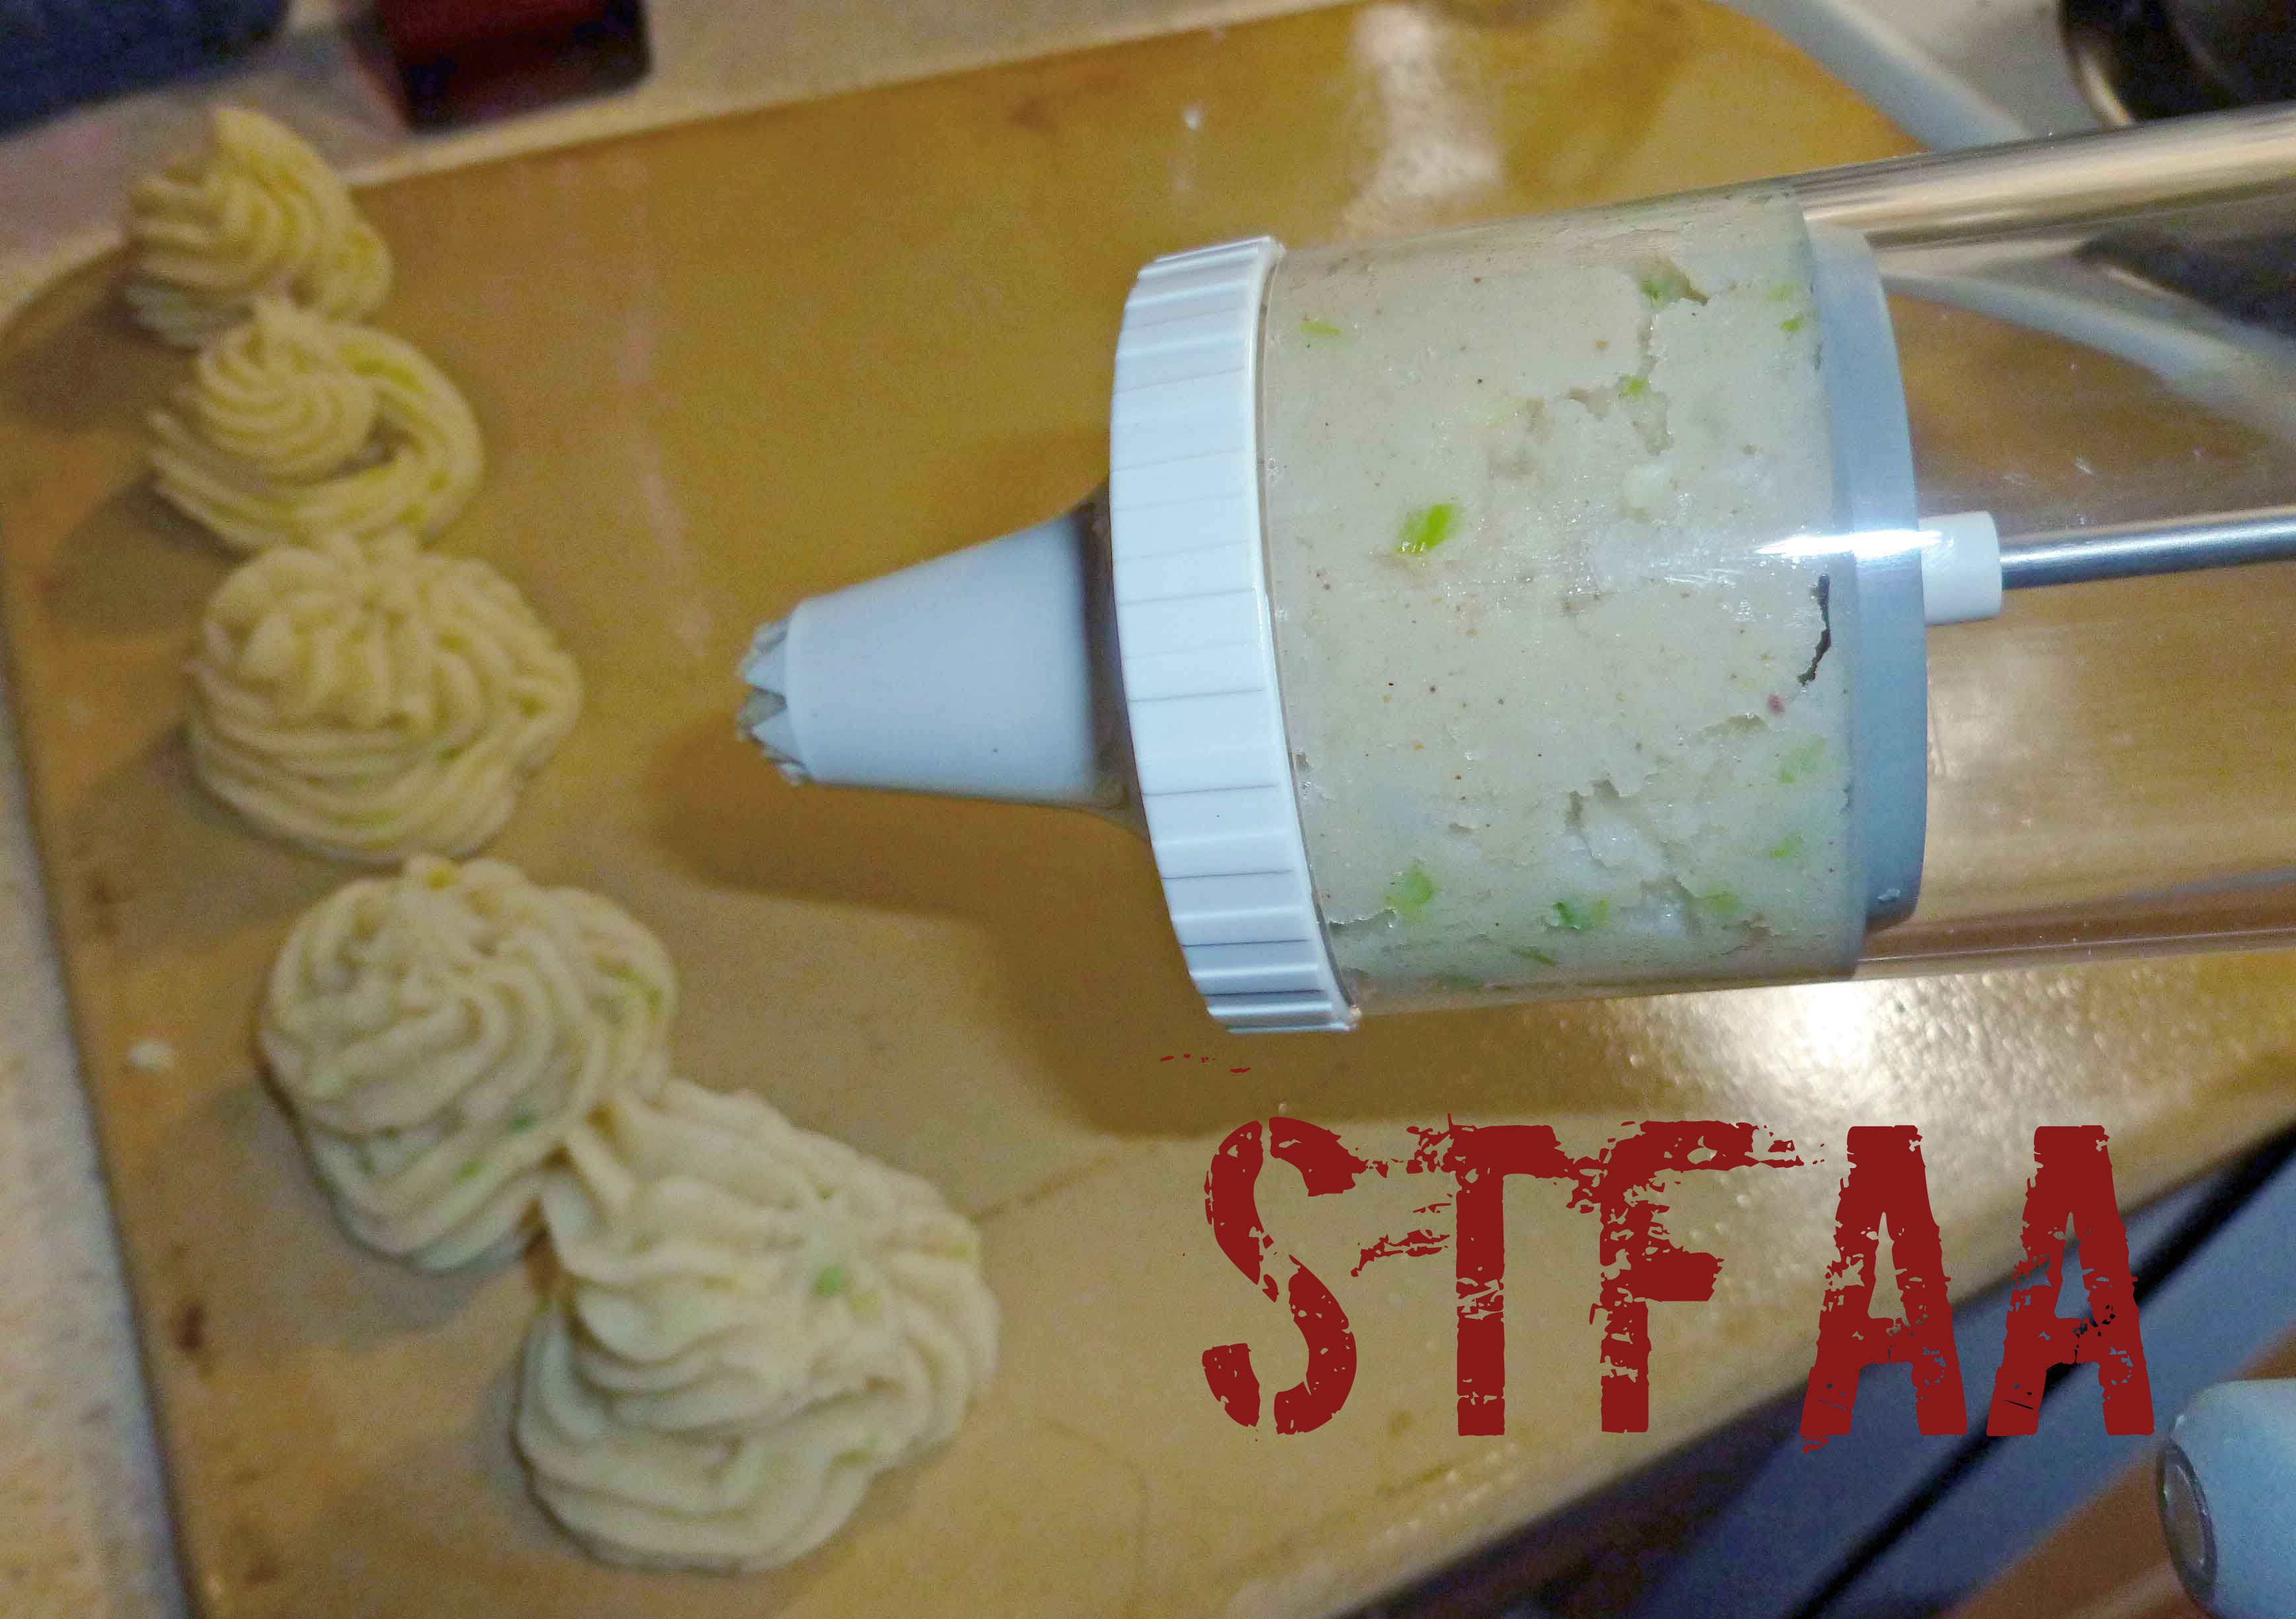
You can also mix ingredients together manually but I used a stand mixer. Add all ingredients except the potatoes to the mixer bowl, and stir to combine well. Add the potatoes and mash them a bit before using your mixer. Using your mixer and the beater blade, mix until well combined and smooth.
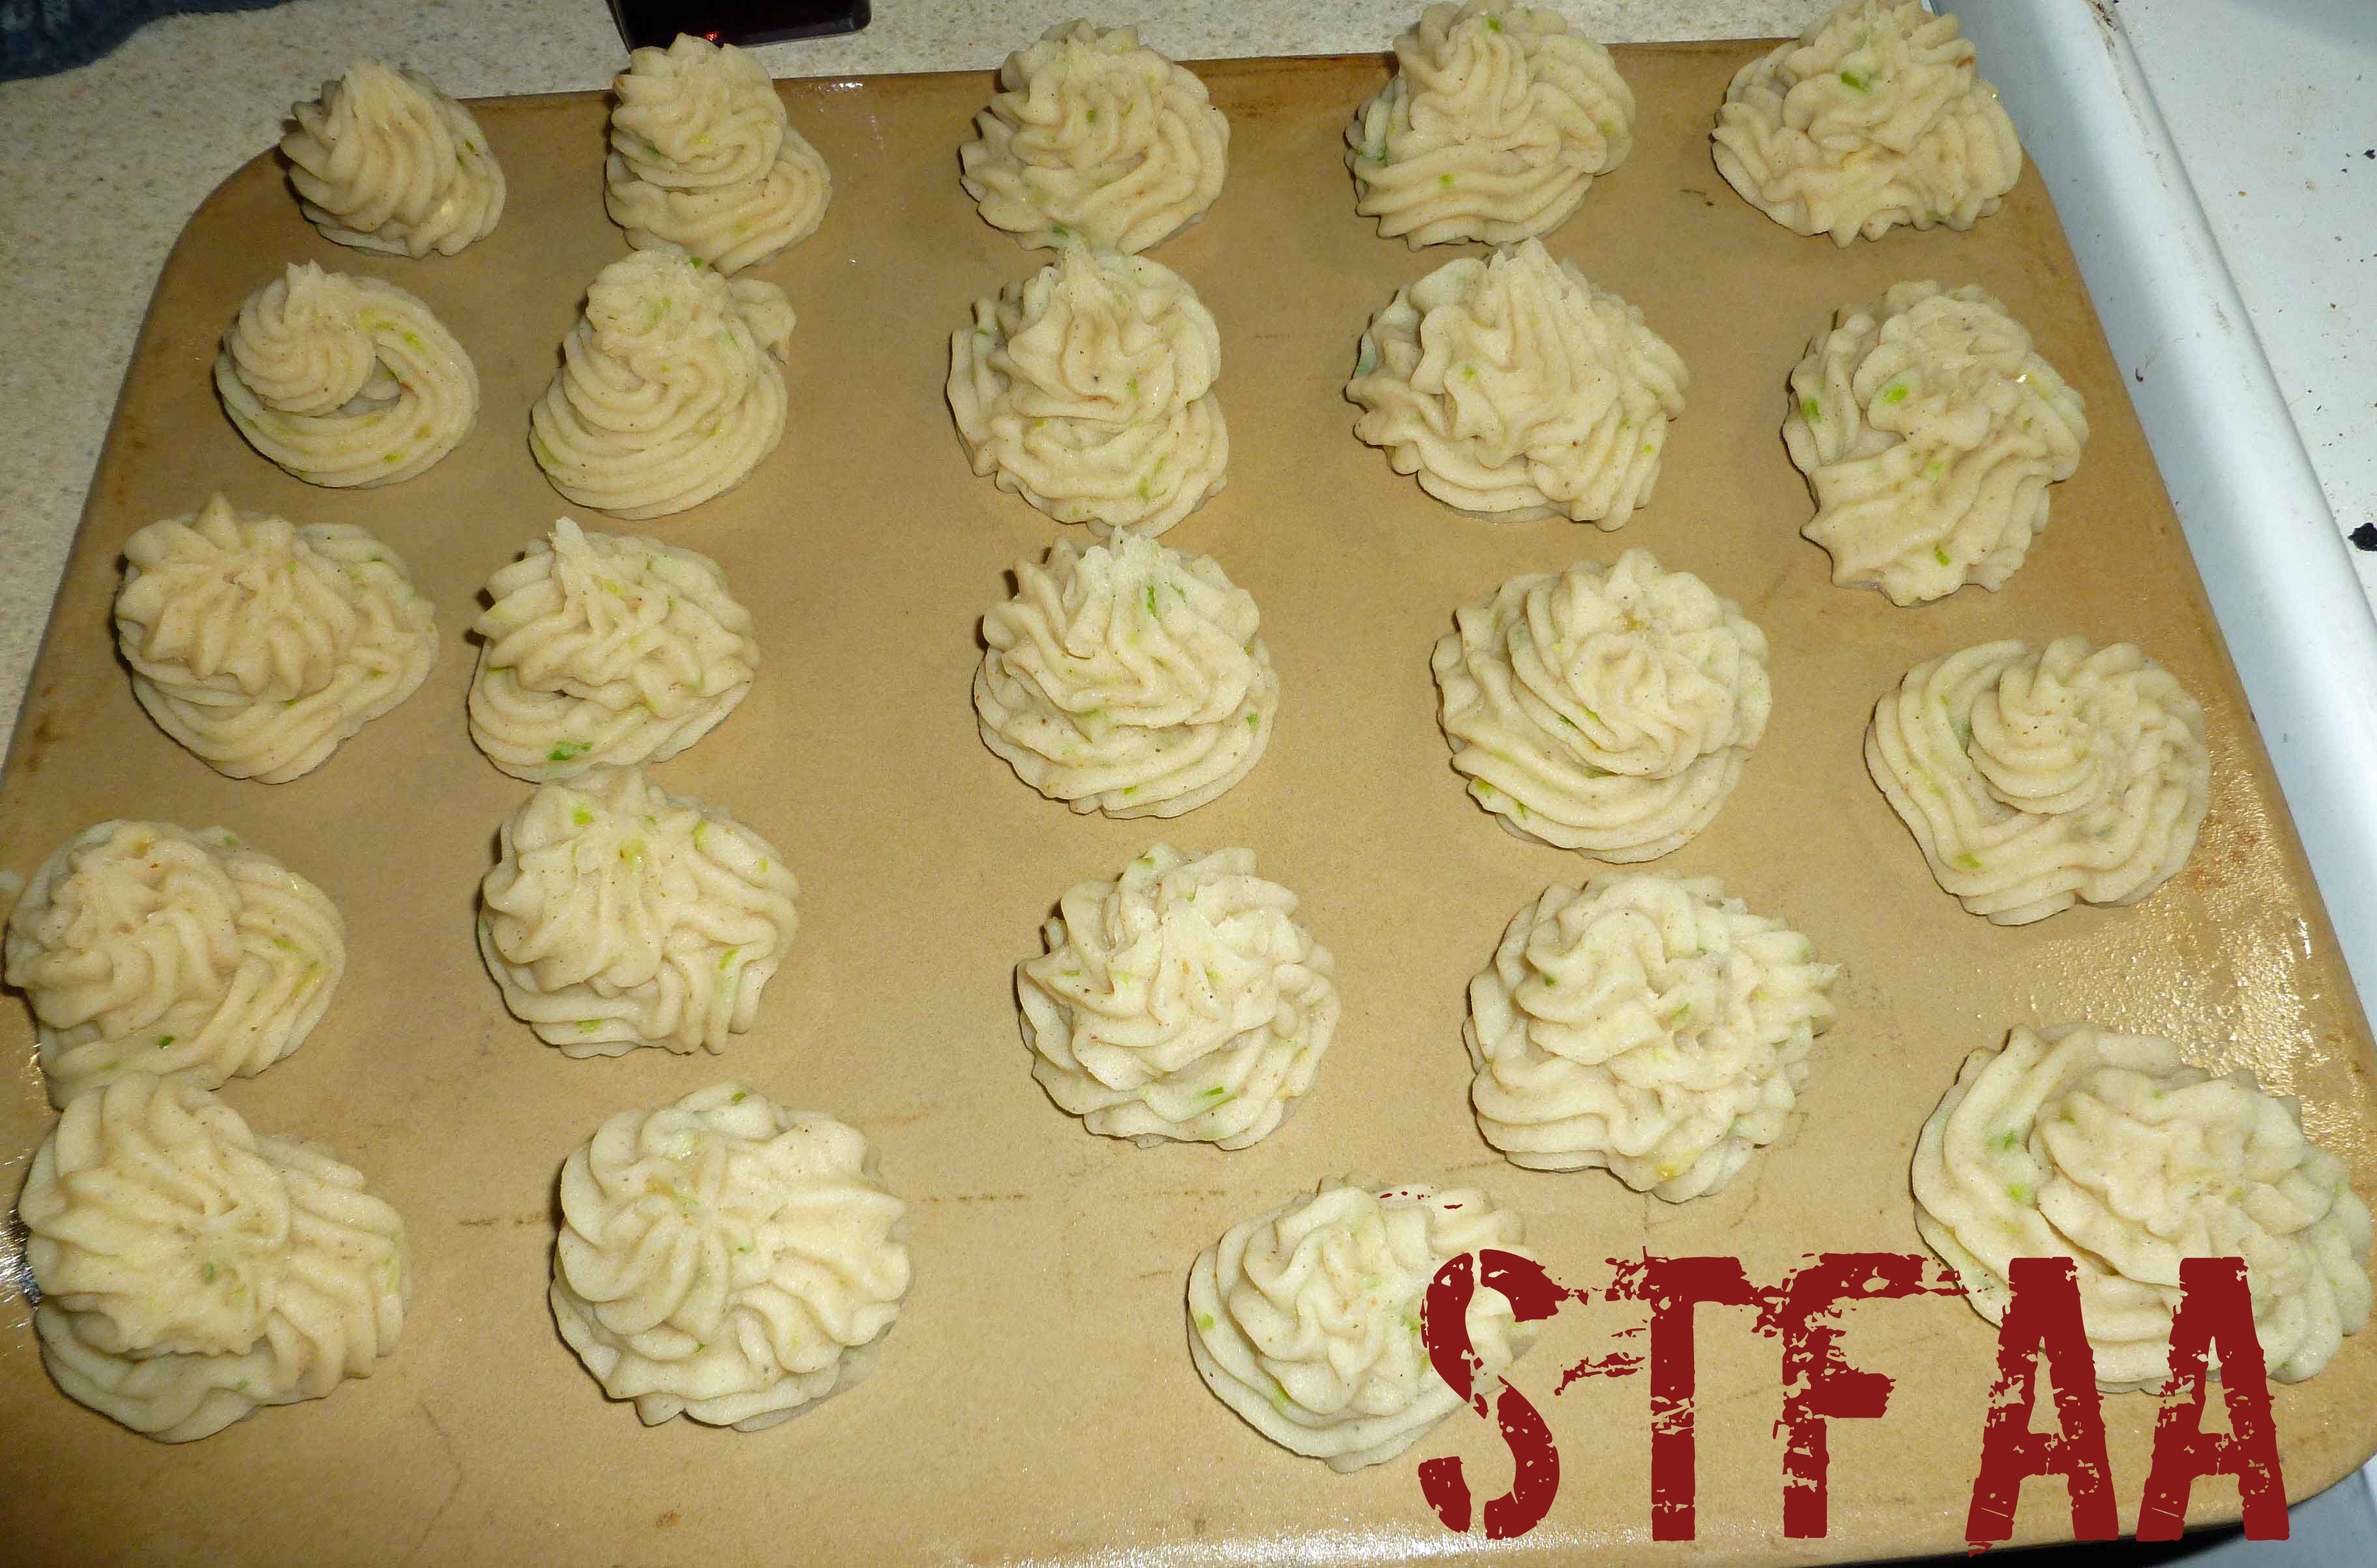
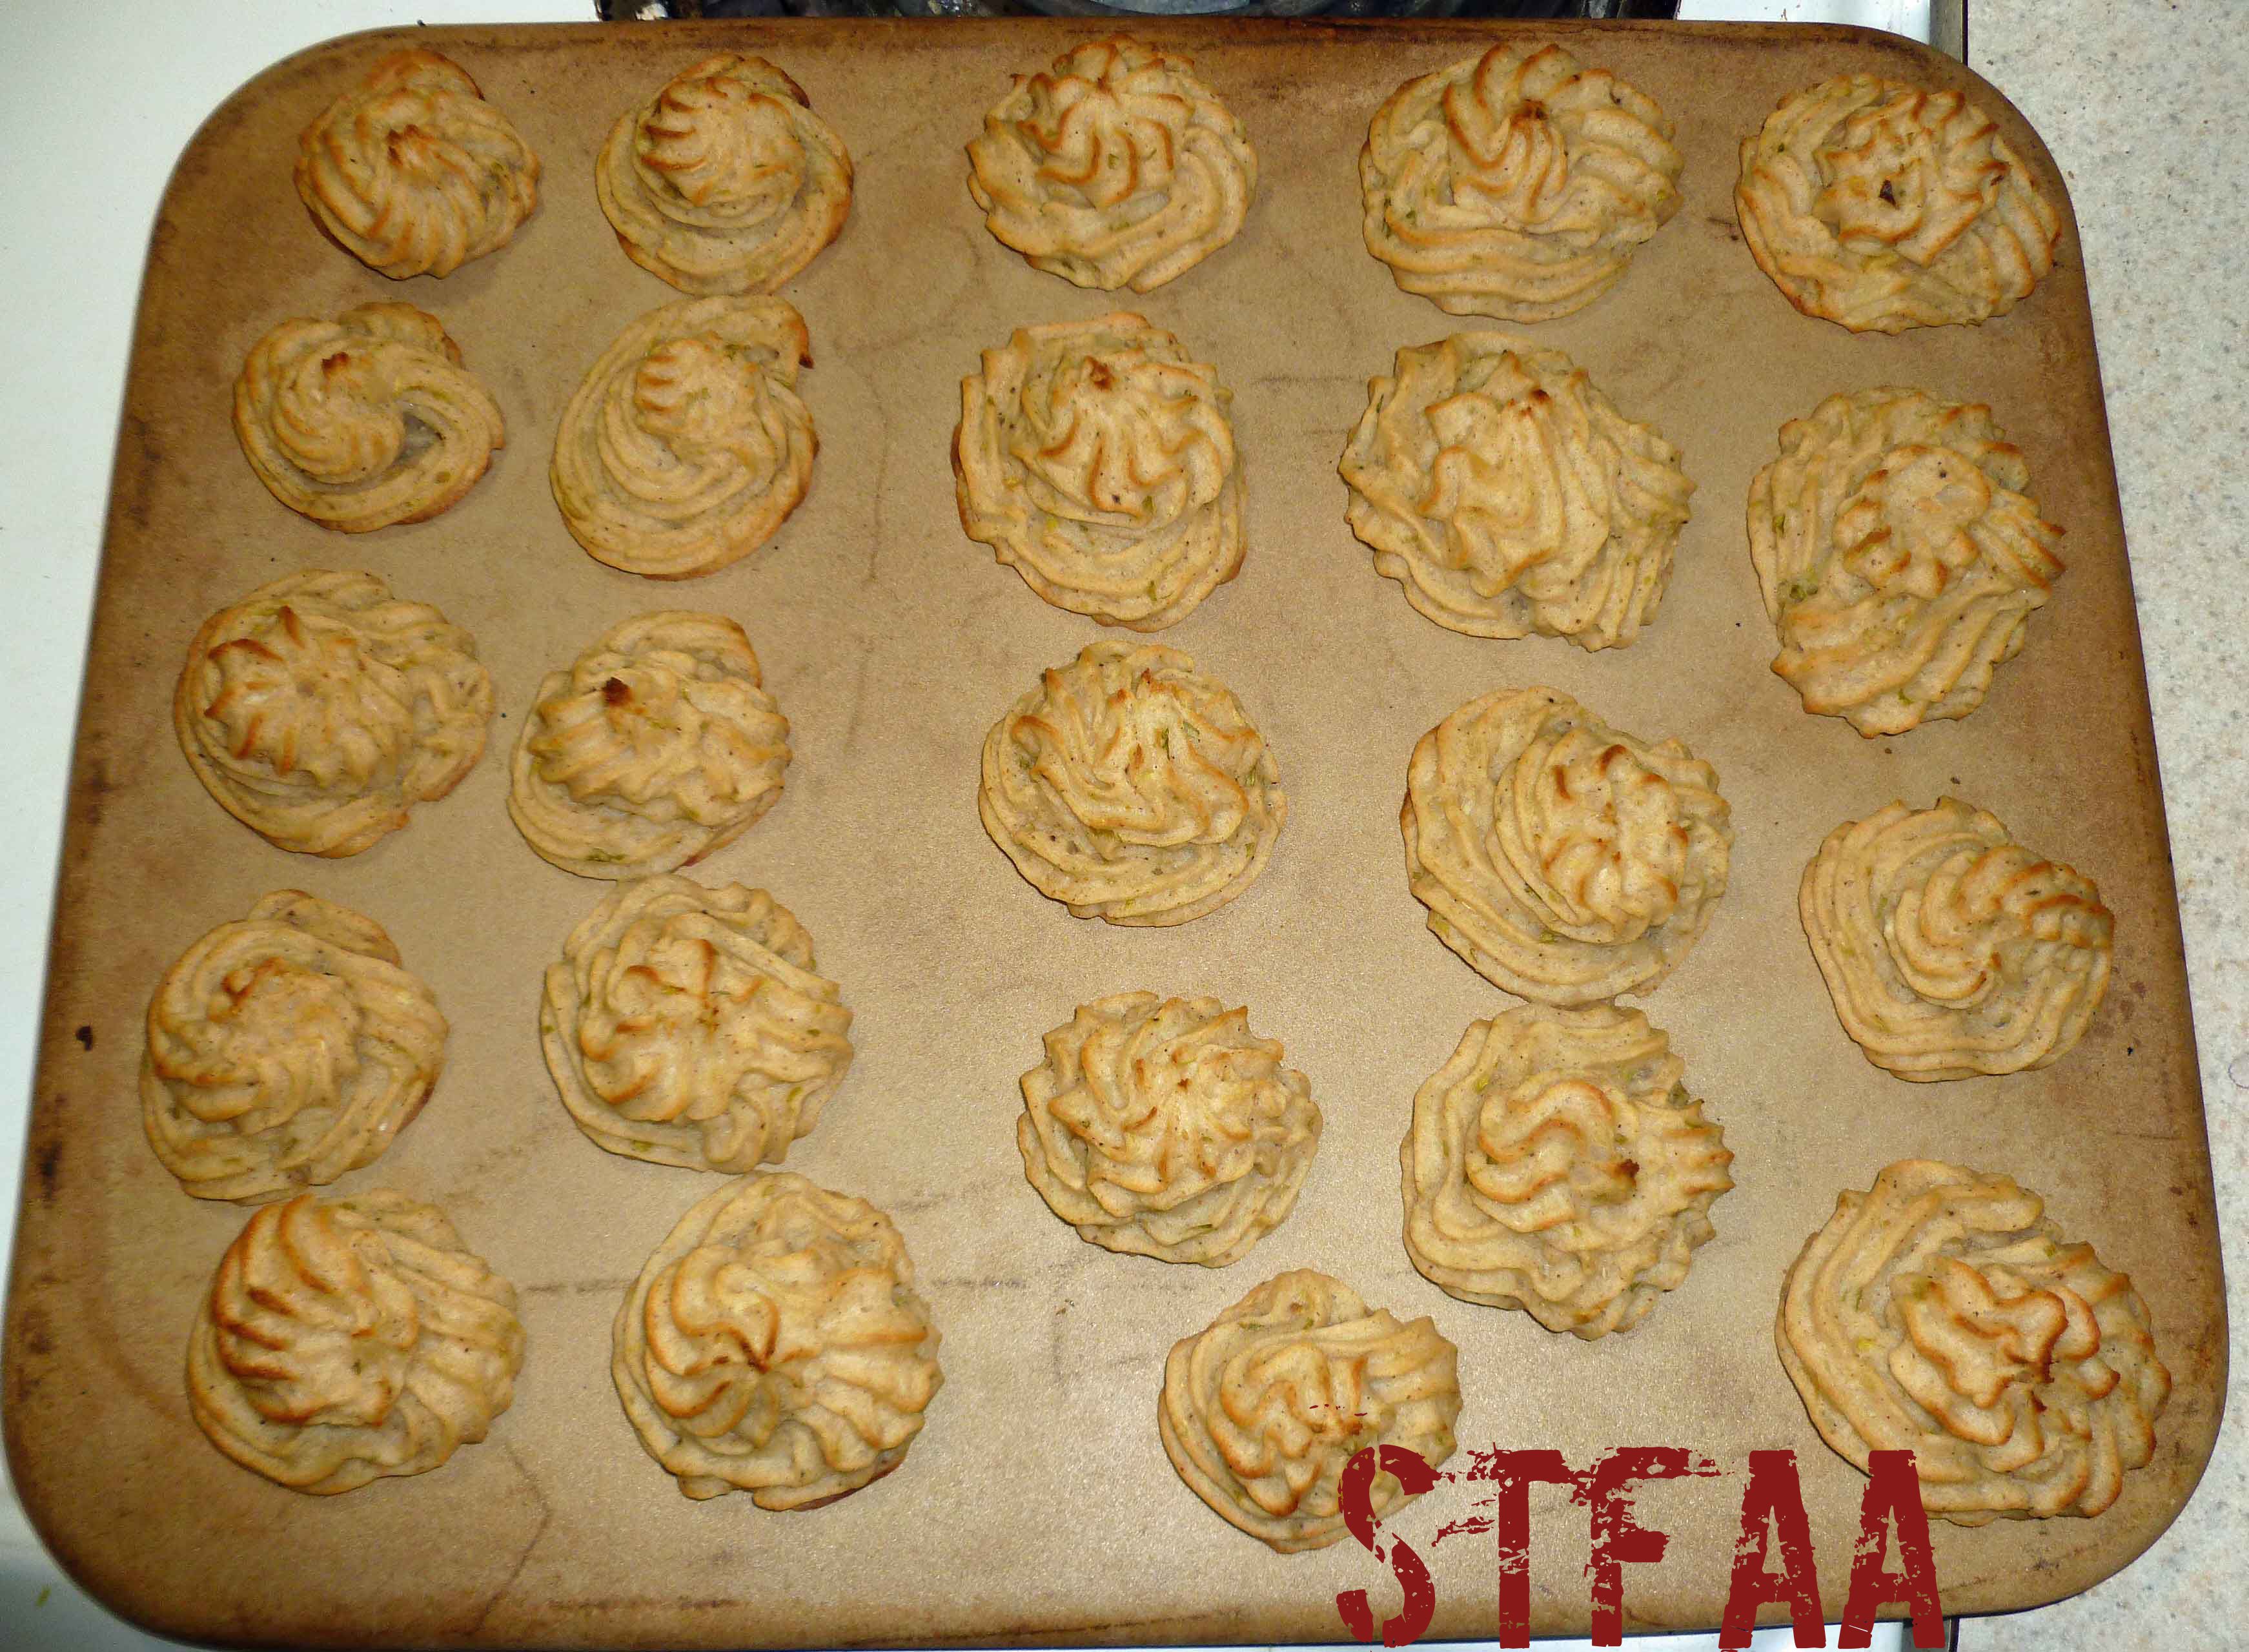
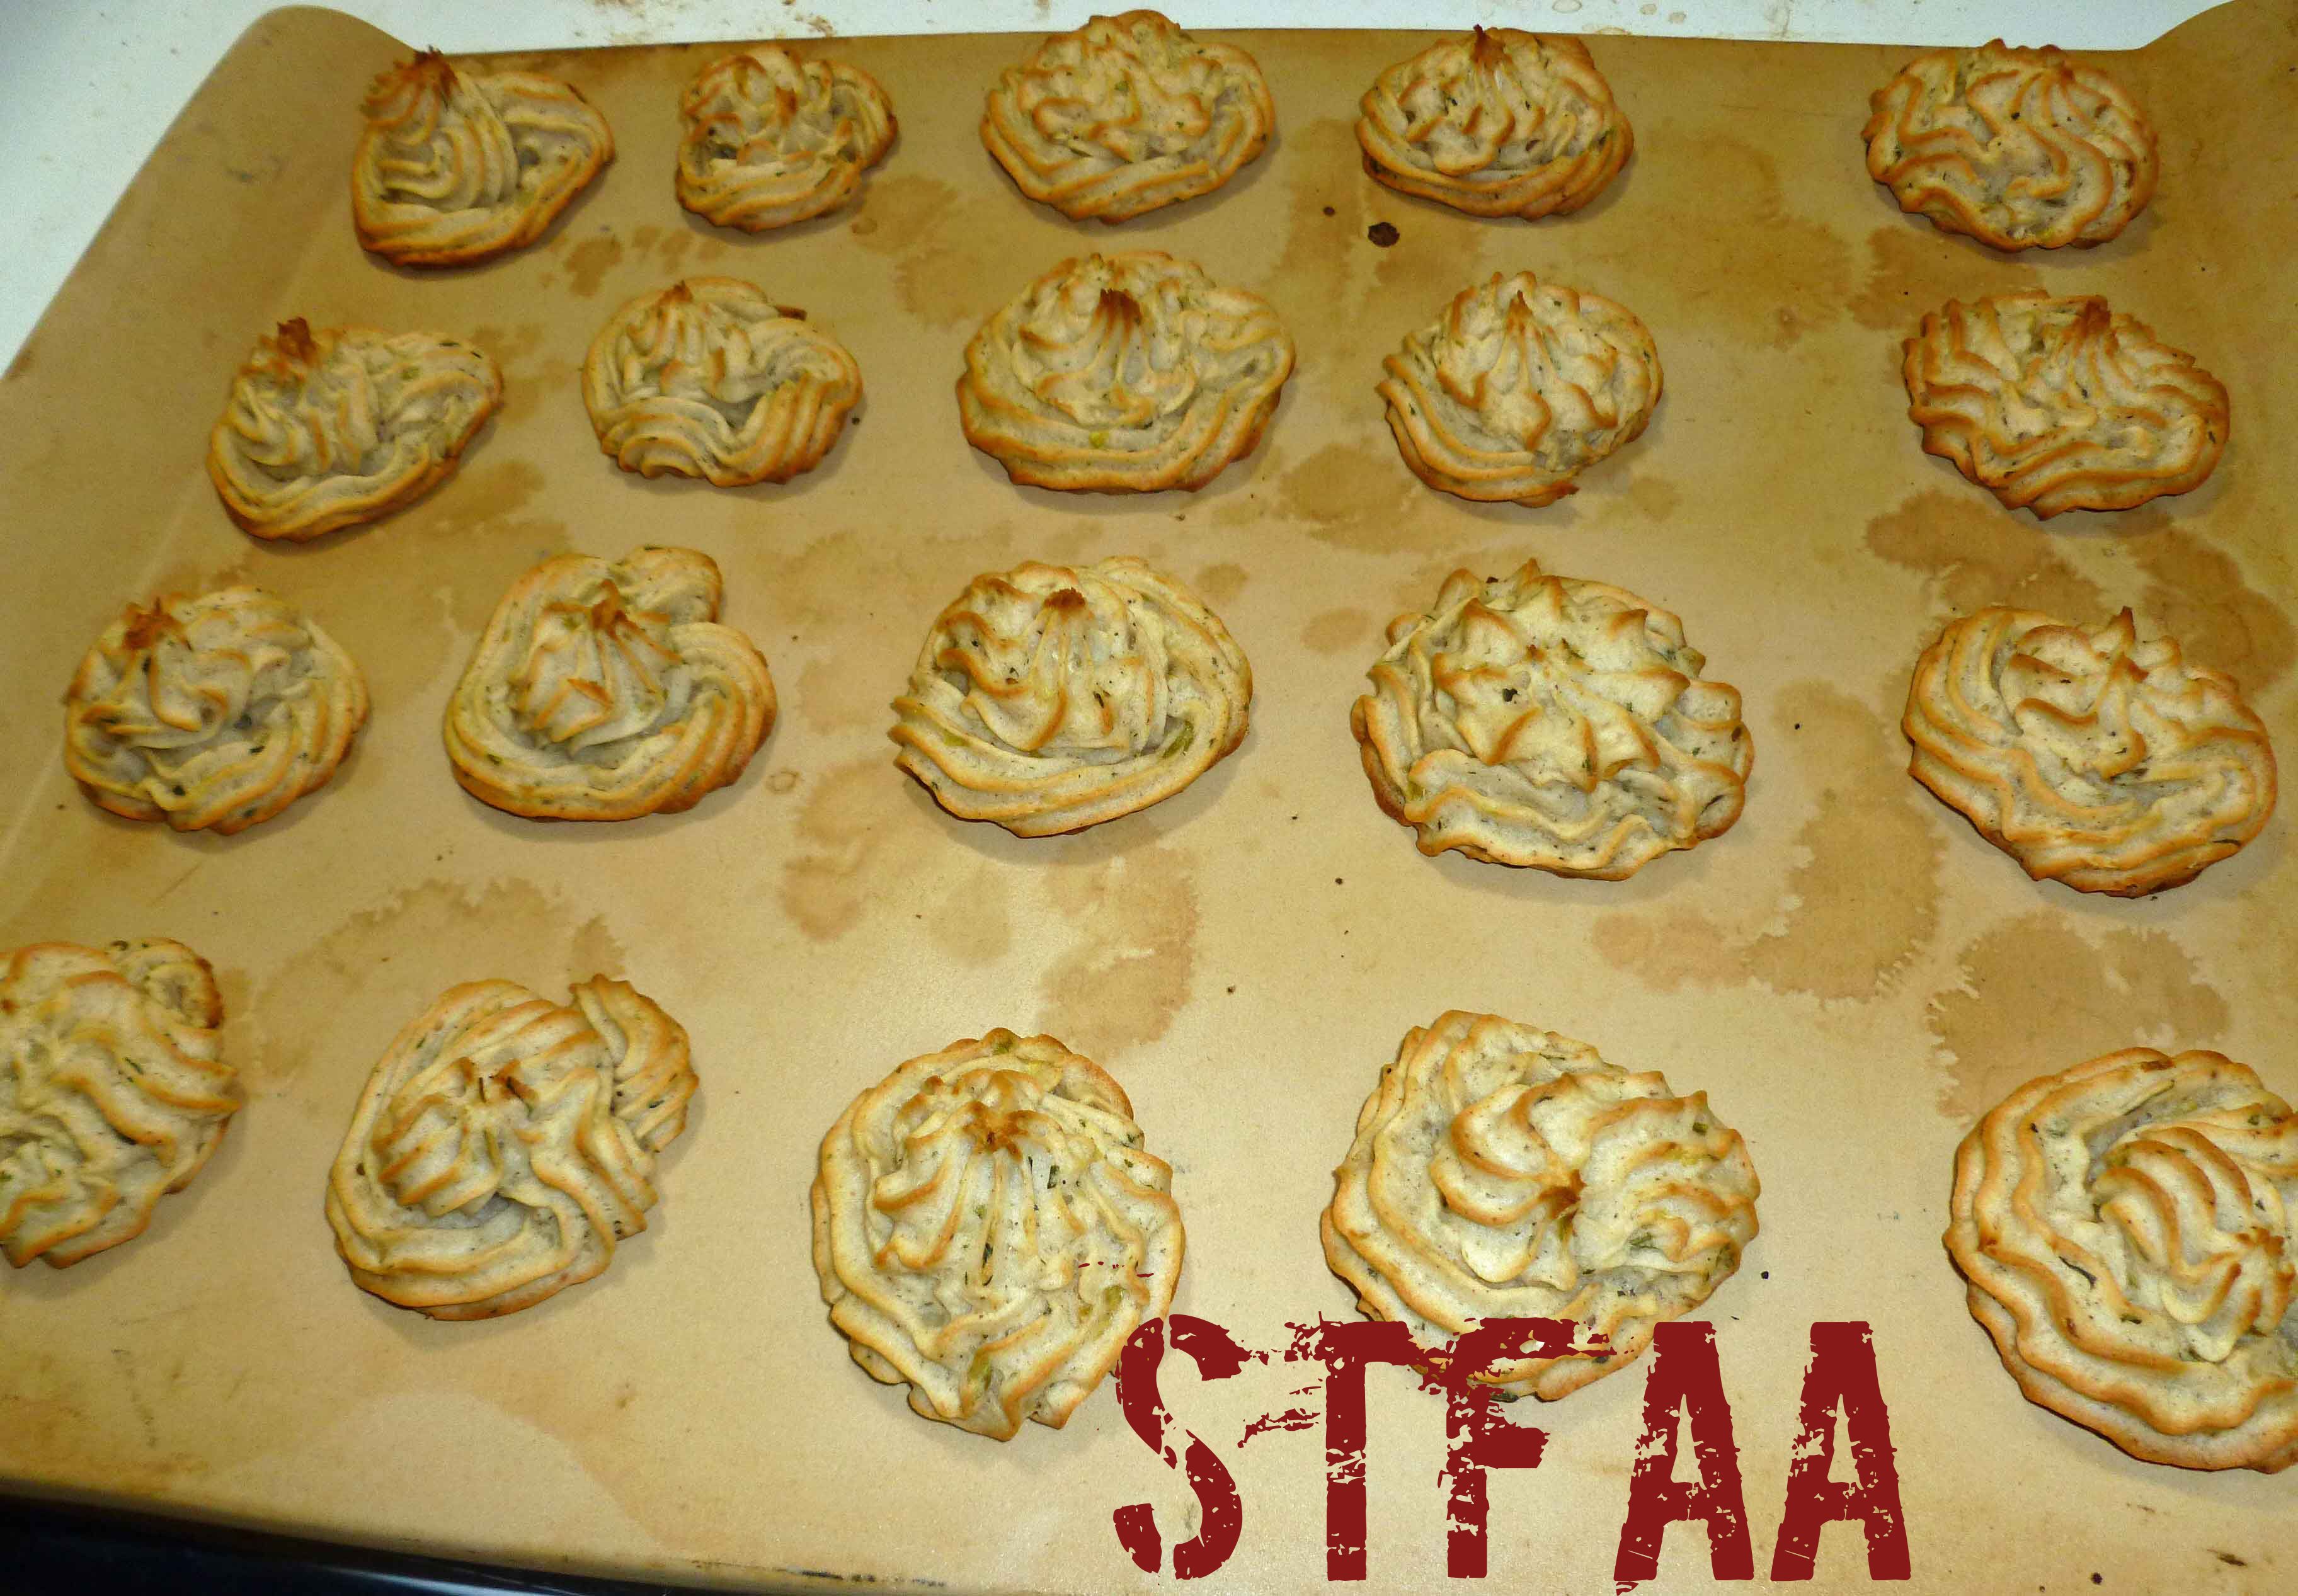
Grease a baking sheet. Spoon the potato mixture into to a pastry bag or a decorator set fitted with a large star shaped tip, and pipe the potato mixture into puffs on the baking sheet. You could also use a tablespoon or cookie scoop. Bake until golden, about 35 minutes on metal cooking sheets and 45 minutes on stoneware.
Scallions, garlic and jalapeno chopped finelyAll ingredients except potato combined well in mixer bowlPotatoes mashedPotatoes mixed with other ingredients in stand mixerCompleted Potato MixturePiping potato puffs onto baking sheetSamosa Spiced Potato Puffs before bakingSamosa Spiced Potato Puffs after bakingSamosa Spiced Potato Puffs after bakingSamosa Spiced Potato Puffs


")