Notice: Function _load_textdomain_just_in_time was called incorrectly. Translation loading for the wp-ultimate-recipe domain was triggered too early. This is usually an indicator for some code in the plugin or theme running too early. Translations should be loaded at the init action or later. Please see Debugging in WordPress for more information. (This message was added in version 6.7.0.) in /home/maryzahc/public_html/adultfoodallergies.com/wp-includes/functions.php on line 6121
Veg*n Option – Page 2 – surviving the food allergy apocalypse (archive)

Tag: Veg*n Option

  • Spritz or Cookie Press Cookies – Gluten-Free, Dairy-Free, and Egg-Free

    Spritz or Cookie Press Cookies – Gluten-Free, Dairy-Free, and Egg-Free

    Spritz or Cookie Press Cookies - Gluten-Free, Dairy-Free, and Egg-Free
    Spritz or Cookie Press Cookies – Gluten-Free, Dairy-Free, and Egg-Free

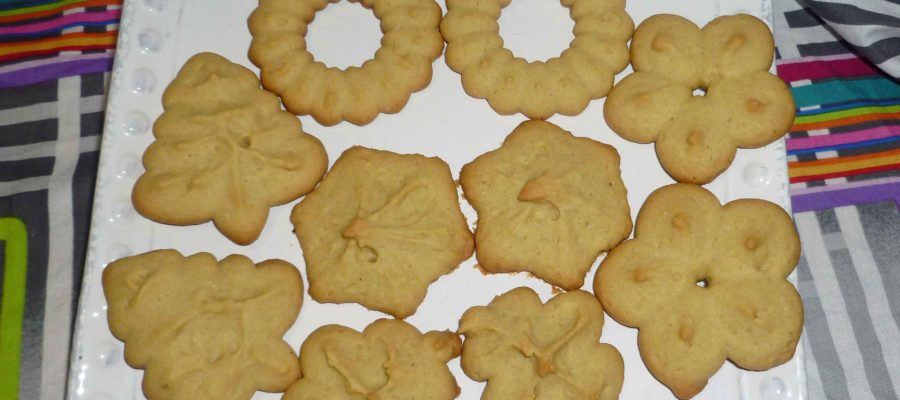
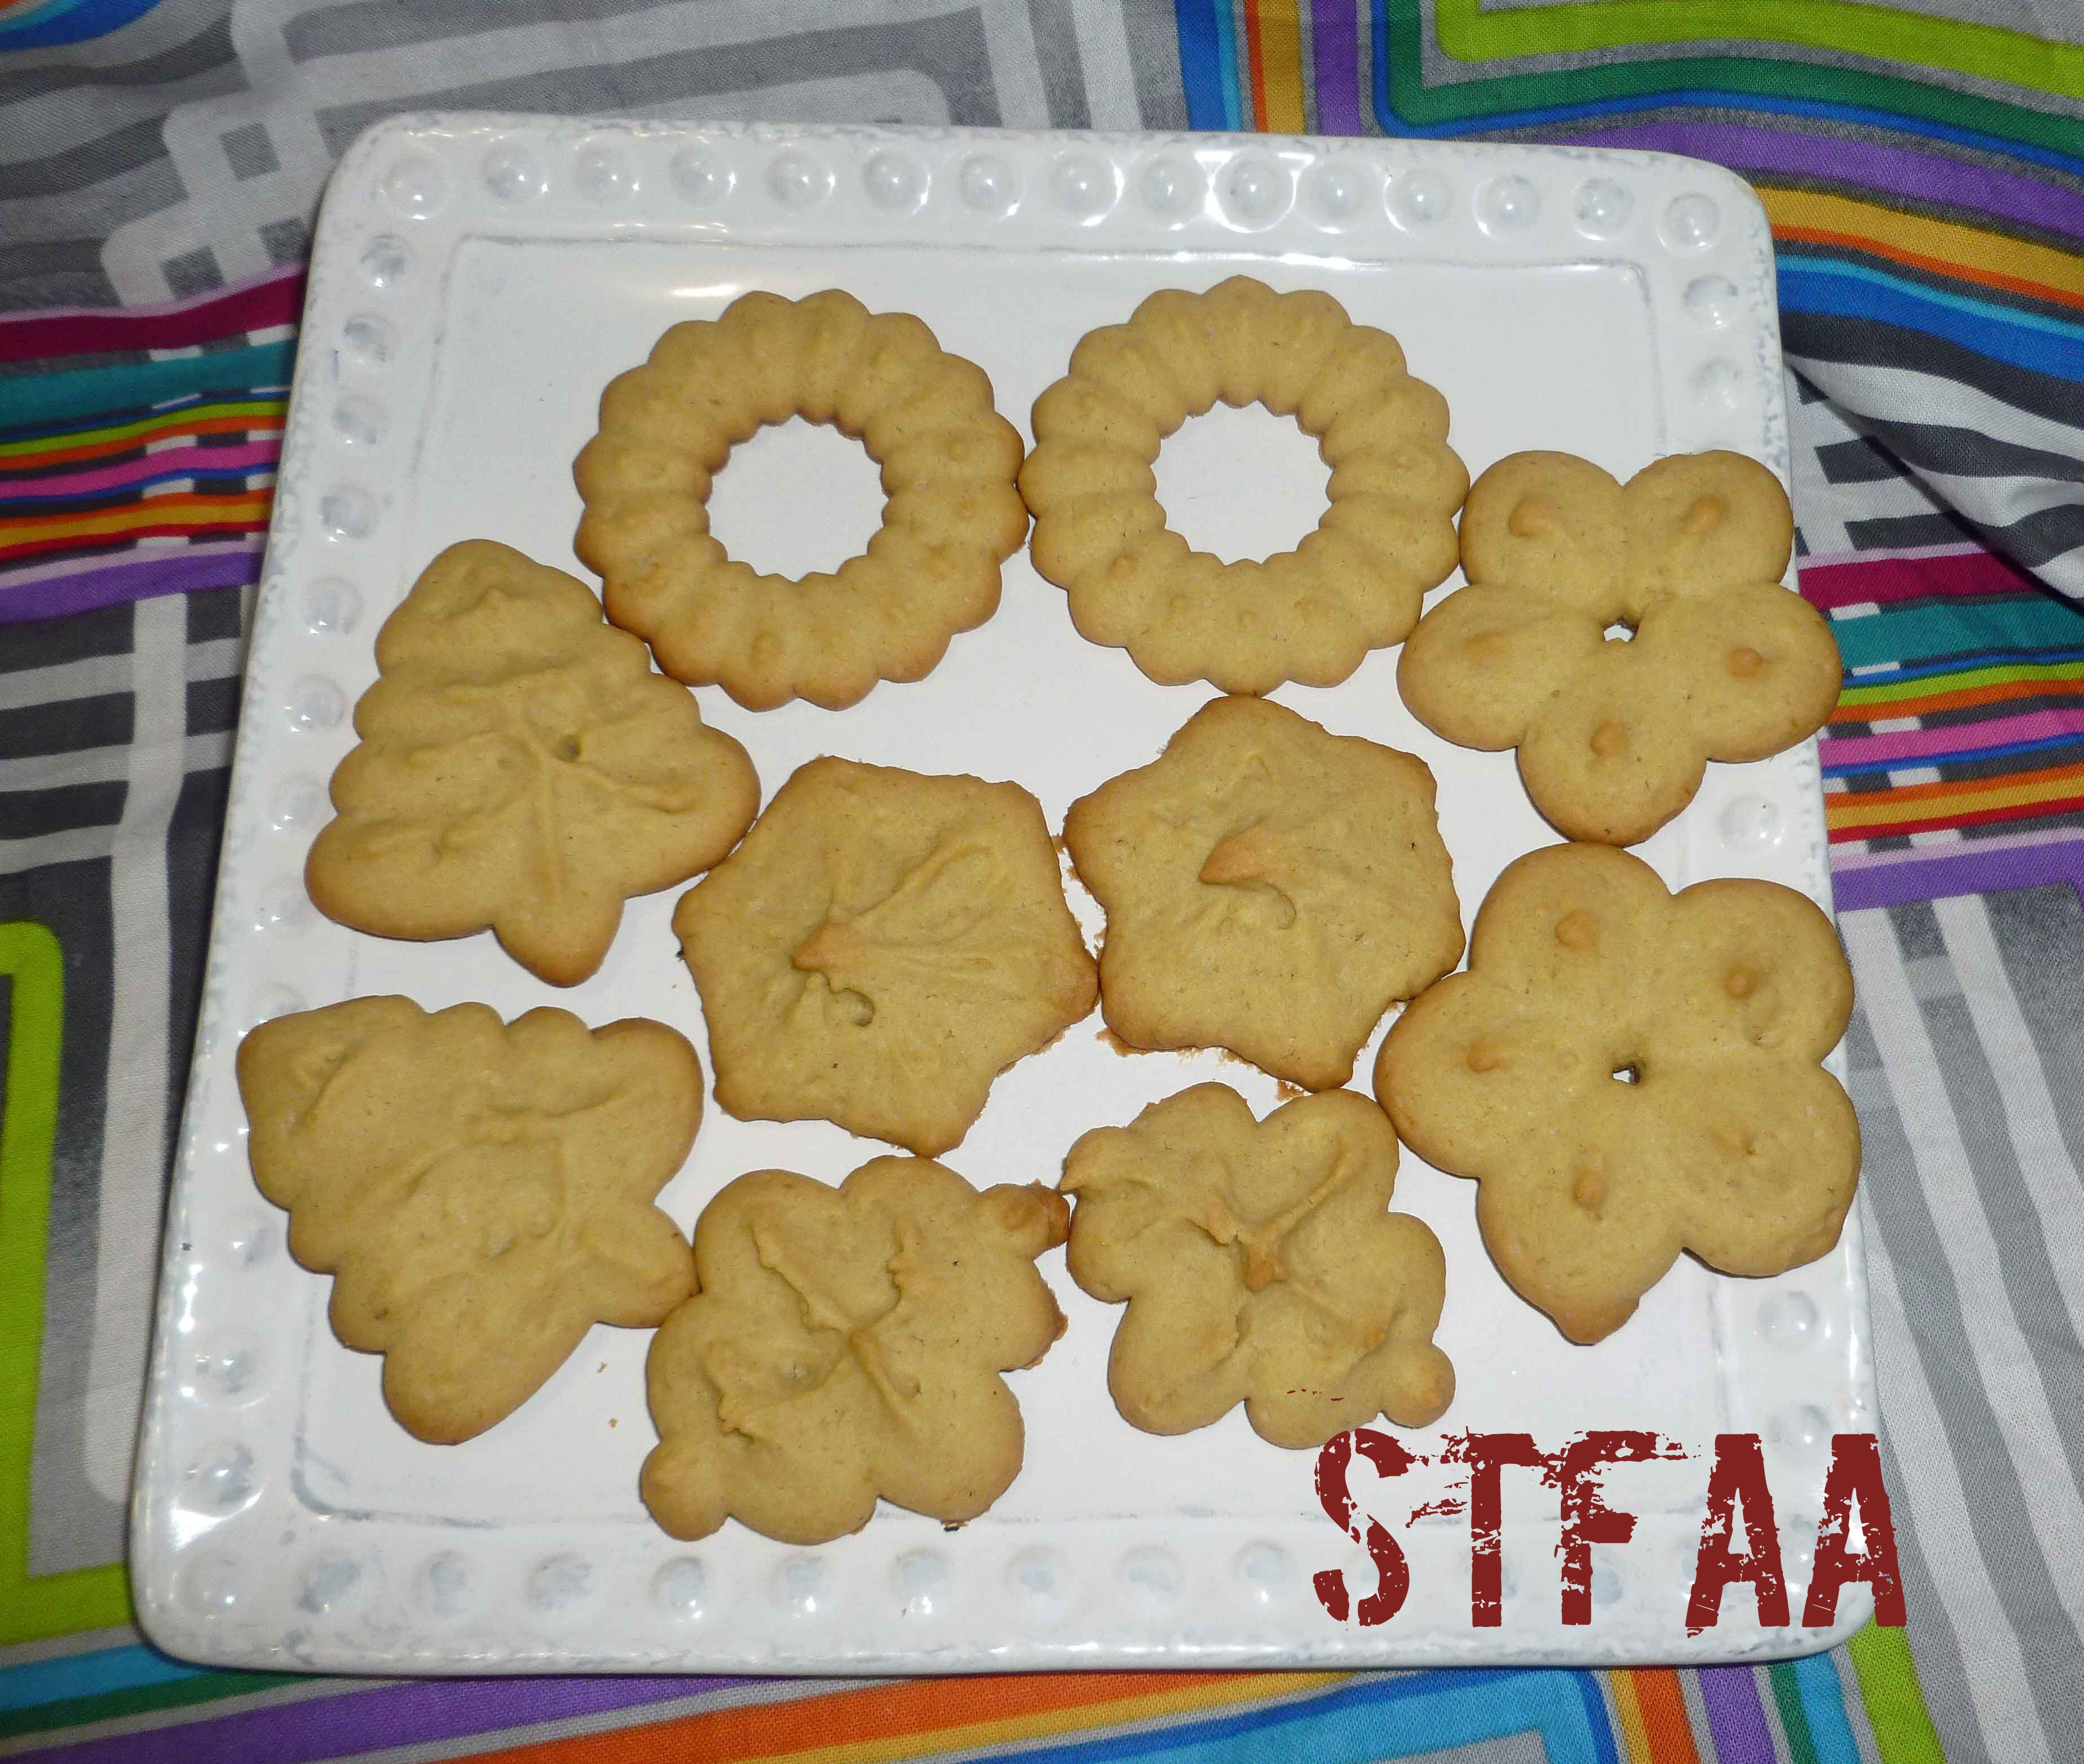
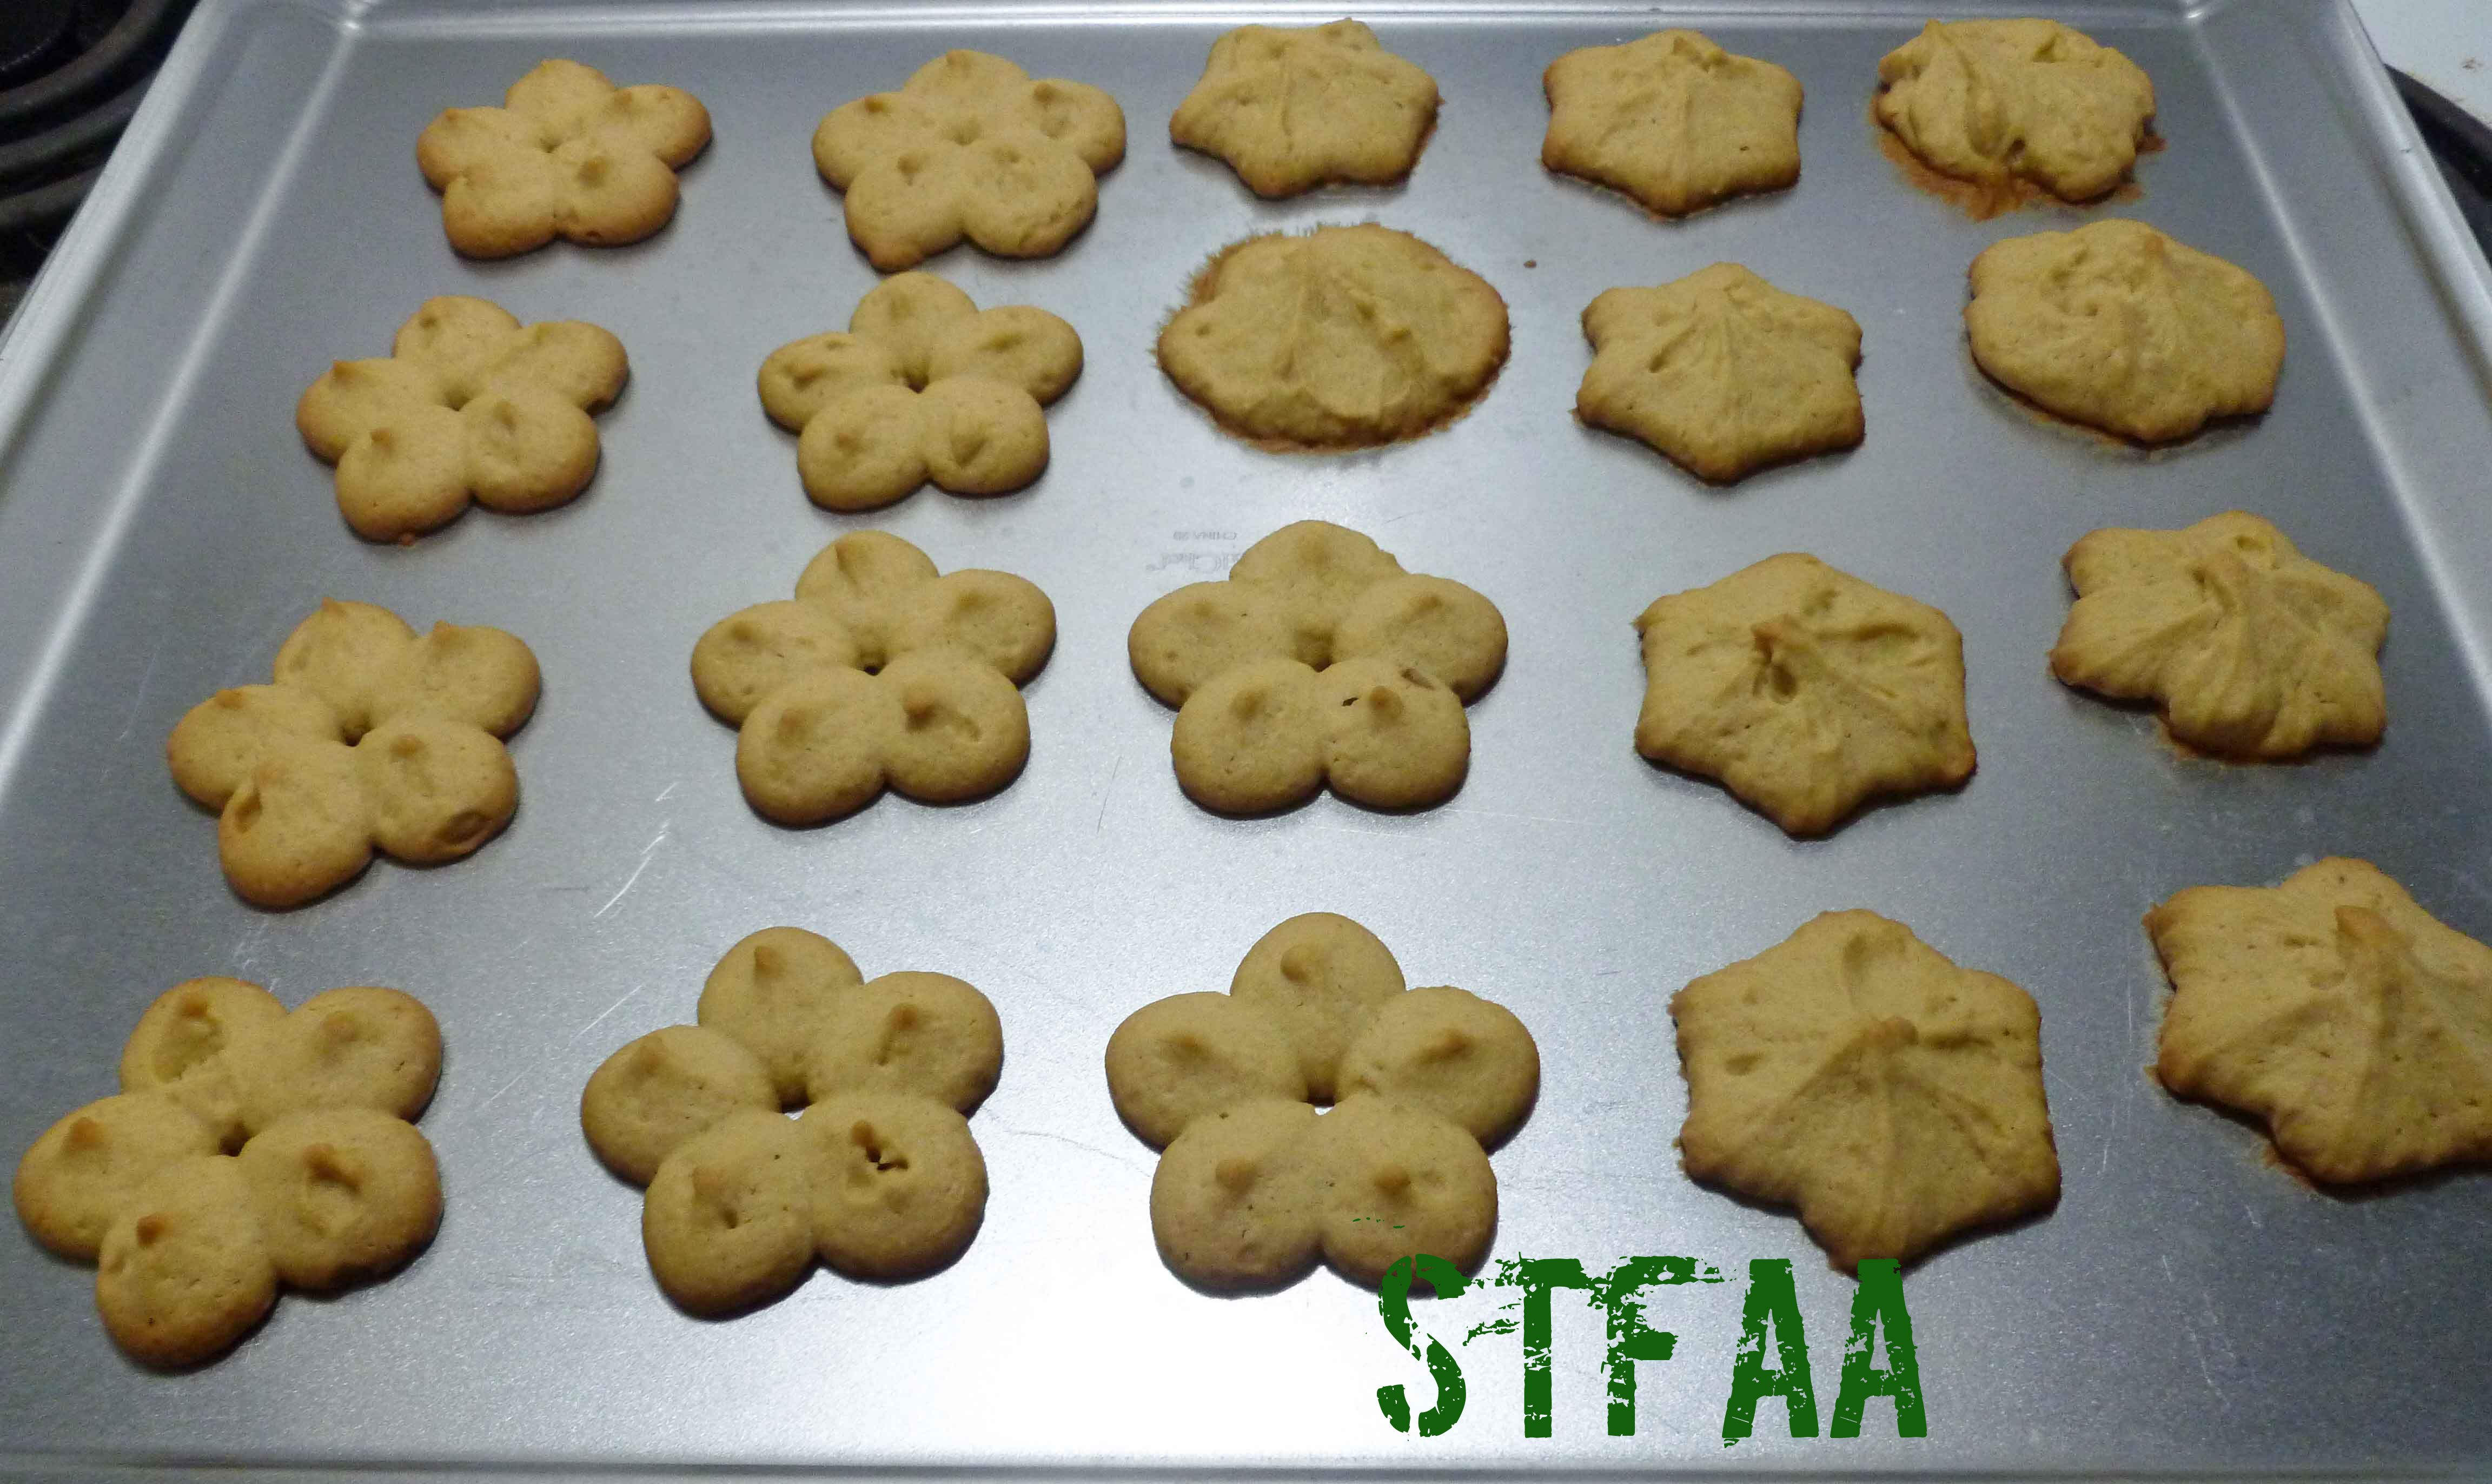
    I’m not a baker in general. MaryKate is a much better baker than I am and she’s more into it. I’m more of a “get an appetizer instead of dessert” kind of woman. But around the holidays I kind of want some sort of cookie. A couple of weeks ago when I was developing my Homemade Pasta, Gluten-Free, Vegan & Gum-Free recipe, I was going through my assortment of kitchen toys looking for the pasta attachments for the KitchenAid, and I came across my Pampered Chef Cookie Press that I bought years ago out of nostalgia. My mom had one (which she probably doesn’t even remember having) that I used to use when I was a kid. And after I found it, I kept thinking about it, so I developed this recipe. It’s probably the closest I will ever get to having a shortbread buttery kind of cookie again. If you don’t have a cookie press, Pampered Chef has one that is a twist style now, but I like the gun ones better. Here’s an example of the gun style (no affiliation with Amazon), which is very similar to the one I have.

    Full disclosure: I’m using psyllium husk in this recipe instead of chia, because chia is currently on the suspect list as a potential new allergy. Sigh. If you can still use chia (or flax, I’m allergic to flax too), I’m pretty sure that would work too. Also, I’m using my Homemade Margarine, New and Improved in this recipe because it’s all I have (note: I use cashew milk in my margarine recipe, but you can use any non-dairy milk in it). If you don’t have a corn or coconut allergy or react to palm, and you can use either Earth Balance margarine or a vegetable shortening, give it a go. If you decide to use shortening, I’d add a tablespoon of water or non-dairy milk because shortening is dryer than margarine.

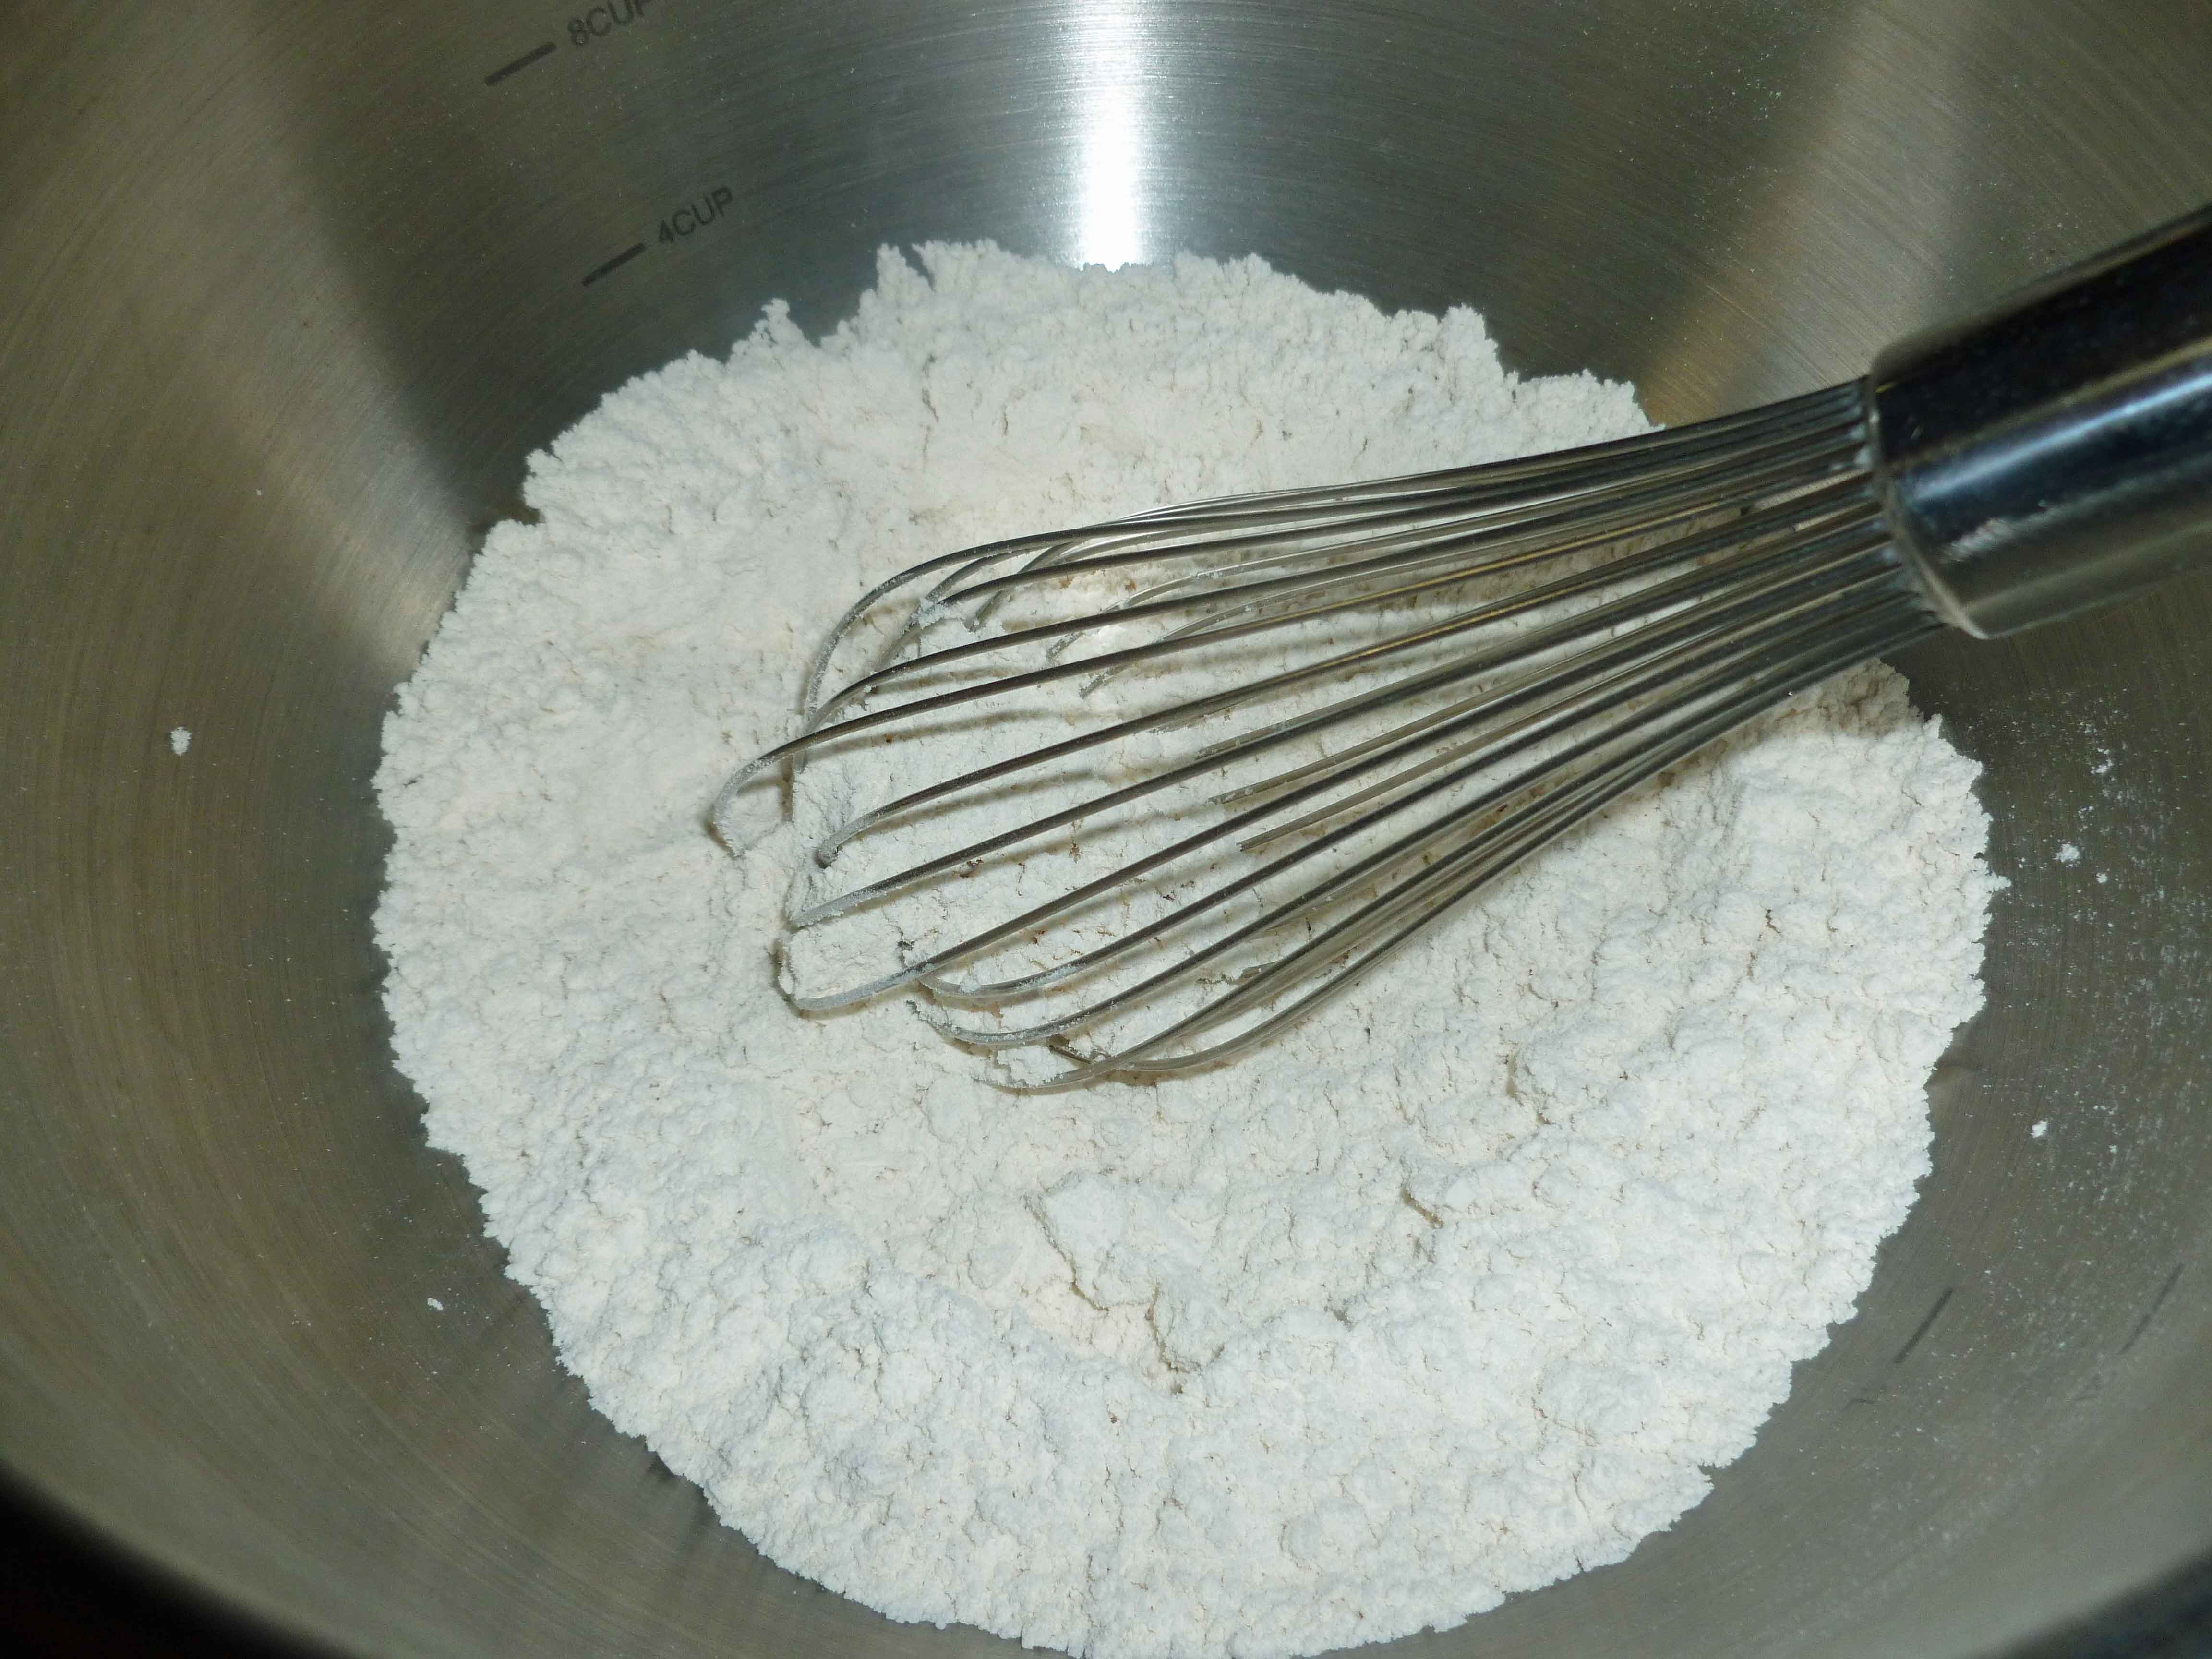
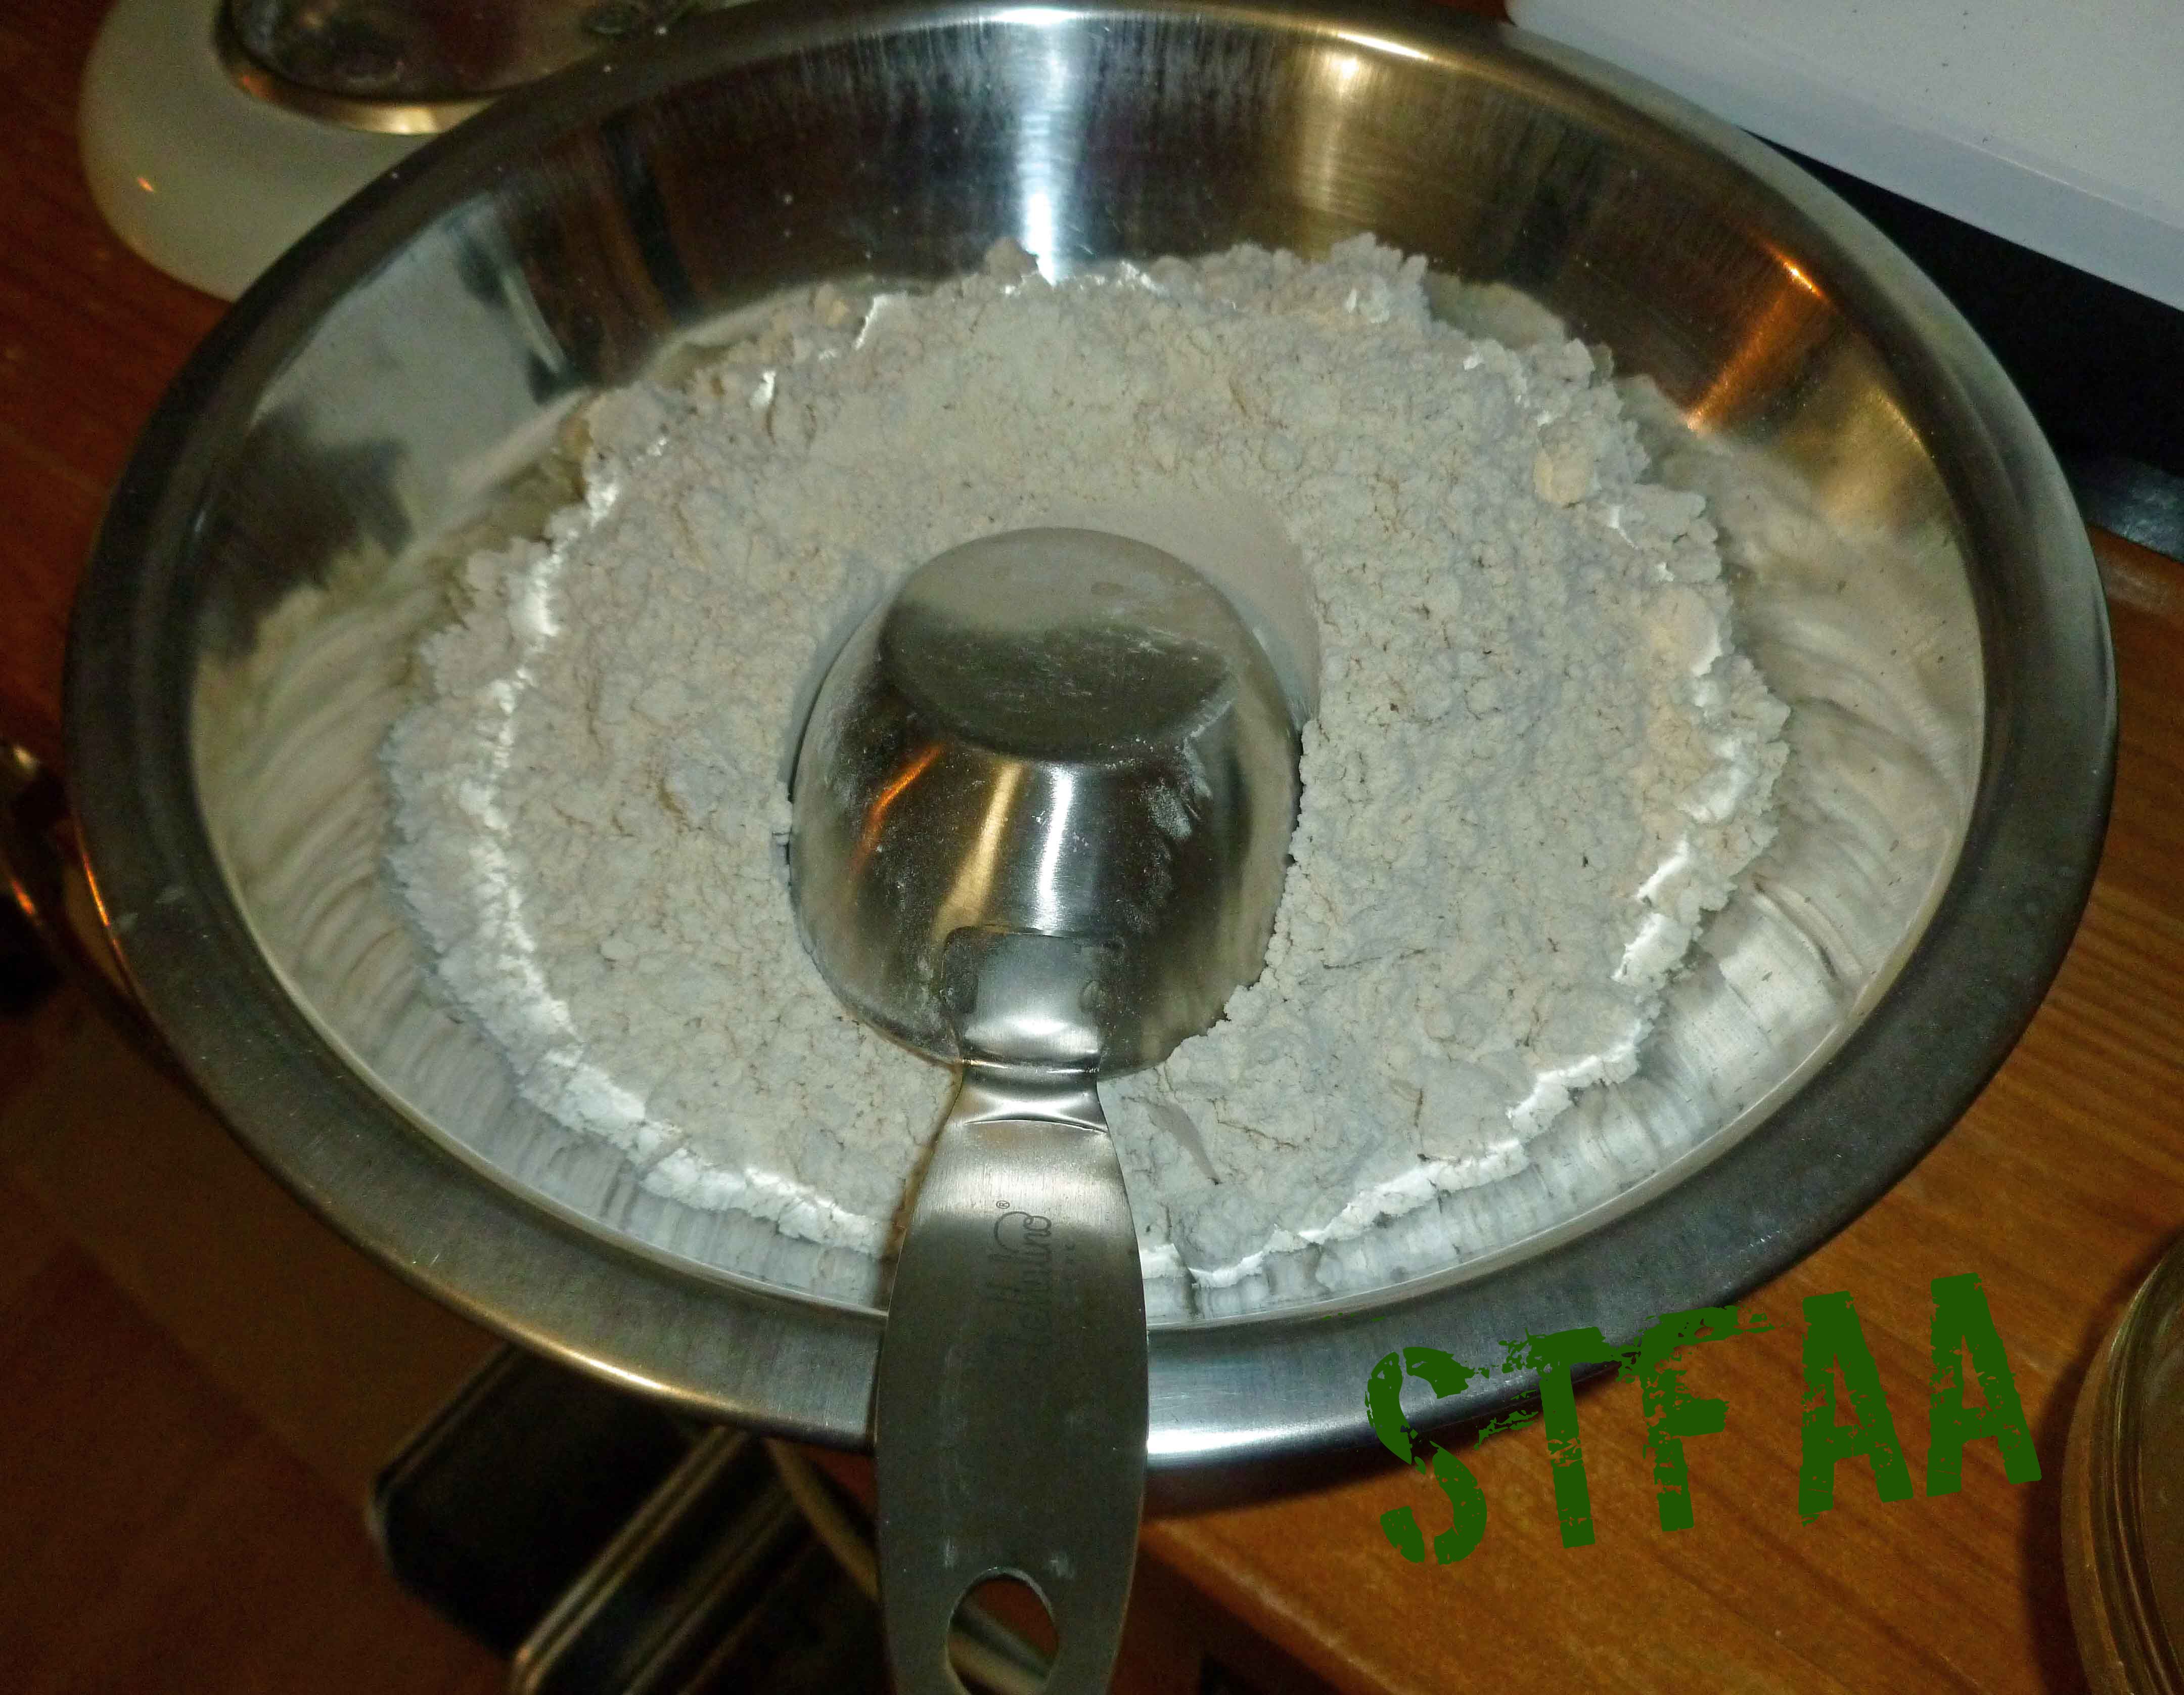
    I modified my normal all purpose gluten-free flour blend because the millet gave the cookies more of a whole grain taste than I was going for. The mix below makes 4 1/2 cups, but you only need 3 1/2 cups for the cookies.


    Notice: Trying to access array offset on value of type bool in /home/maryzahc/public_html/adultfoodallergies.com/wp-content/plugins/wp-ultimate-recipe/helpers/models/recipe.php on line 254
    Gluten-Free Flour Blend for Spritz or Cookie Press Cookies
    Print Recipe
    Servings Prep Time
    4 1/2 cups 5 minutes
    Servings Prep Time
    4 1/2 cups 5 minutes
    Gluten-Free Flour Blend for Spritz or Cookie Press Cookies
    Print Recipe
    Servings Prep Time
    4 1/2 cups 5 minutes
    Servings Prep Time
    4 1/2 cups 5 minutes
    Ingredients
    • 1 1/2 cups sorghum flour
    • 1 1/2 cups oat flour
    • 1 cup tapioca starch
    • 1/2 cup arrowroot starch
    Servings: cups
    Instructions
    1. Measure all ingredients into a large bowl and whisk together. Store in a tightly sealed container.
    Share this Recipe
     
    Powered byWP Ultimate Recipe
    Gluten-Free Flour Blend for Spritz or Cookie Press Cookies
    Gluten-Free Flour Blend for Spritz or Cookie Press Cookies

    Notice: Trying to access array offset on value of type bool in /home/maryzahc/public_html/adultfoodallergies.com/wp-content/plugins/wp-ultimate-recipe/helpers/models/recipe.php on line 254
    Spritz or Cookie Press Cookies – Gluten-Free, Dairy-Free, and Egg-Free
    Print Recipe
    You can still have a holiday classic, even with allergies
    Servings Prep Time
    3-4 dozen 15 minutes
    Cook Time
    15-20 minutes
    Servings Prep Time
    3-4 dozen 15 minutes
    Cook Time
    15-20 minutes
    Ingredients
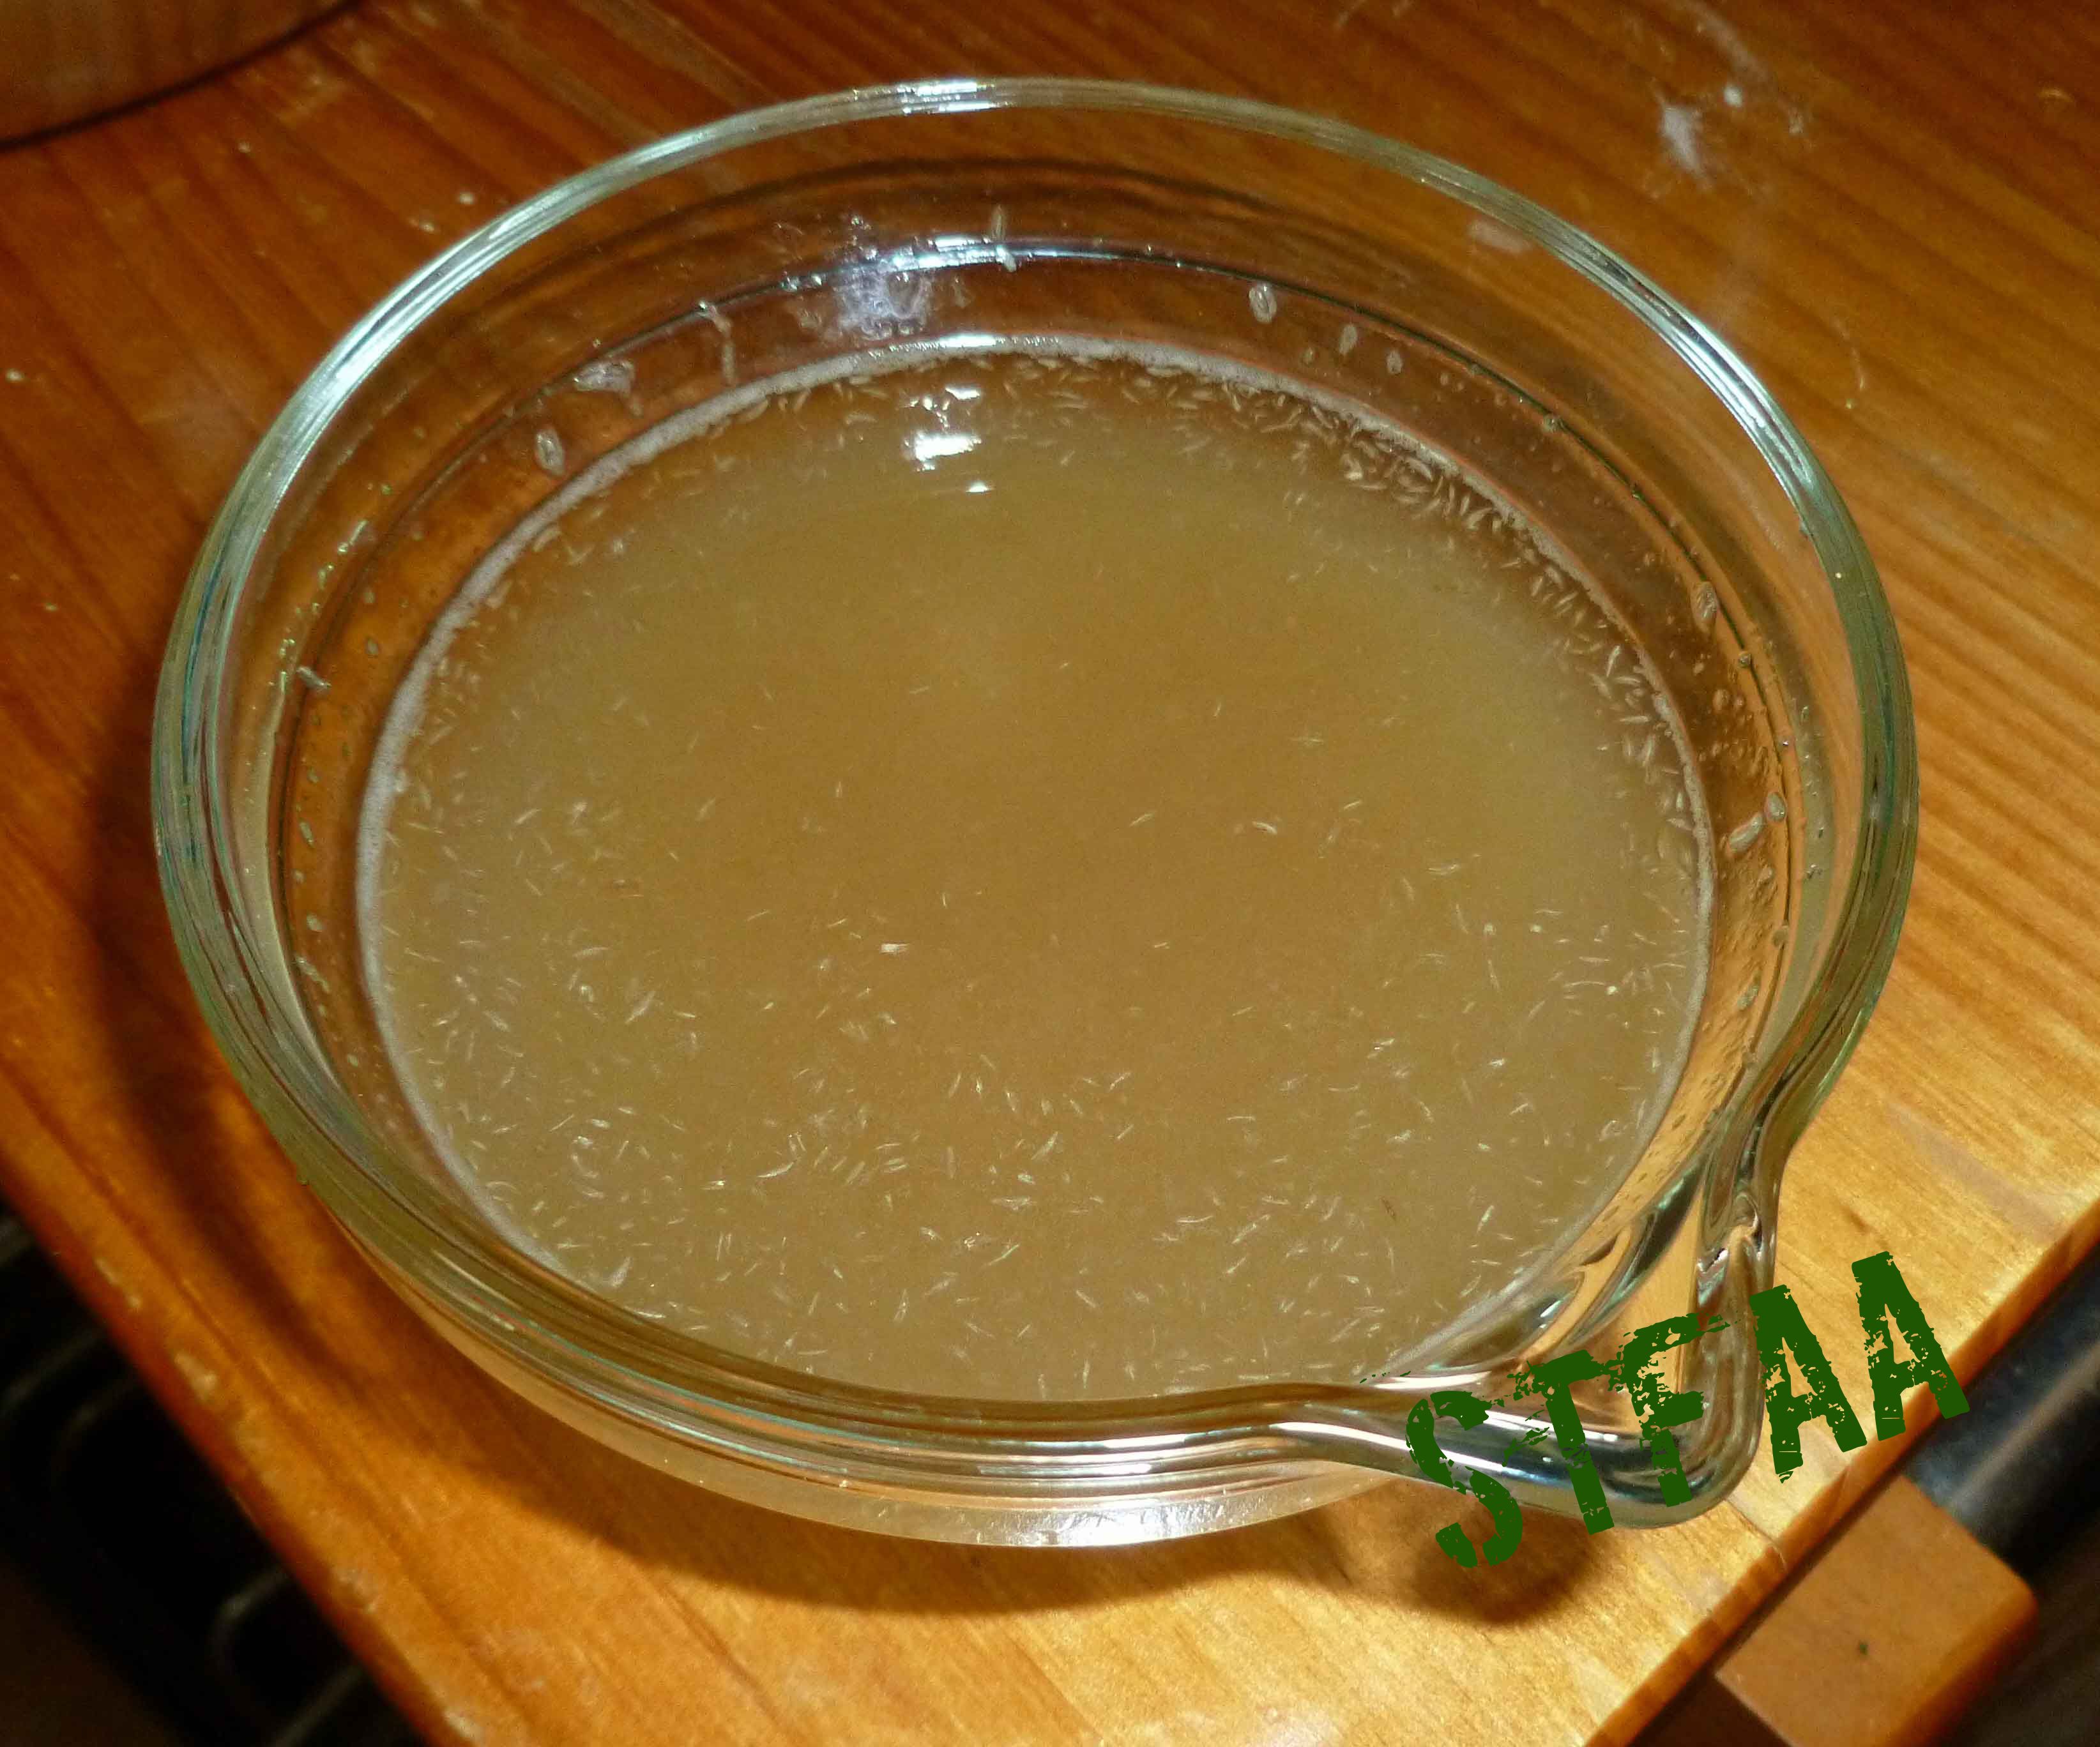
    • 3 tbsp aquafaba (see http://aquafaba.com/)
    • 1 tsp psyllium husk (or ground chia seed or flax seed)
    • 2 tsp vanilla extract (I make my own with vanilla beans and vodka made from potatoes, as most commercial extract contains corn)
    • 1 tsp water (if using shortening, add a tablespoon)
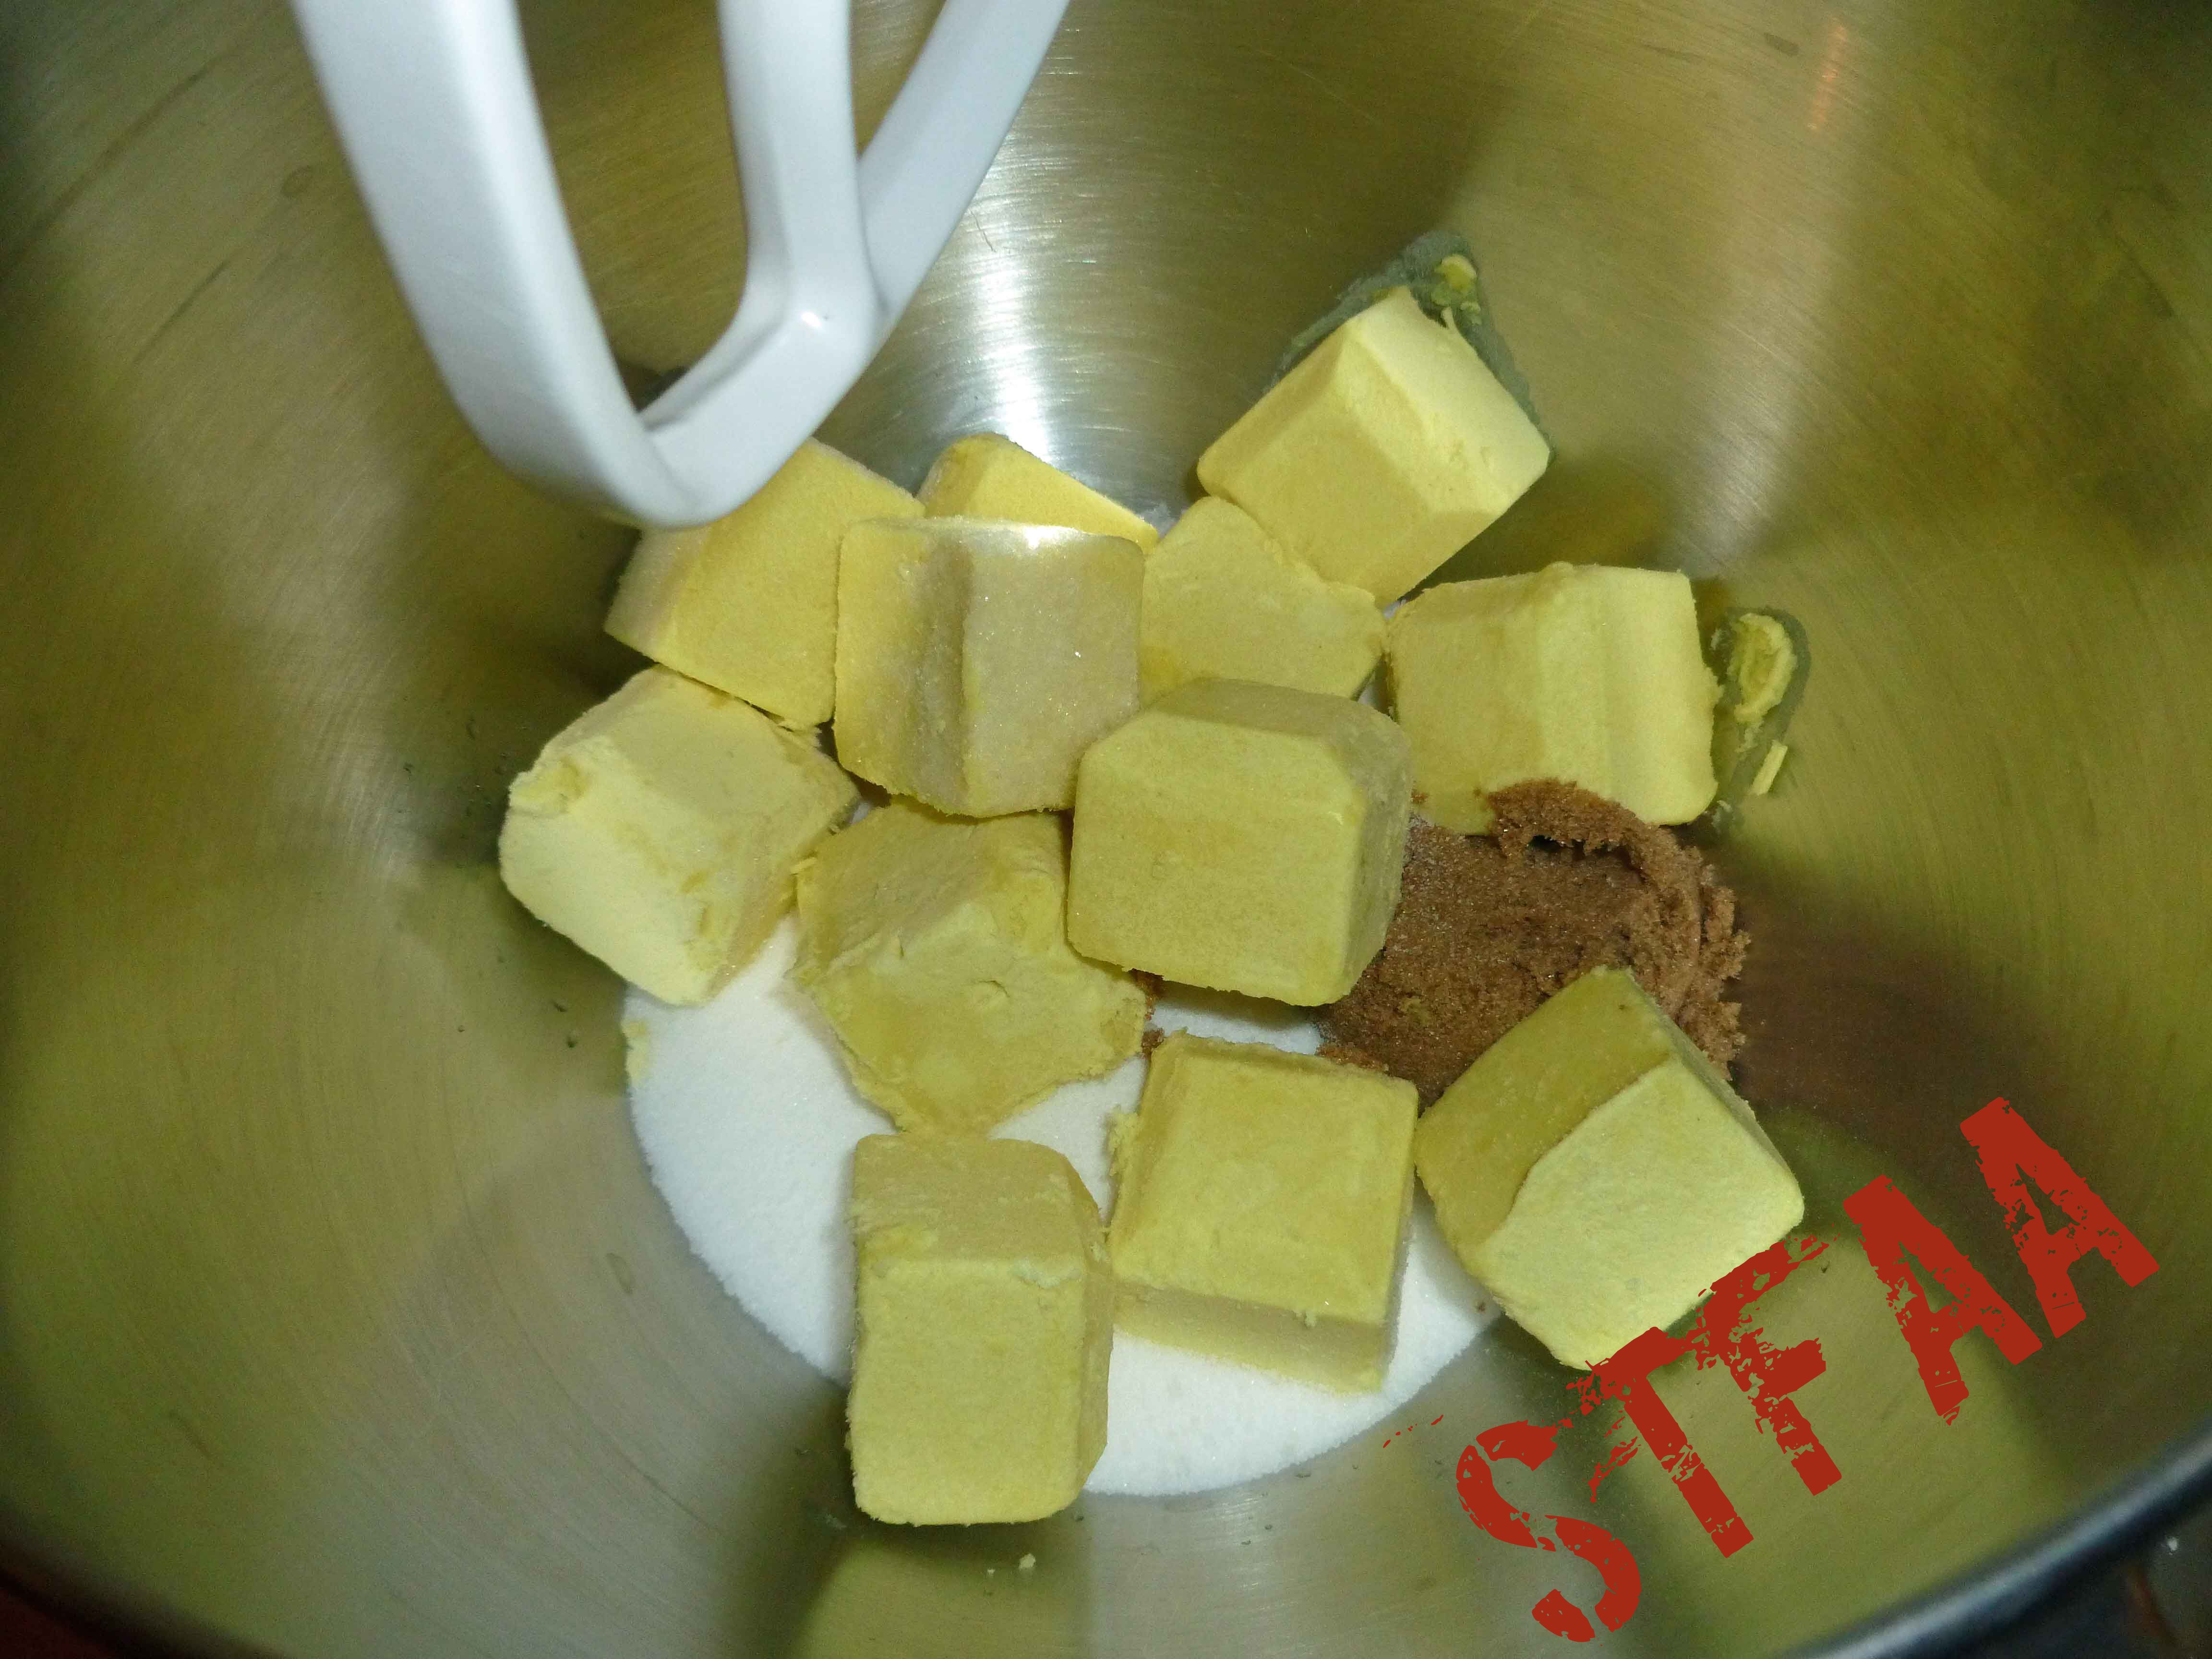
    • 1 1/2 cups homemade margarine, Earth Balance margarine or vegetable shortening (Earth Balance margarine and vegetable shortening are generally not safe for corn, coconut, or palm allergies)
    • 1/4 cup brown sugar
    • 3/4 cup white sugar
    • 1/4 tsp sea salt
    • 3 1/2 cups Gluten-Free Flour Mix for Spritz or Cookie Press Cookies
    Servings: dozen
    Instructions
    1. Preheat oven to 375°F.
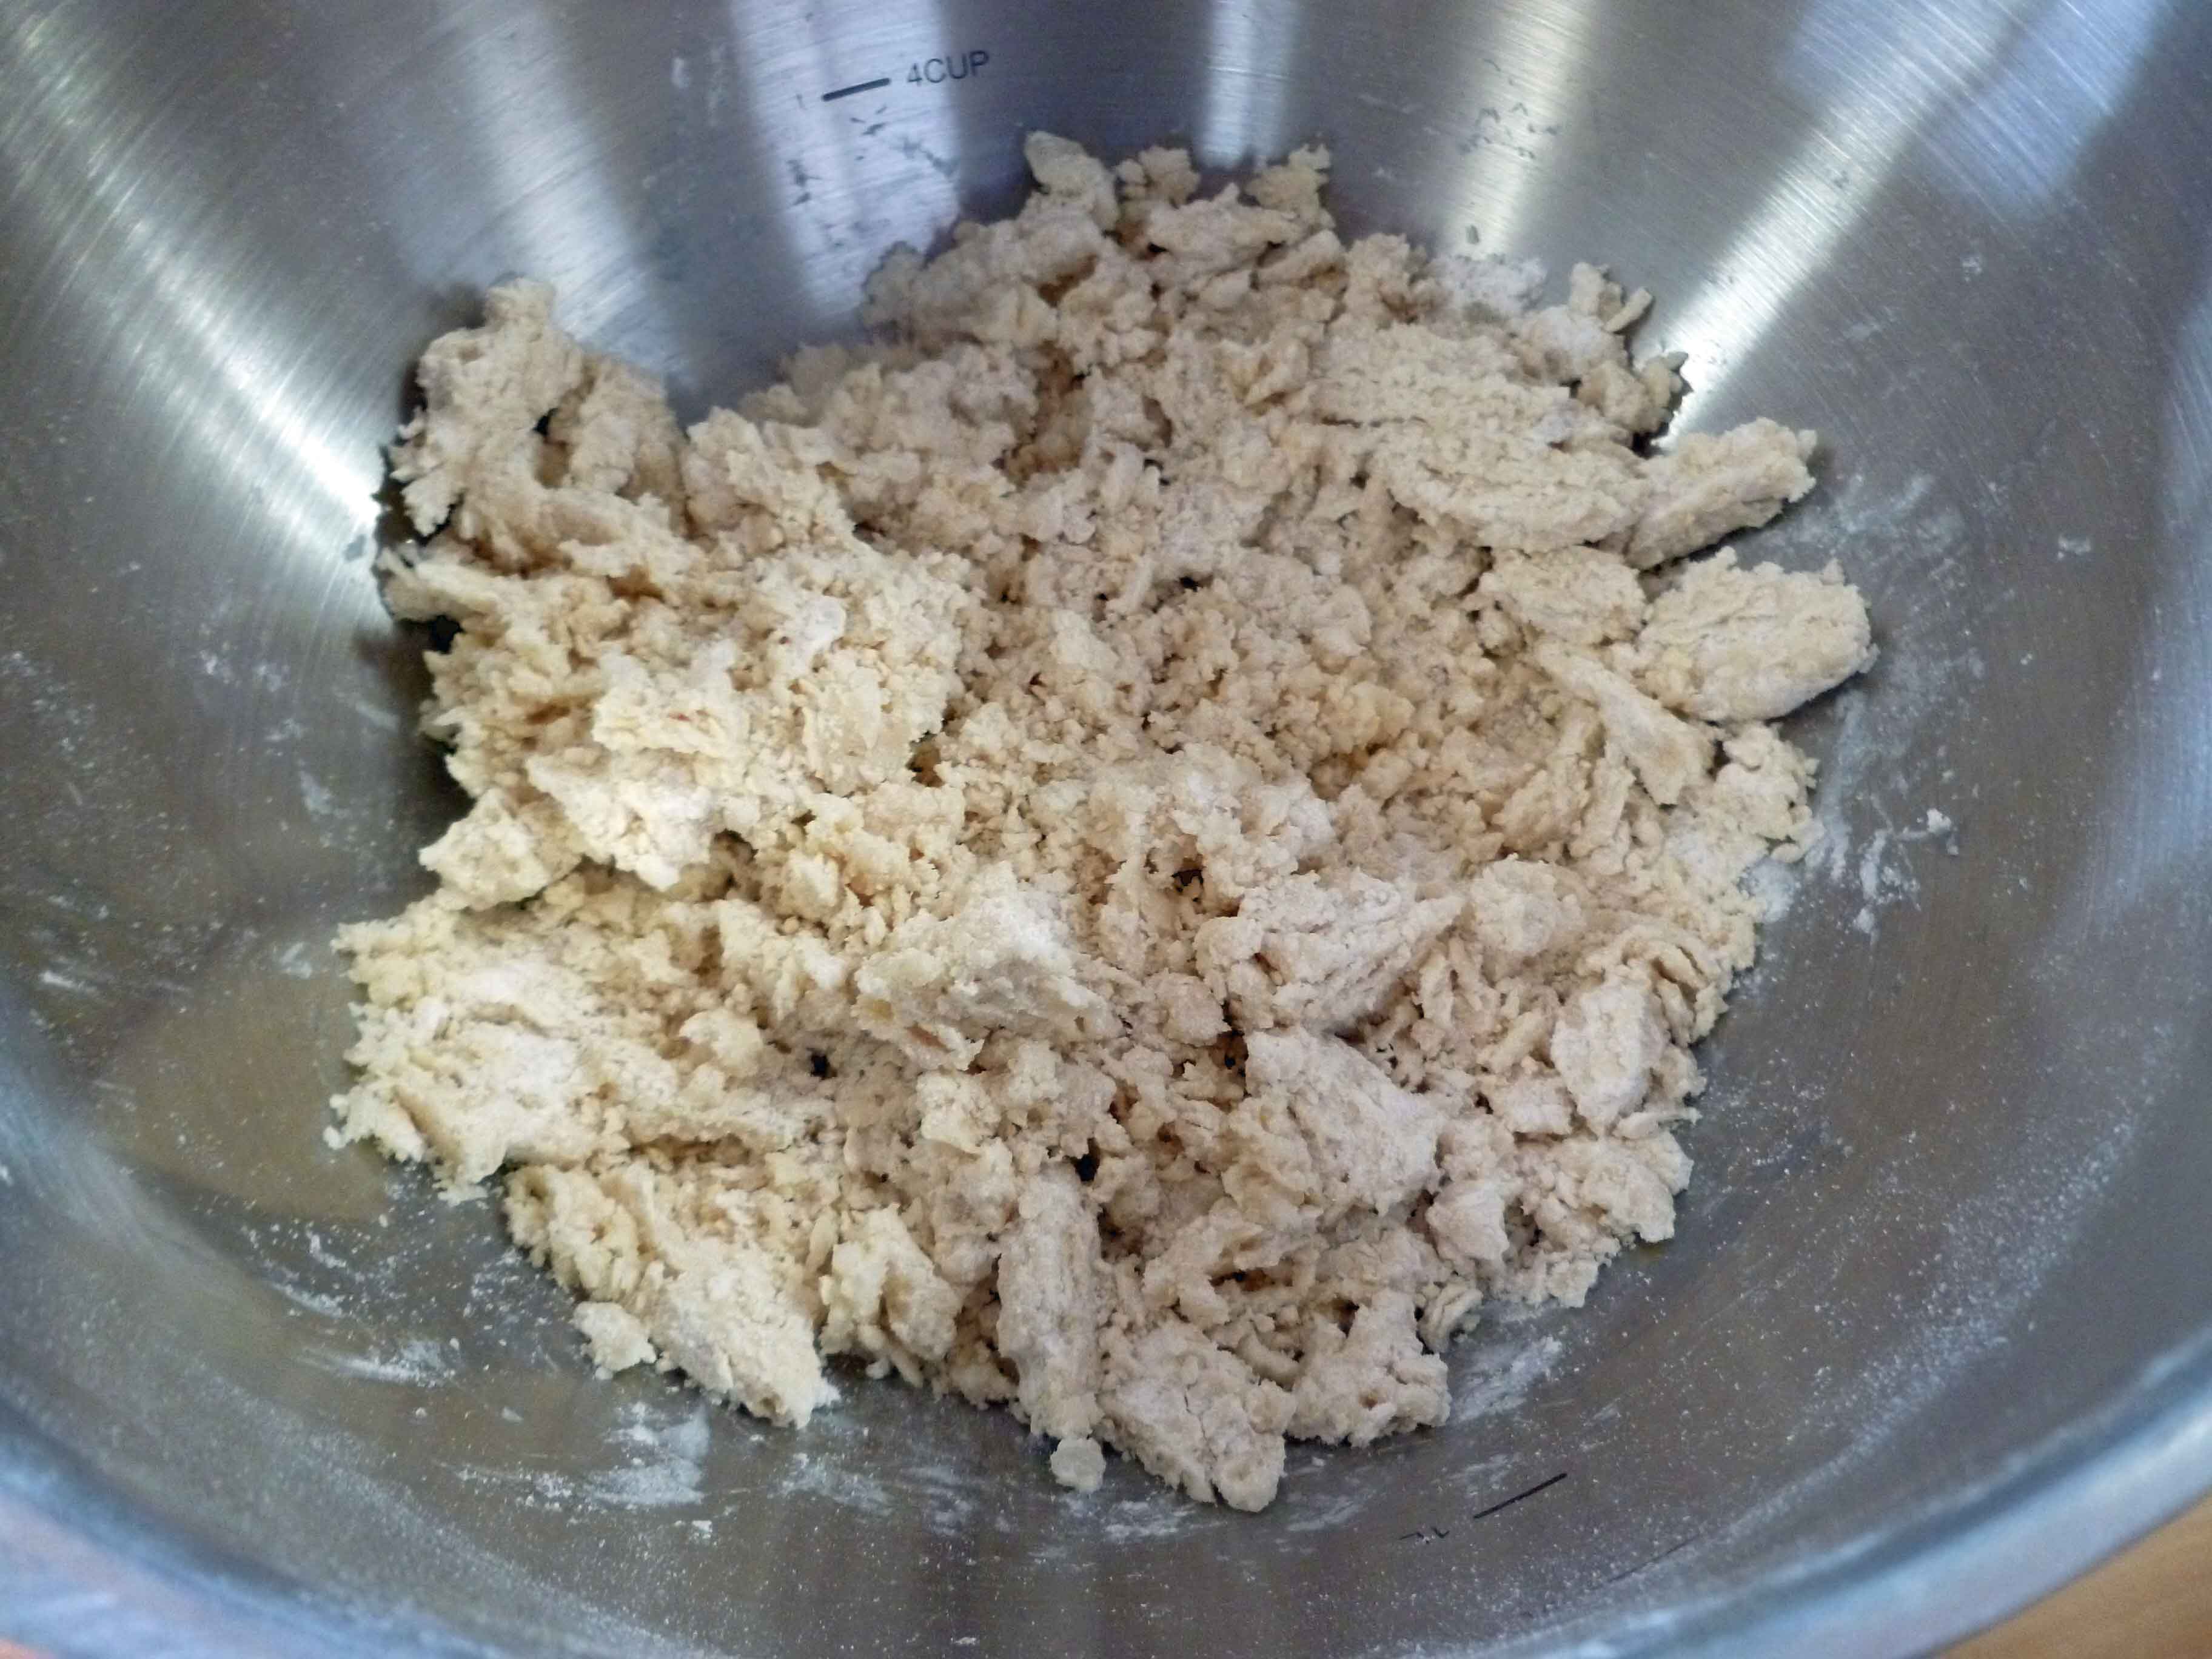
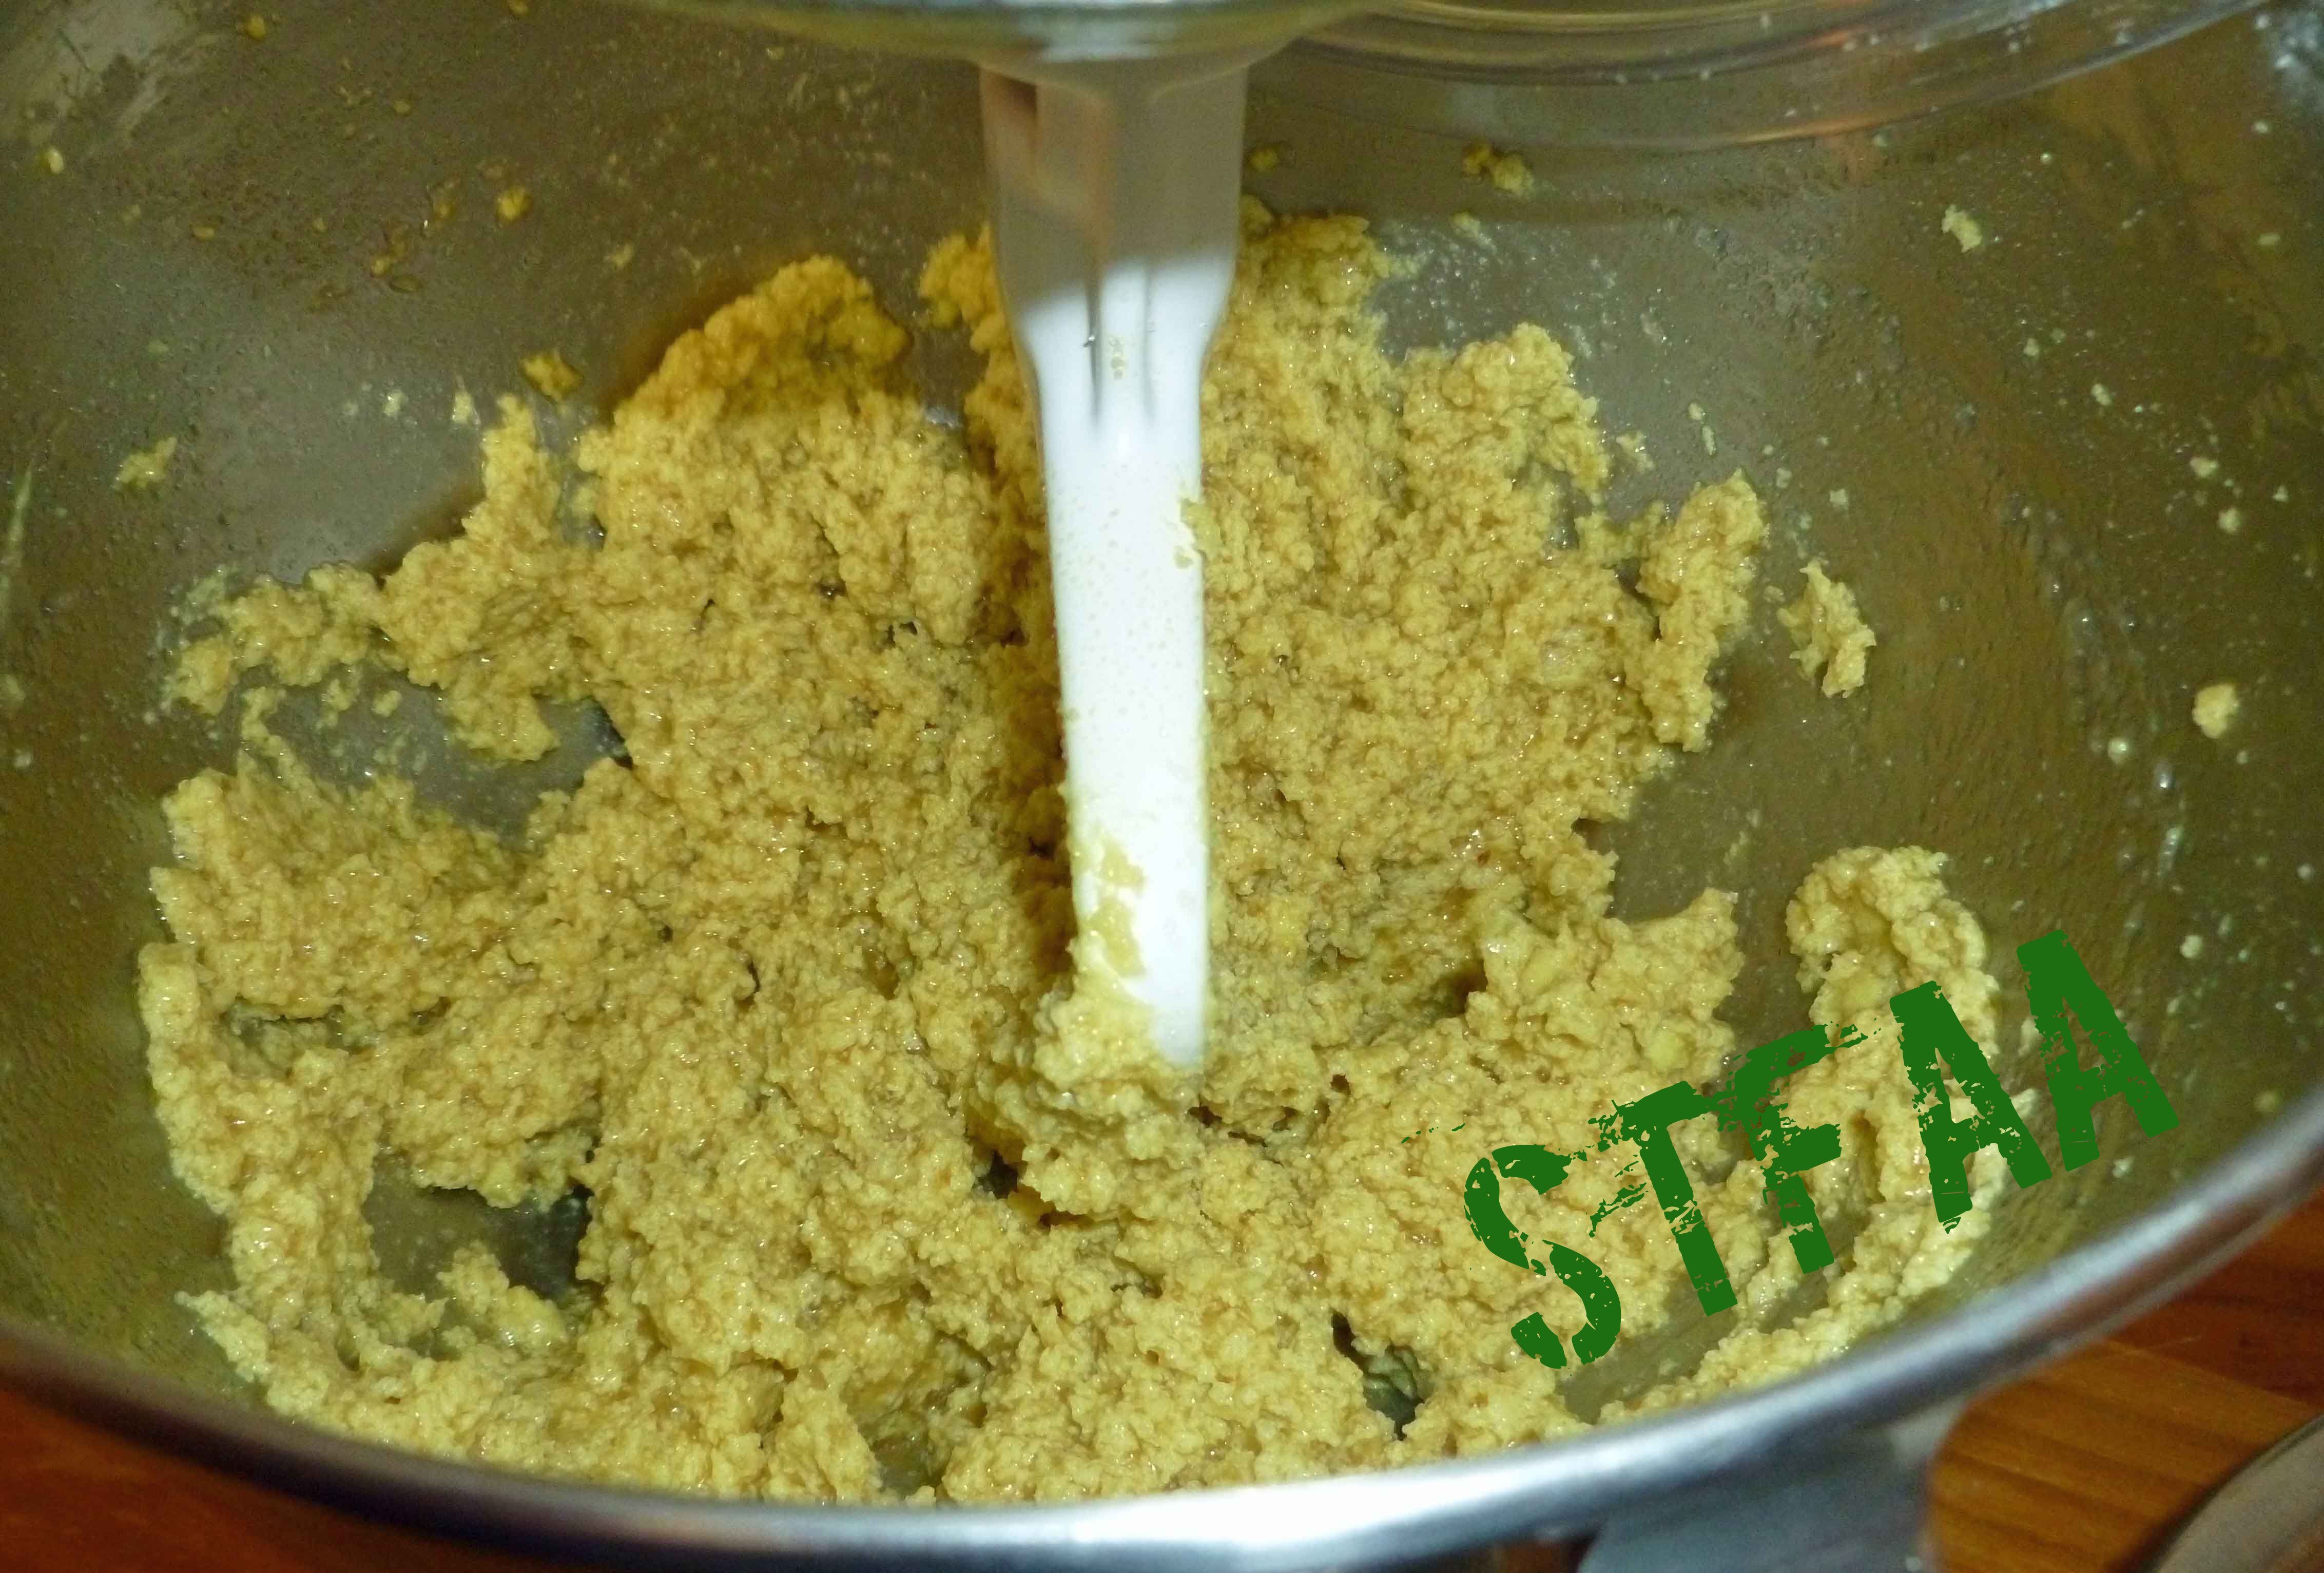
    2. Mix aquafaba, psyllium, vanilla extract, and water in a small bowl and set aside to let it gel. Add salt to flour mixture in a large bowl and set aside.
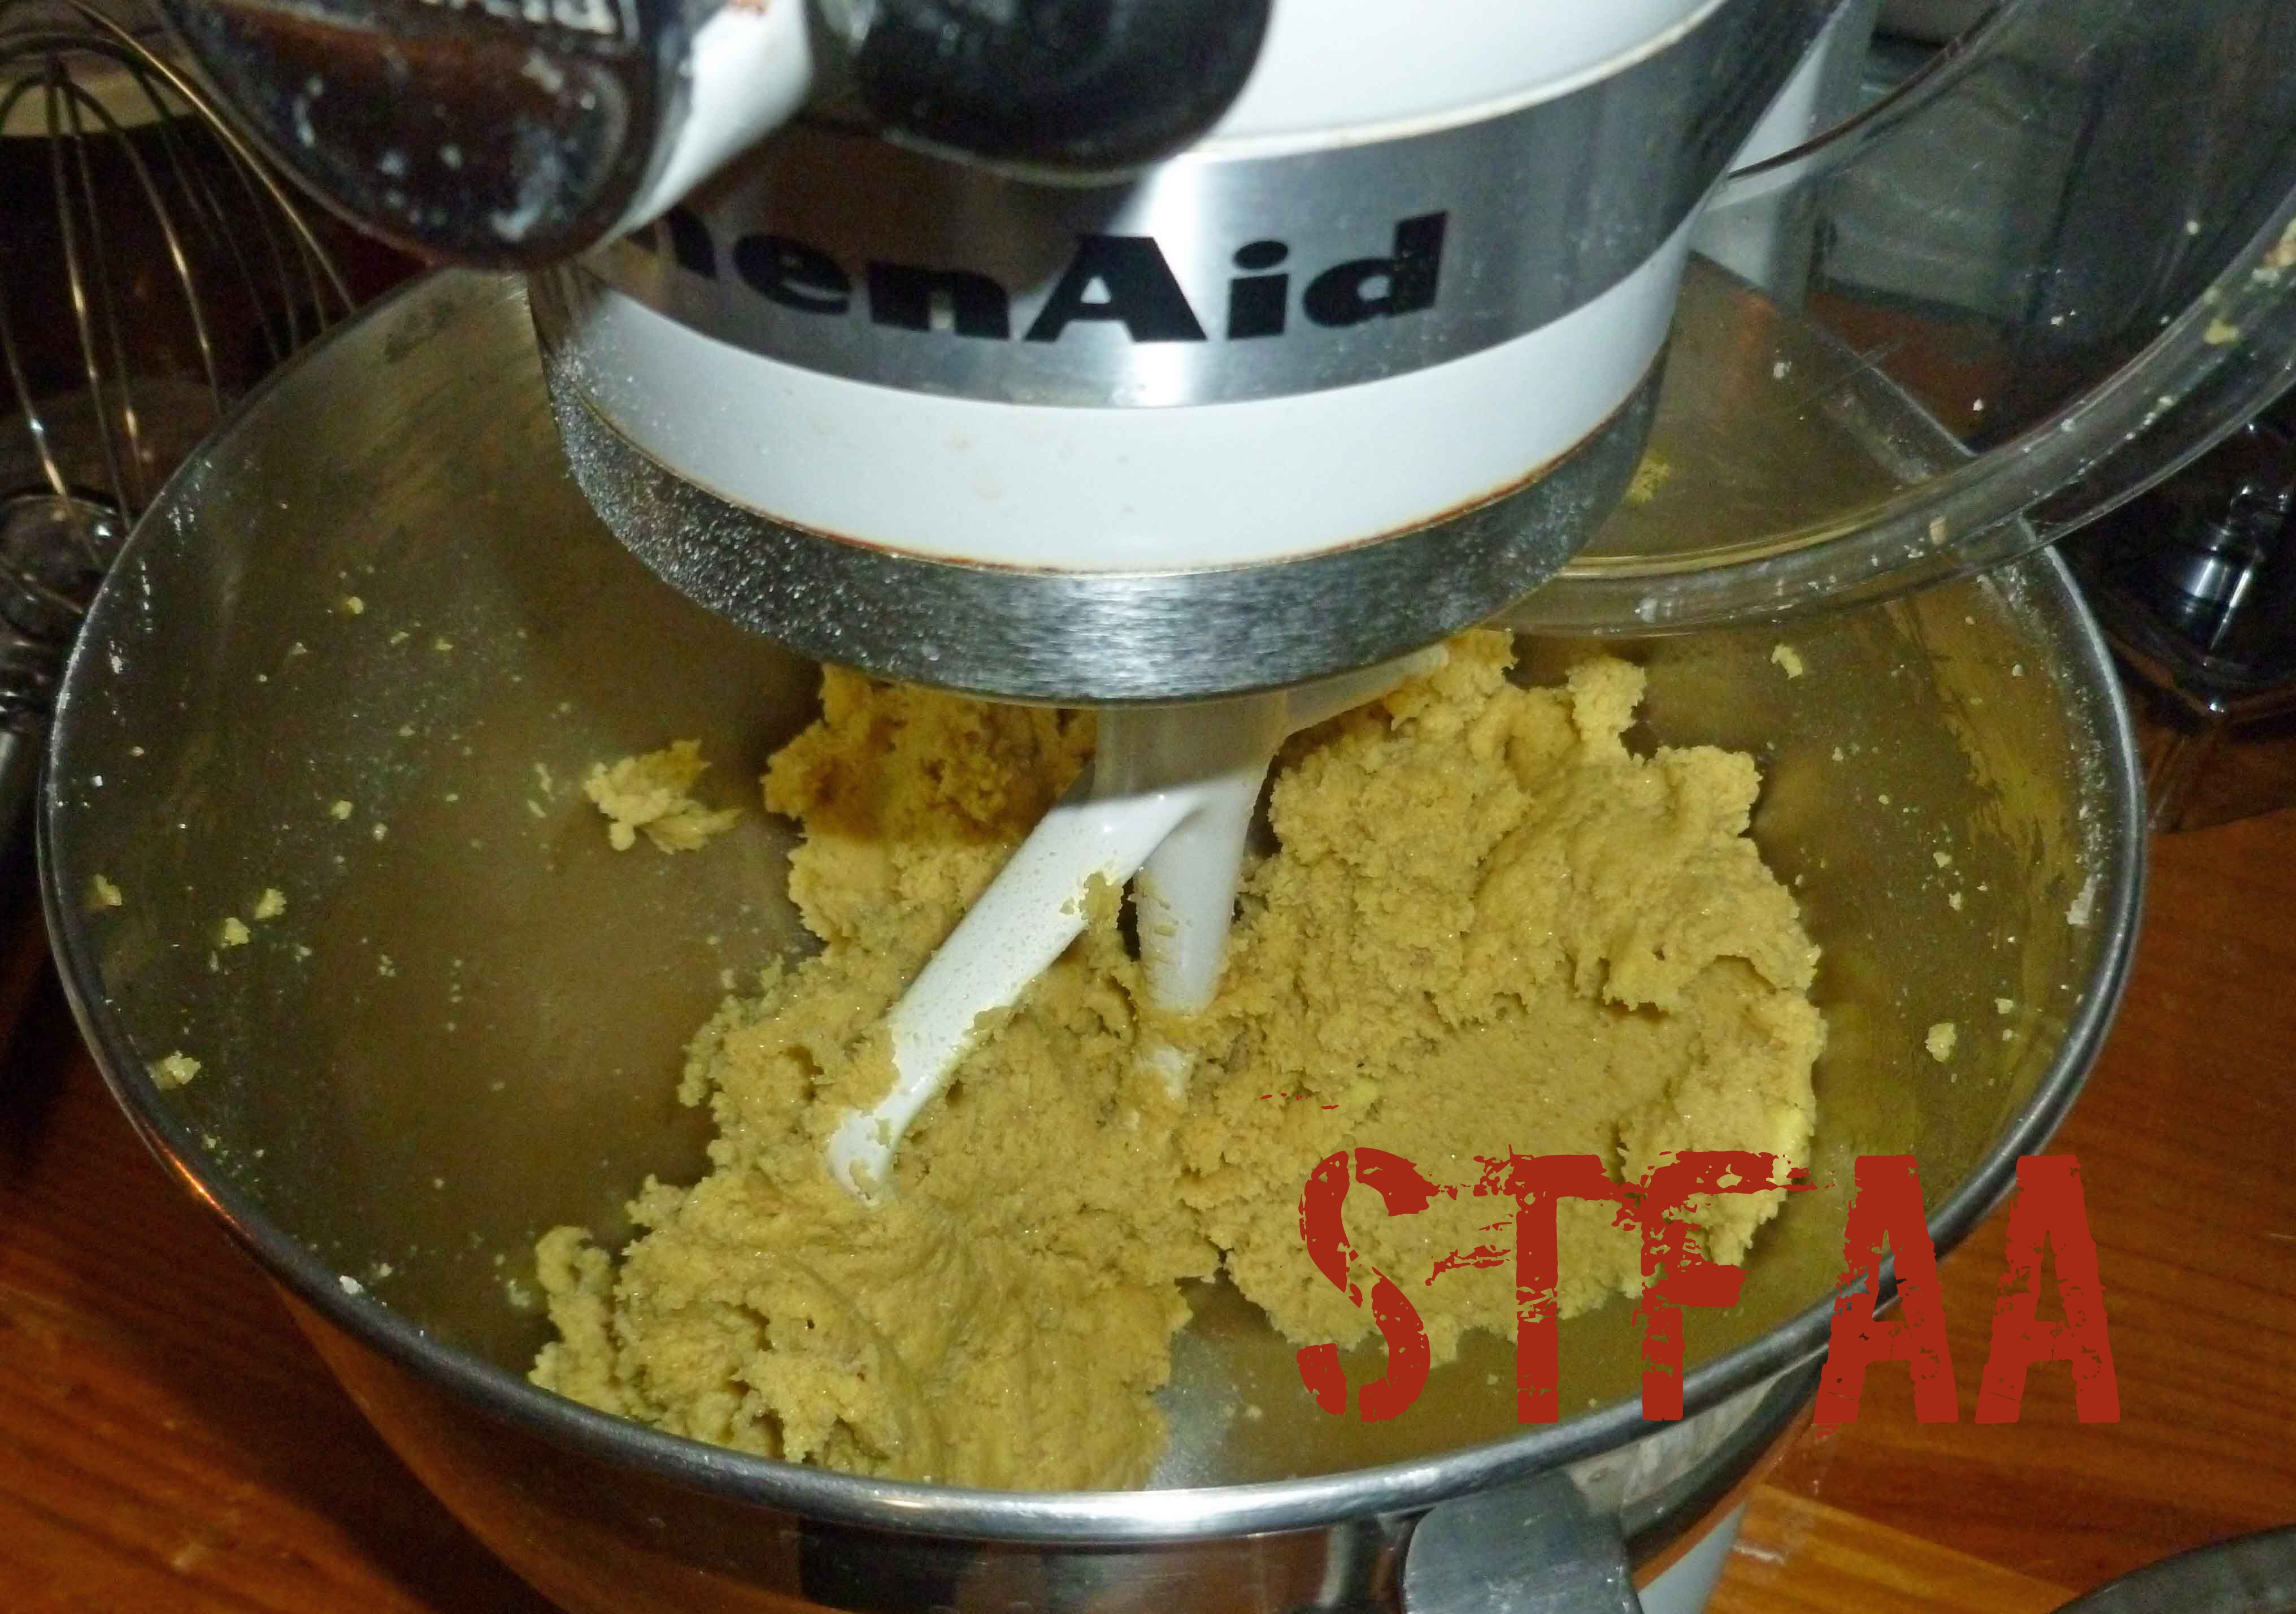
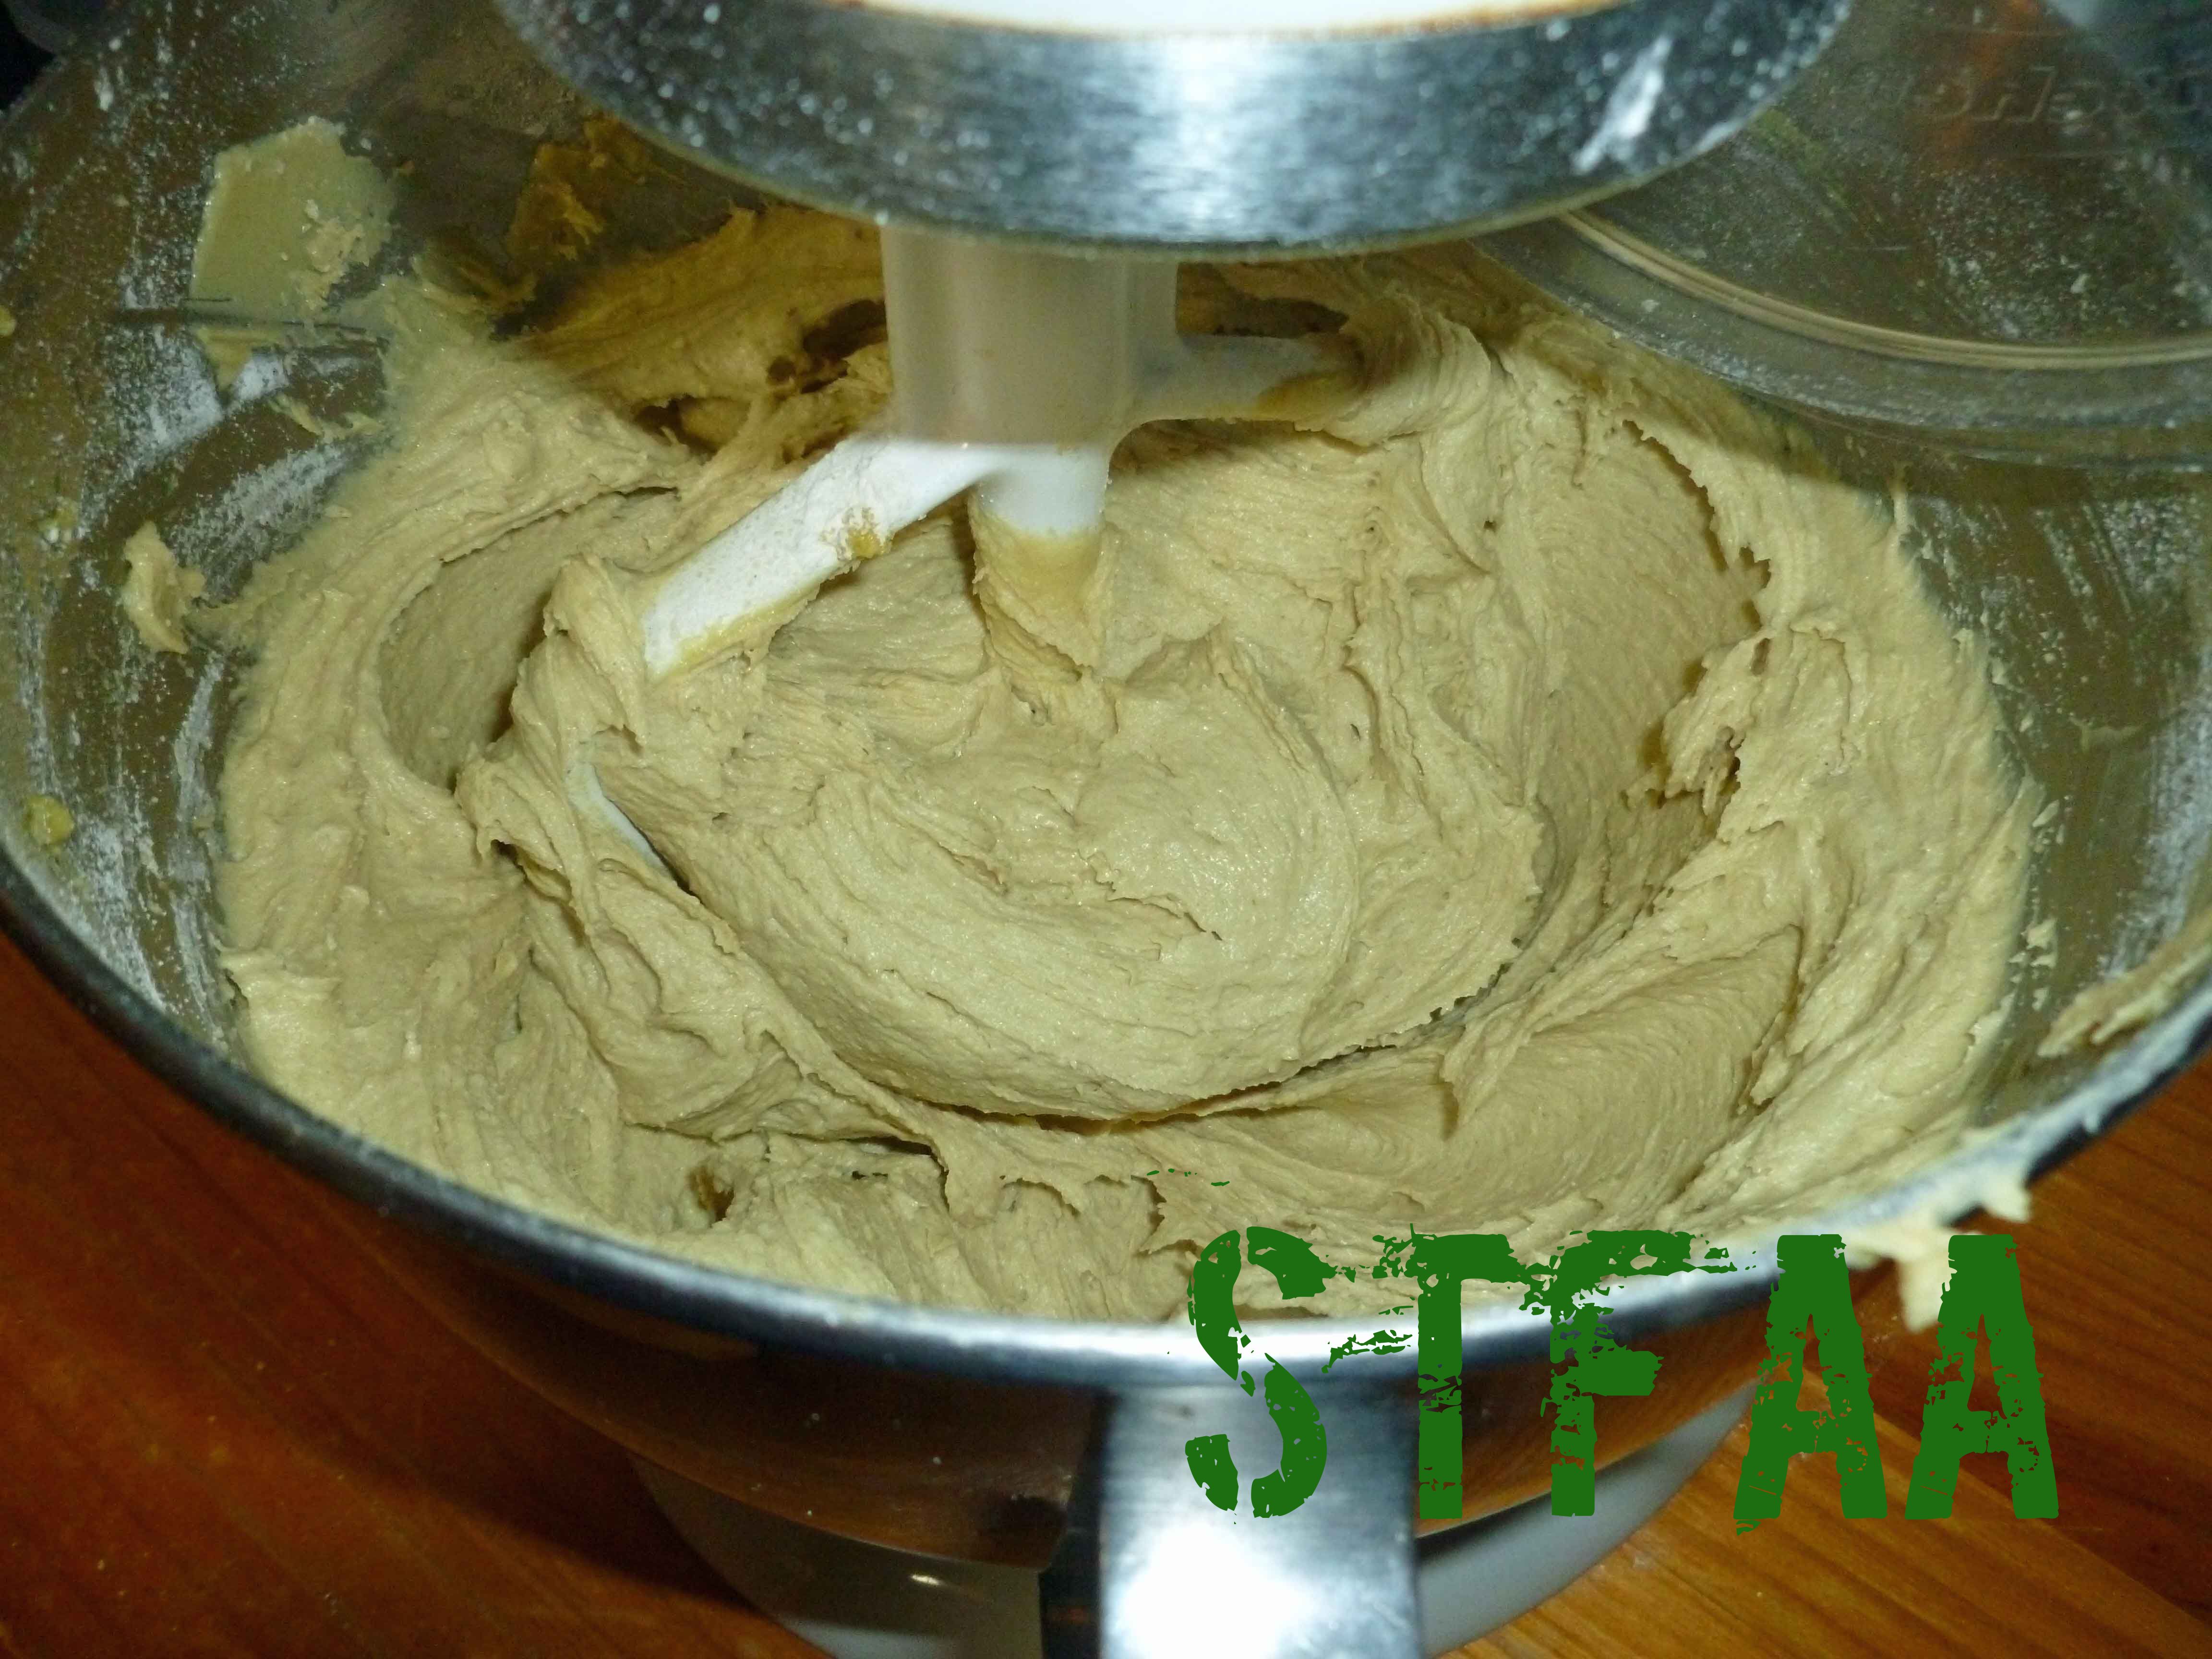
    3. Using a stand mixer and the beater blade, cream margarine or shortening with brown sugar and white sugar until well combined. Scrape down sides and add aquafaba/psyllium/vanilla extract/water mixture to the bowl. Beat together until well combined, scraping down the sides as necessary.
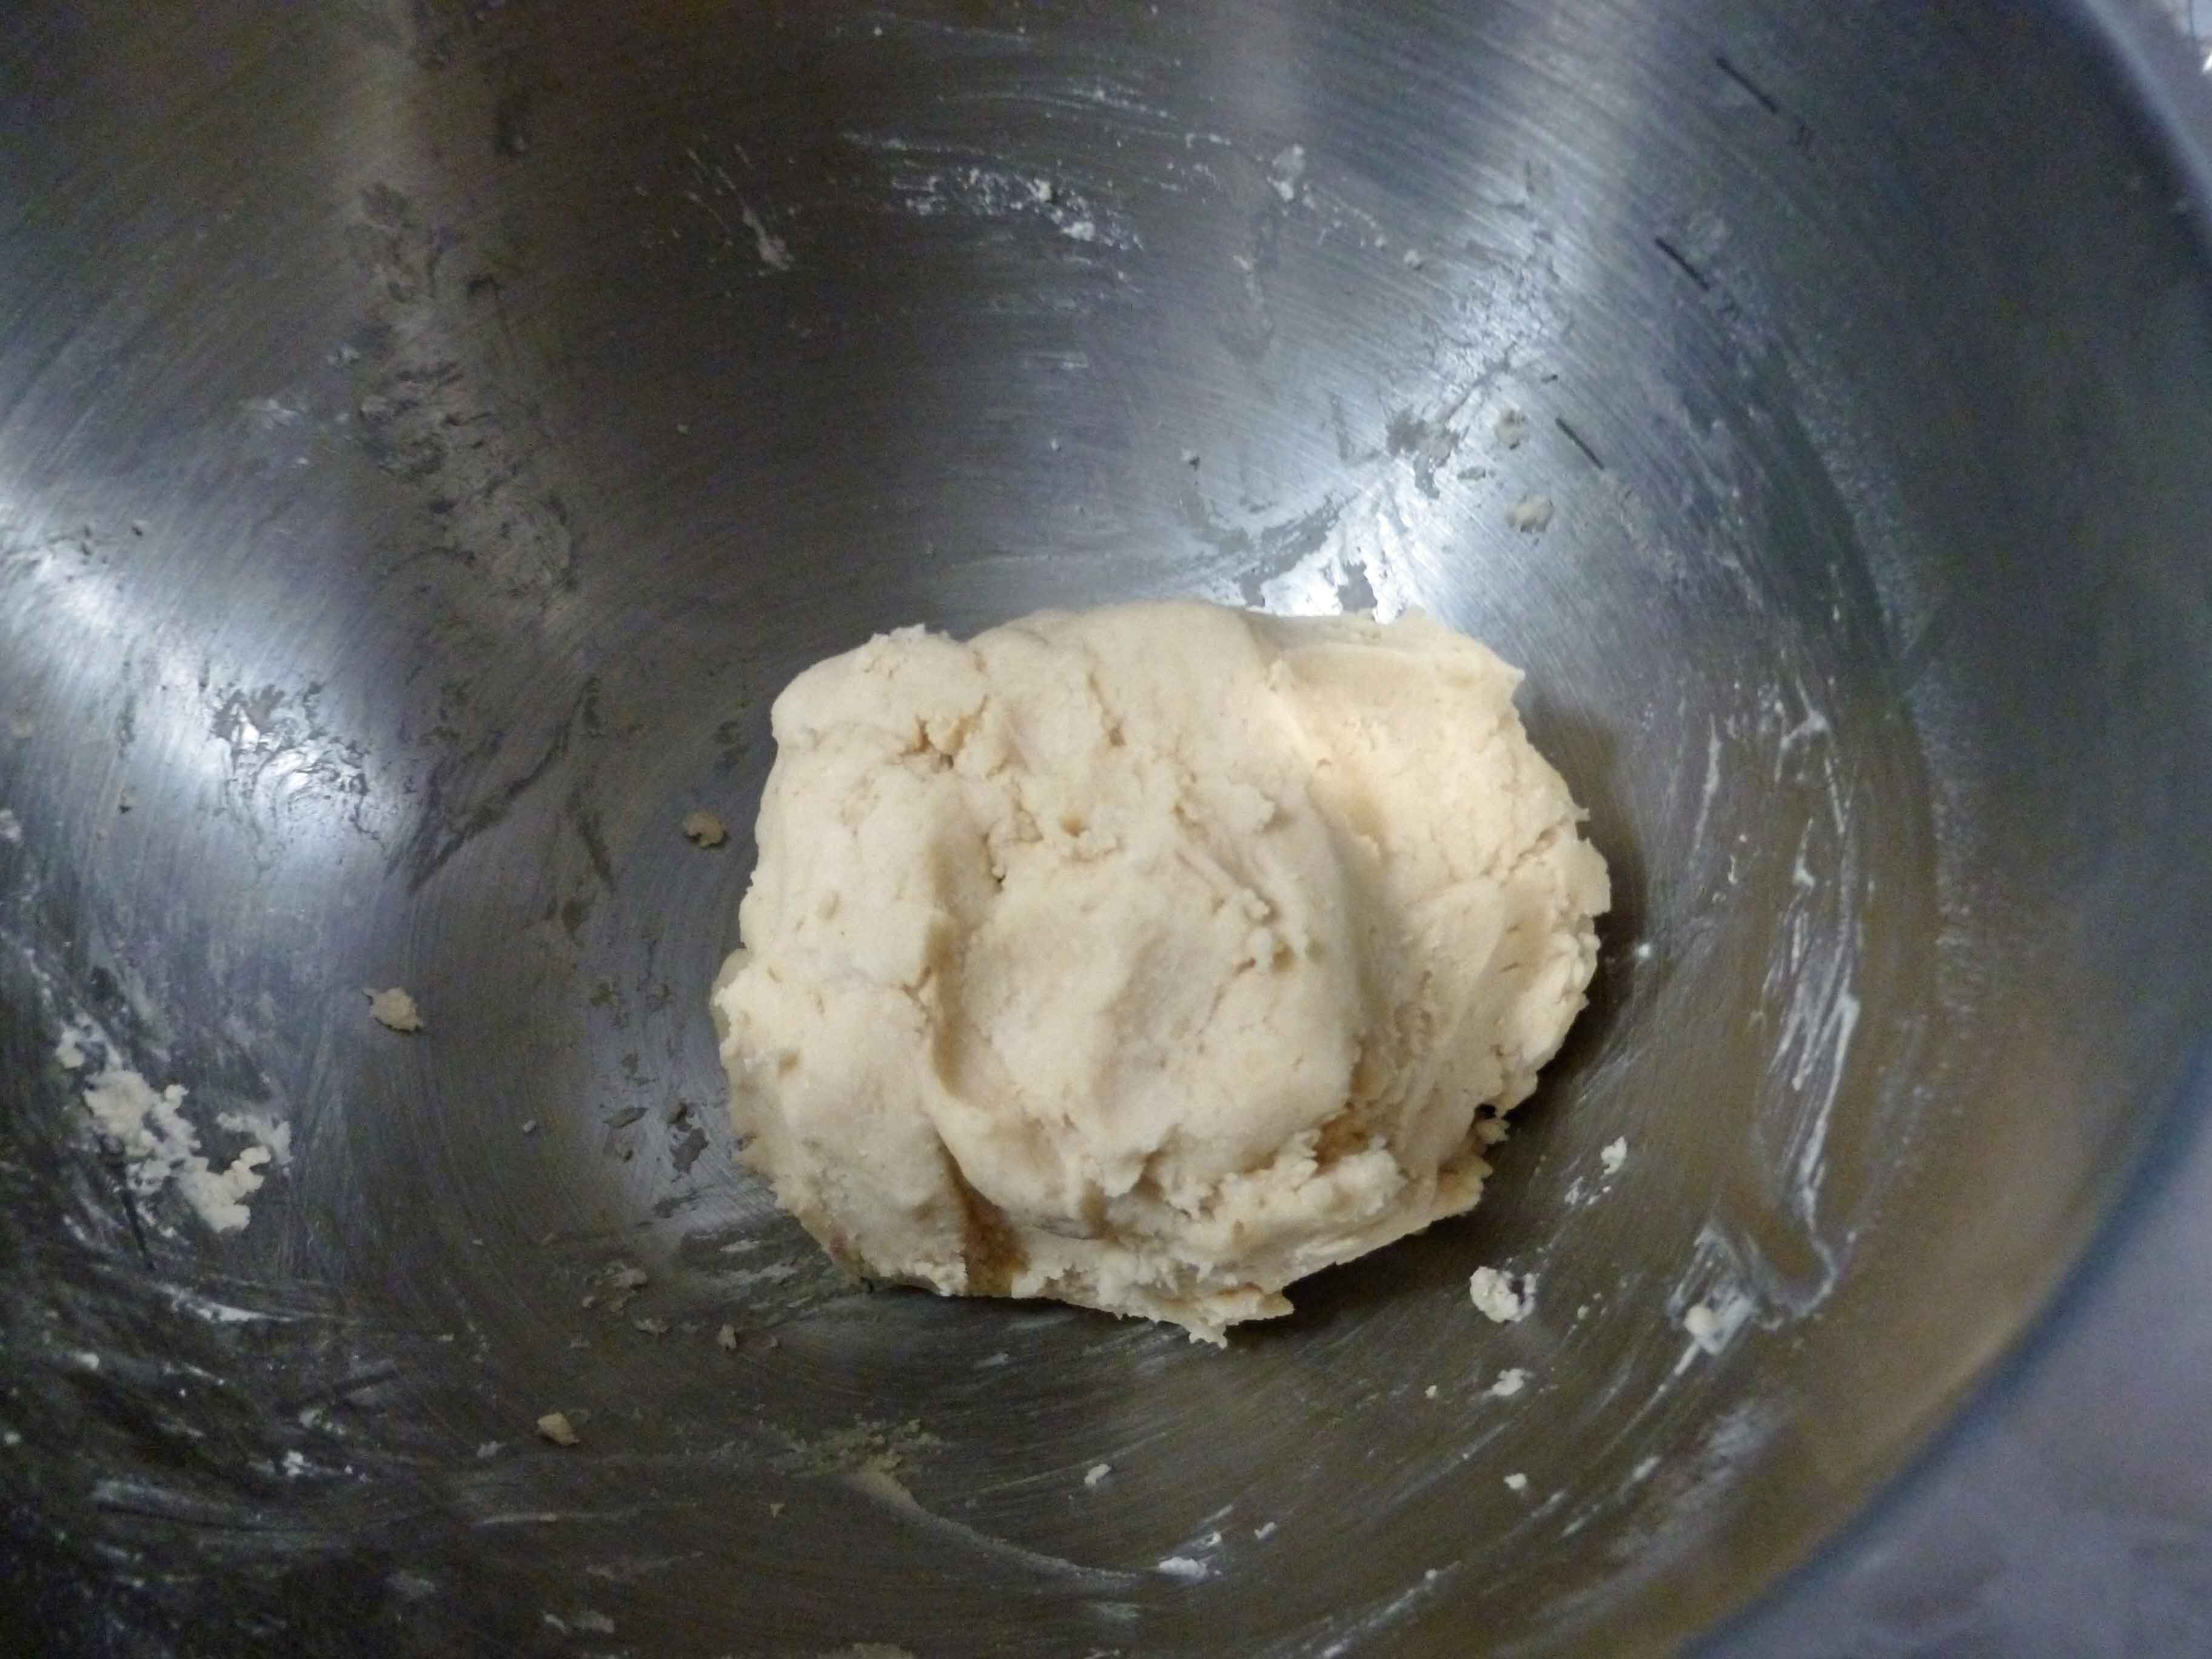
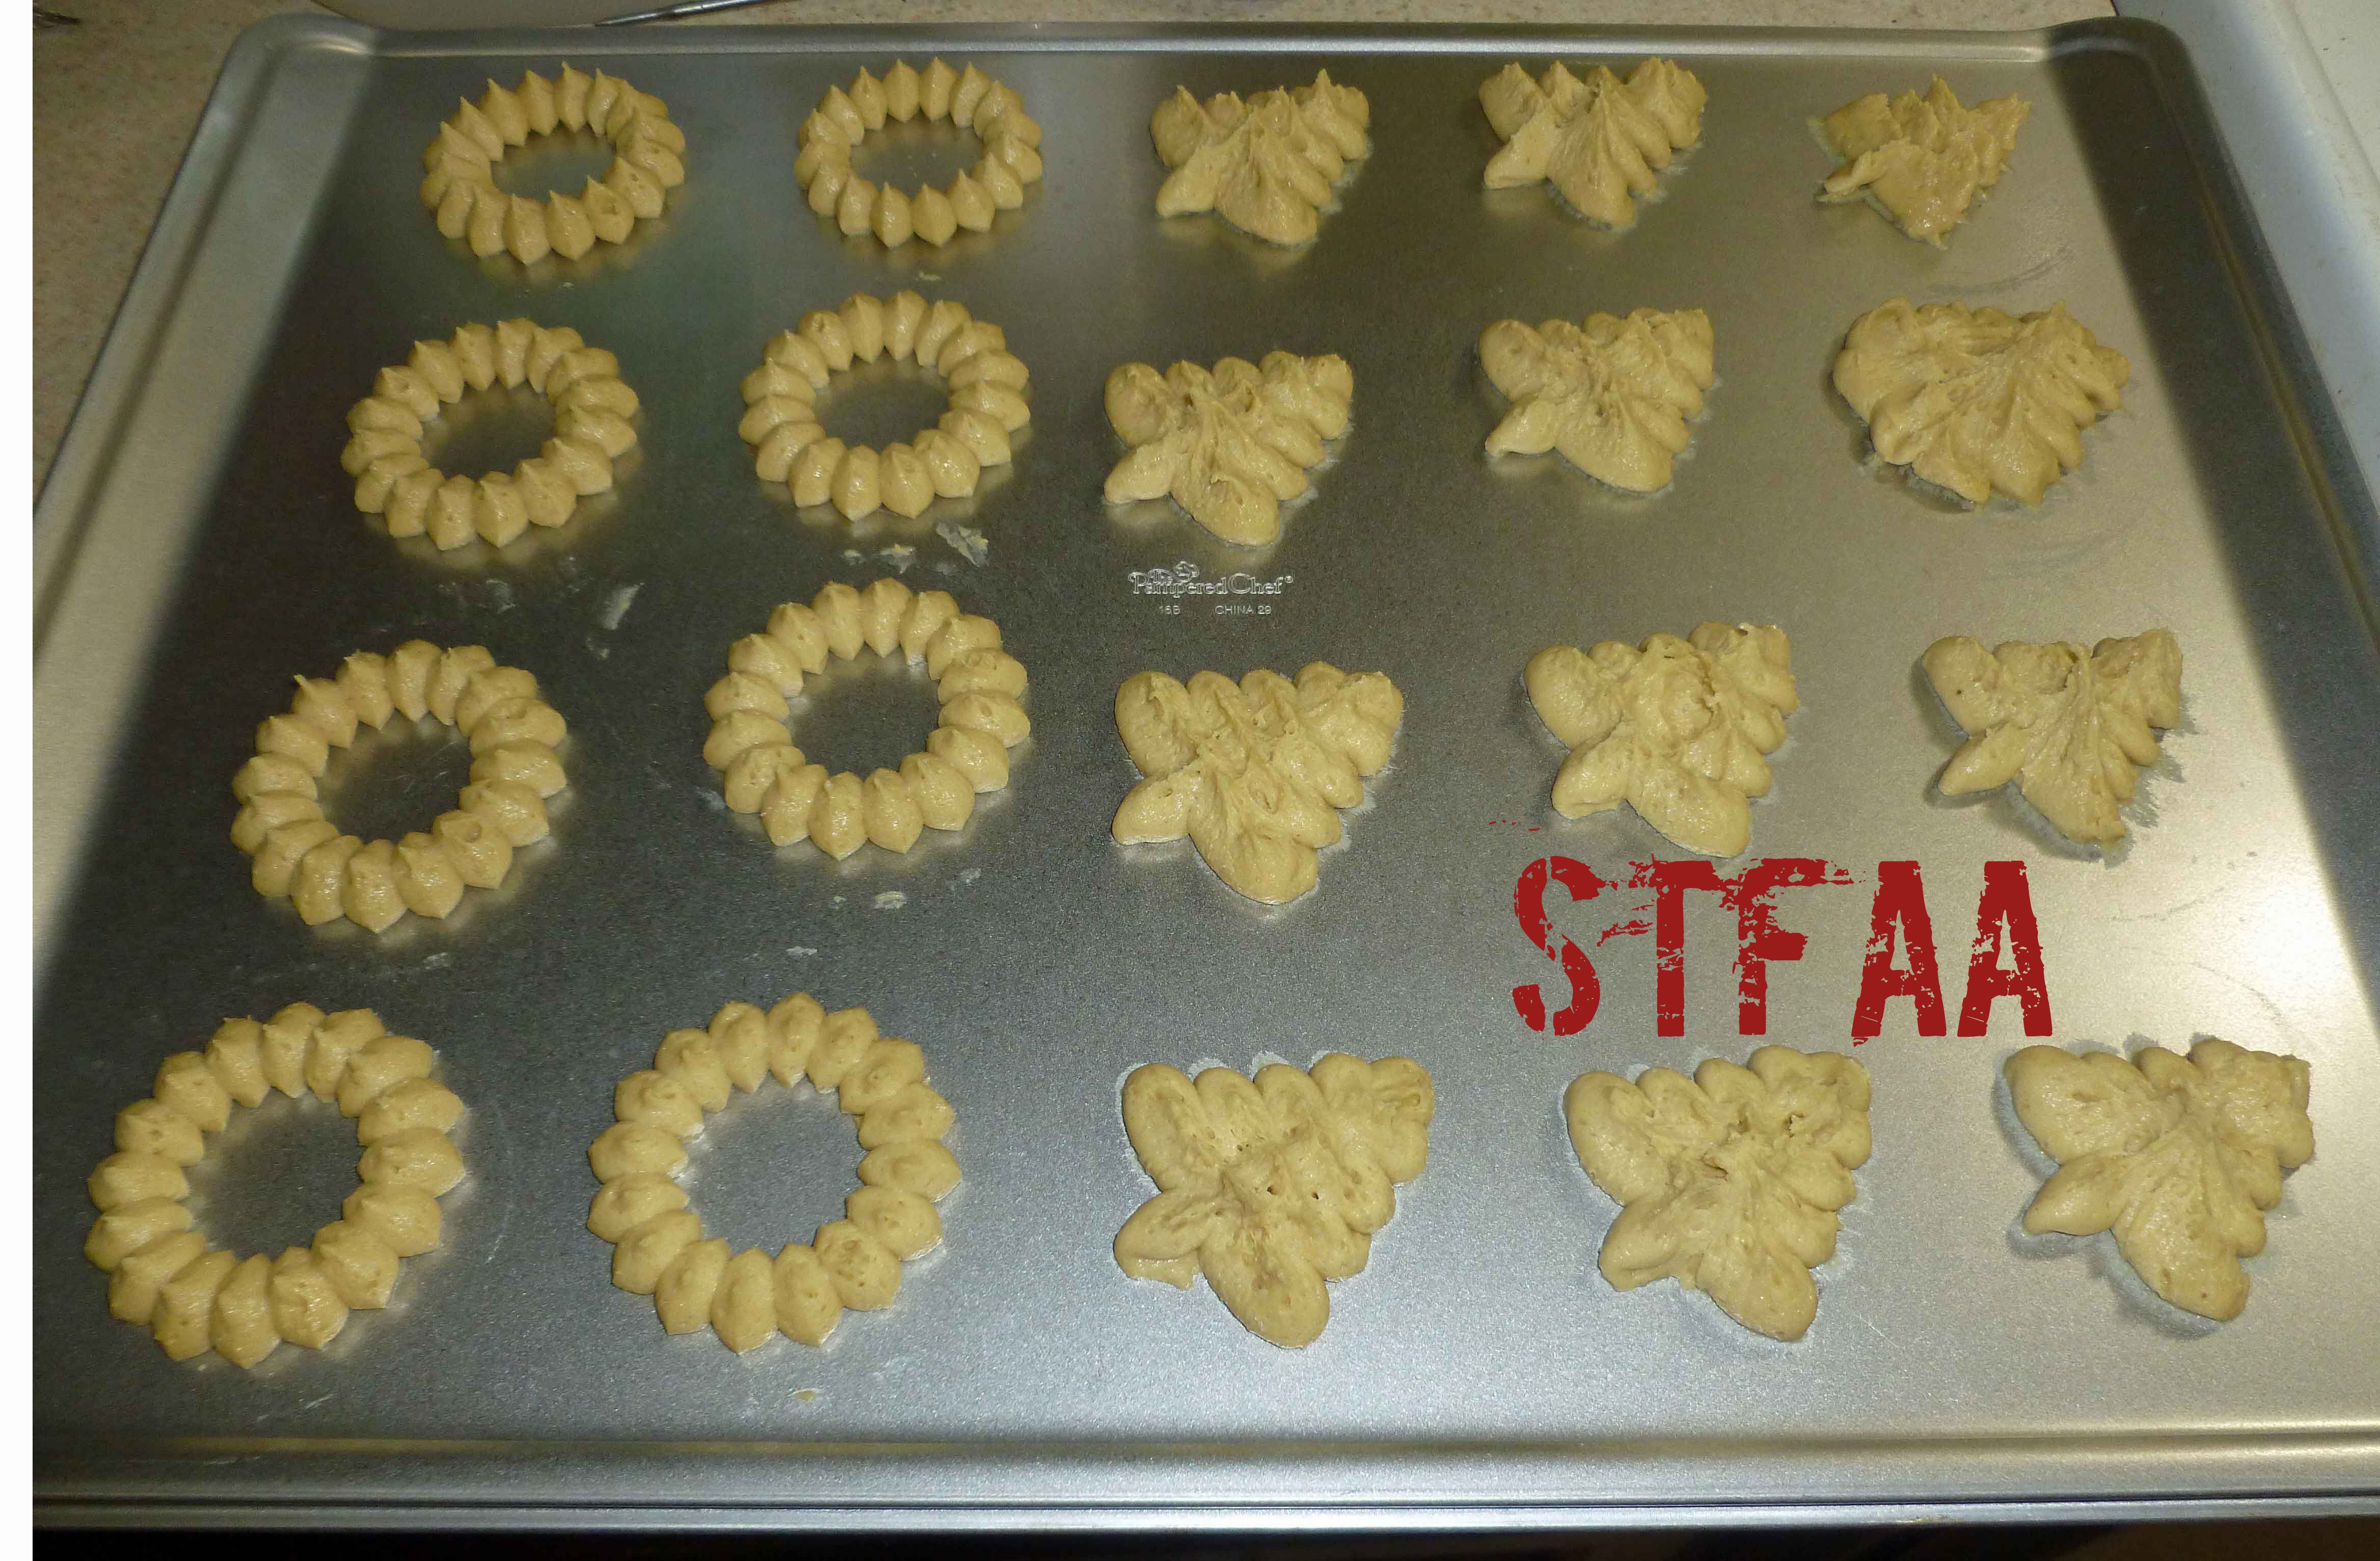
    4. Add the flour mixture a cup or so at a time, beating it in as you go, scraping down the sides as necessary. Once all the flour is well incorporated, put the dough in your cookie press and spritz/press your cookies onto cookie sheets.
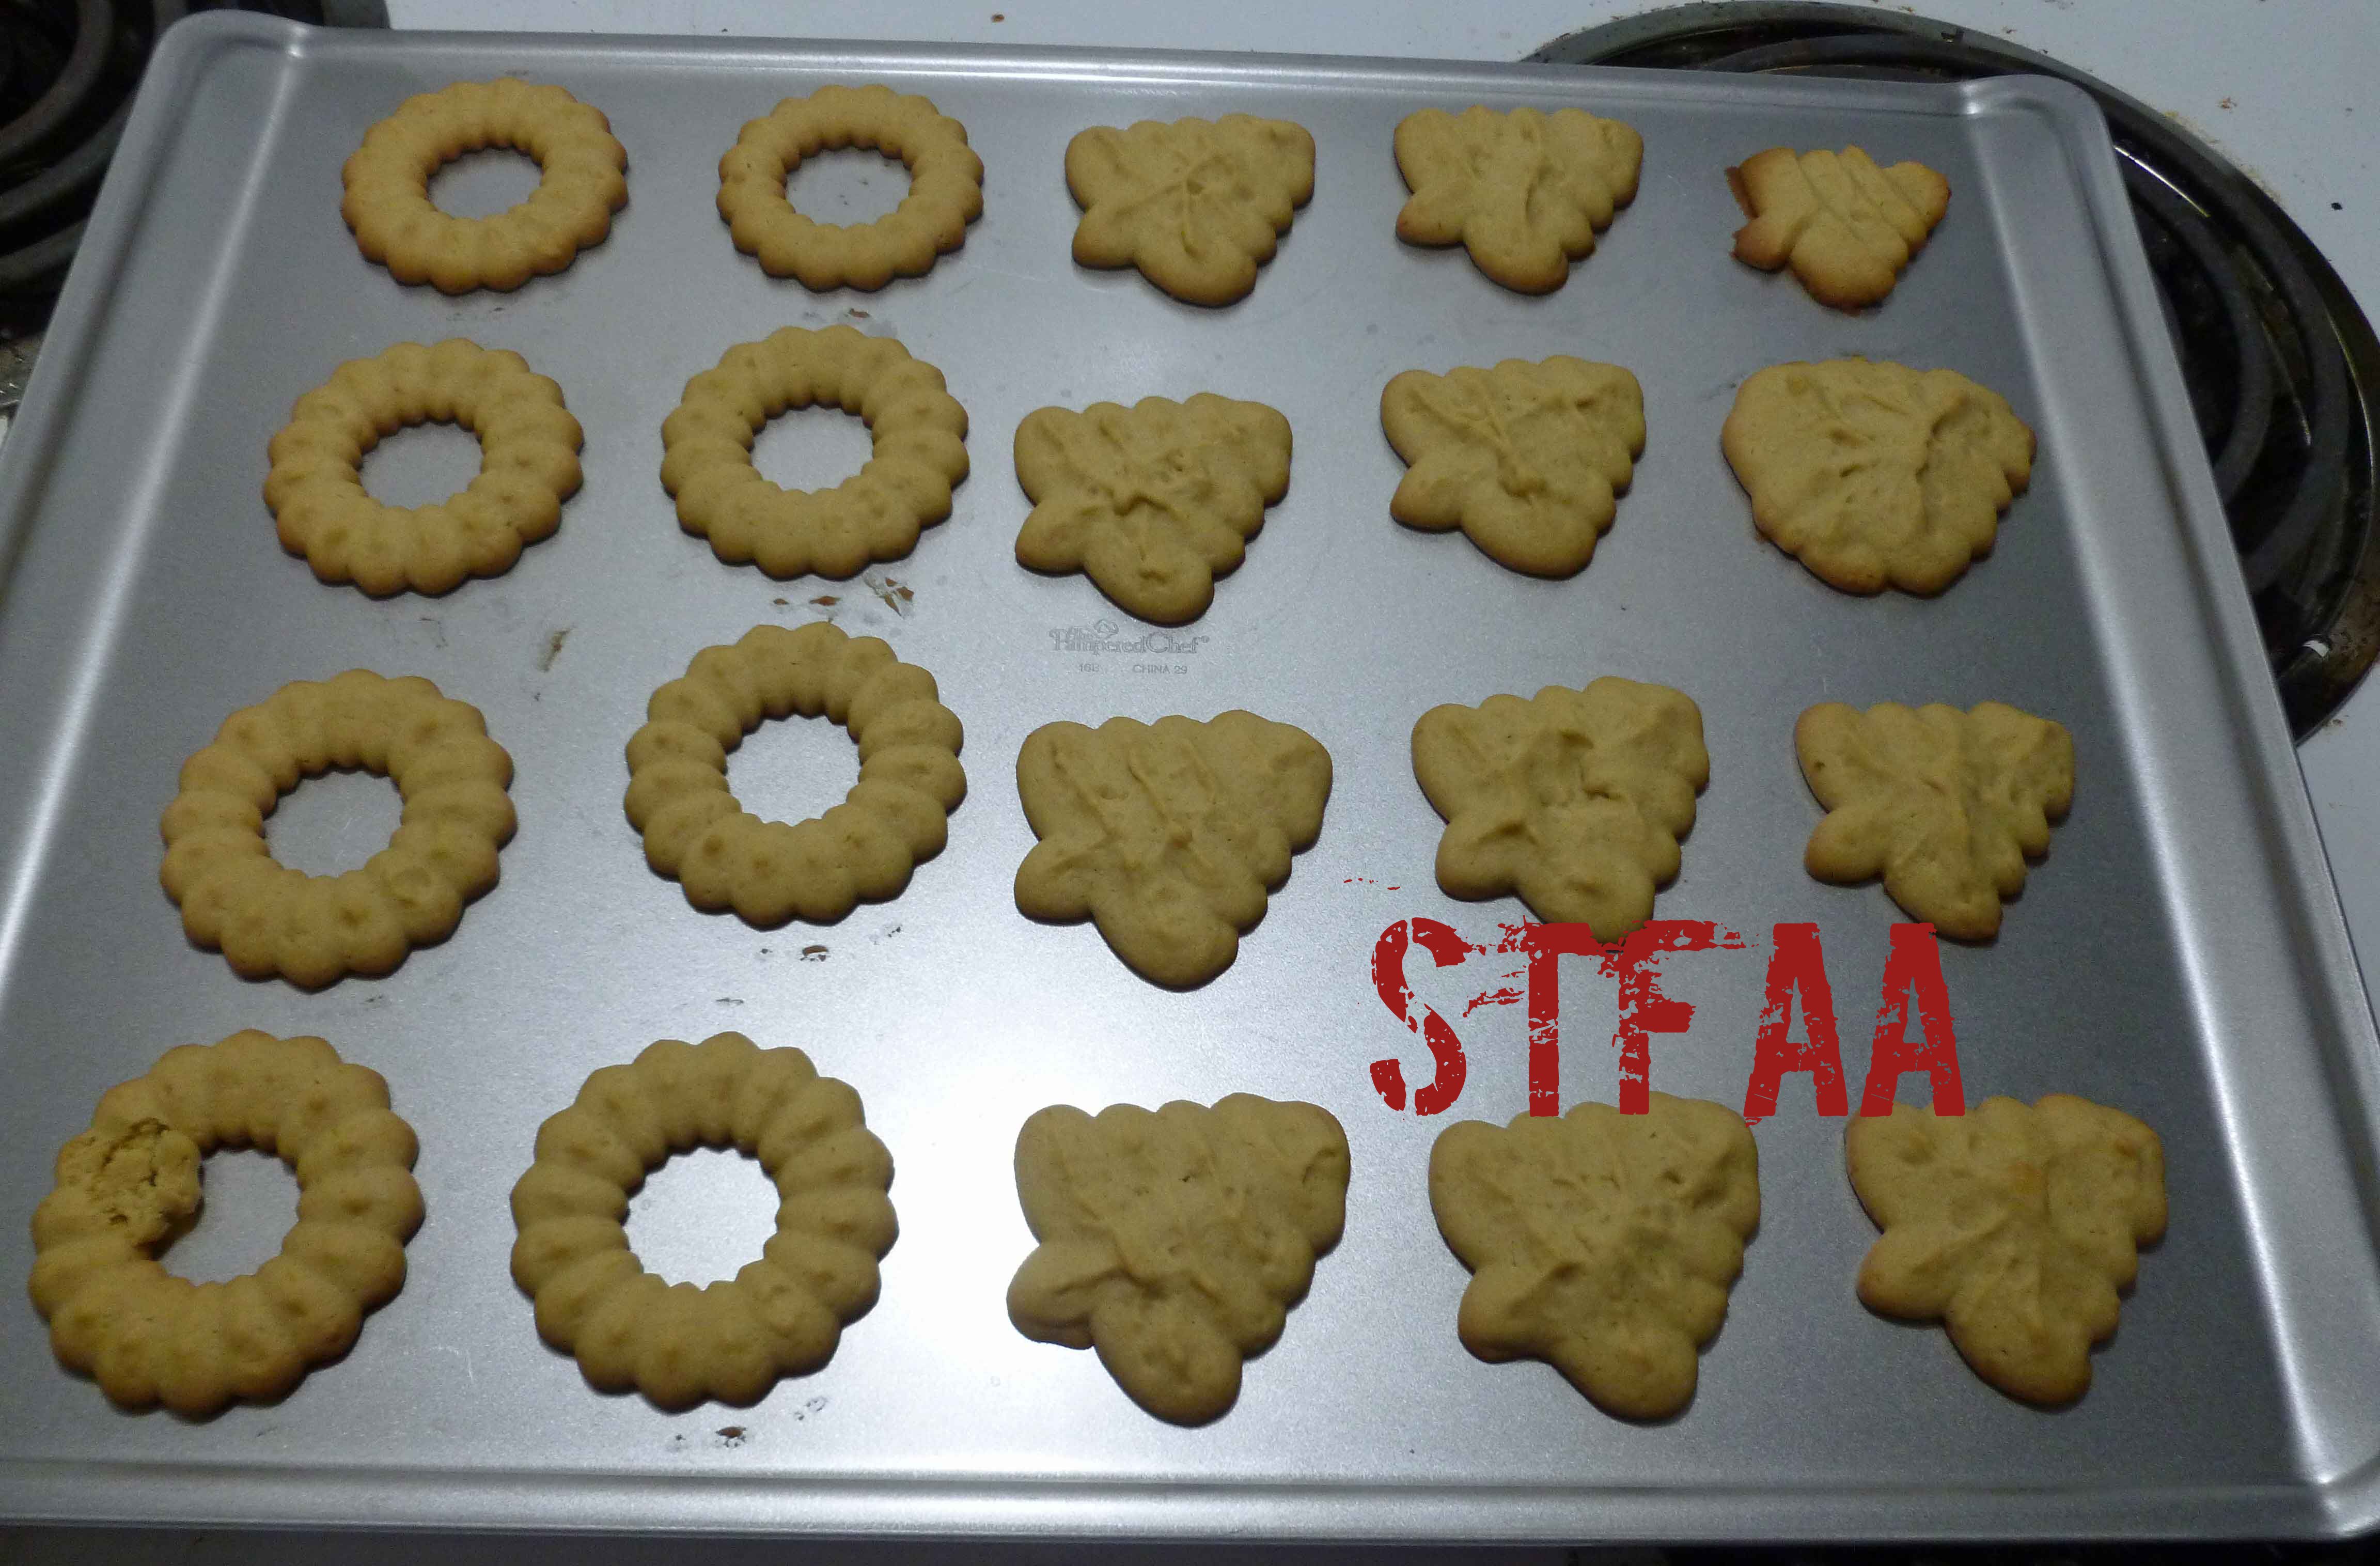
    5. If you are baking on metal cookie sheets, bake for 15-17 minutes depending on your oven. If you are using baking stones, bake for 19-21 minutes, depending on your oven.
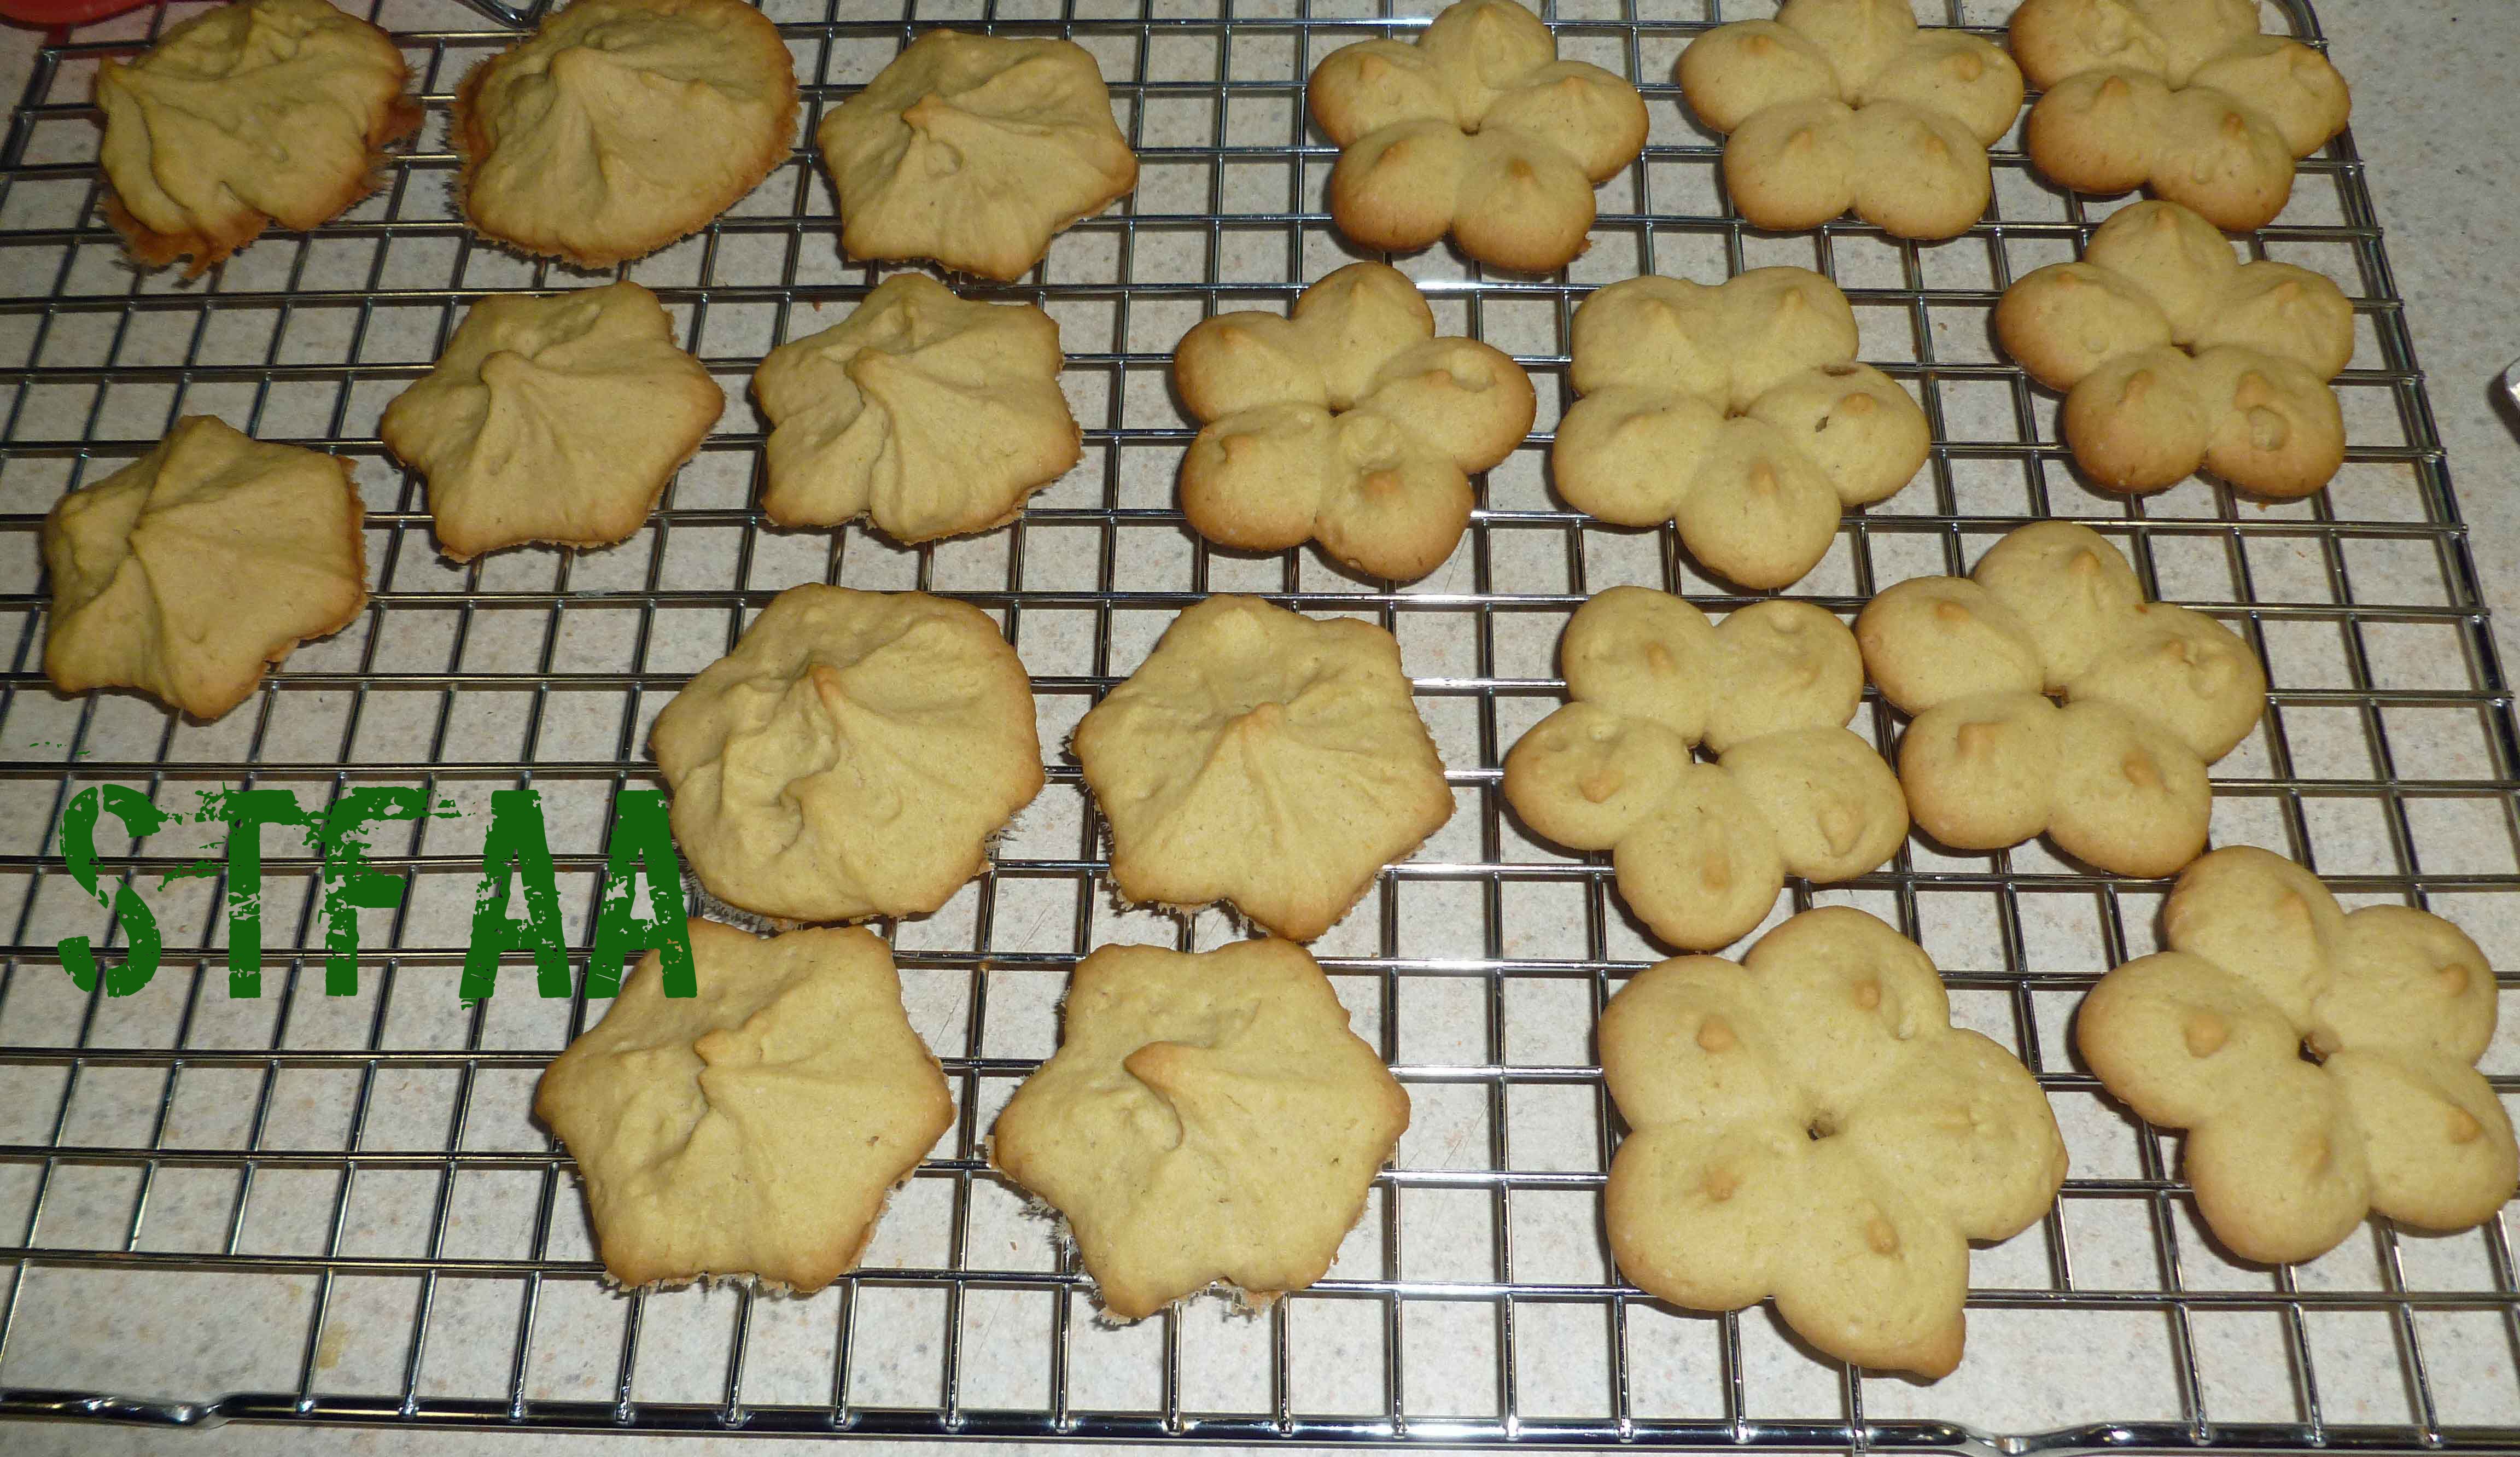
    6. Let cool on cookie sheet or baking stone for two minutes before removing to cool on a rack.
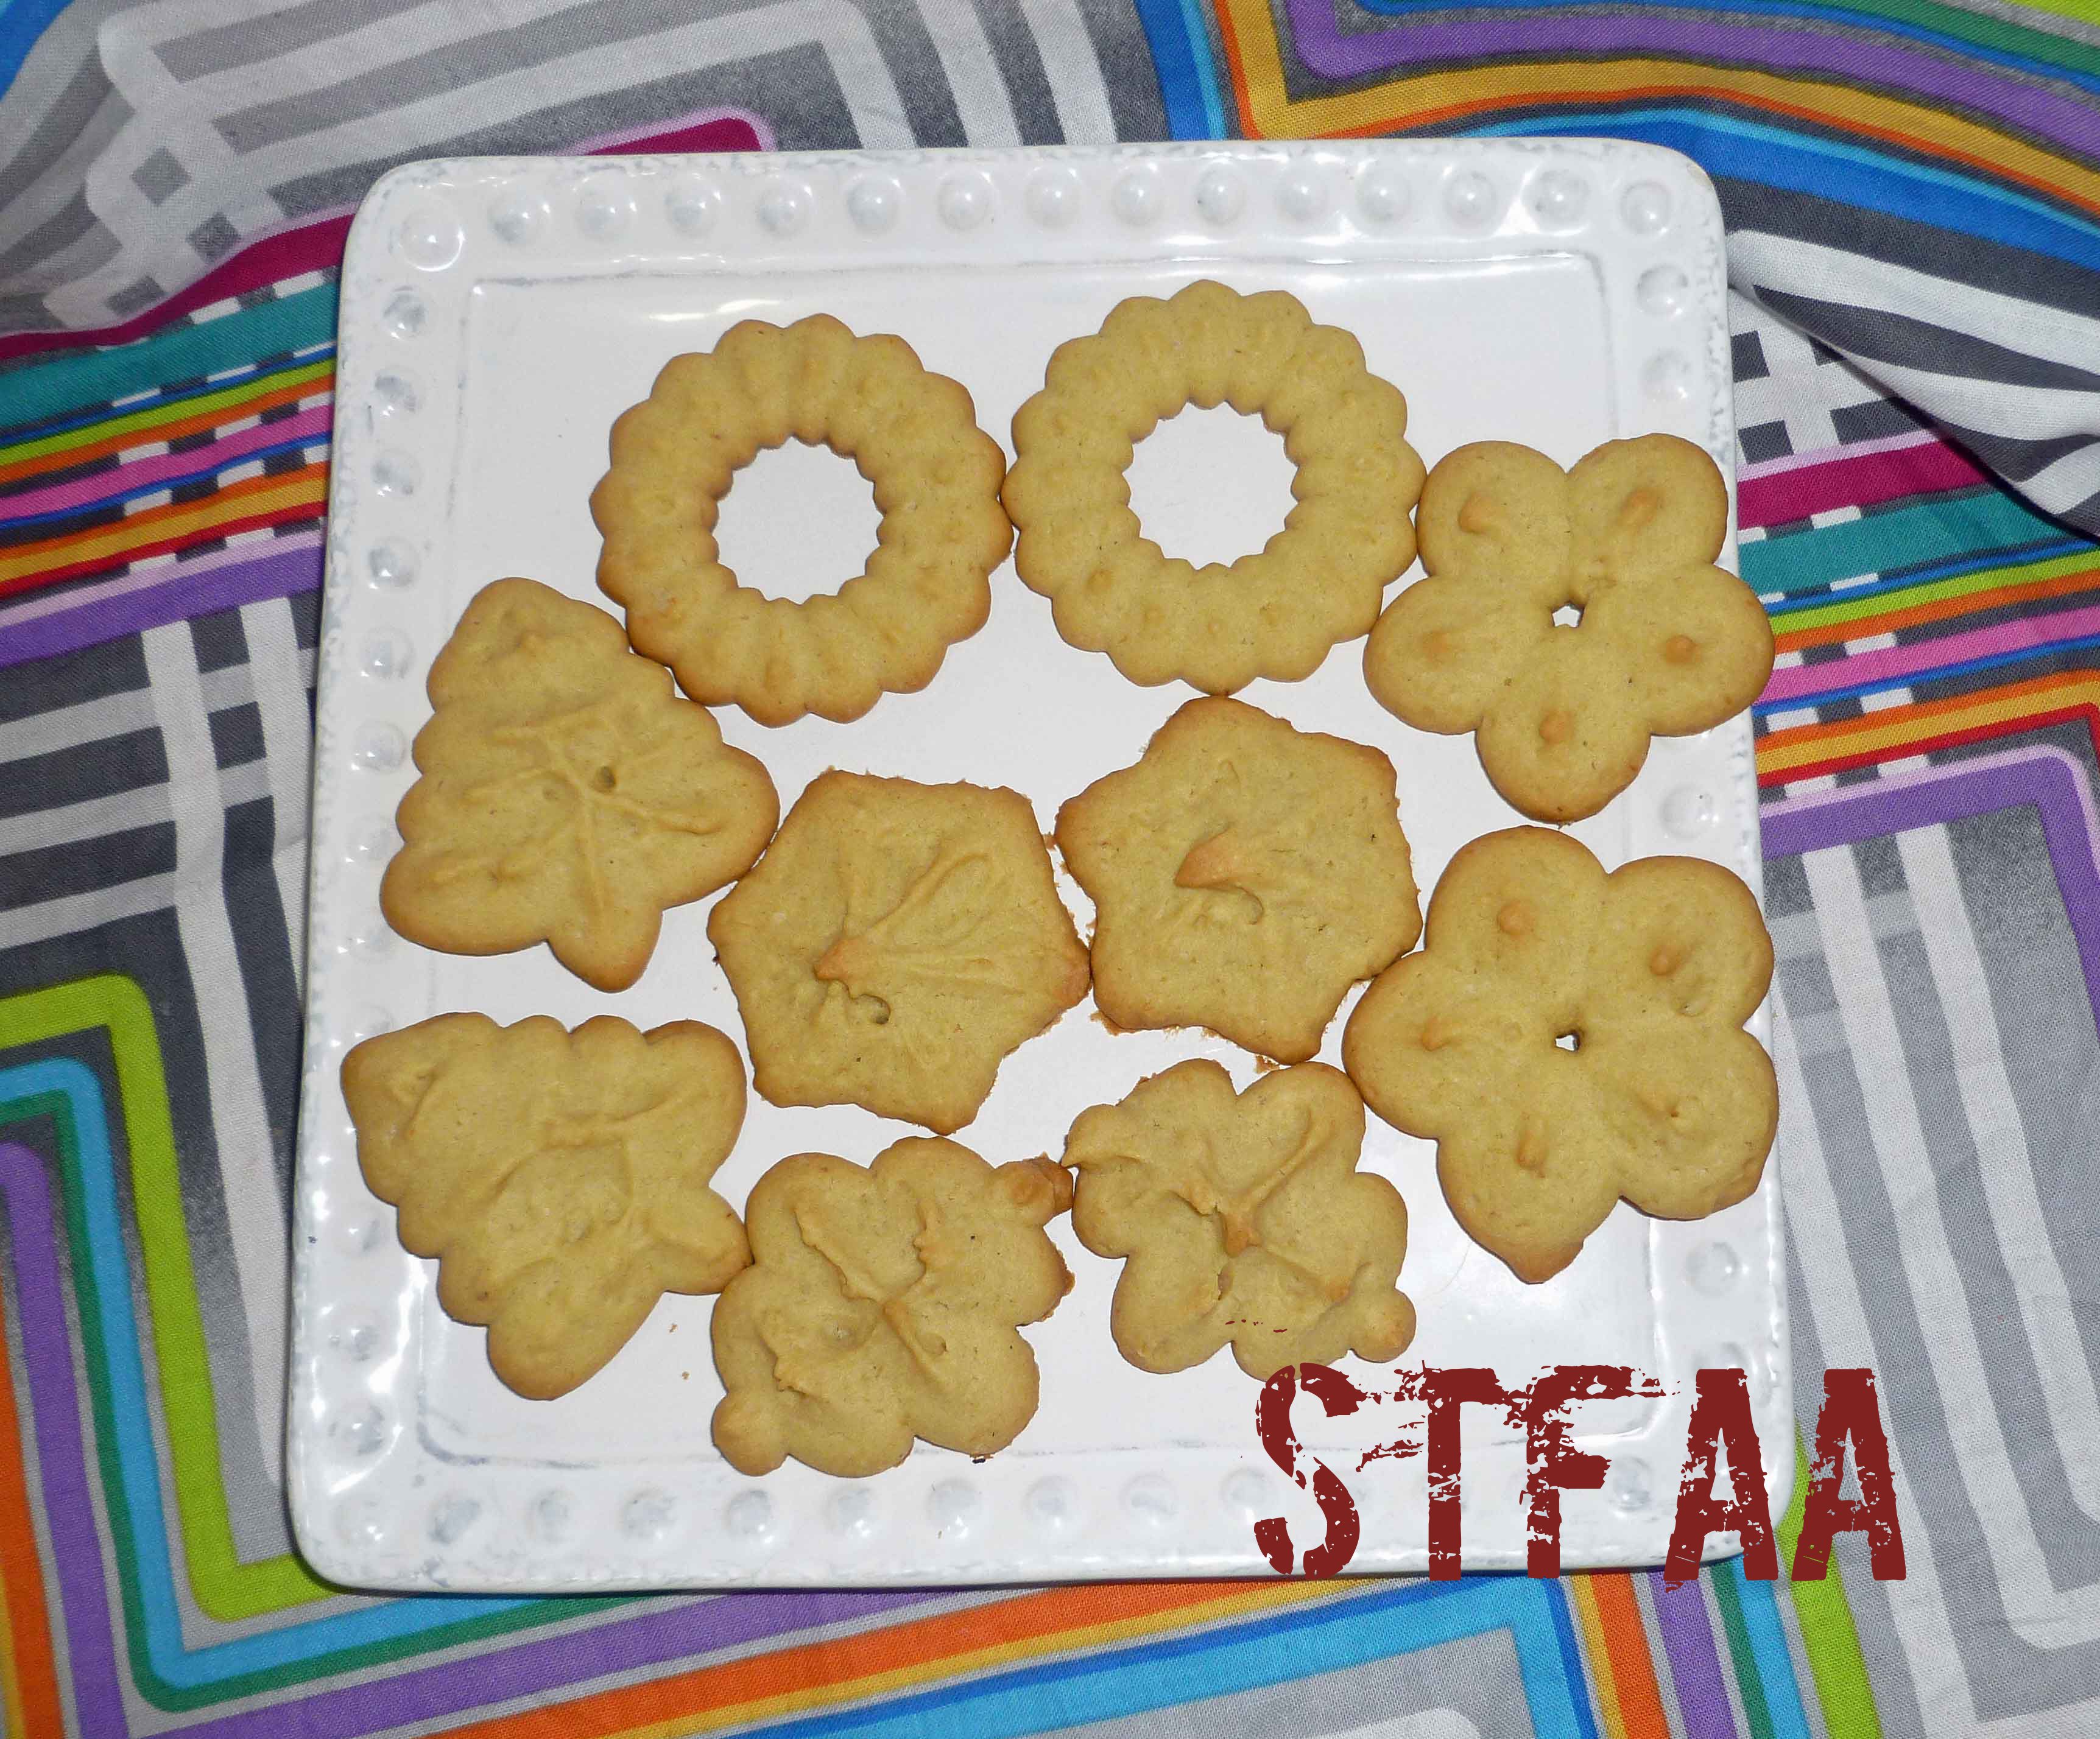
    Share this Recipe
     
    Powered byWP Ultimate Recipe
    Aquafaba/Psyllium mixture
    Aquafaba/Psyllium mixture
    Homemade Margarine and Brown and White Sugar before mixing
    Homemade Margarine and Brown and White Sugar before mixing
    Homemade Margarine and Sugar Mixture after beating
    Homemade Margarine and Sugar Mixture after beating
    Homemade Margarine and Sugar Mixture, after adding Aquafaba/Psyllium Mixture
    Homemade Margarine and Sugar Mixture, after adding Aquafaba/Psyllium Mixture
    Spritz or Cookie Press Cookie dough after all flour mixture has been added
    Spritz or Cookie Press Cookie dough after all flour mixture has been added
    Spritz or Cookie Press Cookie dough after pressed onto cookie sheets before baking
    Spritz or Cookie Press Cookie dough after pressed onto cookie sheets before baking
    Spritz or Cookie Press Cookies after baking
    Spritz or Cookie Press Cookies after baking
    Spritz or Cookie Press Cookies after baking
    Spritz or Cookie Press Cookies after baking
    Spritz or Cookie Press Cookies cooling on rack
    Spritz or Cookie Press Cookies cooling on rack
    Spritz or Cookie Press Cookies - Gluten-Free, Dairy-Free, and Egg-Free
    Spritz or Cookie Press Cookies – Gluten-Free, Dairy-Free, and Egg-Free

    Enjoy!

  • Roasted Yam Soup

    Roasted Yam Soup

    Roasted Yam Soup
    Roasted Yam Soup

    IMPORTANT CONTENT NOTE: Those of you who hate cilantro, sorry. Please go Google one of the 100,000 other root vegetable soups out there. I know, your condition is genetic, and I’m sorry for you. This soup lives and breathes cilantro, and if you leave it out, there will be no point in making this particular soup recipe. Come again?

    For those of you still here, hi. Welcome to another edition of “MaryKate made soup, and it’s not very pretty, but I swear it tastes good anyway.” I’m your host, MaryKate, and, yes. I made soup. In my first months here in Seattle, I’m exploring new grocery stores and new ingredients, and as it is fall, there are so many root vegetables out. Most of them I know, but I’m seeing so many different things beyond just “sweet potatoes” and “yams.” To be honest, I don’t care which they are — I buy and bake any of them. But recently, I’ve found myself with 1 or 2 each of 4 different kinds of tubers all labeled “yam” with no other identifying information. In order to compare them, I’ve roasted them — and they are different! Starchier, sweeter, more mild. And all the colors! Yam love. Honestly, the most impressive flavor were the boring white ones — a bit sweeter and starchier than regular sweet potatoes, and really tasty.

    Blending these into soup was a great decision. The cilantro lightens the earthy flavor of the tubers and really makes it something different — hearty, but not heavy, and somehow, fresh.

    yams-collage
    Notice: Trying to access array offset on value of type bool in /home/maryzahc/public_html/adultfoodallergies.com/wp-content/plugins/wp-ultimate-recipe/helpers/models/recipe.php on line 254

    Roasted Yam Soup
    Print Recipe
    Servings Prep Time
    6 servings 60 minutes
    Cook Time Passive Time
    60 minutes 30 minutes
    Servings Prep Time
    6 servings 60 minutes
    Cook Time Passive Time
    60 minutes 30 minutes
    Roasted Yam Soup
    Print Recipe
    Servings Prep Time
    6 servings 60 minutes
    Cook Time Passive Time
    60 minutes 30 minutes
    Servings Prep Time
    6 servings 60 minutes
    Cook Time Passive Time
    60 minutes 30 minutes
    Ingredients
    • 3.5 lbs. yams and sweet potatoes Get everything you can find — why not?
    • 1/2 lb. rutabega
    • 1-2 Tablespoons olive oil
    • 1 teaspoon kosher salt
    • 3/4 cup onion
    • 6 cups vegetable stock
    • 1 cup cilantro chopped + more for garnish
    Servings: servings
    Instructions
    1. Preheat oven to 450ºF.
    2. Peel and chop yams, sweet potatoes, rutabega, and onion. Go for about 1/2 inch cubes, but really, just try to get them all about the same size.
    3. Put all chopped vegetables into a bowl. Add the olive oil and salt and stir to coat. Start with the smaller amount of olive oil, but add more if you need it. You don’t want greasy, but you do want everything fully coated.
    4. Bake for 30-45 minutes, until all the vegetables begin to brown. This is where so much flavor is born.
    5. When you have about 15 minutes left of cooking, heat your stock and cilantro in a large soup pot over medium-low heat.
    6. When the roasted vegetables are done and the soup stock is simmering, add the veg to the stock. Stir well, and then puree. A stick blender is the easiest way to do this, but use a blender if that’s what you’ve got. When you have a nice thick puree, heat thoroughly (takes only a few minutes) and stir well.
    7. Serve with an added sprinkle of cilantro for extra flavor.
    Share this Recipe
     
    Powered byWP Ultimate Recipe

  • End of Winter Stew

    End of Winter Stew

    End of Winter Stew with Rice
    End of Winter Stew with Rice

    I made this for our first day of spring blizzard. Because in New England, we have a first day of spring blizzard, right? Basically, it’s a bunch of what I’d consider staple ingredients that I nearly always have in the house, spiced up with a small amount of spicy sausage I had leftover and froze.

    So it’s a veg-forward, but not vegetarian, dish. If you wanted to make it vegan, leave out the sausage, make sure you use vegetable broth, and up the spices by a good bit (add some hot sauce, if that’s your thing).

    This was a great soup/stew for that week where it was a little cold in the mornings and merely chilly at noon. It’s warm and warming, but it is also rather light. Serve with or without rice.

    End of Winter Stew without Rice
    End of Winter Stew without Rice

    Notice: Trying to access array offset on value of type bool in /home/maryzahc/public_html/adultfoodallergies.com/wp-content/plugins/wp-ultimate-recipe/helpers/models/recipe.php on line 254
    End of Winter Stew
    Print Recipe
    A quick, warming, but light mostly vegetable stew
    Servings Prep Time
    6-8 people 20 minutes
    Cook Time Passive Time
    40 minutes 20 minutes
    Servings Prep Time
    6-8 people 20 minutes
    Cook Time Passive Time
    40 minutes 20 minutes
    End of Winter Stew
    Print Recipe
    A quick, warming, but light mostly vegetable stew
    Servings Prep Time
    6-8 people 20 minutes
    Cook Time Passive Time
    40 minutes 20 minutes
    Servings Prep Time
    6-8 people 20 minutes
    Cook Time Passive Time
    40 minutes 20 minutes
    Ingredients
    • 1.5-2 cups onion, chopped (2 smaller onions)
    • 1/2 teaspoon salt
    • 1+ teaspoon olive oil
    • 2 cups sweet potatoes, cubed (one large)
    • 2 teaspoons garlic, chopped
    • 2 cups celery, chopped
    • 8 ounces (1 pkg) mushrooms, broken into pieces
    • 3.5-4 cups soup stock vegetable or chicken, your preference
    • 1 1/4 teaspoons seafood seasoning I used Penzey’s Chesapeake Bay
    • 15 ounces navy beans, cooked (drained and rinsed if canned)
    • 1/2+ cup andouille sausage, chopped (make sure this is safe for you), also, optional if you want to make it vegan
    Servings: people
    Instructions
    1. In a large stock pot over medium heat, add the onion, olive oil, and salt, stirring well. You may need more olive oil if you are using a larger pot than I did, or one with a “stickier” surface.
    2. When the onion begins to brown, add the rest of the ingredients in the order listed. Between each addition, pause to stir well. When adding the garlic, give it an extra minute — add more when you can smell the garlic cooking.
    3. When all of your ingredients have been added, cover the pot and let it come to a boil. Texture-wise, letting it come to a boil from medium heat seems to turn out a less mushy stew than turning the heat up to high.
    4. Once you’ve reached boiling, turn the heat down to low (but still simmering) and remove the lid. Cook 10-15 minutes, stirring occasionally, until the sweet potato is soft.
    5. This is really good served over rice, which will stretch the number of servings, but is also great alone.
    Recipe Notes

    If you plan to leave out the sausage for a vegan version, add more of the seafood seasoning and a pinch of cayenne or a few dashes of hot sauce to  get the warming heat of the spicy sausage. It’s there for flavor, not protein.

    Share this Recipe
     
    Powered byWP Ultimate Recipe
  • (Gluten-free, dairy-free) S’mores Pie

    (Gluten-free, dairy-free) S’mores Pie

    S'mores Pie -- campy goodness
    S’mores Pie — campy goodness

    This is the post for the chocolate lovers. I know. Today, you’re buying Valentine’s Day chocolate on sale, but here’s a classy way to do chocolate. PIE. Chocolate pie. Make this pie for a video games party (if that’s a thing you might do), for a Primary watching party, for Thanksgiving, for Pi Day (coming up!)

    Basically, I’m saying that it’s a pie for almost all occasions. Lovely graham cracker crust, rich, creamy chocolate filling, and toasted marshmallows on top. This pie should be served at least slightly chilled, so keep  that in mind (but in winter, that means it’s good in the car for a bit).

    I’ve used pre-made gluten-free graham crackers, which I keep around as a snack, and regular mini-marshmallows, which are safe for me. If you need to make graham crackers or marshmallows, we’ve got you covered (see the links in the recipe!), but plan ahead for the extra time.

    Enjoy the whole pie.

    S'mores Pie
    S’mores Pie

    Notice: Trying to access array offset on value of type bool in /home/maryzahc/public_html/adultfoodallergies.com/wp-content/plugins/wp-ultimate-recipe/helpers/models/recipe.php on line 254
    S’mores Pie
    Print Recipe
    Graham cracker crust, rich chocolate filling, and toasted marshmallows on top
    Servings Prep Time
    8-16 slices 5 minutes
    Cook Time Passive Time
    10 minutes 2 hours
    Servings Prep Time
    8-16 slices 5 minutes
    Cook Time Passive Time
    10 minutes 2 hours
    Ingredients
    Graham Cracker Crust
    • 1 1/2 cups graham cracker crumbs I like Kinnikinnick brand, but use regular if you don’t need gluten-free, and make your own if you need full control of ingredients
    • 1/3 cup brown sugar
    • 5 Tablespoons coconut oil can use other fat that works for you, but coconut oil sets nicely
    Chocolate Filling
    • 1 can (15 oz) full-fat coconut milk do not use “light”! It won’t set.
    • 1 bag (10 oz) safe-for-you chocolate chips (or chop 10 oz of your safe chocolate into small pieces)
    • 1 teaspoon vanilla extract
    Marshmallows
    • 1 1/2 cups mini marshmallows use what is safe for you — regular, vegan, or make our marshmallow recipe
    Servings: slices
    Instructions
    Crust
    1. Crush graham crackers. If you’ve had a bad day, put them in a bag and beat them with a rolling pin. That’s how I was taught to do it growing up, and it’s a good stress-reliever. But you can also use a food processor or blender for a quicker and smoother crumb.
    2. In a bowl, combine the graham cracker crumbs, sugar, and melted coconut oil. Do not try to do this in the pie plate! I always think this is going to be an excellent idea — why get two things dirty? But it NEVER works out well. With the higher sides of a bowl, you can quickly and completely mix all the crust ingredients using a fork, without scattering them all across the kitchen.
    3. Press crumb mixture into pie plate. This will not form up quite as well as a gluten-containing version does, so it really helps to start out with your greased hands to evenly spread the crust mix over the pie plate. If you need extra compacting, the bottom of a glass works well. Try to even out the top edges of the crust — this will help it hold together when it comes out of the pan.
    4. Chill the pie crust in the fridge for at least half an hour, but better 45 minutes. This is why coconut oil works better to keep the crust intact — it’s solidity when chilled is a benefit here.
    Filling
    1. Pour one can of coconut milk into a sauce pan. Heat over medium low until it begins to boil, stirring frequently. If the solids have somewhat separated, stir them back in to the coconut milk.
    2. When you have the coconut milk at a low boil, remove the pan from the heat. Add the chocolate and stir until it is completely combined with the coconut milk.
    3. Add the vanilla and stir well.
    4. Pour the prepared filling into the chilled pie crust, and put the pie in the freezer to set.
    5. Set your timer for 40 minutes. You want the pie to be mostly but not completely set when you top it with the marshmallows, as you want them to stick. Add the marshmallows and chill for another half an hour.
    6. Toast the marshmallows with your kitchen torch. Alternately, you can use your broiler for this — but set aside extra time to re-chill the entire pie before serving! The broiler will make the entire pie hot and it is easier to burn the marshmallows.
    Share this Recipe
     
    Powered byWP Ultimate Recipe
  • Valentine’s Day Gingerbread Frosted Cookies

    Valentine’s Day Gingerbread Frosted Cookies


    Valentine's Day Frosted Gingerbread Cookies
    Valentine’s Day Gingerbread Frosted Cookies

    Mary Kate and I try occasionally to think up recipes with holiday themes. Valentine’s Day is a somewhat of struggle for me, as I’m generally a bit cynical of the whole thing and not a very sentimental person. But I’ve been craving cookies for a while, and I’d gotten myself some cookie cutters (these and these) with an Amazon gift card I’d gotten for Christmas (thanks Mom!) and I was itching to give them a test drive.  Now granted, the Gingerdead Men cookie cutters aren’t much in the theme of Valentine’s Day, but they were too funny for me not to try out. I took them to work and they were a huge hit with people who have no allergies and can eat gluten, so I think they’re pretty awesome.

    Valentine’s Day Gingerbread Frosted Cookies

    I started with a recipe from Cara Reed’s Decadent Gluten-Free Vegan Baking book, which is an excellent resource.  However, due to my cocktail of allergies, I generally use her book as a starting point to experiment as I generally have to change quite a bit. This time, I had to change the flour mix as I seem to be having issues with potatoes and rice  and I suspect I may be allergic (sigh, shaking fist at the sky). I can’t use vegan shortening or vegan butter due to my corn and coconut allergies. I also can’t use flax as I’m allergic to it. I also wanted to kick up the spices a bit.

    To start, you’ll need to make the Gluten-free, Rice-free, Potato-free Flour Mix:


    Notice: Trying to access array offset on value of type bool in /home/maryzahc/public_html/adultfoodallergies.com/wp-content/plugins/wp-ultimate-recipe/helpers/models/recipe.php on line 254
    Gluten-free, Rice-free, Potato-free Flour Mix
    Print Recipe
    Servings Prep Time
    9 cups 15 minutes
    Servings Prep Time
    9 cups 15 minutes
    Gluten-free, Rice-free, Potato-free Flour Mix
    Print Recipe
    Servings Prep Time
    9 cups 15 minutes
    Servings Prep Time
    9 cups 15 minutes
    Ingredients
    • 2 cups sorghum flour
    • 2 cups oat flour
    • 2 cups millet flour
    • 2 cups tapioca starch
    • 1 cup arrowroot starch
    Servings: cups
    Instructions
    1. Measure all ingredients and place in a large mixing bowl. Using a whisk, mix the ingredients until well combined. Place in an air tight storage container and use in baking recipes.
    Share this Recipe
     
    Powered byWP Ultimate Recipe

    Once your flour mix is done, we can move onto the cookies.

    Cookie Dough:

    • 1/2 cup of cold lard, cold vegetable shortening, or vegan butter (vegan butter and vegetable shortening are not generally safe for those allergic to corn)
    • 2 1/2 cups of Gluten-free, Rice-free, Potato-free flour mix and a bit extra for rolling the dough
    • 1 teaspoon of baking soda
    • 1 1/4 teaspoon of ground ginger
    • 3/4 teaspoon of ground cinnamon
    • 1/4 teaspoon of ground cloves
    • 1/4 teaspoon of ground nutmeg
    • 1/2 cup of sugar
    • 1/2 cup of molasses (Plantation Molasses is the brand most tolerated by those allergic to corn)
    • 1 Tablespoon of ground chia seed
    • 3 Tablespoons of aquafaba
    Pink Royal Icing:
    • 1 1/4 cup powdered sugar
    • 1/4 teaspoon of  vanilla extract  (Here’s a bunch of recipes for vanilla extract, make sure to use safe alcohol if corn or wheat are an issue for you. I used a vodka made only from potatoes,  be careful as some vodkas may also use grain or corn.)
    • 1 Tablespoon of aquafaba
    • 1 teaspoon of beet puree (To make puree, either use canned or fresh cooked beets and puree them in a blender with a bit of cooking liquid)

    In a large bowl, whisk together the Gluten-free, Rice-free, Potato-free flour mix, baking soda, ginger, cinnamon, cloves, and nutmeg, until completely combined and set aside. In a small bowl, mix chia and aquafaba together until combined, and set aside.

    Using a stand mixer, beat the cold lard, cold vegetable shortening, or vegan butter on medium to high speed until softened. Add molasses, sugar, chia and aquafaba mixture, and half of the flour mixture and beat until combined, scraping down the sides as necessary. Then add the remaining flour mixture and beat it in slowly until combined.

    Using a stand mixer, beat the cold lard, cold vegetable shortening, or vegan butter on medium to high speed until softened. Add molasses, sugar, chia and aquafaba mixture, and half of the flour mixture and beat until combined, scraping down the sides as necessary. Then add the remaining flour mixture and beat it in slowly until combined.

    When dough is chilled, preheat oven to 375ºF, and line a baking sheet with parchment paper.

    Place piece of parchment paper large enough to cover your rolling surface. Lightly flour the parchment paper with some Gluten-free, Rice-free, Potato-free flour mix, flatten the dough ball and flip it to be covered with some of the flour.

    Flattened, floured doughball
    Flattened, floured doughball

    Add another piece of parchment paper on top. Roll the dough between the pieces of parchment paper to 1/8 of an inch thickness.

    Dough being rolled between two pieces of parchment
    Dough being rolled between two pieces of parchment

    If you don’t roll the cookies thin enough, they will spread.

    Dough rolled out
    Dough rolled out

    Cut shapes with a cookie cutter and place them 1 inch apart on the parchment covered baking sheet.

    Cookies on cookie sheet (placed much too closely, beware!)
    Cookies on cookie sheet (placed much too closely, beware!)

    Bake 7-13 minutes (range is for a metal sheet pan to Pampered Chef stoneware, you need more time for stoneware) until the edges are lightly browned.

    Cookies placed too closely and rolled too thick - A friend noted it looked like a cave made of hearts collapsing on the men, haha!
    Cookies placed too closely and rolled too thick – A friend noted it looked like a cave made of hearts collapsing on the men, haha!

    Cool on the baking sheet for 1 minute before transferring them to a wire rack.

    Cookies cooling on rack
    Cookies cooling on rack

    When they are cool, it’s time to frost them.  To make the Pink Royal Icing, place the powdered sugar, vanilla extract, aquafaba, and beet puree in a bowl and using a stand or electric mixer, beat ingredients until completely combined. If frosting is not firm enough, add additional powdered sugar by the teaspoon until it is.

    Pink Royal Icing
    Pink Royal Icing

    Place the frosting in a cake decorator and frost as you wish. Enjoy!

    Valentine's Day Gingerbread Frosted Cookies
    Valentine’s Day Gingerbread Frosted Cookies

    Notice: Trying to access array offset on value of type bool in /home/maryzahc/public_html/adultfoodallergies.com/wp-content/plugins/wp-ultimate-recipe/helpers/models/recipe.php on line 254
    Valentine’s Day Gingerbread Frosted Cookies
    Print Recipe
    Cookies for your sweetheart!
    Servings Prep Time
    2 dozen 30 minutes
    Cook Time Passive Time
    7-13 minutes 3 hours
    Servings Prep Time
    2 dozen 30 minutes
    Cook Time Passive Time
    7-13 minutes 3 hours
    Valentine’s Day Gingerbread Frosted Cookies
    Print Recipe
    Cookies for your sweetheart!
    Servings Prep Time
    2 dozen 30 minutes
    Cook Time Passive Time
    7-13 minutes 3 hours
    Servings Prep Time
    2 dozen 30 minutes
    Cook Time Passive Time
    7-13 minutes 3 hours
    Ingredients
    Pink Royal Icing
    • 1 1/4 cup powdered sugar
    • 1/4 tsp vanilla extract
    • 1 tbsp aquafaba
    • 1 tsp beet puree (To make puree, either use canned or fresh cooked beets and puree them in a blender)
    Servings: dozen
    Instructions
    Making Cookies
    1. In a large bowl, whisk together the Gluten-free, Rice-free, Potato-free flour mix, baking soda, ginger, cinnamon, cloves, and nutmeg, until completely combined and set aside. In a small bowl, mix chia and aquafaba together until combined, and set aside.
    2. Using a stand mixer, beat the cold lard, cold vegetable shortening, or vegan butter on medium to high speed until softened. Add molasses, sugar, chia and aquafaba mixture, and half of the flour mixture and beat until combined, scraping down the sides as necessary. Then add the remaining flour mixture and beat it in slowly until combined.
    3. Divide the dough in half and create two balls. Either wrap in saran wrap or place in a bowl and cover, and then place in the fridge and chill the dough for at least three hours, I prefer overnight.
    4. When dough is chilled, preheat oven to 375ºF, and line a baking sheet with parchment paper.
    5. Place piece of parchment paper large enough to cover your rolling surface. Lightly flour the parchment paper with some Gluten-free, Rice-free, Potato-free flour mix, flatten the dough ball and flip it to be covered with some of the flour, and add another piece of parchment paper on top. Roll the dough between the pieces of parchment paper to 1/8 of an inch thickness. If you don’t roll the cookies thin enough, they will spread. Cut shapes with a cookie cutter and place them 1 inch apart on the parchment covered baking sheet.
    6. Bake 7-13 minutes (range is for a metal sheet pan to Pampered Chef stoneware, you need more time for stoneware) until the edges are lightly browned. Cool on the baking sheet for 1 minute before transferring them to a wire rack.
    Making Frosting
    1. Place powdered sugar, vanilla extract, aquafaba, and beet puree in a bowl and using a stand or electric mixer, beat ingredients until completely combined. If frosting is not firm enough, add additional powdered sugar by the teaspoon until it is.
    Share this Recipe
     
    Powered byWP Ultimate Recipe
  • Gluten-free Apple Pie (vegan option)

    Gluten-free Apple Pie (vegan option)
    Gluten-free Apple Pie (vegan option)

    Now that we have have a pie crust that works, of course I had to make apple pie. Because most of you won’t have the copious amount of home canned apple pie filling that is currently sitting in my garage, I made one up using fresh apples.

    Gluten-free Apple Pie (vegan option)
    Gluten-free Apple Pie (vegan option)

    Gluten-free Apple Pie (vegan option)

    • batches of our Gluten-free Pie Crust (vegan option) recipe
    • 7-8 cups thinly sliced, peeled apples (I used Cortland apples)
    • 1/2 cup sugar
    • 1/4 cup of brown sugar tightly packed
    • 2 tablespoons tapioca starch or arrowroot starch
    • 3/4 teaspoon ground cinnamon
    • 1/8 teaspoon ground allspice
    • 1/8 teaspoon ground nutmeg

    Make two batches of our Gluten-free Pie Crust (vegan option) recipe  and chill the resulting dough balls as described until you’re ready for them.

    Preheat oven to 400° F. Peel, core and slice your apples if you haven’t already.

    Peeled, cored and sliced apples
    Peeled, cored and sliced apples

    Place sugar, brown sugar, tapioca starch or arrow root, cinnamon, nutmeg and allspice into a large bowl.

    Dry ingredients
    Dry ingredients

    Mix dry ingredients until well combined.

    Dry ingredients well combined
    Dry ingredients well combined

    Mix apples into dry ingredients until combined and set aside.

    Dry ingredients mixed with apples
    Dry ingredients mixed with apples

    Take chilled dough balls and use one to roll out bottom crust for pie. Place in pie pan, making sure that the rolled crust is wide enough to cover the sides of the pie pan.

    Bottom crust placed in pie pan
    Bottom crust placed in pie pan

    Place apples in pie pan.

    Apples placed in pie pan
    Apples placed in pie pan

    Use other dough ball to roll out top crust and place over top of pie pan, sealing top crust over bottom crust. Using a knife, cut a few vent holes in the top of the pie crust.

    Top crust placed in pan and edges sealed
    Top crust placed in pan and edges sealed

    Bake for 60 to 75 minutes until the crust is browned to your liking.

    Gluten-free Apple Pie (vegan option)
    Gluten-free Apple Pie (vegan option)

    This cooks longer than a “regular” pie, because of the increased amount of apples (a standard recipe calls for 6 cups but I like mine with more) and the gluten-free crust.

    Enjoy!


    Notice: Trying to access array offset on value of type bool in /home/maryzahc/public_html/adultfoodallergies.com/wp-content/plugins/wp-ultimate-recipe/helpers/models/recipe.php on line 254
    Gluten-free Apple Pie (vegan option)
    Print Recipe
    Classic apple pie with gluten-free crust
    Servings Prep Time
    6-8 slices depending on size 60 minutes
    Cook Time Passive Time
    60-75 minutes 60-75 minutes
    Servings Prep Time
    6-8 slices depending on size 60 minutes
    Cook Time Passive Time
    60-75 minutes 60-75 minutes
    Ingredients
    • 2 batches Gluten-free Pie Crust (vegan option) recipe http://adultfoodallergies.com/gluten-free-pie-crust-vegan-option/
    • 6 cups thinly sliced, peeled apples I used Cortland apples
    • 1/2 cup sugar
    • 1/4 cup brown sugar
    • 2 tbsp tapioca starch
    • 3/4 tsp ground cinnamon
    • 1/8 tsp ground nutmeg
    • 1/8 tsp allspice
    Servings: slices depending on size
    Instructions
    1. Make two batches of our Gluten-free Pie Crust (vegan option) recipe at http://adultfoodallergies.com/gluten-free-pie-crust-vegan-option/ and chill the resulting dough balls as described until you’re ready for them.
    2. Preheat oven to 400° F. Peel, core and slice your apples if you haven’t already.
    3. Place sugar, brown sugar, tapioca starch or arrow root, cinnamon, nutmeg and allspice into a large bowl. Mix dry ingredients until well combined. Mix apples into dry ingredients until combined and set aside.
    4. Take chilled dough balls and use one to roll out bottom crust for pie. Place in pie pan, making sure that the rolled crust is wide enough to cover the sides of the pie pan. Place apples in pie pan.
    5. Use other dough ball to roll out top crust and place over top of pie pan, sealing top crust over bottom crust. Using a knife, cut a few vent holes in the top of the pie crust.
    6. Bake for 60 to 75 minutes until the crust is browned to your liking. This cooks longer than a “regular” pie, because of the increased amount of apples and the gluten-free crust.
    Share this Recipe
     
    Powered byWP Ultimate Recipe
  • Gluten-free Pie Crust (vegan option)

    Gluten-free Pie Crust (vegan option)

    When I first was diagnosed with my wheat allergy (yep, actually allergic, not celiac), I tried to do a pie crust. I figured that all I’d have to do is mix some rice flour with shortening (I still had a safe-ish one at that point) and a bit of salt and voila, it’d all work out. So that’s what I did and made a pot pie. Ummm…not so much. It was like eating a pot pie with a layer of very fine beach sand on it. Appetizing, right?

    Pie crust has been a much bigger struggle than I originally anticipated. I ended up not having a safe shortening, and I can’t buy commercial lard. So I have to render the lard at home. Xanthan gum is problematic for me on a number of levels, and I don’t care for guar gum. So I put off the problem for a while. However, after hearing about aquafaba, I decided to give it another go, and used this recipe as a starting point. I switched out a flour and switched amounts around, got rid of the gum, used cold aquafaba (I refrigerated it) instead of water, and used lard instead of shortening (if you have a safe shortening to use instead of the lard, go for it; it should work).

    Gluten-free Pie Crust (Vegan Option)

    • 1/3 cup of sorghum flour
    • 1/3 cup of Otto’s Naturals cassava flour
    • 1/3 cup of arrowroot starch
    • 1/4 cup of millet  flour
    • 1/2 teaspoon of salt
    • 1/2 cup of cold lard or cold shortening
    • 1 1/2 teaspoons of apple cider vinegar
    • 5 Tablespoons of cold aquafaba.

    Whisk together the sorghum flour, cassava flour, arrowroot starch, millet flour and salt in a large mixing bowl.

    Flour mixture
    Flour mixture

    Using a pastry blender or a fork, cut in the lard or shortening until the mixture looks like crumbs.

    Flour mixture after cutting in lard or shortening
    Flour mixture after cutting in lard or shortening

    Mix the water, aquafaba and apple cider vinegar together until blended thoroughly in a small bowl or glass measuring cup, and add it to the flour mixture, stirring until it comes together to form a dough.

    Mixture formed into dough ball
    Mixture formed into dough ball

    Shape the dough into a smooth ball, and put the dough ball into the freezer to chill for 30 minutes. You can chill it for longer, it’ll help make the pie crust more flaky and crisp.

    Using some of your other flours (I used sorghum) dust the surface of your rolling space.  I was able to roll out my pie crust on a rolling mat and use my rolling pin to transfer the pie crust to the pie plate without too much difficulty. However, if you like your crust thin, try doing rolling your crust out on parchment paper to make it easier to transfer to the pie pan. Make sure you use plenty of dusting flour so that it doesn’t stick to the rolling surface or parchment paper.

    You can also use the crust to make tarts or stuffed pastries. The dough does not have the same elasticity as normal pie dough, but you can work with it a little, You can’t bend it in half because it will break. but you can stack pieces of dough on top of each other as long as the filling isn’t too tall. Next time I might experiment with larger top pieces to accommodate more filling.

    Bake your pie crust according to your pie recipe. Since I was winging it, I cooked my little pies, tarts, and pastries in the slide slow above for about 45 to 60 minutes.  If you’re worried about soggy crusts, you can try blind baking your bottom crust.  The Kitchn explains here much better than I can.

    Have fun, and send us pictures of your creations!


    Notice: Trying to access array offset on value of type bool in /home/maryzahc/public_html/adultfoodallergies.com/wp-content/plugins/wp-ultimate-recipe/helpers/models/recipe.php on line 254
    Gluten-free Pie Crust (vegan option)
    Print Recipe
    A lovely crust for both dessert and savory applications. Double the recipe to make a top and bottom pie crust.
    Servings Prep Time
    1 single crust 45 minutes
    Passive Time
    30 minutes
    Servings Prep Time
    1 single crust 45 minutes
    Passive Time
    30 minutes
    Ingredients
    • 1/3 cup sorghum flour
    • 1/3 cup Otto’s Naturals cassava flour
    • 1/3 cup arrowroot starch
    • 1/4 cup millet flour
    • 1/2 tsp salt
    • 1/2 cup cold lard or cold vegetable shortening
    • 1 1/2 tsp apple cider vinegar
    • 5 tbsp cold aquafaba
    Servings: single crust
    Instructions
    1. In a large bowl, whisk together the sorghum flour, the cassava flour, arrowroot starch, millet flour, and salt, until they are thoroughly mixed.
    2. Using a pastry blender or a fork, cut in the lard or vegetable shortening until the mixture looks like crumbs.
    3. In a small bowl or glass measuring cup, mix the aquafaba and apple cider vinegar together until it is well blended. Add the liquid mixture to your flour mixture and stir until it comes together to form a dough.
    4. Shape the dough into a smooth ball, and put the dough ball into the freezer to chill for 30 minutes before rolling it out.
    5. Using some of your other flours (I used sorghum) dust the surface of your rolling space. I was able to roll out my pie crust on a rolling mat and use my rolling pin to transfer the pie crust to the pie plate without too much difficulty. However, if you like your crust thin, try doing rolling your crust out on parchment paper to make it easier to transfer to the pie pan. Make sure you use plenty of dusting flour so that it doesn’t stick to the rolling surface or parchment paper.
    6. Place pie crust in pie plate, and fill pie. Bake according to pie recipe. If you’re concerned about soggy crust, you may wish to blind bake your bottom crust first.
    Share this Recipe
     
    Powered byWP Ultimate Recipe
  • Gingerbread Modern Haus

    Modern gingerbread masterpieces. Photo by J. Andrews
    Modern gingerbread masterpieces. Photo by J. Andrews

    One of my favorite things when I was about 12 was making this gingerbread village for the holidays. It was from the Southern Living cookbook, had two houses and a little church, and I’d make walls and a skating pond and generally took me a full day to construct. Gingerbread houses are generally not the tastiest cookies — in order to be structurally sound, they need to be rather hard and dry, and then you leave them out for a while, so they get stale. But they look so cool! I don’t know if we ever ate the village, given that I wouldn’t let anyone touch it.

    Unadorned and decorating. Photos by J. Andrews
    Unadorned and decorating. Photos by J. Andrews

    Last year, I made gingerbread cookies for the first time in years — gluten-free. They were good, but softer than houses. This year, I was more ambitious, so I tried a few different recipes until I got one that seemed like it might be structurally sound. THIS IS NOT MY RECIPE. I just slightly altered one from Fork and Beans, and then I overbaked the cookies slightly. But I did design the houses, made a “safe” frosting for Denise, and decorate them. Denise made the gumdrops, and we made the marshmallows together. It was an incredible labor of great artistic merit, and we destroyed it all within two days. As an adult, yeah, it’s awesome to build houses out of cookies and candy, but they then need to be enjoyed. Who wastes all that good sugar?

    The blizzard-bound A-frame. Photo by J. Andrews
    The blizzard-bound A-frame. Photo by J. Andrews

    First up, make the candy and stuff you want for decorating. See the posts linked above.

    Second, make the cookies. HERE are your designs, or design your own. Or check out Pinterest, as I am willing to bet there are tons.

    Vegan, Gluten-free Gingerbread Cookies, altered from Fork and Beans

    • 1/2 cup vegan shortening (I used Spectrum)
    • 2 1/2 cups gluten-free all-purpose flour (again, I point you back to Fork and Beans)
    • 1/2 cup granulated sugar (choose corn-free if you need to)
    • 1/2 cup molasses
    • 1 chia egg (1 Tablespoon ground chia seeds mixed with 3 Tablespoons water, set aside to gel)
    • 1 teaspoon baking soda (again, choose corn-free if you need to)
    • 2 teaspoons ground ginger
    • 1 teaspoon cinnamon
    • 1/2 teaspoon ground cloves

    Pre-heat the oven to 375ºF

    Beat the shortening until soft and fluffy. Add half the flour.

    Add the sugar, molasses, chia egg, baking soda, and spices and beat until combined.

    Add the rest of the flour and beat well.

    Divide the dough in two, cover tightly with plastic wrap, and refrigerate until cold. I just did it overnight.

    Roll out the dough between two sheets of parchment paper until about 1/8-inch thick (or until it looks “thin enough” and you are sick of rolling. I am not patient). Put the rolled out dough on a cookie sheet and re-chill it in the fridge while you roll out the other ball. Then trade them out for cutting.

    Using the patterns linked — or using your own — cut out the right number of pieces. Believe me, double-check your count! Try to space these out so that you don’t need to move them again. Peel the excess dough from around them — ball this up and re-chill it. (This is my favorite thing about gluten-free dough — you can’t really overwork it, as there is no gluten to get tough!)

    Leaving the cookies on the parchment (and I’d suggest you use the parchment, not silicone sheets, as I don’t really advise cutting on those), on the baking sheet, bake for 15 minutes, or until pretty firm. Remember, these are now architectural building blocks you’re making. Drag the parchment to a wire rack and cool the cookies completely.

    Mortar Frosting

    • 1/4 cup shortening (butter, lard, Crisco, whatever you want. We used lard that Denise rendered, as that is safe for her)
    • 1 teaspoon vanilla extract
    • 2-4 cups powdered sugar (again, be safe — Trader Joe’s powdered sugar uses tapioca starch, not corn, so I used that)

    Beat shortening until creamy and fluffy. Add the vanilla and beat more. Gradually add the powdered sugar. Depending on the temperature and your choice of shortening, you may need more or less powdered sugar. Remember, this is mortar. You want this to be stiff frosting. So I’d suggest more, not less, powdered sugar. (Tip: If you’re using Earth Balance soy-free, add a large pinch of xanthan gum or you will not have a room-temp stable mortar.)

    Load this into a pastry bag or frosting gun and assemble your houses.

    ASSEMBLE!

    Tips for assembly — the A-frame is kind of hard to put together! Lay one roof piece down and frost both triangular walls onto it. Then add the other (put the frosting on the wall pieces), and then flip it upright. That seems to work okay.

    With the modern shed roof, lay the tall wall flat. Add both end walls to that, then add the shorter “front” wall. Stand up your roofless house, and then add frosting all along the roofline before putting the roof on.

    Now? Decorate with whatever you want. Use more frosting.

    House On a Slant. Photo by J. Andrews
    House On a Slant. Photo by J. Andrews

    Share your masterpieces with people you like. And hey, if you make these, share a photo or two with us, too. We’d love to see what you come up with.