Notice: Function _load_textdomain_just_in_time was called incorrectly. Translation loading for the wp-ultimate-recipe domain was triggered too early. This is usually an indicator for some code in the plugin or theme running too early. Translations should be loaded at the init action or later. Please see Debugging in WordPress for more information. (This message was added in version 6.7.0.) in /home/maryzahc/public_html/adultfoodallergies.com/wp-includes/functions.php on line 6121
Vegetarian/Vegan – Page 13 – surviving the food allergy apocalypse (archive)

Tag: Vegetarian/Vegan

Recipes contain no animal products or by-products. Consider the sourcing of your ingredients if purity is important to you.

  • Grilled Peach Salsa


    Grilled Peach Salsa - Photo by J. Andrews
    Grilled Peach Salsa – Photo by J. Andrews


    When Mary Kate and I began to plan the cookout we held several weeks ago (grilling, friends and lots o’ posts for the blog, what could be better?), we started with thinking about what ingredients were in season and could be grilled.  We wanted to do a dessert, but I couldn’t figure out anything with my restrictions by the time we were solidifying the menu. I had seen a recipe for peach salsa for canning, but I wondered what it would be like grilled instead, because it would bring out the sweetness of the peaches and combine it with some lovely caramelized, smokey flavors. So we tried it. It’s good. And for those of you that can’t have chips like me (the corn chips are only to make the picture pretty in my case, although Mary Kate can eat them), this salsa is really good on pork chops as a sauce. You could also use it as a marinade or a glaze on pork or chicken, depending on how finely you chop the ingredients or just put it in the blender for a peach barbecue sauce. This is a low heat salsa, so don’t be afraid because I’m posting it. For the chili heads, don’t worry, I’ve got a hot sauce coming up in few weeks that blows my head off, and will have appropriate warnings.

    Grilled Peach Salsa

    • 1 pound of peaches, grilled
    • 1 small red red onion, grilled
    • 1/2 of a orange bell pepper, grilled (If you don’t know what to do with the half of orange bell pepper you’ll have left over, de-stem and de-seed it, put it in a freezer zip top bag and put it in your freezer. Peppers need no additional prep to freeze. Use it the next time you make a soup, stew, chili or marinara sauce.)
    • 2 jalapeno peppers, grilled
    • 1/2 of a bulb of garlic, with top cut off and with most of the outer layer peels removed (Grill the whole bulb and put the remainder in the fridge to use for mashed potatoes or something else where roasted garlic would be awesome)
    • 1/2 tablespoon of olive oil or other safe-for-you oil
    • 1/4 cup of white wine vinegar
    • 2 Tablespoons brown sugar
    • 1/2 teaspoon of ground cumin
    • 1/8 teaspoon of ground cayenne pepper

     **Please keep in mind as you look at the pictures that I was cooking a whole lot of other things the day we were grilling, so the pictures do not reflect the correct amounts of the ingredients shown, or may show additional ingredients. Also, my original recipe made a holy ton of salsa, so we cut the ingredients in half for the purposes of this post.

    De-stem and de-seed your peppers.

    Peppers de-stemmed and de-seeded.
    Peppers de-stemmed and de-seeded  – Photo by J. Andrews

    Place the peppers on the grill and grill until they get a bit tender and have a bit of char on them.

    Peppers on the grill
    Peppers on the grill – Photo by J. Andrews
    Peppers and Garlic on the grill
    Peppers and Garlic on the grill – Photo by J. Andrews

    Take your garlic bulb, slice off the top so that the cloves are exposed a bit (see the picture and description in our previous Grilled Salsa recipe), and place it on some aluminum foil large enough to wrap the garlic in as shown in the picture above. Drizzle the olive oil over your garlic bulb, and wrap the aluminum foil around it and place it on the grill. Roast the garlic until the cloves are cooked and mushy.

    Trim and peel your onion and then slice it in about half to one inches slices and place on the grill. Grill until you have a bit of char, and the onion is tender. (Ours were a bit more charred probably than strictly necessary, we were having issues with the grill, totally user error.)

    Sliced Onions
    Sliced Onions – Photo by J. Andrews
    Sliced onions on the grill
    Sliced onions on the grill – Photo by J. Andrews
    Sliced onions on the grill just before they got a bit too done.
    Sliced onions on the grill just before they got a bit too done – Photo by J. Andrews

    Cut your peaches in half and remove the pit. On some of them I had to cut the peaches in quarters to get the pit out, but it’ll still work, it’s just halves are a little easier to manipulate on the grill.  Place the peaches on the grill and grill until they are a bit more tender and have some nice charring on the outside.

    Peaches in halves and quarters
    Peaches in halves and quarters – Photo by J. Andrews
    Peaches on the grill
    Peaches on the grill – Photo by J. Andrews

    Once all your grilled ingredients are cooked, squeeze out the roasted garlic from the cloves, and put the garlic, peppers, onions, and peaches in a blender or food processor, and process until chopped to the level of chunkiness that you like. I used the manual food processor from Pampered Chef because I wouldn’t have to truck everything back inside or find an electric outlet (no affiliation, I just like it). You are likely going to have to process in batches.  Place all the chopped ingredients in a large bowl and add the white wine vinegar, brown sugar, cumin and cayenne pepper. Mix thoroughly.

    Completed Grilled Peach Salsa
    Completed Grilled Peach Salsa – Photo by J. Andrews

    Enjoy!


  • Fresh Corn Stew

    Fresh Corn Stew
    Fresh Corn Stew

    I hate writing recipes I know Denise can’t eat, but that’s one of the things we deal with with food allergies — I almost feel guilty eating things someone else can’t. But I also know not to push that guilt on them. So sorry, corn-allergic friends and readers, but this one isn’t for you.

    With our CSA share, we are currently getting a ton of corn — about 6 ears a week. And I get all of it (which, I think works out — Denise has taken all the lettuce because I don’t eat it.) Corn on the cob is awesome (if you’re not allergic), but frankly, it gets boring quickly. Using up all the leftover corn gave rise a few variations to this recipe, a corn stew, though I’m not entirely sure about calling it a “stew.” It’s not primarily broth, like a soup, but it’s not a chowder because there is no cream or milk in it (though if you stir in the cashew sour cream suggested as a topping, BAM: chowder!). So we’ll go with stew. English. So imprecise sometimes.

    If you’ve never taken corn off the cob, here are some ideas about how to do this. I just use my largest cutting board and a long thin knife and clean up the mess.

    This stew is completely vegan, but depending on the toppings you choose, you might alter that. I suggest considering, as toppings: avocado, crumbled bacon, scallion greens, cashew sour cream, cheese (vegan or not, as you decide), and cilantro. You sure don’t need all of these, but this stew kind of begs for a topping or two. In any case, it highlights the sweet corn that says “summer” to so many people.


    Versatile: with bacon, vegan, and with cashew sour cream
    Fresh Corn Stew is Versatile: with bacon, vegan, and with cashew sour cream

    Fresh Corn Stew

    • about 2 T oil or fat of your choice (if you are going to top this with bacon, consider using the fat!)
    • 2 leeks, chopped (about 3/4 cup)
    • 1 Italian pepper, chopped (about 1/4 cup)
    • 3 ears of fresh sweet corn, cooked and kernels cut off the cob (between 1.5 and 2 cups)
    • 1 teaspoon dried basil (or about 4 leaves fresh, chopped)
    • salt and pepper to taste
    • 16-20 oz. of vegetable broth or stock
    • 3 small fresh tomatoes, cut into chunks (between 3/4 and 1 cup)

    Toppings, all optional:

    • scallions
    • cashew sour cream*
    • fresh cilantro, chopped
    • bacon, cooked and crumbled
    • cheese or cheese substitute
    • avocado

    In large pot, heat oil over medium heat. When hot, add leeks, stir well, and then add chopped pepper. Cook for about 5 minutes, or until soft.

    Add corn kernels, stir well, and then add basil, salt, and pepper. If you are using commercial broth, go light on the salt until you’ve tasted the broth. Stir seasonings in well.

    Add broth and bring to a low boil. Add tomatoes, and when low boil is again achieved, turn down the heat to low and simmer about 10 minutes.

    Top as desired, and enjoy. This soup is great the next day.

    Cashew Sour Cream (modified from oh she glows!) (obviously this makes it not nut-free)

    • 1/2 cup raw cashew pieces, soaked overnight or in hot water for a few hours
    • 3 Tablespoons water
    • 2 teaspoons lime juice
    • pinch salt (to taste)
    • 1 teaspoon chives

    Add cashews, water, and lime juice to blender. Blend until smooth. Stir in chives and salt. Refrigerate for an hour to thicken.

    Enjoy.

    Fresh Corn Stew with Bacon
    Fresh Corn Stew with Bacon
  • Zesty Mexican Style Bean Salad

    Zesty Mexican Style Bean Salad
    Zesty Mexican Style Bean Salad – Photo by J. Andrews

    I modified this recipe from a recipe in an old Weight Watcher’s magazine. The original had raw green bell pepper and Great Northern beans in it instead, but back in the day before food allergies, I preferred it with roasted red pepper in a jar and garbanzo beans, and with some added spice enhancement. (Shocker, I know.) These days I can’t buy roasted red peppers at the store because of the citric acid, and I’ve been meaning to can my own so I could make this, but I hadn’t gotten around to it yet with everything else on my plate. So when Mary Kate and I decided to have a cookout, a light bulb went off that I could grill the red peppers and make this again. You could also broil the red peppers in your oven. (Not sure why that did not occur to me until I went to type up this post; I could have been making this all along. Sigh.)

    Zesty Mexican Style Bean Salad

    • 1 – 15 ounce can of black beans (Find a safe brand for you. I pressure can my own from dry beans.)
    • 1 – 15 ounce can of garbanzo beans (Find a safe brand for you. I pressure can my own from dry beans.)
    • 1 1/2 cups of chopped tomatoes
    • 1 cup grilled or broiled red bell pepper (about one and half peppers)
    • 1 cup of sliced green onions
    • 1 cup of salsa (Make sure you use a safe for you brand. I used my home canned salsa.)
    • 1/4 cup of red wine vinegar
    • 2 Tablespoons of fresh chopped cilantro
    • 1/2 teaspoon of salt
    • 1/2 teaspoon of black pepper
    • 1 teaspoon of Adobo seasoning (If you don’t have Adobo seasoning or you don’t have a safe version, mix 1/8 cup of paprika, 1 1/2 Tablespoons of ground black pepper, 1 Tablespoon of onion powder, 1 Tablespoon of dried oregano, 1 Tablespoon of ground cumin, 1/2 Tablespoon of ground chipotle, and 1/2 Tablespoon of garlic powder, this makes half a cup of seasoning)
    • hot sauce to taste (Use a safe for you brand. I used my own homemade version of Sriracha.)

    Cut your red bell peppers into quarters and seed and de-stem them.

    Quartered and de-seeded peppers - Photo by J. Andrews
    Quartered and de-seeded peppers – Photo by J. Andrews

    Place the red bell pepper quarters on a hot grill or under the broiler in your oven on a rack with a cookie sheet under it, and grill/broil them until they have a bit of char and are tender. When they are done, take them off the grill or out of the oven and let them cool a bit.

    Peppers on the grill - Photo by J. Andrews
    Peppers on the grill – Photo by J. Andrews

    In a large bowl, place the chopped tomatoes, sliced green onions, salsa, red wine vinegar, cilantro, salt, black pepper, and Adobo seasoning. Drain and rinse the black beans and garbanzo beans and add them to the bowl.

    All ingredients except the grilled red pepper - Photo by J. Andrews
    All ingredients except the grilled red pepper – Photo by J. Andrews

    Now that your red bell pepper has probably cooled down a bit, either give them a quick spin in a food processor to chop them into small pieces, or chop them up finely with a knife, and put them in the large bowl.

    Mix everything in the bowl together very well with a spatula or spoon. You want to make sure that none of the spices are clumping up. Taste it, and then decide how much hot sauce to need to add. Mix in the hot sauce really well.

    Mix all ingredients together - Photo by J. Andrews
    Mix all ingredients together – Photo by J. Andrews

    If you have safe chips, feel free to eat this with them. I don’t at the moment, but I’m happy just eating it with a fork or spoon. It also holds up very well in the refrigerator if you have leftovers.

    Enjoy!


    Zesty Mexican Style Bean Salad
    Zesty Mexican Style Bean Salad
  • Mint Lemonade Rocket Pops with raspberries onboard

    Mint Lemonade Rocket Pops with raspberries
    Mint Lemonade Rocket Pops with raspberries. Photo by J. Andrews

    The frozen fruity goodness of popsicles is pure summer magic — so much so that in the middle of winter, when I’m starting to believe summer is a myth, I crave popsicles. Many popsicles are safe for people with allergens, though I’d be concerned personally if I had nut anaphylaxis, but reading the ingredients list on your average box is an education in chemical compounds. We had plastic molds as kids, and my brother and I dreamed up all sorts of combinations — many of them were juice and Sprite, as soda carbonation leaves fun holes in a frozen pop. But this summer, I wanted to make something slightly more suited to an adult palate.

    So with the aid of some fun new Tovolo molds from our local kitchen store (Things Are Cooking, on Main Street in Concord), I’m working on making my own. The molds are kind of amazing, and it’s hard to choose, but I am me, so rocket pops were a given. I also ended up with the twin pops, which do break apart just like the ones we occasionally got as kids. That’s probably one of the few things my brother and I were good at sharing.

    Making ice pops can be super easy — just find a juice you like, pour, and freeze. But I wanted something different. Lemonade would be the other thing I’m really hung up on this summer, and it’s also hard to get it right — so I figured I’d make my own and make a fancy pop out of it. What I decided on was a tart lemonde with mint in the sugar water, and raspberries added to the pops. The result is a bit tart, a bit sweet, with a refreshing hint of mint and the surprise of bits of berries inside it. These took a little over 4 hours to freeze, so plan accordingly.

    Rocket Pops Vs. Twin Pop. If you ever played 1980s video games you can imagine the sounds Denise and I were making while poor Jack asked us to just hold the pops still so he could take the photograph. Photo by J. Andrews.
    Rocket Pops Vs. Twin Pop. If you ever played 1980s video games you can imagine the sounds Denise and I were making while poor Jack asked us to just hold the pops still so he could take the photograph. Photo by J. Andrews.

    Raspberry-Mint-Lemonade Rocket Pops

    • 5 lemons, freshly squeezed (3/4 cups juice)
    • 1 cup boiling water
    • 1/4 cup sugar
    • 1 sprig of mint (10 or so leaves)
    • 1/2 a carton of raspberries

    Squeeze the lemons and strain out pulp and seeds.

    Put the sugar in a heat safe bowl and mix in the mint leaves. Pour the boiling water over the sugar and mint, and stir until the sugar is dissolved. Let the mixture cool to room temperature.

    Mix the lemon juice and the sugar-mint water. Add the raspberries and lightly crush — you don’t really want to make raspberry-lemonade so much as you want a bit of essence of raspberry in the juice and some flattened raspberries that will be frozen into your pops.

    The molds I have have a pretty solid base, but the openings aren’t huge. A measuring cup with a pouring spout worked perfectly. Be careful not to overfill them, as that gets messy, and you still need to insert the sticks.

    Unmolding may require running the mold under hot water for a minute. The nice thing about these molds is that they are individual, not all one piece, which makes them easier to take apart. Do whatever your molds require, then sit in the sun and enjoy a pop.

    If you’re looking for new molds, can I highly suggest rocket shapes? Too much fun. This recipe makes a full 6 rocket pops and a full six (so 12) twin pops. Cut it down if you’re only doing one mold. My original recipe made enough for 4 molds, but I don’t have them and don’t have near enough freezer space either for that many. If you have the small molds that are most commonly sold, this recipe may also make too much juice. If you have leftovers (you might) you will need to add a bit more water to make a drinkable lemonade; this is more like a concentrate.

    Rocket pop flying solo, to the Top Gun theme. Photo by J. Andrews
    Rocket pop flying solo, to the Top Gun theme. Photo by J. Andrews
  • Vegan Sushi Rice Salad


    Vegan Sushi Rice Bowl, raw veg and soy-free sauce
    Vegan Sushi Rice Bowl, raw veg and soy-free sauce

    Denise and I both love sushi, and, with a little care, it’s something we both seem to be able to order out in relative comfort. But I could eat sushi a lot more often than I go out to eat. You can make sushi at home, but mostly, I’m too lazy to roll my own maki*, and I don’t trust my own judgement on sushi grade fish. When I do sushi at home, it’s always vegan.

    So my solution to weeknight laziness and/or heat is a sushi salad — flavors on the order of a California roll** or a veggie roll, which differs from restaurant to restaurant. I’m going to give a menu of options — the rice, cold avocado and cucumber, and dressing are necessary. Everything else is optional — I’m including some roasted veg, as an option, and some additional vegetables I’ve used and liked.

    This recipe makes one sushi rice bowl. Increase as needed to feed more people. The roasted veg will make enough mushrooms for one, but I would just roast the whole bunch of asparagus and use the leftovers for snacking the rest of the week.

    The recipe calls for sesame in the form of seeds in the dressing and toasted sesame oil in the rice and roasted vegetables — this is optional. It adds a nice bit of flavor, but if you’re allergic or just don’t have it, don’t worry about it; your sushi bowls will still be good.

    *(Side note: Want to learn to roll sushi? The internet has tons of videos, but the one I learned from is part of the sadly short-lived Post-Punk Kitchen video series: Episode 1: Sushi and Cupcakes, which I used years ago when living in Bismarck, North Dakota before they got a sushi restaurant — they have one now. If you can eat soy, try the tempeh “spicy tuna.” It’s so good.)

    **(Side note 2: Regarding California rolls, beware the imitation crab sticks. They can be rife with allergens, including dairy, soy, egg, and gluten, and likely they have corn derivatives. It would be generally safer to avoid it.)

    Vegan sushi rice bowl with just raw vegetables: cucumber, avocado, sugar snap peas
    Vegan sushi rice bowl with just raw vegetables: cucumber, avocado, sugar snap peas


    Vegan Sushi Rice Salad

    Rice:

    • 1/2 cup sushi rice
    • 1 cup water
    • 1 Tablespoon rice wine vinegar (set aside for after rice is cooked — and check this for additives!)
    • 1/2 teaspoon toasted sesame oil (optional)

    Cooked option veg:

    • 3 or so shitake mushrooms, washed and stemmed
    • 1 bunch asparagus, ends broken off and discarded (you will likely have leftovers of this, which is good!)
    • 1 teaspoons toasted sesame oil (optional)
    • 1 Tablespoon olive oil
    • salt (optional) and pepper, lightly applied

    Raw veg (use these with or without roasted vegetables):

    • 1/2 cup cucumber, cut into sticks or cubed
    • 1/2 avocado, cubed
    • 1/4 sheet nori, cut into thin strips and then into bits (use scissors for this)

    Additional raw veg options:

    • carrots, finely shredded
    • sugar snap peas, strings removed, cut in half

    Dressing:

    • 1 Tablespoon gluten-free tamari or soy sauce replacer, or coconut aminos (I have not tested coconut aminos in this recipe)
    • 1 teaspoon rice vinegar (check this for additives!)
    • 1 pinch of garlic powder
    • 1 pinch of ginger powder
    • 1 pinch of wasabi powder (optional)
    • 1 Tablespoon sesame seeds (optional)

    If you’re going to roast vegetables, preheat the oven to 425ºF.

    Start the rice. I always use a rice cooker, but if you don’t, you can do this on the stovetop. Just don’t ask me how. I can’t cook rice on the stove at all.

    Roast veg: Toss mushrooms and asparagus in oils, and sparingly sprinkle with salt and pepper. Place on a parchment paper-covered baking sheet, and bake for 15-20 minutes, until tender.

    While the rice is cooking, prepare your raw vegetables.

    Prepare the dressing by mixing everything together.

    When the rice is done, toss the rice with rice wine vinegar and toasted sesame oil, if using. If using raw carrots, I like to toss them in with the hot rice to soften them.

    Scoop the rice into a bowl. Top with the roasted and raw veg, sprinkling nori on top, then add the dressing.

  • Blueberry Syrup and Bonus

    Blueberry Syrup
    Blueberry Syrup

    So recently I’ve become concerned that I may be reacting to maple syrup. It stands to reason that with the number of types of tree pollen to which I am allergic that the sap of the tree might be an issue as well. I’ve noticed some correlation, but there were other potential issues during the same time frame, so I need to do some food challenges to verify whether it’s truly an issue or not. However, in the meantime, I need some syrupy stuff for waffles while I wait to do a challenge. As some you know, I’ve been canning to beat the band so that I have convenient, shelf stable, safe food and condiments, so I took a look in my canning books to see what I could find.

    Now I’m not suggesting that you can this recipe, as I know that that’s a lot of work for most of you, and you might not be into the canning thing. But if you wanted to do that, the recipe is here. I’ve cut this down to a manageable amount for immediate use and made a suggestion for thickening it for a more substantial syrup. The recipe still makes 3 cups of syrup. Since that’s still kind of a lot, you can freeze a portion of it before you thicken it. Be aware that the pictures are some what deceptive because the batch I made was three times this size so that I ended up with 12 half pints of canned blueberry syrup. Also because there’s so much blueberry pulp left, I’ve provided you with some ideas for using it in other recipes at the end of this post. When food is so hard for many of us, we don’t want to waste anything.

    Blueberry Syrup

    Makes about 3-4 cups of syrup.

    Ingredients:

    • 4 cups of blueberries
    • 3 cups of water (used divided, as described below)
    • 1 1/2 Tablespoons of grated lemon zest
    • 1 1/2 cups of white cane sugar
    • 1 Tablespoon of freshly squeezed lemon juice
    • 1-2 Tablespoons of arrowroot or tapioca flour (optional)
    • 1-2 Tablespoons of water (optional)

    Necessary equipment:

    • Stainless steel or other non-reactive (ceramic or enamel, do not use aluminum or cast iron) pot
    • Potato masher or large spoon
    • Strainer or colander
    • Cheesecloth (look in grocery stores where the utensils are, or in hardware stores or department stores where the canning stuff is)
    • Candy thermometer

    Wash your blueberries and pick out any squished or yucky berries or any stems or leaves. You need to crush your berries. Place a thin layer of blueberries in a large stainless steel stockpot (the pot needs to be stainless steel or another non-reactive surface), and mash the berries with a potato masher or the back of a large spoon. Make sure they are all squished. Then add another layer and mash them, repeating until all the berries are mashed to bits.

    Once the berries are all mangled, add 1 cup of the water and the lemon zest, and over medium heat, bring the mixture to a gentle boil. Allow the mixture to continue to boil gently for 5 minutes.

    Set up your strainer so that it hangs over a deep bowl or other non reactive pot so that the strainer does not rest in the bowl or pot, but so that all of the blueberry mixture will drip into the bowl or pot, without coming out the sides or making a mess. The bowl or the pot should also be deep enough that the strainer will not come into contact with the liquid as it drips out of the strainer. Line the strainer with several layers of dampened cheesecloth. You want several layers so that it prevents any seeds or pulp from dripping into your juice. The reason for dampening your cheesecloth with water is so that the cheesecloth doesn’t absorb as much of your precious juice.  Once you’ve got your strainer and the container for the juice to drip into properly situated, add the mixture to the strainer. Let it drip for at least two hours. If you’re a purist and you want a clear syrup, you let it drip undisturbed for at least two hours. If you’re like me, and not a purist, you let it drip for at least two hours and then you use a spatula to get as much of the juice as you can. (Keep the pulp, I’ll talk about what you can do with it later.)

    Blueberry Mixture in Strainer
    Blueberry Mixture in Strainer

    Wash the stainless steel stockpot you used to cook the blueberry mixture, and in the now clean pot, add the sugar and the remaining 2 cups of water.

    Sugar and water mixture before boiling
    Sugar and water mixture before boiling

    Over medium high heat, bring the sugar mixture to a boil and cook until it measures 230ºF (you may need to adjust for altitude, we don’t have an altitude issue here). Add your blueberry juice, and increase the heat to high, and bring it to a boil. Boil for 5 minutes, stirring occasionally. Once your five minutes is up, remove the pot from the heat, and stir in your lemon juice.

    Blueberry Syrup after cooking
    Blueberry Syrup after cooking

    At this point, if you’re going to put any of it in the freezer to save for later, pour that amount off into freezer safe and heat safe container and let it cool to room temp before sealing it and putting it in the freezer. If you’re satisfied with the syrup as it is, great, use it for pancakes, waffles, desserts, you name it.

    (SAFETY NOTE: You CANNOT thicken the syrup if you are planning to can it, unless you use Clear Gel, which contains corn. No other thickening method is safe for canning, so if you are allergic to corn, just thicken it after you open the jars and when you are planning to use it.)

    If you’d like to thicken the syrup, place the syrup back over medium heat.  Mix 1 Tablespoon of tapioca or arrowroot with 1 Tablespoon of water to form a paste, and then whisk it slowly into the syrup. Continue to whisk until the paste is well incorporated with the syrup and the tapioca and arrowroot has cooked. If this isn’t sufficiently thick enough for you, repeat the process, until the syrup is the right consistency. Yay! You have blueberry syrup!

    Now, let’s chat about that leftover pulp. There are a few ways you could use it:

    (1) Put the leftover pulp in your pancake or waffle batter for blueberry overload. Yum!

    (2) You can make yourself some blueberry butter/jam. Put the leftover pulp in a sauce pan with a cup of sugar and a tablespoon of lemon juice, and bring it to a boil over medium high heat, stirring frequently. Once it’s boiling, reduce the heat to medium, and stir frequently until the mixture thickens and holds its shape on a spoon. Store it in the fridge until you want to use it on toast, on ice cream, or just eating it with a spoon, haha!

    (3) Make blueberry vinegar. Mix the pulp with 4 cups of white wine vinegar and put it in a glass jar, covering it with cheese cloth or a coffee filter and securing it with a rubber band. Let it sit on your counter top for a week or two, stirring it once a day to prevent any mold. Strain out the blueberry pulp, and you’ll have blueberry flavored vinegar to use for salad dressings or marinades.

    Enjoy!

  • Berry Poke Cake (vegan, gluten-free)

    Vaguely Patriotic Poke Cake
    Vaguely Patriotic Poke Cake

    So this week is the both the classic summer holiday of Independence Day in the US. I know maybe cake isn’t the first thing one thinks of when you think of summer holiday picnics, but this week is also my birthday, so cake is important. So your theme is: BERRIES. Hah. Actually, berries are one of the more awesome things about summer, and cake is the one truly awesome thing about birthdays, so here’s a berry-themed cake that also just happens to be color-appropriate for a few upcoming holidays — nicely, this works as well for Bastille Day as it does for Independence Day. It’s multi-purpose. This is good, because every day is better with cake.

    This is a riff on a cake my mother used to make — a poke cake, where you soak your cake with gelatin. Her “recipe” came from a magazine recipe (I’m going to guess Better Homes and Gardens, but it might have been the Parade magazine section from the Sunday paper) and involved box cake mix, a box of Jell-O, Cool Whip (which I absolutely adored for all of my formative years) and berries on top. My FrankenCake version involves other people’s recipes instead of boxes, but combined to make “classic” poke cake that is gluten-free, vegan, and completely without preservatives or weird flavorings. This is a dense, moist cake, flavored by the gel, topped with a whipped cream and berries. Served cold, this is great for summer. I mean, it’s berries. What is there not to love?

    You’ll make the cake, cool it, poke holes in it, make a fruit gel, pour it on, cool it, and the “frost” and decorate it. Because it needs to cool completely, twice, this is a good make-ahead recipe. The day before is a good idea, adding the “frosting” and berries not long before serving.

    Cake Assembly
    Cake Assembly

    IMPORTANT NOTE: In case you skipped reading to go straight to the recipe, this is not a “day of” recipe. You need to cool this twice, and the coconut milk for the topping must be refrigerated overnight.


    Patriotic Berry Poke Cake

    1 carton of strawberries or other fresh berries is also needed to decorate the top of the cake.

    Cake (very lightly adapted from Gluten Mama’s GF Vegan Vanilla Cake)

    • ¾ cup sorghum flour
    • ¾ cup tapioca starch
    • ½ cup coconut flour
    • 1 cup sugar
    • ½ teaspoon salt
    • 1 teaspoon baking powder
    • 1 teaspoon baking soda
    • 1 teaspoon xanthan gum
    • ½ cup plain almond milk (or other non-dairy milk)
    • 1 teaspoon lemon juice
    • 1 cup warm water
    • 3 Tablespoons coconut oil
    • 1 Tablespoon vanilla
    • 4 oz (1/2 cup) unsweetened applesauce (I use the snack pack sizes)

    Preheat oven to 375ºF. Lightly grease an 8″x11.5″ pan, or a 9″ square pan.

    Add lemon juice to almond milk and set aside.

    Mix dry ingredients. Then add wet ingredients and mix thoroughly.

    Pour into prepared pan and bake 35 minutes or so — cake is done when lightly browned on top.

    Cool completely, and then poke holes all over the cake with a fork. The more holes, the more your fruit gel will penetrate, so I’d suggest holes no more than 1/2 inch apart, all over the cake.


    Vegan Fruit Gel (I used this recipe from Manjula’s Kitchen)

    Poke and Gel the Cake
    Poke and Gel the Cake


    • 1/2 cup blueberry juice
    • 1/2 cup water
    • 2 Tablespoons sugar
    • 1/4 teaspoon agar agar powder


    If you need to, juice and strain blueberries to get blueberry juice. I just had a bag of frozen berries I picked last summer, so I defrosted them and ran them through a food mill and then a strainer. This made more juice than I needed, but this also makes more gel than you need for the cake.

    Mix the agar agar into your water. Add all the ingredients to a saucepan and bring to a boil over medium heat, stirring occasionally. Boil for three minutes.

    Pour very slowly over the top of your hole-poked cake (this is easier to do if you aren’t taking photos while pouring), letting it soak in, and stop when the gel stops soaking in. You may have a little leftover, so just make a serving of gel for later.

    Put the gel-soaked cake in the fridge and chill for 3-4 hours or overnight.


    Coconut Whipped Cream (see recipe here at Oh She Glows)


    • 1 can full-fat coconut milk without guar gum, refrigerated over night
    • 3 teaspoons sugar
    • 1/2 teaspoon vanilla
    • OR 3 teaspoons of vanilla sugar
    • A chilled metal bowl and electric mixer, with whisk attachment if you have it.


    Flip your can upside down in the fridge. To open it, flip it back upright and open it. Pour off the watery part (you can use this for things, but I don’t like it much, personally.)

    Put JUST the solid part in your chilled bowl and whip it with your whisk attachment or mixer.

    Add the sugar and vanilla (or vanilla sugar) and whip again. Taste it. It’s amazing. Add sugar or vanilla if needed.

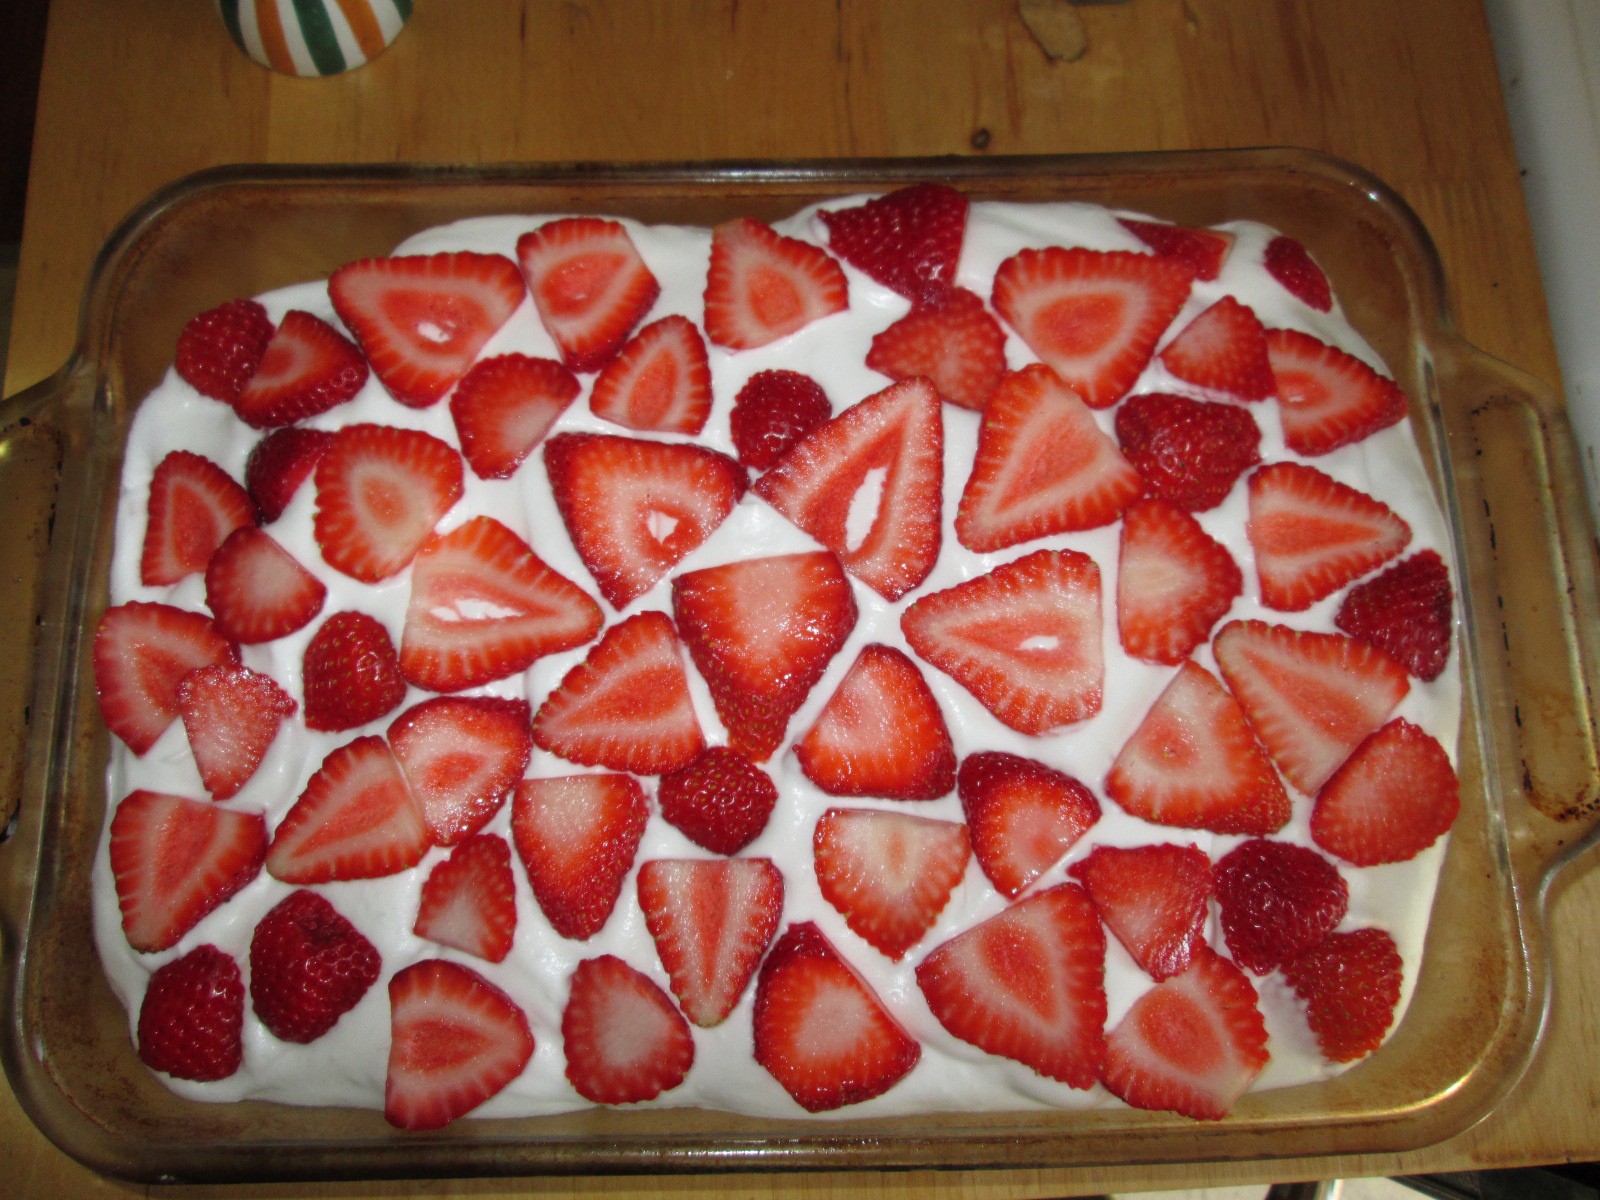
    Use the coconut whipped cream to frost the cake, being generous in your application. Top the cake with berries and keep refrigerated until ready to serve.

    This cake is ready for its close-up
    This cake is ready for its close-up
  • Watermelon White Wine Sorbet or Ice Pops


    Watermelon White Wine Sorbet or Ice Pops
    Watermelon White Wine Sorbet or Ice Pops

    Sorbet is one of the things I miss terribly because almost all of the commercial versions have corn in some form in them. This is a fairly easy recipe, making it perfect for this weekend, when I was going away for my 20th college reunion. Also, just as a side note, you could also sub out the watermelon for a quart of strawberries or a quart of peeled sliced peaches. I bet they’d be awesome too.

    Warning:  Before you make sorbet, you need an ice cream maker and if it’s like mine, you need to have frozen the insert ahead of time.  Also, it helps to make the simple syrup the day before and let it cool in the fridge overnight.  If you’re just making ice pops, just cool the simple syrup to room temperature before mixing it with the watermelon juice. 

    Watermelon White Wine Sorbet

    Makes about 10 or so half cup servings (who ever eats just half a cup though??)

    • 1 1/4 cups sugar
    • 1 1/4 cups water
    • 1/2 cup of chilled white wine (anything will do, but a nice bright citrus-y Sauvignon Blanc or Pinot Grigio would work well. Also, don’t spend a ton of money on this wine, you’re mixing it with watermelon and sugar. Or if you don’t want to use wine because you’re unsure of the wheat or corn ingredients in your wine, you could use a vodka made only from potatoes, but I’d cut it down to a quarter cup. Or not, if you’re not driving. Also, if you don’t want to use alcohol, substitute the wine with some safe-for-you lime or lemon or other fruit juice.)
    • 1 quart of watermelon, peeled and cubed

    Again, make sure that your ice cream maker is ready to go according to the manufacturer’s instructions, whether that means your insert is frozen or whatever else you might have to do.

    The day before you are going to do your sorbet, make the simple syrup. Place the sugar and water in a sauce pan and bring it to a boil without stirring. Turn it down to a low simmer and simmer until all the sugar has dissolved to make a simple syrup. Pour the simple syrup into a heat resistant bowl and put it into the fridge to cool.

    Place watermelon in a food processor or blender (in batches if necessary) and blend until smooth. Pour the liquid through a strainer to remove any seeds making sure that you press any large fruit bits remaining through the strainer. You don’t want to waste any of the watermelon.  Add the wine and the simple syrup to the watermelon mixture and mix until combined thoroughly.

    Follow your ice cream maker’s instructions to make the sorbet, or make ice pops with the mixture by using paper or plastic cups or ice pop molds and placing them in the freezer until frozen.

    Hope you enjoy it!

    atermelon White Wine Sorbet or Ice Pops
    Watermelon White Wine Sorbet or Ice Pops