Notice: Function _load_textdomain_just_in_time was called incorrectly. Translation loading for the wp-ultimate-recipe domain was triggered too early. This is usually an indicator for some code in the plugin or theme running too early. Translations should be loaded at the init action or later. Please see Debugging in WordPress for more information. (This message was added in version 6.7.0.) in /home/maryzahc/public_html/adultfoodallergies.com/wp-includes/functions.php on line 6131 Gluten-free – Page 12 – surviving the food allergy apocalypse (archive)
When we were working on our editorial calendar, Denise said she was working on ham steaks, which you saw last week. We thought that ham seemed like a traditional Easter dish, so maybe we should also consider a side dish for it. I LOVE side dishes. The first thing that came to mind was scalloped potatoes, as that goes with ham. Actually, it’s what my mother used to make with leftover ham.
But I realized that I hated ham and scalloped potatoes! Until my 30s, I didn’t like ham at all. And I know it’s surprising, but scalloped potatoes are my least favorite preparation of potatoes. I tried to figure out why. I’m not opposed to creamy sauces, and potatoes are my favorite food by far, but I realized that the texture of the potatoes just isn’t to my liking. So I fixed it.
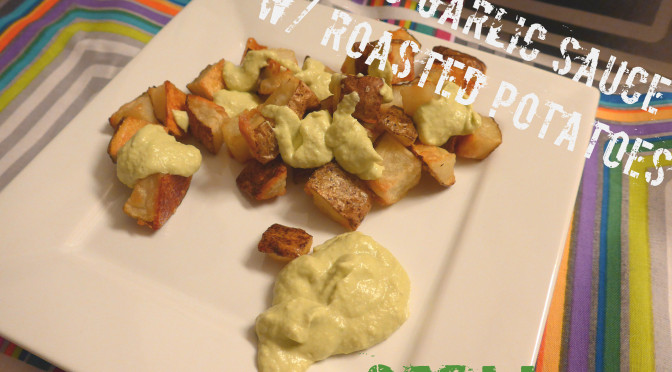
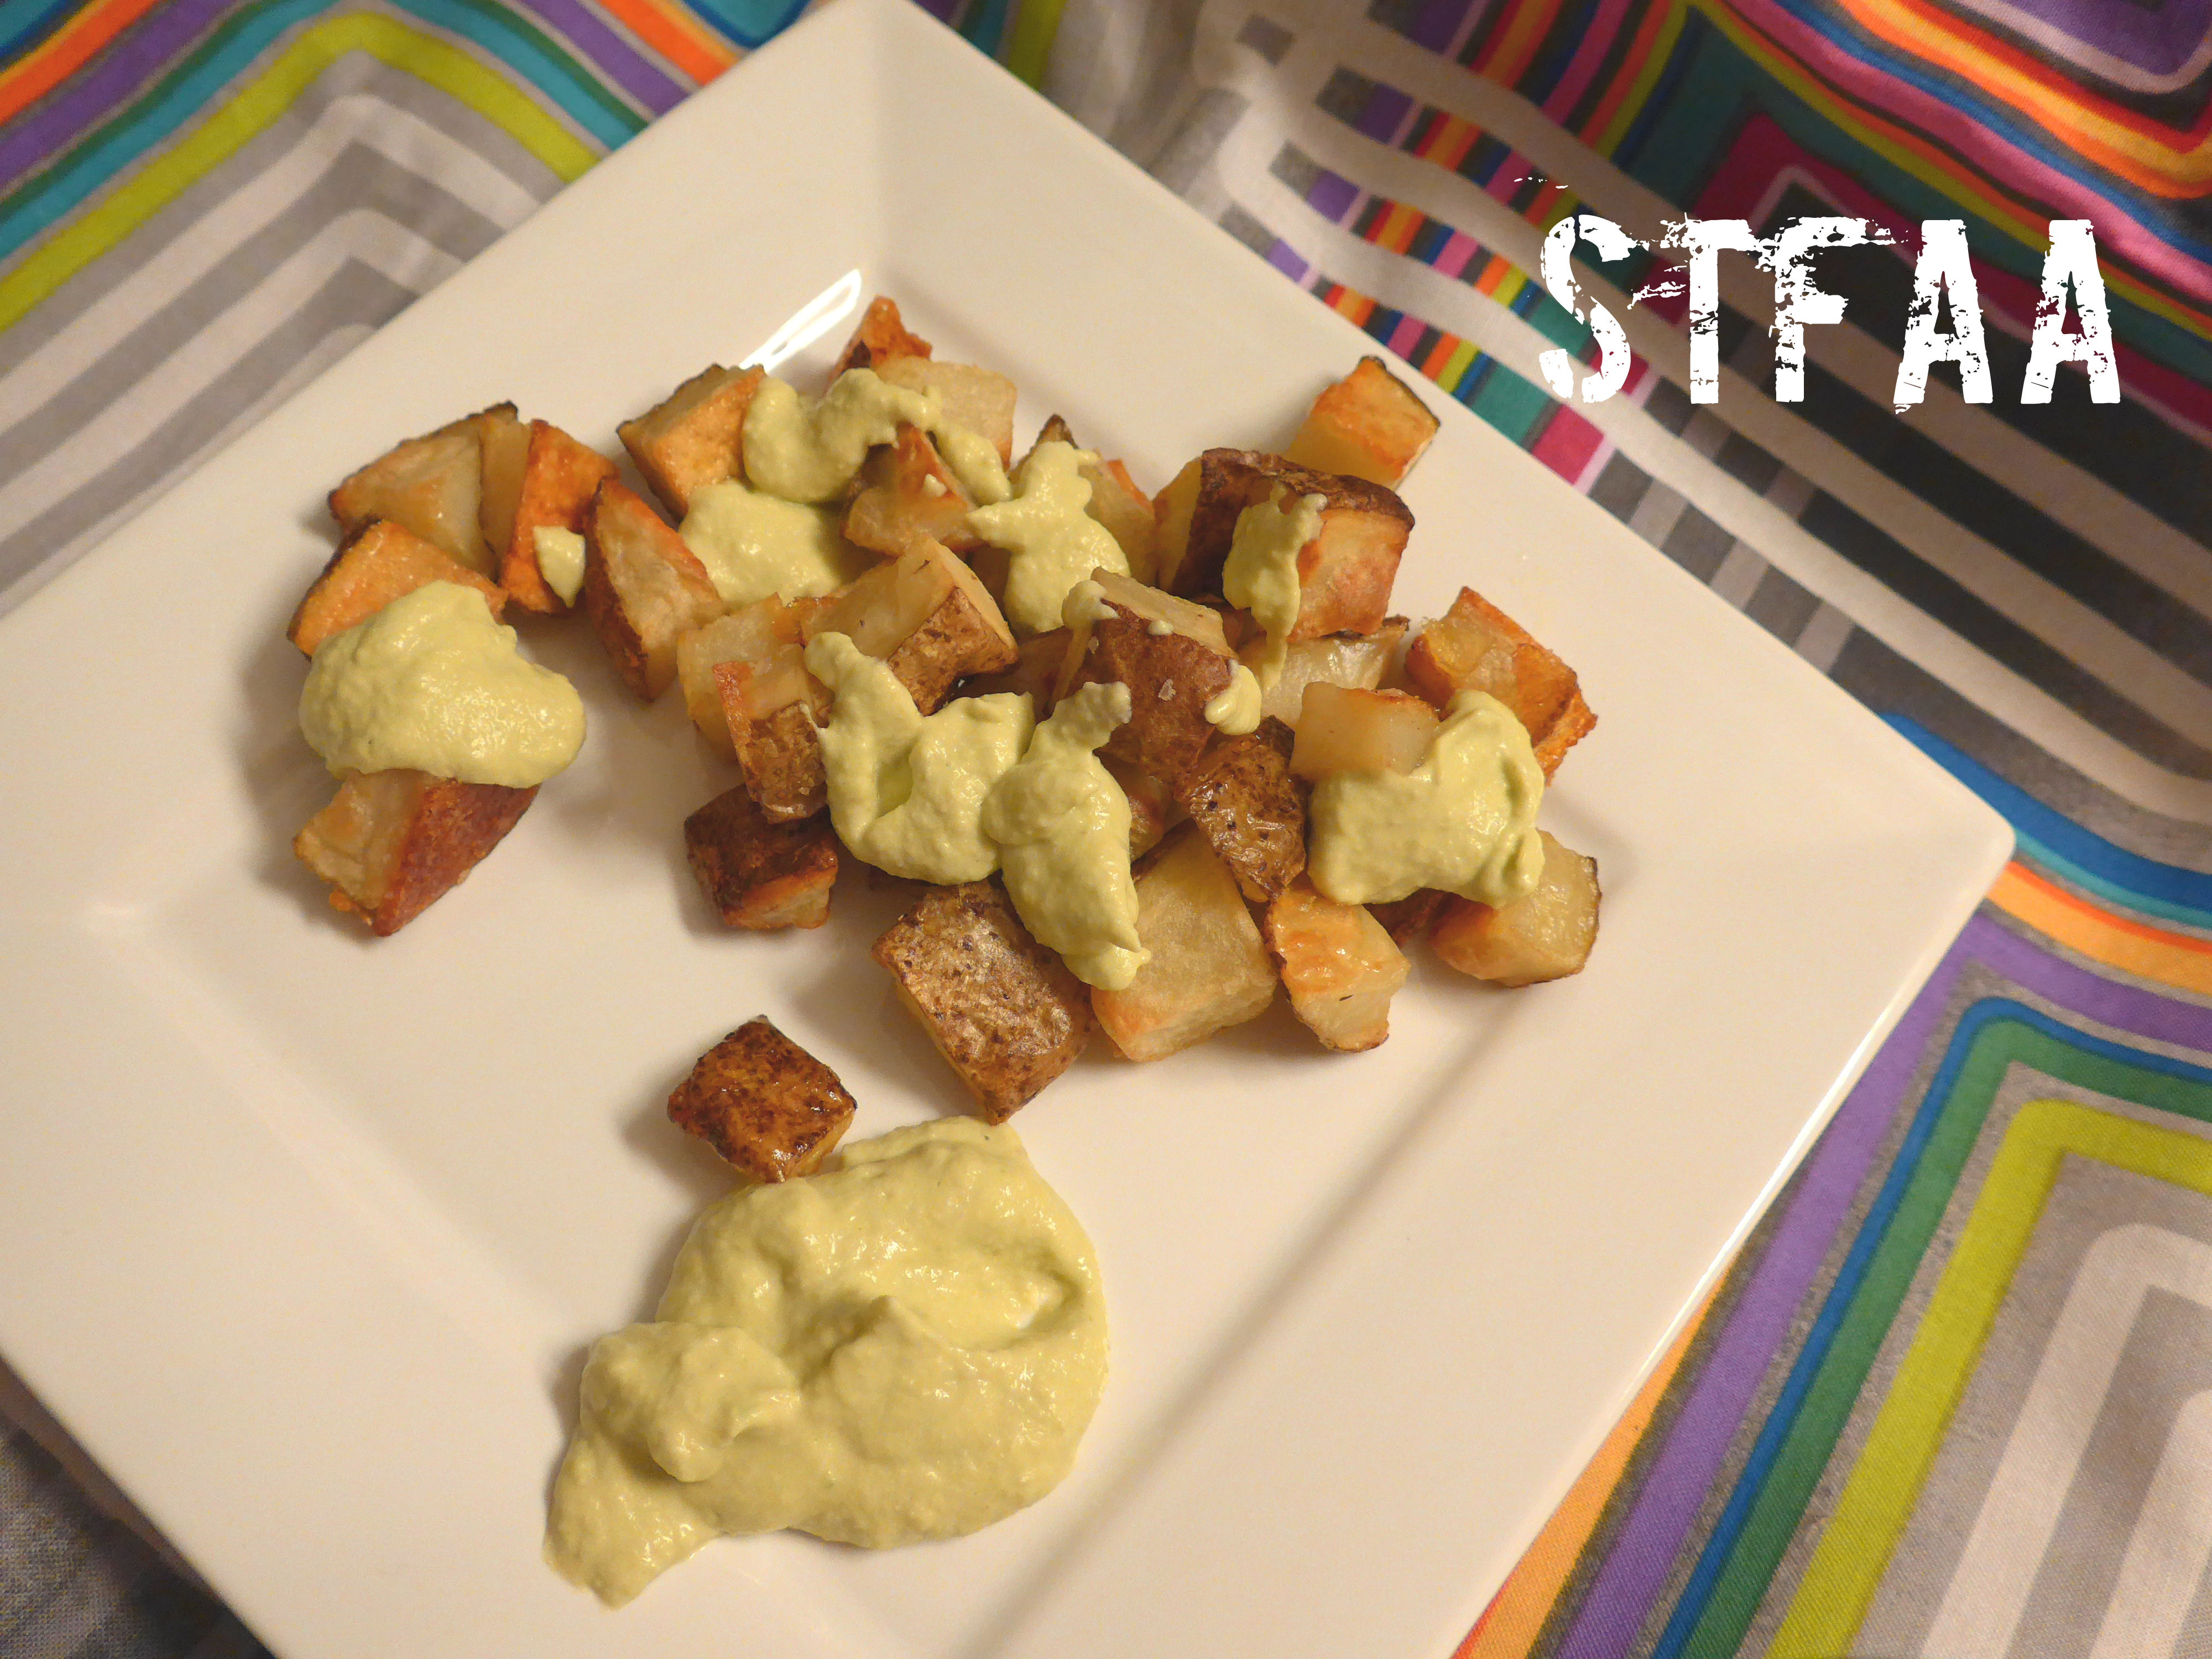
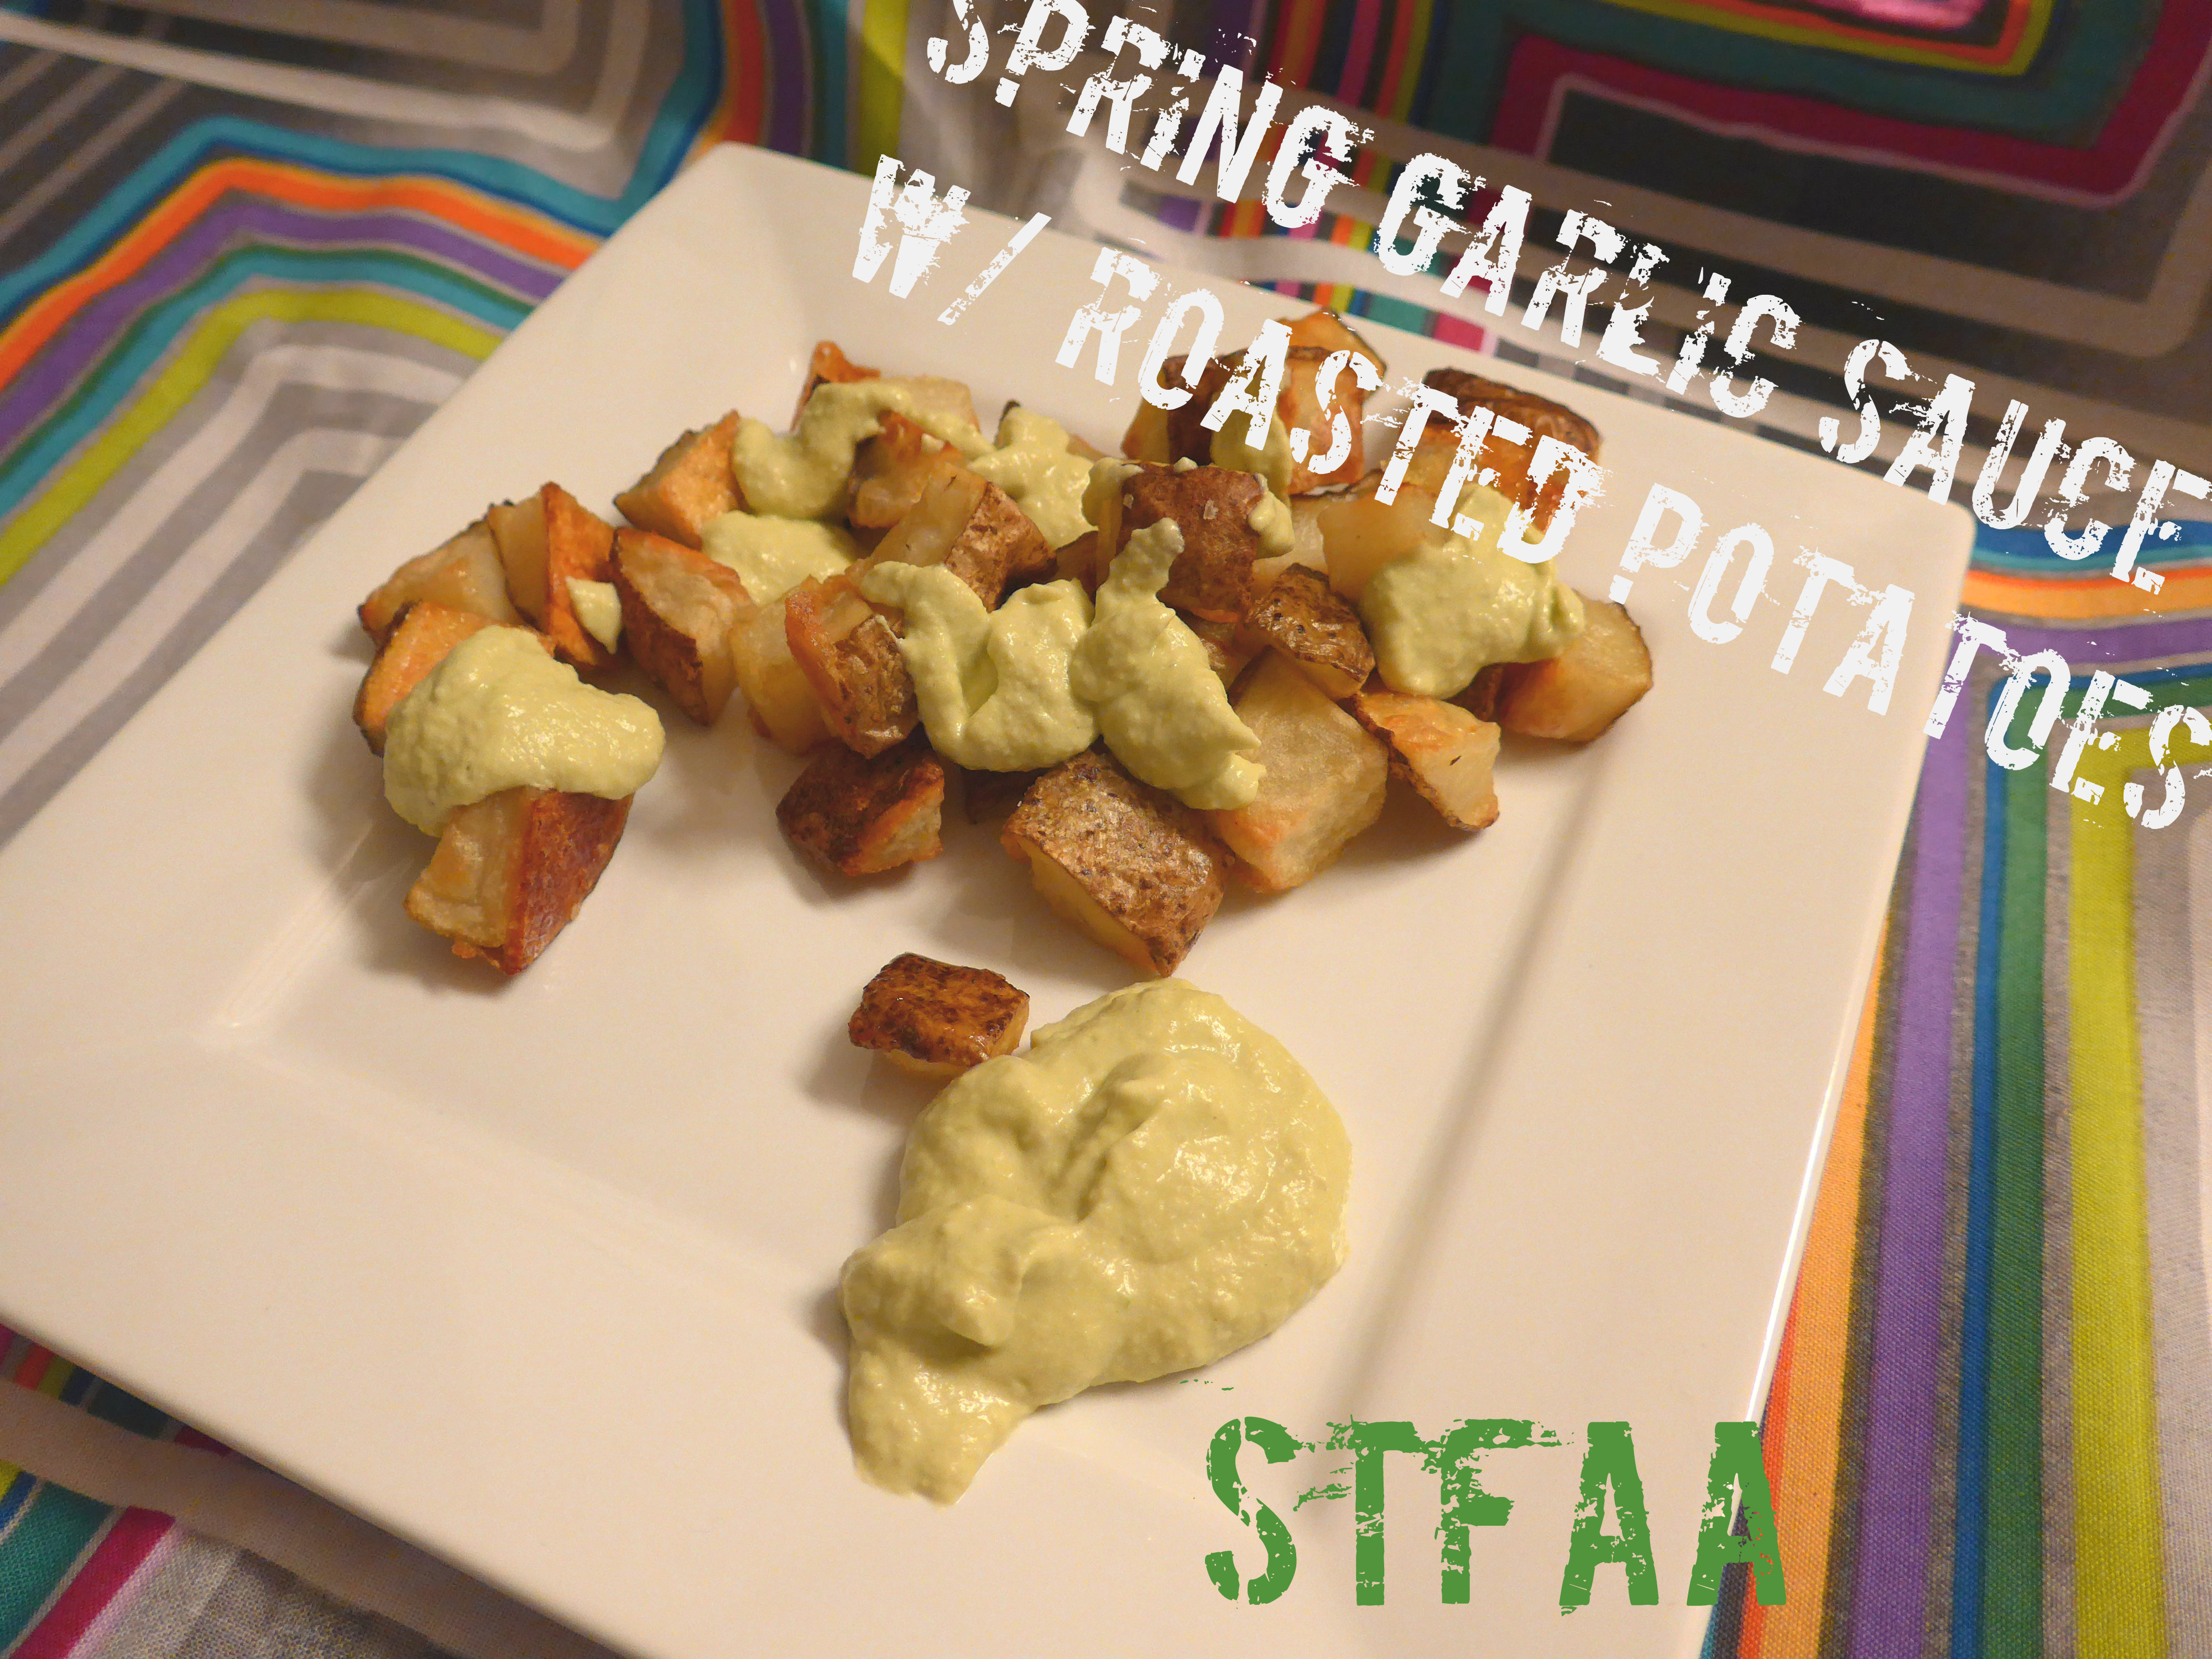
I fixed it by cooking the potatoes separately from the sauce. This dish is made of perfectly roasted potatoes, crisp on the outside, fluffy inside, topped with a creamy sauce made from cashews and white beans flavored with rich roasted garlic and fresh, green scallion tops. It’s a light spring green sauce that goes well with the roasted potatoes but is also good on other vegetables, chicken, and maybe even pasta (I didn’t try that, but I think it would work as a basis for a spring vegetable pasta sauce).
Spring Garlic Sauce with Roasted Potatoes
Notice: Trying to access array offset on value of type bool in /home/maryzahc/public_html/adultfoodallergies.com/wp-content/plugins/wp-ultimate-recipe/helpers/models/recipe.php on line 254
Spring Garlic Sauce with Roasted Potatoes
Print Recipe
This is a substitute for scalloped potatoes — roasted potatoes are fluffy inside, and are covered with a creamy garlic sauce made of cashews and white beans.
Servings
Prep Time
2servings
15minutes
Cook Time
Passive Time
40minutes
35minutes
Servings
Prep Time
2servings
15minutes
Cook Time
Passive Time
40minutes
35minutes
Ingredients
Roasted Potatoes
3cupsraw potatoes,cubed (2-4 potatoes, depending on size)
1-2Tablespoonsolive oil
1/2-1 teaspoonkosher salt
Spring Garlic Sauce
1/2 cupwhite beans
1/2cupraw cashews,soaked 8 hours or overnight
2clovesroasted garlic(taste and add more if you want more. Garlic varies greatly in intensity.)
1/4cupolive oil
1/3cupwater(you may need more — see the recipe itself)
1/2teaspoonsalt
1teaspoonlemon juice or mild vinegar
1bunchscallions, green tops only(4-6 scallions in a bunch, depending on size)
Servings: servings
Instructions
Preheat oven to 450F.
Scrub potatoes. Peel if desired. Cut into approximately 1/2-inch cubes. Toss with olive oil and salt — start with 1 tablespoon, and add more if needed. You don’t want to waste oil, but you do want everything decently coated to help the potatoes brown. Throw them into the oven and set a timer for 20 minutes.
While the potatoes are cooking, make the sauce. Throw all the ingredients except the scallions into a blender or food processor and pulse. Add more water, 1 tablespoon at a time, only if needed! You want this sauce to be thick. When the sauce is mostly smooth, add the scallion tops and blend until smooth.
Toss the hot potatoes with sauce to coat. Yes, this is different than the photos — I was aiming for “artistic arrangement of food,” though it didn’t really work.
Recipe Notes
You do need to roast garlic for this recipe. You could do this at the same time as the potatoes, but you will have to wait for it to cool off to get out the cloves, so this will take longer than estimated. I always roast extra garlic and keep it on hand in the freezer.
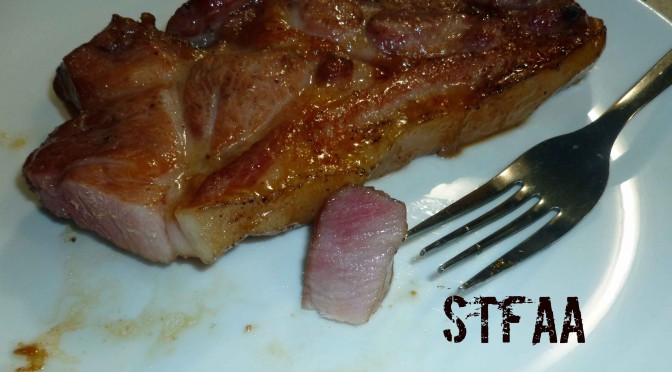
So, like bacon, commercial ham is a problem if you are avoiding corn and all corn derivatives. I’ve tried on multiple occasions to cure a 4-5 pound pork shoulder or a boneless Boston butt (pork butt roast), but the cure only goes in about an inch from the surface and then it’s like a version of a turducken, ham on the outside, pork roast on the inside. That’s really not what I was aiming for, and no matter how many holes I poked into the larger cuts of pork (imagine me maniacally stabbing pork shoulders with a barbecue fork), the same thing kept happening. So I decided to try ham steaks so that the density of the cut would be less thick and the whole thing might cure. Well, it did, and I have ham I can eat again.
Cure Your Own Ham Steaks
5 pound boneless Boston butt, a.k.a. pork butt roast (here’s a link to show you what you’re looking for)
1 1/2 gallons of cold water
1 1/2 cups of brown sugar
1 1/2 cups of kosher, pickling or sea salt (make sure there’s no anti-caking agents and that it’s not iodized salt, or it’ll have corn in it)
1/4 tsp ground cloves
1/2 tsp whole black peppercorns
1 3/4 teaspoons of celery juice powder(if you don’t have celery juice powder, you can try taking about 7-8 stalks of celery, roughly chop them and liquefy them in the blender)
Slice the boneless Boston butt across the grain (go look here if you don’t know what that means) into 1 inch thick slices.
Place all the ingredients listed, except for the boneless Boston butt slices, in a large plastic container. When choosing your container, please note that the boneless Boston butt slices will also need to fit into this container, along with a heavy plate or bowl to weigh the slices down into the brine, and it will all need to be able to fit into your refrigerator. Stir until all the salt, sugar, and celery juice powder is dissolved into the water.
Add the boneless Boston butt slices to the brine and make sure they are submerged (you can use a plate or a bowl to weigh them down).
Cover the plastic container with a lid, if it has one, or use plastic wrap or aluminum foil. Place the container in the refrigerator and brine the boneless Boston butt slices for 3 to 4 days. At the halfway point, rotate the position of the the boneless Boston butt slices so they brine evenly.
After the brining is done, rinse the slices well, making sure there aren’t any peppercorns stuck to the slices.
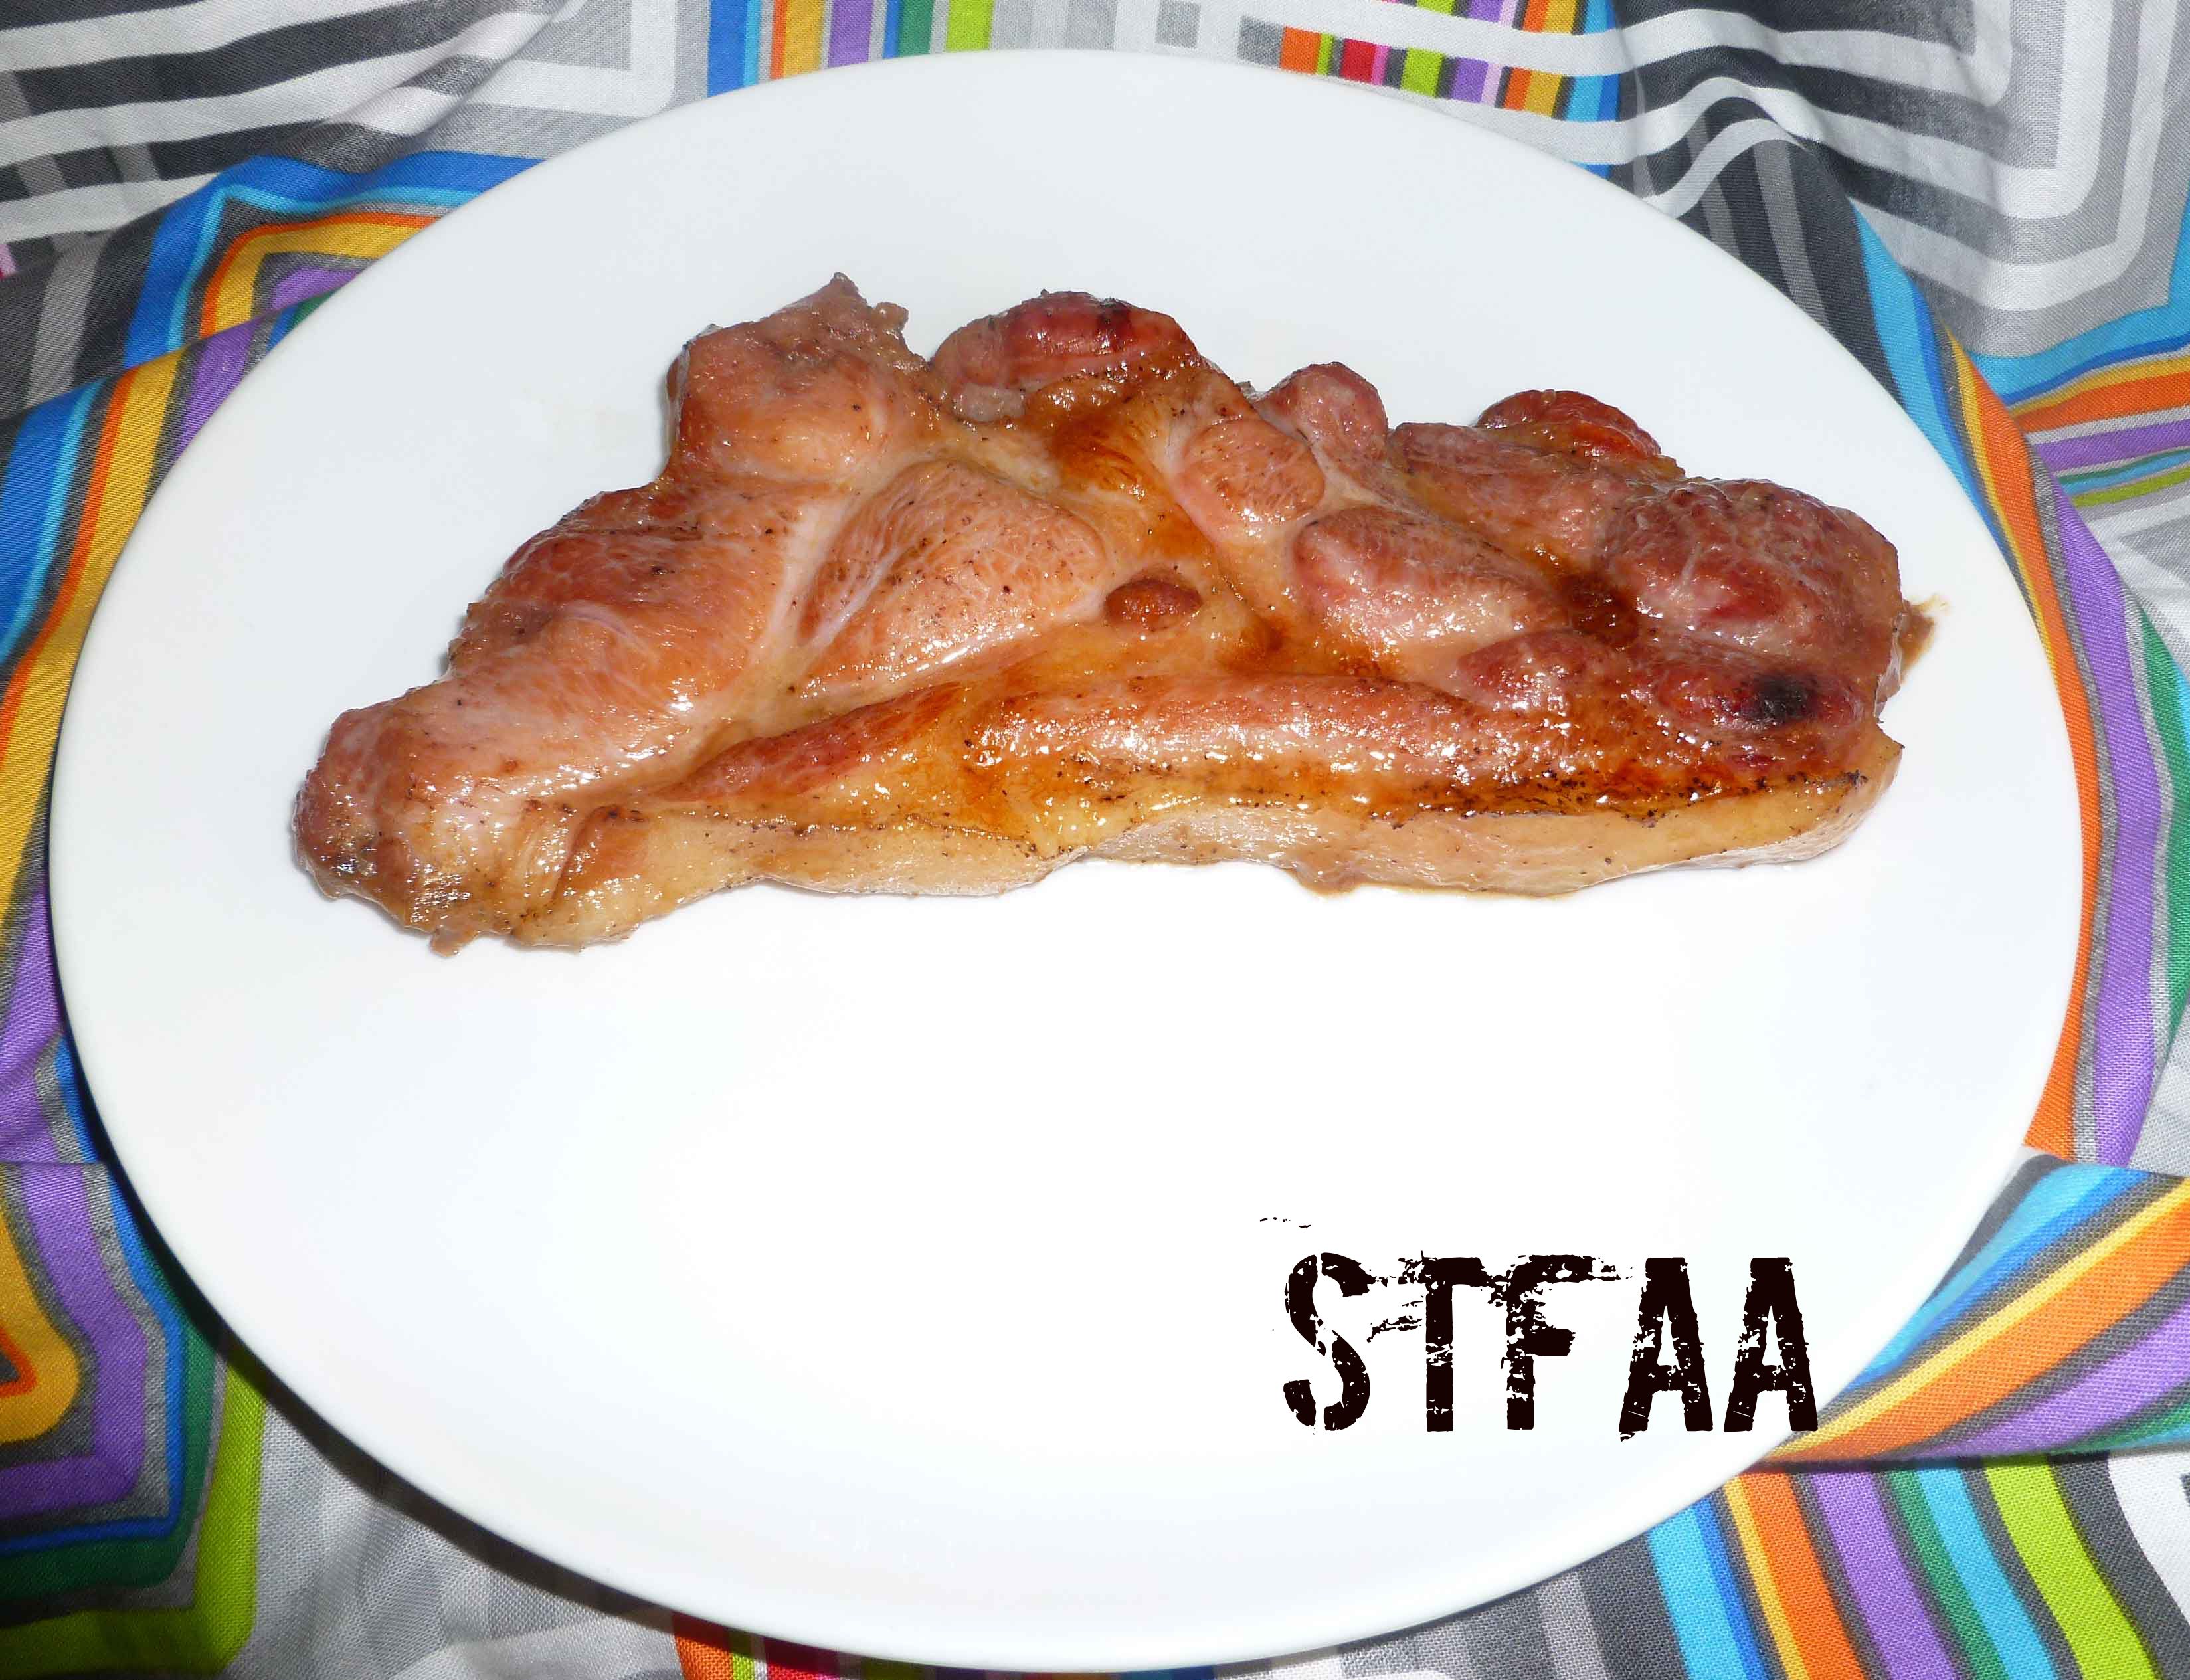
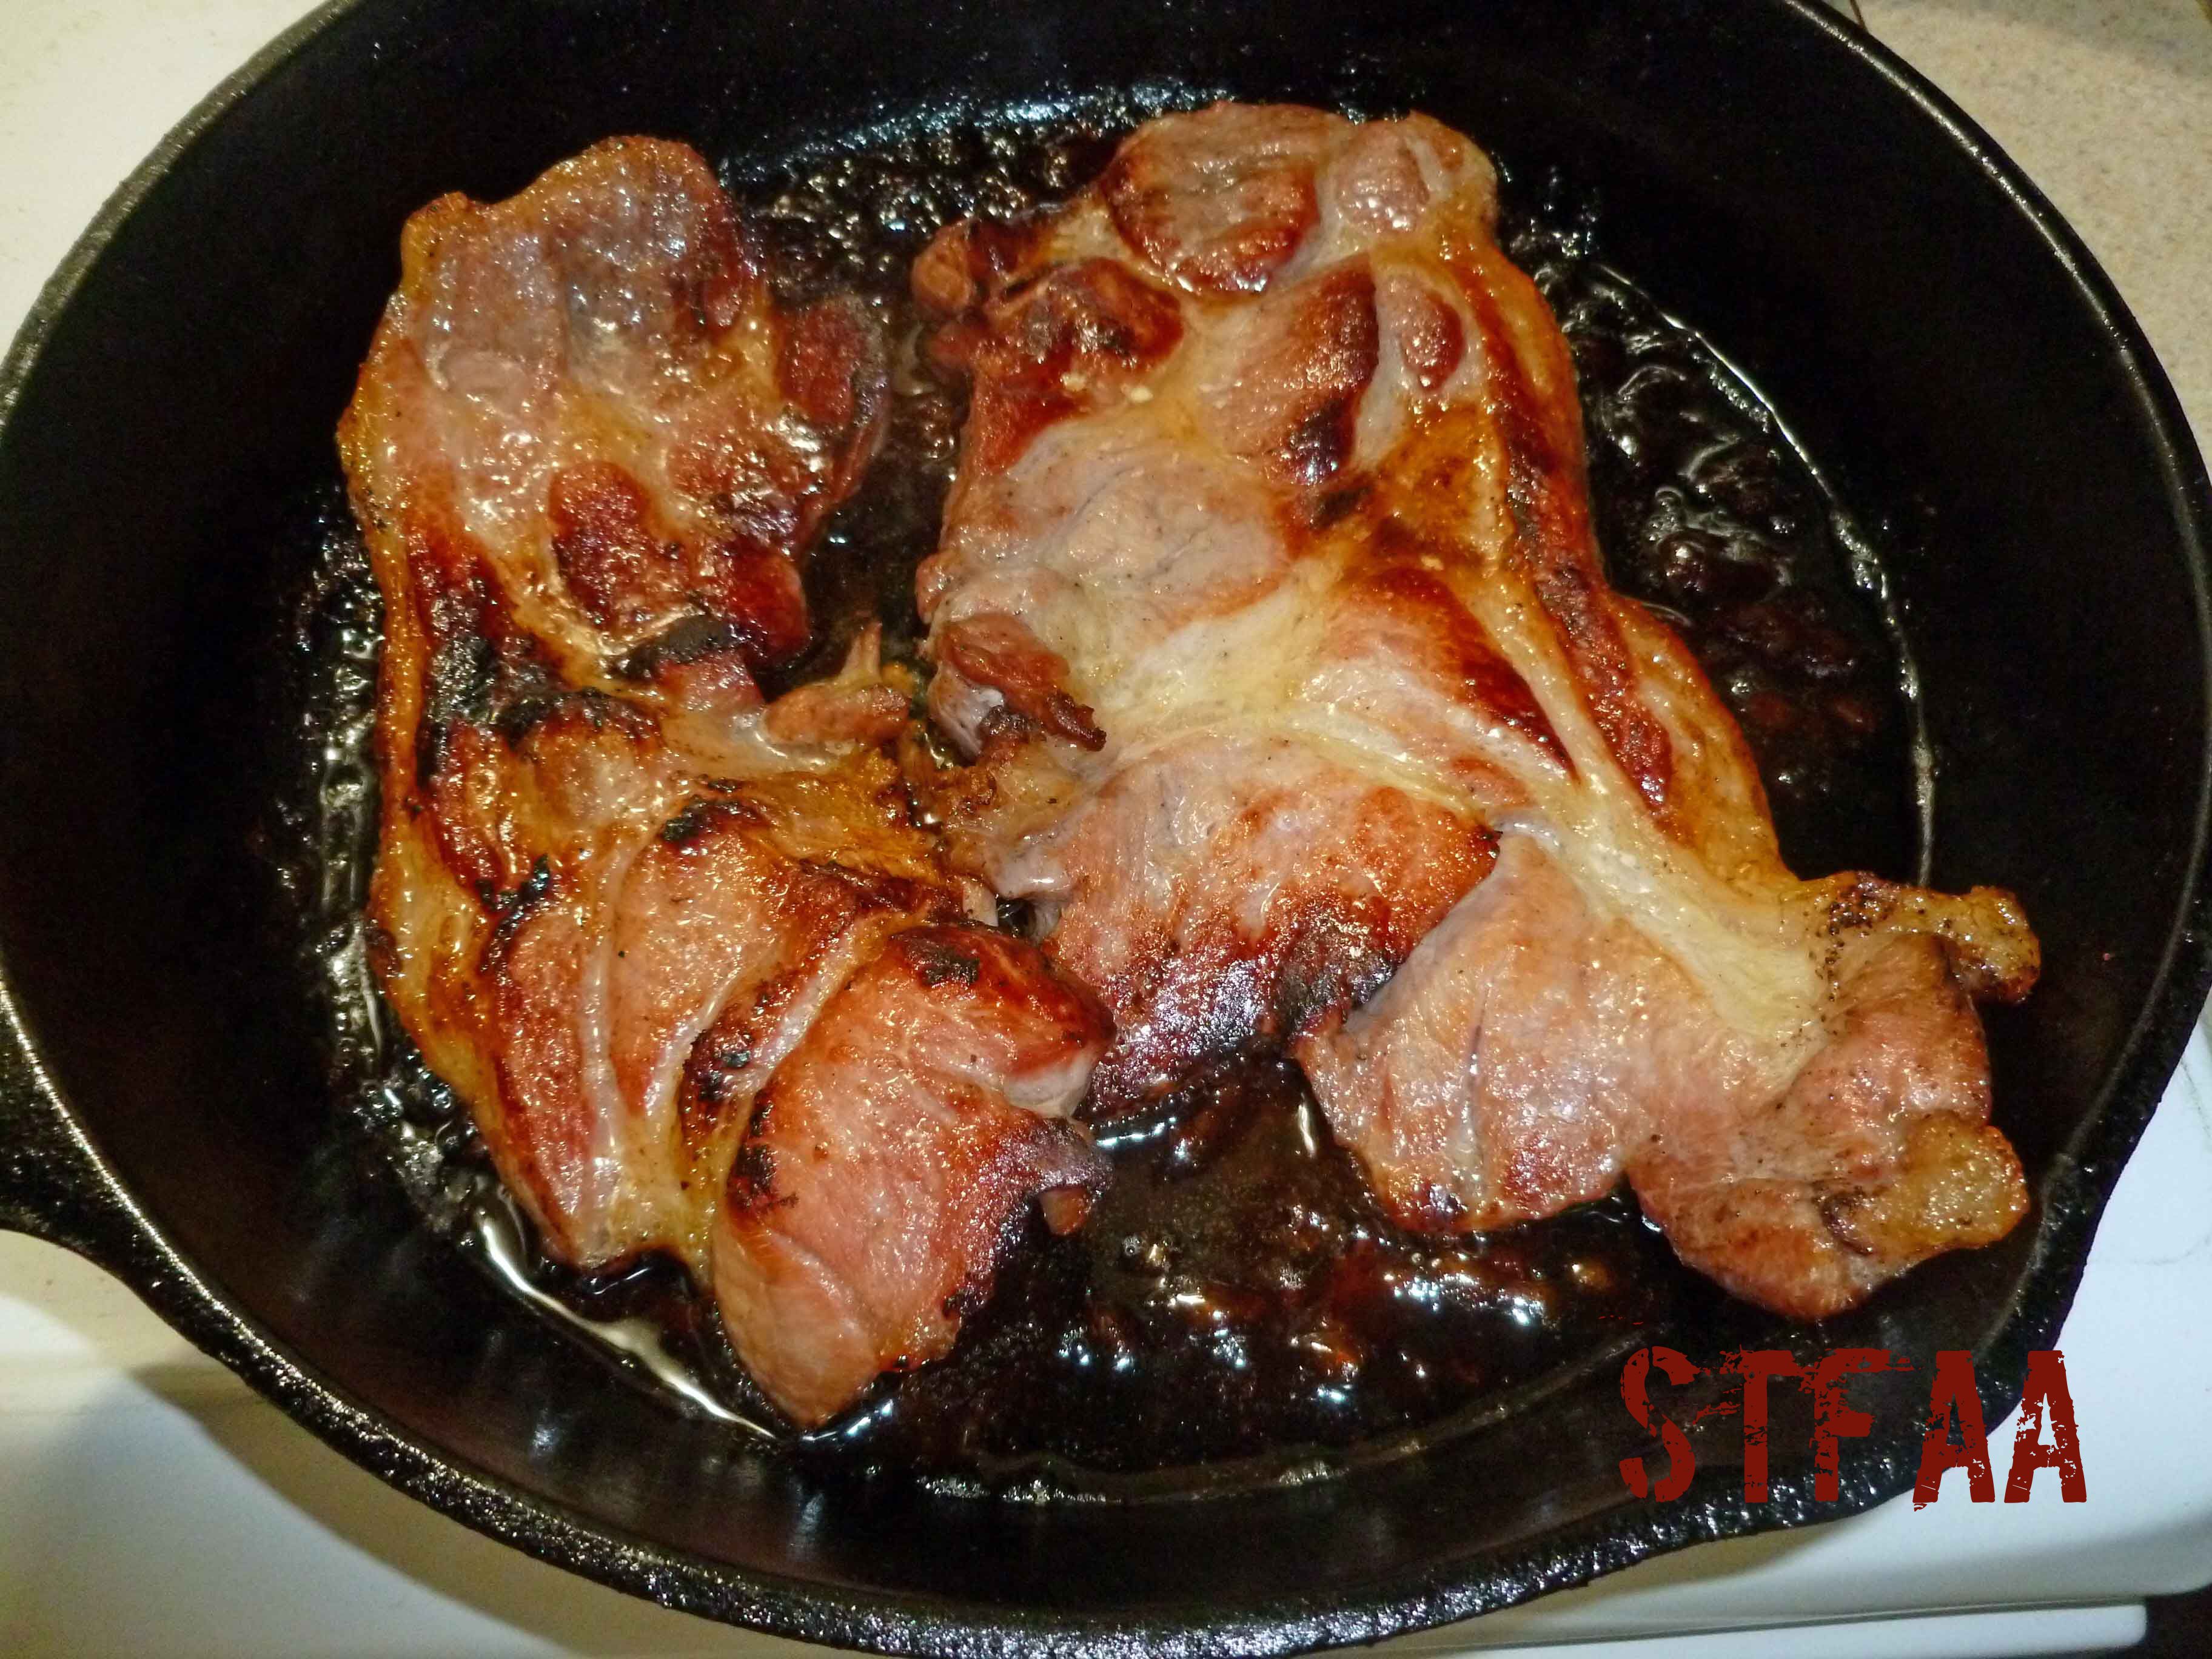
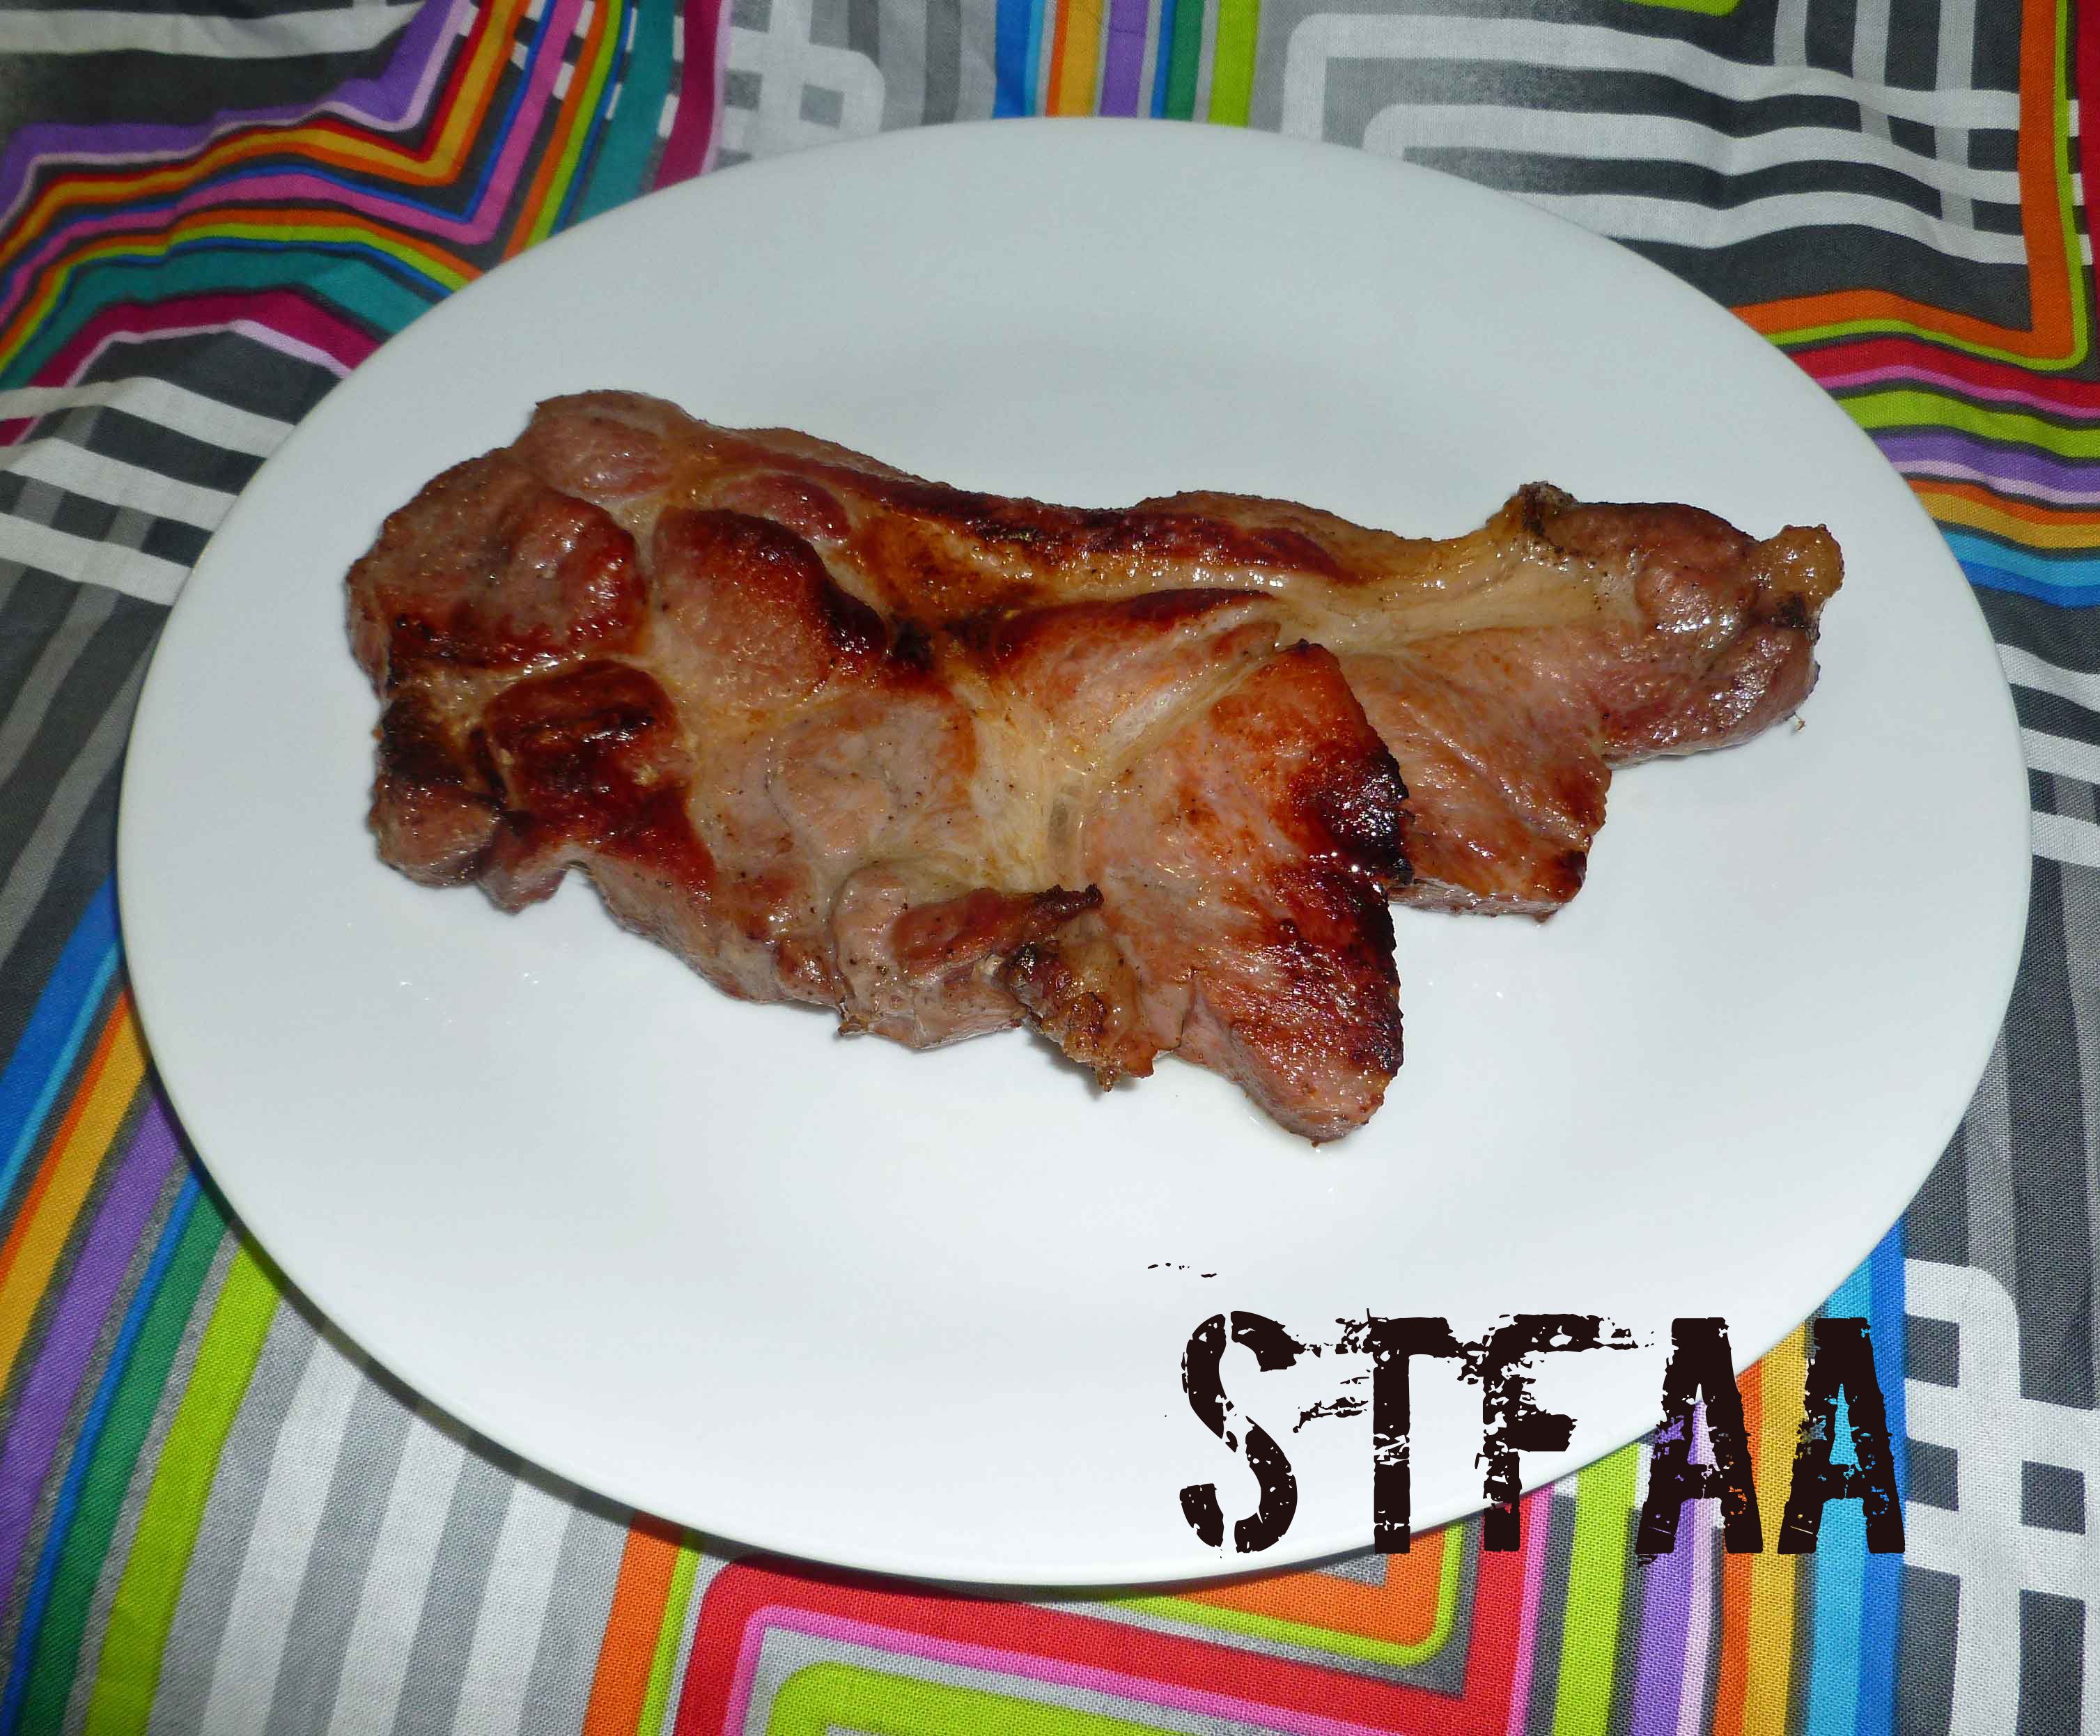
I’ve cooked the resulting ham steaks two ways, in the oven sort of like a whole ham, and seared on the stove top in cast iron and finished in the oven, more like a ham steak.
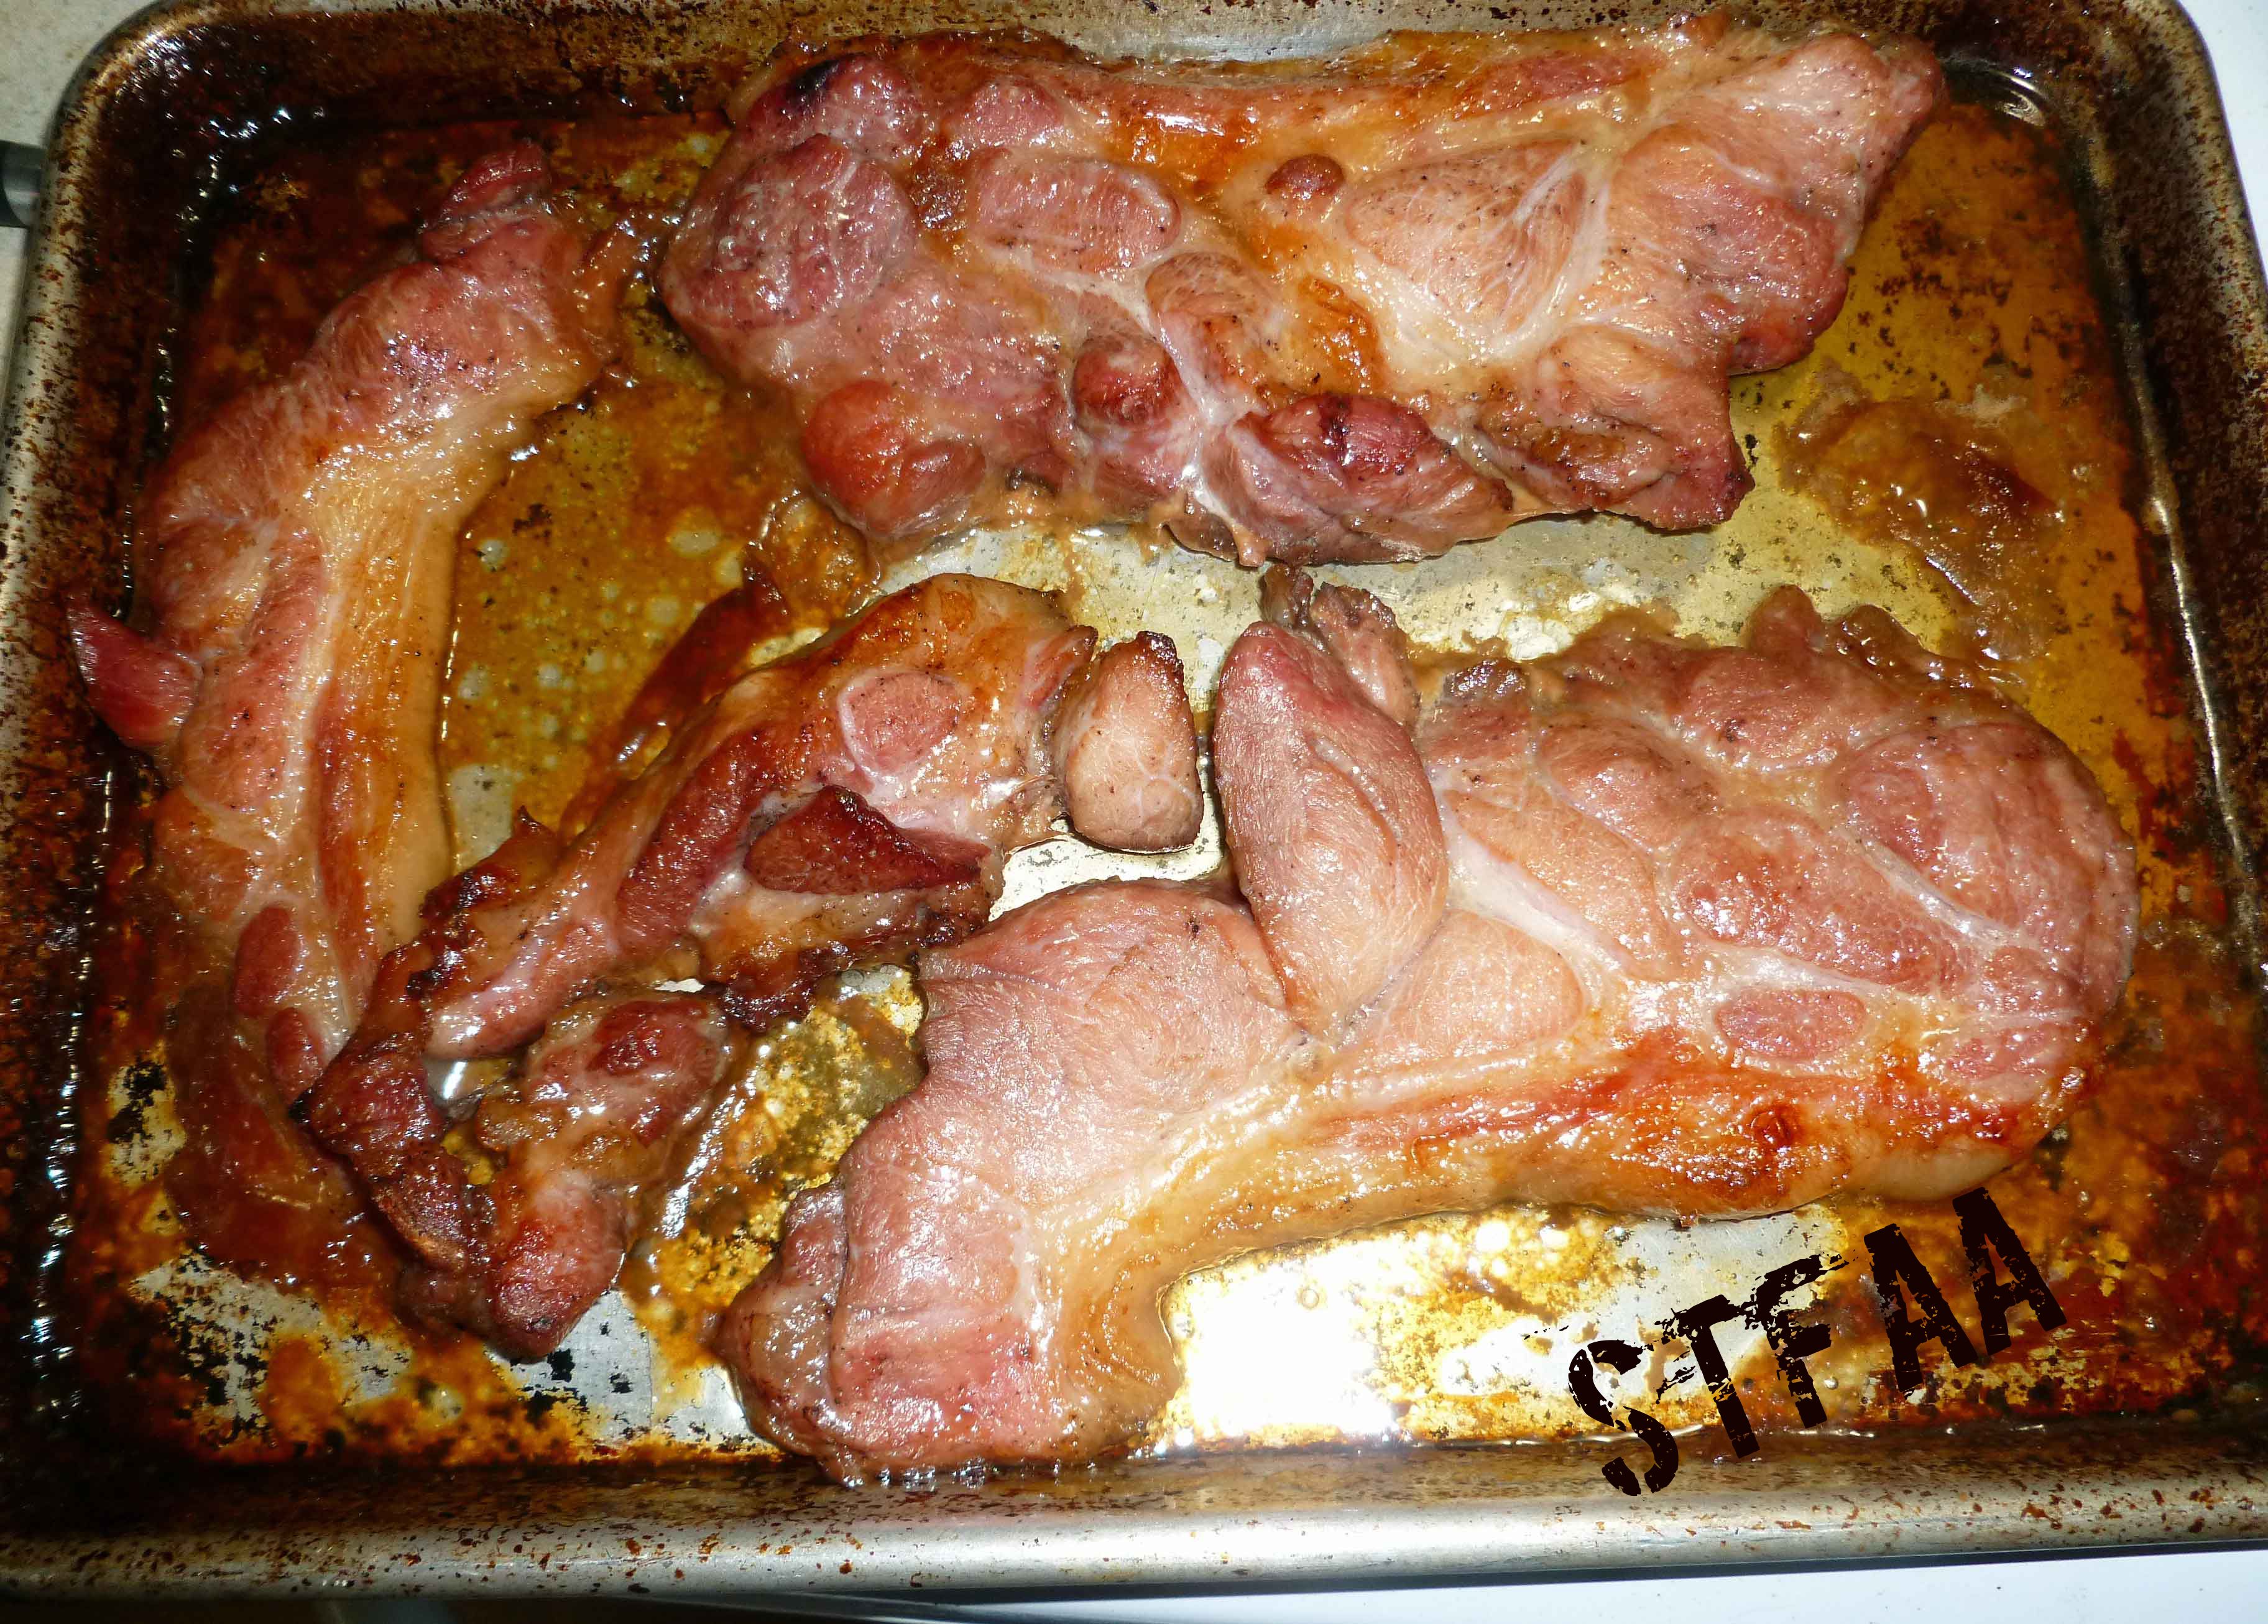
To roast the ham steaks like a whole ham, place the steaks in a roasting pan or baking sheet, and coat them with a bit of brown sugar as a rub. Bake them in a roasting pan at 375°F degrees for about 45 minutes to an hour or until the internal temperature is 160°F degrees.
Ham Steaks rubbed with brown sugar and roasted in the ovenHam Steaks rubbed with brown sugar and roasted in the oven
To cook them like ham steaks, preheat your oven to 375°F degrees. Place a bit of safe for you oil in a cast iron skillet, and turn the burner to medium heat. When the oil and skillet is hot, place the steaks in the skillet, and sear until there is nice golden, caramel crust. Turn the steaks over, and sear the other side. Once both sides of the ham steaks are seared, place the skillet in the oven and roast them for about 30 minutes or until the internal temperature is 160°F degrees.
Ham Steaks seared in cast iron and finished in the ovenHam Steaks seared in cast iron and finished in the oven
Enjoy your ham!
Notice: Trying to access array offset on value of type bool in /home/maryzahc/public_html/adultfoodallergies.com/wp-content/plugins/wp-ultimate-recipe/helpers/models/recipe.php on line 254
Cure Your Own Ham Steaks
Print Recipe
How to have allergy friendly ham for the holidays!
Slice the boneless Boston butt across the grain into 1 inch thick slices.
Place all the ingredients listed, except for the boneless Boston butt slices, in a large plastic container (large enough for brine, boneless Boston butt slices, and a heavy plate or bowl to weigh down the slices, but able to fit into your refrigerator). Stir until all the salt, sugar, and celery juice powder is dissolved into the water.
Add the boneless Boston butt slices to the brine and make sure they are submerged using a plate or a bowl to to weigh them down. Cover the plastic container with a lid or use plastic wrap or aluminum foil. Place the container in the refrigerator and brine the boneless Boston butt slices for 3 to 4 days. At the halfway point, rotate the position of the the boneless Boston butt slices so they brine evenly.
After the brining is done, rinse the slices well, making sure there aren’t any peppercorns stuck to the slices.
To roast the ham steaks like a whole ham, place the steaks in a roasting pan or baking sheet, and coat them with a bit of brown sugar as a rub. Bake them in a roasting pan at 375°F degrees for about 45 minutes to an hour or until the internal temperature is 160°F degrees.
To cook them like ham steaks, preheat your oven to 375°F degrees. Place a bit of safe for you oil in a cast iron skillet, and turn the burner to medium heat. When the oil and skillet is hot, place the steaks in the skillet, and sear until there is nice golden, caramel crust. Turn the steaks over, and sear the other side. Once both sides of the ham steaks are seared, place the skillet in the oven and roast them for about 30 minutes or until the internal temperature is 160°F degrees.
This is the post for the chocolate lovers. I know. Today, you’re buying Valentine’s Day chocolate on sale, but here’s a classy way to do chocolate. PIE. Chocolate pie. Make this pie for a video games party (if that’s a thing you might do), for a Primary watching party, for Thanksgiving, for Pi Day (coming up!)
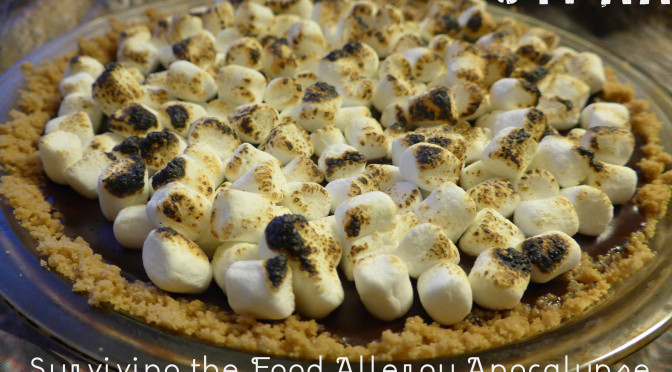
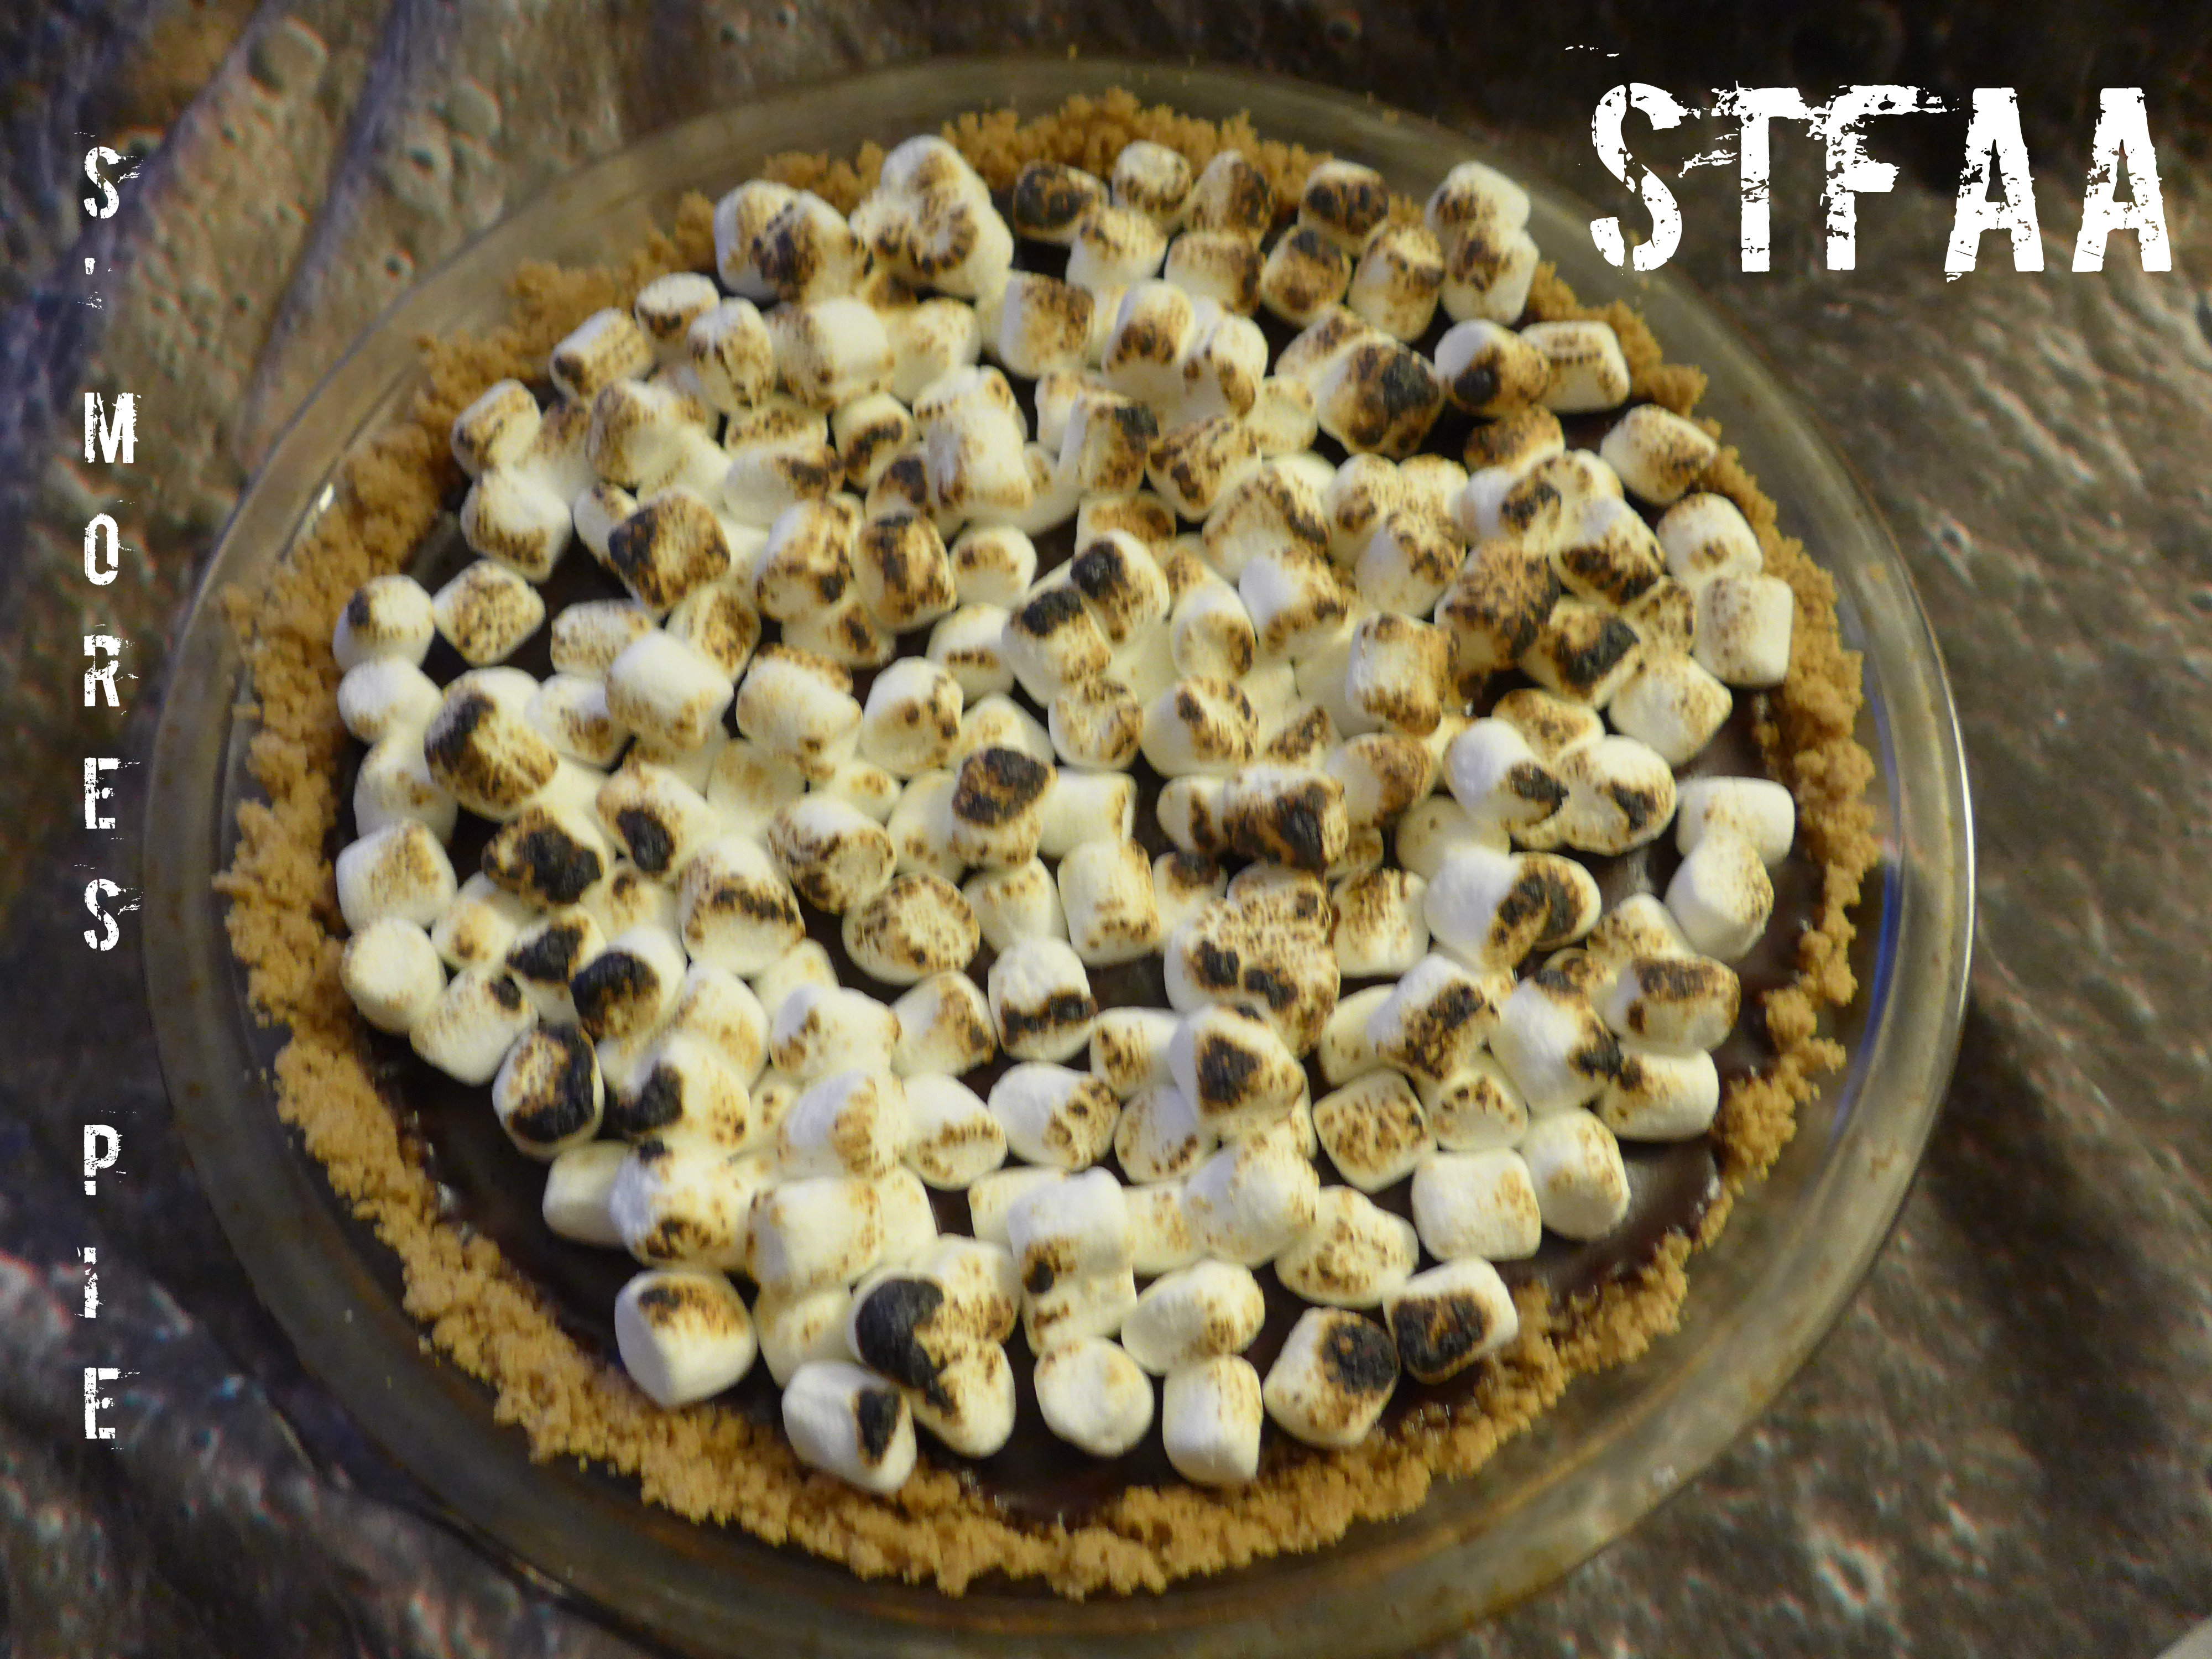
Basically, I’m saying that it’s a pie for almost all occasions. Lovely graham cracker crust, rich, creamy chocolate filling, and toasted marshmallows on top. This pie should be served at least slightly chilled, so keep that in mind (but in winter, that means it’s good in the car for a bit).
I’ve used pre-made gluten-free graham crackers, which I keep around as a snack, and regular mini-marshmallows, which are safe for me. If you need to make graham crackers or marshmallows, we’ve got you covered (see the links in the recipe!), but plan ahead for the extra time.
Enjoy the whole pie.
S’mores Pie Notice: Trying to access array offset on value of type bool in /home/maryzahc/public_html/adultfoodallergies.com/wp-content/plugins/wp-ultimate-recipe/helpers/models/recipe.php on line 254
S’mores Pie
Print Recipe
Graham cracker crust, rich chocolate filling, and toasted marshmallows on top
Servings
Prep Time
8-16slices
5minutes
Cook Time
Passive Time
10minutes
2hours
Servings
Prep Time
8-16slices
5minutes
Cook Time
Passive Time
10minutes
2hours
S’mores Pie
Print Recipe
Graham cracker crust, rich chocolate filling, and toasted marshmallows on top
Servings
Prep Time
8-16slices
5minutes
Cook Time
Passive Time
10minutes
2hours
Servings
Prep Time
8-16slices
5minutes
Cook Time
Passive Time
10minutes
2hours
Ingredients
Graham Cracker Crust
1 1/2cupsgraham cracker crumbsI like Kinnikinnick brand, but use regular if you don’t need gluten-free, and make your own if you need full control of ingredients
1/3cupbrown sugar
5Tablespoonscoconut oilcan use other fat that works for you, but coconut oil sets nicely
Chocolate Filling
1can (15 oz)full-fat coconut milkdo not use “light”! It won’t set.
1 bag (10 oz) safe-for-you chocolate chips(or chop 10 oz of your safe chocolate into small pieces)
1teaspoonvanilla extract
Marshmallows
1 1/2cups mini marshmallowsuse what is safe for you — regular, vegan, or make our marshmallow recipe
Servings: slices
Instructions
Crust
Crush graham crackers. If you’ve had a bad day, put them in a bag and beat them with a rolling pin. That’s how I was taught to do it growing up, and it’s a good stress-reliever. But you can also use a food processor or blender for a quicker and smoother crumb.
In a bowl, combine the graham cracker crumbs, sugar, and melted coconut oil. Do not try to do this in the pie plate! I always think this is going to be an excellent idea — why get two things dirty? But it NEVER works out well. With the higher sides of a bowl, you can quickly and completely mix all the crust ingredients using a fork, without scattering them all across the kitchen.
Press crumb mixture into pie plate. This will not form up quite as well as a gluten-containing version does, so it really helps to start out with your greased hands to evenly spread the crust mix over the pie plate. If you need extra compacting, the bottom of a glass works well. Try to even out the top edges of the crust — this will help it hold together when it comes out of the pan.
Chill the pie crust in the fridge for at least half an hour, but better 45 minutes. This is why coconut oil works better to keep the crust intact — it’s solidity when chilled is a benefit here.
Filling
Pour one can of coconut milk into a sauce pan. Heat over medium low until it begins to boil, stirring frequently. If the solids have somewhat separated, stir them back in to the coconut milk.
When you have the coconut milk at a low boil, remove the pan from the heat. Add the chocolate and stir until it is completely combined with the coconut milk.
Add the vanilla and stir well.
Pour the prepared filling into the chilled pie crust, and put the pie in the freezer to set.
Set your timer for 40 minutes. You want the pie to be mostly but not completely set when you top it with the marshmallows, as you want them to stick. Add the marshmallows and chill for another half an hour.
Toast the marshmallows with your kitchen torch.
Alternately, you can use your broiler for this — but set aside extra time to re-chill the entire pie before serving! The broiler will make the entire pie hot and it is easier to burn the marshmallows.
Mary Kate and I try occasionally to think up recipes with holiday themes. Valentine’s Day is a somewhat of struggle for me, as I’m generally a bit cynical of the whole thing and not a very sentimental person. But I’ve been craving cookies for a while, and I’d gotten myself some cookie cutters (these and these) with an Amazon gift card I’d gotten for Christmas (thanks Mom!) and I was itching to give them a test drive. Now granted, the Gingerdead Men cookie cutters aren’t much in the theme of Valentine’s Day, but they were too funny for me not to try out. I took them to work and they were a huge hit with people who have no allergies and can eat gluten, so I think they’re pretty awesome.
Valentine’s Day Gingerbread Frosted Cookies
I started with a recipe from Cara Reed’s Decadent Gluten-Free Vegan Baking book, which is an excellent resource. However, due to my cocktail of allergies, I generally use her book as a starting point to experiment as I generally have to change quite a bit. This time, I had to change the flour mix as I seem to be having issues with potatoes and rice and I suspect I may be allergic (sigh, shaking fist at the sky). I can’t use vegan shortening or vegan butter due to my corn and coconut allergies. I also can’t use flax as I’m allergic to it. I also wanted to kick up the spices a bit.
To start, you’ll need to make the Gluten-free, Rice-free, Potato-free Flour Mix:
Notice: Trying to access array offset on value of type bool in /home/maryzahc/public_html/adultfoodallergies.com/wp-content/plugins/wp-ultimate-recipe/helpers/models/recipe.php on line 254
Measure all ingredients and place in a large mixing bowl. Using a whisk, mix the ingredients until well combined. Place in an air tight storage container and use in baking recipes.
Once your flour mix is done, we can move onto the cookies.
Cookie Dough:
1/2cup of cold lard, cold vegetable shortening, or vegan butter(vegan butter and vegetable shortening are not generally safe for those allergic to corn)
2 1/2cups of Gluten-free, Rice-free, Potato-free flour mixand a bit extra for rolling the dough
1teaspoon of baking soda
1 1/4 teaspoon ofground ginger
3/4 teaspoon ofground cinnamon
1/4 teaspoon ofground cloves
1/4 teaspoon ofground nutmeg
1/2cup of sugar
1/2cup of molasses (Plantation Molasses is the brand most tolerated by those allergic to corn)
1/4 teaspoon of vanilla extract (Here’s a bunch of recipes for vanilla extract, make sure to use safe alcohol if corn or wheat are an issue for you. I used a vodka made only from potatoes, be careful as some vodkas may also use grain or corn.)
1 teaspoon of beet puree(To make puree, either use canned or fresh cooked beets and puree them in a blender with a bit of cooking liquid)
In a large bowl, whisk together the Gluten-free, Rice-free, Potato-free flour mix, baking soda, ginger, cinnamon, cloves, and nutmeg, until completely combined and set aside. In a small bowl, mix chia and aquafaba together until combined, and set aside.
Using a stand mixer, beat the cold lard, cold vegetable shortening, or vegan butter on medium to high speed until softened. Add molasses, sugar, chia and aquafaba mixture, and half of the flour mixture and beat until combined, scraping down the sides as necessary. Then add the remaining flour mixture and beat it in slowly until combined.
Using a stand mixer, beat the cold lard, cold vegetable shortening, or vegan butter on medium to high speed until softened. Add molasses, sugar, chia and aquafaba mixture, and half of the flour mixture and beat until combined, scraping down the sides as necessary. Then add the remaining flour mixture and beat it in slowly until combined.
When dough is chilled, preheat oven to 375ºF, and line a baking sheet with parchment paper.
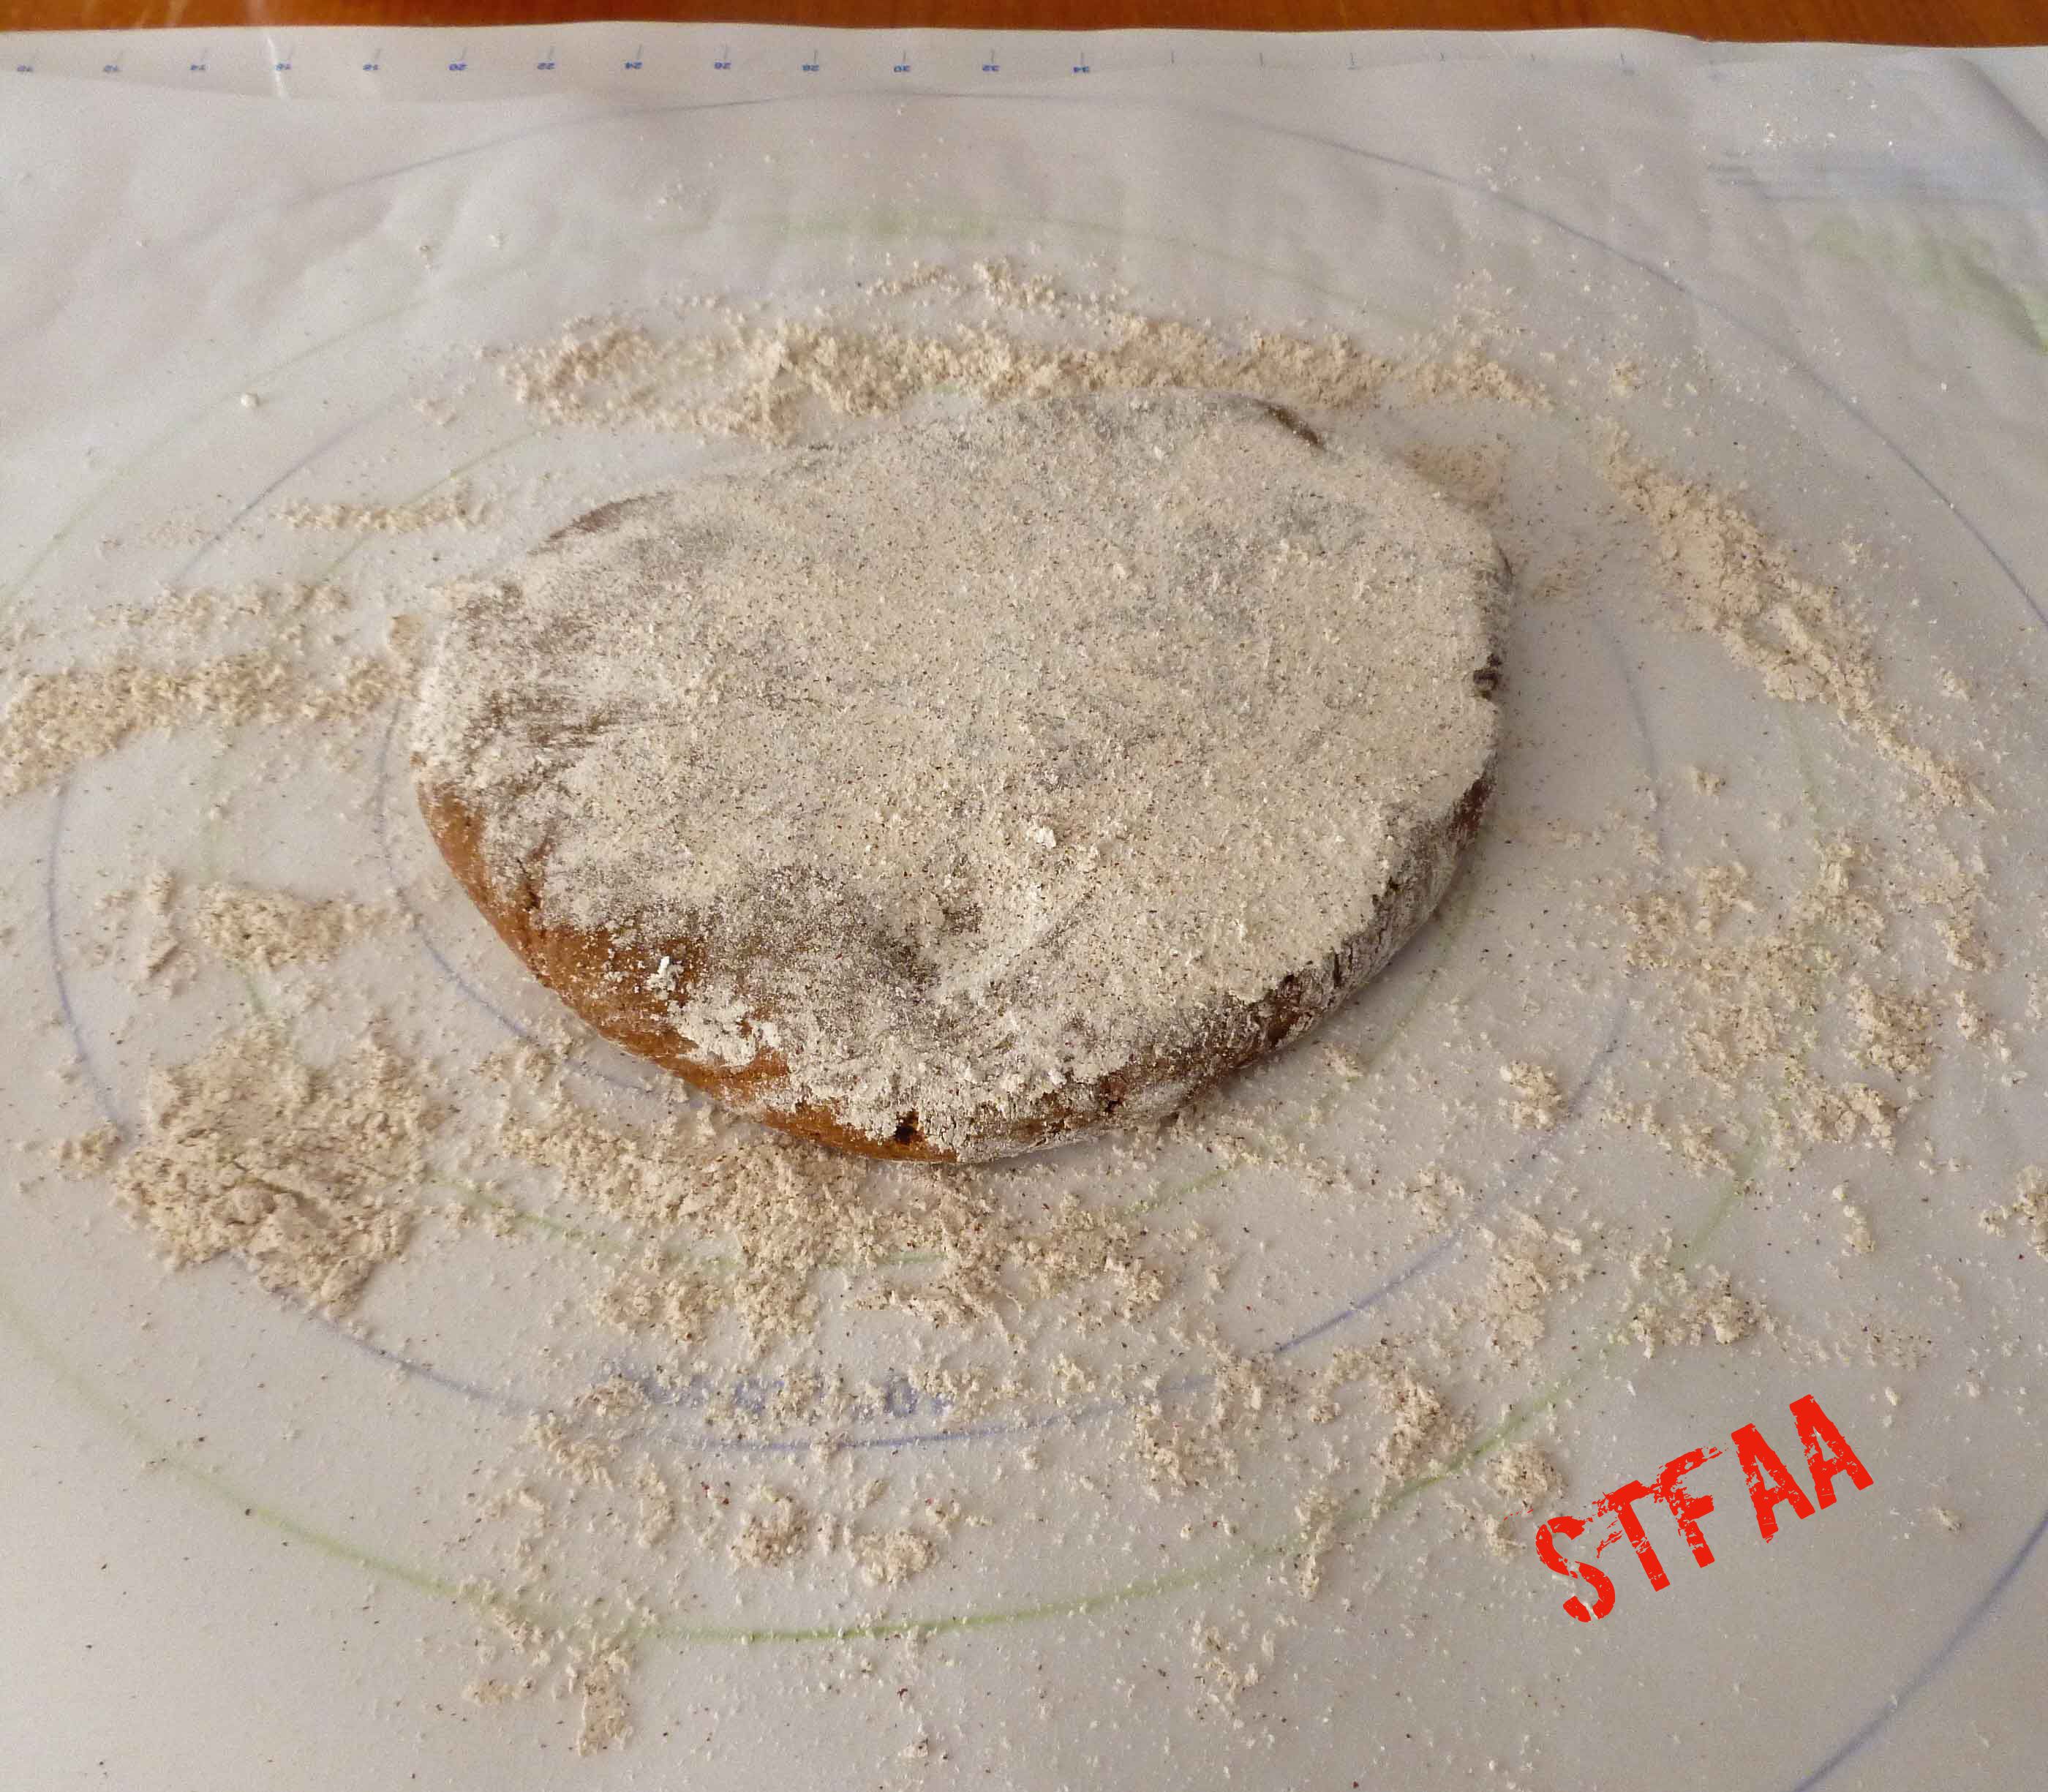
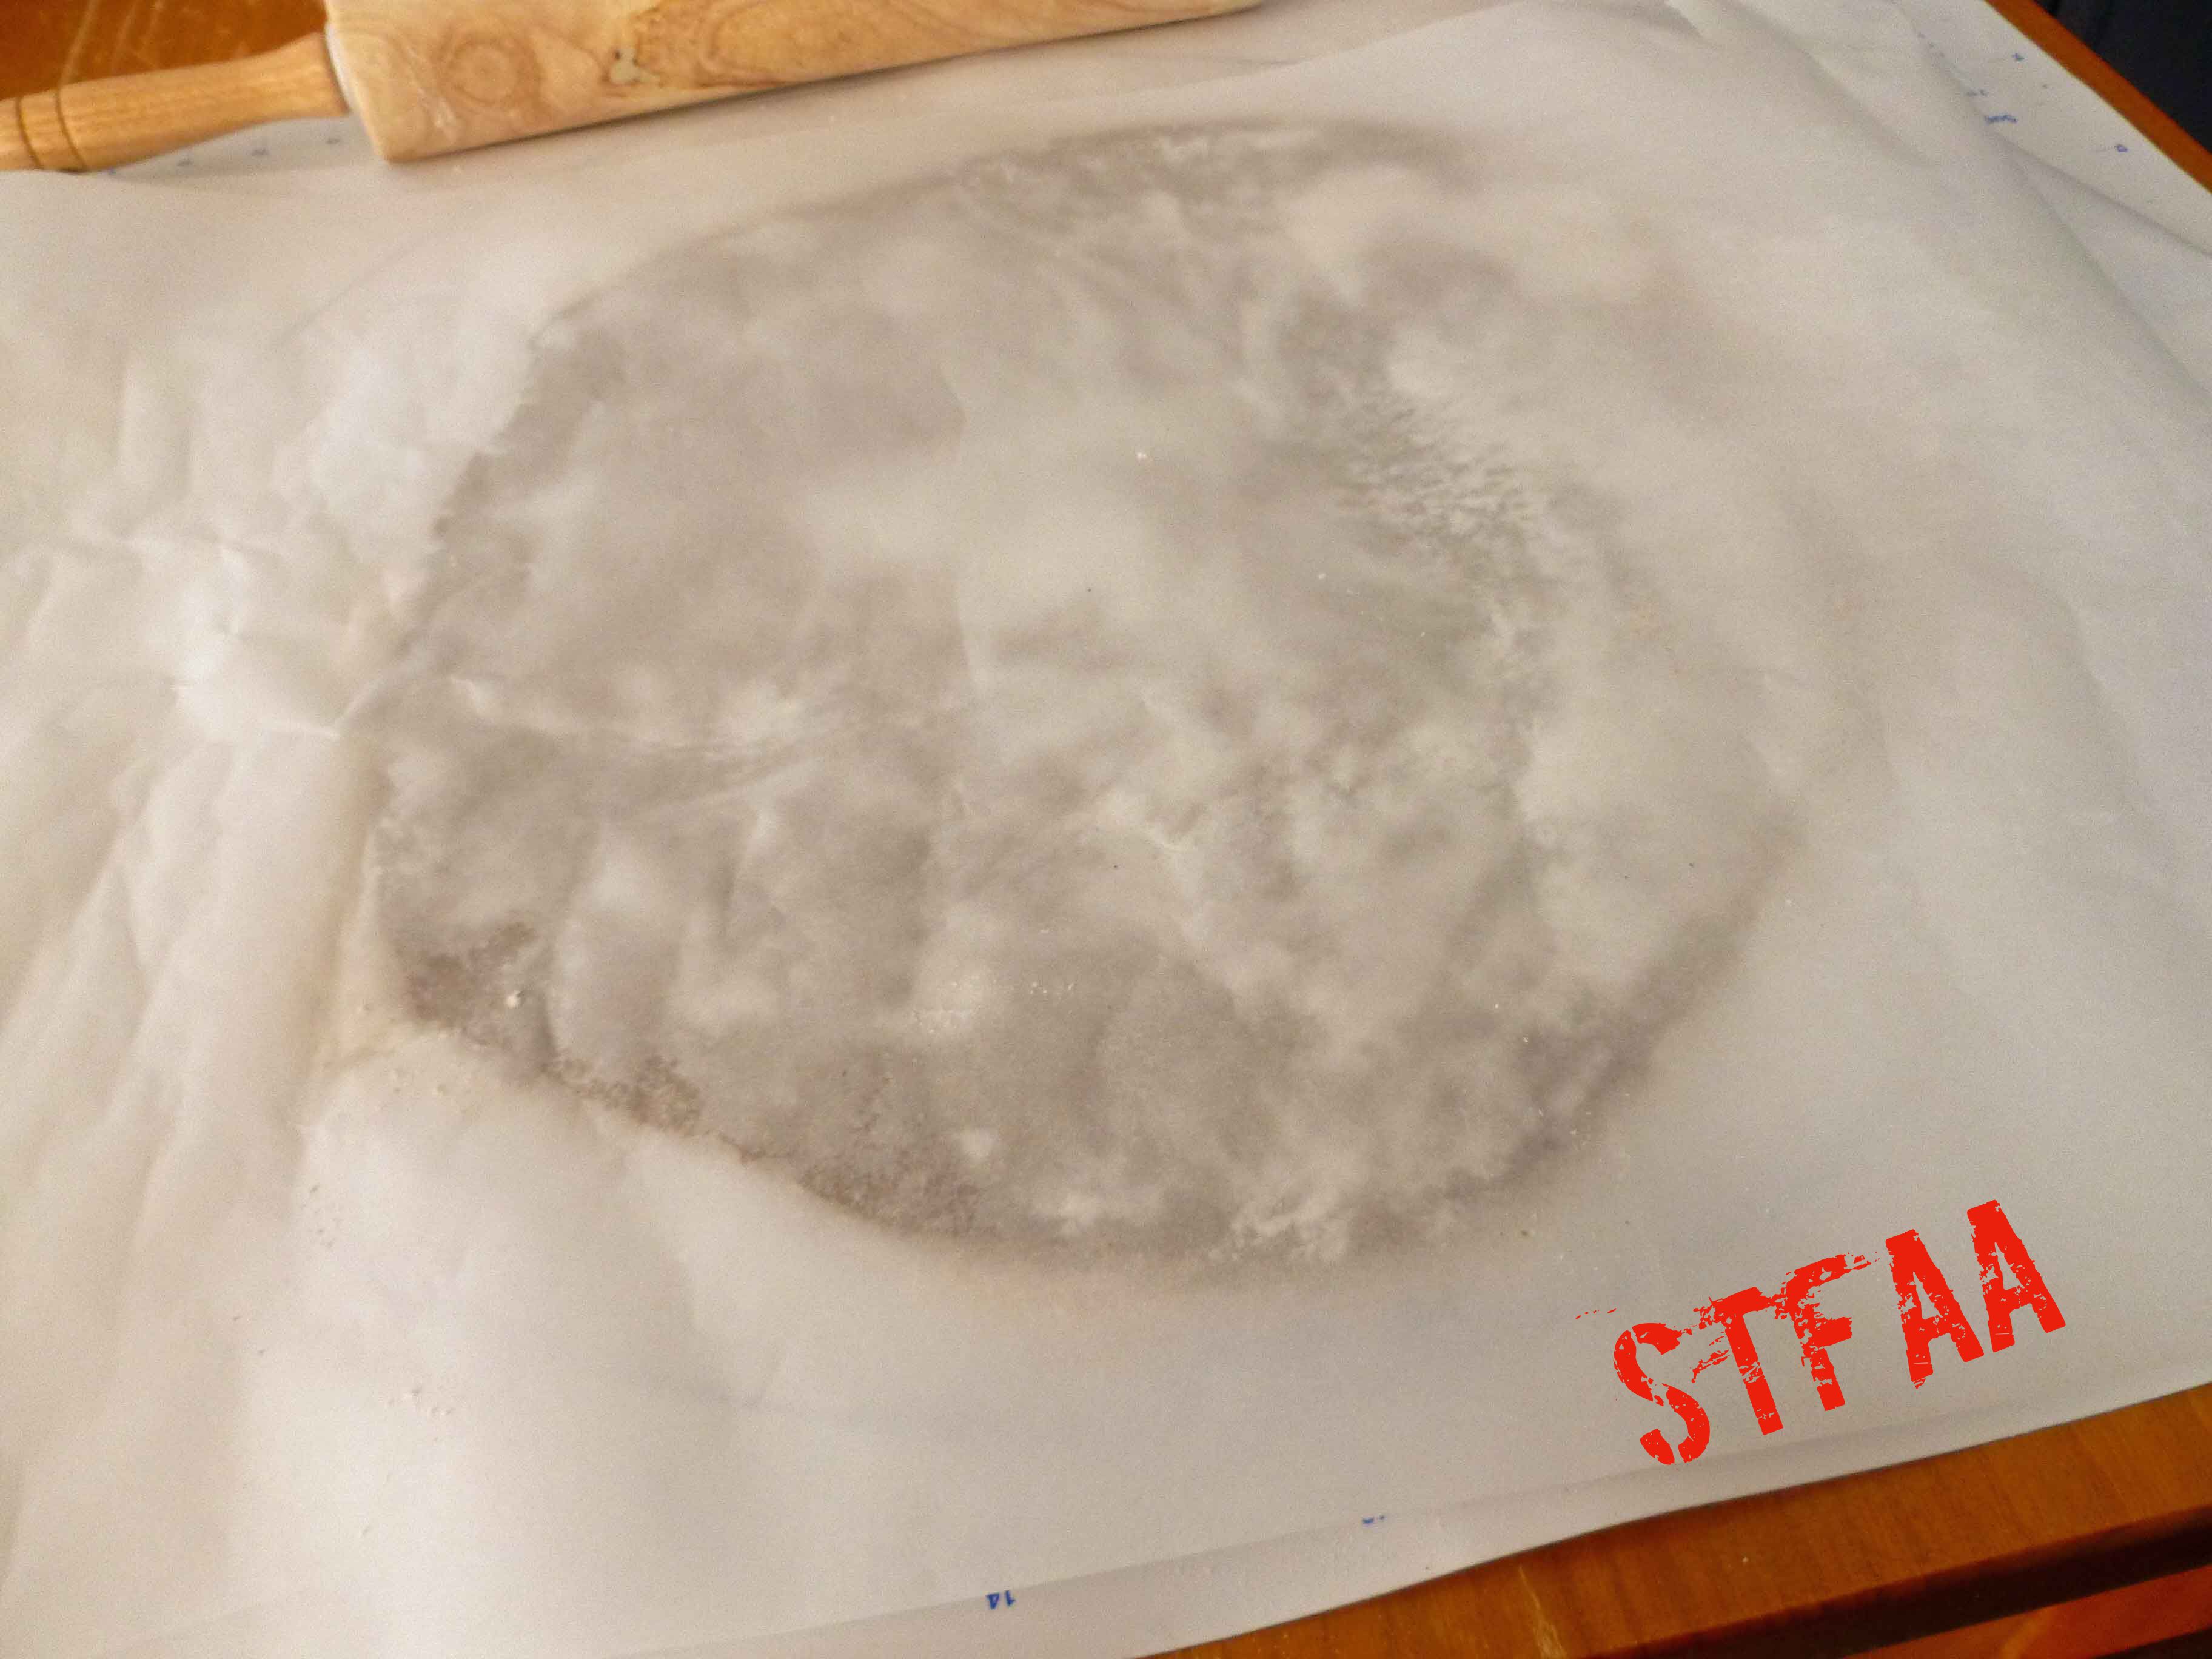
Place piece of parchment paper large enough to cover your rolling surface. Lightly flour the parchment paper with some Gluten-free, Rice-free, Potato-free flour mix, flatten the dough ball and flip it to be covered with some of the flour.
Flattened, floured doughball
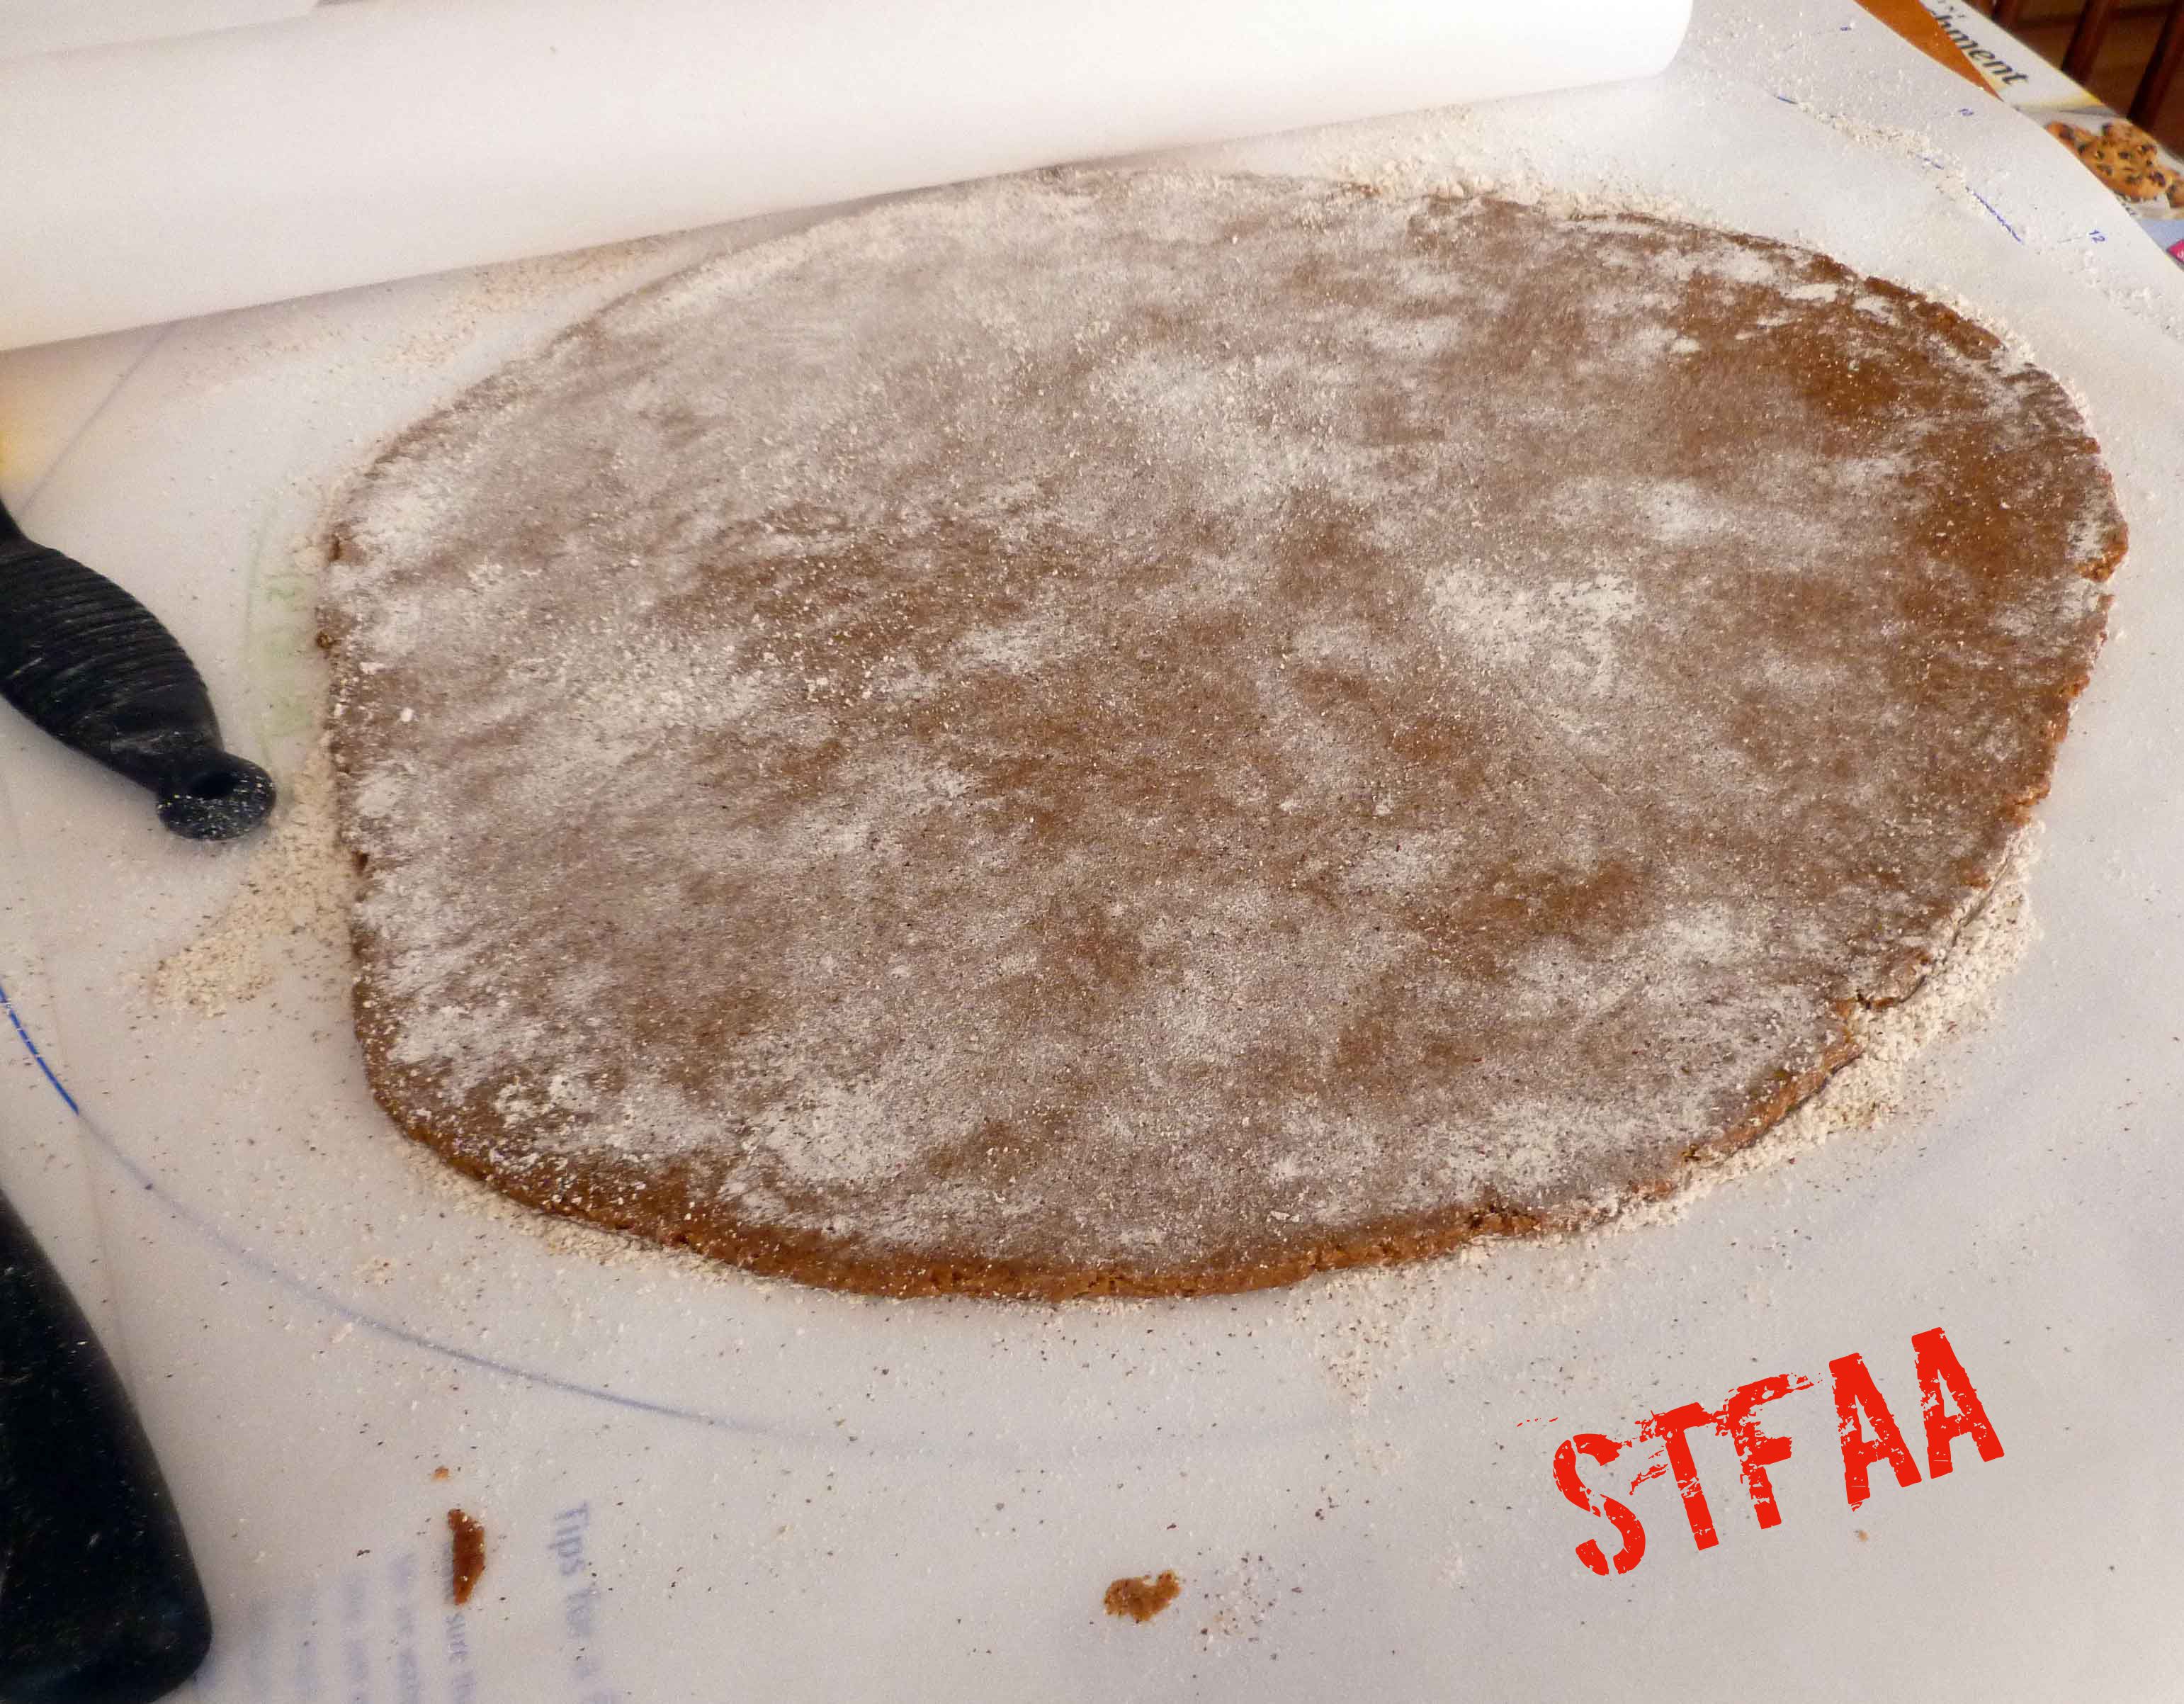
Add another piece of parchment paper on top. Roll the dough between the pieces of parchment paper to 1/8 of an inch thickness.
Dough being rolled between two pieces of parchment
If you don’t roll the cookies thin enough, they will spread.
Dough rolled out
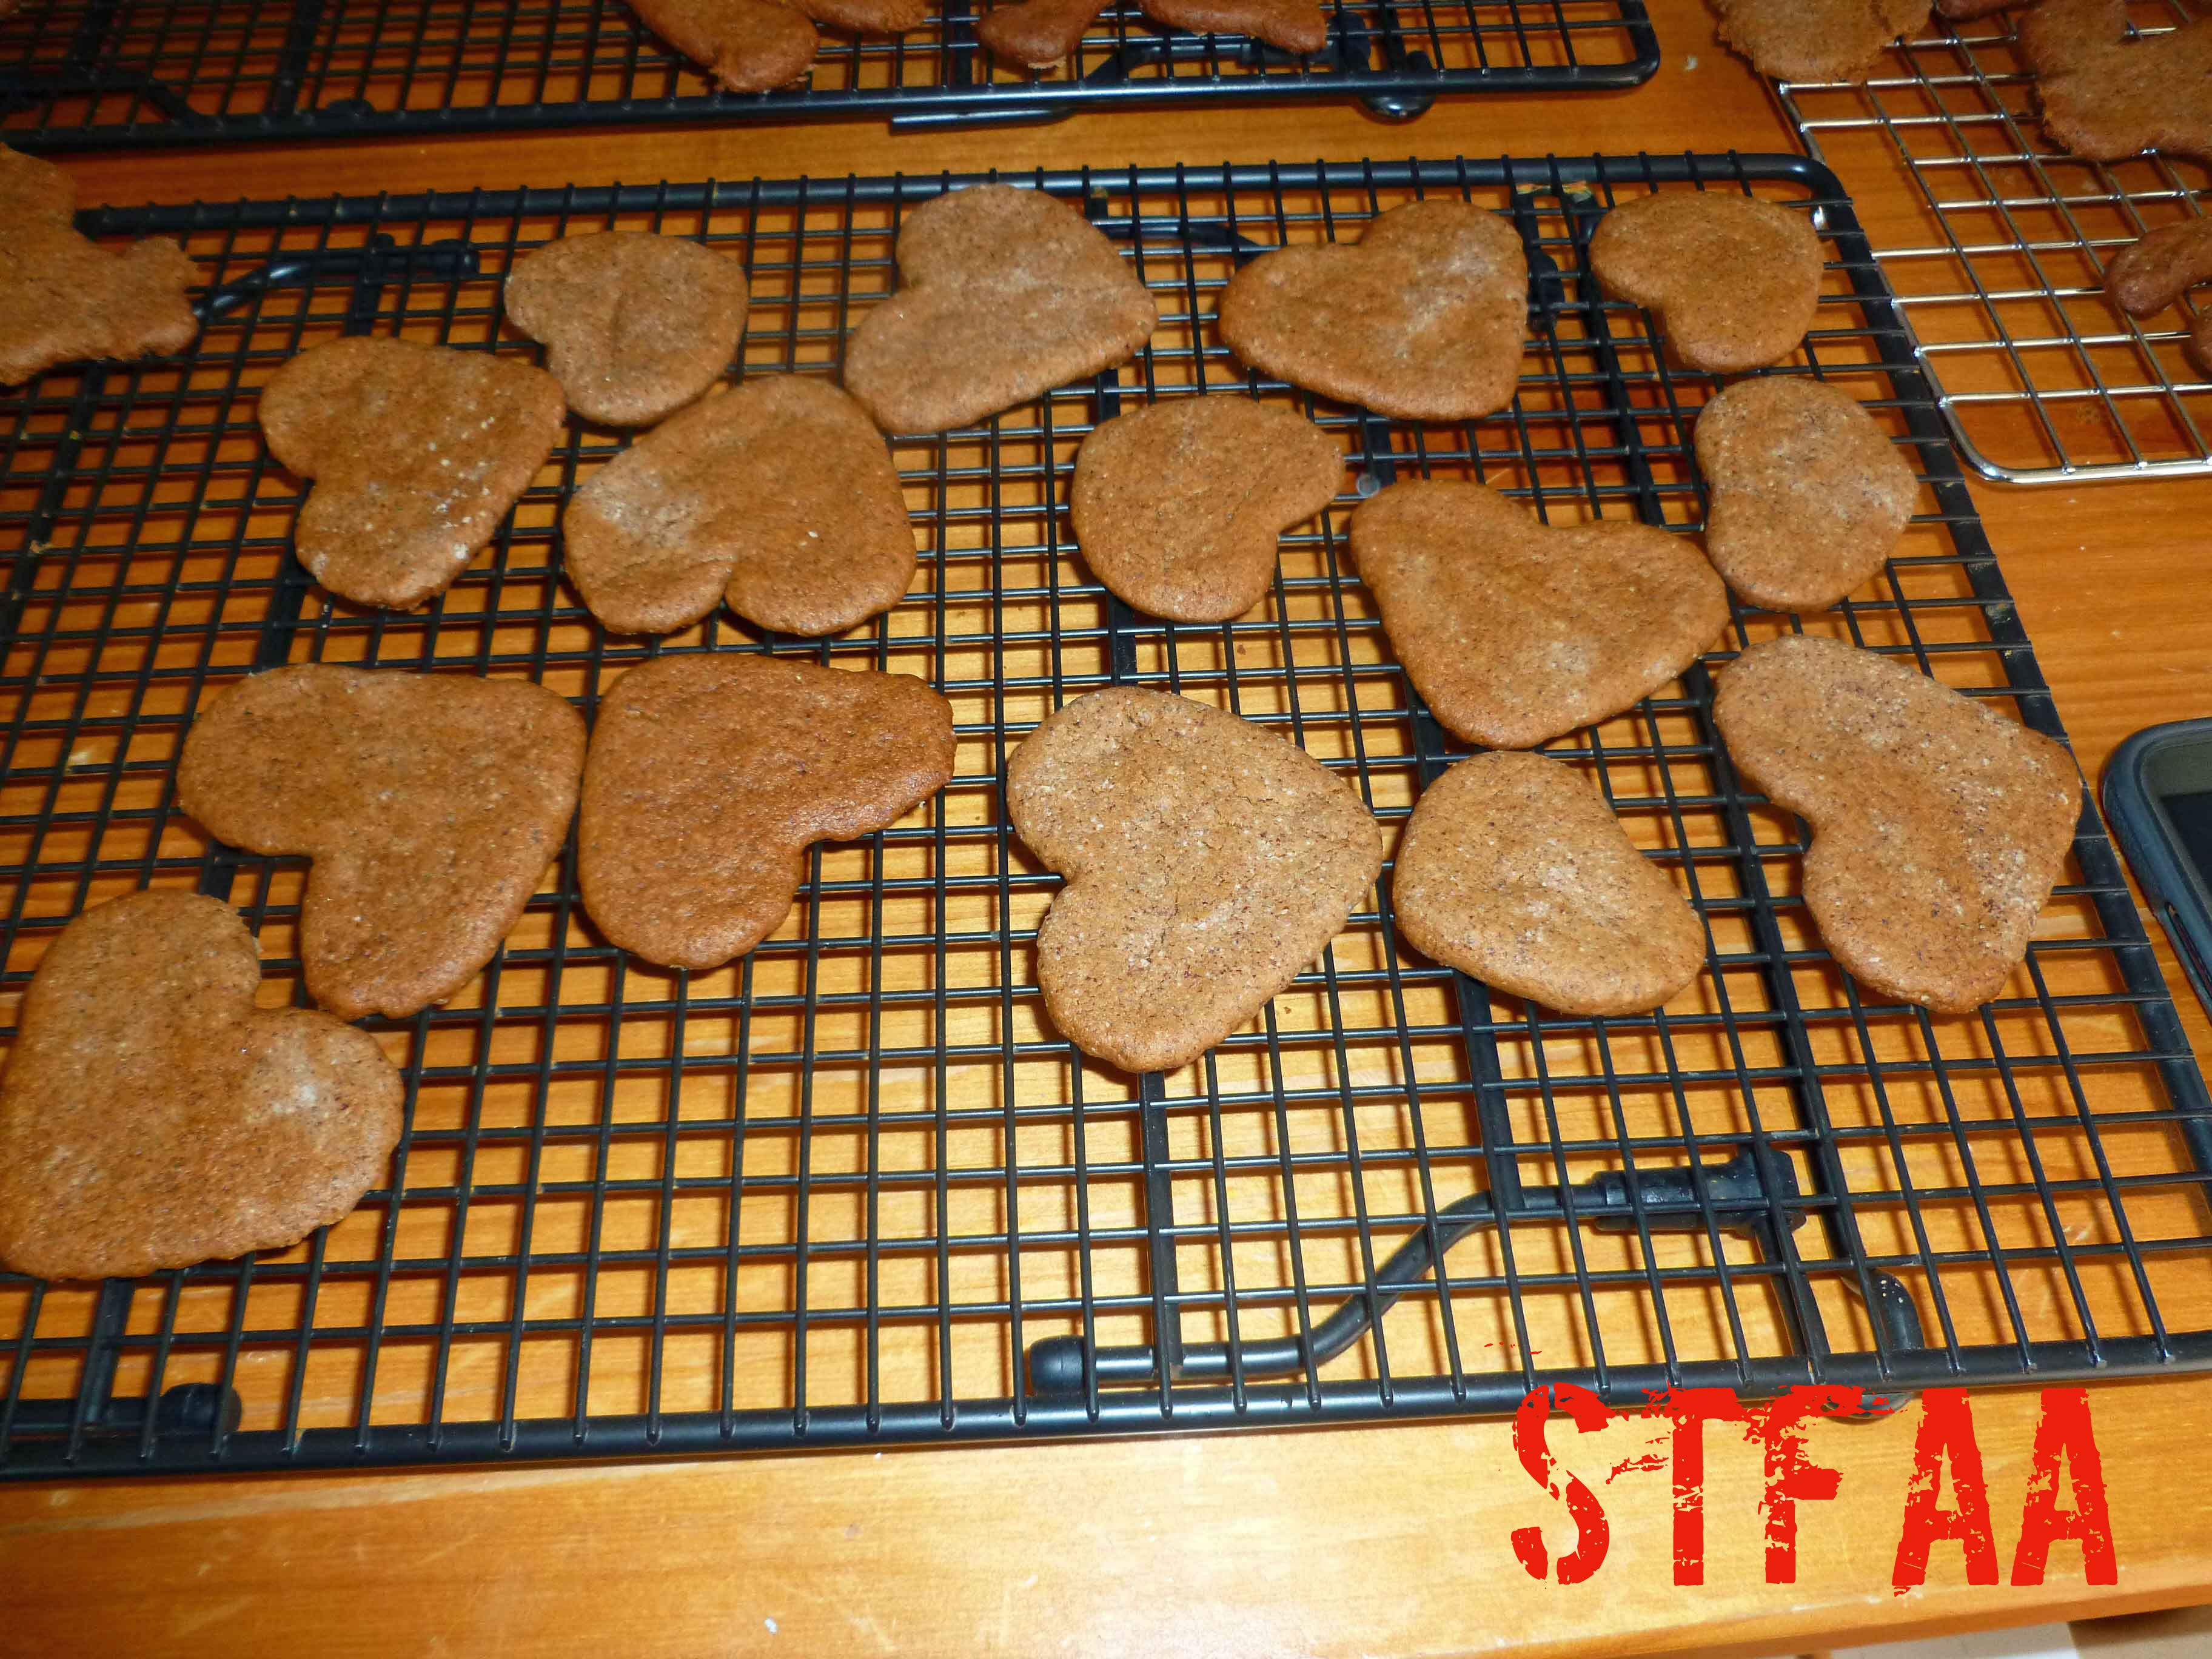
Cut shapes with a cookie cutter and place them 1 inch apart on the parchment covered baking sheet.
Cookies on cookie sheet (placed much too closely, beware!)
Bake 7-13 minutes (range is for a metal sheet pan to Pampered Chef stoneware, you need more time for stoneware) until the edges are lightly browned.
Cookies placed too closely and rolled too thick – A friend noted it looked like a cave made of hearts collapsing on the men, haha!
Cool on the baking sheet for 1 minute before transferring them to a wire rack.
Cookies cooling on rack
When they are cool, it’s time to frost them. To make the Pink Royal Icing, place the powdered sugar, vanilla extract, aquafaba, and beet puree in a bowl and using a stand or electric mixer, beat ingredients until completely combined. If frosting is not firm enough, add additional powdered sugar by the teaspoon until it is.
Pink Royal Icing
Place the frosting in a cake decorator and frost as you wish. Enjoy!
Valentine’s Day Gingerbread Frosted Cookies Notice: Trying to access array offset on value of type bool in /home/maryzahc/public_html/adultfoodallergies.com/wp-content/plugins/wp-ultimate-recipe/helpers/models/recipe.php on line 254
1/2cupcold lard, cold vegetable shortening, or vegan butter(vegan butter and vegetable shortening are not generally safe for corn allergics)
2 1/2cupsGluten-free, Rice-free, Potato-free flour mix(and a bit extra for rolling the dough)
1tspbaking soda
1 1/4tspground ginger
3/4tsp ground cinnamon
1/4tspground cloves
1/4 tsp ground nutmeg
1/2 cup sugar
1/2cup molasses
1tbspground chia seed
3tbspaquafaba
Pink Royal Icing
1 1/4cuppowdered sugar
1/4tspvanilla extract
1tbspaquafaba
1tspbeet puree(To make puree, either use canned or fresh cooked beets and puree them in a blender)
Servings: dozen
Instructions
Making Cookies
In a large bowl, whisk together the Gluten-free, Rice-free, Potato-free flour mix, baking soda, ginger, cinnamon, cloves, and nutmeg, until completely combined and set aside. In a small bowl, mix chia and aquafaba together until combined, and set aside.
Using a stand mixer, beat the cold lard, cold vegetable shortening, or vegan butter on medium to high speed until softened. Add molasses, sugar, chia and aquafaba mixture, and half of the flour mixture and beat until combined, scraping down the sides as necessary. Then add the remaining flour mixture and beat it in slowly until combined.
Divide the dough in half and create two balls. Either wrap in saran wrap or place in a bowl and cover, and then place in the fridge and chill the dough for at least three hours, I prefer overnight.
When dough is chilled, preheat oven to 375ºF, and line a baking sheet with parchment paper.
Place piece of parchment paper large enough to cover your rolling surface. Lightly flour the parchment paper with some Gluten-free, Rice-free, Potato-free flour mix, flatten the dough ball and flip it to be covered with some of the flour, and add another piece of parchment paper on top. Roll the dough between the pieces of parchment paper to 1/8 of an inch thickness. If you don’t roll the cookies thin enough, they will spread. Cut shapes with a cookie cutter and place them 1 inch apart on the parchment covered baking sheet.
Bake 7-13 minutes (range is for a metal sheet pan to Pampered Chef stoneware, you need more time for stoneware) until the edges are lightly browned. Cool on the baking sheet for 1 minute before transferring them to a wire rack.
Making Frosting
Place powdered sugar, vanilla extract, aquafaba, and beet puree in a bowl and using a stand or electric mixer, beat ingredients until completely combined. If frosting is not firm enough, add additional powdered sugar by the teaspoon until it is.
I’d write something eloquent about this, but doesn’t the recipe title tell you everything? My friend Corinne of spare cake made these for me a few years ago, and my guess is that she didn’t make the recipe up. It’s not even much of a recipe — just an amazing technique that you need to know for your next gathering (or blizzard day in).
If your allergies prevent you from eating commercial bacon or frozen tater tots, fear not. We have you covered with DIY bacon and a few versions of potato bites. (If you are making your own, I’d suggest cooking the tots about half way through before wrapping them in bacon).
Enjoy.
Notice: Trying to access array offset on value of type bool in /home/maryzahc/public_html/adultfoodallergies.com/wp-content/plugins/wp-ultimate-recipe/helpers/models/recipe.php on line 254
Bacon-Wrapped Potato Bites
Print Recipe
This is a great appetizer for the next sporting event or movie night or other gathering where clean fingers aren’t a priority (so do not make this for a gaming night!). Plan on maybe a half-dozen potato bites per person, fewer if you have other hearty appetizers. I always cook some extra potatoes just because you can never have extra potatoes.
This is a great appetizer for the next sporting event or movie night or other gathering where clean fingers aren’t a priority (so do not make this for a gaming night!). Plan on maybe a half-dozen potato bites per person, fewer if you have other hearty appetizers. I always cook some extra potatoes just because you can never have extra potatoes.
Take frozen tots out of oven OR make and pre-bake DIY tater tots (bake for half the time in the recipe linked above).
Line a sheet pan with slightly crumpled foil (this will act as a bit of a “rack” for the bacon). Lay strips of bacon out, close, but not touching or overlapping. Bake for about 10 minutes — bacon should start getting some color, but will not yet be crispy. Remove from oven and cool slightly.
If using frozen tots that aren’t thawed yet (and most won’t in 10 minutes), bake for 10 minutes.
When tots are cool enough to touch, wrap each tot in half a strip of bacon, overlapping on one side and stick a toothpick through the overlapped part and out the other side.
Place back on baking sheet (not the greasy foil one!) and bake for another 10-15 minutes, until bacon is crisp and potatoes are cooked through (usually brown on the ends).
Eat with dipping sauce of your choice. Ketchup is good, but cashew ranch would also be a good choice.
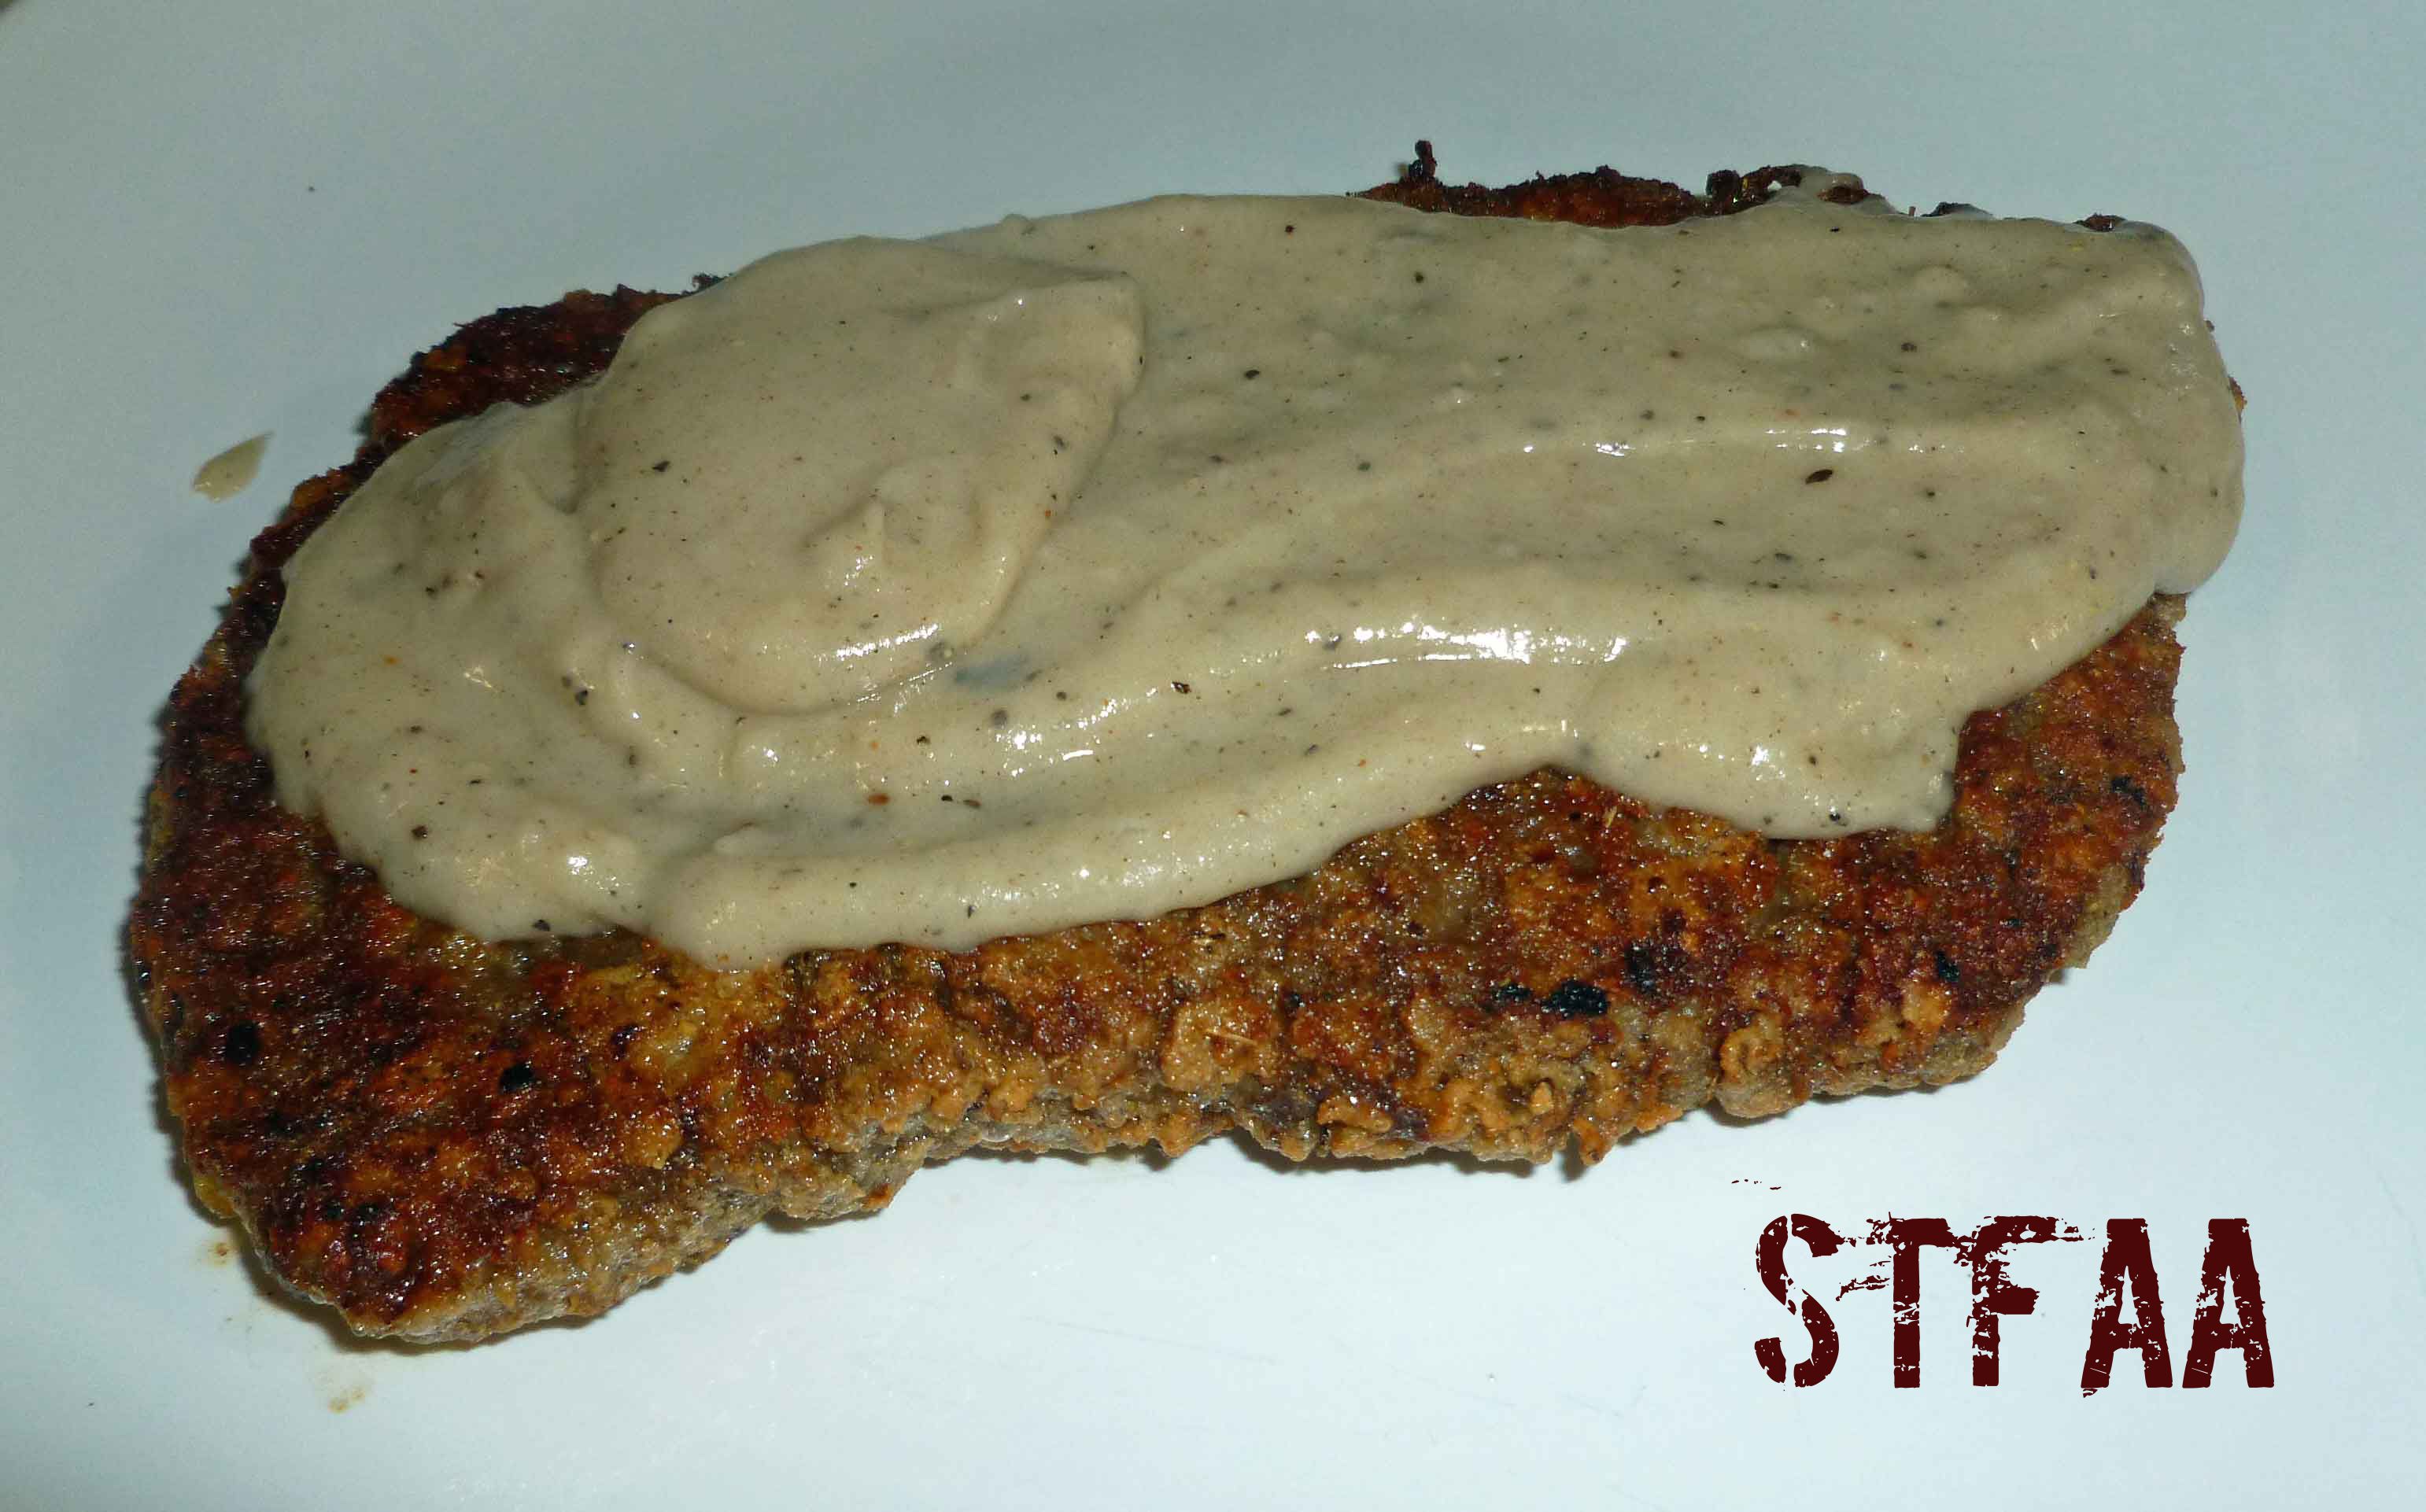
My mother made cube steak sometimes when we were kids, but wasn’t one for sauces, so I wasn’t introduced to white pepper gravy until I began ordering it at diners. I liked nothing better than going to a greasy spoon diner after a night out with friends if we’d been imbibing, or as a recovery measure the morning after when I was in college and law school. I love diner food, and was disappointed in the lack of good diners in New Hampshire when I moved here. Now that the food allergy apocalypse has hit, even the mediocre diners here are off limits. But this recipe takes care of those diner food cravings for me.
2 Tablespoons of aquafaba (you’ll need 4 Tablespoons if you make 2 cube steaks)
2-3 Tablespoons of bacon fat, lard, or other safe for you cooking oil.
White Pepper Gravy Ingredients:
Drippings from frying Chicken Fried Steak
1/4 cup of sorghum flour
1 cup of cashew milk or other safe for you non-dairy milk
1/4 to 1/2 cup of water depending on how thick you like your gravy
1/4 teaspoon of black pepper (you may want to add more or less to taste)
1/4 teaspoon of salt ( you may want to add more or less to taste)
Chicken Fried Steak Instructions:
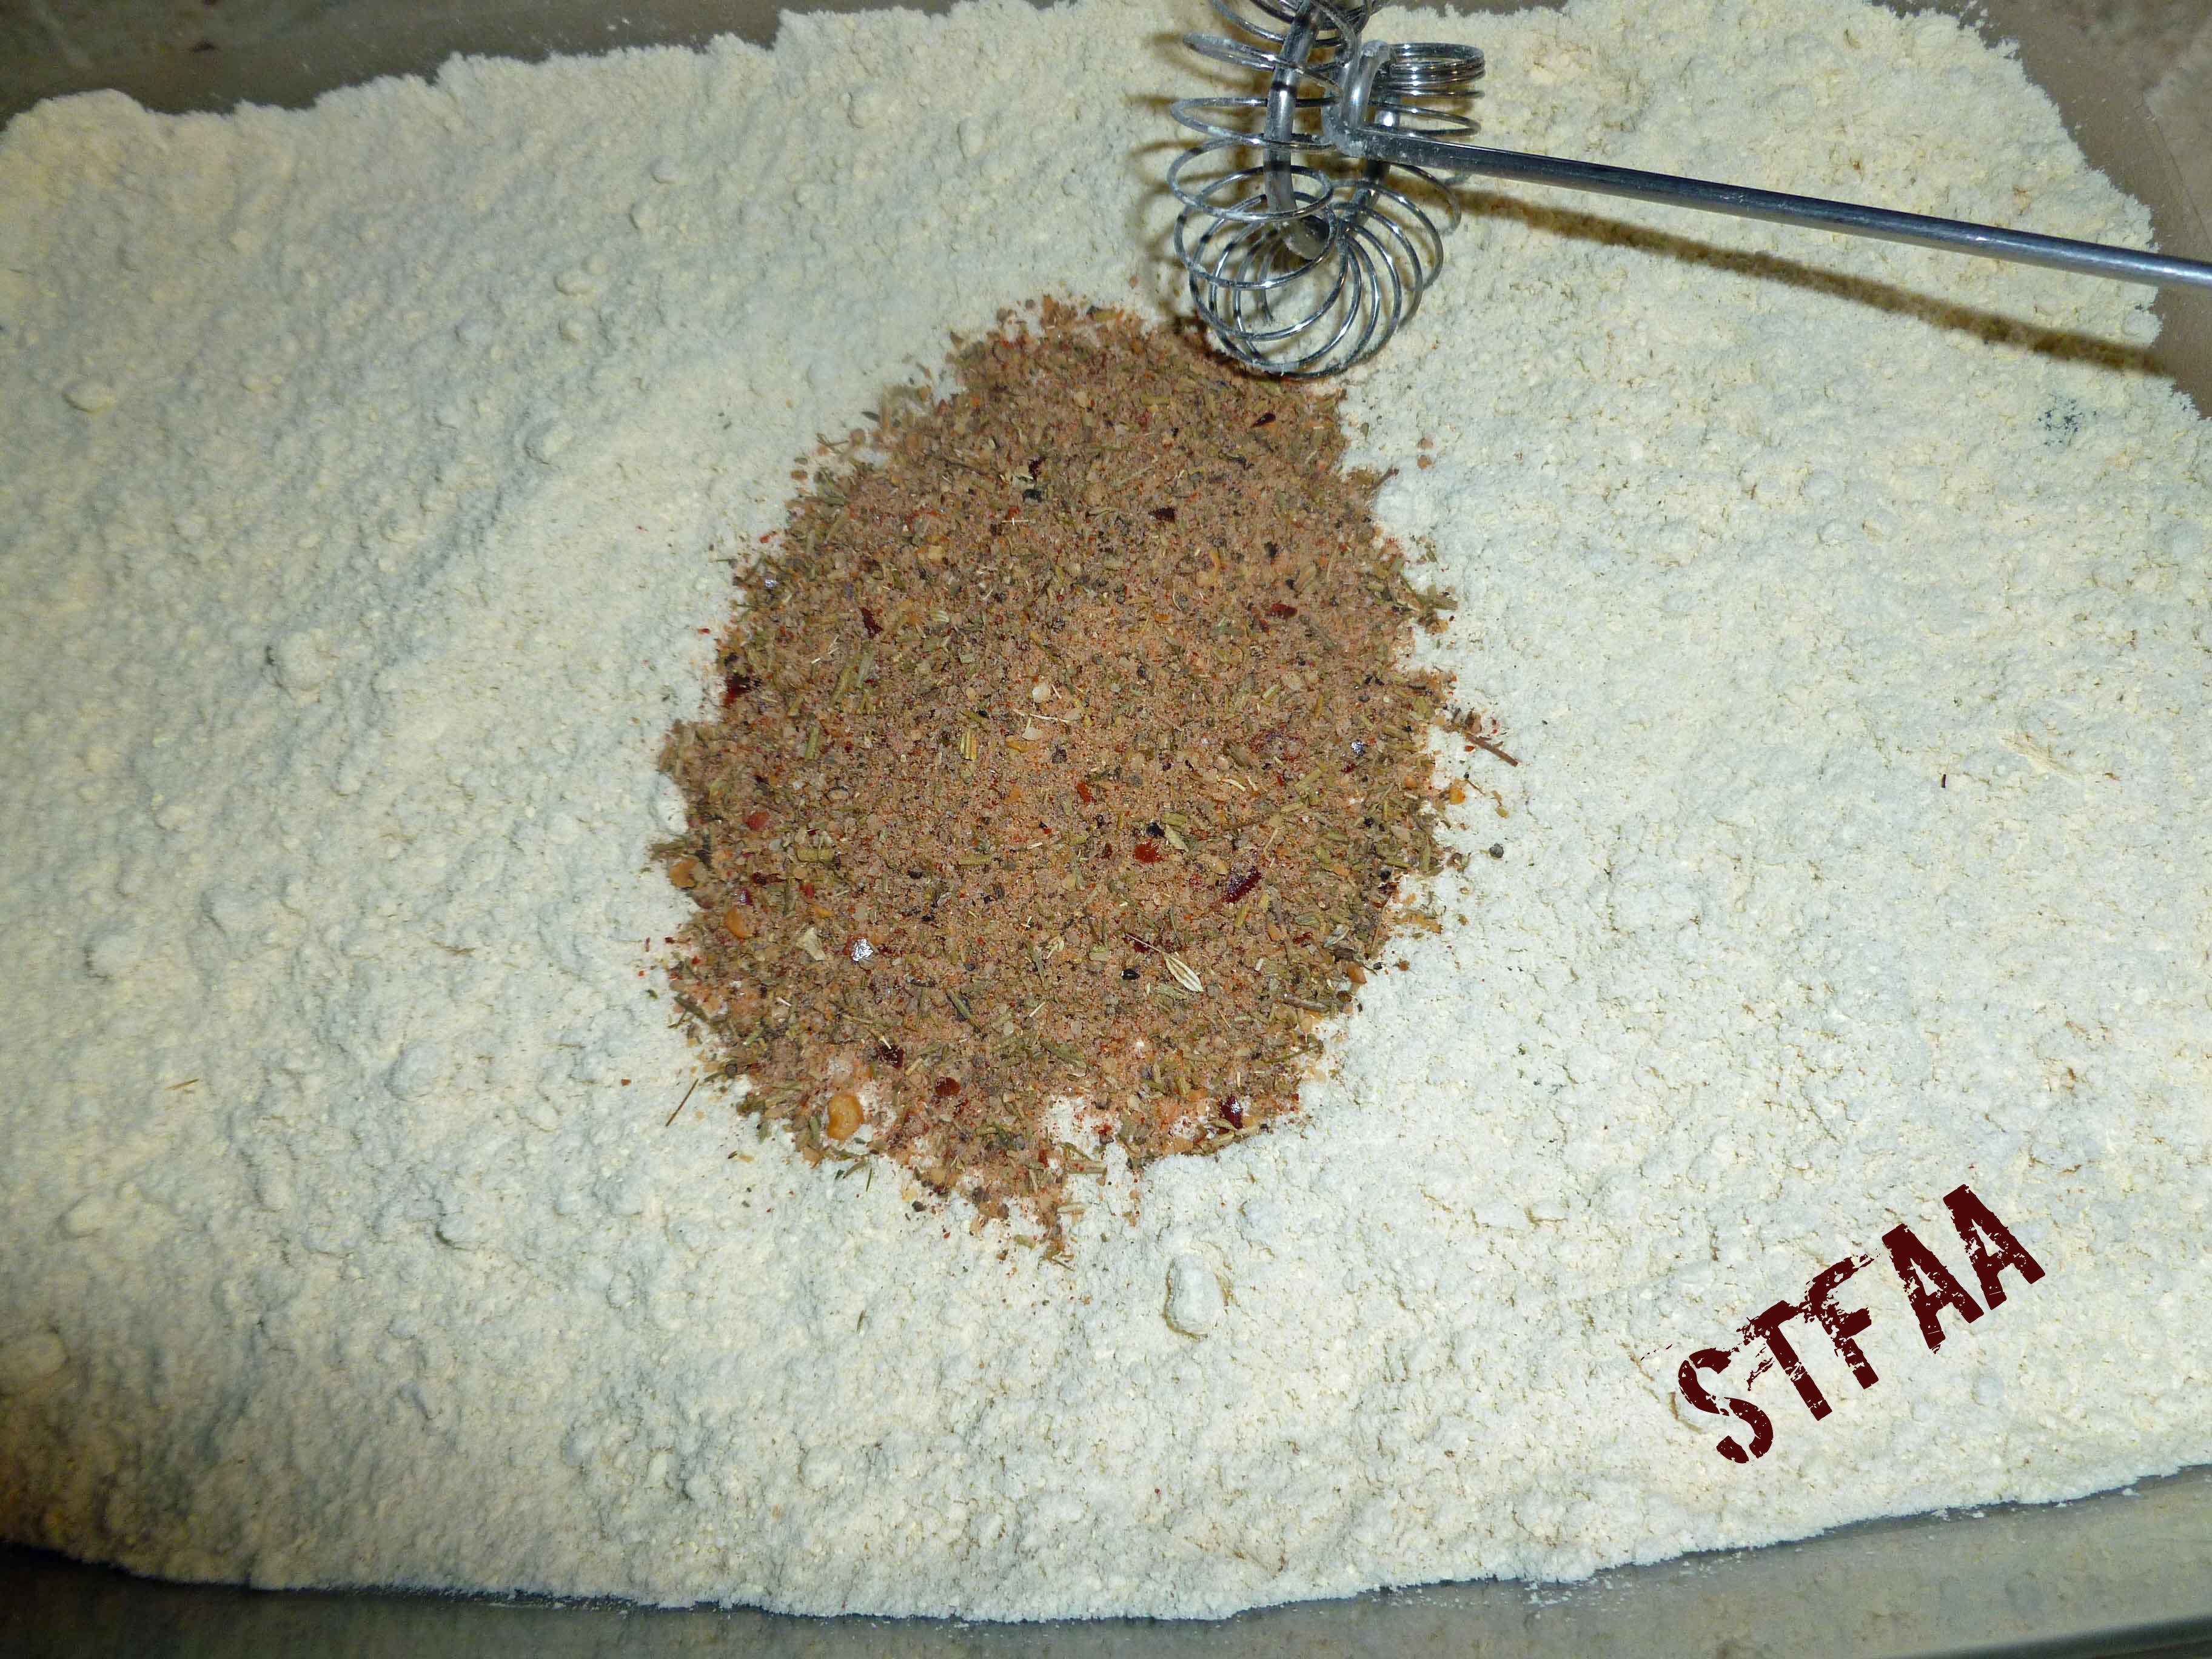
Place 1/4 cup of sorghum flour, 1/4 cup of garbanzo bean flour, and the Montreal Steak Seasoning in a large shallow dish that will allow you to coat the cube steak easily.
Sorghum flour, garbanzo bean flour, and Montreal Steak Seasoning
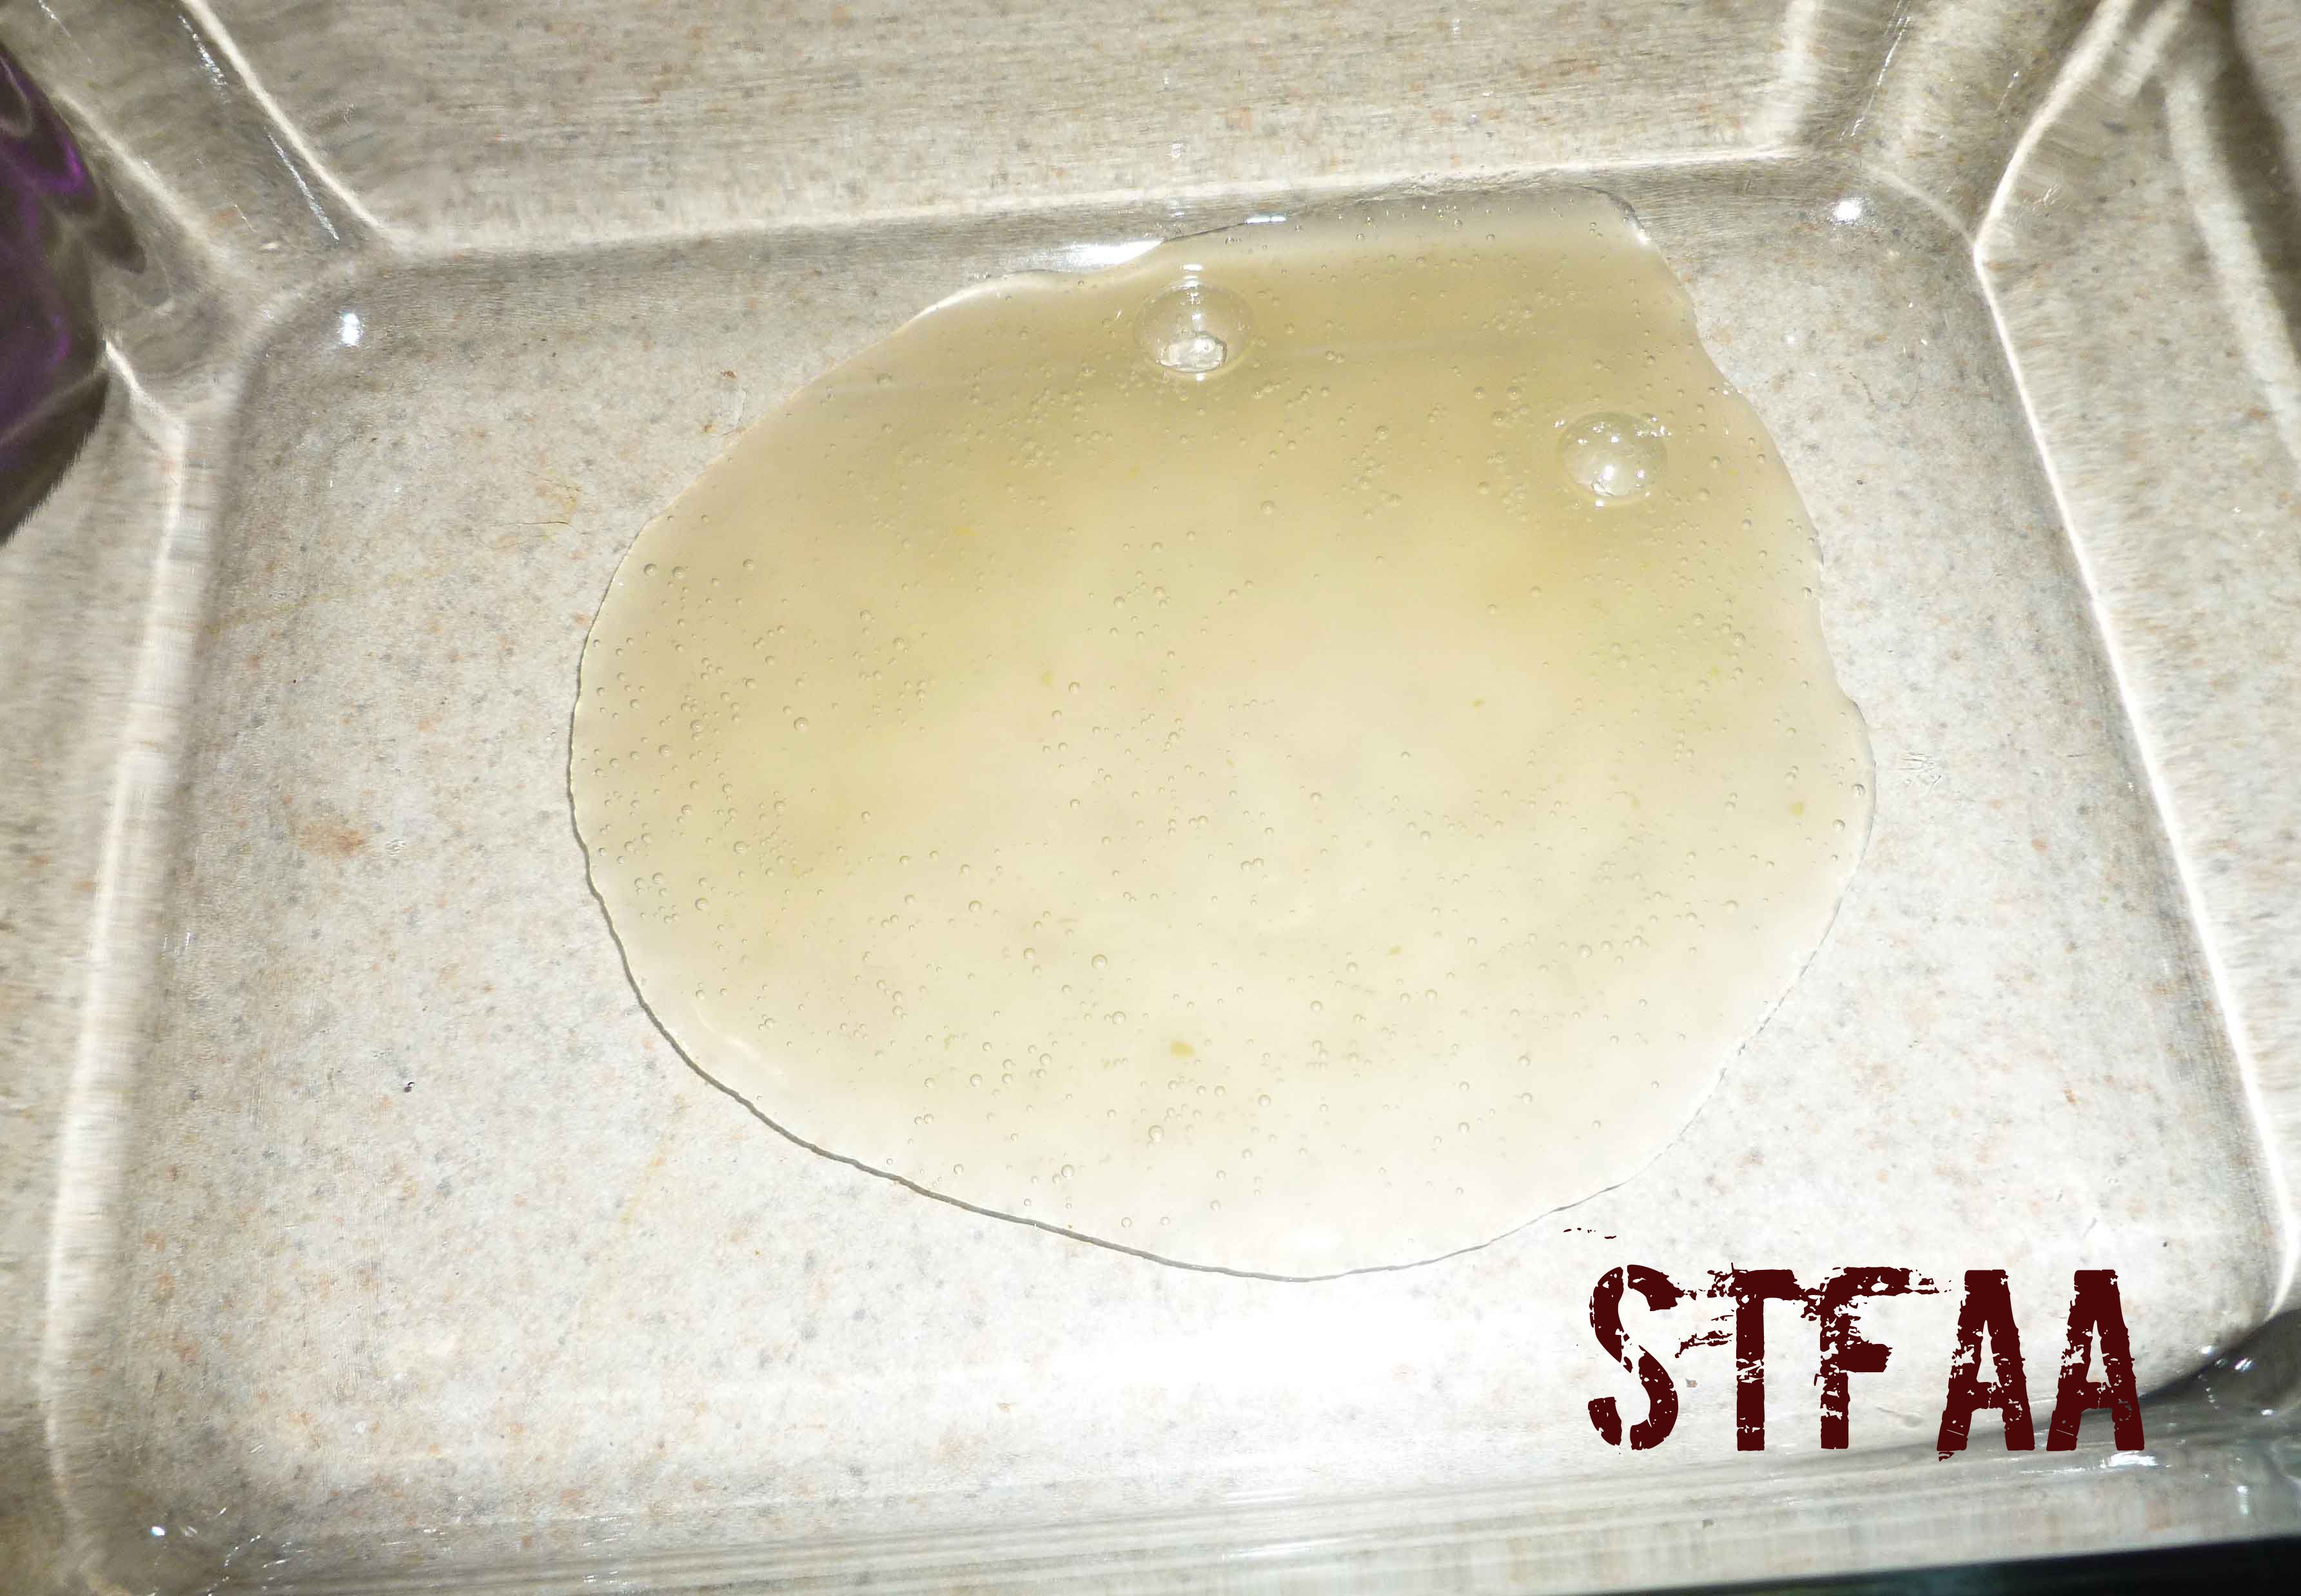
Mix the sorghum flour, garbanzo bean flour and Montreal Steak Seasoning together until they are well combined. Place the aquafaba in another large shallow dish that will allow you to coat the cube steak easily.
Aquafaba
Place your bacon fat, lard, or safe oil in a skillet, and place the skillet on a burner over medium heat.
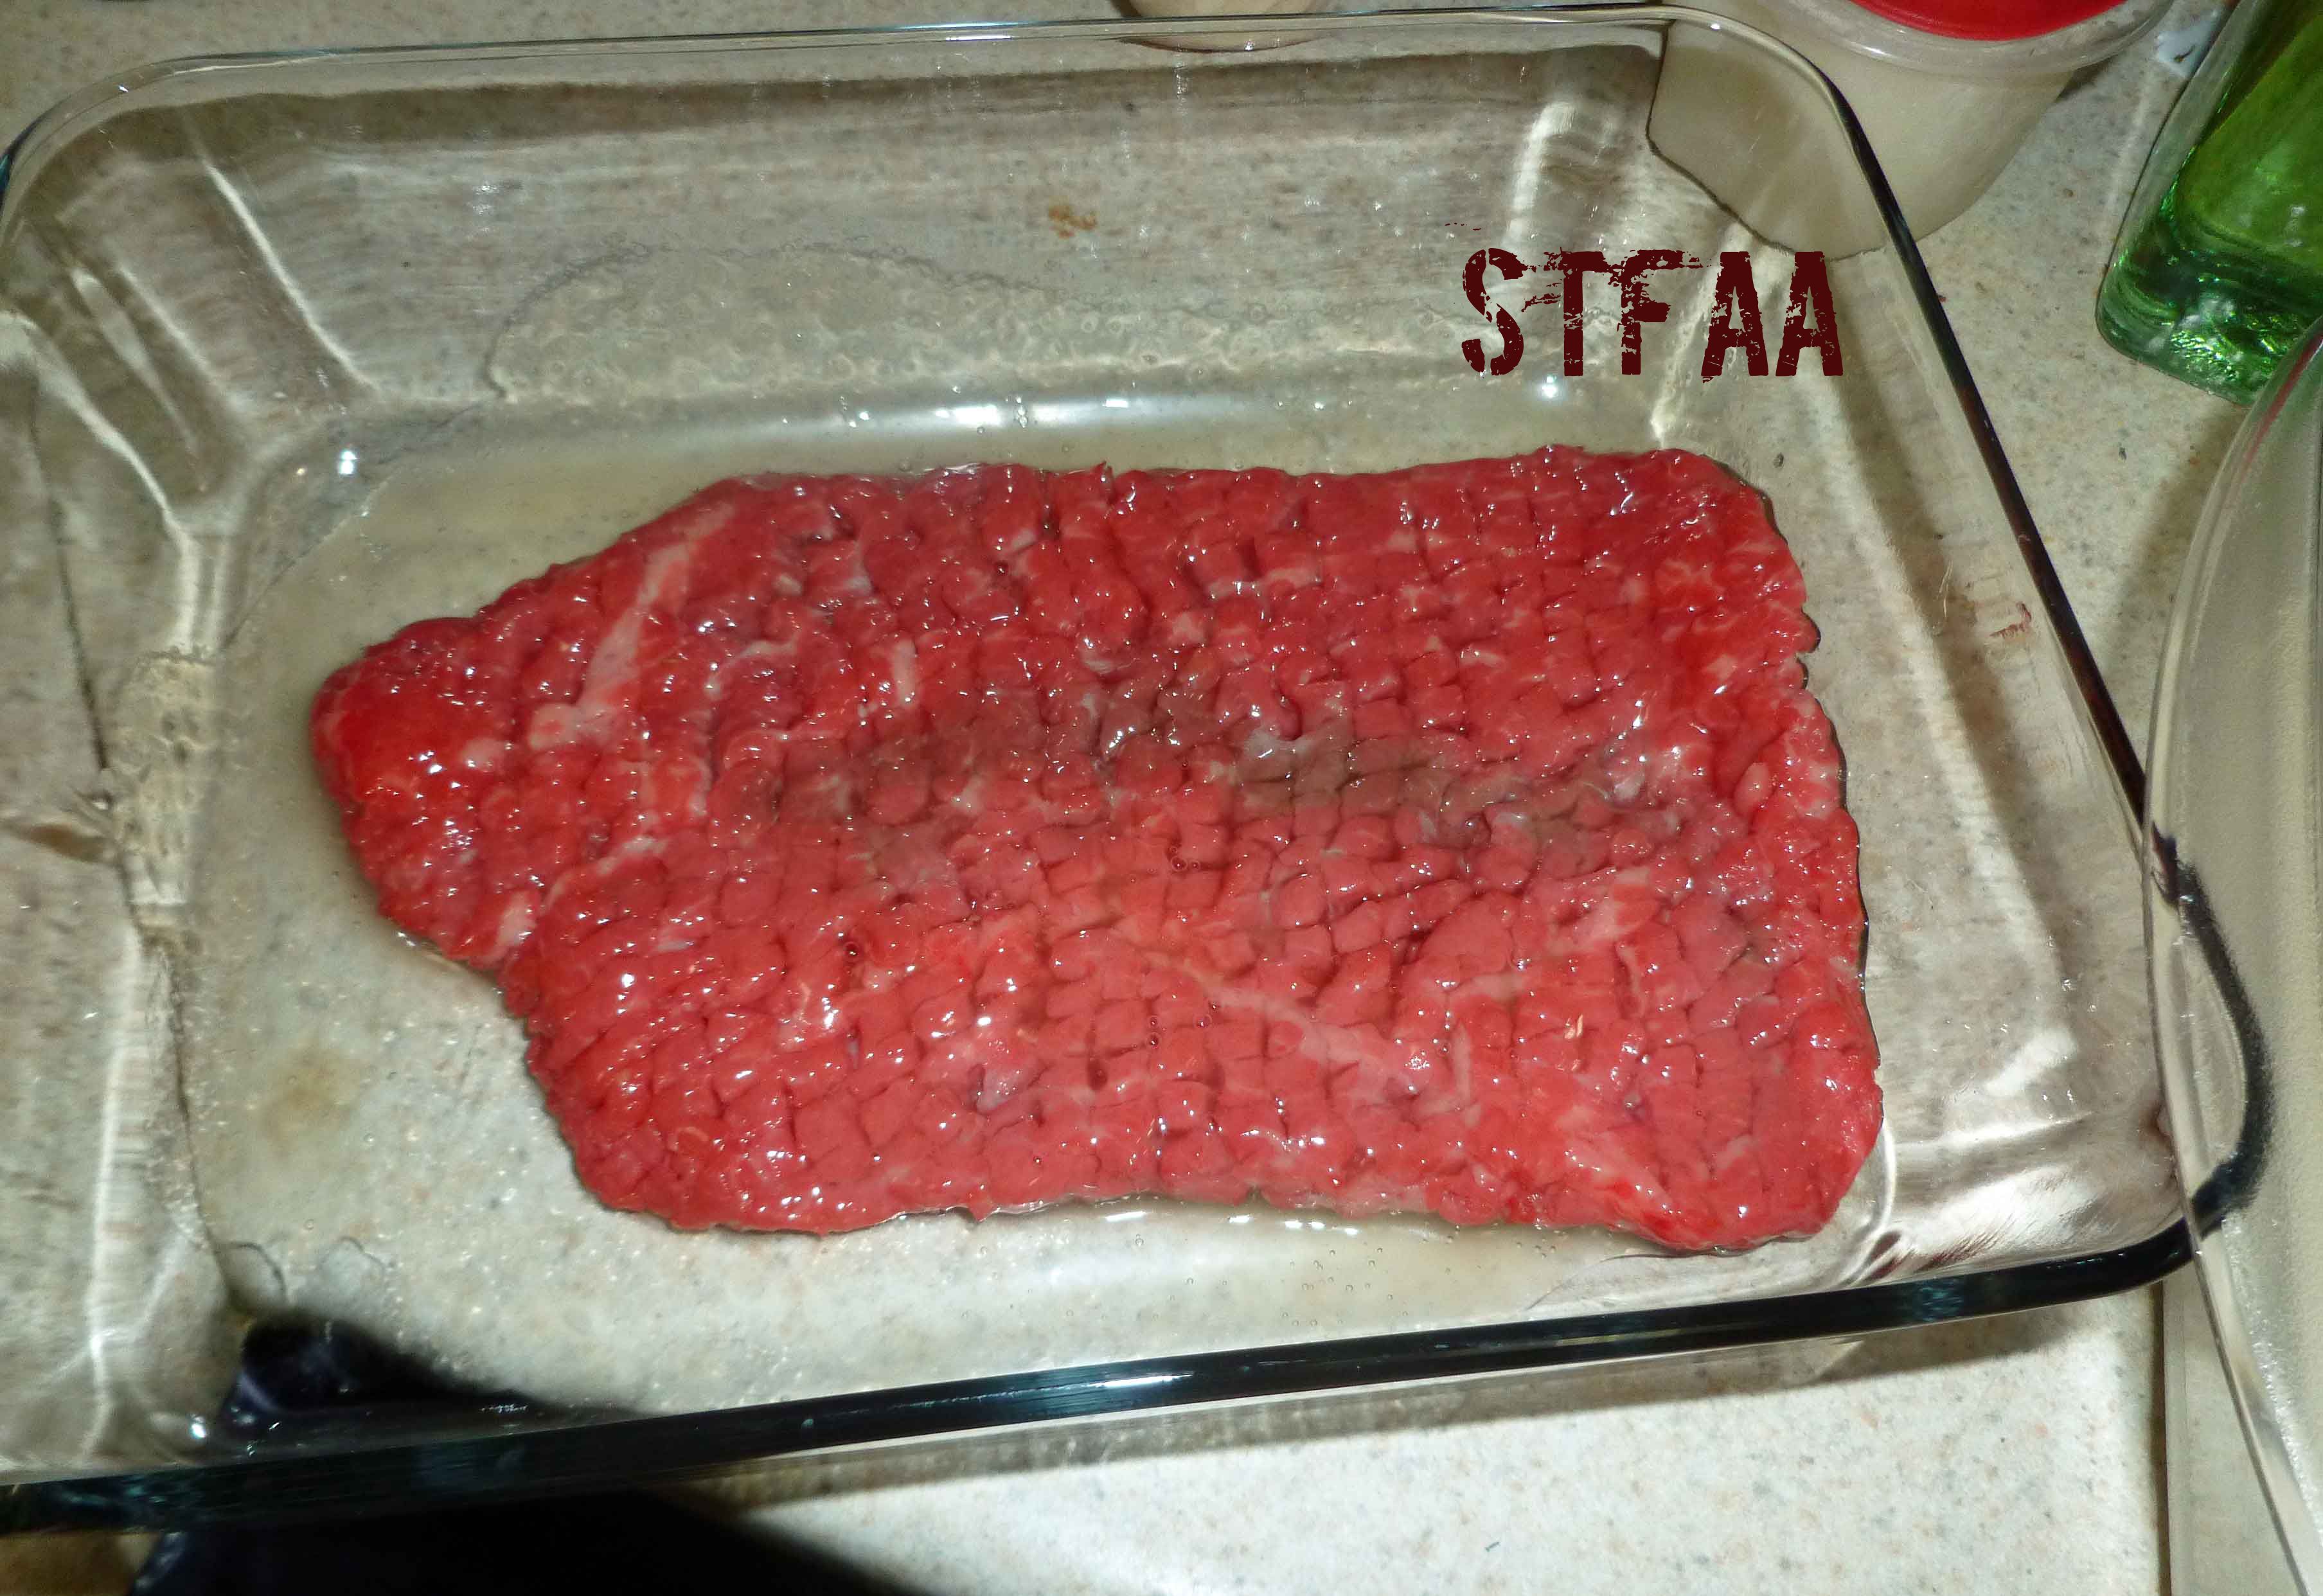
While your fat/oil heats, take your cube steak and coat it in the aquafaba.
Cube steak coated in aquafaba
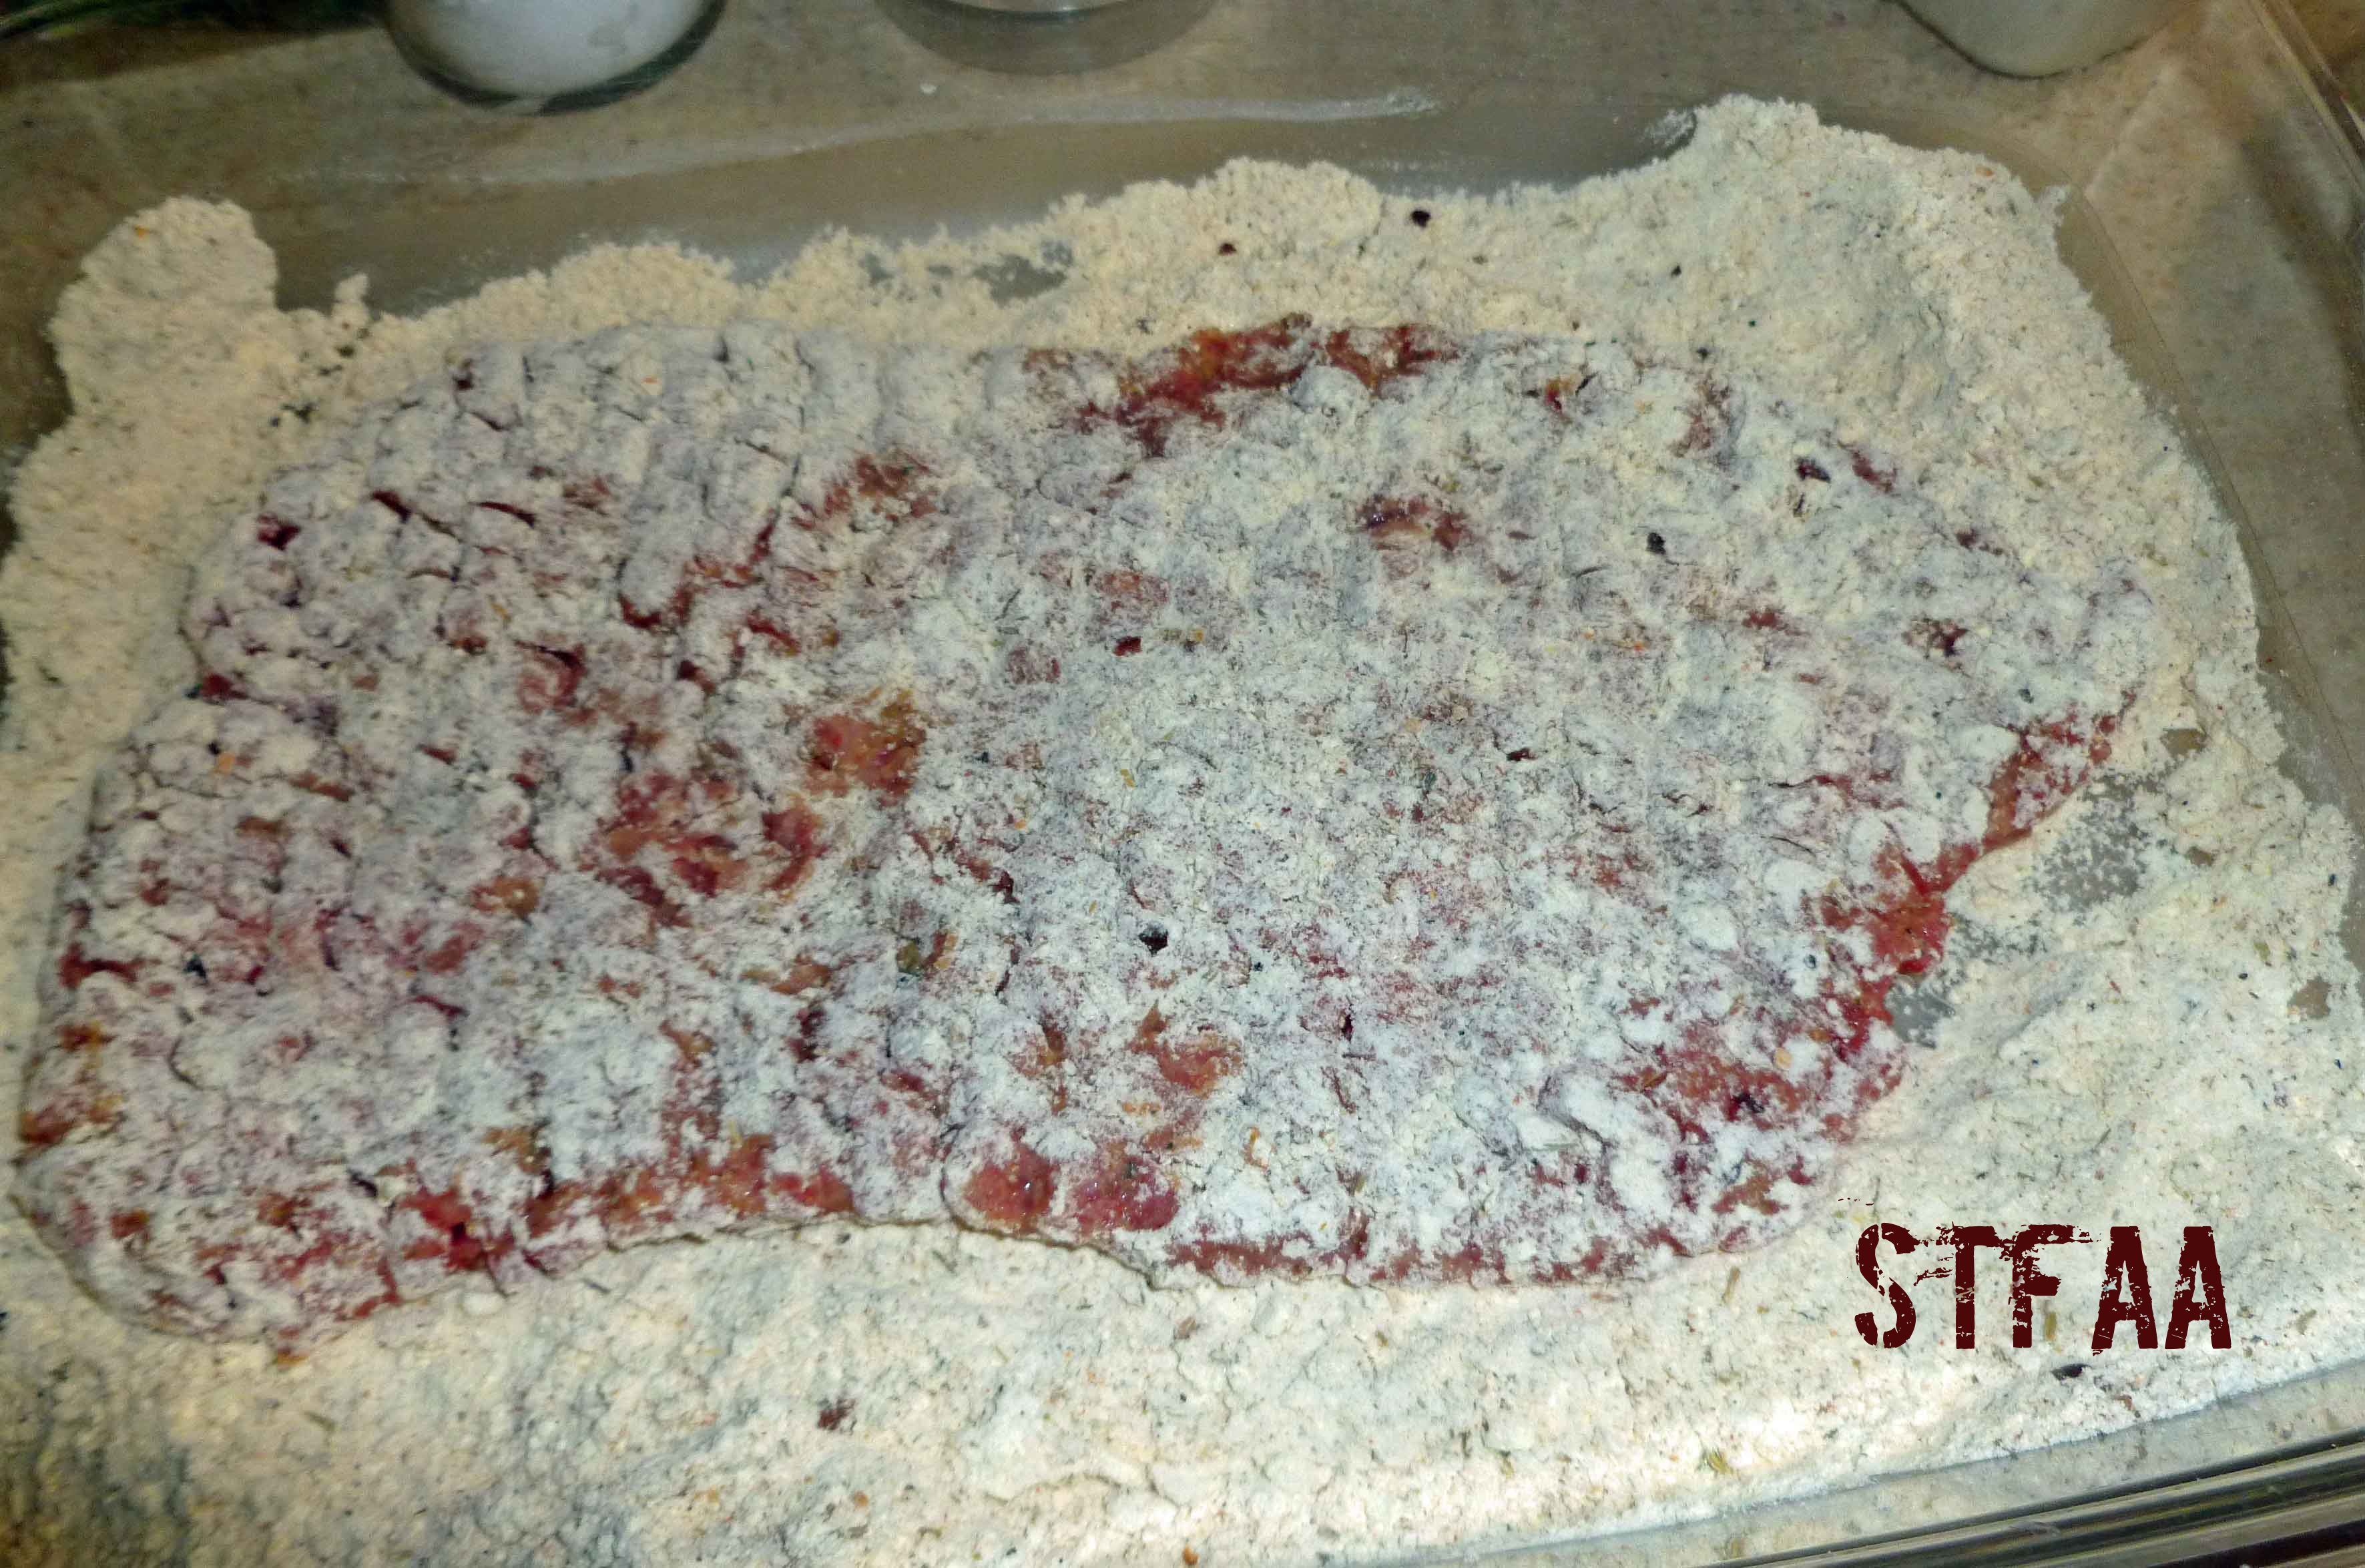
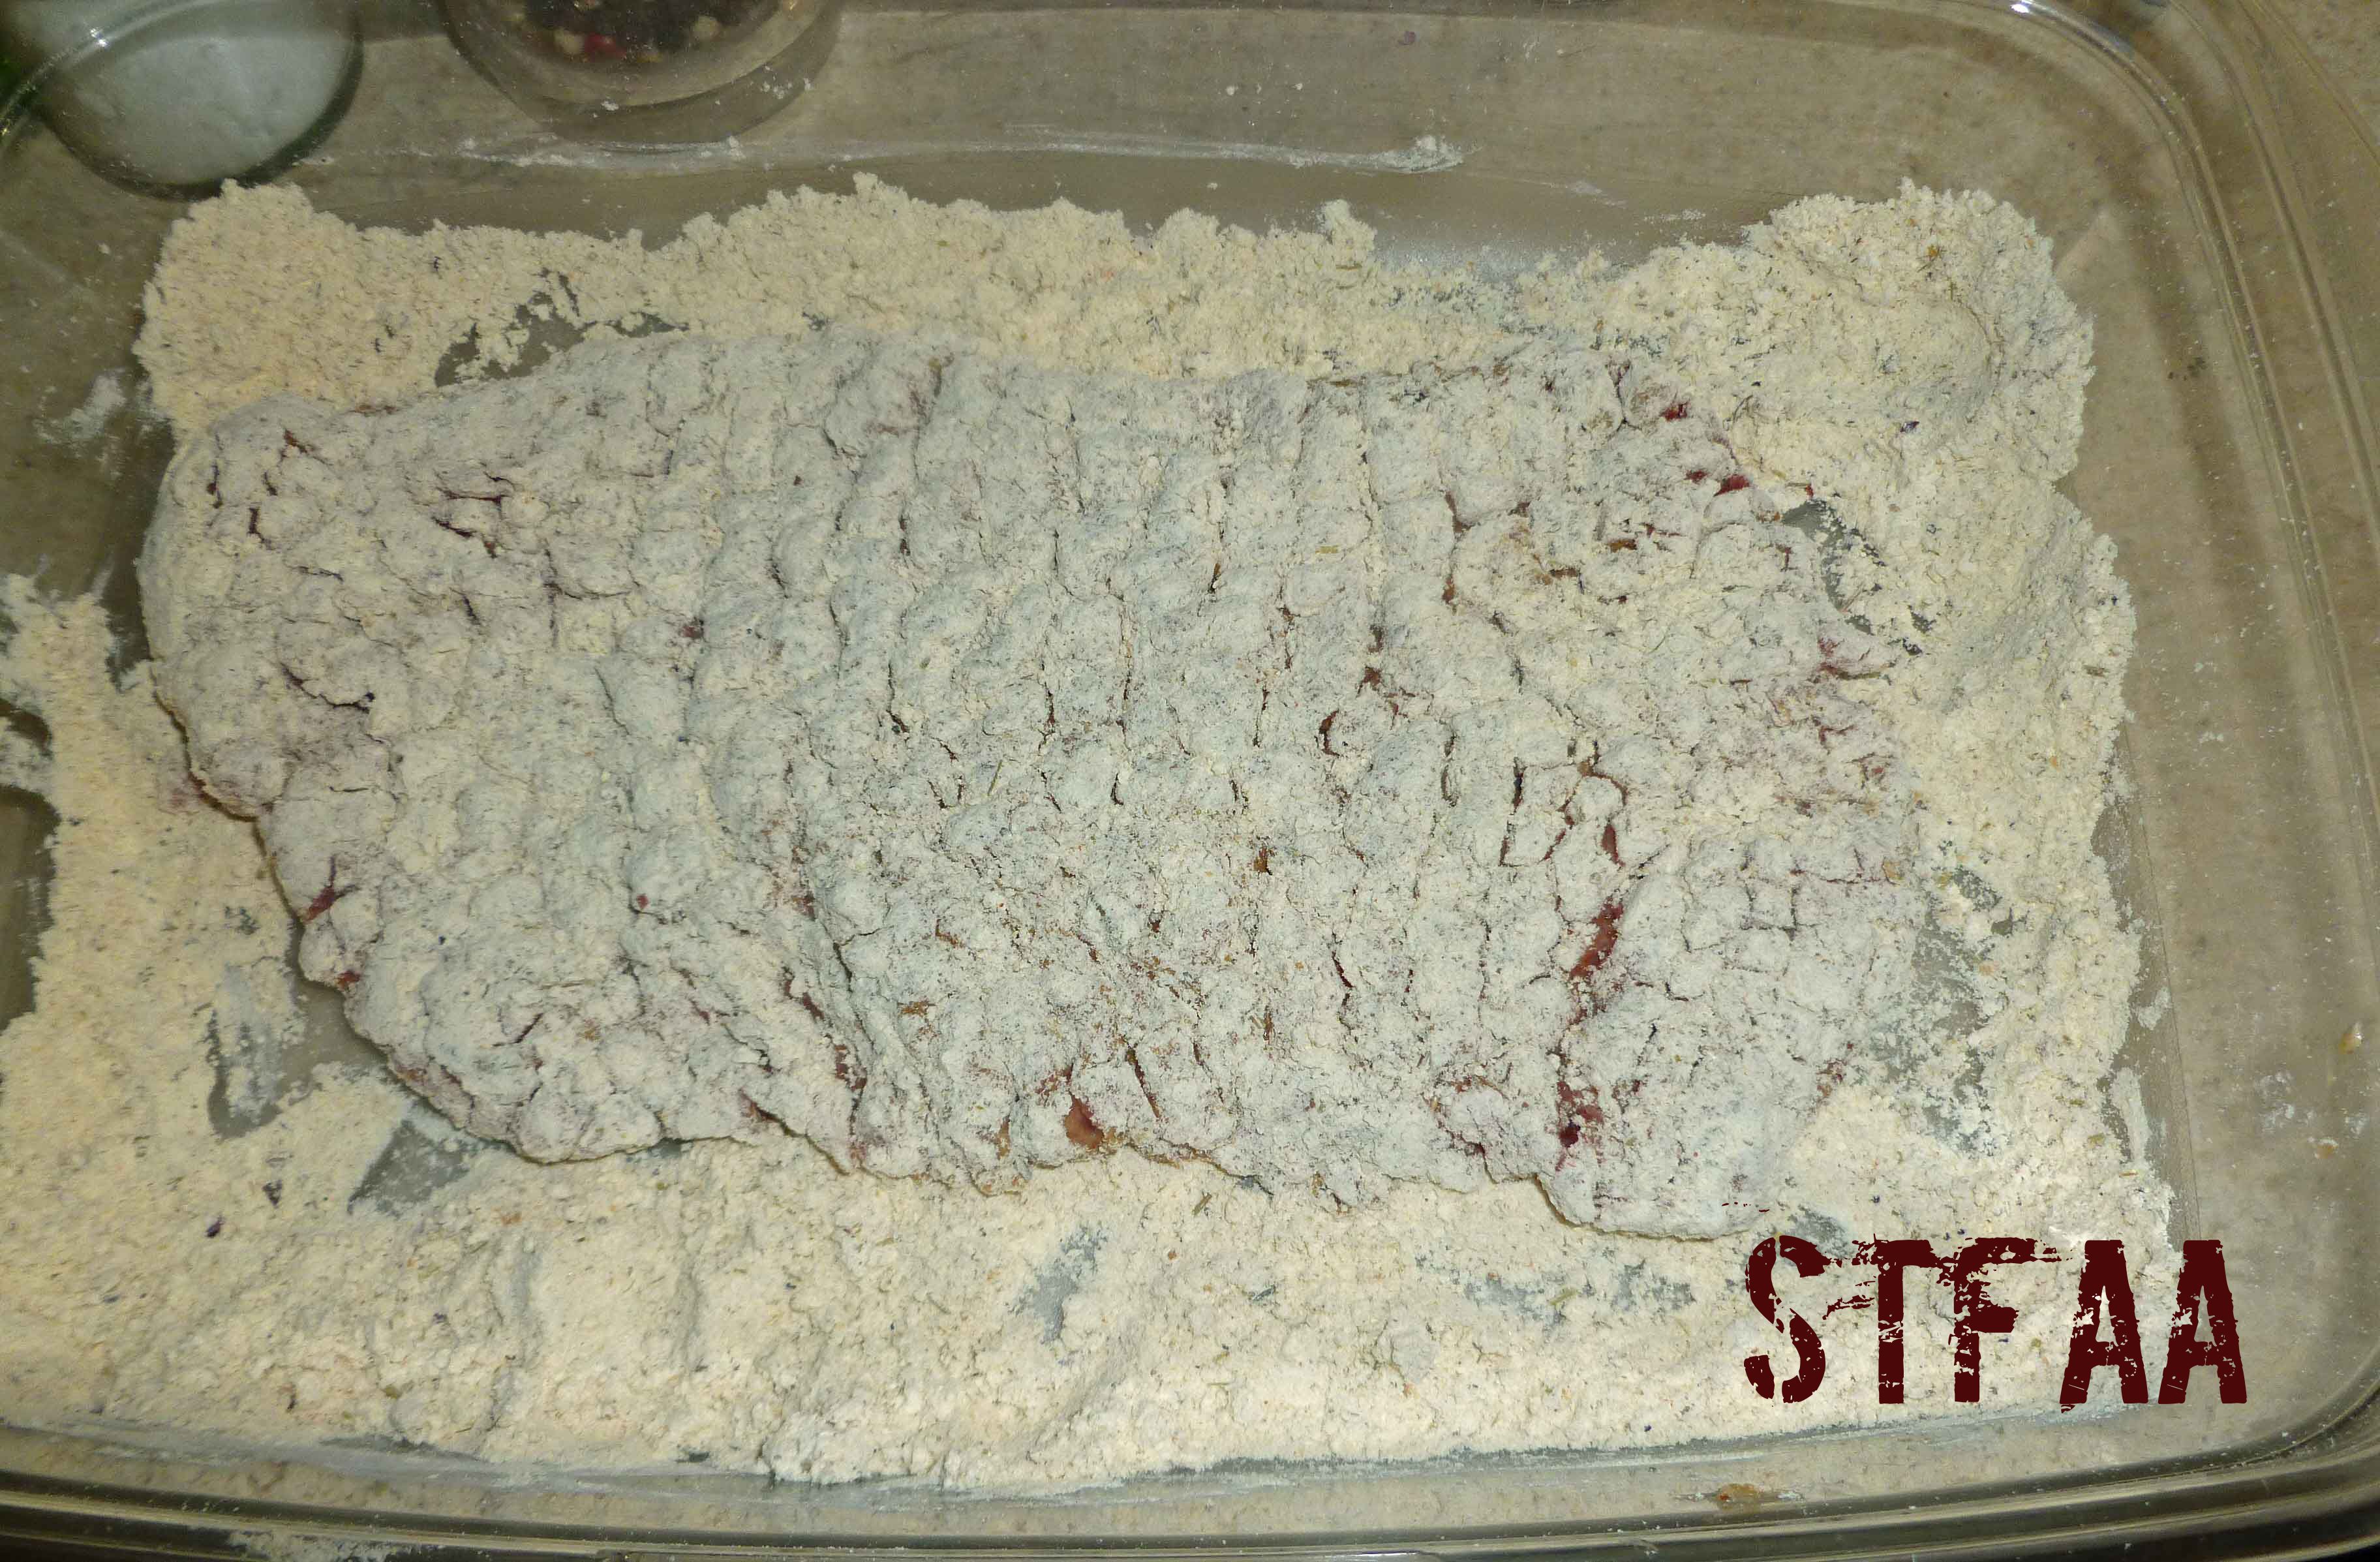
Then dredge the cube steak in the flour mixture.
Cube steak after first dredge in flour mixture
Place the cube steak in the aquafaba again and recoat it, and then re-dredge the cube steak in the flour mixture.
Cube steak after second dredge in flour mixture
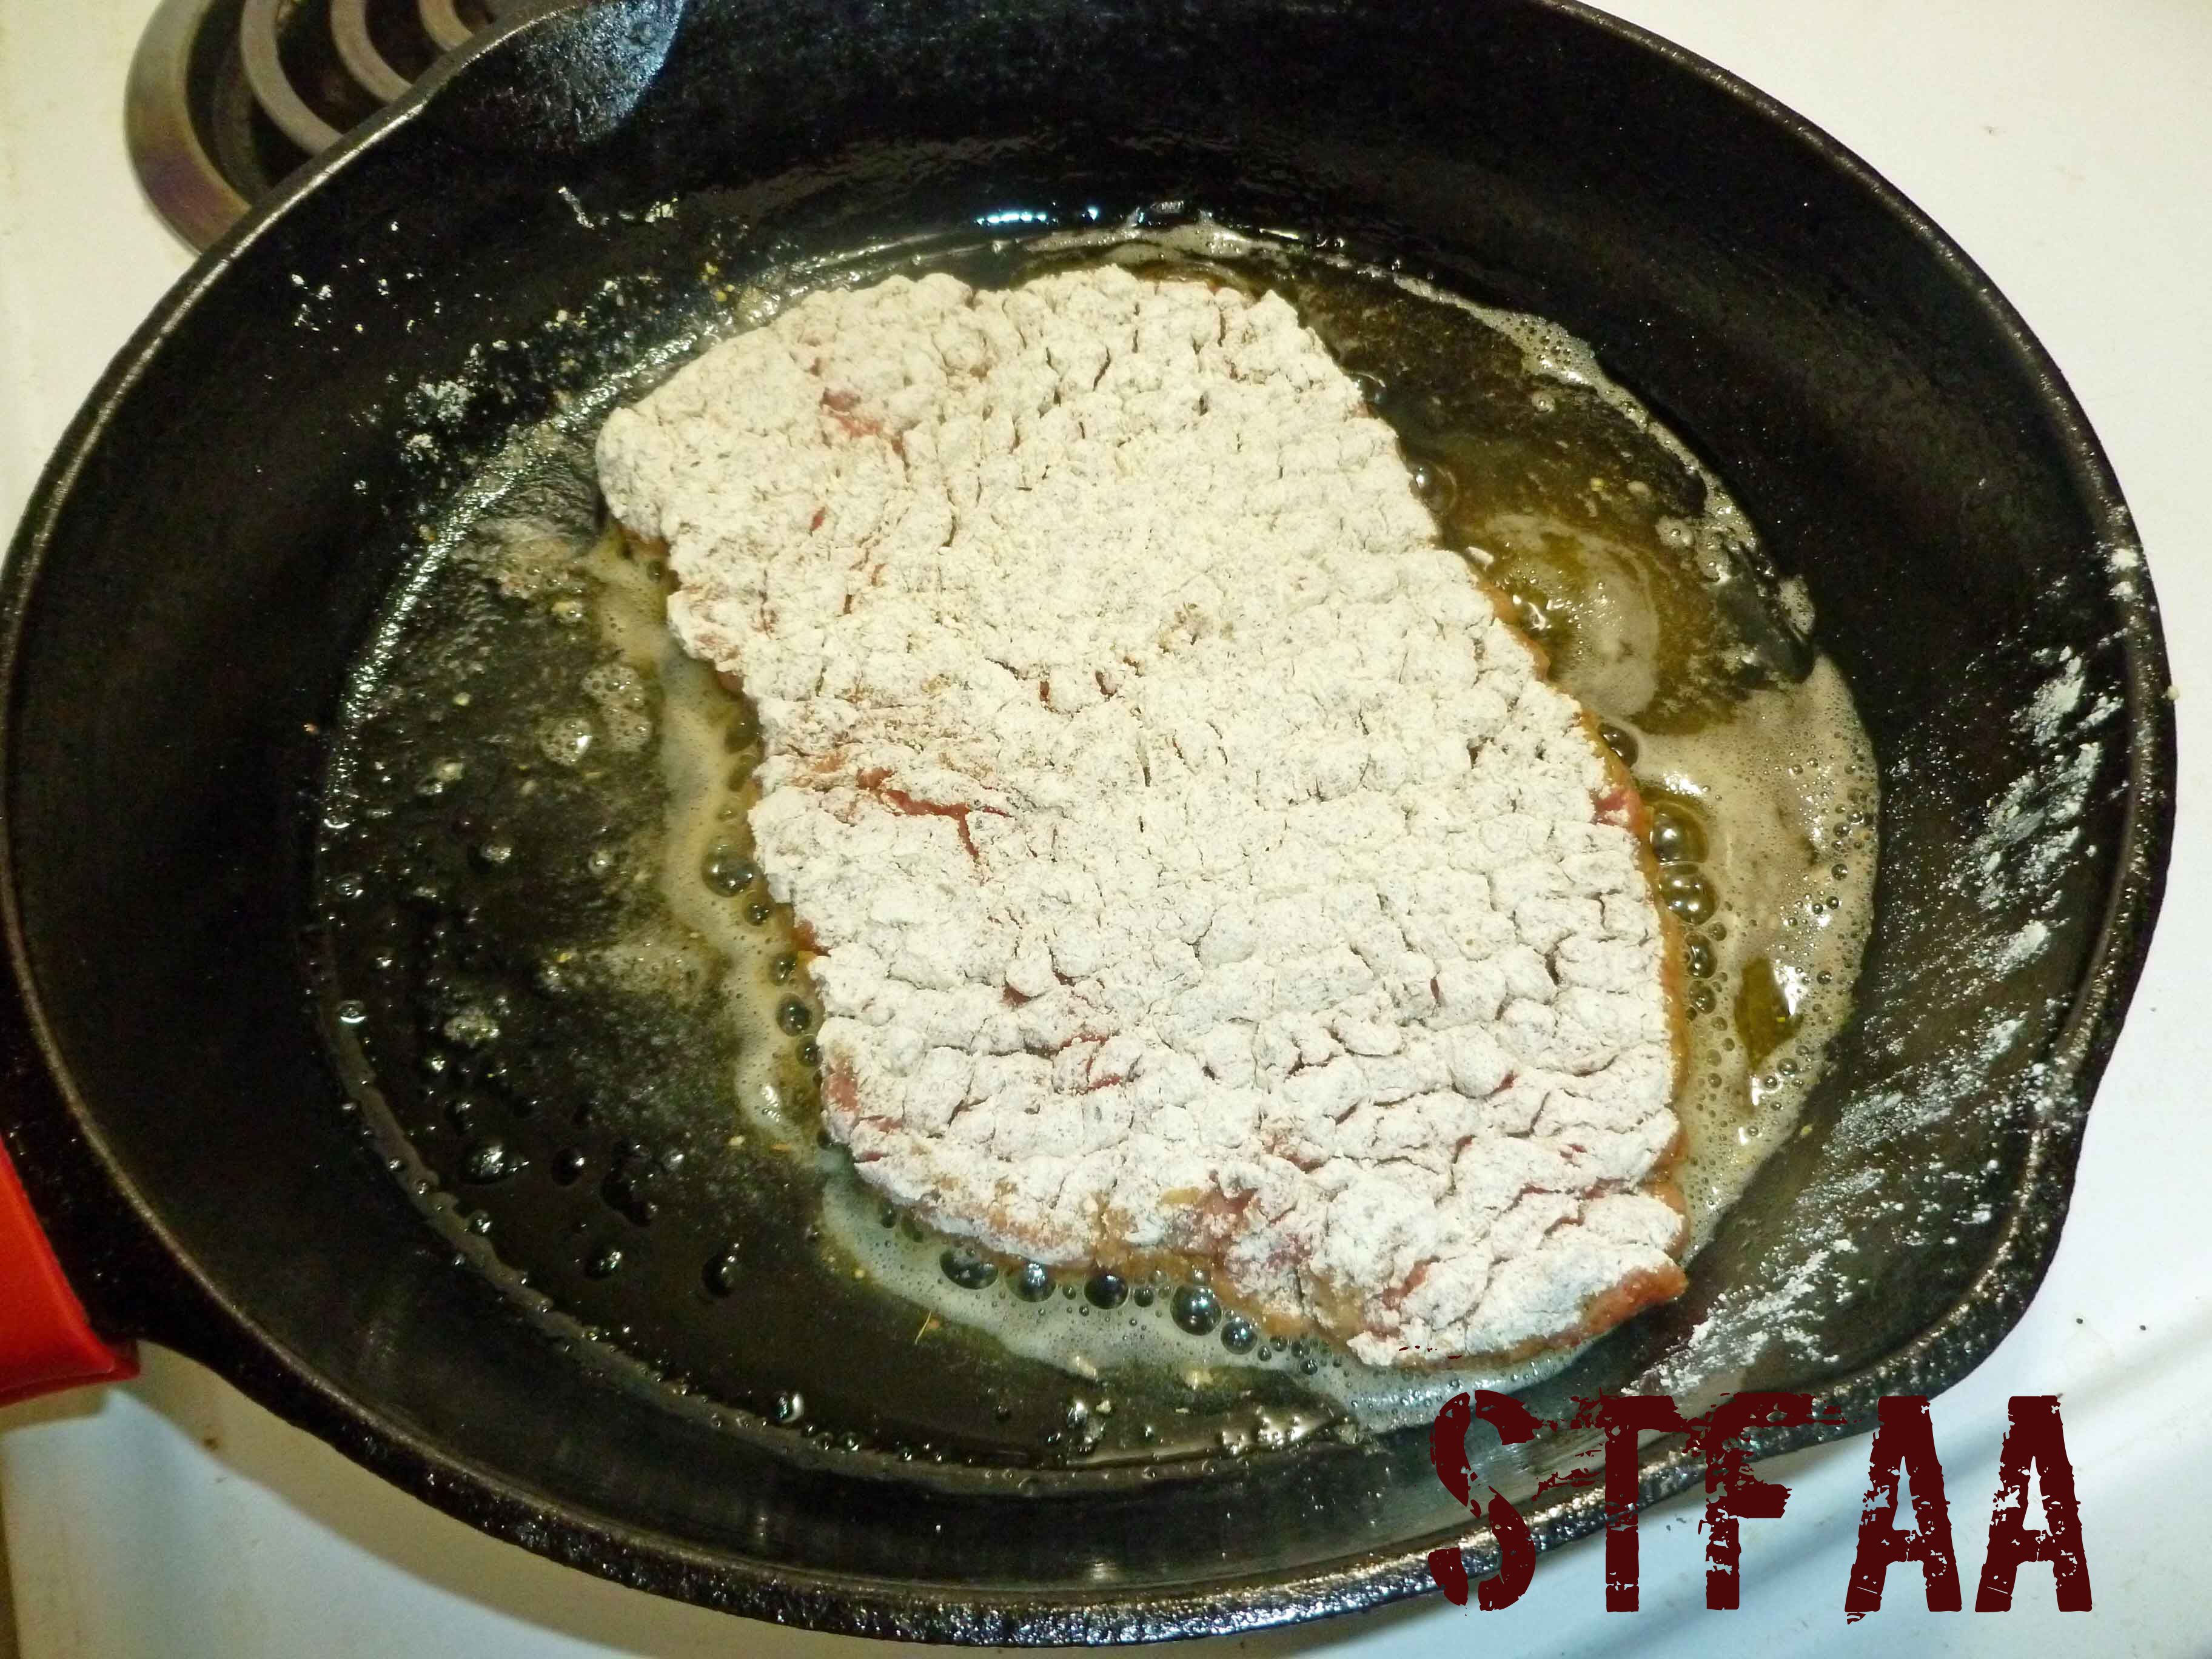
Once your fat/oil is hot, place the steak in the skillet.
Cube steak cooking in skillet
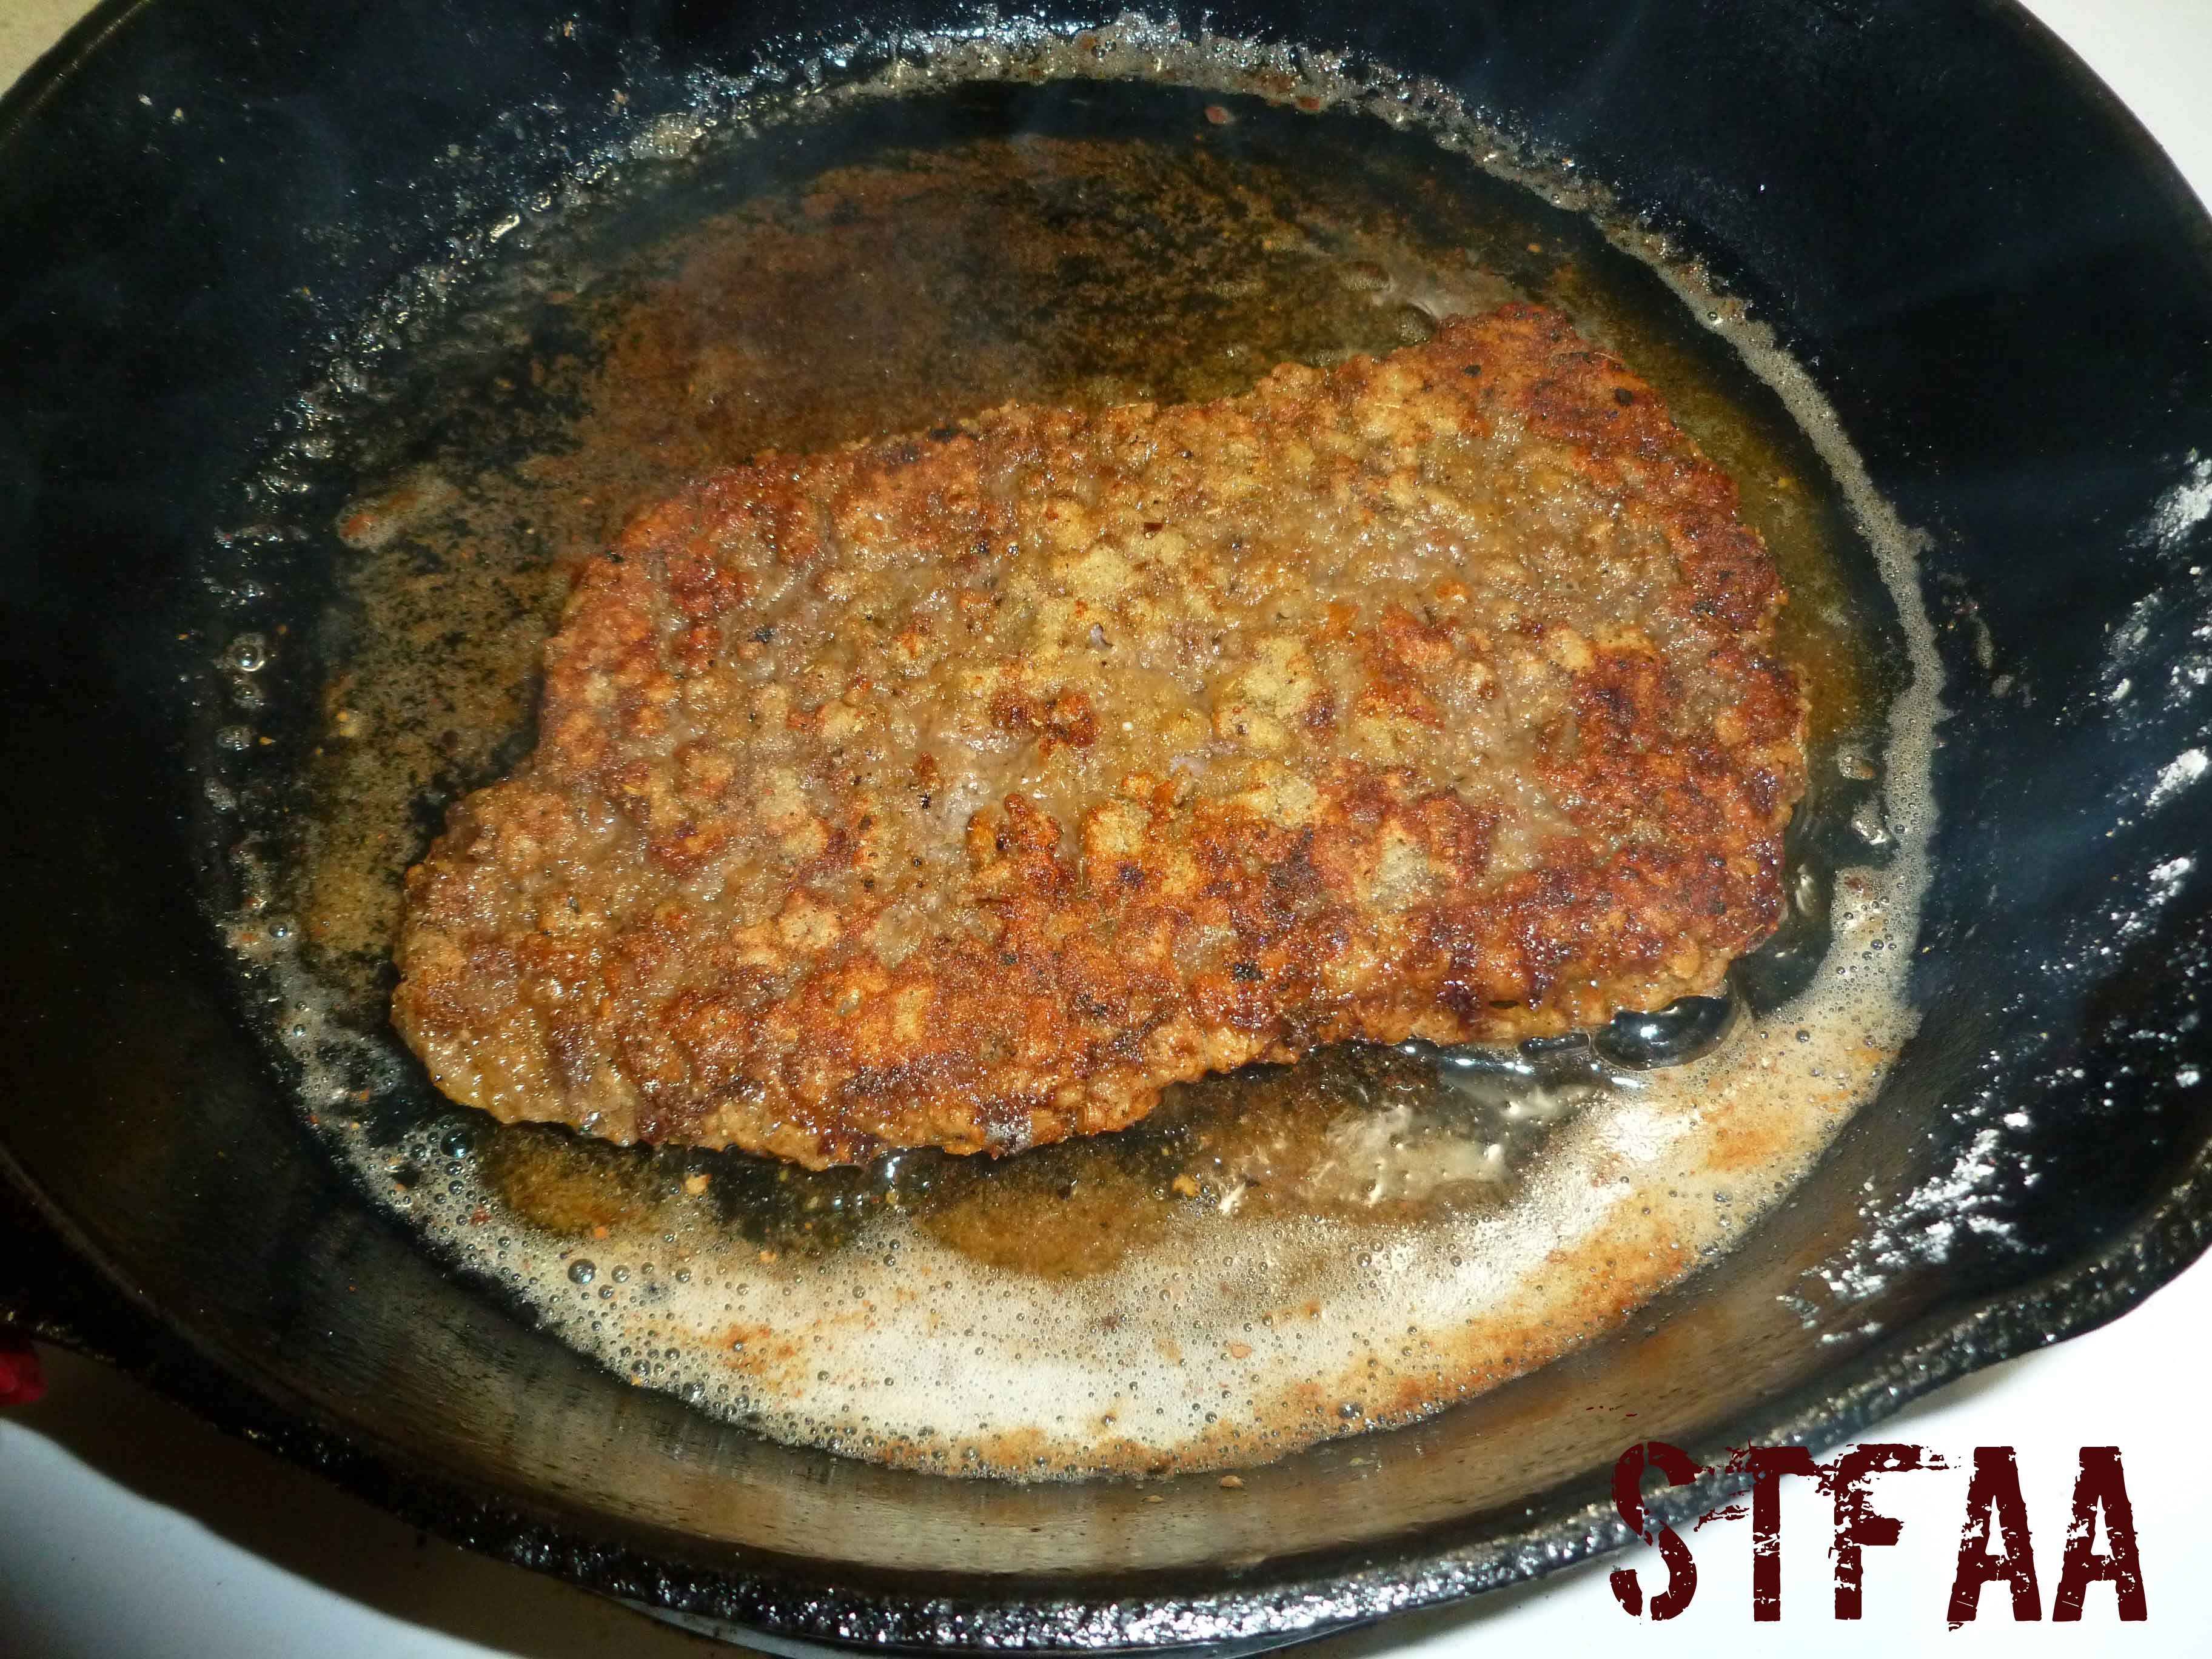
Cook for 3-5 minutes each side (depending on how hot your burner is), making sure the internal temperature reaches 160ºF, and until the coating is a lovely golden brown.
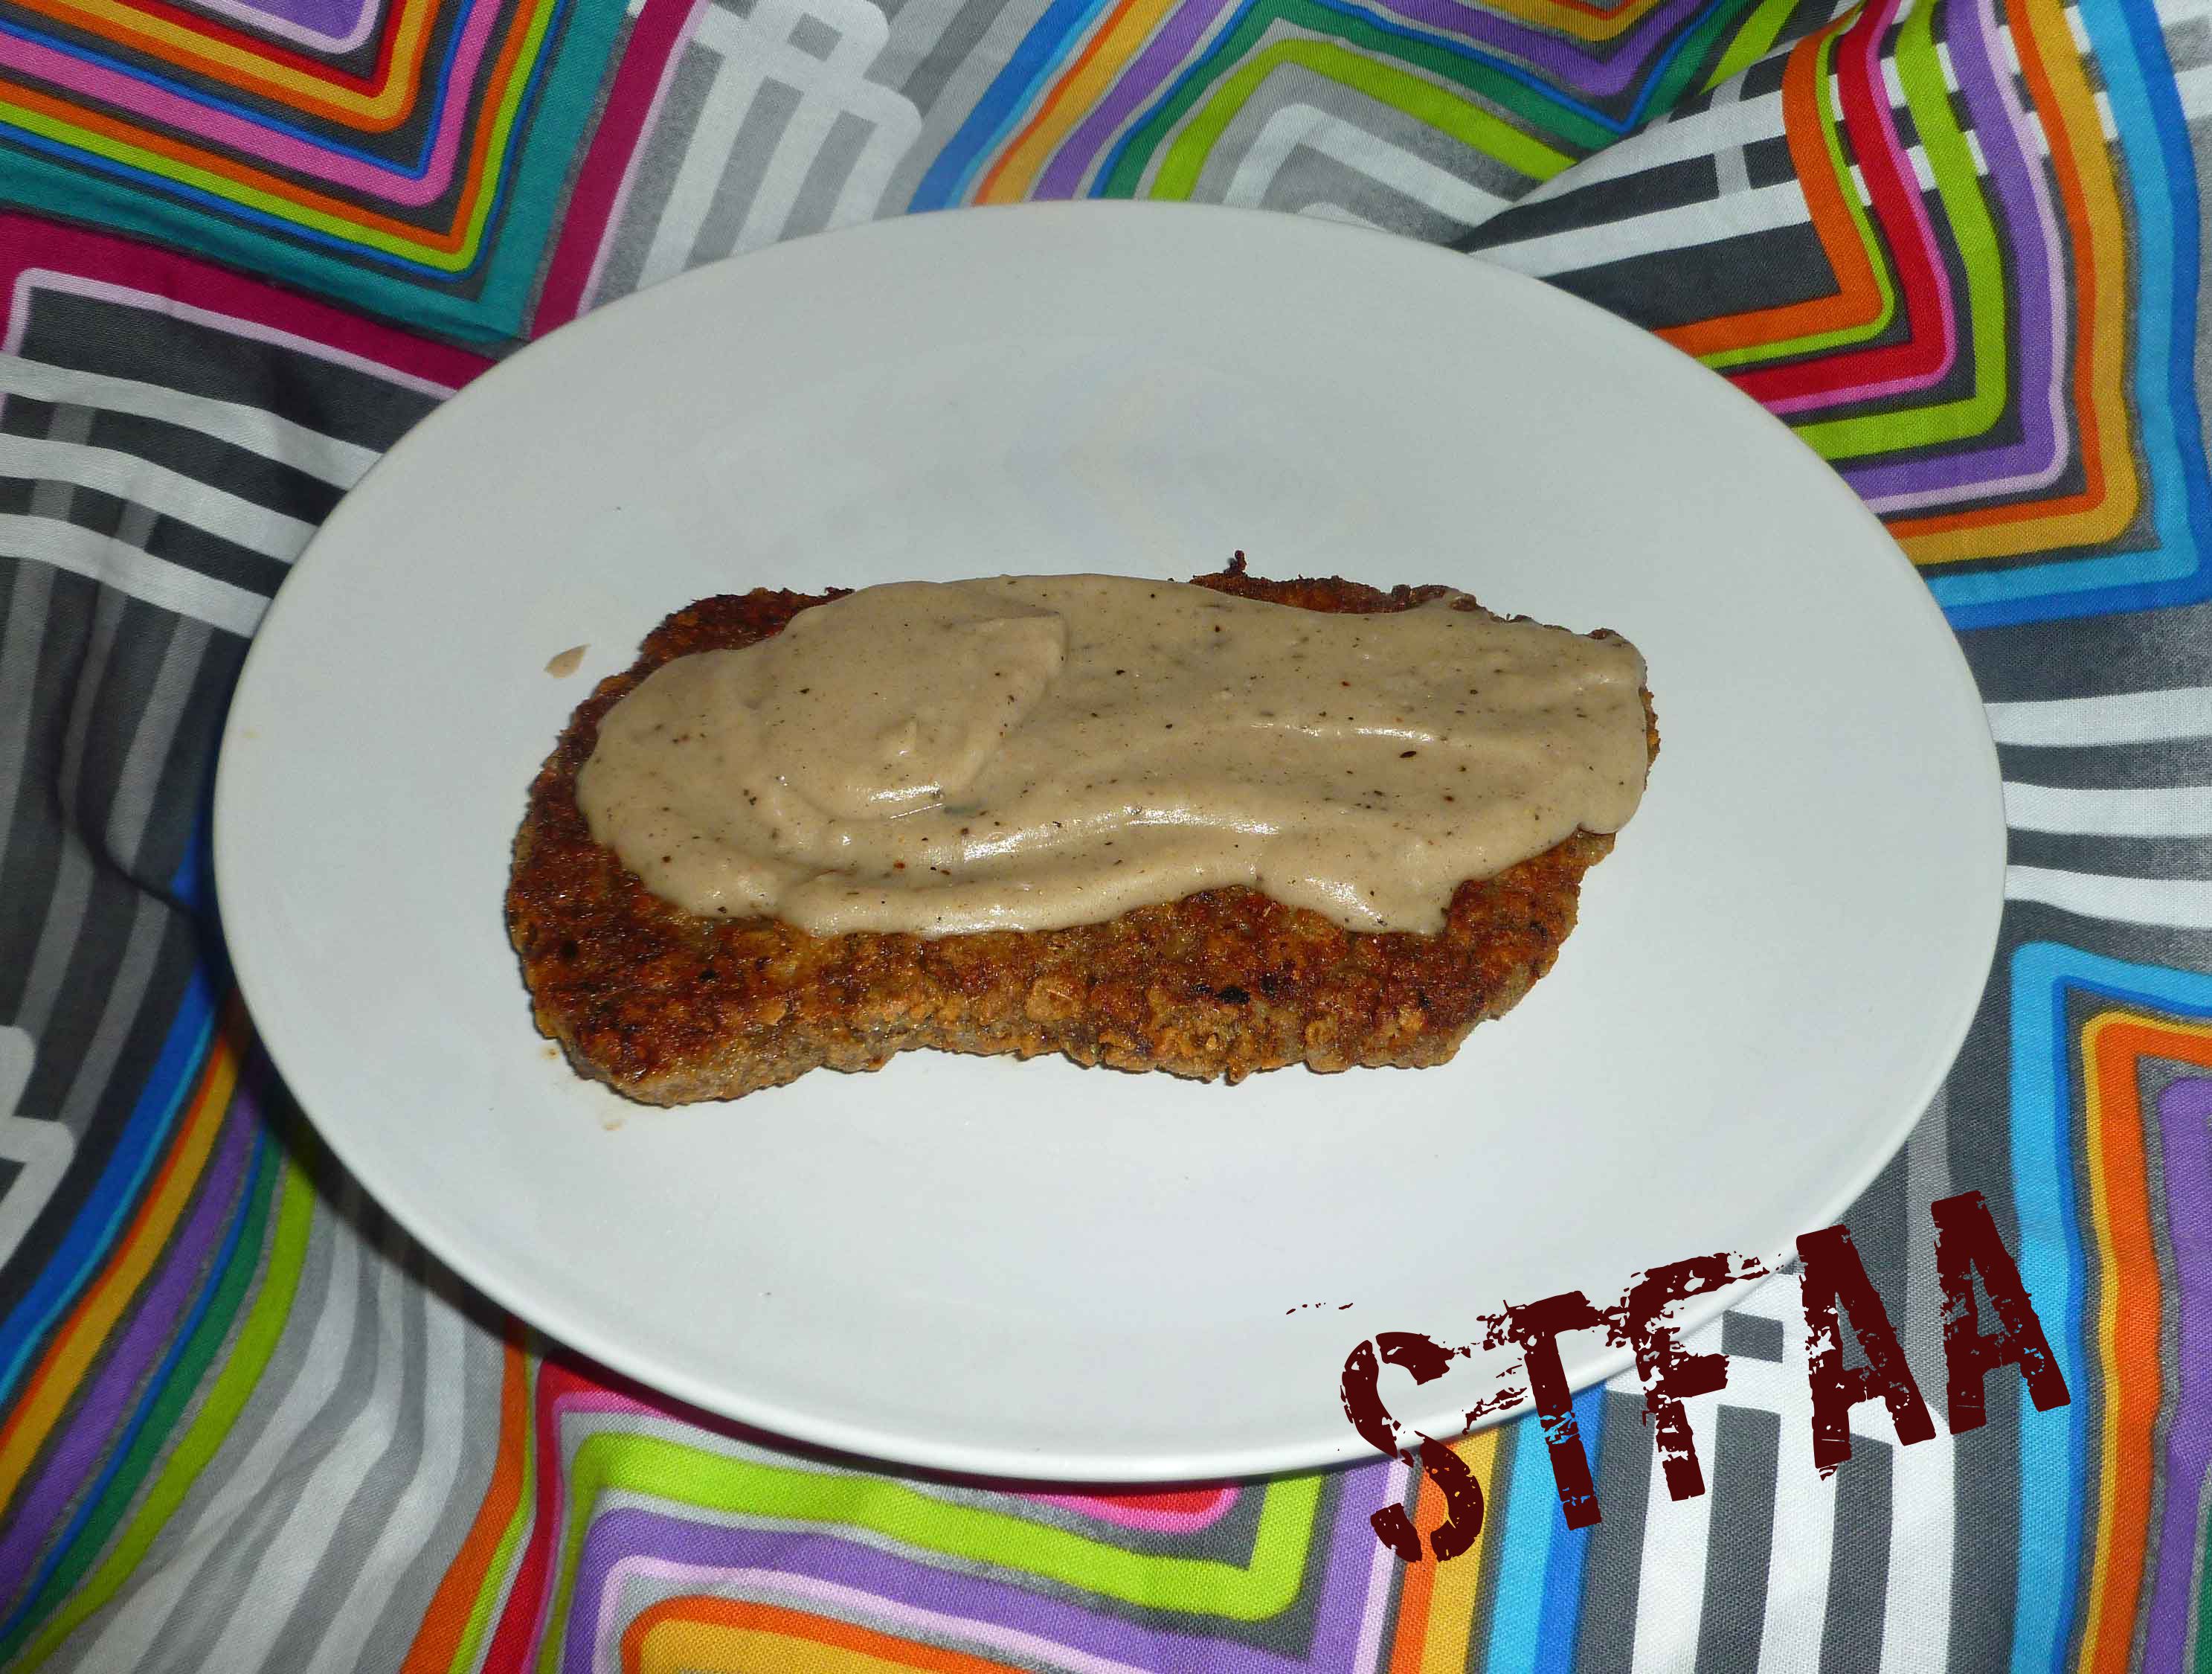
Cube steak with golden brown coating
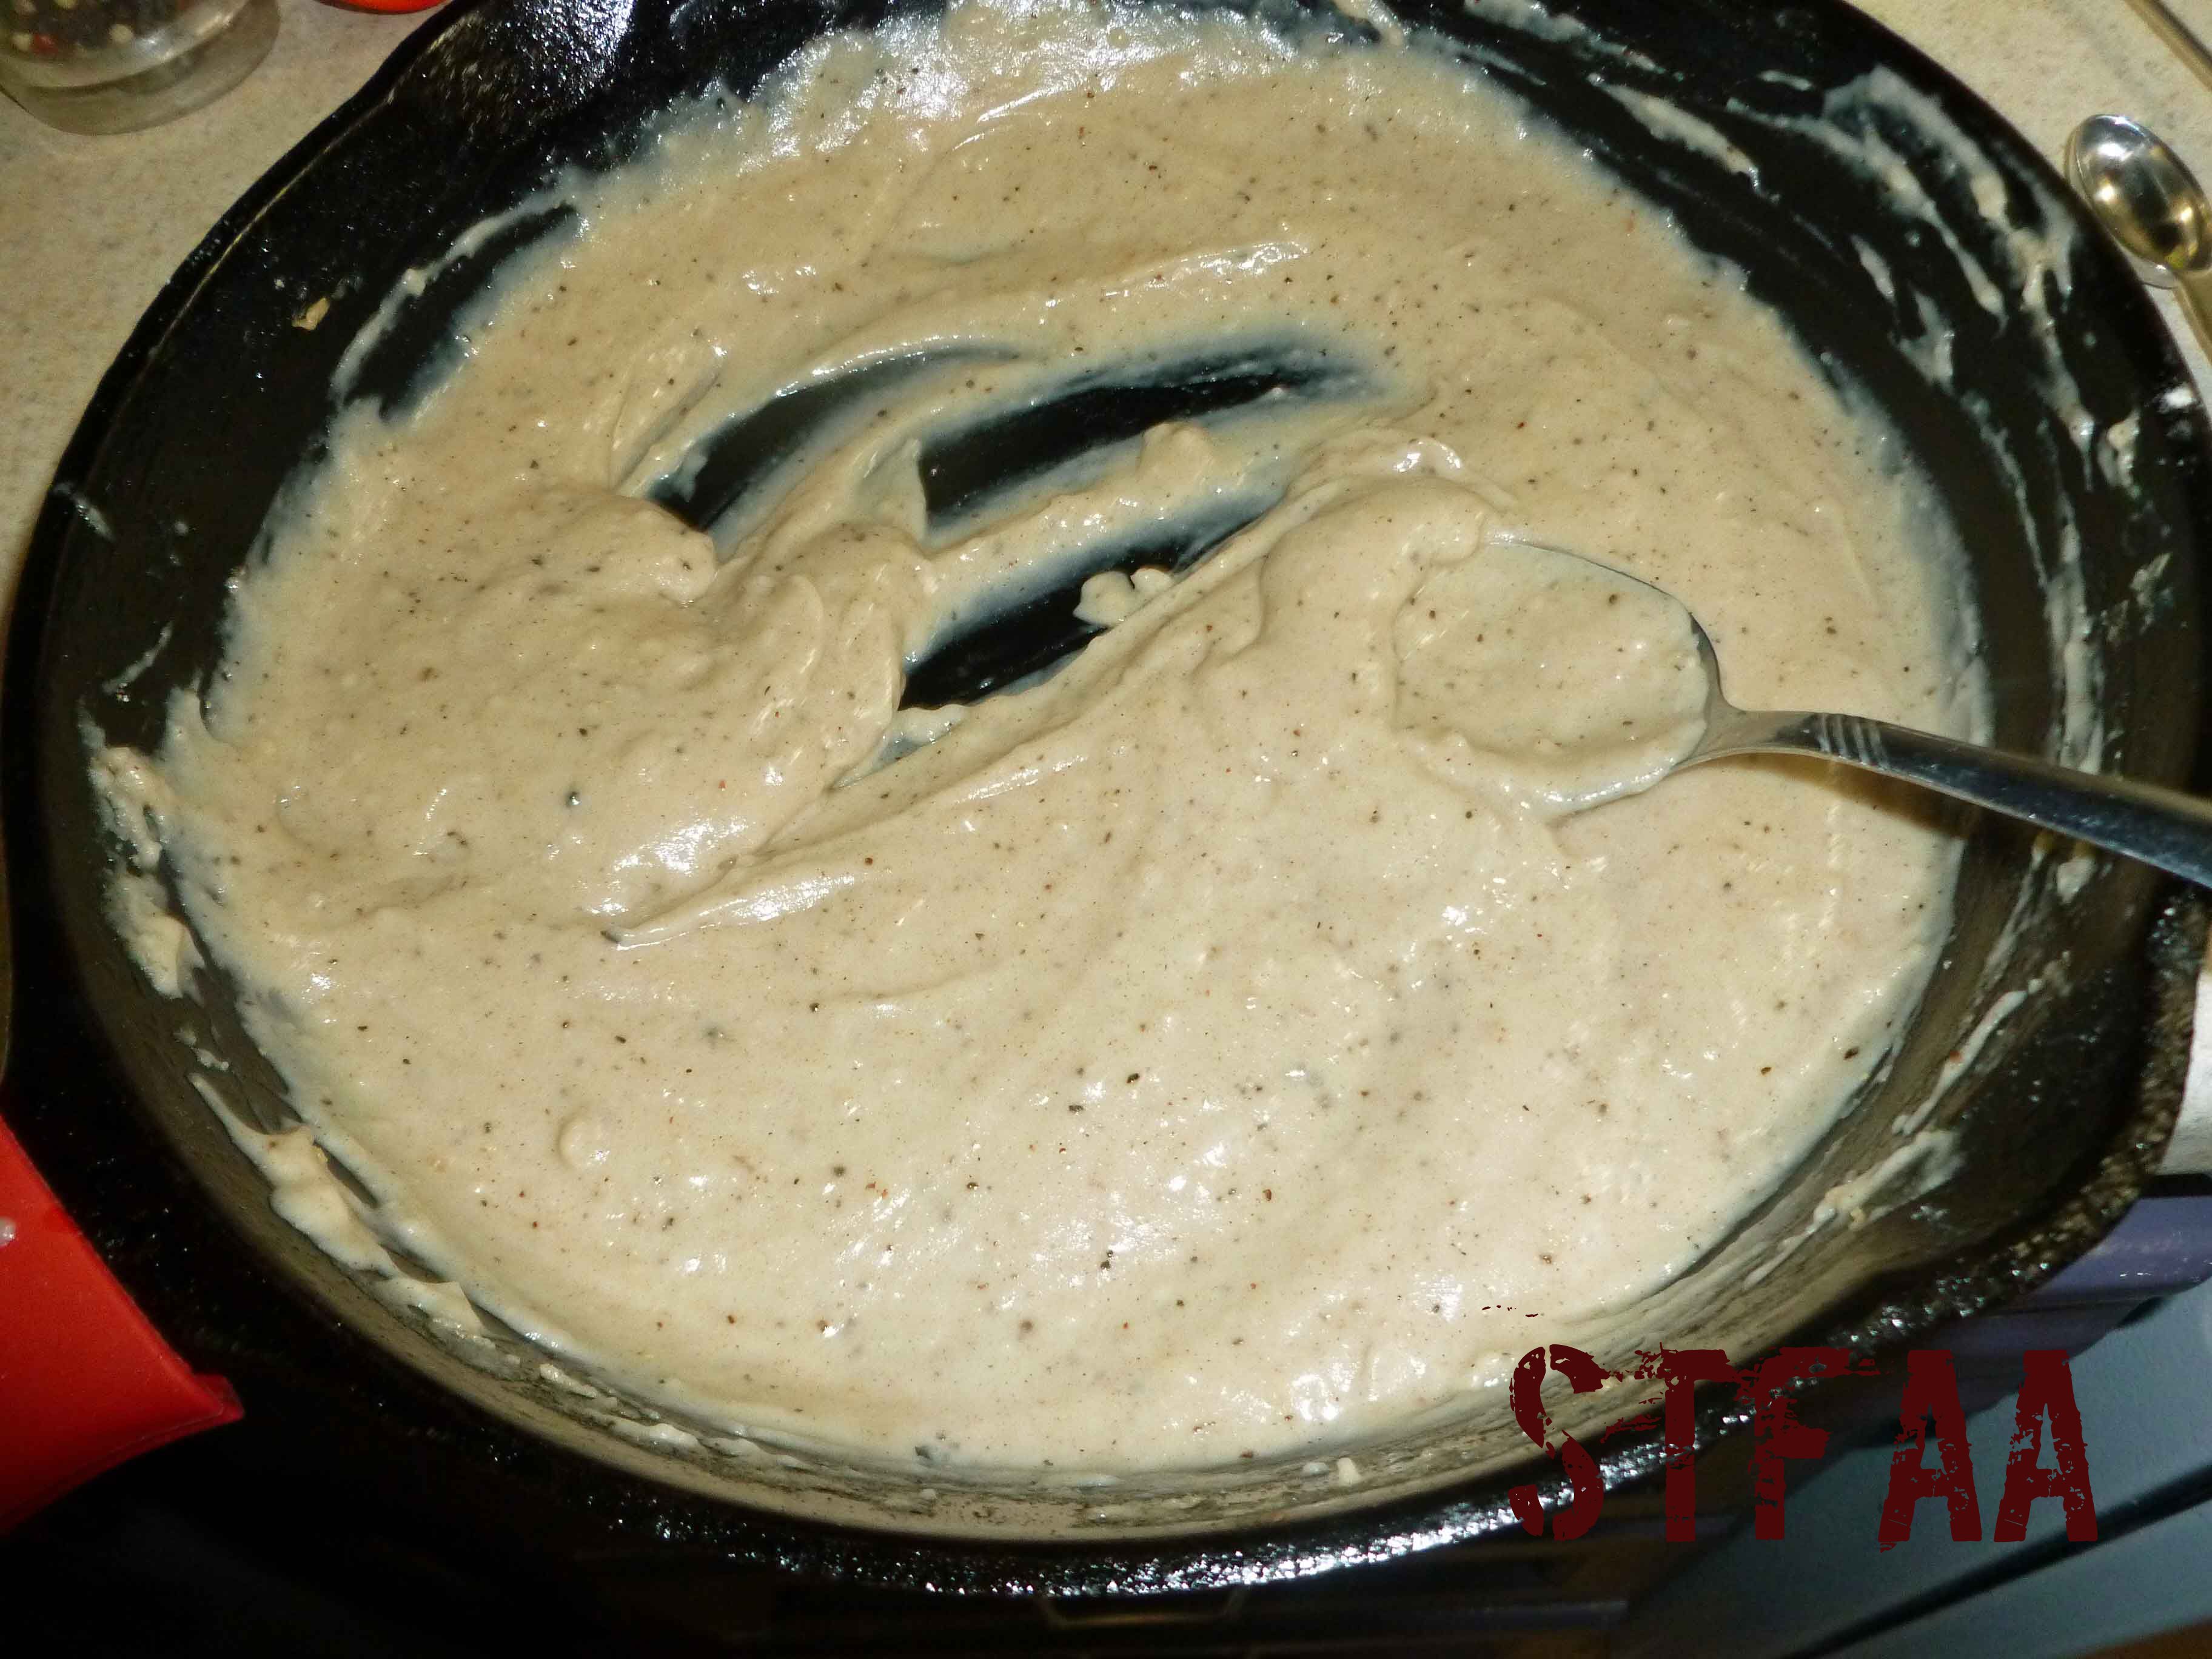
White Pepper Gravy Instructions:
Remove the skillet that you cooked the Chicken Fried Steak from the heat and to allow it to cool down a bit.
Mix 1/4 cup of sorghum flour with cashew milk, 1/4 cup of the water (you can add more later if the gravy’s too thick), black pepper and salt, together in a mixing bowl, until well combined.
Place the skillet back on the burner with the drippings from cooking the Chicken Fried Steak still in it. Pour the flour and cashew milk mixture over the drippings, while whisking constantly over low heat, until the gravy thickens.
White Pepper Gravy after it thickens
Add more water if the gravy is too thick, whisking to incorporate the water, and add more salt and pepper to taste if necessary. Spoon over your Chicken Fried Steak and enjoy!
Chicken Fried Steak with White Pepper Gravy Notice: Trying to access array offset on value of type bool in /home/maryzahc/public_html/adultfoodallergies.com/wp-content/plugins/wp-ultimate-recipe/helpers/models/recipe.php on line 254
1tbspMontreal Steak Seasoning(see recipe on our blog)
2tbspaquafaba
2-3tbspbacon fat, lard, or safe for you oil
White Pepper Gravy
Drippings from frying Chicken Fried Steak
1/4 cupsorghum flour
1cupcashew milk or other dairy free milk
1/4 to 1/2 cup water
1/4tspground black pepper
1/4tspsalt
Servings: people
Instructions
Chicken Fried Steak
For Chicken Fried Steak, place 1/4 cup of sorghum flour, 1/4 cup of garbanzo bean flour, and the Montreal Steak Seasoning in a large shallow dish that will allow you to coat the cube steak easily. Mix the sorghum flour, garbanzo bean flour and Montreal Steak Seasoning together until they are well combined. Place the aquafaba in another large shallow dish that will allow you to coat the cube steak easily.
Place your bacon fat, lard, or safe oil in a skillet, and place the skillet on a burner over medium heat. While your fat/oil heats, take your cube steak and coat it in the aquafaba. Then dredge the cube steak in the flour mixture. Place the cube steak in the aquafaba again and recoat it, and then re-dredge the cube steak in the flour mixture. Once your fat/oil is hot, place the steak in the skillet. Cook for 3-5 minutes each side (depending on how hot your burner is), making sure the internal temperature reaches 160ºF, and until the coating is a lovely golden brown.
White Pepper Gravy
Remove the skillet that you cooked the Chicken Fried Steak from the heat and to allow it to cool down a bit. Mix 1/4 cup of sorghum flour with cashew milk, 1/4 cup of the water (you can add more later if the gravy’s too thick), black pepper and salt, together in a mixing bowl, until well combined. Place the skillet back on the burner with the drippings from cooking the Chicken Fried Steak still in it. Pour the flour and cashew milk mixture over the drippings, while whisking constantly over low heat, until the gravy thickens. Add more water if the gravy is too thick, whisking to incorporate the water, and add more salt and pepper to taste if necessary. Spoon over your Chicken Fried Steak and enjoy!
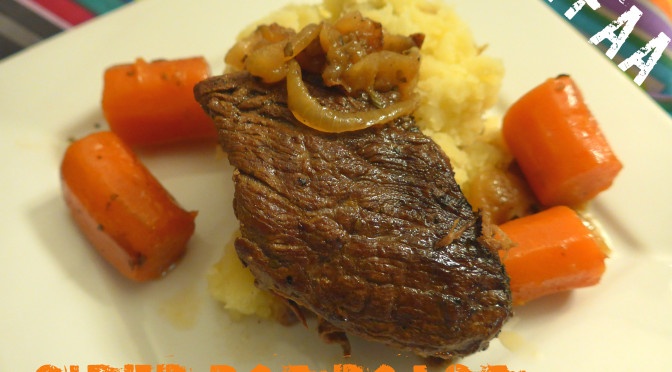
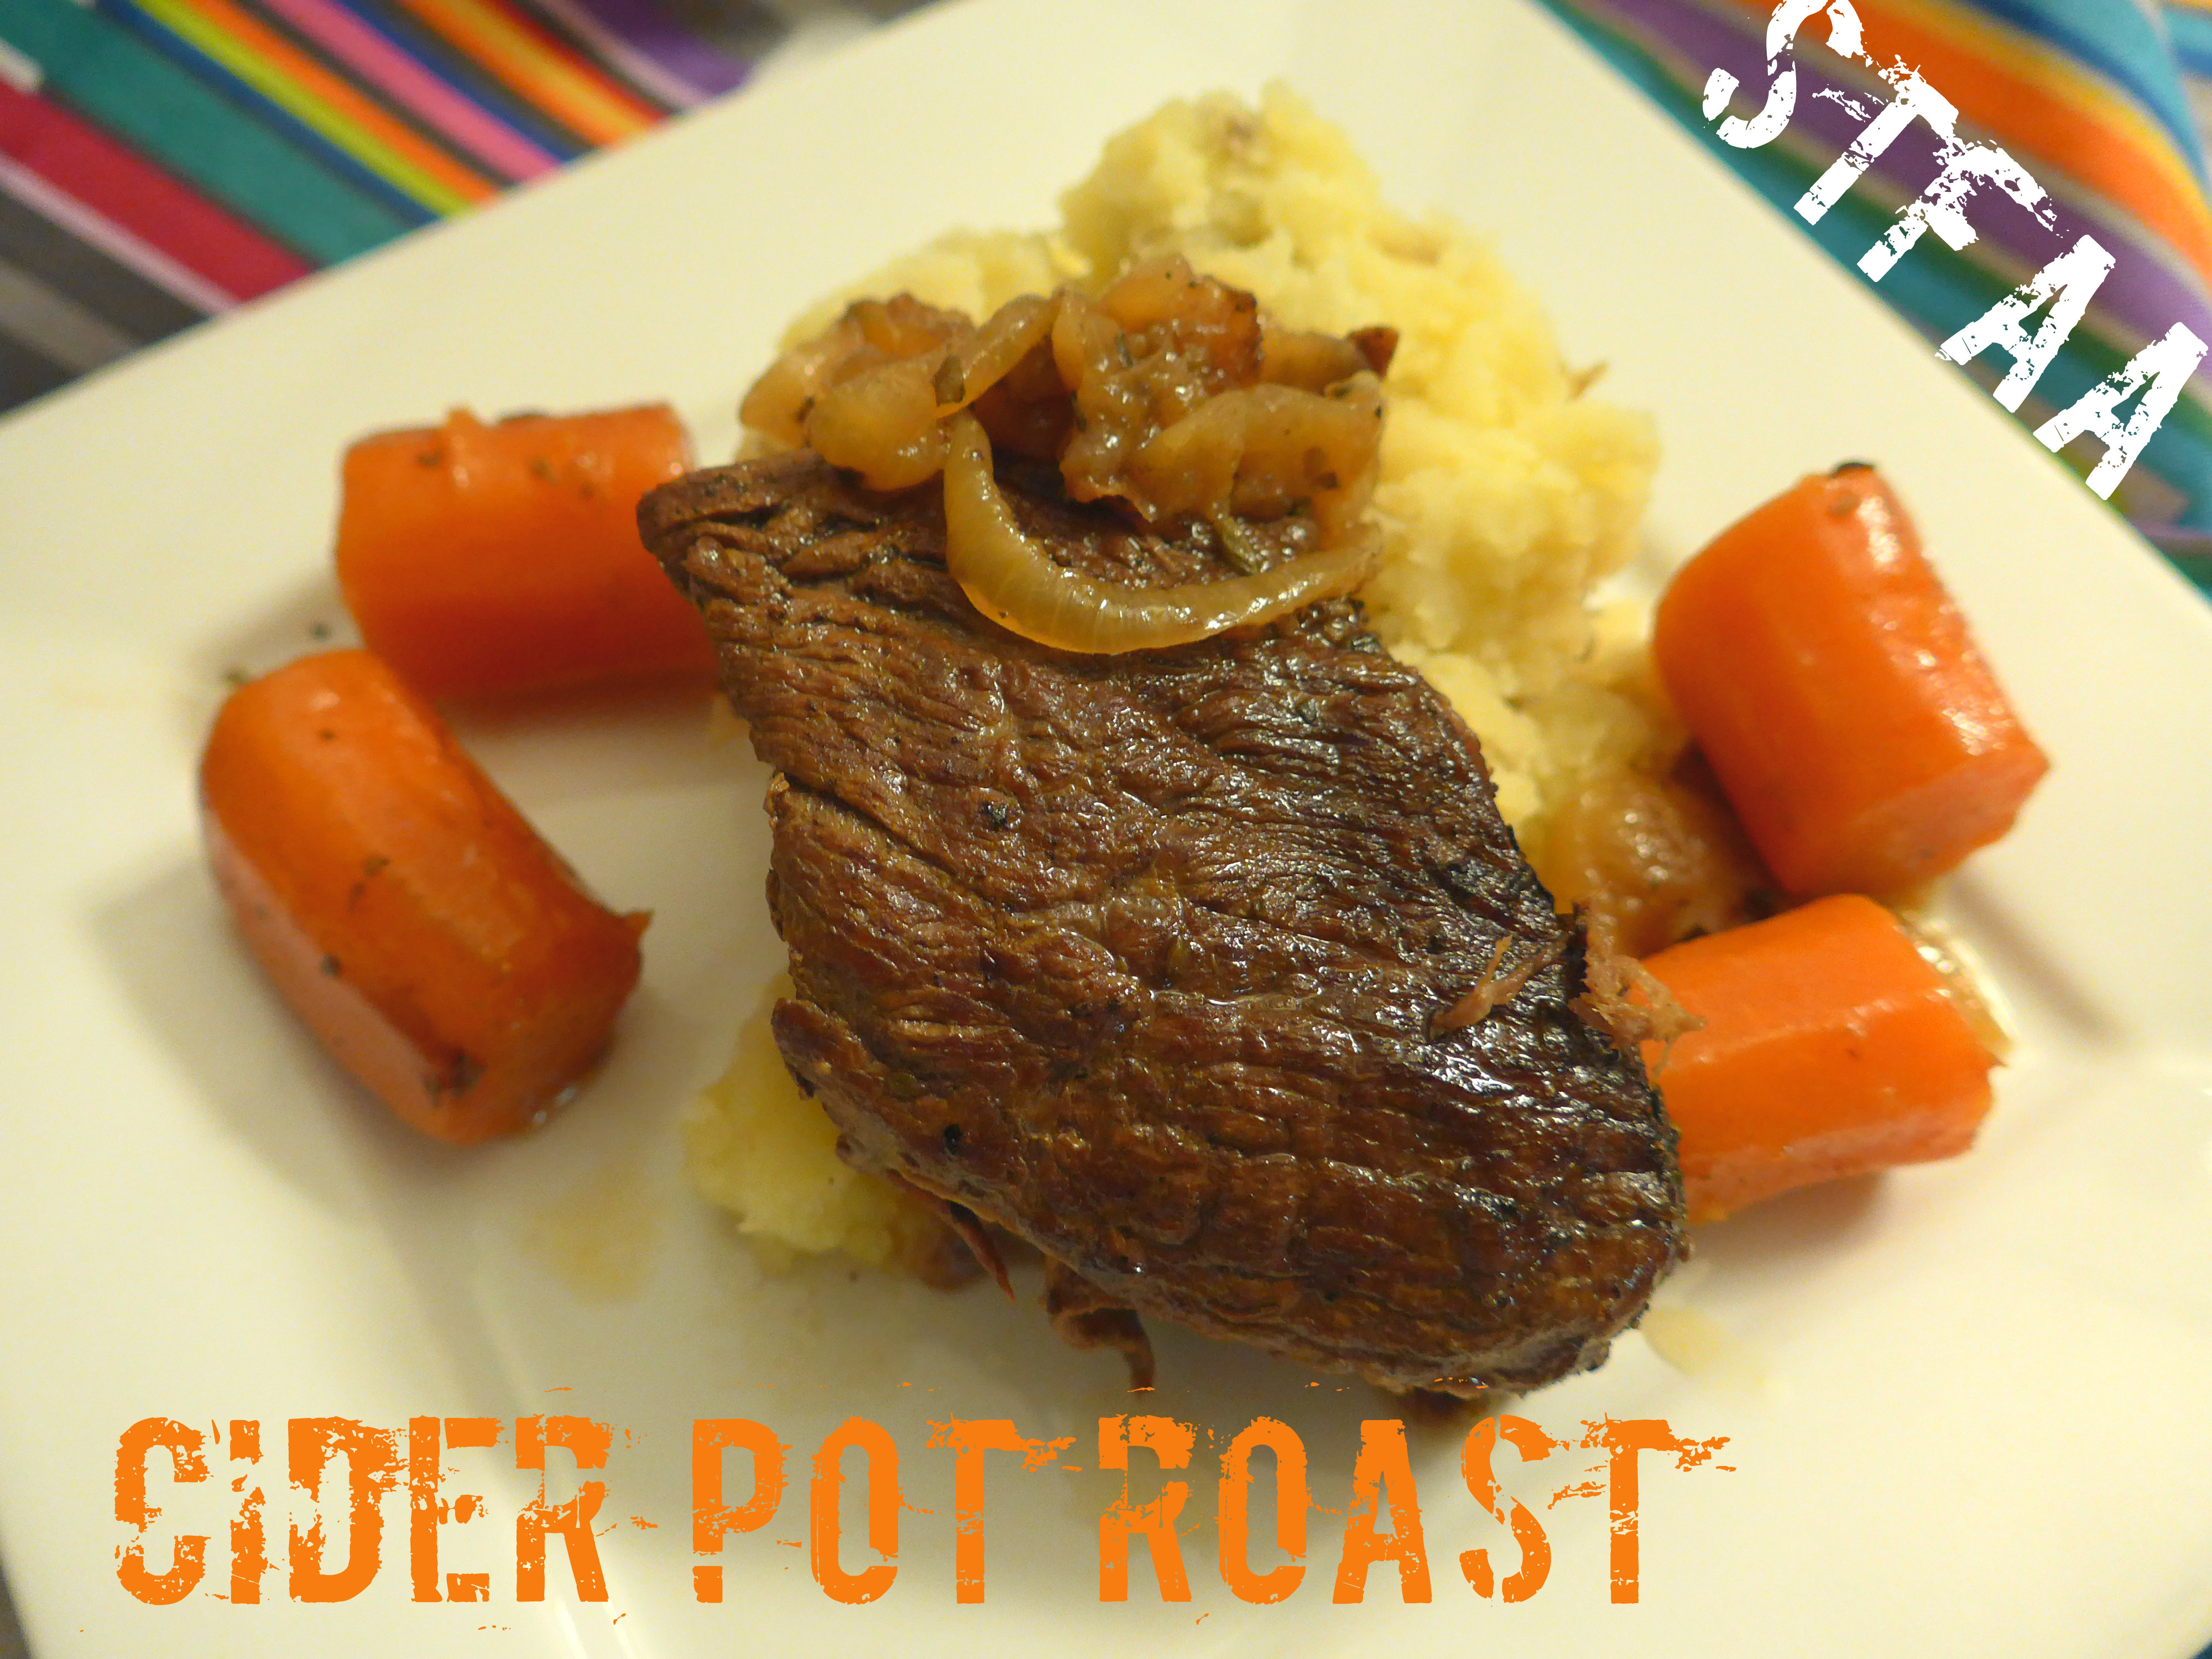
While I know there are people out there who dream of steak dinners, prime rib, or some other fancy cut of cow, my all-time favorite beef dinner is a good pot roast. I’ve been wanting to post a pot roast dinner to the blog for years now, but I hadn’t figured out how to get the right flavor and texture.
Pot roast should be falling apart, fork-tender meat. The onions and carrots should be flavorful, and the braising liquid should be able to be a gravy with no added flavor, only thickening (and I almost never bother). I have made countless pot roasts that have not met this bar. I’ve tried gluten-free beer, wines, beef and chicken broth, and seasoned water. Eh. Everything was edible, but nothing was great.
This time, I tried hard apple cider, Farnum Hill Dooryard Cider, in fact, which is local to New Hampshire. I’m not sure how easy it might be to find elsewhere, but it is gluten-free and safe for me. This cider tends towards dryness, rather than sweetness, which is ideal for this application. See what you can find, and make sure you taste it before cooking with it.
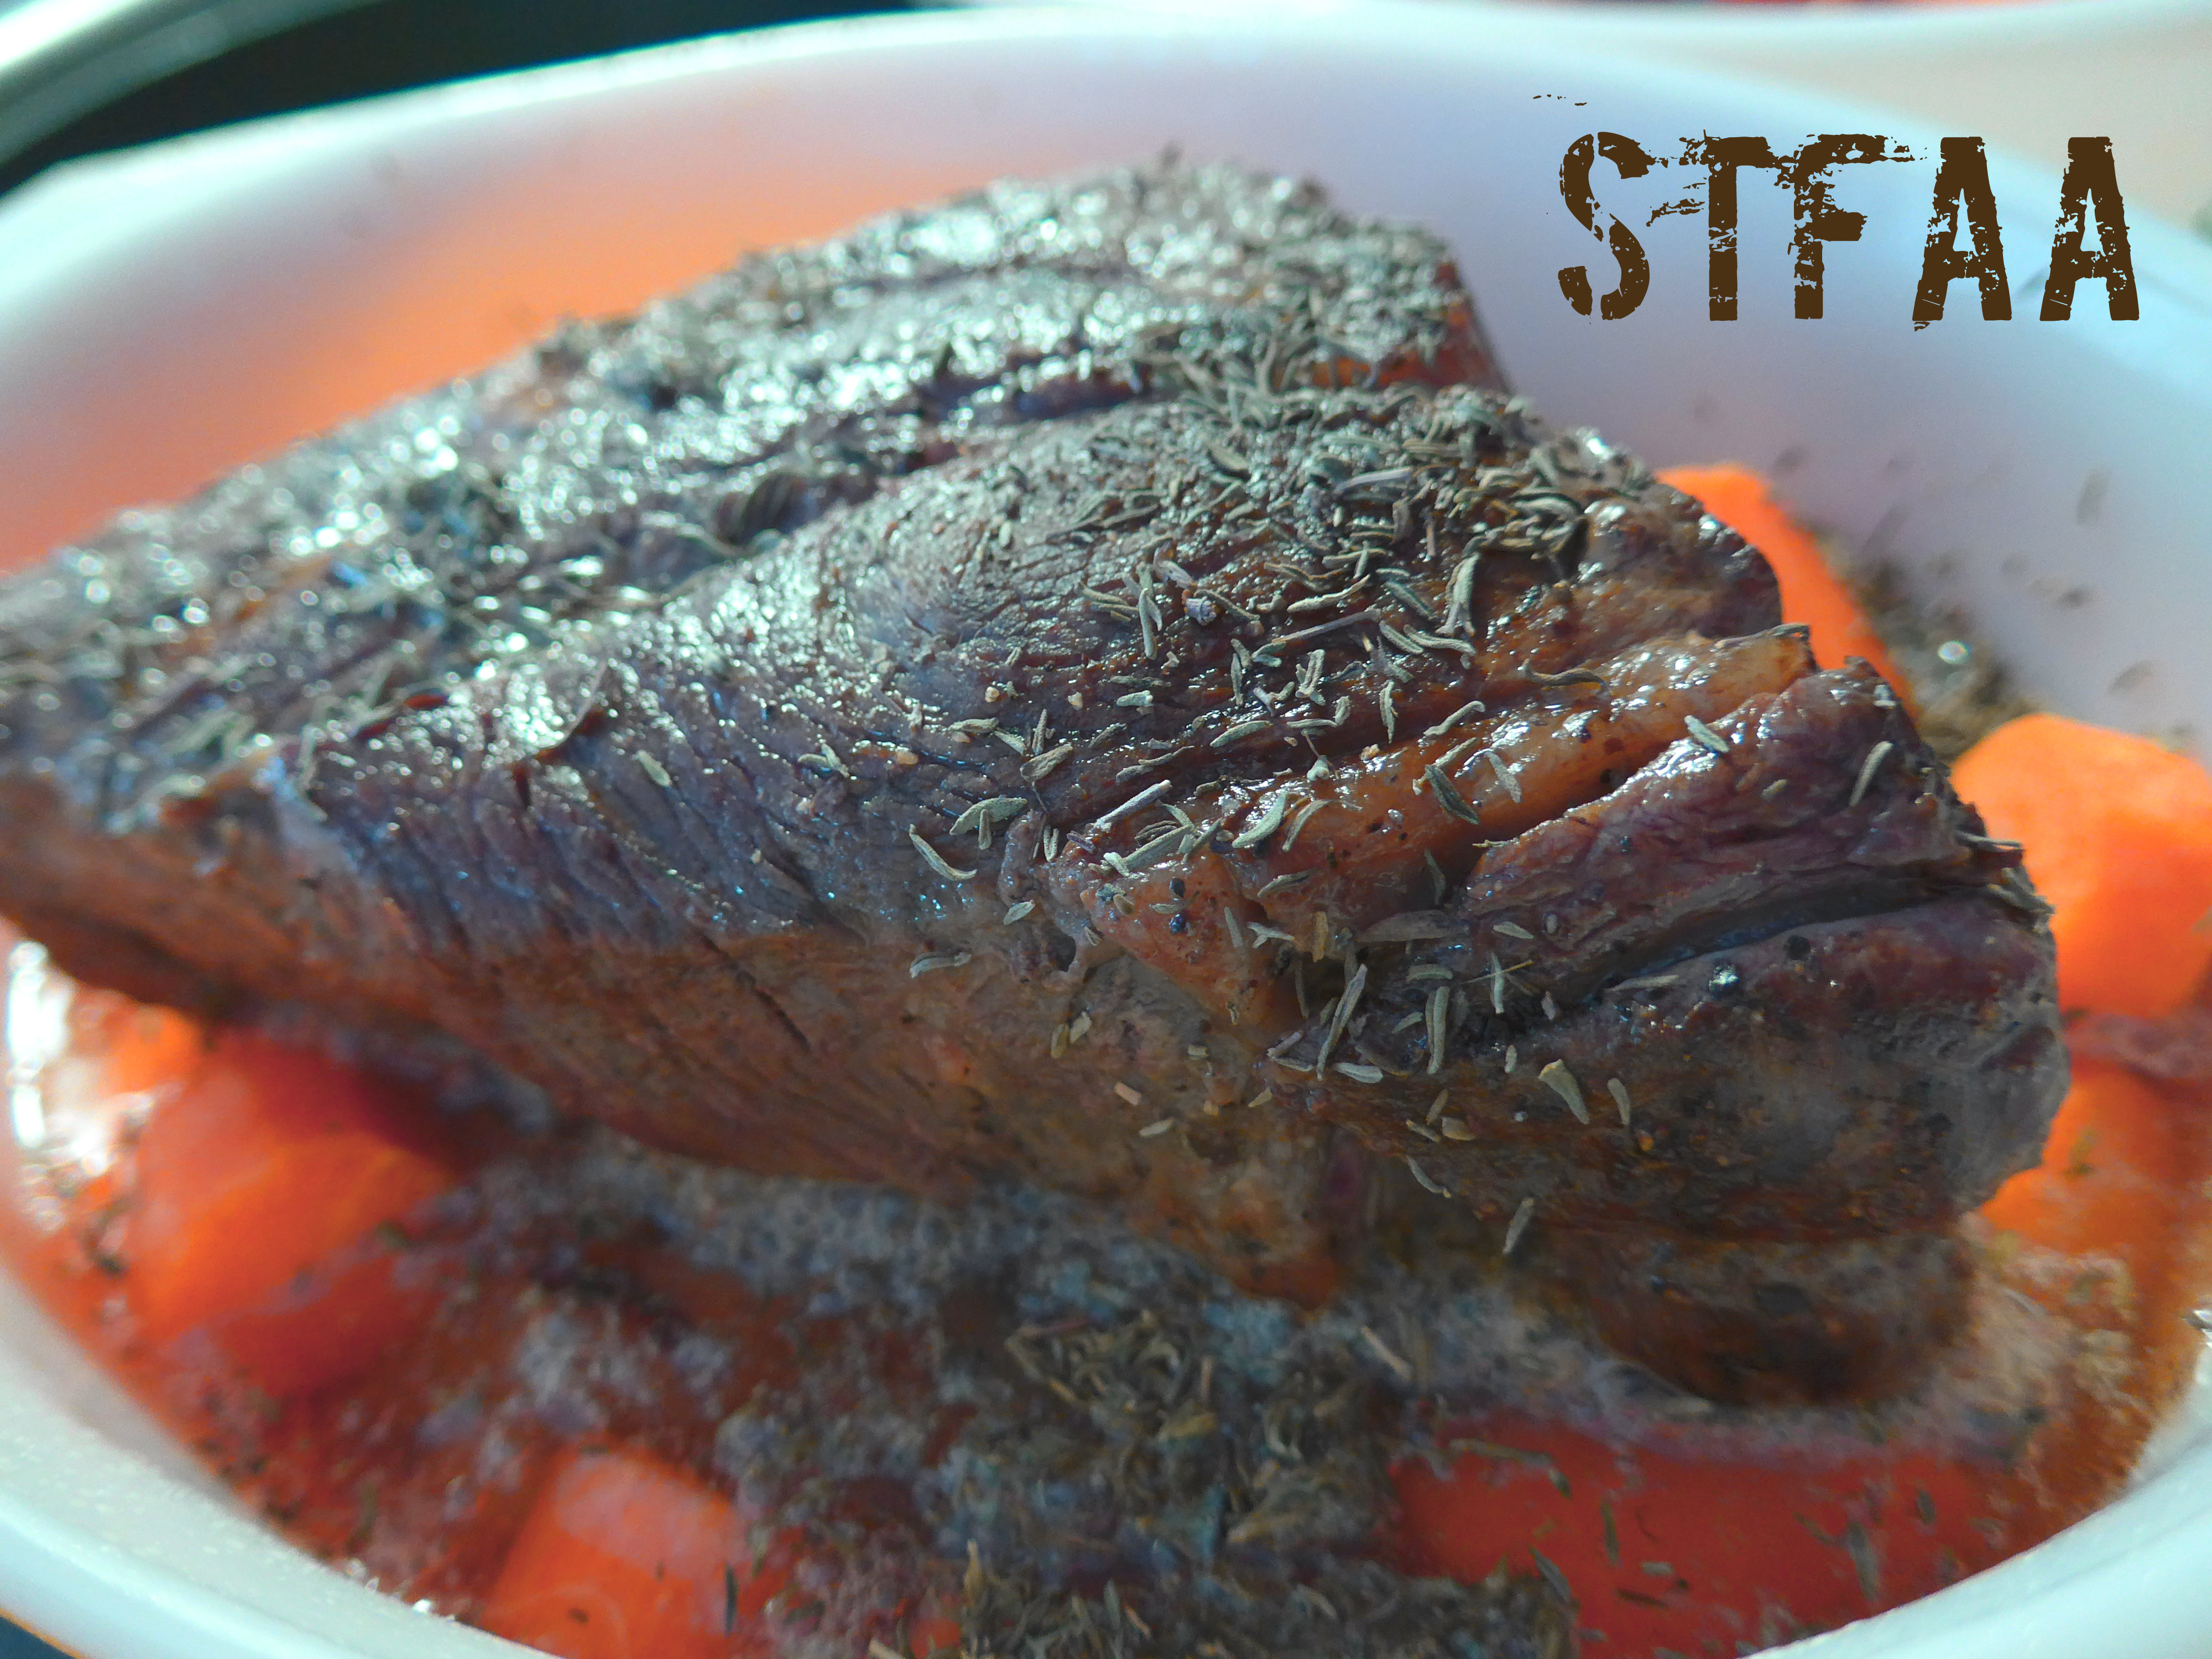
When I tasted this, I ended up going in a slightly different direction with herbs. I did try this with the more traditional thyme, and it was good, but oregano and apple cider was the winning combination for me. Another good reason to taste your ingredients!
Preparing pot roast for baking. Keen eyes may pick up that this is the thyme-covered roast, not the oregano in the recipe. You’d be correct — this photo just turned out much better.
The beef is browned before baking, and it’s cooked with browned onions and carrots, and served over simple smashed potatoes. The recipe lists 3 carrots, but honestly, add as many as your casserole or Dutch oven will hold, as they are amazing. If you prefer to enrich your potatoes with safe margarine and non-dairy milk, feel free — I think they soak up more pan juices without those, though. Anyway, I hope you enjoy this recipe as much as I do.
Notice: Trying to access array offset on value of type bool in /home/maryzahc/public_html/adultfoodallergies.com/wp-content/plugins/wp-ultimate-recipe/helpers/models/recipe.php on line 254
Cider Pot Roast
Print Recipe
This is the pot roast of my childhood — tender meat that you don’t need a knife to eat, slathered in onions, best served over mashed potatoes. In this recipe, I found that hard cider made a good gluten-free substitution for beer.
This is the pot roast of my childhood — tender meat that you don’t need a knife to eat, slathered in onions, best served over mashed potatoes. In this recipe, I found that hard cider made a good gluten-free substitution for beer.
1Tablespoonfatolive oil, bacon fat, whatever you want to use is good here
1.5 lbs.boneless chuck roast
salt and pepperto taste, but be generous
3carrots(actually,I’d add as many as your pot will hold, cut into large chunks)
1teaspoonoregano
1cup hard apple cidermake sure your brand is safe for you
1/4cup water
1lb.potatoes, mashedmake them however you like them
Servings: people
Instructions
Turn your oven on at 325 degrees Fahrenheit.
If you have a stove-top to oven-safe dutch oven or other casserole, this is a good recipe to use it. I do not, so I start out in a skillet, and then transfer to a lidded casserole dish. Either way, heat your pan over medium heat, and add the oil or fat.
When the oil is hot, add the onions, frying until they start to brown. When they are all translucent and/or browning (15-20 minutes, stir regularly), remove from the pan. If you’re using a casserole for the baking, transfer them directly there (I advise you lightly grease the dish AND lid).
Turn up the heat just a bit (medium-high). Salt and pepper all sides of your roast liberally, and use freshly ground pepper if you can. Then brown each side. You don’t have to brown the short sides, but it tastes better if you do. Plan on 3-5 minutes per side.
Now either add the browned beef to your greased casserole dish that has onions at the bottom, or add the onions back to the pot (but not on top of the beef). Add your carrots around the sides of the beef.
Sprinkle the oregano over the top of the dish. Then add the cider and water along the side. I like to have the herbs bake to the top of the meat, so don’t wash them off with the cider.
Cover and bake the pot roast for 2-3 hours. Two and a half is a good estimate, as it gives the meat time to braise and for all the fibers in the meat to break apart. Check on it at 2 hours for two things — using a meat thermometer, see if it’s done (170F/77C for well done, and this is pot roast), and then see if the meat is tender. Cook longer if needed. You can definitely turn off the oven and let the casserole continue in the pre-heated oven for the last 30 minutes, provided that the meat has reached its internal temperature.
For the potatoes, I prefer the simplest preparation — cook whole potatoes in salted water until a knife stuck through the center shows they are done. Then drain and smash, adding nothing. These are the perfect potatoes for absorbing other flavors, as the texture is a bit fluffier than traditional mashed potatoes. But make the potatoes you love.
Serve meat and onions and carrots over potatoes, with plenty of the juice from the pan.
Remember when we were little kids and you could get Atomic Fireball individual candies for a penny or five cents depending on the era and rate of inflation? I wonder how much they are these days. In any case, I was trying to make a spiced cranberry liqueur when I came up with this recipe, but when we sipped it after steeping it, the cinnamon had really taken over, and my husband said it tasted like an Atomic Fireball candy. You know, that’s really not such a bad thing. I think this is pretty good served over ice and sipped carefully. I’ve mixed it with some kombucha (yes, not good for the probiotics, but it tasted good). It’d be great with some hard cider, in a spice chai tea, and I bet it would perk up your coffee. It’s pretty easy to make, and it’s a nice thing to round out your bar for cocktails. If you make some interesting drinks, let us know. Also, I tried to take a pretty picture with the ice shot glasses again, but you can see why ice shot glasses can be fraught with peril, as the bottom melted out before I could take the shot.
Atomic Fireball Liqueur in a melting ice shot glass
Atomic Fireball Liqueur
1 cinnamon stick, broken into pieces
3 whole cloves
3 whole allspice berries
1 cup of sugar
3/4 cup of water
zest of a lemon
1 cup of cranberries, fresh or frozen
1 3/4 cups of vodka (I used a vodka made only from potatoes, be careful as some vodkas may also use wheat or corn)
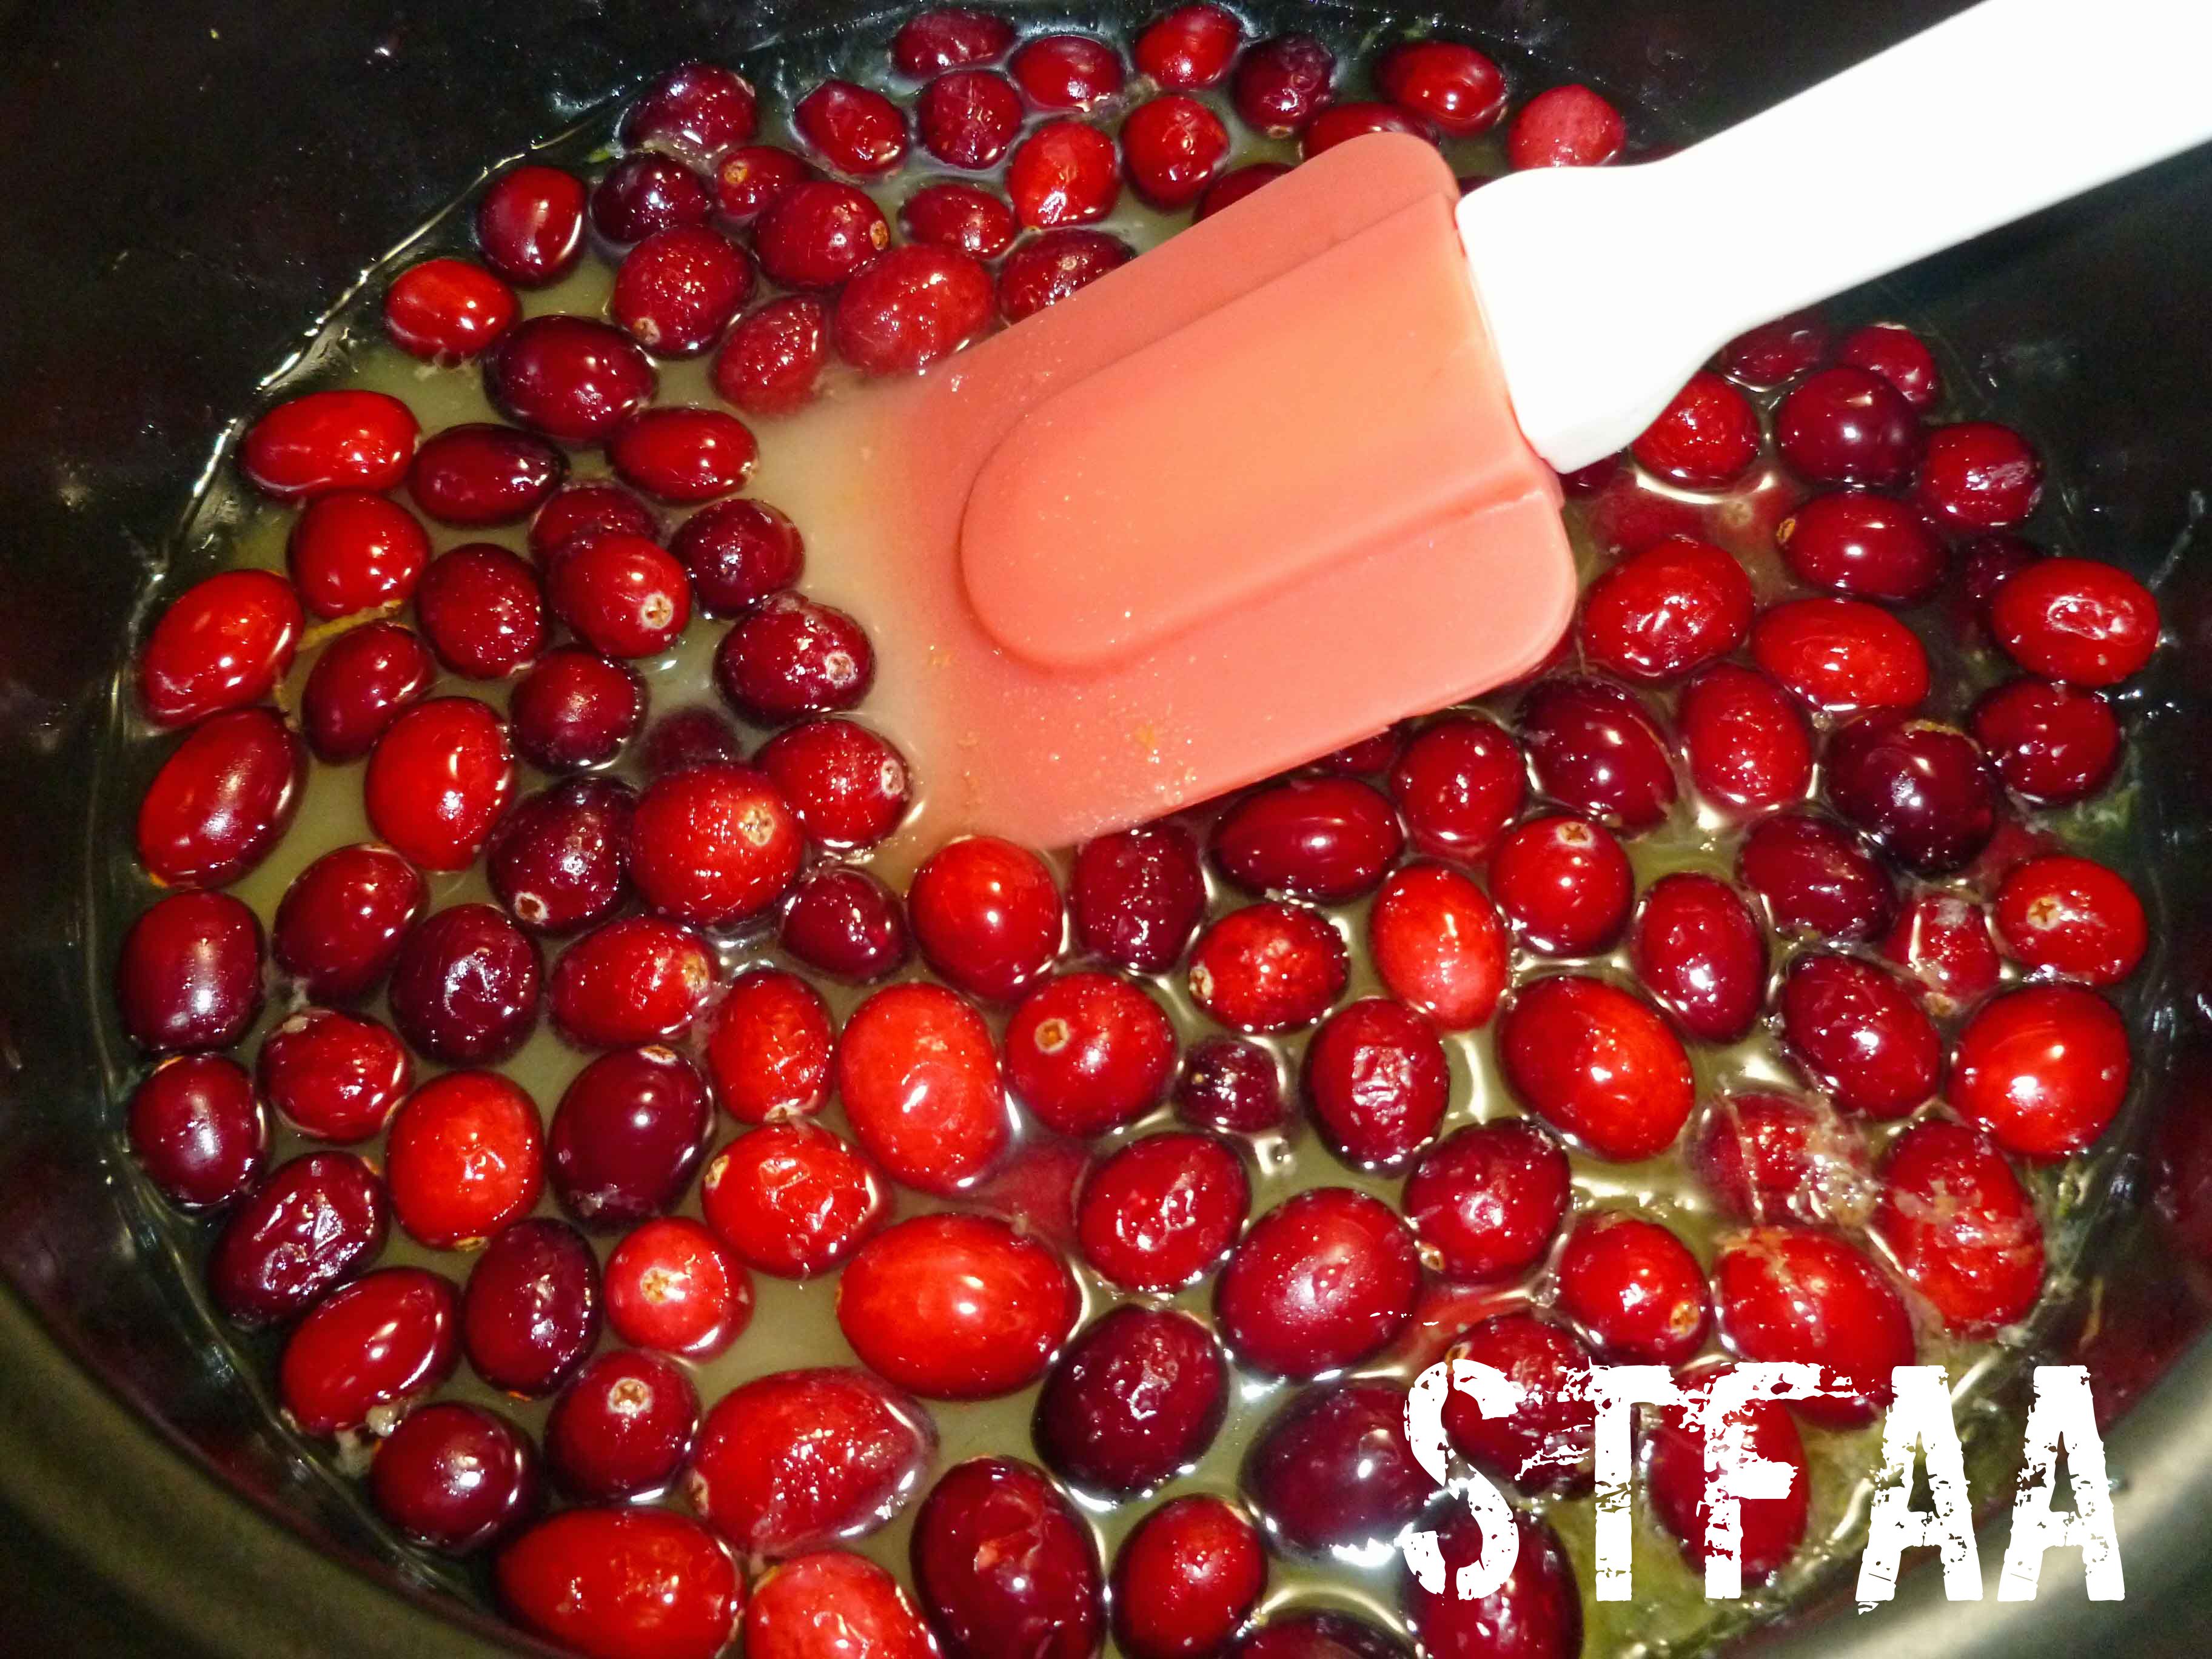
Add the sugar, water, lemon zest, and cranberries to a sauce pot and bring to a boil over medium high heat. Once boiling, reduce to a simmer and continue to simmer until the cranberries begin to burst, for about 10 minutes. Remove from heat and let cool.
Cranberries, sugar, lemon zest and water in a sauce pot
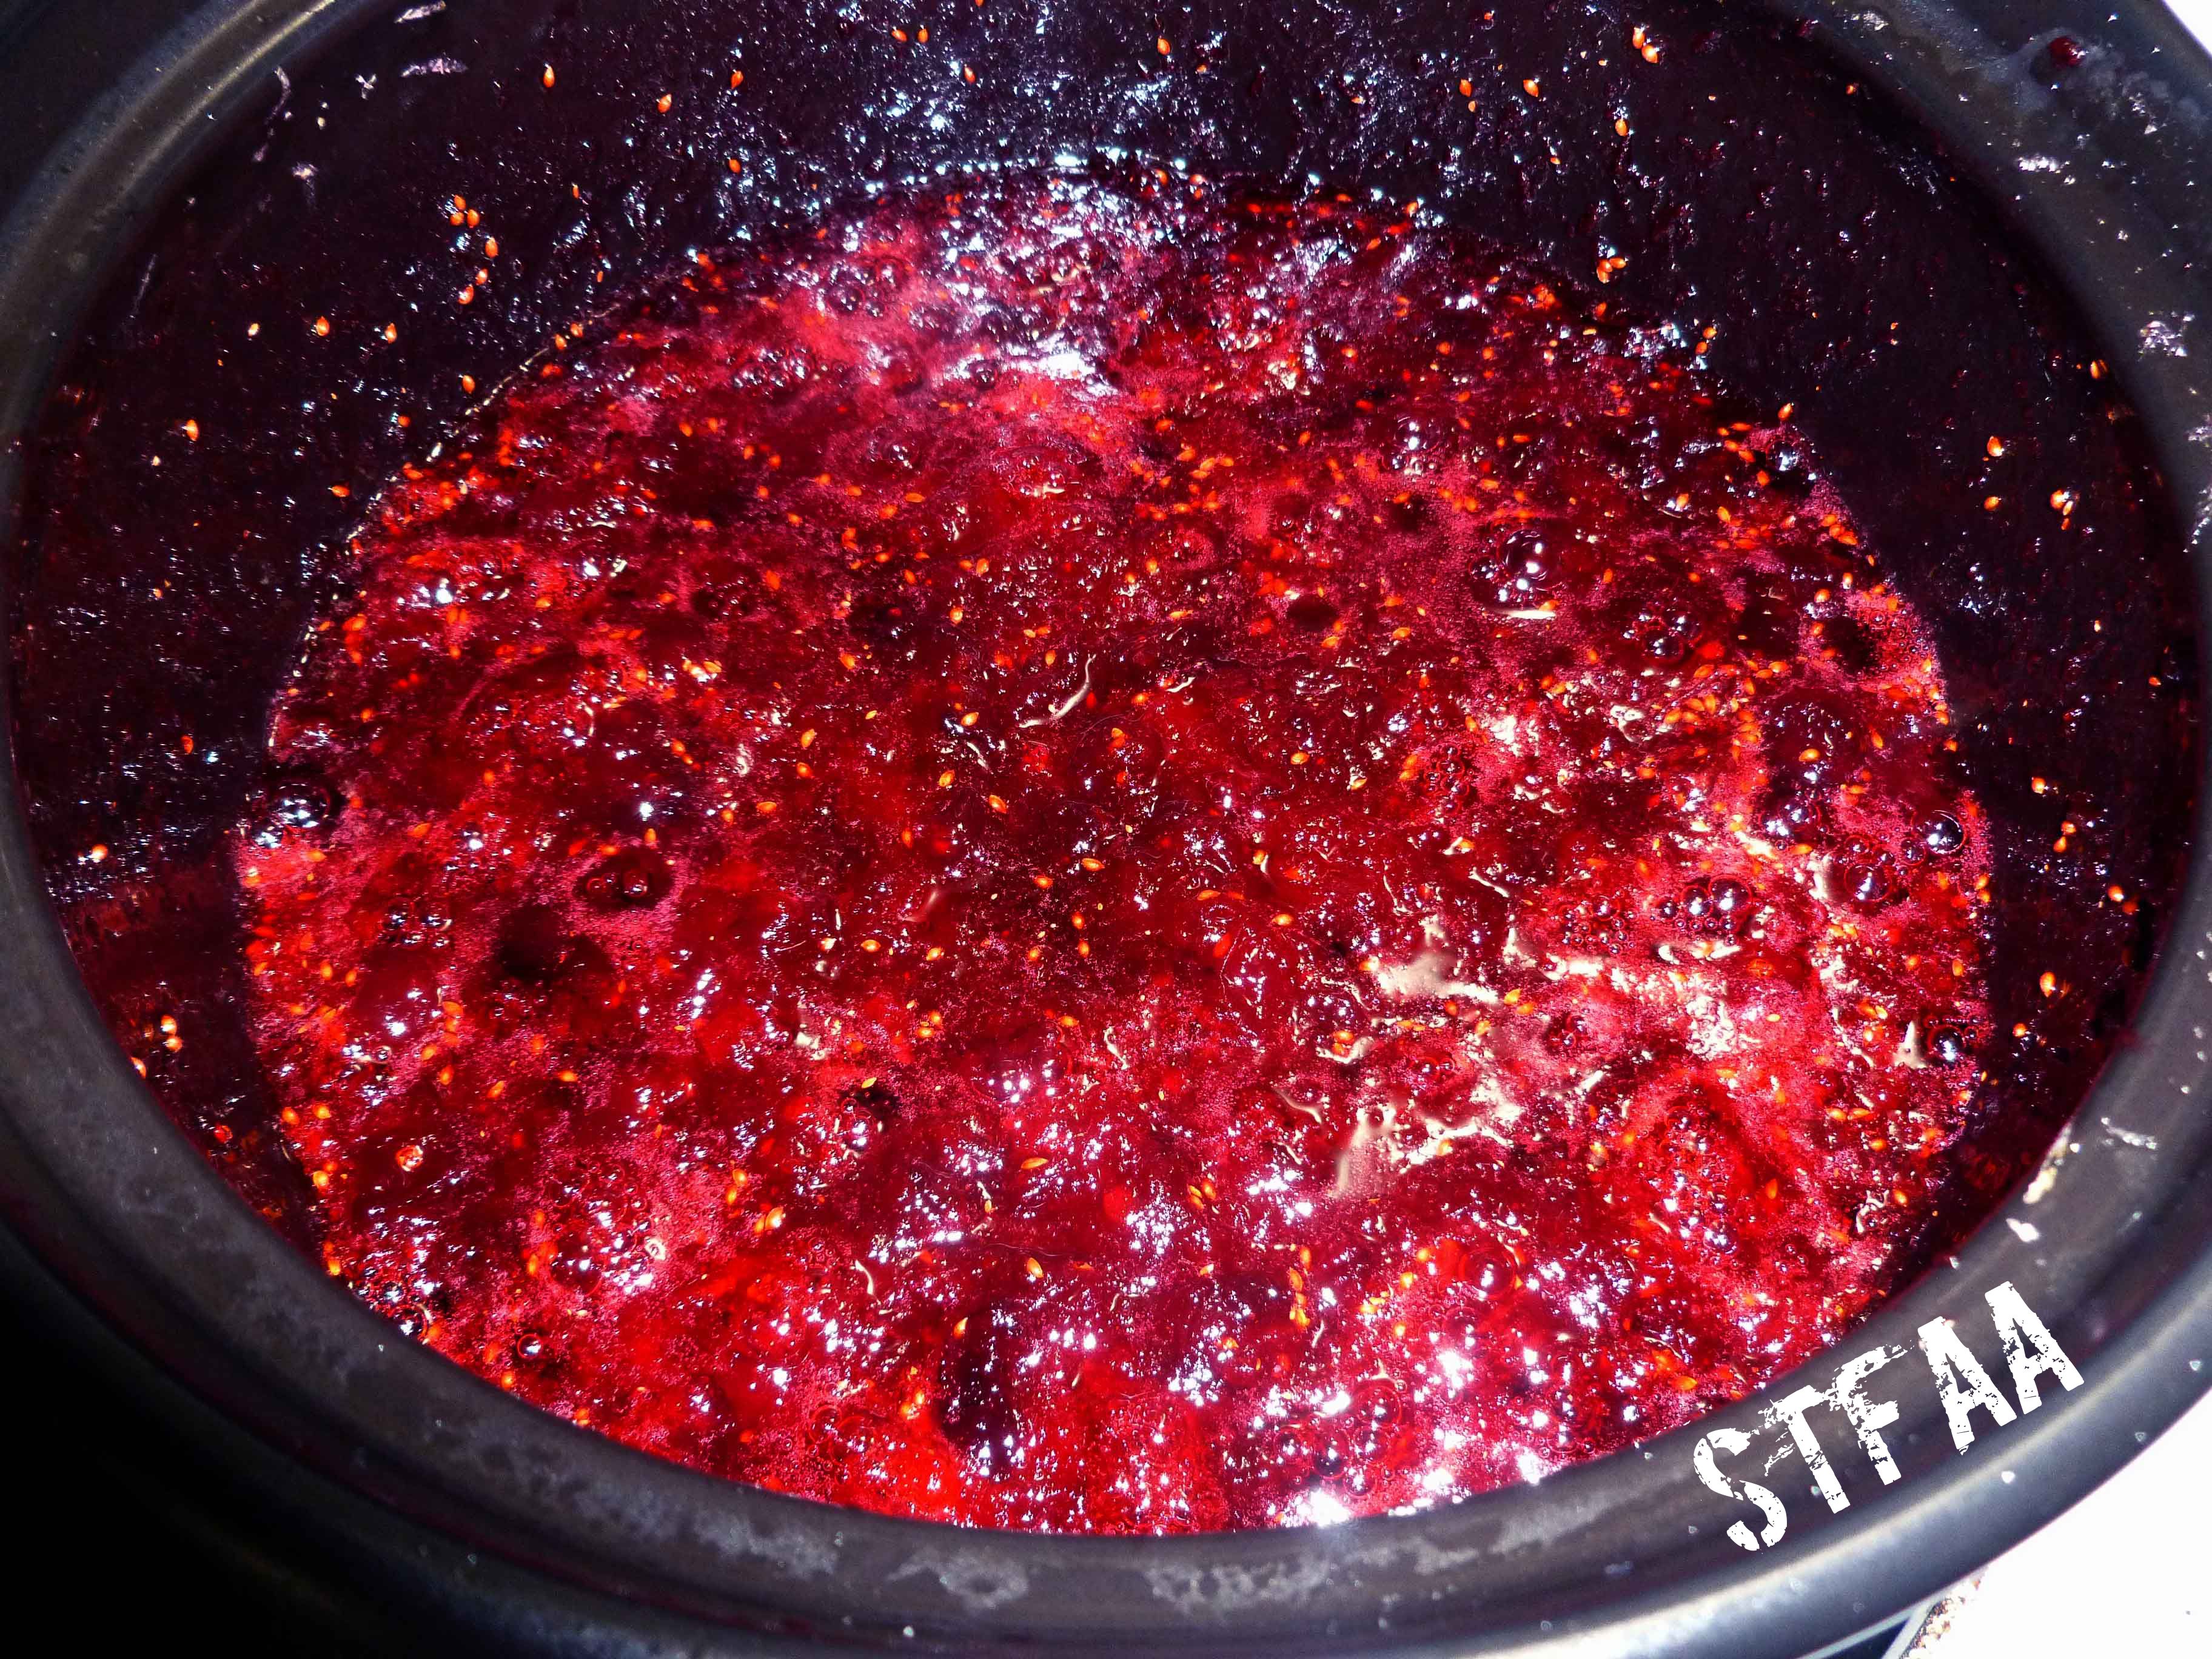
Use an immersion (stick) blender to break up the cranberries enough so the juice is released, but the mixture stays chunky.
Cranberry mixture after blending
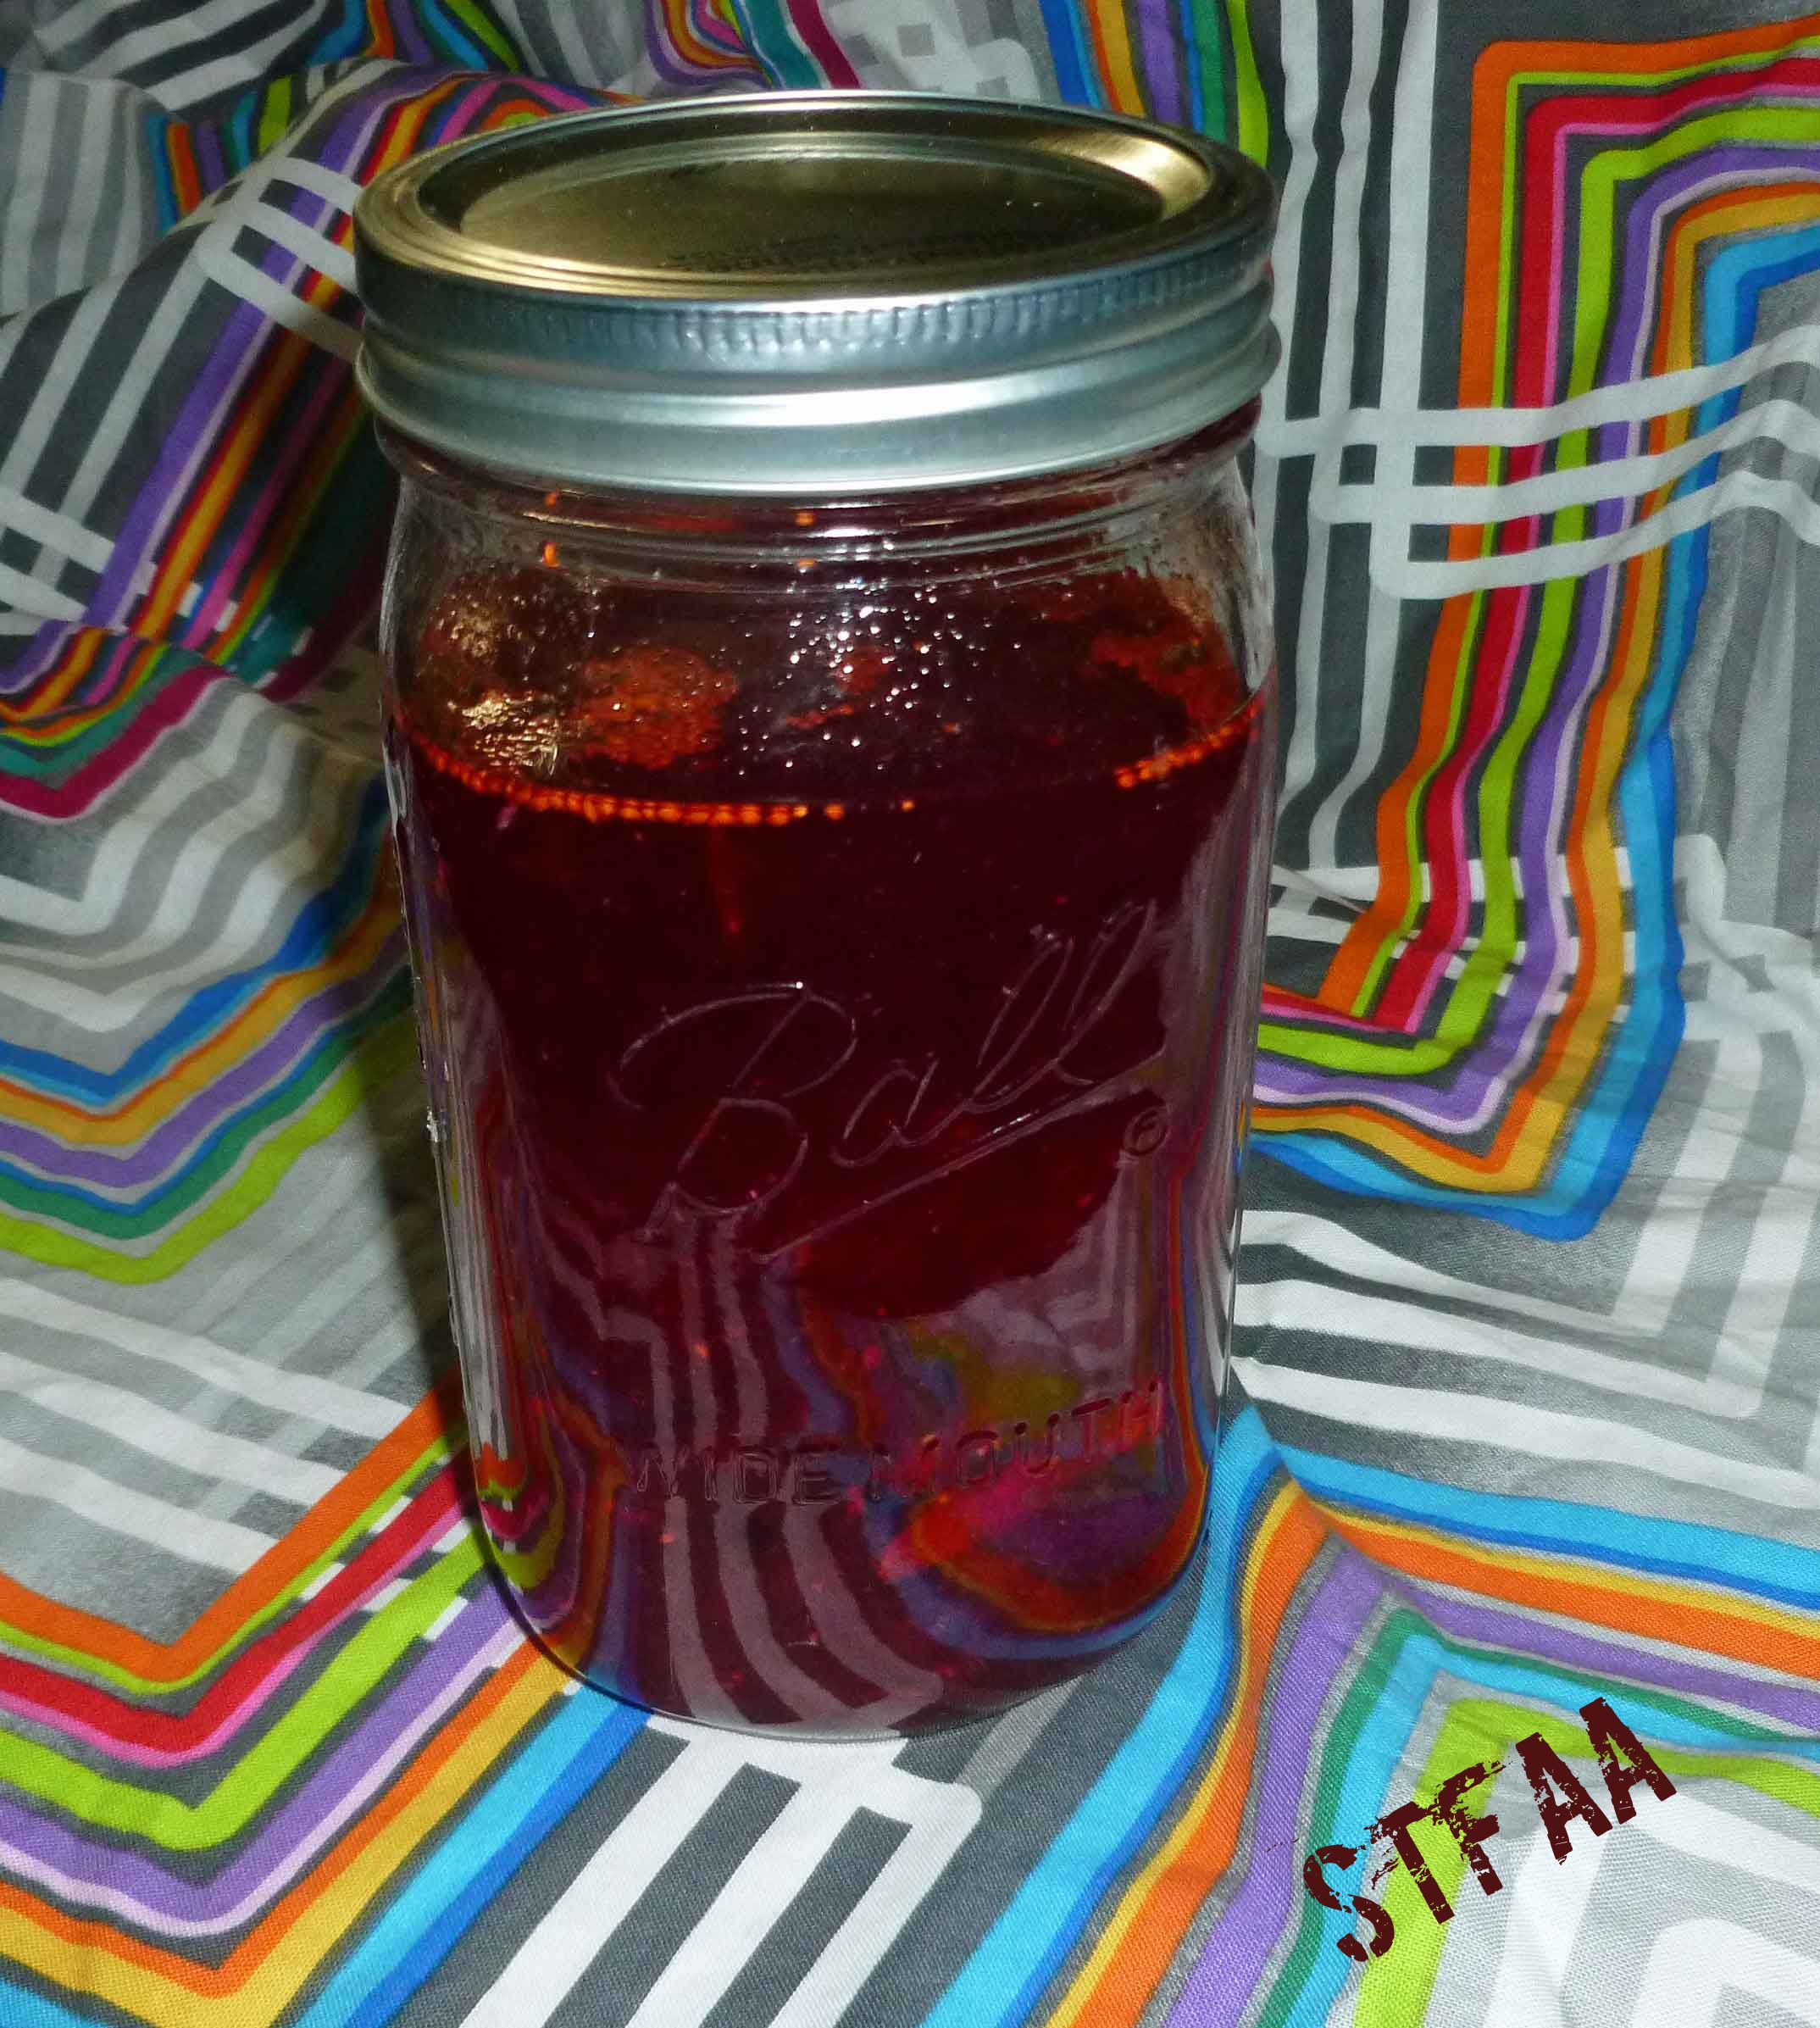
Pour the mixture into a mason jar. Add the vodka, cinnamon stick pieces, cloves, and allspice to the jar. Seal the jar with an air tight lid and shake vigorously.
Cranberry mixture, spices, and vodka steeping
Let steep at room temperature for 2 to 7 days, shaking occasionally and sampling to check to see whether you’re happy with the flavor. I decided mine was done in about two and half days. Using a strainer lined with cheesecloth, strain the mixture, pressing down to extract as much of the liquid as possible. Once strained, keep in an air tight container either at room temperature or in the refrigerator for up to six months.
Notice: Trying to access array offset on value of type bool in /home/maryzahc/public_html/adultfoodallergies.com/wp-content/plugins/wp-ultimate-recipe/helpers/models/recipe.php on line 254
1 3/4cupsVodkaI used a vodka made only from potatoes, be careful as some vodkas may also use grain or corn
Servings: cups
Instructions
Add the sugar, water, lemon zest, and cranberries to a sauce pot and bring to a boil over medium high heat. Once boiling, reduce to a simmer and continue to simmer until the cranberries begin to burst, for about 10 minutes. Remove from heat and let cool.
Use an immersion (stick) blender to break up the cranberries enough so the juice is released, but the mixture stays chunky.
Pour the mixture into a mason jar. Add the vodka, cinnamon stick pieces, cloves, and allspice to the jar. Seal the jar with an air tight lid and shake vigorously.
Let steep at room temperature for 2 to 7 days, sampling to check to see whether you’re happy with the flavor. Using a strainer lined with cheesecloth, strain the mixture, pressing down to extract as much of the liquid as possible. Once strained, keep in an air tight container either at room temperature or in the refrigerator for up to six months.
 Spring Garlic Sauce with Roasted Potatoes