Notice: Function _load_textdomain_just_in_time was called incorrectly. Translation loading for the wp-ultimate-recipe domain was triggered too early. This is usually an indicator for some code in the plugin or theme running too early. Translations should be loaded at the init action or later. Please see Debugging in WordPress for more information. (This message was added in version 6.7.0.) in /home/maryzahc/public_html/adultfoodallergies.com/wp-includes/functions.php on line 6131 Snacks – Page 3 – surviving the food allergy apocalypse (archive)
Snack [snak], noun: a small portion of food or drink or a light meal, especially one eaten between regular meals. c.1400, “a snatch or snap” (especially that of a dog), from snack (v.). Later “a snappish remark” (1550s); “a share, portion, part” (1680s; hence old expression go snacks “share, divide; have a share in”). Main modern meaning “a bite or morsel to eat hastily” is attested from 1757. Snack bar is attested from 1923. Commercial plural form snax attested from 1942 in the vending machine trade. These recipes will not contain dairy, eggs, gluten, wheat or hazelnuts. If we use a top 8 allergen, we will use a tag warning of its use.
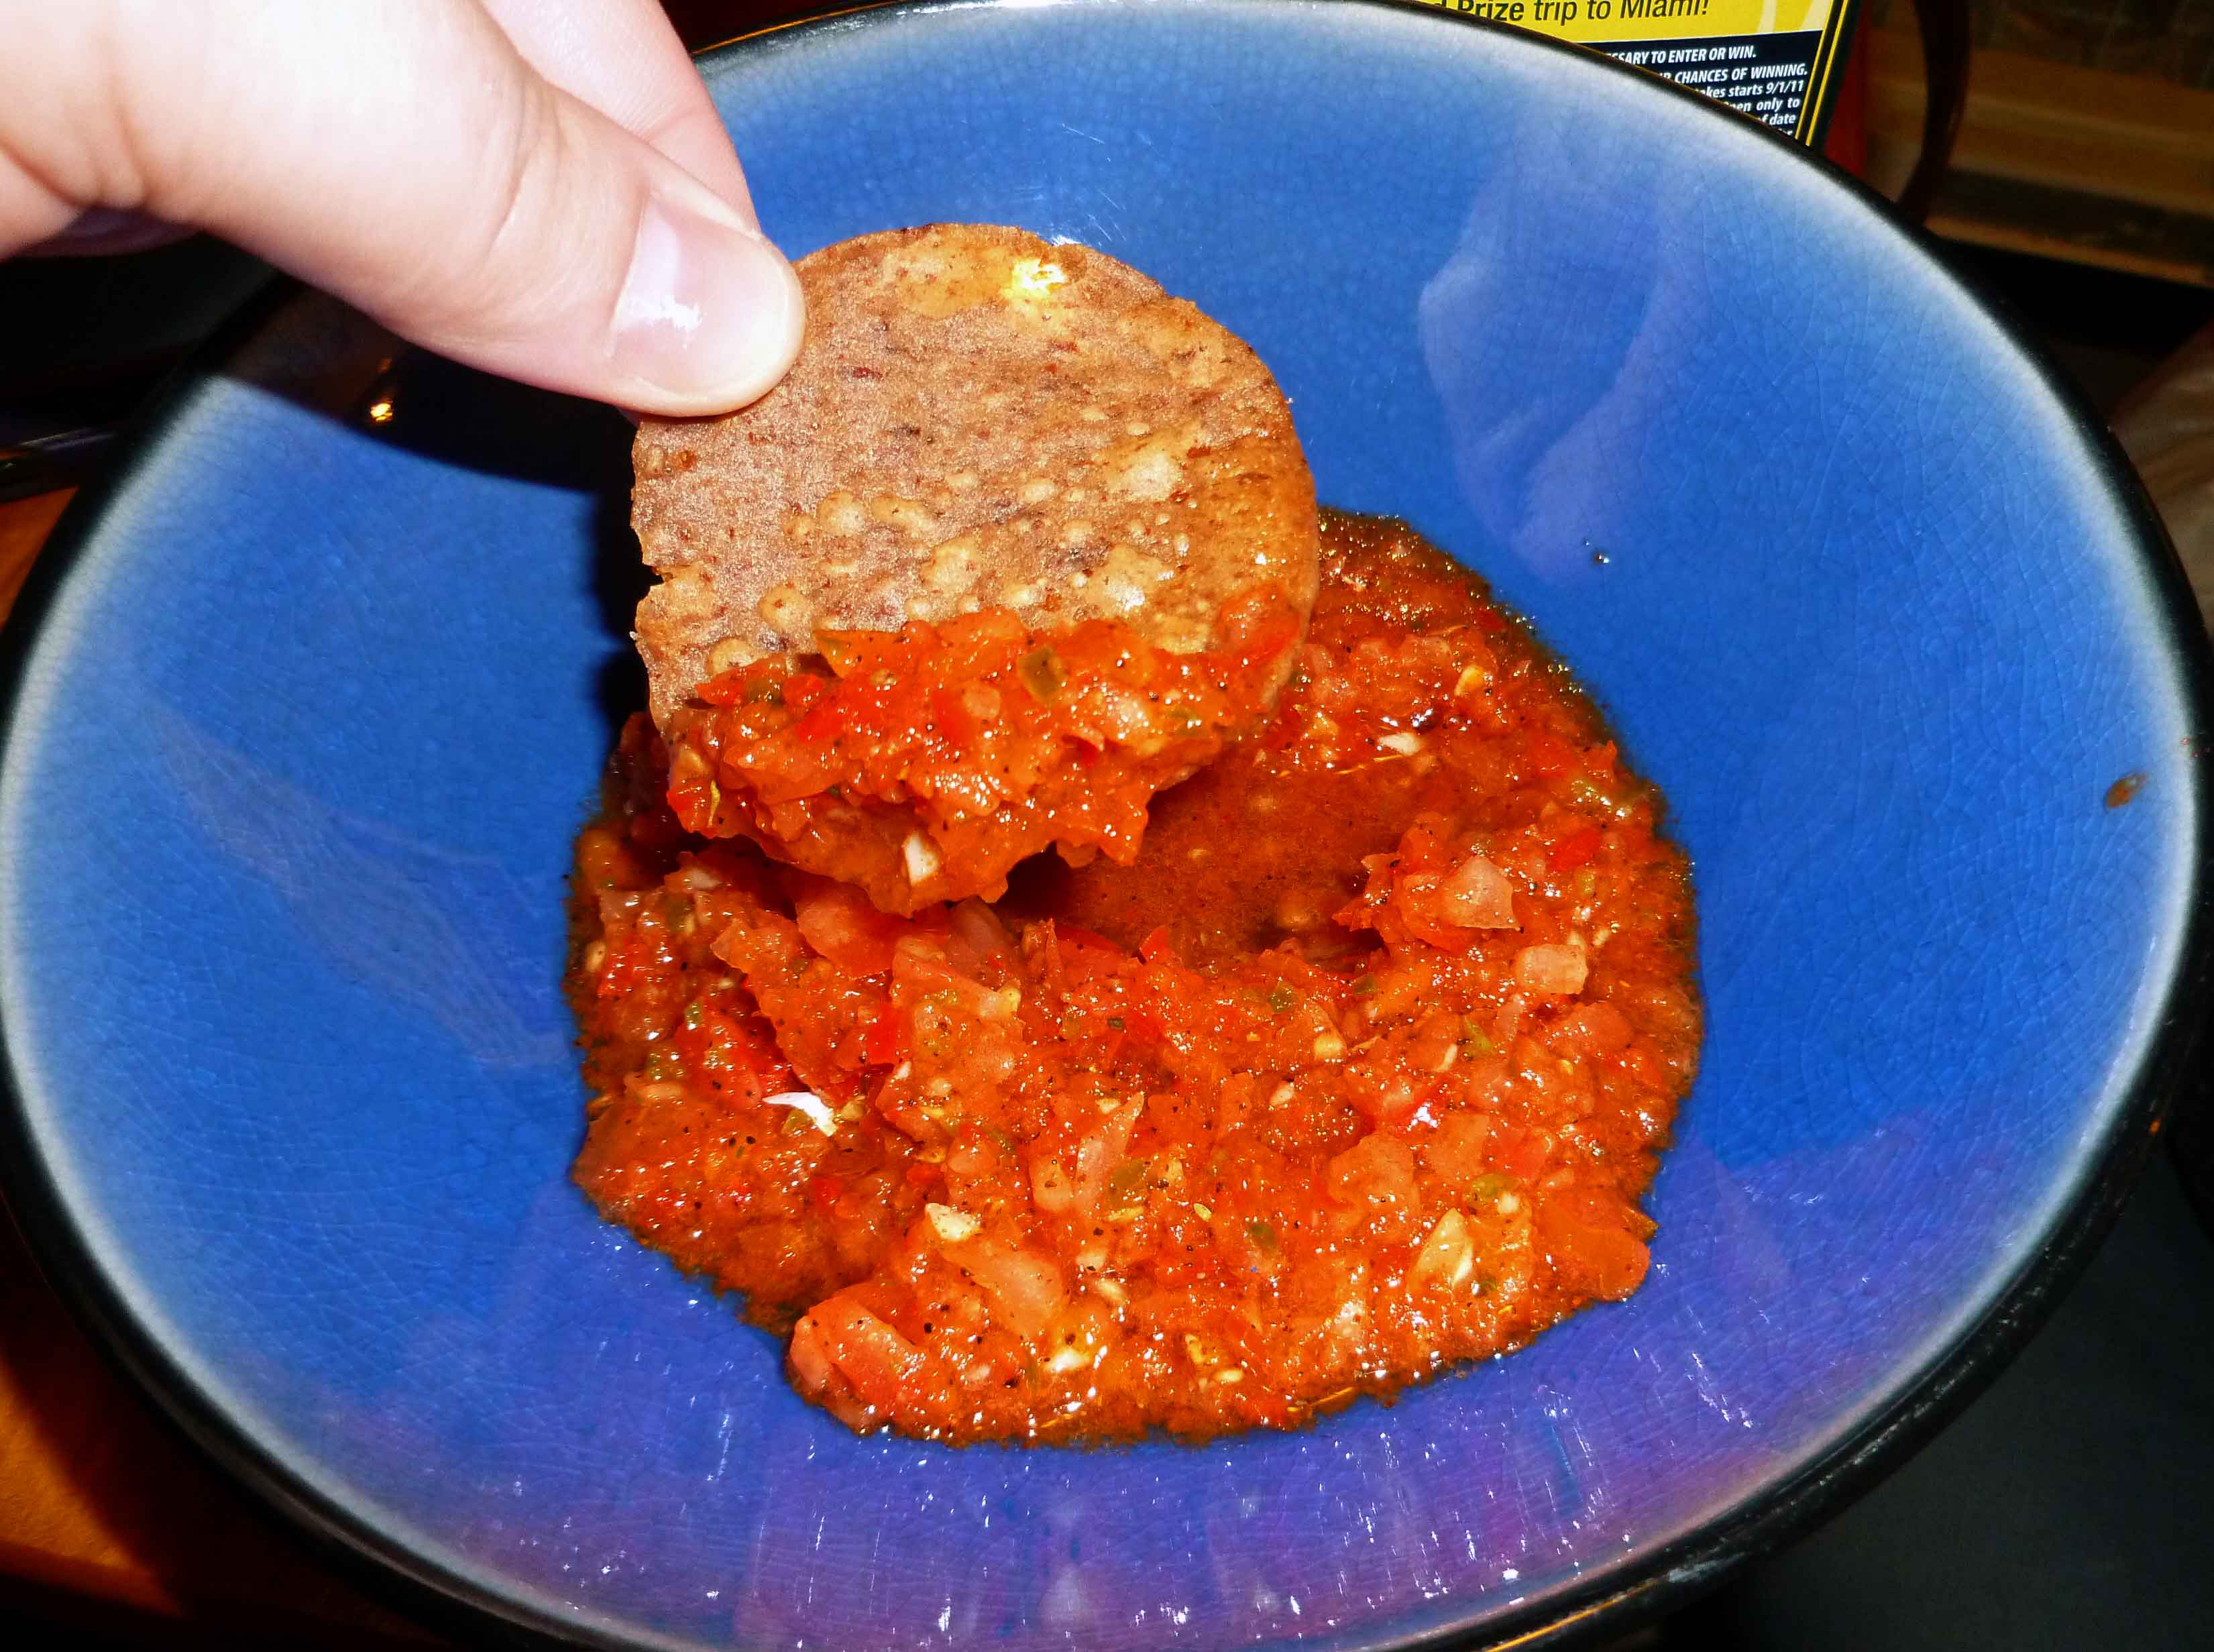
Since I also cannot buy salsa during this whole elimination torture thing (most have celery and onion, which are two no-no’s at the moment), I whipped this up so I’d have something to eat at my book group, since I’d gotten “regular” allergen-filled food for everyone else. I wasn’t going for culinary genius, but just something incredibly quick that wouldn’t be awful, based on what I had in the fridge and cupboards. And when it was done, I was surprised that it came out so well, and Mary Kate suggested I write it up on the blog. If you are not avoiding onion, you can add an small onion to this and I’m sure it would be lovely. You need a food processor to do this one. I tried it in a blender, but I just didn’t get the result I wanted. This is also a fast one, the fifteen minutes includes washing the food processor (if you have the jar of taco seasoning made up ahead of time).
15 Minute Salsa
1 red bell pepper, de-stemmed and de-seeded, and cut into large chunks.
1 jalapeno pepper, de-stemmed and de-seeded, and cut into large chunks.
4-5 cloves of garlic, peeled with the stem end trimmed
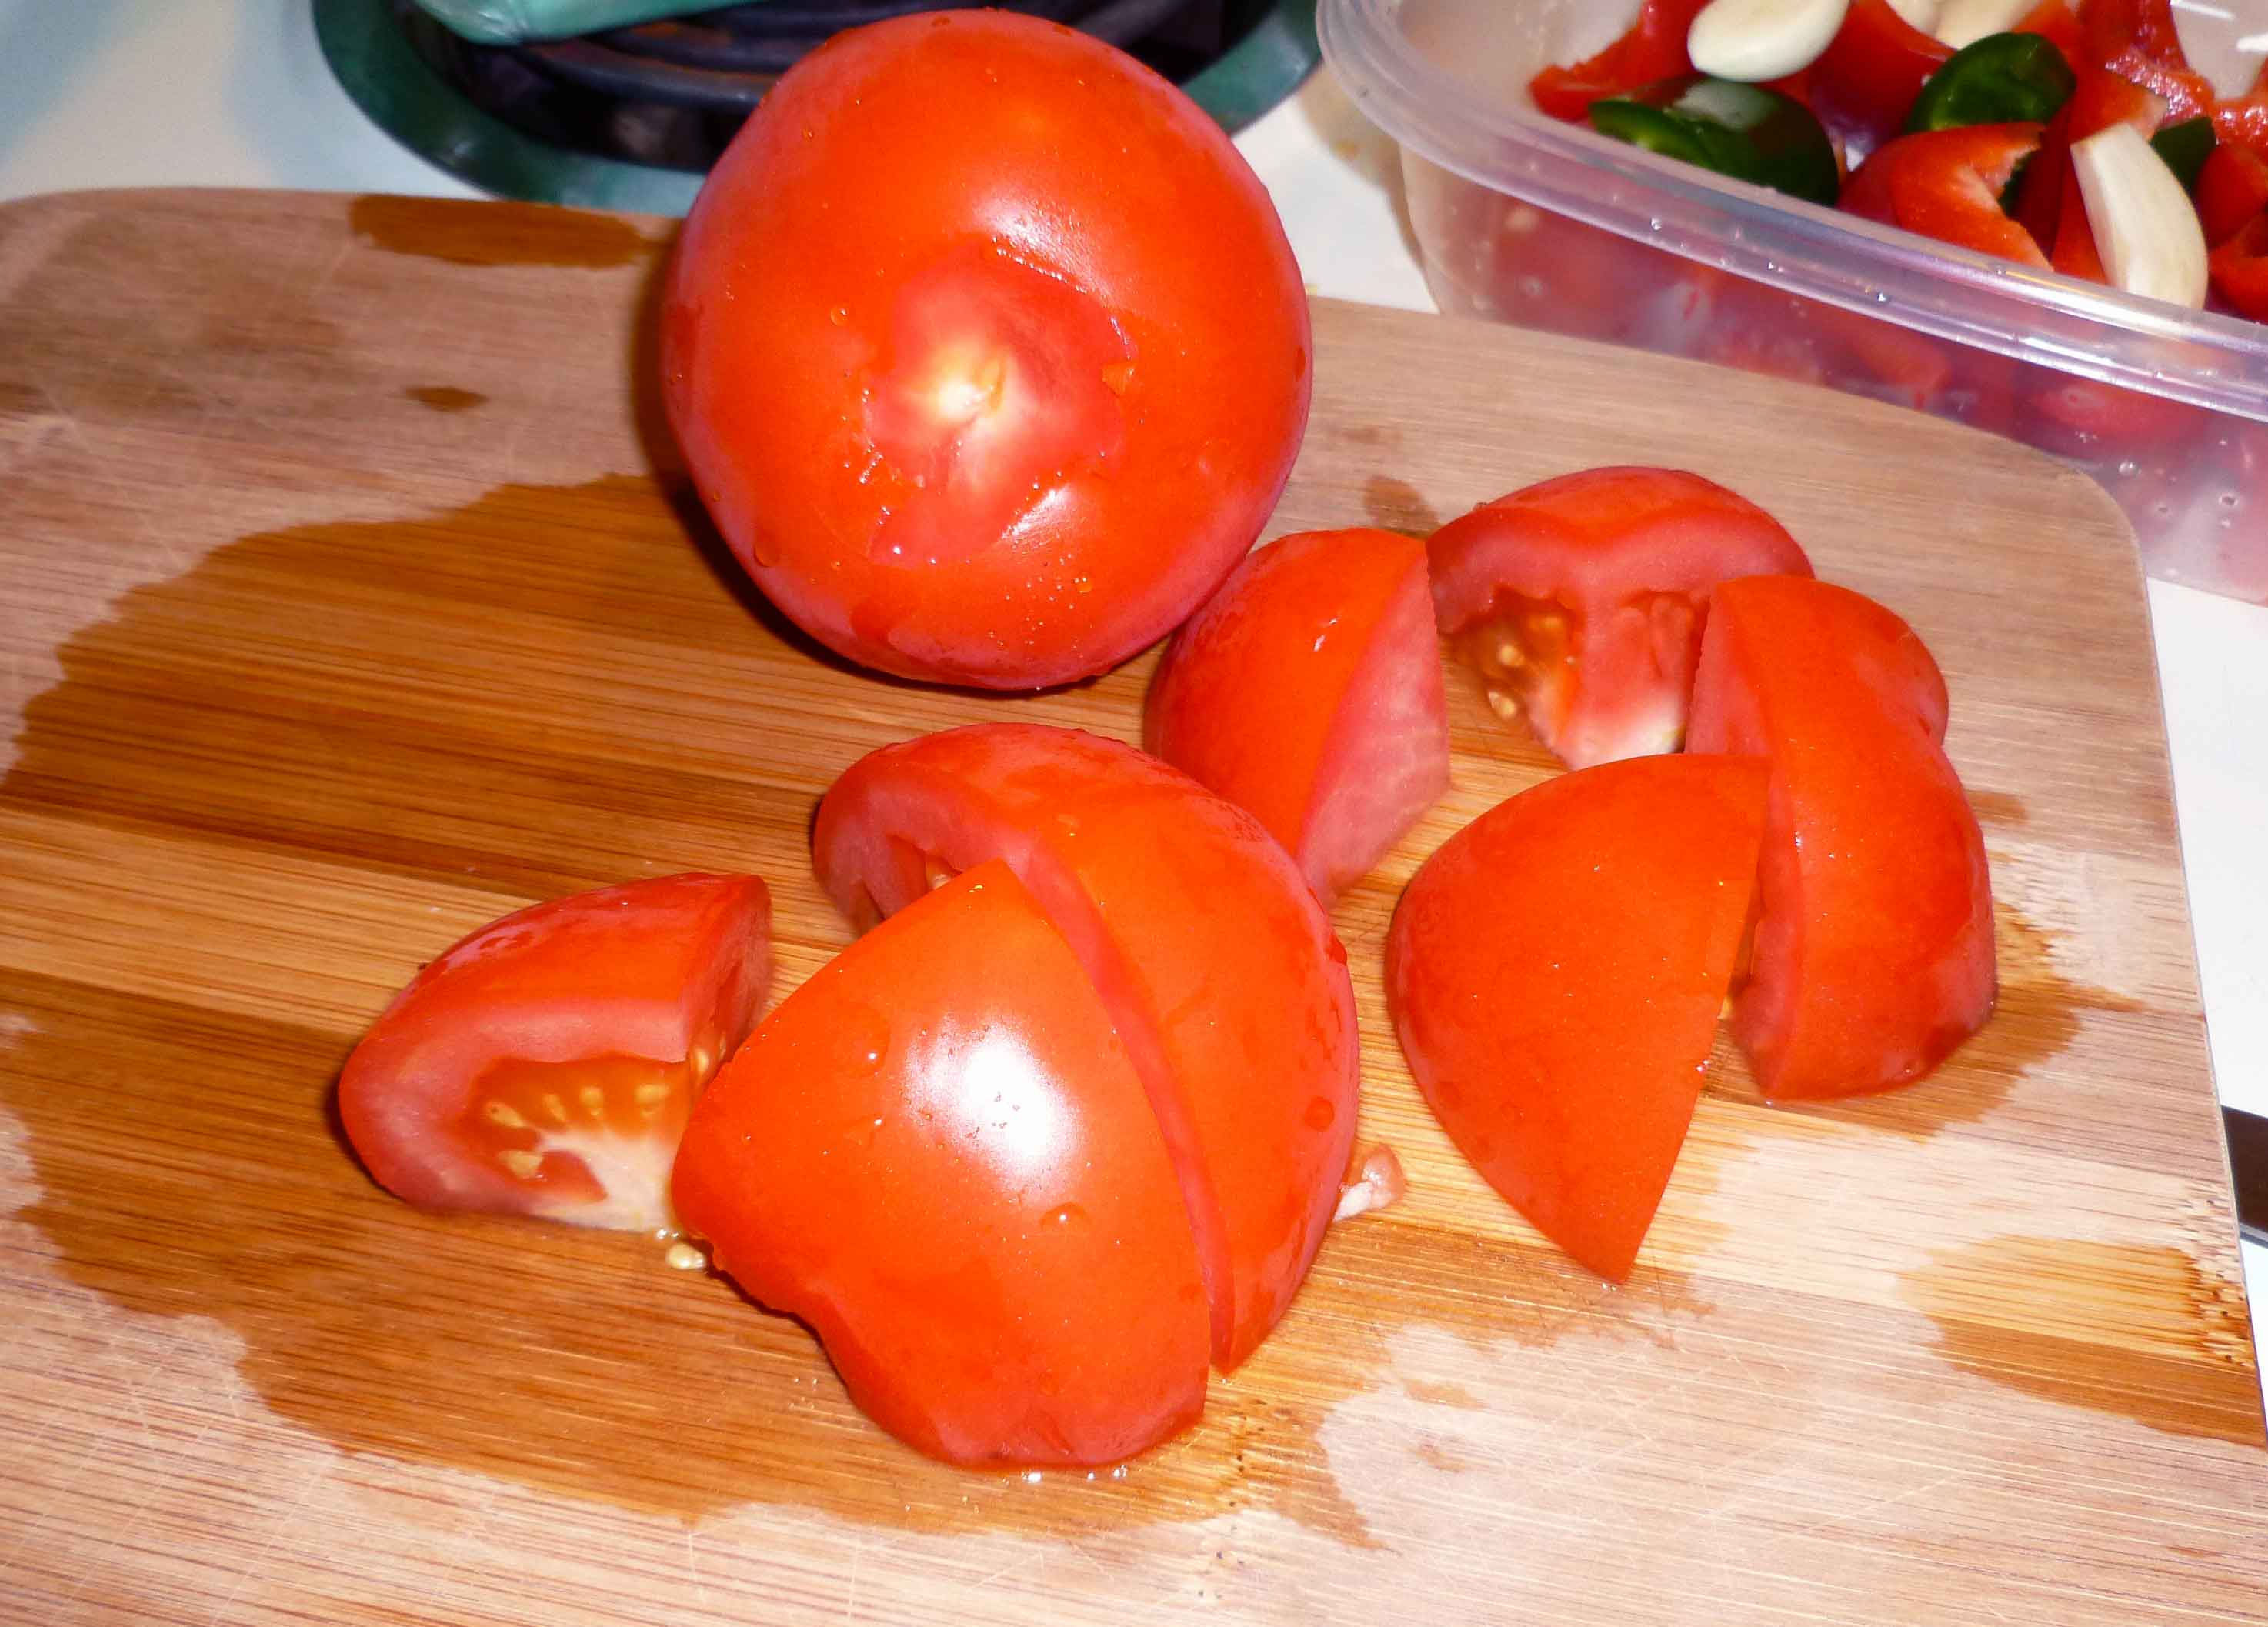
5 tomatoes, stem end trimmed, and cut into eighths (I don’t seed my tomatoes because I don’t mind seeds, but if you do, feel free to take them out, but you might want to add another tomato)
De-stem, de-seed and cut red bell pepper and the jalapeno pepper into chunks. Trim stem ends of garlic.
Red bell pepper, jalapeno pepper and garlic
Core tomatoes and cut them into eighths.
Tomatoes, showing cored and cut into eighths
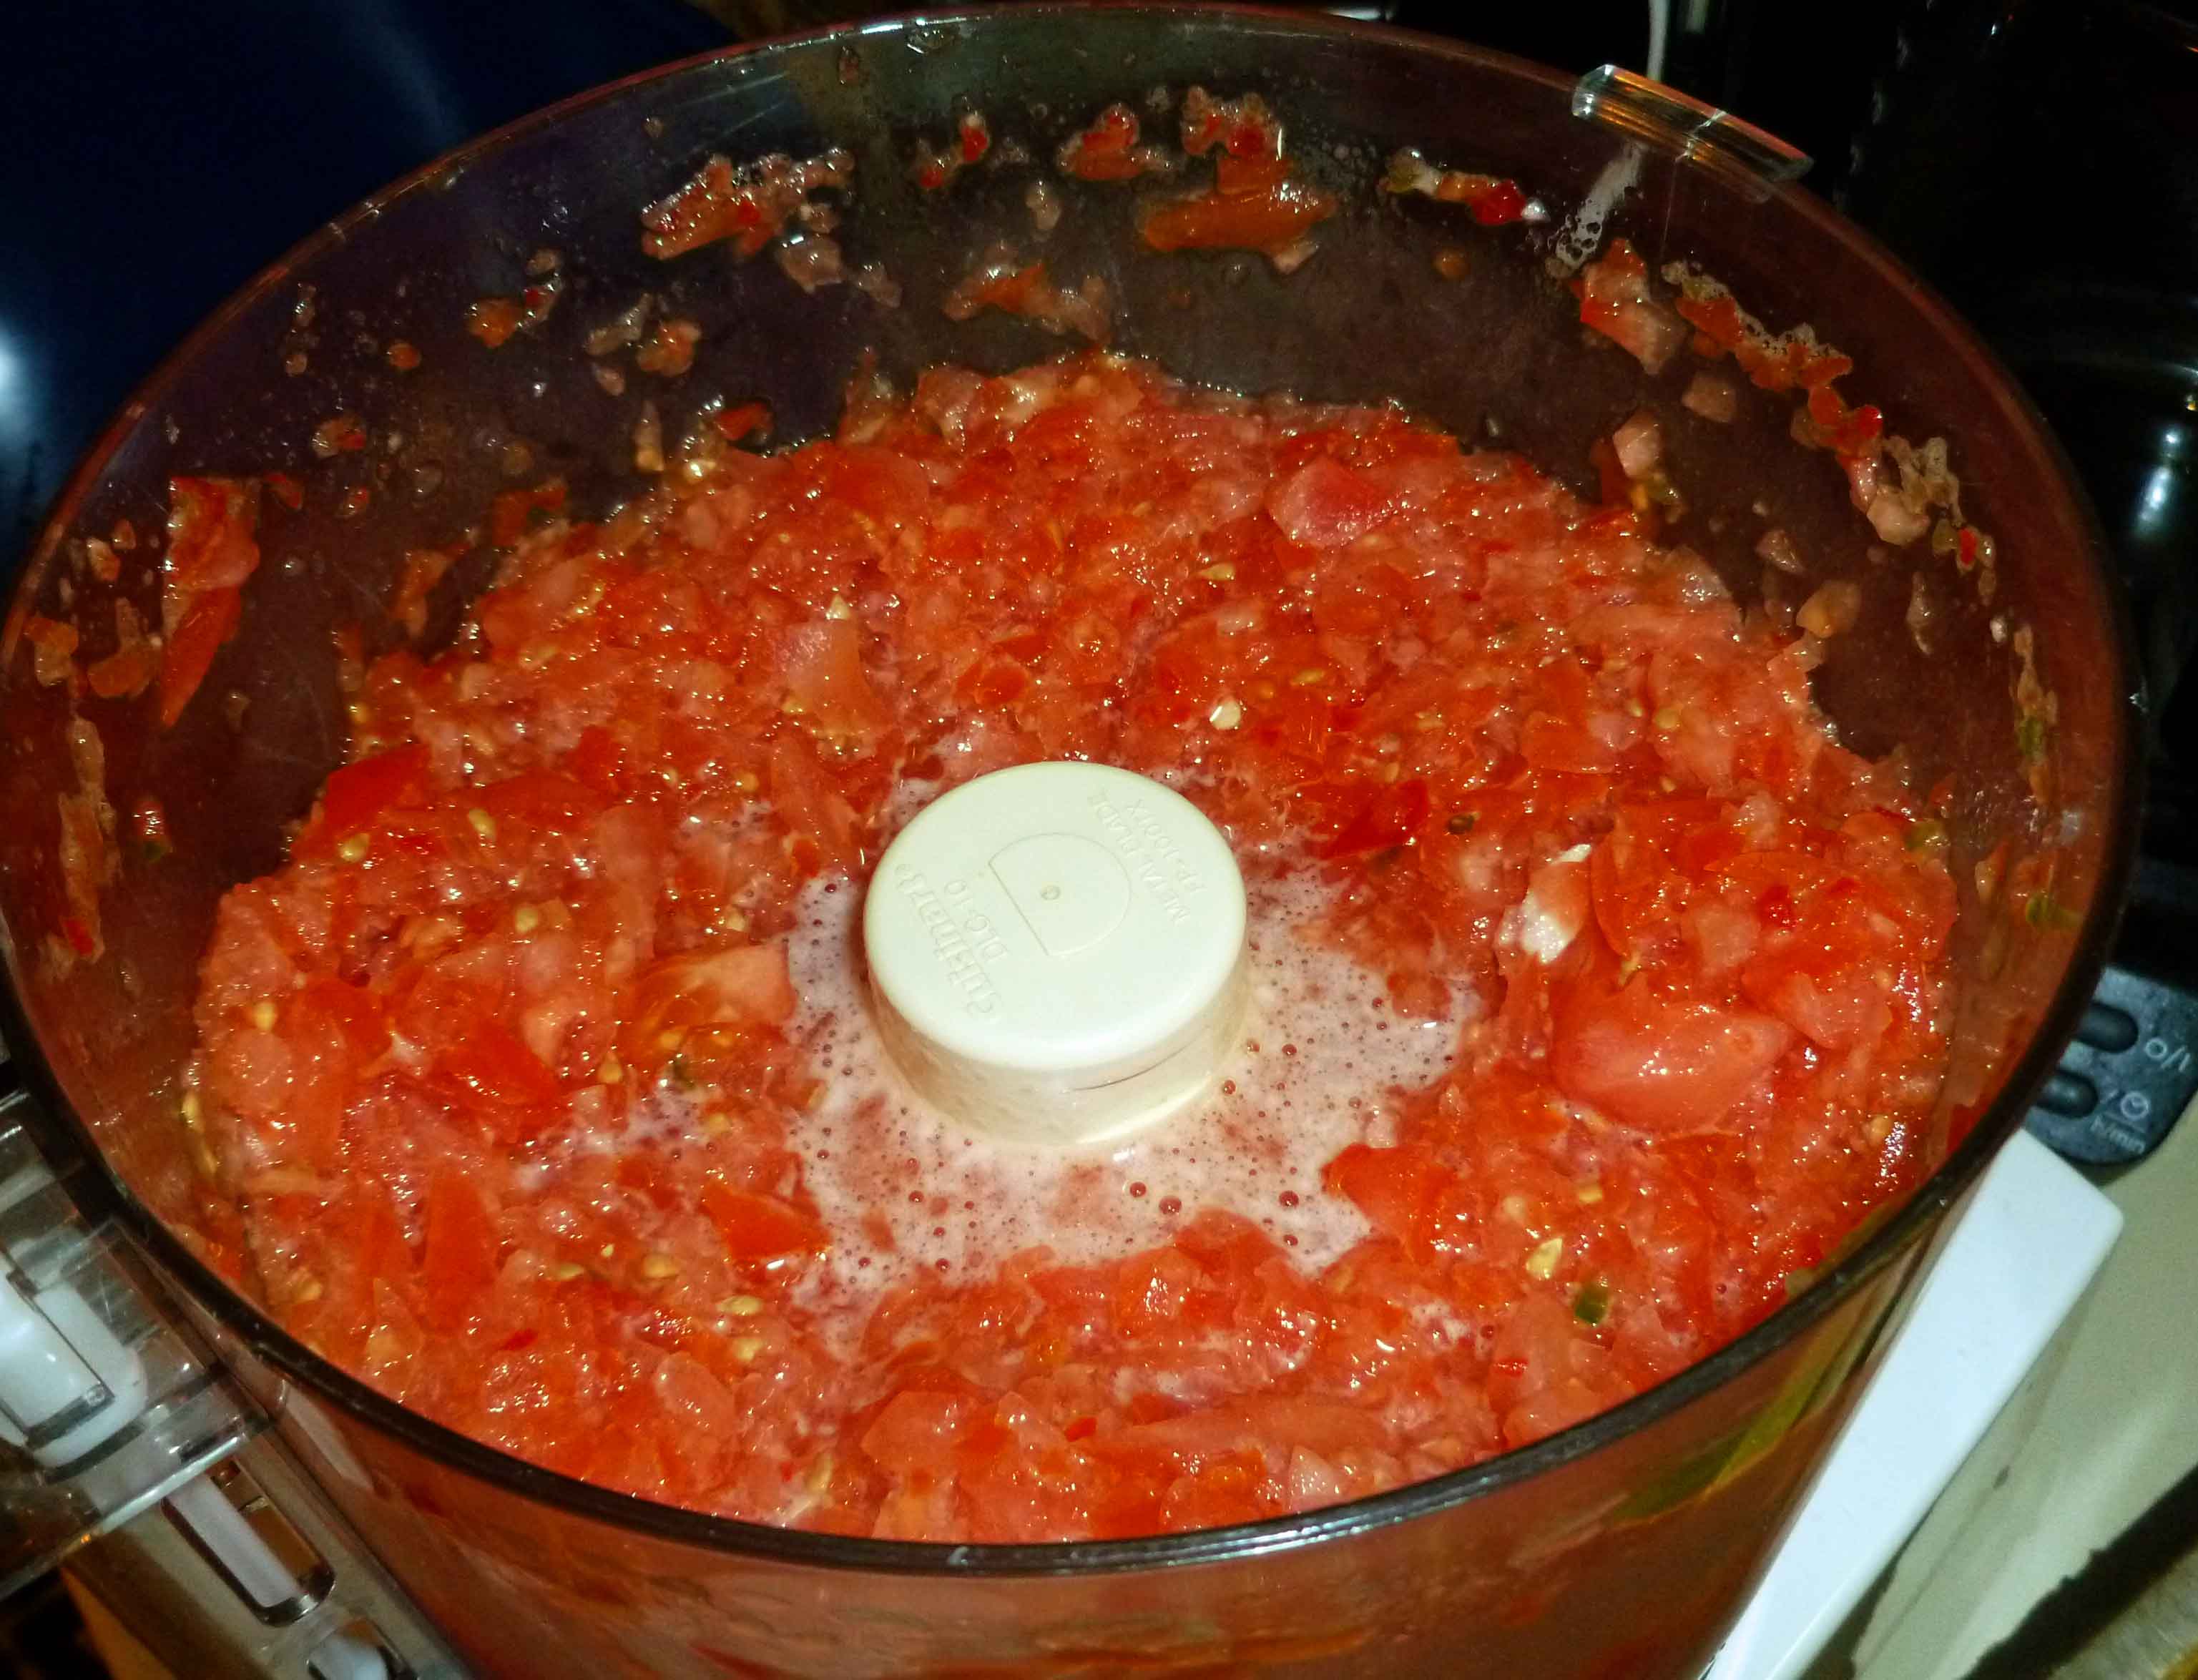
Put peppers, garlic and tomatoes into your food processor. You may need to do this in batches, I have to because my food processor is on the small size. Have a large bowl read to dump your batches in. Pulse until you get the consistency you like. I prefer it a little more processed.
Salsa in food processor
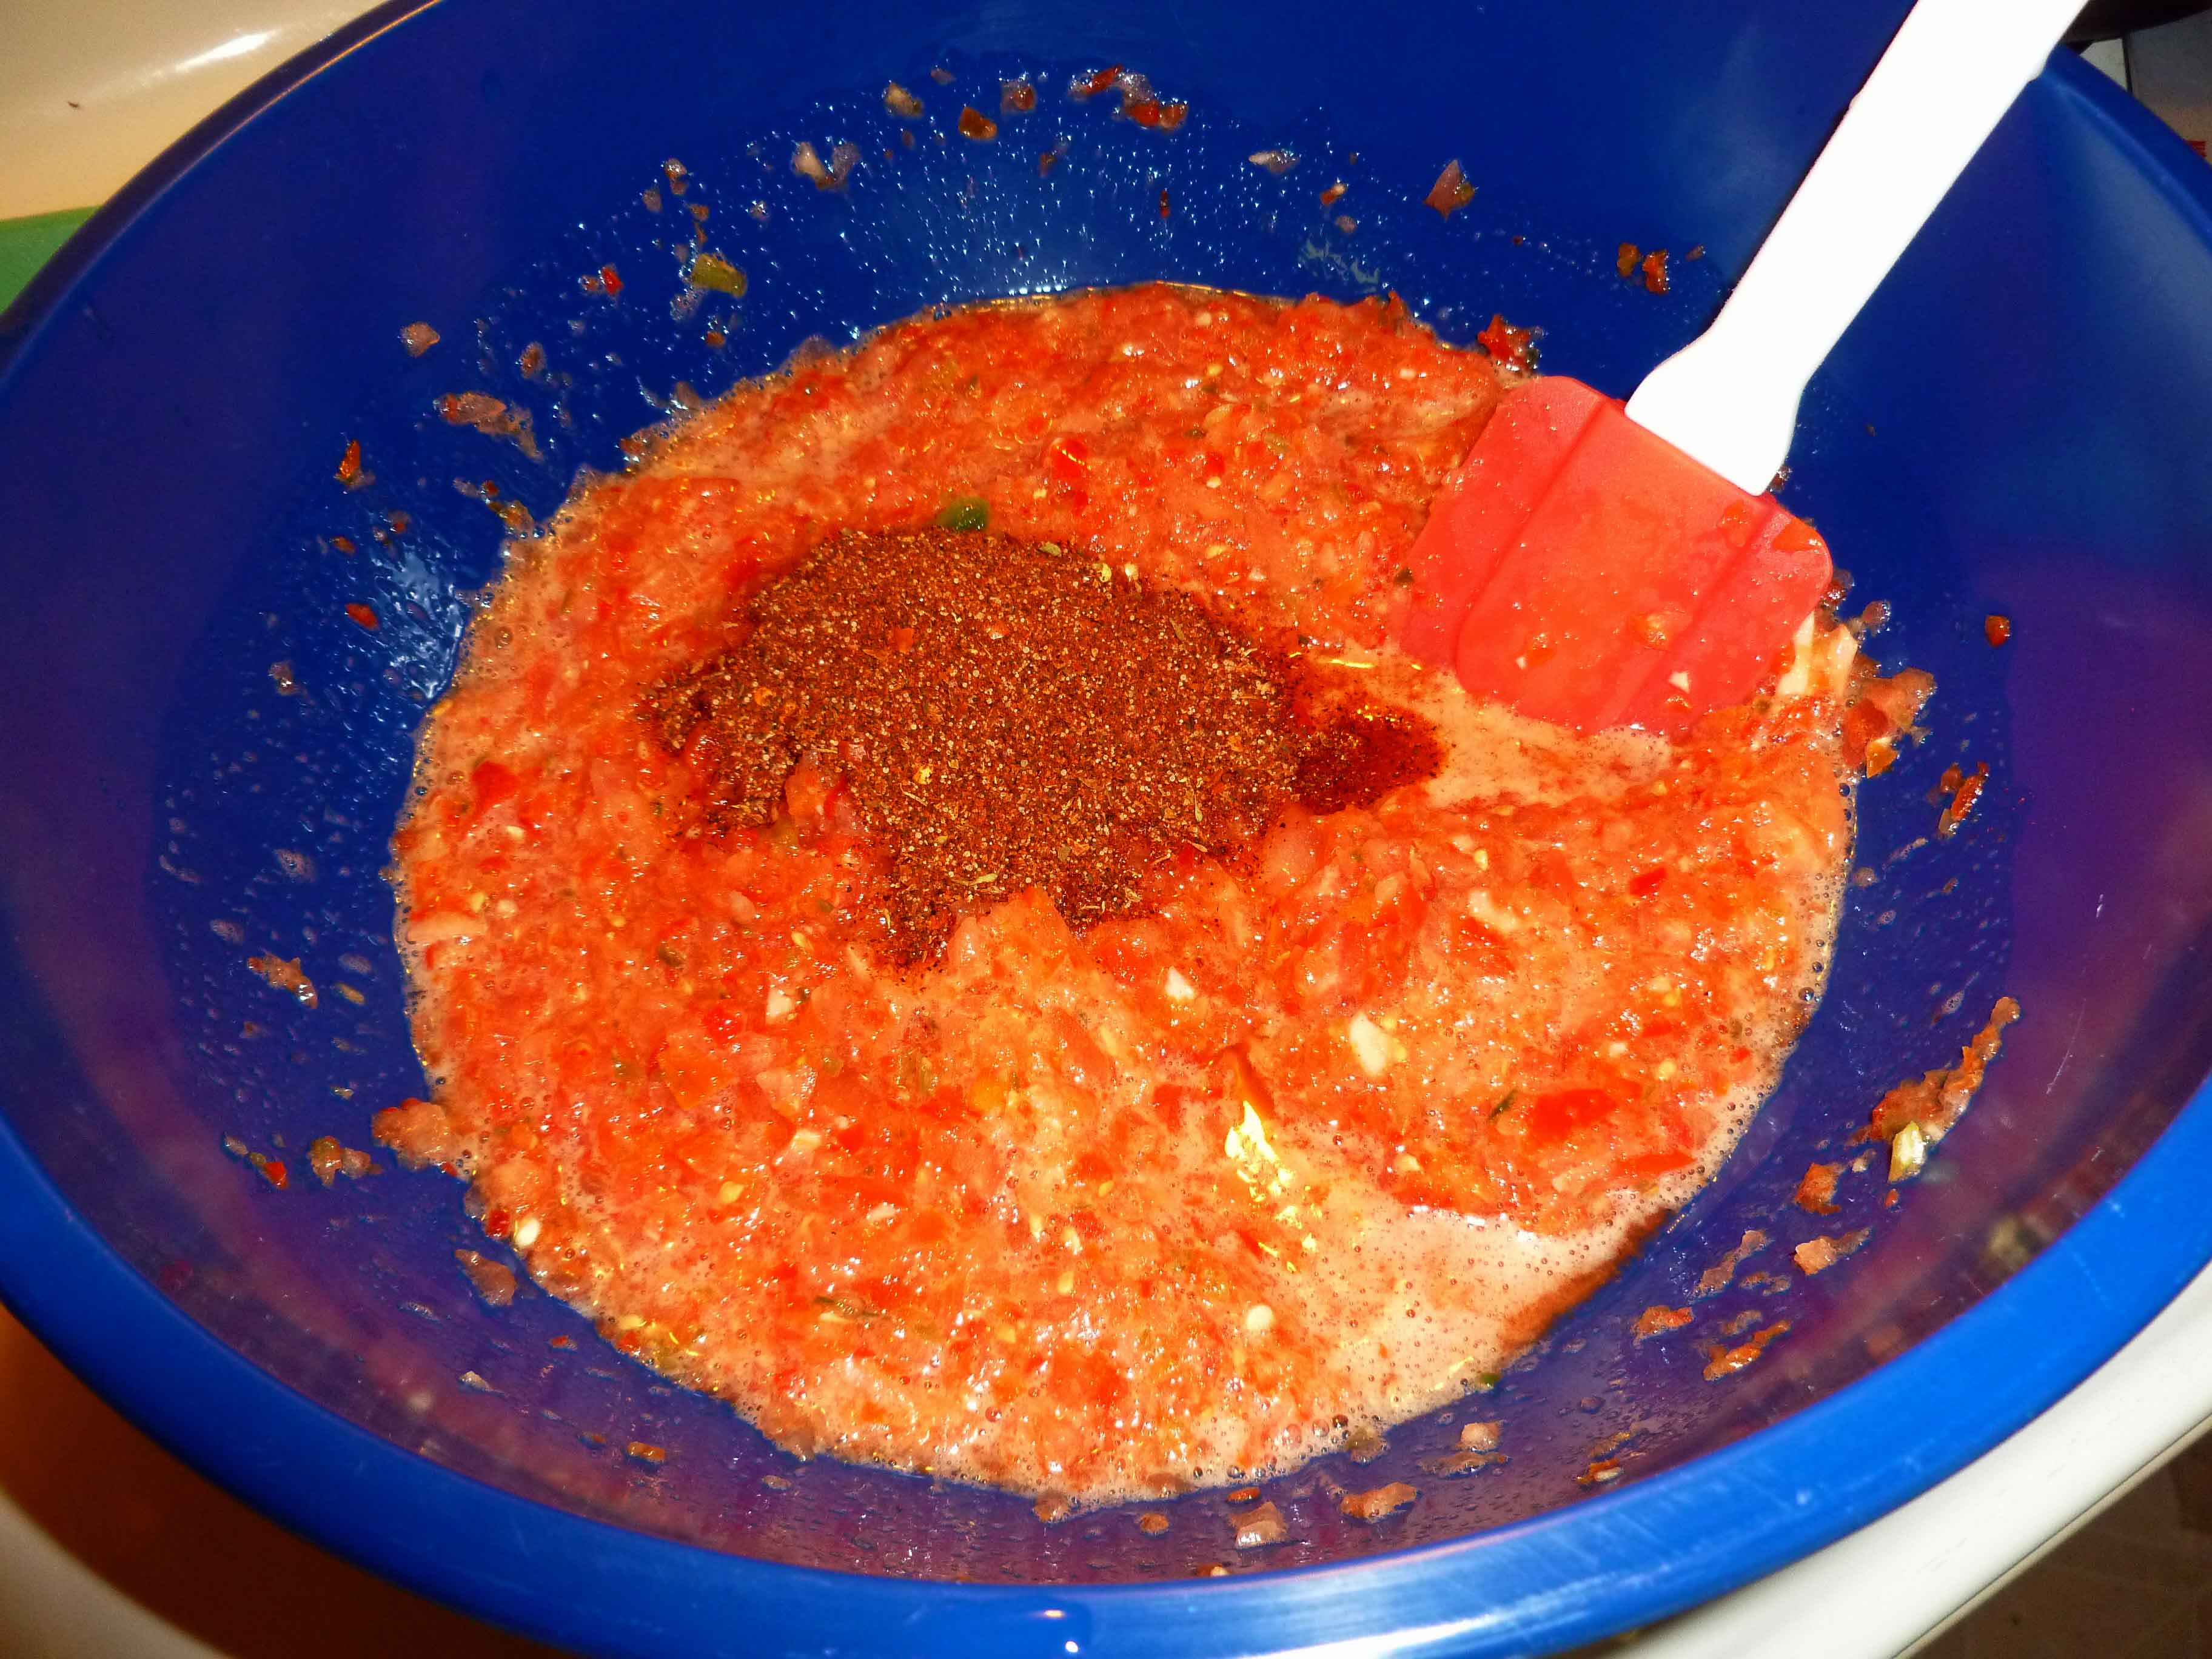
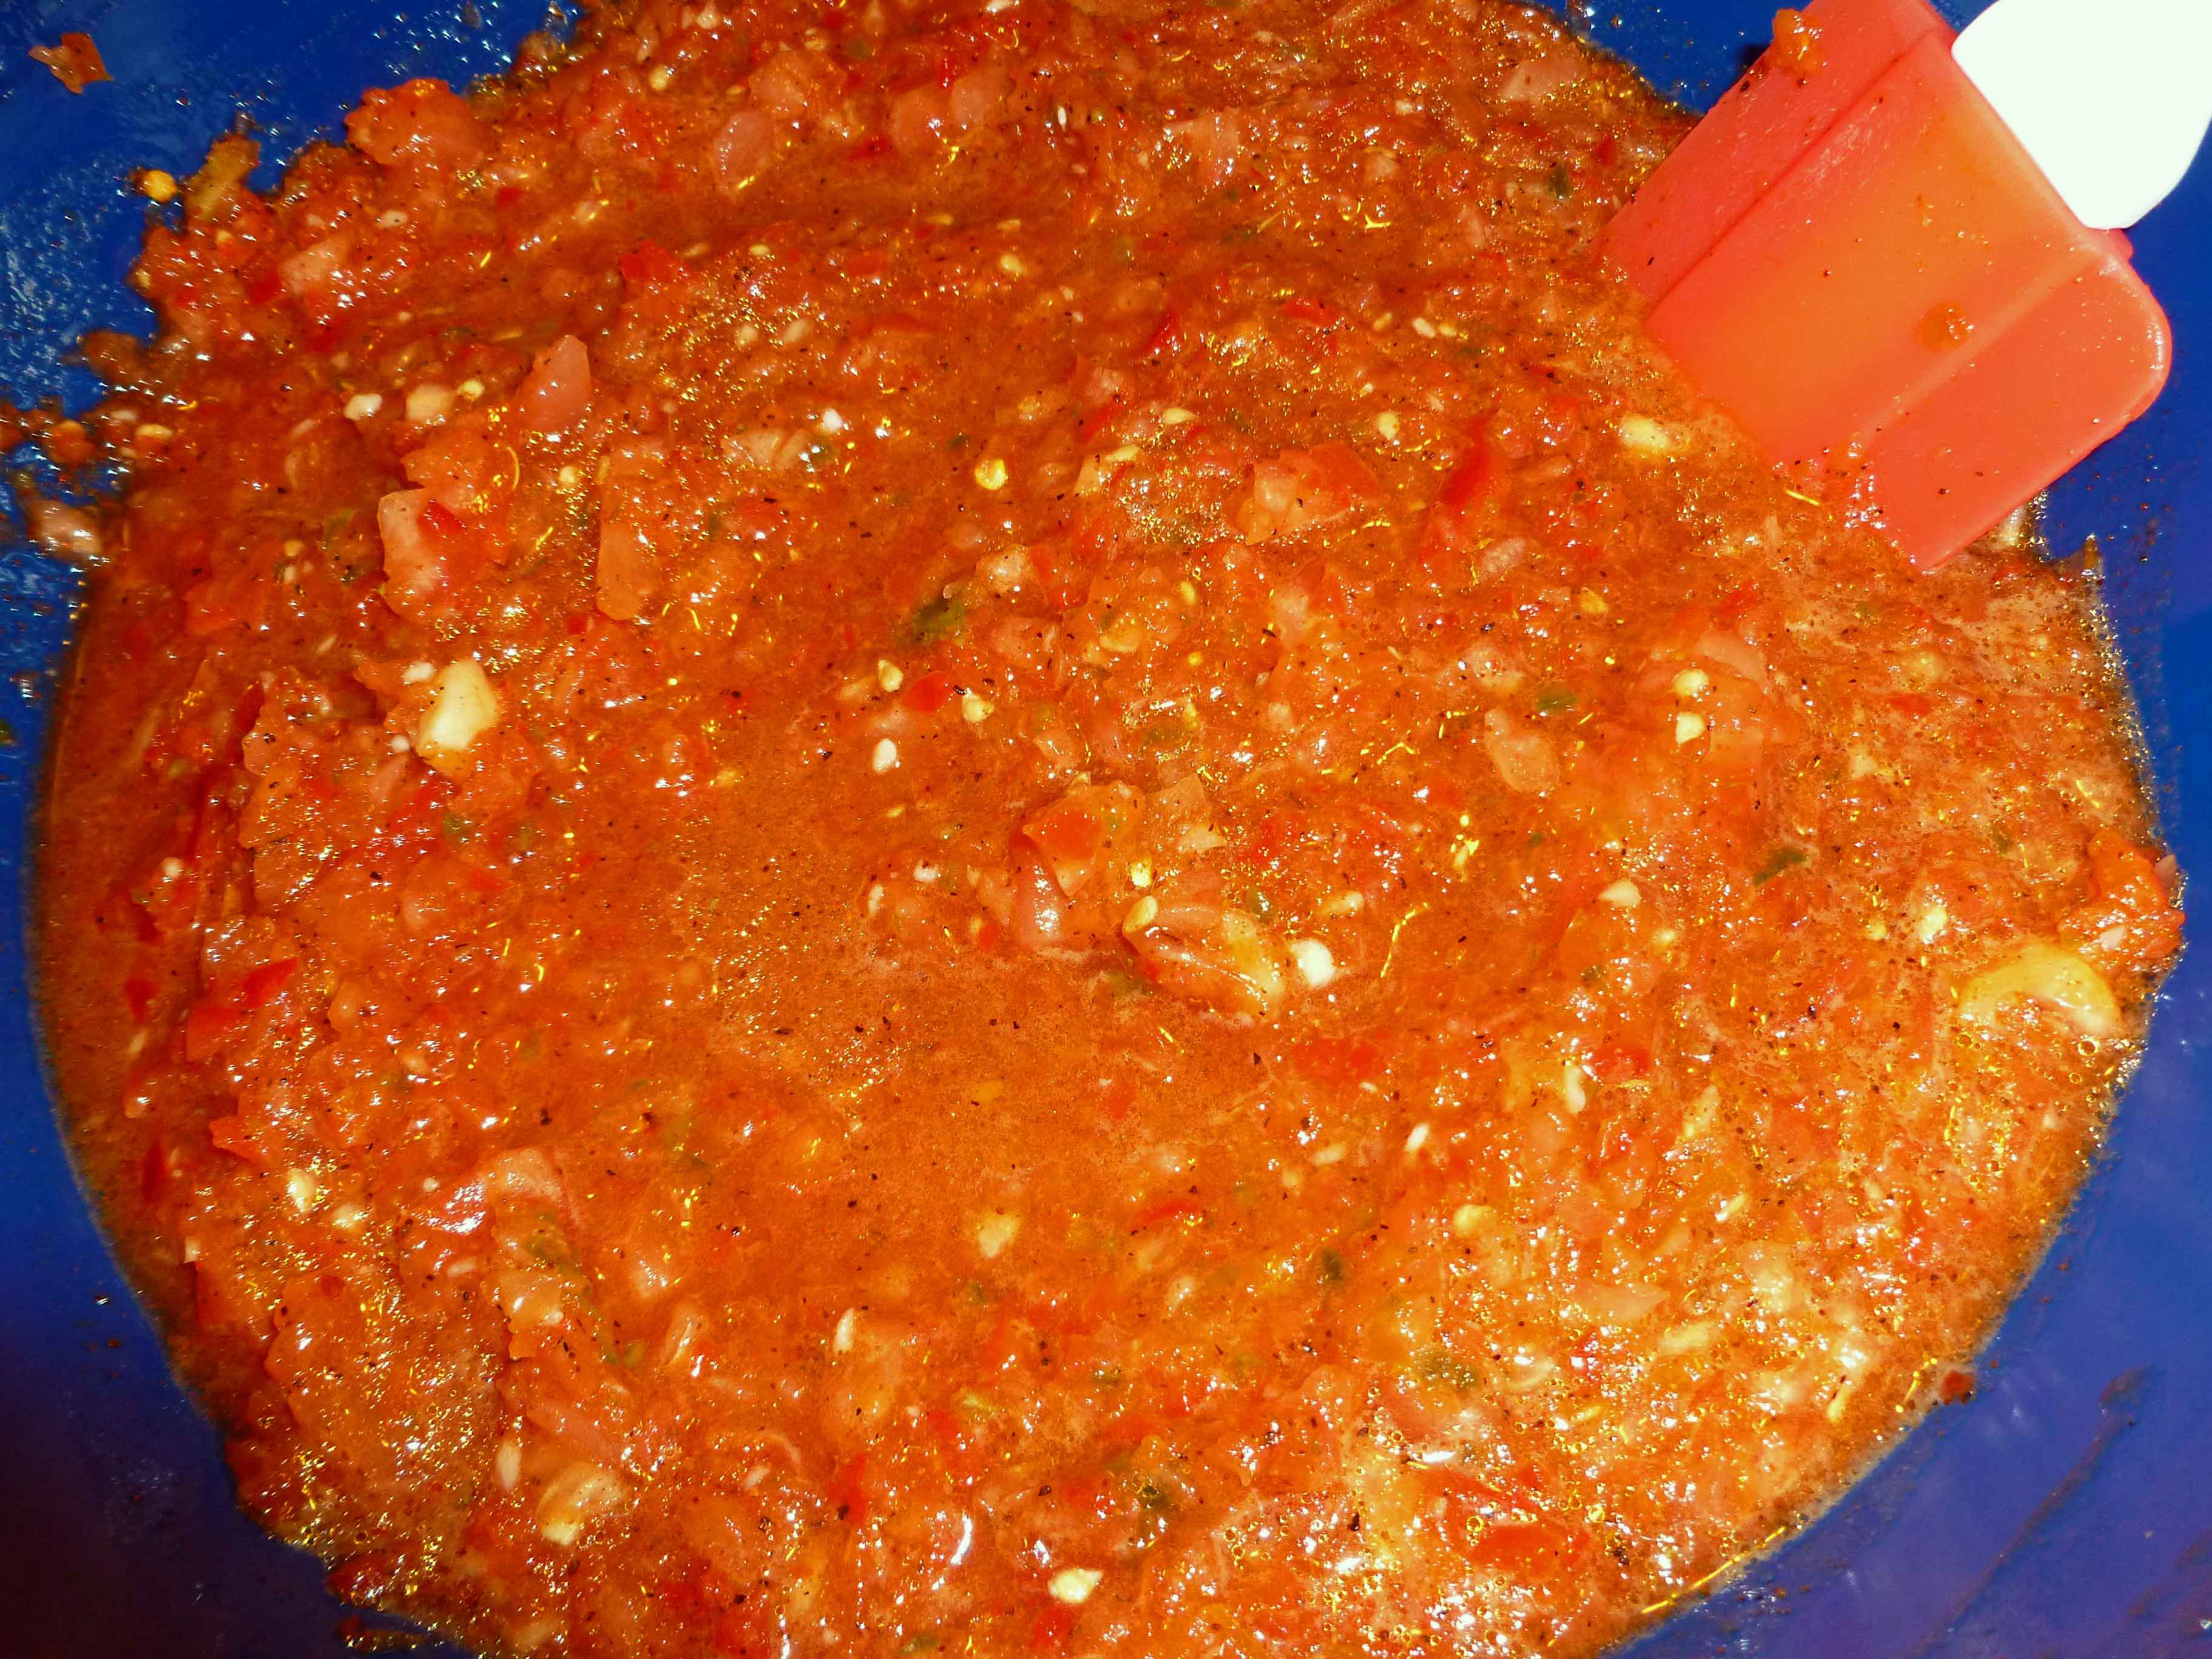
Once you have all your processing batches in the large bowl, stir it well so that all the peppers, garlic and tomatoes are well mixed through out the salsa. Your veggies may look a little frothy, but that’ll sort out once you add the remaining ingredients. Add the taco seasoning, red wine vinegar, and olive oil.
Salsa before seasoning, vinegar and oil are mixed in.
Mix all the ingredients together with a spatula making sure that all the spice mixture gets evenly distributed. This makes about 5-6 cups of salsa so it’s a great recipe for a party. Enjoy!
It’s summer. It’s too hot to cook, but you need a mid-afternoon snack to get you through until dinner. Or it’s breakfast time but it’s 90 degrees in your apartment and food seems, well, heavy. There is a super simple solution to this cooking dilemma: Smoothies, people, smoothies.
I go through smoothie phases. I make them for a while, then get stuck in a rut, and then rediscover them. I’m personally a fan of really simple smoothies that rely primarily on actual fruit, maybe with some yogurt or milk (non-dairy, of course), and generally as few ingredients as possible. I’ve done the green smoothie thing occasionally, and I’ve followed recipes and master recipes. Mostly, though, it’s a way to dump all the stuff in the fridge into a simple healthy creation that just requires a blender.
With this ridiculously simple recipe, a little prep work will give you a snack that taste like the ice cream truck of your childhood just stopped by.
The MANY ingredients
Creamsicle Smoothie
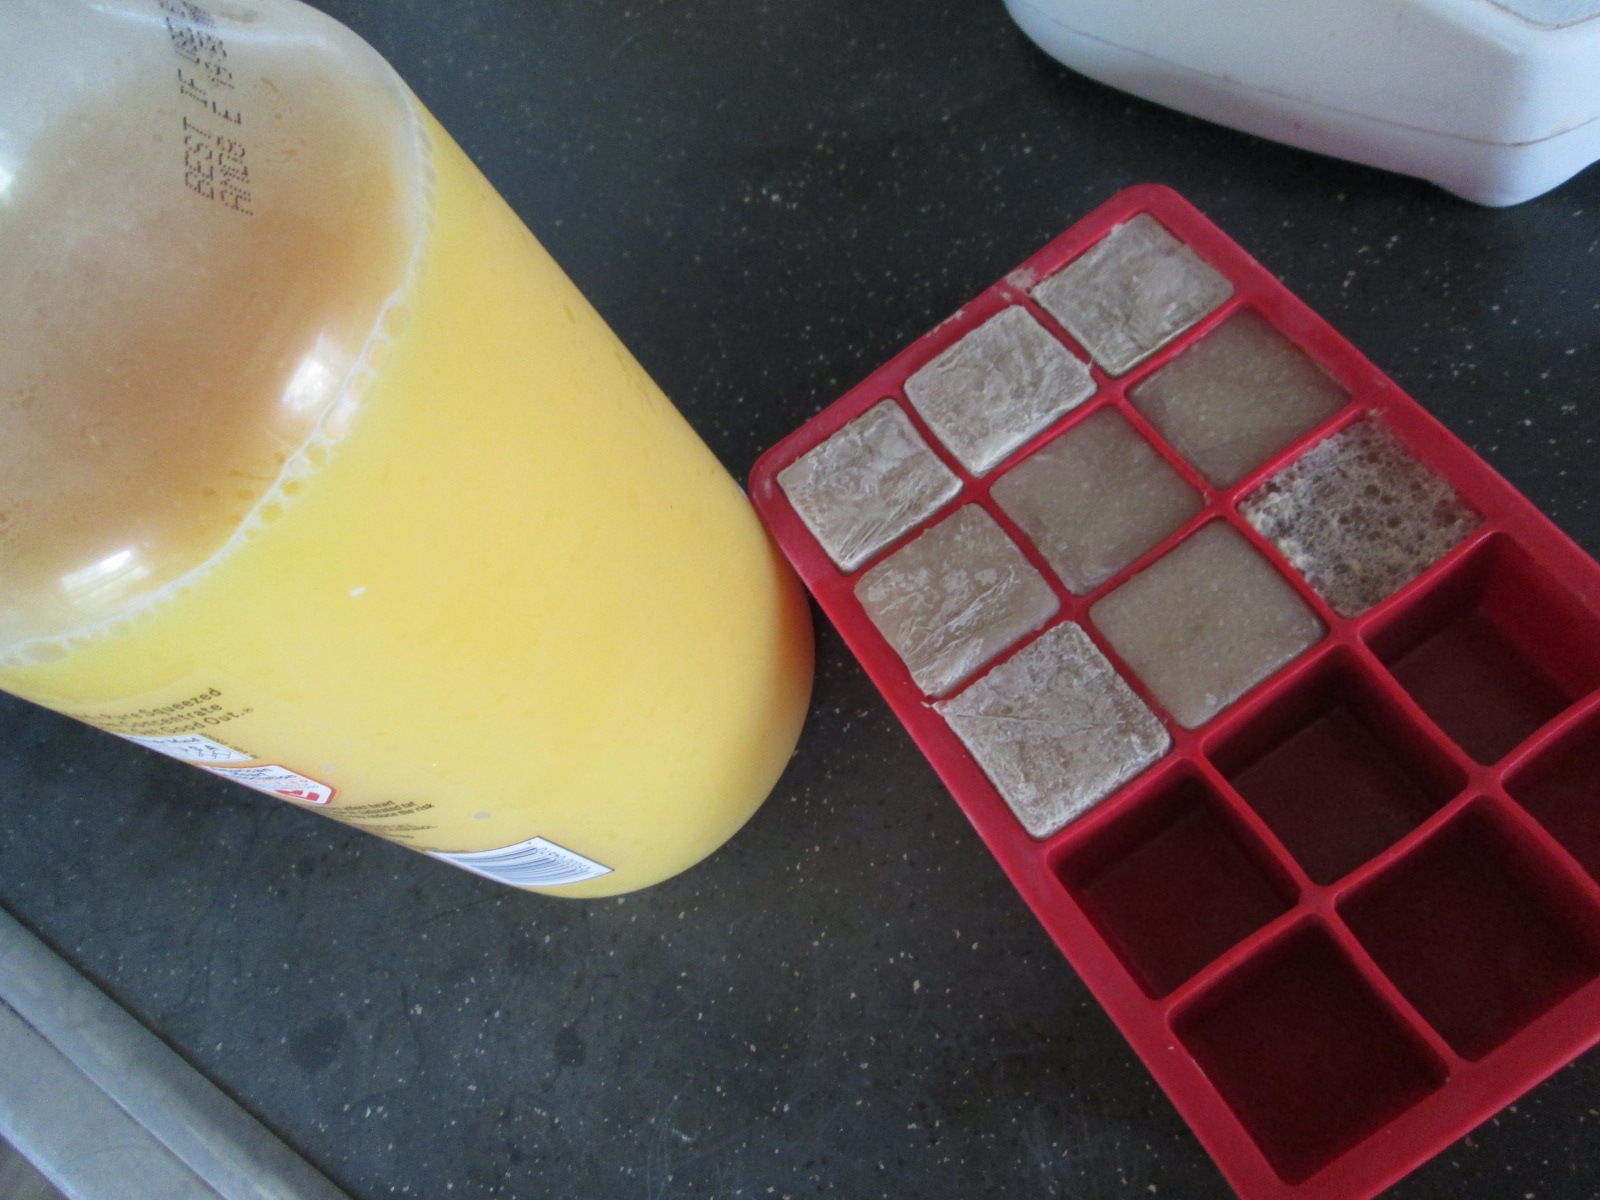
PREPARE AHEAD: Freeze some of your favorite vanilla non-dairy milk* in ice cube trays.**
*Note 1: You can use any non-dairy milk. You can probably even use cow’s milk, but frankly, then, go buy yourself a creamsicle! I have used almond milk, primarily, in the vanilla, unsweetened variety. I am sure soy or rice will work, too. This recipe can be nut-free and soy-free, if you want.
**Note 2: Measure your ice cube trays. I freeze a lot of ingredients in ice cube trays for ease of use later — tiny amounts of leftover broth or stock, sometimes herbs or pastes, fresh lemon or lime juice. All of my ice cube trays hold approximately 1 Tablespoon of liquid. It’s good to measure yours so that you know for the future recipes you’ll make with those ingredients.
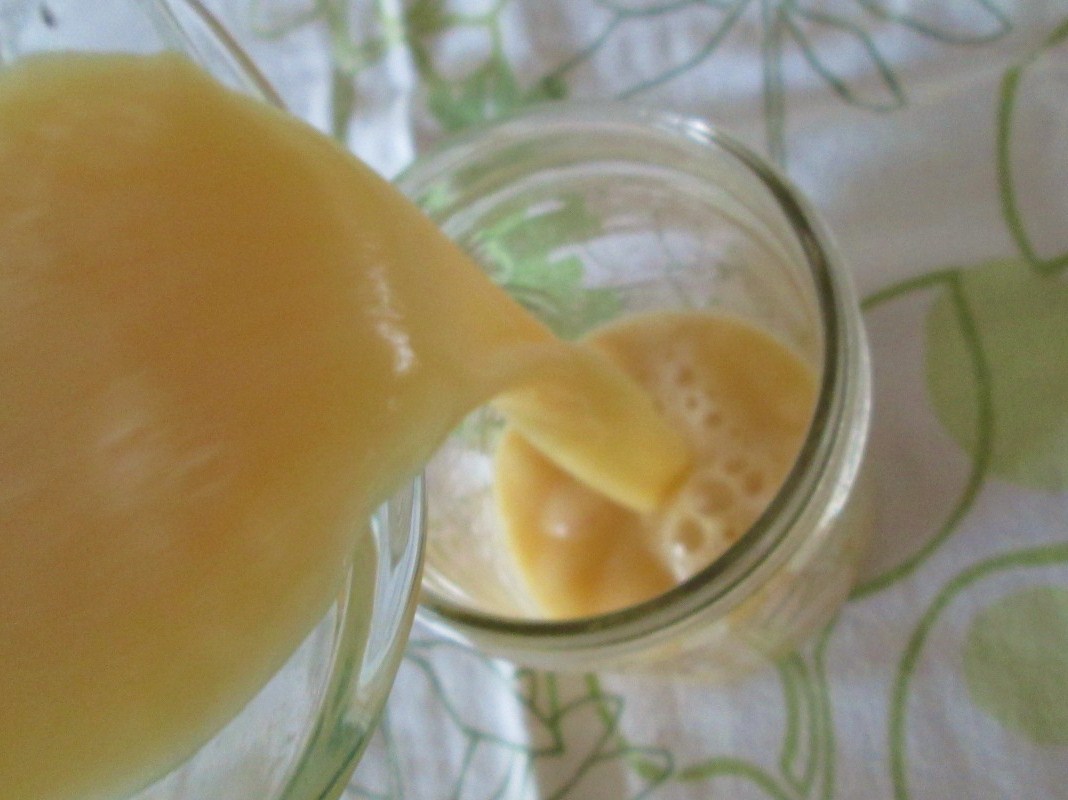
In a blender, combine:
4 Tablespoons (4 cubes) of frozen vanilla almond or other non-dairy milk
1 1/4 cup of orange juice
Blend.
Yes, seriously, that’s it. It’s really that easy and that good.
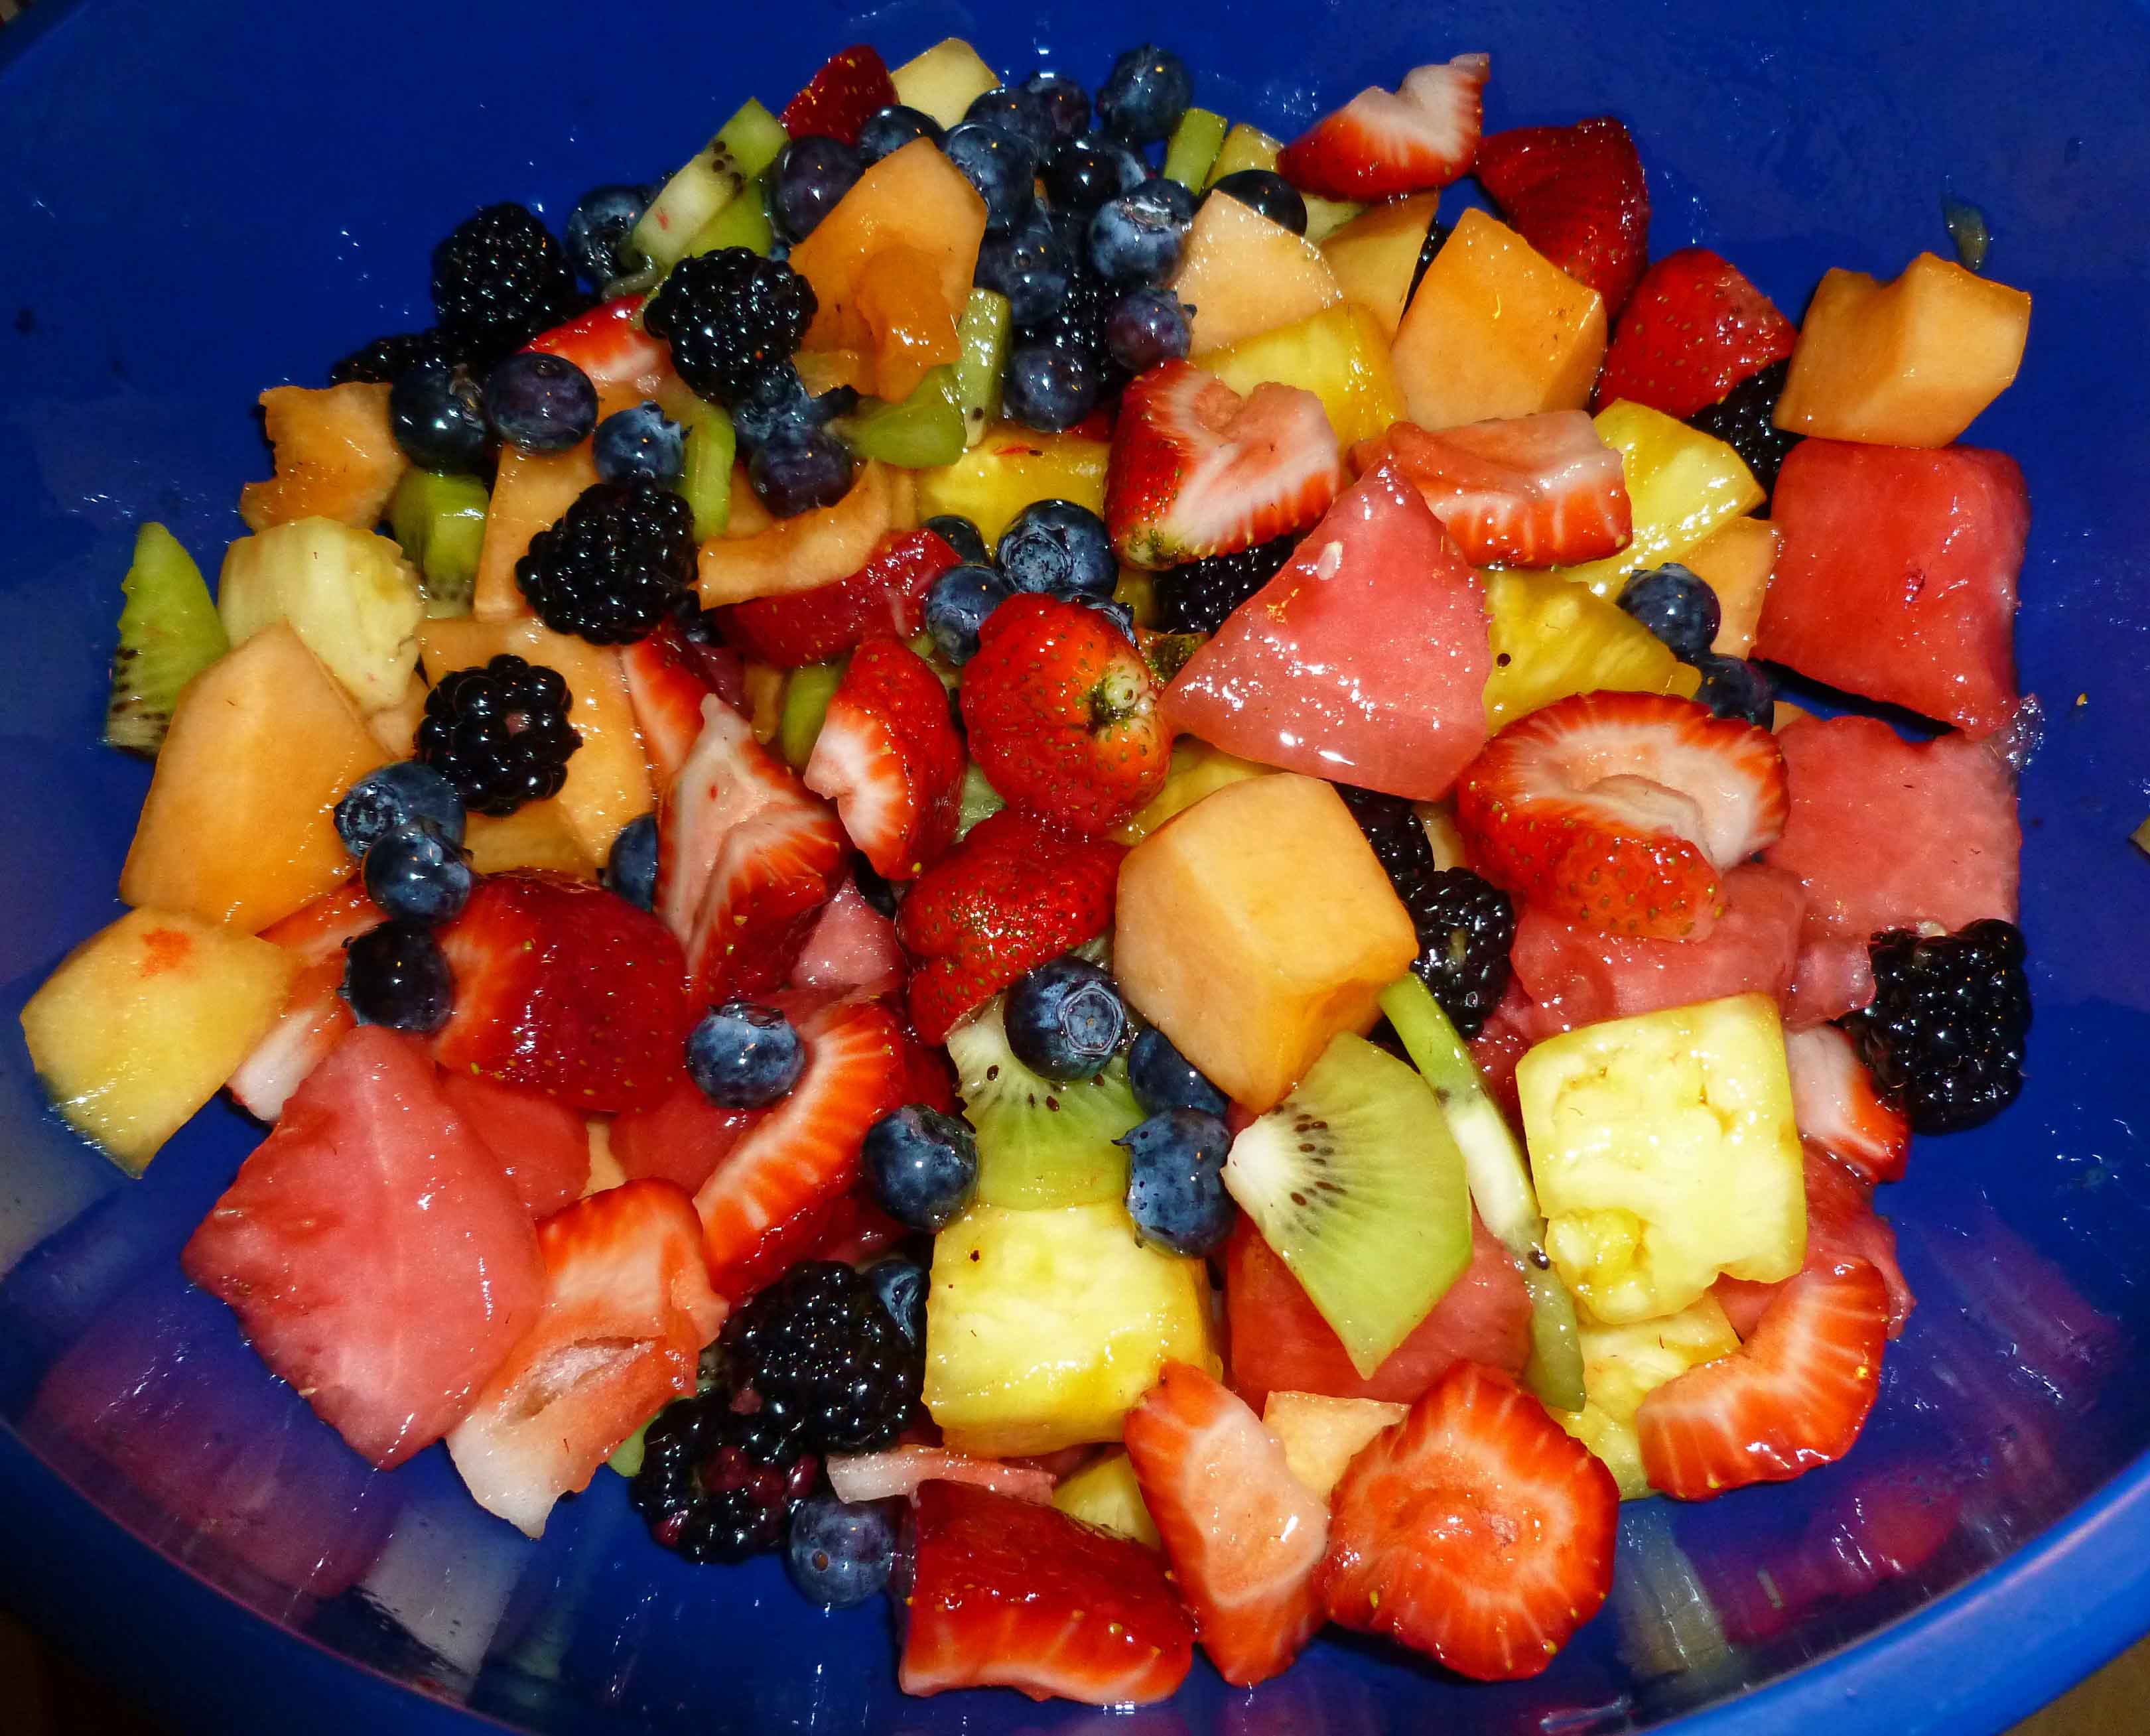
So, last weekend it snowed in New Hampshire, and this weekend it’s been 95°F all weekend. Hilarious. I don’t handle the heat well, if at all, nor do I handle the crazy freaking changes well. The humidity and corresponding air quality in New Hampshire has been known to send me right into an asthma attack. We’ve got the air conditioners cranked, but I don’t want to heat the apartment up any more than necessary, so we’ve been eating salads and fruit. And since it’s the time of year that you might be heading to potluck type gatherings, here’s a spruced up fruit salad you can take with you. Also, this can be made much much easier by doing what I did and buying a fruit tray and some berries and using it, so you don’t have to peel melons and pineapple. You can do it the night before and let the dressing soak in, but it’s yummy either way.
Margarita Tropical Fruit Salad
1/2 cup of freshly squeezed lime juice (about 4-5 limes)
1/2 cup of agave syrup
1/2 cup of tequila
2 1/2 teaspoons of arrowroot
2 Tablespoons of water
About 6-8 cups of fruit cut in bite size pieces, filling a large salad bowl. The mixture is up to you, but I used cantaloupe, watermelon, strawberries, pineapple, kiwi, strawberries, blueberries, and blackberries.
First, wash your limes carefully under hot water to get rid of the wax they put on them. To get the most juice out of them, I’ve found two tips that really help. Put your limes in a microwave safe container and nuke them on high for one minute.
Limes in microwave safe bowl
Then put them on a cutting board, and using the palm of your hand roll the limes back and forth, putting enough pressure on them so that you can feel the lime squeeze against the board, but not enough so you break the lime against the cutting board. Now juice your limes.
Denise awkwardly rolling limes with her left while she takes pictures with her right
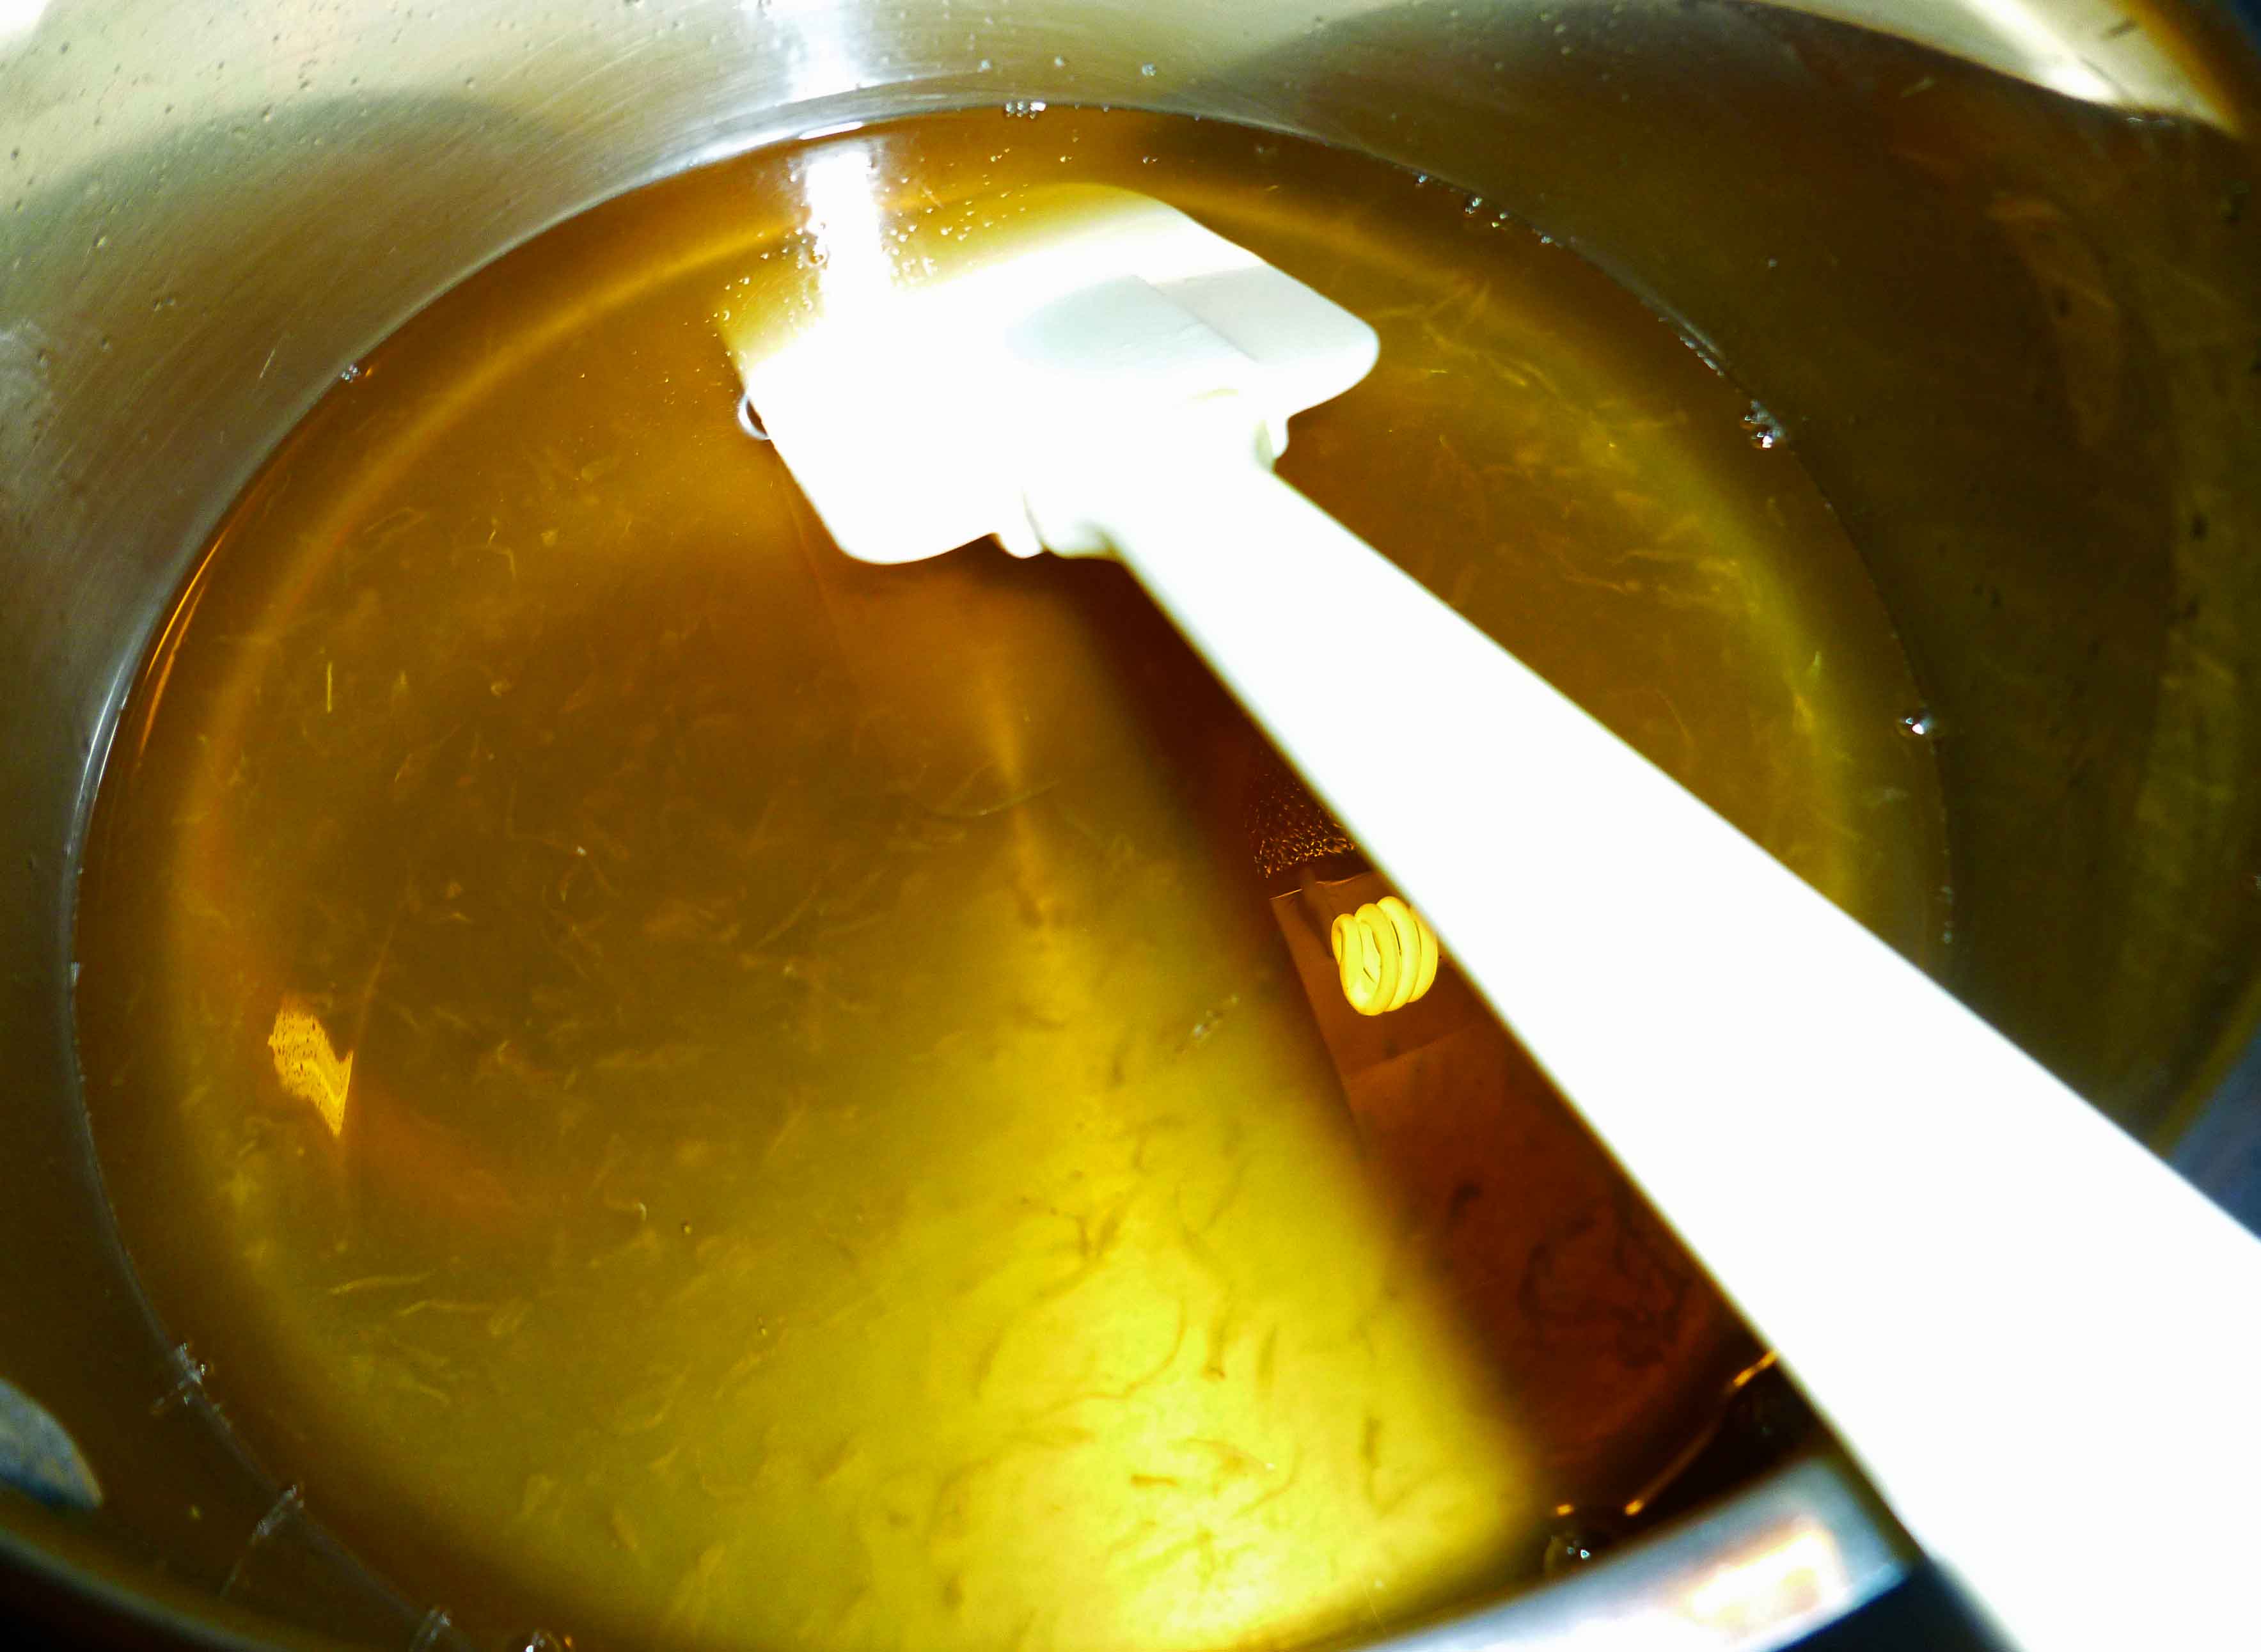
Make sure you don’t have any seeds in with the lime juice and pour it into a sauce pan. Add the agave syrup and the tequila to the sauce pan, mix until thoroughly combined, and then bring it to a boil for about two minutes. Turn the heat to low, and in a small container (I used a glass measuring cup) mix the arrowroot and water together. Pour the water and arrowroot mixture into the sauce pan, stirring quickly so that it doesn’t clump. Turn to medium low heat and let it simmer for 15 minutes or so, and then remove from the heat.
Agave Lime Tequila dressing in sauce pan
When the agave lime tequila dressing has cooled (you can cheat by sticking it the freezer for a few minutes if you need to), pour it over the cut fruit and toss to combine. Enjoy!!
So this isn’t the post that was originally supposed to be here. I was supposed to have concocted this wonderful braised pork chop recipe, but Winter Storm Nemo happened and shot my plans to go to the grocery store to hell. I tried to make a go of it with what I had in the apartment, and it wasn’t bad, it just wasn’t worthy of you all. So then I was left to find something else to do at the last minute. And what else do people do when there’s no food, and you don’t feel like cooking? Microwave popcorn. Except for those of us that are dairy free, there’s no microwave popcorn that we can buy without milk or milk derivatives in it. So, the internet to the rescue! I can’t remember where I found the link on how to cook popcorn in a paper lunch bag in the microwave, but I want to thank them fervently.
Also, for those of you who are Valentine’s Day abstainers, popcorn is a good thing to have while you do a movie marathon to ignore the fact that the rest of the planet is participating in a corporate-manufactured holiday.
Basic Microwave Popcorn
⅓ c of popping corn
½ tsp of canola oil
¼ tsp of Lawry’s Seasoned Salt, or Penzey’s 4/S salt.
1 paper lunch bag
1 piece of tape (optional) or a plastic clip like these from Pampered Chef
Variations:
Cajun – Replace seasoned salt with 1/4 tsp Penzey’s Spicy 4/S Salt, or Slap Ya Mama Cajun Seasoning to taste. If your Cajun Seasoning does not have salt, leave the seasoned salt in the basic recipe in as well.
Cheez – Add 1-2 Tablespoons of nutritional yeast to the basic recipe.
Ranch – Add 1 Tablespoon of nutritional yeast, and a dash of each of the following: garlic powder, onion powder, basil, dill weed, and red pepper flakes to the basic recipe.
Curry – Add 1/4 teaspoon Garam Masala, and 1/4 teaspoon of curry powder to the basic recipe. If you want to add some heat, add a dash of cayenne pepper.
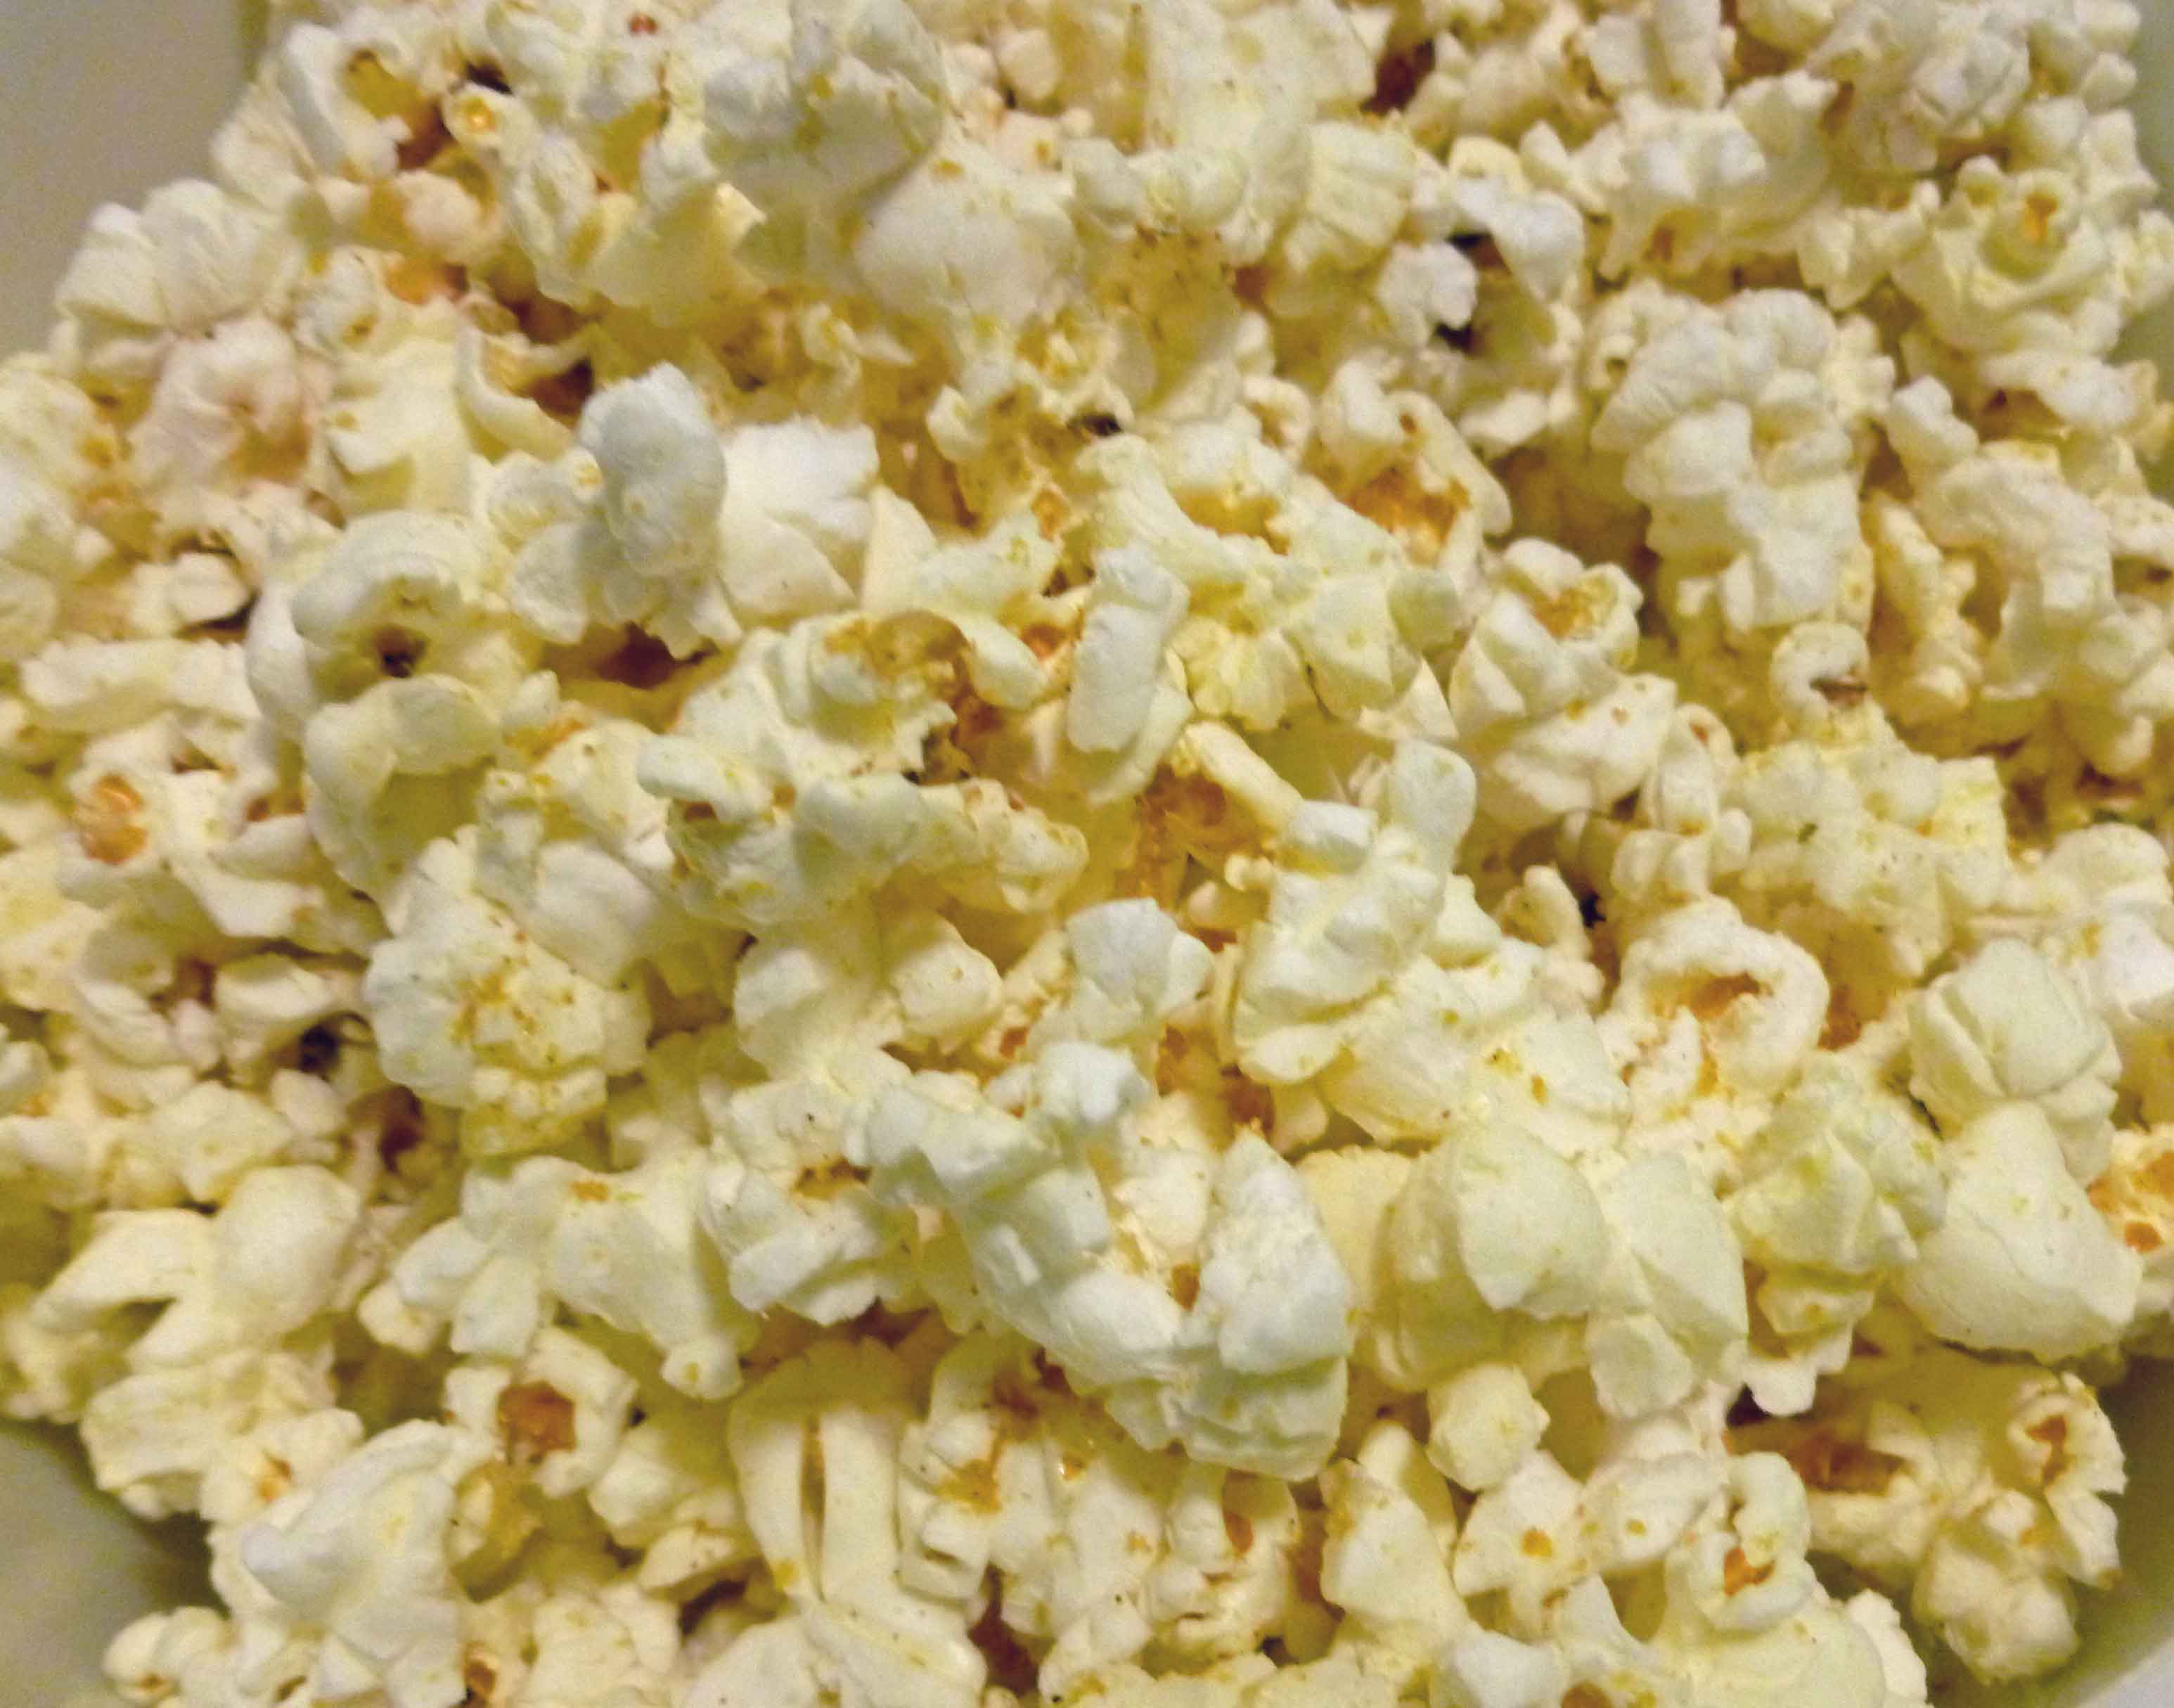
Open paper lunch bag. Add the popcorn kernels and all the seasonings to the bag. Add the oil, and then hold the bag closed and shake quickly to distribute oil and seasoning around popcorn kernels. Either fold the top of the bag over twice, use tape, or the clip to seal the bag tightly. Put the bag in the microwave on its side. Because all microwaves are different and everyone has figured out the optimum time to nuke microwave popcorn without burning it, try it at your normal setting and see if that works, and adjust the time as needed. In my microwave, it takes 1 minute 45 seconds to pop the popcorn without burning it. Shake the bag after taking it out of the microwave and dump the popcorn in a bowl, shaking any seasonings left in the paper bag out over the popcorn.
This would really work with any combination of seasonings you want to try. Let us know how any experiments you do work out. Enjoy!
All the Single People!
And for those who are single or anti-holiday, whatever your reason, here’s Mary Kate’s current V-Day At Home Alone, currently available via streaming Netflix, movie night plan:
When Denise and I sat down to discuss things we needed to learn to make, things we could not longer eat “normal” versions of, one of the things that popped to the top of the list was what my college roommate called “bar food” — fried foods that tasted great and had little or no nutritional value. I can still have french fries, which are my favorite of the genre, but Denise missed mozzarella sticks (to the point that I had dreams about them – D).
As anyone who is vegan, allergic to milk, lactose-intolerant knows, cheese is one of the harder flavors to replicate without actual dairy products. Many have tried, but the majority of “non-dairy” cheeses on the market actually contain some dairy, and therefore aren’t suitable for anyone vegan or with allergies. There is nothing on the market that really would work for a fried cheese product.
But we do have the wonder of Joanne Stepaniak’s The Uncheese Cookbook, which has an amazing variety of cheesy flavors (including the basis for the nacho cheese used in the Happy Layers Nacho Dip). We figured that if we made the mozzarella recipe, made sure it was structurally sound enough to batter and fry, and then figured out a breading, we’d be set. Easy, right?
Not exactly. We had no problems with the cheez, though we made three or four recipes before determining which worked best, and tried several different “egg wash” and breading options, too, before determining which worked best. But even our less perfect attempts were edible, and we’ve shared these with regular omnivorous eaters, and while they wouldn’t mistake them for mozzarella sticks, they did enjoy them. This recipe was our first resounding success, and it’s kept us going for a while.
This is NOT an every day recipe! And frankly, given that it’s fried “cheez,” it really shouldn’t be anyway. There is preparation involved, and then deep frying, but they taste good at room temperature and could easily be re-warmed or kept warm in a low oven.
Before we get started, you will need the proper equipment. You decide how much you can fudge this stuff, but remember you’ll be playing with oil.
For making cheez:
2 qt. saucepan
whisk
silicone ice cube trays or molds with a capacity of about 1 Tablespoon each (cubes are approximately 1 inch square)
plastic wrap
freezer space so they can set
For the frying:
pot deep enough to accommodate about 3 inches of oil and the frying thermometer, a thick stainless steel or a enameled dutch oven would be best. You also want a pot that’s tall enough that the edge is 2 or more inches above the oil level. It’s safer and there’s less splatter all around. The pot we used was 5 inches tall and about 8 inches across. We do not recommend using anything with Teflon or nonstick coatings. Of course, if you have an actual deep fryer appliance, use that.
For recapturing the oil for re-use (with proper care, you can use this oil at least 6 times)
Mason jars
coffee filters
funnel
Ingredients, all in one list:
2 cups rice milk
½ cup nutritional yeast flakes
7 Tablespoons oat flour (if you can’t get gluten free certified oat flour, grind gluten free certified rolled oats in a blender, food processor or coffee grinder until you have flour)
¼ cup tahini
¼ cup cornstarch
4 Tablespoons lemon juice
1 Tablespoon onion powder
1 teaspoon kosher salt
2 Tablespoons Ener-G egg replacer powder
1/2 cup warm rice milk
one loaf of white rice bread, turned into bread crumbs, or about 1 1/2 cups of bread crumbs
a large jug of canola oil, for frying
marinara or tomato sauce for dipping (optional)
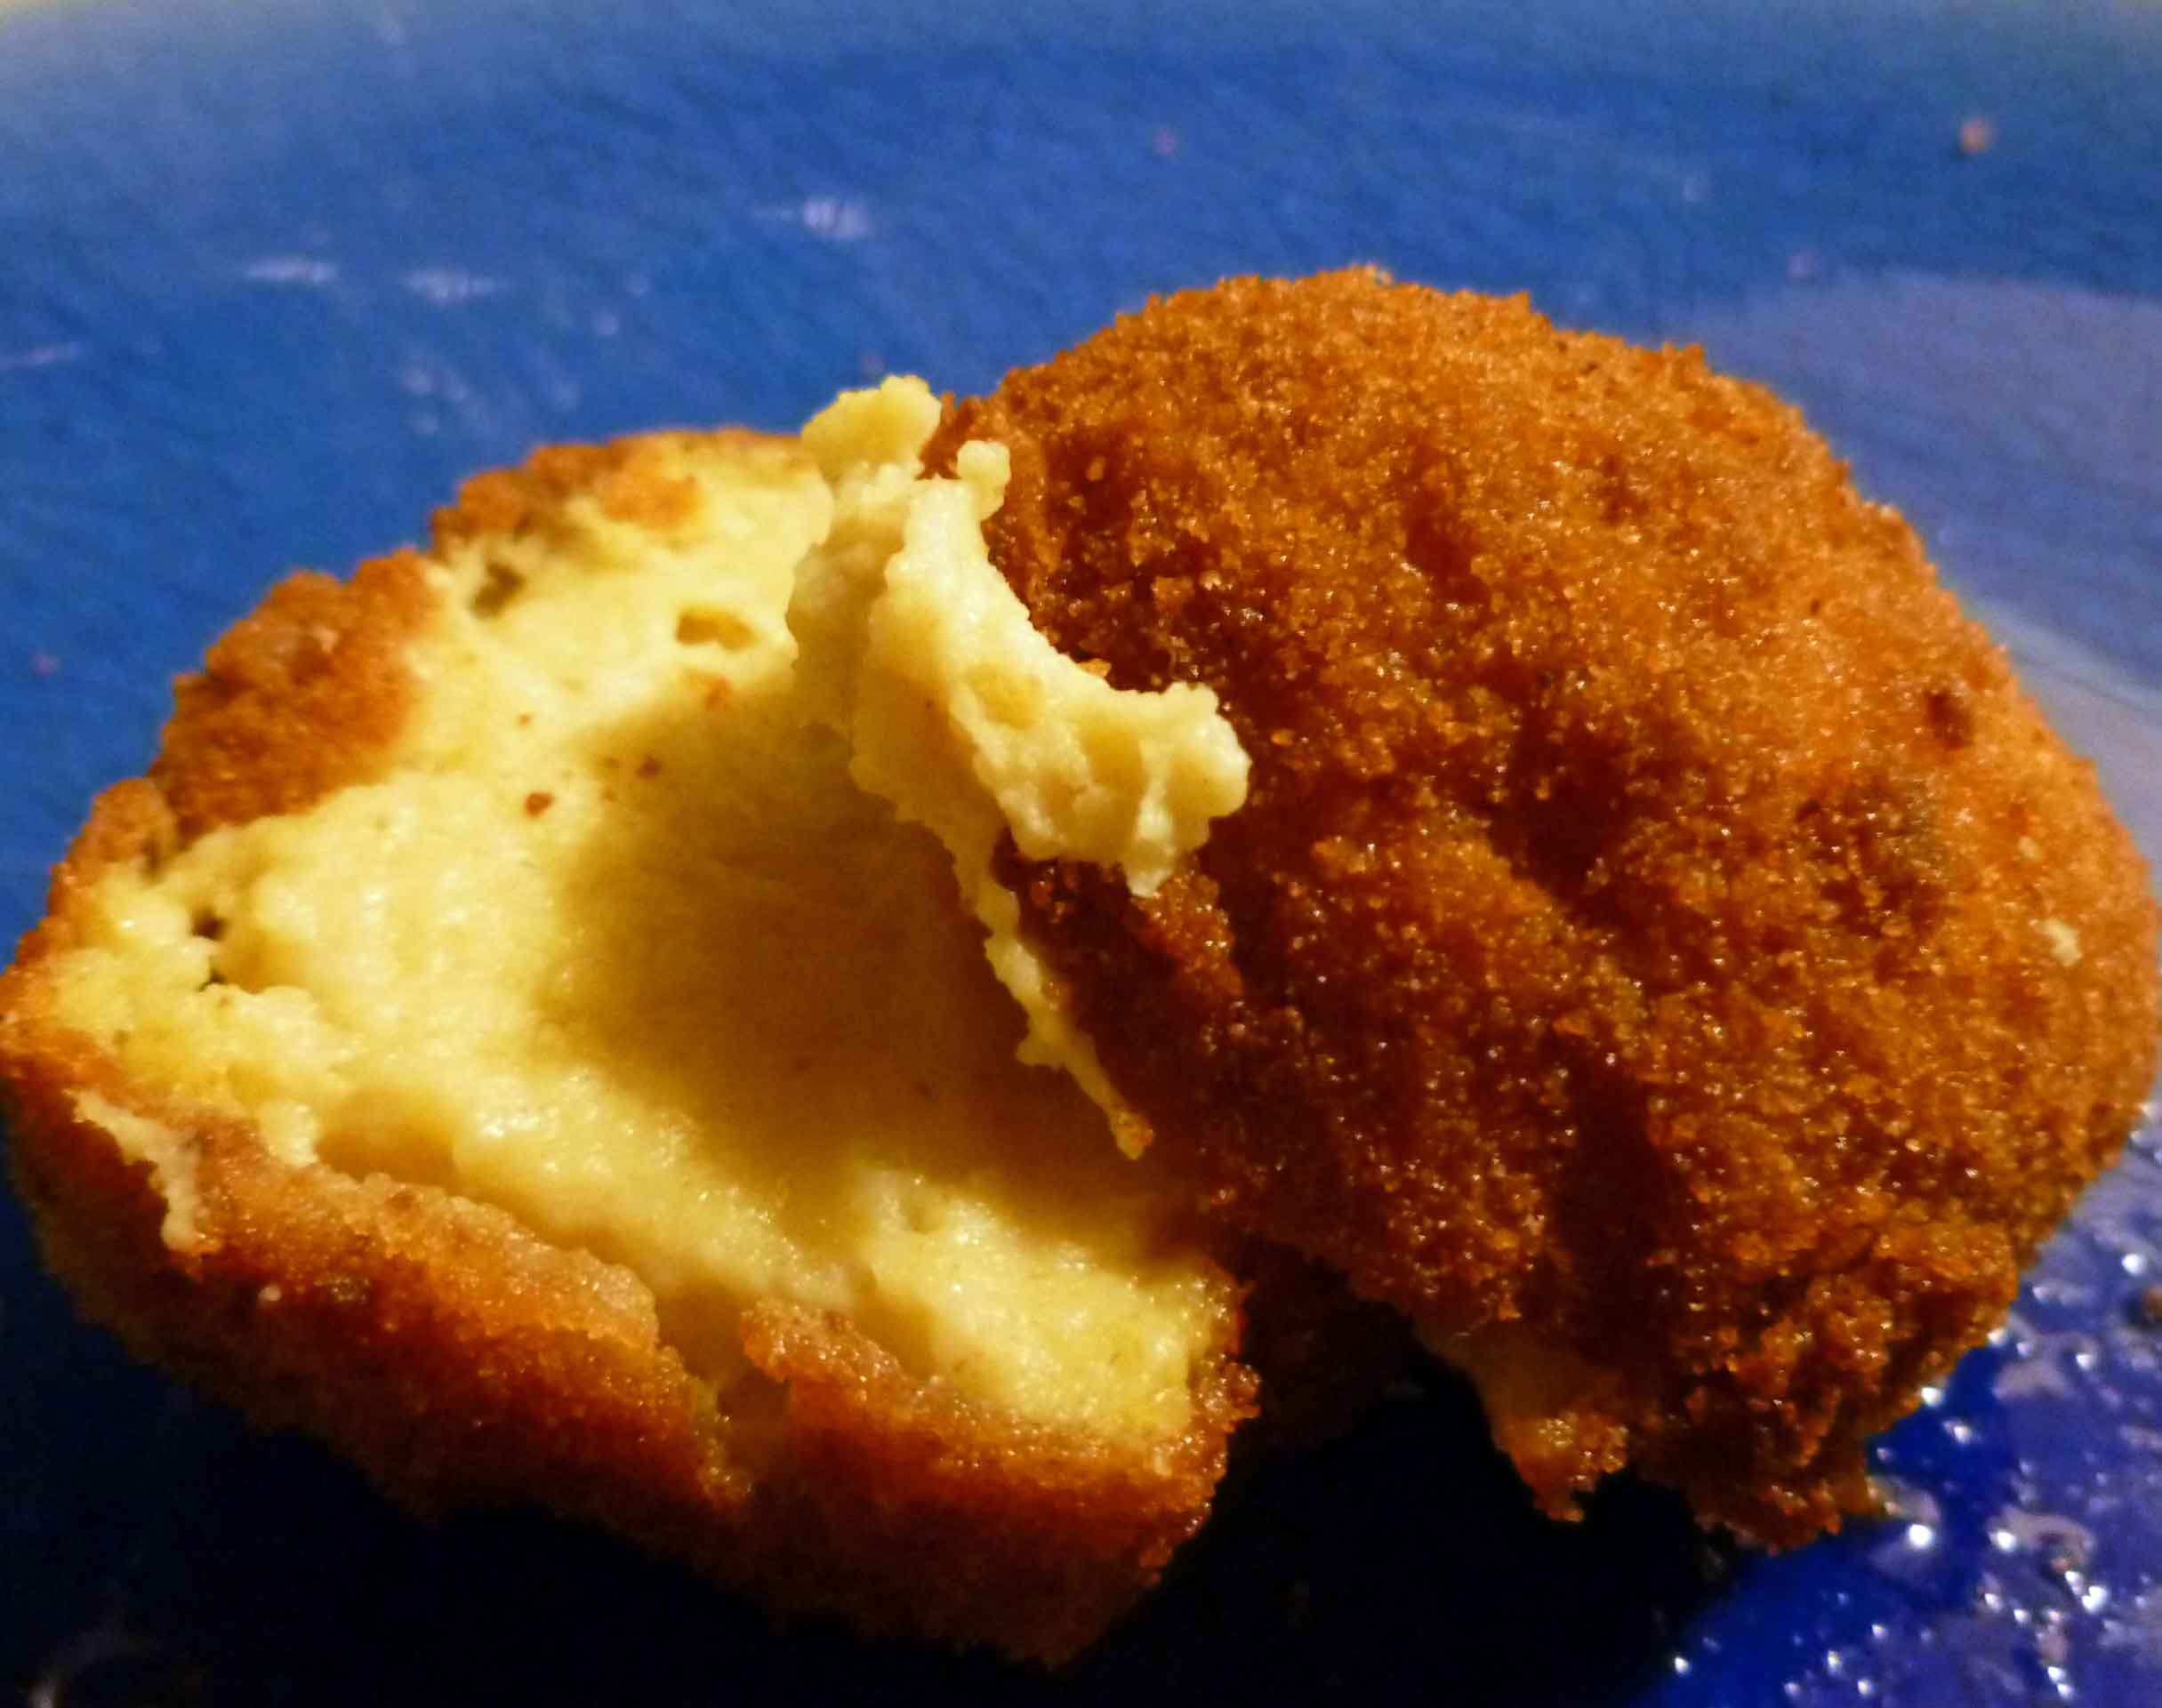
Miraculous Cheez Nuggets
There are two things you need to do in advance — make the cheez and make the bread crumbs. You could buy bread crumbs, but it may be easier to make your own and control the bread. For gluten-free bread crumbs, we suggest either Ener-G White Rice Bread or Food for Life White Rice Bread. In my opinion (MK), neither one is a fantastic sandwich bread, but the white rice breads do make excellent bread crumbs for frying.
For either one, lay the slices out on the oven rack and bake for about 2 hours at 200°F. Let cool completely, and then put through the food processor. You won’t use the whole loaf’s worth of crumbs, but why not keep the rest on hand? They keep well in a plastic bag or other sealed container.
Make cheez:
Place the following ingredients in the saucepan:
2 cups rice milk
½ cup nutritional yeast flakes
7 Tablespoons oat flour (if you can’t get gluten free certified oat flour, grind gluten free certified rolled oats in a blender, food processor or coffee grinder until you have flour)
¼ cup tahini
¼ cup cornstarch
4 Tablespoons lemon juice
1 Tablespoon onion powder
1 teaspoon kosher salt
Whisk all ingredients together until well combined.
Cheez Ingredients mixed before heating
Cook over medium-low heat, whisking occasionally until mixture starts to thicken. Turn heat to low, whisk constantly until mixture starts to pull together and away from sides of pan.
Cheez after cooking
Spoon into silicone molds or ice cube trays, approximately 1 tablespoon per cube. Try your best to smooth out the tops.
Cheez in Silicone Ice Cube Trays
Cool in fridge. Then cover with plastic wrap and freeze the cheez over night. The cheez must be frozen to hold up to frying without becoming a really nasty mess. The last batch we made we had intended to fry the the next day but couldn’t, so the cheez was in the freezer for a week or so with no ill effect. To save time, you could keep some cheez made ahead of time in the freezer and then just bread and fry when you want some.
Frying Fun!
Fill the frying pot (described above) with about 3 inches of canola oil, and put your frying thermometer in place. Start heat over medium-low and aim for 360ºF.
Frying Set Up
While waiting for your oil to heat, you will bread your cheez. Make an “egg” mix by mixing the following:
2 Tablespoons Ener-G egg replacer powder
1/2 cup warm rice milk
Place egg mix in a deep enough container or bowl that you can dip the cheez nuggets in it and coat them easily. Place bread crumbs in a low flat container so that you can easily roll the nuggets to coat them in the bread crumbs.
Remove cheez nuggets from silicone molds. One at a time, dip nuggets in egg mix, then in bread crumbs. Place on a tray to until you are ready to fry them.
Coating Cheez in Bread CrumbsCheez Nugget Coated in Bread CrumbsTray of Breaded Cheez Nuggets
Fry them! Drop nuggets (gently!) in the hot oil and then cover the pot with the splatter screen.
Putting Cheez Nuggets into OilCheez Nuggets FryingUsing Splatter Screen
Our pot was about 8 inches in diameter, with 3 inches of oil, and we could fry 5 nuggets at a time. Each batch took approximately 5 minutes with the starting oil temperature at 360-370ºF. We were able to test the interior temperature (remember, these will still be frozen when you drop them in the oil) with the probe thermometer — anything over 70ºF is good (take a nugget out of the oil and test it on a plate. DO NOT TRY TO PROBE A NUGGET WHILE FRYING). You can also just cut one open and feel it.
Blurry Photo of using Probe Thermometer
If you put too many nuggets in the oil at once, you will drop the temperature too far down (don’t go below 330ºF), and you won’t get a golden brown outside with a warm cheezy center. If your oil drops more than 15 degrees, put fewer nuggets in the next time around. You can also adjust your stove temperature to try to keep the oil temperature consistent.
When the nuggets are done, lay them on the cookie sheet that you’ve prepared — cover the cookie sheet with paper towels and lay your cooling rack upside down on the paper towels. The fried nuggets will be kept up off the paper towels, and the towels will draw the oil down. These nuggets are NOT greasy if you’re doing all this right, and they are wonderful.
Taking out Cheeze Nuggets to Put on RackCheez Nuggets on Rack
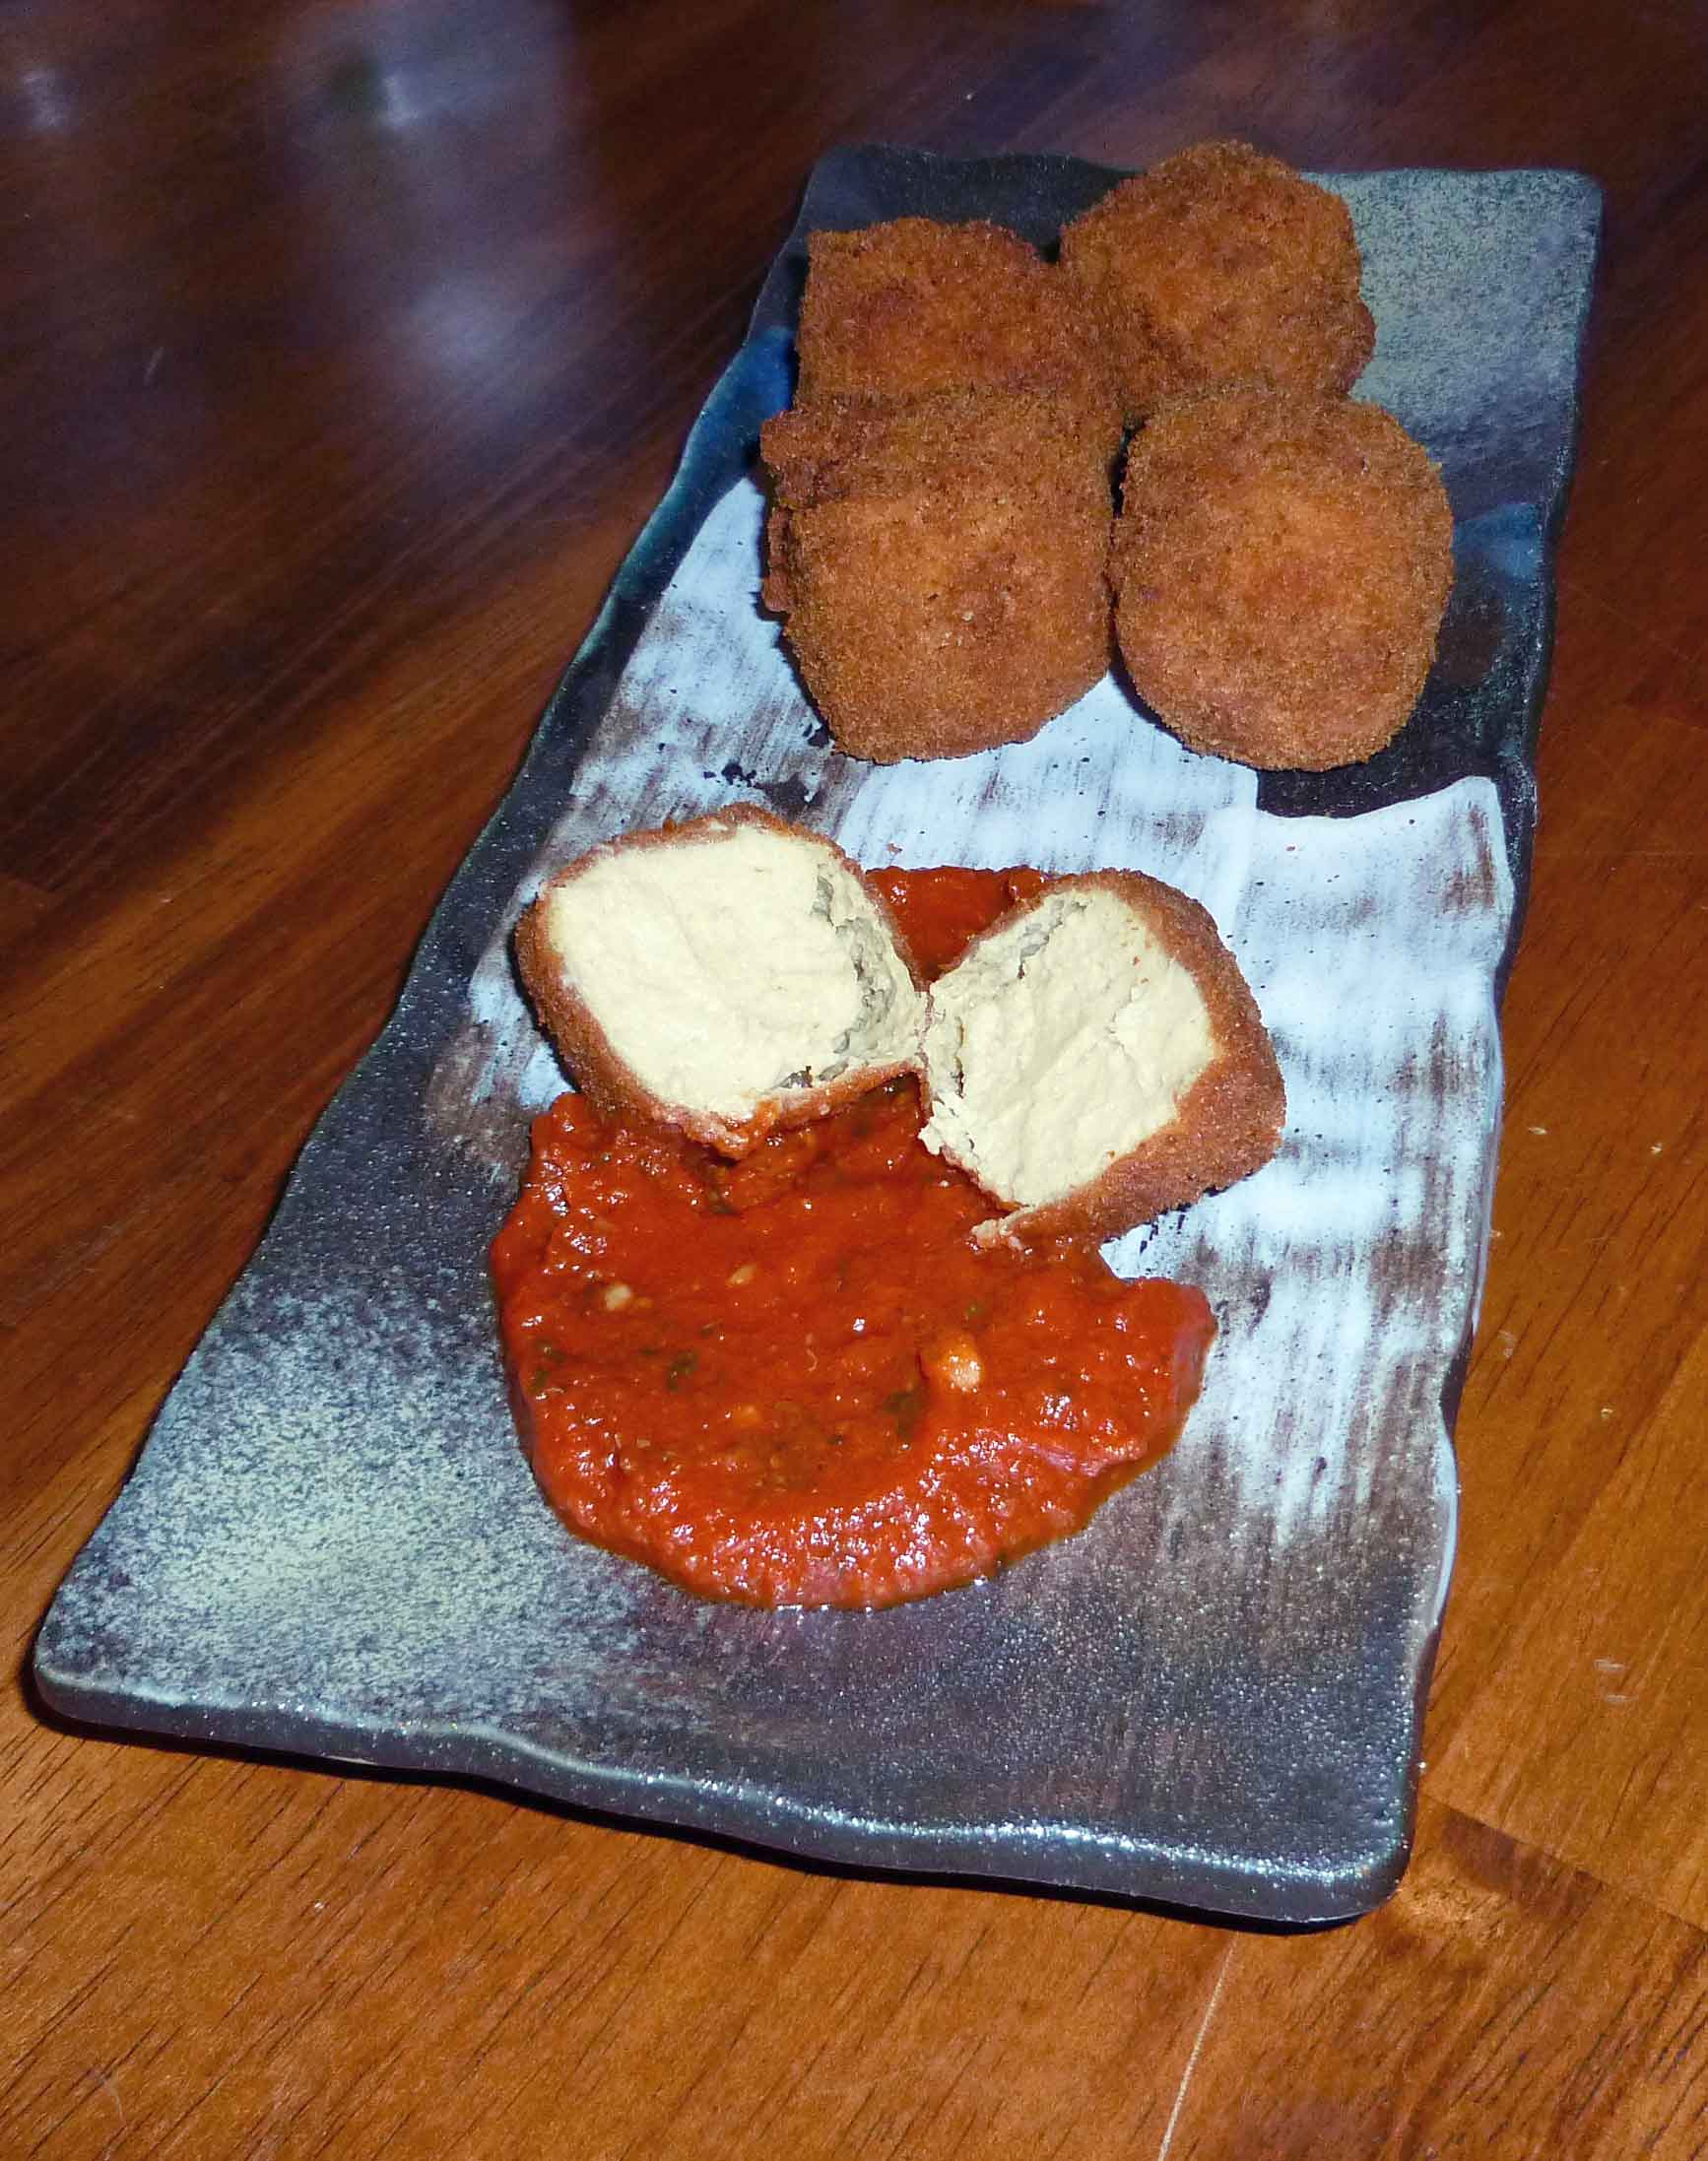
Serve while still warm, with marinara if you so wish.
You can freeze any leftovers, but reheat them low and slow — 250ºF for about 30 minutes seems to work. We only tested reheating them once, though, so if you do it, let us know how it goes!
Why buffalo wings? Because I love them, and I can’t eat them out anymore. Buffalo wing sauce is generally made with butter or margarine, and therefore contains milk. And depending on the particular restaurant, the breading may contain milk and they might use an egg to coat the chicken before breading it. And many restaurants use wings that are delivered to them already breaded/coated so they have no clue what’s in them unless they still have a box kicking around with the label on it. You can imagine just how much fun this conversation with restaurant servers would be and why it’s not even worth the bother to try – Oh, can you make me a special sauce that doesn’t contain any milk or milk products, and by the way, margarine contains dairy. And even though you get the wings pre-breaded, can you find some wings that aren’t coated and cook them for me? Yeah, right. Not happening in this universe. Secondly, although I learned how to deep fry with a stockpot and a candy/frying thermometer while we were working on one of our recipes, I’m not frying on a work night and cleaning that up. So the recipe had to be baked. I started with this recipe and modified it to be dairy free, and then did a gluten-free version too, even though Mary Kate doesn’t really care for buffalo wings. The nice thing about this recipe is that you can take the cooked chicken wings and make any sauce you want and then coat them with it. So if you don’t like buffalo wings, experiment. Tell us what you used for alternate sauces.
Easy Buffalo Wings (Dairy-free, BUT NOT gluten-free version)
Easy Buffalo Wings (Dairy-free, BUT NOT gluten-free version)
Wings and Coating:
36 chicken wing pieces
2 Tablespoons canola oil
1 teaspoon salt or spicy seasoned salt, such as Penzey’s Spicy 4/S Salt or Slap Ya Mama Cajun Seasoning
1 cup all-purpose flour
1 teaspoon of Penzey’s Forward Seasoning (If you don’t have this, mix some black pepper, onion powder, paprika, garlic powder, and turmeric together to equal 1 teaspoon)
Wings Coated on Baking SheetCooked Wings on Baking Sheet
Preheat oven to 425 degrees F. In a bowl toss the wings with the oil, and salt. Place flour and Forward seasoning into a gallon zip lock bag and seal closed. Shake to evenly distribute flour and Forward seasoning. Add a few wing pieces and shake to coat evenly. Remove wings from the bag, shaking off excess flour, and spread out evenly on oiled baking pan(s). Do not crowd. Repeat until all wings are coated. Bake for about 20-25 minutes, turn the wings over, and cook another 20-25 minutes, or until the wings are cooked through and browned.
Sauce Ingredients in SaucepanCompleted Buffalo Sauce
While the wings are baking, mix all the ingredients for the sauce in a pan, and over low heat bring to a simmer, stirring occasionally, and then turn off.


")


