Notice: Function _load_textdomain_just_in_time was called incorrectly. Translation loading for the wp-ultimate-recipe domain was triggered too early. This is usually an indicator for some code in the plugin or theme running too early. Translations should be loaded at the init action or later. Please see Debugging in WordPress for more information. (This message was added in version 6.7.0.) in /home/maryzahc/public_html/adultfoodallergies.com/wp-includes/functions.php on line 6121
Snacks – surviving the food allergy apocalypse (archive)

Category: Snacks

Snack [snak], noun: a small portion of food or drink or a light meal, especially one eaten between regular meals. c.1400, “a snatch or snap” (especially that of a dog), from snack (v.). Later “a snappish remark” (1550s); “a share, portion, part” (1680s; hence old expression go snacks “share, divide; have a share in”). Main modern meaning “a bite or morsel to eat hastily” is attested from 1757. Snack bar is attested from 1923. Commercial plural form snax attested from 1942 in the vending machine trade. These recipes will not contain dairy, eggs, gluten, wheat or hazelnuts. If we use a top 8 allergen, we will use a tag warning of its use.

  • Dragontail Radish Pod Fridge Pickles

    Dragontail Radish Pod Fridge Pickles

    Dragontail Radish Pod Fridge Pickles
    Dragontail Radish Pod Fridge Pickles

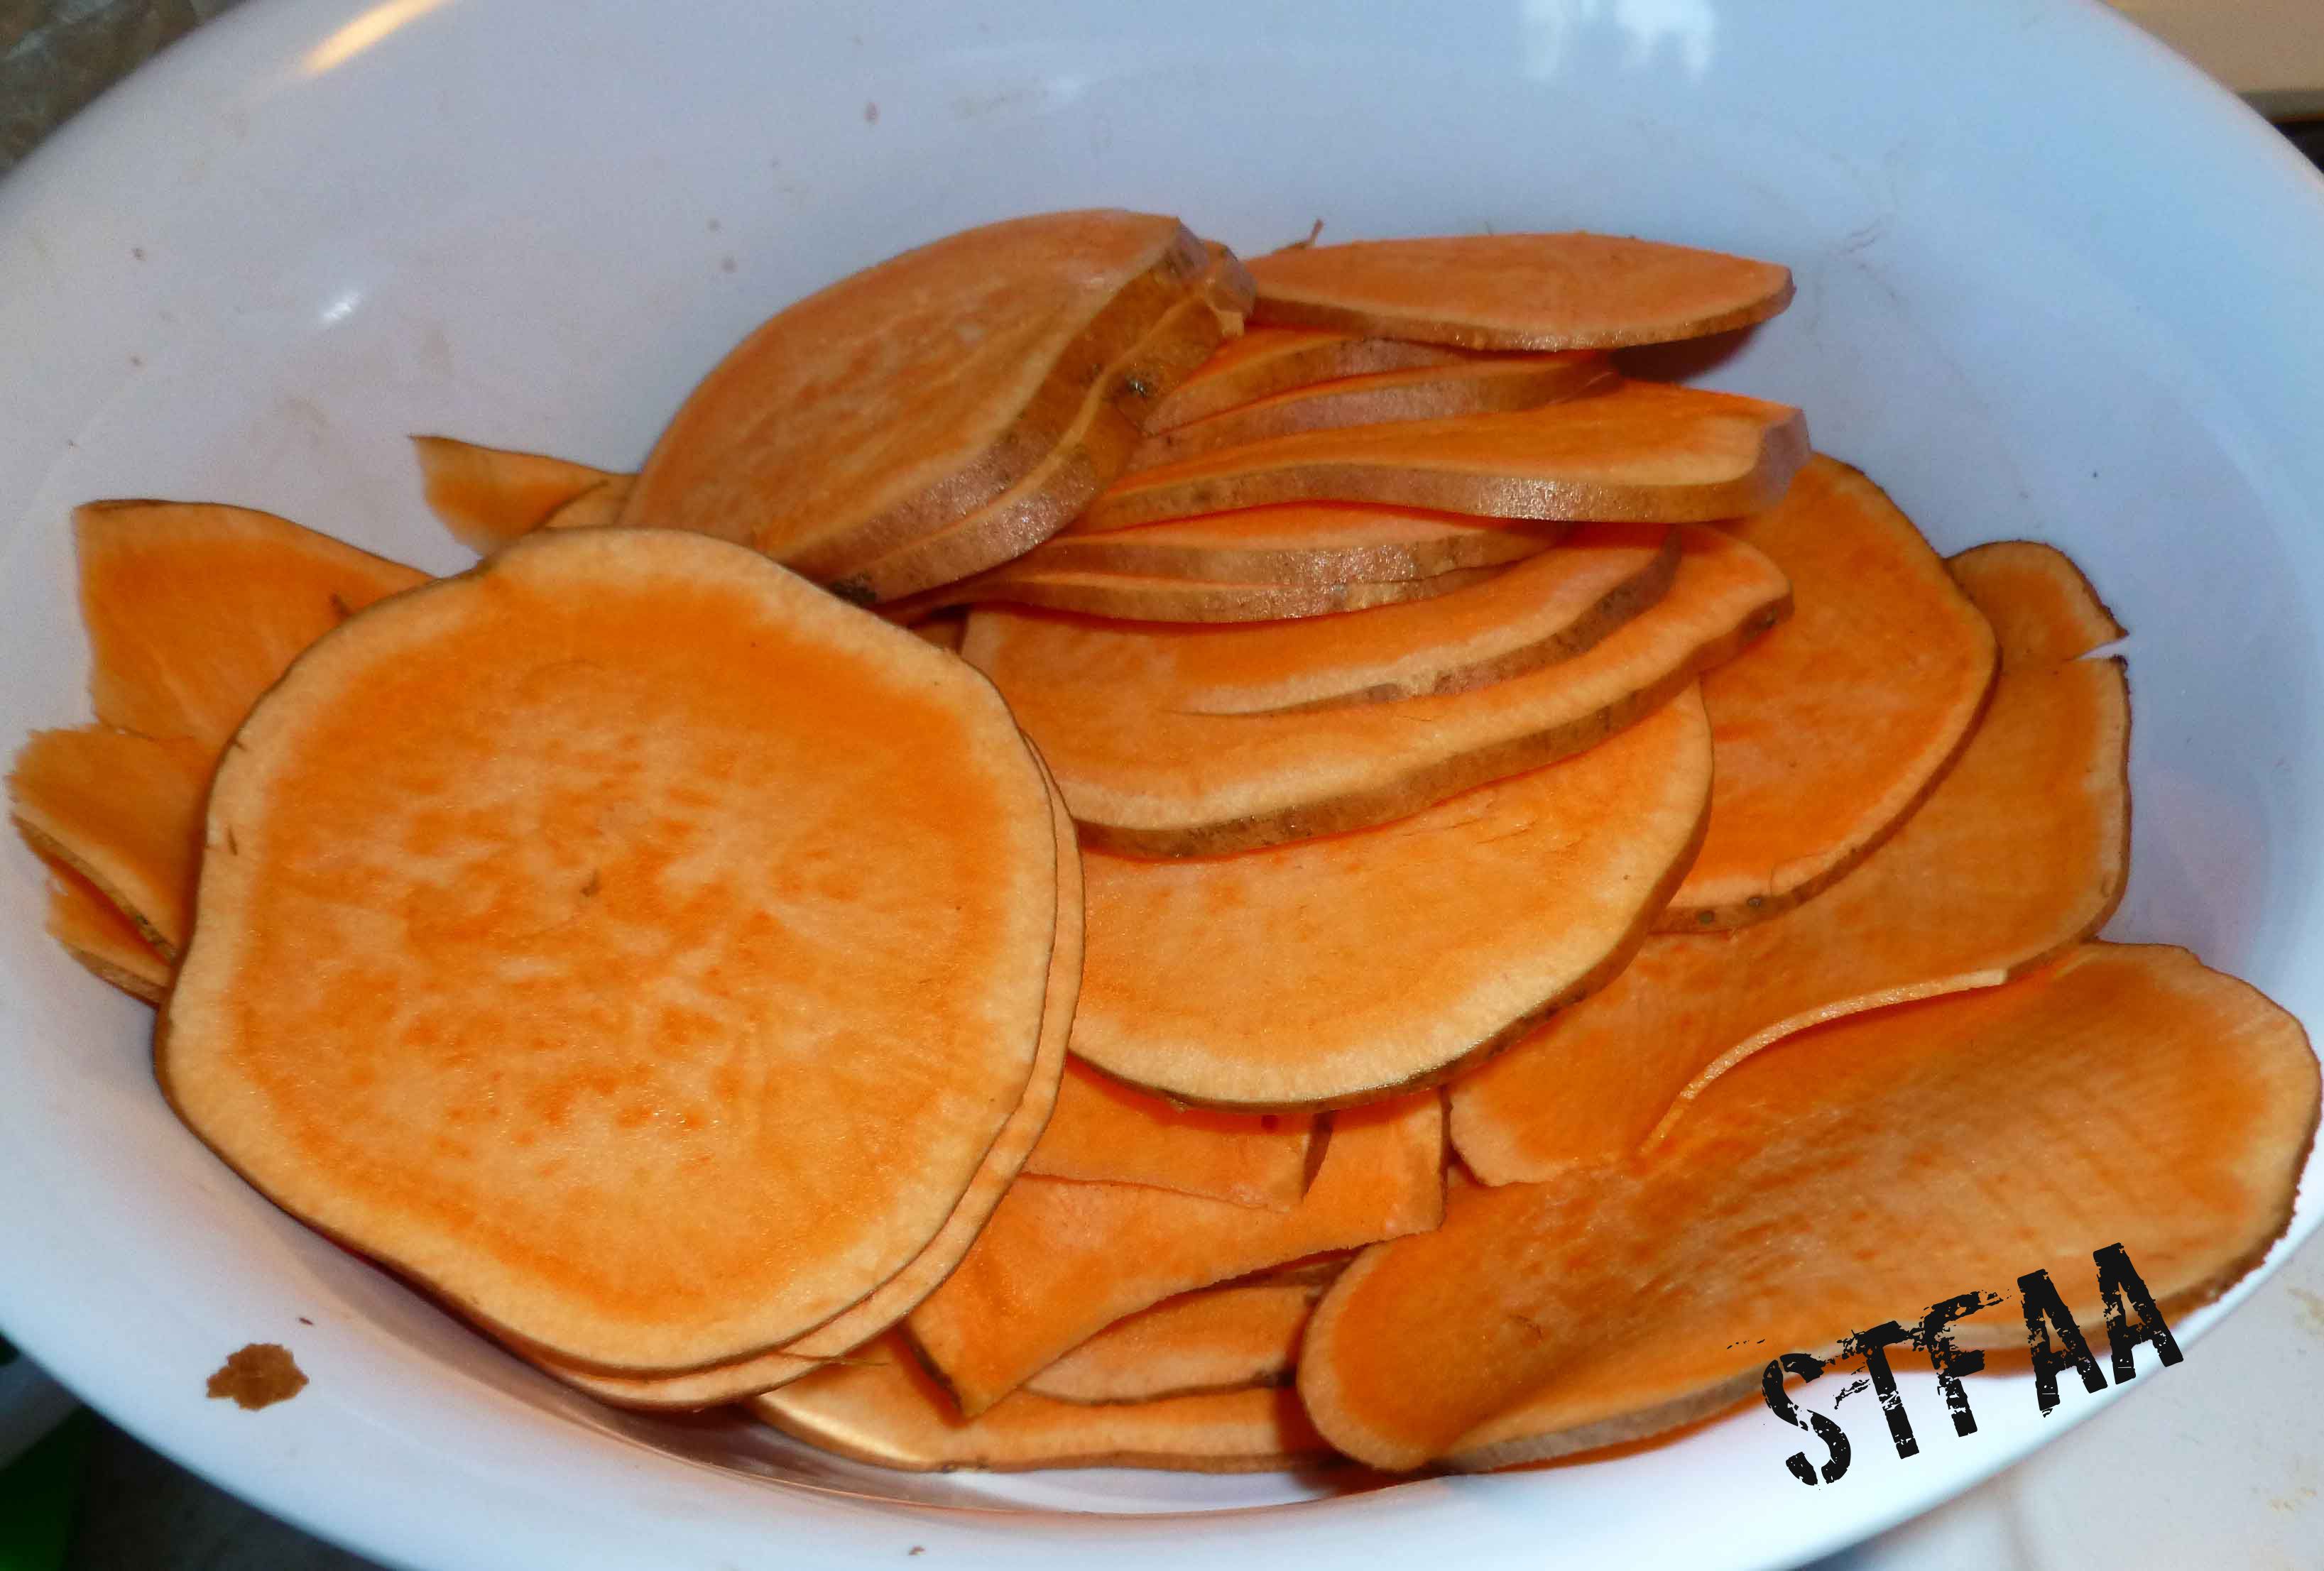
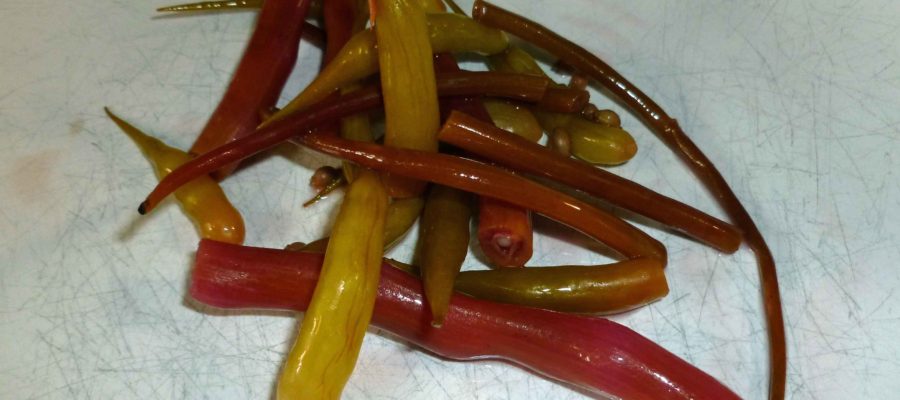
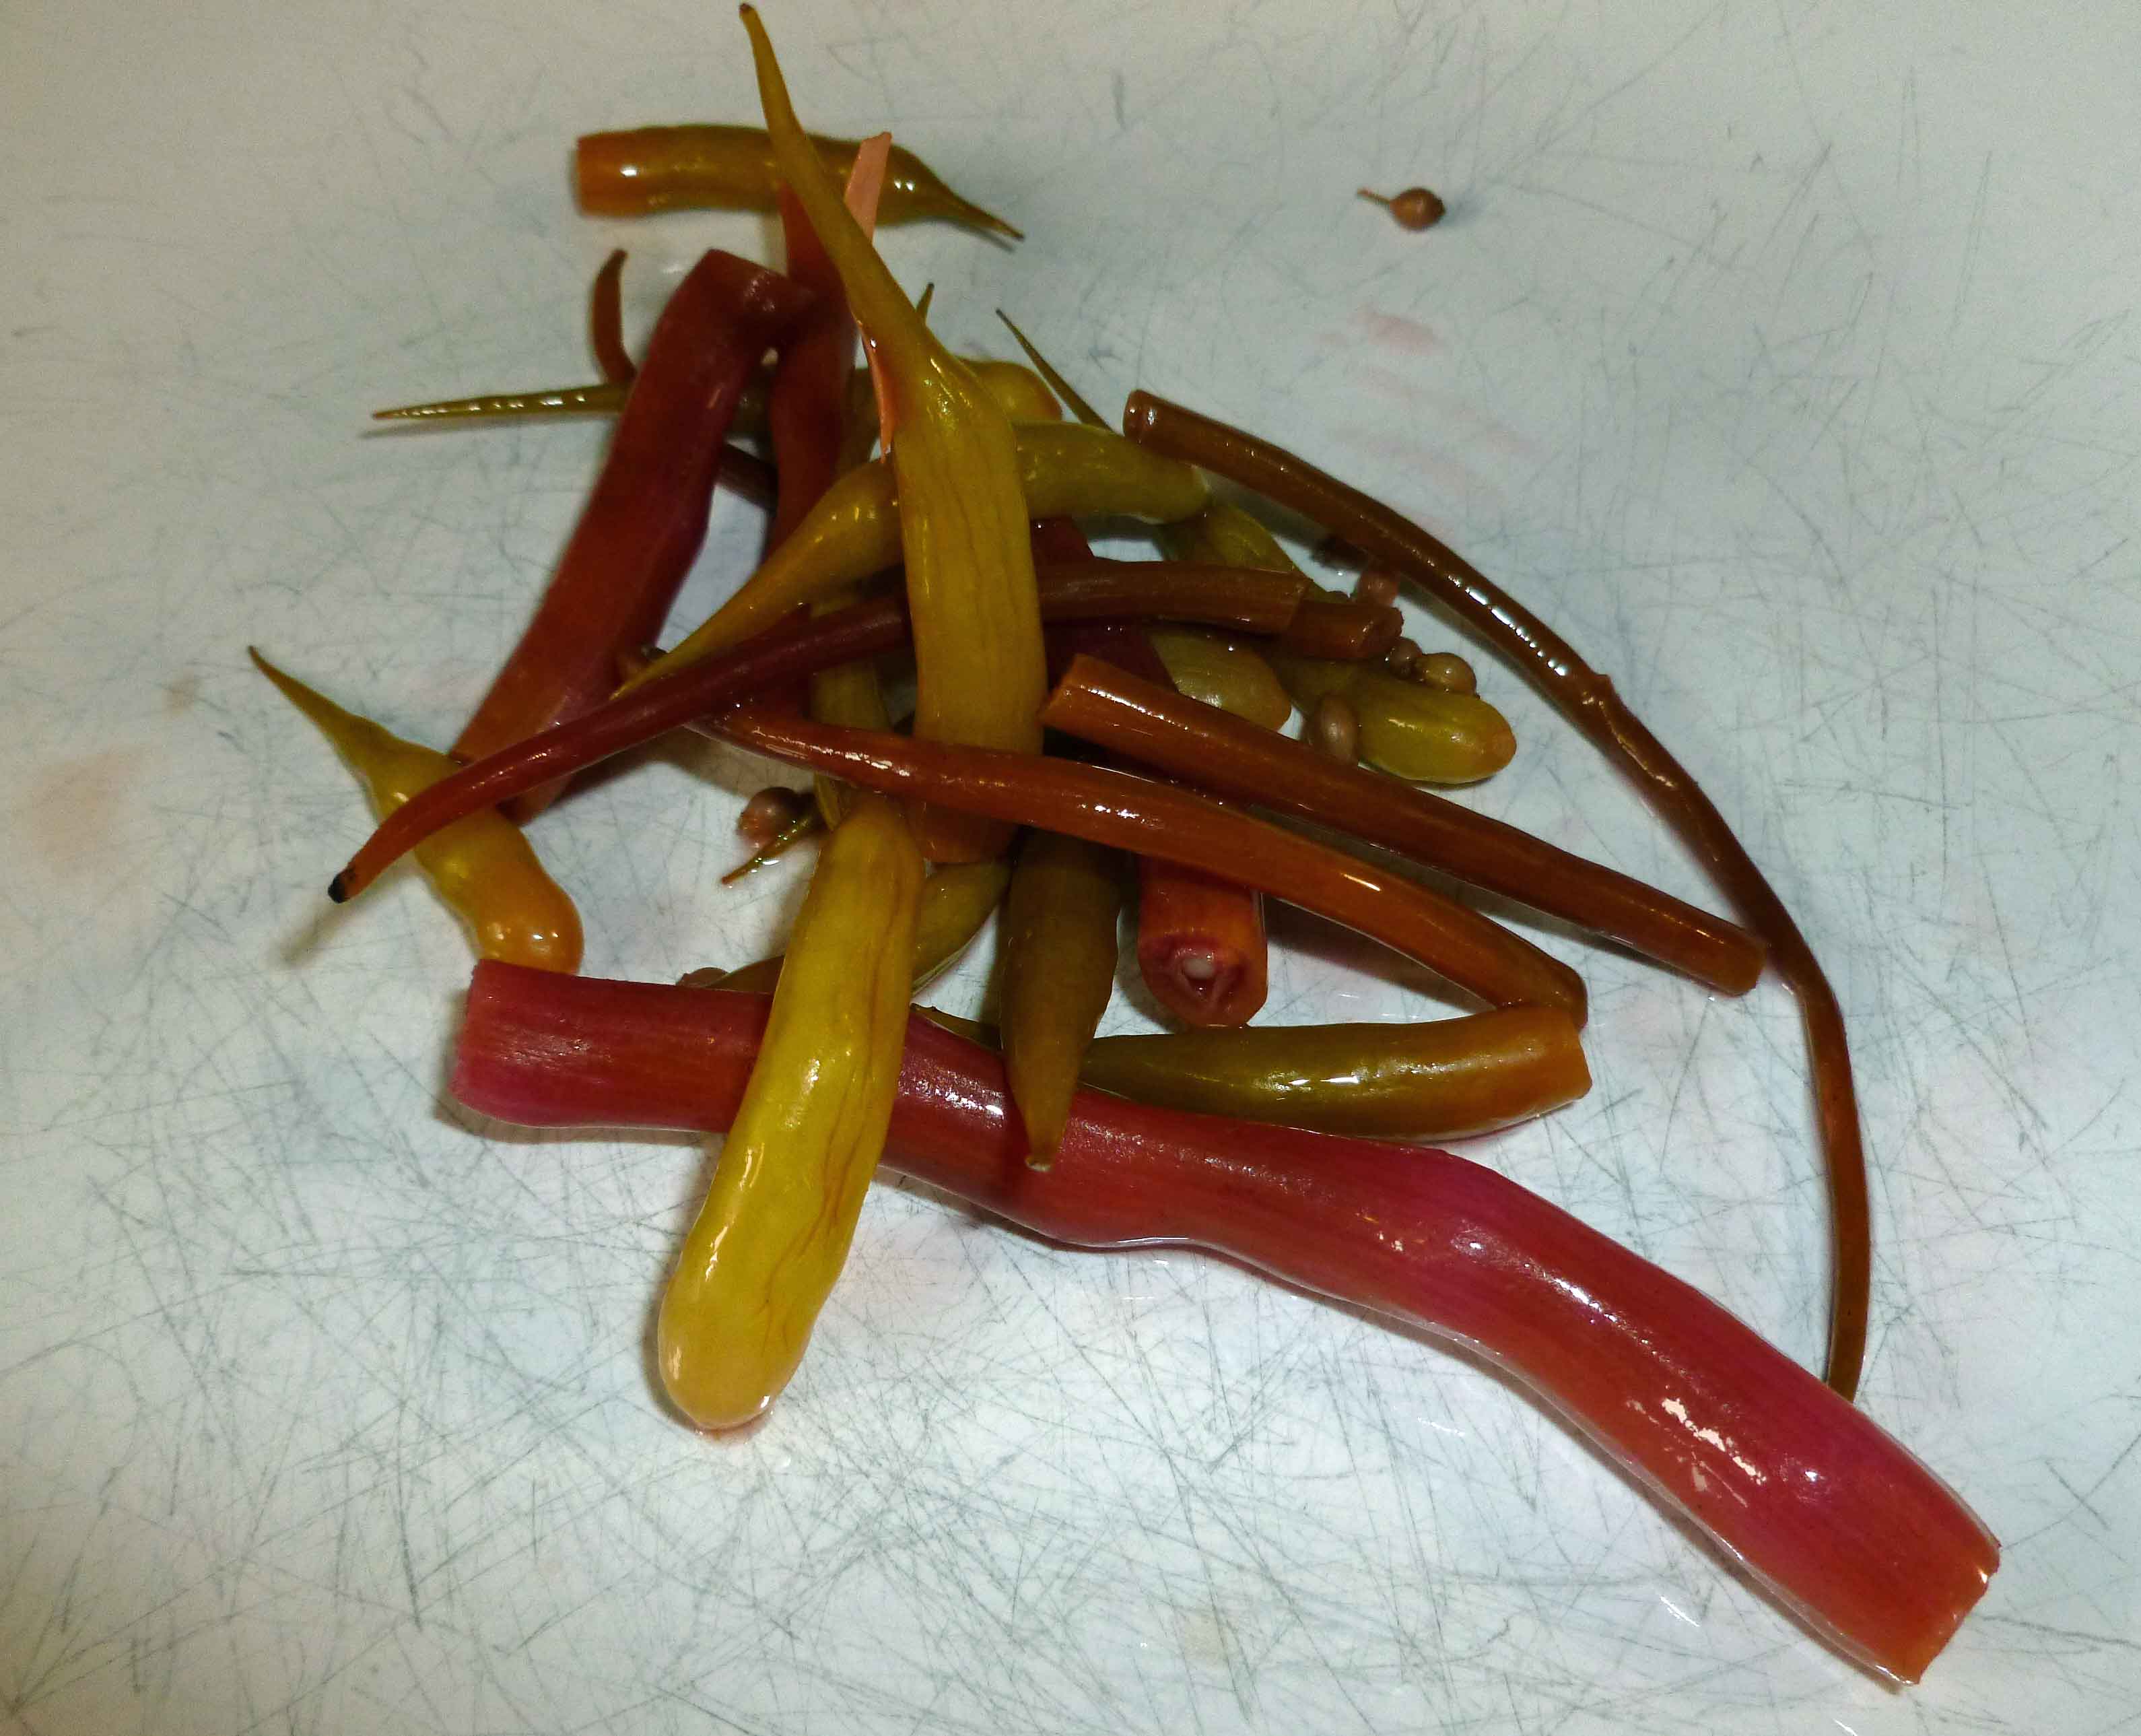
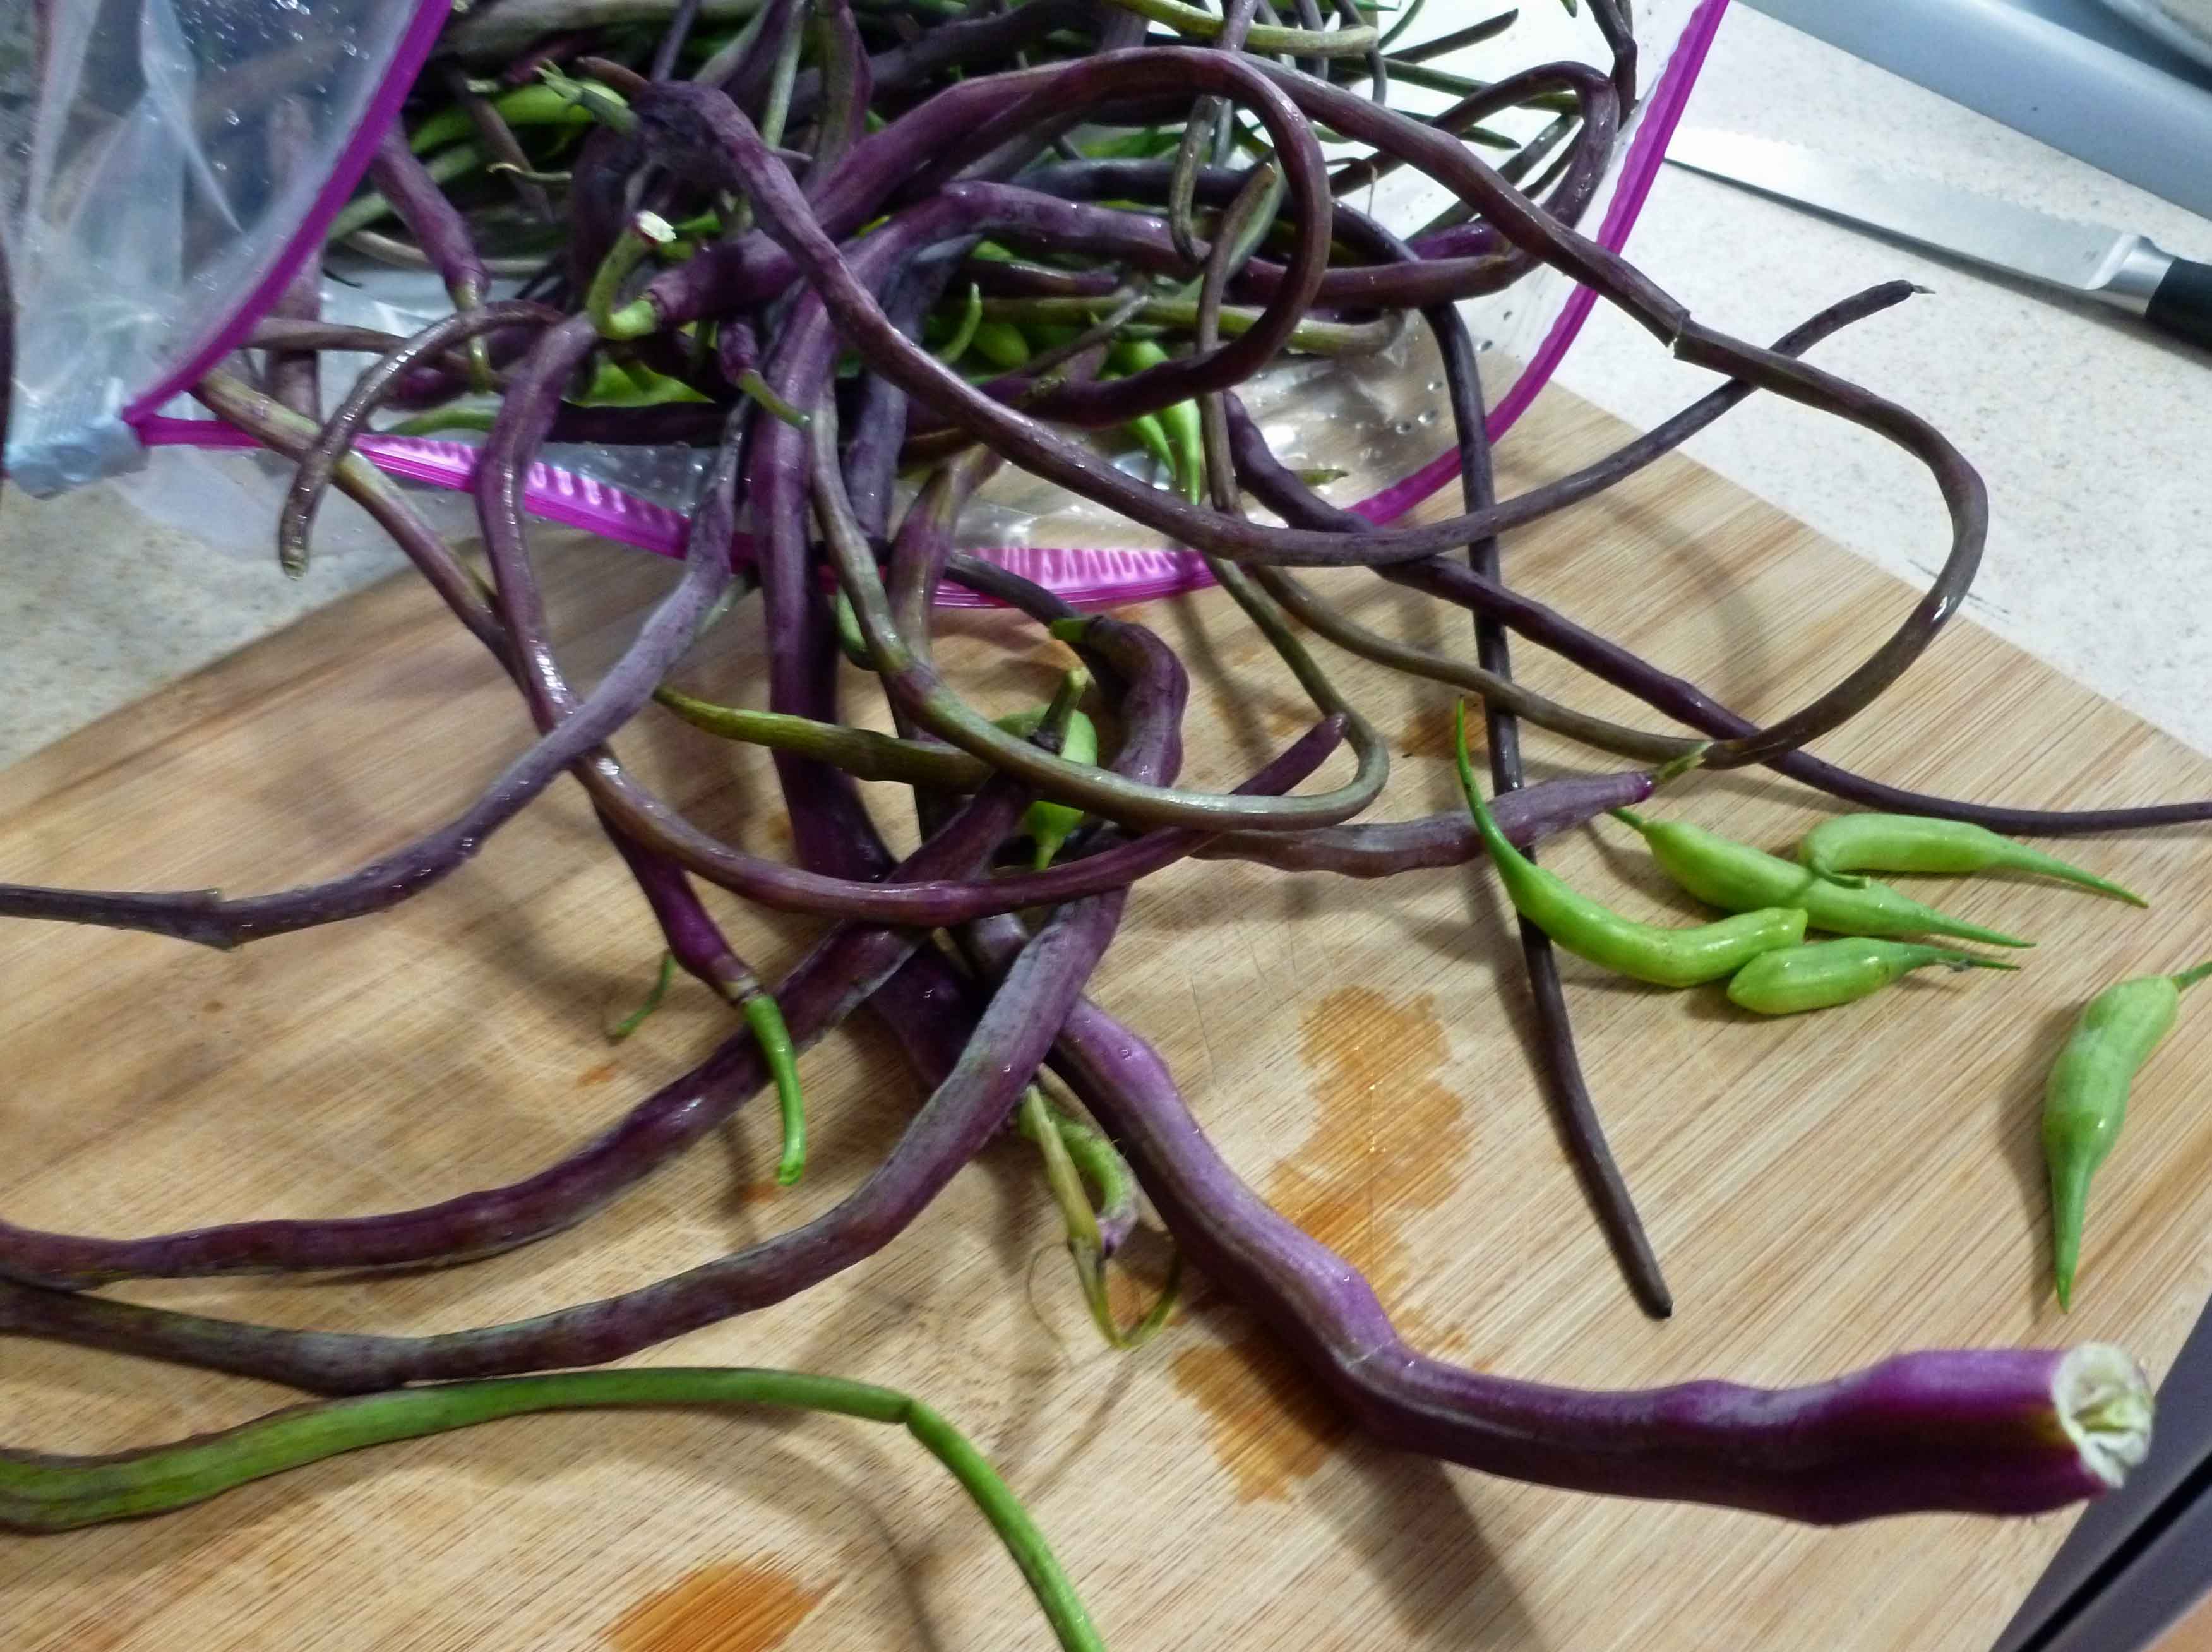
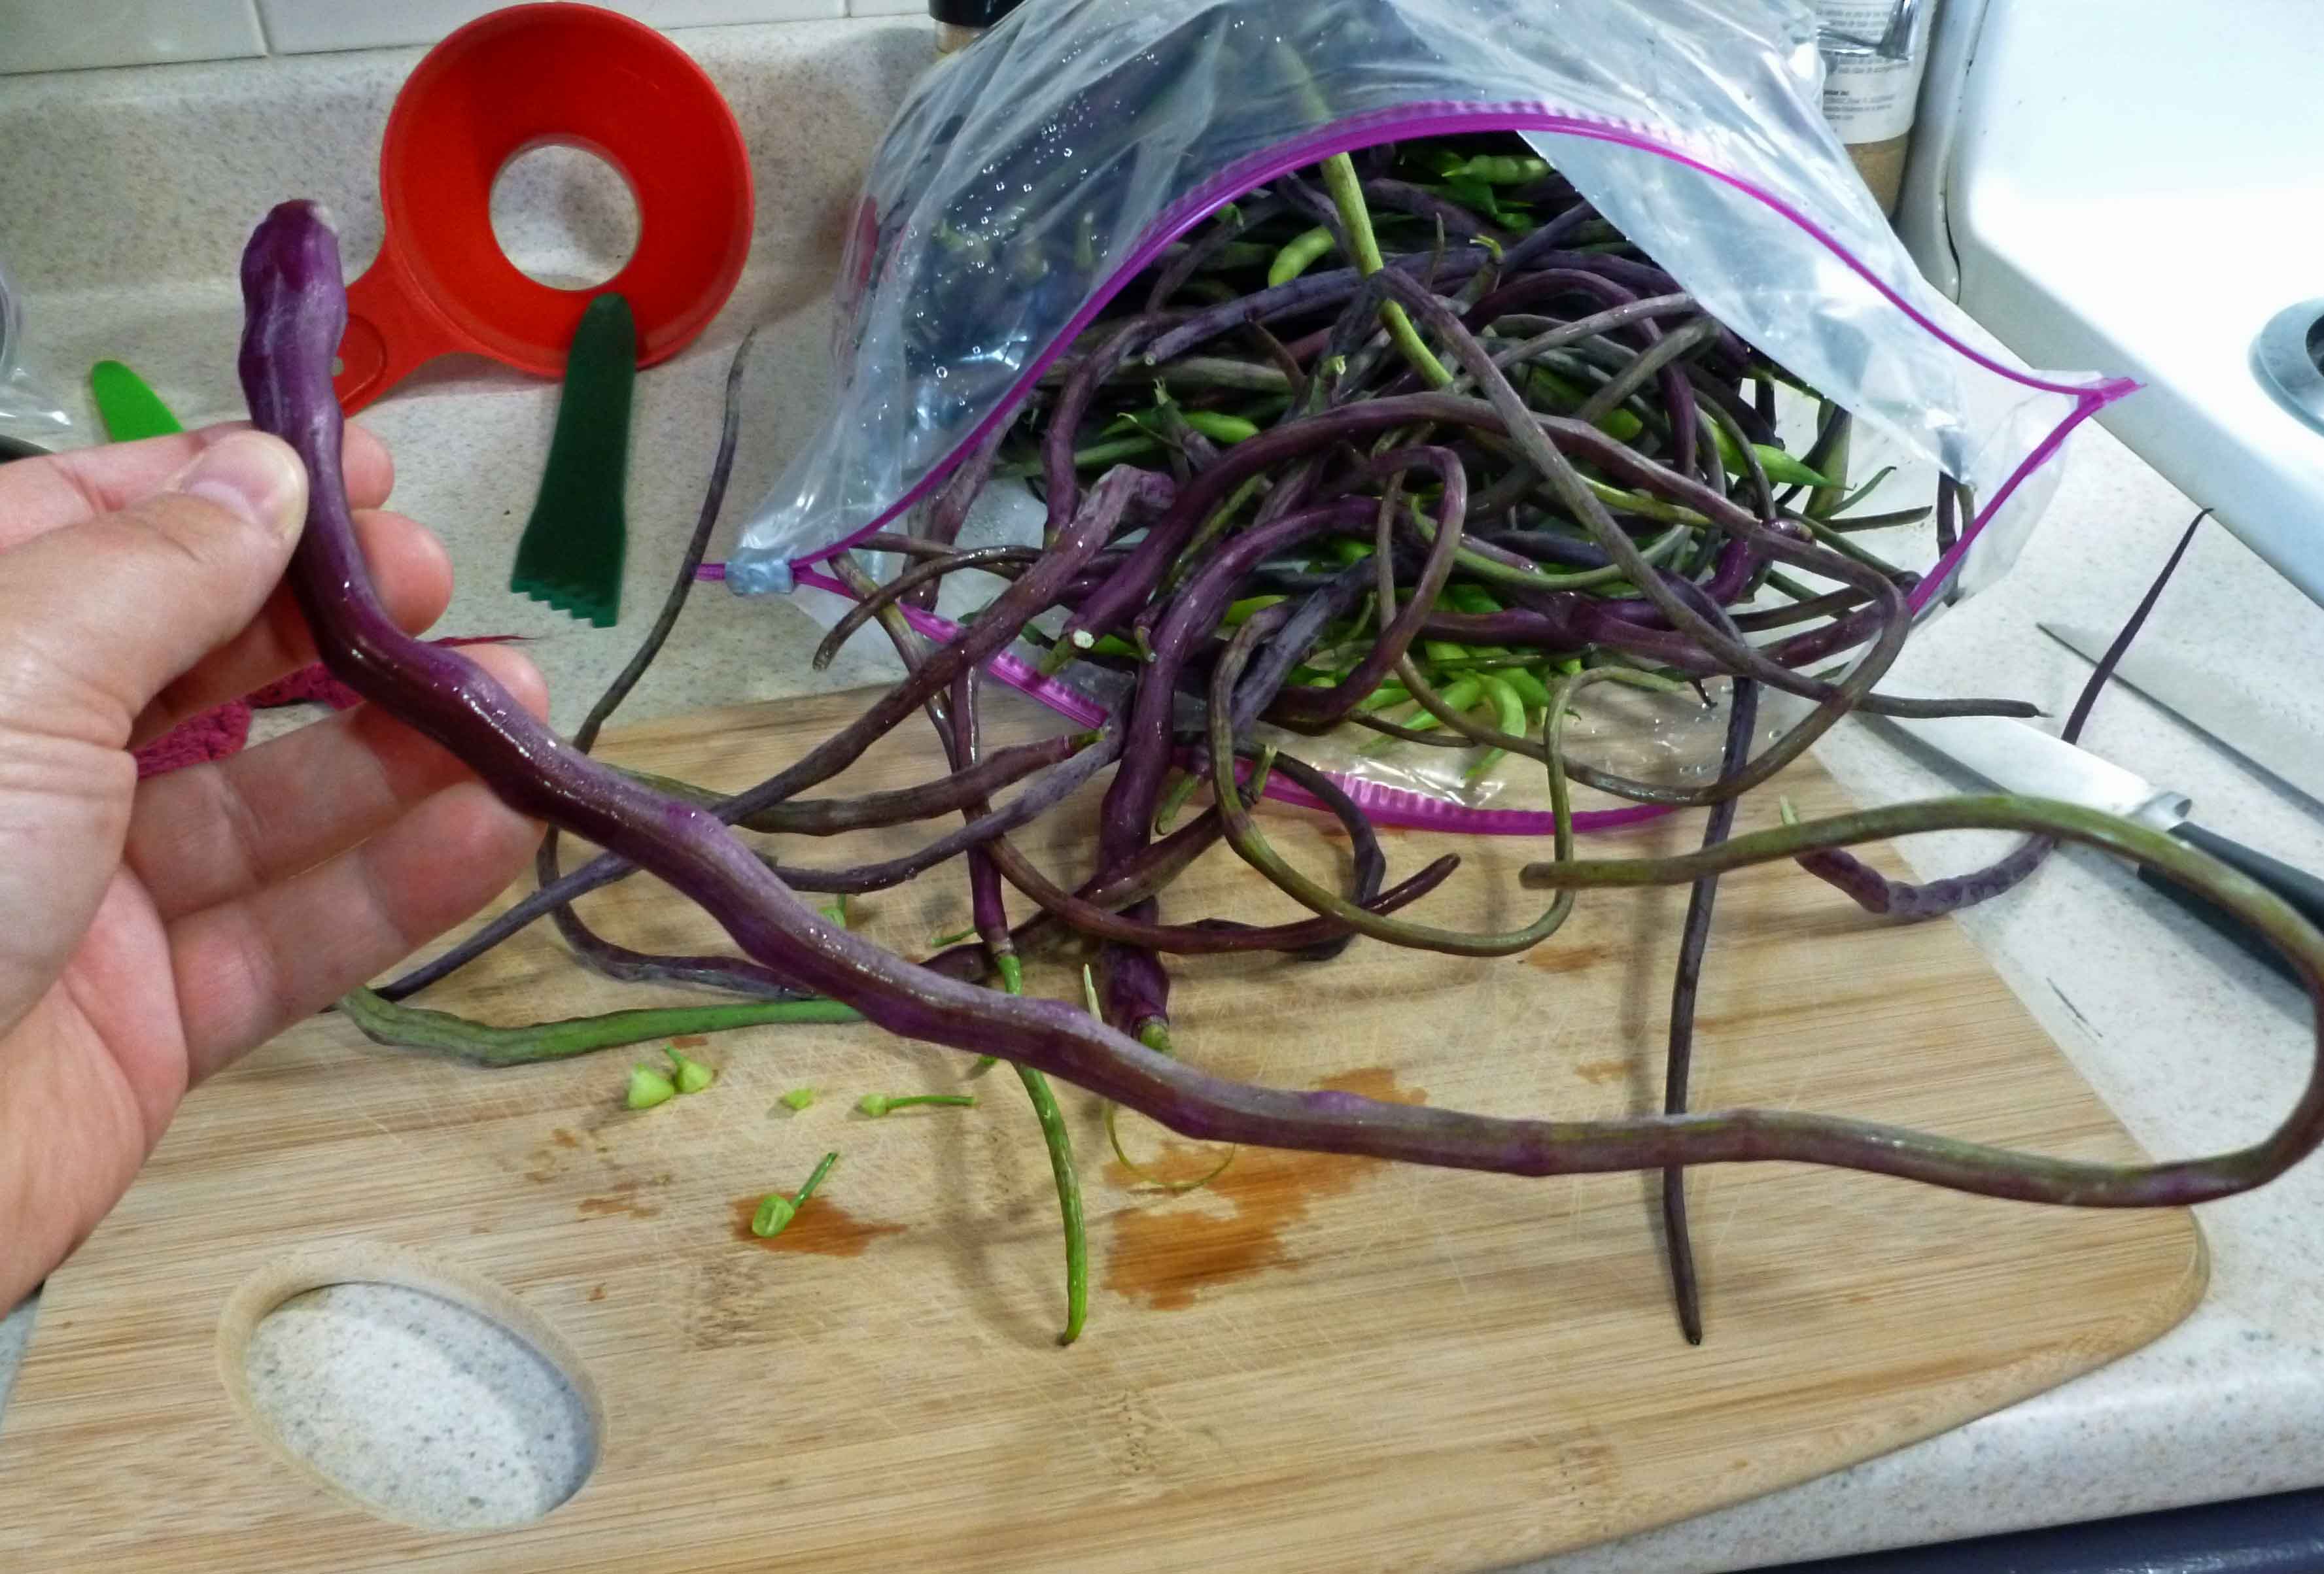
    Last summer, I got behind in the garden and let some of the radishes go to seed. I was okay with that because the bees loved those flowers and I just let them be for the bees (yes, I know that’s an awful phrasing, but I couldn’t help it). So, doing what plants inevitably do after pollination, they produced seed pods. They looked so interesting, but I didn’t know what you could do with them or if they were edible. After they were hard, dried out, and nasty, and it was too late, I was paging through The Joy of Pickling by Linda Ziedrich (no affiliation with Amazon) to see if what else I could do with daikon radish, and discovered a radish pod pickle which supposedly dates from 1824.  When I was pouring over seed catalogs to plan for spring in January, I found this purple Dragontail Radish (no affiliation with Burpee) that you grow just for the pod. It was purple, and I was already curious about it. What was I supposed to do? Of course I ordered some seeds. And I got purple radish pods ranging from 6 to 18 inches long. And then of course, I flaked on harvesting some of the regular radishes again, so I had a bunch of very pretty little green seed pods about 2 inches long. 

    Dragontail and regular radish seed pods
    Dragontail and regular radish seed pods
    Dragontail and regular radish seed pods
    Dragontail and regular radish seed pods

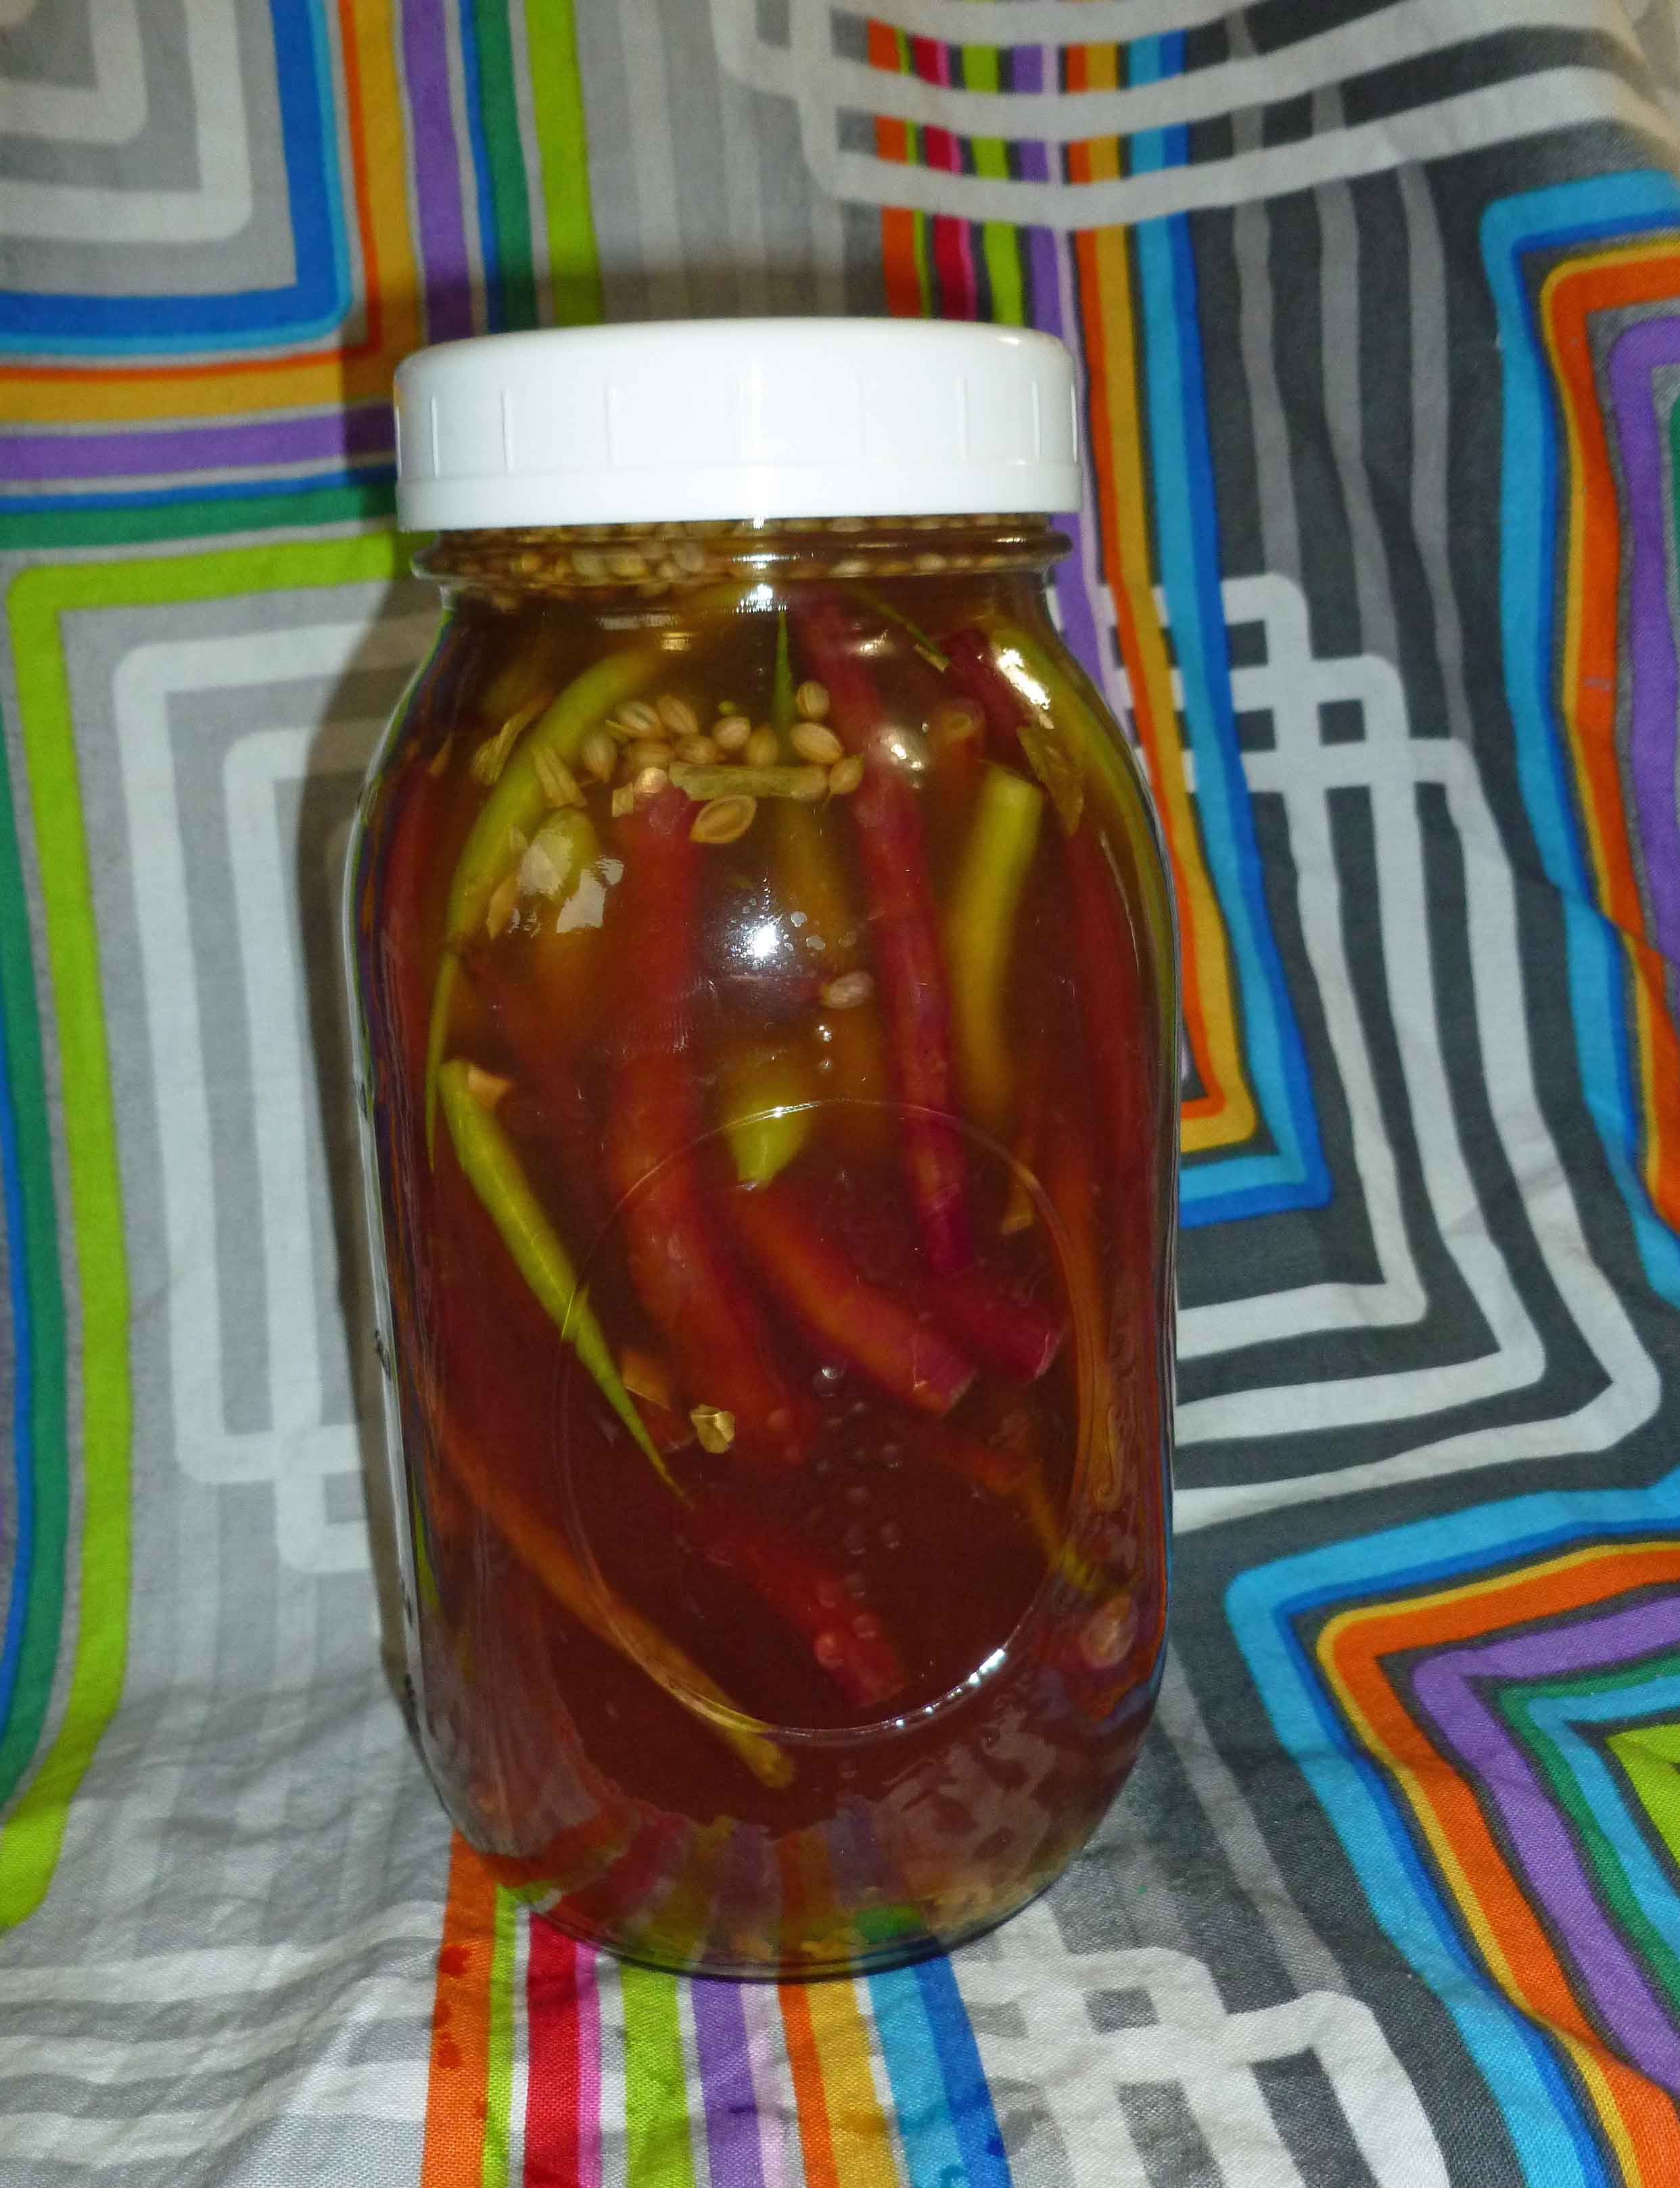
    I modified the recipe in The Joy of Pickling by Linda Ziedrich to make it a fridge pickle for quick eating and added some whole coriander seed to give it a lemony taste. They are lovely. If you can’t find radish pods and want to give this recipe a go, I’d try it with sliced radishes as well, the flavor profile will be the same.

    Dragontail Radish Pod Fridge Pickles

    Dragontail Radish Pod Fridge Pickles
    Dragontail Radish Pod Fridge Pickles
    Print Recipe
    An easy pickle, great as a snack or on salads
    Servings Prep Time
    1 quart 10 minutes
    Cook Time
    5 minutes
    Servings Prep Time
    1 quart 10 minutes
    Cook Time
    5 minutes
    Dragontail Radish Pod Fridge Pickles
    Dragontail Radish Pod Fridge Pickles
    Print Recipe
    An easy pickle, great as a snack or on salads
    Servings Prep Time
    1 quart 10 minutes
    Cook Time
    5 minutes
    Servings Prep Time
    1 quart 10 minutes
    Cook Time
    5 minutes
    Ingredients
    • Radish Seed Pods (enough to fit in a quart jar)
    • 1 dried arbol pepper Sliced in half, you can use other dried chili peppers you may have on hand)
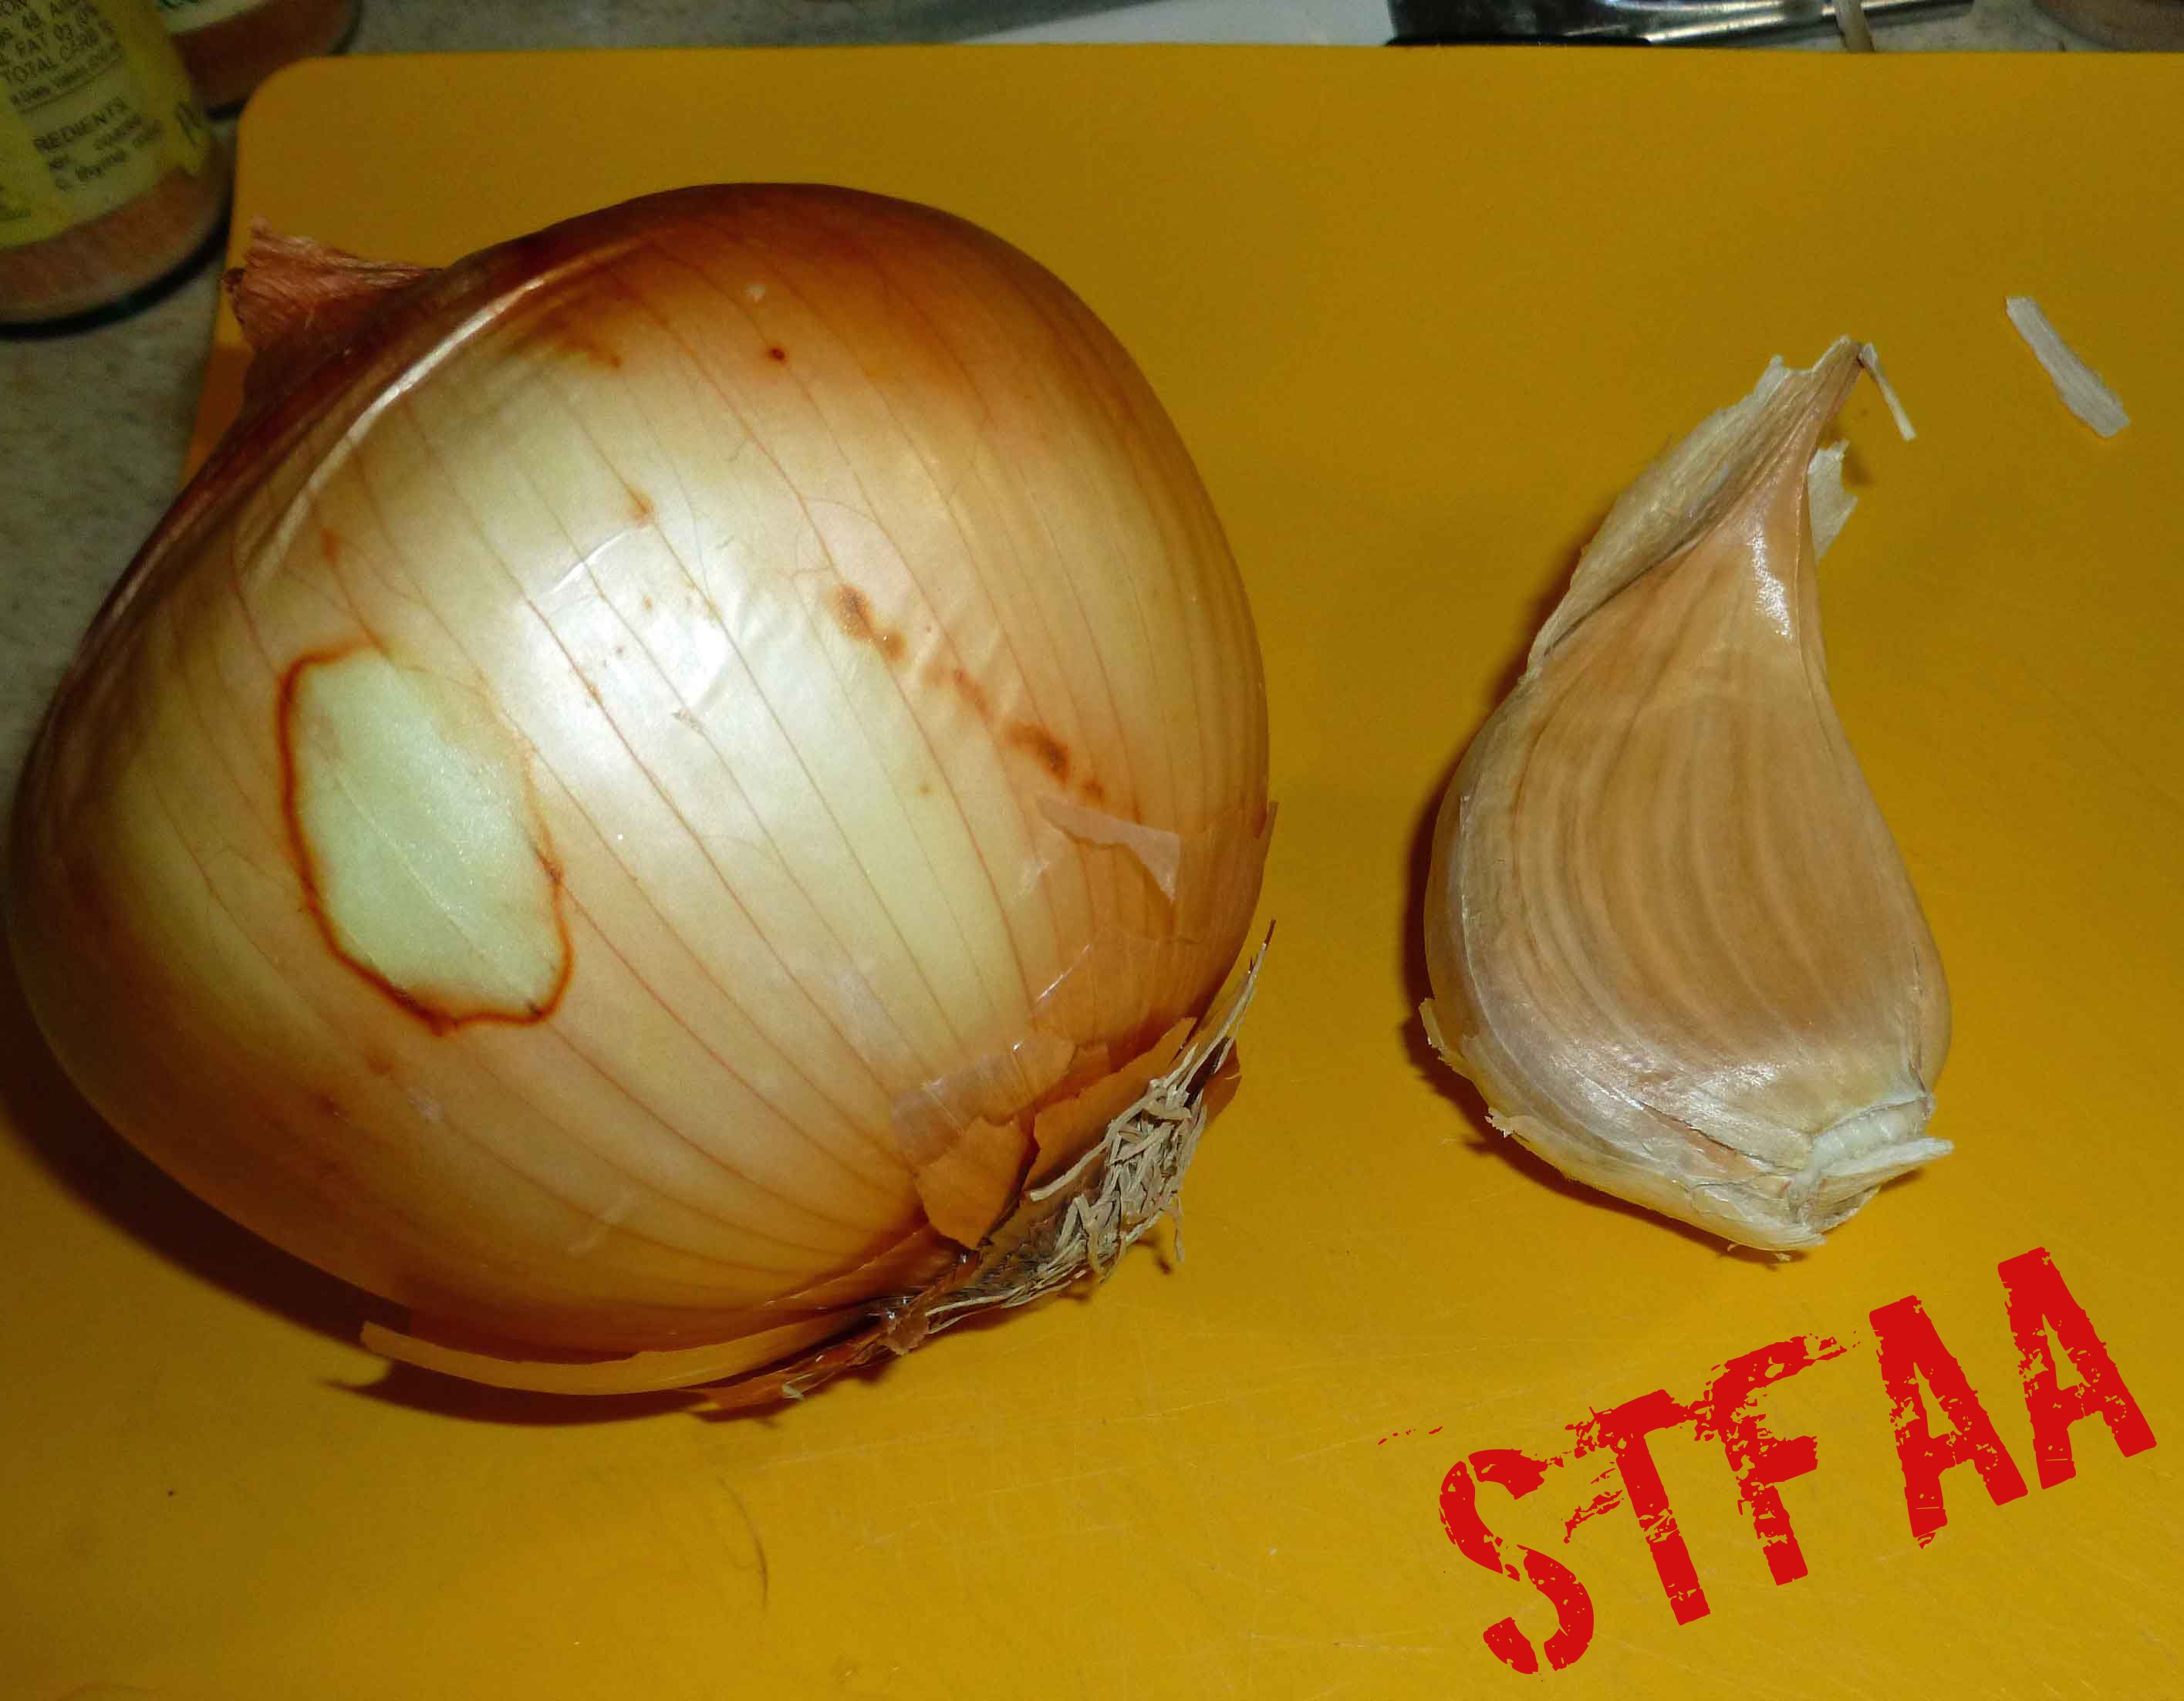
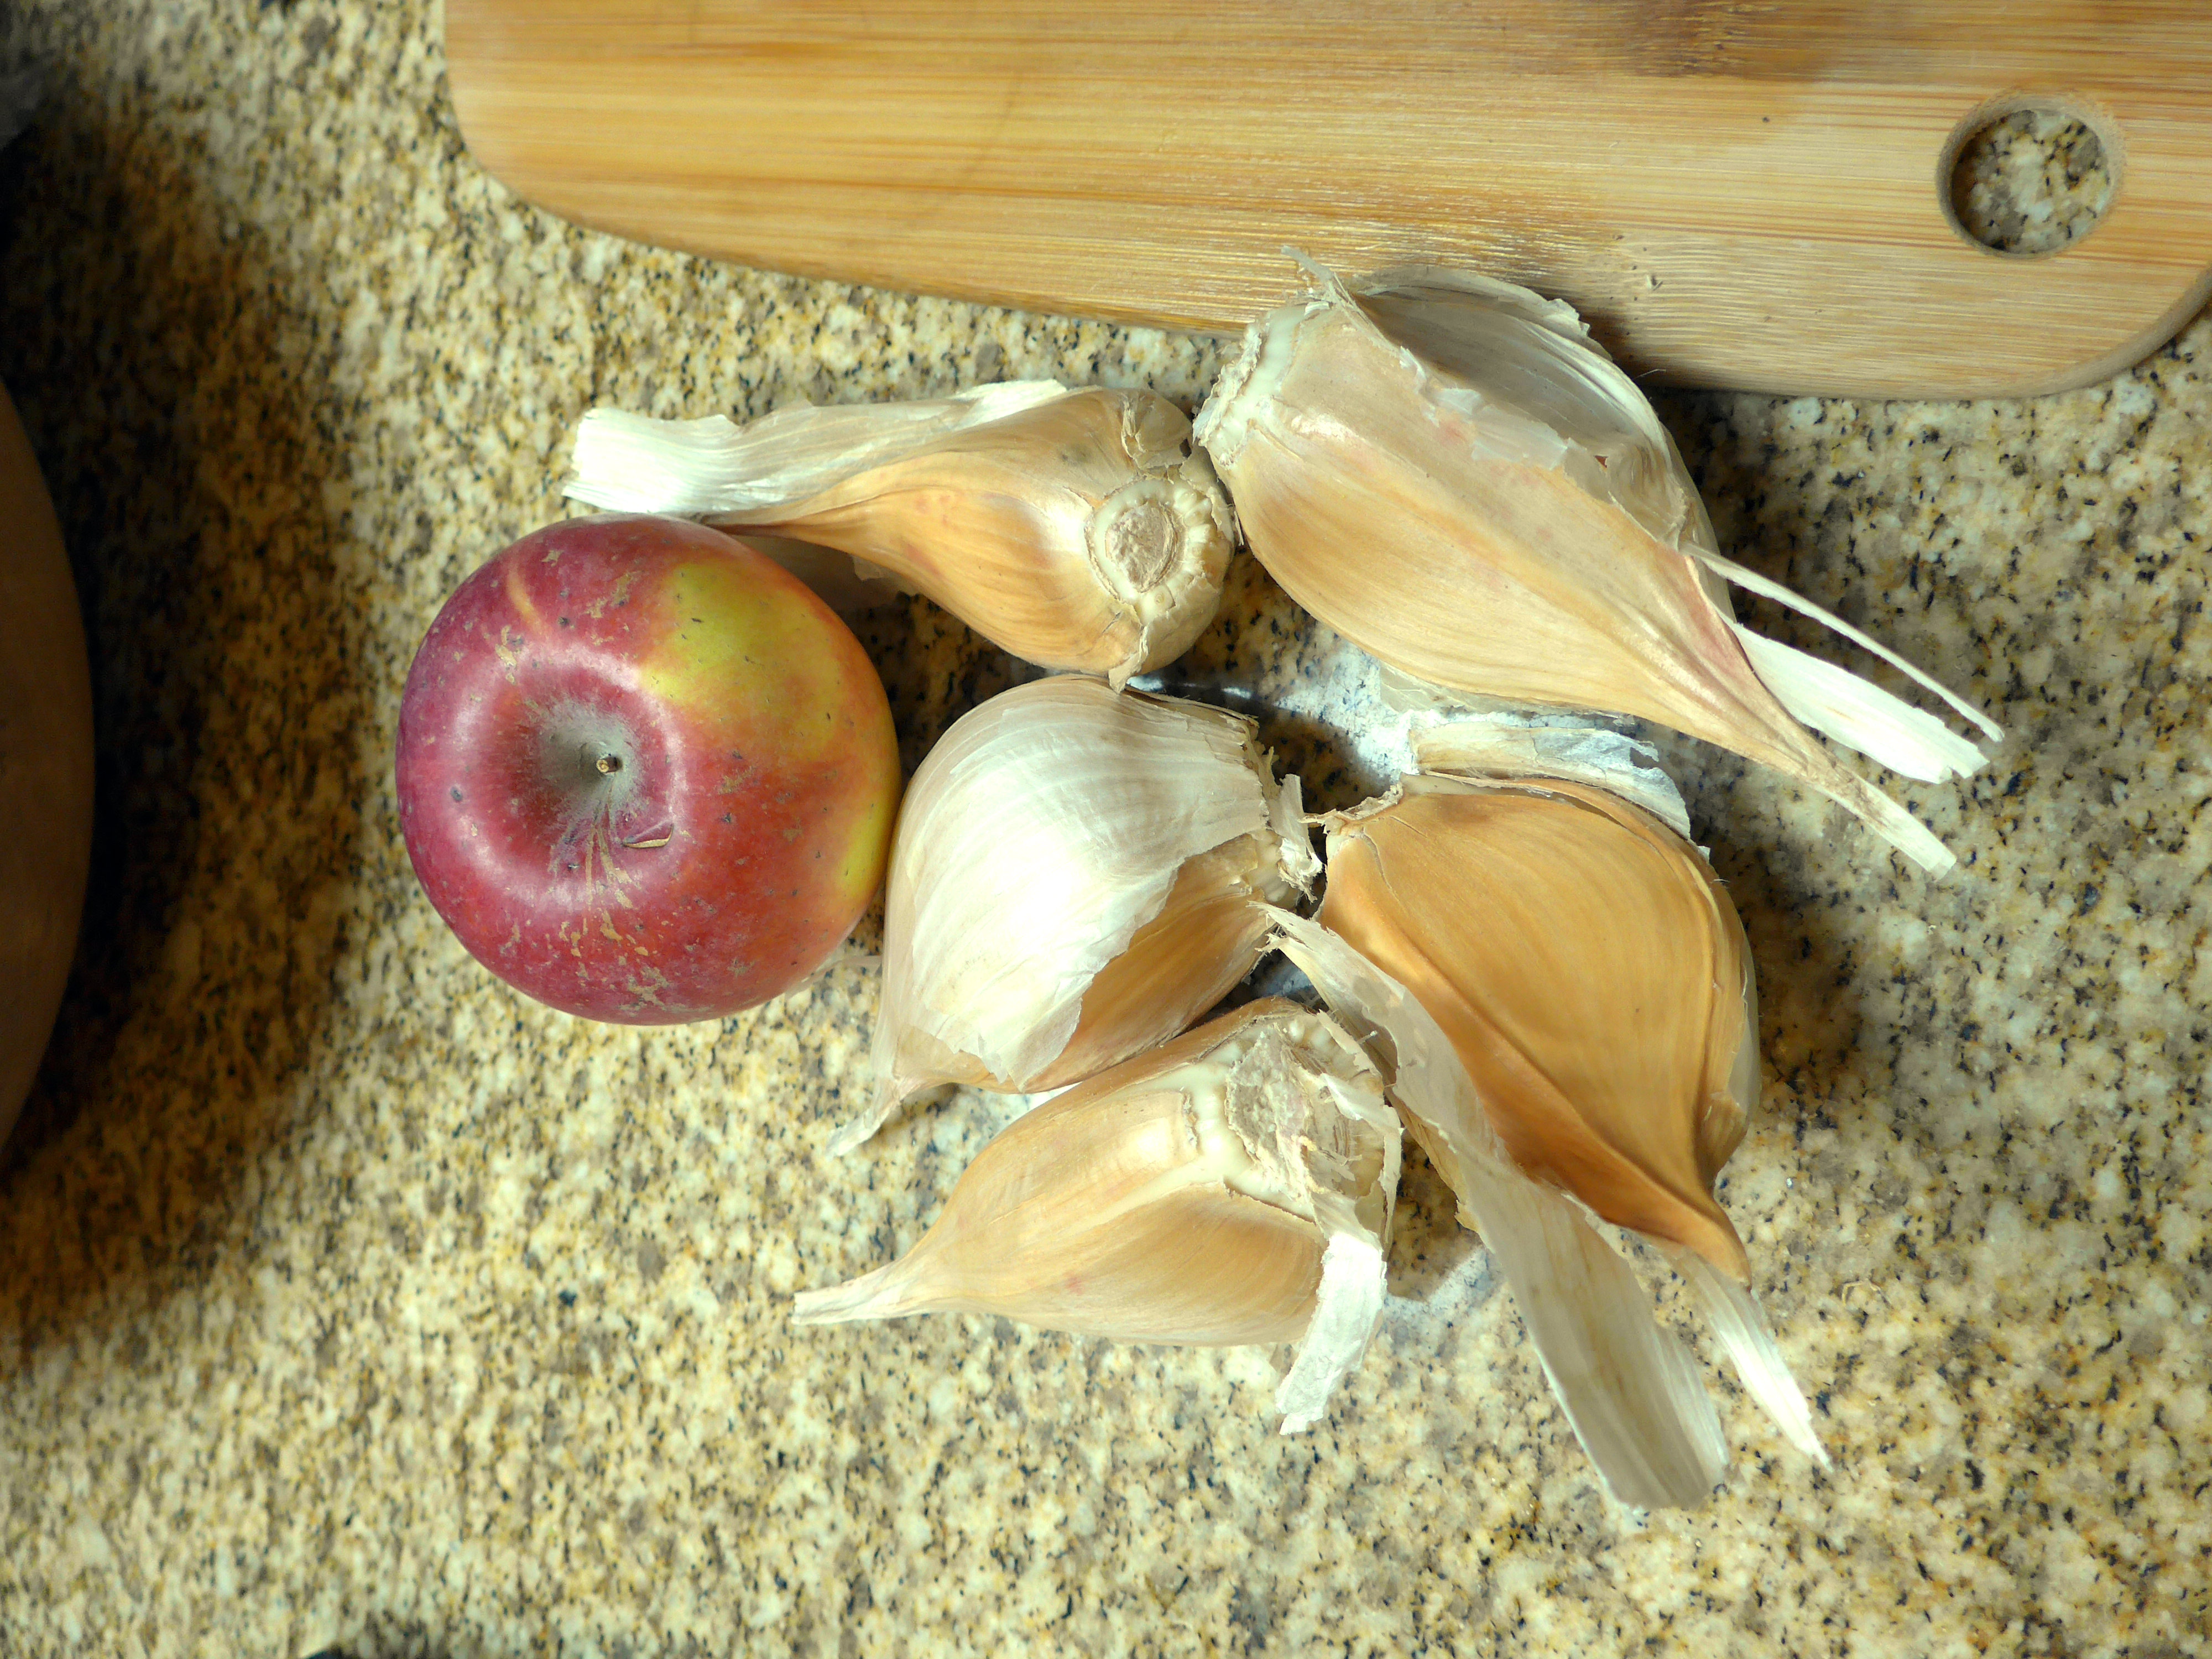
    • 1 clove garlic, peeled and sliced (I used two garlic scapes because I had them to use up)
    • 1 1/2 cups apple cider vinegar (Braggs is most tolerated for those allergic to corn)
    • 1 1/2 cups water
    • 2 1/2 teaspoons salt
    • 1/2 teaspoon tarragon (If fresh, use one sprig)
    • 1 teaspoon whole coriander seed
    Servings: quart
    Instructions
    1. Place radish seed pods, chili peppers, garlic or garlic scapes, tarragon, and coriander seed in quart jar.
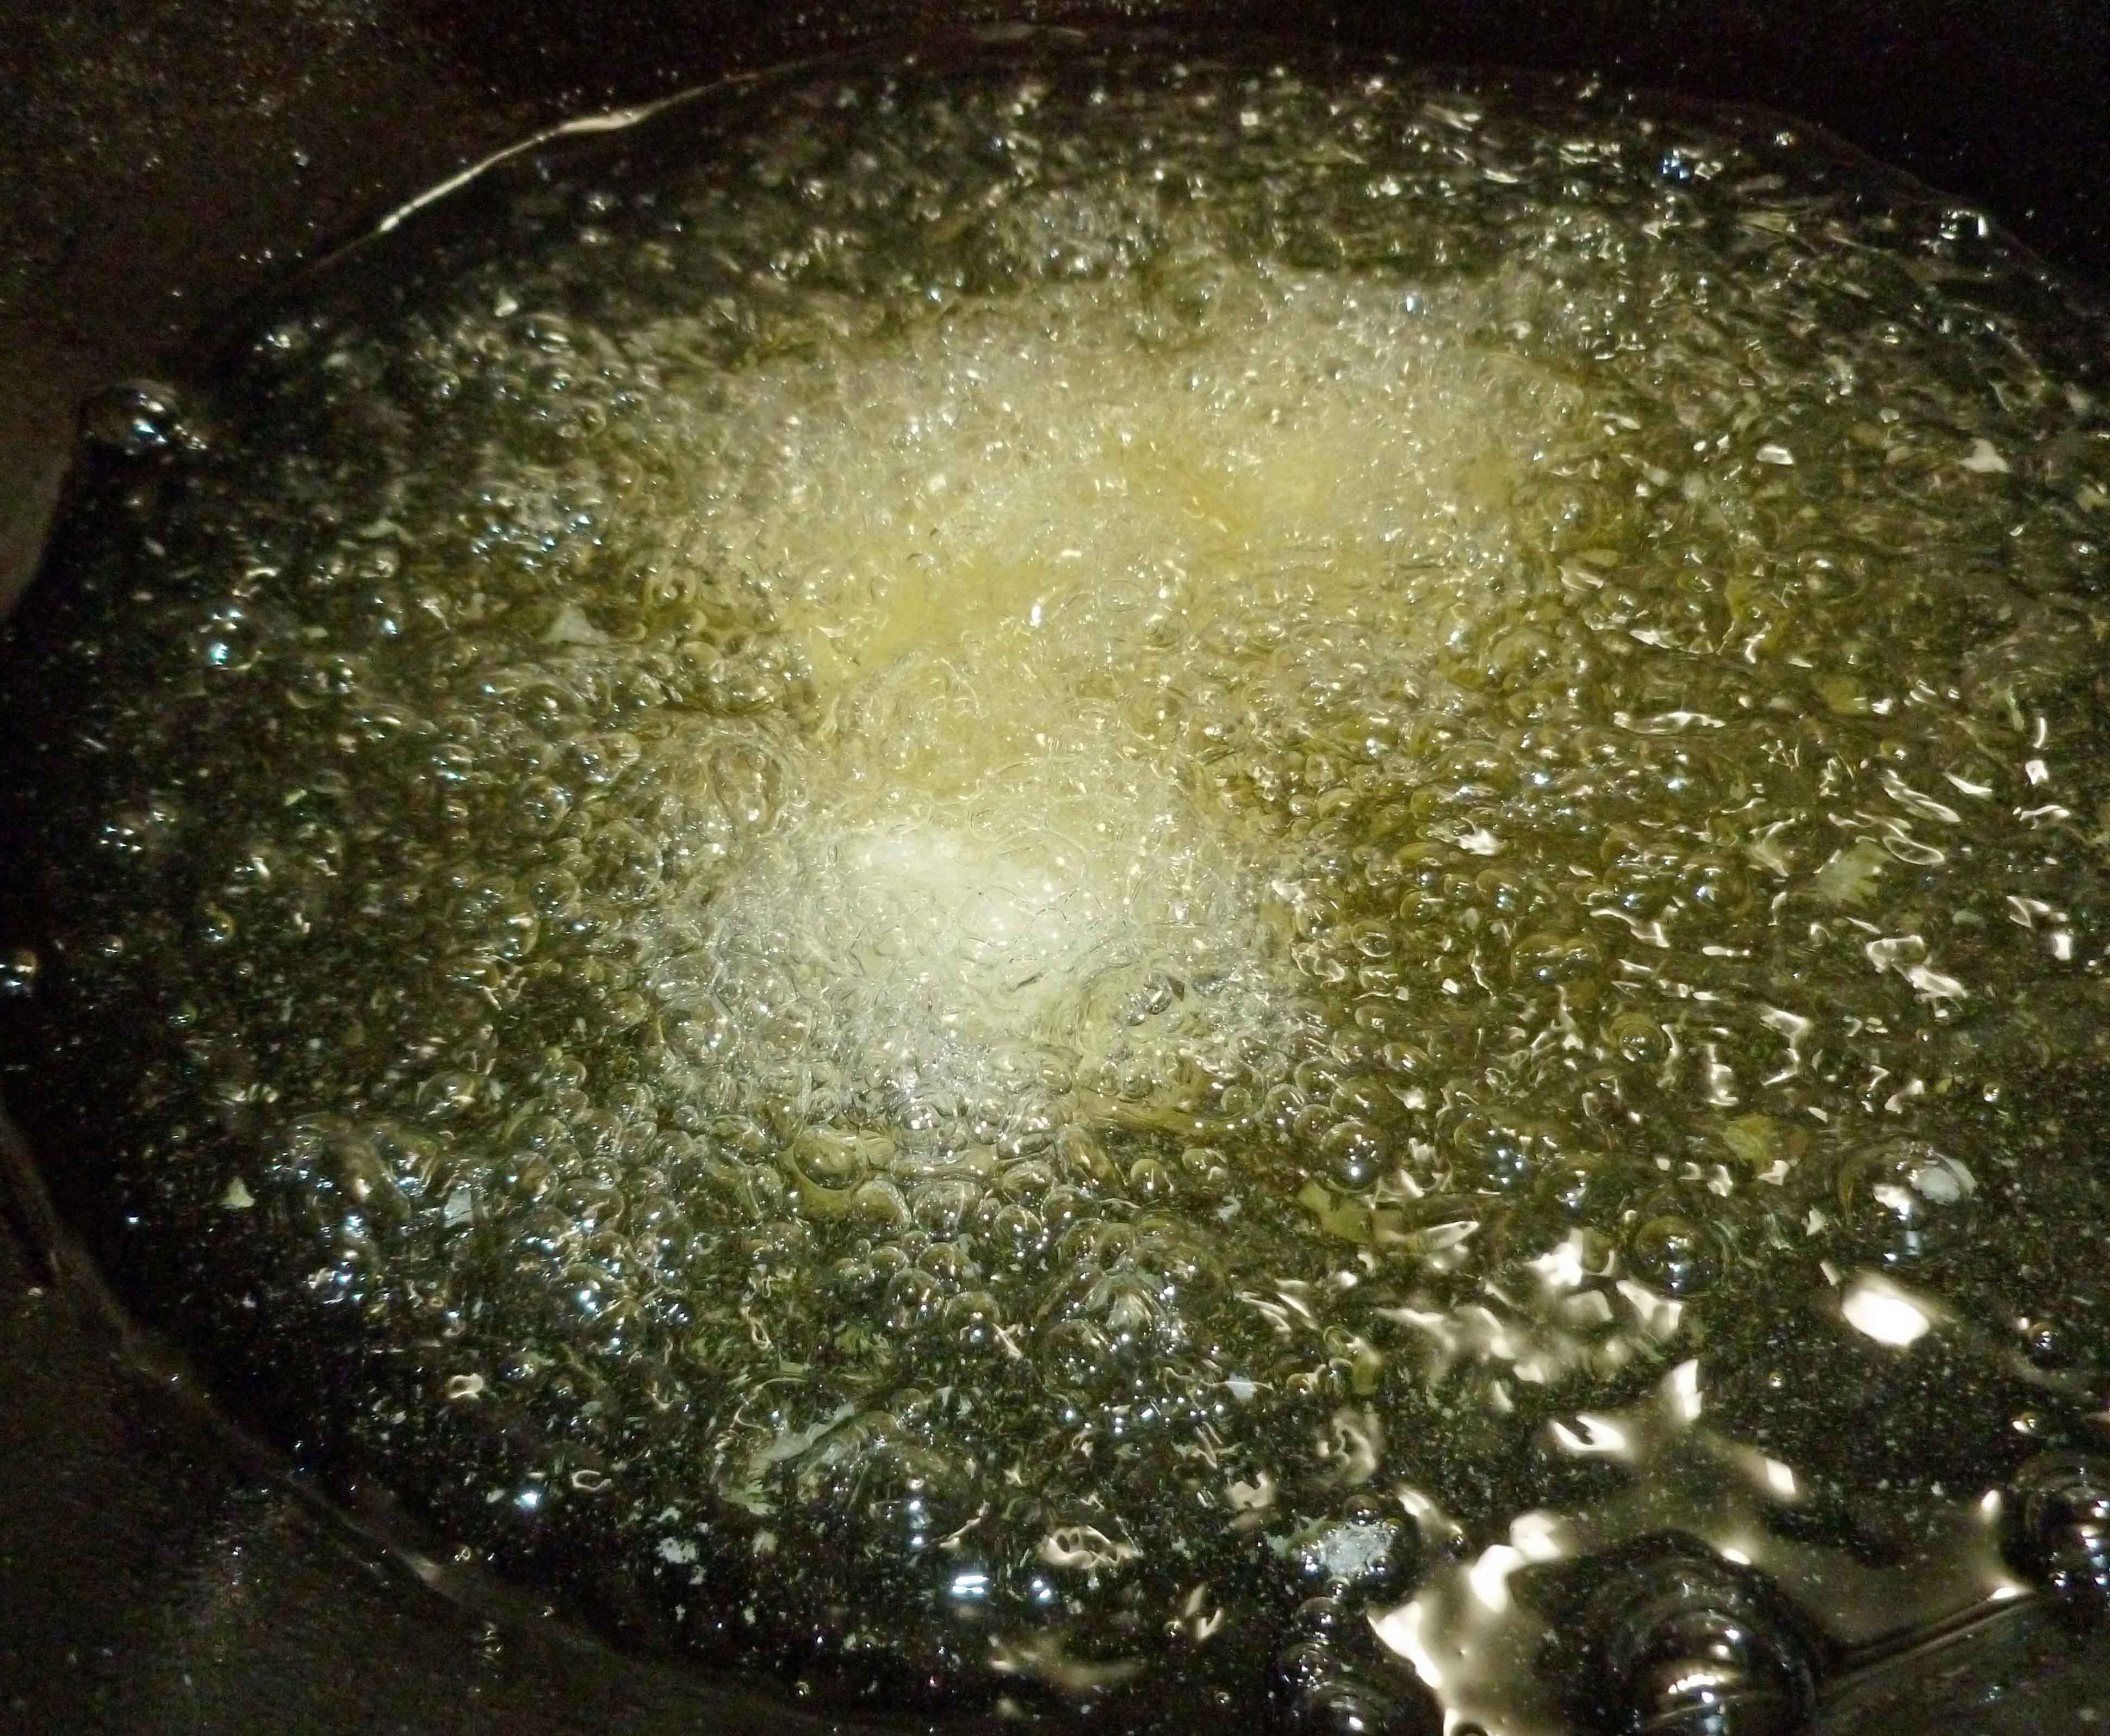
    2. Place apple cider vinegar, water, and salt in a small sauce pan and bring to a boil.
    3. Pour hot apple cider vinegar mixture into jar to covering radish pods. Place lid on jar, cool to room temperature and place in the refrigerator. You can eat them the next day, but for the full flavor to steep in it might take a day or two.
    Share this Recipe
    Powered byWP Ultimate Recipe
    Dragontail Radish Pod Fridge Pickles
    Dragontail Radish Pod Fridge Pickles


  • Stuffed Potatoes (Papas Rellenas inspired)

    Stuffed Potatoes (Papas Rellenas inspired)

    Stuffed Potatoes (Papas Rellenas inspired)
    Stuffed Potatoes (Papas Rellenas inspired)

    It’s the last recipe day of our potato themed month. And once again, I’m ignoring Irish cuisine despite my intent. I’ve taken inspiration from a Puerto Rican version of Papas Rellenas, but modified it to be safe for me, and cheated a bit by using salsa and taco seasoning for the ground beef mixture. But it still tastes really good. I’ve used my home canned salsa, but you can pick and choose your own salsa if you have a safe one you can purchase. I’ve also used my own home mixed taco seasoning, but again if you have a safe commercial one, have at it.

    The potato mixture should be dough like. If you have to add a bit more tapioca starch to get there, add another tablespoon or two if necessary. Make sure that the potato balls are really sealed, if not, they will open when deep frying and make a good bit of mess in the oil (ask me how I know). Also, I think they would be really good pan fried if you want to flatten them a bit, and skip the deep frying. If you would like to make them vegan, you could use a can of pinto beans or black beans instead of the ground beef, which would work just as well and be just as yummy.

    Stuffed Potatoes (Papas Rellenas inspired)
    Stuffed Potatoes (Papas Rellenas inspired)
    Print Recipe
    A comfort food you can deep fry or pan fry. If you wish to make this vegetarian or vegan, use a can of pinto beans or black beans in place of the beef.
    Servings Prep Time
    4 people 1 hour
    Cook Time
    5 minutes
    Servings Prep Time
    4 people 1 hour
    Cook Time
    5 minutes
    Stuffed Potatoes (Papas Rellenas inspired)
    Stuffed Potatoes (Papas Rellenas inspired)
    Print Recipe
    A comfort food you can deep fry or pan fry. If you wish to make this vegetarian or vegan, use a can of pinto beans or black beans in place of the beef.
    Servings Prep Time
    4 people 1 hour
    Cook Time
    5 minutes
    Servings Prep Time
    4 people 1 hour
    Cook Time
    5 minutes
    Ingredients
    Potato Mixture
    • 2 pounds russet potatoes washed, peeled and cubed
    • 3 Tablespoons tapioca starch
    • 3 Tablespoons aquafaba (see http://aquafaba.com/)
    • 1/2 teaspoon sea salt
    Beef Mixture
    • 1/2 pound ground beef or use one can of drained and rinsed pinto or black beans
    • 1/2 cup salsa (I used my homemade canned salsa)
    • 1 Tablespoon taco seasoning (see spice mix in our post on Taco Beef for Tacos, Salads, and Nachos) http://adultfoodallergies.com/taco-beef-for-tacos-salads-and-nachos/)
    Frying Ingredients
    • 1/2 cup tapioca starch to be used for flouring your hands while forming balls
    • oil for frying
    • stainless steel pot or skillet
    • thermometer
    Servings: people
    Instructions
    Potato Mixture
    1. Place potatoes in a pot of lightly salted water. Cover the pot, bring to a boil, then reduce heat to a simmer for 15-20 minutes, or until potatoes are soft. Or use your Instant Pot to cook them if you have one, using a trivet and a bowl or a steamer, adding a cup of water, and cooking on high pressure for 9 minutes.
    2. Mix 3 tablespoons of tapioca starch, salt, and aquafaba in a small bowl and set aside.
    3. Drain potatoes. You can also mix ingredients together manually but I used a stand mixer. Add the potatoes and mash them a bit before using your mixer. Using your mixer and the beater blade, mix until smooth. Slowly add the tapioca starch, salt, and aquafaba mixture while mixing. Scrape down the bowl as needed and mix until well combined. Set aside
    Beef Mixture
    1. Brown ground beef in a skillet. When brown, drain fat, and then add the taco seasoning and salsa to the browned ground beef. Mix the ingredients well, simmering for a few minutes. Set aside.
    Forming and Frying Stuffed Potatoes
    1. Dust your hands in tapioca starch, and flatten about 1/2 cup of the potato mixture into a disk in the palm of your hand. Add a heaping tablespoon of the beef mixture into the center of the disk, and bring the edges of the potato around the beef mixture. Seal the edges and roll into a smooth ball. Repeat until all the potato mixture has been used, making sure to keep your hands dusted in tapioca starch. Make sure that you seal them very well, if the seams open, it will be very messy.
    2. Heat oil to 375°F and deep fry the potato balls about 5 minutes, turning as needed until golden brown. You could also flatten them a bit and pan fry them.
    Share this Recipe
    Powered byWP Ultimate Recipe
    Potatoes after quick mashing before mixing
    Potatoes after quick mashing before mixing
    Tapioca starch and aquafaba mixture
    Tapioca starch and aquafaba mixture
    Completed potato mixture
    Completed potato mixture
    My homemade salsa (ta da, haha!)
    My homemade salsa (ta da, haha!)
    Completed beef mixture
    Completed beef mixture
    Forming potato balls
    Forming potato balls
    Forming potato balls
    Forming potato balls
    Forming potato balls
    Forming potato balls
    Completed potato balls
    Completed potato balls
    Frying the stuffed potatoes
    Frying the stuffed potatoes
    Stuffed potatoes after frying
    Stuffed potatoes after frying
    Stuffed Potatoes (Papas Rellenas inspired)
    Stuffed Potatoes (Papas Rellenas inspired)

    These are great as an appetizer, as a snack or as bar food.  You could serve them with a hot sauce spiked mayo, a mojo de ajo sauce, or a chili sauce. Enjoy!

  • Garlic and Onion Pakoras

    Garlic and Onion Pakoras

    Garlic and Onion Pakoras
    Garlic and Onion Pakoras

    Garlic and Onion Pakoras

    MaryKate and I were on the same wave length about our first recipe, in that garlic must be fried somehow. I’ve looked at doing pakoras several times, but hadn’t gotten around to it. I mean, fried veggie fritters with Indian spices? How can that be bad? So when MaryKate sent me some extreme elephant garlic from Seattle, I knew this would be a great use for it.

    Onion and Elephant garlic clove
    Onion and Elephant garlic clove

    Look that the elephant garlic in the picture. For scale, that onion is a bit larger than a baseball, but not as big as a softball. Crazy huge right? If you don’t have access to elephant garlic, just use an entire bulb of regular garlic. (Oh, and to resolve the unfortunate aroma later, I swished with a glass of water with a couple of tablespoons of peroxide and a drop of peppermint essential oil mixed in it, after lots of brushing teeth and tongue.)

    The garlic clove was actually large enough that I could put it through the grater on my food processor. I grated the onion, garlic and cayenne in the food processor and used my Pampered Chef ginger grater for the ginger (you could also use a microplaner).

    Onion, garlic, cayenne pepper, and grated ginger
    Onion, garlic, cayenne pepper, and grated ginger

    The batter ingredients go in the blender, and you blend before adding water, but keeping it to a thick paste.

    Batter paste ingredients in blender
    Batter paste ingredients in blender

    After you’ve made the paste, mix in the veggies and your batter for the Garlic and Onion Pakoras is ready to fry.

    complete Garlic and Onion Pakora batter
    Completed Garlic and Onion Pakora batter

    I’ve learned to deep fry in a stainless steel or cast iron pot using a thermometer. Deep fryers generally have nonstick interiors which could potentially give off fumes that would kill my parrot. Also, once you get used to it, it’s really no big deal to fry on the stove top. Just use a pot that’s nice and deep to prevent splattering. I use a Lodge cast iron wok and I love it for frying. High walls to prevent splatter, but large open surface and it uses less oil than a regular stock pot.

    Garlic and Onion Packoras being fried
    Garlic and Onion Packoras being fried

    Once they are golden brown, you want to drain off the excess oil. Conventional wisdom says its best to drain on a rack over paper towels, but…that’s just one more damn thing I’m going to have to wash, and I don’t care enough.

    Garlic and Onion Packoras draining after being fried
    Garlic and Onion Packoras draining after being fried

    Serve with ketchup or a chili sauce or you can mix up some chaat masala to sprinkle on them. Enjoy!

    Garlic and Onion Pakoras
    Garlic and Onion Pakoras

    Notice: Trying to access array offset on value of type bool in /home/maryzahc/public_html/adultfoodallergies.com/wp-content/plugins/wp-ultimate-recipe/helpers/models/recipe.php on line 254
    Garlic and Onion Pakoras
    Print Recipe
    A lovely fried garlic and onion snack or appetizer when you’re playing with deep frying.
    Servings Prep Time
    4 people 15 minutes
    Cook Time
    5 minutes
    Servings Prep Time
    4 people 15 minutes
    Cook Time
    5 minutes
    Garlic and Onion Pakoras
    Print Recipe
    A lovely fried garlic and onion snack or appetizer when you’re playing with deep frying.
    Servings Prep Time
    4 people 15 minutes
    Cook Time
    5 minutes
    Servings Prep Time
    4 people 15 minutes
    Cook Time
    5 minutes
    Ingredients
    • 1 medium onion
    • 1 clove elephant garlic (if you don’t have elephant garlic, use an entire bulb of regular garlic)
    • 1 hot pepper, destemmed and deseeded (use a jalapeno, serrano, or cayenne pepper depending on your preferred level of heat)
    • 2 teaspoons ginger grated
    • 4 Tablespoons garbanzo bean flour (besan)
    • 1 Tablespoon rolled oats
    • 1 Tablespoon rice flour
    • 1/2 teaspoon sea salt
    • 1/8 teaspoon ground turmeric
    • 1/4 teaspoon crushed red pepper
    • 1/4 teaspoon ground cumin
    • 1/4 teaspoon ground garam masala
    • 1/2 inch piece of peeled ginger
    • water
    • safe oil for frying
    • thermometer
    • stainless steel or cast iron pot
    Servings: people
    Instructions
    1. Thinly chop up the onion, garlic, and pepper, and grate 2 teaspoons of ginger. I used the grater blade in my food processor for the vegetables, and grated my ginger with a ginger grater (you could use a microplaner). If you are using a knife, wear safe for you food prep gloves to prevent you from burning your hands when chopping the pepper.
    2. In a blender, place the garbanzo bean flour, oats, rice flour, salt, turmeric, crushed red pepper, cumin, garam masala, 1/2 inch piece of peeled ginger. Blend. Add enough water, teaspoon by teaspoon to form a thick paste, scraping down the sides as necessary. Keep the paste thick as more water will be added when you add the vegetables.
    3. Add the chopped vegetables, and blend for only a few seconds, just enough to incorporate the veggies with the paste. You do not want the vegetables pureed. Empty the blender into a bowl or container and make sure the mix is well combined.
    4. Place safe oil into a stainless steel or cast iron pot, two inches deep. Heat oil until the temperature is 360°F. Using a tablespoon or small scoop, place a spoonful or scoop into the hot oil and deep fry a few minutes on each side until golden brown.
    5. Place on plate with paper towels to drain off excess oil. Serve warm with a ketchup or chili sauce, or try making up your own chaat masala mix. Enjoy!
    Share this Recipe
     
    Powered byWP Ultimate Recipe
  • Garlic Potato Scallion Snacks

    Garlic Potato Scallion Snacks

    Potato UFOs? Not quite crackers?
    Potato UFOs? Not quite crackers? Pardon the weird font — my computer’s acting weird.

    In February, we’ve decided to play with garlic. Mmmmm, garlic. It’ll keep the vampires away, but it’s also good for colds and such. I’m guessing, with the load of elephant garlic I just roasted, we’ll just keep people far enough away not to share germs? Garlic is such an excellent base flavor for so many things. I would guess that I use garlic, whether fresh or powder, in maybe 70% of the savory dishes in my kitchen? I love it so. Way back at the beginning of my food allergy journey, garlic was one of the foods I cut out, thinking it was an issue. Looking back, I figured out that it wasn’t — it was just heavily featured in many dishes that were also full of dairy, which is a problem. I know that garlic isn’t an easy or favored food for some people on restricted diets. I’m sorry! This isn’t your month here at Surviving the Food Allergy Apocalypse. I hope you learn something else, or, if it’s easier, come back on Fridays for links instead.

    This is elephant garlic. Each clove is about, what, half an apple or so? They are huge and mild and awesome.
    This is elephant garlic. Each clove is about, what, half an apple or so? They are huge and mild and awesome.

    Let me be honest — I do not know what to call this dish. I was fussing with the basic recipe, and I tried cooking it a variety of ways. The flavor is nice in all of them, but the “winning” version has the best texture, like a small flexible pancake snack, savory, not sweet. I’m sure you could top it with something, but it’s tasty all on its own. So is it okay if I call it just a snack? You could eat this while watching a game. Or just TV or a movie. I don’t advise eating it while playing a game, like a board or card game, as I think it would leave you with greasy fingers, leaving prints on the game bits.

    SO this is Garlic Potato Scallion Snacks. They are tasty and warm and not too labor intensive. Enjoy.


    Notice: Trying to access array offset on value of type bool in /home/maryzahc/public_html/adultfoodallergies.com/wp-content/plugins/wp-ultimate-recipe/helpers/models/recipe.php on line 254
    Garlic Potato Scallion Snacks
    Print Recipe
    Servings
    2 dozen “snacks”
    Servings
    2 dozen “snacks”
    Garlic Potato Scallion Snacks
    Print Recipe
    Servings
    2 dozen “snacks”
    Servings
    2 dozen “snacks”
    Ingredients
    • 1 head garlic
    • 1 Tablespoon olive oil
    • 1 pound potatoes yukon gold, peeled if you prefer
    • 1 Tablespoon salt
    • 2 Tablespoons vegan margarine, safe for you
    • 2 oz roasted garlic
    • 2 Tablespoons vegan cream cheese (I like Kite Hill, which is almond-based. Use what is safe for you.)
    • 2 Tablespoons glutinous rice flour (which does not actually contain gluten)
    • 2-4 Tablespoons vegetable stock
    • 1-2 Tablespoons olive oil
    Servings: dozen “snacks”
    Instructions
    1. Roast garlic. Chop off top of bulb, drizzle with olive oil, wrap in foil, and bake at 450º for 45 minutes. Let cool. If you are using elephant garlic, like in the photos, you can peel the cloves first, as I did.
    2. Boil potatoes in salted water until easily pierced with a fork. The time for this will depend on the size of the potatoes. I personally like to buy bigger potatoes and boil them whole, as I think I get the best texture this way
    3. Preheat oven to 350ºF. Line a baking sheet with parchment paper or a silicon baking sheet.
    4. When potatoes are done, drain and lightly mash. Add vegan margarine, vegan cream cheese, roasted garlic, and mash.
    5. Add rice flour and veggie stock and mash to completely combine. You should have a sticky mash when you are done, so don’t add too much veggie stock. I added it 1 Tablespoon at a time.
    6. Make approximately 1 Tablespoon drops onto your prepared baking sheet. Leave about 1 inch of space around each drop, as they will flatten out into pancakes. No need to flatten them yourself. Using the second tablespoon of olive oil, brush the top of each.
    7. Bake for approximately 25 minutes, until the edges have browned.
    Recipe Notes

    I’ve given a garlic measurement in ounces rather than cloves as garlic cloves differ drastically in size. Taste and adjust as you go, if you don’t have a kitchen scale.

    Share this Recipe
     
    Powered byWP Ultimate Recipe
  • Cashew-Ginger Hummus

    Cashew-Ginger Hummus

    This recipe came out of what I had in the house when I wanted to bring some hummus over to Denise’s for a gathering. Denise is allergic to sesame, an allergy I understand is becoming more common, but not allergic to cashews. I’m not sure how common this combo is, but if your diet allows you to have cashews, give this spin on hummus a try. It’s enough like “typical” hummus to please purists, and different enough to be exciting. I think the cashews are a creamier, more neutral flavor than tahini, and it makes the perfect backdrop for ginger to pop. This is a really great hummus for making sandwiches or veggie wraps out of — somehow, the ginger just stands up well in a salad-like situation. I also stop my homemade hummus before it becomes too smooth — I like a little more texture than commercial hummus generally has.

    Cashew-Ginger Hummus
    Cashew-Ginger Hummus

    Notice: Trying to access array offset on value of type bool in /home/maryzahc/public_html/adultfoodallergies.com/wp-content/plugins/wp-ultimate-recipe/helpers/models/recipe.php on line 254
    Cashew-Ginger Hummus
    Print Recipe
    This twist on hummus replaces tahini with ground cashews for more texture and a creamier texture, with ginger replacing garlic as the primary flavor. This hummus is most excellent as a sandwich spread.
    Prep Time
    10 minutes
    Prep Time
    10 minutes
    Ingredients
    • 1/2 cup raw cashews,
    • 1 Tablespoon fresh ginger see recipe for technique
    • 16 ounces garbanzo beans
    • 1/4 cup aquafaba (juice from can or cooking water from beans)
    • 1/4 cup olive oil
    • 1 teaspoon garlic chopped
    • 1 Tablespoon lemon juice
    • 1/2 teaspoon kosher salt
    Servings:
    Instructions
    1. Using a food processor, add the ingredients in order of the recipe — with one big exception! If your ginger is already ground, chopped, or microplaned, start with the cashews. If not, begin with the ginger.
    2. If beginning with the ginger, just pulse until it is all shredded.
    3. If beginning with the cashews, pulse until you have a fine powder if you like texture. If you want your hummus to be really smooth, go ahead and make cashew butter.
    4. Add the chickpeas and liquid and process. Then add everything else and process to your desired smoothness.
    5. Enjoy as a spread or as a dip. If you’re using good quality pure olive oil, this will get somewhat stiff in the fridge. A few minutes resting at room temperature will fix that.
    Share this Recipe
     
    Powered byWP Ultimate Recipe
  • Brown Rice Pulp Chips (+ rice milk)

    Brown Rice Pulp Chips
                                                                   Brown Rice Pulp Chips

    I occasionally want to use rice milk in cooking, but I really dislike all the commercial rice milks that I’ve tried. I find them thin and flavorless. But in trying to use up  some leftover rice, I discovered that by adjusting the amount of water (and using really good rice, I could make a thick, almost cream-like rice milk that worked pretty well in baking. I still don’t really like rice milk for drinking — there’s something sort of “dry” about the flavor. That’s odd, I know, but that’s the best description I can come up with.

    Anyway, any time I’m making rice and think I’ll have time for rice milk later in the week, I make a cup or two extra. It doesn’t take that much longer in the rice cooker. I’ll take the leftover rice and let it soak in mason jars overnight, and then blend it up the next day. If you strain it, it’s nice and smooth (depending on what you want to use it for, consider not straining it. It seems to add some bulk to bread and cake unstrained, but none of those recipes are blog-ready, I’m still playing.) But I hate throwing out the pulp and wondered if I could season it and make crackers out of it.

    It worked! But they really have more of a chip texture than a cracker, so I’m calling these chips. I did these in the dehydrator, but if you don’t have one, I’m guessing that doing this on low in the oven would work. The times I’ve given will be wrong, though. I didn’t try this because I’ve not made them yet this summer when it was cool enough to want to use the oven. You can also use whatever seasoning you like, but I don’t really recommend a salt-free one. Those turned out really bland. I tried a bunch of the seasonings in my kitchen, and I’ve listed what I liked best.

    On rice: I use a brown jasmine rice I buy in large bags at the Asian market in Nashua. Brown jasmine is my “all-purpose” rice at this point in time. It’s likely that the brown rice adds to the leftover pulp, so I would suggest using brown rice for this. But if you try it with a white rice — or something else, please let us know in the comments. You do get rice cream (which is easily thinned down to rice milk) and crackers out of this, so it’s a 2-for-1 recipe.

    I did not give an exact number of chips, as it’s come out a little different each time for me, despite all attempts to create stringent measurements. Since this is basically a way to use up something you’d throw out otherwise, maybe a little uncertainty is okay?

    Brown Rice Pulp Chips up close
                                                                      Brown Rice Pulp Chips up close

    Brown Rice Pulp Chips

    Fill a quart mason jar with the rice, lightly packing it in. Fill the jar with water. Put it in the fridge overnight. I’m not 100% sure it needs to be refrigerated, but better safe than sorry. The rice will soak up a lot of this water, and I think it makes a smoother milk.

    Empty the water and about half the rice from the jar into your blender. Add a cup of water and blend. If you need more water, add it, but your goal is to blend the smoothest rice milk with the least amount of water here. You will need more, but add it gradually

    Repeat with the other half of the rice, but add about 1 1/2 cups of water to begin, as you don’t have leftover soaking water.

    Now strain the rice milk through a fine sieve. Keep stirring the mush to drain as much milk as possible out of the rice pulp.

    I usually get about a quart of rice cream out of this.

    With the leftover pulp, drop in about 1 Tablespoon blobs onto the fruit roll trays of your dehydrator (or onto a cookie sheet if you’re trying the oven). Sprinkle generously with seasoning.

    Run the dehydrator at 155ºF for 9 hours, and check to see if your chips are crispy. They may need a little more time when it’s humid out. Lock these up in an airtight container to keep.

  • White Bean Pizza Hummus

    White Bean Pizza Hummus
    White Bean Pizza Hummus

    Being allergic to foods that are staples of the Standard American Diet can mean that road trips are, well, a little sad. But not going on a road trip would be more sad. So thinking about road trips like setting out for the western frontier (or, in this case, Vermont, which is to the west) means that with a plan and a cooler (and a hotel chosen partly for the microwaves and mini-fridges in each room), means “yay! Road trip!” I admit that I really miss finding awesome, off-beat restaurants in new cities. Now, if I plan to eat out, I check ahead and carefully read menus. That’s hard to do when you don’t know where you’ll be for lunch. So, again, the cooler and the meal plan.

    Hummus is a great road trip food. I’m a little bored of chickpea hummus, the standard, and I had time (and a plan) to make my own. I was going to make a black bean hummus I’d forgotten about — but in planning the grand meal plan, I forgot to see if I had black beans in the house. Oops.

    I did have cannellini beans. And I have not yet killed my fresh herbs on the deck — I have chocolate mint, thyme, and oregano, and my neighbor is growing basil. Oregano and basil made me think of pizza, so I went that direction. Instead of tahini, I’ve used cashews, as I thought their more neutral flavor would be good with this combination. I think tahini would likely be okay (and make it nut-free), so if you make it that way, let us know in the comments how it turned out.

    White Bean Pizza Hummus
    White Bean Pizza Hummus

    White Bean Pizza Hummus

    • 1/4 cup raw cashew pieces (yes, you can use whole. The pieces are usually cheaper, though.)
    • 1/2 teaspoon chopped garlic (more, up to 1 teaspoon, if you want a prominent garlic flavor. Roasted garlic would also be excellent here, but I’m currently out.)
    • 1 Tablespoon tomato paste
    • 1 can (15 oz.) cannellini beans, drained and rinsed (Save the liquid!)
    • 5 large fresh basil leaves, rinsed
    • about 1 Tablespoon of fresh oregano leaves, rinsed
    • pinch of fennel seeds, crushed
    • 2 Tablespoons good quality olive oil, plus more to drizzle on top

    In a food processor fitted with the S-blade, add the cashews and puree. They will not quite turn into nut butter (you’d need a little oil), but let them go until they are almost there.

    Add the garlic and tomato paste and pulse it in.

    Add the beans and puree the mix.

    Add the basil, oregano, fennel seed, and olive oil and run until everything is smooth, scraping down the sides of the bowl as needed.

    Transfer to a serving bowl or storage container and drizzle olive oil over the top — just a bit will help keep the hummus from drying out. Unlike in the photos, swirl it around so that it coats the top — I just wanted better photos, so I didn’t do that until I was done.

    Serve with crackers, chips, or veggies of your choice.

  • Chili Flavored Russet and Sweet Potato Chips

    Chili Flavored Sweet Potato Chips
    Chili Flavored Sweet Potato Chips
    Chili Flavored Russet Potato Chips
    Chili Flavored Russet Potato Chips

    I’ve been meaning to fry stuff for sometime, because I miss fried food and the last time Mary Kate and I had a fry-a-palooza was this past Thanksgiving. And I wanted potato chips. I tried a recipe where you baked them, but it took two hours of prep, and seriously, I can fry them faster than that, with less aggravation. This is one of those recipes where having good tools helps. I used a mandoline to slice the russet potato and sweet potato, and I used a Thermopop thermometer to keep track of the temperature of the oil.  Also, I used a cast iron wok to fry in, because I like it and it uses less oil, but you can use a regular skillet or stock pot if you use enough oil.

    Chili Flavored Russet and Sweet Potato Chips:

    Serves 1 (let’s be realistic about this…I ate them all in 10 minutes).

    • 1 Russet Potato, sliced extremely thin
    • 1 Sweet Potato, sliced extremely thin
    • a pinch of DIY Chili Powder
    • a pinch of salt
    • safe oil for frying enough to fill the pot about 3 to 4 inches deep

    For the frying:

    • A pot deep enough to accommodate about 3 inches of oil and the frying thermometer, a thick stainless steel stock pot or an enameled dutch oven would be best, although I used a cast iron wok and just fried less chips at a time. You also want a pot that’s tall enough that the edge is 4 or more inches above the oil level. It’s safer and there’s less splatter all around. We do not recommend using anything with Teflon or nonstick coatings. Of course, if you have an actual deep fryer appliance, use that.
    • frying thermometer (but you can’t use this one with a wok, in case you planned use a wok instead, I used this one and just stuck it in the oil periodically to check.)
    • tongs and/or slotted frying spoon/spider  (we used a silicone one rather than the traditional wire and bamboo, but I can’t find a picture of ours)
    • plate or cookie sheet, lined with paper towels

    Set up your frying pot, add your safe oil, and set up your thermometer. Start heating your oil over medium heat, as it will take some time to reach the right temperature.  You are aiming for about 380ºF.

    I used a mandoline, shown below, to slice my potatoes, but you can slice them with a knife if your knife skills are that good.

    Mandoline
    Mandoline

    The slices of your Russet potato will be wet and starchy. Place them in a bowl and water and agitate them a bit to rinse the starch off.

    Rinsing off the starch from the Russet potato slices
    Rinsing off the starch from the Russet potato slices

    Place the rinsed slices in between the folds of a clean kitchen towel to dry them off.

    Rinsed slices on clean kitchen towel
    Rinsed slices on clean kitchen towel
    Fold towel over slices to dry both sides
    Fold towel over slices to dry both sides

    The sweet potato slices should be dry enough after slicing as there is less water content than a Russet potato.

    Sweet Potato Slices
    Sweet Potato Slices

    When the oil temperature is 380°F, carefully add some of the potato slices to the pot. You don’t want to overcrowd them.

    Russet Potato frying
    Russet Potato frying
    Sweet Potato frying
    Sweet Potato frying

    Fry the potatoes, turning them occasionally with tongs until they are golden brown. They should be fried a bit darker in color than normal potato chips so that they are crispy. The mandoline does not quite cut the potatoes as thinly as a commercial potato chip, and in order to get some crisp, you need to cook them a little longer. The potatoes will start to wave and distort when they are close. if the potato chip seems pretty flat still, keep frying a bit.  When the potato slices are fried, place them on the plate or cookie sheet lined with paper towels to drain.

    Sweet Potato Chips
    Sweet Potato Chips
    Russet Potato Chips
    Russet Potato Chips

    Once the chips have cooled a little, place them in a bowl and sprinkle the salt and chili powder on them to taste and toss them a bit to coat them and distribute the seasoning.

    Chili Flavored Sweet Potato Chips
    Chili Flavored Sweet Potato Chips
    Chili Flavored Russet Potato Chips
    Chili Flavored Russet Potato Chips

    Enjoy!