Notice: Function _load_textdomain_just_in_time was called incorrectly. Translation loading for the wp-ultimate-recipe domain was triggered too early. This is usually an indicator for some code in the plugin or theme running too early. Translations should be loaded at the init action or later. Please see Debugging in WordPress for more information. (This message was added in version 6.7.0.) in /home/maryzahc/public_html/adultfoodallergies.com/wp-includes/functions.php on line 6170 Main Dishes/Entrées – Page 8 – surviving the food allergy apocalypse (archive)Skip to content
Main Dishes/Entrée [ahn-trey] noun: a dish served as the main course of a meal. These recipes will not contain dairy, eggs, gluten, wheat or hazelnuts. If we use a top 8 allergen, we will use a tag warning of its use.
Quick-ish Beef Pho, with Sriracha and Hoisin sauce
So one of my pet peeves about the corn thing is no more going out for Vietnamese food, which is one of my favorite things ever. I actually made and pressure canned my own safe Hoisin sauce, and fermented my own Sriracha sauce so that I could still eat them. But you have to have stuff to eat the Hoisin and Sriracha on, and it’s winter, and we need pho. And we need an easy, quick-ish pho that it doesn’t kill you to make on a weeknight. You could do it the more traditional way, but again, we need dinner fast on a weeknight. This is why it’s good to have some of the Roasted Beef Stock around, either pressure canned, or in your freezer.
Quick-ish Beef Pho
Serves two really hungry people.
For the broth:
2 shallots (peeled, cut in half and broiled until browned)
6 cups of Roasted Beef Stock or a commercial variety if you can get some that’s safe for your allergies
1 cinnamon stick
1 ounce (or a nice thick piece between an inch and two inches long) of fresh ginger root, peeled and sliced into a few pieces
2 star anise (whole)
5 cloves (whole)
1 Tablespoon of fish sauce (optional) – make sure it’s safe for you
1 Tablespoon of sugar
For the fixings:
one half of a 16 oz package of rice noodles
a half pound of extra lean shaved steak
mung bean sprouts
a lime, sliced into wedges
fresh basil leaves or fresh chopped cilantro, or both
one half of a small red onion sliced very thinly
a Thai chili or two, sliced thinly
Turn your oven to its broil setting or preheat your oven to 500°F. Move your oven rack to the highest setting, and place your peeled and halved shallots on a baking sheet and put them in the oven. Check them every three to five minutes until they are browned as shown below.
Broiled Shallots on baking sheet
While the shallots are broiling, place the Roasted Beef Stock in a stockpot, along with the cinnamon stick, sliced ginger, star anise, cloves, fish sauce, and sugar. Bring it to a boil, then turn it down to a simmer. When the shallots having finished broiling, slice them into pieces and add them to the stock.
Pho broth simmering away
In another stockpot, bring enough water to cover your rice noodles to a boil. Add the rice noodles to the water and boil for 3-5 minutes or so until they are cooked to your liking, and then strain them. At this point, I parcel them out in the bowls I intend to serve them in, as the noodles may stick together too much if you let them sit in one container (they will un-stick when you add the broth). Wash your mung bean sprouts and then put your preferred amount of sprouts in each soup bowl. Slice your red onion finely, and then add some to each soup bowl.
Sliced red onion
Bring your pho broth back to a boil. At this point I scoop out the cinnamon, ginger, star anise, and cloves. There are two ways to approach your beef depending on your comfort level. First, you can add the raw shaved steak to the bowls and allow the heat of the pho broth being poured over it to cook it. Second, you can put the beef in the pho stock and let it cook for just a bit before ladling it into the bowls. I tend to go for the first approach, but it’s up to you. Pick an approach and add your beef and pho broth to the bowls. Place a couple of basil leaves, a lime wedge, some of the chopped cilantro, and the sliced thai chilis on top of the soup.
Quick-ish Beef Pho before adding condiments
Garnish with safe Hoisin, Sriracha, or chili garlic sauce to your taste, if you have safe versions. Enjoy!
So Denise posted a Meat-Eater’s Menu for Romance last week. But we know that not all of our readers are meat eaters — and I tend to vacillate. What if you or your significant other don’t eat meat? No fear! I’ve got a tasty vegan menu for sharing — or indulging in by yourself. This is my version of a refined plate, with subtle and complimentary flavors for a fine dining feel in your safe, allergen-free home: Grilled Coriander-Cumin Portabella Mushrooms, Toasted Garlic Green Beans, and Wine-Baked Red Potatoes.
There is nothing hard about this menu, but the timing is important to get everything to come out at the same time. So I’m going to give you each dish’s ingredients up front, then break down the timing by doing all the instructions for the meal as a whole instead of each dish. Hopefully that won’t be too confusing since I’ve told you up front, and timing’s always the hardest part for me.
Since I’ve not made a dessert either, I’d echo Denise in suggesting a fine bar of chocolate to share, a pint of your favorite safe ice cream, or check out our desserts category for ideas. I’d tell you that this is heart-healthy or some other such cheesy pun-age, but who knows? It’s tasty, and allergen-free, plus animal-free. Enjoy.
Artistic Plating, my best attempt
Be My Vegan Valentine Dinner
Wine-Baked Red Potatoes (adapted from an Edward Espe Brown recipe)
2 pounds small red potatoes — look for about ping-pong ball size or smaller
10 cloves of garlic, peeled
5-10 sprigs of fresh herbs (dill, rosemary, or thyme are recommended — buy whatever you like best and looks freshest)
about half a bottle of red or white wine, your choice (but don’t get something sweet). I had some of each, so I used about 1/4 a bottle of red table wine, and about the same amount of a chardonnay. Pick something you like OR if you don’t drink wine regularly, get a table wine — a blend of wines that should be neither too dry nor sweet.
3/4 cup non-dairy milk or cream — if you make your own, just cut the amount of water in half
Toasted Garlic Green Beans
1/2 pound (be generous with this) green beans
1/4 cup oil (I used olive oil — you will use about half of this for the mushrooms)
2 Tablespoons chopped garlic
salt to taste
Grilled Cumin-Coriander Portabella Mushrooms
4 mushrooms, washed and de-stemmed
2 Tablespoons brown sugar
1/2 teaspoon salt
1/2 teaspoon ground cumin
1 teaspoon ground coriander
pinch of cayenne (optional, but adjust for your desired spice-level)
(you will be adding some oil to this from the green bean recipe)
Cooking times:
The potatoes are going to take about 2 hours — they can go more, if you want, but do not plan for less.
The green beans themselves will take maybe 10 minutes, but the garlic will take about a half an hour before you cook the beans.
The mushrooms will take about 8 minutes if you have a two-sided grill (like a Foreman grill), and about 13 if you’re using a skillet or grill pan.
IF you time it right, this will all be done in 2 hours, with a few periods of activity but a lot of downtime. We’re working in the order of these bullets — potatoes, garlic, green beans, mushrooms.
To begin, preheat the oven to 375F. Wash and scrub your potatoes. If you were unable to find smaller red potatoes, cut the ones you have down to approximately the size of ping-pong balls. You need a baking dish that will hold all of your potatoes in a single layer with a little space around them — I have an 8.5″ by 11″ glass dish that is perfect for this.
Lay your herbs out on the bottom of the baking dish so that you have an evenly dispersed layer. Put your potatoes on top. Throw the whole garlic cloves in scattered around the dish. Then add your wine — it should come about halfway up the potatoes, which is why I haven’t given you an actual measurement — just pour it in until you have enough.
IF your potatoes are cut, add salt and pepper now. If they aren’t, I prefer to add the salt and pepper at the table. Cover the dish with foil, but don’t scrunch it too tight — you want some of the steam to escape, but not most of it. Put the potatoes in the oven and set the timer for an hour. Now go find something to do for an hour. You are not needed here.
One hour later …
Reset your timer for 30 minutes. Leave the potatoes alone. They still don’t need you.
Put a skillet, cast iron if you’ve got it, over medium low heat and let it heat empty. When the skillet is hot, add 1/4 cup of olive oil. Let the oil heat up, and then turn it down to low. Add your 2 Tablespoons of chopped garlic and stir. Stir it every 10 minutes or so over the next half hour — you are aiming for a golden brown garlic here.
Golden brown garlic, almost perfect
While the garlic cooks, rinse your green beans and trim the ends off. Set these aside to drain and dry while the garlic cooks.
Depending on your speediness, you probably have 15 minutes or so to clean up some dishes or go read some internet.
When your timer goes off, check on your garlic first — is it golden brown? If so, tilt your pan and skim out the garlic, leaving the oil behind. Set the toasted garlic aside. If it’s not quite done yet, move on to the potatoes, but keep an eye on the garlic.
Take your potatoes out of the oven, or just open the oven and slide the rack out so you can reach the potatoes. Remove the foil. Add the cashew or almond or soy cream or milk, whatever you’re using. Put or push the potatoes back in the oven, leaving the foil off. Set the timer again, for another 30 minutes.
If you haven’t removed the garlic, it should be done now. You can safely leave the oil on over the heat — you’ll be cooking the beans in about 15 minutes.
Turn on your grill or put your grill pan over medium to medium-high heat.
If you need to wash your mushrooms, do so. Then mix up the spice mix, making sure to incorporate the spices into the brown sugar. Tip your skillet up and scoop out about half of the oil into the spice mix. You don’t need to be exact here, but it should be about 2 Tablespoons if you’d rather measure. Mix the oil into the spices well. Brush the tops of the mushrooms well with this mix, and then liberally baste the interiors of the mushrooms with the oil-spice mix.
Turn the heat in the skillet for the green beans up to medium, and add the green beans. Stir occasionally.
If you’re using the grill pan or skillet for cooking the mushrooms, start now — tops down. You’ll cook them for 6-10 minutes on the first side, and another 5-8 on the other. If you’re using an electric grill, you only need about 7 or 8 minutes total. Plan accordingly.
This should net you three lovely decadent vegetable dishes all done at the same approximate time. Slice the mushrooms, sprinkle the garlic over the green beans, and cut the potatoes in half and salt if they weren’t salted before cooking. Light some candles for ambiance, add some amusing conversation, and enjoy a nice dinner with someone special — or add a good movie and call yourself special. Hey, no judgements.
So, here’s the thing, I pretty much can’t go out to dinner anymore with the whole corn thing. Makes it hard to go out for a romantic dinner, if all I can do is sip a glass of wine and watch my husband eat his dinner. Fun right? So that might mean finding a non-food related activity or it might mean cooking at home instead. Because some of you might want the nice dinner, and I can’t think of anything fun to do in winter in New Hampshire on Valentine’s Day, cooking at home it is. Shawn is a carnivore, so I’m doing a really nice rib eye roast (two weeks early, just for you guys), but Mary Kate will be supplying a Vegetarian/Vegan option next week. We’ll have you covered. (Also, I would totally make this for myself if I was single, leftovers are awesome!)
The rib eye roast is a bit pricey, but my thought was that it’s still cheaper than going out to dinner, having appetizers, an entree, dessert, and drinks. I’m also going to you some options for side dishes, Garlic Mashed Potatoes, and Oven Roasted Asparagus. I’m not handling dessert, I’m still having complications with respect to having safe fats to use for baking, and you should just get some chocolate if it’s safe for your allergies from the Dancing Lion (yo, anyone getting me presents for Valentine’s, hint, hint, not that my husband reads this blog).
One thing that’s really helpful is a probe meat thermometer. Seriously. Get one now, if you’re sick of your meat and poultry being overcooked. I mean it. Why waste your hard earned money on overcooked food? Isn’t making all our food hard enough? Okay, I’m off the soap box, but seriously, do it. Or at least get one of these so you can check the temp periodically. (No affiliation with Amazon whatsoever, but their site has good pictures and descriptions.)
Garlic Mashed Potatoes
1/3 cup of roasted garlic (Here’s how to do it, takes an hour, do a bunch ahead of time and store it in a jar in your fridge or freeze it so you can use when you want it without the aggravation).
Amount of Garlic I roasted, you don’t need this much, but it’s good to haveRoasted Garlic in a pint jar
5-6 large potatoes, peeled and cut into 2″-3″ inch square chunks
2-3 Tablespoons of extra virgin olive oil (if you have a safe margarine or butter, you can use that, I don’t, unfortunately.)
1/4 cup of non-dairy milk (I’m using homemade cashew milk, but use what works for you.)
Save a couple of the roasted garlic cloves to one side so you can use it as a garnish if you want to get all fancy about it. Place your peeled and chunked potatoes in a large pot.
Peeled and chunked potatoes in a pot
Cover them with enough water that the potatoes are submerged by an inch or so. Bring the potatoes to a boil on high, and then turn down to medium high (about 7-8 on my dial). Continue to cook until the potatoes are fork tender. Drain in a strainer/colander and place the cooked potatoes back in the pot.
Potatoes cooked fork tender and placed back in pot
Mash the potatoes with a potato masher. Add the garlic (with exception of the cloves for the garnish), the olive oil, and the non-dairy milk and mash the new ingredients into the potatoes until all the ingredients are thoroughly mixed. Either place the potatoes in a decorative serving dish with the garlic cloves on top, or place some on the plate with a garlic clove as a garnish.
Garlic Mashed Potatoes in a Serving Dish
Oven Roasted Asparagus
a bundle of asparagus
2 Tablespoons of extra virgin olive oil
1 teaspoon of Penzey’s Greek Seasoning (or use about an 1/8 of a teaspoon each of salt, garlic, lemon peel, black pepper, Turkish oregano, marjoram, and mix it together.)
Preheat oven to 400° F. Wash and trim the asparagus, and then cut it into 1-2″ inch pieces.
Asparagus cut in pieces
Place them in a bowl. Drizzle the asparagus with the extra virgin olive oil and the seasoning mix. Using a silicone spatula, toss the asparagus in the bowl until it is thoroughly coated with oil and seasoning mix.
Asparagus in bowl being tossed with oil and seasoning
Spread them out on a baking sheet, making sure to scrape down the bowl so that the oil and seasoning end up on the asparagus on the baking sheet. Put the baking sheet in the oven and bake for approximately 30 minutes until asparagus is tender.
Asparagus after roasting
Boneless Rib Eye Roast
3-5 pound boneless rib eye roast
about 1-2 teaspoons of Penzey’s English Prime Rib Rub (or use an 1/8 of a teaspoon each of salt, ground celery seed, sugar, ground black pepper, onion powder, garlic powder, and arrowroot and mix it together).
Based on this recipe, you need to cook the roast for about 15-18 minutes per pound after the initial 15 minutes as described below, and will need to rest for 15-20 minutes after you remove it from the oven. Calculate how long that will be based on your roast size to figure out when you need to begin cooking to have the roast be ready to serve at the time you wish to eat. An hour before you intend to begin cooking in order to have the roast cooked and rested by the time you wish to eat, take the roast out of the refrigerator and place it on the counter to bring it to room temperature.
Preheat your oven to 450° F. Take a baking pan, and place a rack in it.
Cooling Rack on a baking sheet
Season your roast with your spice mix by rubbing it all over the roast. Place the meat on the rack, with the fat side up.
Roast with spice rub and placed on rack
Place the roast in the oven for 15 minutes, then turn the oven temperature down to 325° F. Place your probe thermometer through the center of the roast, making sure it is going through the very center.
Roast after 15 minutes and placement of probe thermometer
Continue to roast for 15-18 minutes per pound or until the thermometer reaches 125°F for an internal temperature. This is fairly rare, but as the roast rests the internal temperature will continue to rise for another 5 to 10 degrees. If you like more of a medium rare, wait until the internal temperature reaches 135° F. Take the roast out of the oven.
Completed Roast after cooking
Tent it with aluminum foil and let it rest for 15-20 minutes. Do not cut the roast before it has had a chance to rest. I mean it. Seriously. Otherwise, you’ll lose all the moisture. Once the roast has rested properly, cut the strings on the roast and remove them, and then cut the roast into slices.
Cutting Roast into slices
Plate up your roast and sides and eat up while asking your husband, partner or date to say something outlandishly romantic. Mine doesn’t do it, but it’s fun to watch the facial contortions, as I make unreasonable demands. Remind me to tell you about the time I nagged him to write me a poem for almost a year and a half. Oh and the sculpture, too.
During the holidays, I fully explored that cookie obsession that was in evidence in all of our Friday posts. Overall? They weren’t too bad, though the results were a little mixed. Turns out that parchment paper is an amazing invention that no gluten-free baker should be without, and keeping the dough cold is important. Also, I’m pretty bad at rolling out dough. Luckily, I had help.
But because gluten-free baked goods don’t last as long as other baked goods (they dry out and/or mold rather quickly), I ate. And ate, and ate, and ate. Mmmmm, cookies. ALL the cookies. Thing is that sugar, when consumed in great quantities for a week or so, makes me crave vegetables, and this time around, particularly spinach. Mostly, I eat a little spinach salad here and there, or I saute it with garlic, and I’m frankly bored with both. I was planning to make tacos, but since I had the spinach, taco salad seemed the thing to do. The hot topping balances out the cold salad part, giving a great balance between wanting the raw spinach and needing hot food for dinner when it’s cold out.
This recipe is perfect for a quick weeknight meal, as it comes together in a matter of maybe 10 minutes. Honestly, it takes as long to assemble the salad as it does to cook the topping, and the salad can incorporate whatever you have around. I’ve written it up as I’ve made it and like it, but you know we’re all about tinkering around here.
Vegan Black Bean Pumpkin Taco Salad
Vegan Black Bean Pumpkin Taco Salad
Makes 2 large, meal-sized salads
For the cooked taco topping:
1 Tablespoon oil (I’ve been using safflower)
1/2 cup chopped onion (this is where having extra chopped onion in the freezer is really a time-saver)
1 Tablespoon of taco, Mexican, or southwest-style seasoning mix (I used Arizona Dreaming)
1/2 can (8 oz.) canned pumpkin (I am pretty sure that mashed butternut squash or sweet potatoes would also work well here — let me know if you try it)
1 can (15 oz) black beans, drained and rinsed well
Heat a saucepan over medium heat. When hot, add the onion and cook, stirring occasionally, until translucent. Add the seasoning, and stir well into the oil and onions. Add the pumpkin, stirring well, and then the black beans. Lower the heat to medium-low, and cook, stirring occasionally, for 5-10 minutes, or until everything is heated through.
Then, make your salad.
2 large handfuls of baby spinach, roughly chopped (or salad greens of your choice)
1/4 cup of shredded vegan cheddar (optional)
1/2 of a Hass avocado, sliced (optional)
sprouts, if you’ve got them and like them (I do, but optional)
any other fun salad toppings you might dream up
1/4 cup of red salsa (recipes from us here and here, if you want to make your own)
Lay out your spinach, lettuce, or greens on two plates or in large bowls. Top each with half the taco mixture, in several dollops to spread it out over the salad. Add the cheese (if using) and other vegetables or toppings, and pour the salsa on top as a dressing. If you’re using the avocado, I suggest a sprinkle of salt on just that.
Spicy Green Pork Amazing (a.k.a. Pork Chile Verde)
So, here’s the thing. Most of you will be able to make this recipe without making the bonus recipe for Roasted Green Tomatillo Salsa, because you’ll be able to buy safe canned green tomatillo salsa at the grocery store. With the corn allergy, I can’t because it’ll have citric acid or some other corny evil thing in it. I do have some green tomatillo salsa I canned myself earlier in the summer, but since I would end up using it all up for this one dish, and since my local grocery store had tomatillos this week, I made up a fresh batch for this recipe. You’ll also need a 4 quart or larger crock pot for this recipe and a food processor or a blender if you’re making the salsa.
Spicy Green Pork Amazing (a.k.a. Pork Chile Verde)
3 1/2 – 4 pounds of boneless pork butt, cut into cubed pieces about 1-2″ inches square and trimmed of fat or left whole in one piece (see your options below).
2 small onions or 1 medium onion, diced into half inch square pieces
4 stalks of celery, cut into half inch pieces
1 Italian pepper or 1 green bell pepper, de-stemmed and de-seeded and chopped into half inch pieces
Italian Pepper, just for identification and reference
3 cups of green tomatillo salsa, either from the grocery store or using the recipe below
2 cloves of garlic, minced
1 1/2 teaspoons of ground cumin
1 1/2 teaspoons of dried oregano
1 teaspoon of ground black pepper
2 Tablespoons of lemon juice
salt to taste when you have finished cooking
If you have safe green tomatillo salsa you can buy, skip past this next part to the ♦ symbol below.
2 medium onions, chopped into about half to one inch pieces
2 Serrano chile peppers, de-stemmed and de-seeded and cut into halves or quarters
4 cloves of garlic, trimmed of the stem end
1/2 cup of tightly packed cilantro, washed and chopped
1 1/2 teaspoons of salt
1/3 of a cup of water.
Place the tomatillos, the onions, the Serranos and the garlic on a large baking sheet or roasting pan that’s safe for the broiler.
Tomatillos, Serranos, Onions and Garlic on a Baking Sheet
Turn your broiler to 500° and broil until the tomatillos are an olive green color and have browned. You may hear some of them pop, it’s okay.
Broiled Tomatillos, Serranos, Onions and Garlic on a Baking Sheet
Once the tomatillos are done, put the roasted ingredients in a blender or food processor as well as any juices that have cooked out into your pan, making sure that you’ve de-glazed any of the good tasty browned bits too. Add the cilantro, the salt and the water, and process. You might have to do this in batches, depending on the size of your blender or food processor. I did. I used a large bowl hold the batches and then mixed it altogether at the end. This makes about 4 cups of salsa, so you’ll have enough for the recipe and some to just eat as well.
♦ Now that we have our safe salsa, or you’ve gotten some from the grocery store, it’s time to go onto the pork. Depending on your inclination, you can use the pork all in one piece and shred it later when it’s cooked, or you can cut into pieces about 1-2″ inches square and trim off the extra fat as you go. I cubed and trimmed my pork and removed about half a cup of extra fat.
On the bottom of your crock pot, place the celery and onions that you’ve cut into half inch pieces. Place either the whole piece or the cubed and trimmed pieces of boneless pork butt in the crock pot on top of the celery and onion. Place the chopped Italian or bell pepper on top of the pork.
Pork, Italian Pepper, Onions and Celery in Crock Pot
In a bowl, add the green tomatillo salsa, the minced garlic, the cumin, the dried oregano, the ground black pepper, and the lemon juice. and mix it thoroughly. Pour the mixture over the pork, making sure to scrape the bowl well, and get every bit into the crock pot. I also use a spatula to push the mixture down through the pork pieces if you have cubed the pork. If you like less sauce, you can cut the salsa back by a cup, but I like mine with a lot.
Salsa Mixture over Pork, Italian Pepper, Onions and Celery in Crock Pot before cooking
Put the lid on your crock pot, and cook on low for 8 to 10 hours, or on high for 4 to 5 hours.
Spicy Green Pork Amazing (a.k.a. Pork Chile Verde) after cooking
You can serve this with safe for you tortillas (there’s a lot of recipes out there) and other fixings, or you can serve it over rice. Also, if you have a dairy free sour cream replacement product you can use, that would be great as a garnish.
Spicy Green Pork Amazing (a.k.a. Pork Chile Verde)
So, if you’ve got leftover cranberries in the freezer from Turkey Day, this is a great way to use them up. And it doesn’t involve turkey, which you’re probably heartily sick of at this point. I couldn’t resist adding a bit of spice to this recipe, but it’s minimal in the finished product. If spice bothers you, leave the Red Fresno pepper out of the cranberry sauce. If you like it hotter, use a habanero.
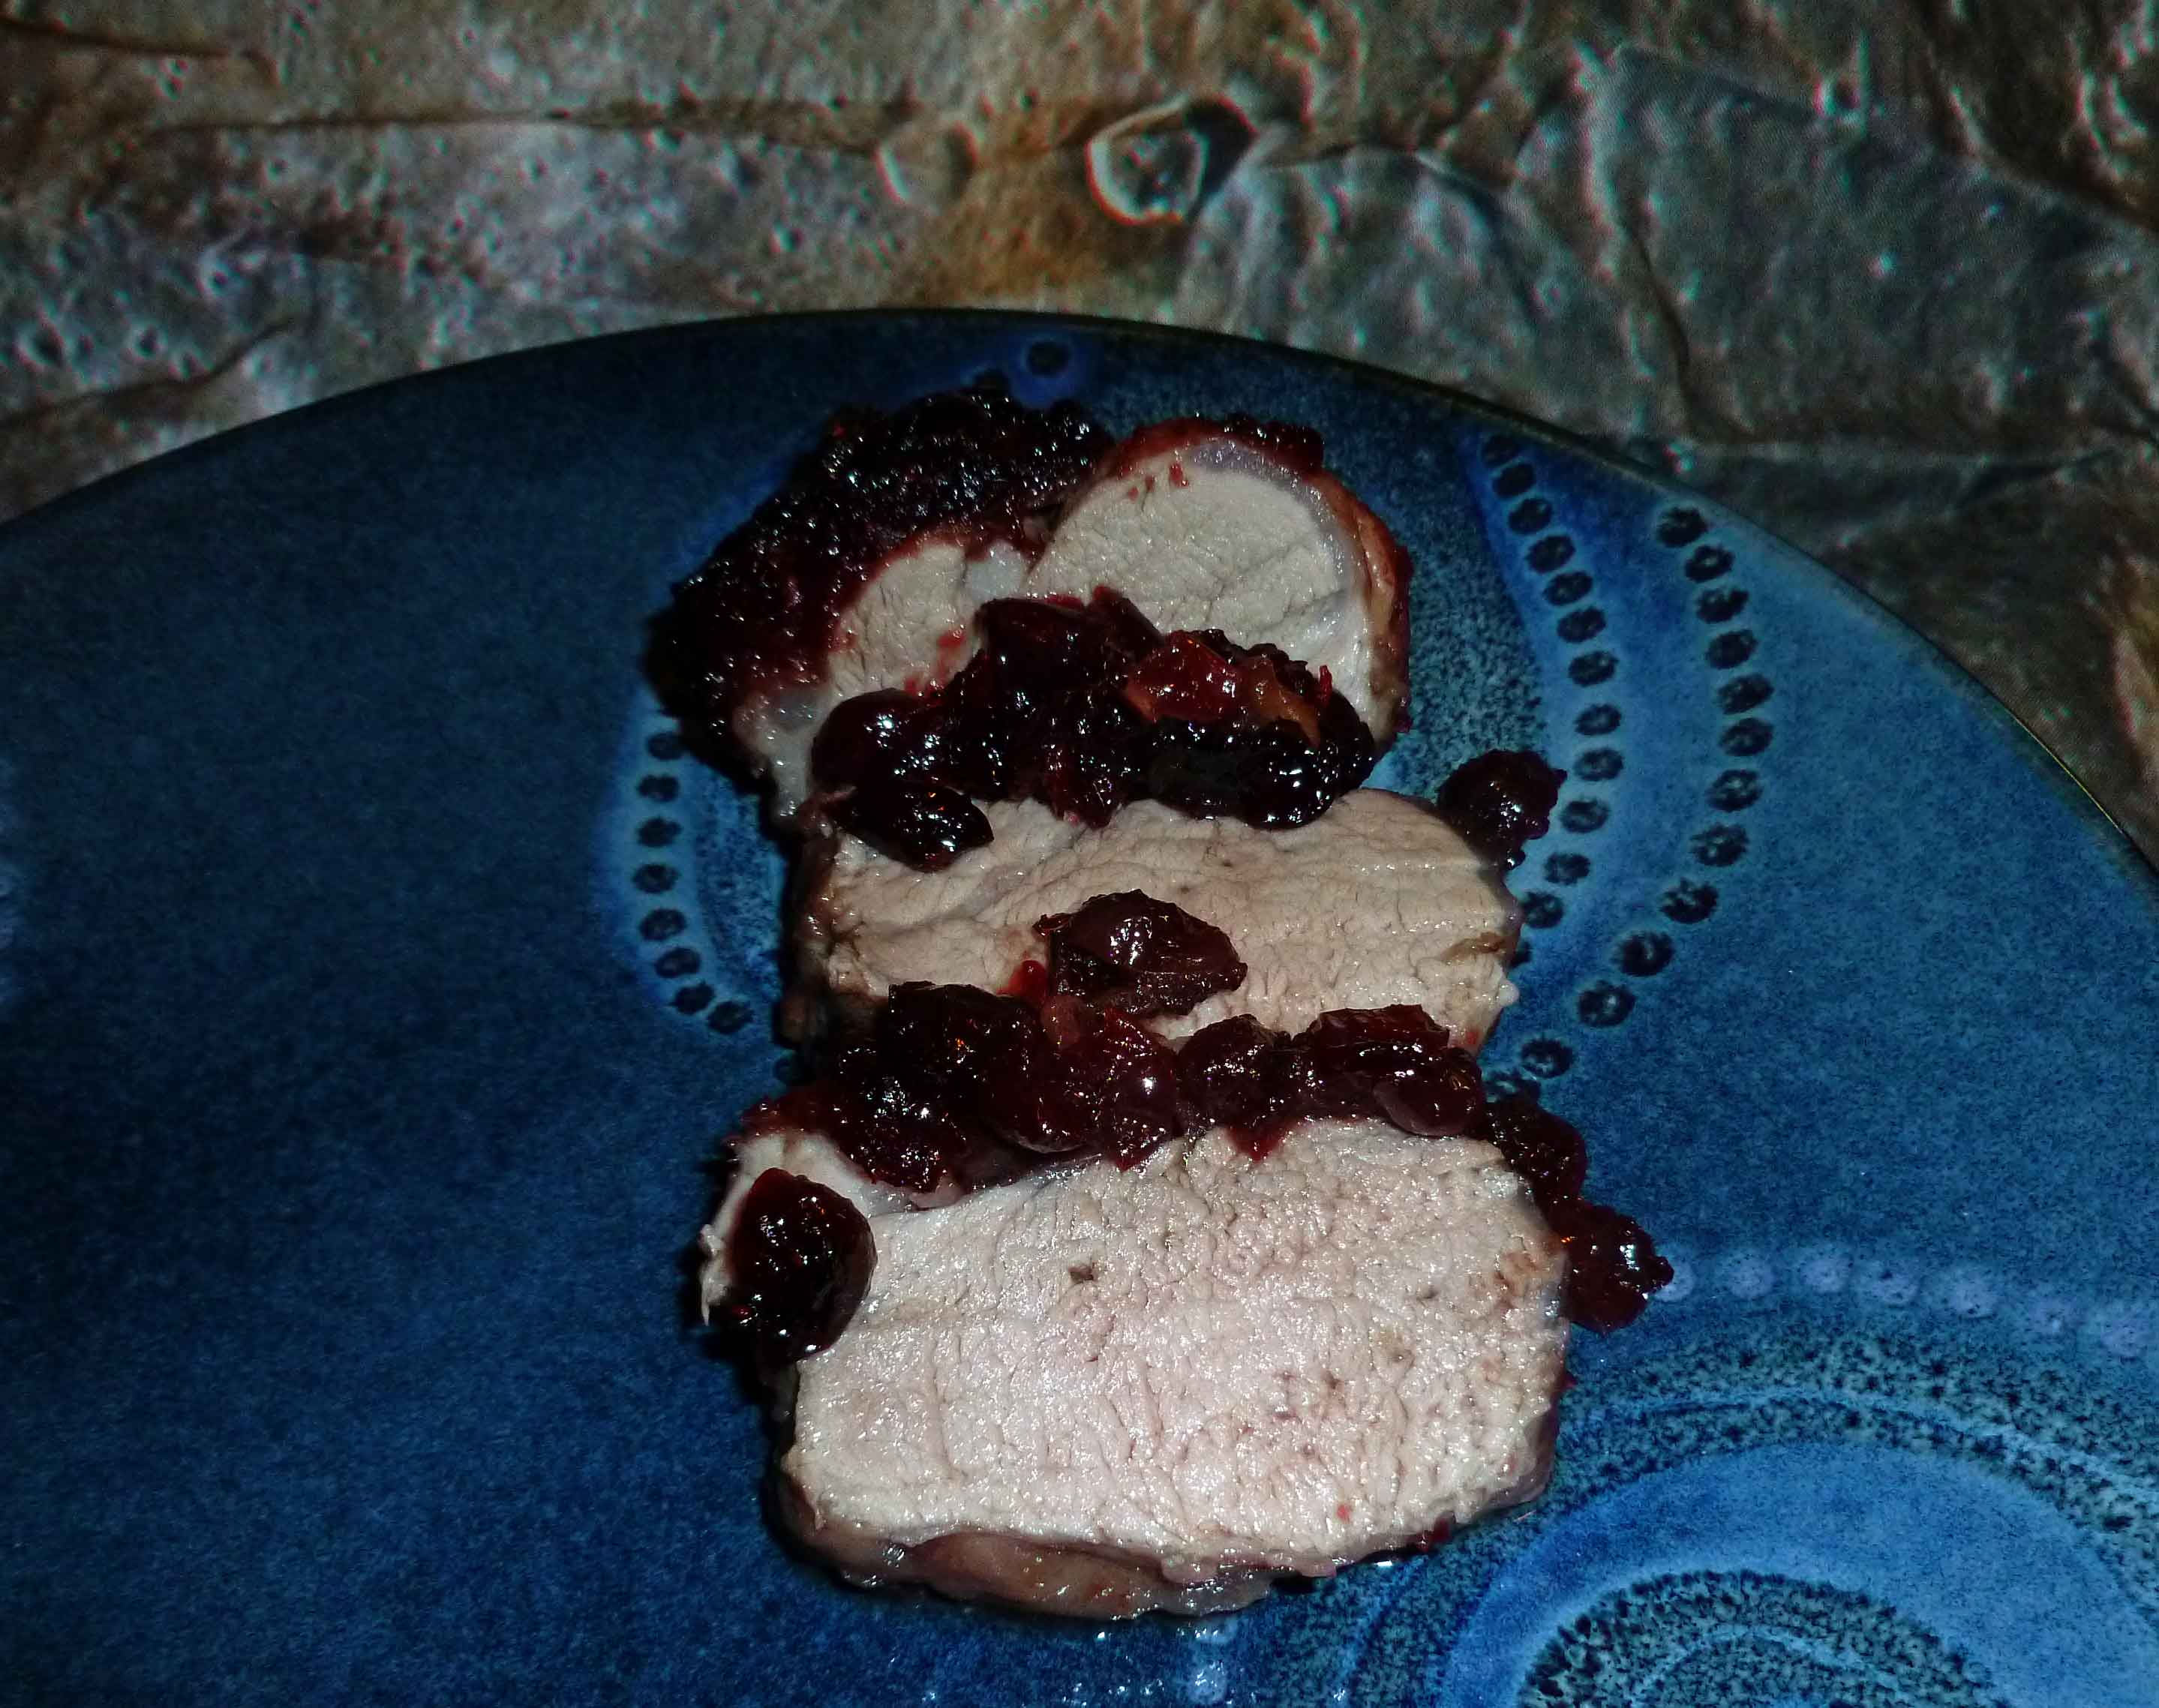
Spicy Red Wine Cranberry Crusted Pork Loin
Serves about 4.
1 cup of red wine
1 cup of brown sugar
1 Red Fresno chile pepper, de-stemmed, seeded, and minced.
1 12 ounce bag of cranberries, either fresh or frozen
1 1-2 pound pork loin
Preheat your oven to 400°F. Using an oil mister, or a bit of oil and a paper towel, grease a sheet pan.
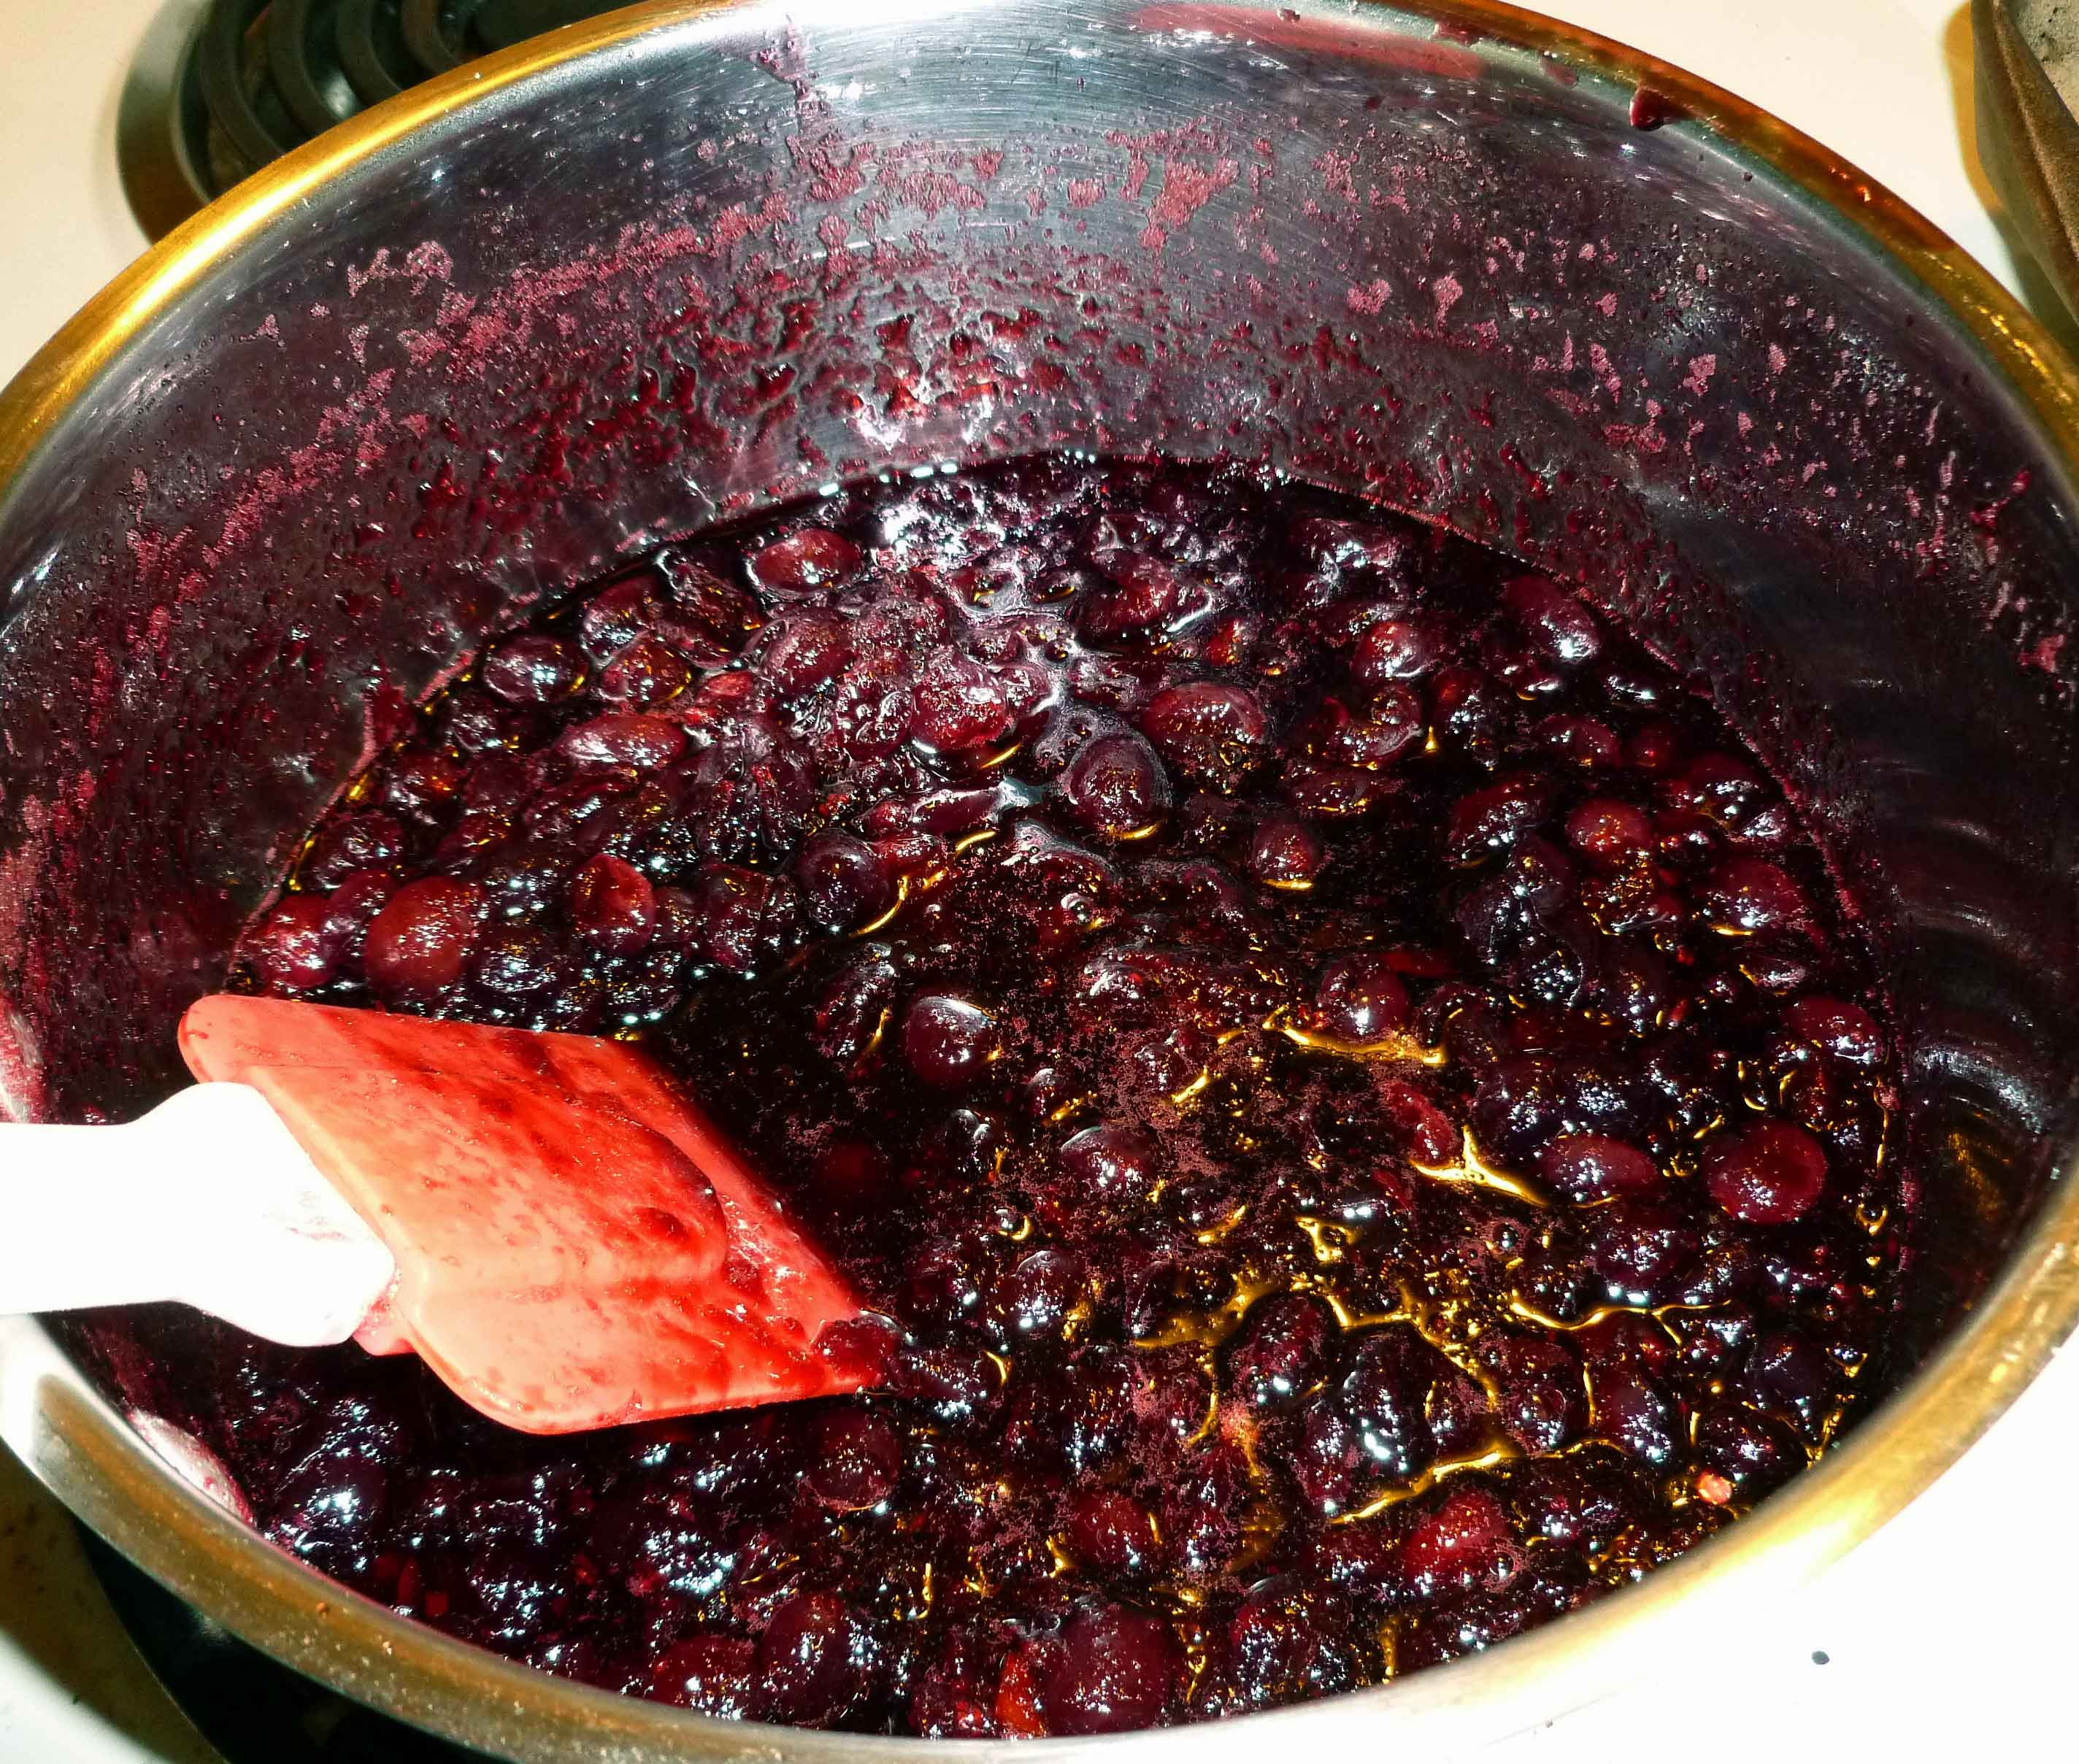
Wash the cranberries and pick out the soft, crushed and/or bad ones. In a small non-reactive sauce pan, add the wine, brown sugar, and minced Red Fresno chile pepper, and bring it to a boil. Once the wine, brown sugar, and chile pepper are boiling, add the cranberries and let it come back to a boil. Reduce to the heat to medium and boil gently for 10 minutes. Basically you’re making red wine cranberry sauce with some chile in it. It’s really good by itself, just saying.
Spicy Red Wine Cranberry “crust” for pork loin
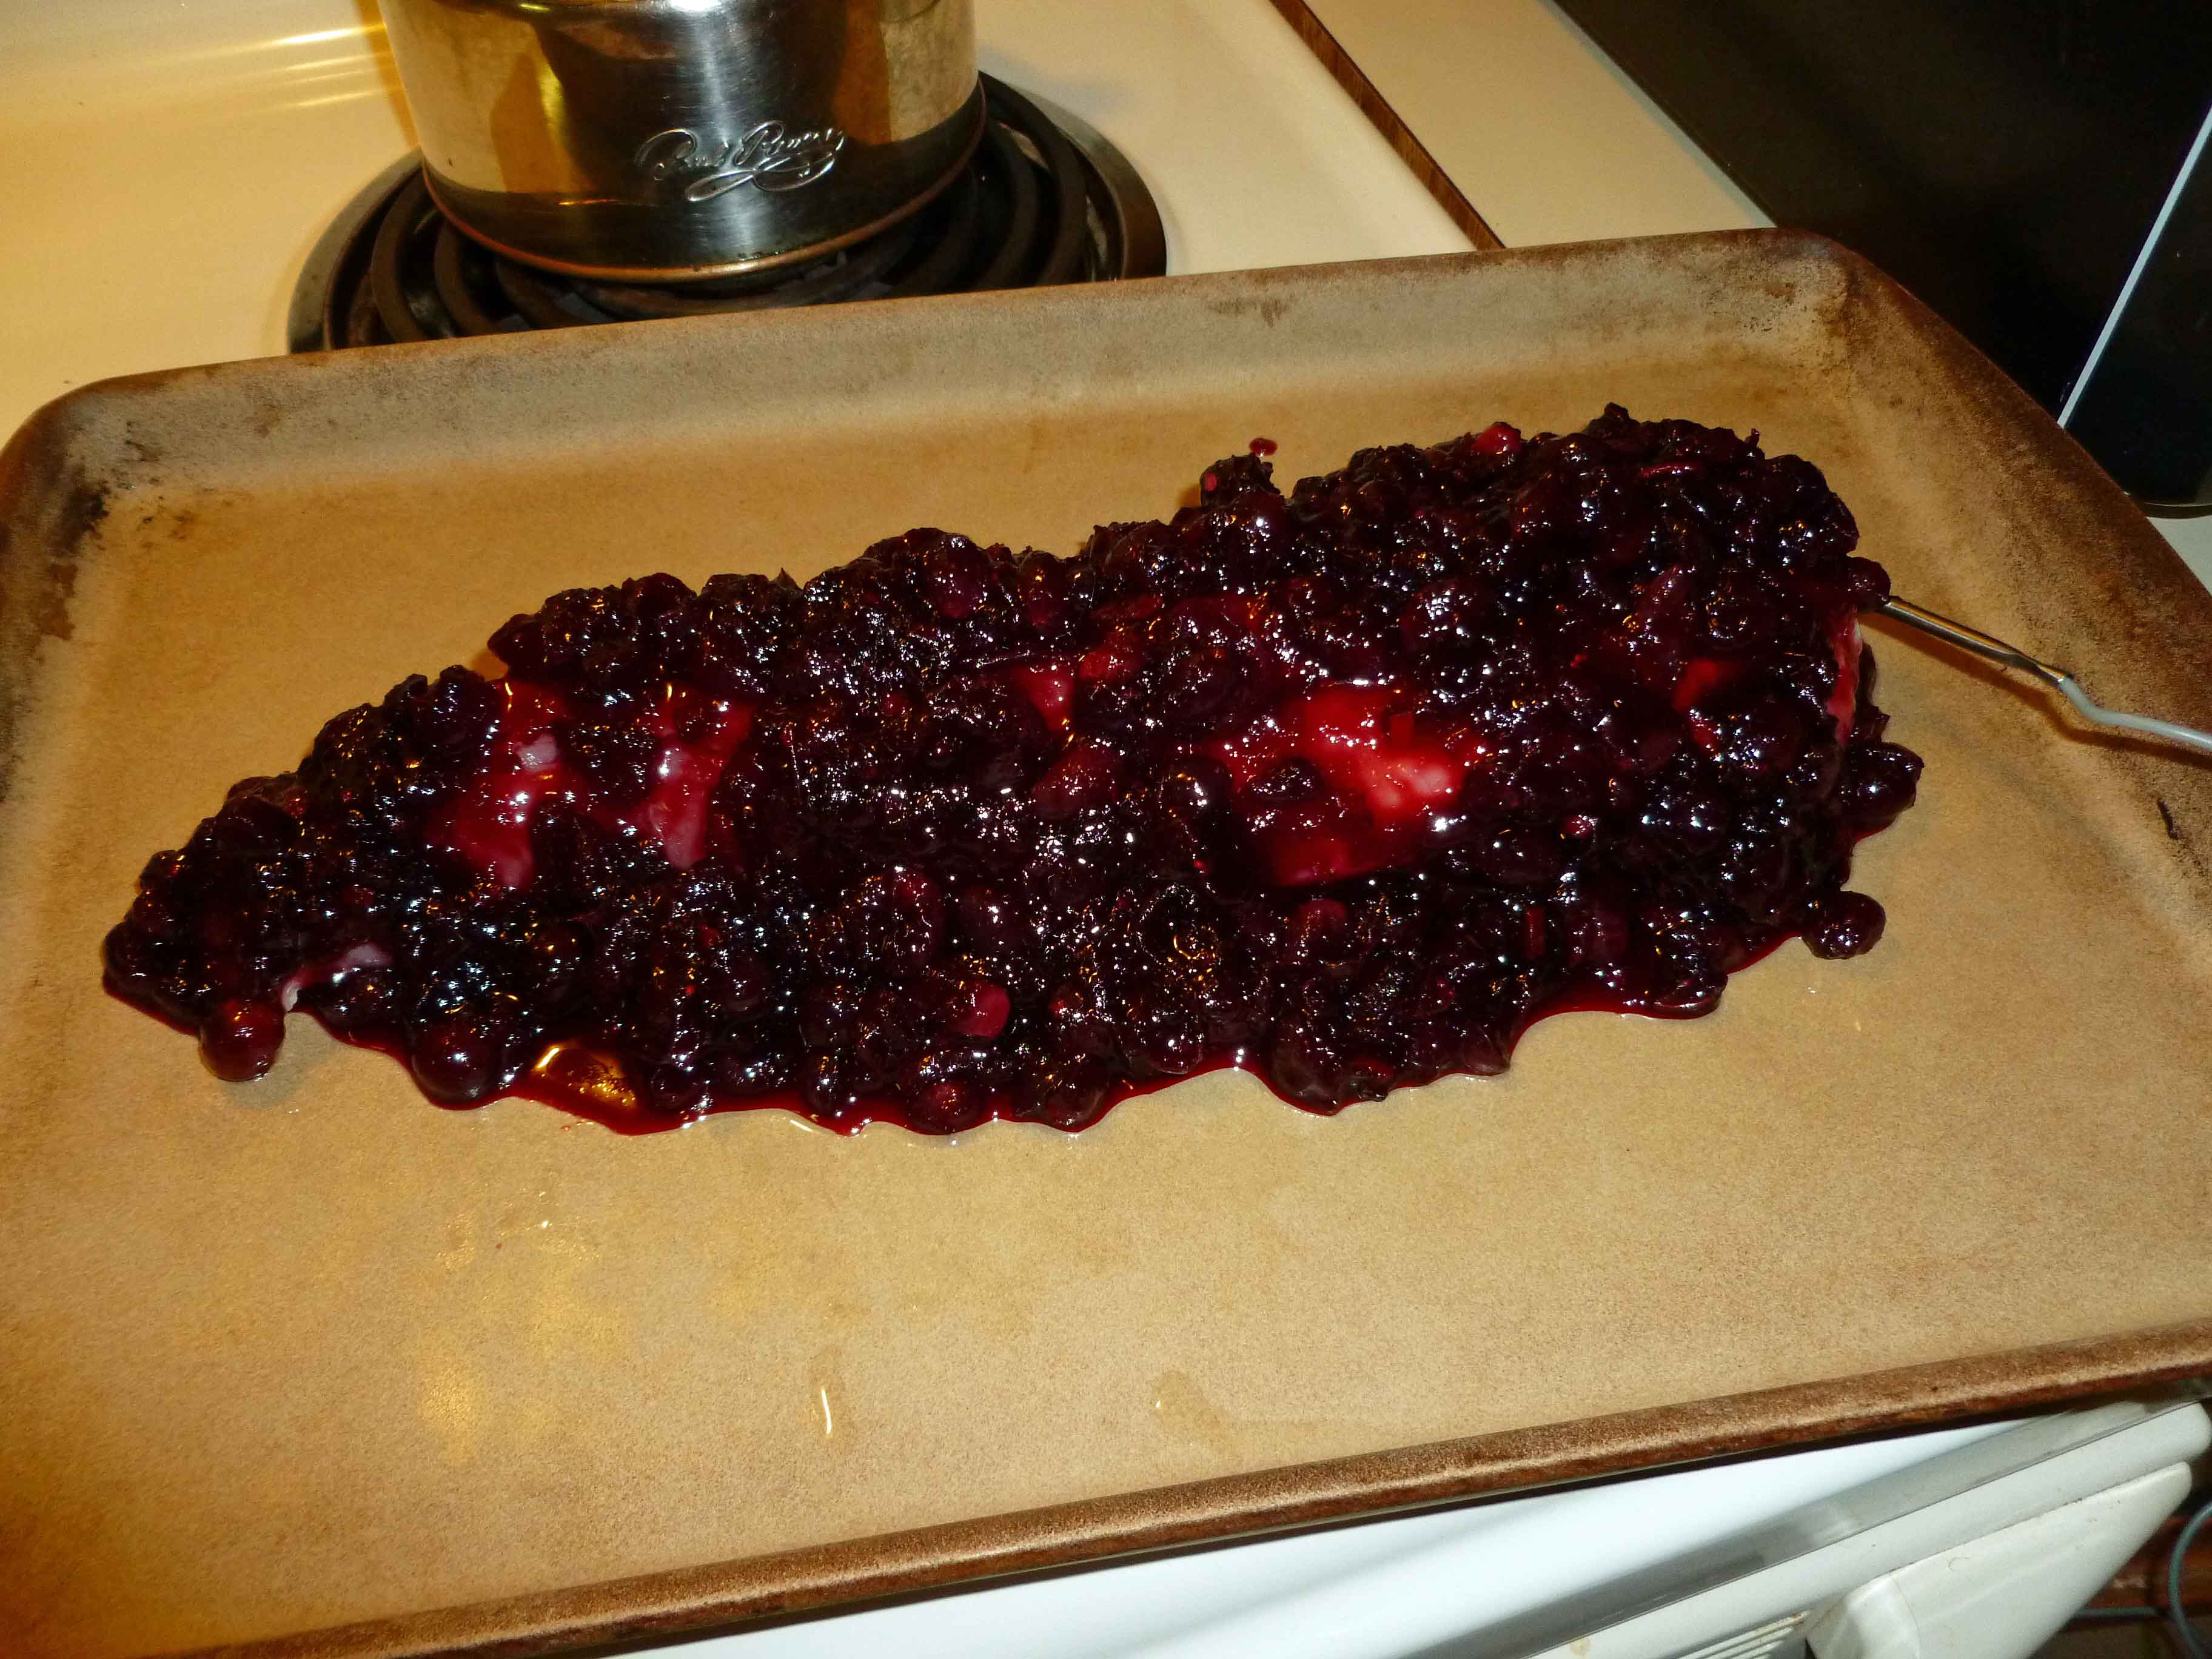
Once you’ve finished the sauce, spread out a little bit of it on the pan, to match the general length and width of your pork loin, so that your pork loin will be resting in a bed of the cranberries.
Bed of cranberries for the pork loin.
Place the pork loin on top of the cranberries, so that if there is a fat layer on the pork loin that the layer rests on the bed of cranberries (or remove it), and then cover the pork loin with the remaining cranberries. You’ll note I have a probe thermometer in the pork loin. It’s one of the best kitchen tools I ever bought, no more overcooked meat.
Pork loin covered with cranberry “crust”
Put the pork loin in the oven. I set the probe thermometer for an internal temp of 161°F, which is what the FDA says is safe. The actual cooking time was about 45 minutes, but this may vary depending on the size of your pork loin and how well, or not, your oven works.
Spicy Red Wine Cranberry Crusted Pork Loin just out of the oven.
Let it rest a couple of minutes and then slice it up and serve with some of the cranberries and drippings. It’s really yummy!
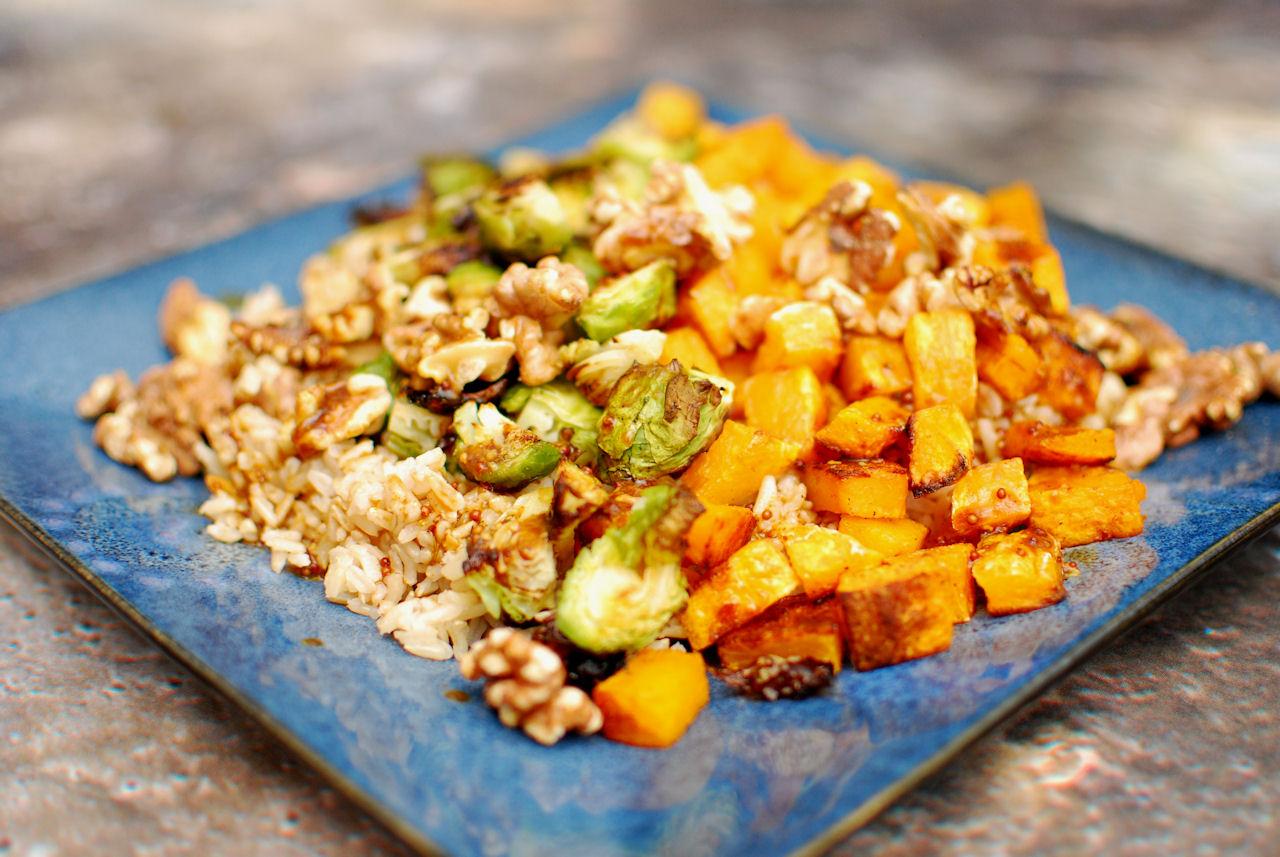
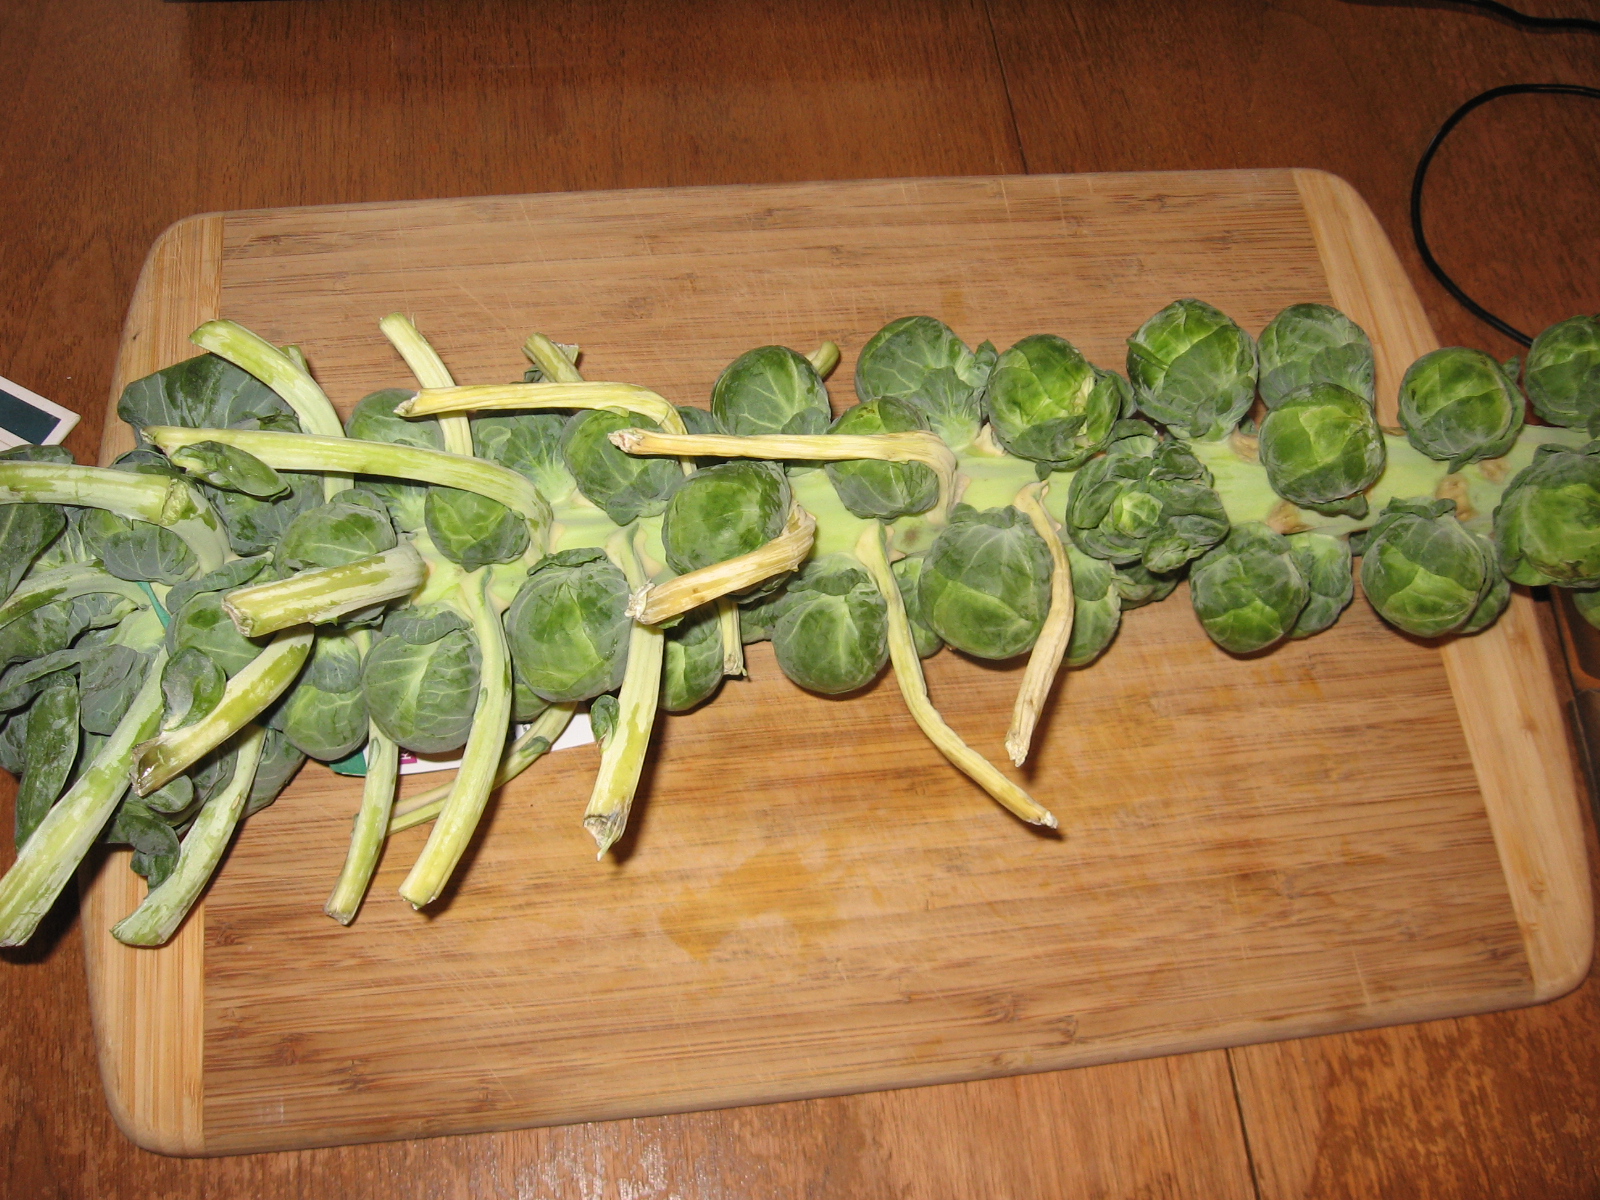
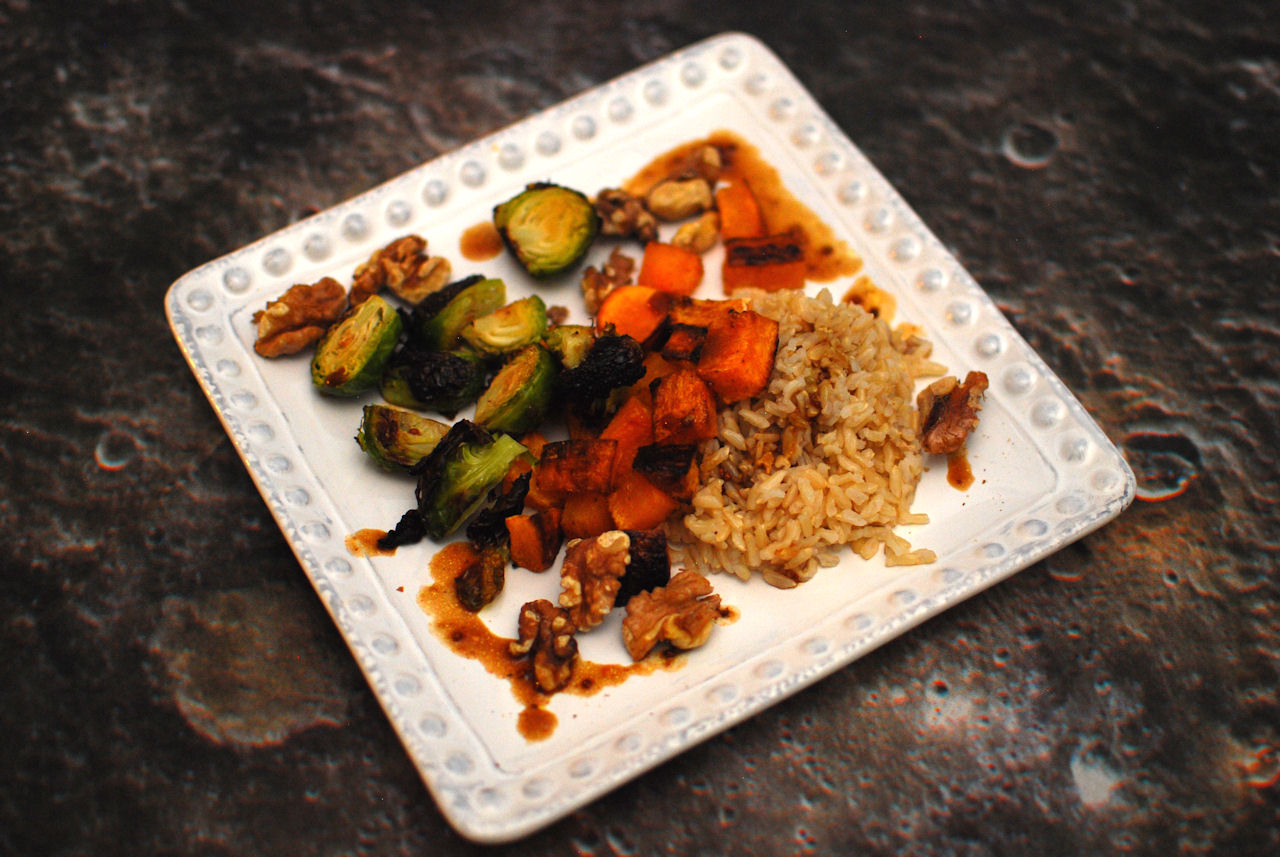
Squash and Sprout Rice Platter. Photo by J. Andrews
I started working on this particular dish about a year ago when I discovered this branch of Brussels sprouts at a Trader Joe’s and had to buy it. How do you not buy that?
Sprouts!
I made a lot of different Brussels sprouts recipes to use them all up, but most of them involved roasting the sprouts. There is no better way. Roasting is also really the only way to cook butternut squash, and I thought maybe these things would go together well, maybe with some rice and a sauce. I made a dressing using a magical mustard I’d brought back from Paris that was curried apricot mustard, and I’ve been trying to reproduce that flavor since. It took more than a few tries, but it was still cheaper than going back to Paris (where, I need to tell you, there is a whole store that just sells mustard. They have mustard on tap. That was absolutely a highlight of my trip.)
I wanted to call this a pilaf, but apparently a pilaf requires the rice to be cooked in a flavored broth. This dish calls for brown rice cooked in very exciting water, but the dressing you toss everything with at the end adds plenty of flavor, and the vegetables have their own flavors — plus carmelization (i.e. oxidization of the sugars) because of the roasting. Tasty.
Squash and Sprout Rice Platter
Preheat oven to 450F.
3/4 cup brown rice
1/4 cup wild rice
2 1/4 cups water
OR
1 cup brown rice
2 1/4 cups water
Cook rice however you normally cook rice. I throw it in my rice cooker. This takes about 40 minutes, and so will your vegetables, so start the rice first and then move on.
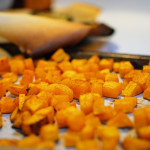
Butternut Squash
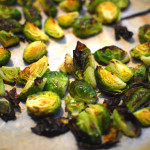
Brussels Sprouts
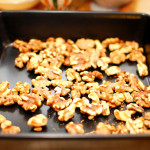
Walnuts
1/2 lb. butternut squash, peeled* and cut into 1/2 inch cubes — about the size of playing dice
1/2 lb. Brussels sprouts, ends trimmed off and any weird outer leaves removed, halved or quartered depending on your preference — make them bite-sized
1 cup raw walnut halves or pieces (optional)
2 Tablespoons to 1/4 cup oil of your choice (I use olive oil or safflower oil)
1 teaspoon seasoned salt (I use a spicy seasoned salt, but you can use regular — whatever is your favorite)
1/2 teaspoon salt
Line three separate baking sheets with parchment paper (or don’t, but this makes clean up easier).
Toss the squash with 1-2 Tablespoons of oil, lay out in a single layer on a baking sheet, and sprinkle with either salt, seasoned salt, or spicy seasoned salt. I prefer the latter. Throw them in the oven and set the time for 25 minutes.
Toss the sprouts with another 1 Tablespoon of oil, lay out on the second sheet, and sprinkle with about 1/2 teaspoon salt. When the time goes off for the squash, throw the sprouts in (don’t remove the squash!) and reset the timer for 10 minutes.
Spread the walnuts out on the third sheet. When the time goes off again, add the walnut pan to the oven and check the sprouts — remove if necessary. Set the timer for 5 minutes.
A note for the nut allergic: The walnuts are optional in this dish! If you aren’t allergic but just don’t like whole walnuts, chop them up some, as they do add a great flavor to this dish.
Your total cooking time is 45 minutes. The squash gets the full amount, the sprouts about 15, and the walnuts 5. This works out perfectly in my oven, but keep an eye out, especially for the nuts.
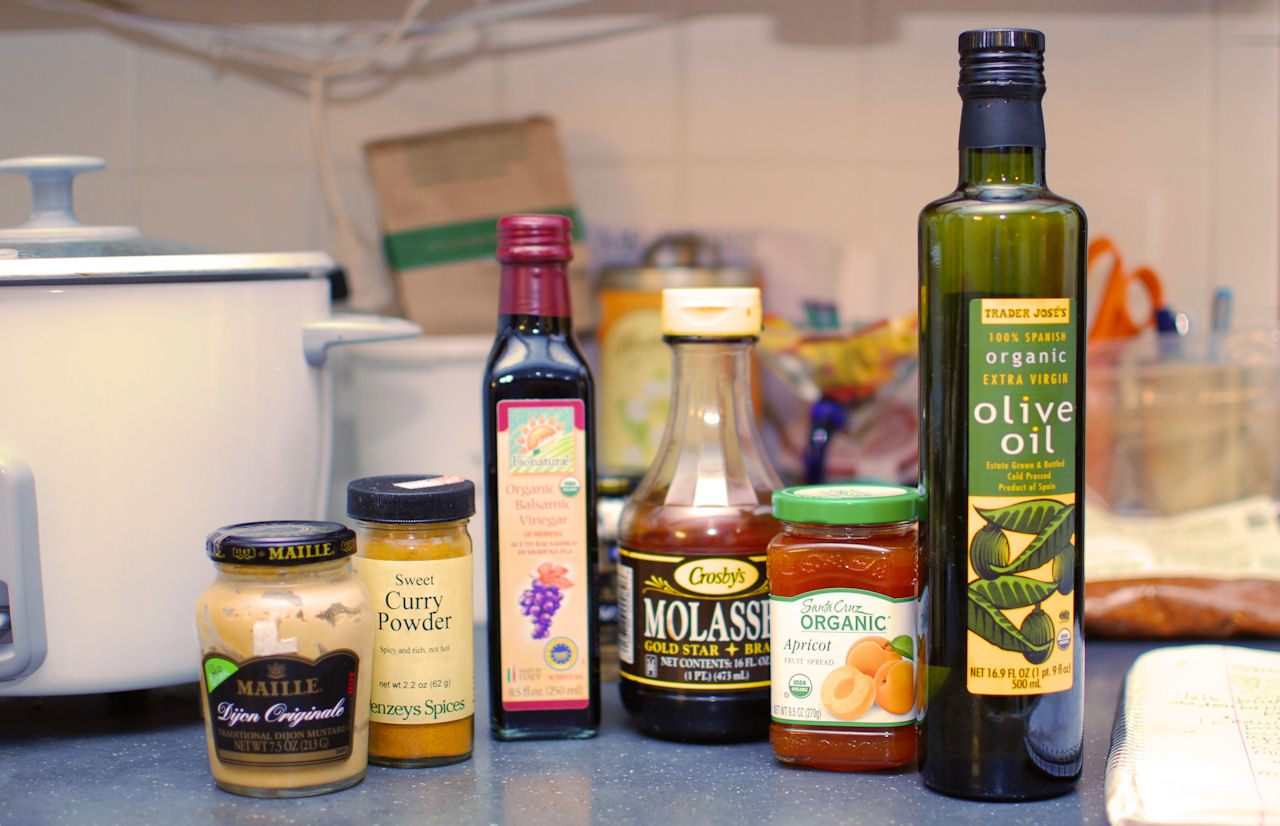
For the sauce:
4 Tablespoons balsamic vinegar
1 1/2 teaspoon molasses
2 teaspoons apricot jam
1/2 teaspoon curry powder (again, if you like the spice, get the spicy one)
3 1/2 teaspoons Dijon mustard — grainy if you wish, but smooth works best here
1 1/2 Tablespoons high-quality olive oil
Whisk all ingredients together.
Plate the rice, add the veggies, drizzle on the sauce, and sprinkle walnuts over the top. Dig in and enjoy.
Squash and Sprout Rice Platter. Photo by J. Andrews
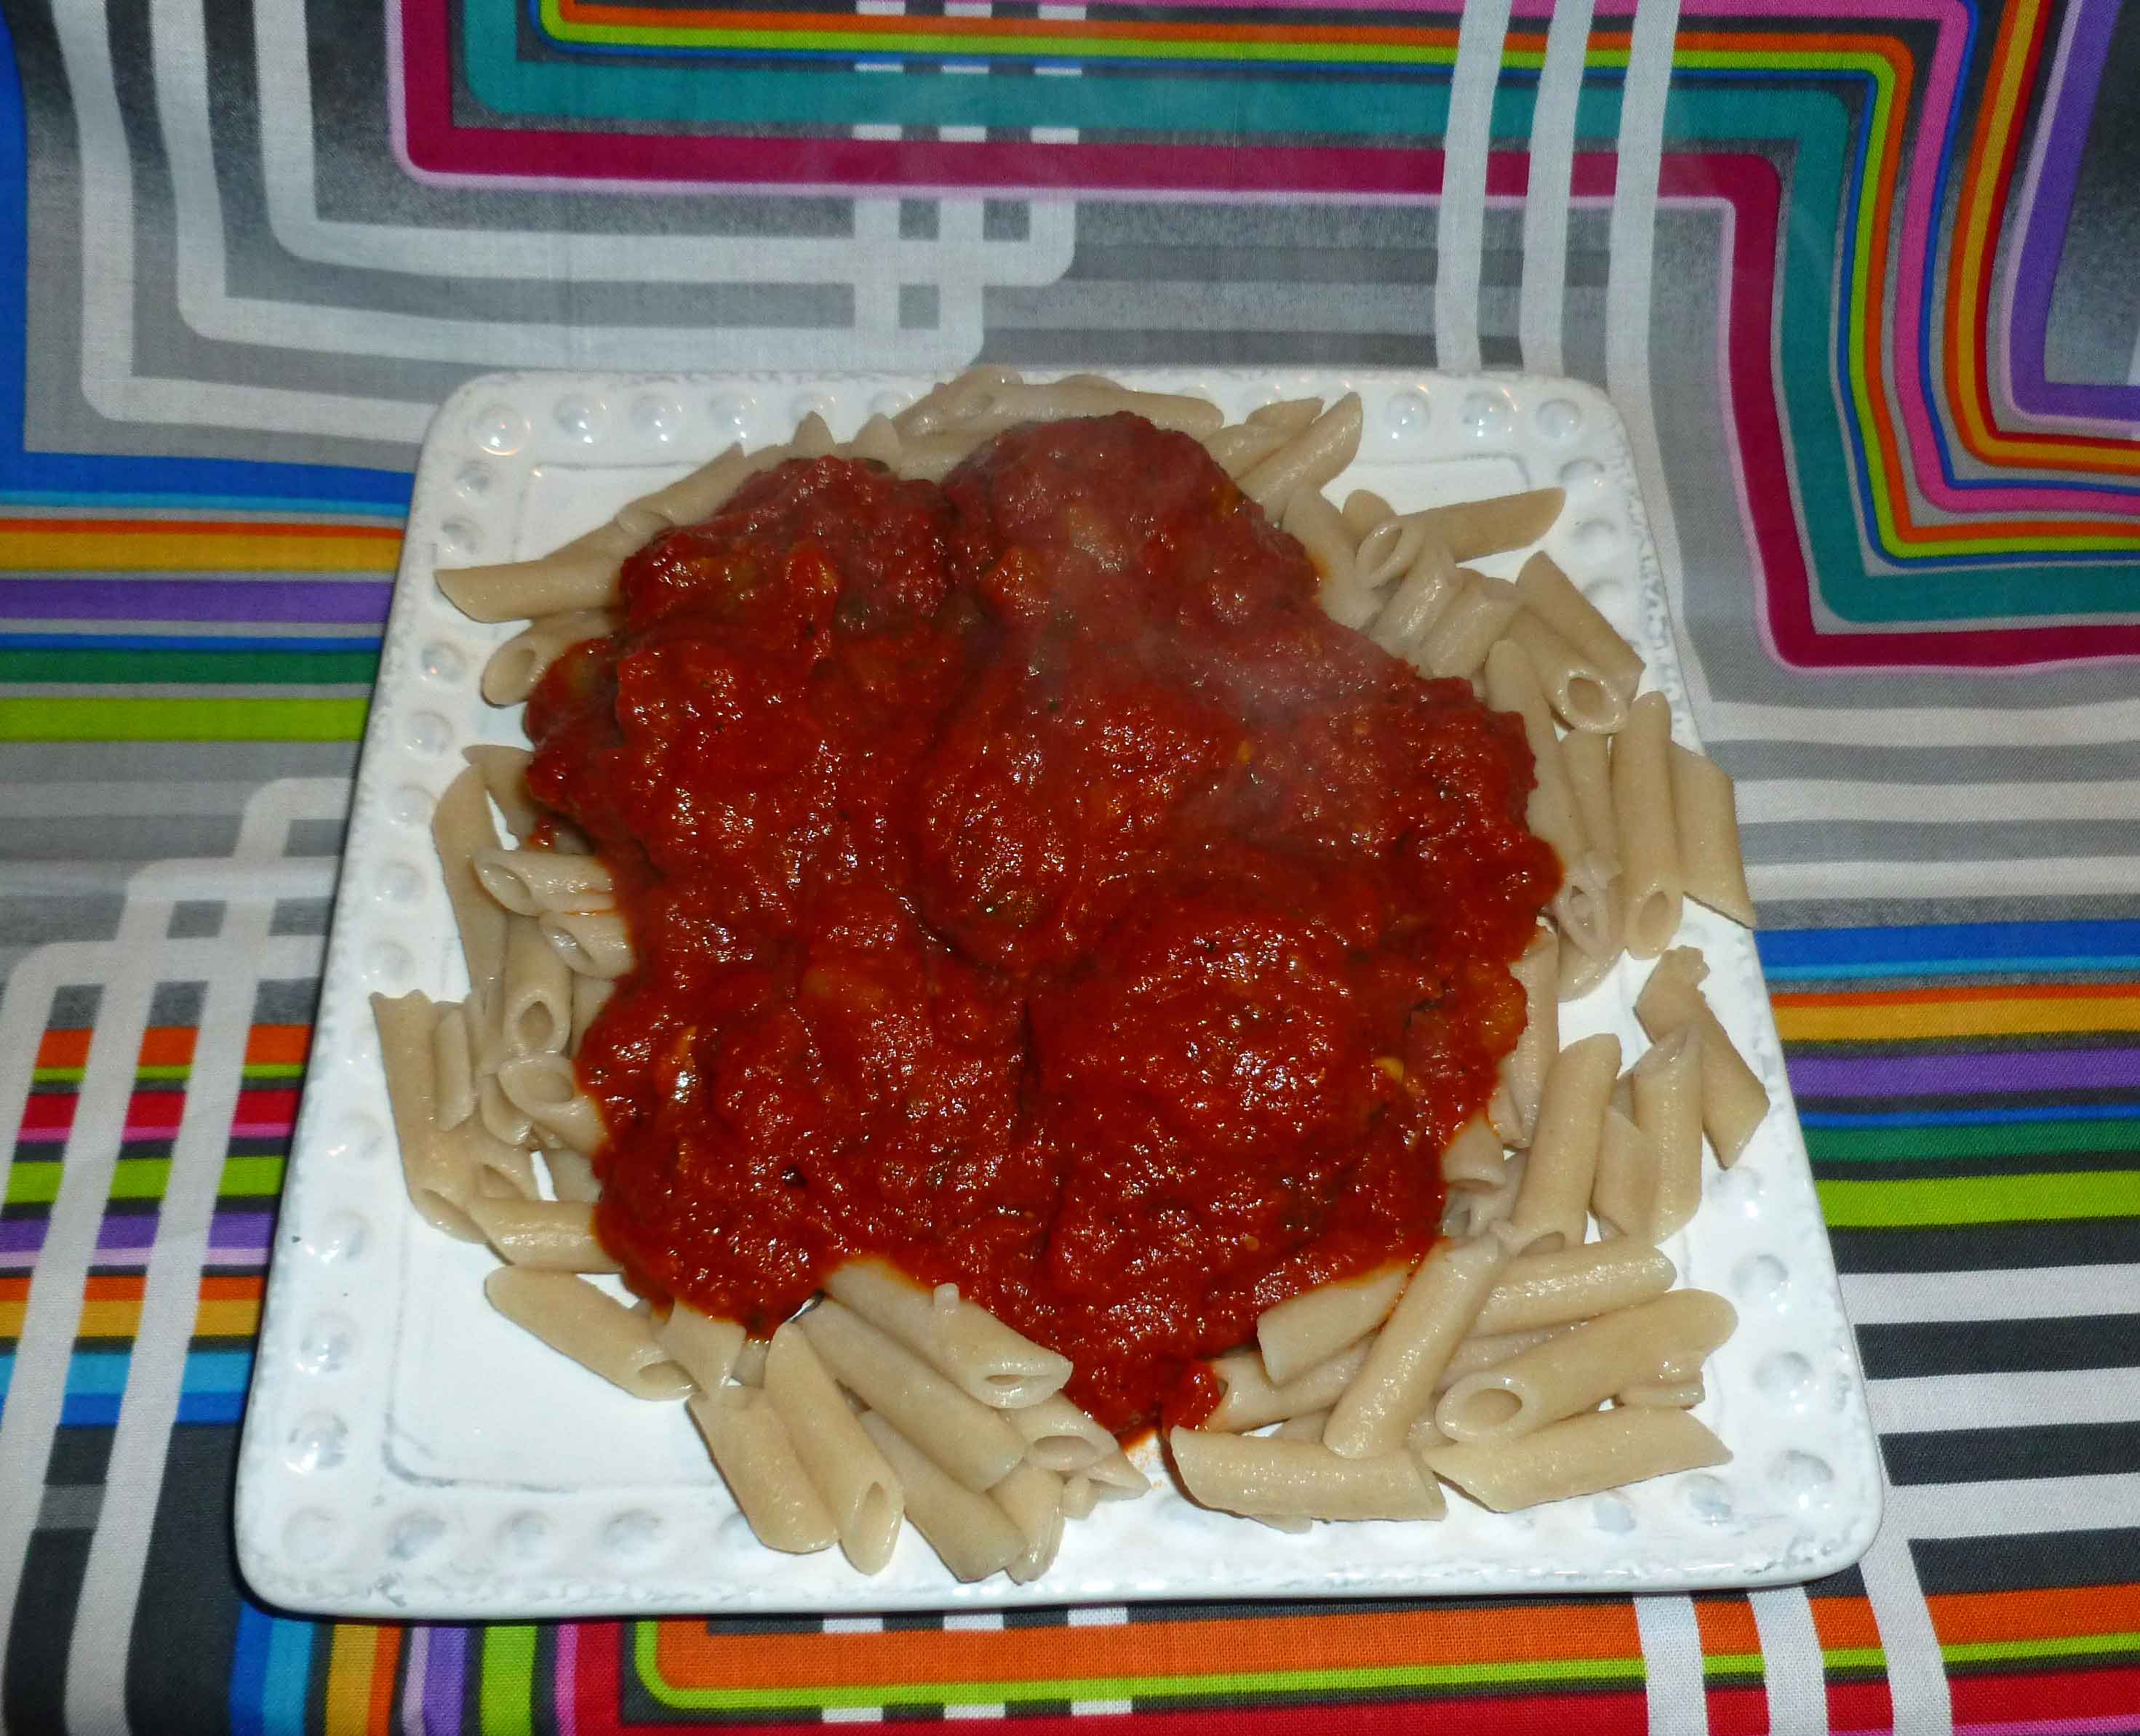
Meatball Sub Meatballs in Marinara Sauce over Penne
As I stated a week ago in my Quick-ish Marinara Sauce post, I really miss meatball subs. Although I don’t have a safe bread or cheese, this meatball recipe gets me at least part way there.
Meatball Sub Meatballs
Makes about 24 large meatballs, about the size of golf balls or ping pong balls.
1 pound of 80/20 ground pork
1 pound of ground beef (I prefer a higher fat content for the beef as well, but that’s up to you)
1 Tablespoon of ground chia seed
3 Tablespoons of water
1 Tablespoon of olive oil
1 medium onion minced very finely
1 teaspoon of salt
1/2 teaspoon of ground black pepper
1/2 teaspoon of oregano
1/2 teaspoon of basil
1/2 teaspoon of thyme
1/2 teaspoon of garlic powder
3/4 cup of gluten-free bread crumbs
a small amount of olive oil for greasing the baking sheet.
Preheat oven to 375°F.
Take ground pork and ground beef and crumble it into a large mixing bowl.
In a small bowl, mix chia seed, water, and olive oil together to make a chia egg. Set it aside.
Mince onion and add it to the bowl with the ground pork and ground beef.
Add the salt, ground black pepper, oregano, basil, thyme, and garlic power to the bowl, sprinkling them evenly over the beef and pork (it’ll be easier to mix it in).
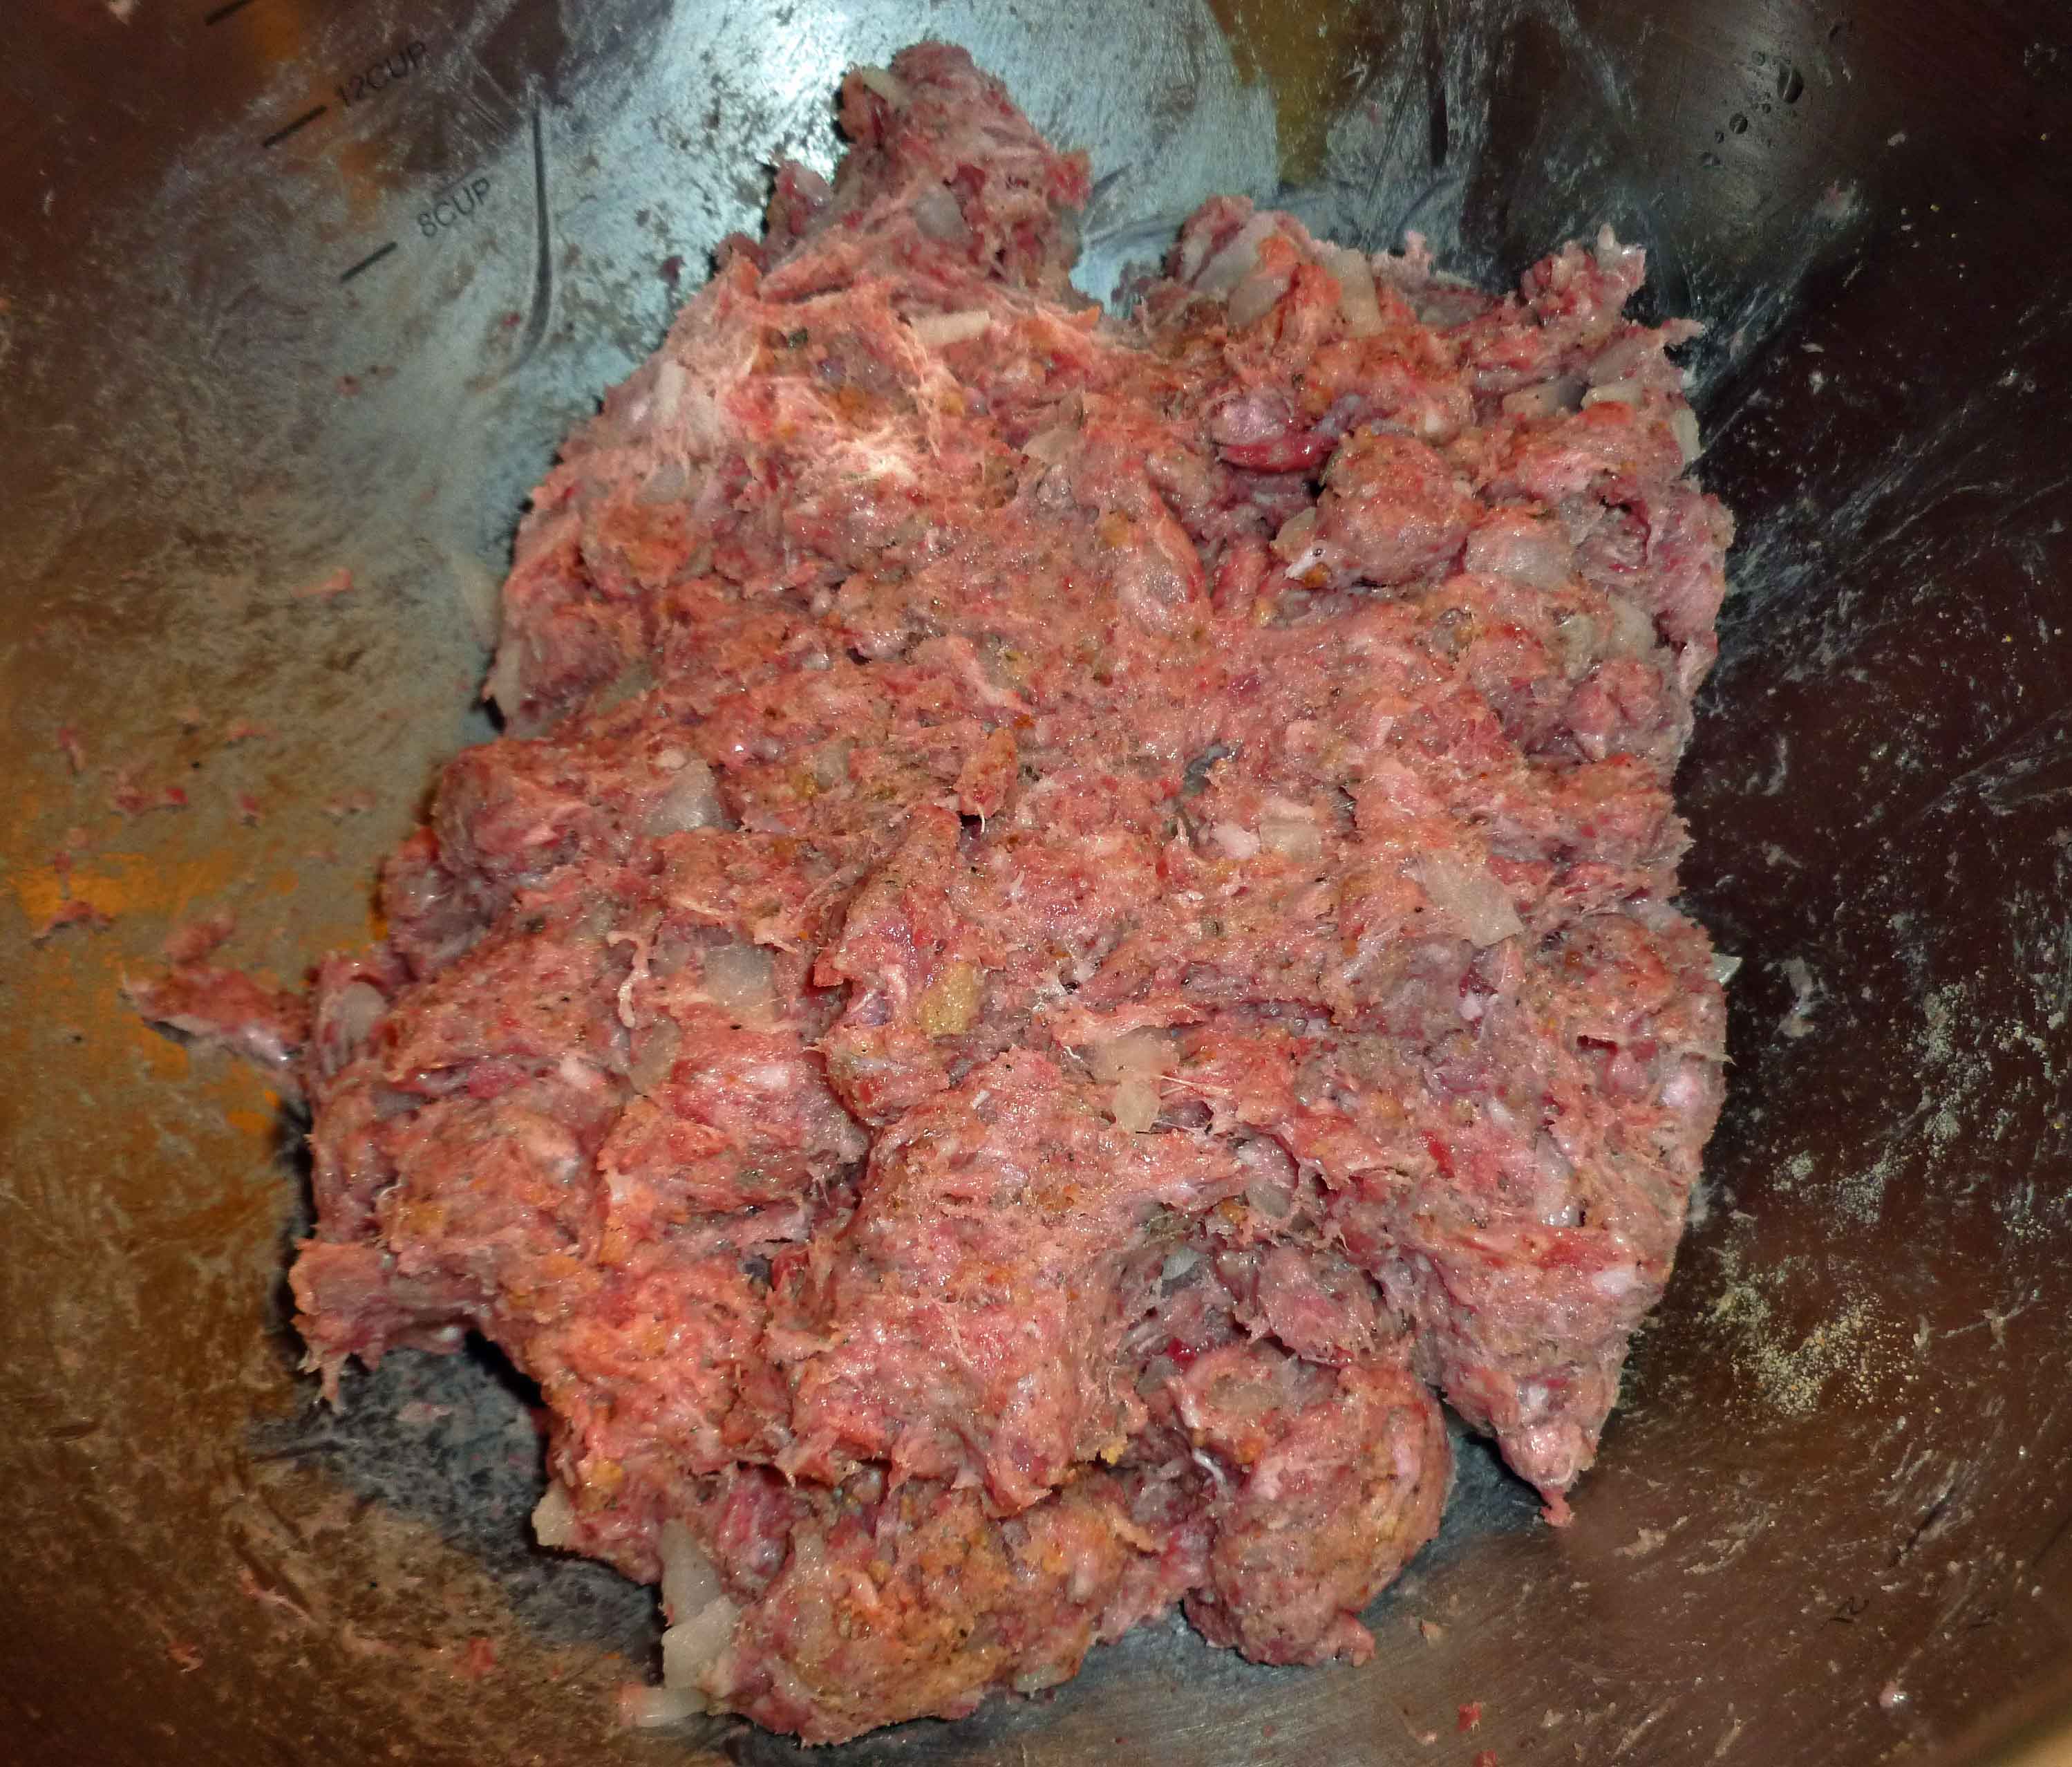
Add your bread crumbs and the chia egg, and use your hands to knead the mixture until it is thoroughly combined.
Meatball mix after all ingredients combined
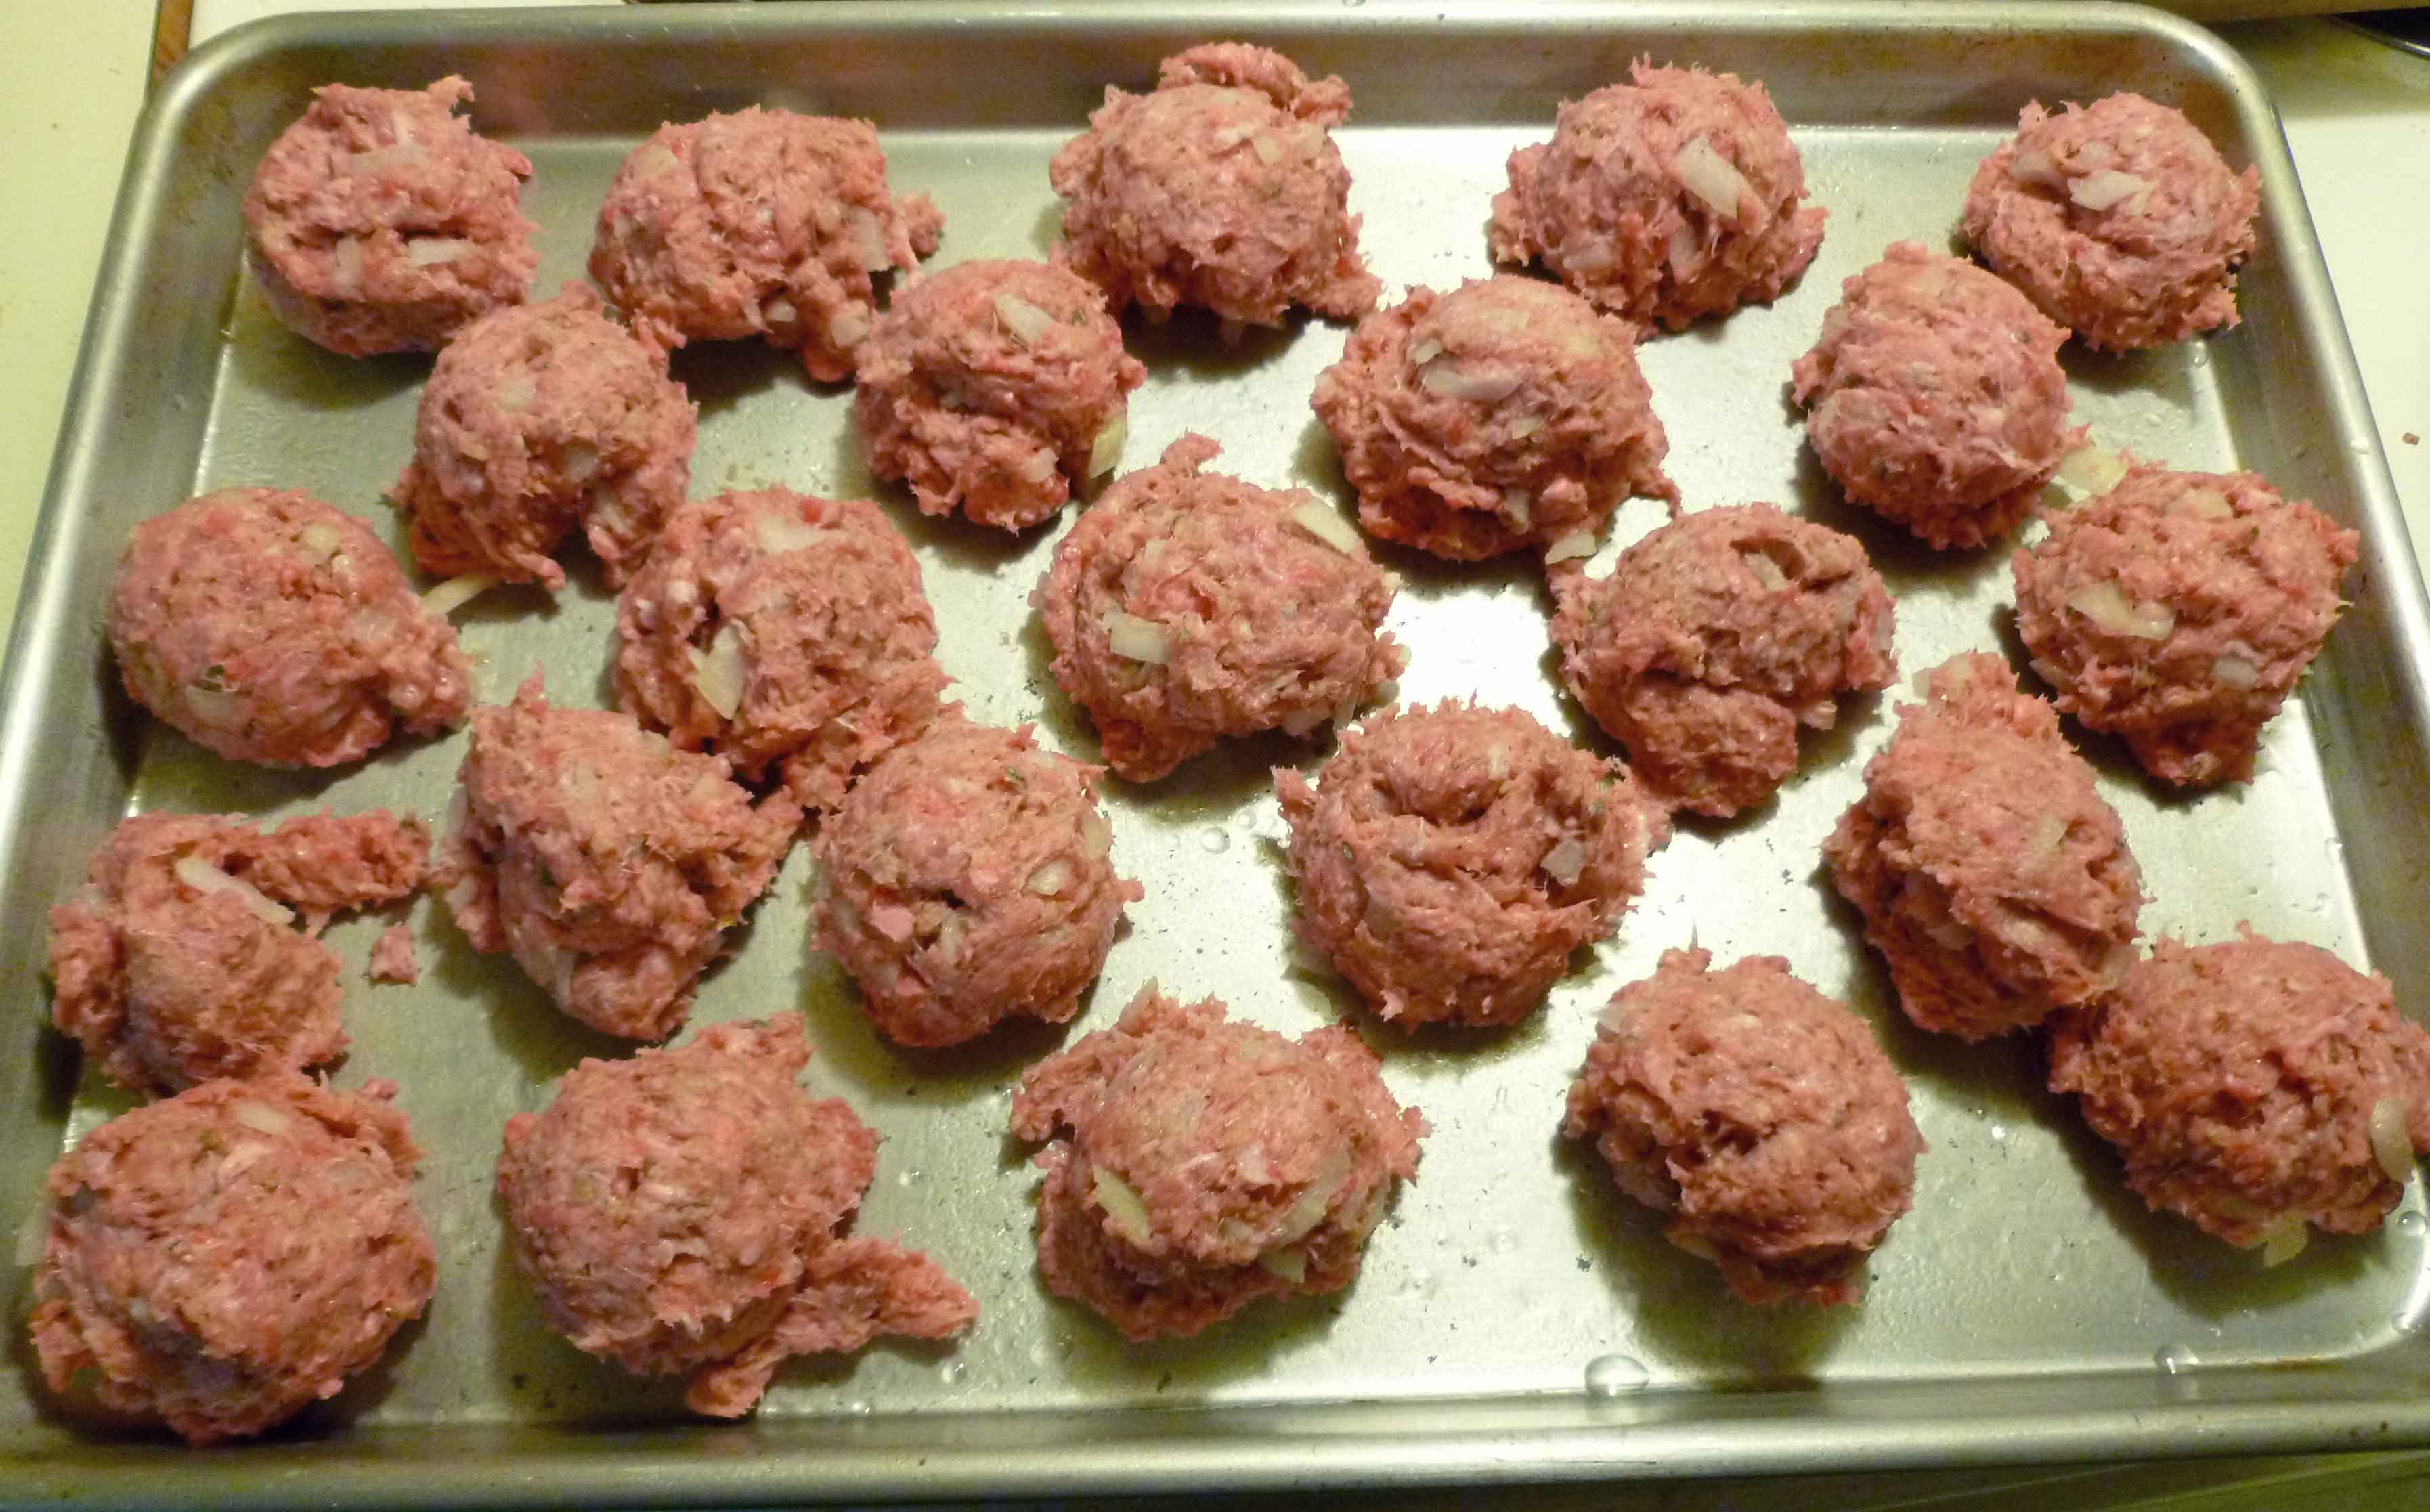
Grease your baking sheet. Form meatballs about the size golf balls. I used a large scoop from Pampered Chef to form my meatballs, but you can use your hands instead. Place them on the baking sheet, spaced out evenly, and put them in the oven.
Meatballs before cooking
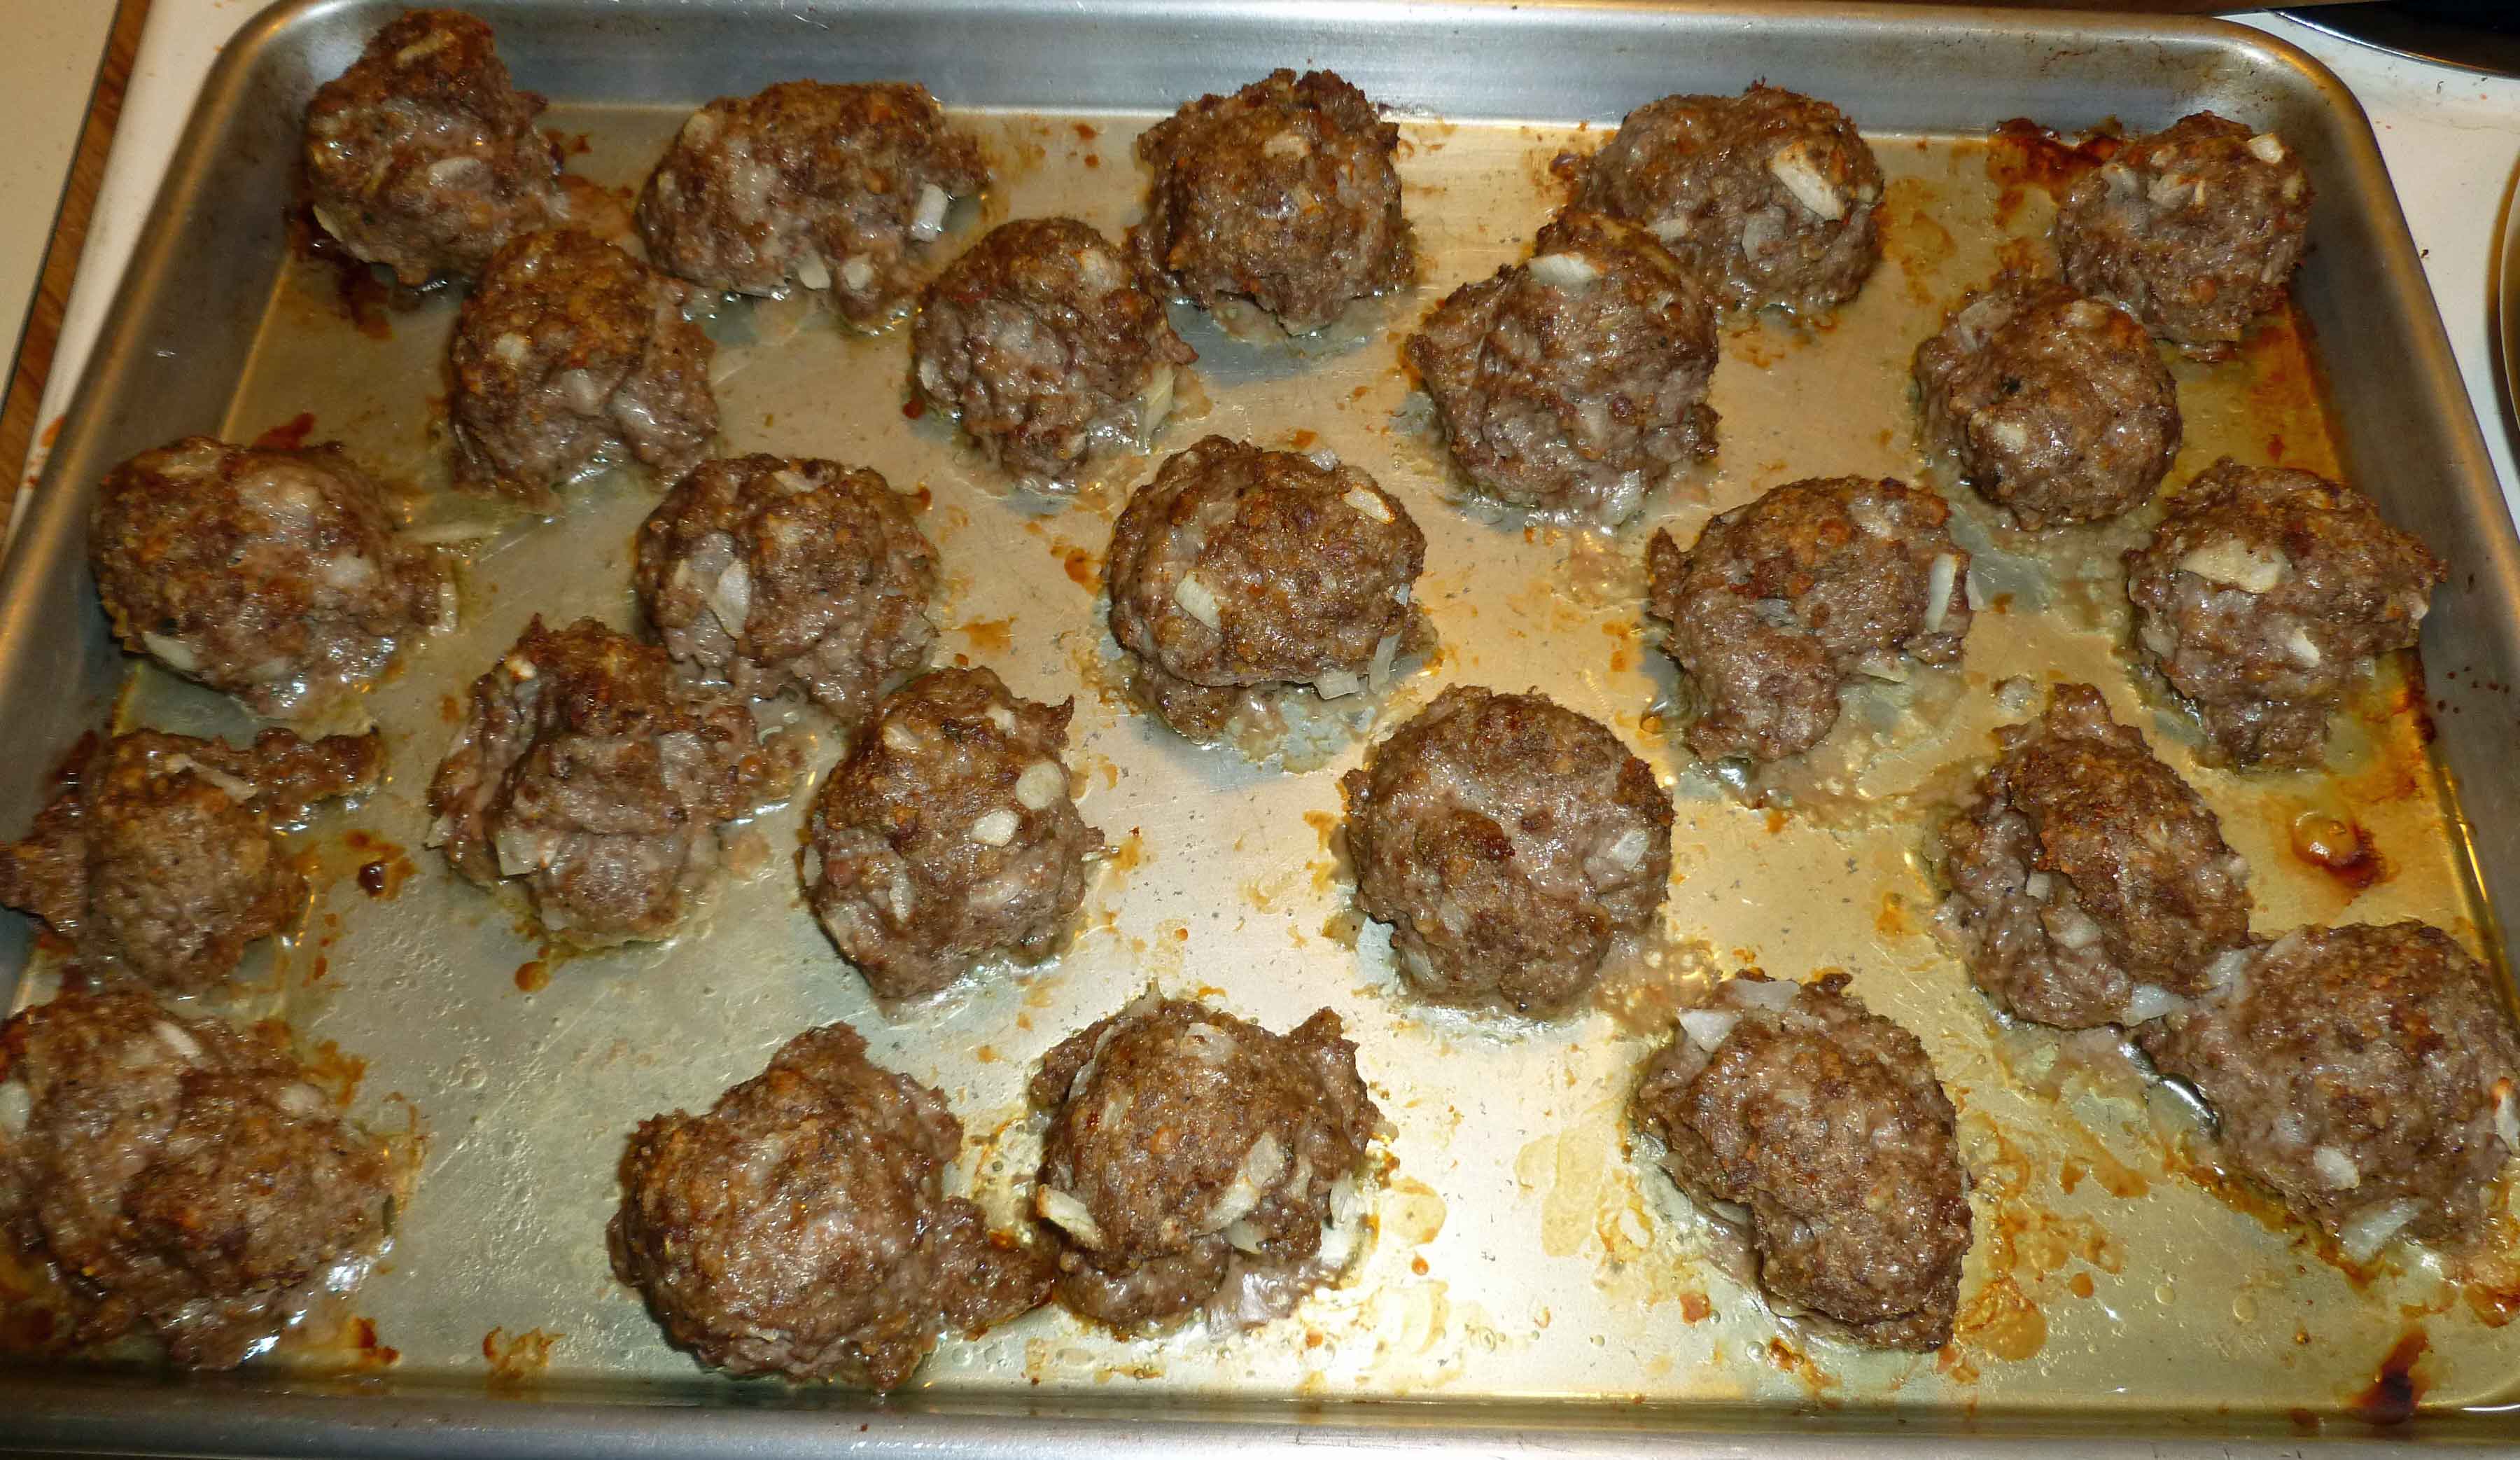
Bake them for 30 minutes. Once they are done (internal temp of 161°F) you can add them to sauce, or you can freeze some of them to use later.
Meatballs after cooking
Enjoy, and if you’ve got ideas for dairy-free, egg-free, gluten-free, corn-free bread recipes, I want to hear about them!