Notice: Function _load_textdomain_just_in_time was called incorrectly. Translation loading for the wp-ultimate-recipe domain was triggered too early. This is usually an indicator for some code in the plugin or theme running too early. Translations should be loaded at the init action or later. Please see Debugging in WordPress for more information. (This message was added in version 6.7.0.) in /home/maryzahc/public_html/adultfoodallergies.com/wp-includes/functions.php on line 6131 Main Dishes/Entrées – Page 4 – surviving the food allergy apocalypse (archive)
Main Dishes/Entrée [ahn-trey] noun: a dish served as the main course of a meal. These recipes will not contain dairy, eggs, gluten, wheat or hazelnuts. If we use a top 8 allergen, we will use a tag warning of its use.
Sometimes I struggle with what is blog-worthy food and what isn’t. As anyone with food sensitivities knows, we cook a lot. Most of my dinners aren’t really recipes, as most weeknights, I make recipes up based on “what’s in the house” and “what can I make before I starve?”
This is really one of those dinners, but I was able to plate it up nicely. It took less than 20 minutes to make, used only one pan, a cutting board, and a few utensils, and is made up of food that I generally have in the house.
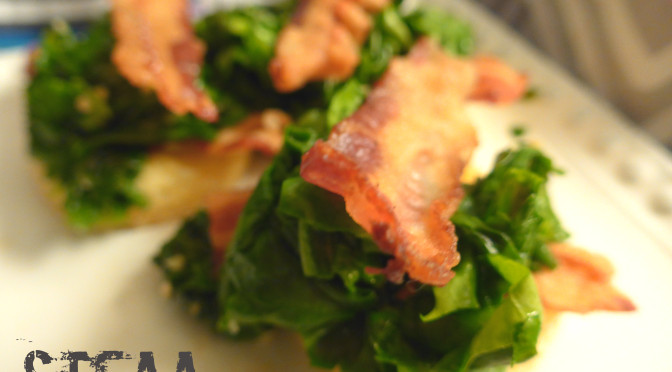
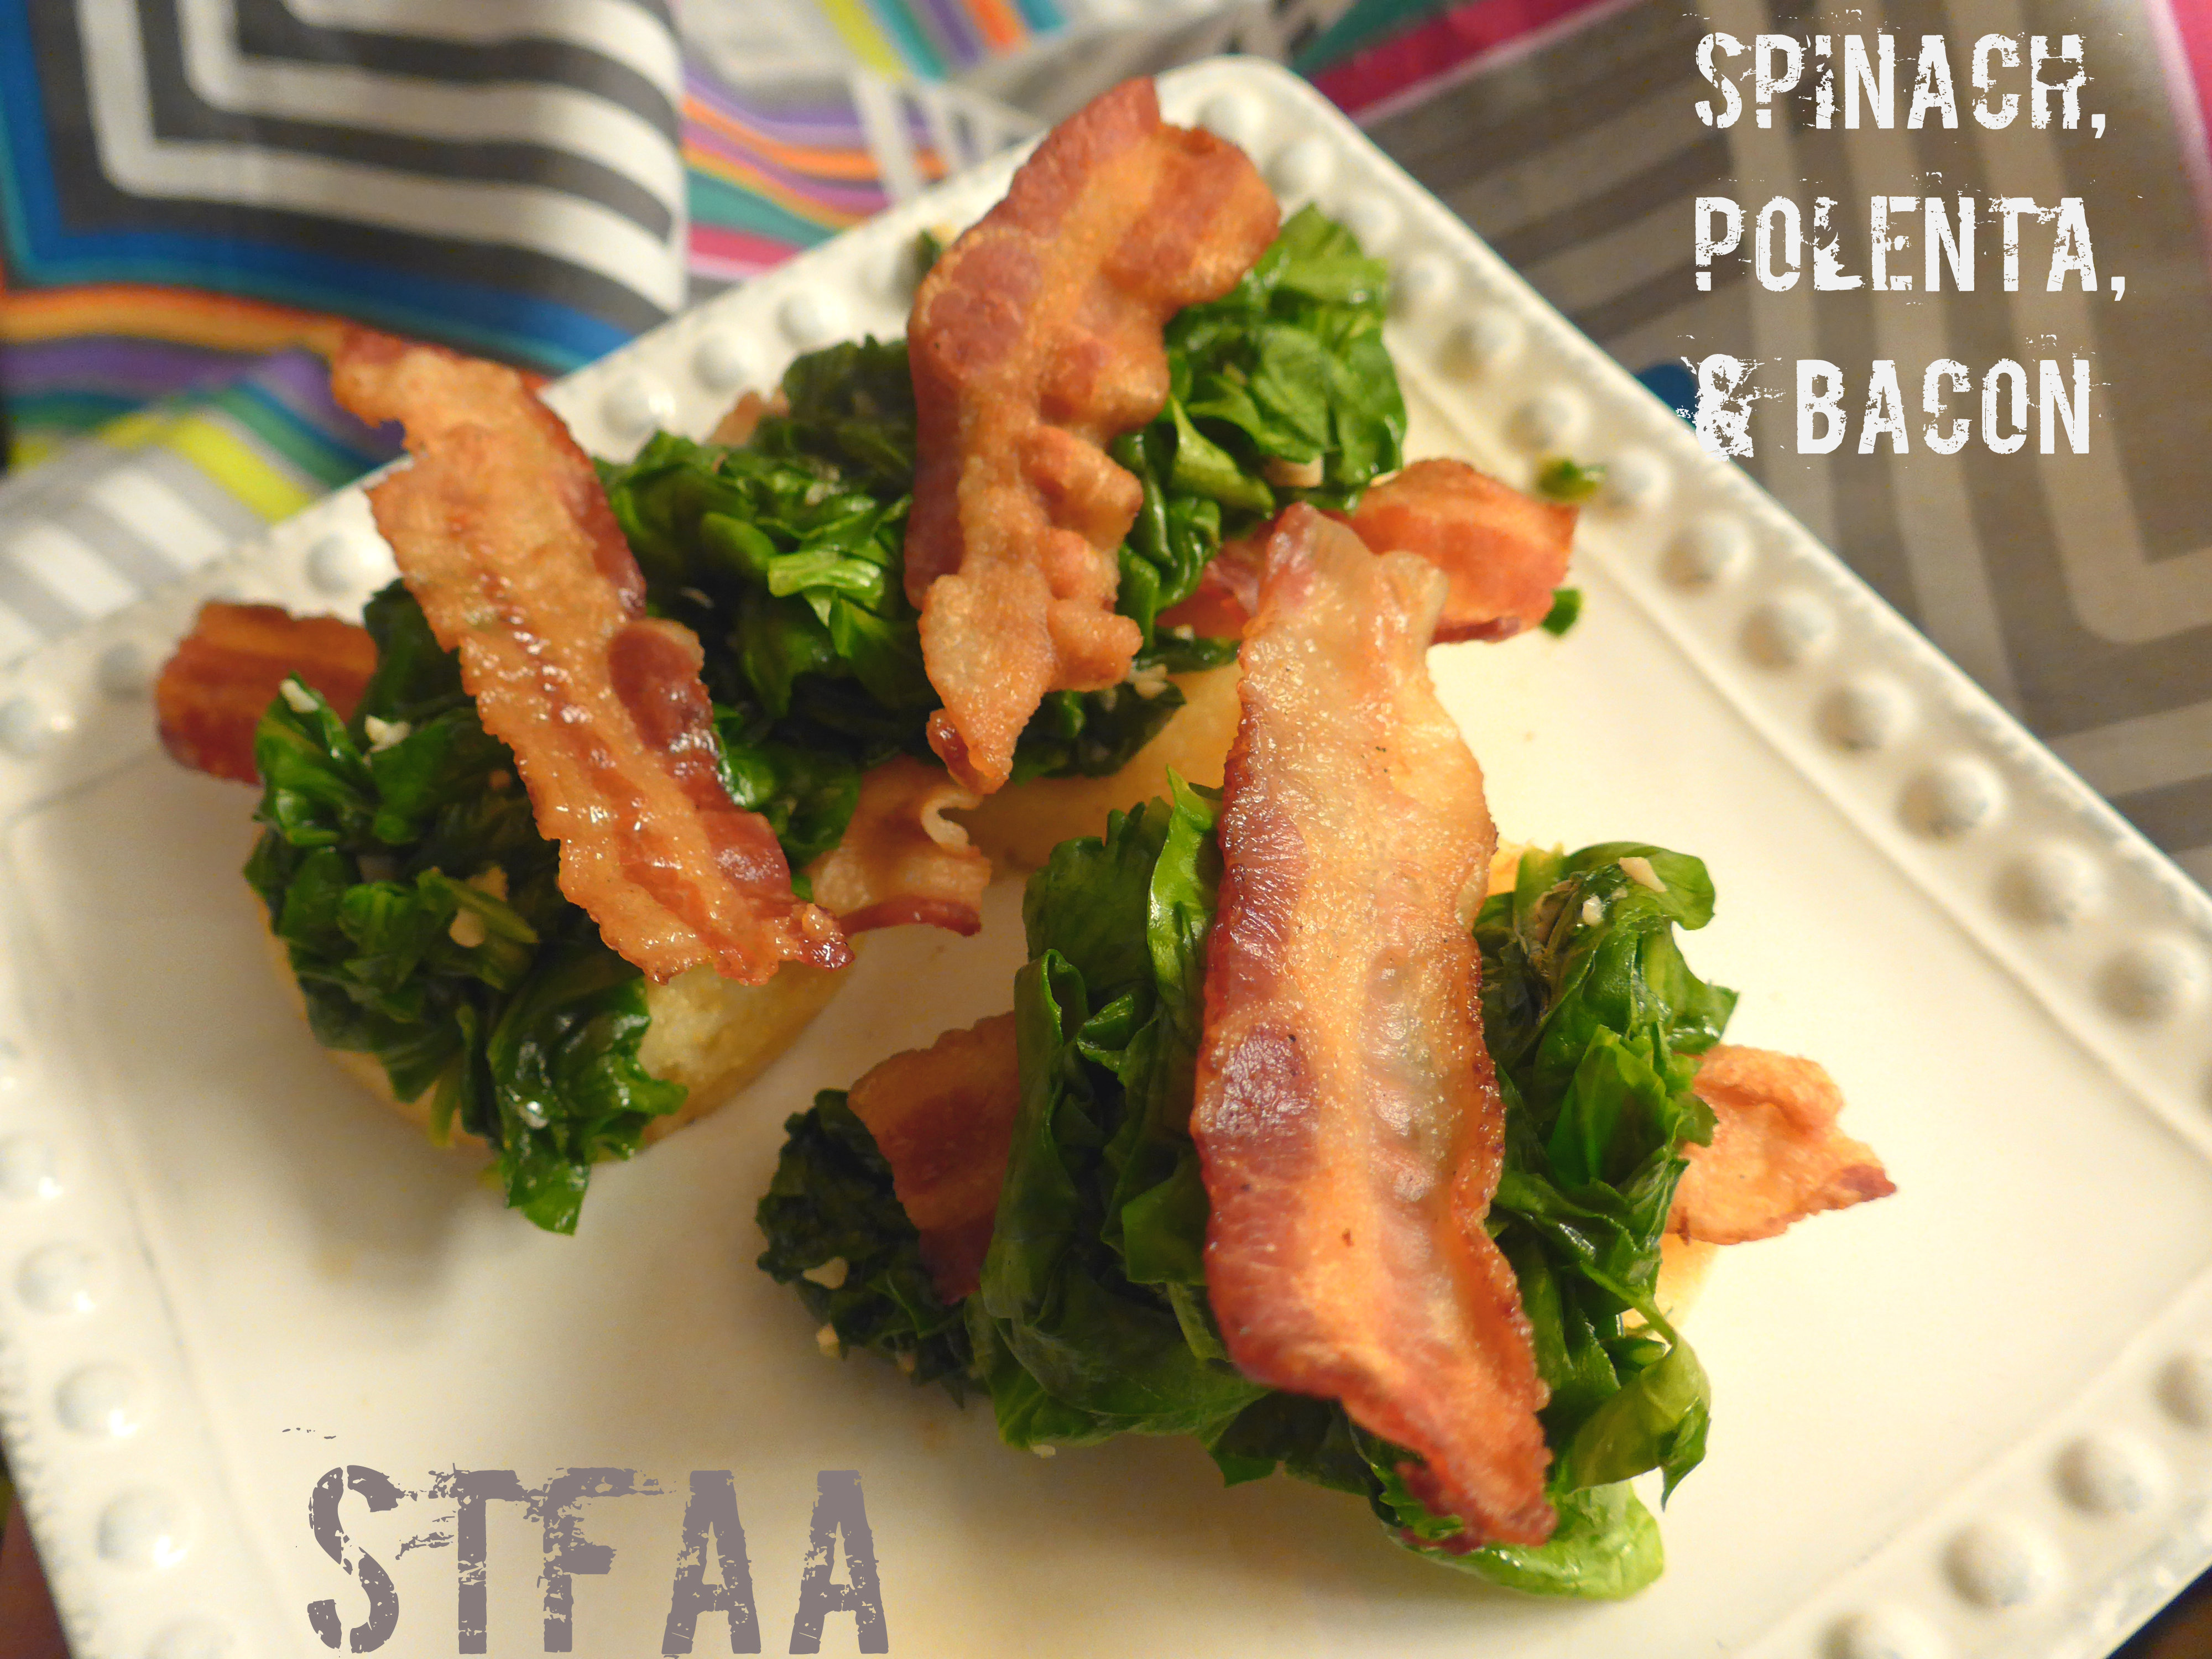
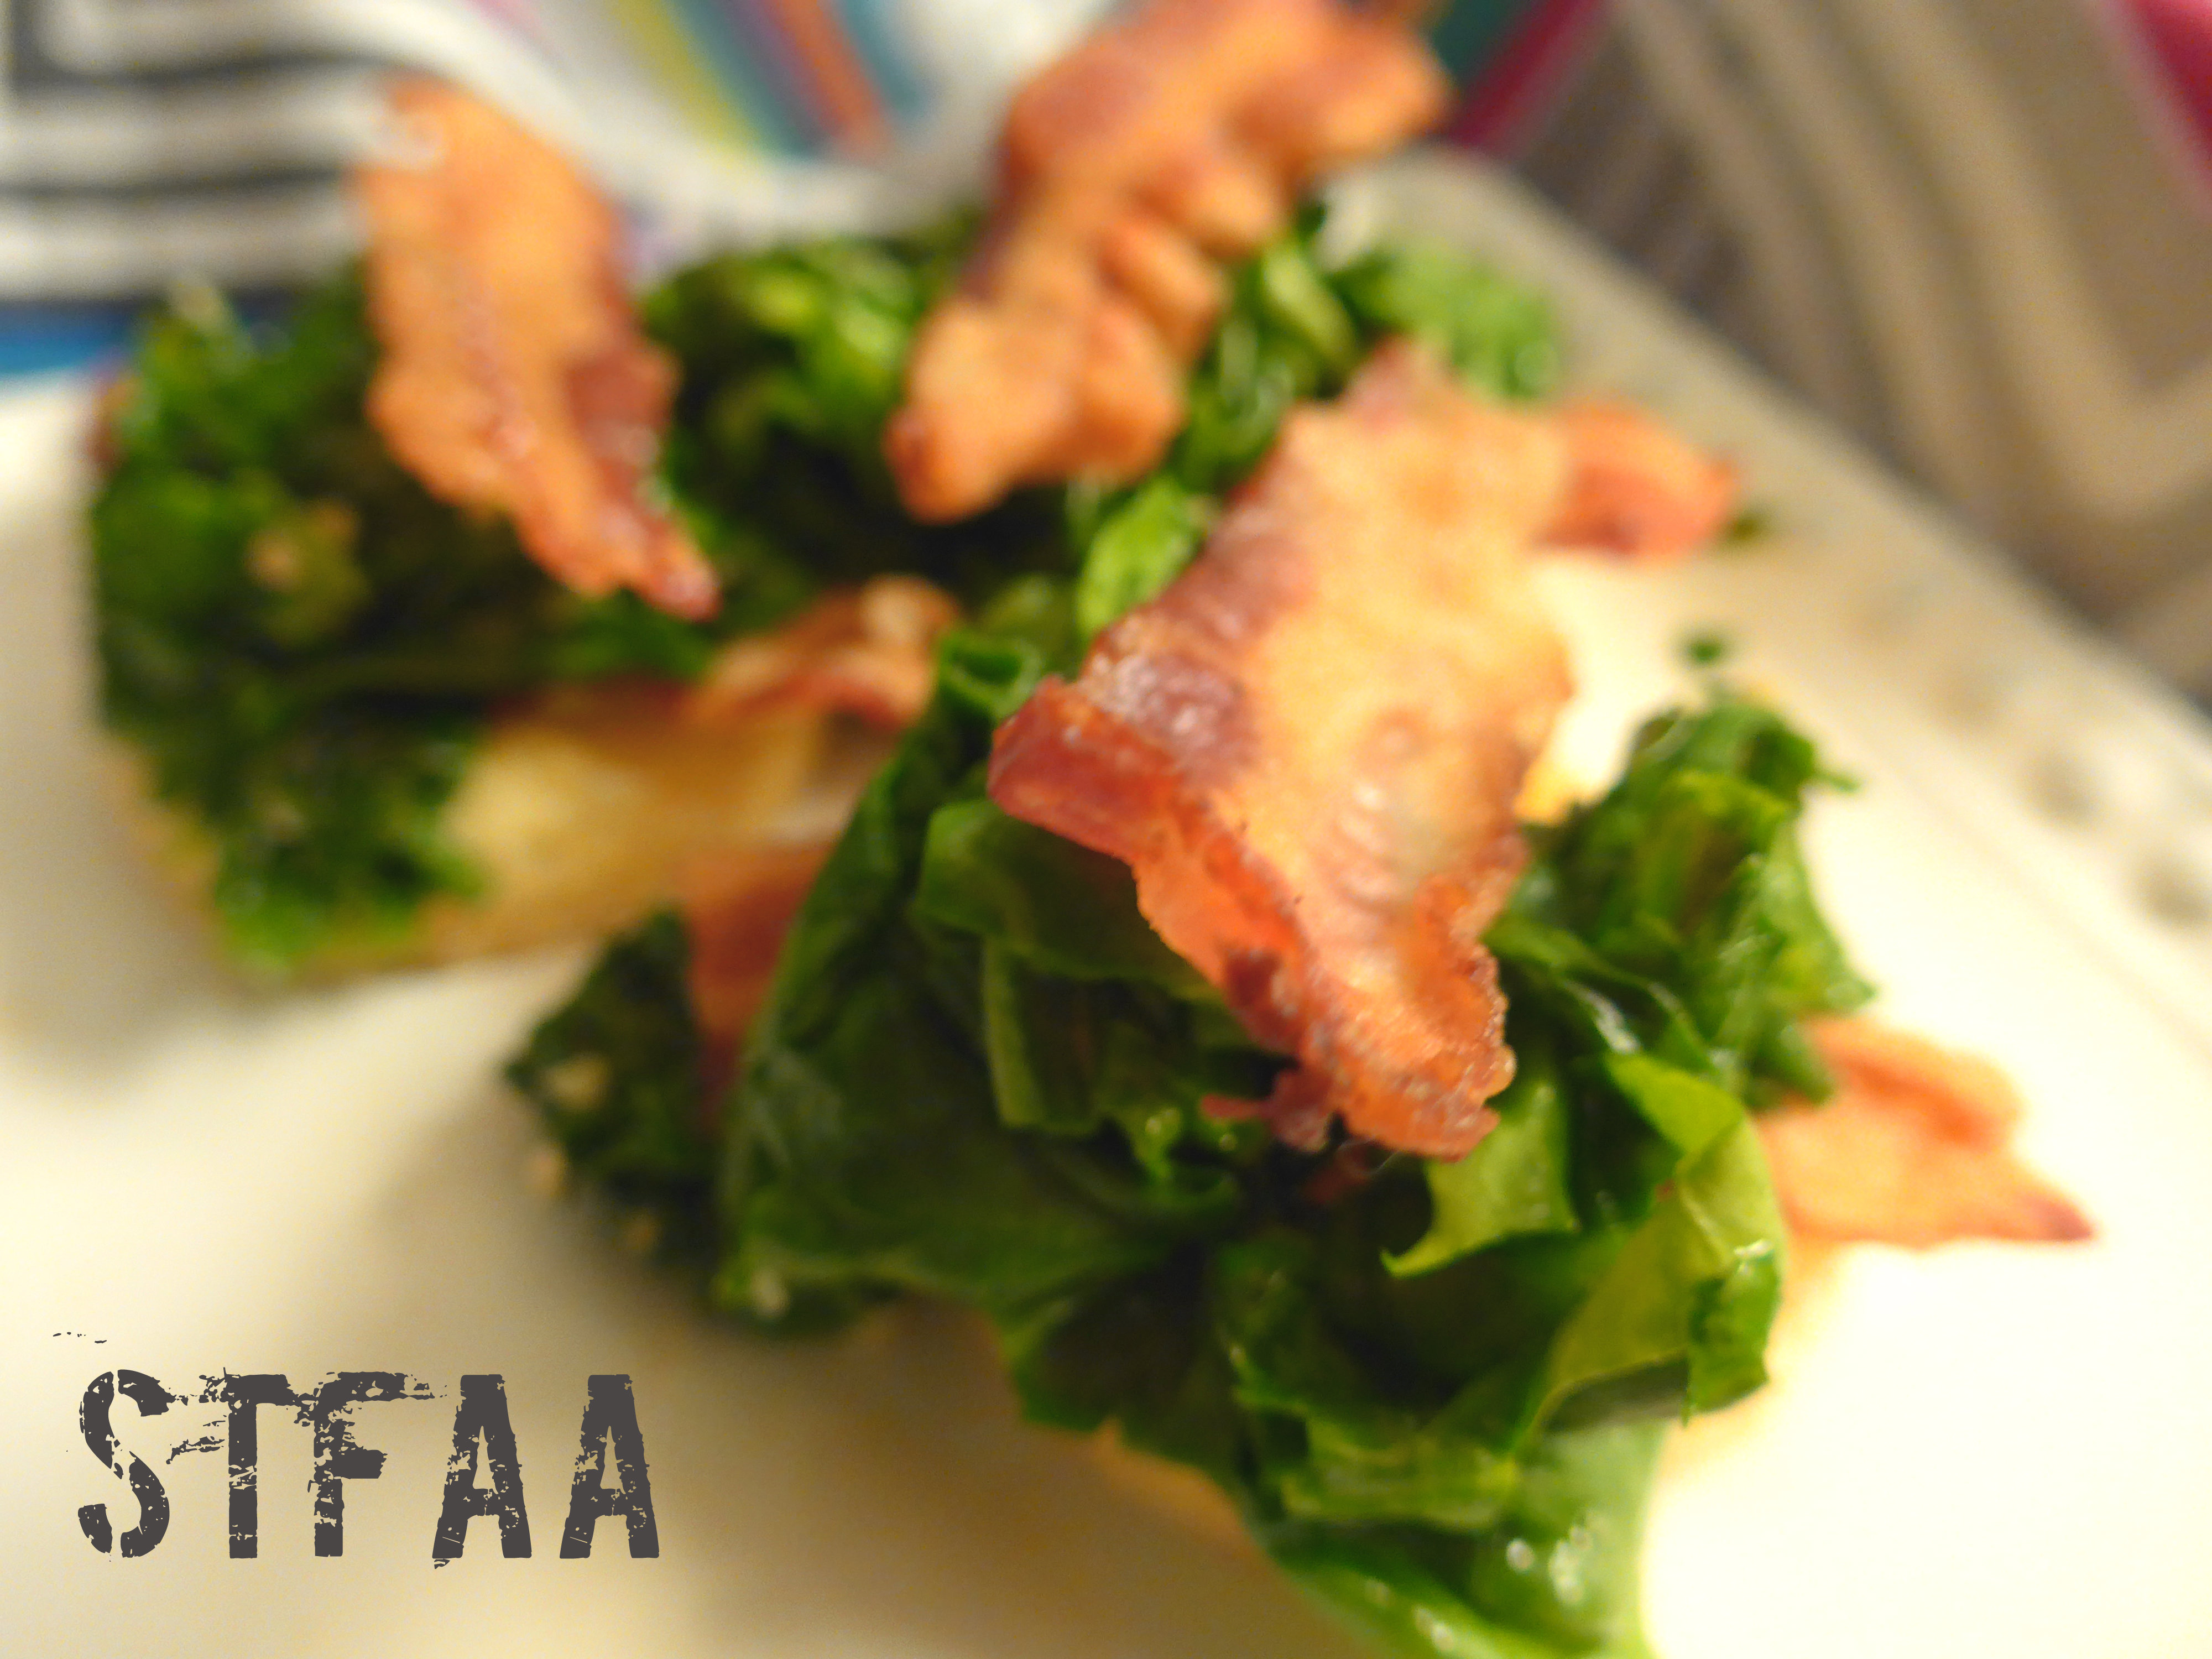
I always forget about polenta — a naturally gluten-free food (obviously not safe for the corn sensitive!), that some of us can buy prepared in shelf-stable tubes. Polenta is an excellent way to fill a biscuit-type craving. It isn’t a biscuit, no. But it’s great texture for a bread craving. I cooked a pan of bacon, first, crisped and warmed the polenta in a bit of the fat, and then quickly wilted some garlic and spinach over the top. This is the type of quick and satisfying meal I want after a busy work day. I hope you enjoy it, too.
(If you cannot eat regular polenta, made of corn, consider making a savory version of millet polenta. Our sweet breakfast version of millet polenta can be modified by leaving out the sugar and fruit.)
Spinach and bacon is a winning combo. Notice: Trying to access array offset on value of type bool in /home/maryzahc/public_html/adultfoodallergies.com/wp-content/plugins/wp-ultimate-recipe/helpers/models/recipe.php on line 254
Spinach, Polenta, and Bacon
Print Recipe
Servings
Prep Time
2people
20 minutes
Cook Time
20 minutes
Servings
Prep Time
2people
20 minutes
Cook Time
20 minutes
Spinach, Polenta, and Bacon
Print Recipe
Servings
Prep Time
2people
20 minutes
Cook Time
20 minutes
Servings
Prep Time
2people
20 minutes
Cook Time
20 minutes
Ingredients
6stripsbacon
1tubepolenta,sliced into 1/4-inch to 1/2-inch slices
10cupsspinachroughly chopped
1-2teaspoonsgarlicminced
Servings: people
Instructions
Heat a cast iron skillet over medium heat. When hot, add the bacon.
While the bacon is cooking, wash and drain the spinach. Open the polenta and slice it. Chop the spinach and garlic.
When the bacon is done, remove it to drain on a paper towel-covered plate. Drain most of the rendered fat, leaving a thin skim of bacon grease to cook the rest of dinner.
Lay polenta slices in a single layer in the hot skillet. Cook 2-3 minutes per side, then remove to the serving dish.
Add the garlic to the hot pan, stirring, and when it becomes fragrant (1-2 minutes) add the spinach and stir until wilted.
Top each polenta slice with a slice of bacon (I broke mine in half, but also consider crumbling the slices if you’ve made them crispy). Top with a good solid mound of spinach, and enjoy your dinner.
Recipe Notes
I’m pretty sure this would work with most greens, but I have spinach on hand more often than any other green, plus it cooks quickly.
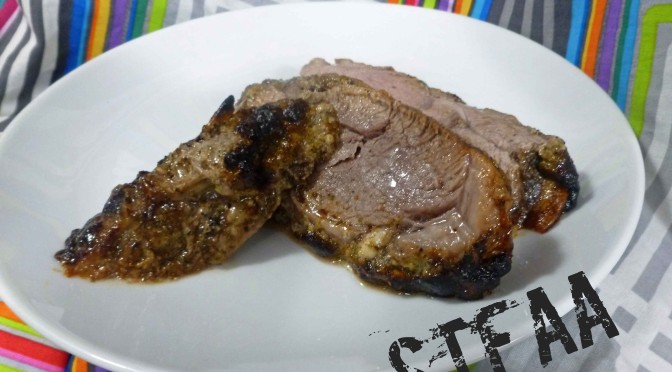
When Mary Kate and I sit down to plan posts ahead, we look at the calendar and try to pick things to develop that go with upcoming holidays. When we were looking at St. Patrick’s Day, we were sort of stumped, because we’ve already got a corned beef recipe, and we really weren’t that familiar with Irish dishes that we could do. So we decided that something with lamb would be good because we thought lamb dishes were vaguely Irish in our very limited experience. I was tasked with developing the lamb dish. I reviewed an Irish cookbook, looked around on the internet, checked The Joy of Cooking and The Better Home and Gardens New Cook Book, and talked to a friend, Nancy B, who makes lamb. This is a combination of a couple of approaches and might not quite be authentic Irish cuisine, but let’s just call it Irish cuisine inspired. Also, you could make it for Easter if you wanted.
Herbed Leg of Lamb
Serves 6-8 people.
Lamb:
4poundboneless leg of lamb roast
2clovesgarlic, thinly sliced
1tspolive oil or other safe for you oil to grease baking dish
Herb Wet Rub:
3clovesgarlic, peeled and stem end trimmed off
1/2cuplemon juice, fresh squeezed
2tbspdried parsley
3tbspolive oil or other safe for you oil
1 1/2tbspDijon mustard (I use my own homemade, home canned mustard, but use what’s safe for you.)
1tspdried basil
1tspdried rosemary
1/2tsponion powder
1/4tspground black pepper
1/4tspsalt
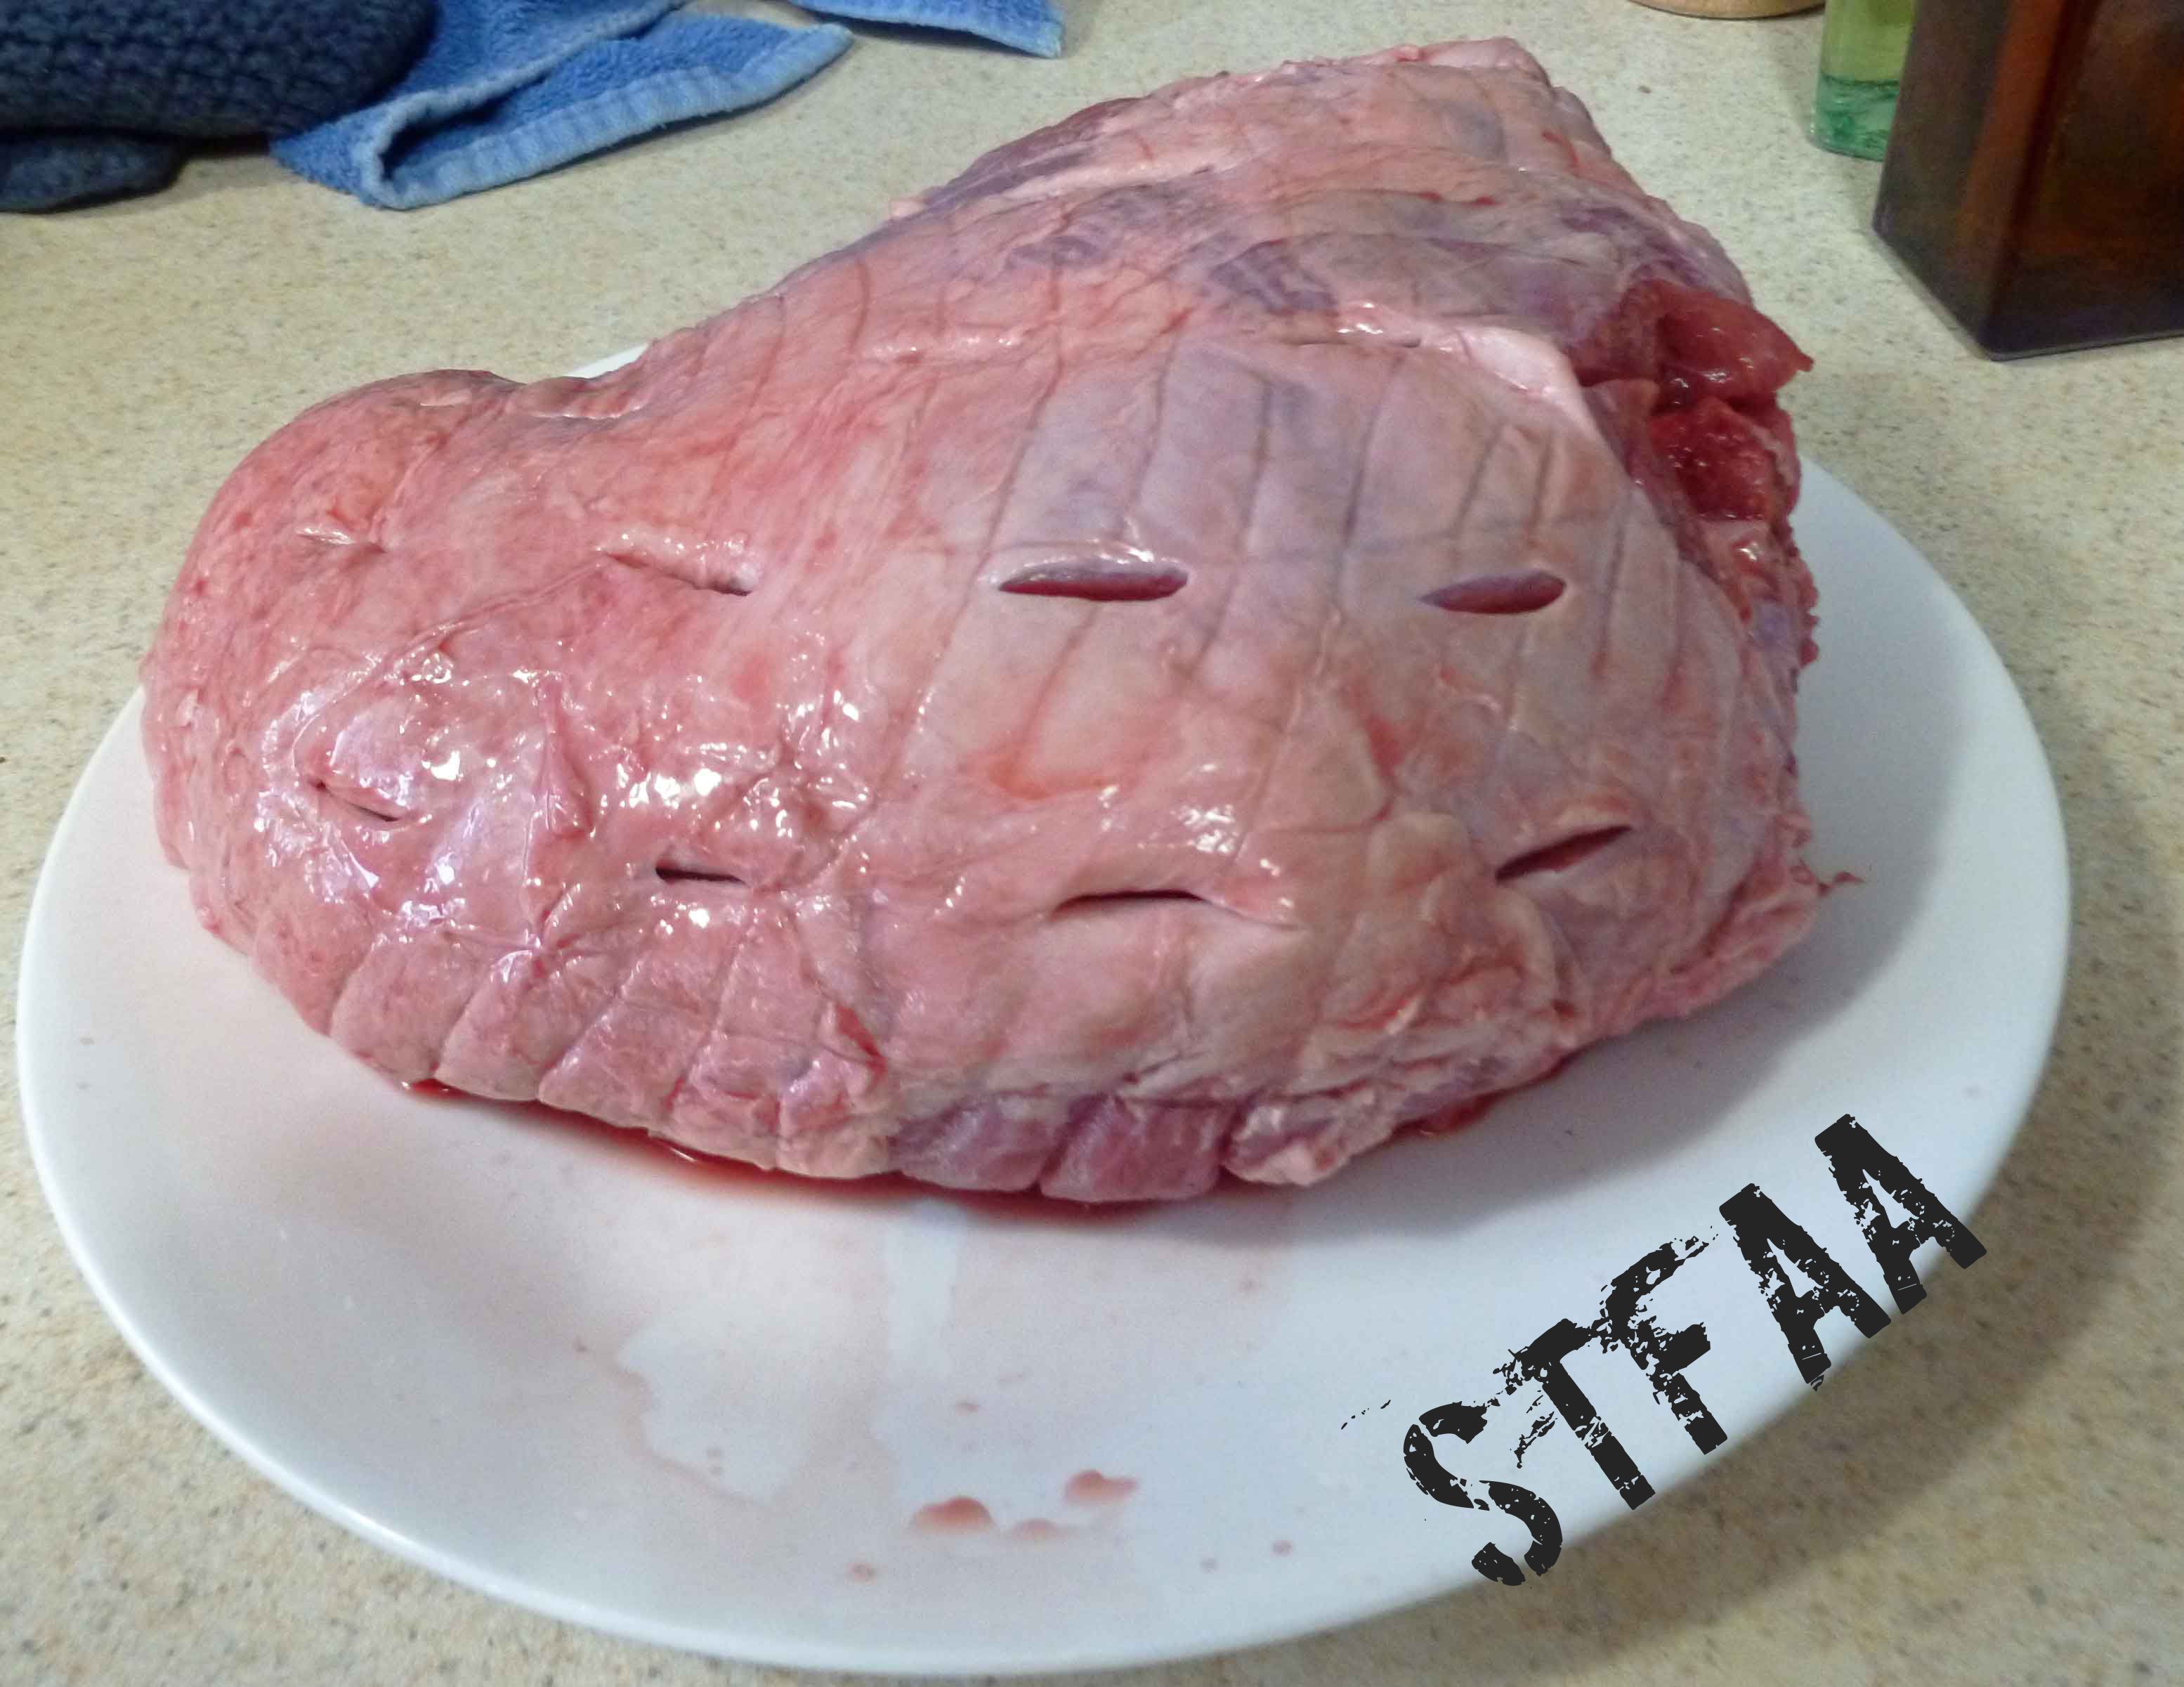
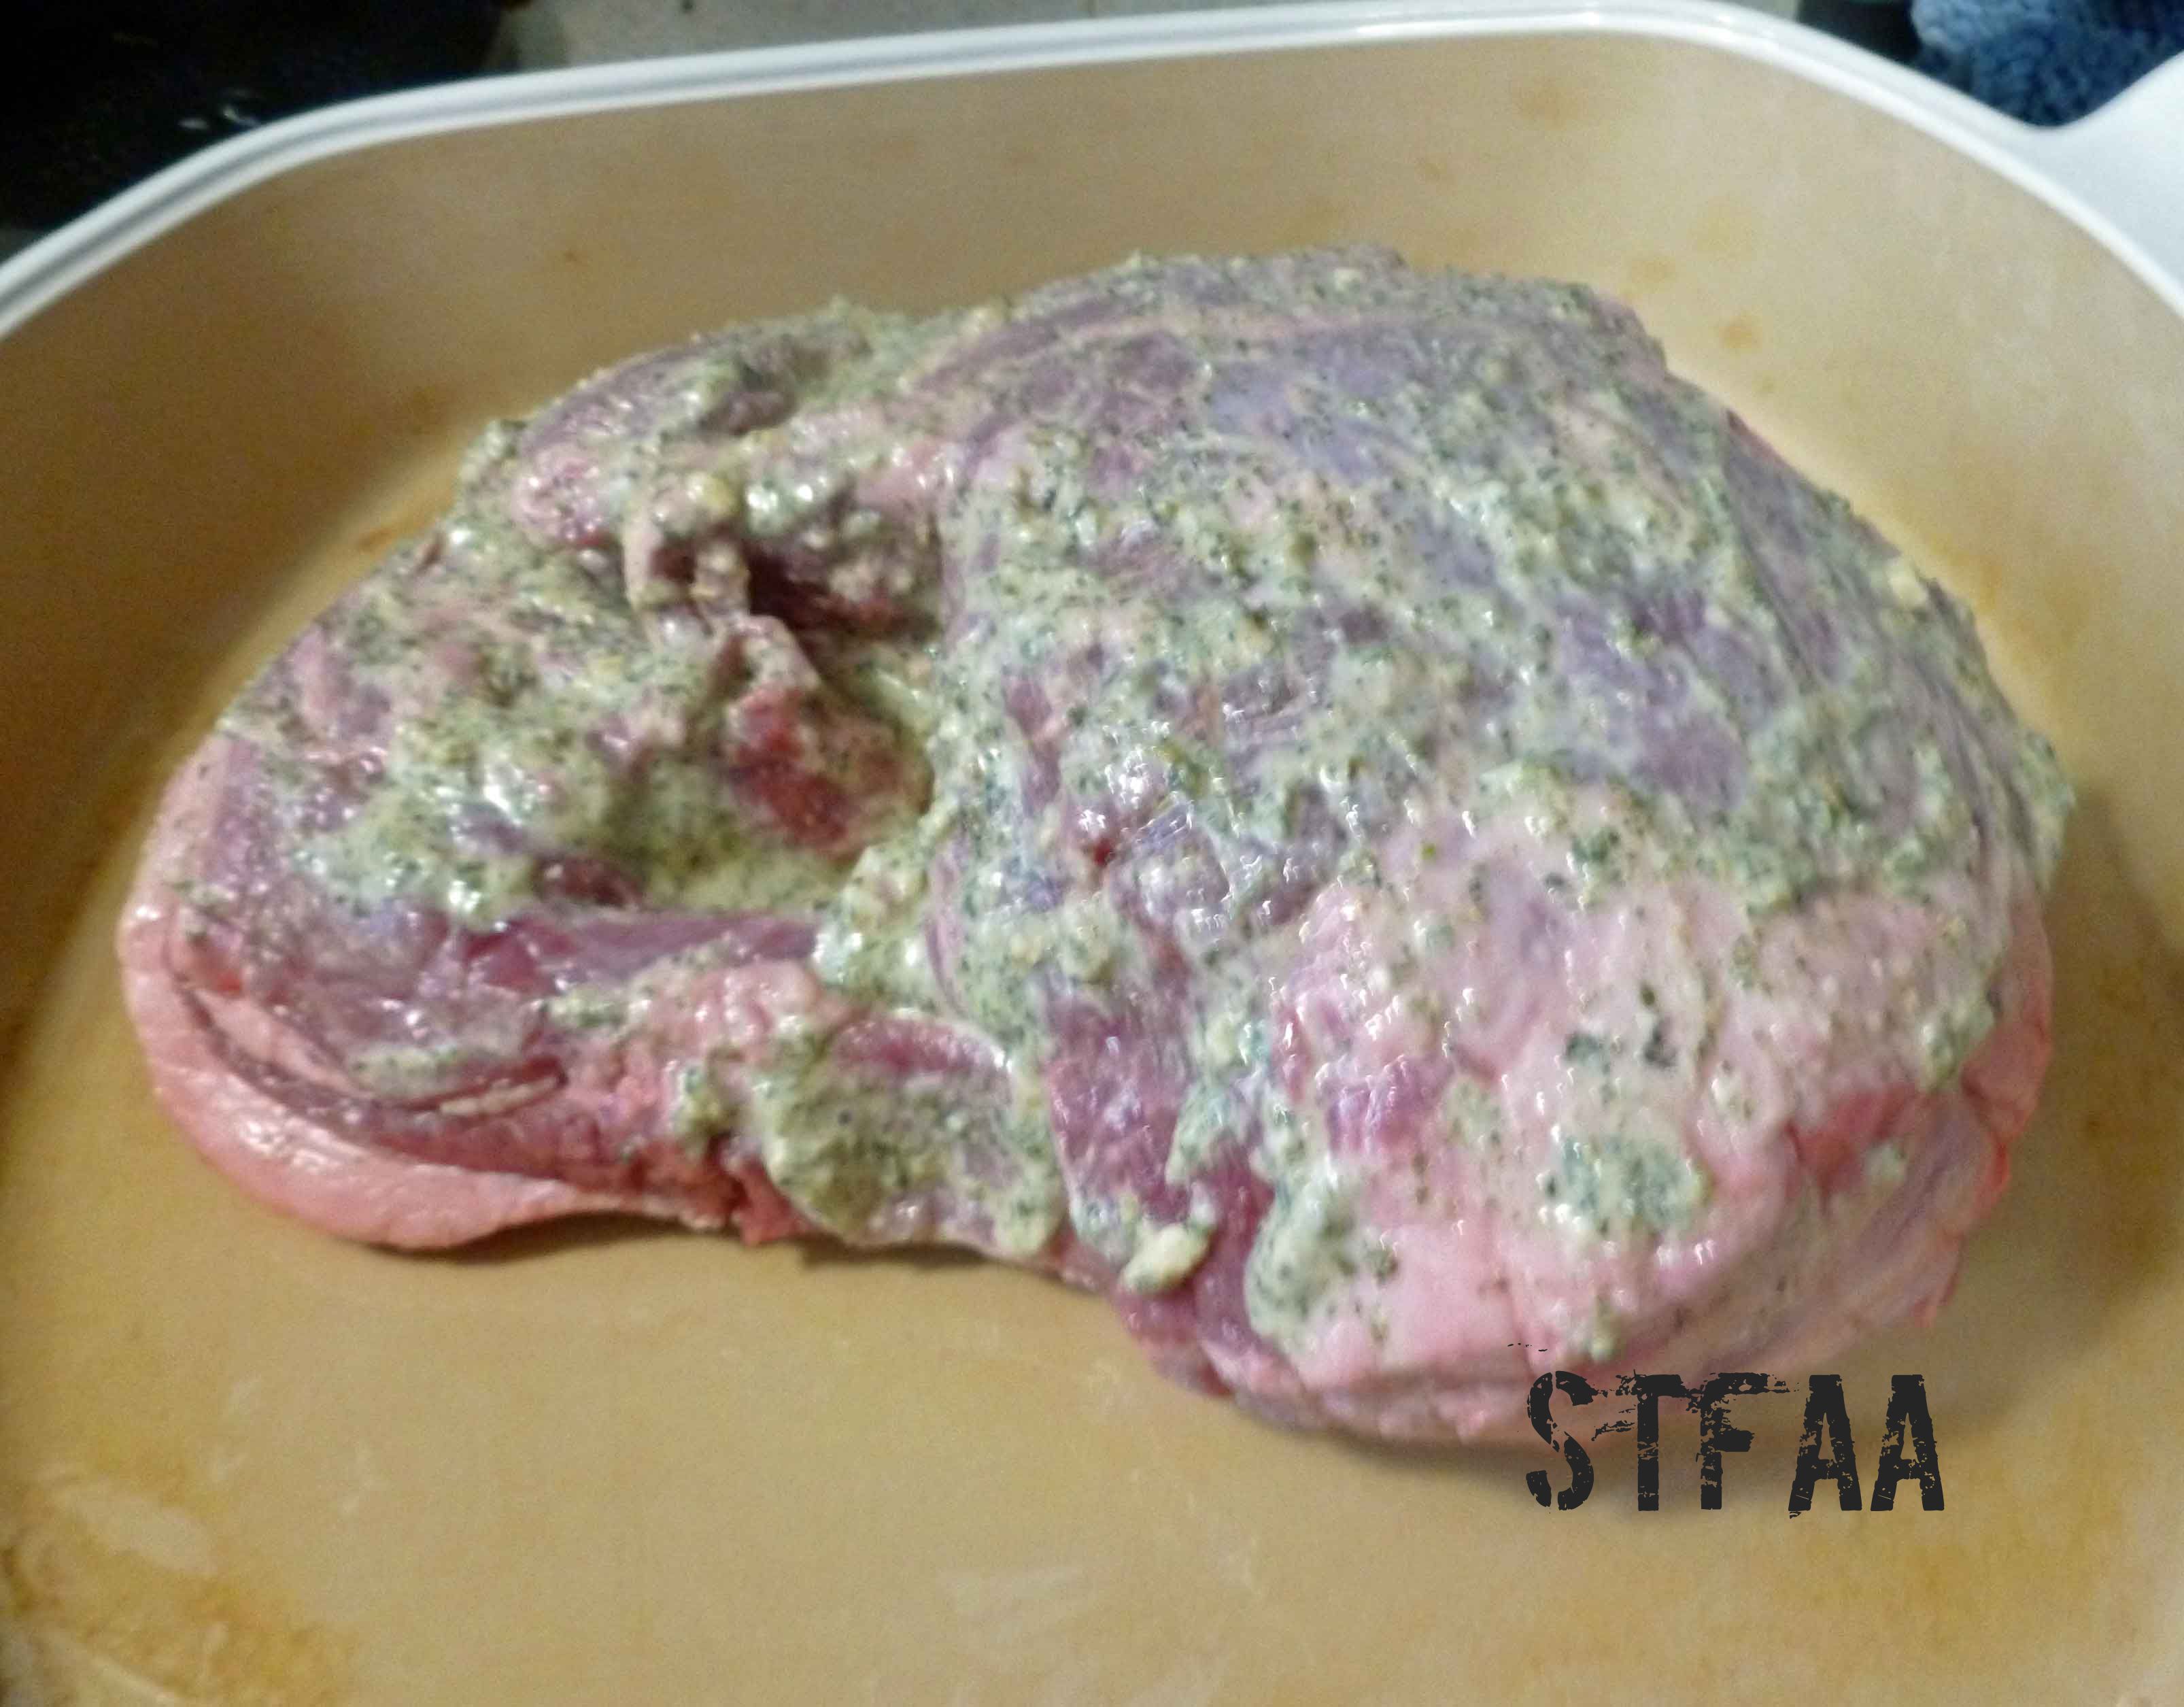
Preheat oven to 450°F. Remove boneless leg of lamb from packaging and remove netting. Cut 1/2 inch wide slits into the lamb at 1 inch intervals on the top (fat side) of the lamb.
Leg of lamb with 1/2 slits
Peel and slice two cloves of garlic thinly, and set aside.
Thinly sliced cloves of garlic
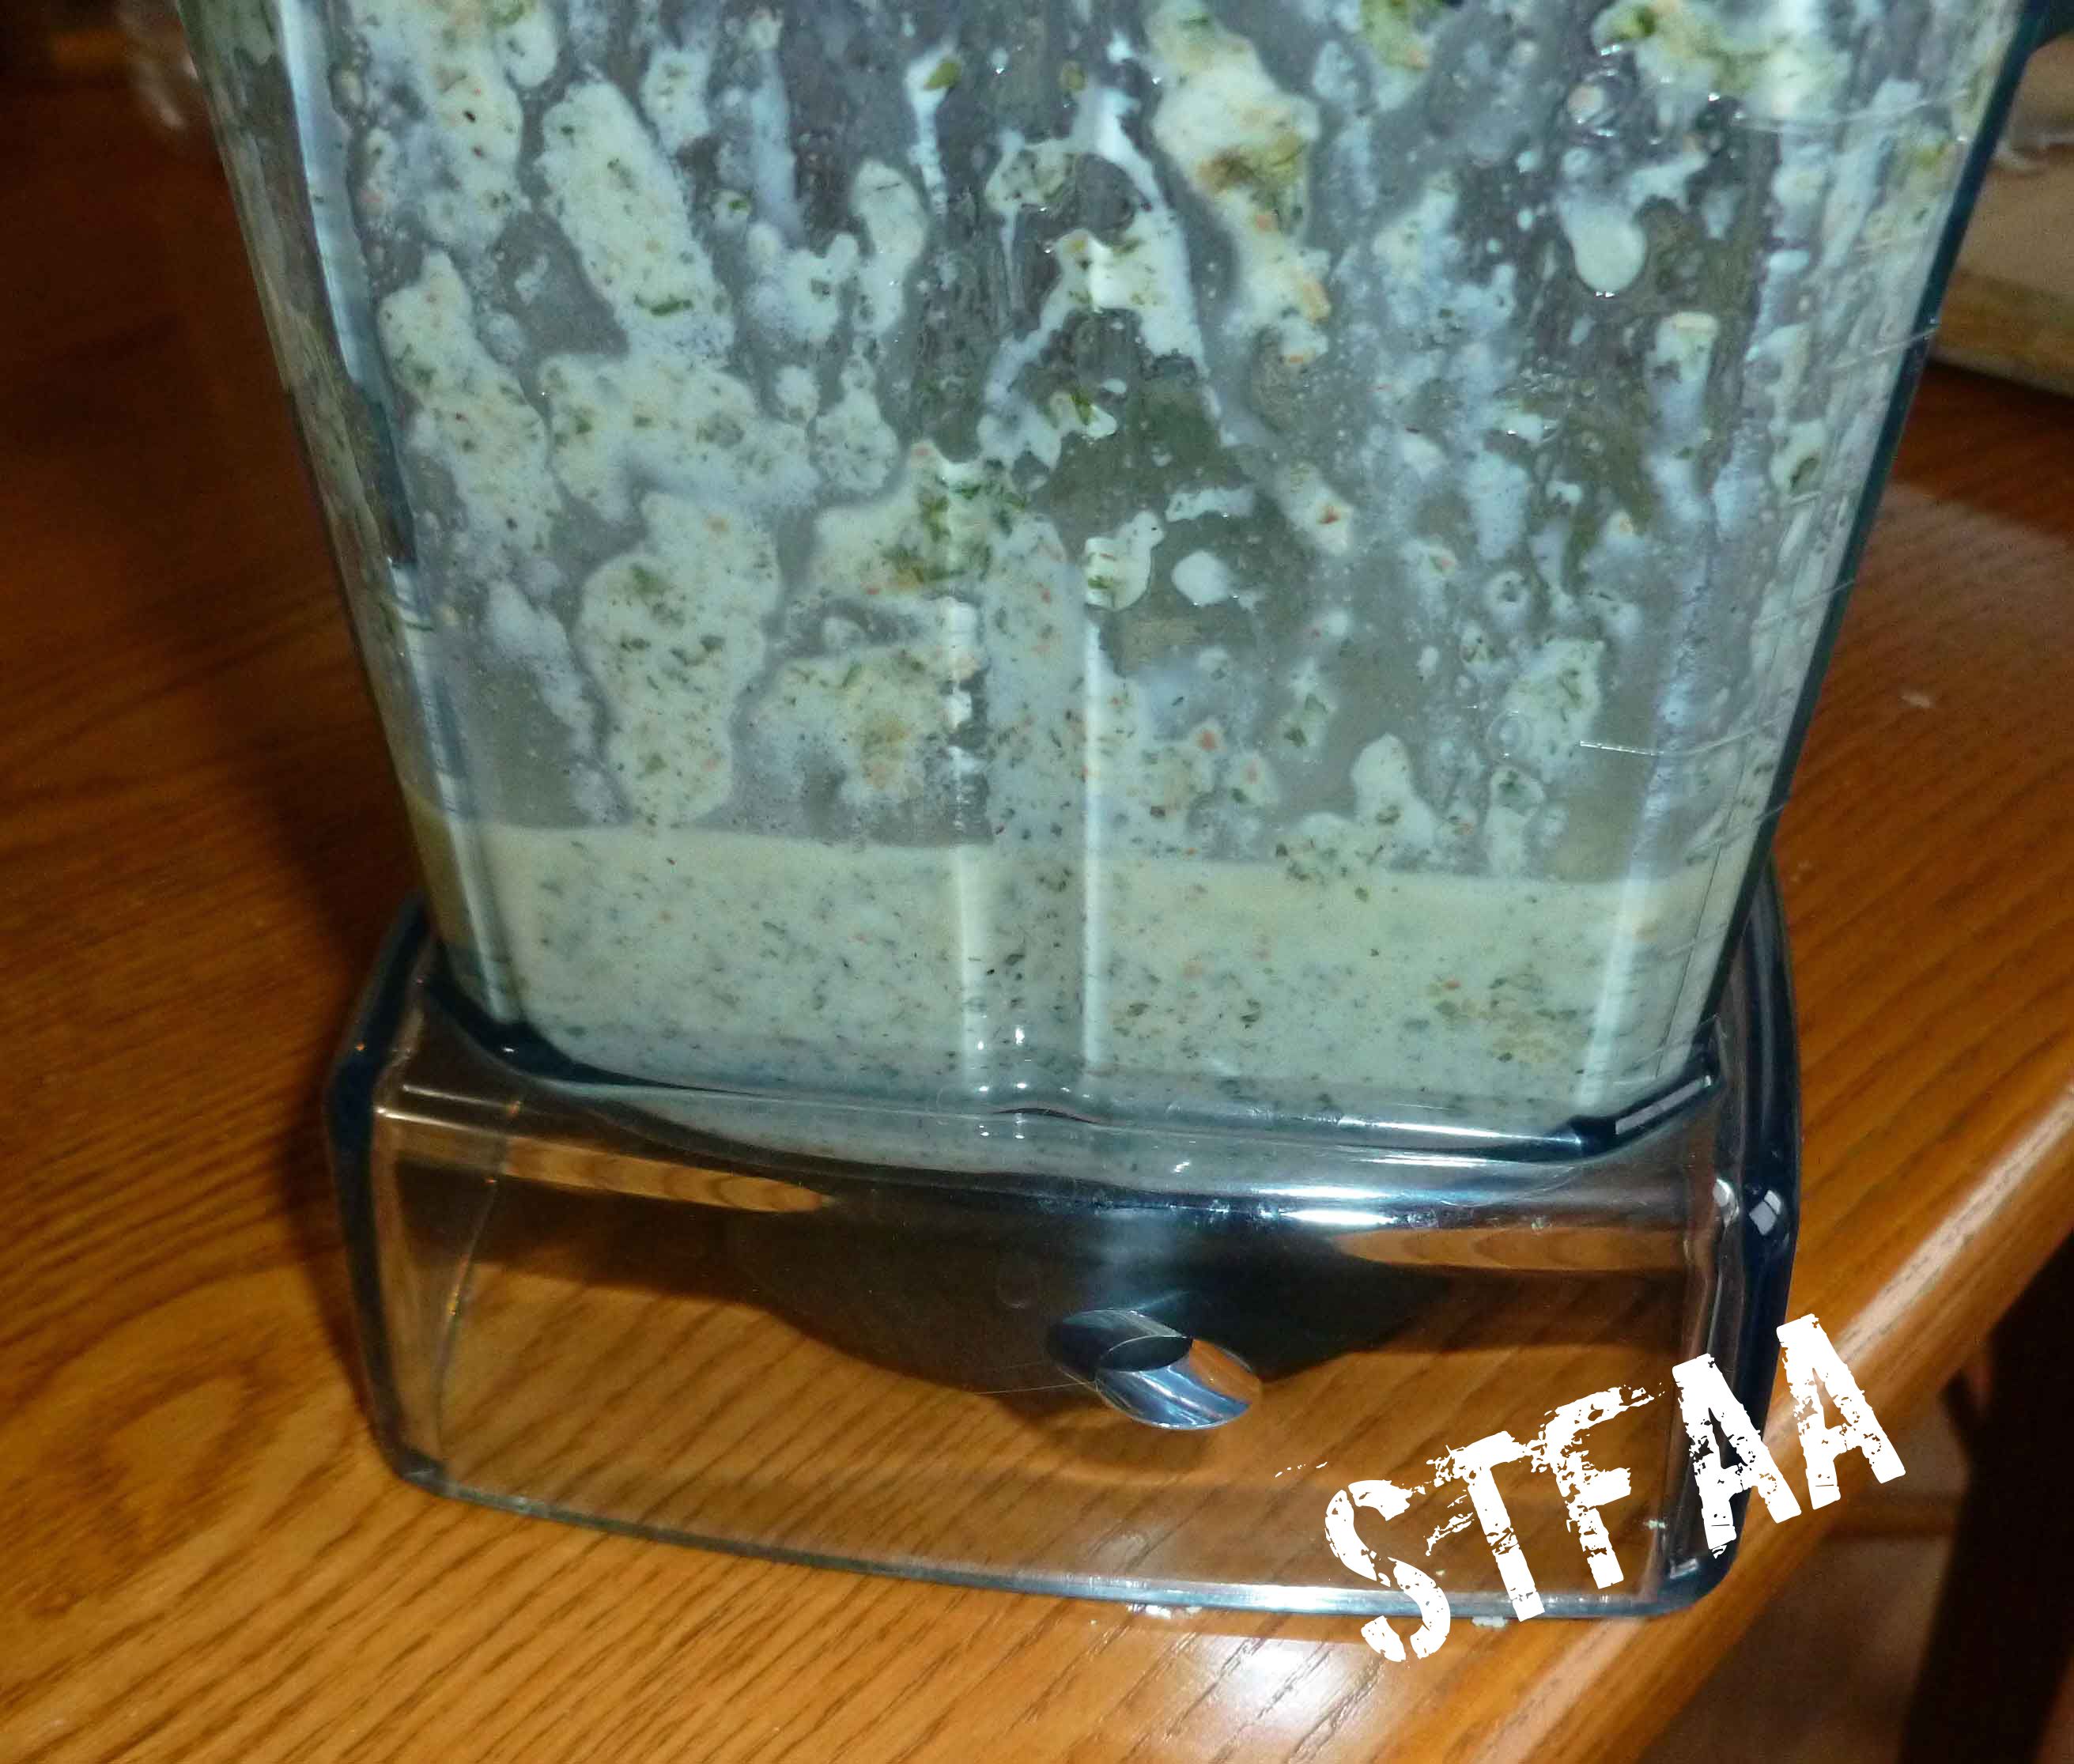
Peel remaining garlic cloves and place in blender with the remaining wet rub ingredients: lemon juice, parsley, olive oil, mustard, basil, rosemary, onion powder, black pepper and salt. Process until mixture is fairly finely blended, but not completely smooth.
Herb Wet Rub after processing
Grease a shallow baking dish with a teaspoon of olive oil. Place lamb in shallow roasting dish upside down and pour approximately a third of the wet rub on the lamb. Use your hands or a basting brush to spread the wet rub over the entire surface of the bottom of the lamb.
Bottom of lamb with a third of the wet rubBottom of lamb coated with wet rub
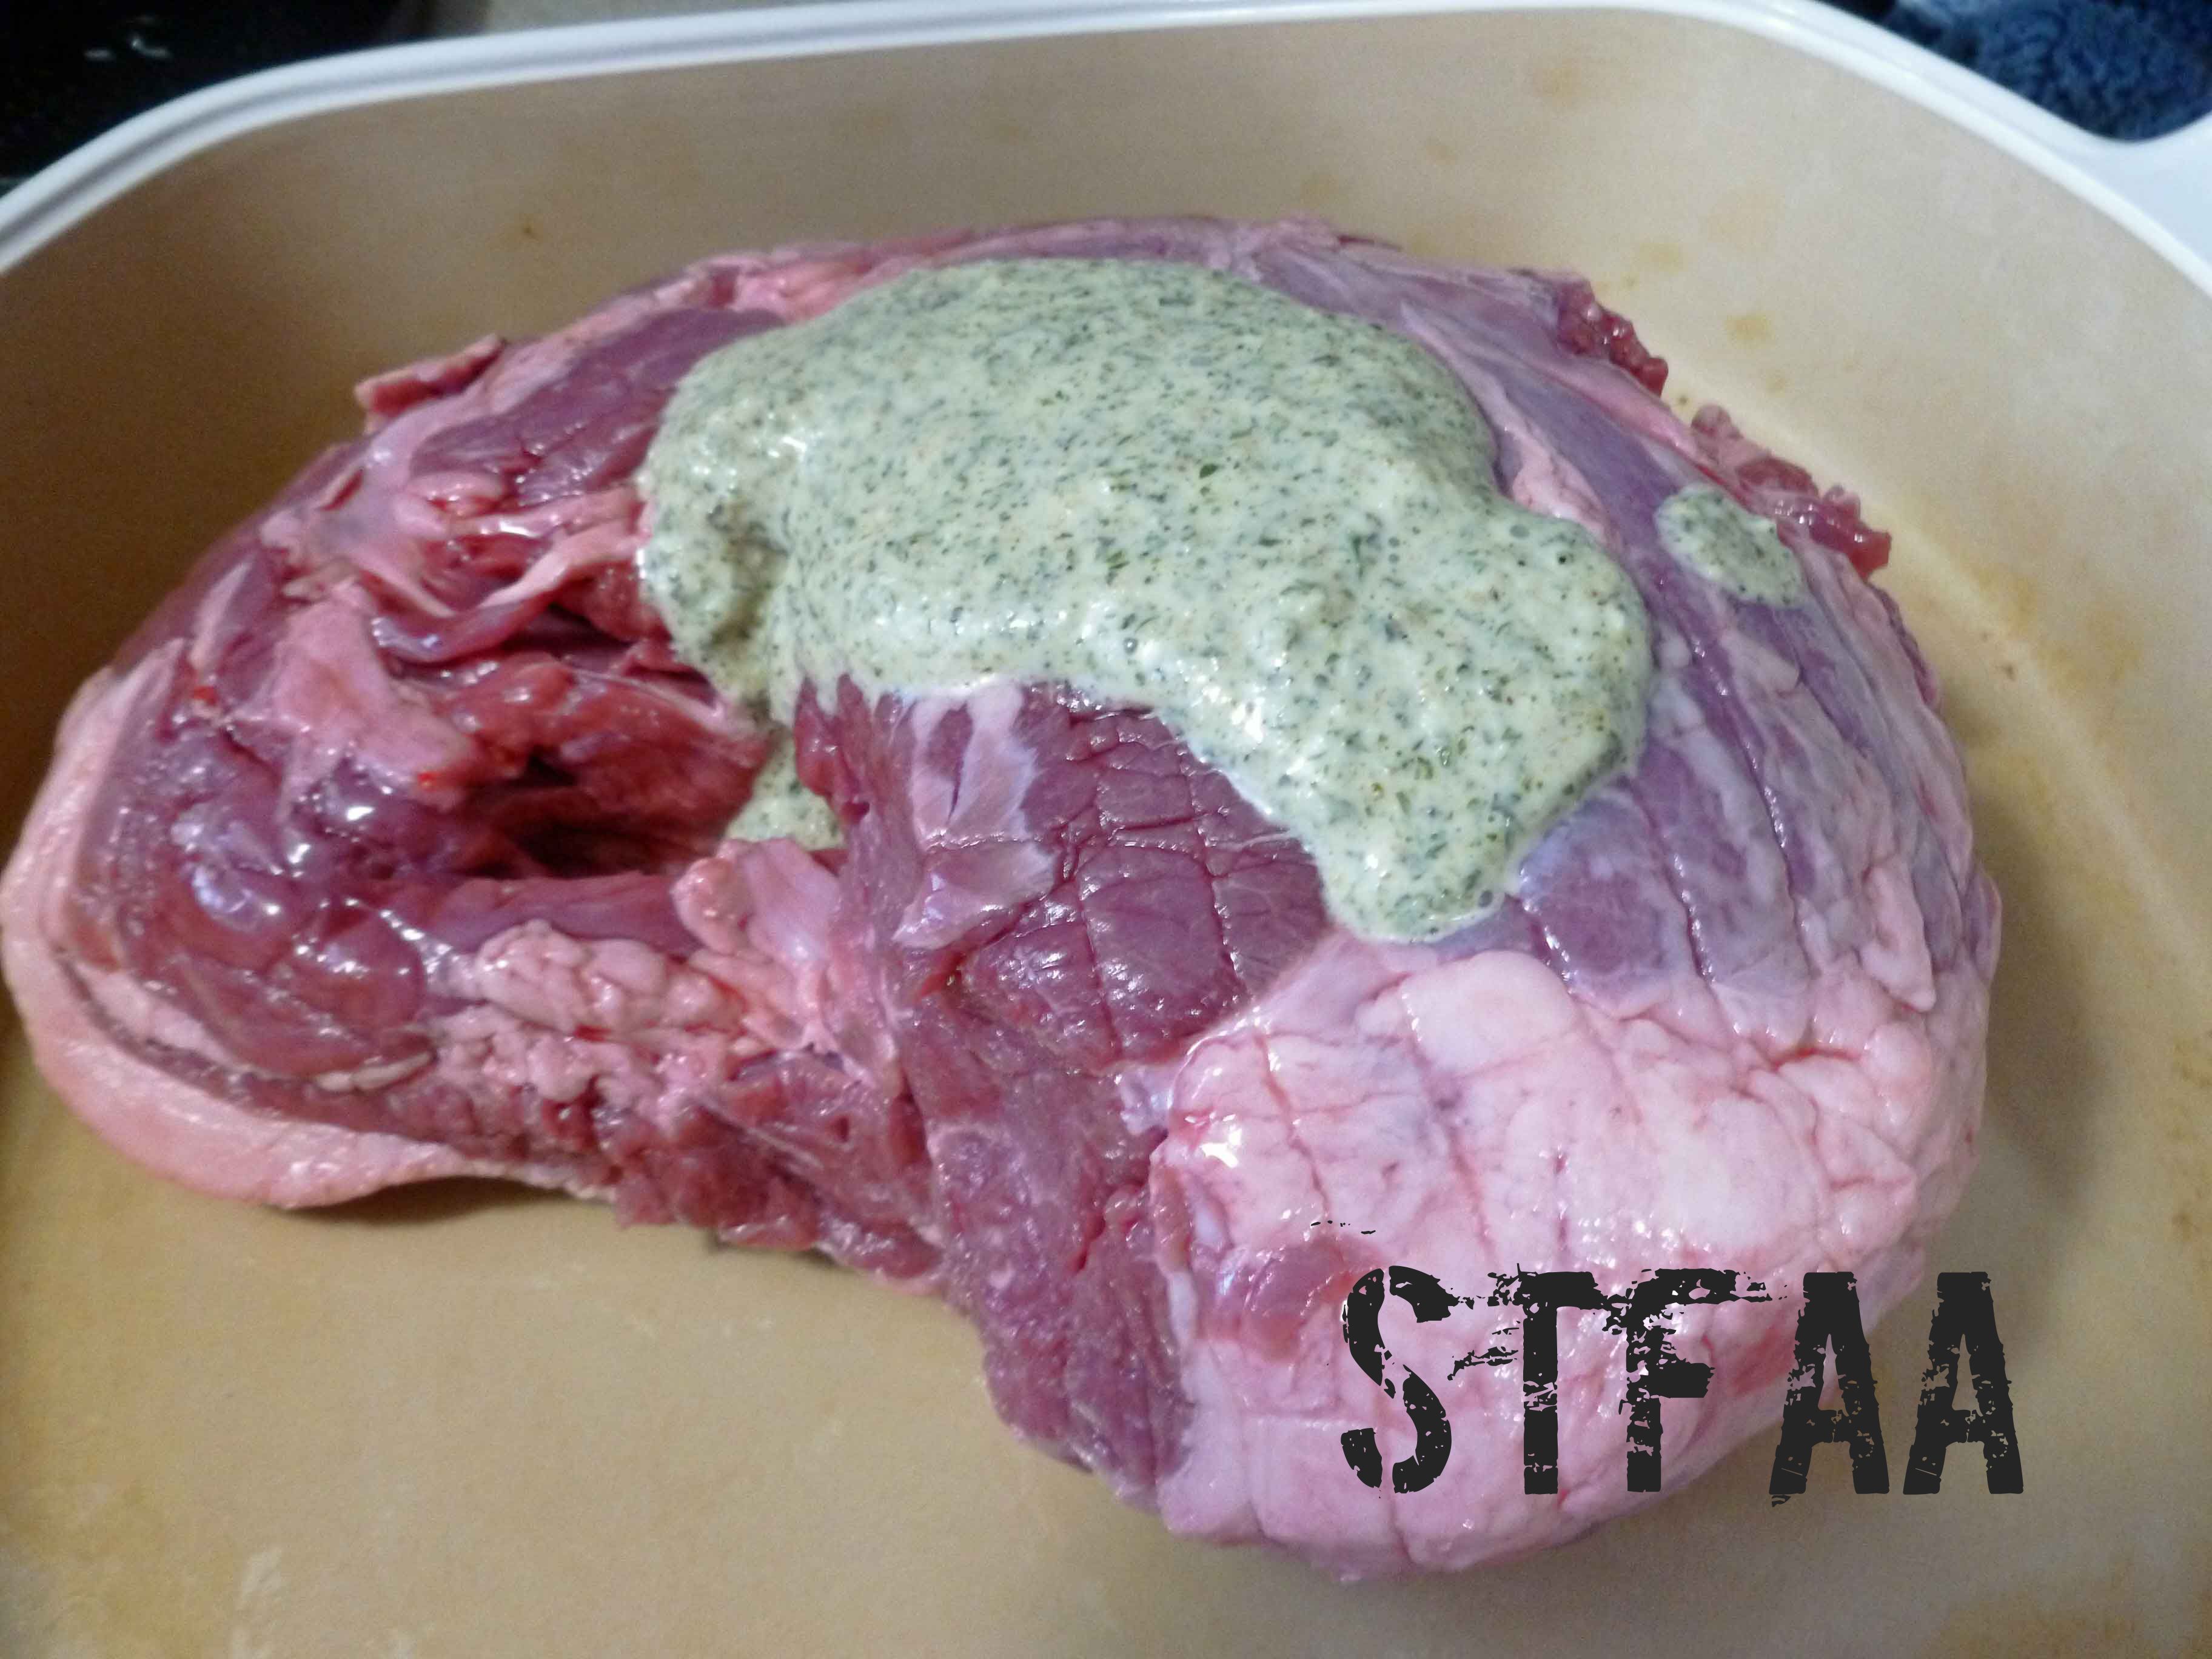
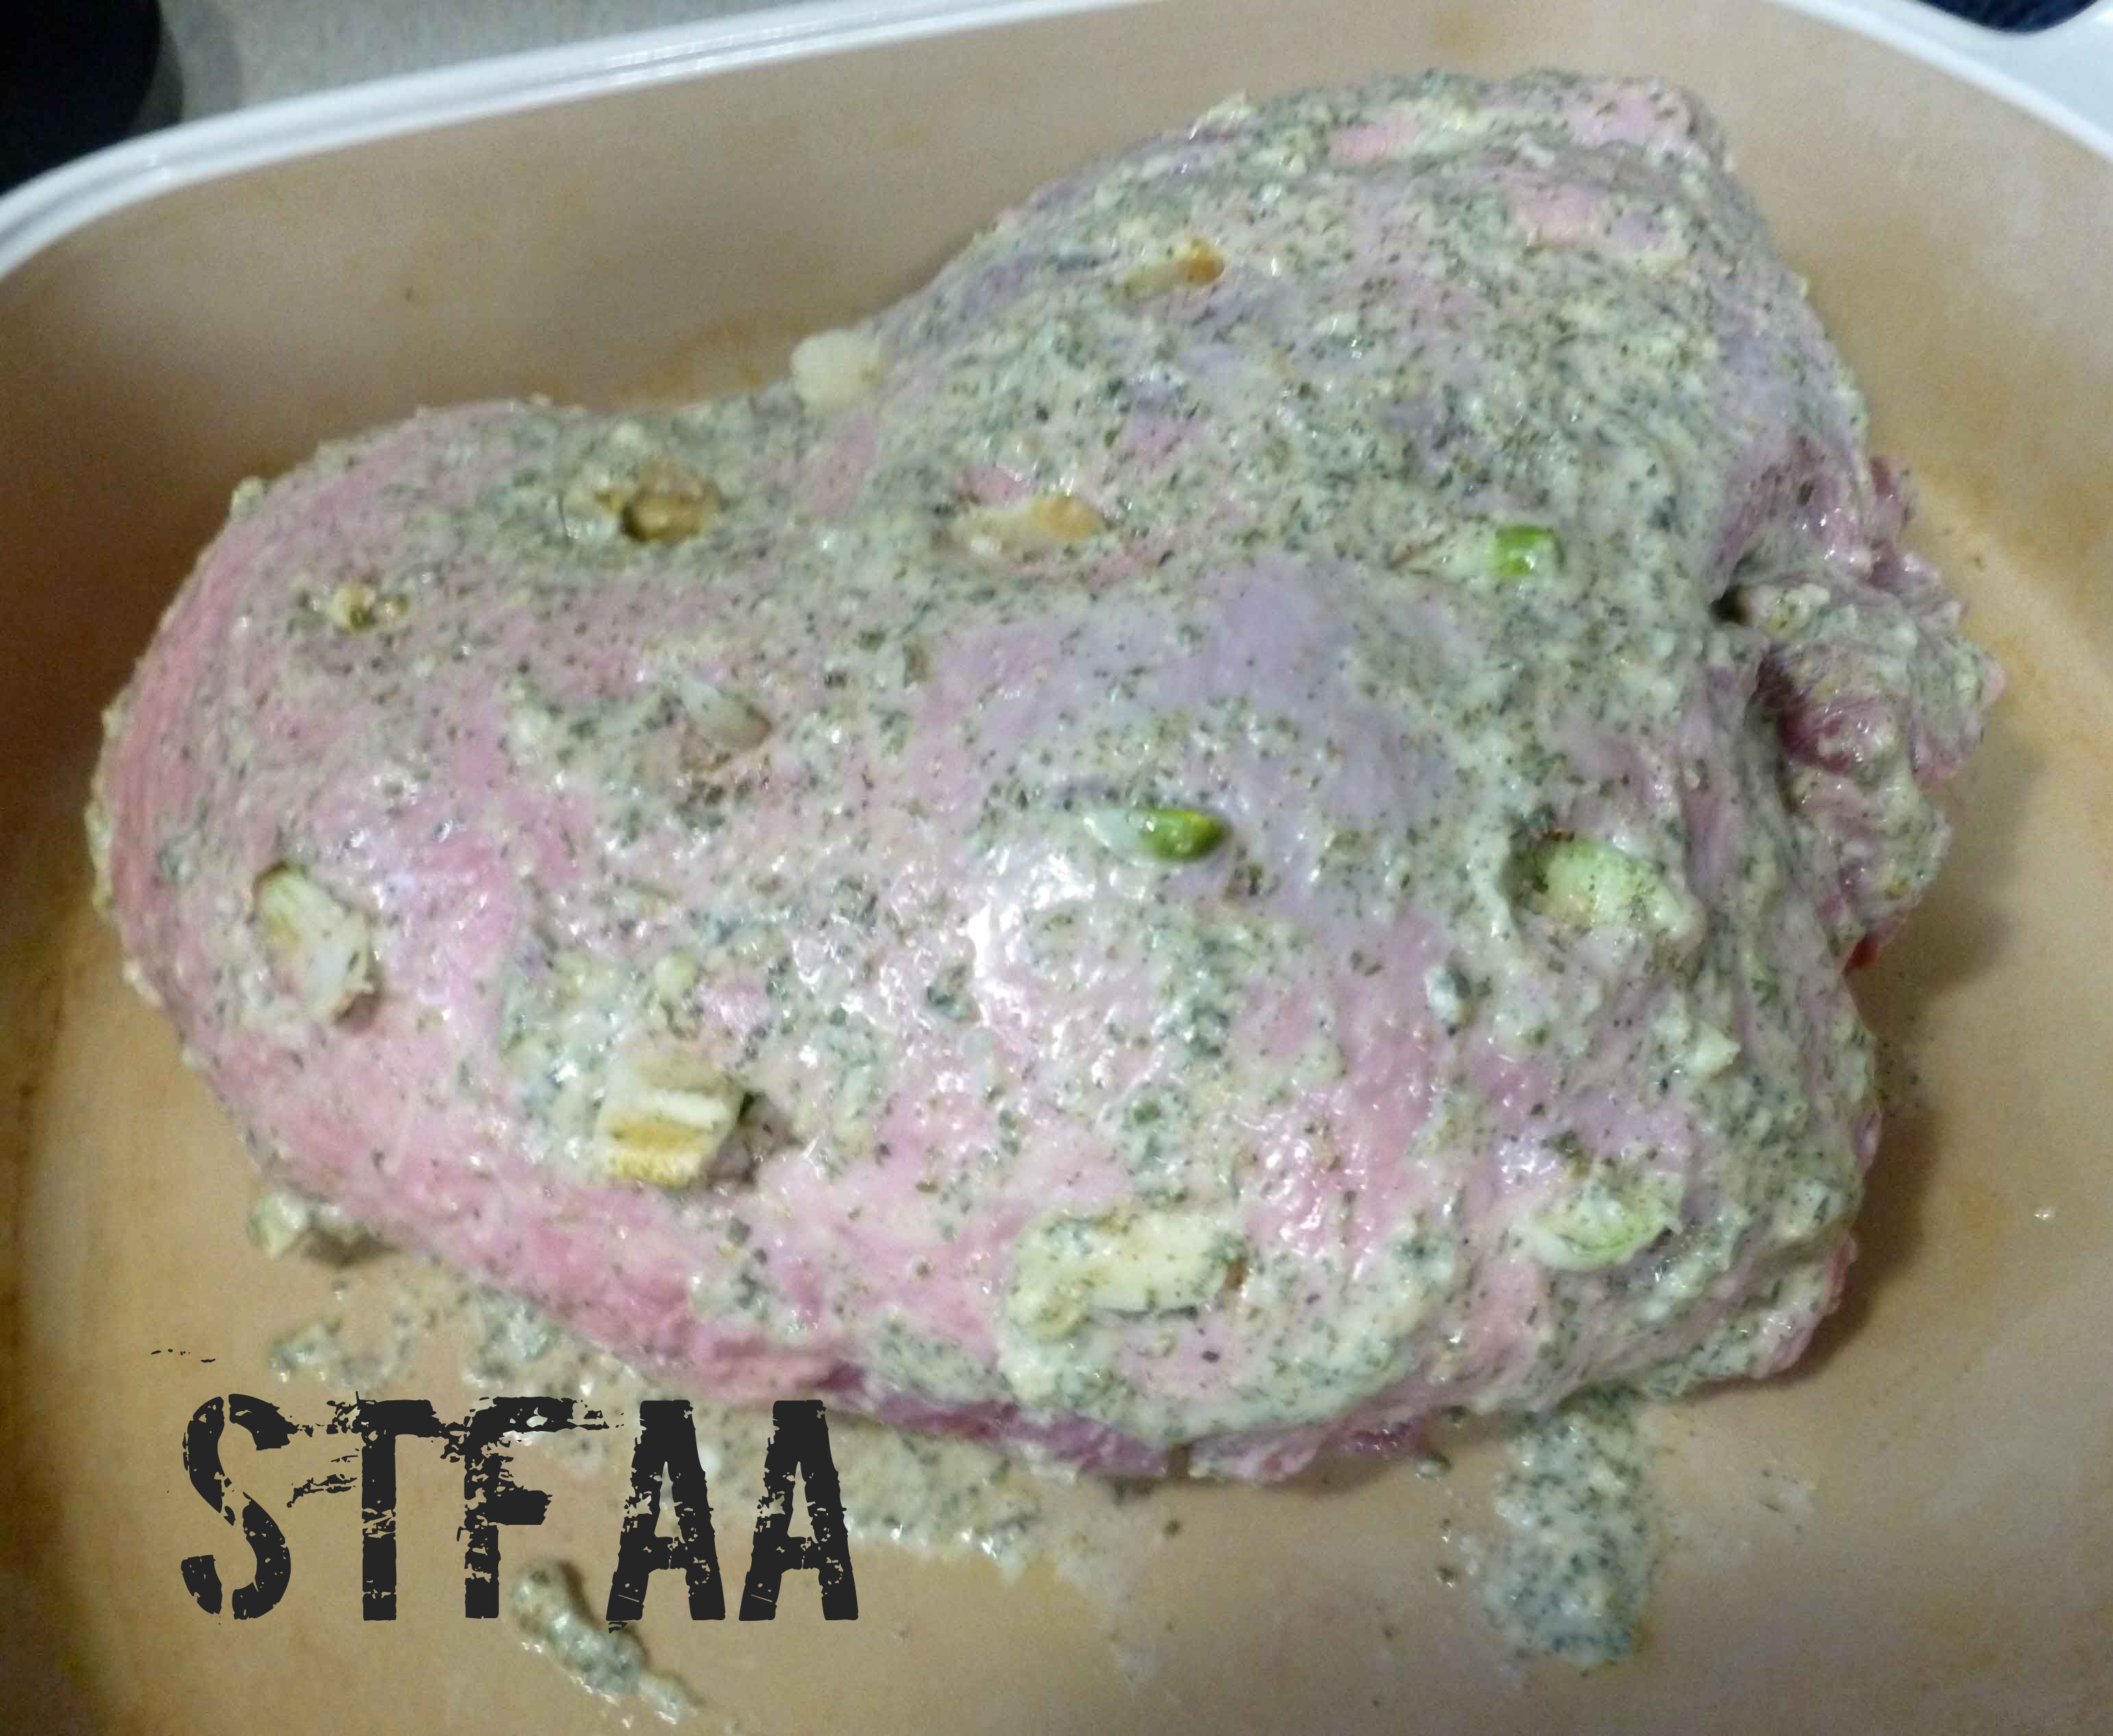
Flip the lamb over, and pour a third of the wet rub on the lamb, rubbing it into the surface, the slits and any pockets. Take the two cloves of sliced garlic and push a slice of garlic clove into each slit you cut into the lamb.
Top of lamb coated with first layer of wet rub and garlic slices inserted in slits
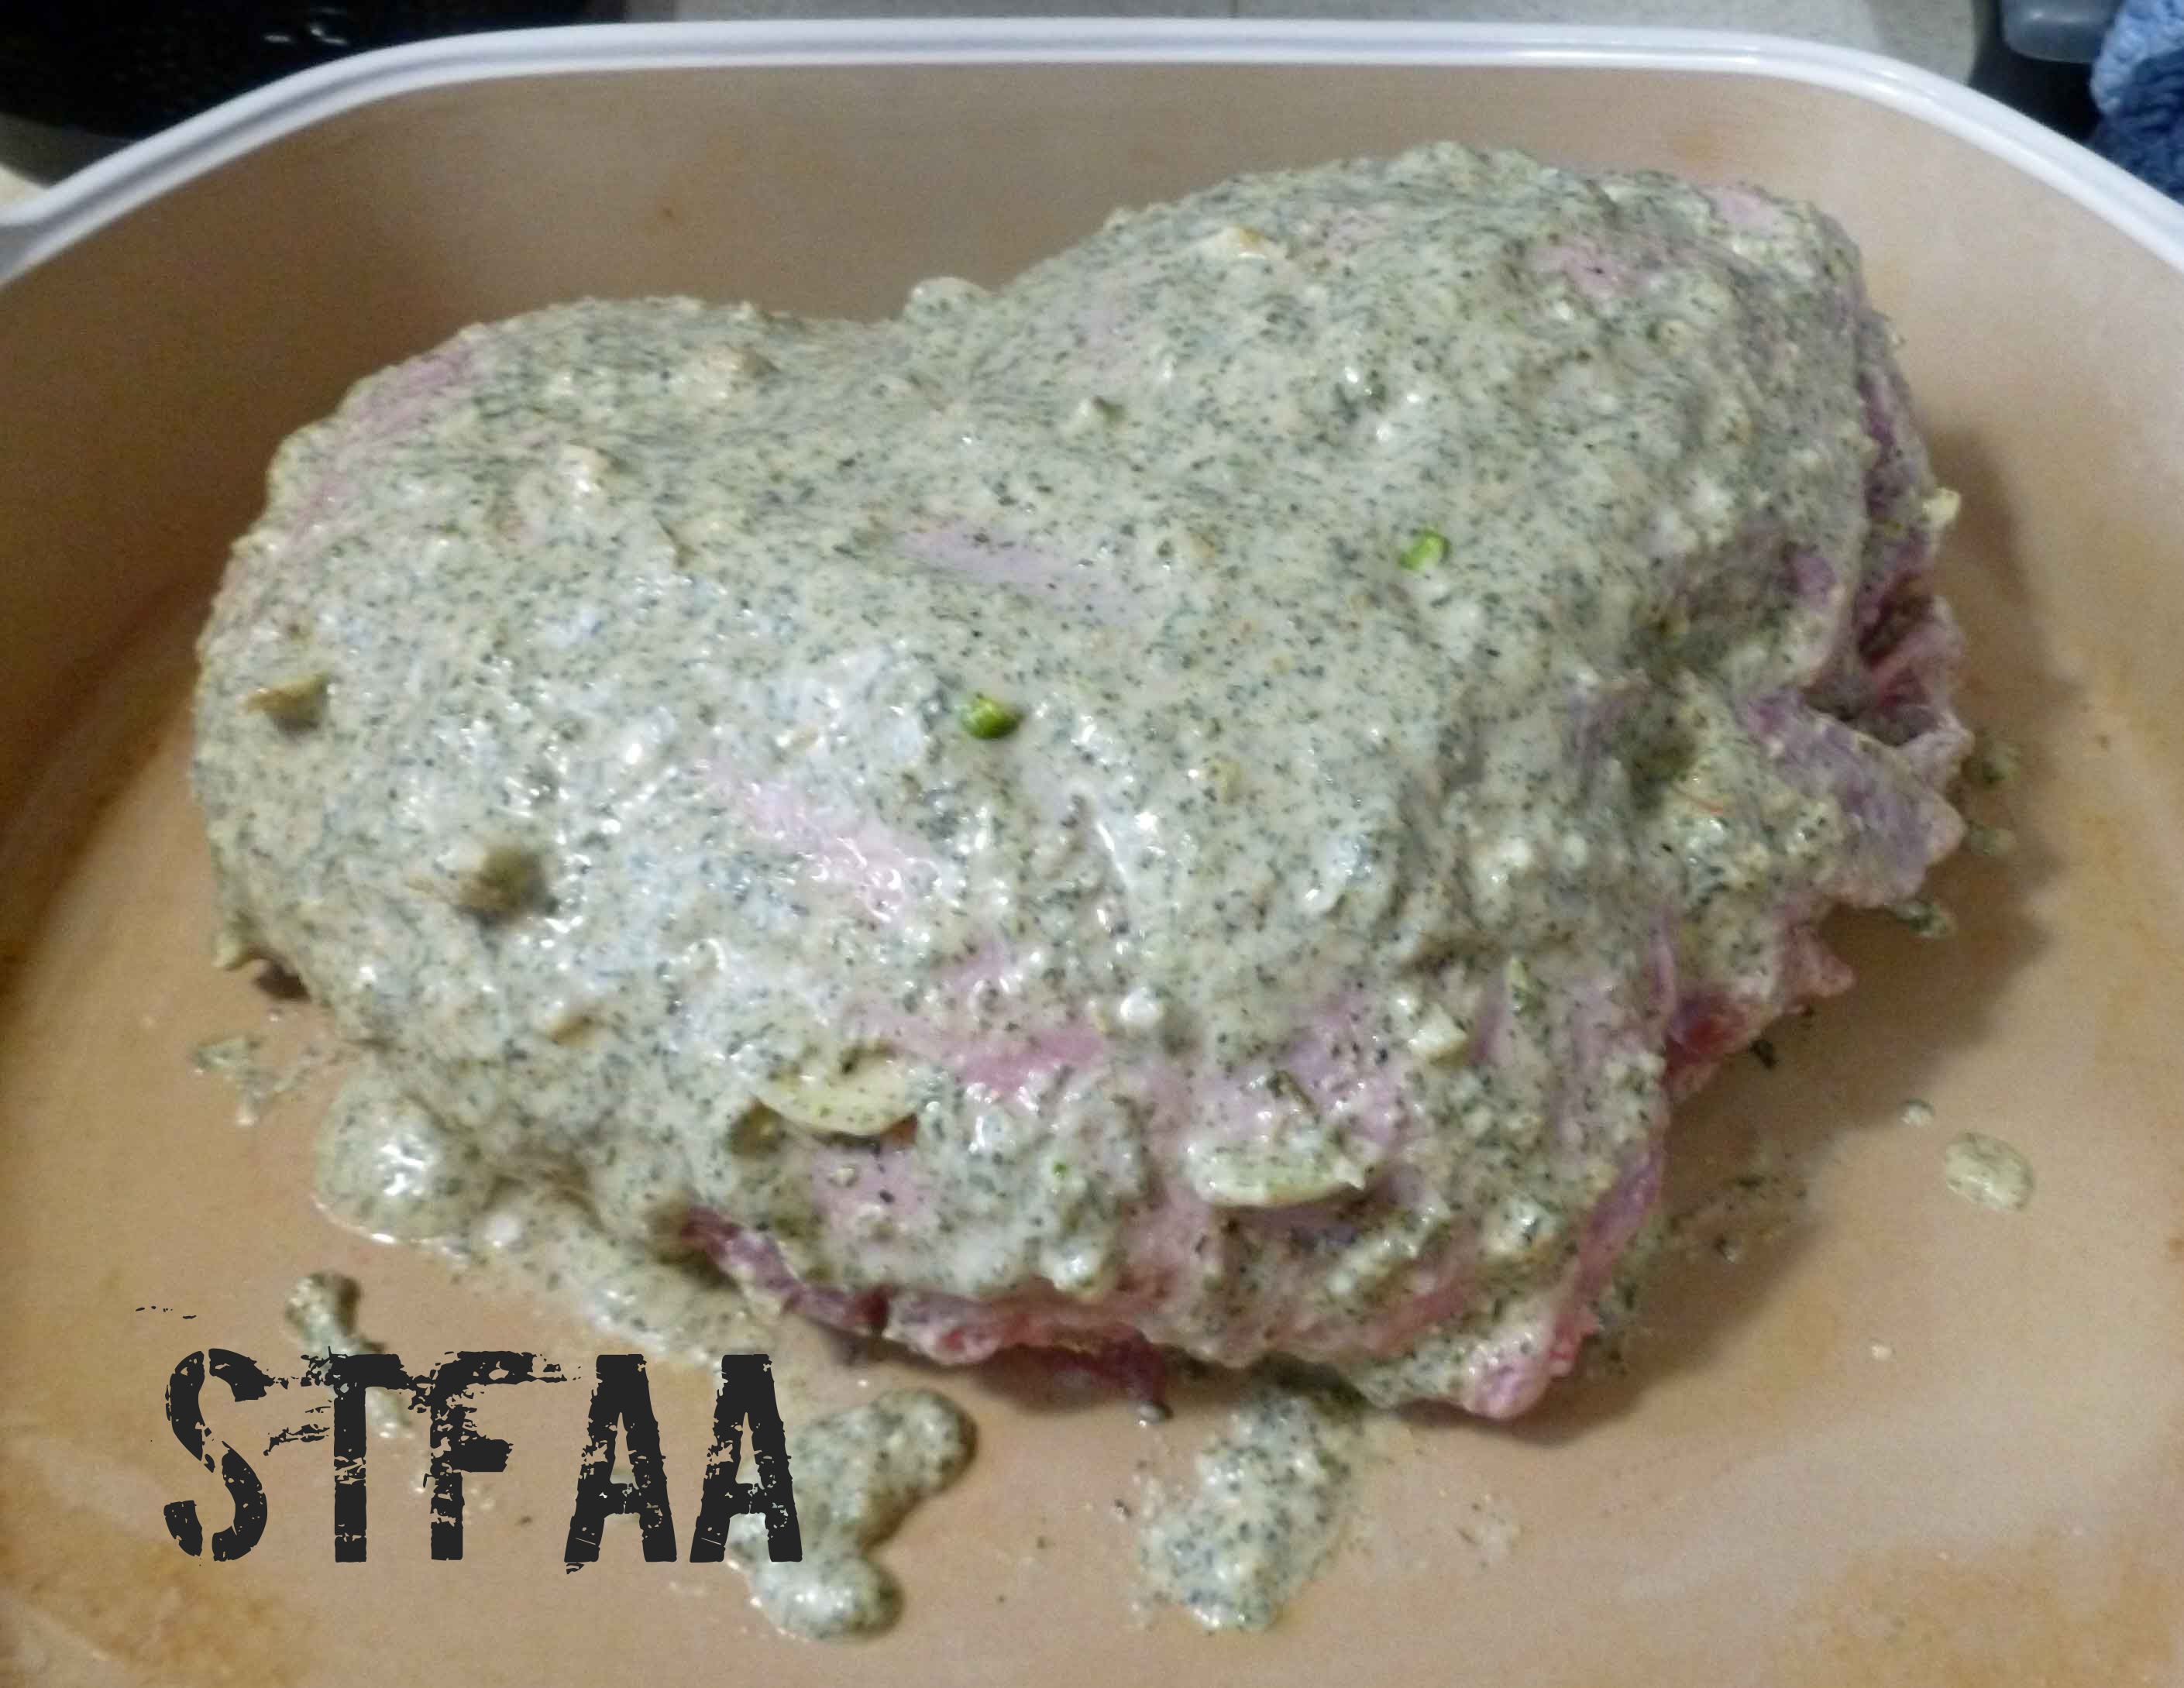
Then pour the remaining wet rub onto the lamb and spread it over the surface.
Lamb with remaining wet rub coating added
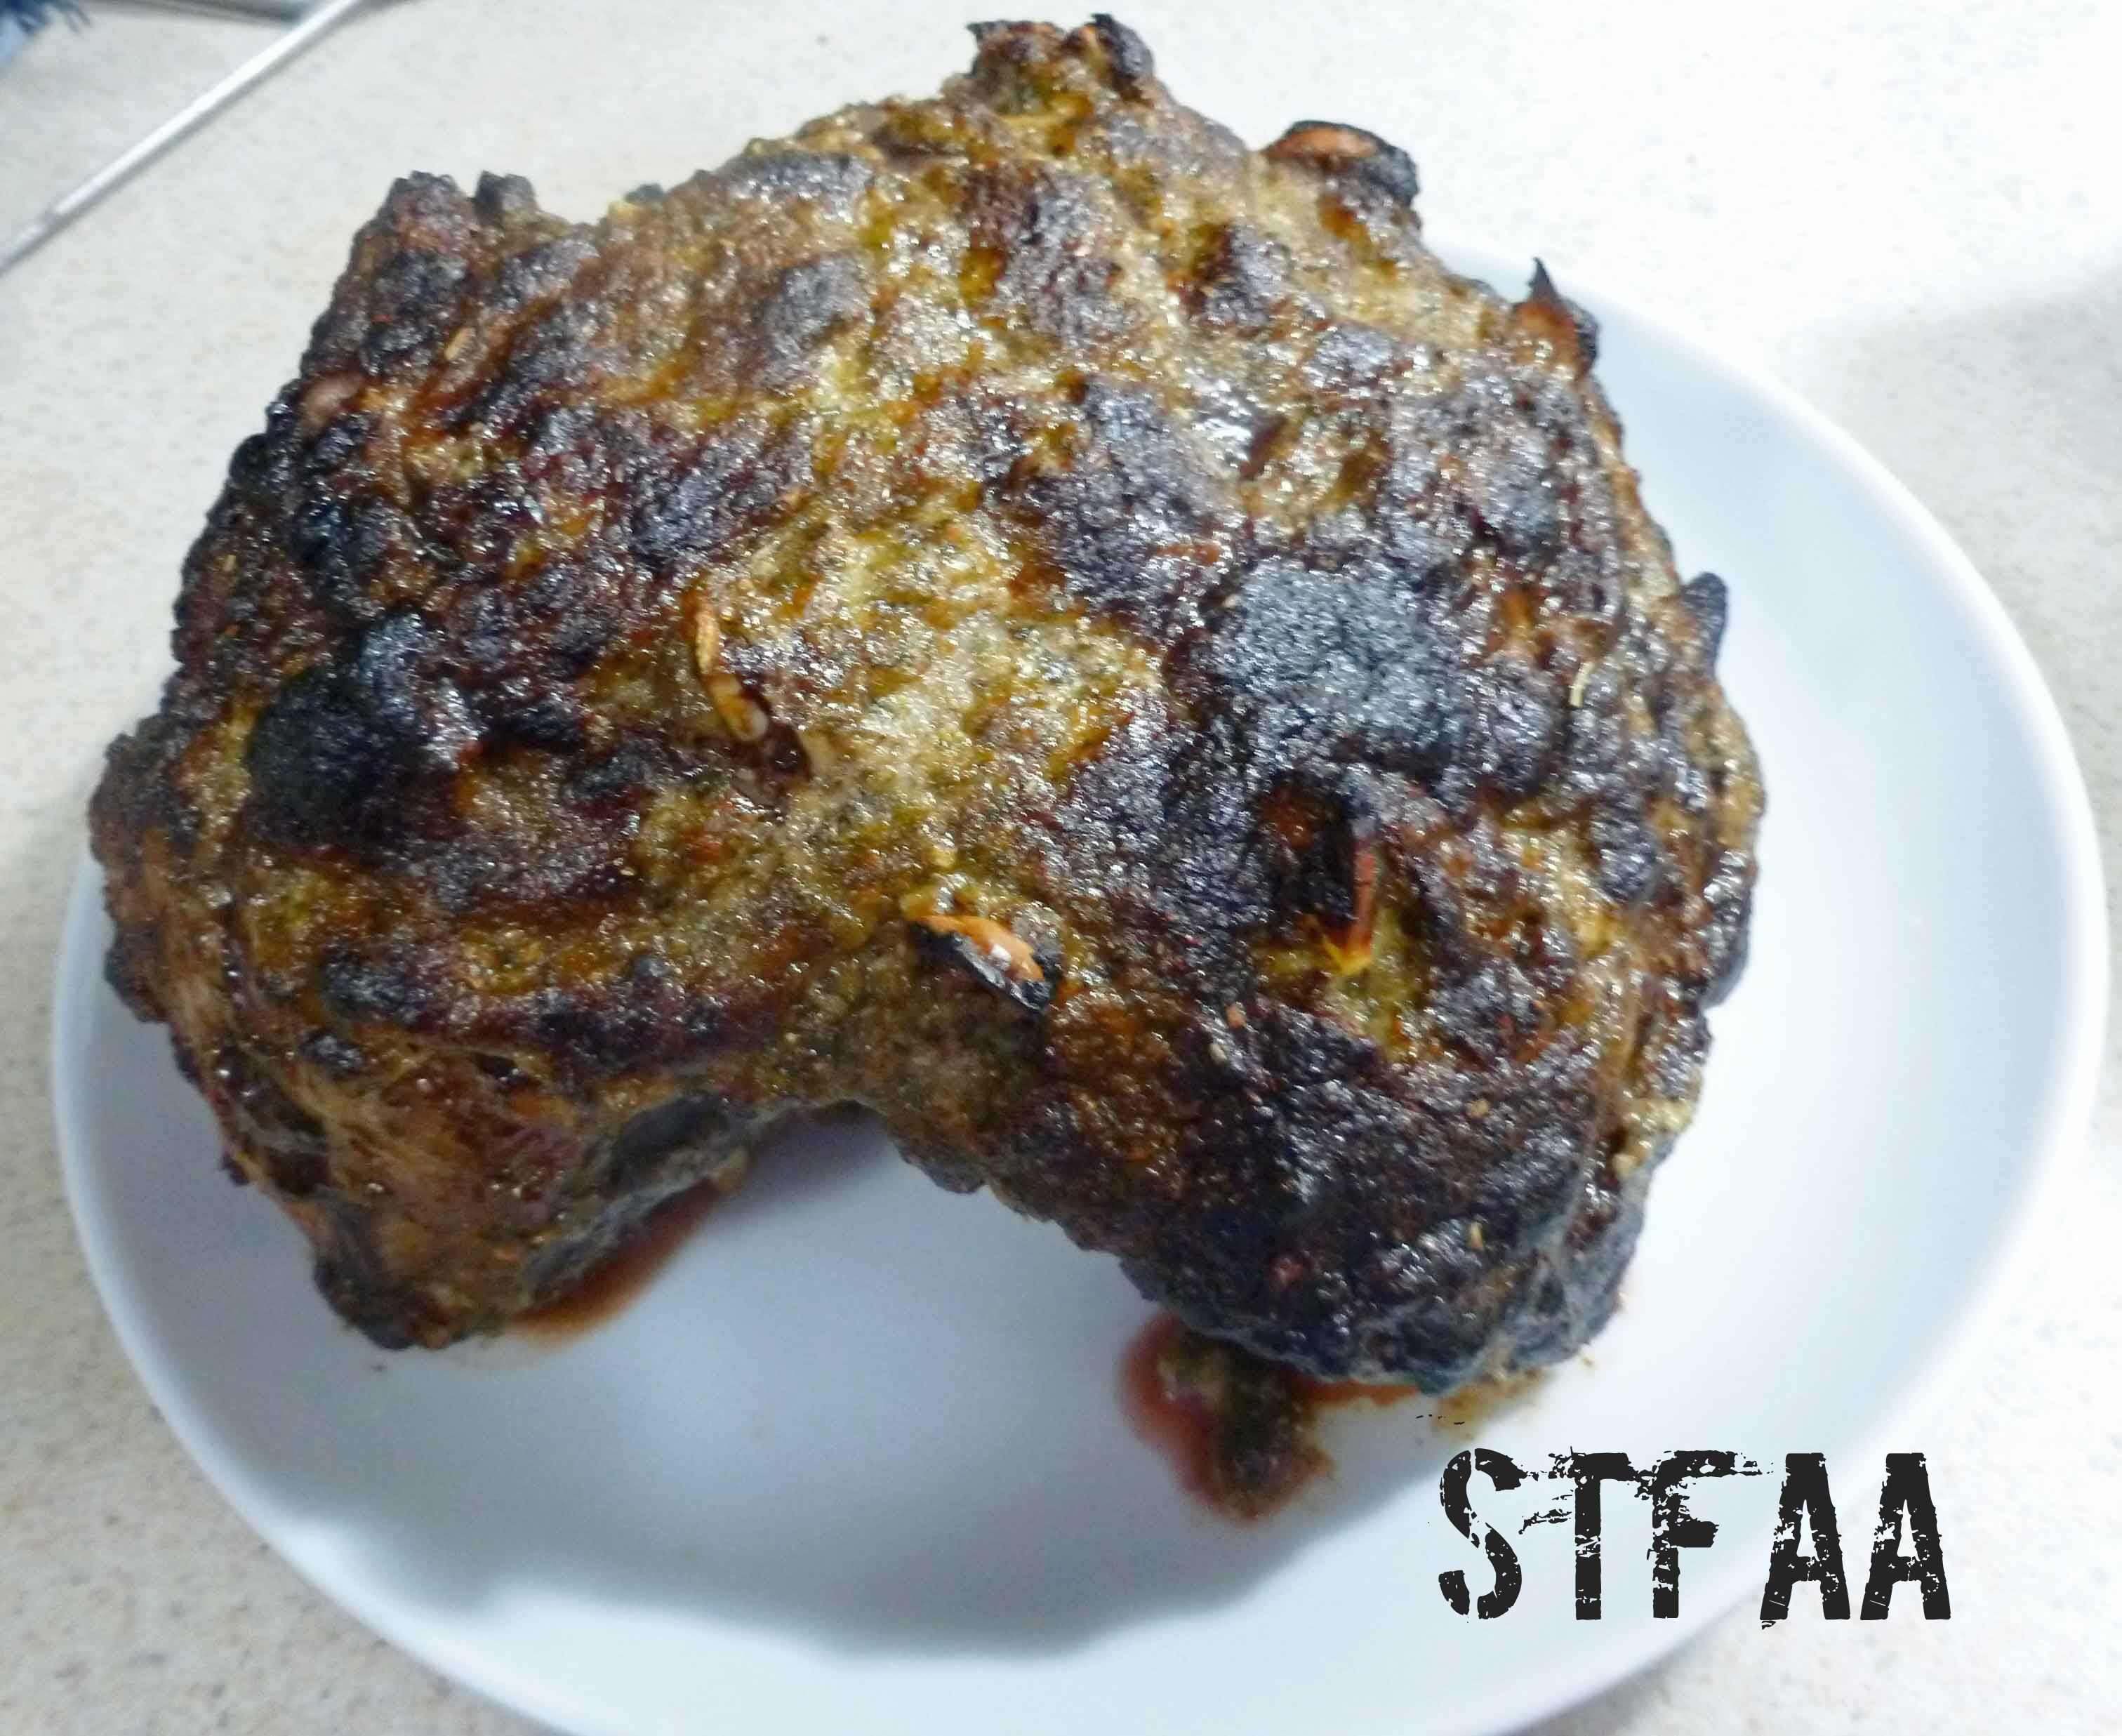
Roast the lamb at 450°F for 30 minutes, then reduce the oven temperature to 350°F. Continue roasting the lamb for about 15 minutes for each pound, until the internal temperature reaches 140°F for medium rare, or 155°F for medium, using a meat thermometer or a probe thermometer. To reach 155°F, I ended up cooking my lamb for an additional 75 minutes after the initial 30 minutes, for a total of an hour and 45 minutes of cooking time.
Lamb removed from roasting pan to rest
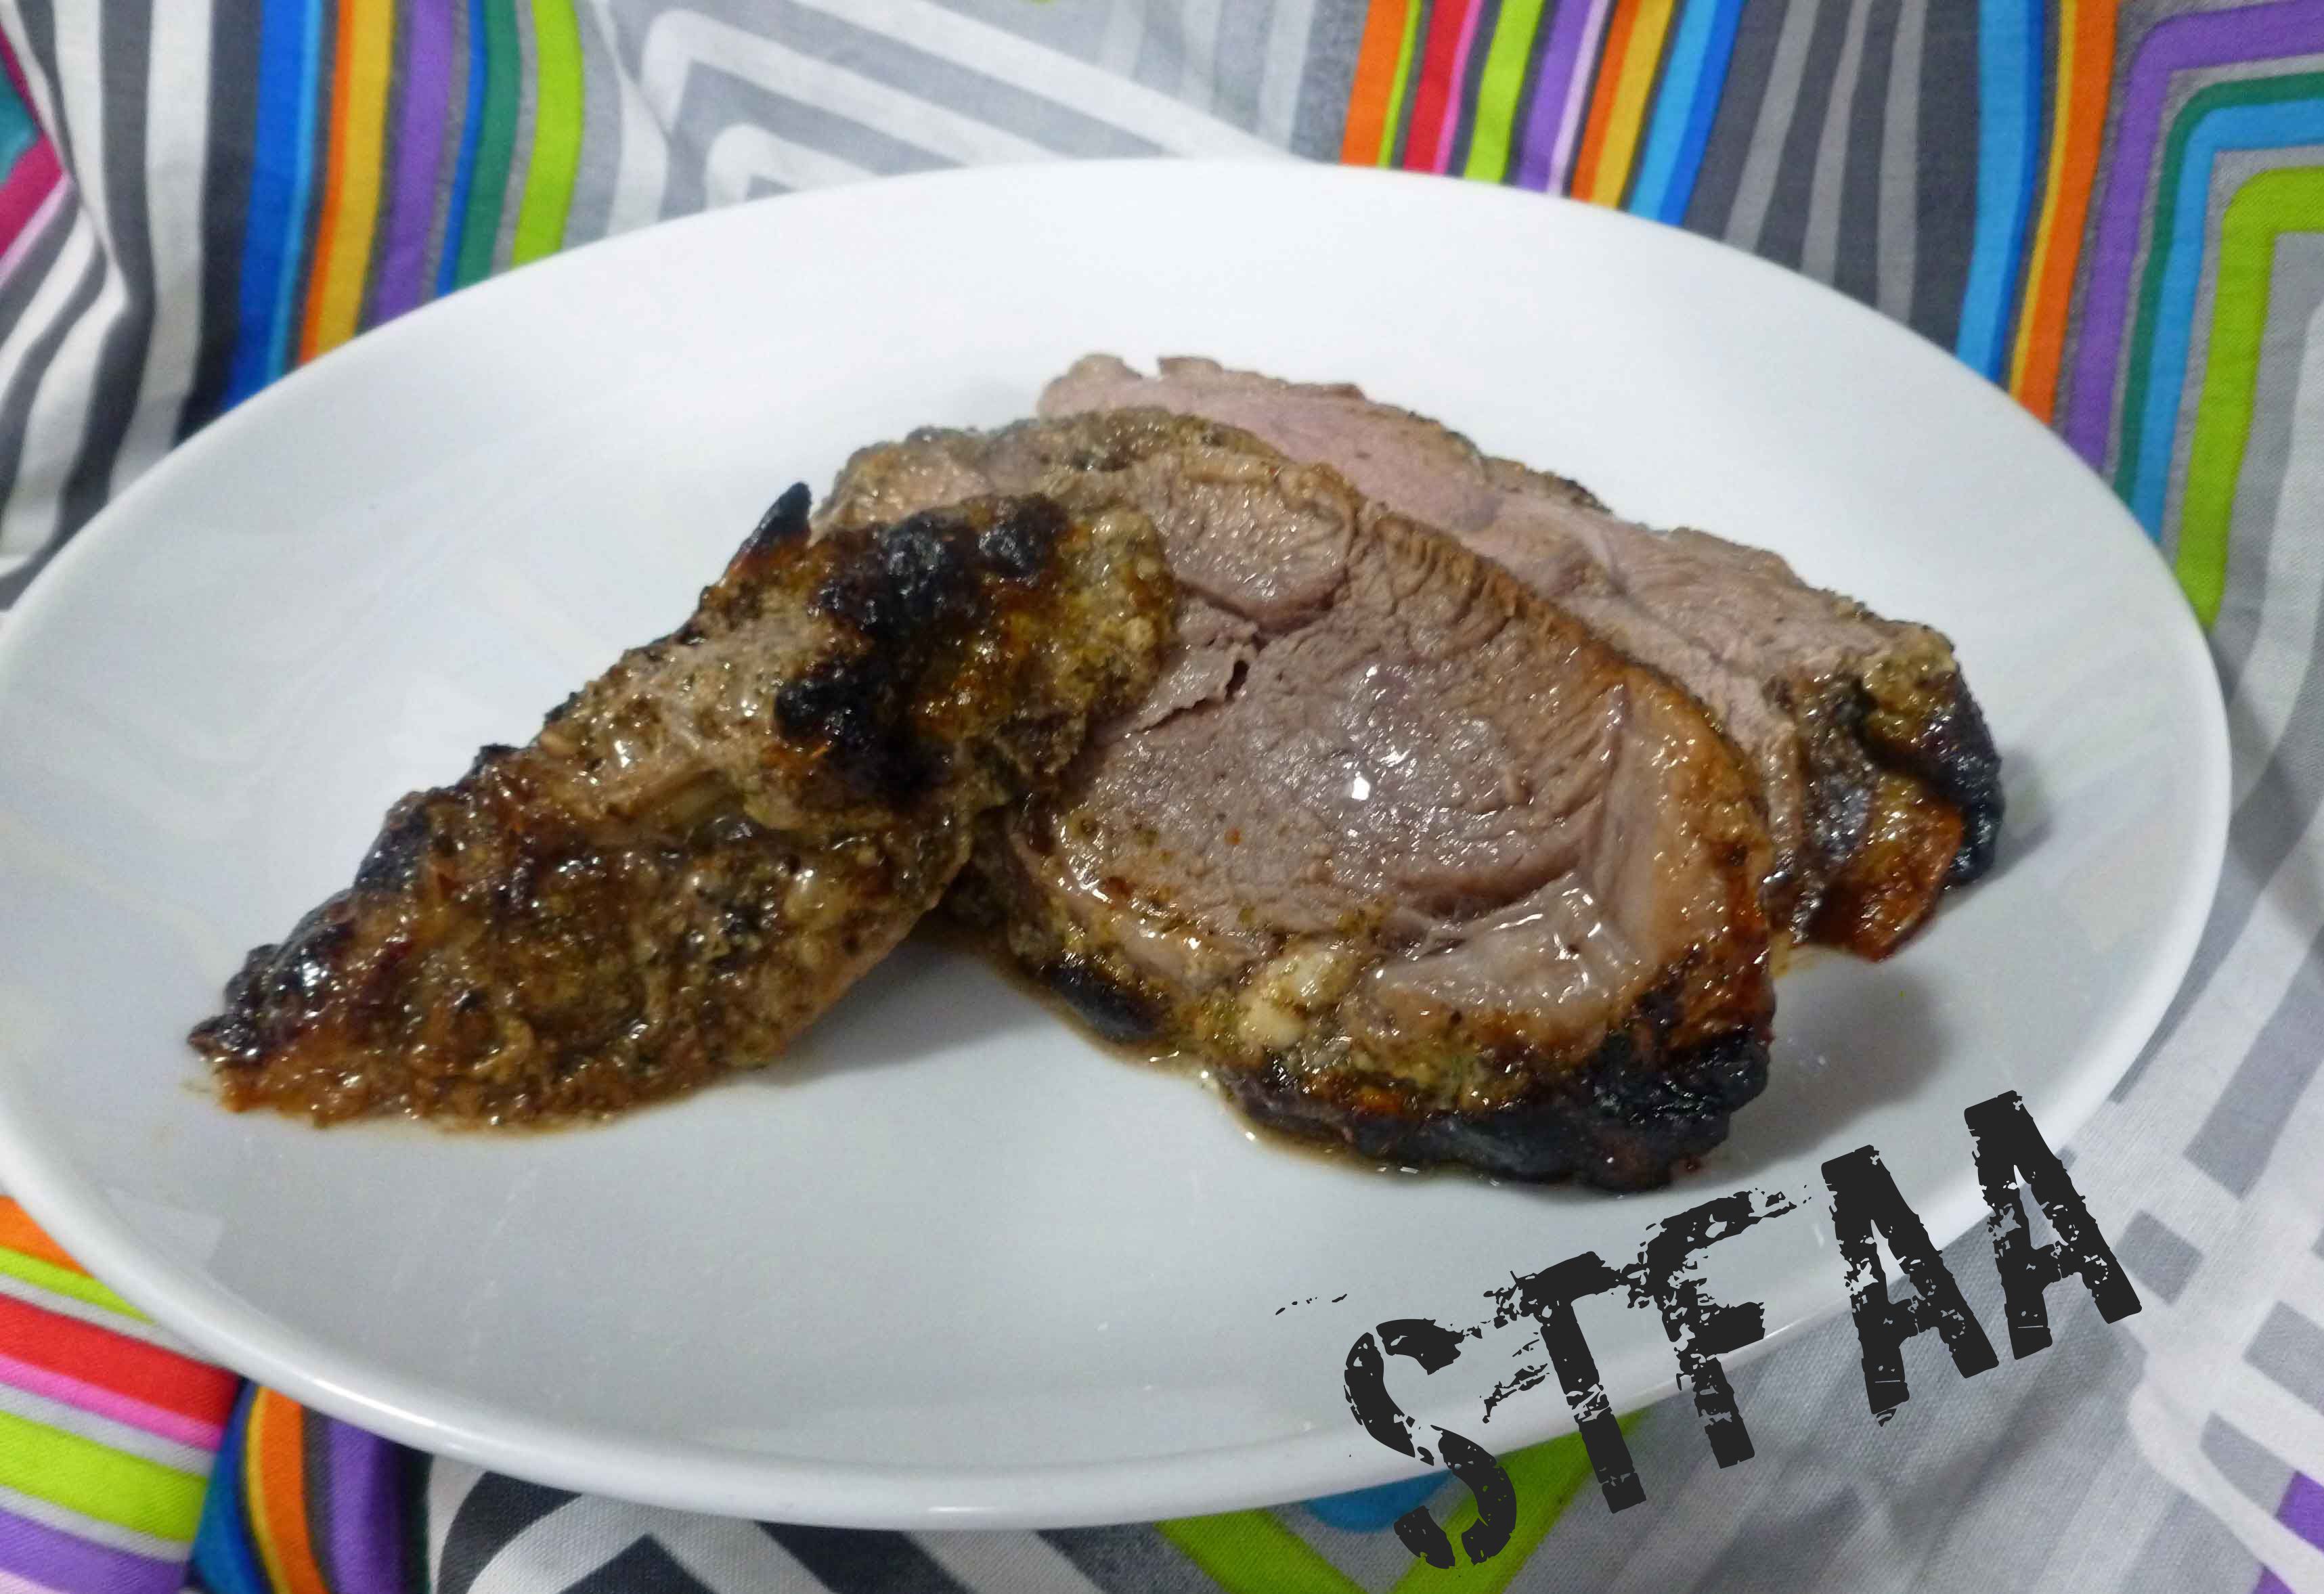
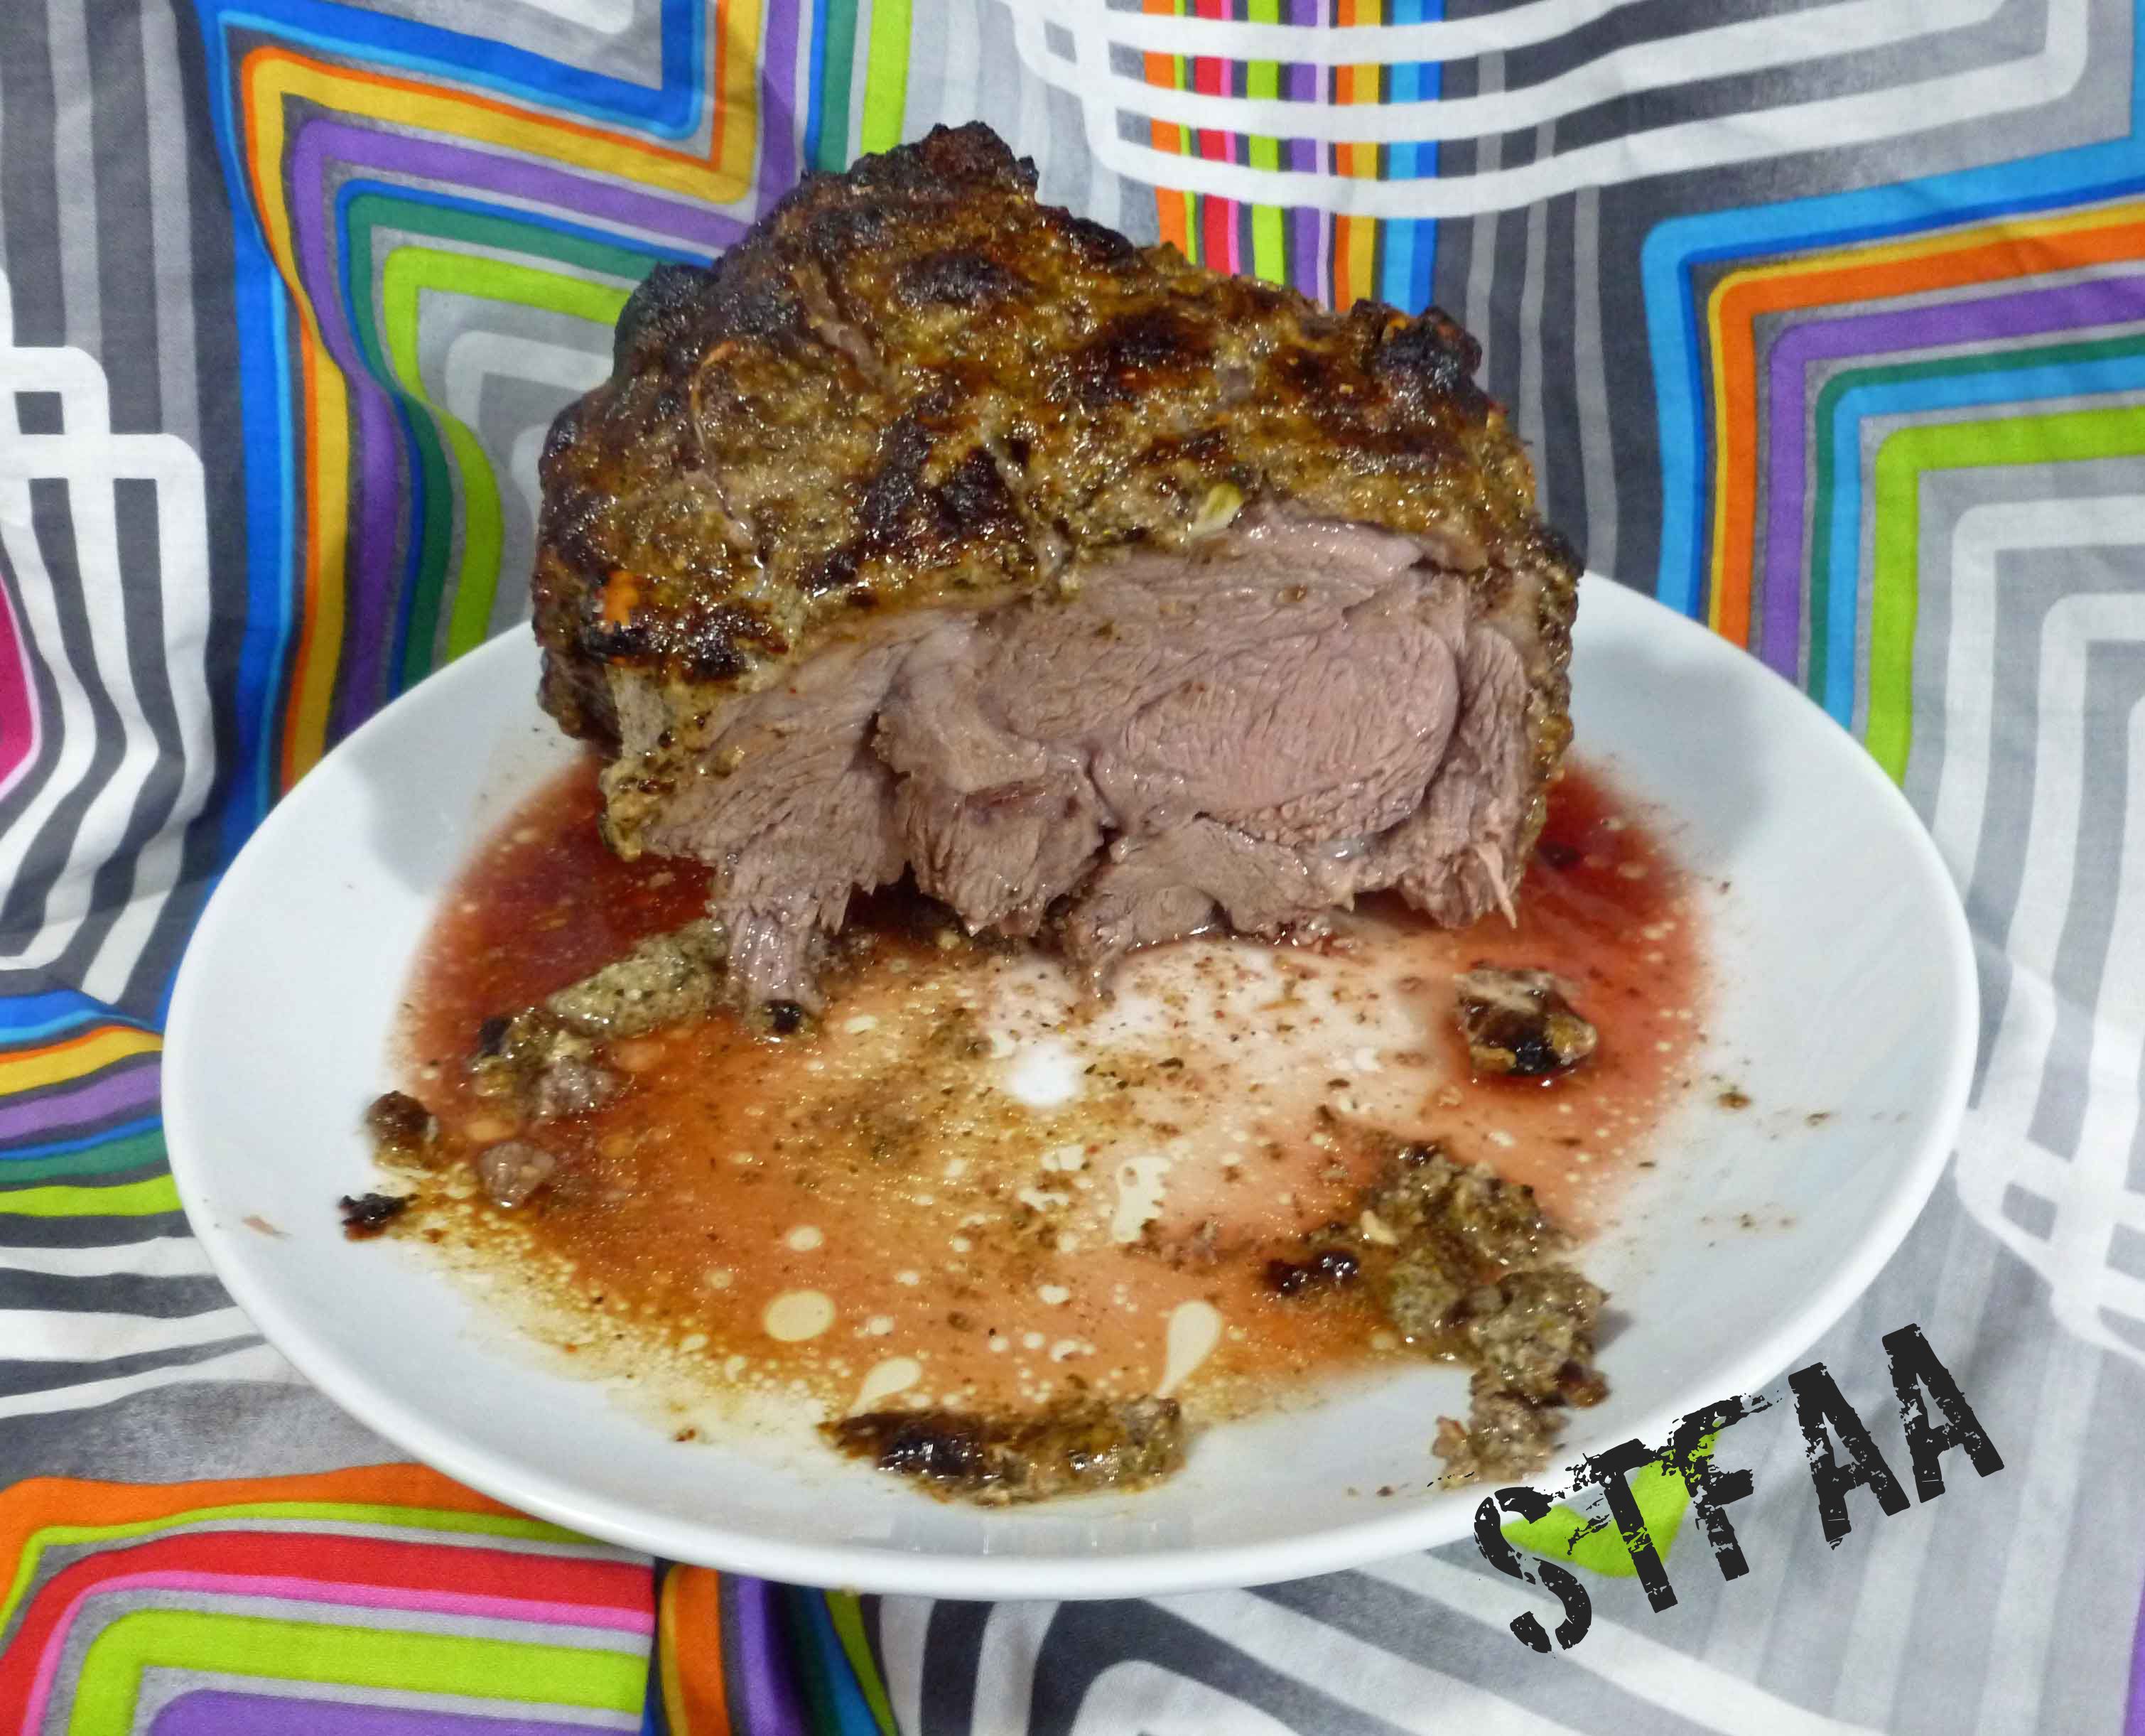
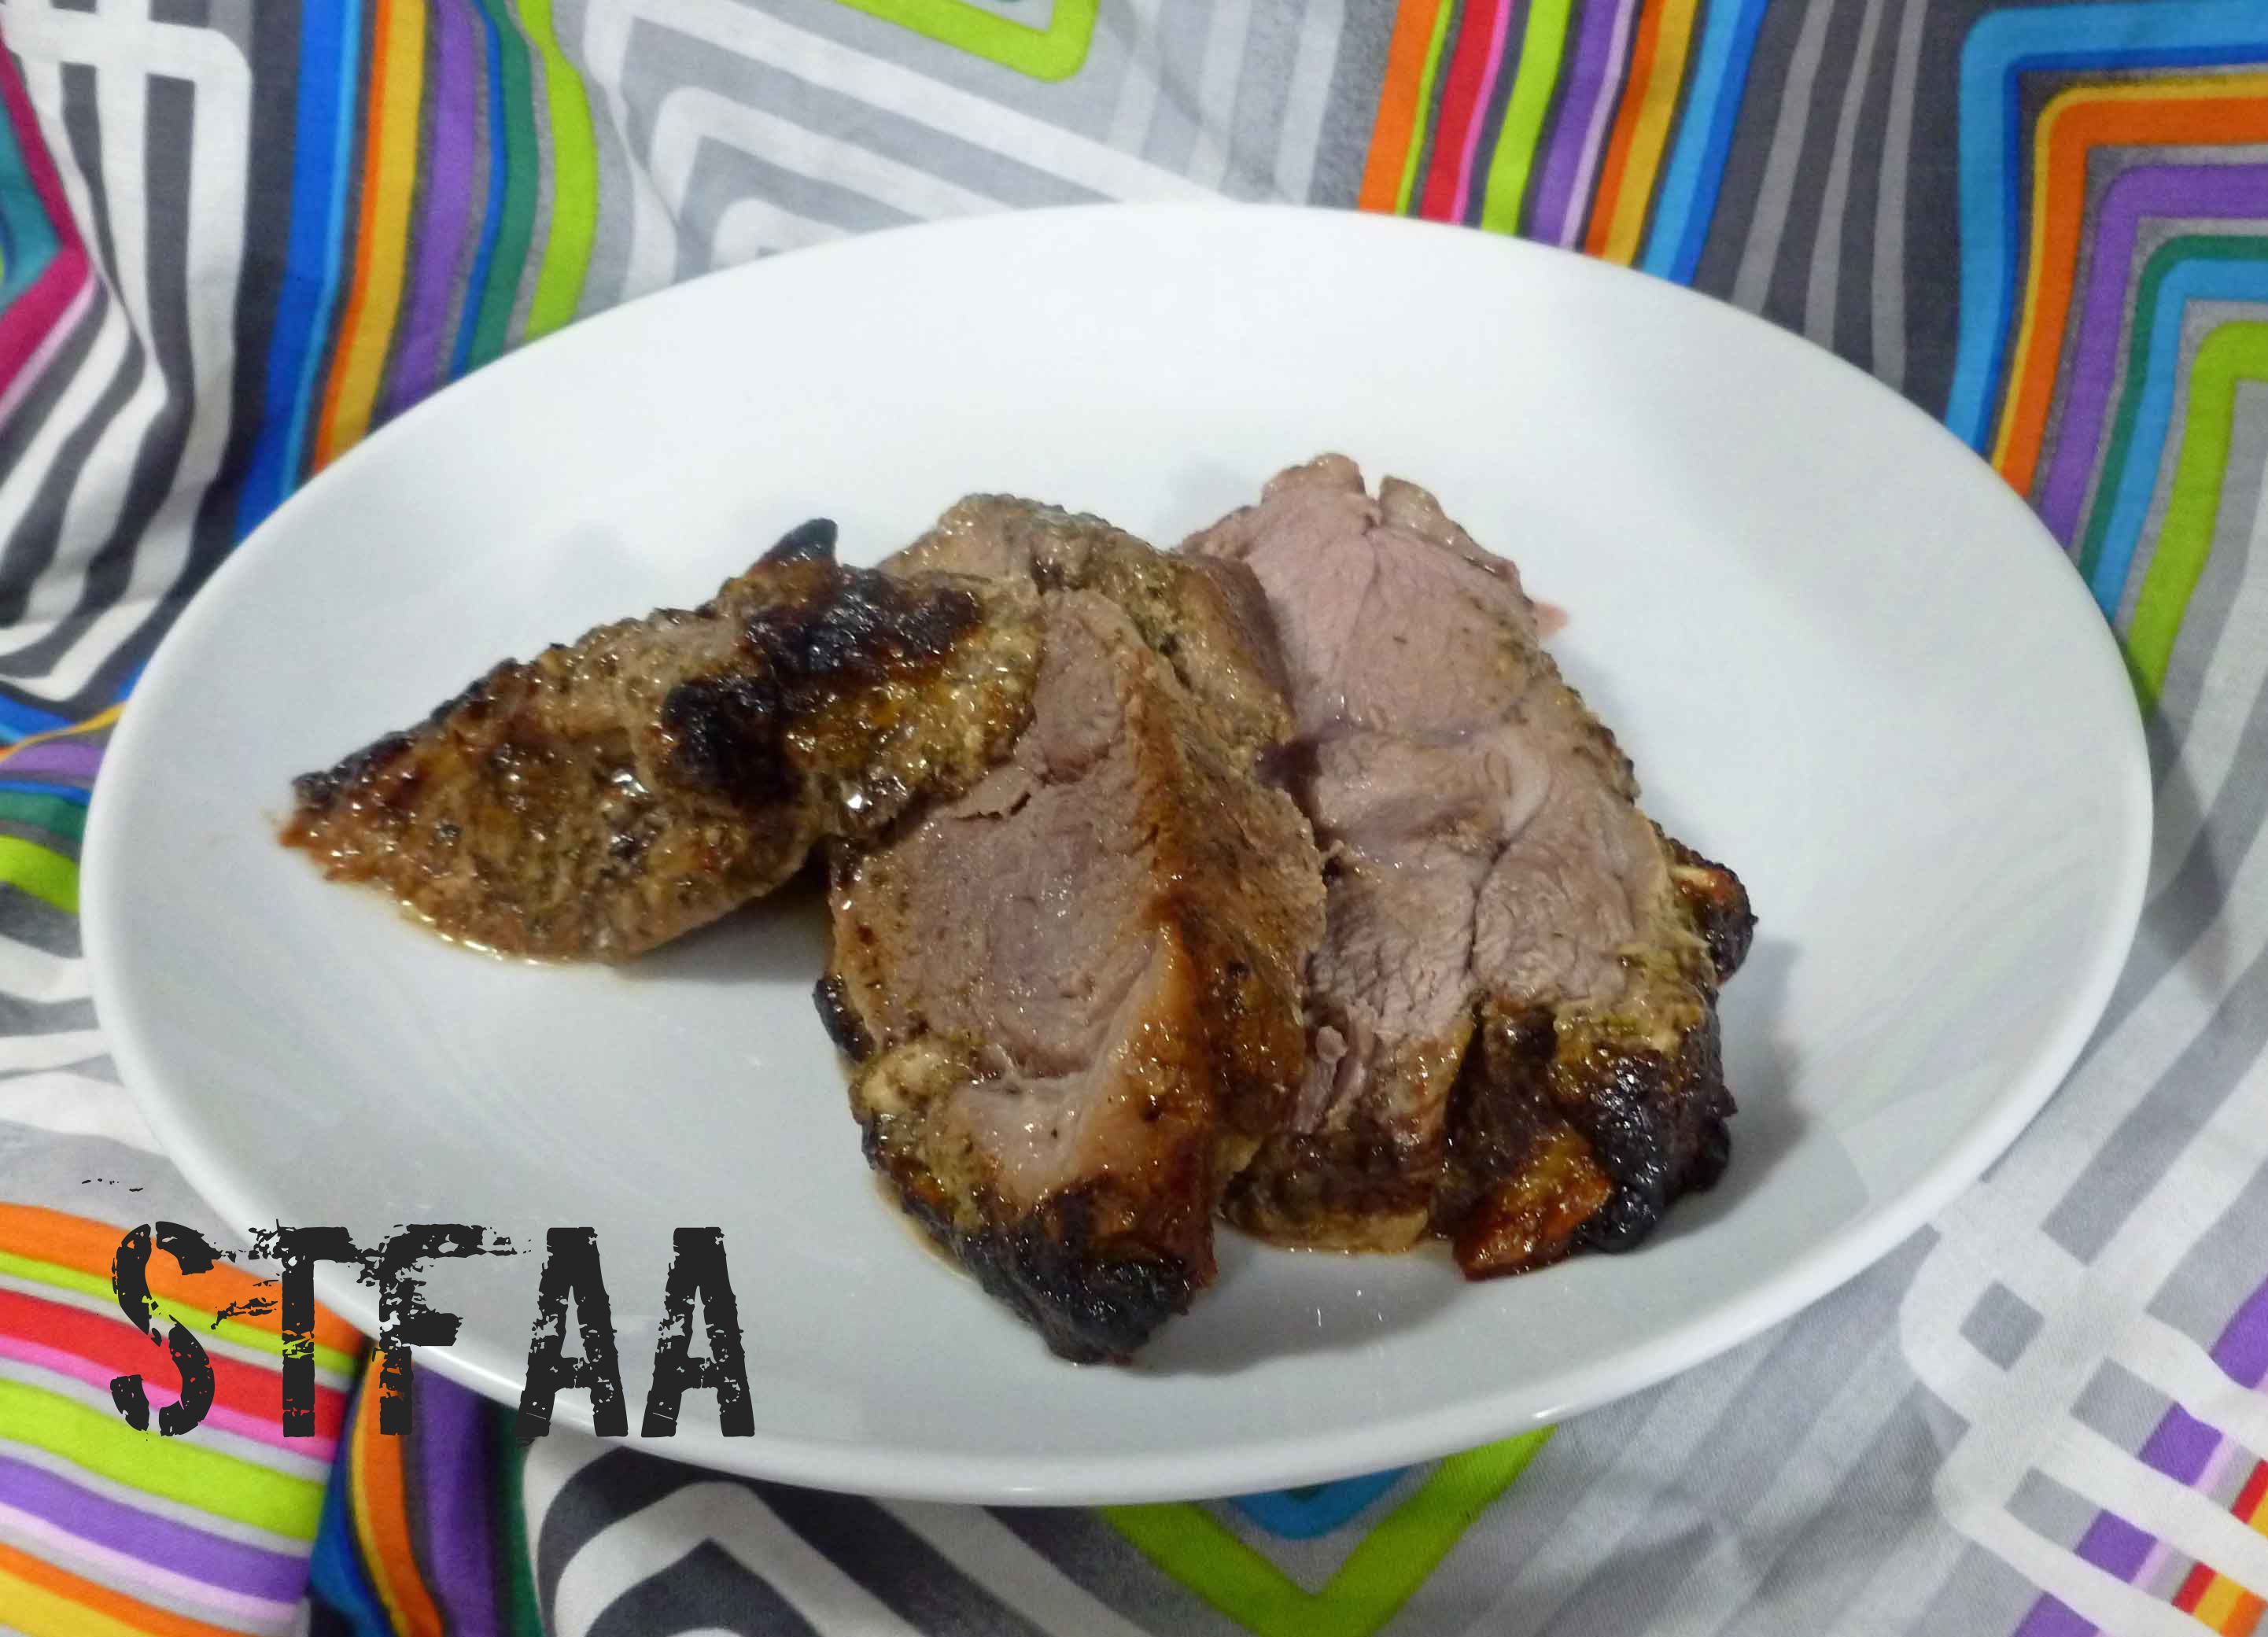
Let lamb rest for about 15 minutes or so and then carve.
Herbed Leg of Lamb in process of being carvedCarved Herbed Leg of Lamb slices
Enjoy!
Notice: Trying to access array offset on value of type bool in /home/maryzahc/public_html/adultfoodallergies.com/wp-content/plugins/wp-ultimate-recipe/helpers/models/recipe.php on line 254
Herbed Leg of Lamb
Print Recipe
A boneless leg of lamb recipe for St. Patrick’s Day or Easter
Preheat oven to 450°F. Remove boneless leg of lamb from packaging and remove netting. Cut 1/2 inch wide slits into the lamb at 1 inch intervals on the top (fat side) of the lamb. Peel and slice two cloves of garlic thinly, and set aside.
Peel remaining garlic cloves and place in blender with the remaining wet rub ingredients: lemon juice, parsley, olive oil, mustard, basil, rosemary, onion powder, black pepper and salt. Process until mixture is fairly finely blended, but not completely smooth.
Grease a shallow baking dish with a teaspoon of olive oil. Place lamb in shallow roasting dish upside down and pour approximately a third of the wet rub on the lamb. Use your hands or a basting brush to spread the wet rub over the entire surface of the bottom of the lamb. Flip the lamb over, and pour a third of the wet rub on the lamb, rubbing it into the surface, the slits and any pockets. Take the two cloves of sliced garlic and push a slice of garlic clove into each slit you cut into the lamb. Then pour the remaining wet rub onto the lamb and spread it over the surface.
Roast the lamb at 450°F for 30 minutes, then reduce the oven temperature to 350°F. Continue roasting the lamb for about 15 minutes for each pound, until the internal temperature reaches 140°F for medium rare, or 155°F for medium, using a meat thermometer or a probe thermometer. To reach 155°F, I ended up cooking my lamb for an additional 75 minutes after the initial 30 minutes, for a total of an hour and 45 minutes of cooking time.
Let lamb rest for about 15 minutes or so and then carve. Enjoy!
So, like bacon, commercial ham is a problem if you are avoiding corn and all corn derivatives. I’ve tried on multiple occasions to cure a 4-5 pound pork shoulder or a boneless Boston butt (pork butt roast), but the cure only goes in about an inch from the surface and then it’s like a version of a turducken, ham on the outside, pork roast on the inside. That’s really not what I was aiming for, and no matter how many holes I poked into the larger cuts of pork (imagine me maniacally stabbing pork shoulders with a barbecue fork), the same thing kept happening. So I decided to try ham steaks so that the density of the cut would be less thick and the whole thing might cure. Well, it did, and I have ham I can eat again.
Cure Your Own Ham Steaks
5 pound boneless Boston butt, a.k.a. pork butt roast (here’s a link to show you what you’re looking for)
1 1/2 gallons of cold water
1 1/2 cups of brown sugar
1 1/2 cups of kosher, pickling or sea salt (make sure there’s no anti-caking agents and that it’s not iodized salt, or it’ll have corn in it)
1/4 tsp ground cloves
1/2 tsp whole black peppercorns
1 3/4 teaspoons of celery juice powder(if you don’t have celery juice powder, you can try taking about 7-8 stalks of celery, roughly chop them and liquefy them in the blender)
Slice the boneless Boston butt across the grain (go look here if you don’t know what that means) into 1 inch thick slices.
Place all the ingredients listed, except for the boneless Boston butt slices, in a large plastic container. When choosing your container, please note that the boneless Boston butt slices will also need to fit into this container, along with a heavy plate or bowl to weigh the slices down into the brine, and it will all need to be able to fit into your refrigerator. Stir until all the salt, sugar, and celery juice powder is dissolved into the water.
Add the boneless Boston butt slices to the brine and make sure they are submerged (you can use a plate or a bowl to weigh them down).
Cover the plastic container with a lid, if it has one, or use plastic wrap or aluminum foil. Place the container in the refrigerator and brine the boneless Boston butt slices for 3 to 4 days. At the halfway point, rotate the position of the the boneless Boston butt slices so they brine evenly.
After the brining is done, rinse the slices well, making sure there aren’t any peppercorns stuck to the slices.
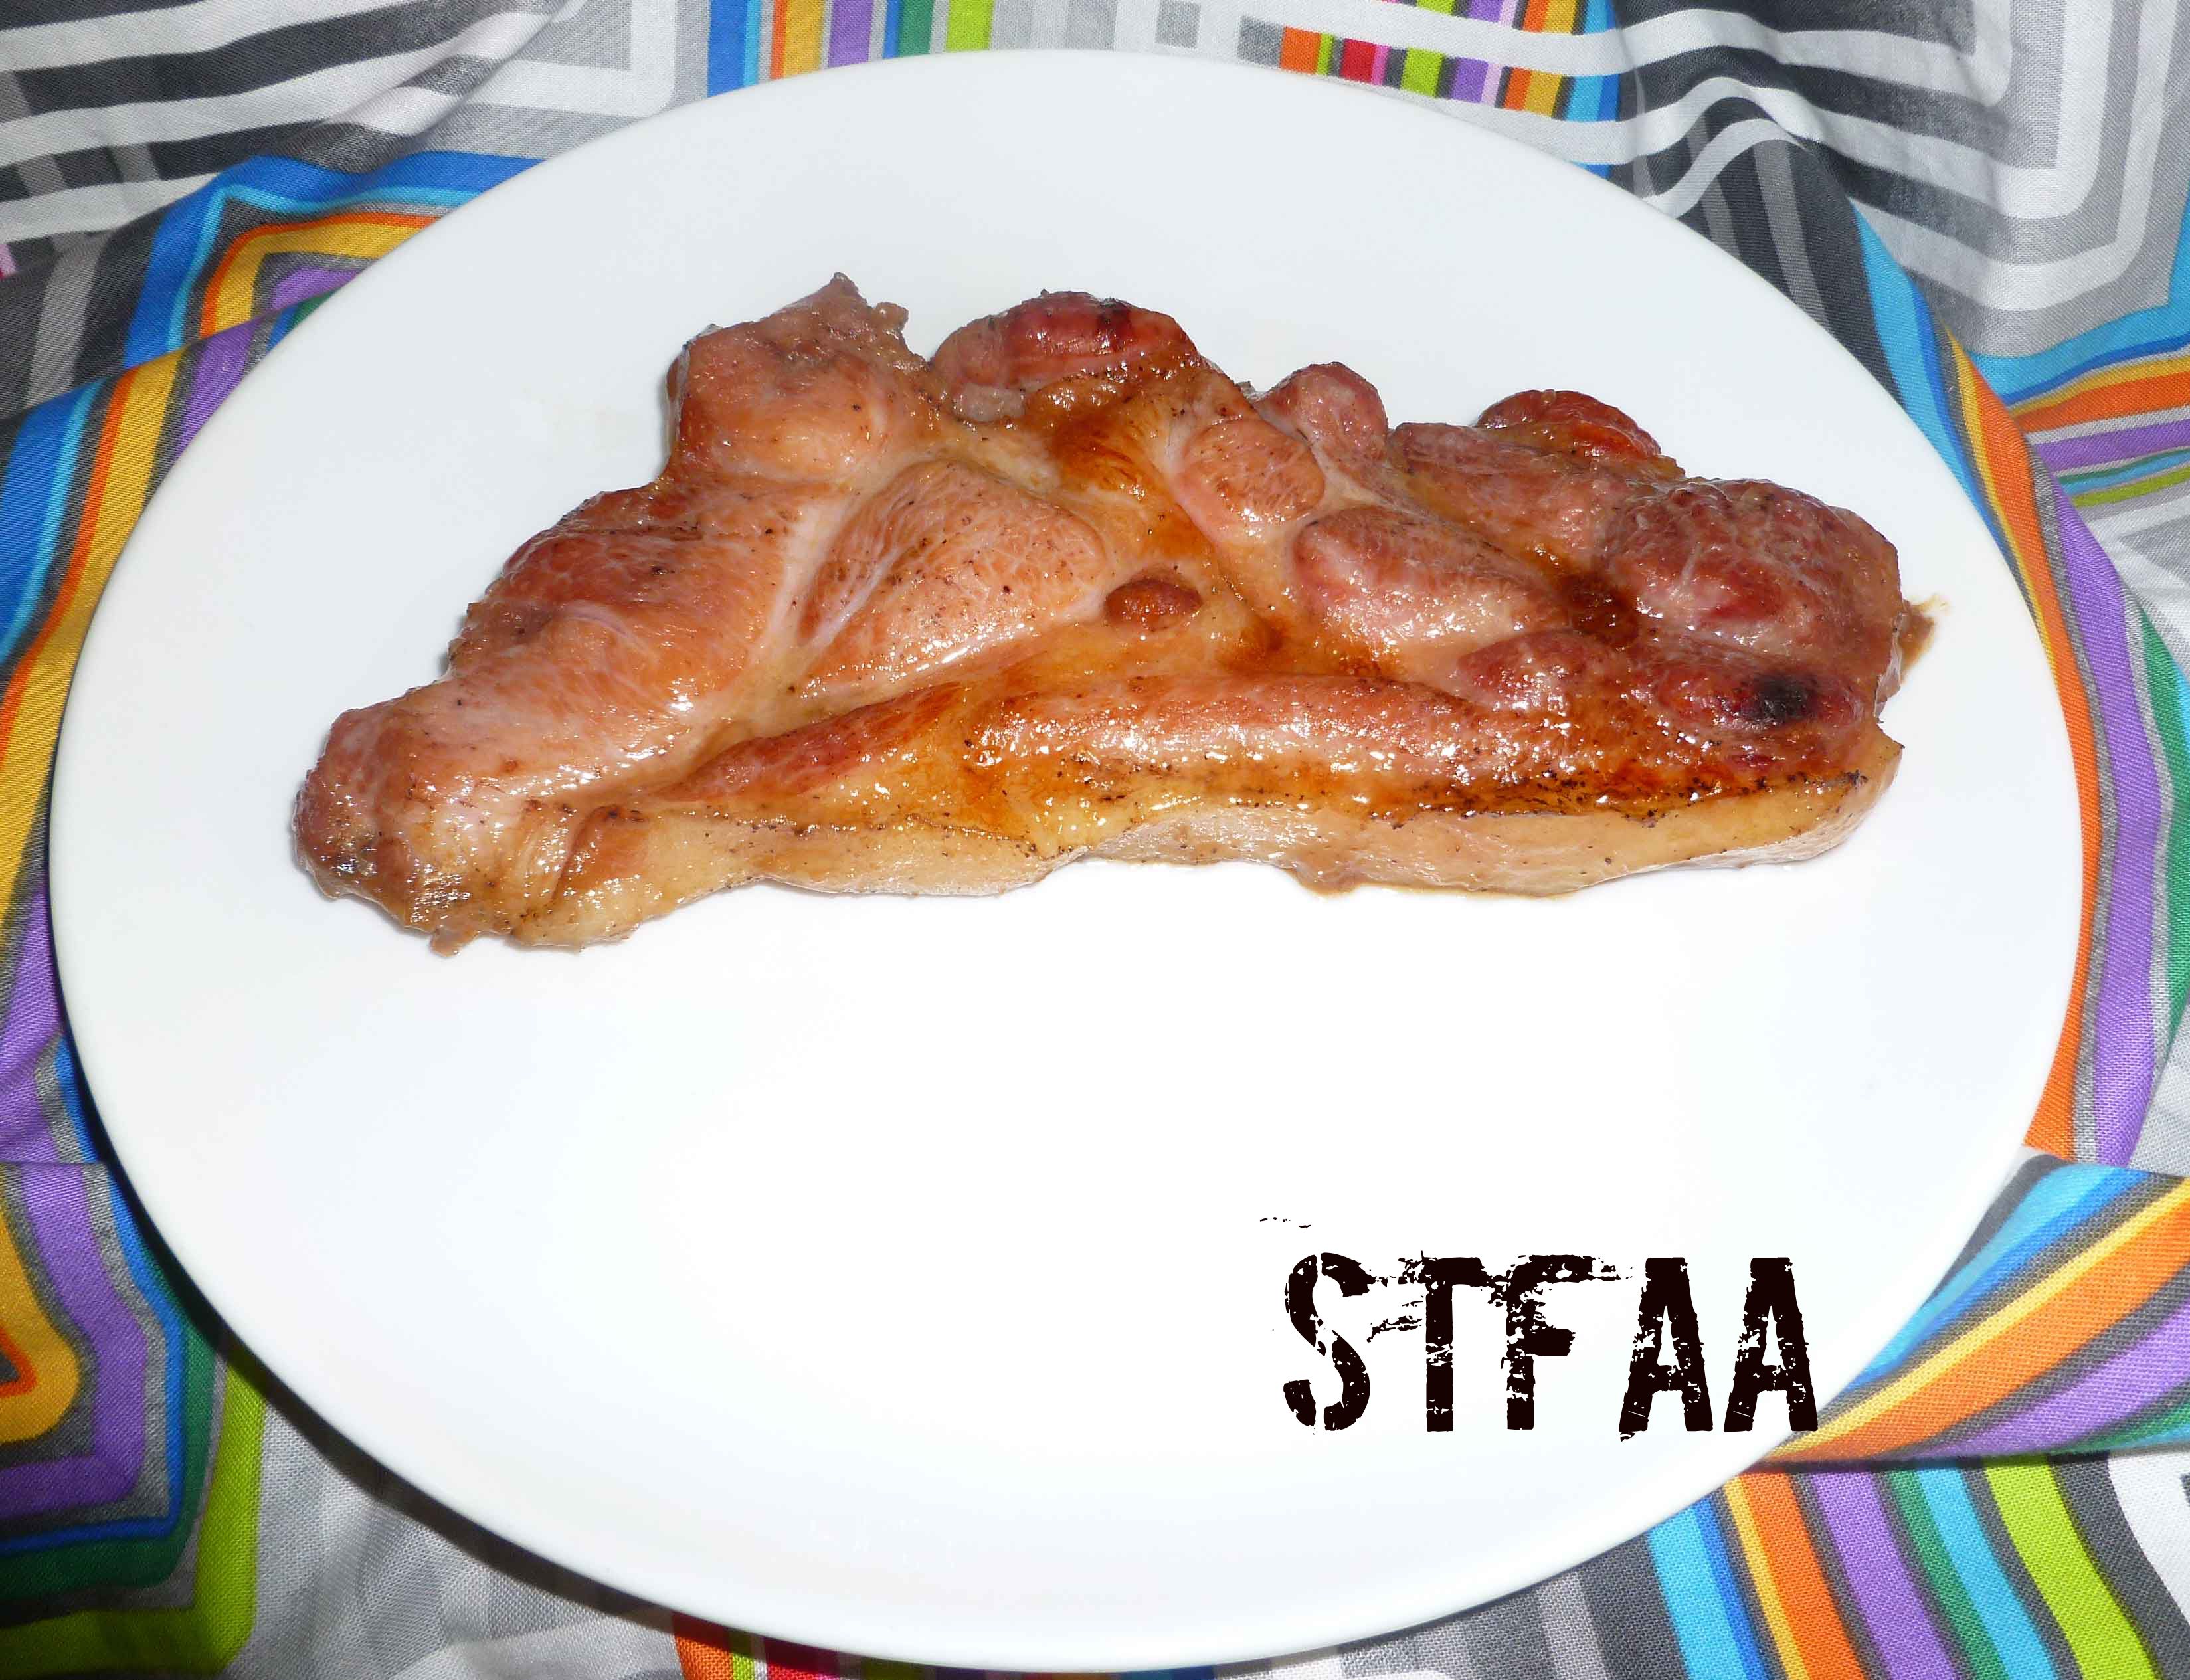
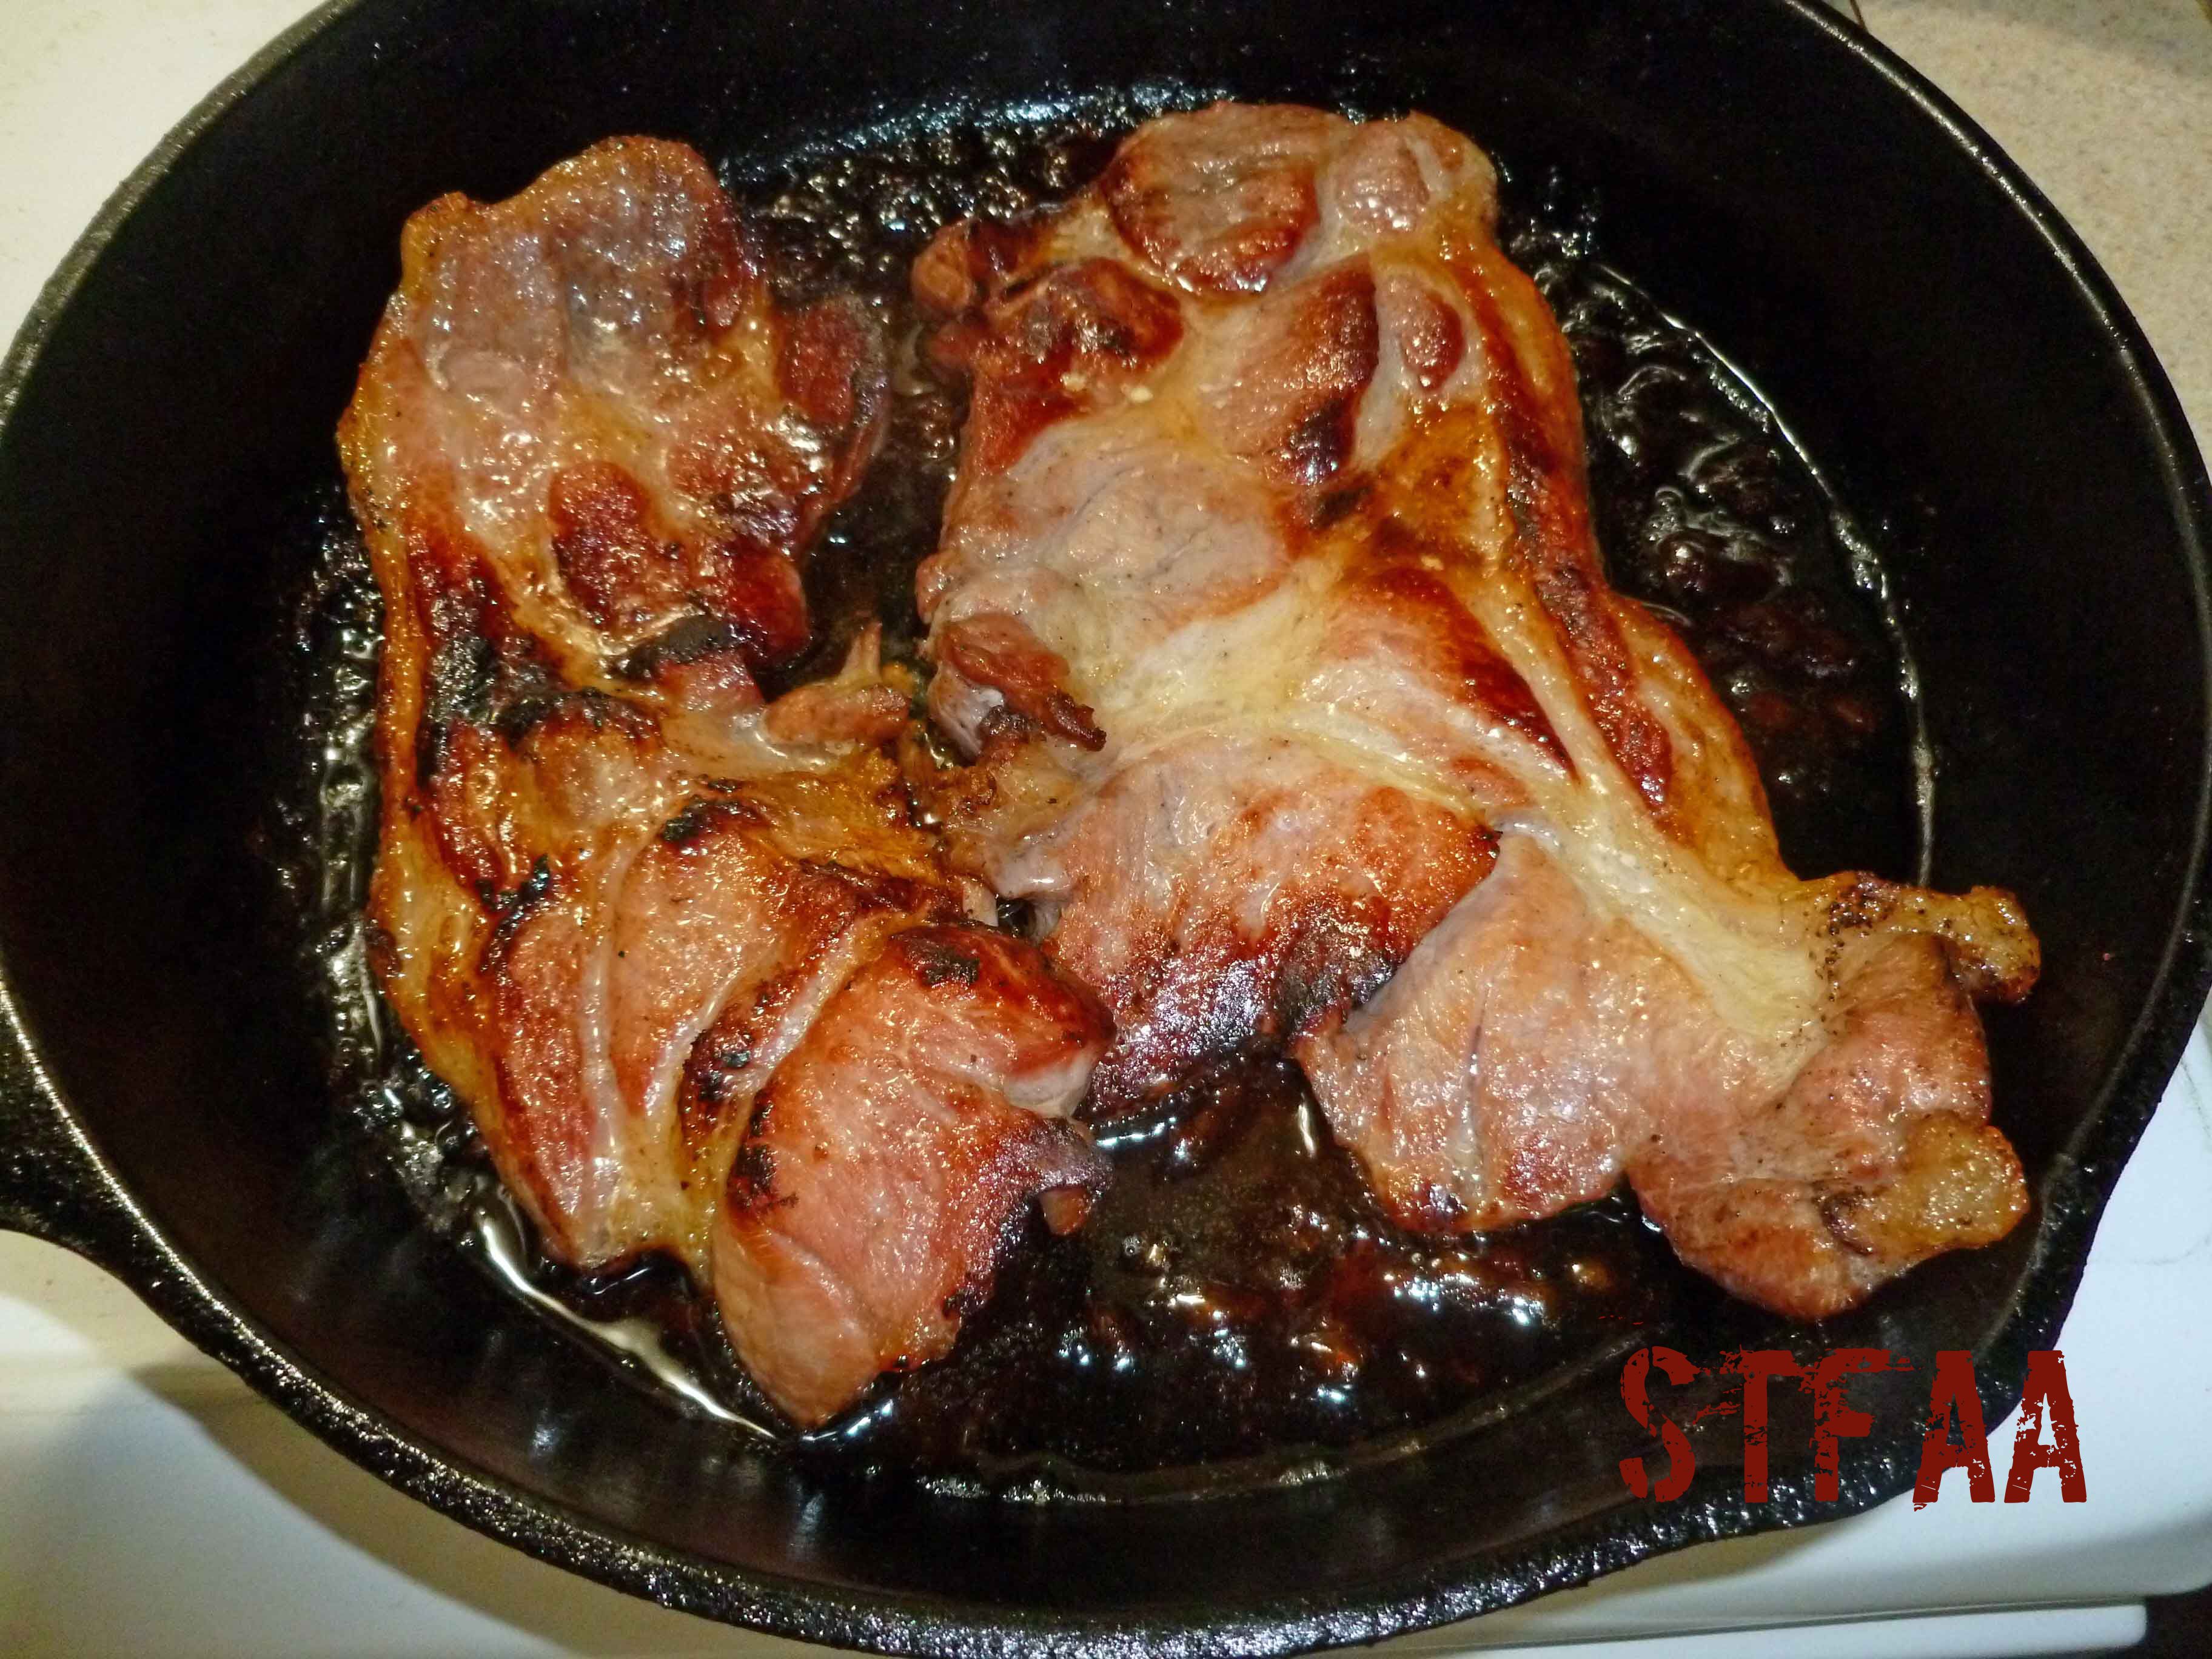
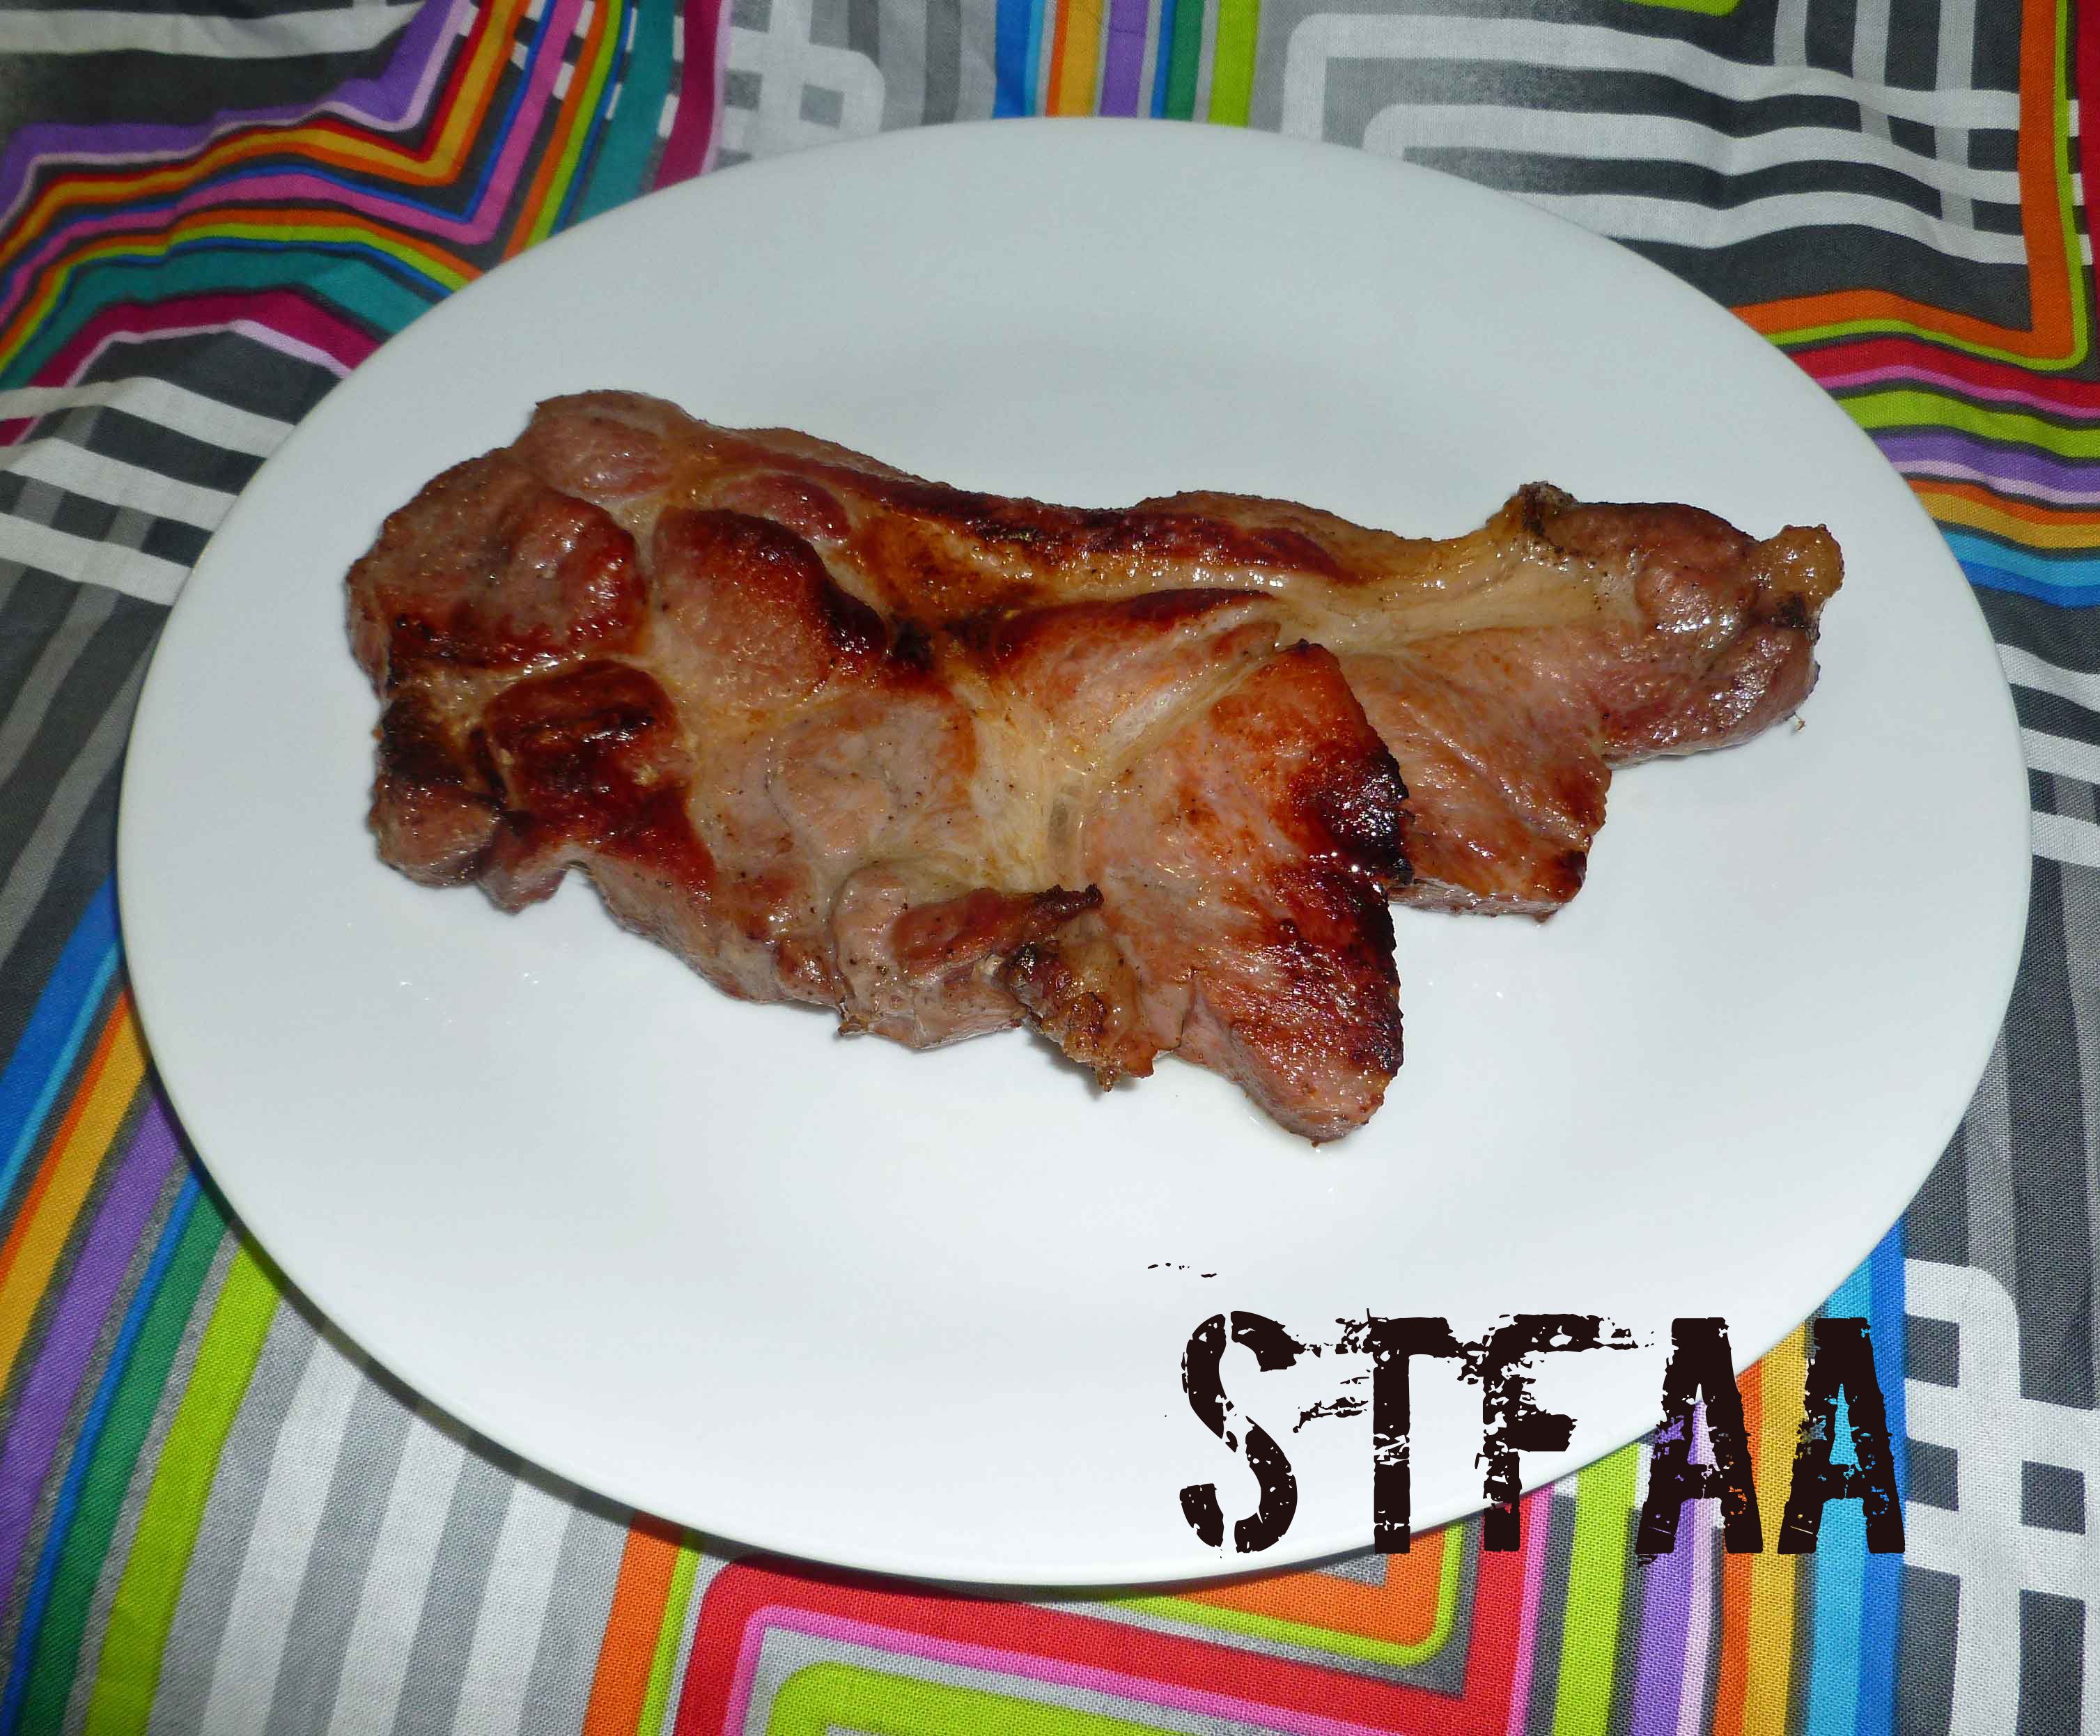
I’ve cooked the resulting ham steaks two ways, in the oven sort of like a whole ham, and seared on the stove top in cast iron and finished in the oven, more like a ham steak.
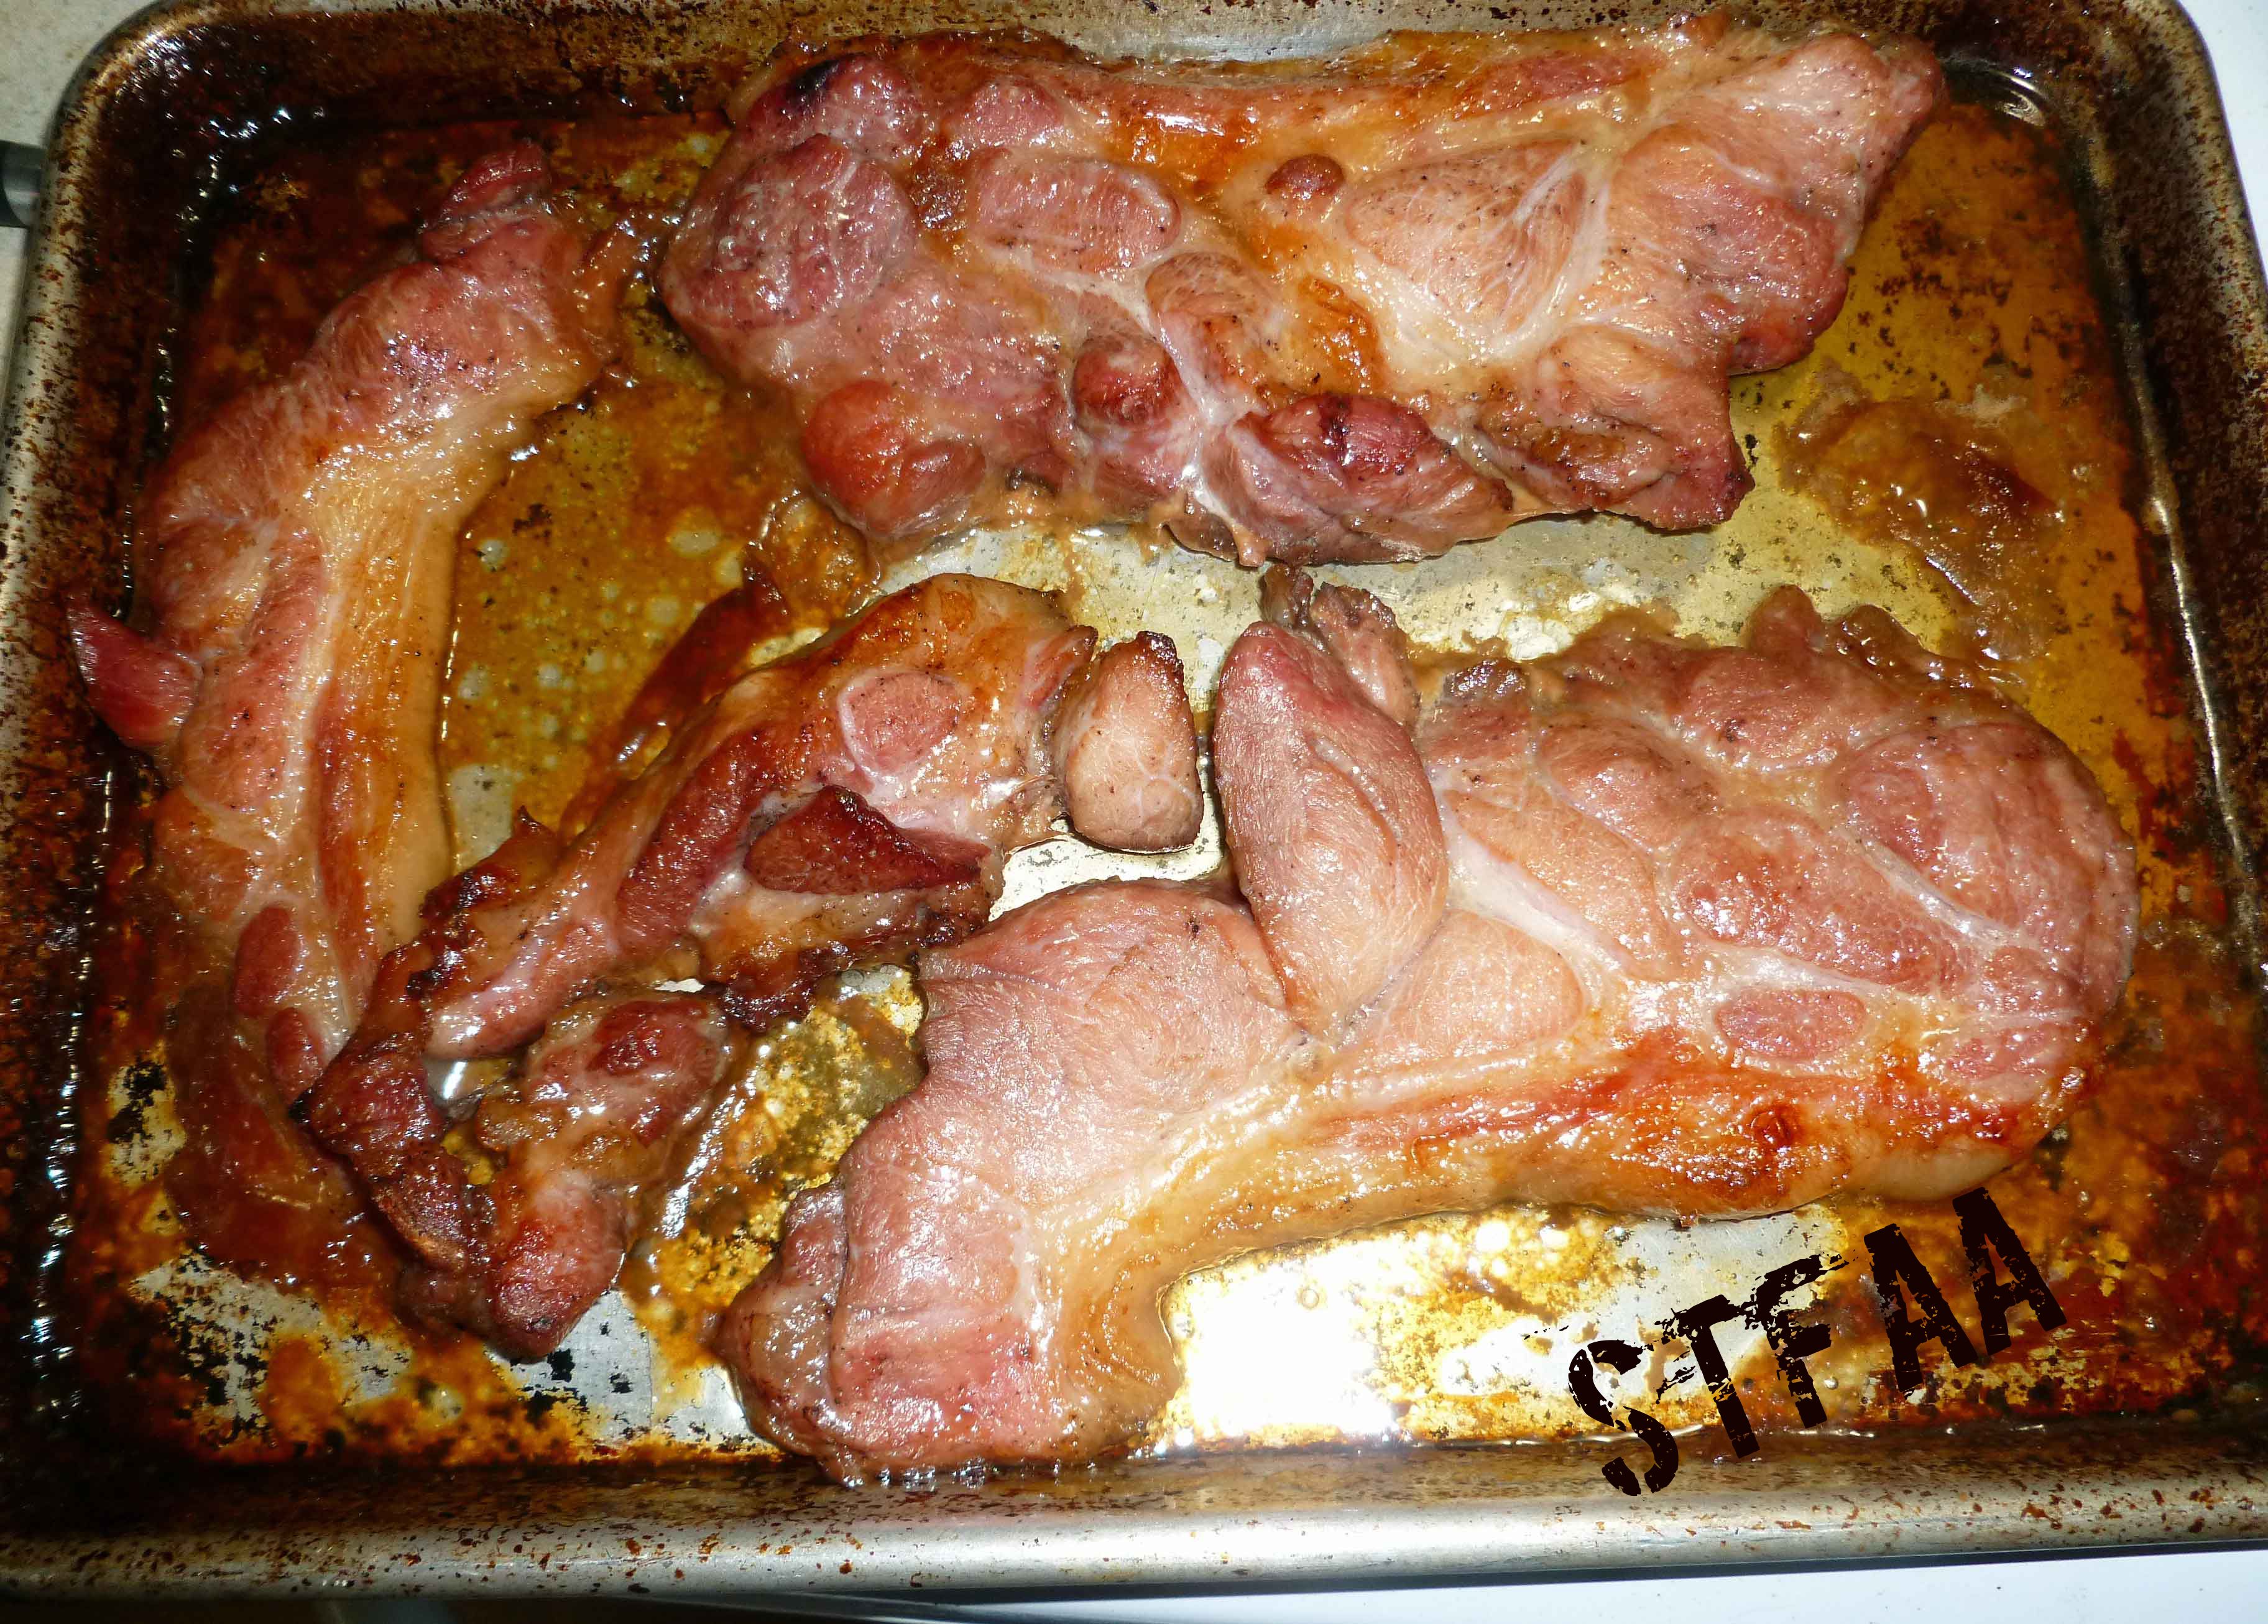
To roast the ham steaks like a whole ham, place the steaks in a roasting pan or baking sheet, and coat them with a bit of brown sugar as a rub. Bake them in a roasting pan at 375°F degrees for about 45 minutes to an hour or until the internal temperature is 160°F degrees.
Ham Steaks rubbed with brown sugar and roasted in the ovenHam Steaks rubbed with brown sugar and roasted in the oven
To cook them like ham steaks, preheat your oven to 375°F degrees. Place a bit of safe for you oil in a cast iron skillet, and turn the burner to medium heat. When the oil and skillet is hot, place the steaks in the skillet, and sear until there is nice golden, caramel crust. Turn the steaks over, and sear the other side. Once both sides of the ham steaks are seared, place the skillet in the oven and roast them for about 30 minutes or until the internal temperature is 160°F degrees.
Ham Steaks seared in cast iron and finished in the ovenHam Steaks seared in cast iron and finished in the oven
Enjoy your ham!
Notice: Trying to access array offset on value of type bool in /home/maryzahc/public_html/adultfoodallergies.com/wp-content/plugins/wp-ultimate-recipe/helpers/models/recipe.php on line 254
Cure Your Own Ham Steaks
Print Recipe
How to have allergy friendly ham for the holidays!
Slice the boneless Boston butt across the grain into 1 inch thick slices.
Place all the ingredients listed, except for the boneless Boston butt slices, in a large plastic container (large enough for brine, boneless Boston butt slices, and a heavy plate or bowl to weigh down the slices, but able to fit into your refrigerator). Stir until all the salt, sugar, and celery juice powder is dissolved into the water.
Add the boneless Boston butt slices to the brine and make sure they are submerged using a plate or a bowl to to weigh them down. Cover the plastic container with a lid or use plastic wrap or aluminum foil. Place the container in the refrigerator and brine the boneless Boston butt slices for 3 to 4 days. At the halfway point, rotate the position of the the boneless Boston butt slices so they brine evenly.
After the brining is done, rinse the slices well, making sure there aren’t any peppercorns stuck to the slices.
To roast the ham steaks like a whole ham, place the steaks in a roasting pan or baking sheet, and coat them with a bit of brown sugar as a rub. Bake them in a roasting pan at 375°F degrees for about 45 minutes to an hour or until the internal temperature is 160°F degrees.
To cook them like ham steaks, preheat your oven to 375°F degrees. Place a bit of safe for you oil in a cast iron skillet, and turn the burner to medium heat. When the oil and skillet is hot, place the steaks in the skillet, and sear until there is nice golden, caramel crust. Turn the steaks over, and sear the other side. Once both sides of the ham steaks are seared, place the skillet in the oven and roast them for about 30 minutes or until the internal temperature is 160°F degrees.
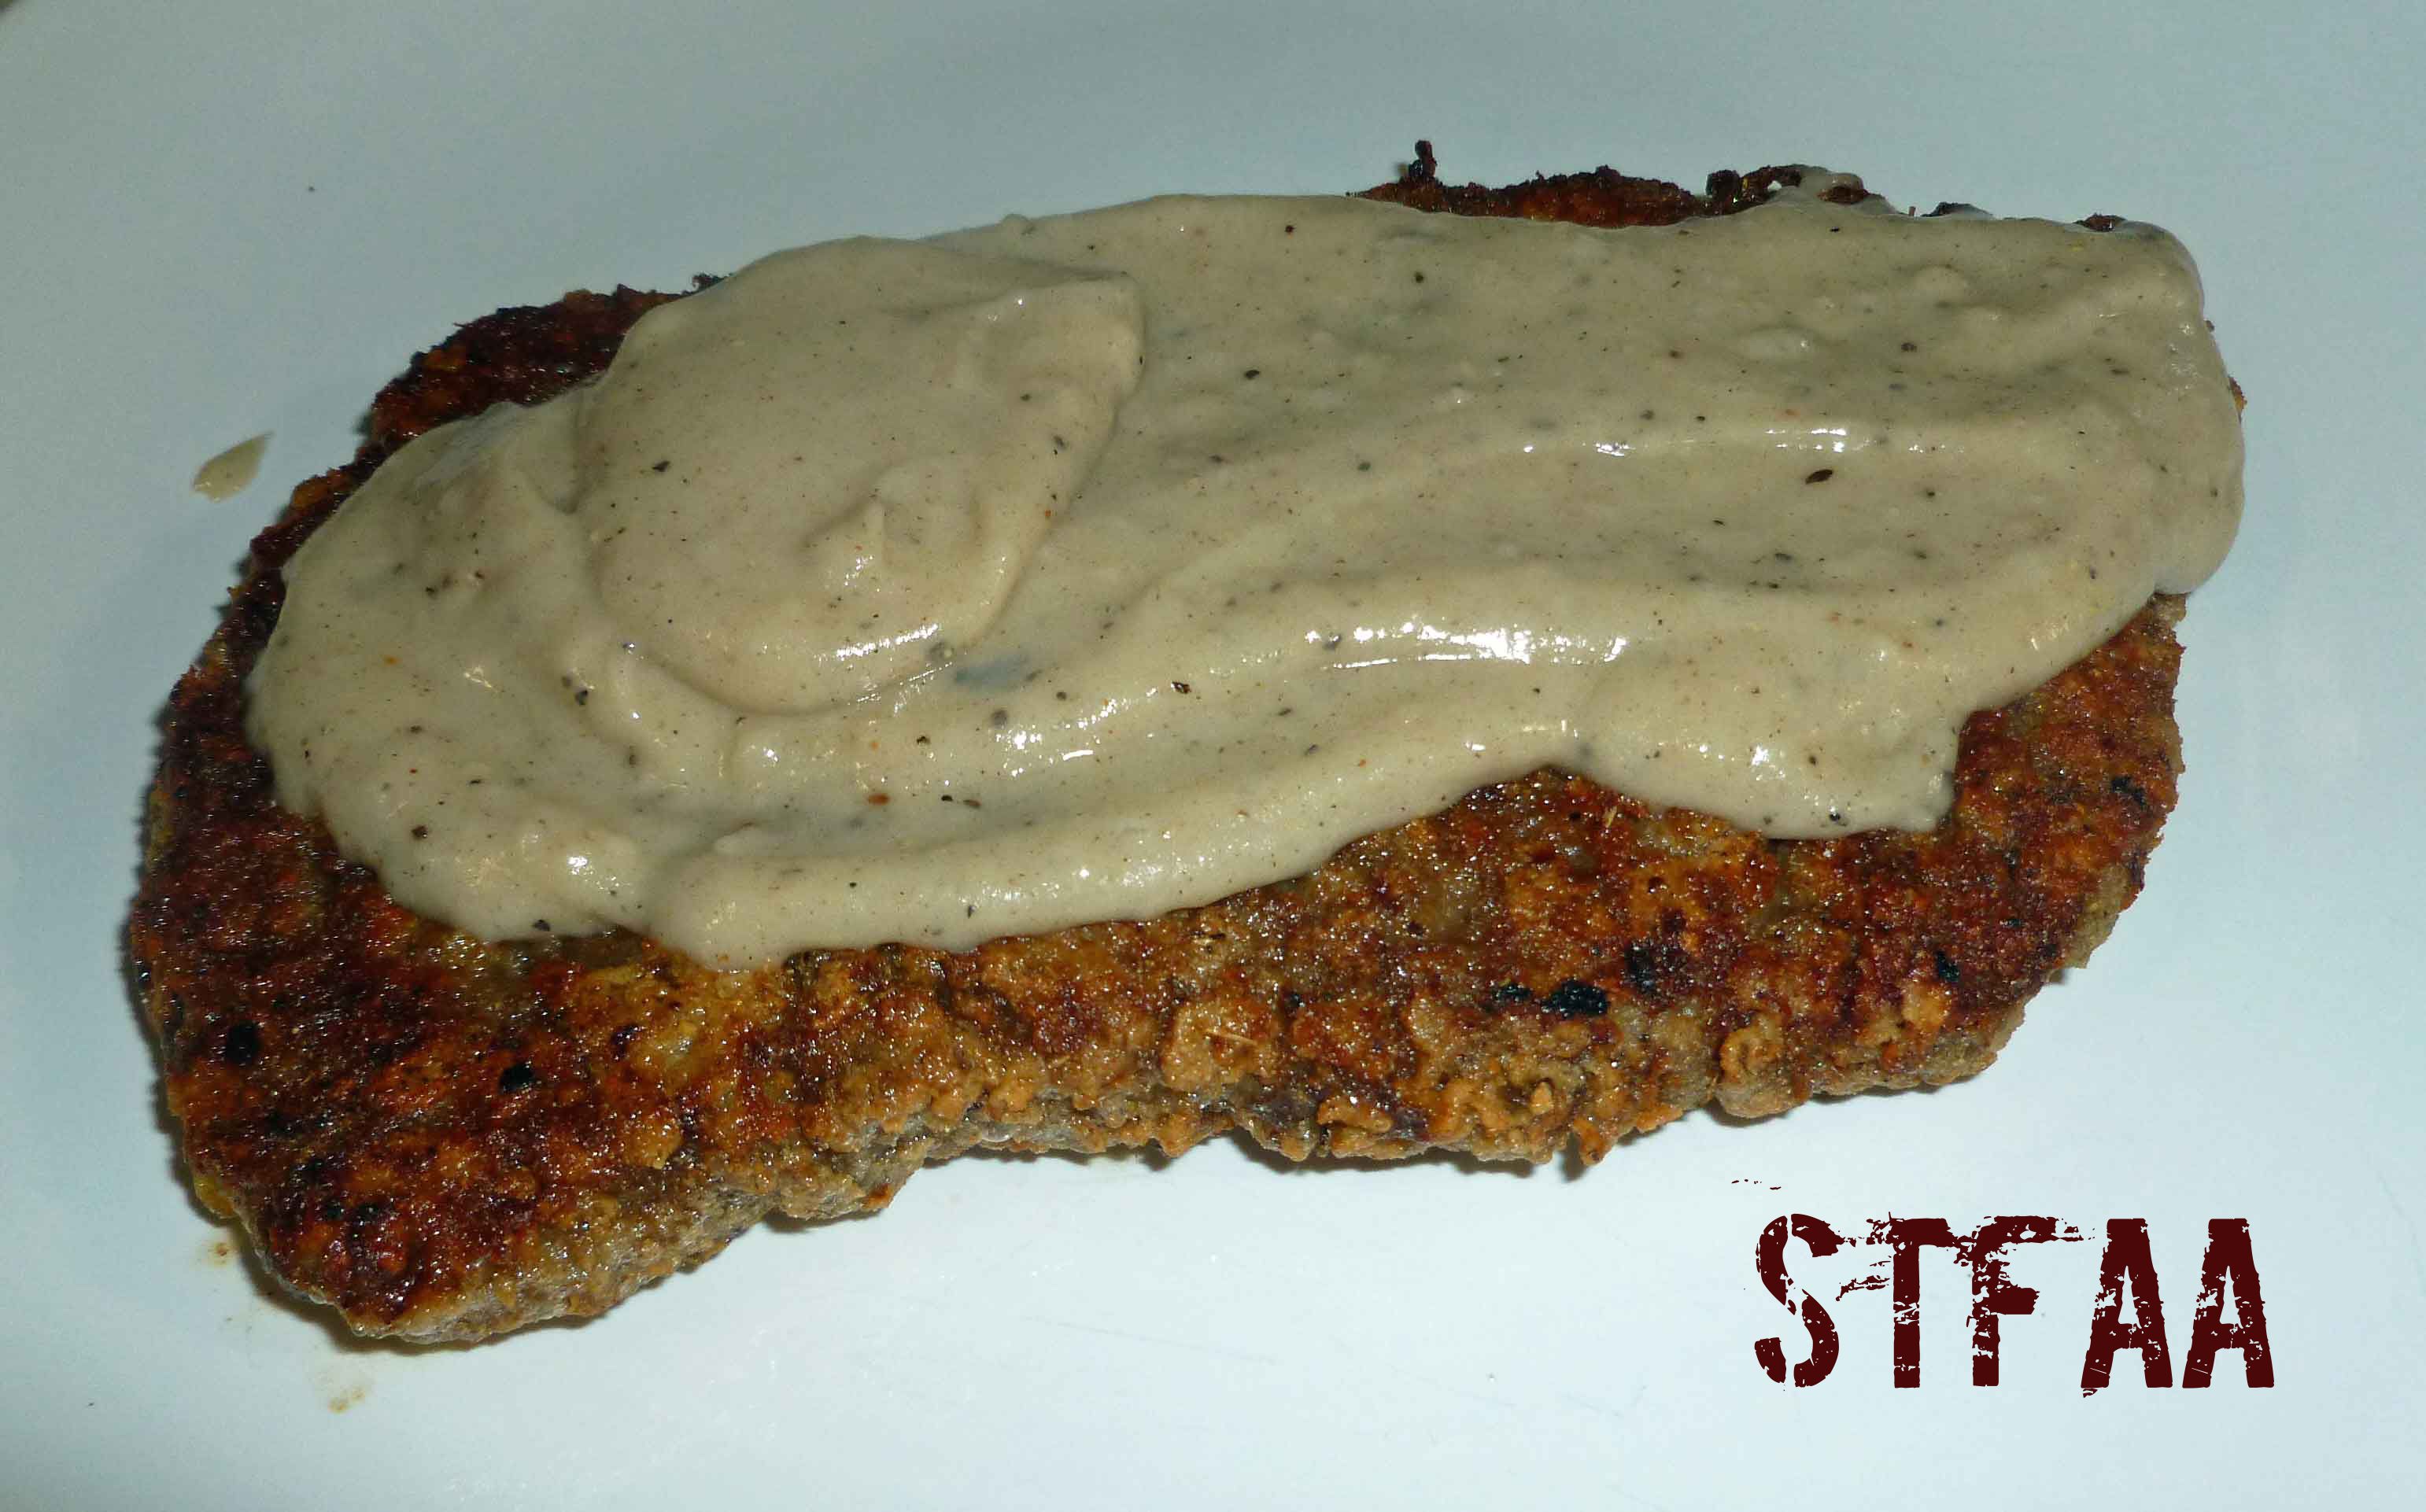
My mother made cube steak sometimes when we were kids, but wasn’t one for sauces, so I wasn’t introduced to white pepper gravy until I began ordering it at diners. I liked nothing better than going to a greasy spoon diner after a night out with friends if we’d been imbibing, or as a recovery measure the morning after when I was in college and law school. I love diner food, and was disappointed in the lack of good diners in New Hampshire when I moved here. Now that the food allergy apocalypse has hit, even the mediocre diners here are off limits. But this recipe takes care of those diner food cravings for me.
2 Tablespoons of aquafaba (you’ll need 4 Tablespoons if you make 2 cube steaks)
2-3 Tablespoons of bacon fat, lard, or other safe for you cooking oil.
White Pepper Gravy Ingredients:
Drippings from frying Chicken Fried Steak
1/4 cup of sorghum flour
1 cup of cashew milk or other safe for you non-dairy milk
1/4 to 1/2 cup of water depending on how thick you like your gravy
1/4 teaspoon of black pepper (you may want to add more or less to taste)
1/4 teaspoon of salt ( you may want to add more or less to taste)
Chicken Fried Steak Instructions:
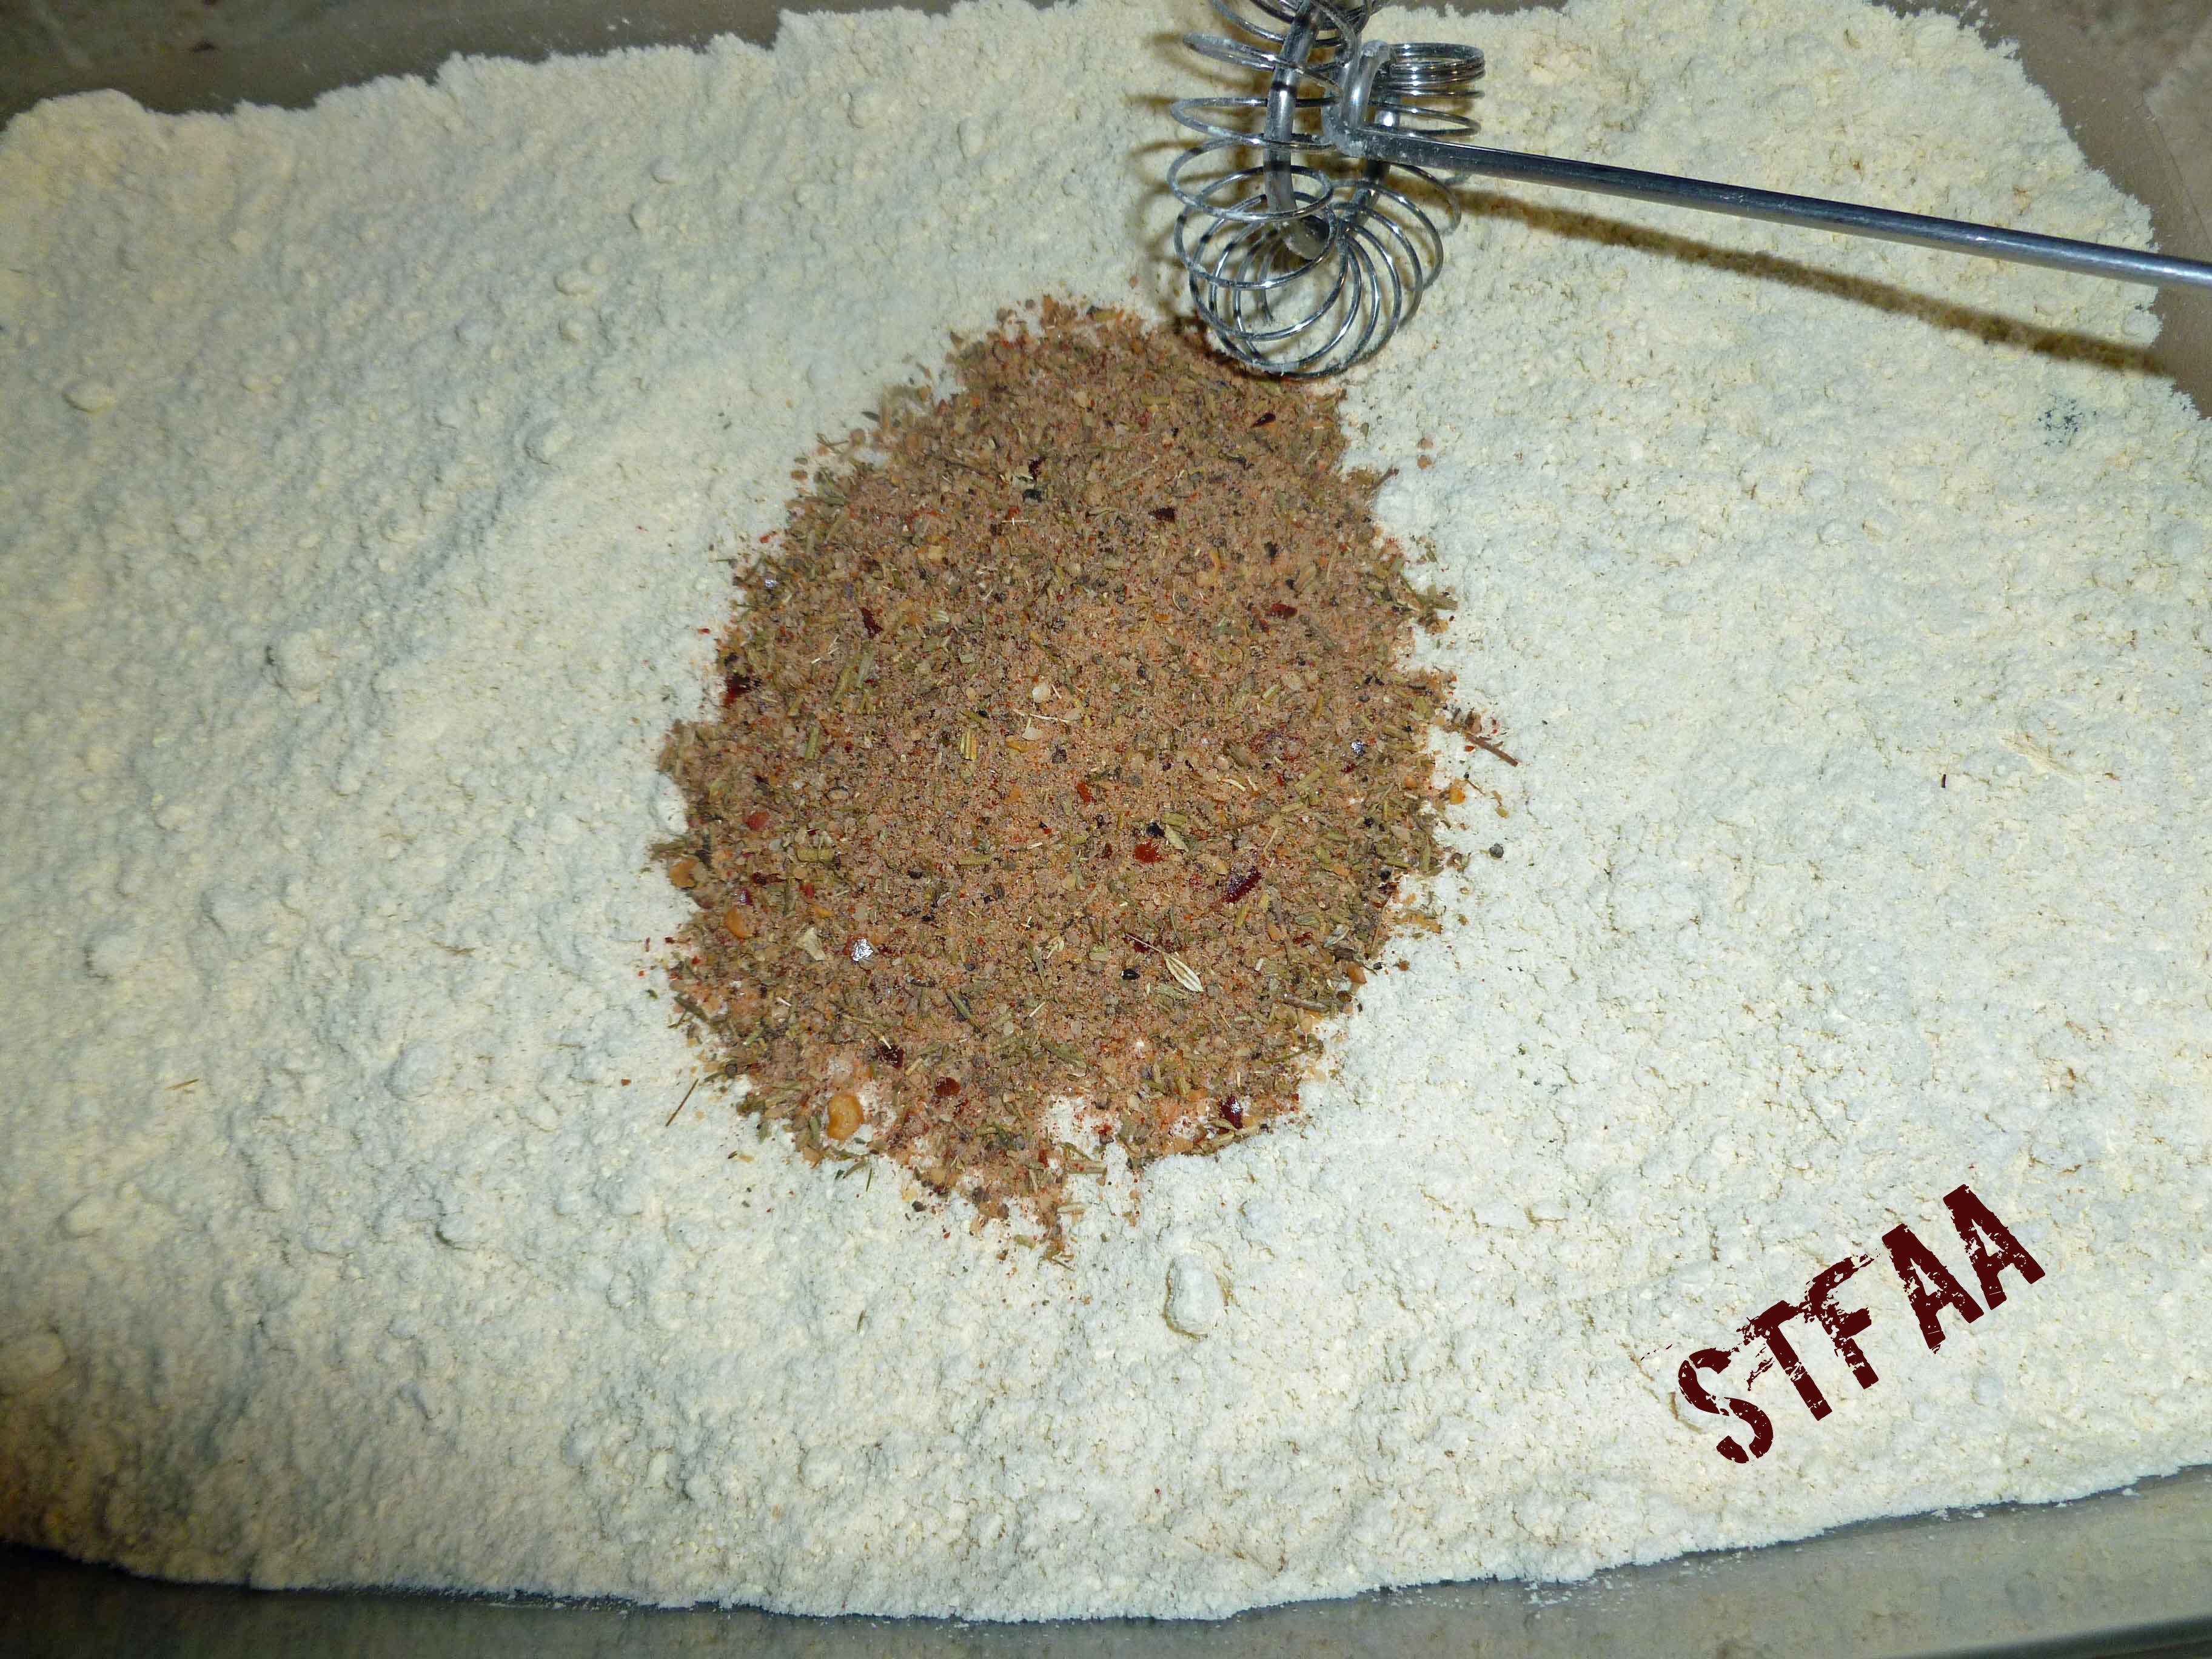
Place 1/4 cup of sorghum flour, 1/4 cup of garbanzo bean flour, and the Montreal Steak Seasoning in a large shallow dish that will allow you to coat the cube steak easily.
Sorghum flour, garbanzo bean flour, and Montreal Steak Seasoning
Mix the sorghum flour, garbanzo bean flour and Montreal Steak Seasoning together until they are well combined. Place the aquafaba in another large shallow dish that will allow you to coat the cube steak easily.
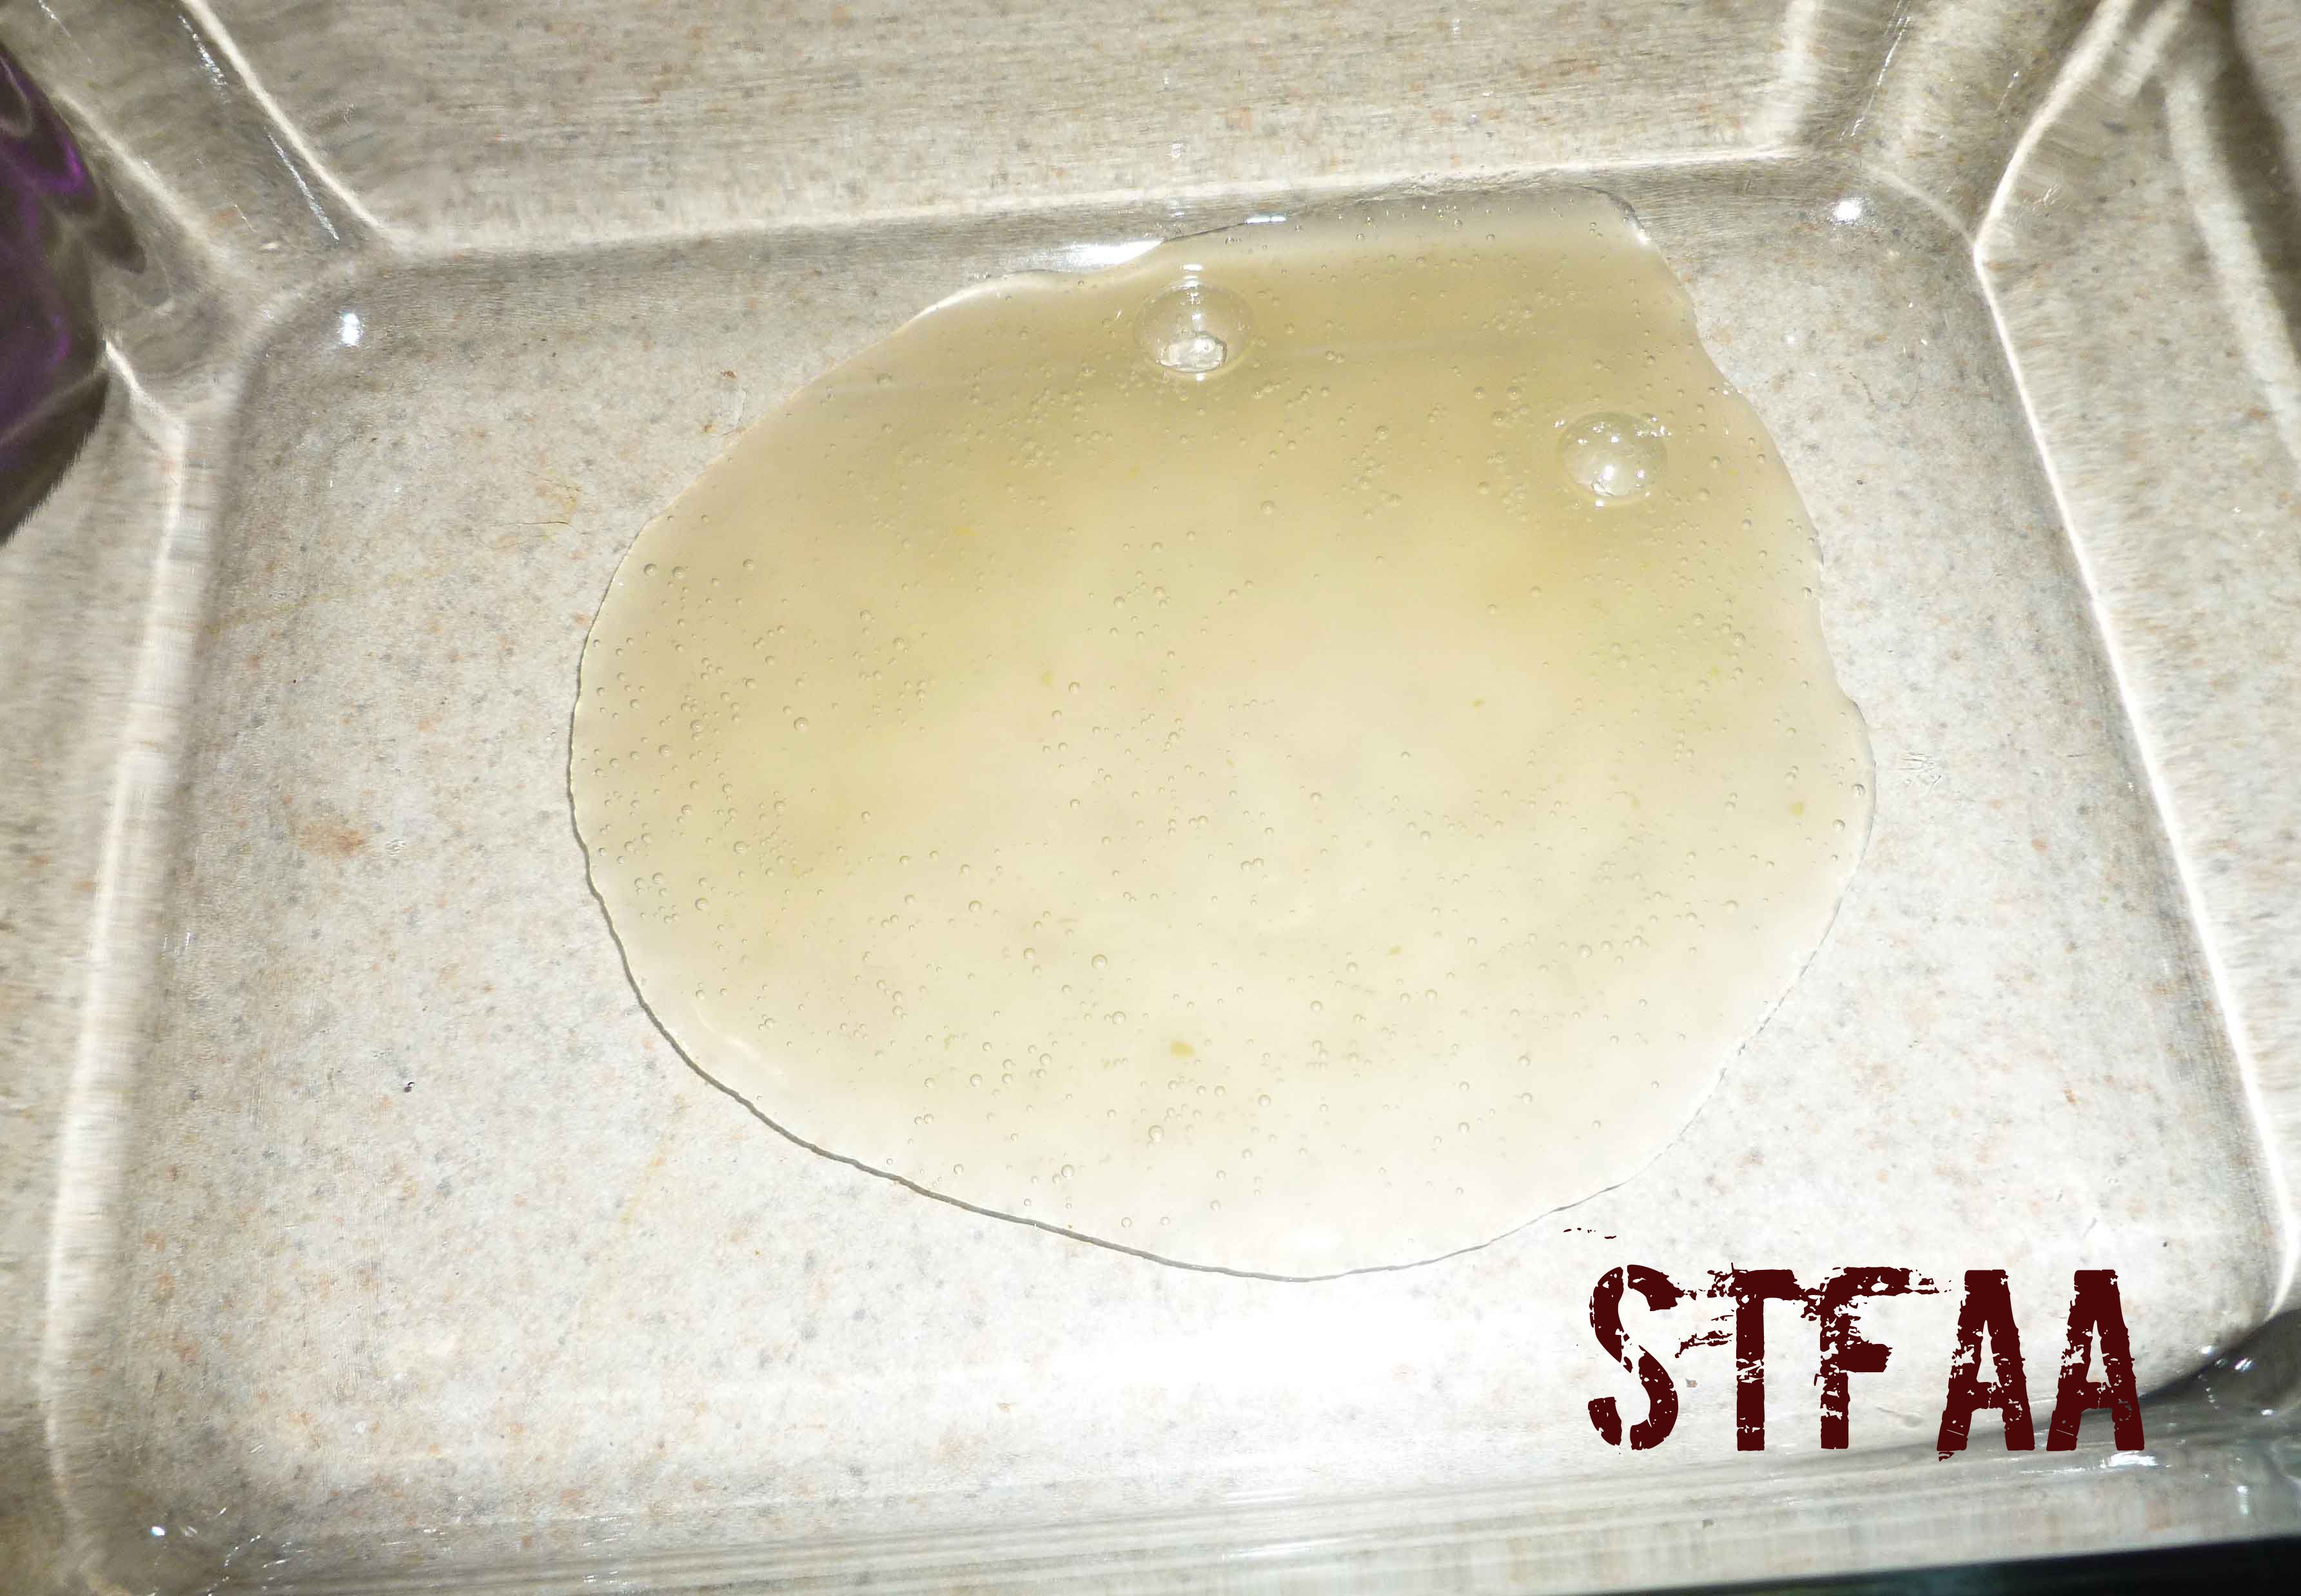
Aquafaba
Place your bacon fat, lard, or safe oil in a skillet, and place the skillet on a burner over medium heat.
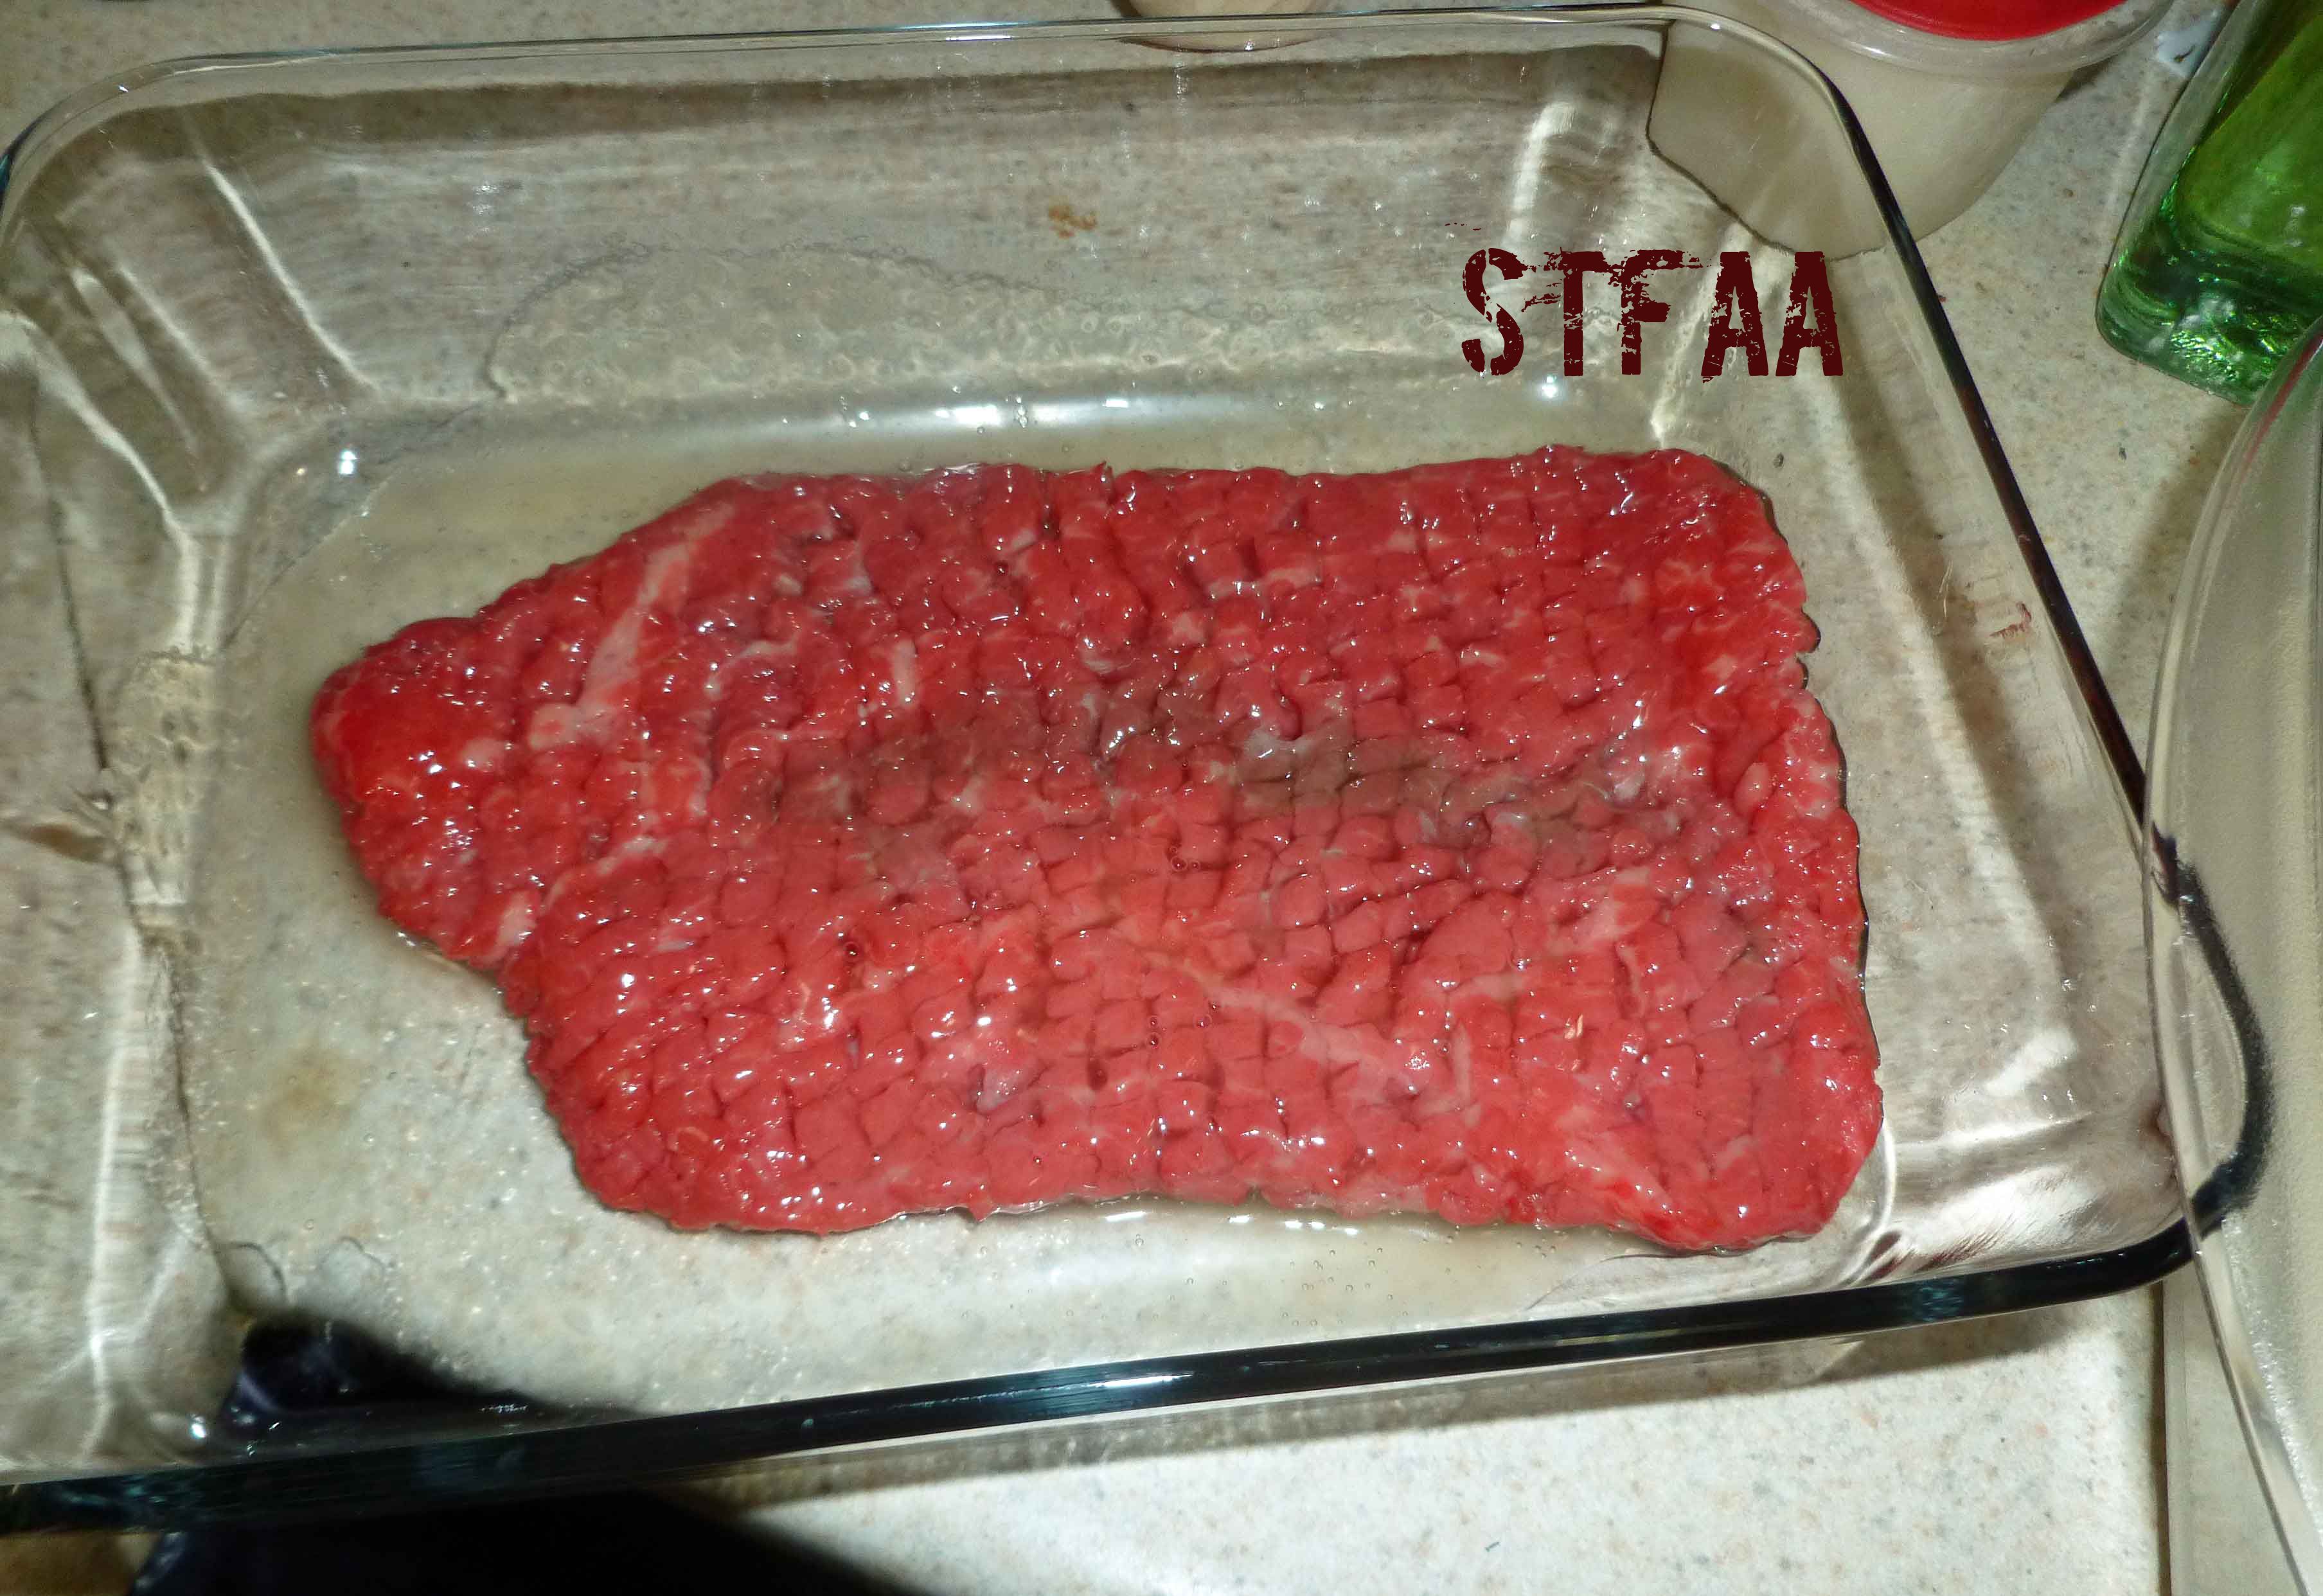
While your fat/oil heats, take your cube steak and coat it in the aquafaba.
Cube steak coated in aquafaba
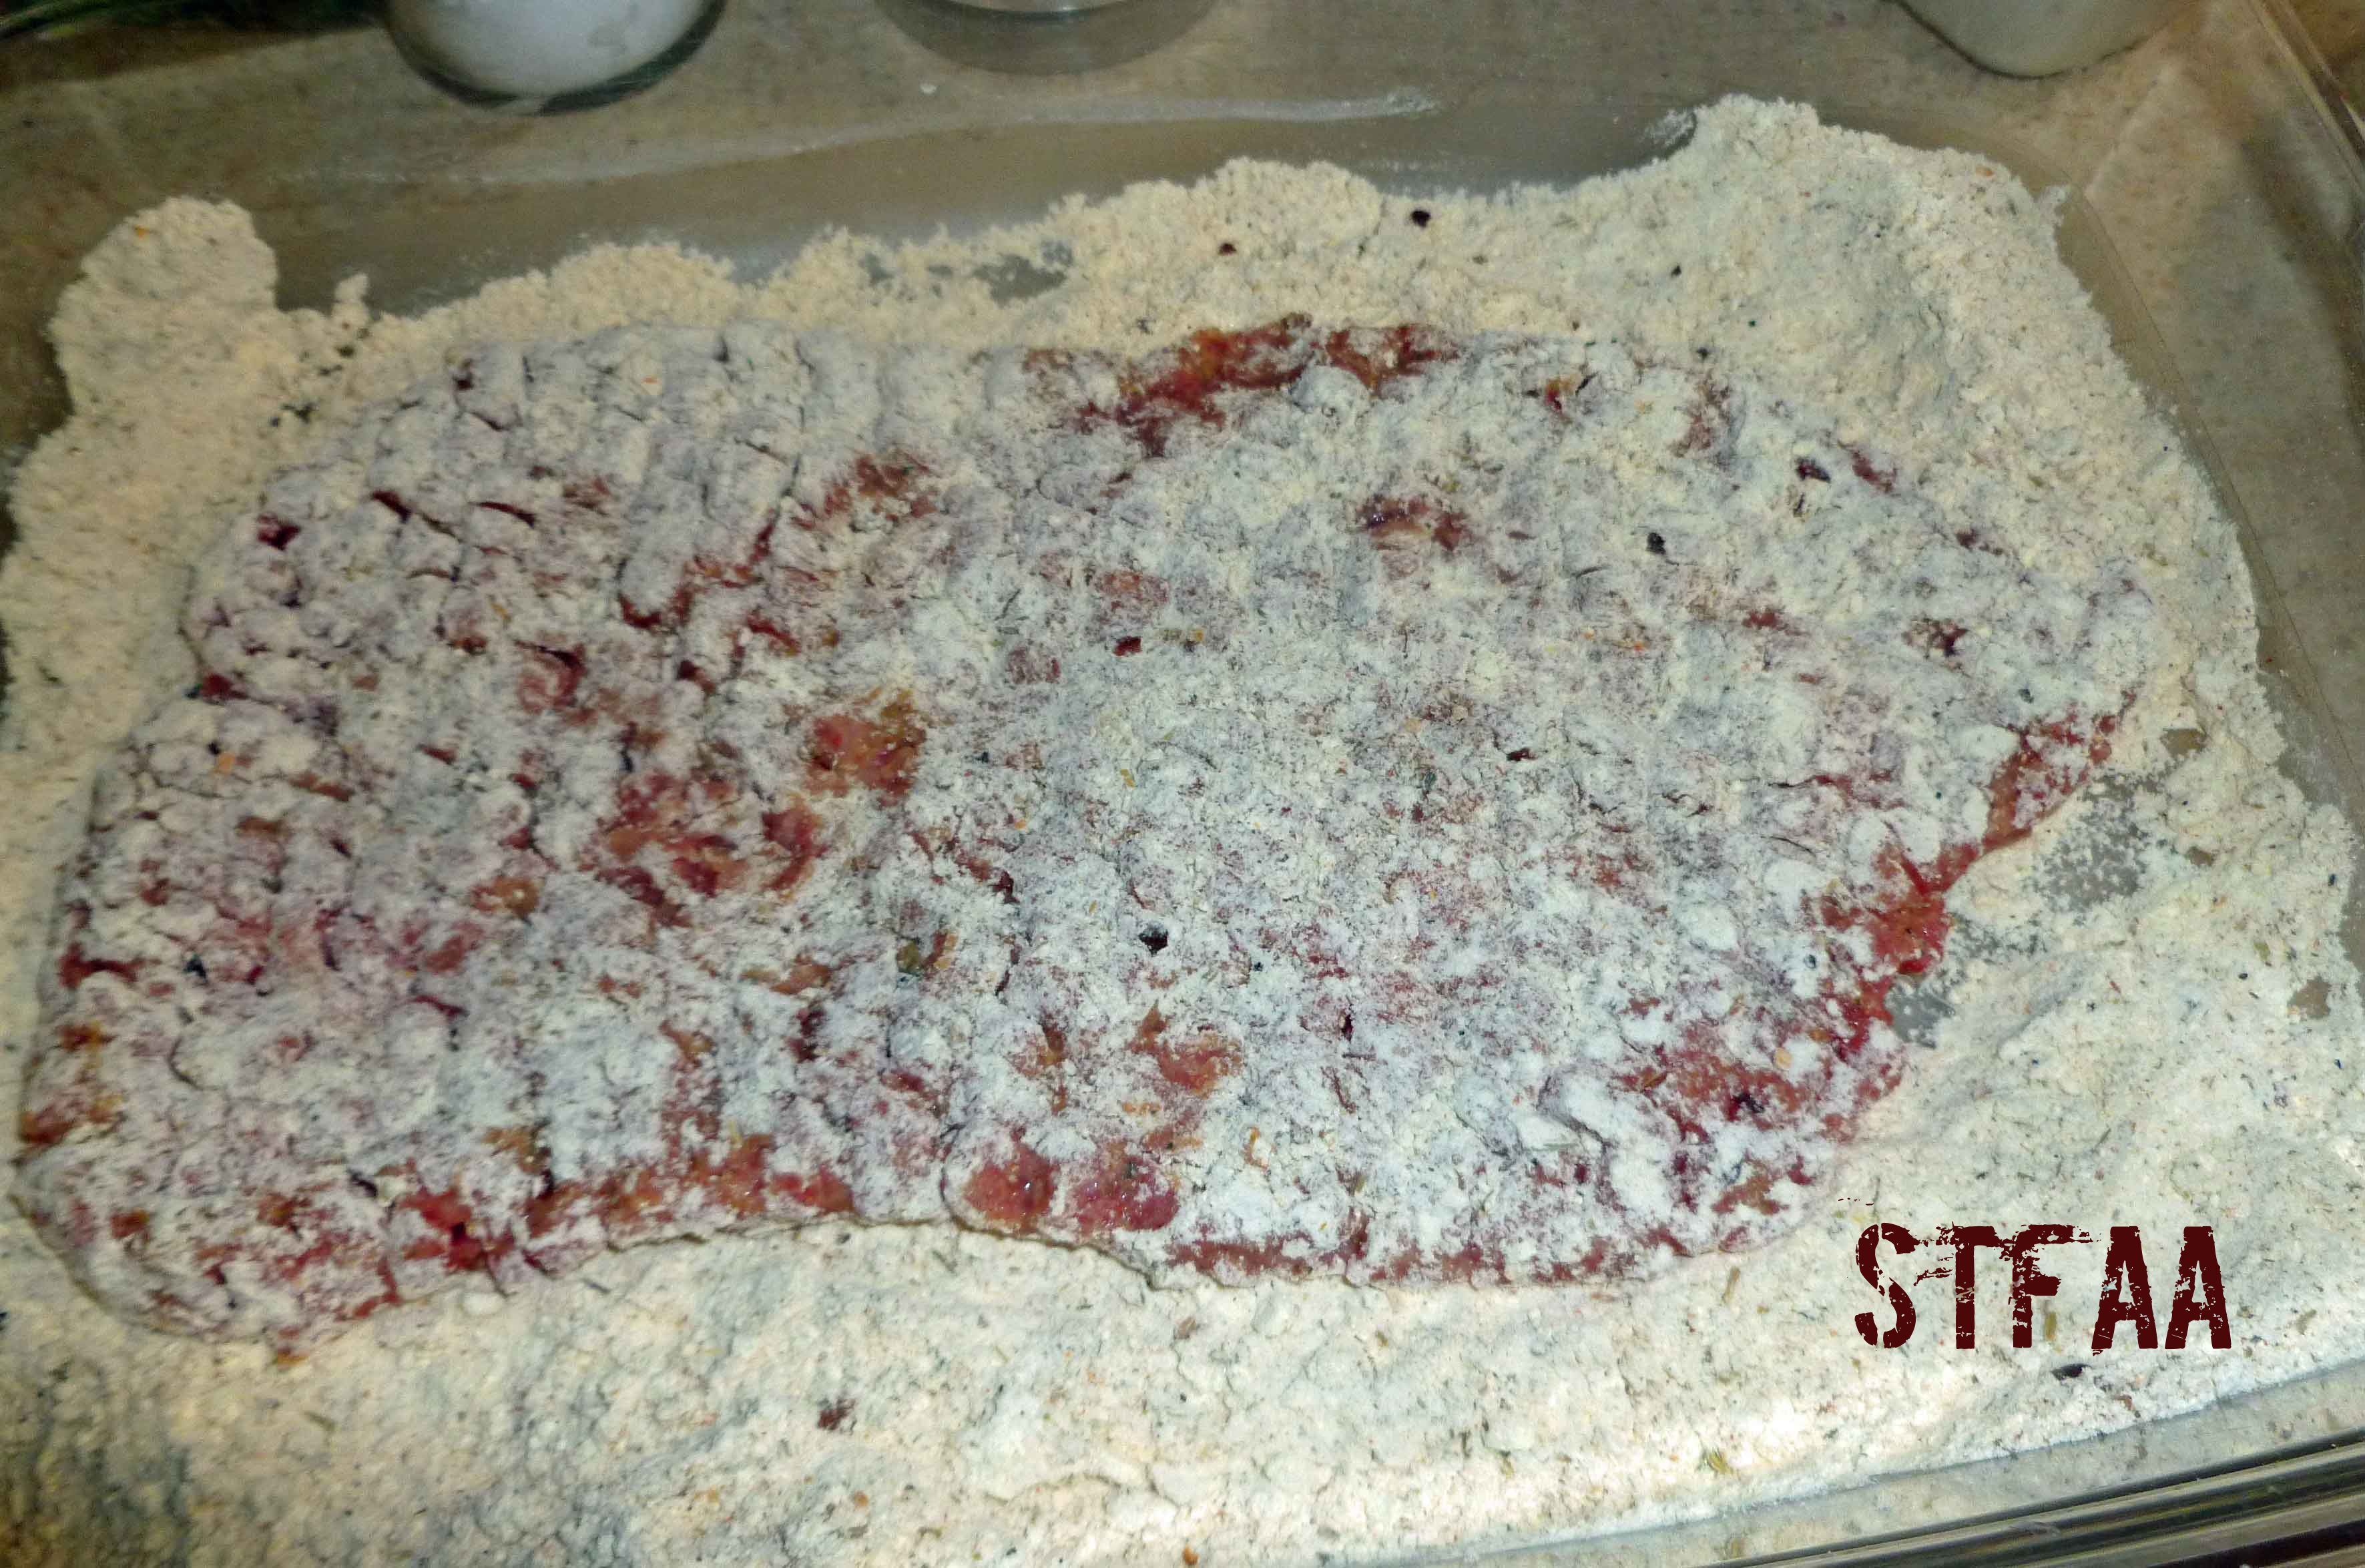
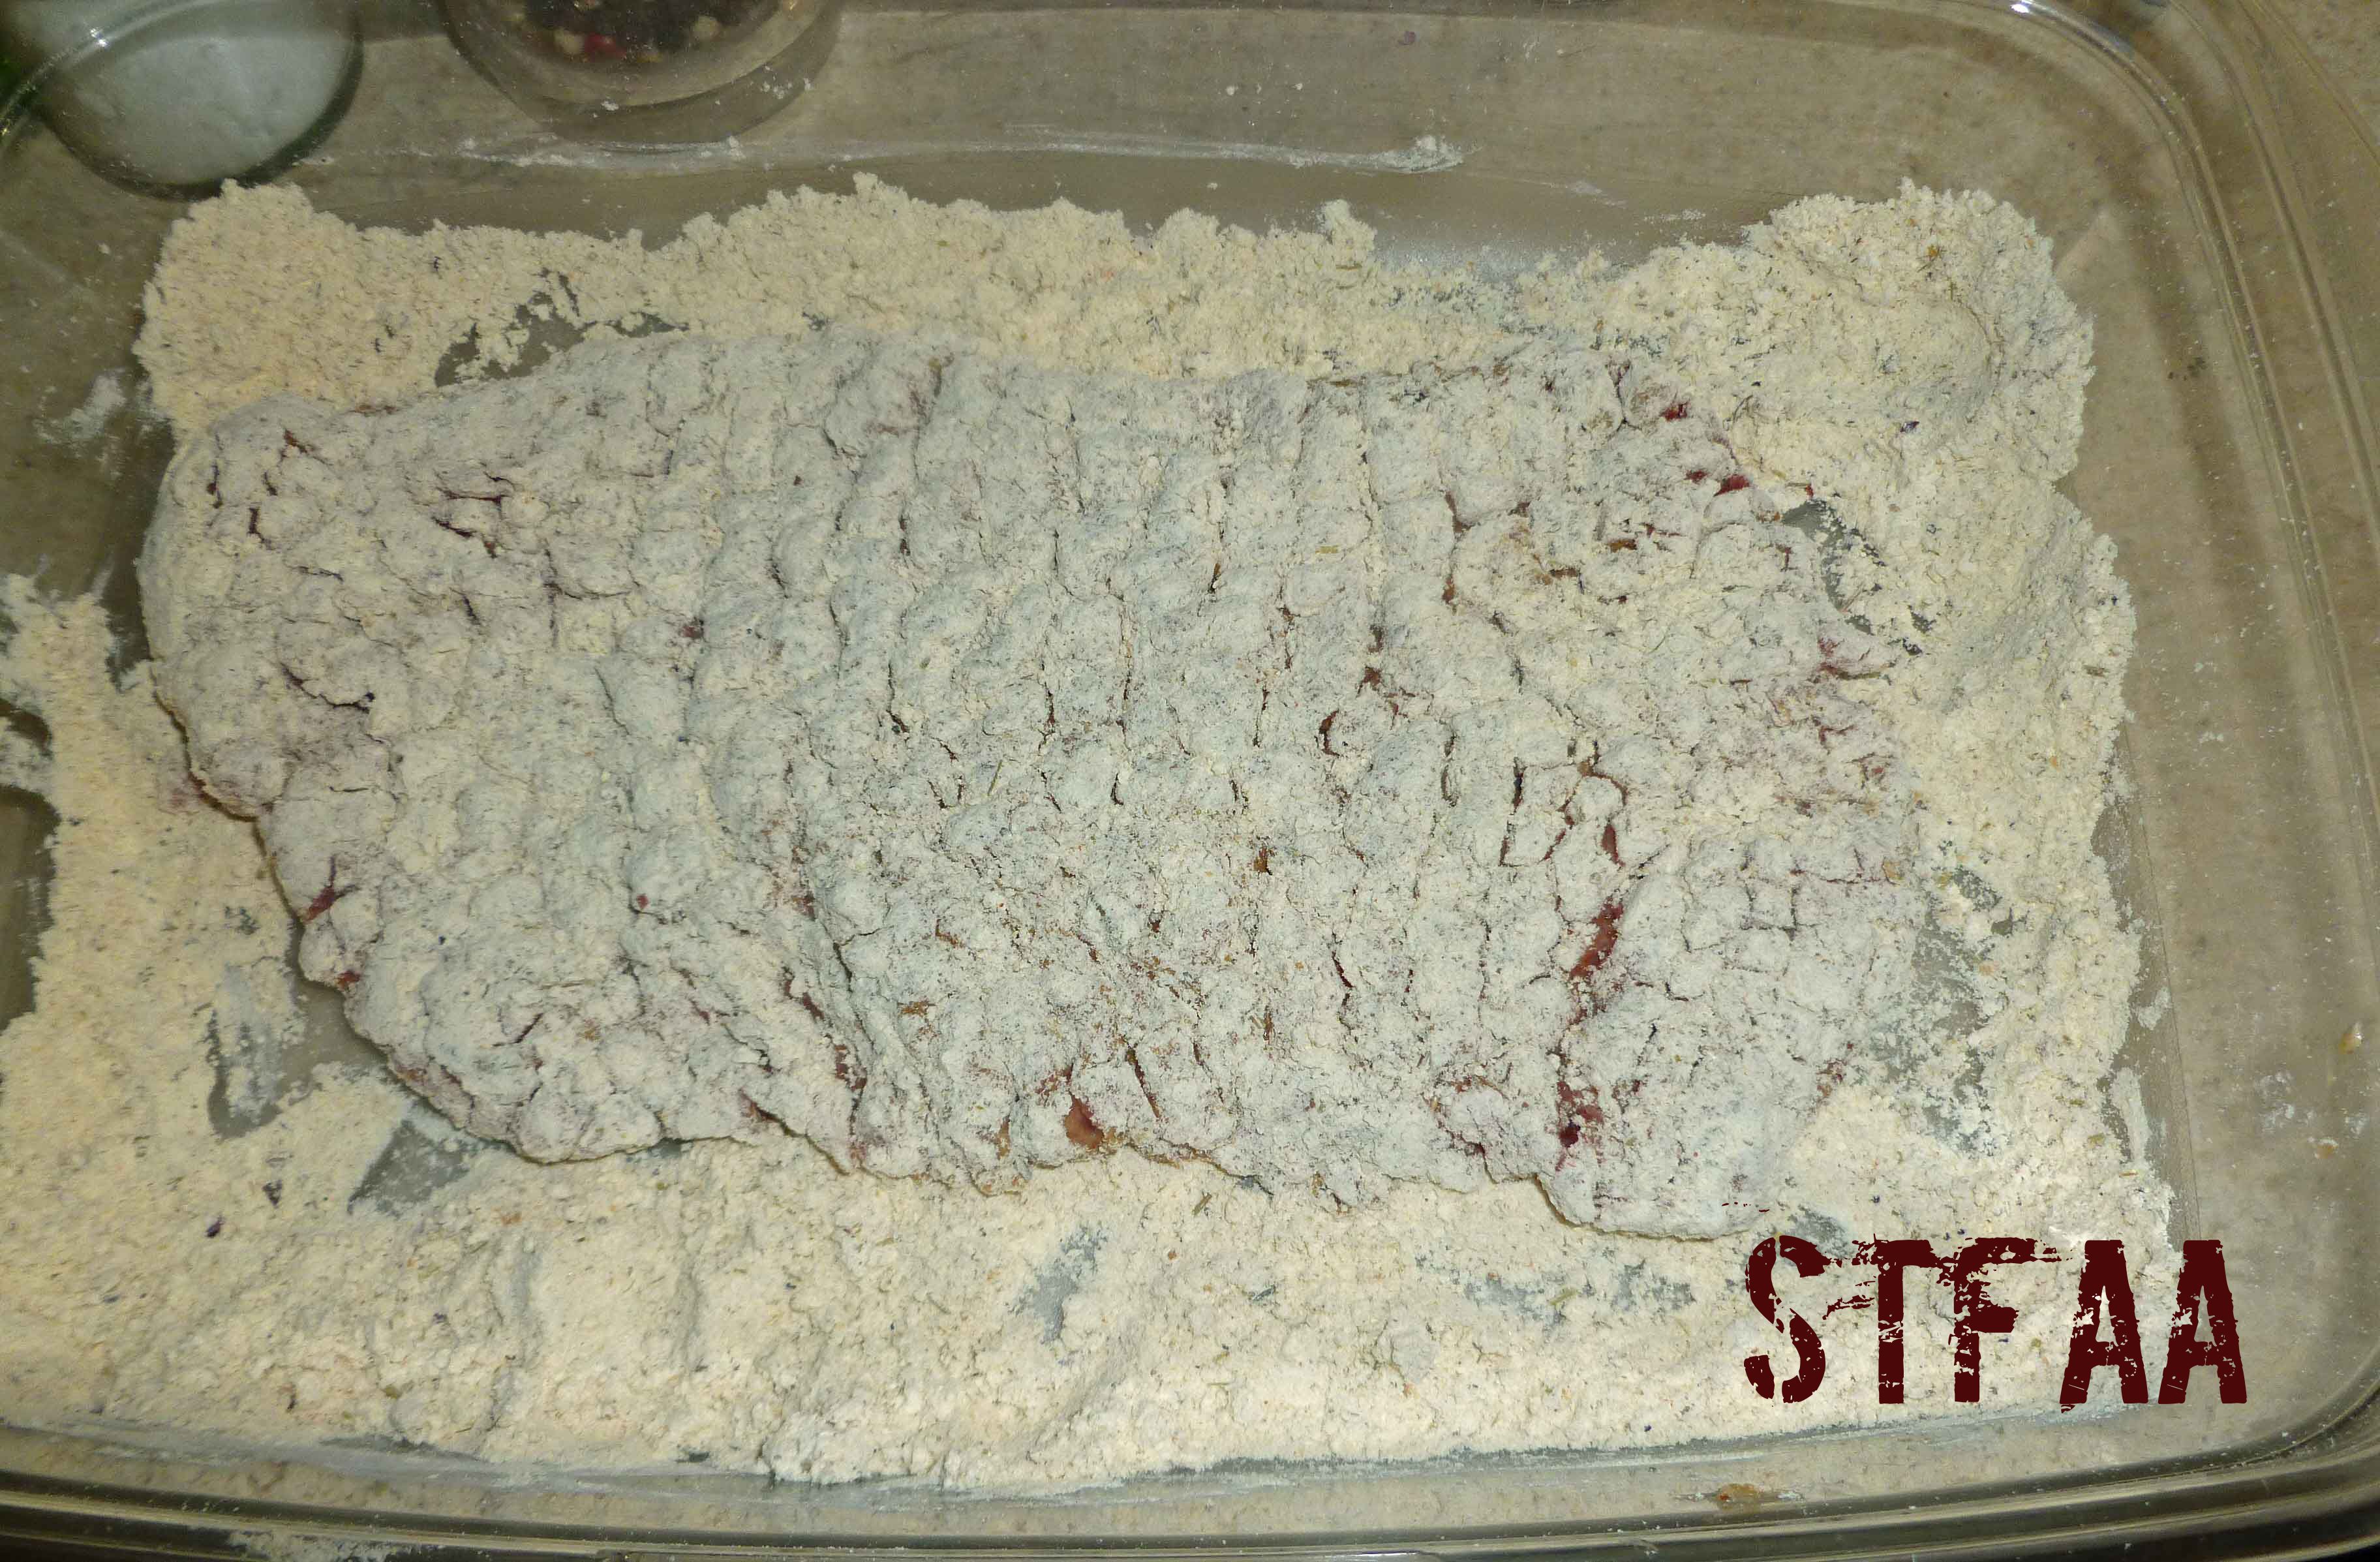
Then dredge the cube steak in the flour mixture.
Cube steak after first dredge in flour mixture
Place the cube steak in the aquafaba again and recoat it, and then re-dredge the cube steak in the flour mixture.
Cube steak after second dredge in flour mixture
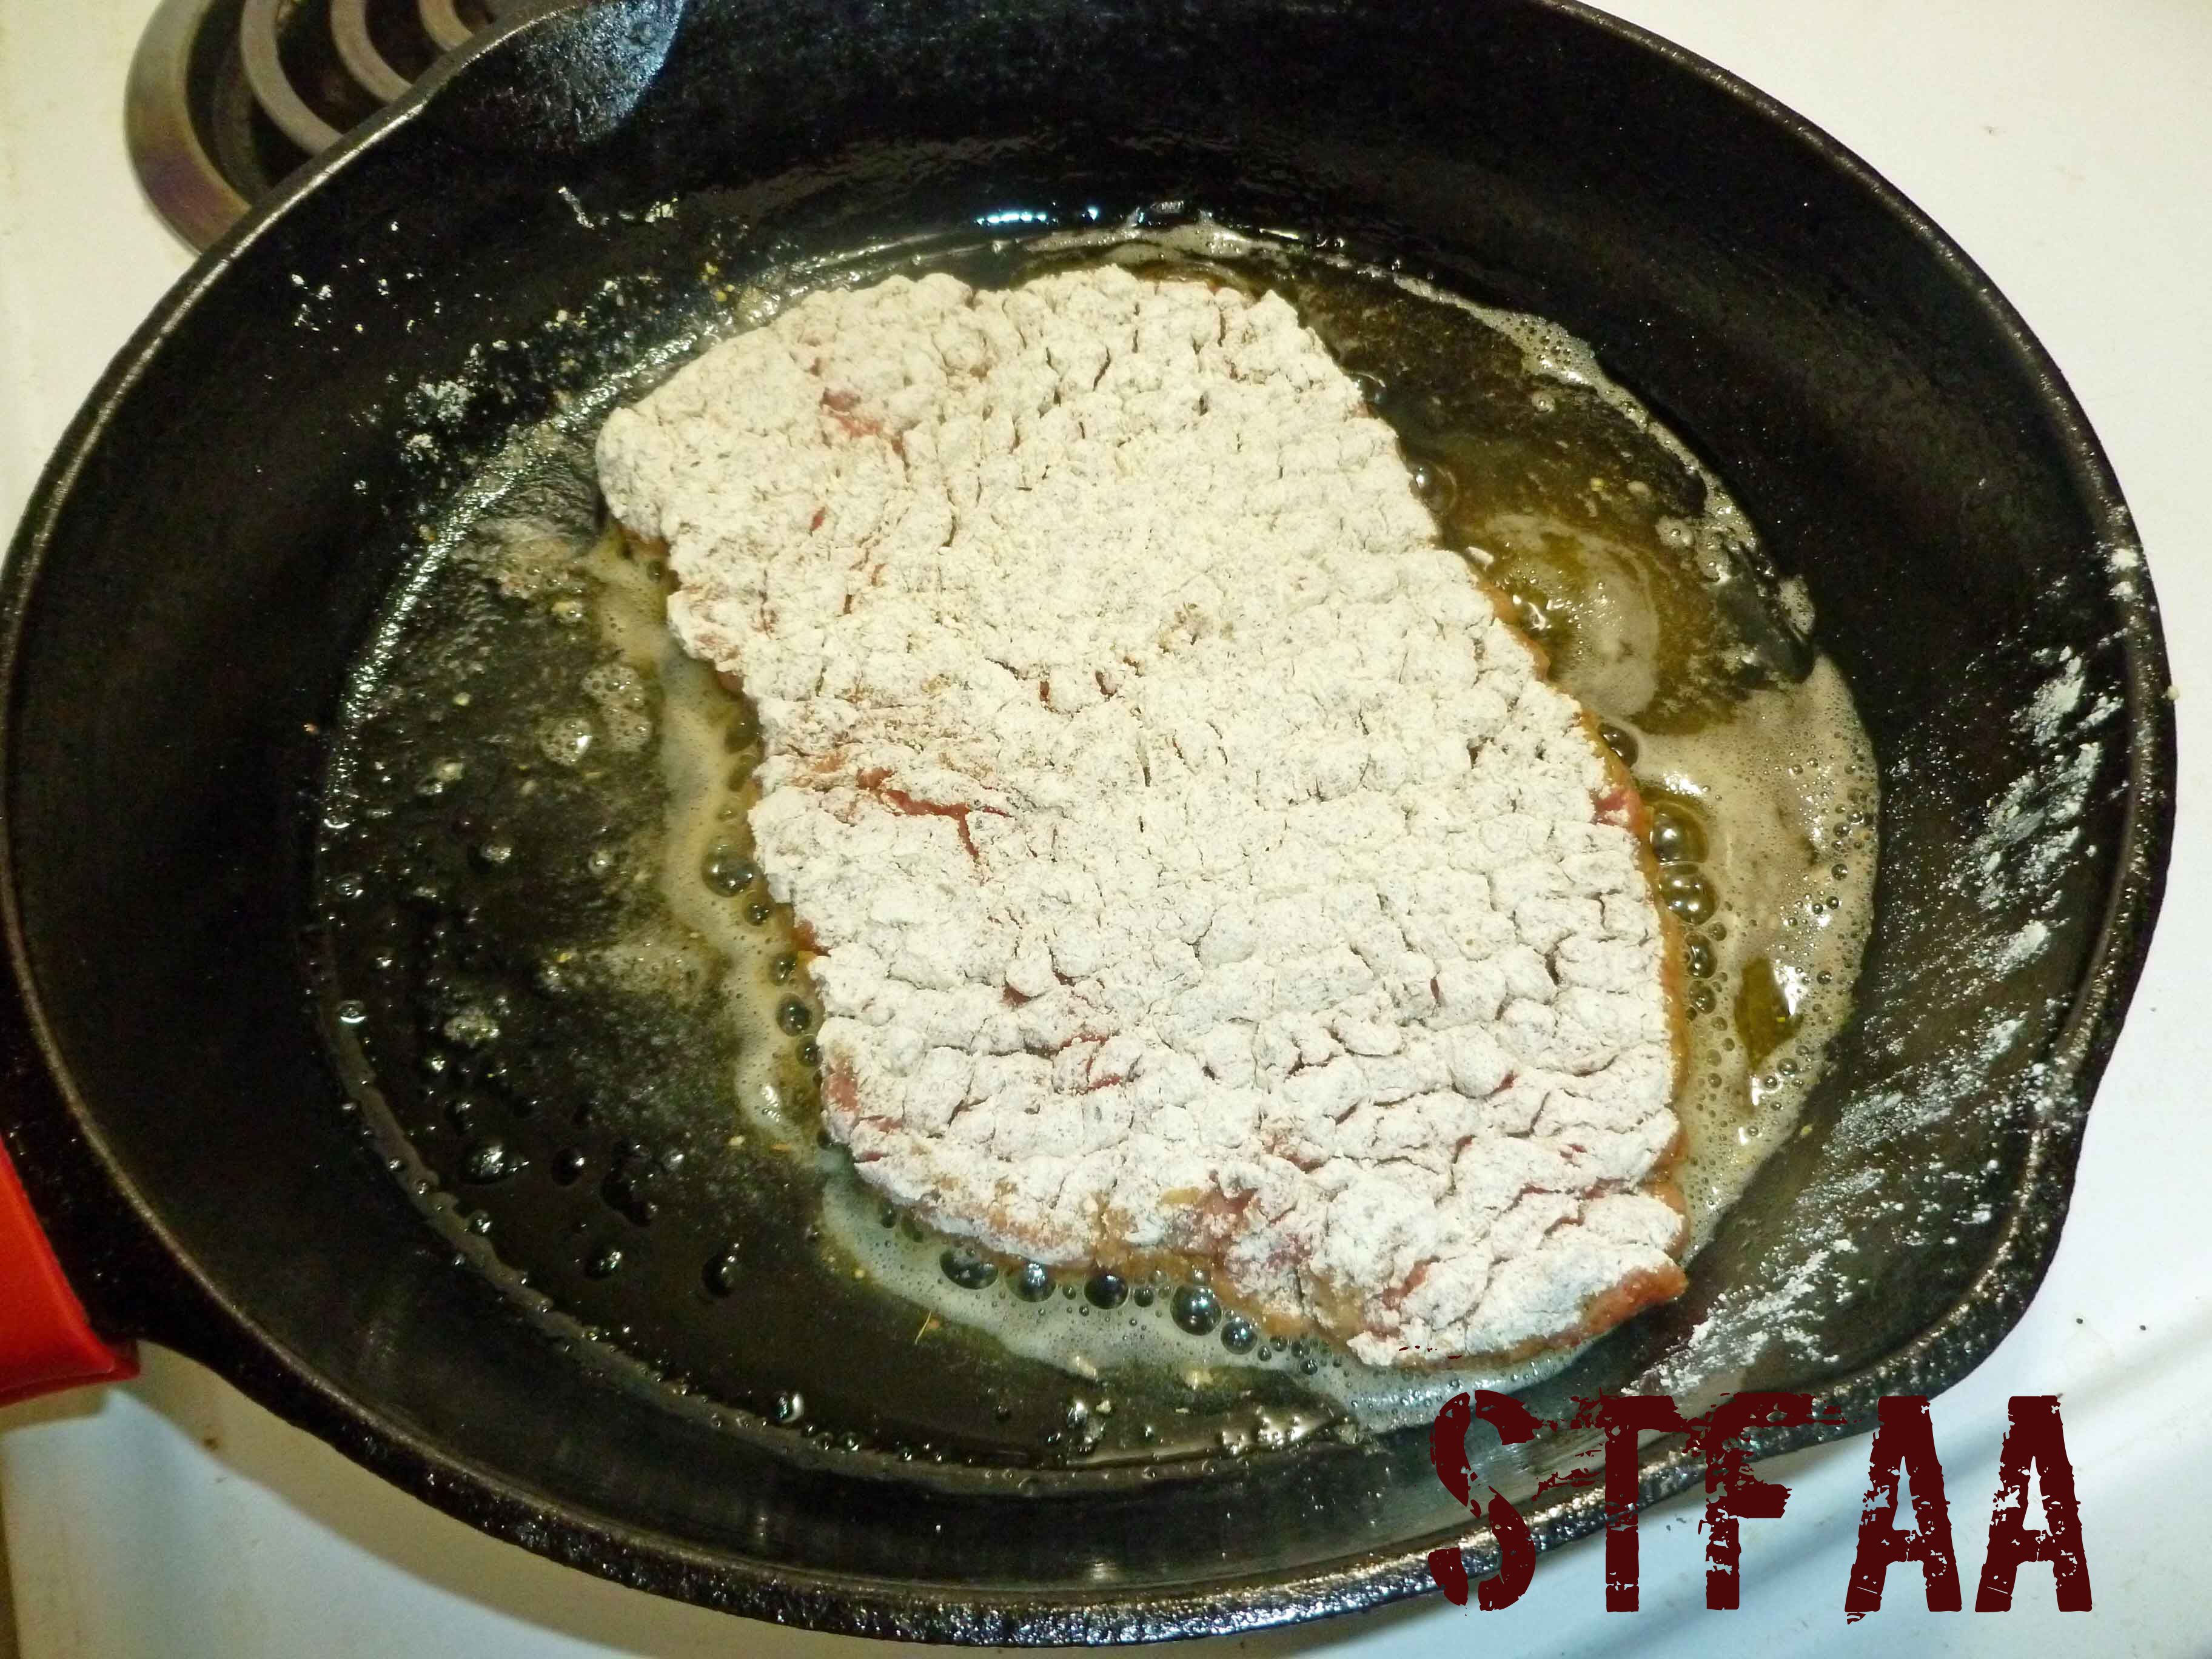
Once your fat/oil is hot, place the steak in the skillet.
Cube steak cooking in skillet
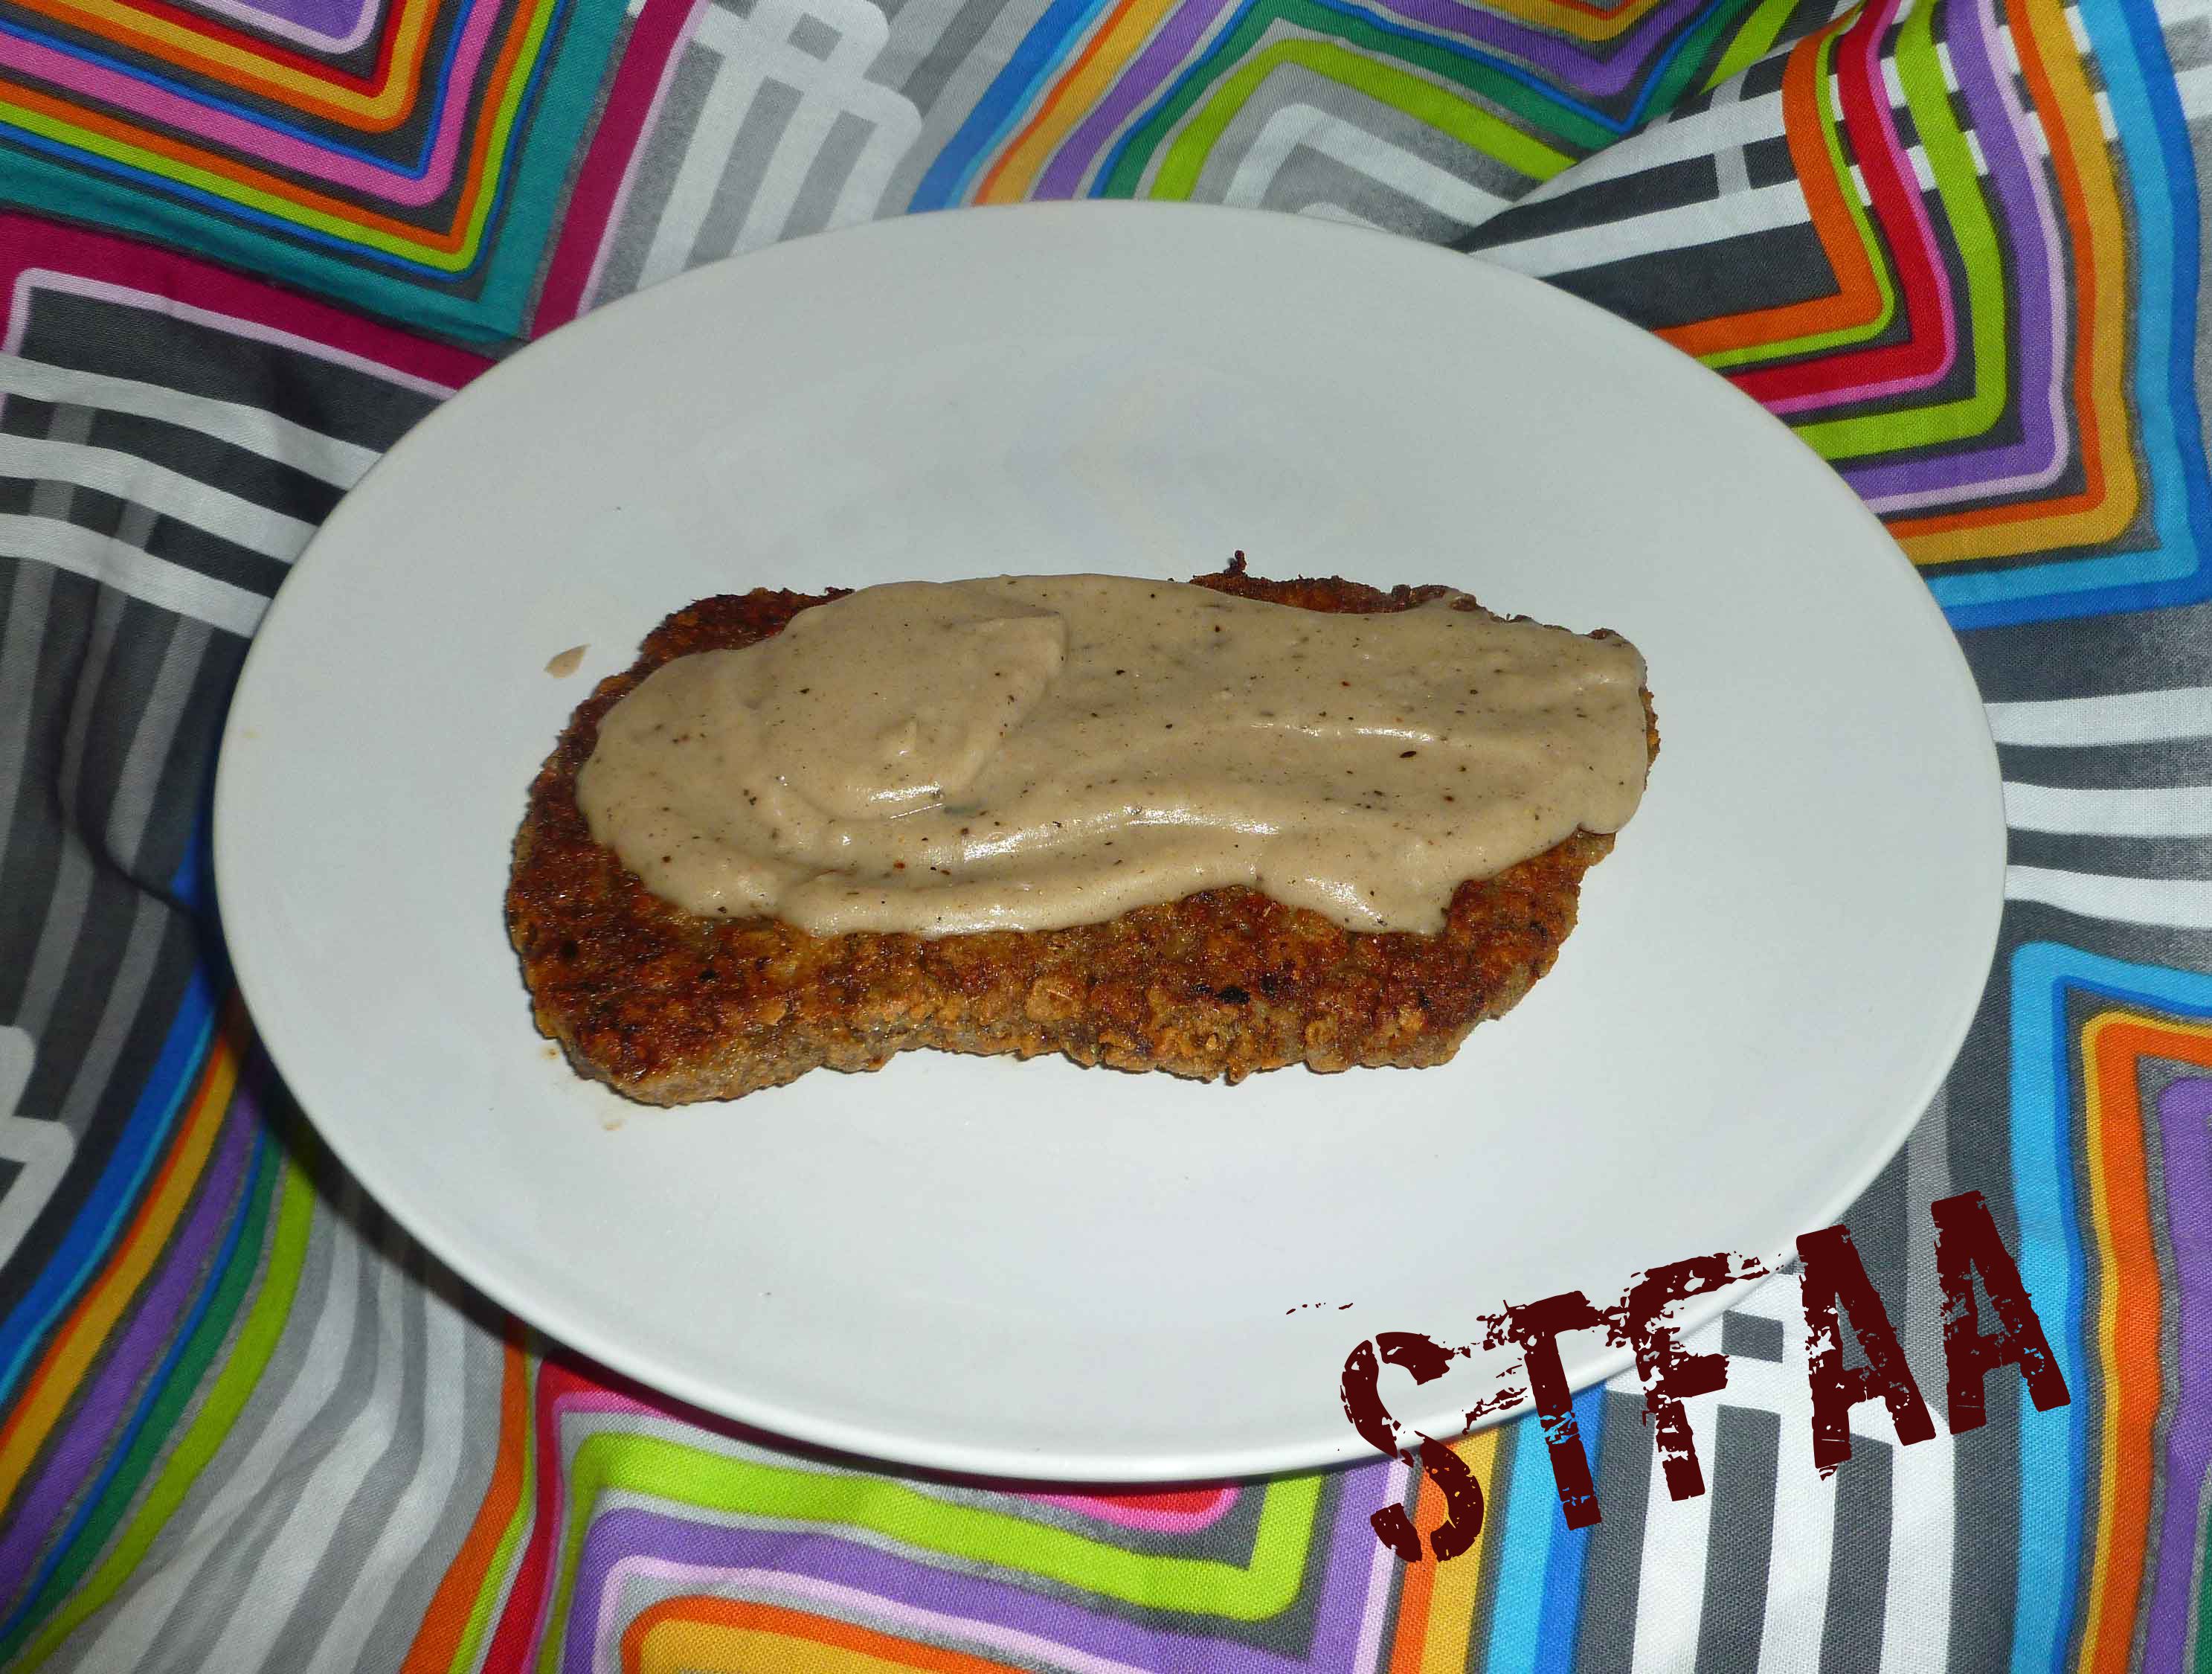
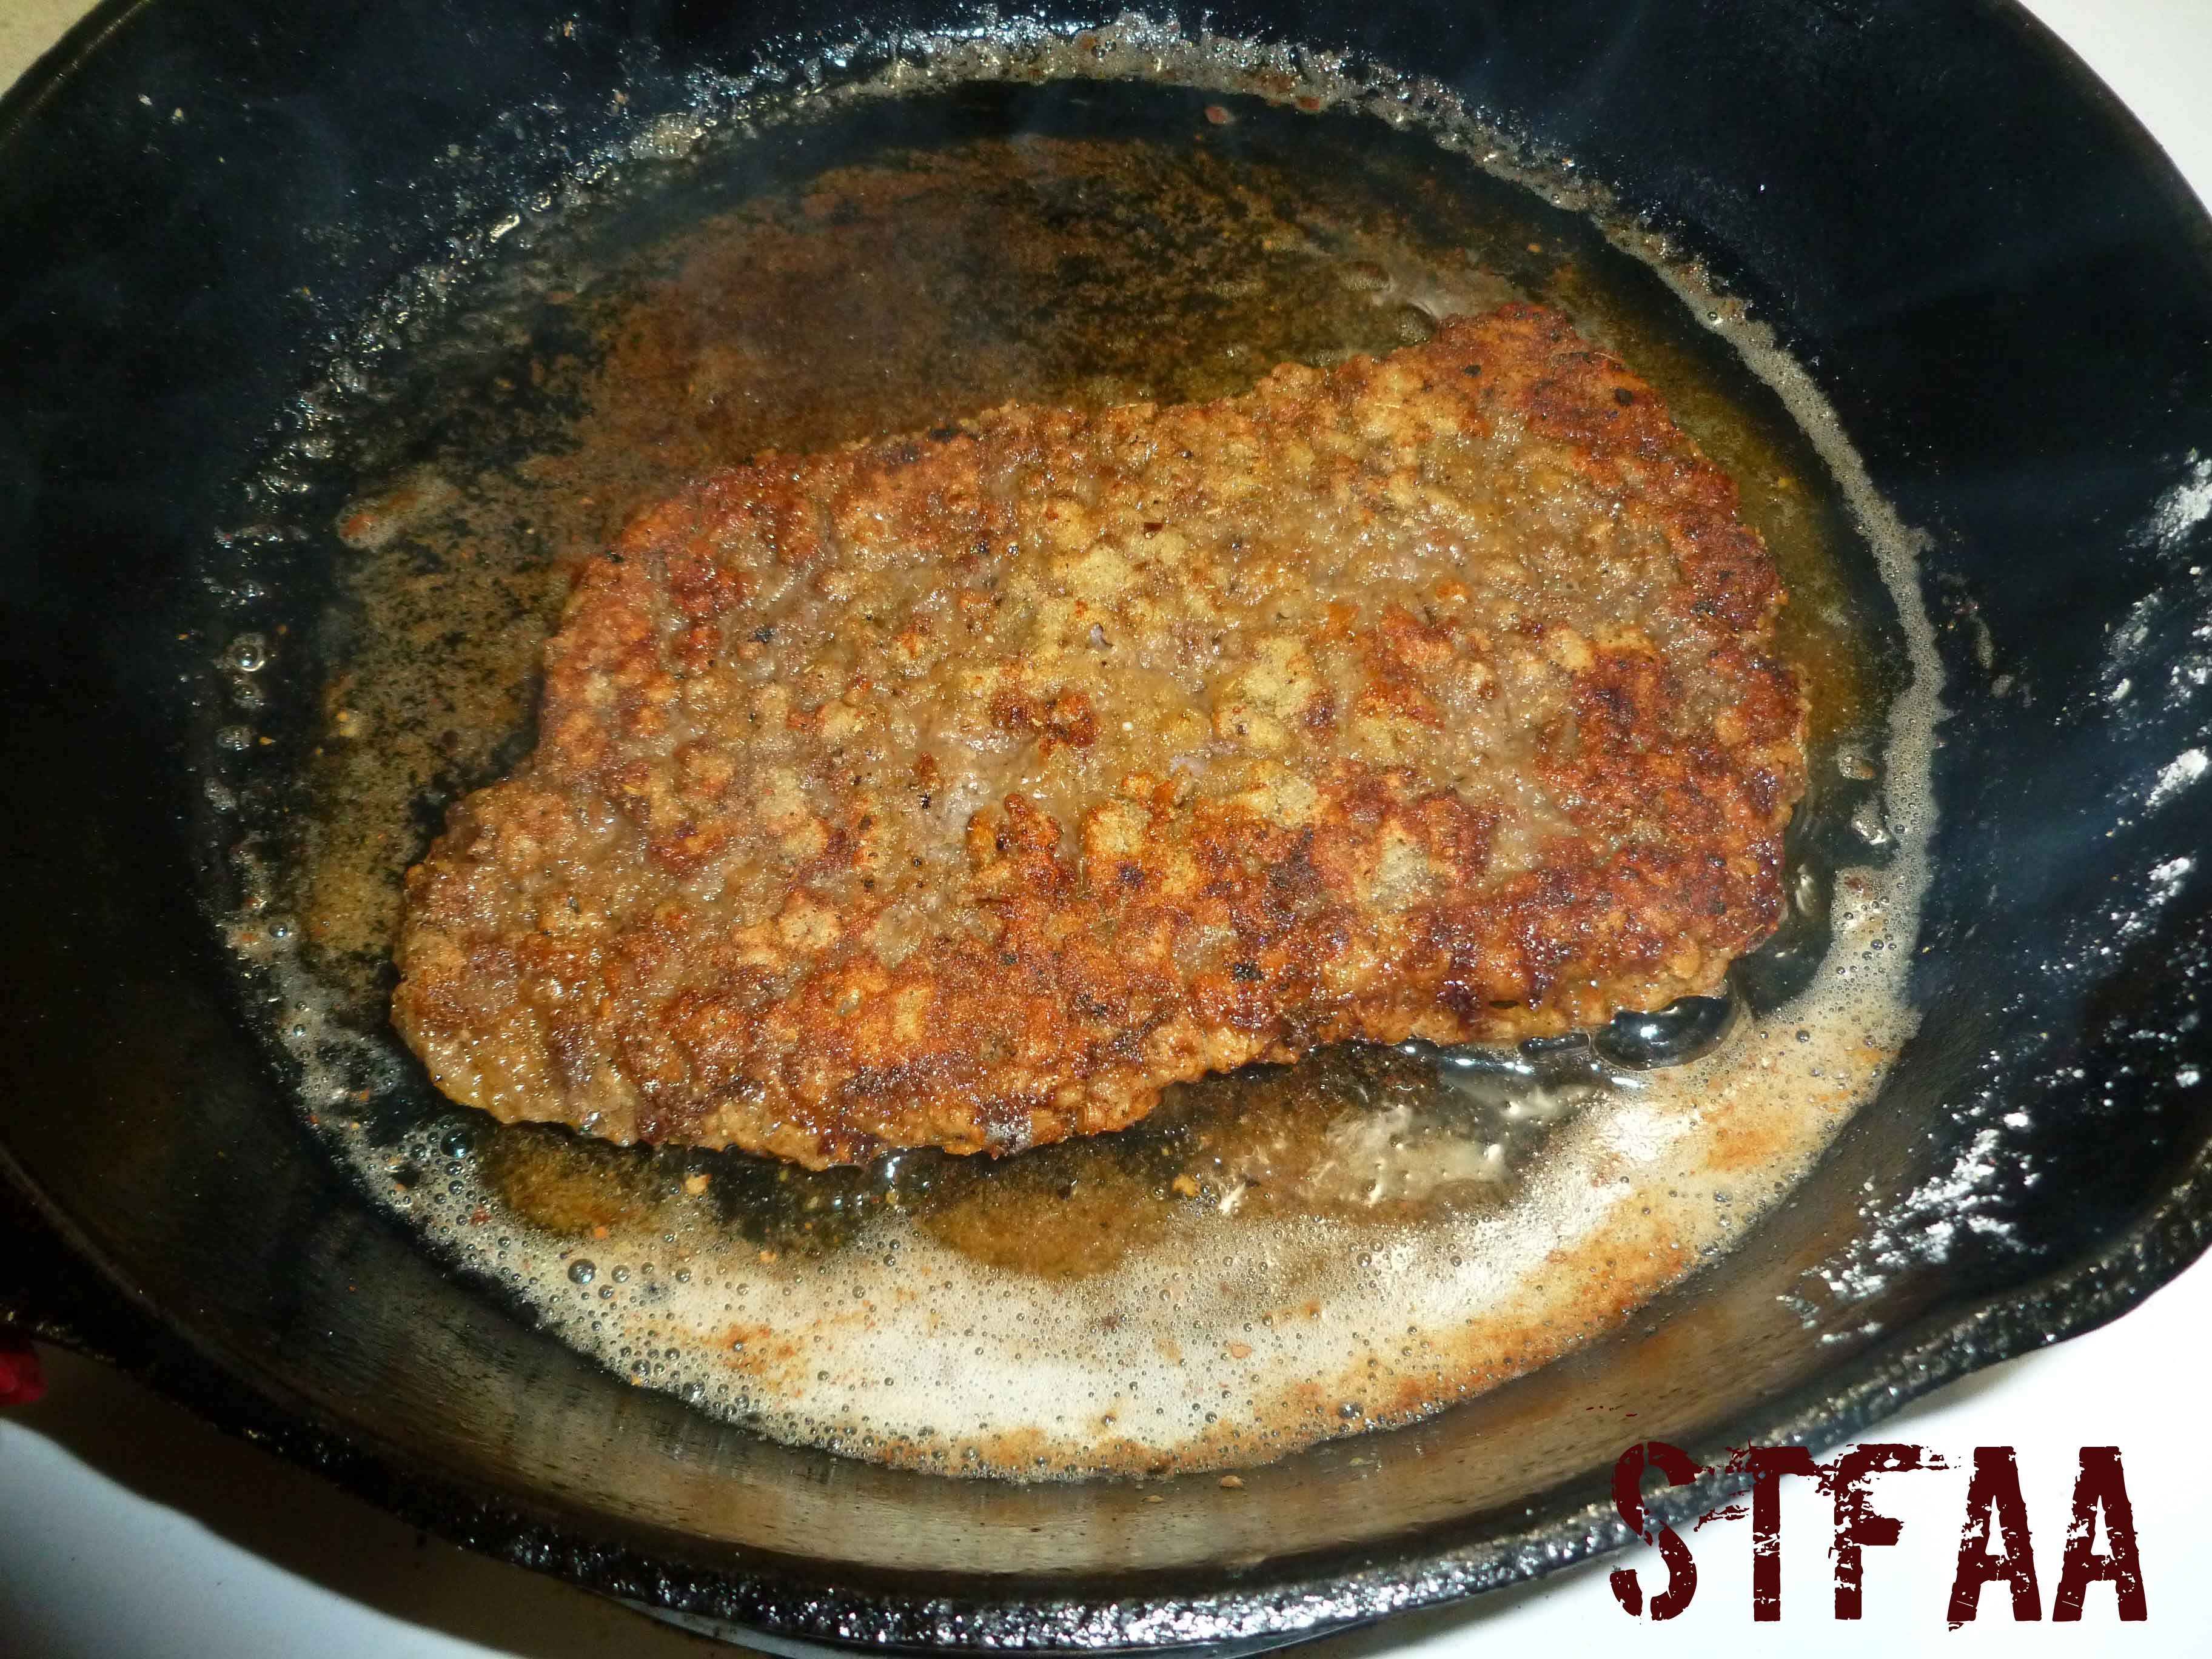
Cook for 3-5 minutes each side (depending on how hot your burner is), making sure the internal temperature reaches 160ºF, and until the coating is a lovely golden brown.
Cube steak with golden brown coating
White Pepper Gravy Instructions:
Remove the skillet that you cooked the Chicken Fried Steak from the heat and to allow it to cool down a bit.
Mix 1/4 cup of sorghum flour with cashew milk, 1/4 cup of the water (you can add more later if the gravy’s too thick), black pepper and salt, together in a mixing bowl, until well combined.
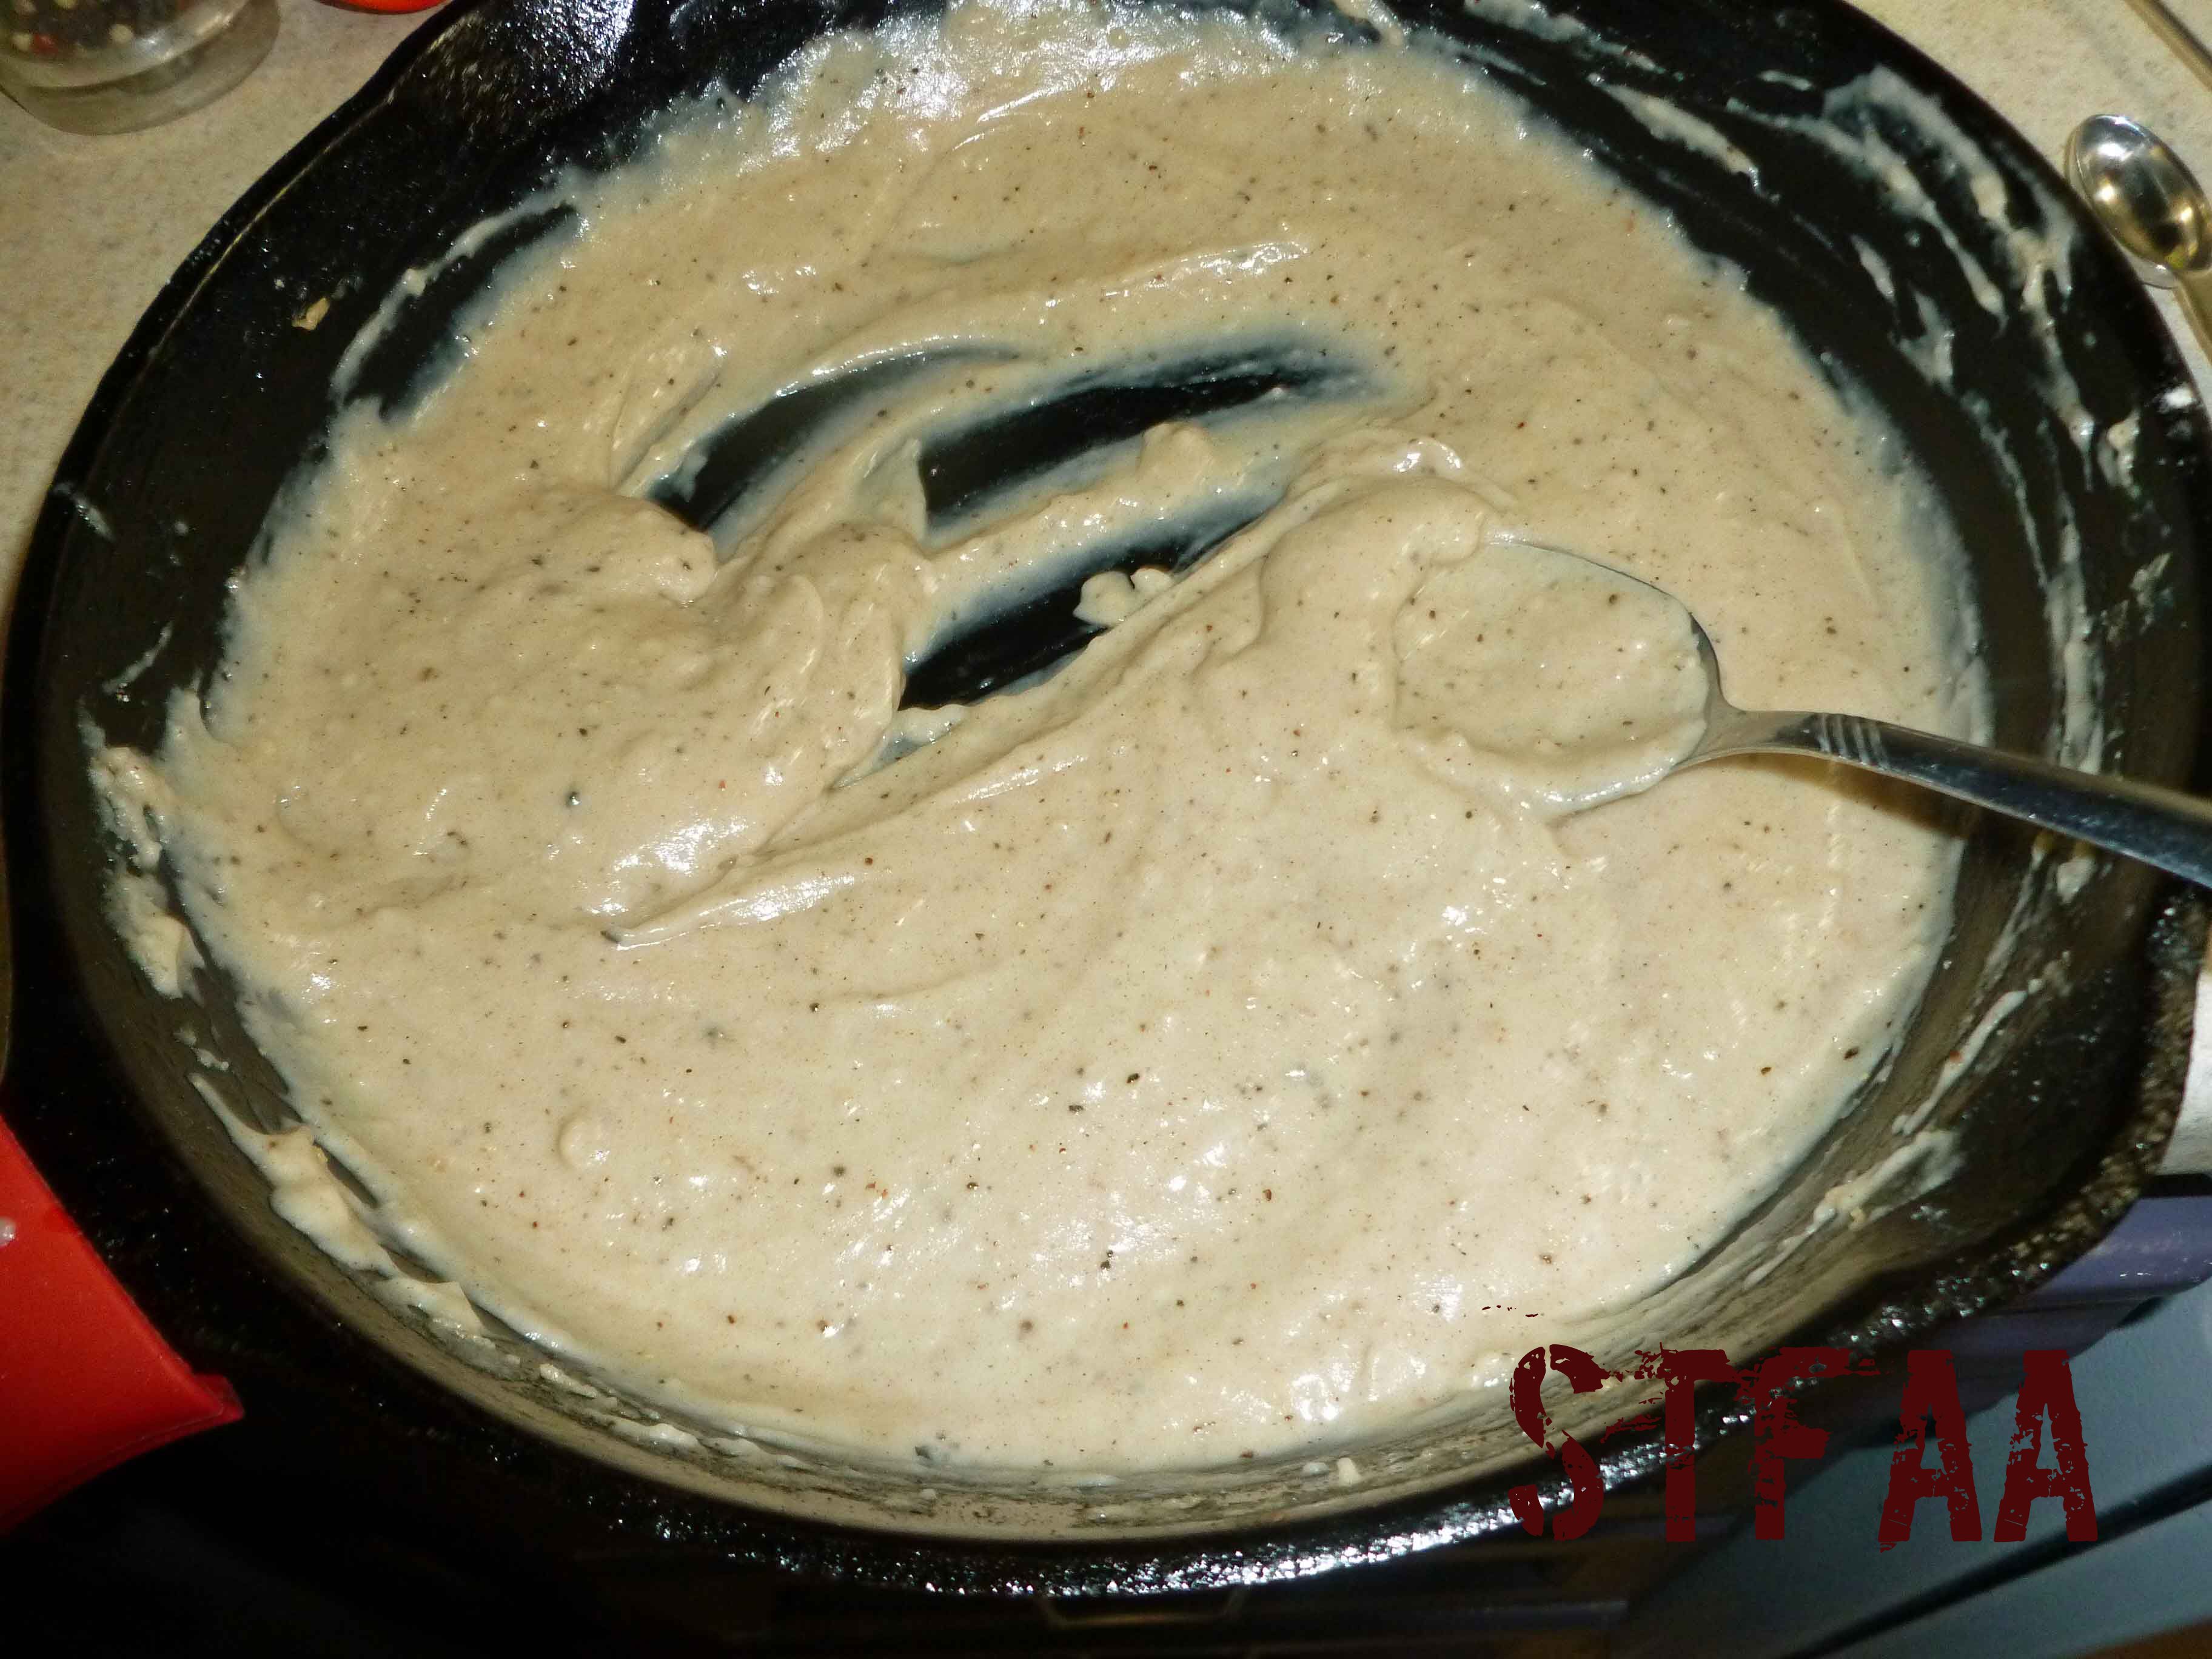
Place the skillet back on the burner with the drippings from cooking the Chicken Fried Steak still in it. Pour the flour and cashew milk mixture over the drippings, while whisking constantly over low heat, until the gravy thickens.
White Pepper Gravy after it thickens
Add more water if the gravy is too thick, whisking to incorporate the water, and add more salt and pepper to taste if necessary. Spoon over your Chicken Fried Steak and enjoy!
Chicken Fried Steak with White Pepper Gravy Notice: Trying to access array offset on value of type bool in /home/maryzahc/public_html/adultfoodallergies.com/wp-content/plugins/wp-ultimate-recipe/helpers/models/recipe.php on line 254
1tbspMontreal Steak Seasoning(see recipe on our blog)
2tbspaquafaba
2-3tbspbacon fat, lard, or safe for you oil
White Pepper Gravy
Drippings from frying Chicken Fried Steak
1/4 cupsorghum flour
1cupcashew milk or other dairy free milk
1/4 to 1/2 cup water
1/4tspground black pepper
1/4tspsalt
Servings: people
Instructions
Chicken Fried Steak
For Chicken Fried Steak, place 1/4 cup of sorghum flour, 1/4 cup of garbanzo bean flour, and the Montreal Steak Seasoning in a large shallow dish that will allow you to coat the cube steak easily. Mix the sorghum flour, garbanzo bean flour and Montreal Steak Seasoning together until they are well combined. Place the aquafaba in another large shallow dish that will allow you to coat the cube steak easily.
Place your bacon fat, lard, or safe oil in a skillet, and place the skillet on a burner over medium heat. While your fat/oil heats, take your cube steak and coat it in the aquafaba. Then dredge the cube steak in the flour mixture. Place the cube steak in the aquafaba again and recoat it, and then re-dredge the cube steak in the flour mixture. Once your fat/oil is hot, place the steak in the skillet. Cook for 3-5 minutes each side (depending on how hot your burner is), making sure the internal temperature reaches 160ºF, and until the coating is a lovely golden brown.
White Pepper Gravy
Remove the skillet that you cooked the Chicken Fried Steak from the heat and to allow it to cool down a bit. Mix 1/4 cup of sorghum flour with cashew milk, 1/4 cup of the water (you can add more later if the gravy’s too thick), black pepper and salt, together in a mixing bowl, until well combined. Place the skillet back on the burner with the drippings from cooking the Chicken Fried Steak still in it. Pour the flour and cashew milk mixture over the drippings, while whisking constantly over low heat, until the gravy thickens. Add more water if the gravy is too thick, whisking to incorporate the water, and add more salt and pepper to taste if necessary. Spoon over your Chicken Fried Steak and enjoy!
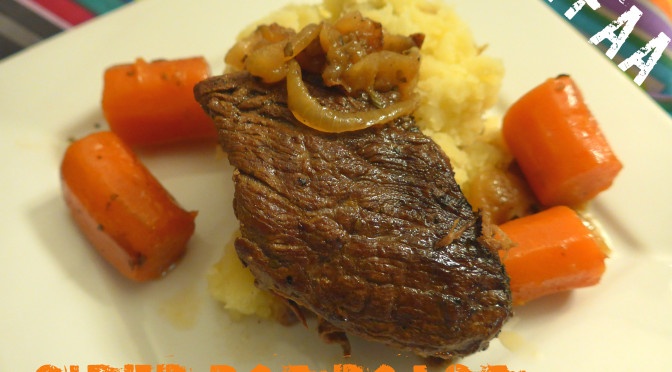
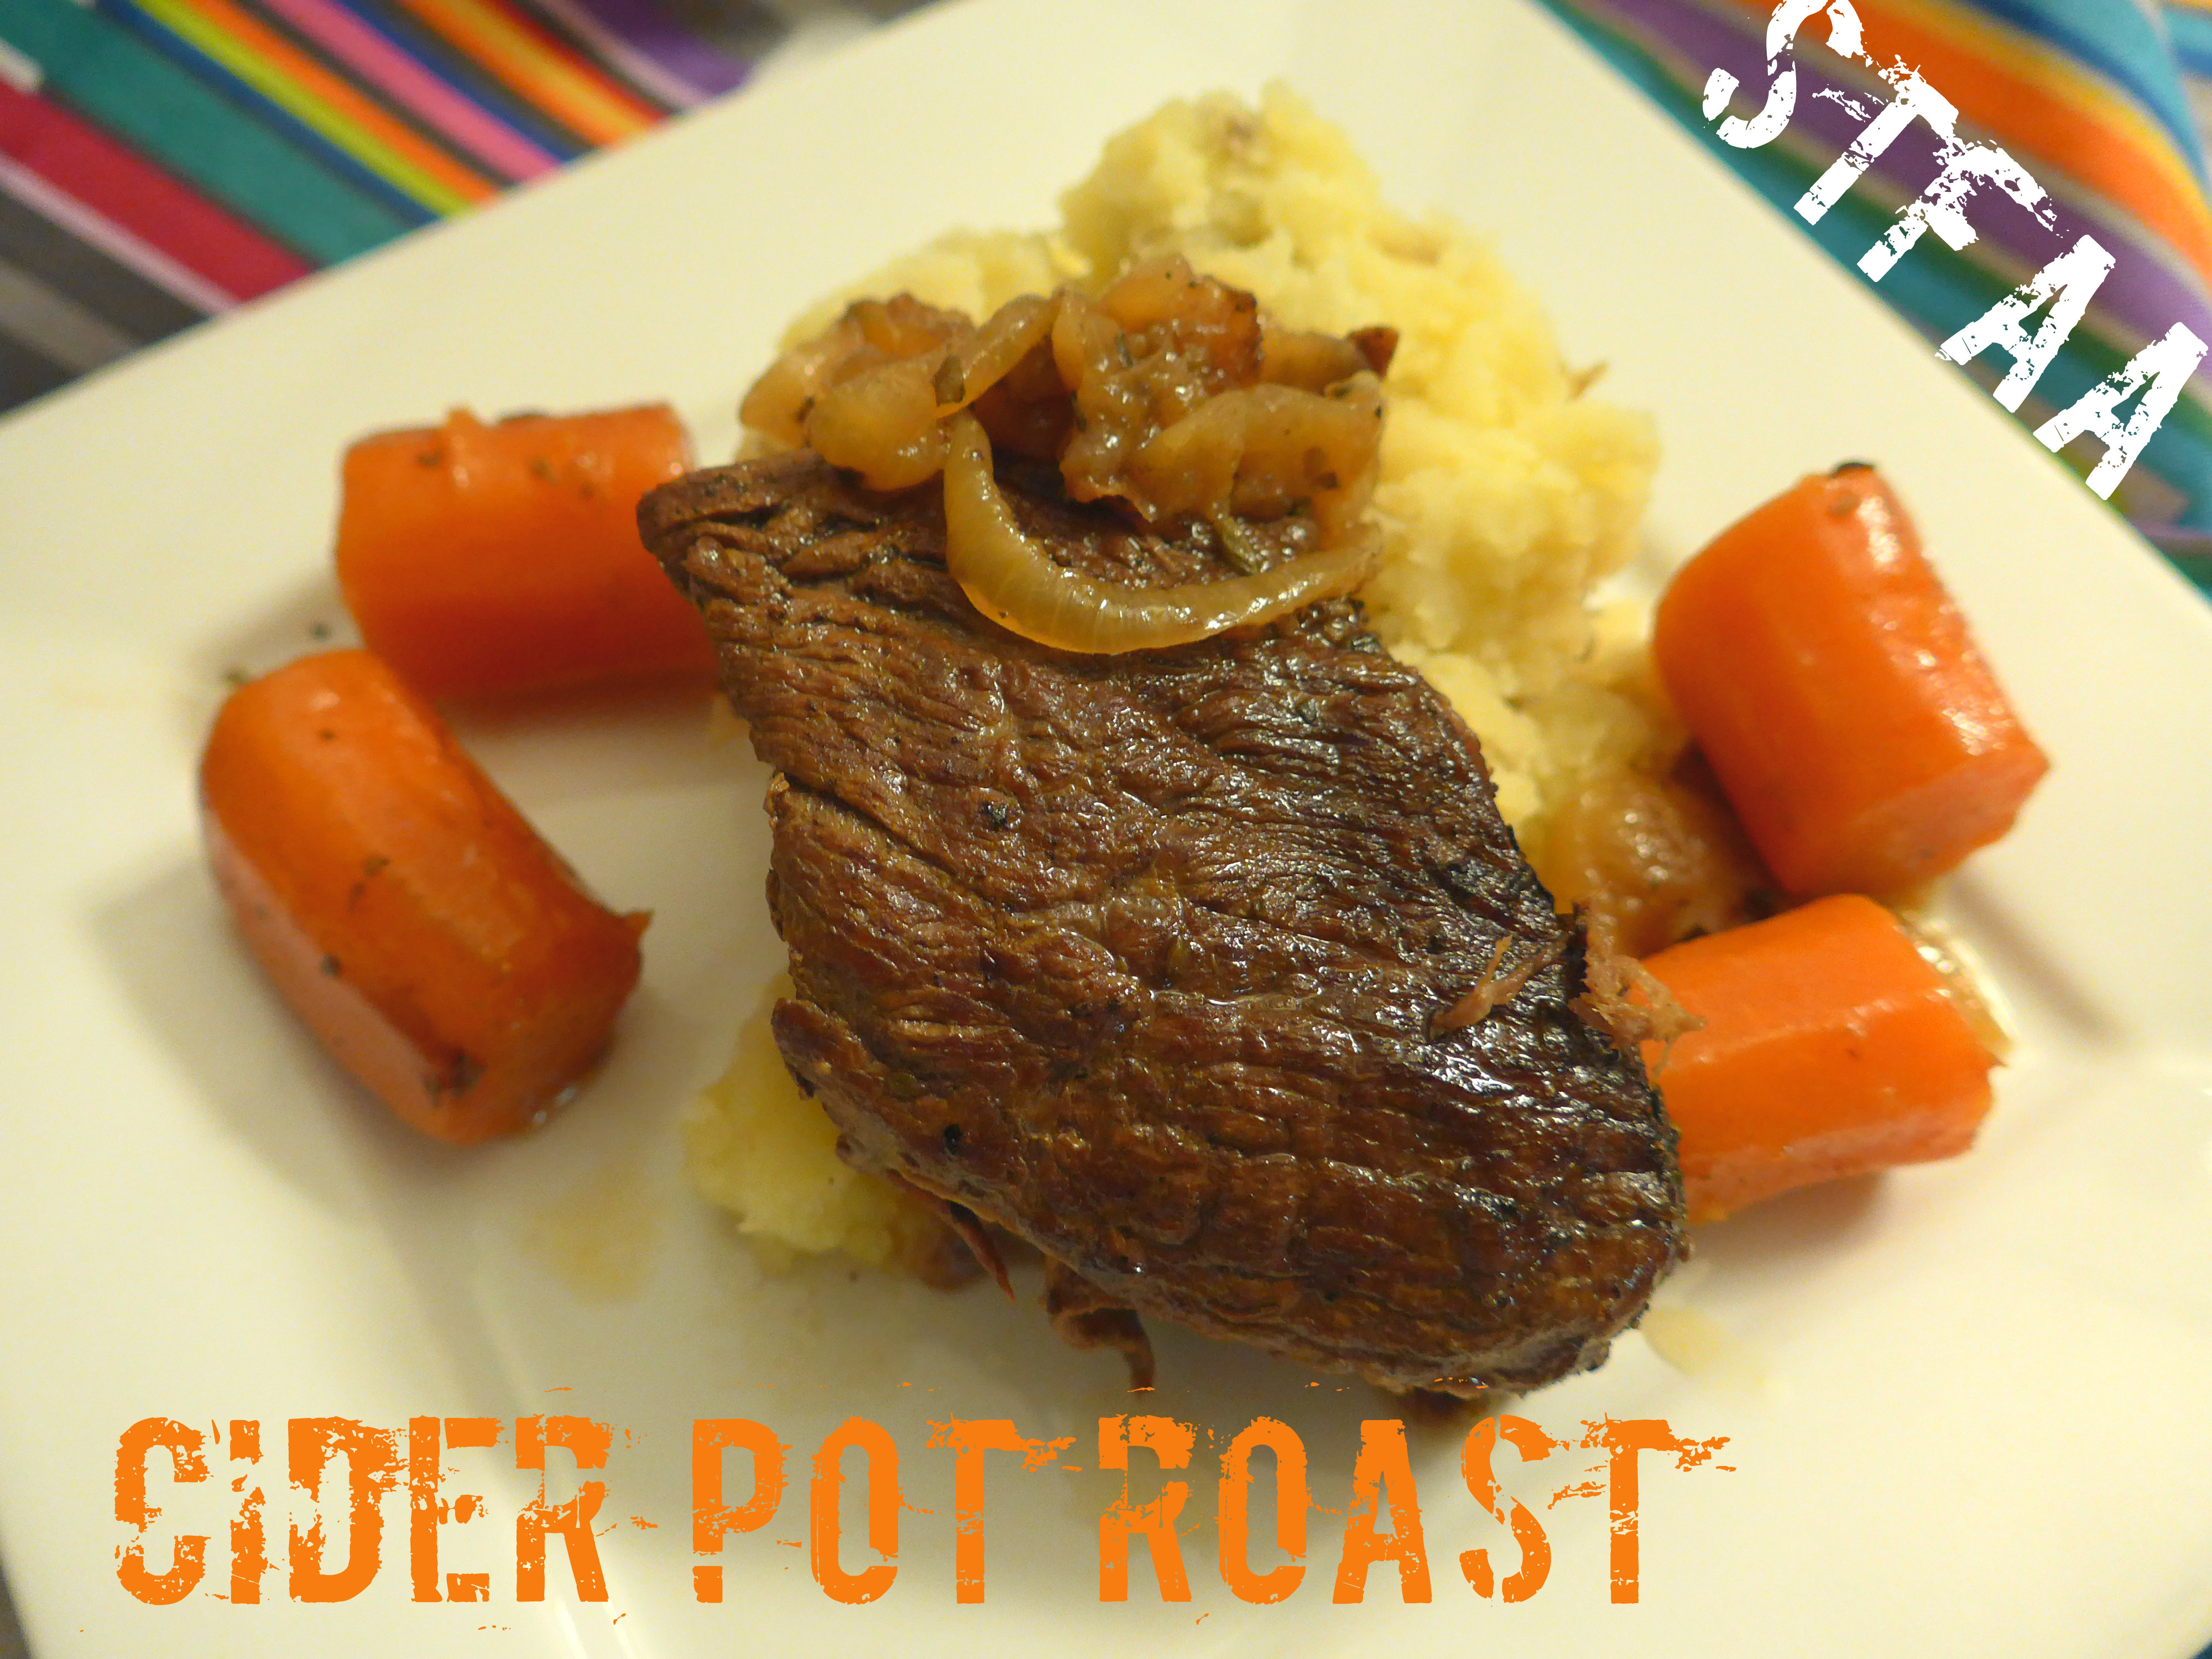
While I know there are people out there who dream of steak dinners, prime rib, or some other fancy cut of cow, my all-time favorite beef dinner is a good pot roast. I’ve been wanting to post a pot roast dinner to the blog for years now, but I hadn’t figured out how to get the right flavor and texture.
Pot roast should be falling apart, fork-tender meat. The onions and carrots should be flavorful, and the braising liquid should be able to be a gravy with no added flavor, only thickening (and I almost never bother). I have made countless pot roasts that have not met this bar. I’ve tried gluten-free beer, wines, beef and chicken broth, and seasoned water. Eh. Everything was edible, but nothing was great.
This time, I tried hard apple cider, Farnum Hill Dooryard Cider, in fact, which is local to New Hampshire. I’m not sure how easy it might be to find elsewhere, but it is gluten-free and safe for me. This cider tends towards dryness, rather than sweetness, which is ideal for this application. See what you can find, and make sure you taste it before cooking with it.
When I tasted this, I ended up going in a slightly different direction with herbs. I did try this with the more traditional thyme, and it was good, but oregano and apple cider was the winning combination for me. Another good reason to taste your ingredients!
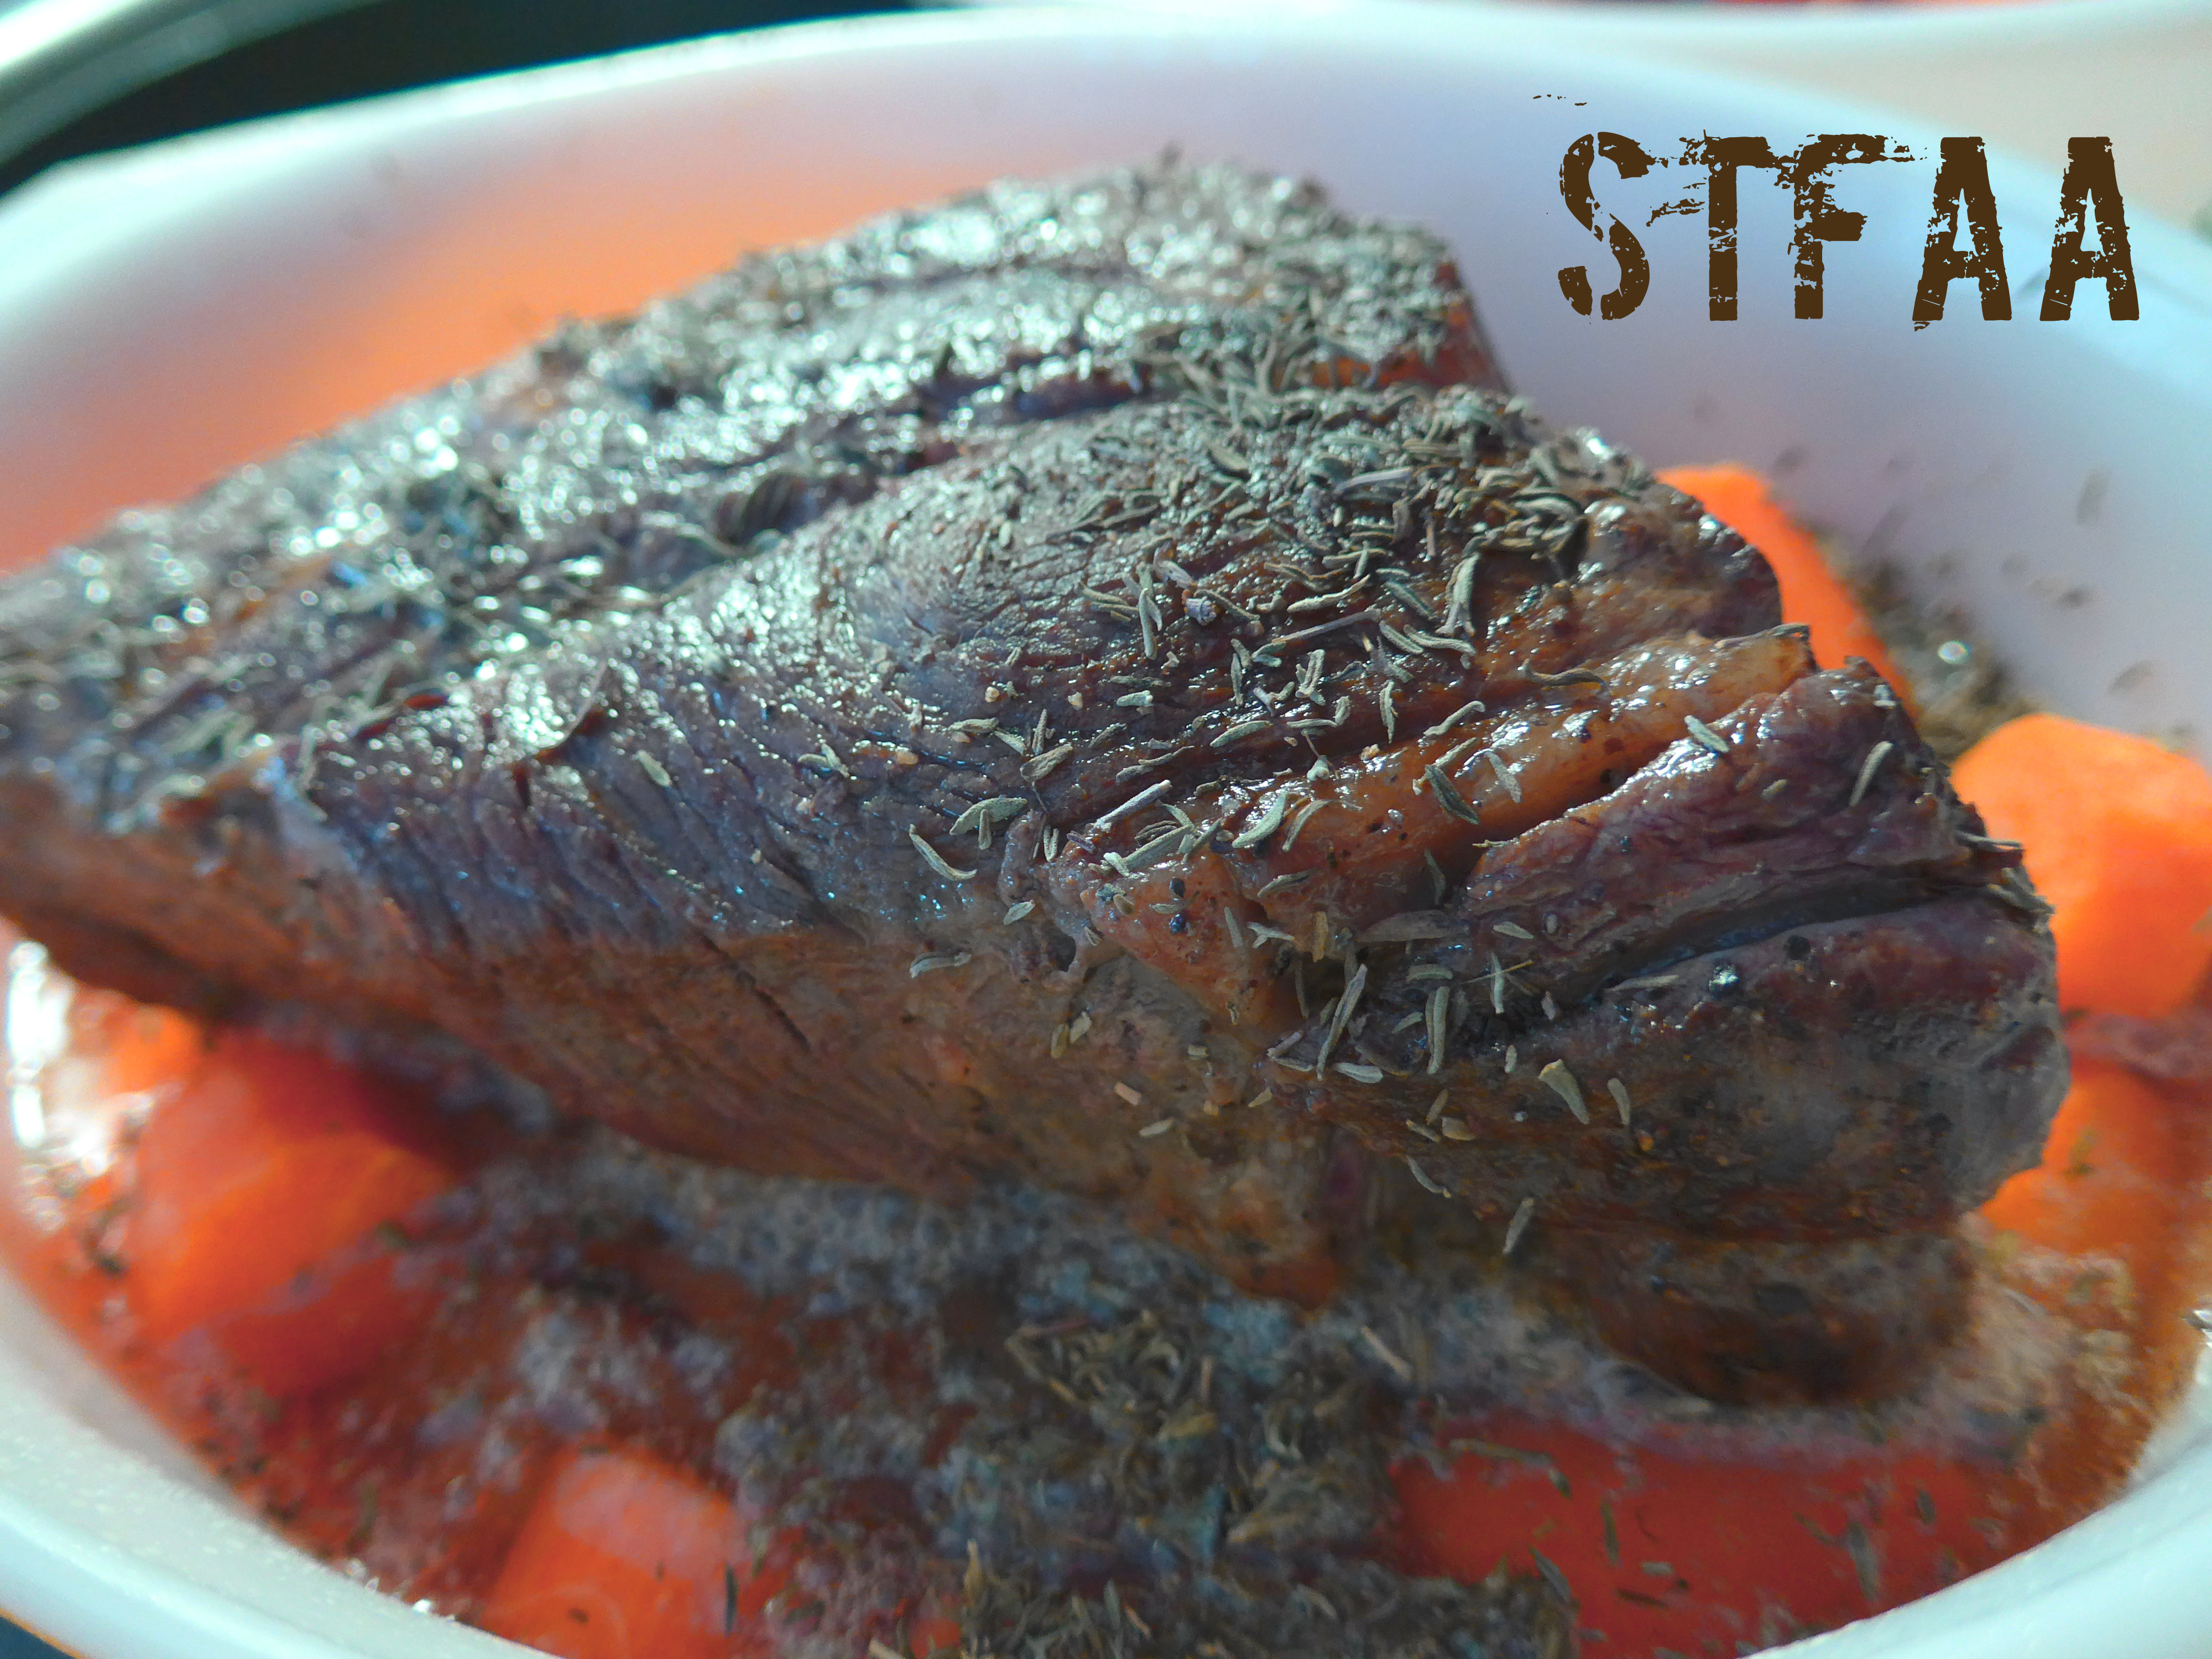
Preparing pot roast for baking. Keen eyes may pick up that this is the thyme-covered roast, not the oregano in the recipe. You’d be correct — this photo just turned out much better.
The beef is browned before baking, and it’s cooked with browned onions and carrots, and served over simple smashed potatoes. The recipe lists 3 carrots, but honestly, add as many as your casserole or Dutch oven will hold, as they are amazing. If you prefer to enrich your potatoes with safe margarine and non-dairy milk, feel free — I think they soak up more pan juices without those, though. Anyway, I hope you enjoy this recipe as much as I do.
Notice: Trying to access array offset on value of type bool in /home/maryzahc/public_html/adultfoodallergies.com/wp-content/plugins/wp-ultimate-recipe/helpers/models/recipe.php on line 254
Cider Pot Roast
Print Recipe
This is the pot roast of my childhood — tender meat that you don’t need a knife to eat, slathered in onions, best served over mashed potatoes. In this recipe, I found that hard cider made a good gluten-free substitution for beer.
This is the pot roast of my childhood — tender meat that you don’t need a knife to eat, slathered in onions, best served over mashed potatoes. In this recipe, I found that hard cider made a good gluten-free substitution for beer.
1Tablespoonfatolive oil, bacon fat, whatever you want to use is good here
1.5 lbs.boneless chuck roast
salt and pepperto taste, but be generous
3carrots(actually,I’d add as many as your pot will hold, cut into large chunks)
1teaspoonoregano
1cup hard apple cidermake sure your brand is safe for you
1/4cup water
1lb.potatoes, mashedmake them however you like them
Servings: people
Instructions
Turn your oven on at 325 degrees Fahrenheit.
If you have a stove-top to oven-safe dutch oven or other casserole, this is a good recipe to use it. I do not, so I start out in a skillet, and then transfer to a lidded casserole dish. Either way, heat your pan over medium heat, and add the oil or fat.
When the oil is hot, add the onions, frying until they start to brown. When they are all translucent and/or browning (15-20 minutes, stir regularly), remove from the pan. If you’re using a casserole for the baking, transfer them directly there (I advise you lightly grease the dish AND lid).
Turn up the heat just a bit (medium-high). Salt and pepper all sides of your roast liberally, and use freshly ground pepper if you can. Then brown each side. You don’t have to brown the short sides, but it tastes better if you do. Plan on 3-5 minutes per side.
Now either add the browned beef to your greased casserole dish that has onions at the bottom, or add the onions back to the pot (but not on top of the beef). Add your carrots around the sides of the beef.
Sprinkle the oregano over the top of the dish. Then add the cider and water along the side. I like to have the herbs bake to the top of the meat, so don’t wash them off with the cider.
Cover and bake the pot roast for 2-3 hours. Two and a half is a good estimate, as it gives the meat time to braise and for all the fibers in the meat to break apart. Check on it at 2 hours for two things — using a meat thermometer, see if it’s done (170F/77C for well done, and this is pot roast), and then see if the meat is tender. Cook longer if needed. You can definitely turn off the oven and let the casserole continue in the pre-heated oven for the last 30 minutes, provided that the meat has reached its internal temperature.
For the potatoes, I prefer the simplest preparation — cook whole potatoes in salted water until a knife stuck through the center shows they are done. Then drain and smash, adding nothing. These are the perfect potatoes for absorbing other flavors, as the texture is a bit fluffier than traditional mashed potatoes. But make the potatoes you love.
Serve meat and onions and carrots over potatoes, with plenty of the juice from the pan.
I’m not a big holiday celebration person, but I do like cooking special food for special occasions. Christmas, growing up, was always a special meal, but it wasn’t one specific thing. For years, Christmas Eve was Welsh Rarebit (something like this recipe — completely not allergy-friendly beer cheese sauce over toast), and then it was stir fry.
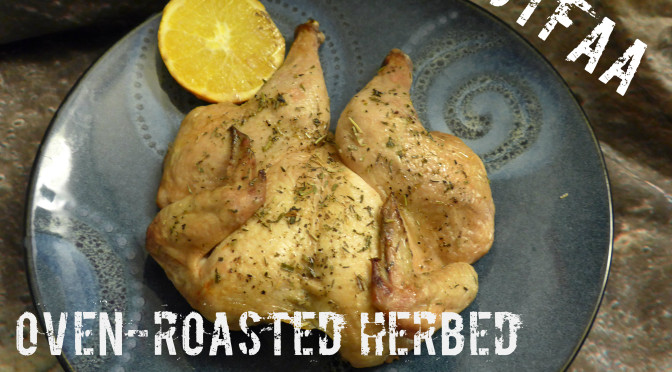
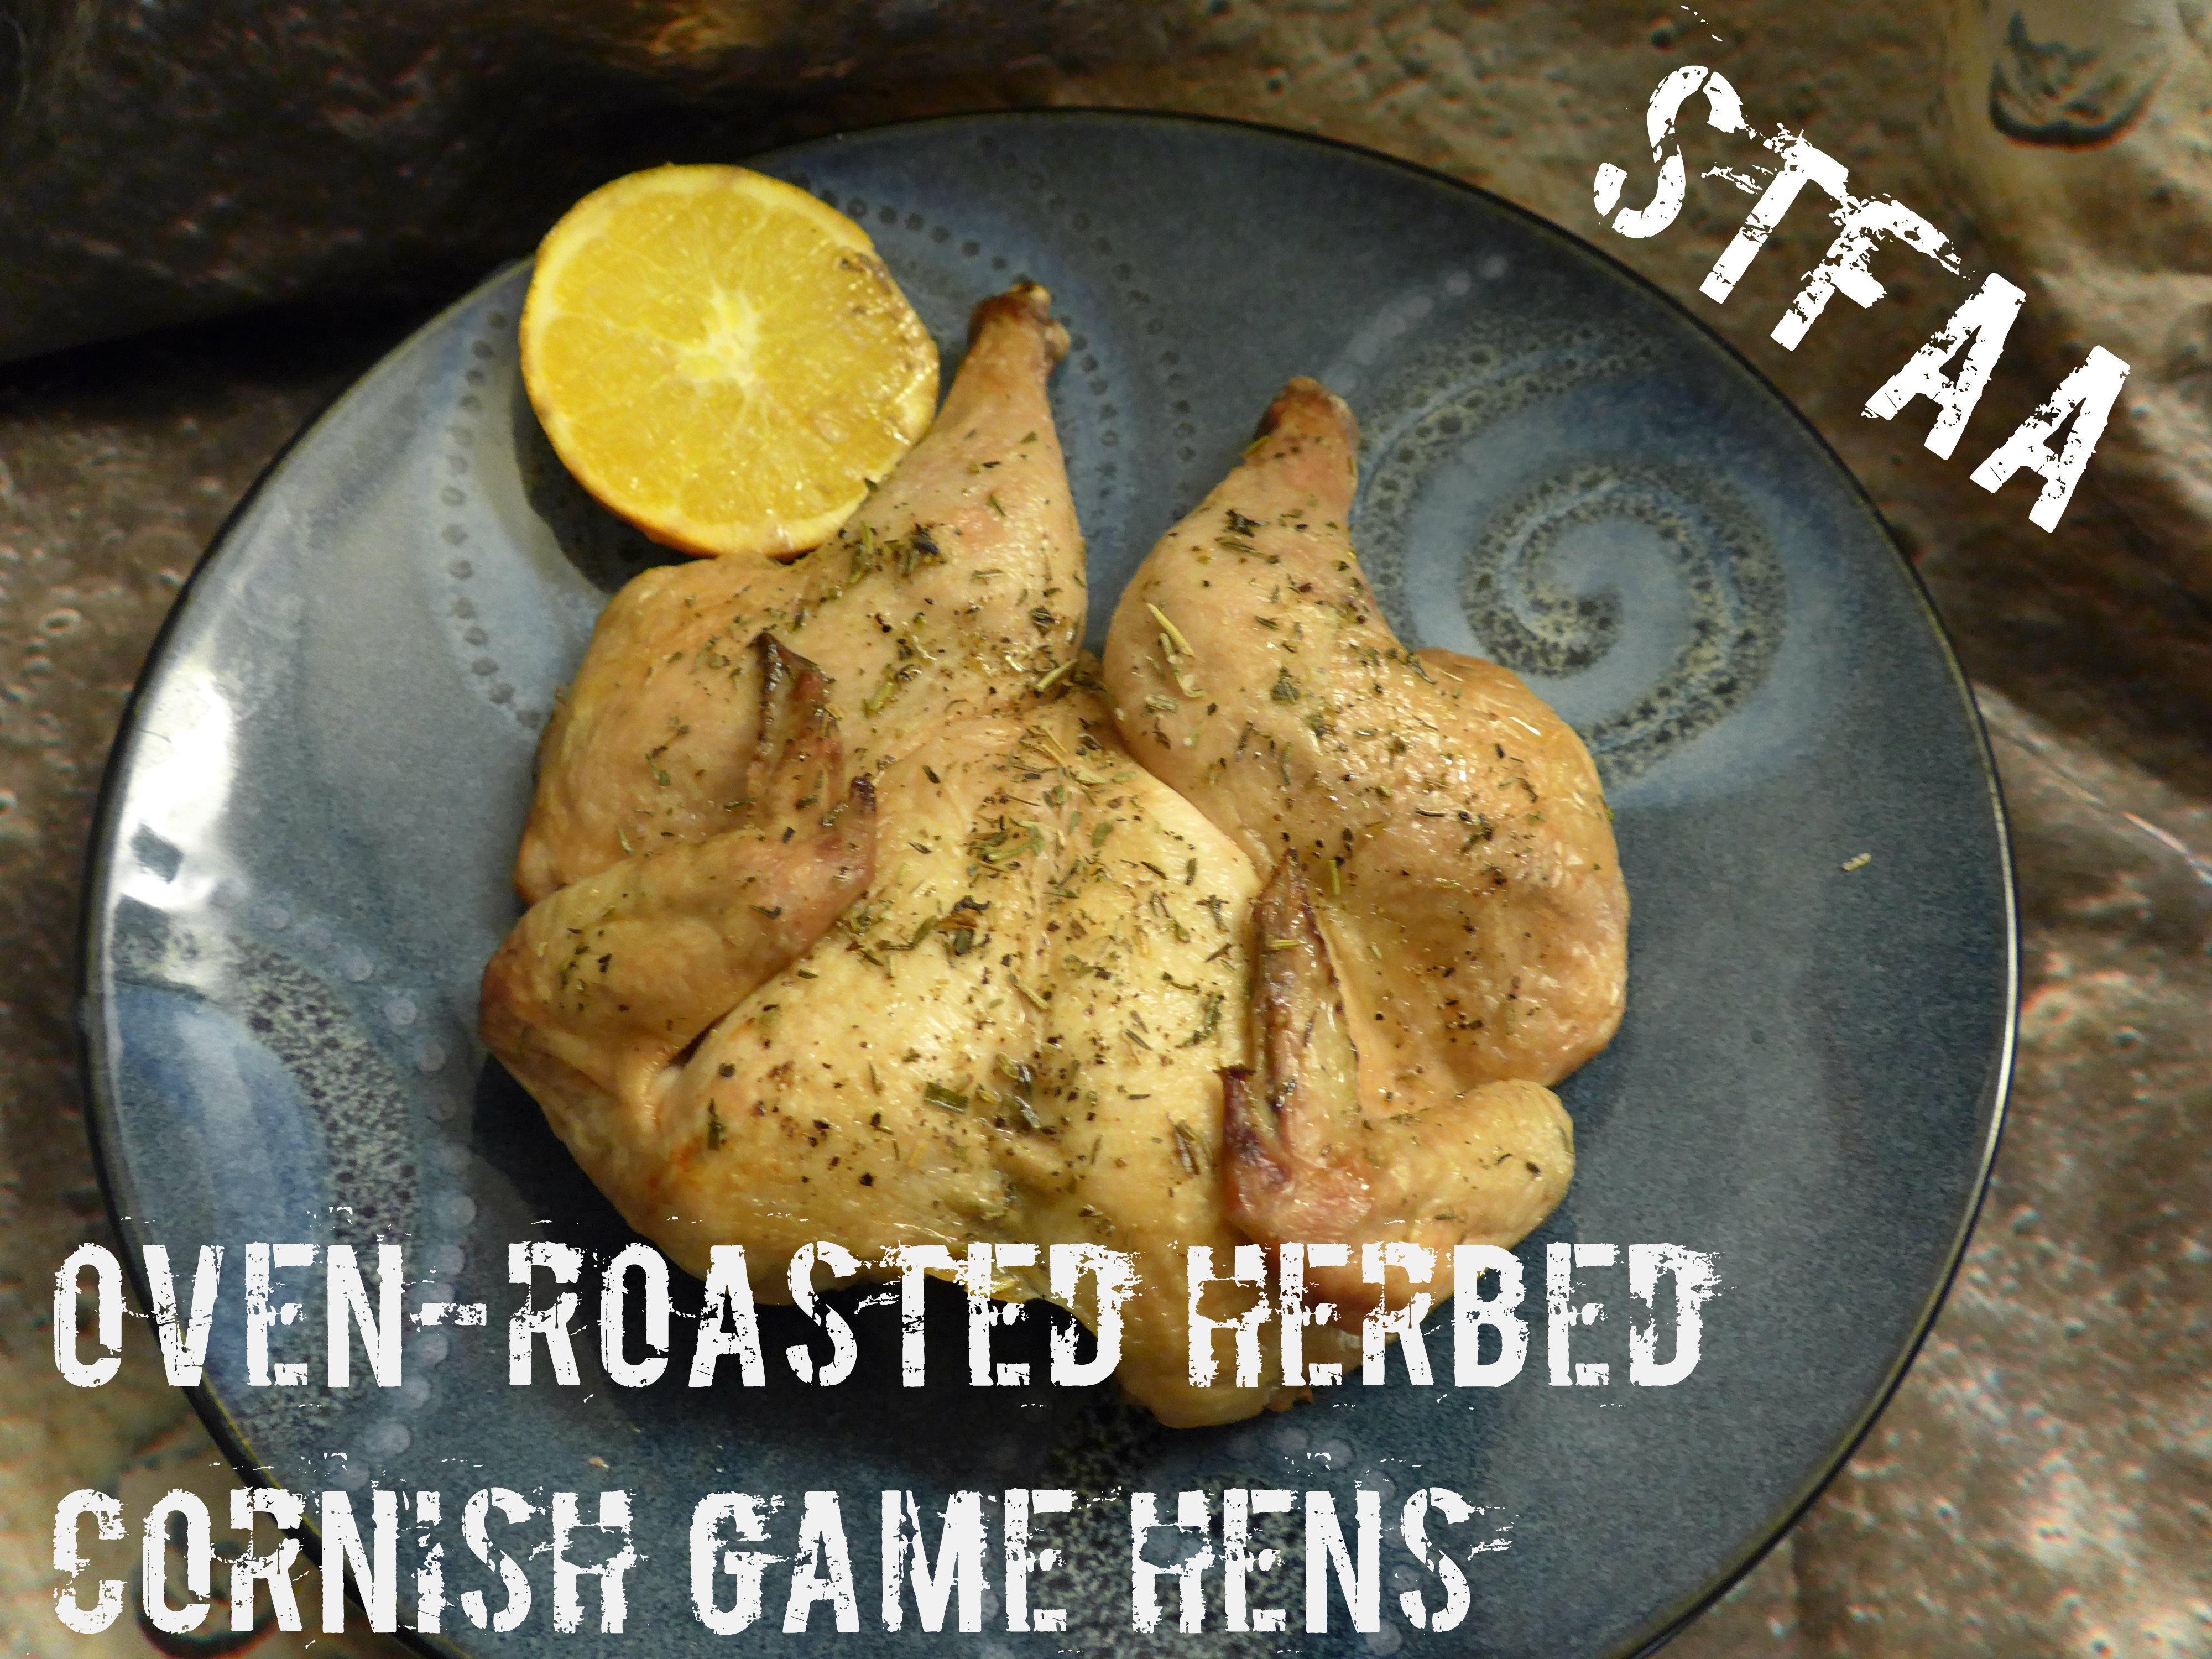
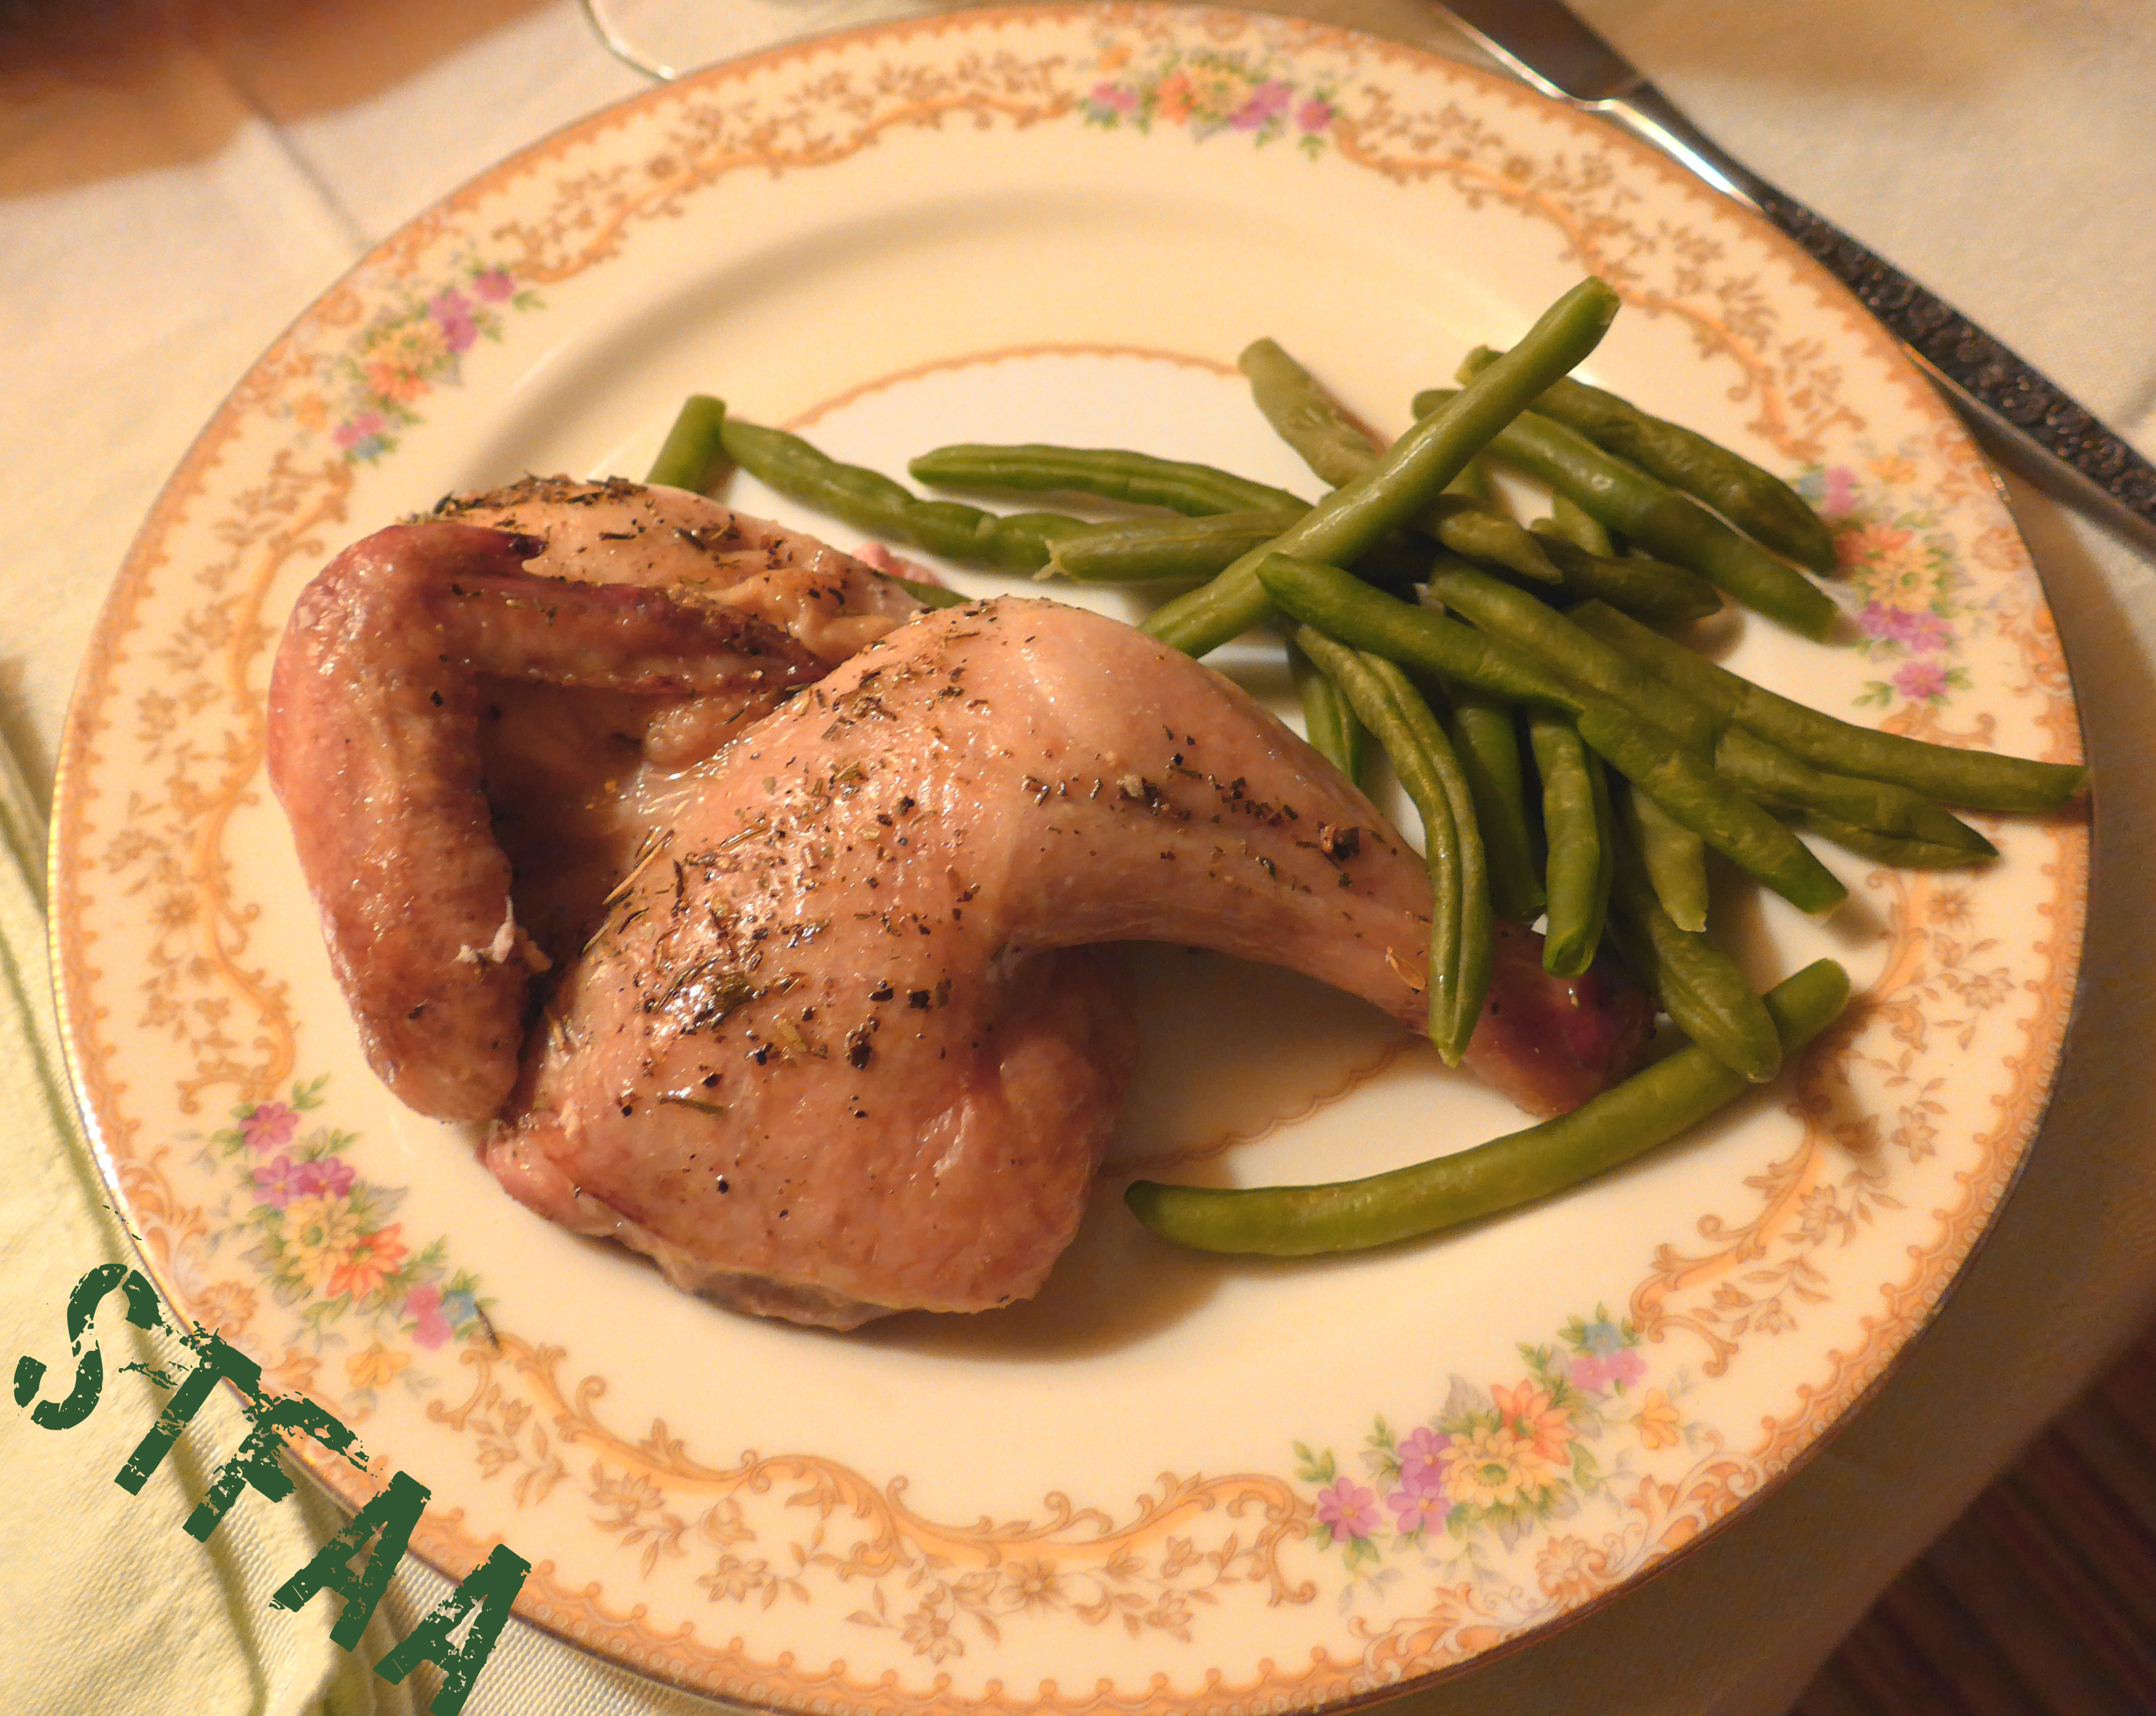
This year, I wanted something special but not large, and when Cornish game hens were on sale at the grocery store, I decided that this would be perfect for Christmas Eve. There were two birds in my package, but it turns out that about half a bird is a single serving. I knew I wanted to spatchcock the birds (although it doesn’t cut the cooking time down much here) so that they might stay juicy, and also so that I didn’t have to worry about stuffing them. I cooked them over thick slices of orange, coated in herbes d’provence, and served them with dressing, mashed potatoes, green beans, and a mushroom gravy. The dressing and gravy can be found as part of an previous post, my Thanksgiving casserole.
This is what the bird looked like “carved” and plated with lovely green beans on my china (of which I own four whole pieces).
This bird did look elegant for dinner, but eating the parts is a little fussy. Maybe don’t make this for when you need your table manners to be most impressive? Unless you’re really good eating a tiny drumstick with a knife and fork? Cornish game hens are a nice change from chicken, but they are also a little fussy to eat.
Notice: Trying to access array offset on value of type bool in /home/maryzahc/public_html/adultfoodallergies.com/wp-content/plugins/wp-ultimate-recipe/helpers/models/recipe.php on line 254
Baked Herbed Spatchcocked Cornish Game Hens
Print Recipe
That is a LOT of qualifiers! But this recipe is really straightforward and requires only one sort of specialized piece of equipment — kitchen shears. Otherwise, use your oven just go.
I am NOT going to talk you through spatchcocking. Try our turkey post here, or this post, which has tons of photos.
Servings
Prep Time
4people (with sides)
10 minutes
Cook Time
Passive Time
45minutes, approximately
45minutes
Servings
Prep Time
4people (with sides)
10 minutes
Cook Time
Passive Time
45minutes, approximately
45minutes
Ingredients
2wholeCornish game hens
1whole orange, cut into 1/2 inch slices
2teaspoonsherbes d’provence blend
1teaspoon olive oil
Servings: people (with sides)
Instructions
Spatchcock and wash your hens.
Place hens over a thick slice of orange on a rimmed baking tray with a rack.
Pat the skin dry, then rub with olive oil and sprinkle on herb blend.
Bake at 325ºF for 30-45 minutes, or until a meat thermometer reaches 160ºF. You are aiming for a final temperature of 165ºF, but when you rest the birds for a few minutes outside the oven, it will keep climbing. Rest meat, and then carve.
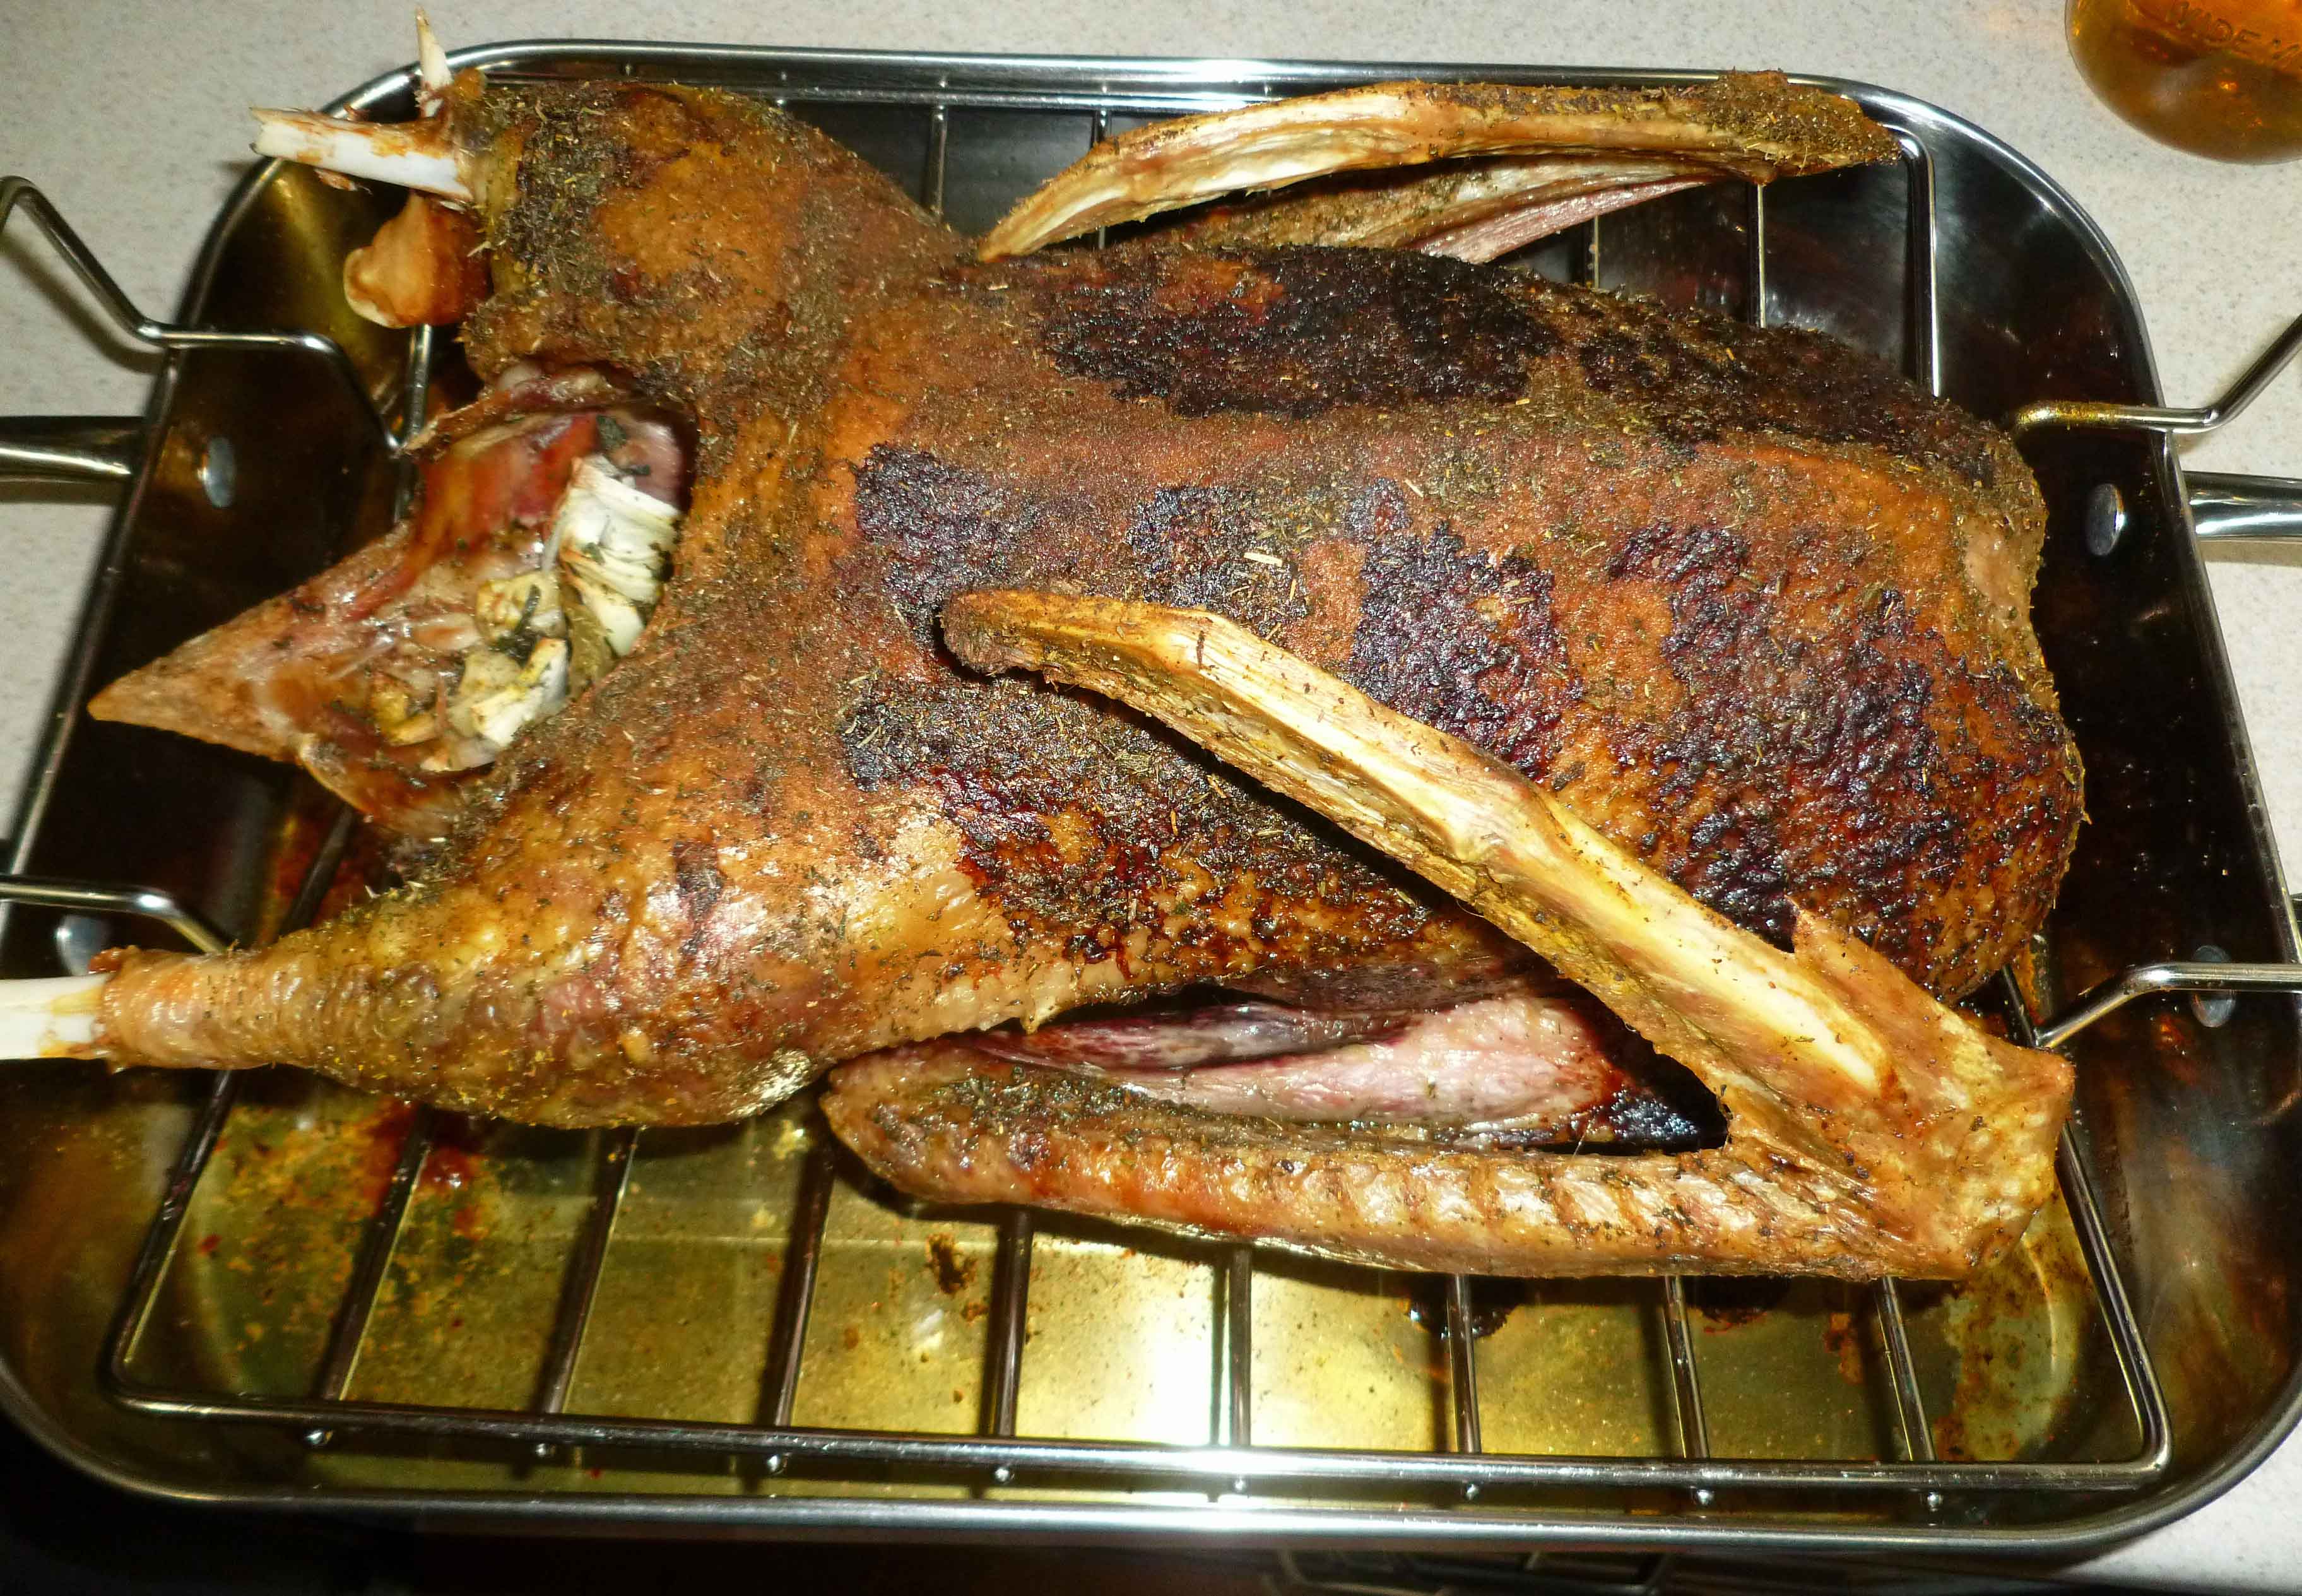
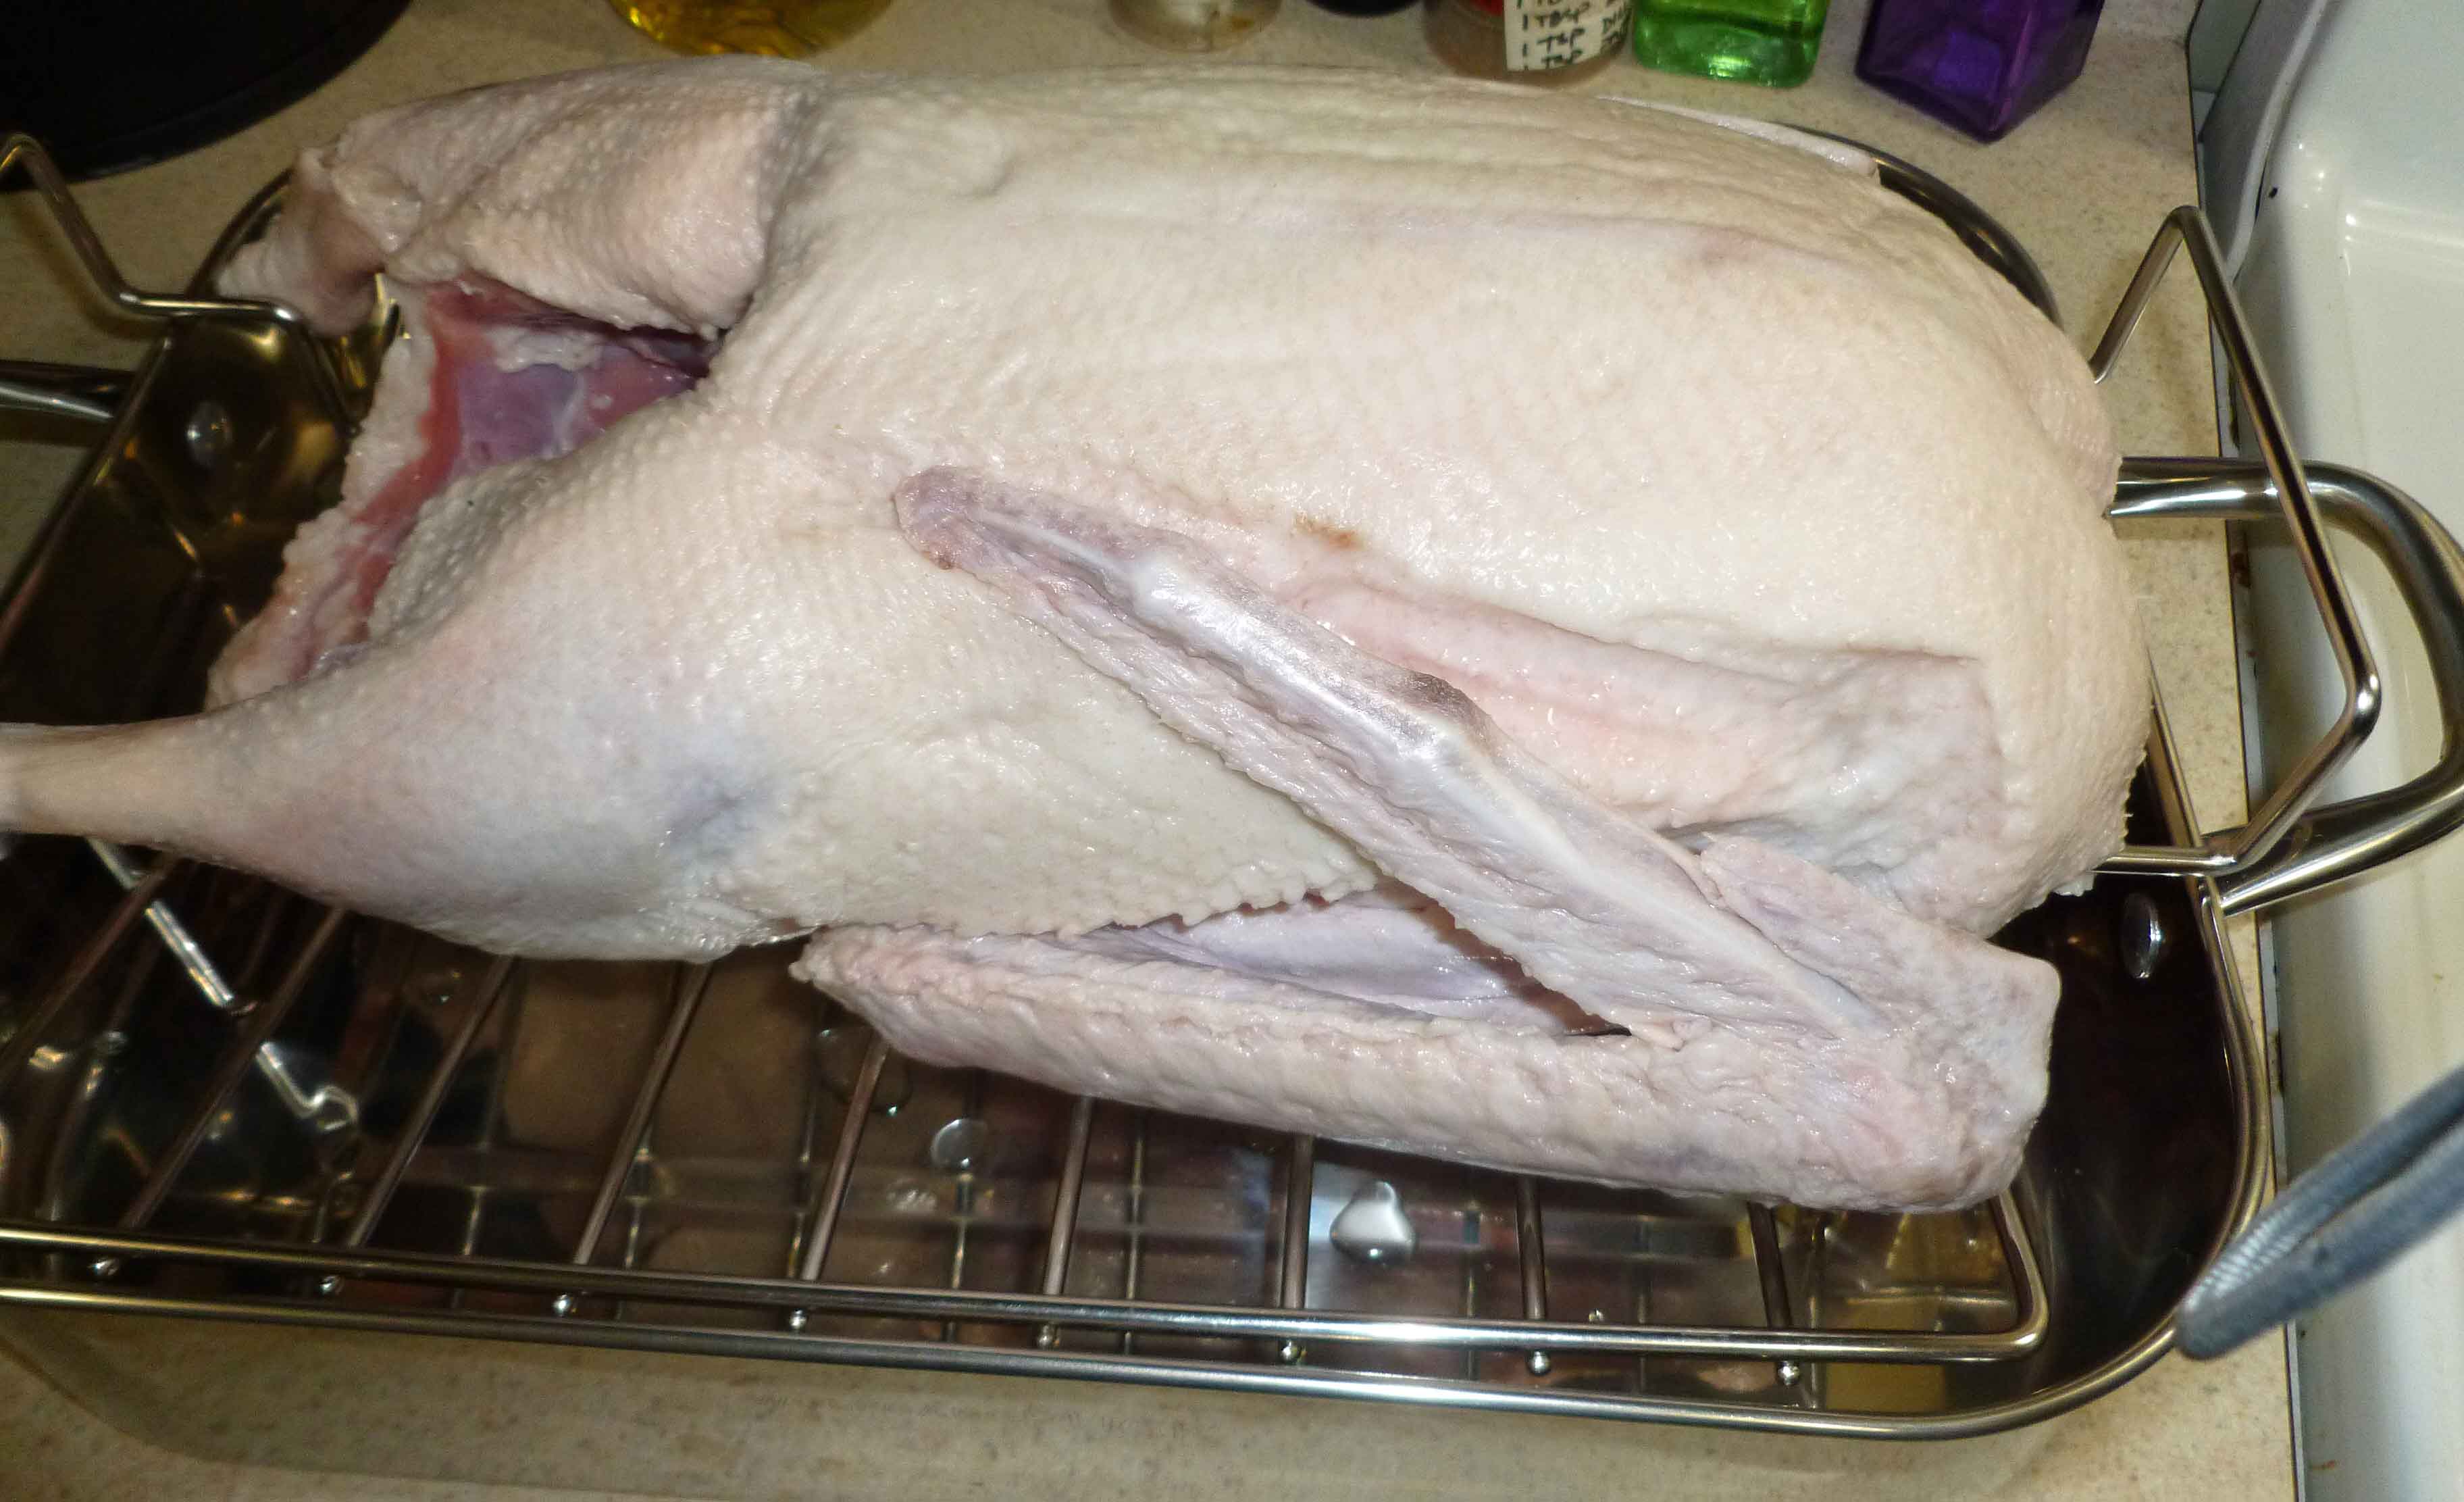
Why Roast Goose? I’m sure some of you are asking that question. Well, I’m allergic to chicken and I reacted to turkey when I challenged it. However, I don’t appear to react to duck and I like it. After further research it turns out that chicken and turkey are both in the Phasianidae family, and duck is in the Anatidae family. Goose is also in the Anatidae family, and when I saw a relatively clean one (no solutions, added water, etc.), I decided to buy it to see if I reacted and see if I liked it, because having two poultry options would not be a bad thing. The Verdict: I did not react in a significant manner (weird ear pressure?), but. . . I did not like it either. So goose and I will part ways at this point as duck is easier to find and I like it. Although I am not picky, I like venison, and I much prefer dark meat if I could still eat chicken or turkey, goose was too gamy for me. But I liked the poultry rub I used, and hey, you might like goose if you tried it, so I present this recipe. If you can eat chicken or turkey, try the poultry rub.
Goose Ingredients:
1 fresh or frozen goose (10-12 pounds)
2-3 stalks of celery cut in 1 inch pieces
1 head of garlic, cloves peeled and cut in half
1headgarliccloves peeled and cut in half
1mediumonion, peeled anddiced
1Tablespoon of dried thyme
1Tablespoon of rubbed sage
Poultry Rub Ingredients:
1 Tablespoon of rubbed sage
1 Tablespoon of dried thyme
1/2teaspoon of paprika
1/2teaspoon ofturmeric
1/2teaspoon ofcelery salt (I use a home made version from home ground celery seed and salt)
1/2teaspoon ofground black pepper
If your goose is frozen, thaw it in the the refrigerator before cooking. This may take a least a day or two. Preheat your oven to 400°F. Remove the goose from the packaging and make sure you remove the giblets from the cavity of the bird.
Place the goose in roasting pan with a rack, and trim off the excess fat around the cavities. (For those of you with low access to safe cooking fats, I rendered the excess fat in a crock pot as you would for lard or tallow, and got about a pint of goose fat.) Prick the surface of the goose skin, with a sharp knife, but be careful not to go past the skin into the goose.
Goose in Roasting Pan with Rack
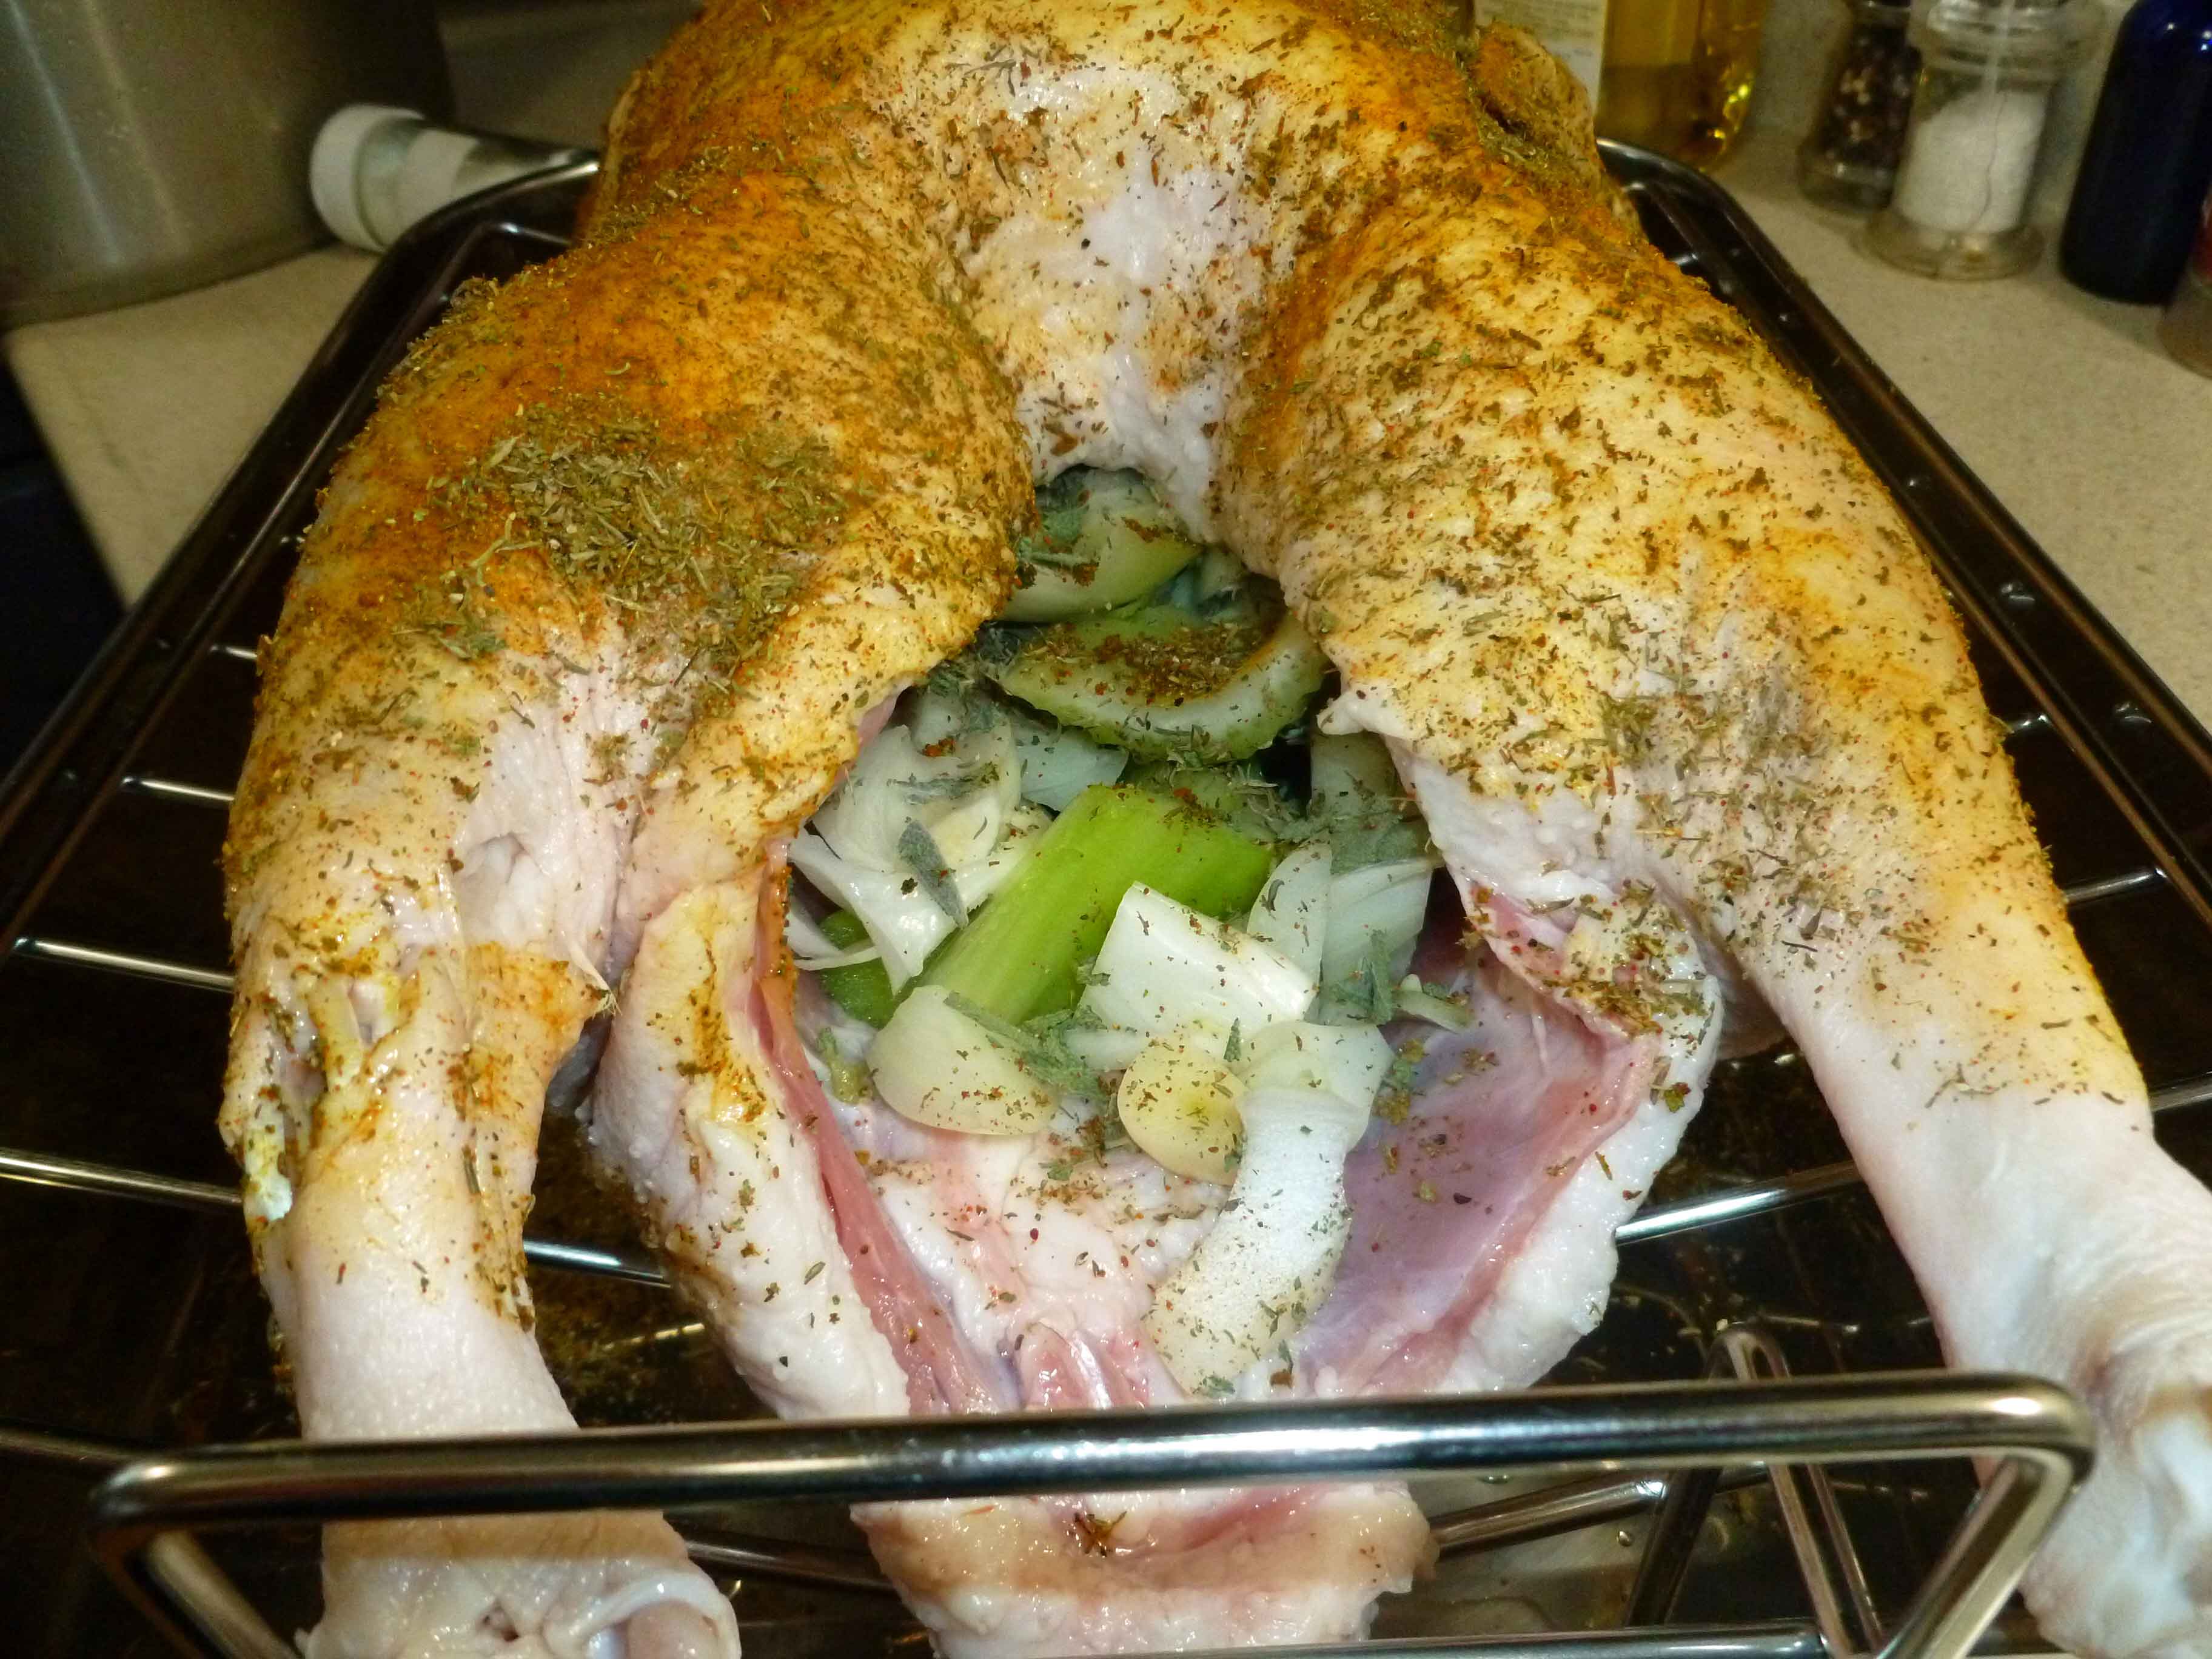
Sprinkle the goose cavity with 1 Tablespoon of the dried sage and 1 Tablespoon of the dried thyme. Place the celery, garlic, and onion into the cavity of the goose.
Celery, Onion, Garlic, Sage and Thyme in Goose Cavity
Place the ingredients for the poultry rub in a bowl and mix them well. Coat the outside of the goose with the rub.
Goose coated with Poultry Rub
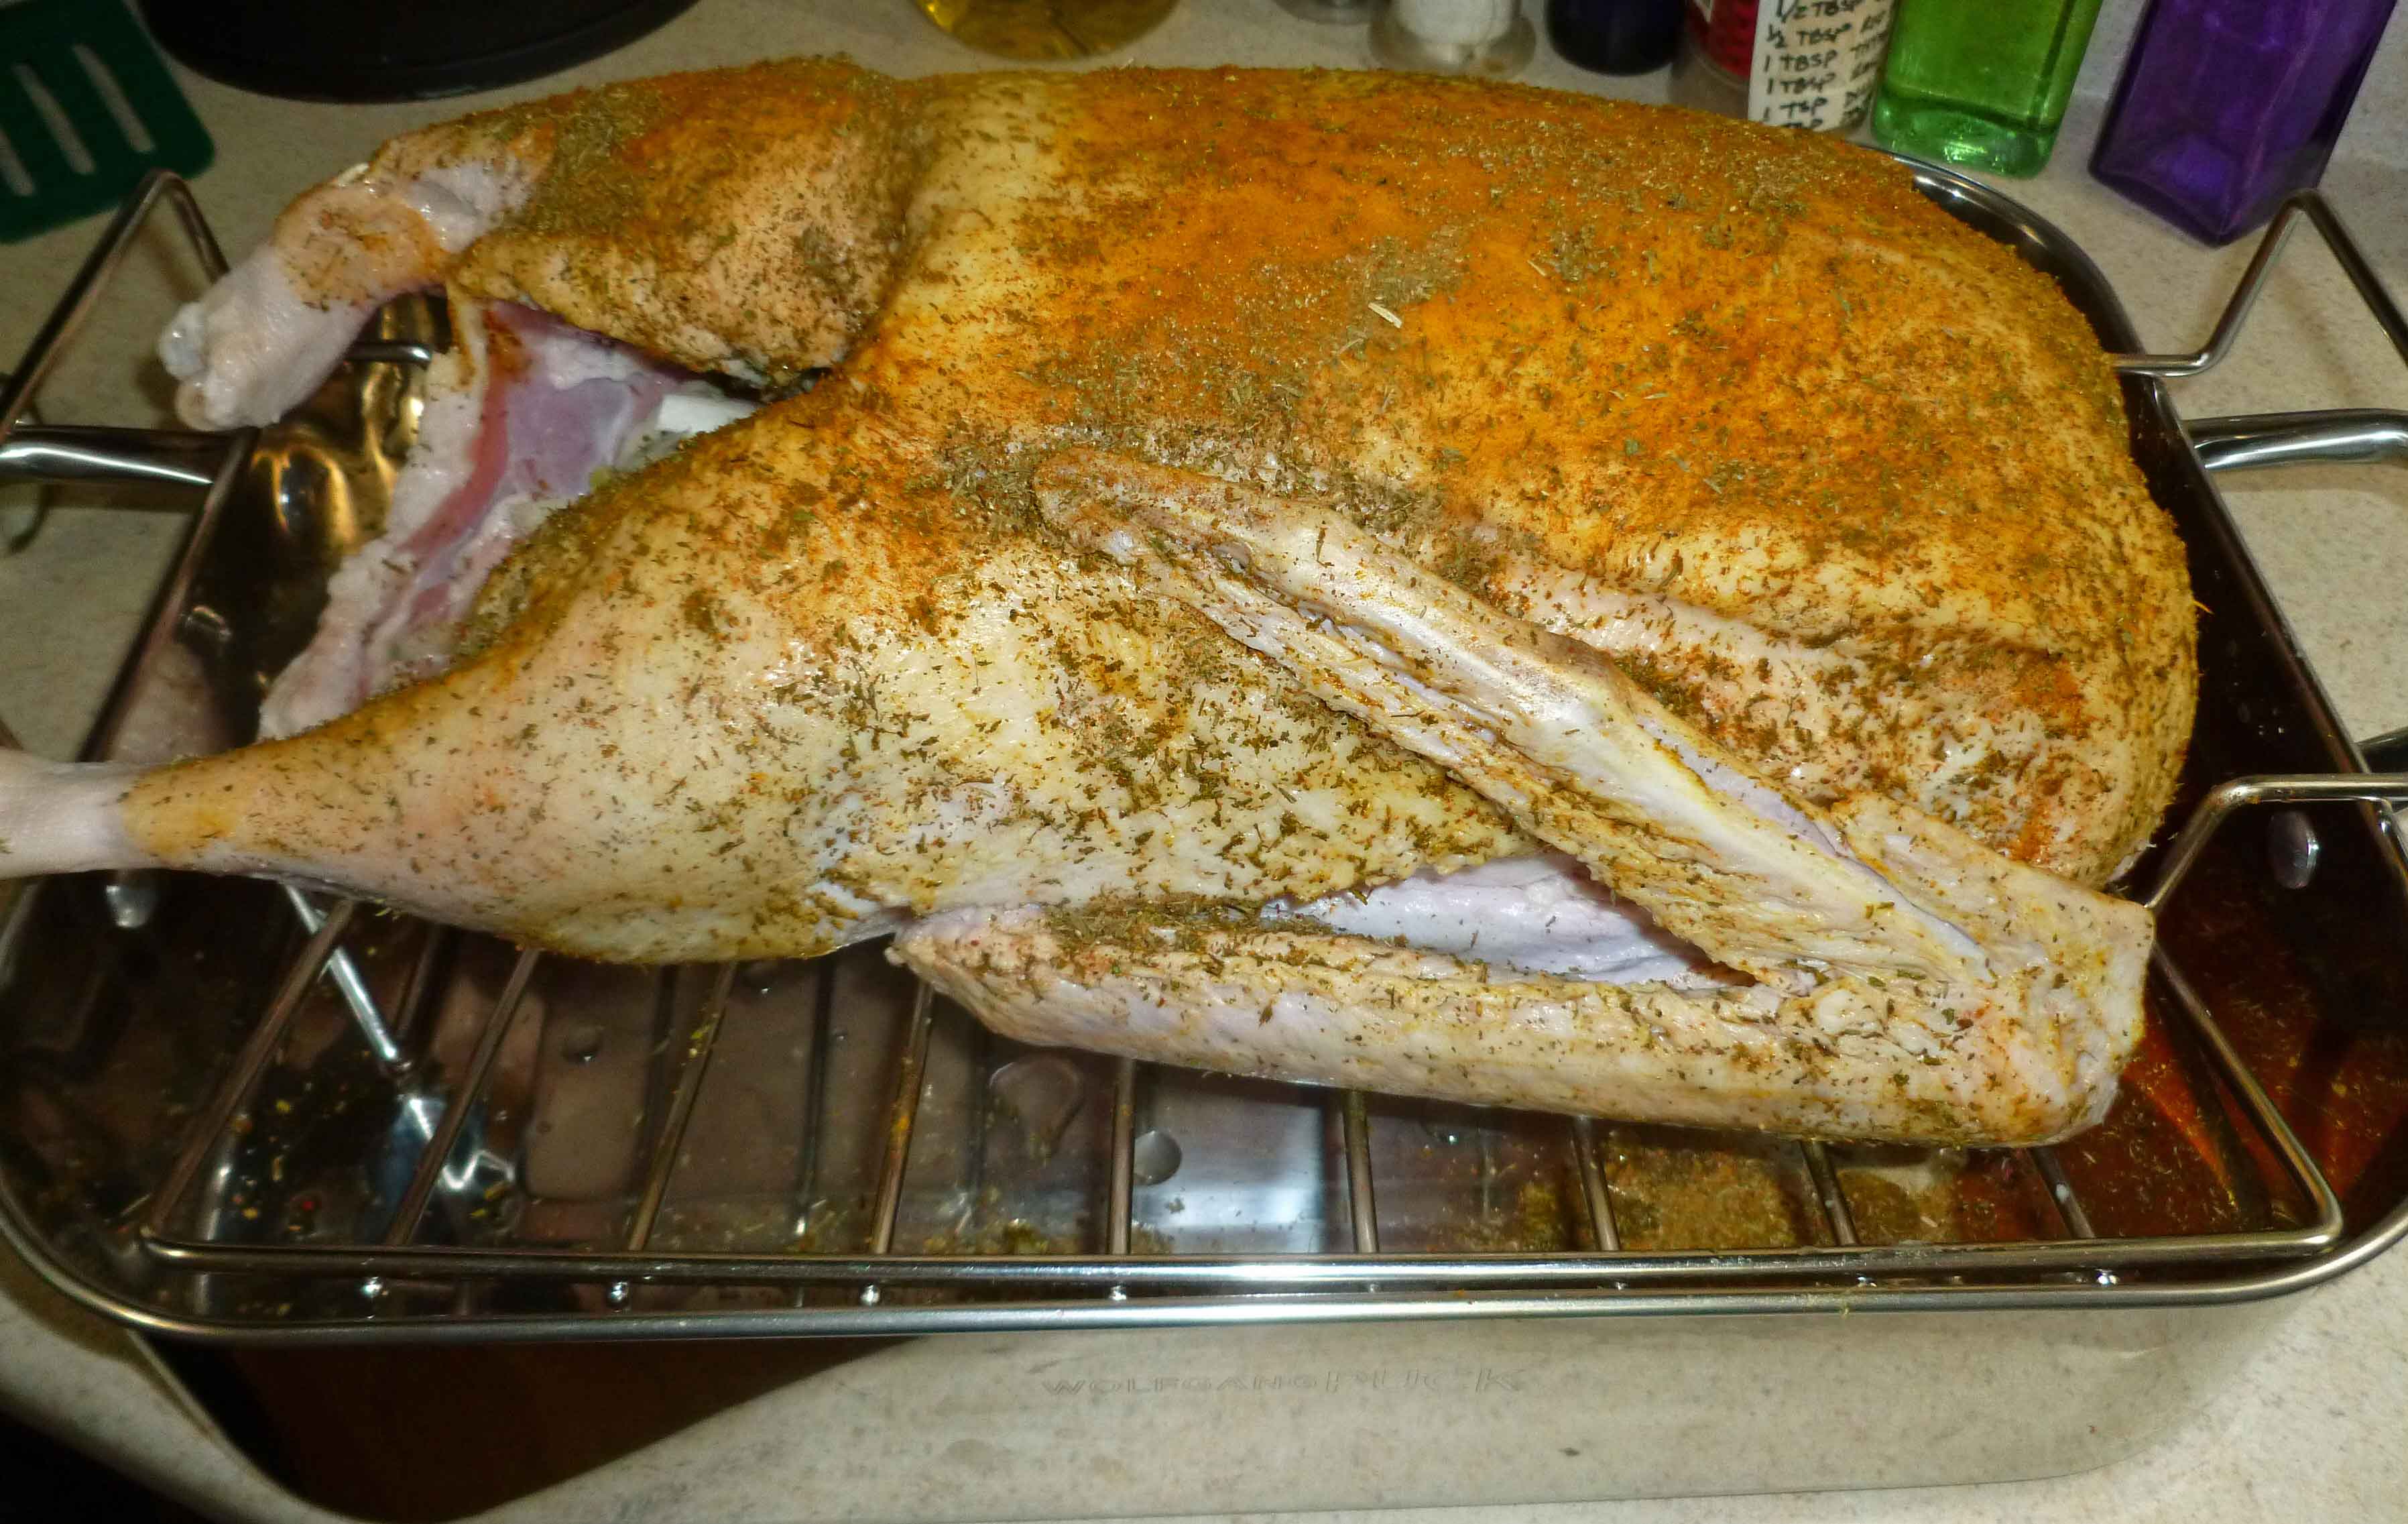
Roast the goose at 400°F in the oven for about an hour until it turns golden brown, while at the same time removing the goose fat from the roasting pan using a turkey baster every 30 minutes. (I saved the fat obtained and got almost a quart of goose fat from the pan that I’ll use as a cooking fat later.) Reduce the temperature to 325°F and roast until well browned, and the internal temperature reaches 180°F (about an hour to an hour and half after reducing the temperature depending on the size of your goose.)
I like to let my poultry rest a bit before carving, 15 or so minutes. Carve and serve.
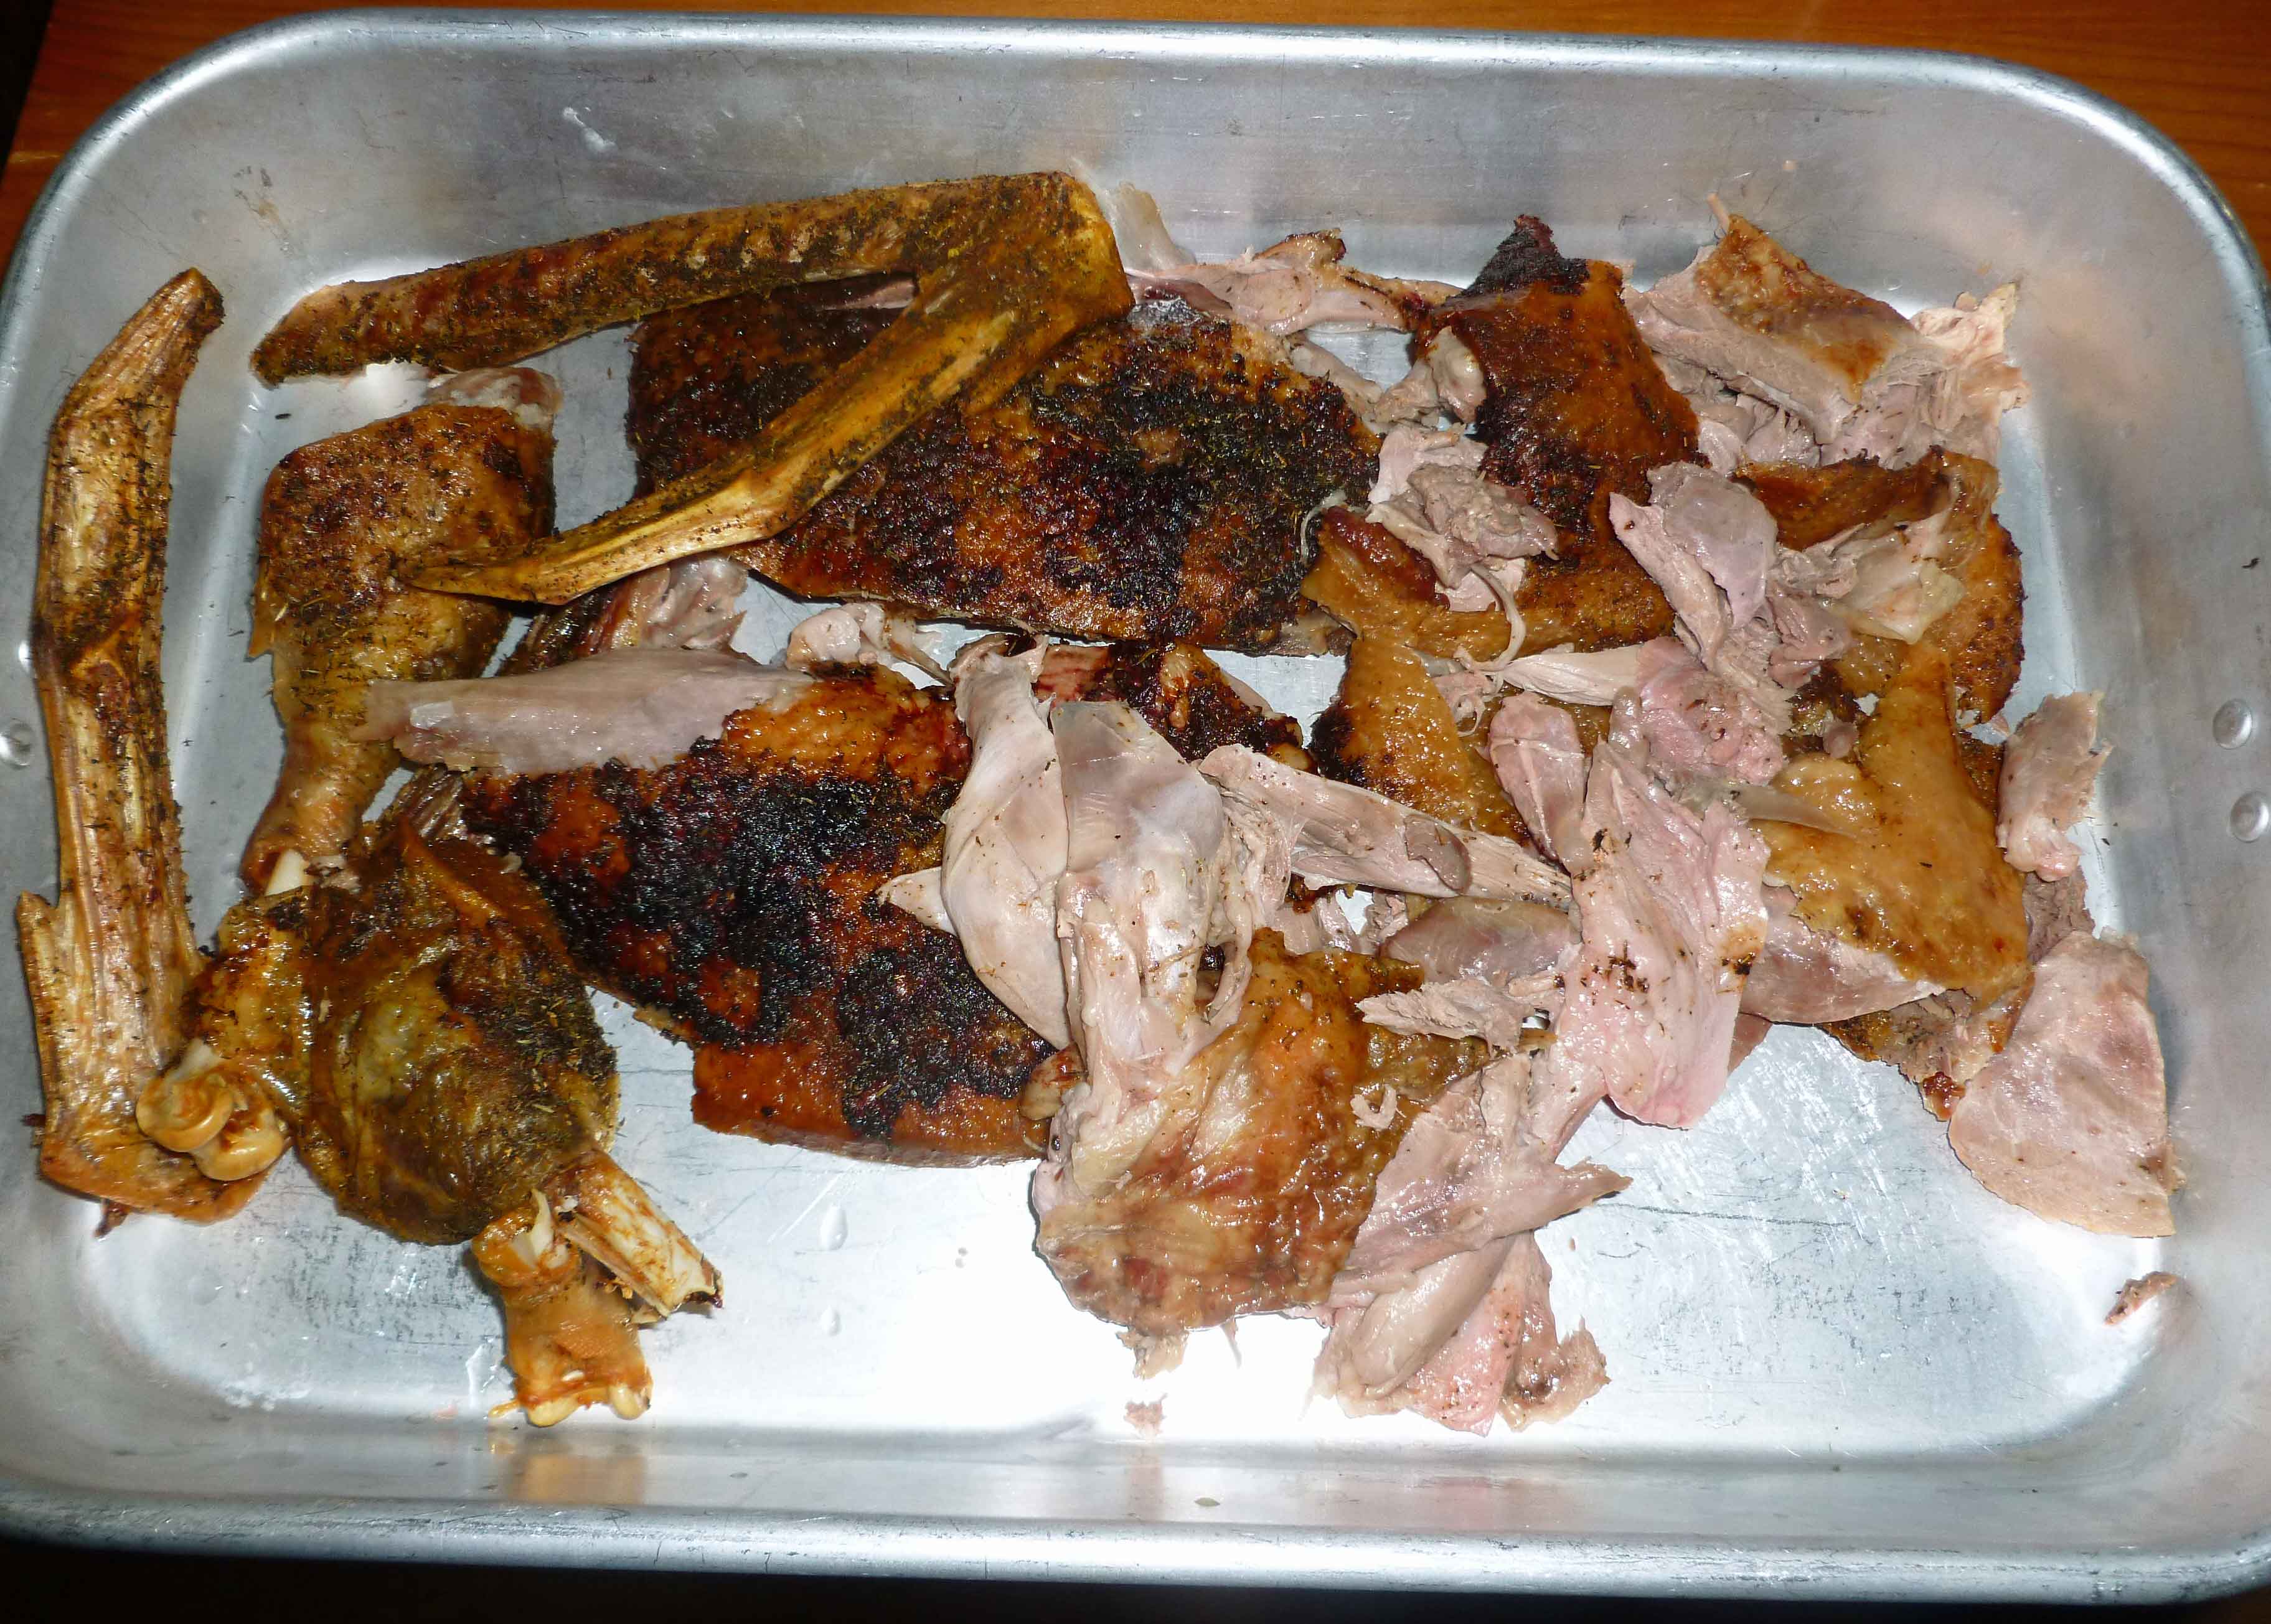
Roast Goose, carved
If you decide to try goose, let me know what you think. I really thought I would like it and was surprised when I didn’t.
Notice: Trying to access array offset on value of type bool in /home/maryzahc/public_html/adultfoodallergies.com/wp-content/plugins/wp-ultimate-recipe/helpers/models/recipe.php on line 254
Roast Goose
Print Recipe
A basic roast goose recipe for the holiday season.
If your goose is frozen, thaw it in the the refrigerator before cooking. This may take a least a day or two. Preheat your oven to 400°F. Remove the goose from the packaging and make sure you remove the giblets from the cavity of the goose.
Place the goose in roasting pan with a rack, and trim off the excess fat around the cavities. Prick the surface of the goose skin, with a sharp knife, but be careful not to go past the skin into the goose.
Sprinkle the goose cavity with 1 Tablespoon of the dried sage and 1 Tablespoon of the dried thyme. Place the celery, garlic, and onion into the cavity of the goose. Place the ingredients for the poultry rub in a bowl and mix them well. Coat the outside of the goose with the rub.
Roast the goose at 400°F in the oven for about an hour until it turns golden brown, while at the same time removing the goose fat from the roasting pan using a turkey baster every 30 minutes. Reduce the temperature to 325°F and roast until well browned, and the internal temperature reaches 180°F (about an hour to an hour and half after reducing the temperature depending on the size of your goose.)
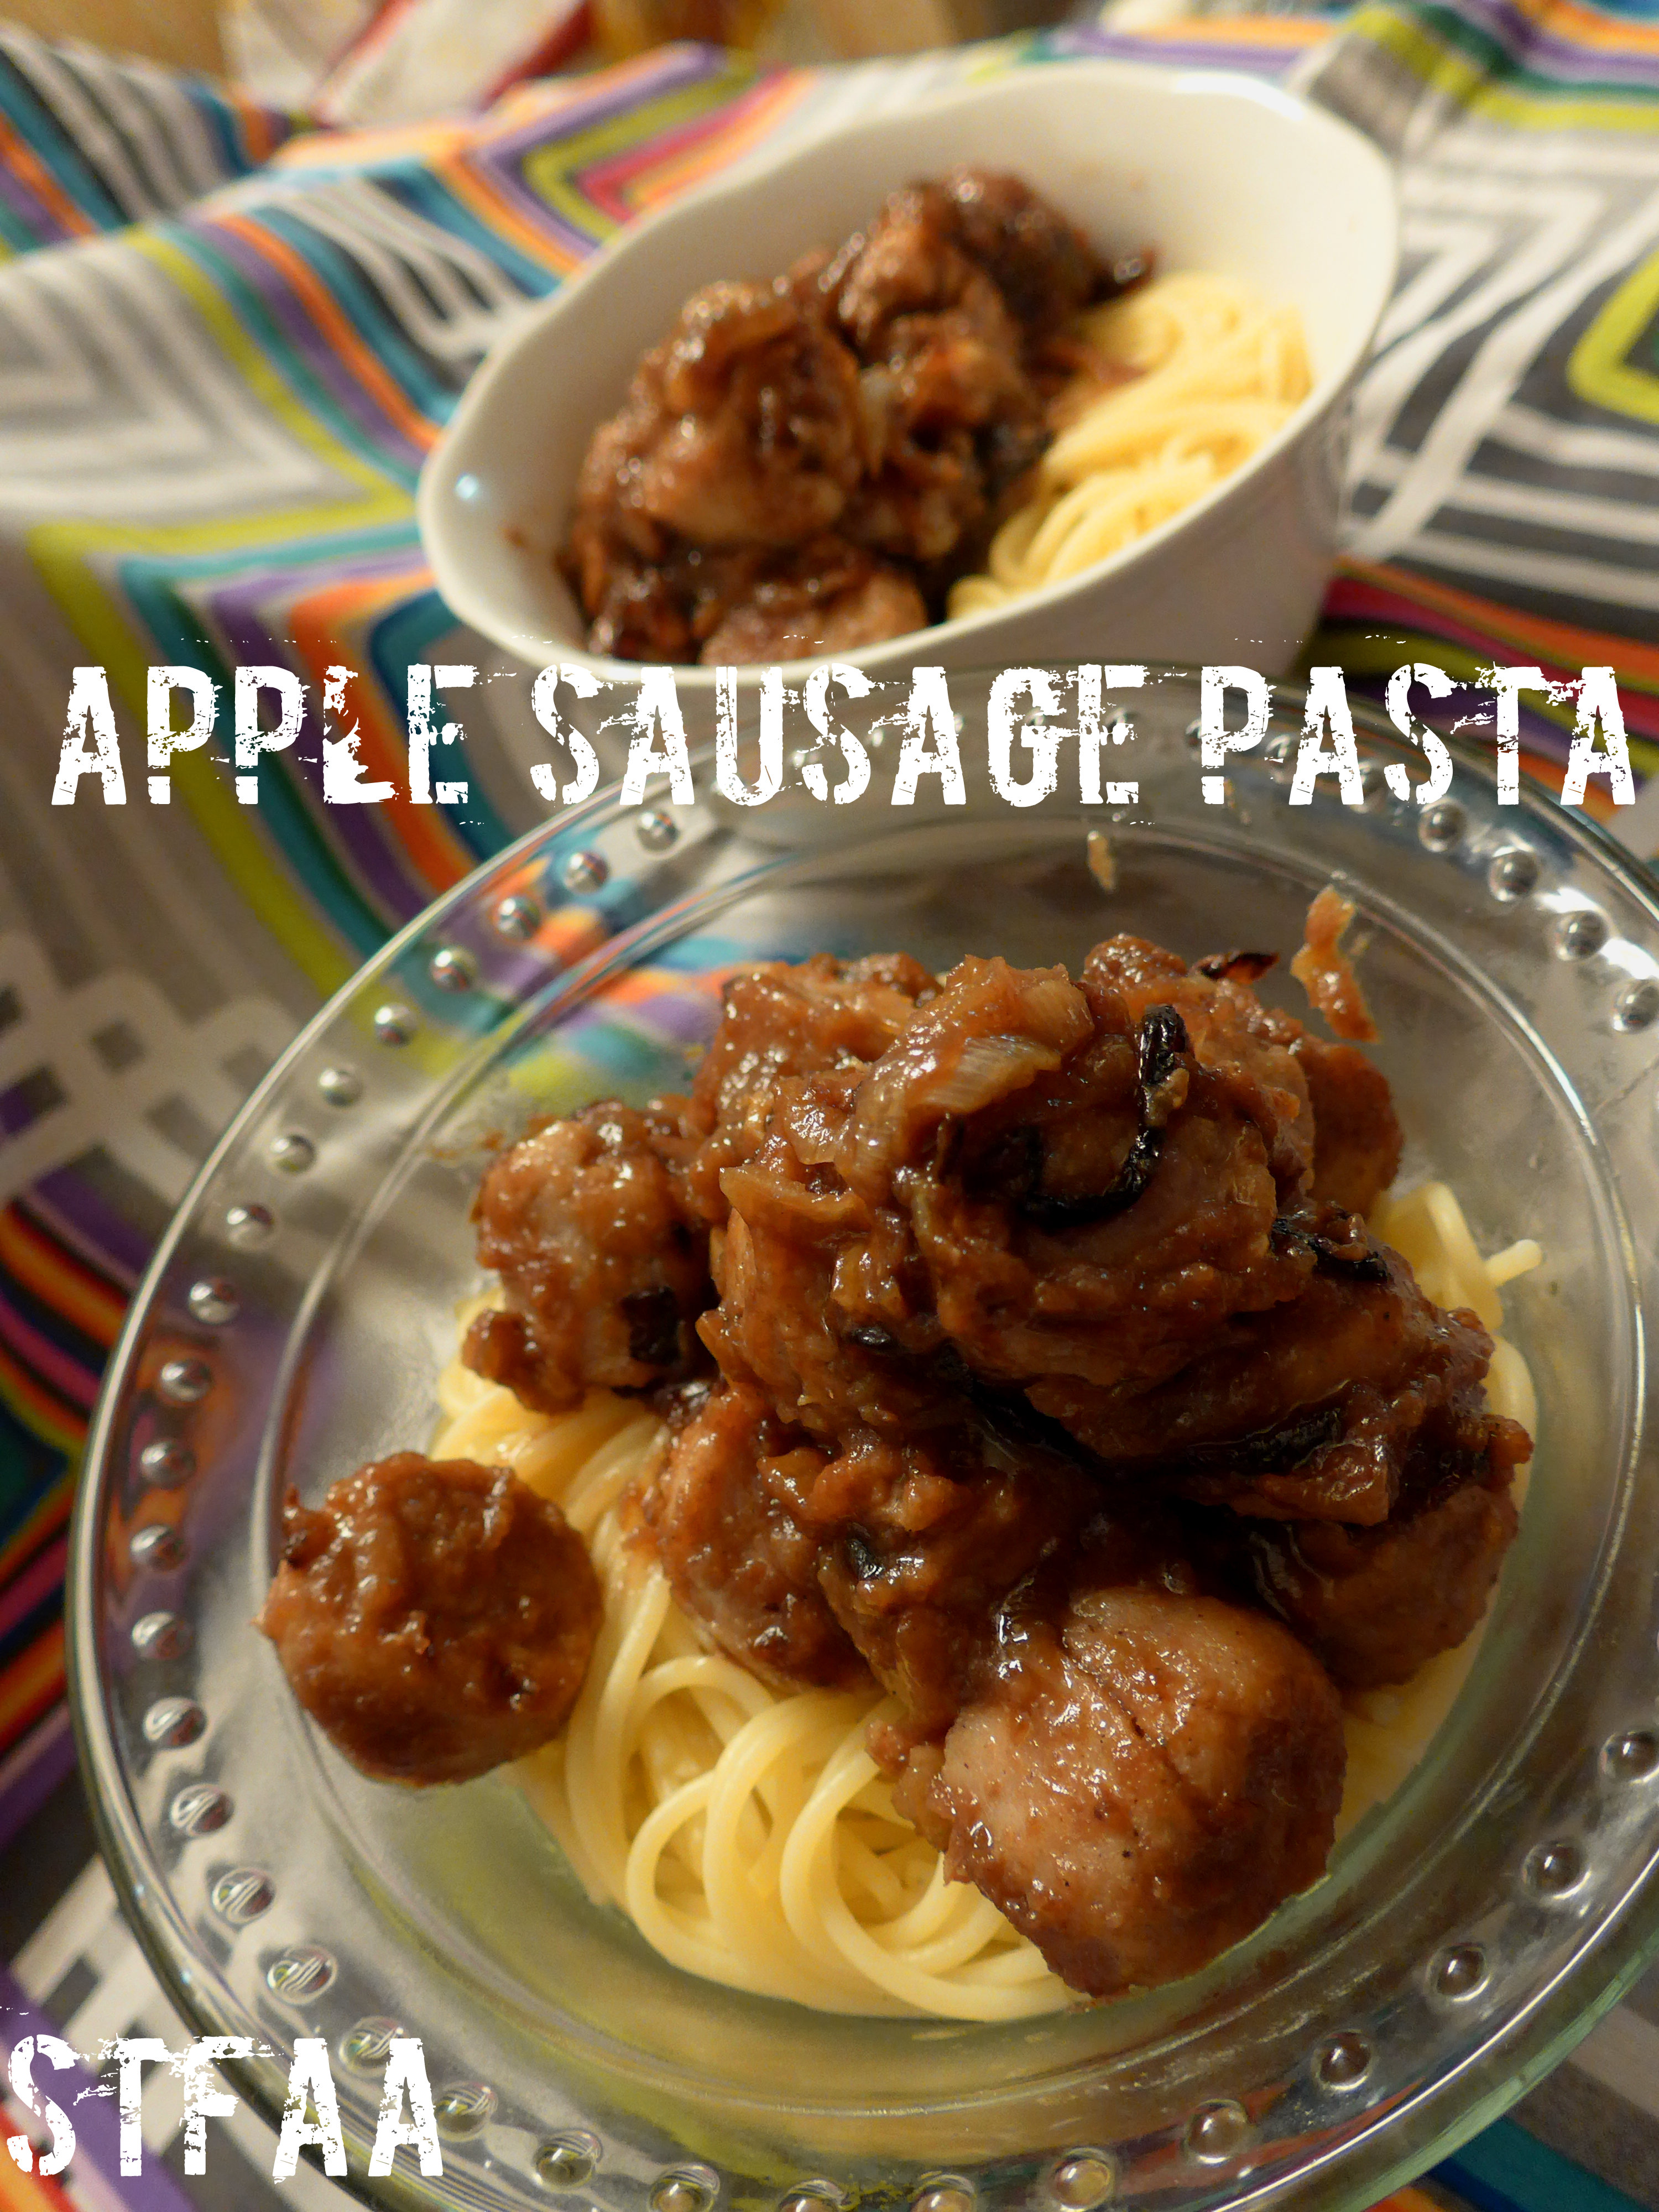
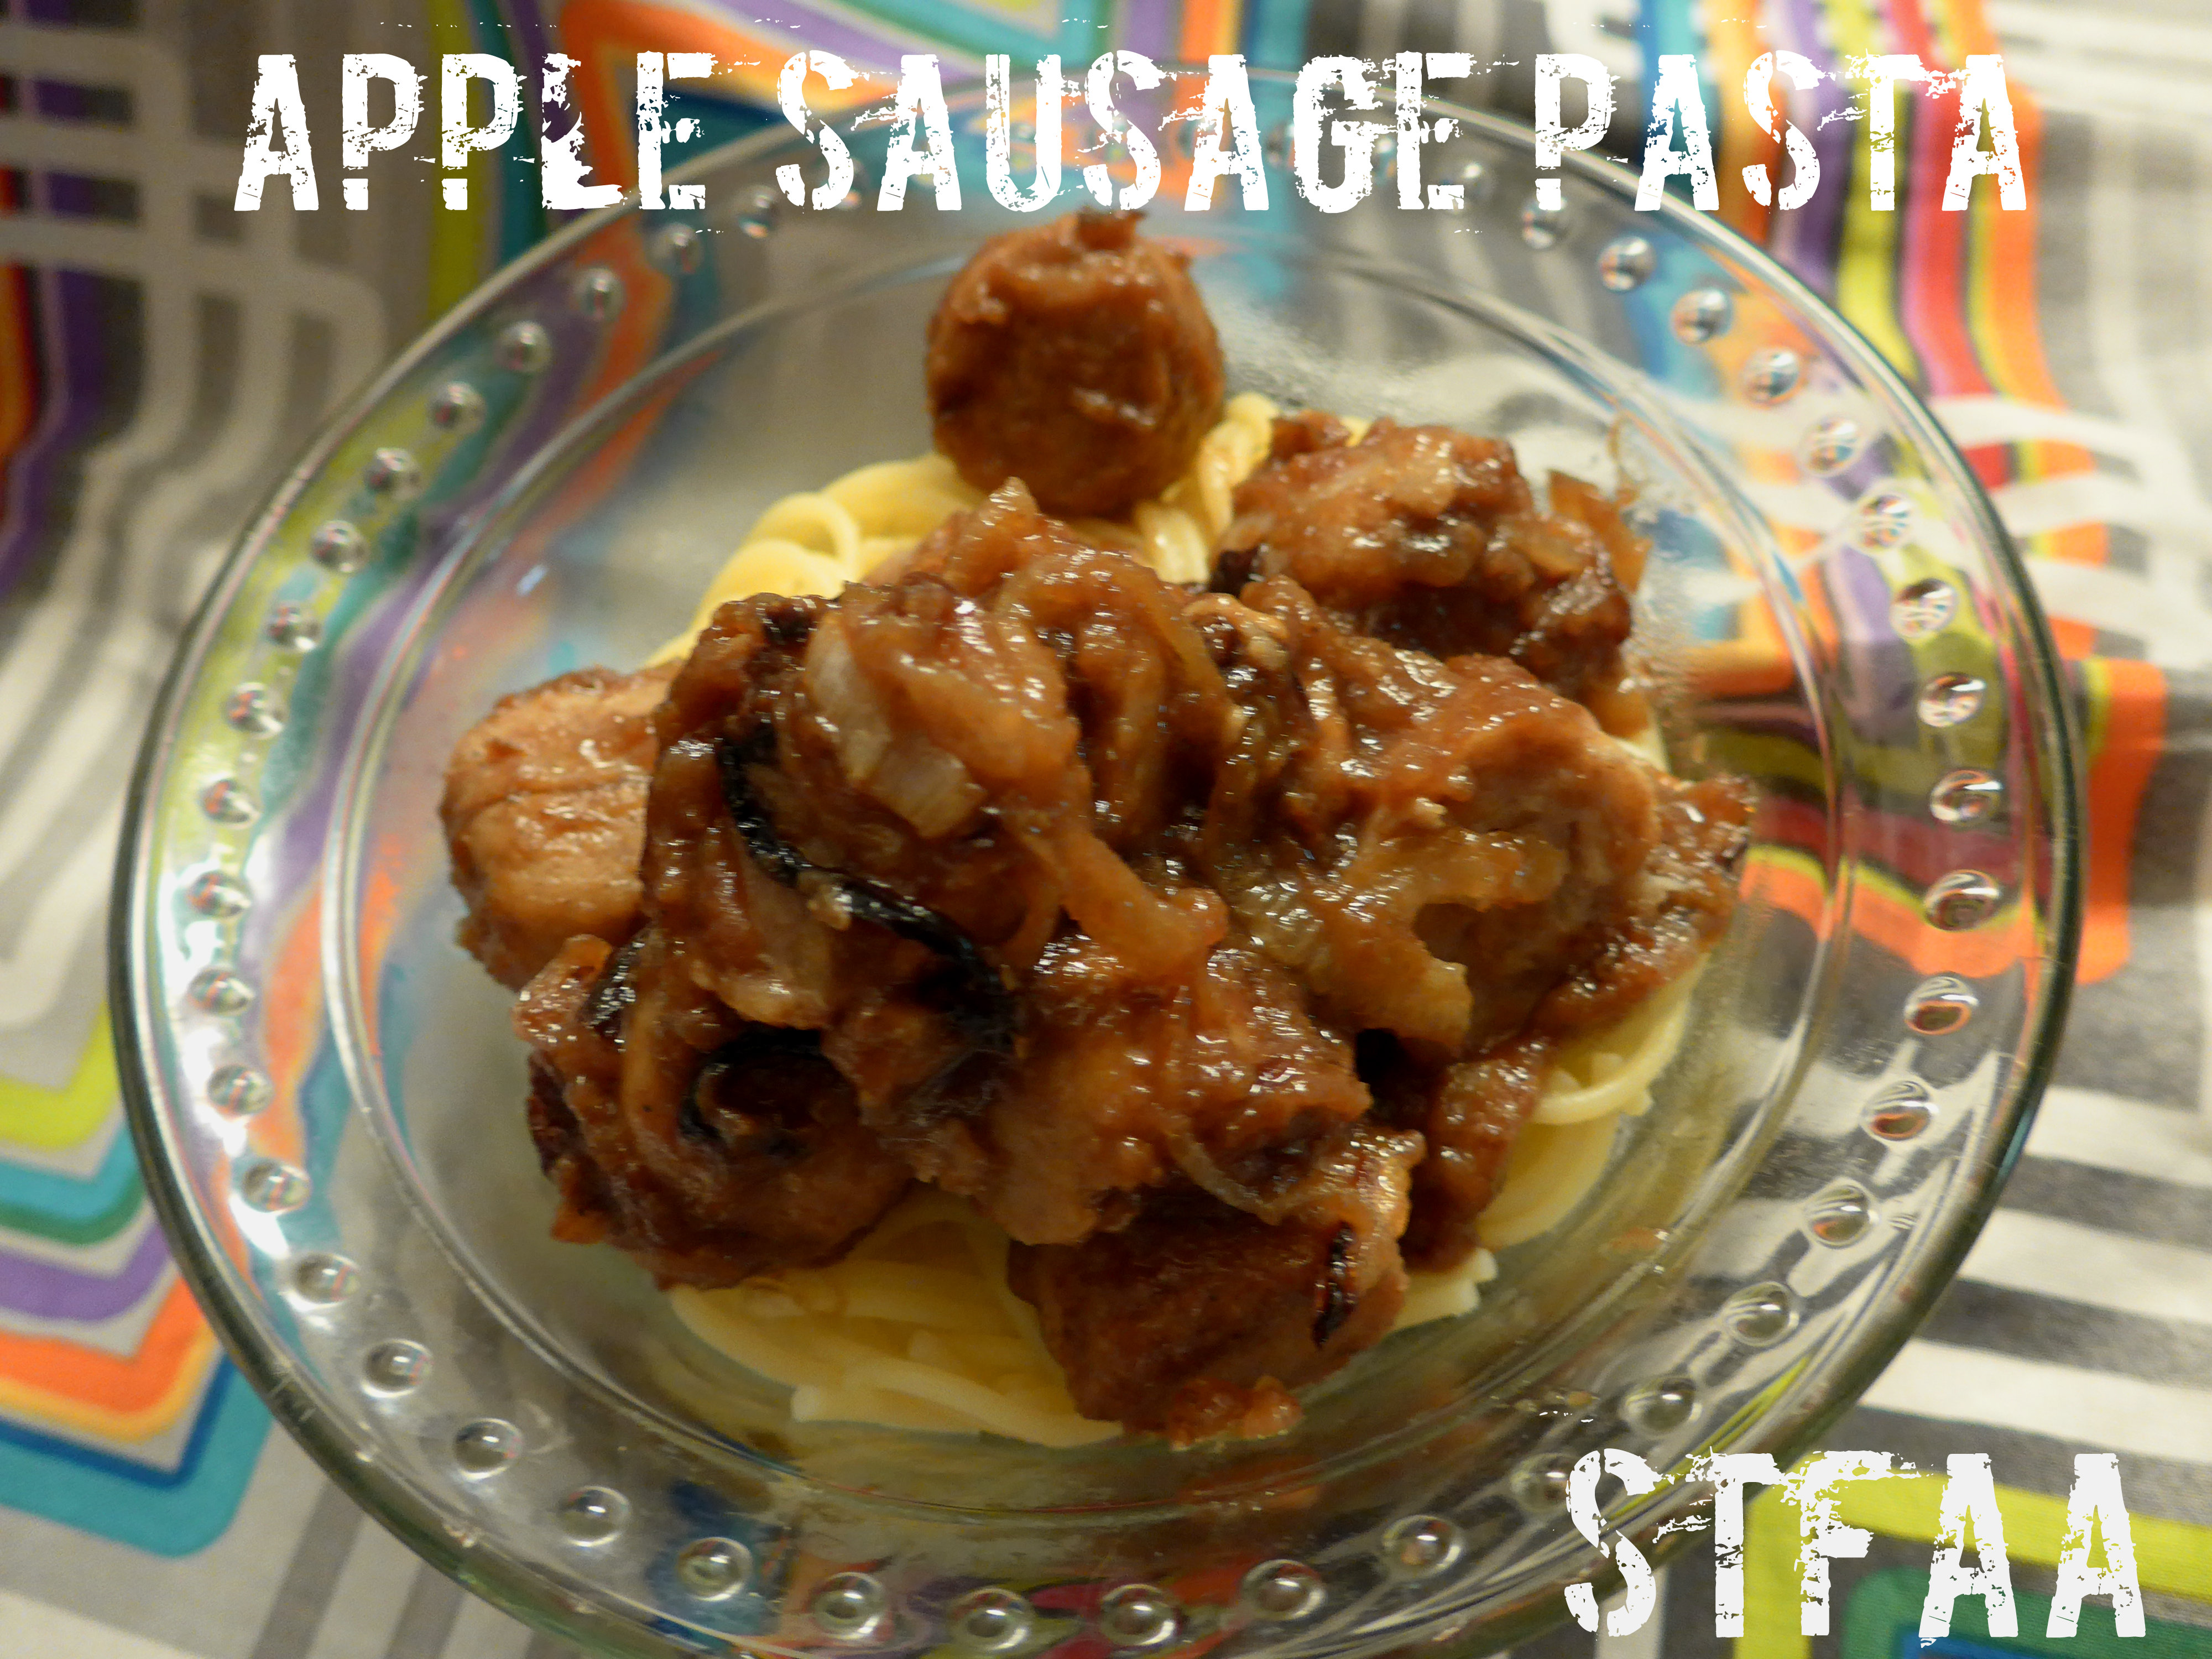
This dish is kind of an accident. I like to keep chicken sausages around as they are quick and easy for nights where I don’t really want to cook but want hot food. I started buying the apple sausages recently just for something different, and they seemed to beg for a different treatment than my normal sausages and caramelized onions. Because I had apple butter from Denise’s huge apple tree stash, I figured if I could balance the sweetness, I might have a winner. Caramelized onions, a hit of garlic and a bit of vinegar, and we have a winner. This is a really different dish — it’s not overly sweet, but it’s a different tenor from anything else I make regularly, and I like the break.
Apple Sausage Pasta Notice: Trying to access array offset on value of type bool in /home/maryzahc/public_html/adultfoodallergies.com/wp-content/plugins/wp-ultimate-recipe/helpers/models/recipe.php on line 254
Apple Sausage Pasta
Print Recipe
This sweet and savory apple-based pasta sauce is good over whatever pasta you may enjoy. Make it gluten-free by using the gluten-free pasta of your choice. This works best with a chicken and apple sausage, but would likely work great with a straightforward pork sausage as well.
This sweet and savory apple-based pasta sauce is good over whatever pasta you may enjoy. Make it gluten-free by using the gluten-free pasta of your choice. This works best with a chicken and apple sausage, but would likely work great with a straightforward pork sausage as well.
2servingspasta of your choicecooked according to package directions
Servings: large servings
Instructions
Heat olive oil in a heavy skillet over medium heat.
Add onions and stir well to coat with oil. Sprinkle with salt. Cook until caramelized, about 40 minutes, stirring about every 10 minutes. You’re looking for golden brown.
Add sliced sausages and cook for about 5 minutes until browned on one side, stir to flip around. If you need to cook your pasta and it takes about 10 minutes, start it now while the sausage browns.
Add garlic powder, apple cider vinegar, apple butter, and applesauce. Stir well until all incorporated, and turn heat down to low.
When the pasta is done, decide if you need to thin down your sauce a bit and reserve a bit of pasta water to do so. Drain your pasta and scoop the sauce over top. Mix well and enjoy.
Recipe Notes
This dish reheats pretty well, so if there’s just one of you, you now have lunch.