Notice: Function _load_textdomain_just_in_time was called incorrectly. Translation loading for the wp-ultimate-recipe domain was triggered too early. This is usually an indicator for some code in the plugin or theme running too early. Translations should be loaded at the init action or later. Please see Debugging in WordPress for more information. (This message was added in version 6.7.0.) in /home/maryzahc/public_html/adultfoodallergies.com/wp-includes/functions.php on line 6121
Main Dishes/Entrées – Page 10 – surviving the food allergy apocalypse (archive)

Category: Main Dishes/Entrées

Main Dishes/Entrée [ahn-trey] noun: a dish served as the main course of a meal. These recipes will not contain dairy, eggs, gluten, wheat or hazelnuts. If we use a top 8 allergen, we will use a tag warning of its use.

  • Falafel Burgers

    Falafel Burger (shown with Tzatziki Sauce)
    Falafel Burger (shown with Tzatziki Sauce)

    So we’re heading into picnic and cookout weather, and we have some holidays coming up that might result in you getting invited to some cookouts.  Mary Kate and I thought it’d be a good idea to have some burgers that are safe for those of us allergies that we can prep ahead of time and bring with us to throw on a grill.  Now you may be saying, Denise and Mary Kate, why wouldn’t ground beef be safe?  Well, it is–unless someone decides to season it with ranch dressing.  And unless you’ve seen the package for the hot dogs, they might have milk in them.  And I know people who soak their chicken in buttermilk before grilling or frying it. It’s a lot easier to bring your own food and be sure you can eat something, than to sit at a cookout all afternoon looking at food you can’t eat. So with that in mind, we’ve come up with some great recipes that you’re going to be seeing pop up here and there over the next few months. Because it’s going to be summer, and we need to cook stuff outside with fire!
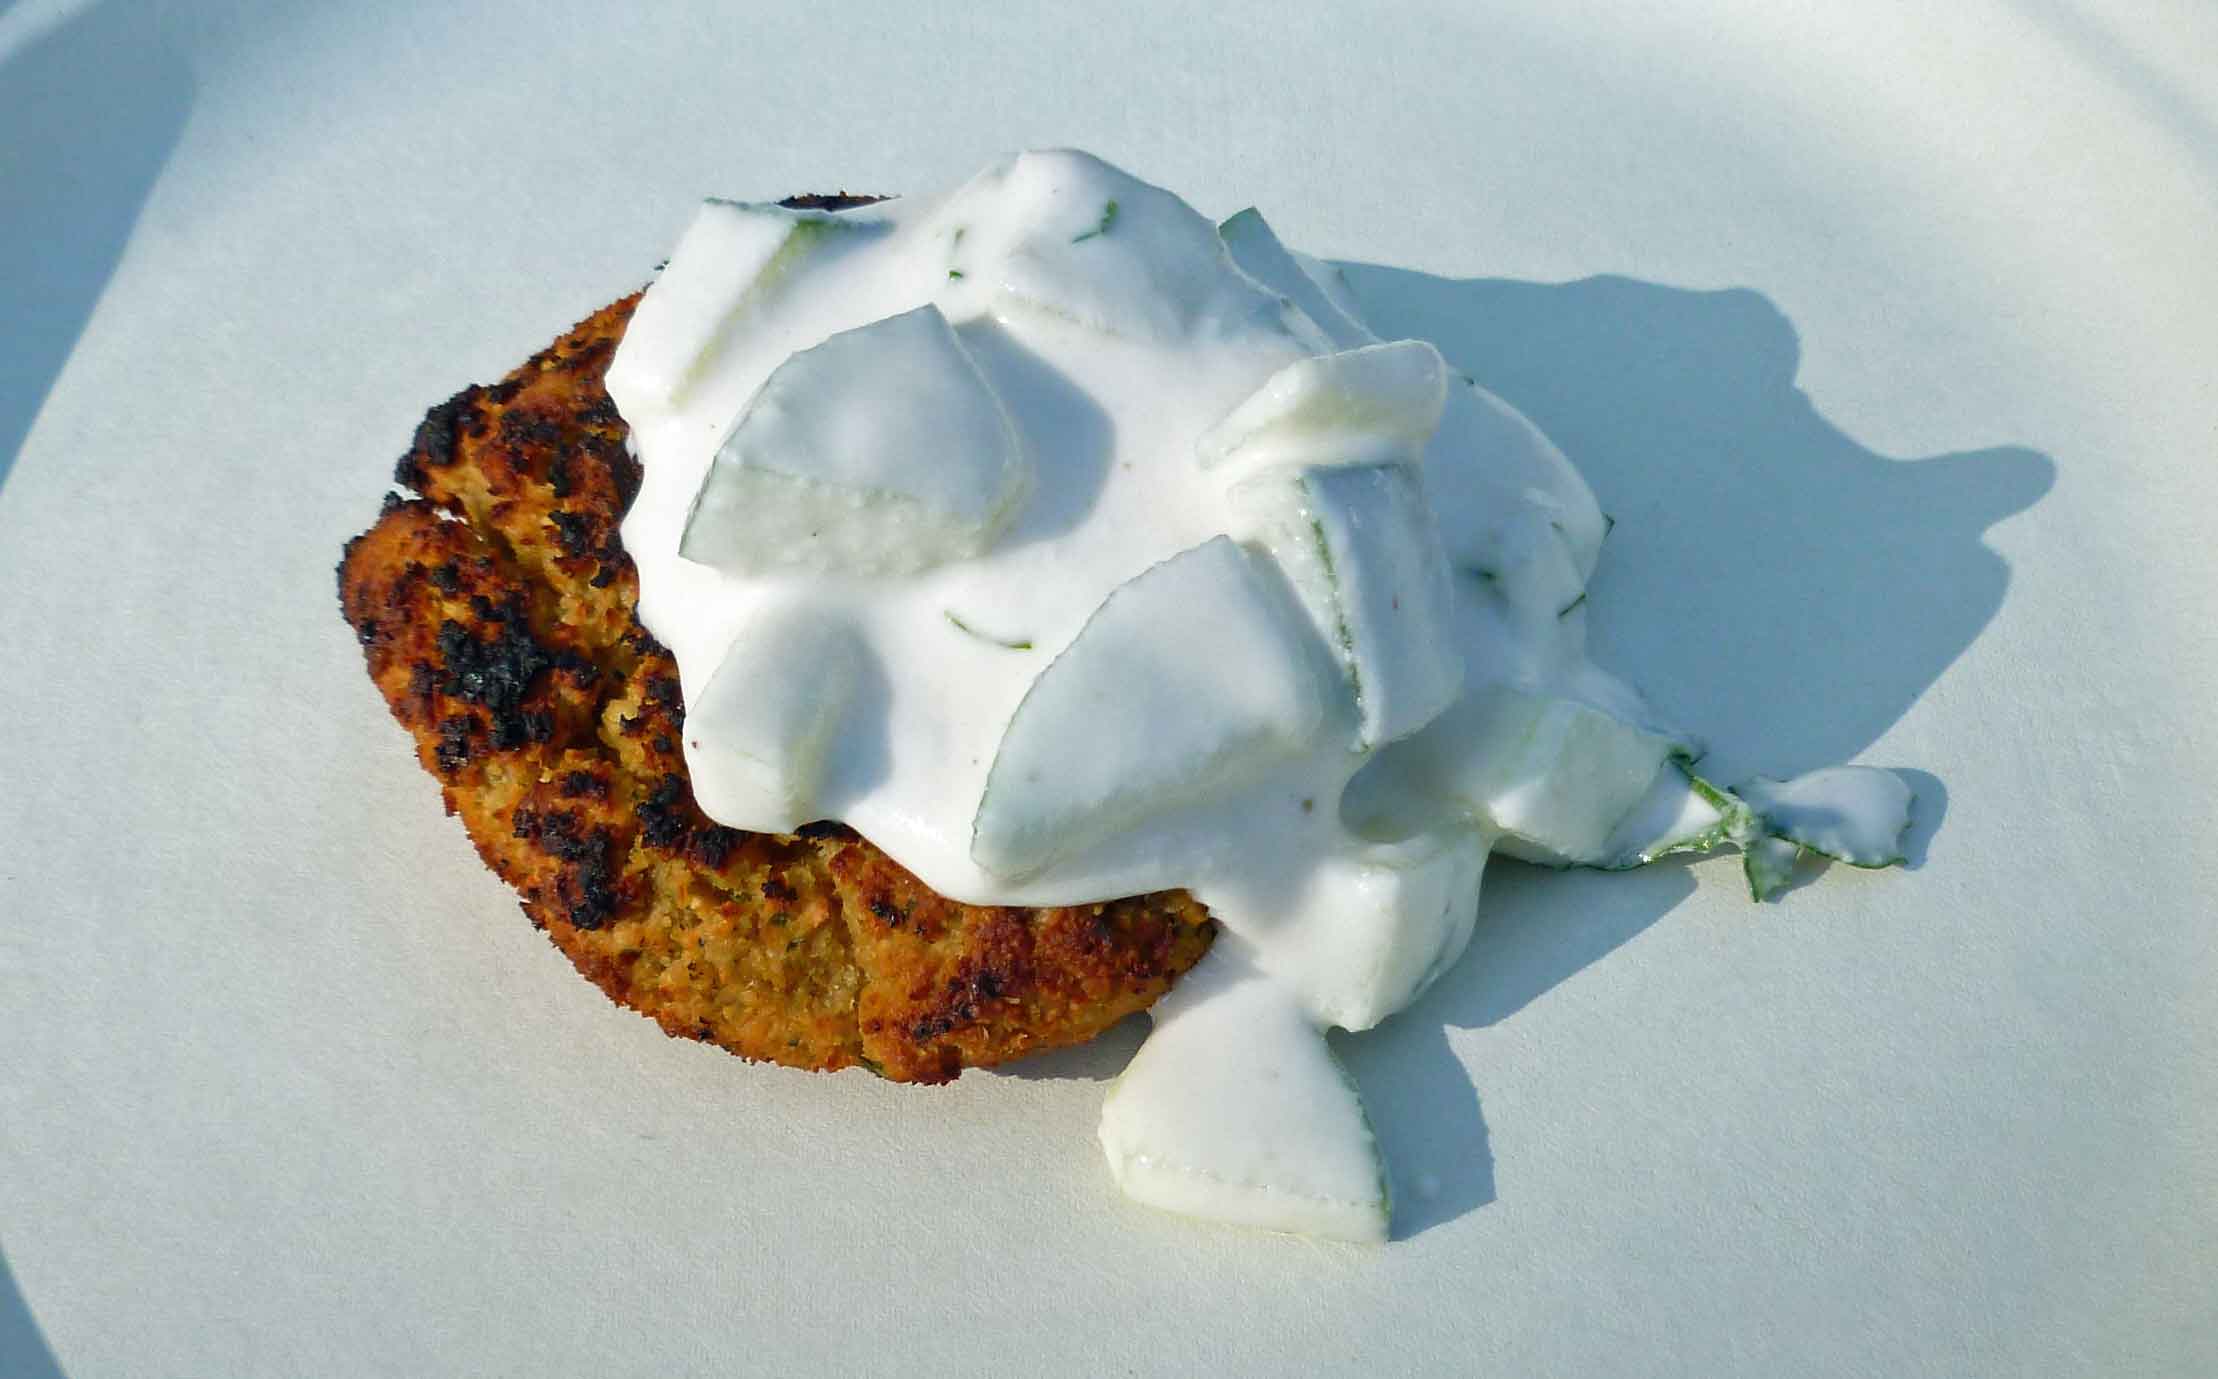
    Falafel Burgers

    • l lb bag of garbanzo beans/chick peas (soaked overnight, see below)
    • 1 medium onion, chopped
    • 6-8 cloves of garlic
    • 1/2 cup of parsley, chopped
    • 2 teaspoons of salt
    • 1 teaspoon of coriander
    • 1/2 teaspoon of black pepper
    • 2 teaspoons of cumin
    • 1 teaspoon of paprika
    • 1/4 to 1/2 teaspoon of cayenne pepper (depending on your spice tolerance)
    • 2 Tablespoons of garbanzo bean/chick pea flour
    • A food processor (you really can’t do this in a blender)

    Place the garbanzo beans in a large bowl and cover them by 3-4 inches of water.  Let them soak overnight.  They should double in size.

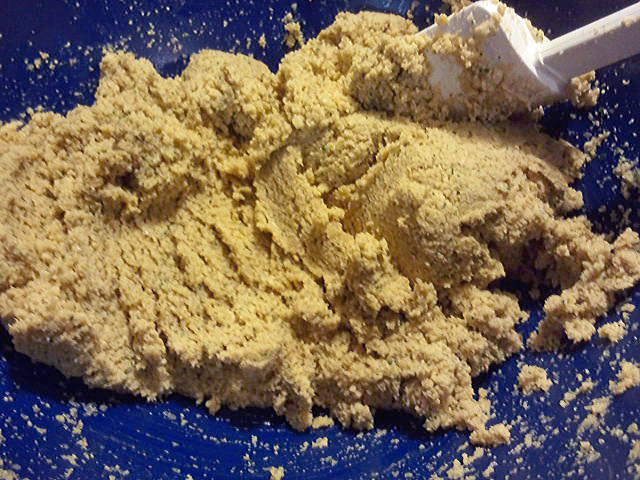
    Drain and rinse the garbanzo beans thoroughly.  Unless your food processor is a heck of a lot bigger than mine, you’re going to have to do the following in batches.  Place the garbanzo beans, onion, garlic, parsley, salt, coriander, black pepper, cumin, paprika, cayenne pepper, and flour in the food processor and process until a rough coarse meal forms, so that it’s somewhere between a paste and the size of millet or quinoa.  To do this, I had to process garbanzo beans in three batches, leaving them a bit rough, dumping the processed garbanzo beans into an appropriately sized holding bowl.  Then I put about half a cup of the processed garbanzo beans back in the food processor along with the onion, garlic, parsley, salt, coriander, black pepper, cumin, paprika, cayenne pepper, and flour, and processed it. Then I dumped the completed mix back into the bowl and stirred it with the plain garbanzo beans and then ran the whole  mixture back from the food processor to ensure that the spice mixture was evenly mixed with all the garbanzo beans.

    Garbanzo bean mixture after processing
    Garbanzo bean mixture after processing

    You can make the garbanzo bean mixture the day before you intend to serve the burgers to make the day of cooking easier.  If you do, cover the mixture with plastic wrap and put it in the refrigerator until you need it.

    If you’re cooking these on a grill (yes, it is possible), make your burgers slightly smaller, more like sliders because they’ll hold together easier.  Spray down your grill with grilling spray, checking to make sure it’s safe for your allergies. Depending on the heat of your grill, cook each side 2-3 minutes at least each side.  Only turn them once otherwise you make make a mess.  To get them golden brown, we cooked them on a hotter grill that we thought appropriate at first.

    Grilled Falafel Burgers
    Grilled Falafel Burgers

    If you don’t have a grill, you can cook them in a skillet with some vegetable oil.  Fill a skillet with about a inch of vegetable oil and heat the oil at medium heat.  Cook them for 2-3 minutes per side until they are golden brown.  Remove them from the oil with a slotted spoon and drain them on paper towels.

    Serve your falafel in a wrap with Tzatziki Sauce, some lettuce, and other veggies or put it on a burger bun with the Tzatziki Sauce.

    Enjoy!

  • Awesome Curry

    Chickpea Spinach Curry
    Chickpea Spinach Curry

    Disclaimer: This is not an original recipe.  But it’s the best curry I’ve ever made at home, and as such, I want to share it with all of you today.  With full credit to the author and cookbook, of course.

    The Chickpea and Spinach Curry comes from one of my all-time favorite cookbooks, Isa Chandra Moskowitz’s Vegan with a Vengeance.  This is the first cookbook I purchased after my first intolerance-related diagnosis — lactose intolerance.  While I ate a strictly vegan diet for a while, and don’t at the moment, I still love vegan cookbooks.  They correlate with my preferred way of eating — heavy on the vegetables — and a good vegan cookbook relies mostly on whole foods, not processed foods.  In a completely non-compensated way, I can highly and heartily endorse this whole cookbook (though, honestly, if you’re brand new to vegan cooking, consider starting with Veganomicon, as it’s got more basic information in it and a broader range of recipes).  Most vegan cookbook authors are very aware of ingredients and a great place to learn to cook without — no matter what you’re cooking without.

    And it’s a big hit at potlucks — with vegans and omnivores alike.  The recipe below is kind of huge.  If it’s just for me, I made a half-recipe.

    So, without further ado:

    Mise en place
    Mise en place

    Chickpea and Spinach Curry, from Vegan with Vengeance by Isa Chandra Moskowitz

    Preheat a pot over medium heat.  A good Dutch oven would work, if you have one, or a large sauce pan, but to minimize the mess I generally make with cooking (and because I don’t have a Dutch oven), I use my stock pot.  When the pot is hot,  add

    • 3 Tablespoons oil (not olive, vegetable, as this is kind of hot for olive oil)
    • 2 teaspoons mustard seeds

    Cover the pot and let the seeds pop for about a minute.  They do pop, like popcorn.  It’s cool.

    Turn the heat up to medium-high. Add the following:

    • 1 large onion, chopped (about 2 cups)

    Sautee until it starts to brown — 5-10 minutes, depending on your heat level.

    Add and sautee two minutes:

    • 4 cloves garlic, minced
    • 2 Tablespoons ginger, minced or microplaned*

    Add and sautee another minute:

    • 3 teaspoons curry powder**
    • 2 teaspoons ground cumin

      pile o' spice
      pile o’ spice
    • 1 teaspoon ground coriander
    • 1/8 teaspoon ground cloves
    • 1/2 teaspoon ground cinnamon
    • 3 cardamom pods
    • 1/2 teaspoon salt
    • 1/4 cup of juice drained from can of diced tomatoes
    • 14 oz can of diced tomatoes, with juice drained and reserved*

    Rinse and drain, then chop

    • 10 cups of spinach, chopped.  Yes this seems like a TON, but it really will all incorporate perfectly.  Add this in handsful, stirring each addition until wilted.

    When all the spinach is wilted, add:

    • 2 cans of chickpeas (15 oz. each), rinsed and drained (4 cups if you cook your own)

    Stir, cover and turn heat to low.  If you’re planning to make rice, start it now.  Let the stew simmer for 10 minutes.

    Uncover, stir, taste.  Adjust the seasonings if necessary (I’ve only ever needed a tiny pinch of salt), and let simmer for another 10 minutes, until its all thickened and wonderous.  Enjoy it over rice.

    *The single asterisk represents minor alterations I’ve made to the original recipe.

    **Curry powder is amazing, but it’s a blend of ground spice, so quality can vary widely.  To get a good curry, the spices must be fresh when they’re combined and reasonably fresh when you use it.  And your curry dish will only be as good as your curry spice is.  As you might already know, both of us believe the post-apocalypse relies heavily on Penzey’s Spices, based in Wisconsin.  They have a variety of curries; if you’re new to curry, try the sweet curry.  Curry is NOT inherently spicy hot, so don’t be scared if you don’t like spicy.  If you do like spicy, try the hot curry.

    So that’s the best curry I know how to make.  Let us know what you think.

  • Hot & Crazy Noodles Apocalypse Style

    Hot & Crazy Asian Noodles Apocalypse Style
    Hot & Crazy Asian Noodles Apocalypse Style

    Before the food allergy apocalypse hit, one of the things I really liked was Thai food, and one of the dishes I really enjoyed at Siam Orchid, our local Thai place, was Hot & Crazy Noodles, which is a spicy version of Pad Sei Ew (or whatever spelling variant of Thai anglicized you might find).  It’s probably a safe-ish dish for me still, but going to Thai places reminds me of all the curry and satay and other yummy dishes that I now cannot eat because of the whole coconut thing, so I just don’t go.  But I’ve been thinking a lot about it lately, so I thought I’d try to do my own version.

    Hot & Crazy Asian Noodles Apocalypse Style

    Makes 4-6 servings (if you are cooking for one or two people and don’t want tons of leftovers, cut the portion amounts in half).

    Marinade for Chicken

    Other Ingredients

    • 1 lb of sliced chicken breast
    • 8 oz of dry rice noodles (check labels, make sure only ingredients are rice and water)
    • 1 teaspoon of canola oil
    • 1-2 Tablespoons of chili oil (make sure it’s gluten free, I used Hokan Chili Oil )
    • 1 carrot, sliced thinly
    • 1 small to medium onion, sliced thinly
    • 1 cup of snow peas or sugar snap peas, washed
    • 1 small zucchini, sliced thinly
    • 2-4 stalks of asparagus, cut in bite size pieces
    • 1-2 green onions, both green and white parts, sliced
    • 2 cups of mung bean sprouts approximately
    • 2 Thai chilis
    • 2 cups of baby bok choi leaves, washed and detached from heads of baby bok choi
    • 10-15 Thai basil leaves to taste

    Sauce for Noodles

    First, mix the soy sauce and the baking soda for the chicken marinade in a small bowl and then add the sliced chicken, mixing it well.  Put it aside.

    Bring a large pot of water to a boil. Add the rice noodles and cook according to the directions on the package (mine said about 6-8 minutes). When done, drain the noodles using a colander and then place them back in the pot, tossing them with the canola oil so that they are less likely to stick together.

    Cooked and Drained Rice Noodles
    Cooked and Drained Rice Noodles

    Using some of the chili oil, coat the bottom of your wok (or skillet in my case, I know I used to have a wok, but I have no idea where it went), turn the heat to medium high and cook the chicken in batches so it fries and doesn’t just steam.  Once you have finished one batch, place it aside in a large bowl and cook then next batch, again placing it the large bowl when it’s cooked.

    Chicken cooked in batches
    Chicken cooked in batches

    Using a bit more of the chili oil if needed, start stir frying the carrot, onion, peas, zucchini, asparagus, green onion, bean sprouts, thai chili, baby bok choi leaves, and thai basil leaves in batches, adding them to the large bowl when cooked.

    Stir-fried Veggies
    Stir-fried Veggies
    Stir-fried Veggies
    Stir-fried Veggies
    Stir-fried Baby Bok Choi and Basil
    Stir-fried Baby Bok Choi and Basil

    To make the sauce for the noodles, whisk the garlic, ginger, soy sauce, Sriracha, Hoisin sauce, rice wine vinegar, corn starch, sugar and szechuan peppercorns together in a little bowl.  Using a little of the chili oil, stir fry the cooked noodles in your wok/skillet and add the sauce for the noodles, mixing well, until the noodles are hot and thoroughly coated with the sauce.

    Cooked Noodles Coated in Sauce
    Cooked Noodles Coated in Sauce

    Once the noodles are coated and nice and hot, place them in the large bowl with the other ingredients and mix all the ingredients in the bowl thoroughly.

    All cooked ingredients being mixed in bowl
    All cooked ingredients being mixed in bowl

    Once mixed, serve them immediately while they are nice and hot, and have some of the Sriracha and Hoisin available as condiments so your family and/or guests can doctor their portions to their taste.  Enjoy!

    Hot & Crazy Asian Noodles Apocalypse Style
    Hot & Crazy Asian Noodles Apocalypse Style
  • Year of the Snake Stir Fry

    Chinese New Year Stir Fry
    Chinese New Year Stir Fry

    For the many years where the only allergen I needed to avoid was dairy,  Asian restaurants of most types were a saving grace.  With the exception of Indian cuisine, which uses cream and butter, most cuisines of the Asian continent use little to no dairy.

    Now that there are more allergens in my arsenal, it’s not quite as simple.  But what is reasonably simple is learning to adapt recipes at home.  I like that stir fry is an excellent way to incorporate a lot of vegetables into one dish, with meat as a flavoring rather than the focus — and you can make a vegan version by either substituting tofu or seitan for the meat.  This marinade should work well for either, but I have not tried it since I can’t eat either anymore.

    Year of the Snake Stir Fry

    For marinade:

    • 1 teaspoon toasted sesame oil
    • 1 1/4 teaspoon crushed garlic (2-3 cloves)
    • 1 Tablespoon, rounded, crushed or grated ginger
    • 2 Tablespoons gluten-free tamari (soy sauce)
    • 3 Tablespoons rice wine vinegar
    • 4 Tablespoons mirin (Japanese cooking wine) or dry cooking sherry

    Add

    • 1/2 to 3/4 of a pound of thin cut pork sirloin, cut into bite-sized chunks
    • 1 cup thinly sliced onions.

    Marinate overnight.

    Get rice cooking.  I can’t give you a recipe or time — read your package or your rice cooker directions.  I am generally hopeless at cooking rice.  My Chinese ancestors would be less than best pleased.

    Stir fry with

    • 1/4 cup yellow bell pepper, sliced thin
    • 1 cup celery, chopped
    • 1 cup broccoli florets
    • 1 cup of sugar snap peas, whole
    • 1 cup of mushroom pieces, broken instead of sliced
    • 1/4 cup of celery leaves, chopped

    This makes a lot of stir fry.  I tend to stir fry the ingredients in rounds, each ingredient separately — meat first, and then through the veggies.  Strain the marinade out — you want to fry the meat, not boil it — and discard.  Stir fry until cooked through, and then remove from pan.  Cook the peppers.  Remove.  I stir fry in canola oil, and use it sparingly adding a tiny bit with each ingredient.

    Stir Fry Flavor Meld
    Stir Fry Flavor Meld

    When all your food is cooked, dump it all back in the wok, turn the burner off, and give it a few minutes to meld.

    Serve over rice. Or, you know, dump some rice in to flavor meld, too.

  • Sizemore Family Mac n’ Cheez

    Sizemore Family Mac n’ Cheez

    Gluten and Dairy Free Mac and Cheese
    Gluten and Dairy Free Mac and Cheese

    Is there anything better than good solid comfort food?  In this dreary mid-winter, I’m drawn again to this casserole that my friend Corianne gave me back when I needed just to go dairy-free.  The recipe is her mother’s, but it seems like food is a family affair — Corianne and her sister now run the vegan Treehouse Bakery in Phoenix (ask nicely — they do gluten-free!  And if you’re in Phoenix or just a glutton for punishment, like them on Facebook to hear the list of flavors every day.  Can I highly recommend the spicy chocolate cupcakes?).

    Anyway, I’ve tweaked very few things over the years I’ve had this recipe, as it’s pretty much perfect.  It was easy to make gluten-free with quinoa pasta.

    Casserole of Awesome
    Casserole of Awesome

    Gluten-free, Soy-free, Vegan Cashew Mac and Cheese, courtesy of the Sizemore family

    • 2 quarts water
    • 1 teaspoon salt
    • 2 cups gluten-free macaroni (I recommend quinoa pasta)

    Cook mac according to package directions, to the shorter end of the cooking time.  Do not overcook!  Drain.  Pour into greased casserole dish.

    • 1 cup raw cashew pieces
    • 2 cups water

    Add to food processor and process until smooth.

    • 2 oz jar of pimentos
    • 2 Tablespoons lemon juice
    • 2 teaspoons onion powder
    • 2 teaspoons salt
    • 1 teaspoon garlic powder
    • 1/2 teaspoon dry mustard (optional — adds a tiny bit of kick)

    Add these to the cashews, and process until smooth.

    Pour sauce over mac.

    Cover and bake for 30 minutes at 350F.

    Uncover.  Top with gluten-free bread crumbs, if desired (I prefer it without, personally) and bake another 15 minutes uncovered.

    Close up Mmmmmm
    Close up Mmmmmm

    Enjoy.  I think this is best served cold, in the morning, for breakfast, with coffee.  But your mileage may vary.  I think plenty of people like their mac n’ cheez hot.


    Notice: Trying to access array offset on value of type bool in /home/maryzahc/public_html/adultfoodallergies.com/wp-content/plugins/wp-ultimate-recipe/helpers/models/recipe.php on line 254
    Sizemore Family Mac ‘n’ Cheez
    Print Recipe
    Sizemore Family Mac ‘n’ Cheez
    Print Recipe
    Ingredients
    • 2 cups gluten-free pasta (I prefer quinoa macaroni for this)
    • 4 cups water
    • 2 teaspoons kosher salt
    • 1 cup cashew pieces soaked overnight
    • 1 3/4 cups water
    • 2 Tablespoons lemon juice
    • 2 teaspoons onion powder
    • 1 1/4 teaspoons salt
    • 1 teaspoon garlic powder
    • 1/2 teaspoon dry mustard optional — adds a tiny bit of kick
    Servings:
    Share this Recipe
     
    Powered byWP Ultimate Recipe


  • Stout Braised Corned Beef and Cabbage

    Stout Braised Corned Beef and Cabbage
    Stout Braised Corned Beef and Cabbage

    St. Patrick’s Day is coming, and what says St. Patrick’s day better than beer and corned beef and cabbage? Other than bedecking yourself with green leprechaun hats, buckled shoes, and carrying around fake pots of gold, not much. The recipe as I made it has gluten in it, because I used Guinness since I can have wheat, and I also used Beef Reduced Sodium Better than Bouillon to cheat and make my beef broth, which also has gluten in it. To make the recipe gluten free, try Pacific Natural Foods Organic Beef Broth which is gluten free, dairy free, wheat free and soy free, and Green’s Endeavor Double, which is a stout-like gluten free beer.

    Stout Braised Corned Beef & Cabbage

    • 1 large dutch oven
    • 2 – 12 oz bottles of Guinness (or Green’s Endeavor Double, gluten free beer)
    • 2 cups of beef broth (if you use commercially made, make sure it’s gluten free and dairy free)
    • 1 Tablespoon of pickling spice (I used Penzey’s pickling spice blend) or use spice packet that came with corned beef if it’s safe for your allergies

      Garlic bulb cut so all cloves are open
      Garlic bulb cut so all cloves are open
    • 1 bulb of garlic, cut as shown
    • 1/2 a medium or large onion, or one small onion, peeled and sliced
    • 3-4 lb corned beef (the one I used was Freirich Certified Angus Beef® Corned Beef Brisket, Mary Kate was awesome and called the company and the natural flavorings were only spices, and they verified that it was dairy, soy and gluten free)
    • enough to water to cover corned beef in dutch oven
    • 1-2 Tablespoons of bacon fat, shortening or cooking oil
    • 4 red skinned potatoes, scrubbed and trimmed, but not peeled, cut into 1 inch pieces
    • 3 carrots, peeled and trimmed, cut into 3/4 inch pieces
    • 1 small turnip, peeled and cut into 1 inch pieces
    • 3-4 stalks of celery, de-stringed, and cut into 3/4 inch pieces
    • 1 large onion, skin removed and cut in half and then each half into quarters
    • 1 small head of cabbage

    Preheat oven to 300°F. Place dutch oven on large burner on top of stove. Add beer, beef broth, pickling spice, sliced onion, and garlic bulb to dutch oven. Stir to combine all ingredients. Carefully place corned beef into dutch oven, so as not to splash the beer mixture all over yourself like I did. If necessary add enough water that corned beef is covered with liquid.

    Corned Beef with Braising Liquid
    Corned Beef with Braising Liquid

    On the stove top, bring to a boil over medium high heat. When you have a big rolling boil, turn the burner off, place the lid on the dutch oven and put it in the oven.

    Corned Beef in Braising Liquid at Rolling Boil
    Corned Beef in Braising Liquid at Rolling Boil

    Bake in the oven for 1 and 1/2 hours, and then flip the corned beef over carefully in the dutch oven, add more water to cover if necessary, and bake for another 1 and 1/2 hours. You may need to add more time if your corned beef is larger than the one called for here.

    Corned Beef after Braising in Oven for 3 hours
    Corned Beef after Braising in Oven for 3 hours

    Once the corned beef is cooked, take it out of the braising liquid and put in an oven safe dish, cover it with a lid or foil, and place it back in the oven, turning it down to 200°F just to keep it warm until the veggies are cooked. Using a strainer, strain out 4 cups of braising liquid from the pan (removing the bits of onion and pickling spice) and set it aside.

    Strained Braising Liquid
    Strained Braising Liquid
    Vegetables
    Vegetables
    Chopped Veggies
    Chopped Veggies

    If you have not already prepared the vegetables, now’s the time. Cut the potatoes into 1 inch pieces. Remove the ends and skin from the onion, then cut it in half, and then each half into quarters. If the carrots need to be peeled, peel them and then cut in to 3/4 inch pieces.  String the celery and cut into 3/4 inch pieces. Peel the turnip and chop into 1 inch pieces. Cut the cabbage into halves and then each half into quarters.

    Browned Vegetables in Fry Pan
    Browned Vegetables in Fry Pan
    Browned Vegetables in Fry Pan
    Browned Vegetables in Fry Pan

    Once the vegetables are chopped, take a frying pan and melt some of the bacon fat (or shortening or cooking oil) over medium low heat. In smaller batches, brown the vegetables, do not crowd them too much or they won’t get golden brown.


    Deglazing frypan with braising liquid
    Deglazing frypan with braising liquid

    Once you have browned all the vegetables, place all vegetables in a stock pot. Deglaze the fry pan with some of the reserved braising liquid, and then using the strainer, strain the deglazed liquid into the stock pot with the vegetables along with the remainder of the 4 cups of reserved braising liquid in the pot.

    Bring to the vegetables to a simmer over medium heat and cook about 20 minutes or so until vegetables are tender. Once they are ready, turn the heat off, and slice the corned beef against the grain.

    Cooked Corned Beef on Cutting Board
    Cooked Corned Beef on Cutting Board
    Sliced Corned Beef
    Sliced Corned Beef

    Plate corned beef with cabbage and other vegetables, and some of the braising liquid used to cook the veggies. Enjoy!!

    Stout Braised Corned Beef and Cabbage
    Stout Braised Corned Beef and Cabbage
  • Come Home to Chicken Stew

    Chicken Stew
    Chicken Stew

    Who likes coming home to dinner already made?  ME!  But hey, I’m single and I work full-time.  Wait.  I have a crock pot.  If you don’t have a house-spouse, your best friend would be the crock pot.  Plug it in as you leave, come home to dinner.  It’s happiness in an appliance.

    Feel free to mess with the vegetables — this recipe is pretty forgiving, and you can have what you like.  If you do not like parsnips, cannot find parsnips, or don’t want to go look, use potatoes instead of them.  If you’ve never had them, give parsnips a go — they’re surprising in flavor, and add something good to this stew.

    Come Home to Chicken Stew

    • 1 pound of chicken breast, cut in 1 inch cubes (could use thighs, too, if you prefer)
    • 2-3 Tablespoons all-purpose gluten-free flour mix (I used Bob’s, more or less depending on how wet your chicken is)
    • 2 teaspoons dried minced onion
    • 1/4 teaspoon thyme
    • 1 teaspoon sweet or Hungarian paprika
    • 1 teaspoon dry mustard
    • 1/2 teaspoon salt*
    • 1/2 teaspoon dill
    • freshly ground pepper, to taste

    Spray or oil your crock.  Add all the above ingredients, and mix thoroughly so chicken is coated and there’s no clumps of flour at the bottom.  If you think your stock is salty, hold off on the salt.

    Add your veg and stock:

    • 2-3 carrots, chopped
    • 2-3 small parsnips, chopped  (or potatoes, see above)
    • 3 ribs celery, chopped
    • 3 cups chicken broth or stock (check for allergens here, unless you make your own)
    • 1 teaspoon balsamic vinegar
    • 2 small or 1 large bay leaves
    • Handful of celery leaves, optional

    Cook on low 8-10 hours or high 4-5 hours.

    Come home and add 1 cup of green beans or peas, if desired, about 1 hour before serving.

    Serve with roasted potatoes, or some sort of roll or bread.

    Hot dinner
    Hot dinner

    What do you do with your crock pot?

  • Happy President's Day! All-American Chicken Ranch Burgers

    Chicken Ranch Burger
    Chicken Ranch Burger

    So Denise and I decided to go theme-ways for this particular Monday holiday.  What does the theme of “Presidents’ Day” conjure up for you?  Let me tell you, I had IDEAS.  Many of them were particularly complicated, some were elaborate, and my fridge is still full of ingredients I bought while over-thinking my options.

    What I ended up with is in homage to our sitting leader, Barack Obama, 44th president.  His love of burgers is well-documented, and our First Lady’s initiatives include promoting healthy eating partly through family time.  This is a quick, easy, and healthy weeknight burger recipe that takes about 15 minutes to prepare.  With sides, this will feed four.  Or it will feed you for a few meals.

    mmmmm
    mmmmmm

    All-American Chicken Ranch Burgers
    Makes 4 quarter pound burgers

    Preheat either indoor grill, grill pan, or cast iron skillet.

    • 1 lb. ground chicken
    • 1 teaspoon crushed garlic (2-3 cloves)
    • 2 teaspoons minced dried onion
    • 1 teaspoon dill
    • ½ teaspoon basil
    • ½ teaspoon dried red bell pepper
    • ¼ teaspoon crushed red pepper flakes (OPTIONAL! For those who like a kick)
    • 1 teaspoon kosher salt
    • 2 Tablespoons potato starch

    Grease your hands, and then mix the spice mix into the ground chicken well.  Divide into 4 balls and compact it.  This is a bit squishier than, say, beef burgers, so it doesn’t form into patties as well.  It seems to work best to leave it in a larger ball and then flatten it once you’ve put it on the heat — or automatically in a two-sided grill.  These take about 5 minutes on a George Foreman grill, and I’m guessing about 3-4 minutes per side in a skillet over medium heat.

    The two flavors of ranch dressing that these ranch burgers are missing are a hit of acid and a creaminess.  So make up for both with an avocado smash.  While the burgers are cooking, make your sauce/topping:

    • 1 ripe avocado
    • 1 lime
    • pinch of salt

    Smash avocado.  Drizzle in a bit of the lime juice to get a guacamole-type consistency.  Sprinkle on just a bit of salt.

    To make up your burger, toast whatever you’re using as a bun.  I used Deland Bakery’s Millet Potato Bread.  If you eat gluten, surely you have a favorite.  If you want a bun, Schar makes some decent ones.

    To this I added:

    • Daiya cheddar block, sliced very thin
    • raw baby spinach, about a handful
    • topped with the burger
    • and then the avocado sauce

    To continue the theme, maybe serve with broccoli, least favorite vegetable of our 41st president, George H.W. Bush?  And jelly beans for dessert, favorite candy of our 40th president, Ronald Reagan?

    Do you enjoy celebrating “minor” holidays?  How?

    (And if anyone tries these on a regular outdoor grill, please let me know how it works out!)