Notice: Function _load_textdomain_just_in_time was called incorrectly. Translation loading for the wp-ultimate-recipe domain was triggered too early. This is usually an indicator for some code in the plugin or theme running too early. Translations should be loaded at the init action or later. Please see Debugging in WordPress for more information. (This message was added in version 6.7.0.) in /home/maryzahc/public_html/adultfoodallergies.com/wp-includes/functions.php on line 6121
Dip or Spread – surviving the food allergy apocalypse (archive)

Category: Dip or Spread

Dip or Spread, noun: Tasty, savory or sweet hearty condiments to be enjoying upon crudites, or allergy friendly crackers or chips. These recipes will not contain dairy, eggs, gluten, wheat or hazelnuts. If we use a top 8 allergen, we will use a tag warning of its use.

  • Cashew Butter and Chocolate Cashew Butter

    Cashew Butter and Chocolate Cashew Butter

    Cashew Butter and Chocolate Cashew Butter
    Cashew Butter and Chocolate Cashew Butter

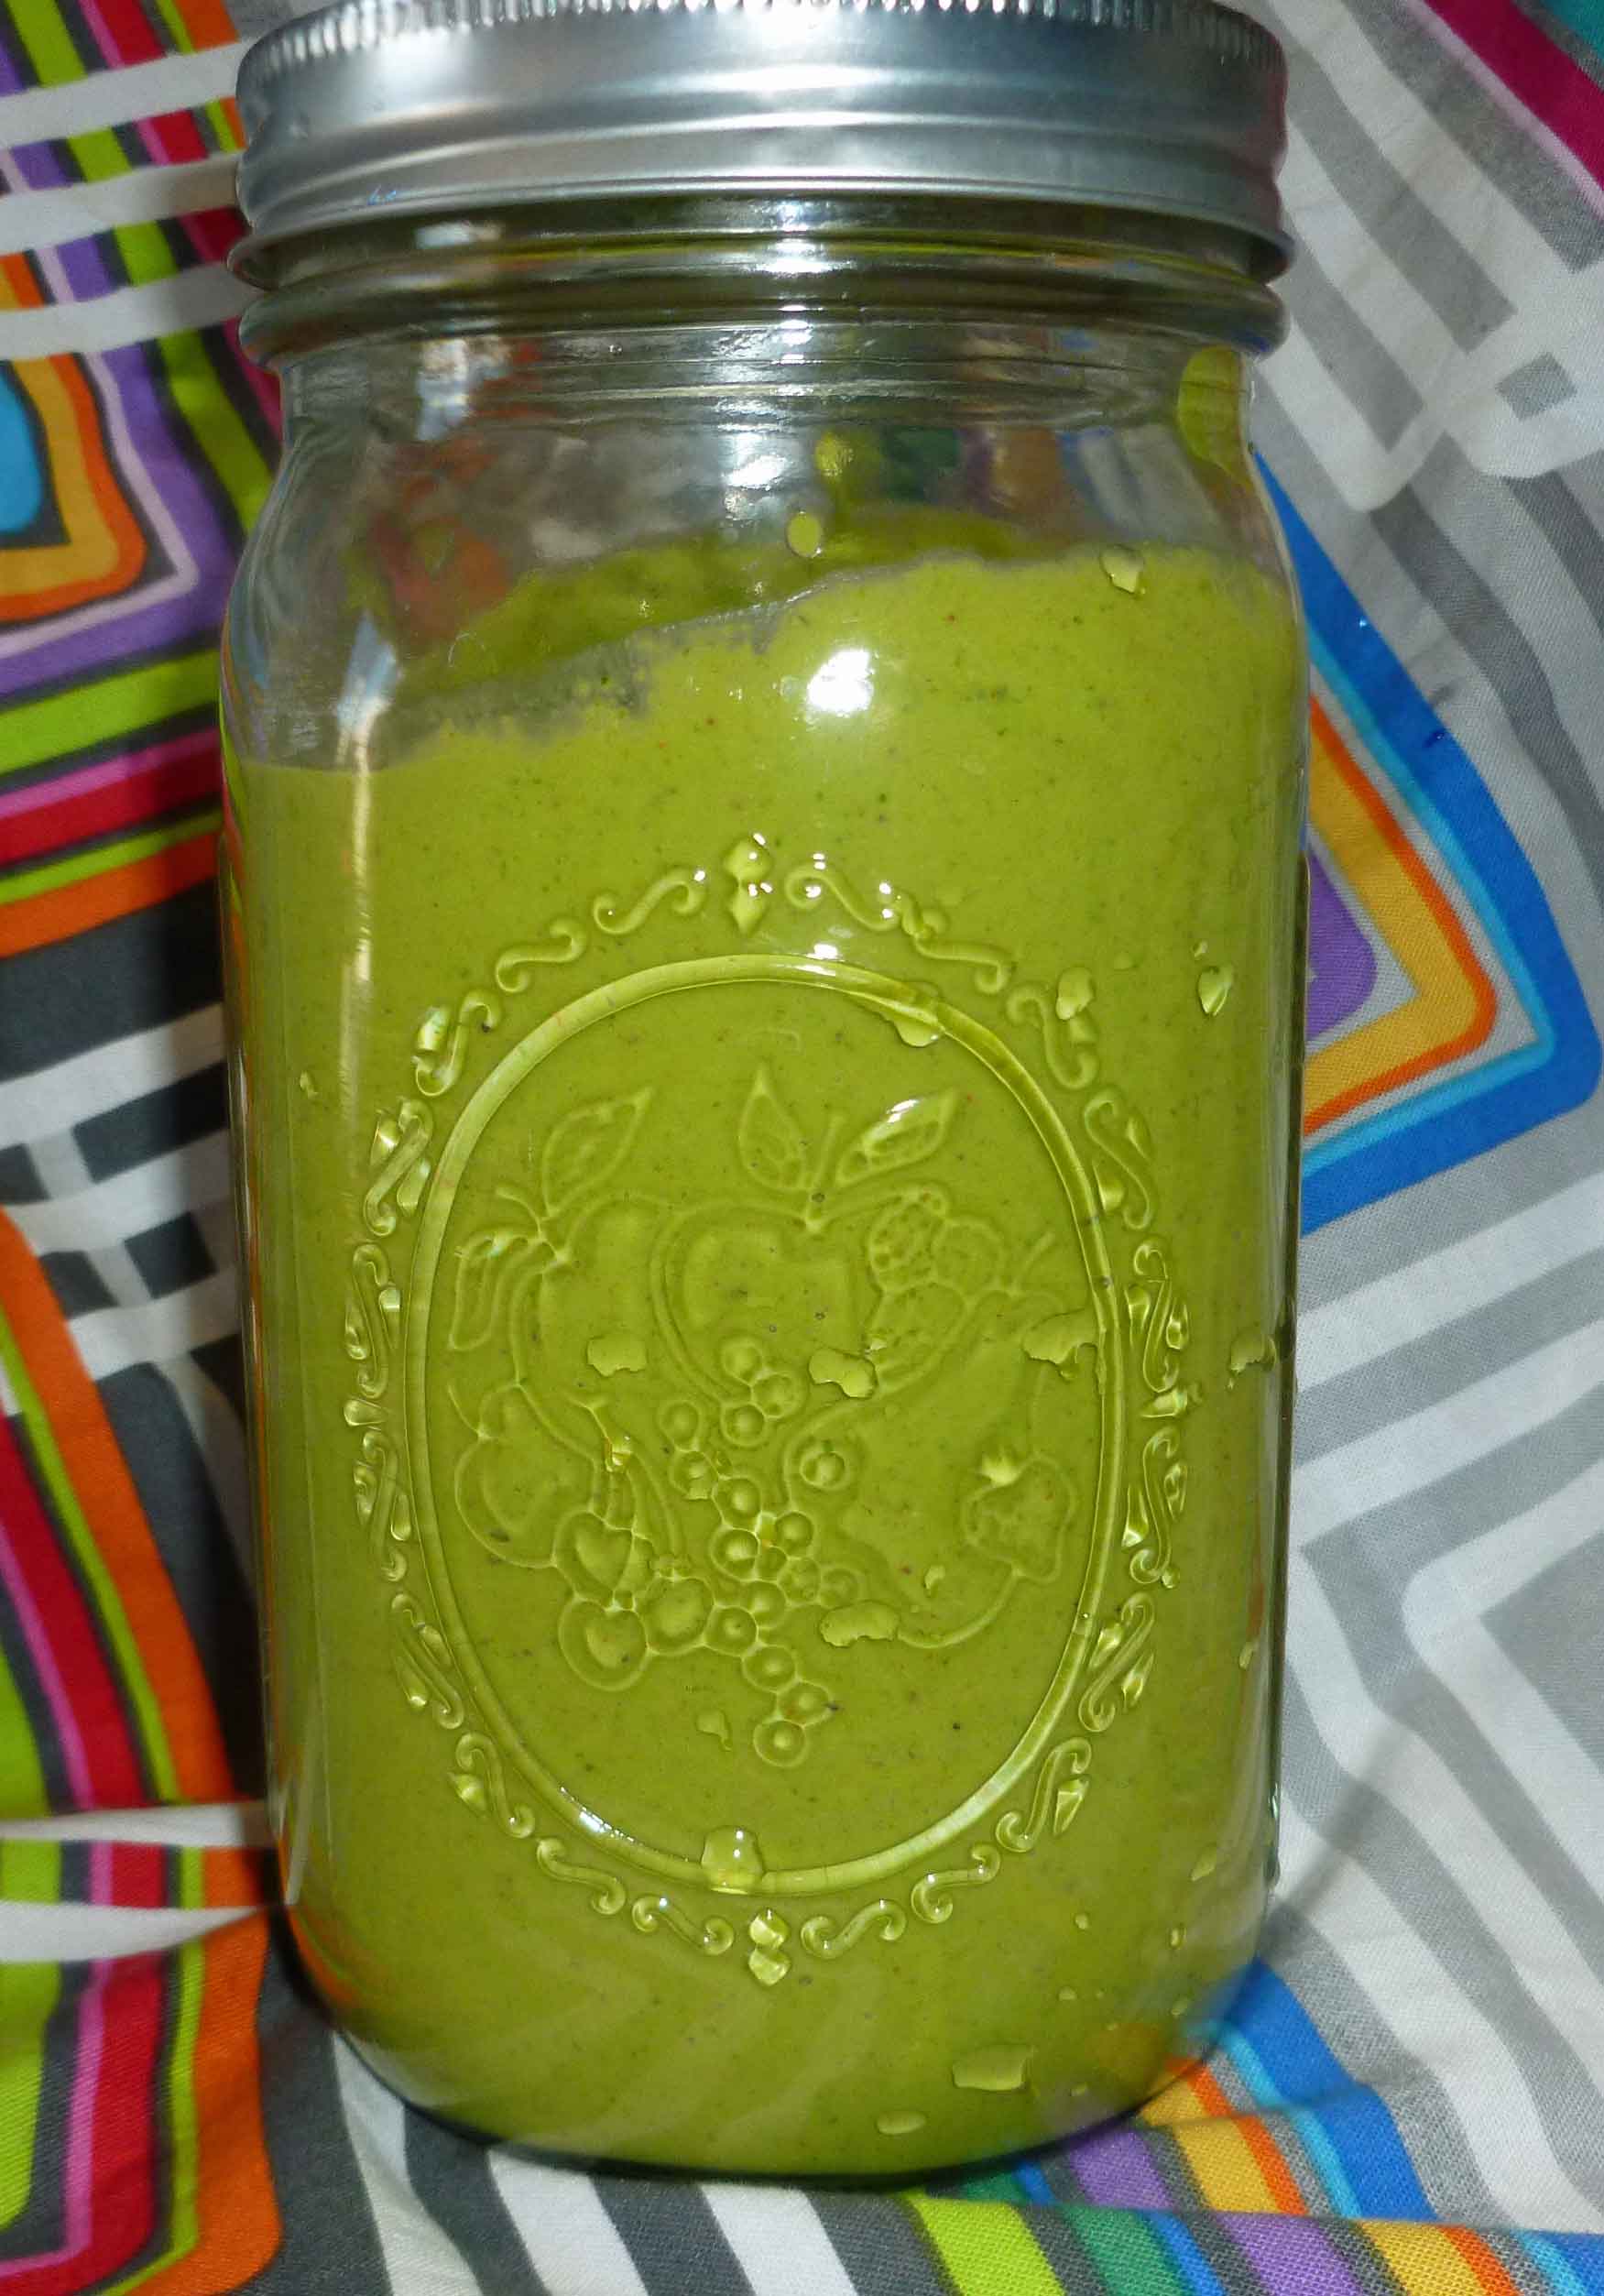
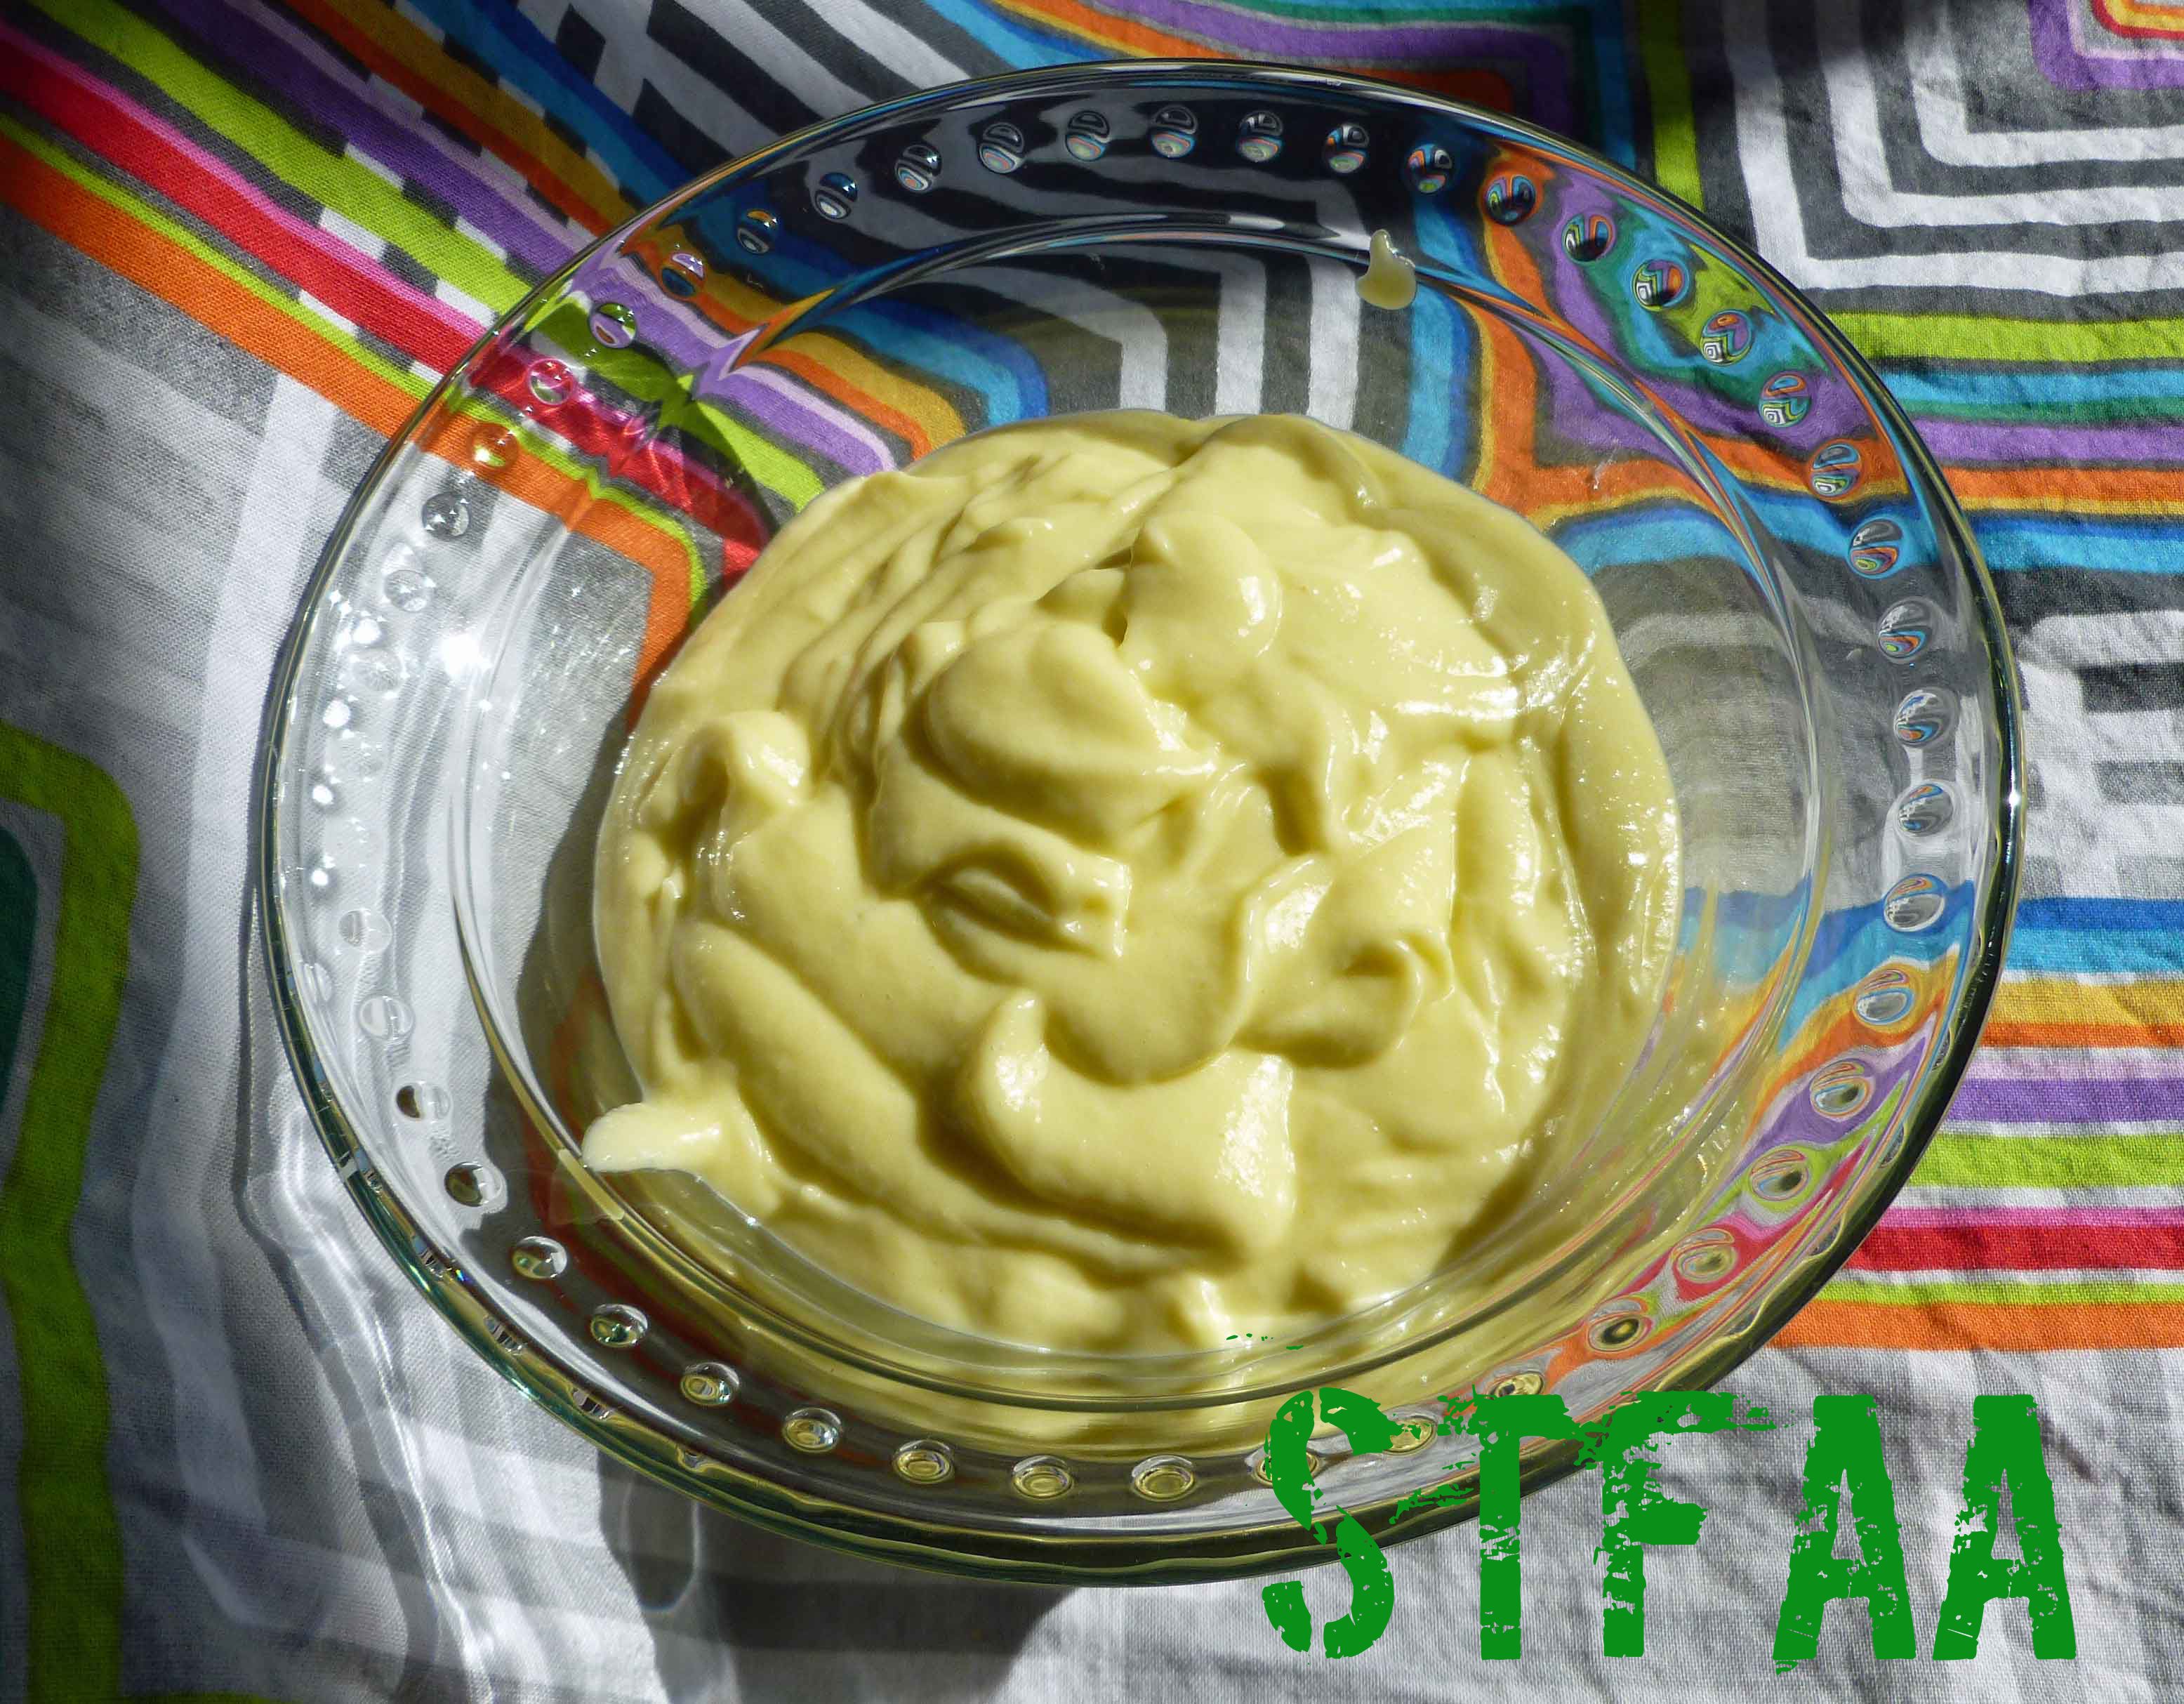
    So this is the last recipe post of breakfast month.  One of the things I miss having for breakfast is a toasted bagel or a toasted slice of bread with some thinly spread butter and some thickly spread peanut butter on top of that. The peanut butter gets all warm and gooey and it’s a quick filling breakfast. (Also, anyone who tells me I don’t need butter if I’m using nut butter is guilty of heresy, just saying.) Well, I haven’t managed a gluten-free, egg-free, dairy-free, and corn-free loaf of bread or bagels yet, but I’m one step closer to getting the ingredients I need. I already had a recipe for a margarine, Homemade Margarine, New and Improved, which works well on baked goods. I’m not allergic to peanuts, but I haven’t been able to buy a commercial peanut butter that’s safe for my cocktail of allergies or that I trust not to have issues with cross contamination in some time. I haven’t sourced safe raw peanuts yet, but I did have cashews I do well with, so I decided to go ahead and make cashew butter. And then I decided to mix some of it with cacao powder to try for something Nutella-esque (I’m allergic to hazelnuts and dairy, among other issues). I used this great tutorial from Tasty Yummies, but used my Vitamix to make the cashew butter.

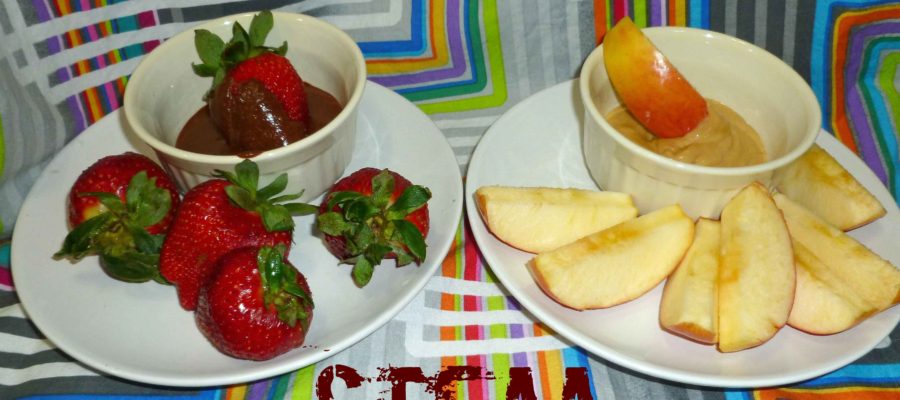
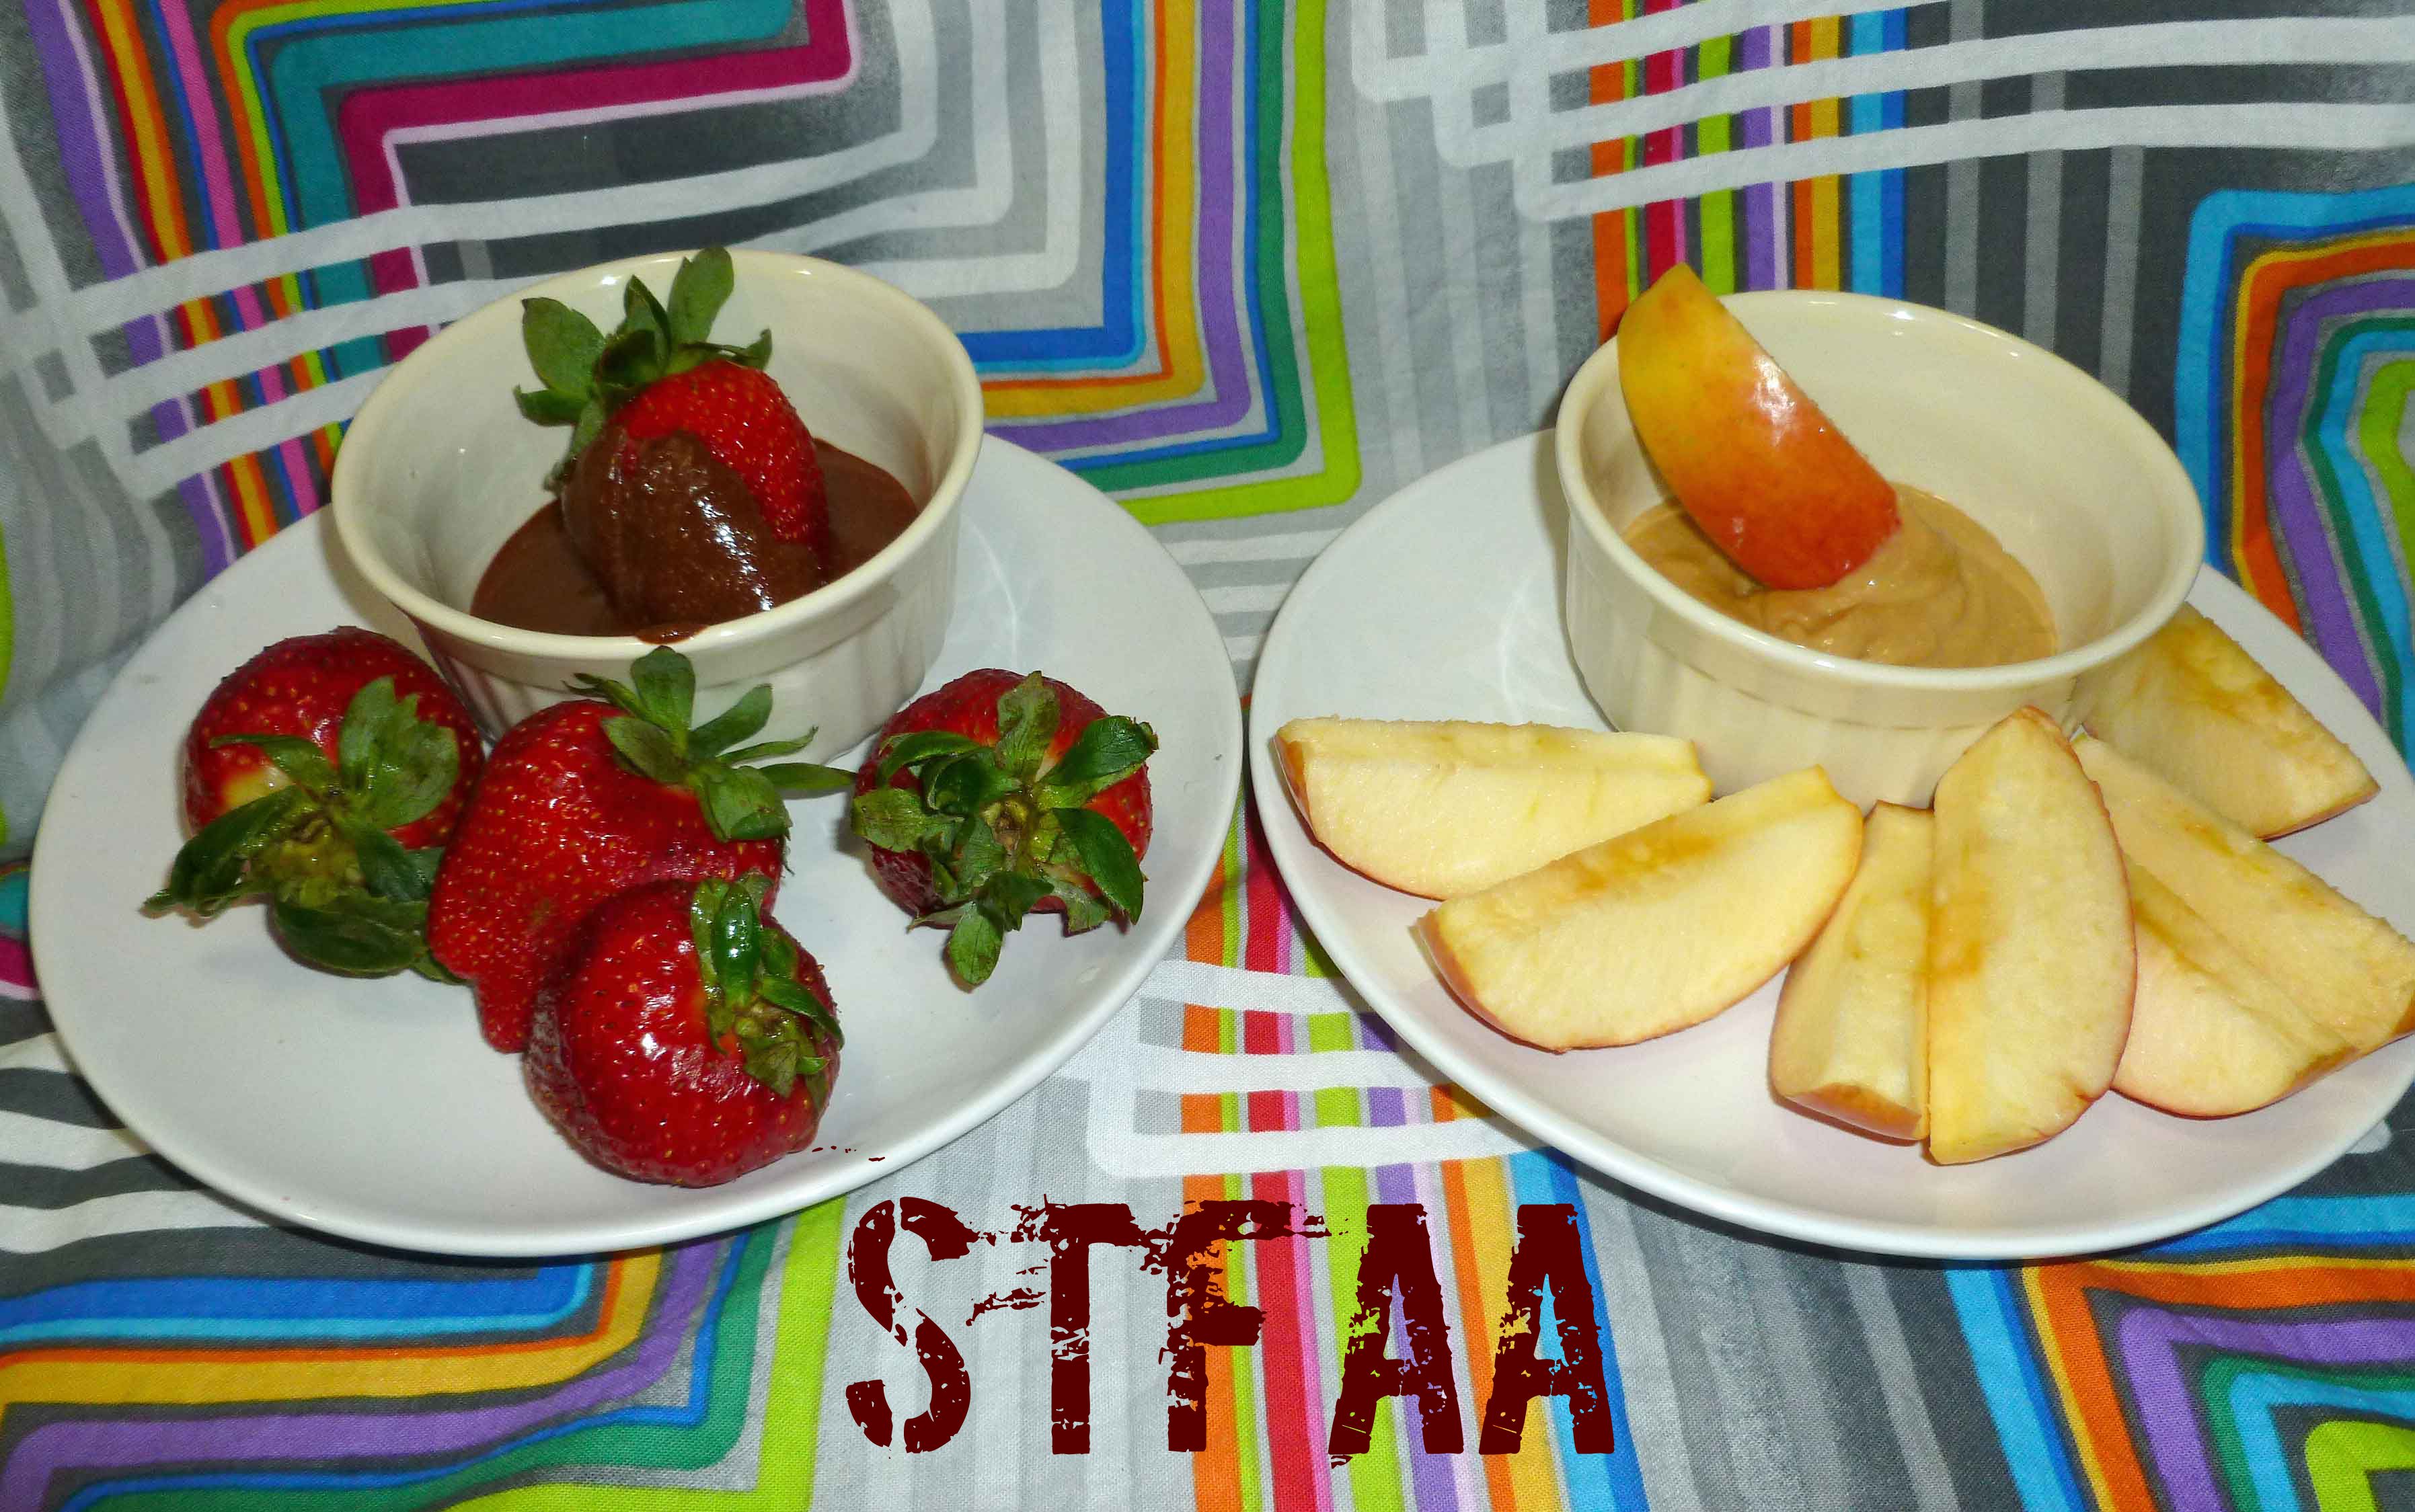
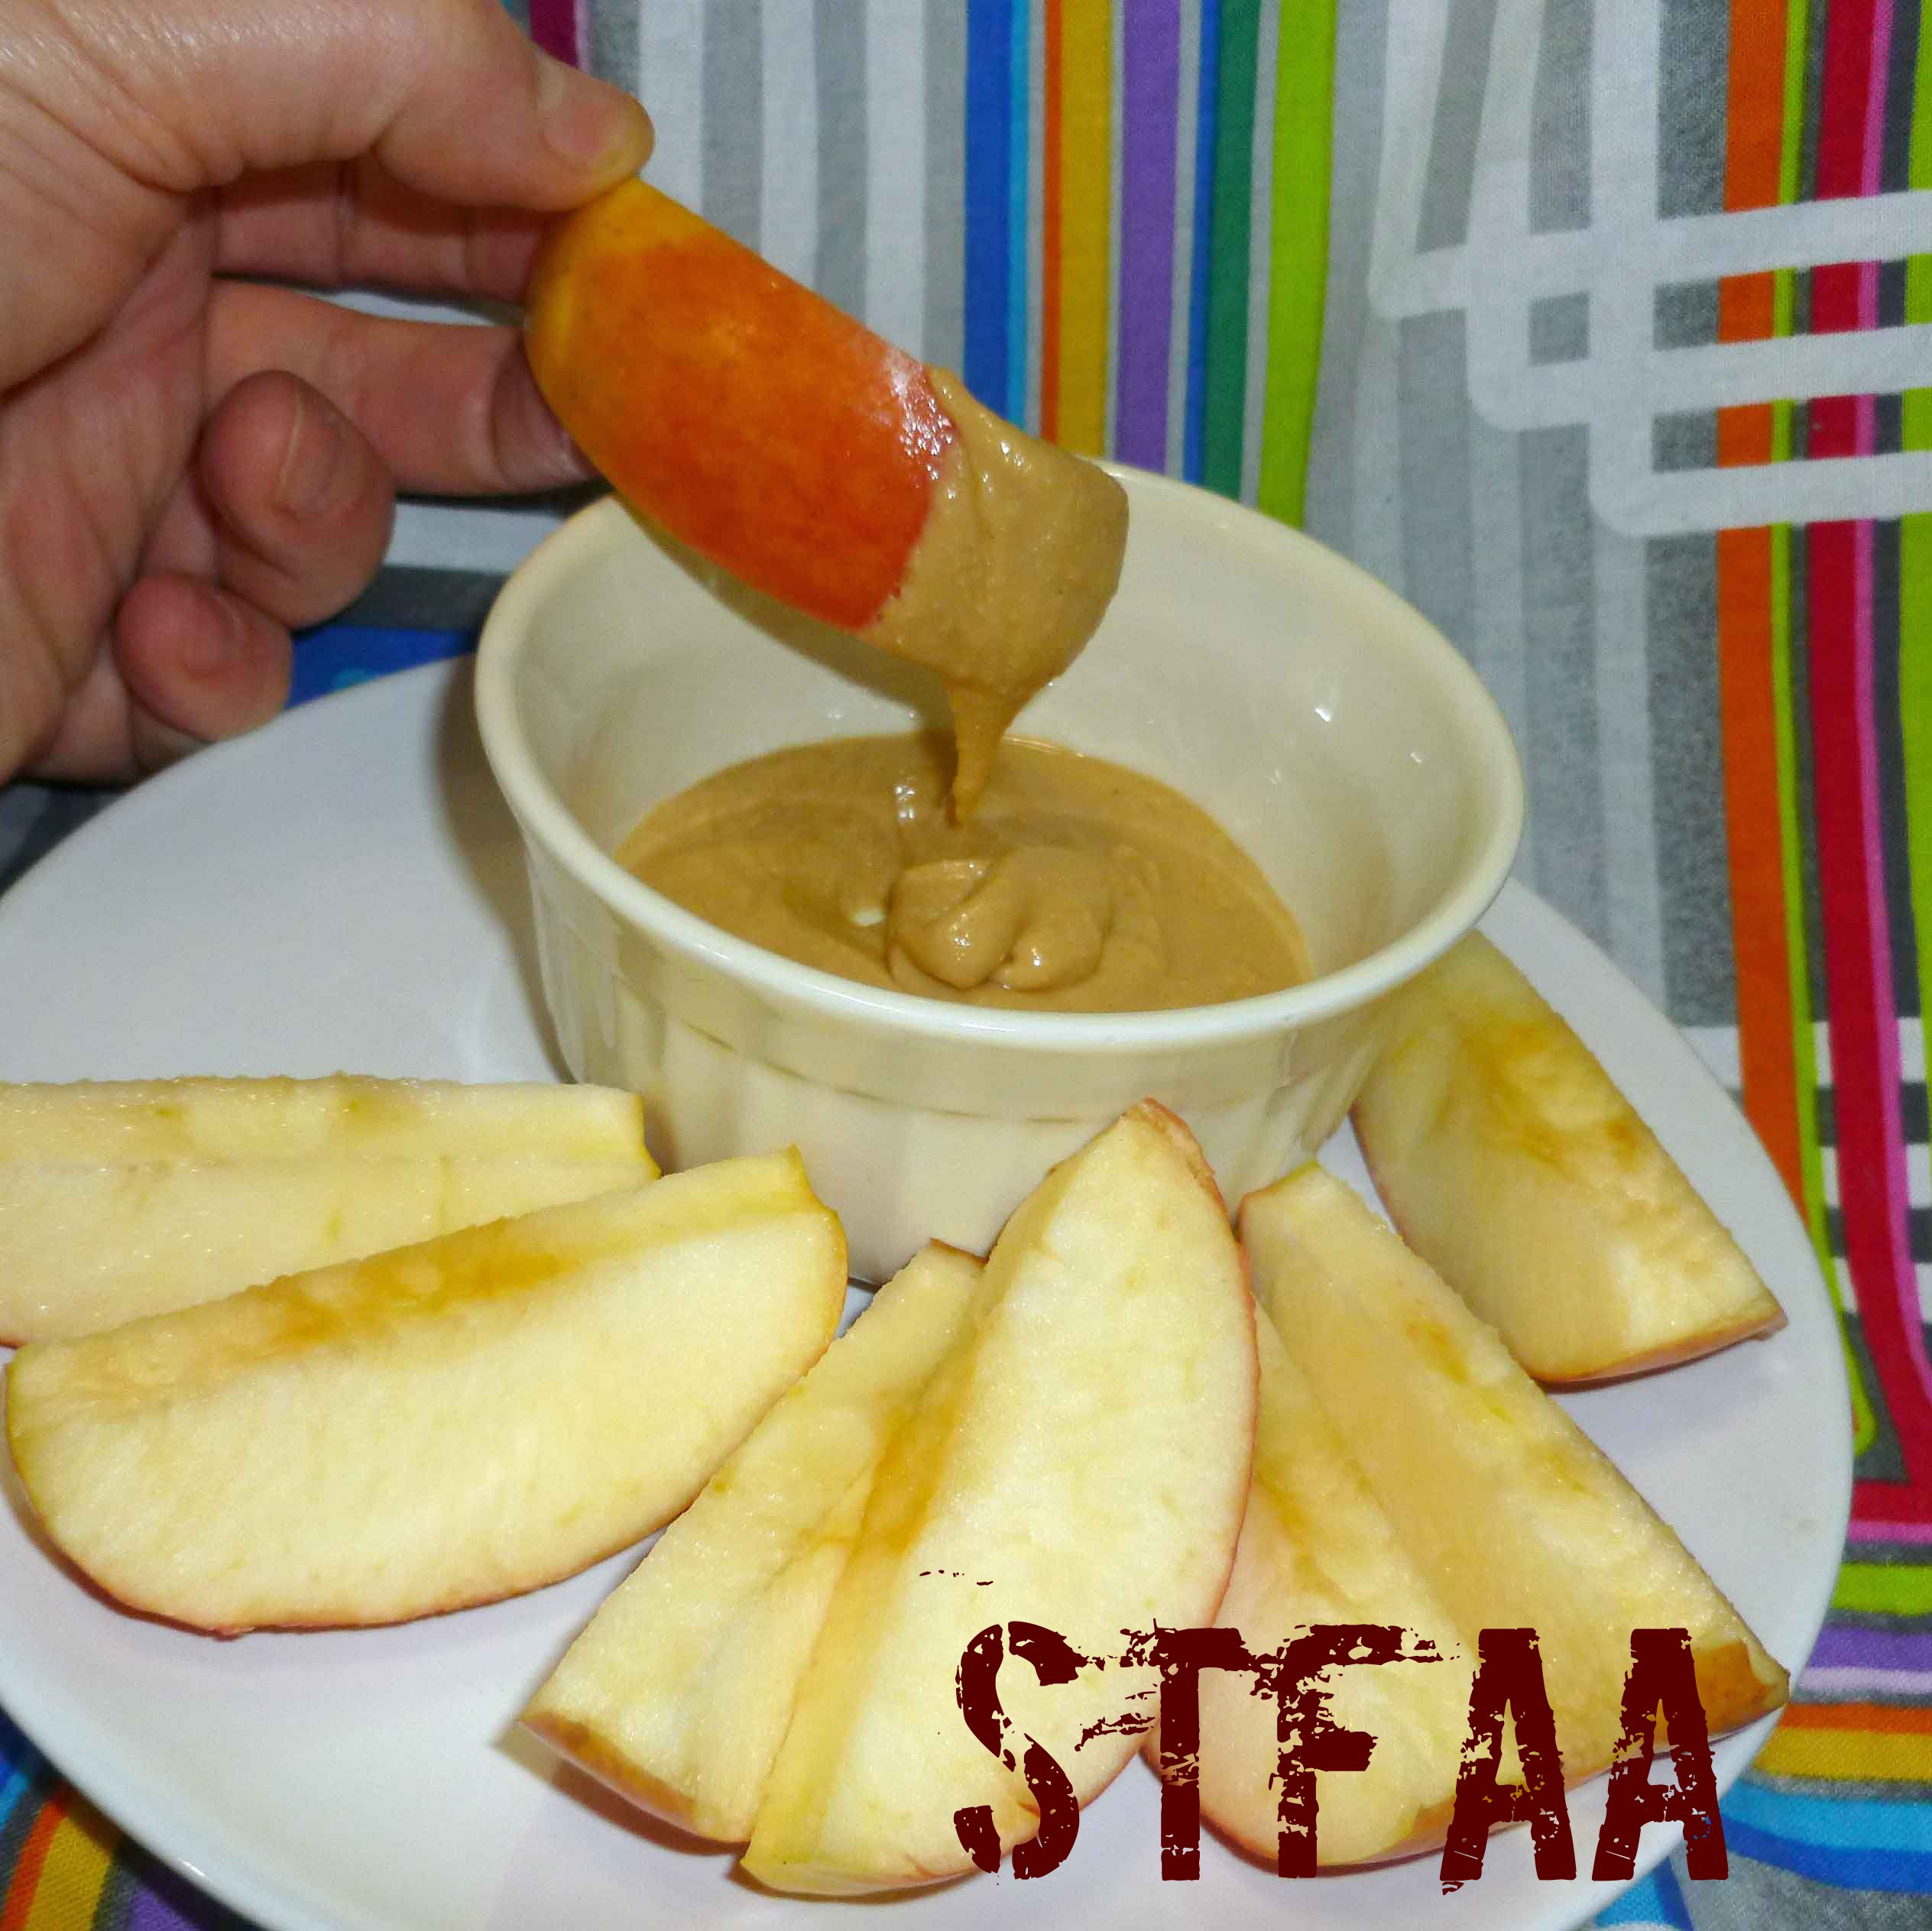
    It’s good. The chocolate cashew butter is not as sweet as Nutella, but it’s nice. And once I manage to make myself bread that I wouldn’t be ashamed to put on the blog, I’ll be even happier. But for now, I ate the plain cashew butter with an apple, and the chocolate cashew butter with strawberries, which isn’t all that bad either.

    Cashew Butter and Chocolate Cashew Butter
    Cashew Butter and Chocolate Cashew Butter

    Notice: Trying to access array offset on value of type bool in /home/maryzahc/public_html/adultfoodallergies.com/wp-content/plugins/wp-ultimate-recipe/helpers/models/recipe.php on line 254
    Cashew Butter and Chocolate Cashew Butter
    Print Recipe
    Makes a cup of each.
    Servings Prep Time
    2 cups 14 hours
    Cook Time
    10-15 minutes
    Servings Prep Time
    2 cups 14 hours
    Cook Time
    10-15 minutes
    Cashew Butter and Chocolate Cashew Butter
    Print Recipe
    Makes a cup of each.
    Servings Prep Time
    2 cups 14 hours
    Cook Time
    10-15 minutes
    Servings Prep Time
    2 cups 14 hours
    Cook Time
    10-15 minutes
    Ingredients
    Cashew Butter
    • 3 cups cashews
    • water (for soaking, if you are soaking)
    • 3-5 Tablespoons grapeseed oil (or other safe for you oil)
    • dash salt
    Additions for Chocolate Cashew Butter
    • 2-3 Tablespoons cacao or cocoa powder
    • 1 teaspoon sugar
    Equipment Needed
    • 1 high performance blender
    Servings: cups
    Instructions
    1. If you want to soak the cashews to clean them well, cover them with water in a bowl and soak for two hours. Drain cashews and dehydrate either in a dehydrator or a oven for 12 to 24 hours at 150°F or less, until dry or crisp. If you are not soaking your cashews, skip to the next step.
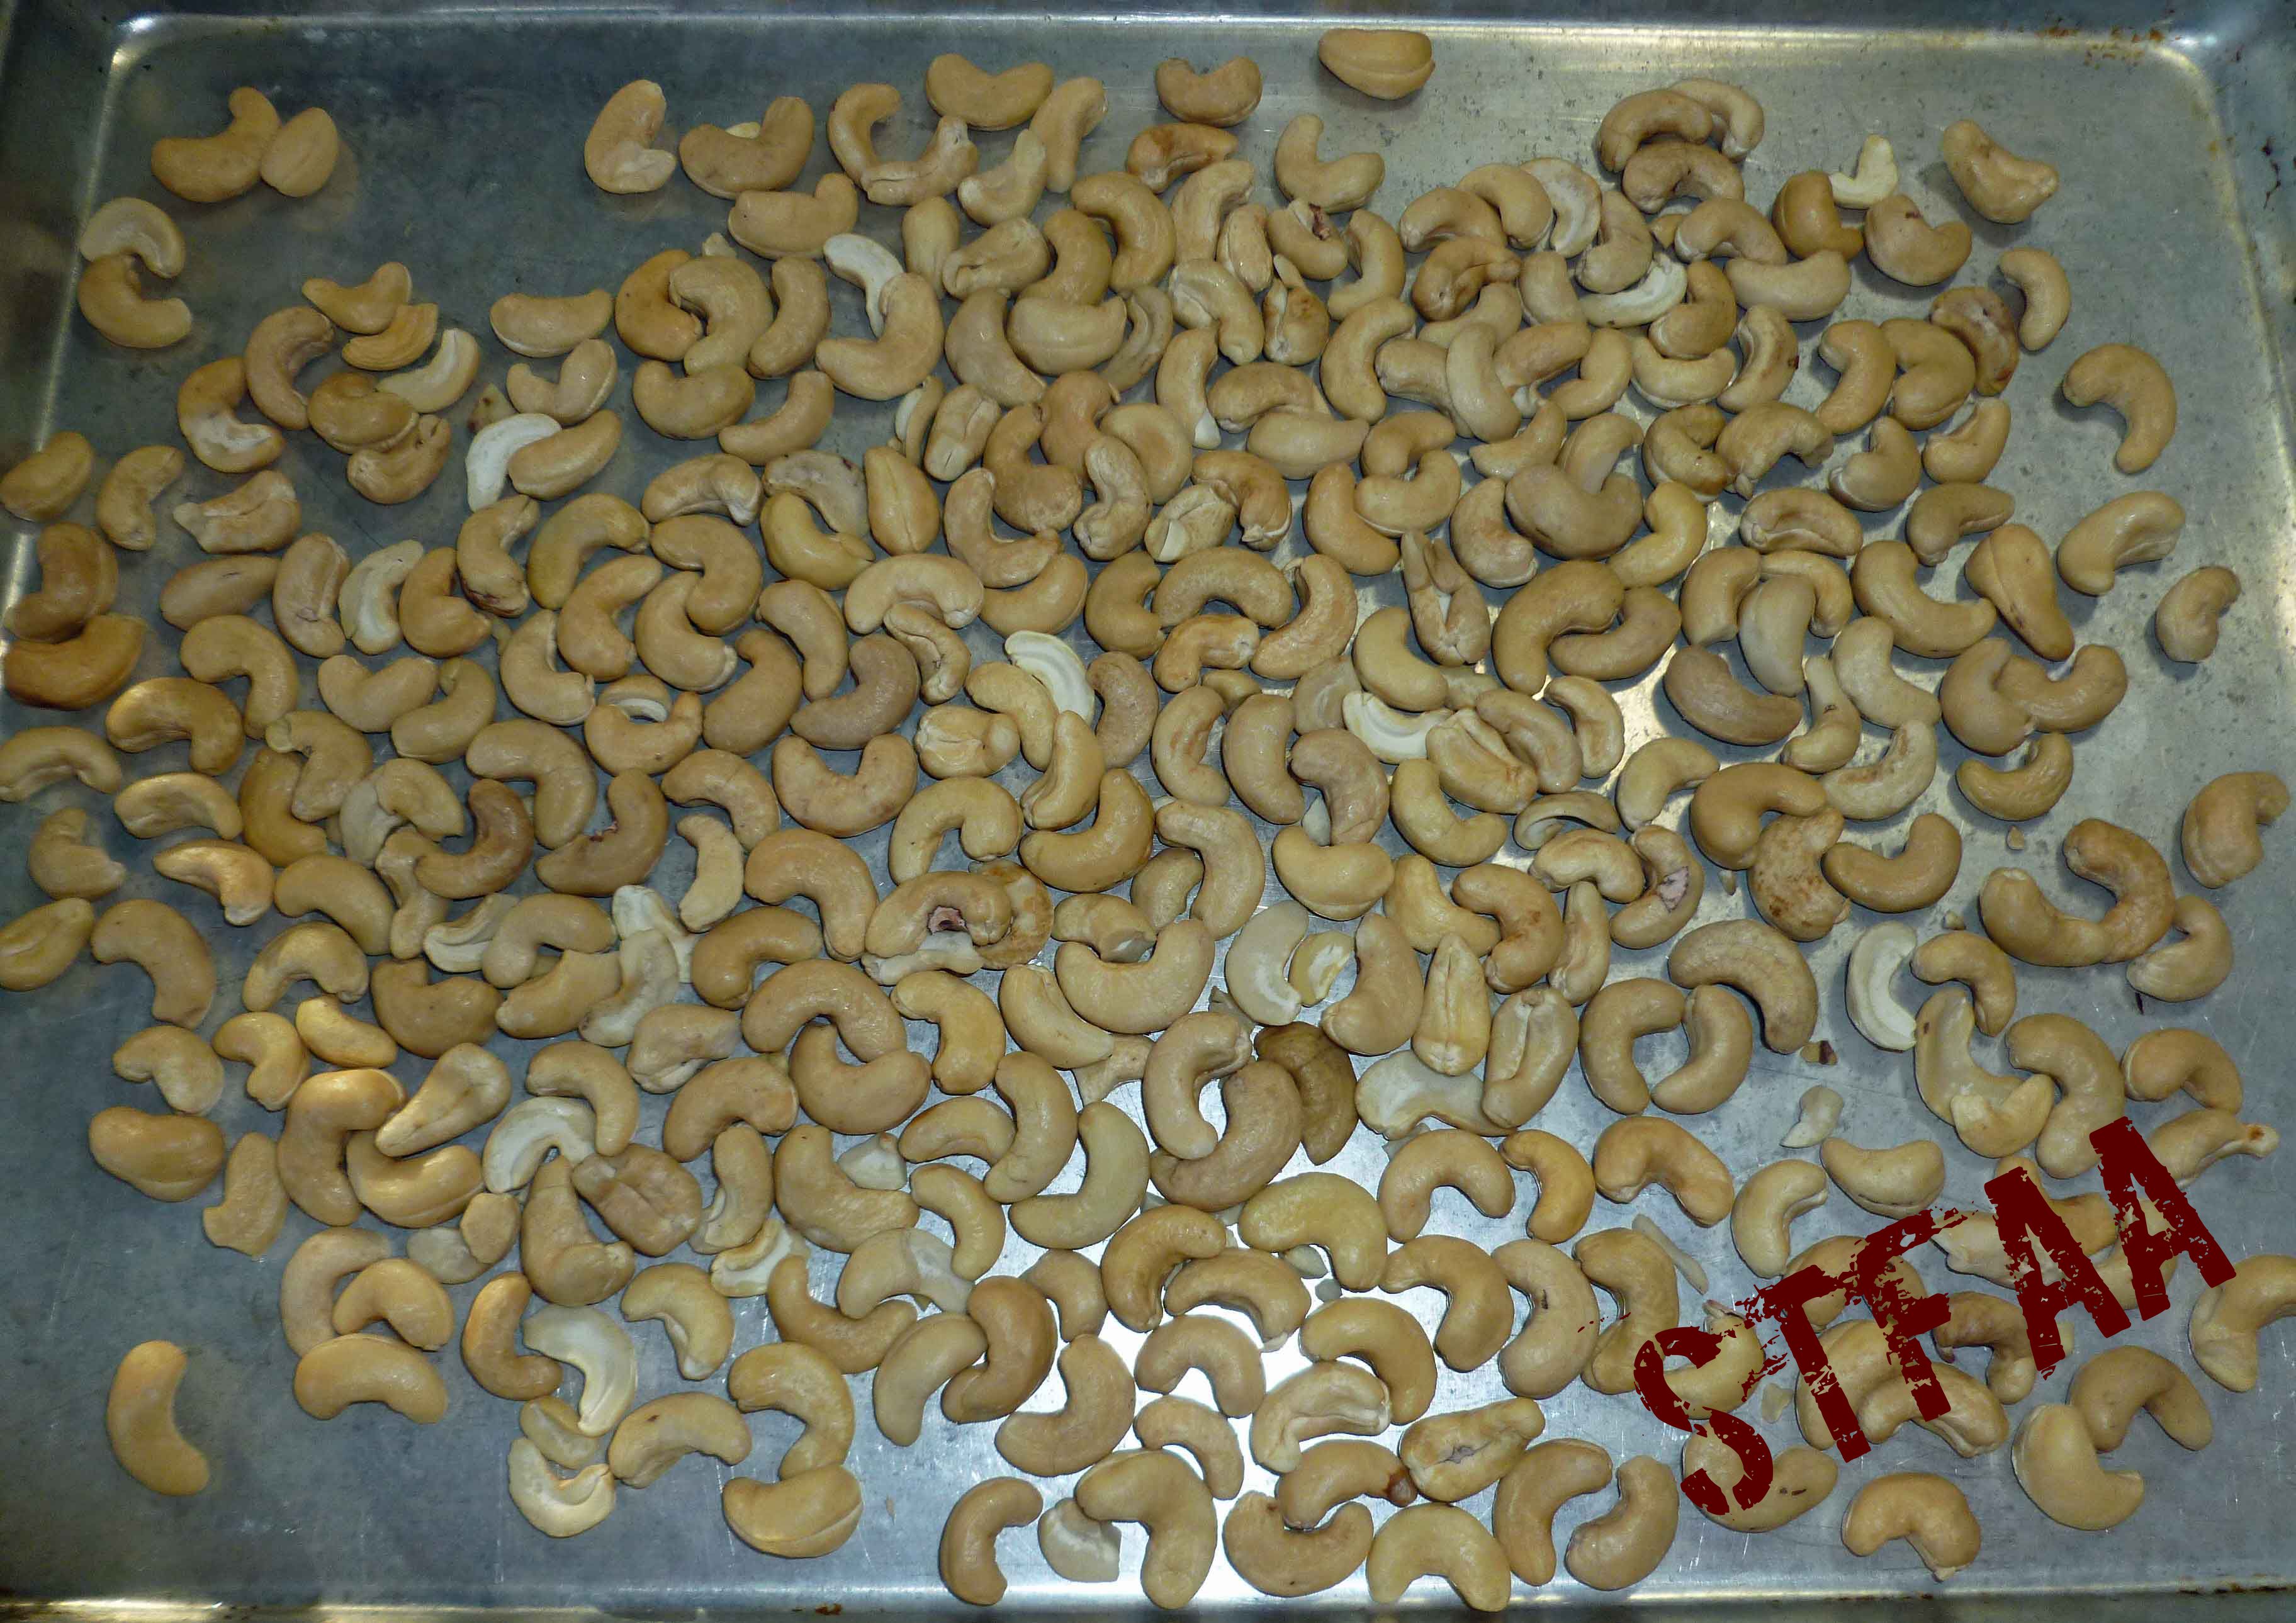
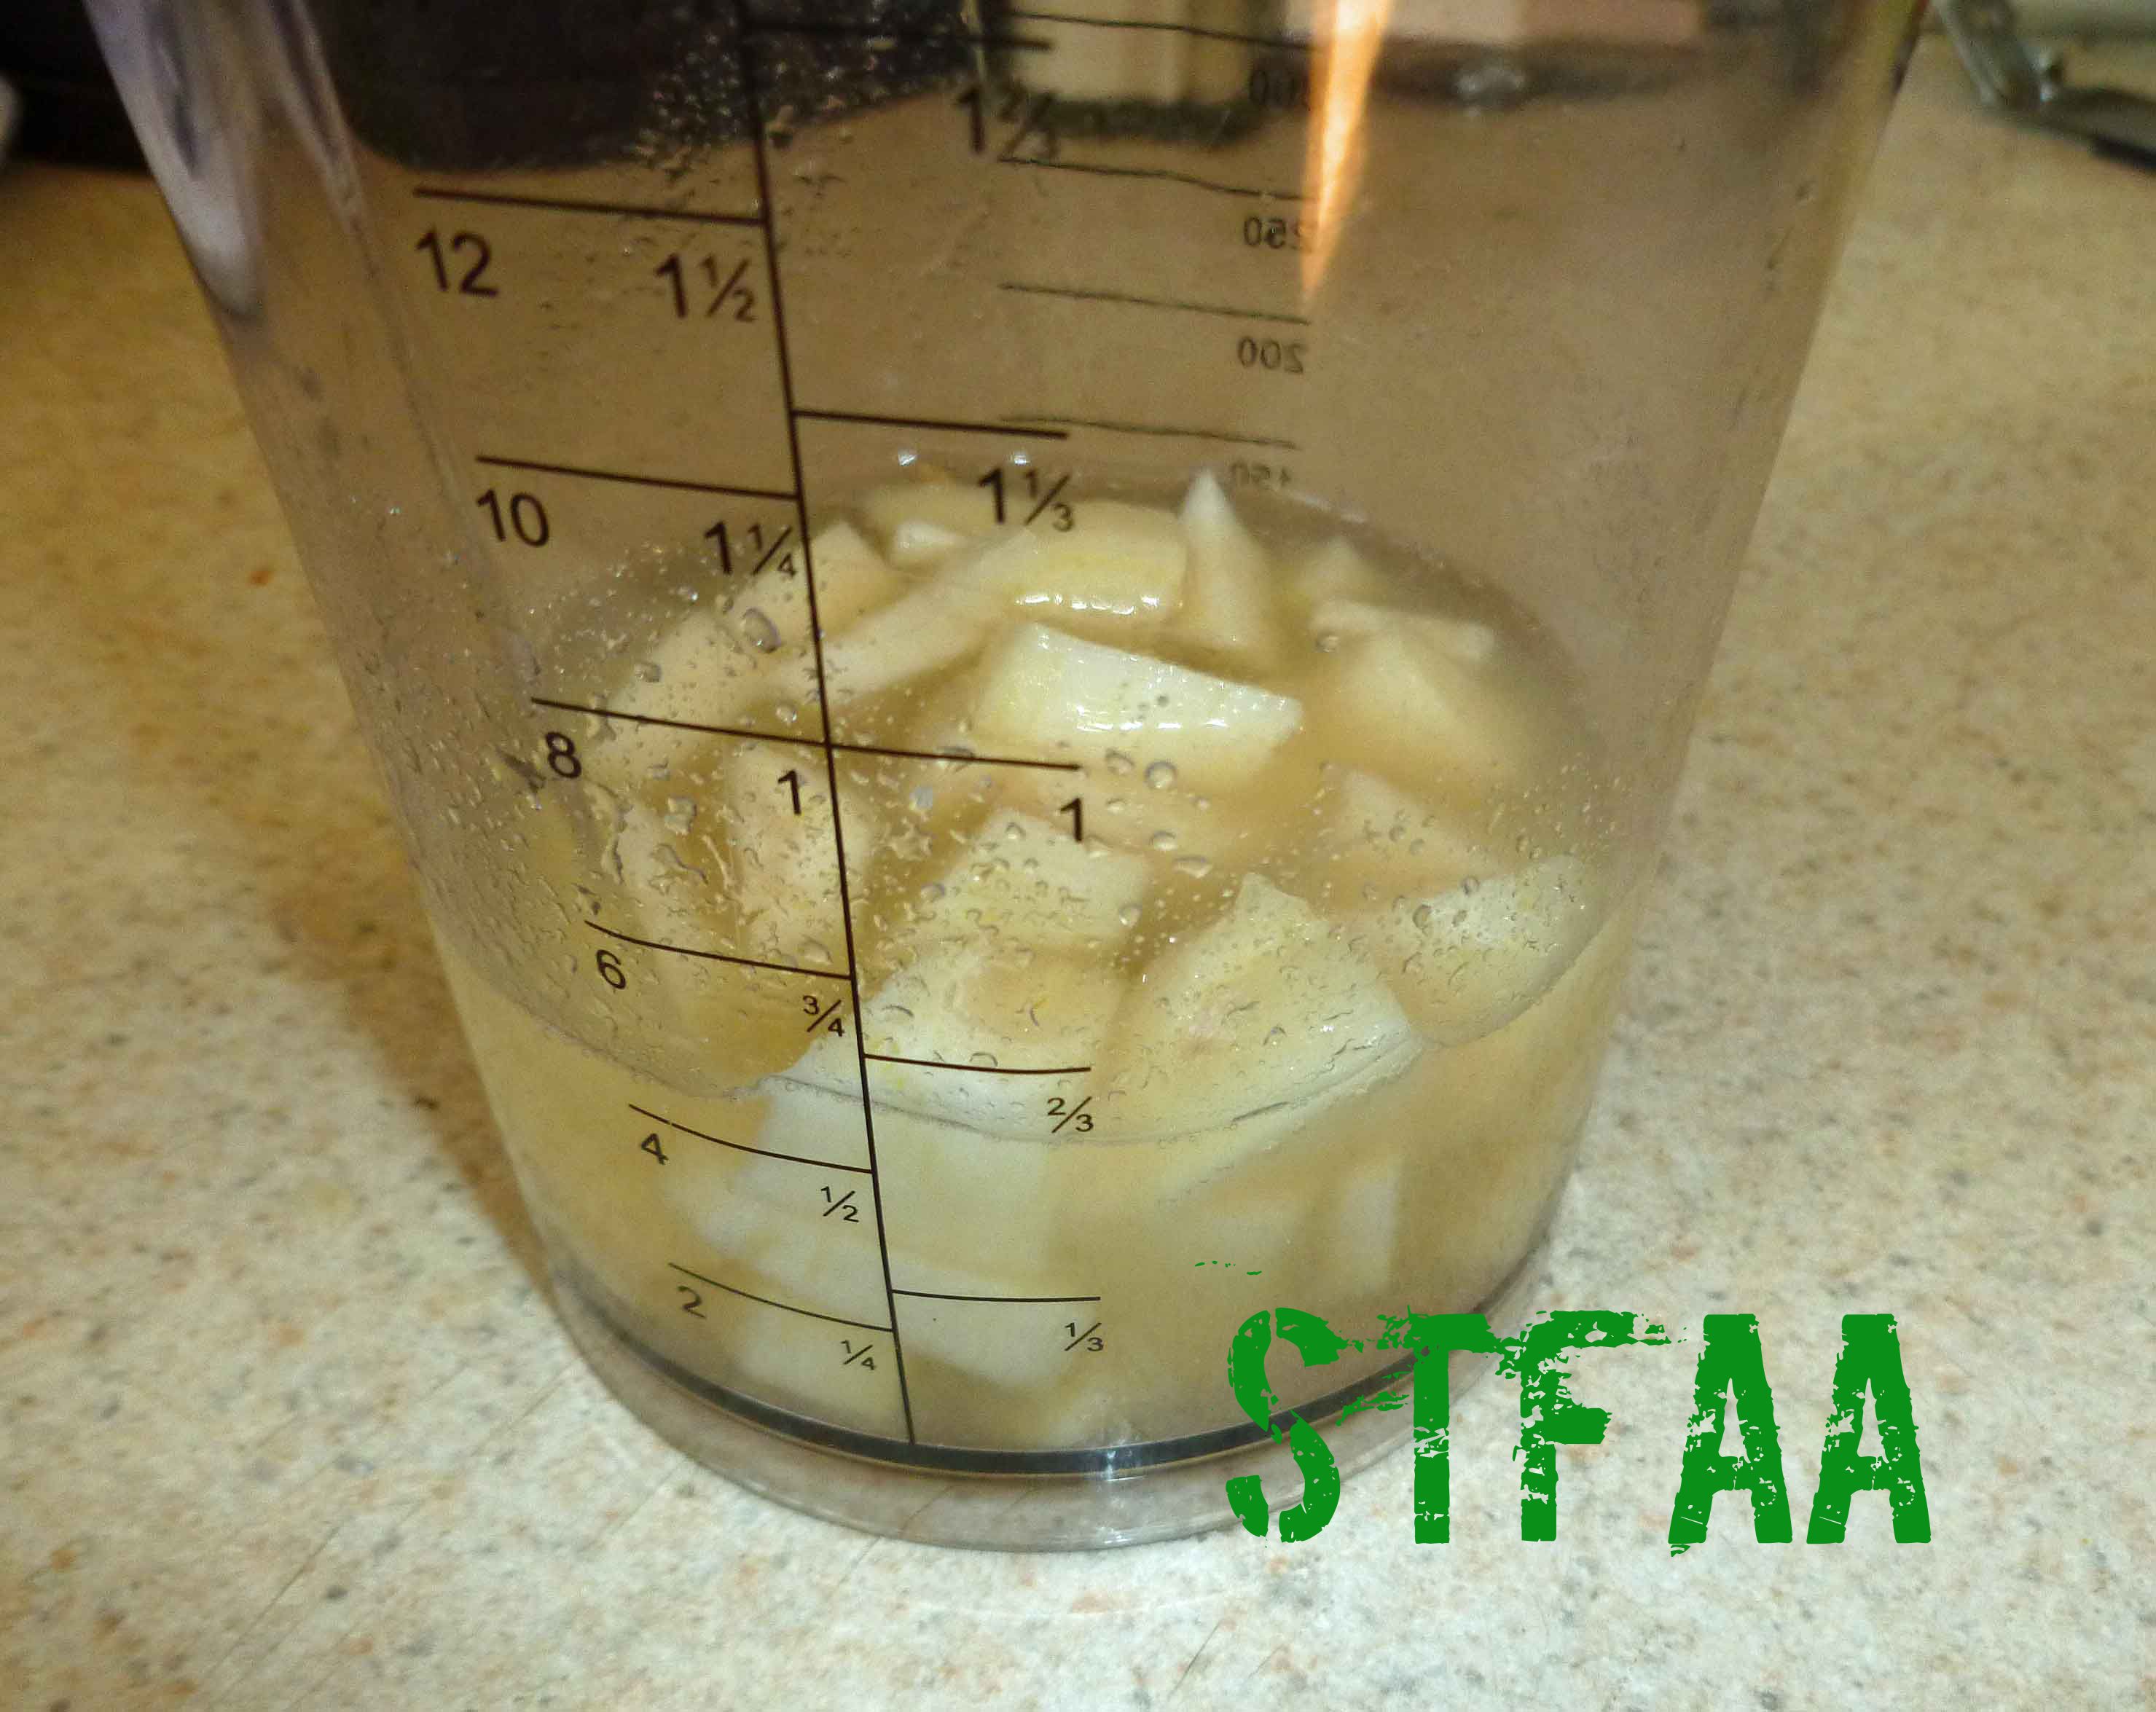
    2. Once your cashews are dry, roast them in a 325°F oven for about 10-15 minutes, watching them carefully so that they do not burn. You want them to be golden brown.
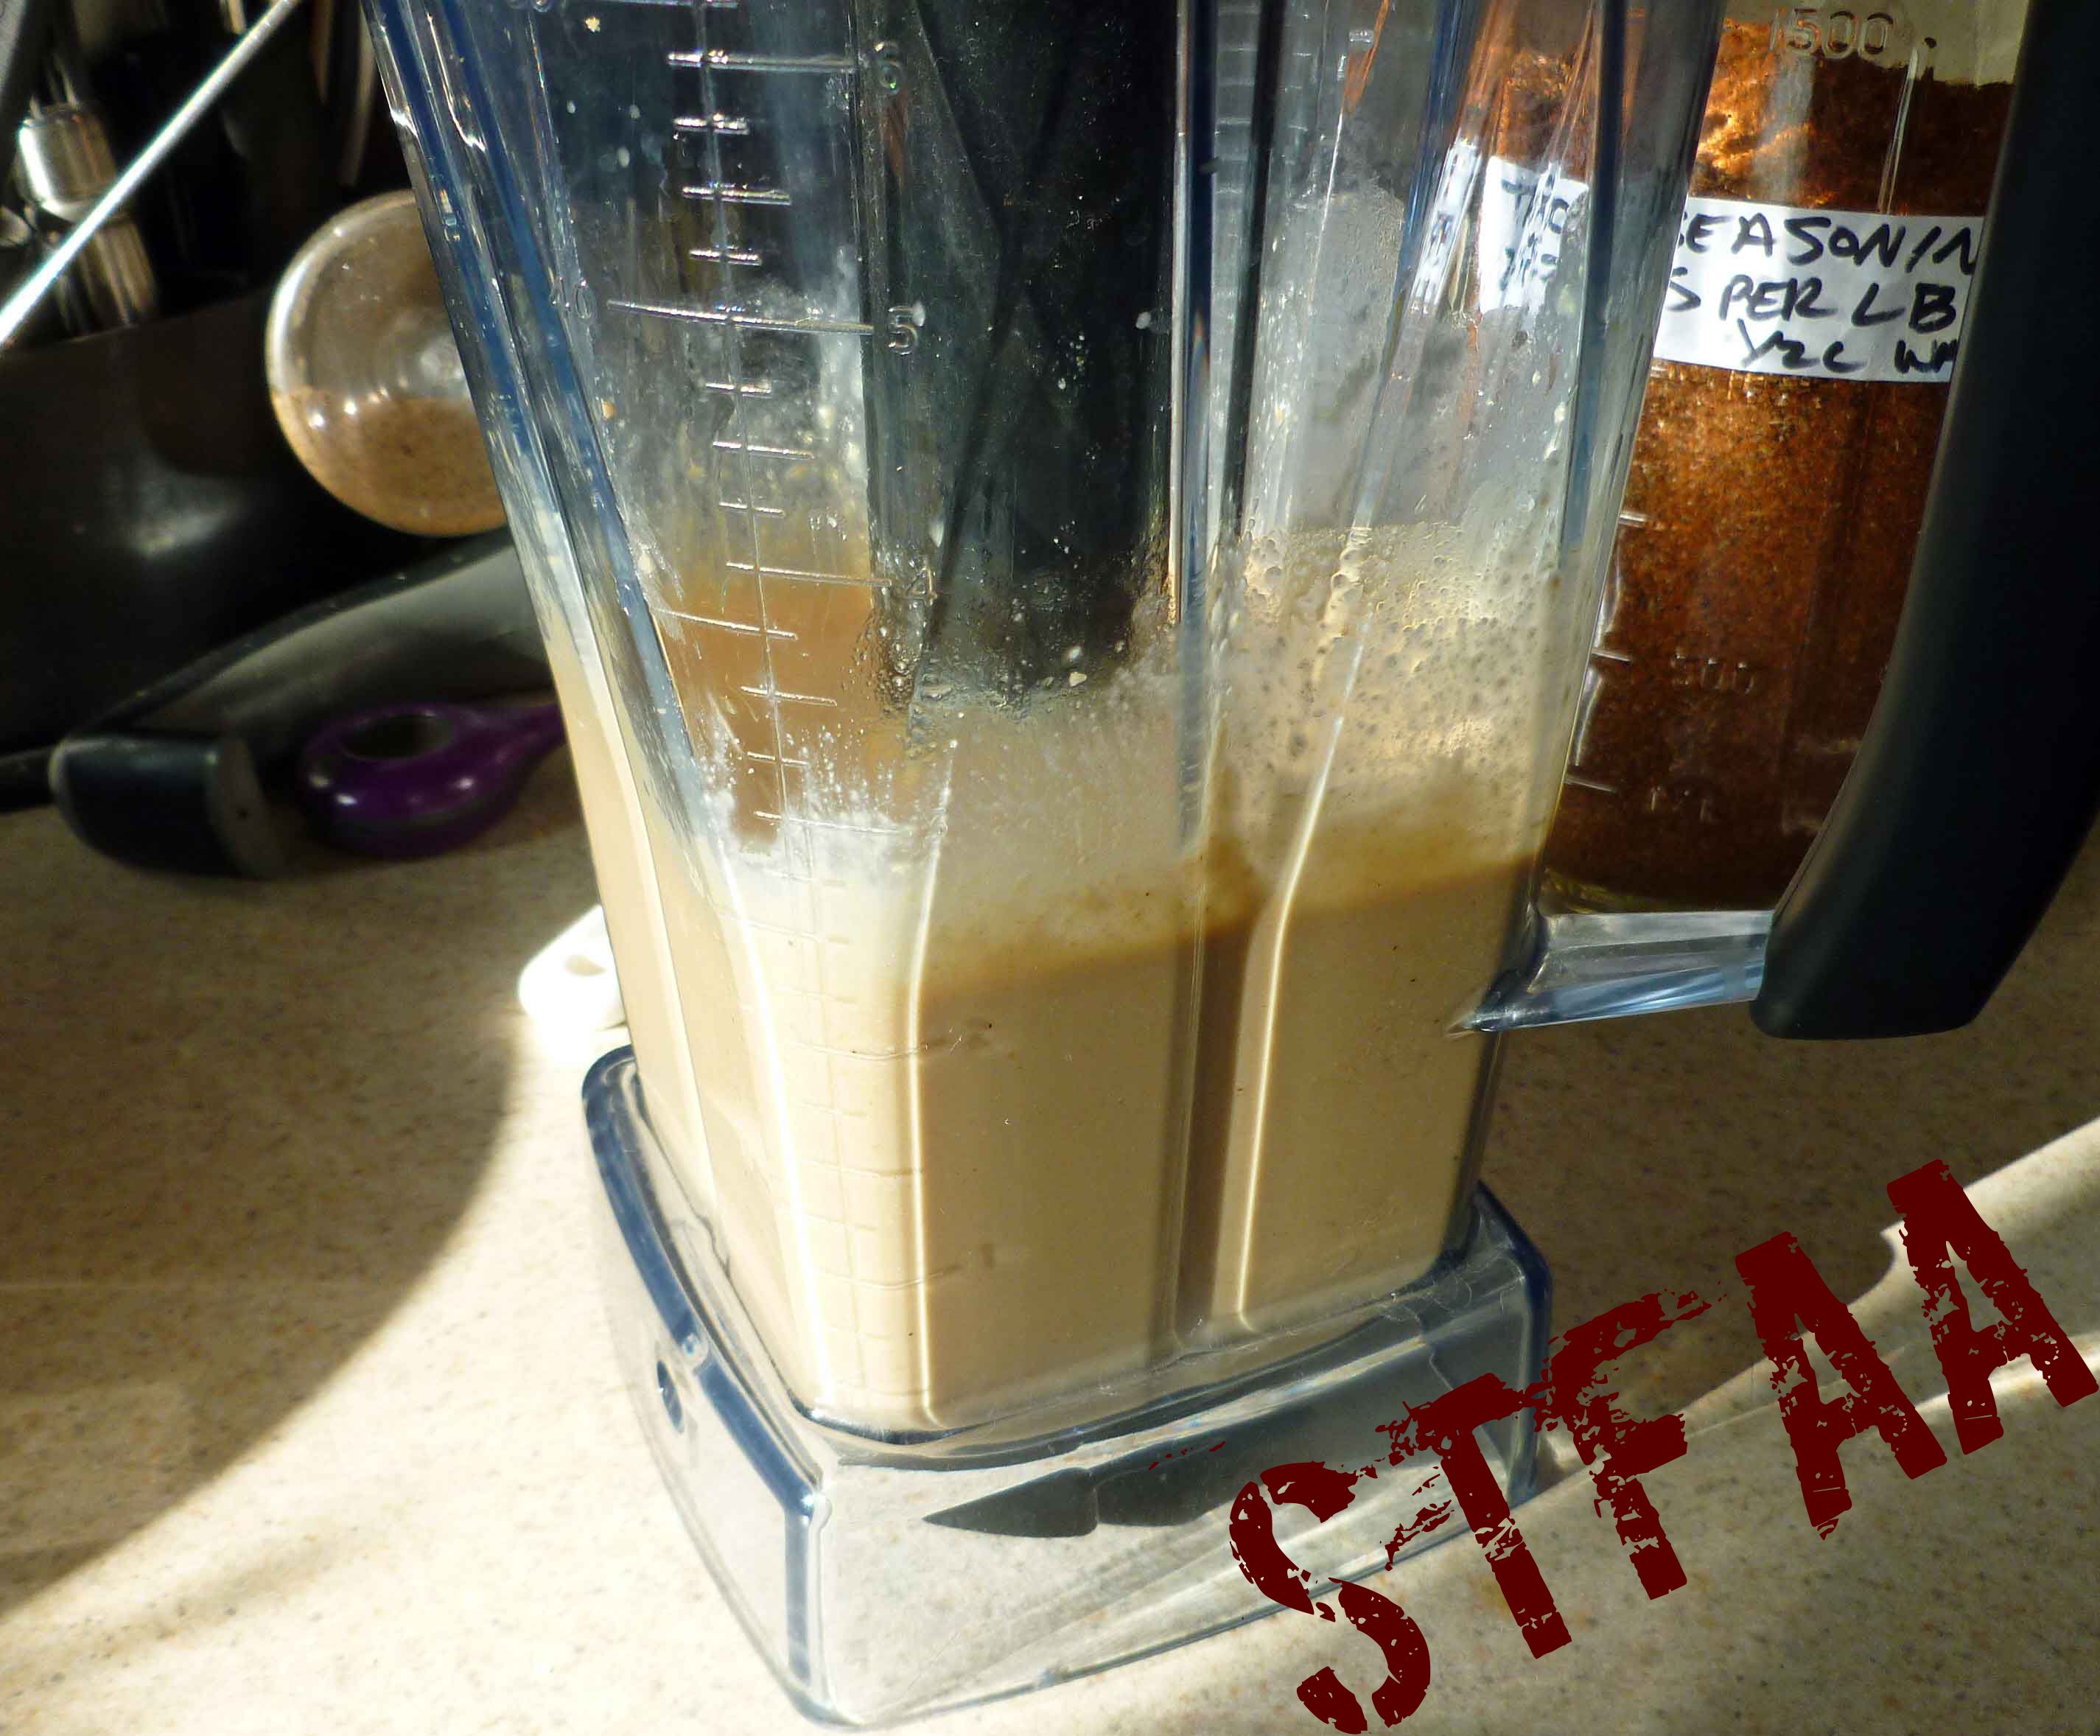
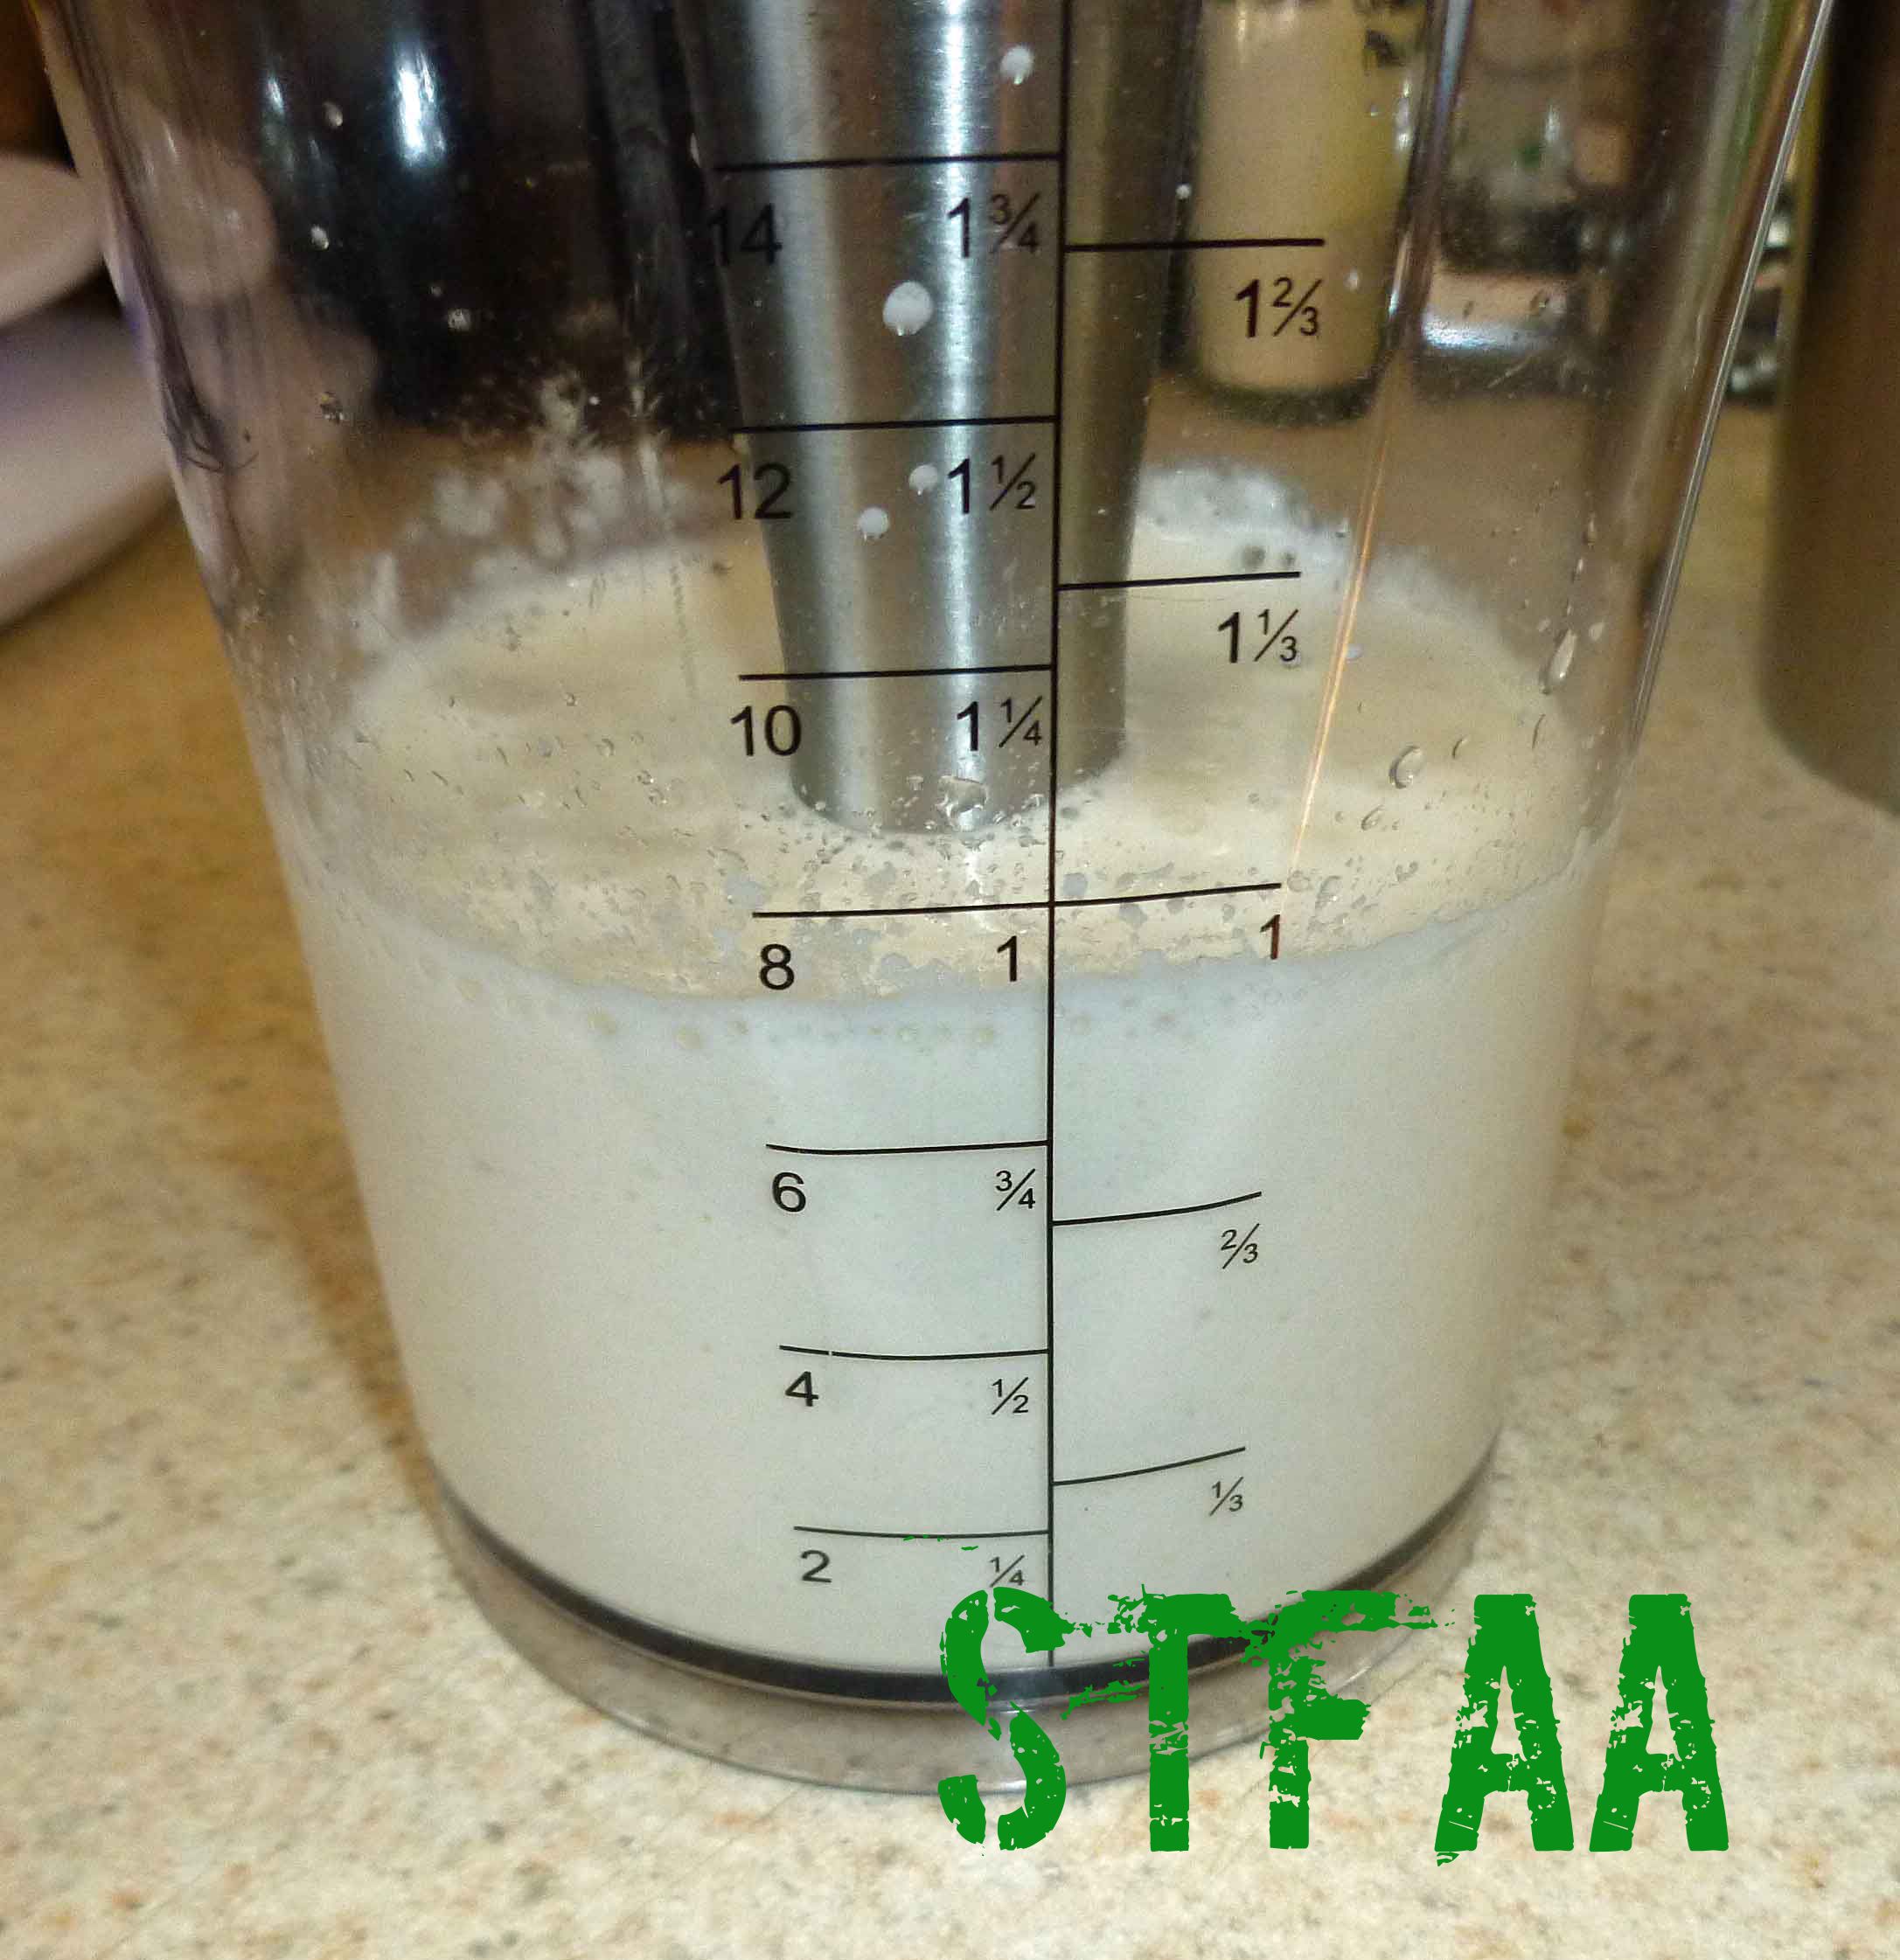
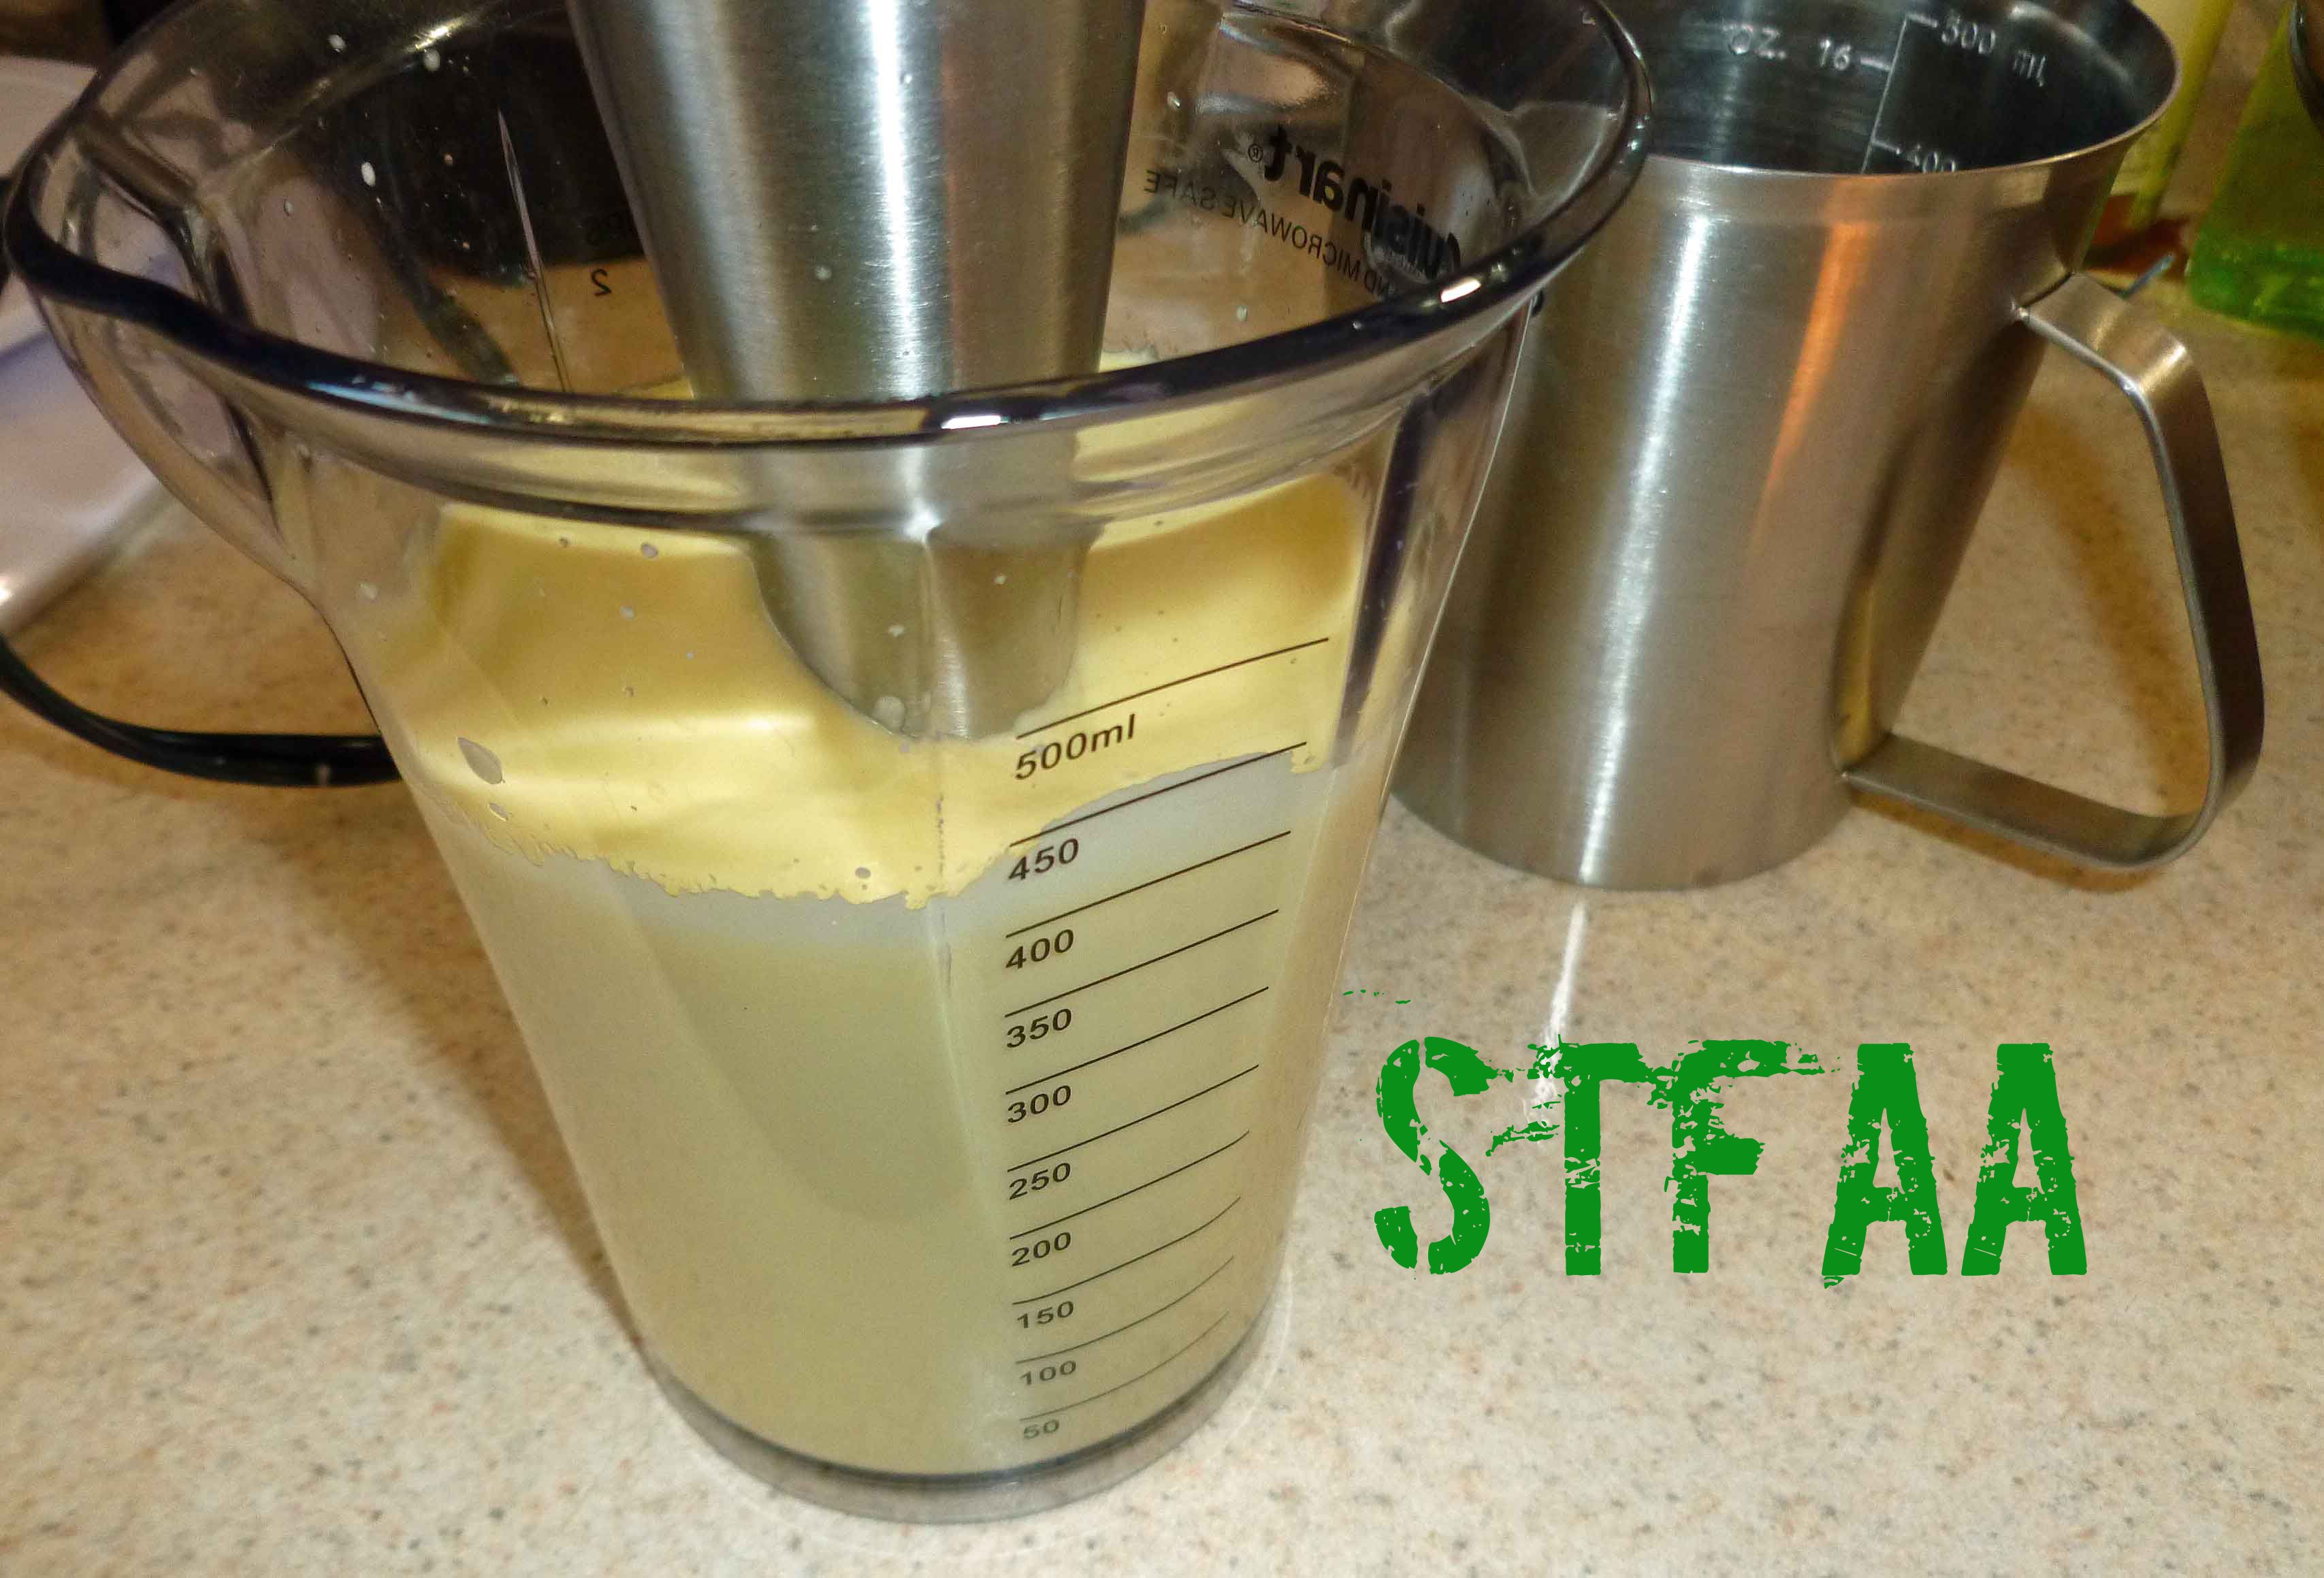
    3. Add your cashews to your blender, along with 3 Tablespoons of your safe oil. Start on the lowest speed, and slowly increase the speed to the highest speed, using the tamper if your blender comes with one. Add more oil if necessary. When the blender changes from a chugging sound to a low laboring machine, stop the blender.
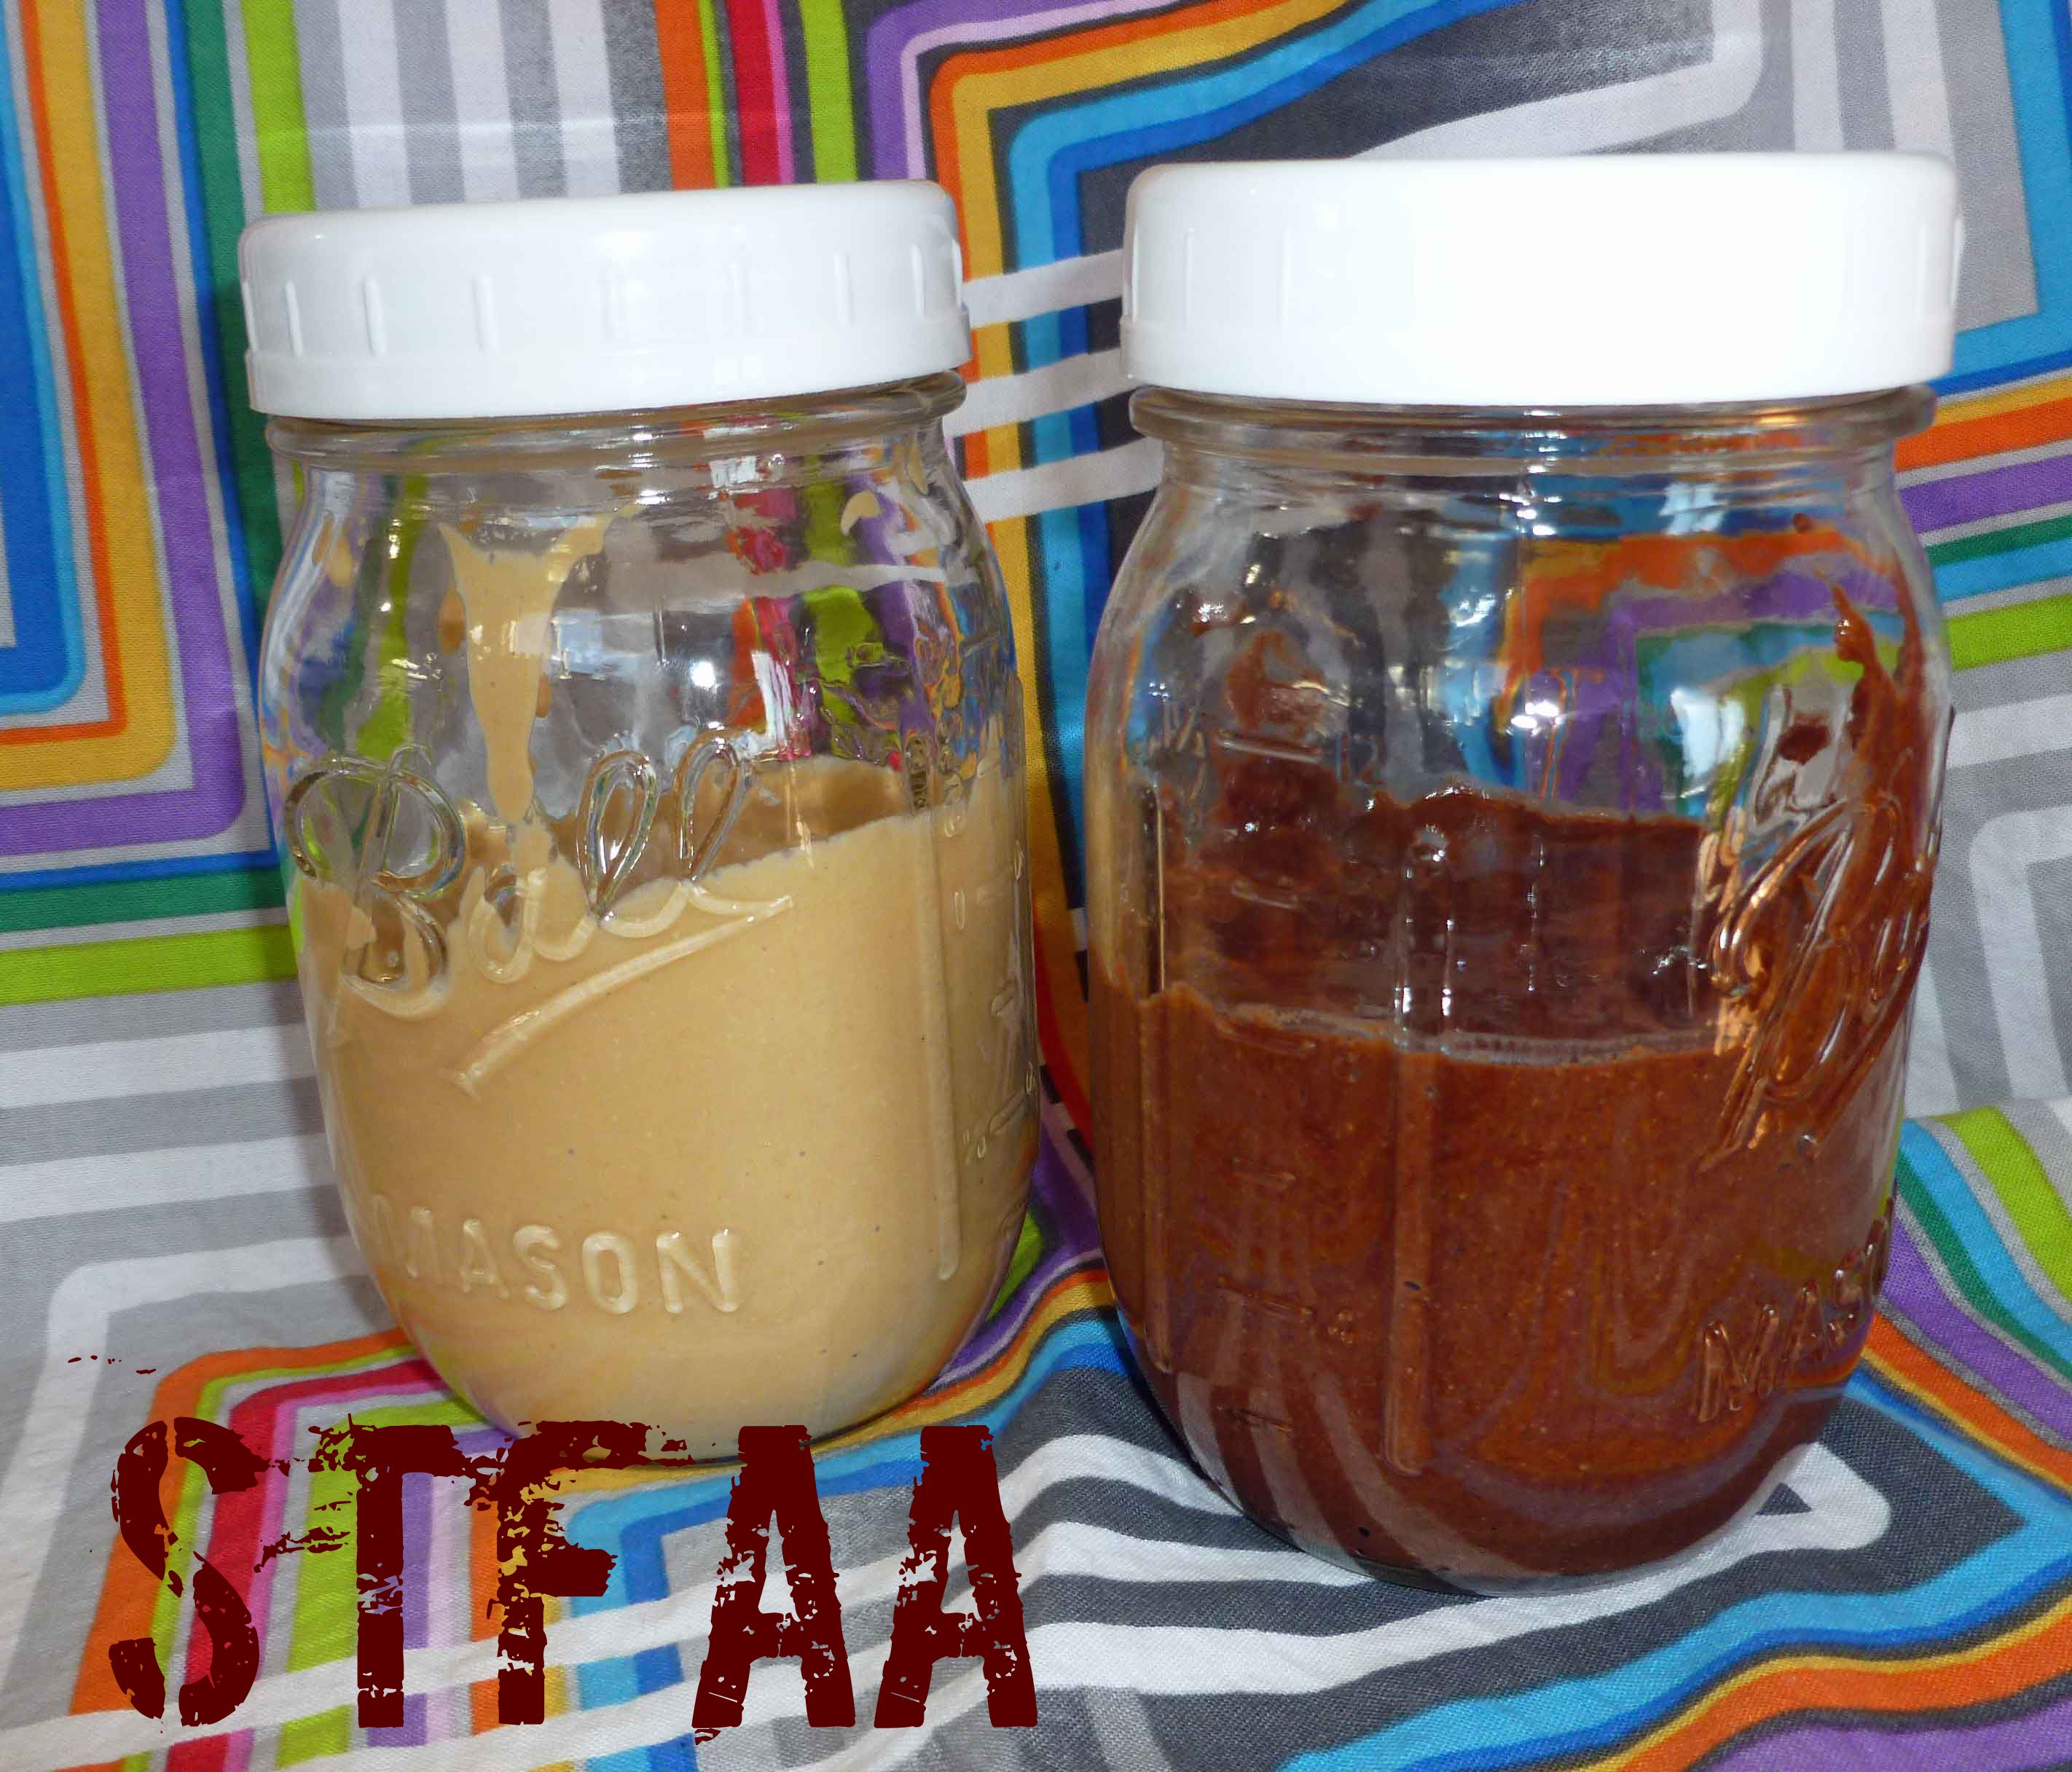
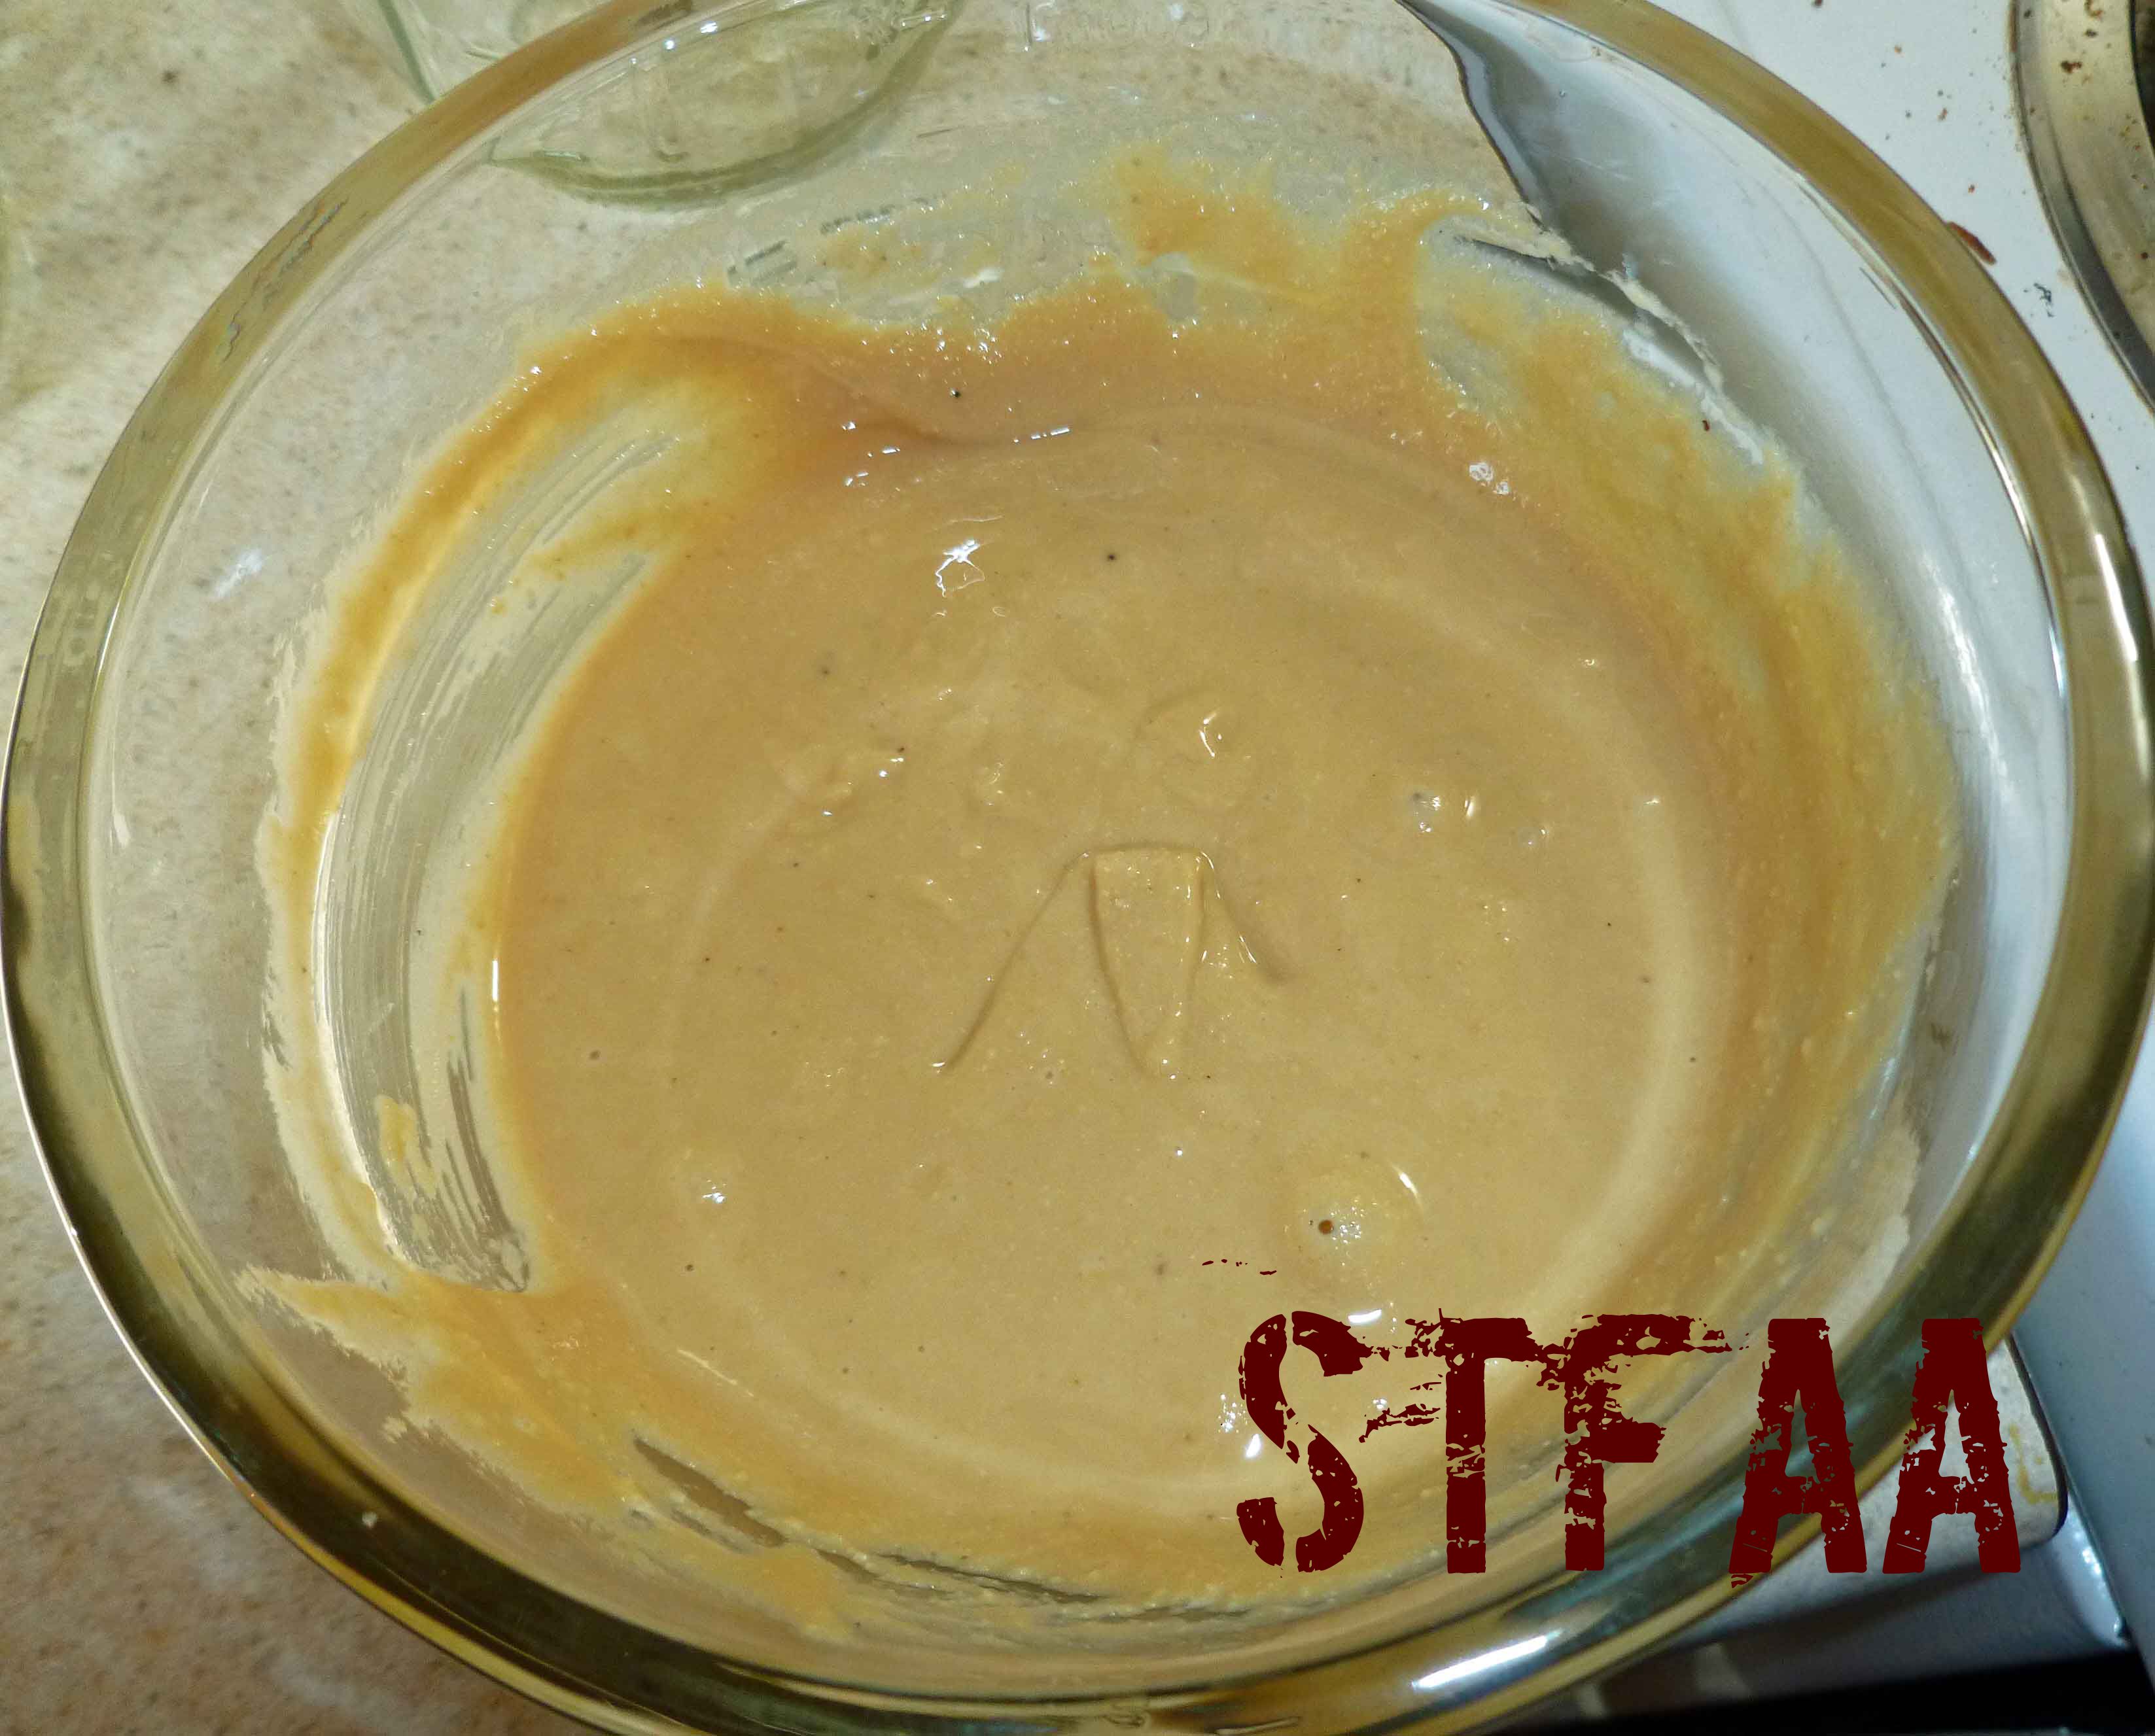
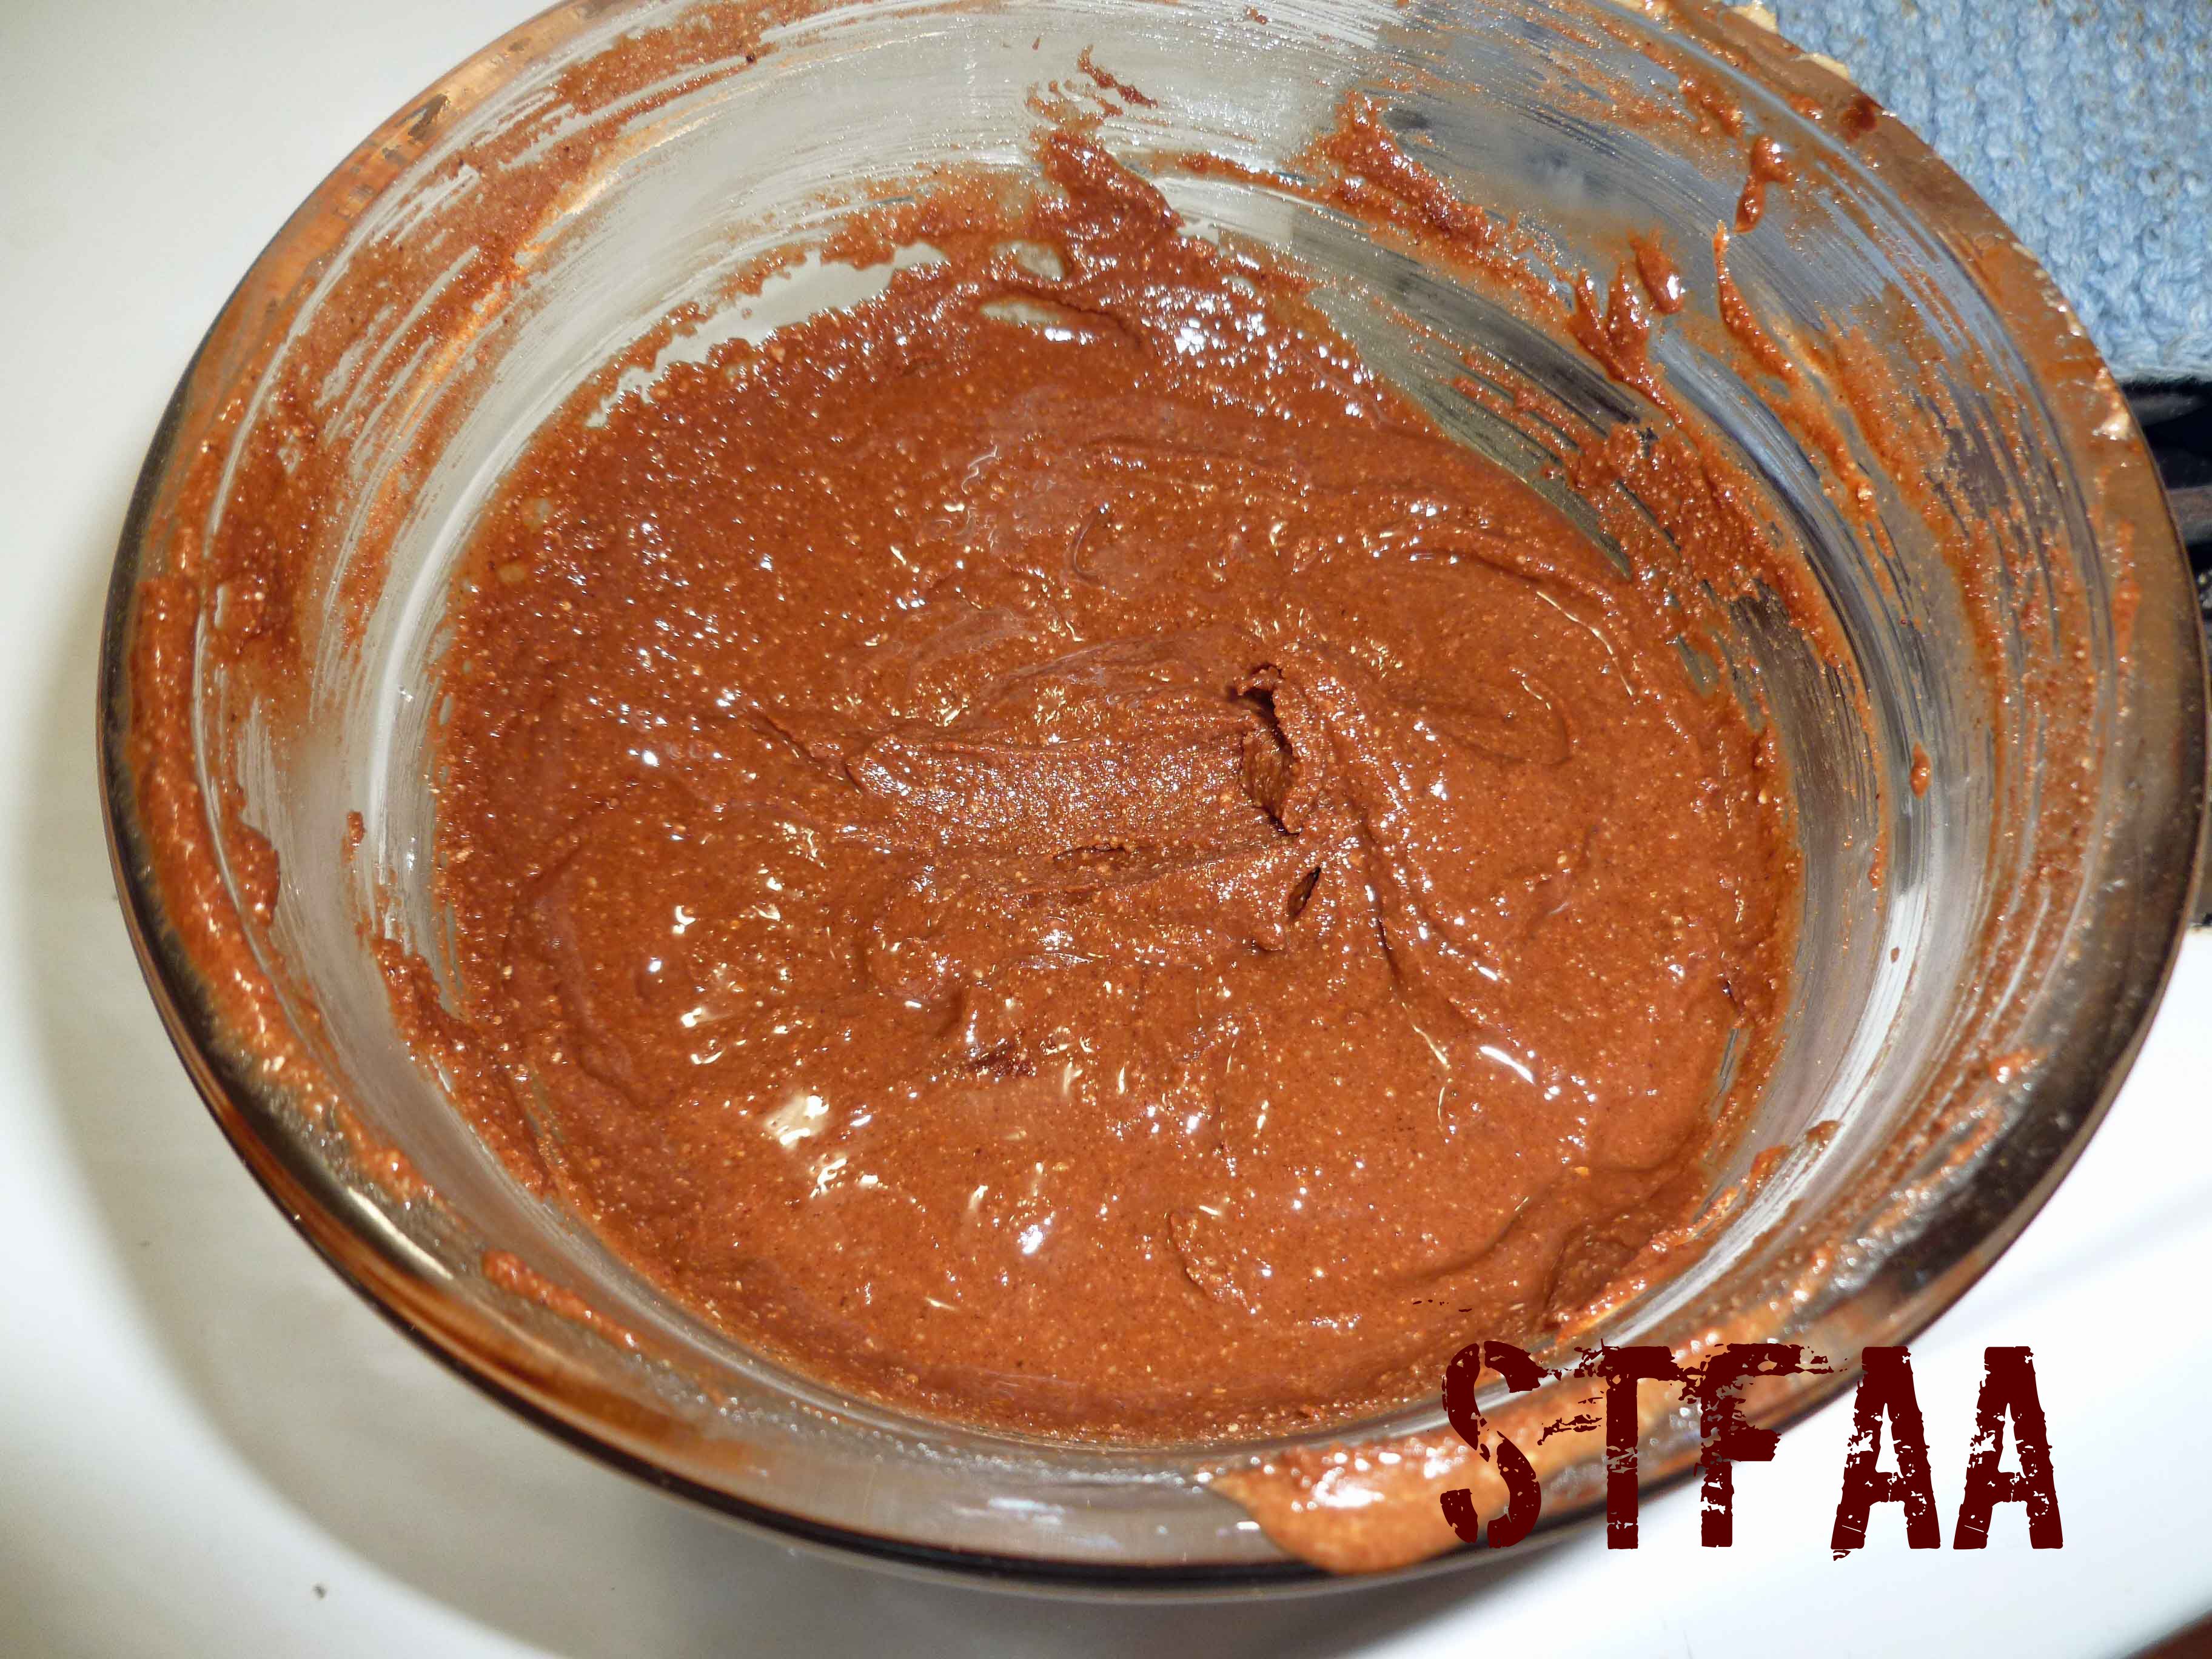
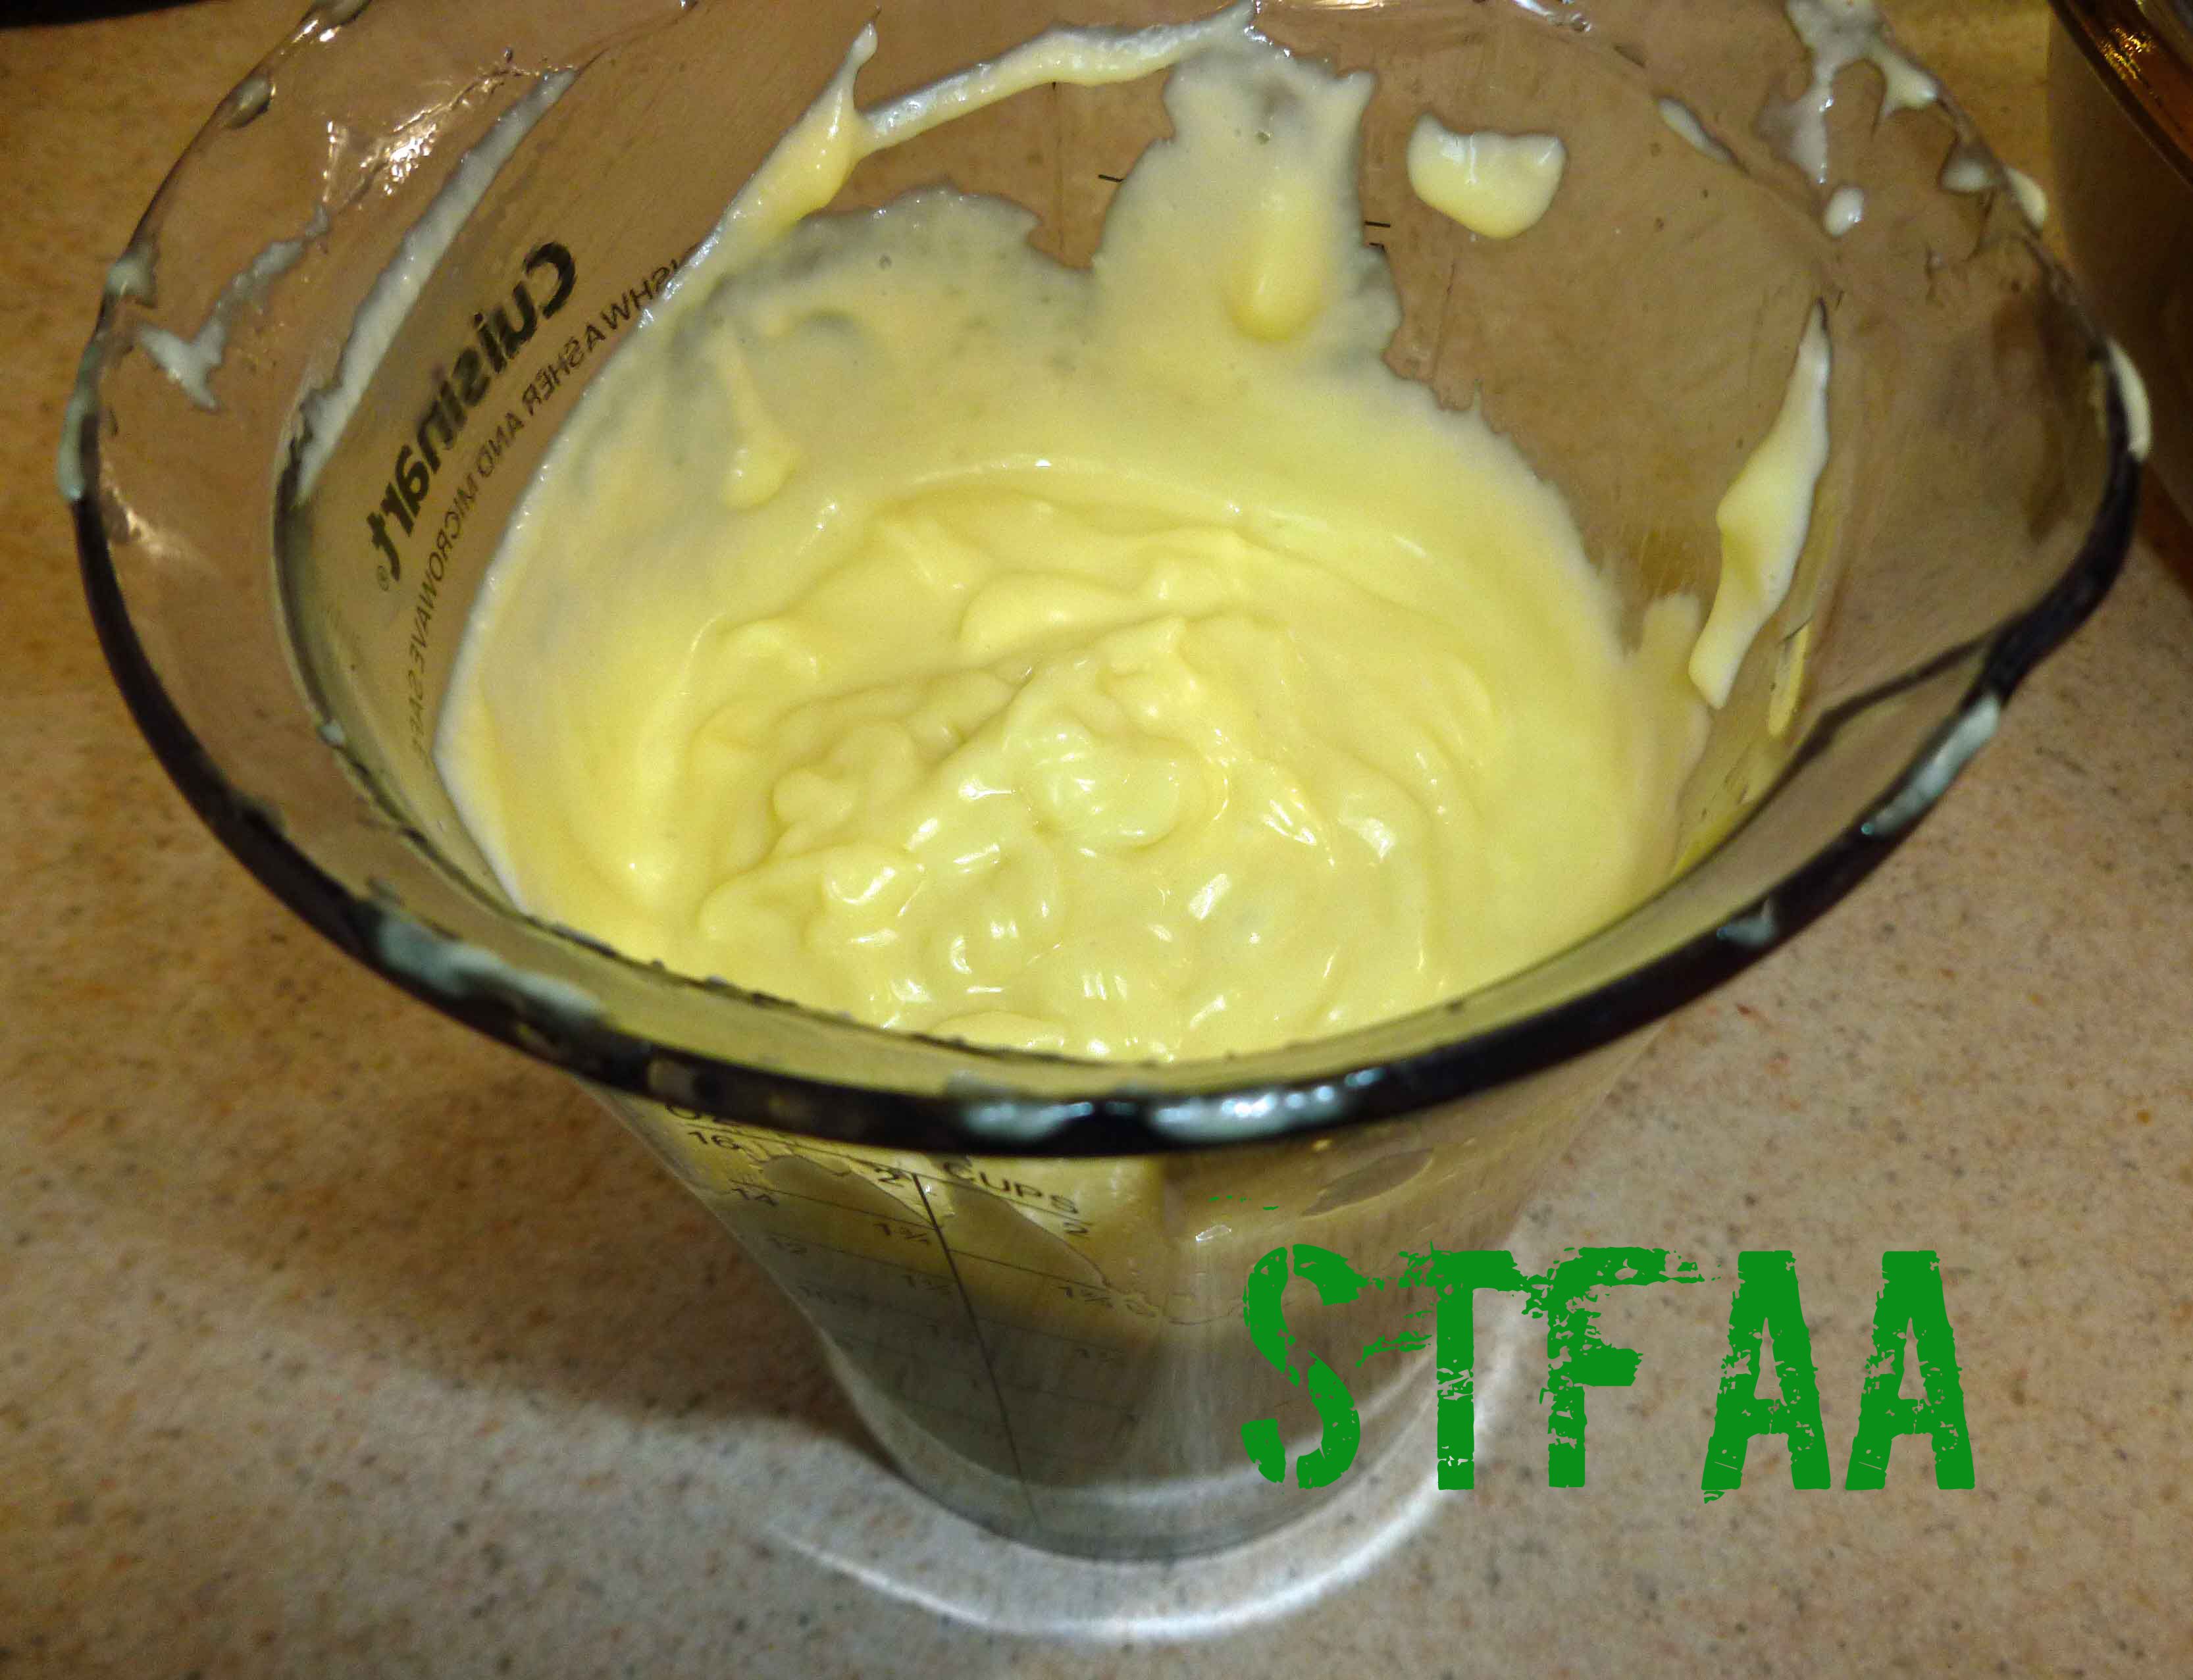
    4. Remove the cashew butter and place equal amounts into two bowls. Mix a dash of salt into each bowl mixing well. One bowl is your now completed plain Cashew Butter. To the second bowl, add 2-3 Tablespoons of cacao powder to taste and the sugar, whisking it in. You also may need to add more oil at this point. This bowl is your Chocolate Cashew butter.
    5. Store in an air tight container or freeze it for longer storage.
    Share this Recipe
     
    Powered byWP Ultimate Recipe
    Cashews after dehydrating and roasting
    Cashews after dehydrating and roasting
    Cashew butter after blending
    Cashew butter after blending
    Cashew Butter completed
    Cashew Butter completed
    Chocolate Cashew Butter completed
    Chocolate Cashew Butter completed
    Chocolate Cashew Butter
    Chocolate Cashew Butter
    Cashew Butter
    Cashew Butter

    Enjoy!

  • Garlic Double Header: Toum Sauce and Garlic Sorghum Flatbread

    Garlic Double Header: Toum Sauce and Garlic Sorghum Flatbread

    Toum Sauce & Garlic Sorghum Flatbread
    Toum Sauce & Garlic Sorghum Flatbread

    It’s our last garlic post of Keeping the Vampires Away month, so I decided to do a double header. And they actually go great together, although you’re going to have to make heroic efforts to get rid of the aroma once you’re finished eating. The great thing about these two recipes is that they use very few ingredients, which is fairly infrequent in allergy cooking.

    Toum Sauce (Lebanese Garlic Sauce)

    The toum sauce is pretty easy and the only ingredient that’s a bit out of the mainstream is the aquafaba which helps it emulsify easily. In researching recipes for toum sauce, some state that using extra virgin olive oil can result in the sauce having a bit of a bite and that grape seed oil doesn’t emulsify well. Since those are my only two safe oils, I chose extra virgin olive oil, and I didn’t mind a bit of a bite.  However, if you have a lighter safe oil, you might want to try it. It’s great to use on sandwiches, falafel, grilled foods, and flatbread. I even put it on salad.

    I didn’t want to make huge amounts so I used an immersion blender, but I think there is enough volume that you can try it in a regular blender as well. I also used the elephant garlic that MaryKate sent me from Seattle, but regular garlic will work.

    Toum Sauce (Lebanese Garlic Sauce)
    Toum (Lebanese Garlic Sauce)
    Print Recipe
    An allergy friendly version to use on shawarma, falafel, grilled foods, and flatbread. I even put it on salad.
    Servings Prep Time
    1 1/2 cups 15 minutes
    Servings Prep Time
    1 1/2 cups 15 minutes
    Ingredients
    • 6-8 cloves garlic (or 1 clove of elephant garlic)
    • 1 teaspoon salt
    • 2 Tablespoons aquafaba (see http://aquafaba.com/)
    • 1 Tablespoon water
    • 1 teaspoon lemon juice (I used freshly squeezed)
    • 1 cup olive oil
    Servings: cups
    Instructions
    1. Peel and trim ends of garlic cloves and roughly chop. Place in small container if using a stick blender or in the blender if using a regular blender. Add salt, aquafaba, water, and lemon juice.
    2. Blend until the garlic, salt, aquafaba, water, and lemon juice is a thick paste. You want the garlic to be completely pureed.
    3. Once the garlic is completely pureed, continue to blend, and very slowly pour olive oil into the mixture as it blends, and the mixture will thicken. Store in the refrigerator.
    Share this Recipe
    Powered byWP Ultimate Recipe
    One clove of the elephant garlic MaryKate sent me with a steak knife for size reference
    One clove of the elephant garlic MaryKate sent me with a steak knife for size reference
    Garlic, salt, aquafaba, water, and lemon juice before blending
    Garlic, salt, aquafaba, water, and lemon juice before blending
    Garlic, salt, aquafaba, water, and lemon juice after blending
    Garlic, salt, aquafaba, water, and lemon juice after blending
    Blending garlic mixture with olive oil
    Blending garlic mixture with olive oil
    Finished toum sauce after blending
    Finished toum sauce after blending
    Toum Sauce (Lebanese Garlic Sauce)
    Toum Sauce (Lebanese Garlic Sauce)

    Garlic Sorghum Flatbread

    Although I’ve modified this recipe from Book of Yum a bit by adding garlic and scallions, I’ve got to give credit where credit is due. I’ve made flatbreads (or roti in Indian cuisine) from other recipes and have not been as successful. Although the recipe is very simple, the technique of cooking half the flour with water is what makes the resulting flatbread nicely pliable. I was able to make them very thin and wrap them around some veggies without them breaking. Plus they were really awesome just dipped in the toum sauce by themselves.

    Garlic Sorghum Flatbreads except the two I ate while cooking :)
    Garlic Sorghum Flatbread
    Print Recipe
    A simple flatbread you can use as a wrap, tortilla, or just to munch on.
    Servings Prep Time
    6-8 flatbreads 20 minutes
    Cook Time Passive Time
    3-5 minutes 10-15 minutes
    Servings Prep Time
    6-8 flatbreads 20 minutes
    Cook Time Passive Time
    3-5 minutes 10-15 minutes
    Ingredients
    • 2 cups sorghum flour
    • 2 cups water
    • 1 teaspoon salt
    • 6-8 cloves garlic or 1 clove of elephant garlic
    • 2 scallions
    • roux whisk (helpful to have)
    Servings: flatbreads
    Instructions
    1. Peel and trim your garlic. Trim the ends of the scallions and any wilted bits of green. Chop garlic and scallions very finely, you want very small pieces but not a paste. I used a manual food processor but you can do it with a knife.
    2. Measure place one cup of the sorghum flour in two bowls, so that the flour is divided to add as needed. In a sauce pan or deep skillet, add the garlic and scallions, salt, and two cups of water. Bring the water to just below a boil in the pan, and add one cup of the flour to the water in a slow stream, using the roux whisk to blend in the flour.
    3. Reduce the heat to low. Using a wooden spoon, stir the other cup of flour into the pan, until it forms a dough ball. Keep stirring and mixing until the dough forms a rubbery texture. Remove the dough and place in a heat safe bowl. Let the dough rest for 10-15 minutes or until it is cool enough to touch.
    4. Form into small balls, a little bigger than the size of a ping pong ball, and place back into the bowl. I used a gallon size freezer safe ziptop bag, with the sides cut out to roll the dough out between with a rolling pin. You could also use a tortilla press, but I don’t have one. Roll the dough out to about an 1/8th of an inch.
    5. Place a cast iron skillet over medium-low to medium heat (depends on your stove and your skillet, you may need to adjust. Cook until the texture changes on the top of the flatbread (it will look a bit dry and cracked) and until you have light brown spots on the side being cooked. Turn the flat bread and cook the other side. Repeat until all your flatbreads are cooked.
    Share this Recipe
    Powered byWP Ultimate Recipe
    Mince garlic and scallions very finely
    Mince garlic and scallions very finely
    Measure out sorghum, one cup in each bowl and get roux whisk ready
    Measure out sorghum, one cup in each bowl and get roux whisk ready
    Add water to saucepan and add garlic and water, bringing just below boiling.
    Add water to saucepan and add garlic and water, bringing just below boiling.
    Slowly add one cup of sorghum flour and mix in with whisk
    Slowly add one cup of sorghum flour and mix in with whisk
    Turn heat to low and mix in second cup with wooden spoon until it forms a rubbery dough
    Turn heat to low and mix in second cup with wooden spoon until it forms a rubbery dough
    Let dough rest in heat safe container
    Let dough rest in heat safe container
    Roll out dough between a ziptop bag with the sizes cut out once cool enough to handle
    Roll out dough between a ziptop bag with the sizes cut out once cool enough to handle
    Cook on cast iron skillet over medium heat
    Cook on cast iron skillet over medium heat
    Flatbread ready to flip (note dry texture around edges)
    Flatbread ready to flip (note dry texture around edges)
    Flatbread after flipping
    Flatbread after flipping
    Garlic Sorghum Flatbreads except the two I ate while cooking :)
    Garlic Sorghum Flatbreads except the two I ate while cooking 🙂

    Enjoy!

  • Cashew-Ginger Hummus

    Cashew-Ginger Hummus

    This recipe came out of what I had in the house when I wanted to bring some hummus over to Denise’s for a gathering. Denise is allergic to sesame, an allergy I understand is becoming more common, but not allergic to cashews. I’m not sure how common this combo is, but if your diet allows you to have cashews, give this spin on hummus a try. It’s enough like “typical” hummus to please purists, and different enough to be exciting. I think the cashews are a creamier, more neutral flavor than tahini, and it makes the perfect backdrop for ginger to pop. This is a really great hummus for making sandwiches or veggie wraps out of — somehow, the ginger just stands up well in a salad-like situation. I also stop my homemade hummus before it becomes too smooth — I like a little more texture than commercial hummus generally has.

    Cashew-Ginger Hummus
    Cashew-Ginger Hummus

    Notice: Trying to access array offset on value of type bool in /home/maryzahc/public_html/adultfoodallergies.com/wp-content/plugins/wp-ultimate-recipe/helpers/models/recipe.php on line 254
    Cashew-Ginger Hummus
    Print Recipe
    This twist on hummus replaces tahini with ground cashews for more texture and a creamier texture, with ginger replacing garlic as the primary flavor. This hummus is most excellent as a sandwich spread.
    Prep Time
    10 minutes
    Prep Time
    10 minutes
    Ingredients
    • 1/2 cup raw cashews,
    • 1 Tablespoon fresh ginger see recipe for technique
    • 16 ounces garbanzo beans
    • 1/4 cup aquafaba (juice from can or cooking water from beans)
    • 1/4 cup olive oil
    • 1 teaspoon garlic chopped
    • 1 Tablespoon lemon juice
    • 1/2 teaspoon kosher salt
    Servings:
    Instructions
    1. Using a food processor, add the ingredients in order of the recipe — with one big exception! If your ginger is already ground, chopped, or microplaned, start with the cashews. If not, begin with the ginger.
    2. If beginning with the ginger, just pulse until it is all shredded.
    3. If beginning with the cashews, pulse until you have a fine powder if you like texture. If you want your hummus to be really smooth, go ahead and make cashew butter.
    4. Add the chickpeas and liquid and process. Then add everything else and process to your desired smoothness.
    5. Enjoy as a spread or as a dip. If you’re using good quality pure olive oil, this will get somewhat stiff in the fridge. A few minutes resting at room temperature will fix that.
    Share this Recipe
     
    Powered byWP Ultimate Recipe
  • Honey Mustard Vinaigrette

    Honey Mustard Vinaigrette

    Honey Mustard Vinaigrette (with tater tots)
    Honey Mustard Vinaigrette (with tater tots)

    Honey mustard reminds me of childhood, specifically this restaurant, Ray’s on the River, outside of Atlanta. Apparently, it opened in 1984. We moved there in 1985, and my dad bought a piano “for the family.” What that meant was that my brother and I were signed up for piano lessons, with mandatory yearly recitals that involved being dressed up, playing horrible dreck in front of a crowd of the parents and other kids, and then going out to dinner as a family. While piano recitals were decidedly not my thing (I was a competent student, but I’m not a performer), this was the kind of dinner out that I actually really liked. We always went to Ray’s for “nice” dinners out — celebrations of some sort. Ray’s had a jazz band in the bar (and this was well before children were banished from bars — we got Shirley Temples and got to listen), a view of the muddy Chattahoochee River, and the best chicken fingers I’ve ever eaten. They had a crispy, light, almost tempura-esque coating which I never could replicated, not even with all the allergens in the world. They were served with a “fancy” honey mustard sauce, which was not like the gluey opaque salad bar version of honey mustard (which is mayonnaise-based). I’m sure this sauce had real honey and real mustard in it, and not a lot more — and this recipe is my attempt to recreate this flavor of my childhood.

    This honey mustard is intended primarily as a salad dressing, but I’ve also cooked salmon, chicken, and potatoes in it with great results. Pick your herbs based on your destination, and you’ll do fine — I prefer the herbes de provence on chicken and salad, and the dill for fish, but the extra dressing never goes to waste no matter which version I make.

    honey mustard vinaigrette 2Honey Mustard. It’s better than piano recitals.


    Notice: Trying to access array offset on value of type bool in /home/maryzahc/public_html/adultfoodallergies.com/wp-content/plugins/wp-ultimate-recipe/helpers/models/recipe.php on line 254
    Honey Mustard Vinaigrette
    Print Recipe
    This sweet and savory classic gets an adult update with great herbs.
    Prep Time
    10 minutes
    Prep Time
    10 minutes
    Honey Mustard Vinaigrette
    Print Recipe
    This sweet and savory classic gets an adult update with great herbs.
    Prep Time
    10 minutes
    Prep Time
    10 minutes
    Ingredients
    • 3 Tablespoons olive oil
    • 3 Tablespoons honey
    • 2 Tablespoons Dijon mustard
    • 2 Tablespoons vinegar (I’ve used red wine and cider vinegar. Both are good. Use your favorite.)
    • 1/4 – 1/2 teaspoon kosher salt
    • 1 teaspoon herbes de provence OR
    • 1 teaspoon dill
    Servings:
    Instructions
    1. Measure ingredients into a bowl (I use a glass measuring cup, as the spout is good for pouring the dressing/sauce on a salad or dish). Mix well with a whisk.
    Recipe Notes

    The order of the ingredients is purposeful — if you measure the olive oil first, the honey and mustard will slide right out and you can use the same measuring spoon for the whole thing.

    If you want to use this as a dipping sauce, I’d suggest making it the day before. A night in the fridge thickens it up quite nicely.

    Share this Recipe
     
    Powered byWP Ultimate Recipe
  • Cilantro Avocado Salad Dressing or Sauce

    Cilantro Avocado Salad Dressing or Sauce

    Cilantro Avocado Salad Dressing or Sauce

    Cilantro Avocado Salad Dressing or Sauce

    I love cilantro and avocado, and I was looking for a new salad dressing because I have a tendency to fall into a rut.  I either make my standard vinaigrette out of habit or use my Thai Hot and Sweet Dipping Sauce because I’ve got a bunch of it canned up and it’s easy, and really good on salad.  So I decided I’d try something different. If you like cilantro and avocado, it’s yummy and will be pretty much great on everything you can think of.

    Cilantro Avocado Salad Dressing or Sauce

    Makes 3 cups

    • 2 cups of tightly packed chopped cilantro
    • 2 garlic cloves, peeled and trimmed
    • 1/4 cup of olive oil
    • 1/2 cup of white wine vinegar
    • 1/4 cup of water
    • 1/2 cup fresh squeezed lime juice (I used two limes)
    • 2 Tablespoons of Adobo seasoning – optional (If you don’t have Adobo seasoning or you don’t have a safe version, mix 1/8 cup of paprika, 1 1/2 Tablespoons of ground black pepper, 1 Tablespoon of onion powder, 1 Tablespoon of dried oregano, 1 Tablespoon of ground cumin, 1/2 Tablespoon of ground chipotle, and 1/2 Tablespoon of garlic powder, this makes half a cup of seasoning)
    • salt to taste
    • 2 avocados

    Put all the ingredients in the blender and puree it. I went overboard with my Vitamix so you can’t see the cilantro.  If you want larger pieces of cilantro, put all the ingredients except for 1 cup of cilantro in the blender first, blend, and then add the reserved cilantro and blend judiciously to leave more visible bits.

    Use it on tossed salads, as a dipping sauce for fries or chips, or a garnishing sauce for fajitas, tacos, or burritos if you have safe tortillas, or on baked potatoes or sweet potatoes. Use it as condiment sauce for steak, pork, or chicken.  If you are worried you can’t use it all up, it freezes well.

    Cilantro Avocado Salad Dressing or Sauce
    Cilantro Avocado Salad Dressing or Sauce

    Notice: Trying to access array offset on value of type bool in /home/maryzahc/public_html/adultfoodallergies.com/wp-content/plugins/wp-ultimate-recipe/helpers/models/recipe.php on line 254
    Cilantro Avocado Salad Dressing or Sauce
    Print Recipe
    Servings Prep Time
    3 cups 15 minutes
    Servings Prep Time
    3 cups 15 minutes
    Cilantro Avocado Salad Dressing or Sauce
    Print Recipe
    Servings Prep Time
    3 cups 15 minutes
    Servings Prep Time
    3 cups 15 minutes
    Ingredients
    • 2 cups fresh cilantro chopped and tightly packed
    • 2 avocados peeled and pitted
    • 2 cloves garlic peeled and trimmed
    • 1/4 cup olive oil
    • 1/2 cup white wine vinegar or use other safe for you vinegar
    • 1/4 cup water
    • 1/2 cup lime juice fresh squeezed
    • 2 tbsp Adobo seasoning If you don’t have Adobo seasoning or you don’t have a safe version, mix 1/8 cup of paprika, 1 1/2 Tablespoons of ground black pepper, 1 Tablespoon of onion powder, 1 Tablespoon of dried oregano, 1 Tablespoon of ground cumin, 1/2 Tablespoon of ground chipotle, and 1/2 Tablespoon of garlic powder, this makes half a cup of seasoning
    • 1 pinch salt to taste
    Servings: cups
    Instructions
    1. Put all the ingredients in the blender and puree it. If you want larger pieces of cilantro, put all the ingredients except for 1 cup of cilantro in the blender first, blend, and then add the reserved cilantro and blend judiciously to leave more visible bits.
    2. Use it on tossed salads, as a dipping sauce for fries or chips, or a garnishing sauce for fajitas, tacos, or burritos if you have safe tortillas, or on baked potatoes or sweet potatoes. Use it as condiment sauce for steak, pork, or chicken. If you are worried you can’t use it all up, it freezes well.
    Share this Recipe
     
    Powered byWP Ultimate Recipe
  • White Bean Pizza Hummus

    White Bean Pizza Hummus
    White Bean Pizza Hummus

    Being allergic to foods that are staples of the Standard American Diet can mean that road trips are, well, a little sad. But not going on a road trip would be more sad. So thinking about road trips like setting out for the western frontier (or, in this case, Vermont, which is to the west) means that with a plan and a cooler (and a hotel chosen partly for the microwaves and mini-fridges in each room), means “yay! Road trip!” I admit that I really miss finding awesome, off-beat restaurants in new cities. Now, if I plan to eat out, I check ahead and carefully read menus. That’s hard to do when you don’t know where you’ll be for lunch. So, again, the cooler and the meal plan.

    Hummus is a great road trip food. I’m a little bored of chickpea hummus, the standard, and I had time (and a plan) to make my own. I was going to make a black bean hummus I’d forgotten about — but in planning the grand meal plan, I forgot to see if I had black beans in the house. Oops.

    I did have cannellini beans. And I have not yet killed my fresh herbs on the deck — I have chocolate mint, thyme, and oregano, and my neighbor is growing basil. Oregano and basil made me think of pizza, so I went that direction. Instead of tahini, I’ve used cashews, as I thought their more neutral flavor would be good with this combination. I think tahini would likely be okay (and make it nut-free), so if you make it that way, let us know in the comments how it turned out.

    White Bean Pizza Hummus
    White Bean Pizza Hummus

    White Bean Pizza Hummus

    • 1/4 cup raw cashew pieces (yes, you can use whole. The pieces are usually cheaper, though.)
    • 1/2 teaspoon chopped garlic (more, up to 1 teaspoon, if you want a prominent garlic flavor. Roasted garlic would also be excellent here, but I’m currently out.)
    • 1 Tablespoon tomato paste
    • 1 can (15 oz.) cannellini beans, drained and rinsed (Save the liquid!)
    • 5 large fresh basil leaves, rinsed
    • about 1 Tablespoon of fresh oregano leaves, rinsed
    • pinch of fennel seeds, crushed
    • 2 Tablespoons good quality olive oil, plus more to drizzle on top

    In a food processor fitted with the S-blade, add the cashews and puree. They will not quite turn into nut butter (you’d need a little oil), but let them go until they are almost there.

    Add the garlic and tomato paste and pulse it in.

    Add the beans and puree the mix.

    Add the basil, oregano, fennel seed, and olive oil and run until everything is smooth, scraping down the sides of the bowl as needed.

    Transfer to a serving bowl or storage container and drizzle olive oil over the top — just a bit will help keep the hummus from drying out. Unlike in the photos, swirl it around so that it coats the top — I just wanted better photos, so I didn’t do that until I was done.

    Serve with crackers, chips, or veggies of your choice.

  • Garlic Scape Pesto Sauce

    Garlic Scape Pesto Sauce
    Garlic Scape Pesto Sauce

    My friend Mary S, of the green thumb, has been gifting me garlic scapes. Since her garlic was planted in the fall and is almost as tall as me, her garlic has lots of scapes, whereas my garlic was planted in the spring, and the tallest plant might be, oh, six inches high, and there are no scapes to be seen. Since I had some basil leftover from another dish, I decided to make a sauce. You will need a blender for this recipe.

    Garlic Scape Pesto Sauce

    • 1 cup of tightly packed basil leaves
    • 1 cup of garlic scapes, chopped into 1 to 2 inch pieces
    • 1 cup of olive oil (make sure it’s safe for you, I do well with California Olive Ranch)
    • 1/4 cup of white wine vinegar (make sure it’s safe for you)
    • 1/2 teaspoon of salt

    Roughly chop up the basil leaves. Add the basil, garlic scapes, olive oil, and vinegar to the blender.  Process until the sauce is pulverized to your liking. I like mine pretty smooth.

    This is a pretty versatile sauce. It can be used mixed into cooked hot rice noodles or even just brown rice to use as a savory side dish. You can use it as a dipping sauce for grilled meat, or toss it with steamed veggies. You can thin it down with a little more vinegar and use it as a salad dressing.  If you come up with other ways to use it, please let us know.

    Enjoy!

    Garlic Scape Pesto Sauce mixed with rice noodles
    Garlic Scape Pesto Sauce mixed with rice noodles
  • Summer Mango Salsa

    Summer Mango Salsa
    Summer Mango Salsa

    Apparently it’s mango season. In browsing the grocery store flyers looking for inspiration, I noticed that two of our three chains had mangoes on sale. I’ve never eaten a mango before, but I’ve had mango juice and liked it. So I thought I’d give it a try. Why not, right?

    According to the Mango Board, mangoes are ripe when they give a little under a gentle squeeze — like avocados. As I said on Friday, it’s really worth your time to watch the video before deciding you know how to cut a mango. You can make it a lot harder than it needs to be (I sure did), but mangoes are sweet and tropical and taste like summer. If your “spring” as been like ours in New England, you need a reminder that warmer weather is coming. Tropical mango flavor helps.

    “Salsa” generally conjures up tomatoes, but fruit salsas are pretty amazing and seem to have a better, brighter balance of flavors for certain main dish meals. (And yes, I know that biologically tomatoes are  a fruit, but US law says they are vegetables). Salsa isn’t the quickest thing ever, but the work that goes in pays amazing dividends in flavor.

    This salsa is fine with chips, but if you want to really highlight it, serve it over a meal. Things I think would work well with the summer mango salsa:

    • Shrimp and rice, if you can do shellfish (this was my choice)
    • Chicken, pork, or fish, if any of those work for you
    • Black beans and rice

    Let us know what you try so that, if it’s good, we can copy you. I have a feeling I’ll be making this a few more times, and I’d love some new ideas for what to serve it over.

    Summer Mango Salsa
    Summer Mango Salsa

    Summer Mango Salsa

    • 1/2 of a sweet onion, finely diced (this should be between 1/3 and 1/2 cup — adjust according to your love for onion)
    • 1/2 teaspoon kosher salt
    • 2 Tablespoons lime juice (I wanted to give you a measurement, but I’ve had to use everything from 2 whole limes to 1/2 a lime to get 2T. It varies widely. I always buy limes in pairs, for whatever reason.)
    • 1 serrano pepper (buy a size commensurate with your love of spice), stem, seeds, and inner membranes removed, diced very finely
    • 1 mango, cut into small cubes
    • 1 avocado, cut into small cubes
    • 3 Tablespoons chopped cilantro

    The order of the ingredients above is deliberate. I love onion in my salsa, but I don’t like it too strong. If you chop it first and then let it marinate in the lime juice while you fight with the mango, it mellows out a bit. I’m assuming that the acid “cooks” the onions a bit, as it does for fish in ceviche. If you’re a better food scientist than I am, I’d love to know if this is true; it could just be the power of suggestion.

    For the best flavor profile, you want the onions and the chile diced very finely, as finely as you can manage, and the mango and avocado a good bit chunkier (but still, not too big). The onion and chile go into the lime juice first. The mango next, and last the avocado — the avocado will break down the more you stir it, and I like it pretty well intact.

    Basically, chop everything up and mix it together in a bowl. This is a very fresh salsa, and it doesn’t need much time to meld — half an hour at room temperature seems to be enough, although it is great the next day. I doubt it would last all that much longer, but I’ve made it a few times now and I’ve yet to test that.

    Enjoy your plate of summer.