Notice: Function _load_textdomain_just_in_time was called incorrectly. Translation loading for the wp-ultimate-recipe domain was triggered too early. This is usually an indicator for some code in the plugin or theme running too early. Translations should be loaded at the init action or later. Please see Debugging in WordPress for more information. (This message was added in version 6.7.0.) in /home/maryzahc/public_html/adultfoodallergies.com/wp-includes/functions.php on line 6121
Desserts – Page 4 – surviving the food allergy apocalypse (archive)

Category: Desserts

Dessert /dɪˈzɜːt/, noun: the sweet, usually last course of a meal. These recipes will not contain dairy, eggs, gluten, wheat or hazelnuts. If we use a top 8 allergen, we will use a tag warning of its use.

  • Gum Drops

    Gum Drops
    Gum Drops – Photo by J. Andrews

    So it’s that holiday time of year. And I like my sweets on holidays, so Mary Kate and I got together to make some candy a couple of weeks ago. (I burned and ruined one pot that day, so you’re not getting a recipe for caramels, until I get a new pot and try it again.) One of the things we tried that was a hit was the gum drops. I actually made them ahead of time because there’s some processing time between steps (AT LEAST 3 DAYS, please read the whole recipe), and we wanted to use them for a construction project (teaser for next week’s post). The recipe I started with was located here at Bakerella. If you can use commercial extracts and commercial food coloring, you can use the recipe as it is. But I can’t. So I used Cara Reed’s ideas from her book, Decadent Gluten-Free Vegan Baking (see Mary Kate’s review here) for food coloring for the green, and then extended her idea and used carrots for the orange. I also used the homemade extracts that I’ve made and some lemon essential oil.  You’ll see four colors of gum drops in the picture, but the best were the lime and orange and the other flavors still need more work before they are blog-worthy.

    Gum Drops

    The recipe for the gum drops makes one batch of one flavor. To make both flavors, either double the amounts for the gum drop and put the ingredients for one flavor in each half of the batch, or use the amounts below for the batch, and use half of the amounts for the flavors in each half of the batch.

    To make Orange Flavor:

    • 2 teaspoons of Orange Food Coloring (To make orange food coloring, take 1/2 cup of peeled, chopped carrots, and cook over medium heat in water in a small sauce pan until tender. Drain the water, saving 1/4 of a cup aside. Place drained carrots and 1/4 cup of reserved cooking water in a blender and process until smooth. Place in a storage container and keep it in the fridge for up to two weeks). 
    • 4 drops of Lemon Essential Oil (make sure it’s pure and not cosmetic grade)
    • 2 Tablespoons of homemade orange extract (I used orange peels as described here and I use either Vikingfjord  or Luksusowa Vodka because they are made only from potatoes, where some vodkas may also use grain or corn.)

    To make Lime Flavor:

    • 2 teaspoons of Green Food Coloring (To make green food coloring, take 1 cup of fresh spinach and boil in 3 Tablespoons of water for 5 minutes while covered. Pour spinach and water in a blender and process until smooth. Place in a storage container and keep it in the fridge for up to two weeks). 
    • 4 drops of Lemon Essential Oil (make sure it’s pure and not cosmetic grade)
    • 2 Tablespoons of homemade lime extract (I used lime peels as described here and I use either Vikingfjord  or Luksusowa Vodka because they are made only from potatoes, where some vodkas may also use grain or corn.)

    Gum Drops:

    • 2 Tablespoons of unflavored gelatin powder (Knox or Great Lakes are generally regarded as being okay if you’re not super sensitive to corn, again no affiliation with Amazon, just linking for reference)
    • 1/2 cup of cold water
    • 3/4 cup of boiling water
    • 2 cups of sugar
    • extra sugar for coating the gum drops
    • a bit of safe for you oil to coat the container in which you’ll cool your gum drops
    • a container about 4 inches by 8 inches in which to cool your gum drops (I used two sandwich sized Rubbermaid food storage containers so my gum drops were a little thinner than normal.) 

    Grease your container to cool your gum drops with your safe oil.

    In a large pot, add the gelatin and cold water.  Whisk them together until the gelatin is completely moistened. Let the gelatin and water mixture sit for five minutes.

    Add the boiling water and whisk until the gelatin dissolves.  Add the sugar and stir it into the gelatin mixture.

    Bring to a boil over medium heat, stirring constantly, and boil for 25 minutes.

    Pour the mixture into your greased container and mix in the food coloring, extract and essential oil, until it is thoroughly combined.

    Cover the container and put it in the fridge overnight to set.

    Take out the container and use a knife dipped in hot water to cut 3/4 inch squares. I found it easiest to take the whole gum drop sheet out of the container (which is no small feat) and place it on a greased plastic cutting board and cut them on the board.

    Roll the cubes in sugar on all sides and place them on waxed paper or parchment paper (whatever is safest for you, those allergic to corn may have trouble with waxed paper), and let them dry at room temperature for two days to let the sugar dry and the gum drop harden a bit.

    Enjoy!

    Gum Drops
    Gum Drops – Photo by J. Andrews


  • Gluten-free, vegan Apple Fritters

    Glorious apple fritters with powdered sugar snow
    Glorious apple fritters with powdered sugar snow

    I have to admit, I spend a lot of fall jealous of people eating cider doughnuts and apple treats of all sorts. It’s part of a day out in the fall — stop at an orchard, get some fried appley things, eat bliss. Nowadays, I get cider, which is great, but somehow not as filling. Lucky for me, I think apple crisp is the pinnacle of baked apple dishes, as that’s super easy to take the gluten out of — it’s not meant to hold together. It’s meant to go in a bowl with ice cream and just be brilliant. But it’s not a fried apple treat of any kind, and I missed those.

    So when Denise and I decided to have another day of frying everything, apple fritters were on my mind. I think it’s been years and years since I had one, so I’m not entirely sure these are “traditional,” but they were tasty, and they kept well in the oven (set down at 170ºF) while we made the rest of the fried things. I’d love to tell you how they did a day later or frozen, but I can’t. We ate them all. I’m not big on food guilt anyway, but I can say that if you fry things maybe three times a year, you can’t really feel bad about eating everything.

    How many fritters you get will depend on how big you make them, and there’s really not a lot of measuring the mess into the oil. Just try to make them similar sizes so that they can be done about the same time. I’m not sure an exact count would be possible anyway — you’ll be eating them as soon as they are cool enough, way too fast to count, anyway, unless you have inhuman strength. The recipe is loosely based on the Chai-Spiced Pancakes recipe on The Canary Files, which is my go-to pancake recipe (my favorite thing about it is that you need to make it the night before and let it sit in the fridge overnight. I LOVE that. I don’t really do mornings so much as mornings happen to me.) For a fritter batter, though, I’ve altered it quite a bit, and then dunked it in hot oil; I’m just saying don’t expect health food.

    Batter, Frying, Draining (and absorbing sugar)
    Batter, Frying, Draining (and absorbing sugar)

    Gluten-free, Vegan Apple Fritters

    • 3/4 cup gluten-free all-purpose flour, blend of your choice (THIS is my go-to)
    • 1 Tablespoon sugar
    • 1 Tablespoon baking powder (corn-free, if you need it)
    • 1/4 teaspoon salt
    • 2 teaspoons cinnamon
    • 1/8 teaspoon nutmeg
    • 2 1/2 cups rice milk, DIVIDED (if you make this by hand, add slightly less water than called for, about a 1:1 ratio of cooked rice to water, and strain it really well for a thicker texture that is so much better for baking)
    • 1 Tablespoon of chia seeds, ground, mixed with 3 Tablespoons warm water to form a chia egg
    • 1 scraped vanilla bean (or 2 teaspoons vanilla extract)
    • 2 Tablespoons light olive oil (regular will be fine, you just might taste it a bit)
    • 1 1/2 teaspoons ground psyllium husk
    • 4 medium apples, peeled, cored, and shredded (medium=baseball-sized)
    • powdered sugar for dusting. Really, don’t even bother to mention this, just sift or sprinkle it on.

    Mix the dry ingredients (AP flour to nutmeg) together well. Add 1 1/2 cups rice milk, chia egg, vanilla bean, olive oil, and psyllium. Mix well, adding more rice milk if needed. Then put in the fridge for an hour. It will thicken considerably. Add the rest of the rice milk and stir in the apples. You want a thick dough, sort of like regular gluten-containing muffin batter would be, so pay attention as you add the liquids.

    Heat a pot of oil to 370ºF. Drop the fritter batter in by spoonfuls, making sure not to crowd the fritters. If you use two spoons, you can sort of flatten or spread the fritters as you form them, making them more UFO saucer shape than rounds, and this will mean the insides cook better. They WILL stick together or stick to the sides of the pot, so bounce them around enough to make sure they don’t. Flip a few times, and see how they brown. You may have to test a few — I’m not giving you a cooking time as it varies widely based on how thick each fritter is, but after 3 or 4, you’ll have the hang of it.

    When they are nicely golden brown, remove them to a paper towel-lined plate or tray to drain. Let the oil return to 370ºF, if need be, before doing the next batch. An oven turned down as low as it goes (170ºF on my oven) will keep them nicely warm until you’ve finished all of them.

    Dust liberally with powdered sugar and no longer feel left out.


  • Mint Lemonade Rocket Pops with raspberries onboard

    Mint Lemonade Rocket Pops with raspberries
    Mint Lemonade Rocket Pops with raspberries. Photo by J. Andrews

    The frozen fruity goodness of popsicles is pure summer magic — so much so that in the middle of winter, when I’m starting to believe summer is a myth, I crave popsicles. Many popsicles are safe for people with allergens, though I’d be concerned personally if I had nut anaphylaxis, but reading the ingredients list on your average box is an education in chemical compounds. We had plastic molds as kids, and my brother and I dreamed up all sorts of combinations — many of them were juice and Sprite, as soda carbonation leaves fun holes in a frozen pop. But this summer, I wanted to make something slightly more suited to an adult palate.

    So with the aid of some fun new Tovolo molds from our local kitchen store (Things Are Cooking, on Main Street in Concord), I’m working on making my own. The molds are kind of amazing, and it’s hard to choose, but I am me, so rocket pops were a given. I also ended up with the twin pops, which do break apart just like the ones we occasionally got as kids. That’s probably one of the few things my brother and I were good at sharing.

    Making ice pops can be super easy — just find a juice you like, pour, and freeze. But I wanted something different. Lemonade would be the other thing I’m really hung up on this summer, and it’s also hard to get it right — so I figured I’d make my own and make a fancy pop out of it. What I decided on was a tart lemonde with mint in the sugar water, and raspberries added to the pops. The result is a bit tart, a bit sweet, with a refreshing hint of mint and the surprise of bits of berries inside it. These took a little over 4 hours to freeze, so plan accordingly.

    Rocket Pops Vs. Twin Pop. If you ever played 1980s video games you can imagine the sounds Denise and I were making while poor Jack asked us to just hold the pops still so he could take the photograph. Photo by J. Andrews.
    Rocket Pops Vs. Twin Pop. If you ever played 1980s video games you can imagine the sounds Denise and I were making while poor Jack asked us to just hold the pops still so he could take the photograph. Photo by J. Andrews.

    Raspberry-Mint-Lemonade Rocket Pops

    • 5 lemons, freshly squeezed (3/4 cups juice)
    • 1 cup boiling water
    • 1/4 cup sugar
    • 1 sprig of mint (10 or so leaves)
    • 1/2 a carton of raspberries

    Squeeze the lemons and strain out pulp and seeds.

    Put the sugar in a heat safe bowl and mix in the mint leaves. Pour the boiling water over the sugar and mint, and stir until the sugar is dissolved. Let the mixture cool to room temperature.

    Mix the lemon juice and the sugar-mint water. Add the raspberries and lightly crush — you don’t really want to make raspberry-lemonade so much as you want a bit of essence of raspberry in the juice and some flattened raspberries that will be frozen into your pops.

    The molds I have have a pretty solid base, but the openings aren’t huge. A measuring cup with a pouring spout worked perfectly. Be careful not to overfill them, as that gets messy, and you still need to insert the sticks.

    Unmolding may require running the mold under hot water for a minute. The nice thing about these molds is that they are individual, not all one piece, which makes them easier to take apart. Do whatever your molds require, then sit in the sun and enjoy a pop.

    If you’re looking for new molds, can I highly suggest rocket shapes? Too much fun. This recipe makes a full 6 rocket pops and a full six (so 12) twin pops. Cut it down if you’re only doing one mold. My original recipe made enough for 4 molds, but I don’t have them and don’t have near enough freezer space either for that many. If you have the small molds that are most commonly sold, this recipe may also make too much juice. If you have leftovers (you might) you will need to add a bit more water to make a drinkable lemonade; this is more like a concentrate.

    Rocket pop flying solo, to the Top Gun theme. Photo by J. Andrews
    Rocket pop flying solo, to the Top Gun theme. Photo by J. Andrews
  • Marshmallows

    Marshmallows
    Marshmallows

    If I was going to a cookout B.F.A. (Before Food Allergies), one of the things I’d pick up is a bag of marshmallows to toast. With the corn allergy, that’s pretty much not an option these days. I’ve been pinning recipes on how to deal with this for about a year, but I hadn’t gotten around to it yet because there were other things that were much more high priority. Plus it was going to be a significant effort because I’d have to make the cane sugar syrup to replace corn syrup and the powdered sugar (stuff at the store generally has corn starch in it) from scratch and that seems like a lot of steps in advance for so little a thing. But I’m going to a cookout in a week, and it seems like it’s finally time. Normally I’d list out the ingredients in the order that you’re going to use them, but since you’re going to have to make some ingredients ahead of time, I’ve listed those first.

    Our friend Fred M. makes beautiful, ethereal, fluffy, light marshmallows, but I wanted these to stand up to getting stuck on a stick for toasting at the cookout so I upped the gelatin amount a bit in the recipes I found and tweaked. These marshmallows are a bit sturdy, but if you want them to be lighter with a little less structure, knock back the amount of gelatin by a tablespoon.

    Marshmallows:

    Ingredients:

    • 1 1/4 cup of cane sugar syrup (You will need to make it ahead of time – there are two good recipes and I’ve used both before. The one from thekitchn.com makes about a quart, and the one from justapinch.com makes about two cups.) 
    • 1 1/2 cups of powdered sugar (You will need to make it ahead of time – here’s a recipe from glutenfreegigi.com on how to do it. I used tapioca starch.) 
    • 2 teaspoons of vanilla extract or another extract might be fun, such as cinnamon (Here’s a bunch of recipes for vanilla extract, make sure to use safe alcohol if corn or wheat are an issue for you. I used Luksusowa Vodka because it’s made only from potatoes, where some vodkas may also use grain or corn. Also you can make cinnamon extract by using whole cinnamon sticks instead of vanilla beans. It’s totally killer in coffee.)
    • 4 Tablespoons of unflavored gelatin powder (Knox or Great Lakes are generally regarded as being okay if you’re not super sensitive to corn, again no affiliation with Amazon, just linking for reference)
    • 1 1/4 cups of cold water, divided
    • 1 1/2 cups of cane sugar (make sure you use a safe-for-you brand)
    • 1/8 teaspoon of salt
    • 1/2 cup tapioca starch (You could also use potato or arrowroot starch, whatever’s safe for you)
    • safe-for-you-oil for greasing the pan or you can use the oil in an oil mister as well

    Kitchen Stuff you will need:

    • Stand mixer with the whisk beater attached
    • candy thermometer that will clip on the side a saucepan
    • 3 or 4 quart saucepan
    • 9 x 13 baking pan or another flat container to spread out your marshmallows
    • a pizza cutter or a sharp knife
    • the normal assortment of bowls, measuring cups, spatulas, forks or whisks and so on

    Grease or spray your baking pan with the oil. Use a paper towel to wipe the pan and make sure that every surface is coated in a thin layer of oil. Put the baking pan and a spatula next to your stand mixer, which should already have the whisk beater on it and your splatter guard ready to go.

    Mix a 1/2 cup of cold water in a measuring cup along with the vanilla. Put the gelatin into the bowl of the stand mixer, and pour the water and vanilla mixture over it while whisking it with a fork or a small whisk. Mix until there are no lumps. Put the bowl back into your stand mixer and attach it.

    Gelatin, water, and vanilla extract well mixed
    Gelatin, water, and vanilla extract well mixed

    Place your saucepan on the burner and clip your candy thermometer to the side of the saucepan. Add the rest of the water (3/4 of a cup), and add the cane sugar, cane sugar syrup and salt. Don’t stir it up.

    water, sugar, cane sugar, syrup and salt with candy thermometer
    water, sugar, cane sugar, syrup and salt with candy thermometer

    Place the saucepan over high head and bring it to a rapid boil. Boil until the sugar mixture measures some where between 245ºF and 250ºF. Don’t let it go any higher than 250ºF. Take the saucepan off the burner and remove the candy thermometer.

    Sugar mixture at a boil
    Sugar mixture at a boil

    Turn on the stand mixer to medium and CAREFULLY pour the sugar mixture down the side of the stand mixer bowl. There will be some bubbling, so go slowly. Also it will freaking burn and hurt if you spill it on yourself, so please don’t.

    When all the sugar mixture is in the mixing bowl and is mixed to together, make sure your splatter guard is down and increase the mixing speed to high.  Continue to mix on high for 10 minutes. Make sure you do the full 10 minutes.

    Whipping marshmallow mixture
    Whipping marshmallow mixture

    Once the ten minutes is up, do not dally, get the marshmallow mixture into the baking pan as fast as you can as it will start to cool really fast, and you want to be able to spread it out in the pan. Use a spatula to scrap out the bowl, but it’s really think and sticky, so you won’t get every bit out. Once it’s in the pan, spray or coat your hands with your oil and spread out the marshmallow evenly.

    Marshmallows spread evenly in baking pan
    Marshmallows spread evenly in baking pan

    Let the marshmallows sit uncovered and at room temperature for 6 or more hours. Don’t let it go any longer than 24 hours though. Once they have cooled, mix your powdered sugar and tapioca starch in a bowl.

    Powder sugar and tapioca starch mixture
    Powder sugar and tapioca starch mixture

    Take a large cutting board or cookie sheet and sprinkle some of the powdered sugar mix on it.  Then sprinkle the top of the marshmallow in the pan with the mixture and smooth it out over the surface. Flip the pan over onto your cutting board. Once you’ve got them out of the pan, sprinkle more of the mixture over the top of the marshmallow layer that was previously on the bottom of the pan.

    Marshmallows powered before cutting
    Marshmallows powered before cutting

    Cut your marshmallows using a sharp knife or a pizza cutter into small squares.

    Marshmallow pieces cut by pizza cutter
    Marshmallow pieces cut by pizza cutter

    Put each square in the bowl with the powdered sugar and tapioca and toss it until coated thoroughly. (If you have extra marshmallow coating afterwards, put it in a jar and use it the next time.)

    Marshmallow being tossed in marshmallow coating
    Marshmallow being tossed in marshmallow coating

    Store them in an airtight container at room temperature. They’ll last for a couple weeks if you don’t eat them right away. Take them to your cookout and toast them. If you can’t wait you can use your stove burner and a bamboo skewer 🙂

    Marshmallow toasted over stove burner
    Marshmallow toasted over stove burner

    Enjoy!

  • Blueberry Syrup and Bonus

    Blueberry Syrup
    Blueberry Syrup

    So recently I’ve become concerned that I may be reacting to maple syrup. It stands to reason that with the number of types of tree pollen to which I am allergic that the sap of the tree might be an issue as well. I’ve noticed some correlation, but there were other potential issues during the same time frame, so I need to do some food challenges to verify whether it’s truly an issue or not. However, in the meantime, I need some syrupy stuff for waffles while I wait to do a challenge. As some you know, I’ve been canning to beat the band so that I have convenient, shelf stable, safe food and condiments, so I took a look in my canning books to see what I could find.

    Now I’m not suggesting that you can this recipe, as I know that that’s a lot of work for most of you, and you might not be into the canning thing. But if you wanted to do that, the recipe is here. I’ve cut this down to a manageable amount for immediate use and made a suggestion for thickening it for a more substantial syrup. The recipe still makes 3 cups of syrup. Since that’s still kind of a lot, you can freeze a portion of it before you thicken it. Be aware that the pictures are some what deceptive because the batch I made was three times this size so that I ended up with 12 half pints of canned blueberry syrup. Also because there’s so much blueberry pulp left, I’ve provided you with some ideas for using it in other recipes at the end of this post. When food is so hard for many of us, we don’t want to waste anything.

    Blueberry Syrup

    Makes about 3-4 cups of syrup.

    Ingredients:

    • 4 cups of blueberries
    • 3 cups of water (used divided, as described below)
    • 1 1/2 Tablespoons of grated lemon zest
    • 1 1/2 cups of white cane sugar
    • 1 Tablespoon of freshly squeezed lemon juice
    • 1-2 Tablespoons of arrowroot or tapioca flour (optional)
    • 1-2 Tablespoons of water (optional)

    Necessary equipment:

    • Stainless steel or other non-reactive (ceramic or enamel, do not use aluminum or cast iron) pot
    • Potato masher or large spoon
    • Strainer or colander
    • Cheesecloth (look in grocery stores where the utensils are, or in hardware stores or department stores where the canning stuff is)
    • Candy thermometer

    Wash your blueberries and pick out any squished or yucky berries or any stems or leaves. You need to crush your berries. Place a thin layer of blueberries in a large stainless steel stockpot (the pot needs to be stainless steel or another non-reactive surface), and mash the berries with a potato masher or the back of a large spoon. Make sure they are all squished. Then add another layer and mash them, repeating until all the berries are mashed to bits.

    Once the berries are all mangled, add 1 cup of the water and the lemon zest, and over medium heat, bring the mixture to a gentle boil. Allow the mixture to continue to boil gently for 5 minutes.

    Set up your strainer so that it hangs over a deep bowl or other non reactive pot so that the strainer does not rest in the bowl or pot, but so that all of the blueberry mixture will drip into the bowl or pot, without coming out the sides or making a mess. The bowl or the pot should also be deep enough that the strainer will not come into contact with the liquid as it drips out of the strainer. Line the strainer with several layers of dampened cheesecloth. You want several layers so that it prevents any seeds or pulp from dripping into your juice. The reason for dampening your cheesecloth with water is so that the cheesecloth doesn’t absorb as much of your precious juice.  Once you’ve got your strainer and the container for the juice to drip into properly situated, add the mixture to the strainer. Let it drip for at least two hours. If you’re a purist and you want a clear syrup, you let it drip undisturbed for at least two hours. If you’re like me, and not a purist, you let it drip for at least two hours and then you use a spatula to get as much of the juice as you can. (Keep the pulp, I’ll talk about what you can do with it later.)

    Blueberry Mixture in Strainer
    Blueberry Mixture in Strainer

    Wash the stainless steel stockpot you used to cook the blueberry mixture, and in the now clean pot, add the sugar and the remaining 2 cups of water.

    Sugar and water mixture before boiling
    Sugar and water mixture before boiling

    Over medium high heat, bring the sugar mixture to a boil and cook until it measures 230ºF (you may need to adjust for altitude, we don’t have an altitude issue here). Add your blueberry juice, and increase the heat to high, and bring it to a boil. Boil for 5 minutes, stirring occasionally. Once your five minutes is up, remove the pot from the heat, and stir in your lemon juice.

    Blueberry Syrup after cooking
    Blueberry Syrup after cooking

    At this point, if you’re going to put any of it in the freezer to save for later, pour that amount off into freezer safe and heat safe container and let it cool to room temp before sealing it and putting it in the freezer. If you’re satisfied with the syrup as it is, great, use it for pancakes, waffles, desserts, you name it.

    (SAFETY NOTE: You CANNOT thicken the syrup if you are planning to can it, unless you use Clear Gel, which contains corn. No other thickening method is safe for canning, so if you are allergic to corn, just thicken it after you open the jars and when you are planning to use it.)

    If you’d like to thicken the syrup, place the syrup back over medium heat.  Mix 1 Tablespoon of tapioca or arrowroot with 1 Tablespoon of water to form a paste, and then whisk it slowly into the syrup. Continue to whisk until the paste is well incorporated with the syrup and the tapioca and arrowroot has cooked. If this isn’t sufficiently thick enough for you, repeat the process, until the syrup is the right consistency. Yay! You have blueberry syrup!

    Now, let’s chat about that leftover pulp. There are a few ways you could use it:

    (1) Put the leftover pulp in your pancake or waffle batter for blueberry overload. Yum!

    (2) You can make yourself some blueberry butter/jam. Put the leftover pulp in a sauce pan with a cup of sugar and a tablespoon of lemon juice, and bring it to a boil over medium high heat, stirring frequently. Once it’s boiling, reduce the heat to medium, and stir frequently until the mixture thickens and holds its shape on a spoon. Store it in the fridge until you want to use it on toast, on ice cream, or just eating it with a spoon, haha!

    (3) Make blueberry vinegar. Mix the pulp with 4 cups of white wine vinegar and put it in a glass jar, covering it with cheese cloth or a coffee filter and securing it with a rubber band. Let it sit on your counter top for a week or two, stirring it once a day to prevent any mold. Strain out the blueberry pulp, and you’ll have blueberry flavored vinegar to use for salad dressings or marinades.

    Enjoy!

  • Berry Poke Cake (vegan, gluten-free)

    Vaguely Patriotic Poke Cake
    Vaguely Patriotic Poke Cake

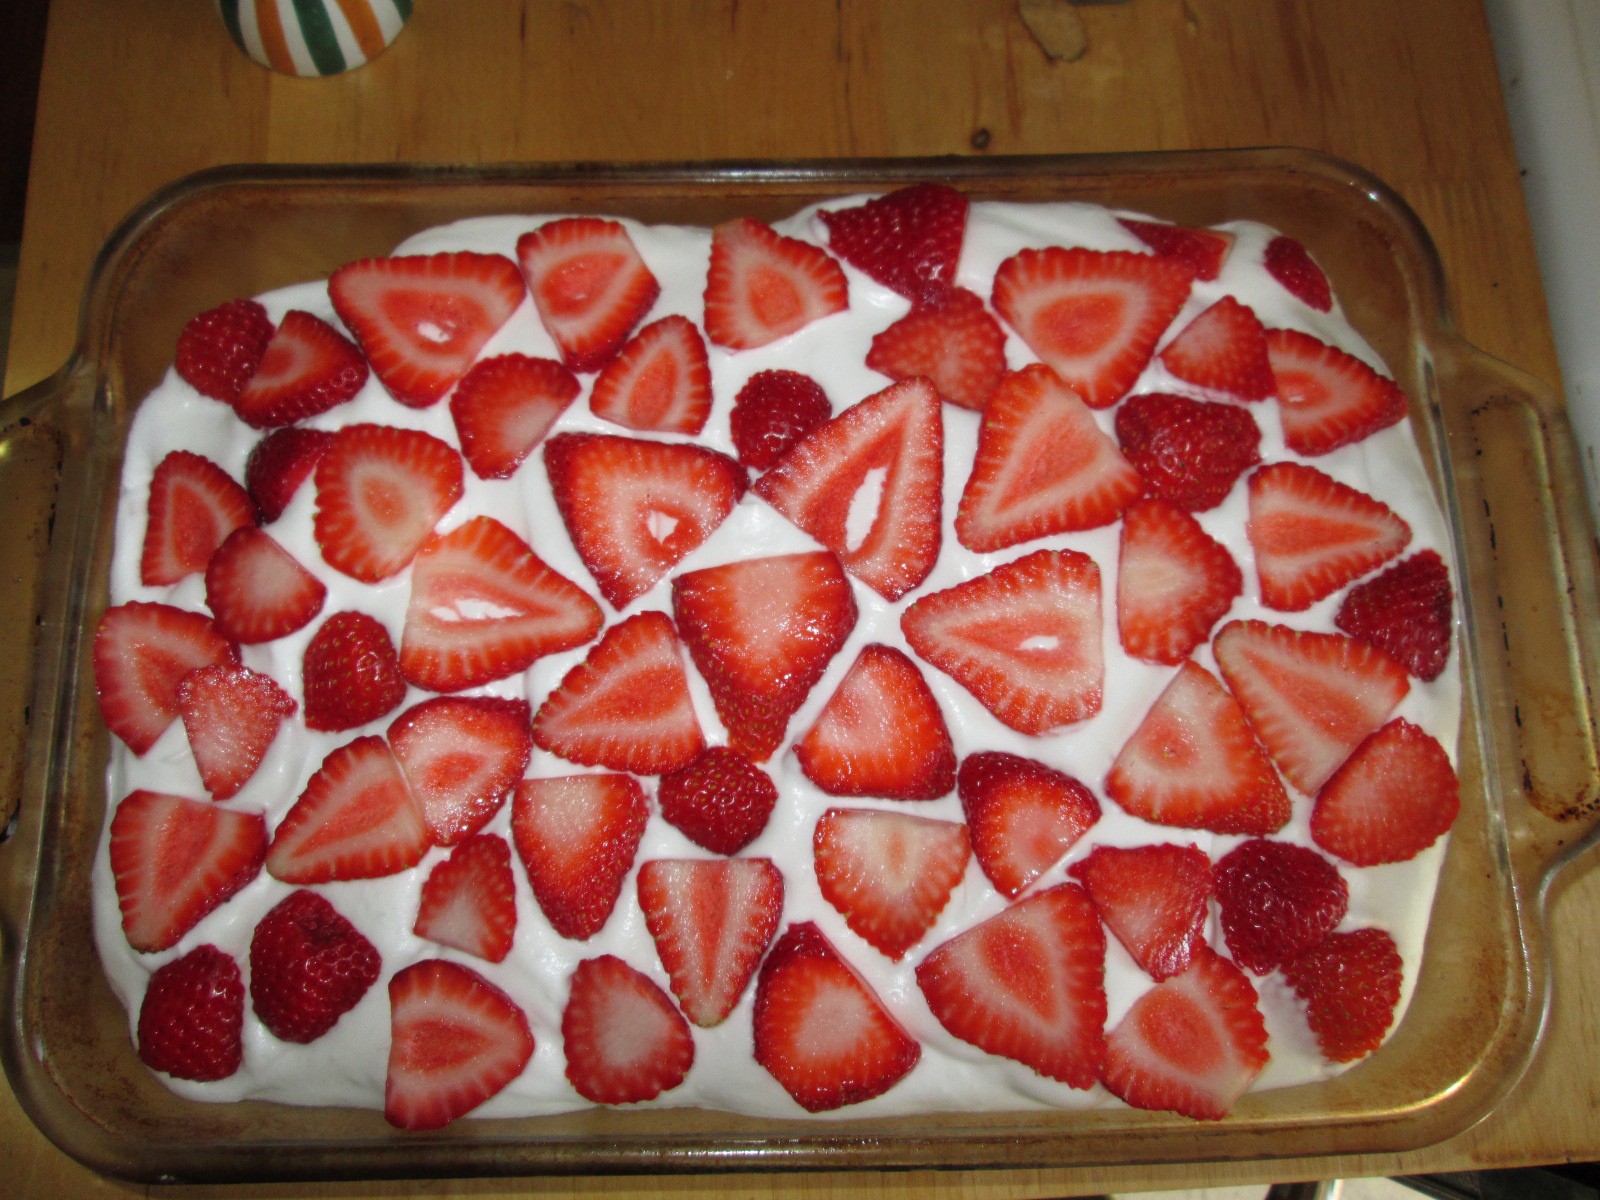
    So this week is the both the classic summer holiday of Independence Day in the US. I know maybe cake isn’t the first thing one thinks of when you think of summer holiday picnics, but this week is also my birthday, so cake is important. So your theme is: BERRIES. Hah. Actually, berries are one of the more awesome things about summer, and cake is the one truly awesome thing about birthdays, so here’s a berry-themed cake that also just happens to be color-appropriate for a few upcoming holidays — nicely, this works as well for Bastille Day as it does for Independence Day. It’s multi-purpose. This is good, because every day is better with cake.

    This is a riff on a cake my mother used to make — a poke cake, where you soak your cake with gelatin. Her “recipe” came from a magazine recipe (I’m going to guess Better Homes and Gardens, but it might have been the Parade magazine section from the Sunday paper) and involved box cake mix, a box of Jell-O, Cool Whip (which I absolutely adored for all of my formative years) and berries on top. My FrankenCake version involves other people’s recipes instead of boxes, but combined to make “classic” poke cake that is gluten-free, vegan, and completely without preservatives or weird flavorings. This is a dense, moist cake, flavored by the gel, topped with a whipped cream and berries. Served cold, this is great for summer. I mean, it’s berries. What is there not to love?

    You’ll make the cake, cool it, poke holes in it, make a fruit gel, pour it on, cool it, and the “frost” and decorate it. Because it needs to cool completely, twice, this is a good make-ahead recipe. The day before is a good idea, adding the “frosting” and berries not long before serving.

    Cake Assembly
    Cake Assembly

    IMPORTANT NOTE: In case you skipped reading to go straight to the recipe, this is not a “day of” recipe. You need to cool this twice, and the coconut milk for the topping must be refrigerated overnight.


    Patriotic Berry Poke Cake

    1 carton of strawberries or other fresh berries is also needed to decorate the top of the cake.

    Cake (very lightly adapted from Gluten Mama’s GF Vegan Vanilla Cake)

    • ¾ cup sorghum flour
    • ¾ cup tapioca starch
    • ½ cup coconut flour
    • 1 cup sugar
    • ½ teaspoon salt
    • 1 teaspoon baking powder
    • 1 teaspoon baking soda
    • 1 teaspoon xanthan gum
    • ½ cup plain almond milk (or other non-dairy milk)
    • 1 teaspoon lemon juice
    • 1 cup warm water
    • 3 Tablespoons coconut oil
    • 1 Tablespoon vanilla
    • 4 oz (1/2 cup) unsweetened applesauce (I use the snack pack sizes)

    Preheat oven to 375ºF. Lightly grease an 8″x11.5″ pan, or a 9″ square pan.

    Add lemon juice to almond milk and set aside.

    Mix dry ingredients. Then add wet ingredients and mix thoroughly.

    Pour into prepared pan and bake 35 minutes or so — cake is done when lightly browned on top.

    Cool completely, and then poke holes all over the cake with a fork. The more holes, the more your fruit gel will penetrate, so I’d suggest holes no more than 1/2 inch apart, all over the cake.


    Vegan Fruit Gel (I used this recipe from Manjula’s Kitchen)

    Poke and Gel the Cake
    Poke and Gel the Cake


    • 1/2 cup blueberry juice
    • 1/2 cup water
    • 2 Tablespoons sugar
    • 1/4 teaspoon agar agar powder


    If you need to, juice and strain blueberries to get blueberry juice. I just had a bag of frozen berries I picked last summer, so I defrosted them and ran them through a food mill and then a strainer. This made more juice than I needed, but this also makes more gel than you need for the cake.

    Mix the agar agar into your water. Add all the ingredients to a saucepan and bring to a boil over medium heat, stirring occasionally. Boil for three minutes.

    Pour very slowly over the top of your hole-poked cake (this is easier to do if you aren’t taking photos while pouring), letting it soak in, and stop when the gel stops soaking in. You may have a little leftover, so just make a serving of gel for later.

    Put the gel-soaked cake in the fridge and chill for 3-4 hours or overnight.


    Coconut Whipped Cream (see recipe here at Oh She Glows)


    • 1 can full-fat coconut milk without guar gum, refrigerated over night
    • 3 teaspoons sugar
    • 1/2 teaspoon vanilla
    • OR 3 teaspoons of vanilla sugar
    • A chilled metal bowl and electric mixer, with whisk attachment if you have it.


    Flip your can upside down in the fridge. To open it, flip it back upright and open it. Pour off the watery part (you can use this for things, but I don’t like it much, personally.)

    Put JUST the solid part in your chilled bowl and whip it with your whisk attachment or mixer.

    Add the sugar and vanilla (or vanilla sugar) and whip again. Taste it. It’s amazing. Add sugar or vanilla if needed.

    Use the coconut whipped cream to frost the cake, being generous in your application. Top the cake with berries and keep refrigerated until ready to serve.

    This cake is ready for its close-up
    This cake is ready for its close-up
  • Watermelon White Wine Sorbet or Ice Pops


    Watermelon White Wine Sorbet or Ice Pops
    Watermelon White Wine Sorbet or Ice Pops

    Sorbet is one of the things I miss terribly because almost all of the commercial versions have corn in some form in them. This is a fairly easy recipe, making it perfect for this weekend, when I was going away for my 20th college reunion. Also, just as a side note, you could also sub out the watermelon for a quart of strawberries or a quart of peeled sliced peaches. I bet they’d be awesome too.

    Warning:  Before you make sorbet, you need an ice cream maker and if it’s like mine, you need to have frozen the insert ahead of time.  Also, it helps to make the simple syrup the day before and let it cool in the fridge overnight.  If you’re just making ice pops, just cool the simple syrup to room temperature before mixing it with the watermelon juice. 

    Watermelon White Wine Sorbet

    Makes about 10 or so half cup servings (who ever eats just half a cup though??)

    • 1 1/4 cups sugar
    • 1 1/4 cups water
    • 1/2 cup of chilled white wine (anything will do, but a nice bright citrus-y Sauvignon Blanc or Pinot Grigio would work well. Also, don’t spend a ton of money on this wine, you’re mixing it with watermelon and sugar. Or if you don’t want to use wine because you’re unsure of the wheat or corn ingredients in your wine, you could use a vodka made only from potatoes, but I’d cut it down to a quarter cup. Or not, if you’re not driving. Also, if you don’t want to use alcohol, substitute the wine with some safe-for-you lime or lemon or other fruit juice.)
    • 1 quart of watermelon, peeled and cubed

    Again, make sure that your ice cream maker is ready to go according to the manufacturer’s instructions, whether that means your insert is frozen or whatever else you might have to do.

    The day before you are going to do your sorbet, make the simple syrup. Place the sugar and water in a sauce pan and bring it to a boil without stirring. Turn it down to a low simmer and simmer until all the sugar has dissolved to make a simple syrup. Pour the simple syrup into a heat resistant bowl and put it into the fridge to cool.

    Place watermelon in a food processor or blender (in batches if necessary) and blend until smooth. Pour the liquid through a strainer to remove any seeds making sure that you press any large fruit bits remaining through the strainer. You don’t want to waste any of the watermelon.  Add the wine and the simple syrup to the watermelon mixture and mix until combined thoroughly.

    Follow your ice cream maker’s instructions to make the sorbet, or make ice pops with the mixture by using paper or plastic cups or ice pop molds and placing them in the freezer until frozen.

    Hope you enjoy it!

    atermelon White Wine Sorbet or Ice Pops
    Watermelon White Wine Sorbet or Ice Pops


  • Magic Spring Cakes

    Legions of Chicks
    Legions of Chicks. Photo by Jack Andrews

    It is no real secret that I’m a huge fan of marshmallow Peeps chicks. I do not know what it is about the goofy things that tickles me so, but they have for years. And it’s not their food value — I don’t really like them that much to eat. They’re just ridiculously cute and fun to play with. And they crack me up. My friends all know this, which is why I have the Peeps craft book, a fantastic Peeps t-shirt, and why Jodi took me to the Peeps store about three years ago:

    MK at the Peeps store -- photo by Jodi Lasky
    MK at the Peeps store — photo by Jodi Lasky

    My friends — they are good peeps.

    This year, though, Wilton kind of made my year by partnering up and making a Peeps silicone baking pan. When I bought it, I had visions of making chocolate-covered marshmallow candy. But I’m really more of a baker. So I started making Peeps cakes. This is how the adorableness of the chicks becomes so very very tasty.

    I’ve tried everything from doughnut batter to cake batter, and found that something in between worked best. I still don’t quite have the hang of food coloring — they’re not as outlandish as I’d initially hoped — but no one’s complained about being forced to test different batches. And I will say this — we’ve had spring, either in temperature or in general sunniness, since I bought the pan, so they ARE magic, and if you live in the upper midwest, maybe you should start baking, too?

    So the recipe below is my favorite version, but here’s how you can adjust it — if you want a larger crumb (stiffer dough), add less non-dairy milk. A smoother, more sponge-cake texture, add more non-dairy milk. The latter is easier to stuff in the molds, but I think somewhere in between is best — this recipe works with as little as a scant 1/4 cup of liquid, and as much as 1 cup. Baking times will vary (obviously). The next batch I test will use chia instead of the Ener-G, which I think will work fine. If you try something different, let me know!

    Happy spring, people.

    Chicks! In! Space! Photo by Jack Andrews
    Chicks! In! Space! Photo by Jack Andrews


    Magic Spring Cakes

    • 1/2 cup sorghum flour
    • 1/2 cup brown rice flour (I used superfine, which is great if you have it)
    • 1/4 cup potato starch
    • 1/4 cup tapioca starch
    • 1/2 teaspoon xanthan gum
    • 2 teaspoons baking powder
    • 1/2 cup brown sugar (I have to admit that I notice a huge difference in flavor with using the Florida Crystals cane sugar version versus the cheapest brown sugar, which is usually beet sugar with molasses added. That could be me being an ingredient snob, but since the FC stuff goes on sale with some regularity, being a snob barely costs me more.)
    • 1/4 teaspoon salt
    • 1/2 teaspoon nutmeg
    • 2 teaspoons cinnamon

    Mix all dry ingredients together thoroughly.

    • 1 Ener-G egg replacer egg (1 1/2 teaspoons Ener-G powder plus 2 Tablespoons warm water, whisked until slightly frothy)
    • 1/4 cup + 1 Tablespoon melted shortening (I used both coconut oil-based Earth Balance and Spectrum shortening, and both worked fine) (ALSO — Melt an additional Tablespoon or two of shortening to grease your pan with)
    • 2 Tablespoons vanilla
    • 2/3 cup non-dairy milk (I usually use almond milk because it’s what I keep on hand, but I notice very little difference using rice milk)
    • Food coloring, if desired

    Use some melted shortening to brush the silicone molds.

    IF you are using food coloring, mix all the wet ingredients but the shortening together before adding them to the dry ingredients. This makes the color spread evenly.

    If you are NOT using food coloring, no need to dirty another bowl — just add all the wet ingredients to the dry ingredients and mix well. I find that my silicone spatula works best for this.

    Scoop into baking molds, and make sure you’ve filled out the bottoms or you lose the detail. I used my spatula to sort of smush and spread the batter into each mold, and then used an icing knife to scrape off any excess. If you’re not using a Peeps mold, you could use another small silicone mold, doughnut pan or a mini muffin tin, and your baking times will be approximately the same. If you’re making cupcakes or a full cake, your baking times will be way off what’s recommended, so I’d suggest checking in 5 minute increments until a toothpick inserted into the center of your cake comes out completely clean.

    For the chicks and bunnies, my cakes took about 24 minutes. I will say check after 20, and judge how much more time you need then. When the cakes are done, flip them out onto a cooling rack immediately, and let cool completely before eating. With the oil brushed on the molds, these get a decent doughnut-type “crust” on the exterior, which is excellent.

    Store your cooled cakes loosely covered, for up to three days.