Notice: Function _load_textdomain_just_in_time was called incorrectly. Translation loading for the wp-ultimate-recipe domain was triggered too early. This is usually an indicator for some code in the plugin or theme running too early. Translations should be loaded at the init action or later. Please see Debugging in WordPress for more information. (This message was added in version 6.7.0.) in /home/maryzahc/public_html/adultfoodallergies.com/wp-includes/functions.php on line 6131 Condiments – Page 4 – surviving the food allergy apocalypse (archive)
Condiment [kon-duh-muh nt] noun: early 15c., from Old French condiment (13c.), from Latin condimentum “spice, seasoning, sauce,” from condire “to preserve, pickle, season,” variant of condere “to put away, store,” from com- “together” (see com- ) + -dere comb. form meaning “to put, place,” from dare “to give”. These recipes will not contain dairy, eggs, gluten, wheat or hazelnuts. If we use a top 8 allergen, we will use a tag warning of its use.
Blueberry Habanero Hot Sauce (and my pathetic attempt to do a smiley face with the hot sauce bottle dripper)
So remember earlier this summer when I went berry picking with Mary Kate and I made the blueberry barbecue sauce? Well, I also made this Blueberry Habanero Hot Sauce. Just a warning that the outset, when I say hot, I mean hot. This is not a sauce for the faint of spice. Please be advised that my taste buds no longer think that Sriracha is all that hot, and I use it like ketchup, so when I say this is hot, I freaking mean it. Now with that out of the way, it’s really good. I really like the fruity spice combination and it was great to kick up my portion of the ribs we made with the Blueberry Barbecue Sauce to acceptable spice levels. Also, it was really good when I dipped marshmallows into it. I used to have a hot sauce collection in the long ago and far away time before corn, and I had a blueberry hot sauce in it. It’s really nice to get it back.
Blueberry Habanero Hot Sauce
Makes about 4 cups.
1 1/2 cups of fresh blueberries
1 onion chopped
1 1/2 cups of apple cider vinegar
1/4 cup of lime juice
3 garlic cloves
2 teaspoons of salt
1 Tablespoon of sugar
10 habanero peppers, seeds and stems removed, chopped.
Combine all ingredients, except for the habaneros, in a saucepan and bring to a medium boil. Cover the saucepan, and gently boil for 10 minutes.
Place the habaneros and the contents of the saucepan in a blender or food processor and puree until smooth.
You can either can this recipe in a water bath as described here – or you can store in the refrigerator or freezer. Also if you’re worried about using up this much hot sauce, you can make half the recipe.
Despite being diagnosed with a likely soy allergy and confirming it with a food challenge, I also challenged gluten-free tamari separately and decided I could handle it. But paying a little more attention to the fact that I felt lousy the day after Denise and I would have sushi, and also when I’d make stir-fry, I started experimenting with making my own soy sauce substitute. I did try coconut aminos. I didn’t like them. Your mileage may vary, but coconut aminos can also be a bit on the pricey side. Regardless of what you find that works for you, I think that soy sauce is a handy flavor to have in your arsenal for so many uses.
I looked at and tried a variety of recipes online, but none were quite exactly what I wanted, taste-wise. This recipe is my version — I’d suggest trying it in this size (makes a little less than a cup) and then seeing what you might want more or less of in your own final version. Then, if you find you use it regularly, double it. So far, it seems to last safely about a month in the fridge. None of mine has made it past that.
This sauce works best, in my opinion, in cooked or mixed recipes, so stir-fry, teriyaki, marinades of all sorts (like jerky), rather than as a dipping sauce for sushi. Although, hey, it works there, too, but it shows its differences a little more.
2 Tablespoons balsamic vinegar (be sure this is free of “caramel coloring”)
2 teaspoons rice vinegar (free of sweeteners)
3 teaspoons molasses
1 teaspoon whole peppercorns (lightly smash one or two if you really like pepper flavor)
1 teaspoon chopped garlic or one large clove, smashed
1 large chunk of ginger — approximately 1 inch square, but chopped into 4 or so pieces
1 pinch of onion powder
1 teaspoon (or so) of salt
In a saucepan, mix all the ingredients except the salt. A fork or whisk seems to work best to incorporate the onion powder and fully blend the molasses.
Bring to a boil, then turn down to a high simmer (it should still be bubbling briskly) and cook, stirring occasionally, for 15-20 minutes, until reduced by 1/3 in volume.
Remove from heat, whisk in salt. Allow the mixture to cool, then strain and bottle. Store in the fridge.
*I would not highly recommend veggie stock for this, although if you really roasted the veg good and brown, it might be okay. Mushroom broth or stock has a richer flavor in the right direction for a soy sauce replacer, though, so if you want to make this vegan or vegetarian, and you’re not allergic to mushrooms, check out that option. There is at least one boxed brand on the market, or Vegetarian Times has a recipe.
If you tweak this to your tastes, please let us know! Post your recipe or a link below in the comments.
When Mary Kate and I began to plan the cookout we held several weeks ago (grilling, friends and lots o’ posts for the blog, what could be better?), we started with thinking about what ingredients were in season and could be grilled. We wanted to do a dessert, but I couldn’t figure out anything with my restrictions by the time we were solidifying the menu. I had seen a recipe for peach salsa for canning, but I wondered what it would be like grilled instead, because it would bring out the sweetness of the peaches and combine it with some lovely caramelized, smokey flavors. So we tried it. It’s good. And for those of you that can’t have chips like me (the corn chips are only to make the picture pretty in my case, although Mary Kate can eat them), this salsa is really good on pork chops as a sauce. You could also use it as a marinade or a glaze on pork or chicken, depending on how finely you chop the ingredients or just put it in the blender for a peach barbecue sauce. This is a low heat salsa, so don’t be afraid because I’m posting it. For the chili heads, don’t worry, I’ve got a hot sauce coming up in few weeks that blows my head off, and will have appropriate warnings.
Grilled Peach Salsa
1 pound of peaches, grilled
1 small red red onion, grilled
1/2 of a orange bell pepper, grilled (If you don’t know what to do with the half of orange bell pepper you’ll have left over, de-stem and de-seed it, put it in a freezer zip top bag and put it in your freezer. Peppers need no additional prep to freeze. Use it the next time you make a soup, stew, chili or marinara sauce.)
2 jalapeno peppers, grilled
1/2 of a bulb of garlic, with top cut off and with most of the outer layer peels removed (Grill the whole bulb and put the remainder in the fridge to use for mashed potatoes or something else where roasted garlic would be awesome)
1/2 tablespoon of olive oil or other safe-for-you oil
1/4 cup of white wine vinegar
2 Tablespoons brown sugar
1/2 teaspoon of ground cumin
1/8 teaspoon of ground cayenne pepper
**Please keep in mind as you look at the pictures that I was cooking a whole lot of other things the day we were grilling, so the pictures do not reflect the correct amounts of the ingredients shown, or may show additional ingredients. Also, my original recipe made a holy ton of salsa, so we cut the ingredients in half for the purposes of this post.
De-stem and de-seed your peppers.
Peppers de-stemmed and de-seeded – Photo by J. Andrews
Place the peppers on the grill and grill until they get a bit tender and have a bit of char on them.
Peppers on the grill – Photo by J. AndrewsPeppers and Garlic on the grill – Photo by J. Andrews
Take your garlic bulb, slice off the top so that the cloves are exposed a bit (see the picture and description in our previous Grilled Salsa recipe), and place it on some aluminum foil large enough to wrap the garlic in as shown in the picture above. Drizzle the olive oil over your garlic bulb, and wrap the aluminum foil around it and place it on the grill. Roast the garlic until the cloves are cooked and mushy.
Trim and peel your onion and then slice it in about half to one inches slices and place on the grill. Grill until you have a bit of char, and the onion is tender. (Ours were a bit more charred probably than strictly necessary, we were having issues with the grill, totally user error.)
Sliced Onions – Photo by J. AndrewsSliced onions on the grill – Photo by J. AndrewsSliced onions on the grill just before they got a bit too done – Photo by J. Andrews
Cut your peaches in half and remove the pit. On some of them I had to cut the peaches in quarters to get the pit out, but it’ll still work, it’s just halves are a little easier to manipulate on the grill. Place the peaches on the grill and grill until they are a bit more tender and have some nice charring on the outside.
Peaches in halves and quarters – Photo by J. AndrewsPeaches on the grill – Photo by J. Andrews
Once all your grilled ingredients are cooked, squeeze out the roasted garlic from the cloves, and put the garlic, peppers, onions, and peaches in a blender or food processor, and process until chopped to the level of chunkiness that you like. I used the manual food processor from Pampered Chef because I wouldn’t have to truck everything back inside or find an electric outlet (no affiliation, I just like it). You are likely going to have to process in batches. Place all the chopped ingredients in a large bowl and add the white wine vinegar, brown sugar, cumin and cayenne pepper. Mix thoroughly.
Completed Grilled Peach Salsa – Photo by J. Andrews
When Mary Kate invited me to go berry picking earlier this summer, I had already done a good bit of canning with blueberries. So when I wound up about 6 cups of blueberries, I decided I want to do something other than jam and syrups, since I had already made syrups and blueberry butter. In poking around online for ideas, I found a canning recipe for blueberry barbecue sauce. I make some tweaks to it in order to make it safe for me, and reduced the amounts by half to make a more reasonable amount for those of you who aren’t into canning. If you do want to can it, the original recipe is here. This is a low heat sauce, as verified by others, so don’t worry that just because I’m posting it, you won’t be able to handle it.
Blueberry Barbecue Sauce
Makes about 2 cups.
1 3/4 cups of fresh blueberries
1/4 cup of safe-for-you ketchup (I don’t have a corn safe one so I make it myself)
2 Tablespoons apple cider vinegar
2 garlic cloves
2 Tablespoons of brown sugar
1/2 Tablespoon of fresh grated ginger
1/8 of a teaspoon of black pepper
1/4 teaspoon of chili flakes
1/4 teaspoon Penzey’s Cajun Seasoning
Combine all ingredients in a saucepan and bring to a medium boil. Stir and lower the heat to a simmer and simmer for about 15 minutes. Use a hand blender to puree all the ingredients, being careful not to splash, or pour the mixture into a blender and blend until smooth.
Once the sauce has cooled you can store it in the refrigerator or freezer until you’re ready to use it. When grilling, I prefer to use a dry rub first, and then once the meat is almost completely cooked, I use a silicone pastry brush to coat the meat with the sauce and then grill each side to warm and/or char up the sauce.
Blueberry Barbecue Sauce – Photo by J. AndrewsBrushing pork with Blueberry Barbecue Sauce – Photo by J. AndrewsGrilling each side after coating with Blueberry Barbecue Sauce – Photo by J. AndrewsBoneless pork ribs with Blueberry Barbecue Sauce – Photo by J. Andrews
So recently I’ve become concerned that I may be reacting to maple syrup. It stands to reason that with the number of types of tree pollen to which I am allergic that the sap of the tree might be an issue as well. I’ve noticed some correlation, but there were other potential issues during the same time frame, so I need to do some food challenges to verify whether it’s truly an issue or not. However, in the meantime, I need some syrupy stuff for waffles while I wait to do a challenge. As some you know, I’ve been canning to beat the band so that I have convenient, shelf stable, safe food and condiments, so I took a look in my canning books to see what I could find.
Now I’m not suggesting that you can this recipe, as I know that that’s a lot of work for most of you, and you might not be into the canning thing. But if you wanted to do that, the recipe is here. I’ve cut this down to a manageable amount for immediate use and made a suggestion for thickening it for a more substantial syrup. The recipe still makes 3 cups of syrup. Since that’s still kind of a lot, you can freeze a portion of it before you thicken it. Be aware that the pictures are some what deceptive because the batch I made was three times this size so that I ended up with 12 half pints of canned blueberry syrup. Also because there’s so much blueberry pulp left, I’ve provided you with some ideas for using it in other recipes at the end of this post. When food is so hard for many of us, we don’t want to waste anything.
Blueberry Syrup
Makes about 3-4 cups of syrup.
Ingredients:
4 cups of blueberries
3 cups of water (used divided, as described below)
1 1/2 Tablespoons of grated lemon zest
1 1/2 cups of white cane sugar
1 Tablespoon of freshly squeezed lemon juice
1-2 Tablespoons of arrowroot or tapioca flour (optional)
1-2 Tablespoons of water (optional)
Necessary equipment:
Stainless steel or other non-reactive (ceramic or enamel, do not use aluminum or cast iron) pot
Potato masher or large spoon
Strainer or colander
Cheesecloth (look in grocery stores where the utensils are, or in hardware stores or department stores where the canning stuff is)
Candy thermometer
Wash your blueberries and pick out any squished or yucky berries or any stems or leaves. You need to crush your berries. Place a thin layer of blueberries in a large stainless steel stockpot (the pot needs to be stainless steel or another non-reactive surface), and mash the berries with a potato masher or the back of a large spoon. Make sure they are all squished. Then add another layer and mash them, repeating until all the berries are mashed to bits.
Once the berries are all mangled, add 1 cup of the water and the lemon zest, and over medium heat, bring the mixture to a gentle boil. Allow the mixture to continue to boil gently for 5 minutes.
Set up your strainer so that it hangs over a deep bowl or other non reactive pot so that the strainer does not rest in the bowl or pot, but so that all of the blueberry mixture will drip into the bowl or pot, without coming out the sides or making a mess. The bowl or the pot should also be deep enough that the strainer will not come into contact with the liquid as it drips out of the strainer. Line the strainer with several layers of dampened cheesecloth. You want several layers so that it prevents any seeds or pulp from dripping into your juice. The reason for dampening your cheesecloth with water is so that the cheesecloth doesn’t absorb as much of your precious juice. Once you’ve got your strainer and the container for the juice to drip into properly situated, add the mixture to the strainer. Let it drip for at least two hours. If you’re a purist and you want a clear syrup, you let it drip undisturbed for at least two hours. If you’re like me, and not a purist, you let it drip for at least two hours and then you use a spatula to get as much of the juice as you can. (Keep the pulp, I’ll talk about what you can do with it later.)
Blueberry Mixture in Strainer
Wash the stainless steel stockpot you used to cook the blueberry mixture, and in the now clean pot, add the sugar and the remaining 2 cups of water.
Sugar and water mixture before boiling
Over medium high heat, bring the sugar mixture to a boil and cook until it measures 230ºF (you may need to adjust for altitude, we don’t have an altitude issue here). Add your blueberry juice, and increase the heat to high, and bring it to a boil. Boil for 5 minutes, stirring occasionally. Once your five minutes is up, remove the pot from the heat, and stir in your lemon juice.
Blueberry Syrup after cooking
At this point, if you’re going to put any of it in the freezer to save for later, pour that amount off into freezer safe and heat safe container and let it cool to room temp before sealing it and putting it in the freezer. If you’re satisfied with the syrup as it is, great, use it for pancakes, waffles, desserts, you name it.
(SAFETY NOTE: You CANNOT thicken the syrup if you are planning to can it, unless you use Clear Gel, which contains corn. No other thickening method is safe for canning, so if you are allergic to corn, just thicken it after you open the jars and when you are planning to use it.)
If you’d like to thicken the syrup, place the syrup back over medium heat. Mix 1 Tablespoon of tapioca or arrowroot with 1 Tablespoon of water to form a paste, and then whisk it slowly into the syrup. Continue to whisk until the paste is well incorporated with the syrup and the tapioca and arrowroot has cooked. If this isn’t sufficiently thick enough for you, repeat the process, until the syrup is the right consistency. Yay! You have blueberry syrup!
Now, let’s chat about that leftover pulp. There are a few ways you could use it:
(1) Put the leftover pulp in your pancake or waffle batter for blueberry overload. Yum!
(2) You can make yourself some blueberry butter/jam. Put the leftover pulp in a sauce pan with a cup of sugar and a tablespoon of lemon juice, and bring it to a boil over medium high heat, stirring frequently. Once it’s boiling, reduce the heat to medium, and stir frequently until the mixture thickens and holds its shape on a spoon. Store it in the fridge until you want to use it on toast, on ice cream, or just eating it with a spoon, haha!
(3) Make blueberry vinegar. Mix the pulp with 4 cups of white wine vinegar and put it in a glass jar, covering it with cheese cloth or a coffee filter and securing it with a rubber band. Let it sit on your counter top for a week or two, stirring it once a day to prevent any mold. Strain out the blueberry pulp, and you’ll have blueberry flavored vinegar to use for salad dressings or marinades.
Indian food, I so miss Indian food. It’s so yummy, and there aren’t a lot of Indian places that would be safe for me between the dairy and coconut thing, even if the corn thing weren’t an issue. Once of my very favorite appetizers to get were Vegetable Samosas. I love them. It’s been a long, long time, so it was time to get around to trying to recreate a safe version. Now I really wanted them to have that egg roll/fried dough/pastry crust type consistency, but without gluten it’s really freaking hard to do. My attempts ended up either being like bad pie crust when I tried baking them, or they flaked apart in the oil when I tried deep frying them. So, not wanting to wait for eternity until I managed to cobble together a dough in the Goldilocks zone, I decided to try rice paper. I love Vietnamese fresh spring/summer rolls, so I have a ton of rice paper in the house. I knew you could fry rice paper wrapped spring rolls, although I’d never done it before, so I decided to just wing it. Apparently you don’t deep fry rice paper wrapped spring rolls. You ever want to see a spring roll bubble up like it has tumors, just deep fry one of these. After doing research on how you’re actually supposed to do it, they came out pretty good, other than being shaped like spring rolls instead of cone or triangle shaped like samosas. Let me know what you think.
Vegetable Samosas and Cilantro Dipping Sauce
Makes about 14, more or less.
Do the sauce first so that it’s all ready to go so that you can eat when you’re done frying.
Cilantro Dipping Sauce:
2 cups of tightly packed chopped cilantro
1 garlic clove
1 jalapeno pepper (use half a habanero if you want to kick things up a bit) de-stemmed, seeded, and minced
1/2 inch long piece of peeled ginger
1 teaspoon garam masala (I used Penzey’s version, but I’m sure there are a ton of recipes on the interwebs)
1 teaspoon olive oil
4 Tablespoons of lemon juice (or the juice of one lemon)
1/2 teaspoon of salt
Put all the ingredients in a blender or food processor. Blend until smooth. (Ta-dah! That was easy wasn’t it?) Put in a container and pop it in the refrigerator until you’re ready for it. (The picture below is all fancy, you get a lot more sauce than that.)
Cilantro Dipping Sauce
Samosas:
3 potatoes, washed, peeled, cubed, and boiled (like you’re making mashed potatoes)
1/2 cup green peas (or whatever other vegetable you’d like in it)
1 teaspoon of grated fresh ginger
1 clove of garlic, minced, or whatever it is when you put it through a garlic press
2 Tablespoons of fresh chopped cilantro
1 jalapeno pepper (or the other half of that habanero if you used it for the dipping sauce) de-stemmed, seeded, and minced
1 teaspoon of garam masala
1 teaspoon of salt
1/2 teaspoon of cumin seeds
2 Tablespoons of lemon juice (or the juice of half a lemon)
Spring Roll Rice Paper Wrappers (Round 22cm) – the link is here so you can see what you’re looking for, but we’re not affiliated with Amazon in anyway. Also, any brand will do.
safe for you oil to use for frying
Once you’ve got your potatoes washed, peeled, cubed, and boiled, you’re going to want to give them a fairly rough mash. You don’t want them smooth, lumpy is good.
Potatoes, roughly mashed
Let them cool for a bit. In the meantime, get all your other ingredients (except the rice paper and oil) in a bowl large enough for the ingredients and the potatoes. When your potatoes have cooled a bit (you can stick them in the fridge to hurry that along), mix the potatoes with the other ingredients so that they are well combined.
Samosa filling
Now to assemble your samosas. You’ll need a bowl of warm water (I use the water as hot as I can get it out of the tap) big enough for you to dip the rice paper in. You’ll also need a smooth clean surface to place your rice paper after moistening it. I used my dough rolling mat, but you can just use a plate if it’s big enough. Also, you’ll need a tray or sheet pan with some parchment paper or waxed paper on it to store your completed samosas until you’re ready to fry.
Dip your rice paper into the water, making sure that the entire surface is moistened.
Moistening your rice paper
Be careful that you don’t let the rice paper fold against itself, I’ve never been talented enough to get it back apart again, although I’m told it’s possible. Lay the rice paper out flat on your working surface.
Rice paper getting ready for filling
Place some filling on your rice paper. I used about two tablespoons. You can use more or less depending on your preference, you’re just going to make more or less samosas.
Samosa filling on rice paper
Fold the two sides over the samosa filling, making it so that the sides angle in towards the top, making it somewhat triangular.
Sides folded over the samosa filling
Fold the bottom edge up over the samosa filling.
Folding bottom edge up over filling
Roll the filling over the rest of the rice paper, like you’re rolling up a sleeping bag, or a burrito, depending on your arbitrary cultural reference. The end should stick to the roll.
Completed samosa
Repeat the process until you have lots of samosas ready to fry.
Samosas ready to fry
Now we need to prepare a place to stash our samosas once they’ve been fried. Cover another tray or sheet pan, with a couple layers of paper towels, and then place a cookie rack on it upside down so that the cookie rack is laying on the paper towels (more oil gets absorbed this way).
In a frying pan, pour enough oil that when you put a samosa in it, the oil will only go half way up the side of the samosa and does not cover the samosa. Less oil is better than more. Heat your oil over medium low to medium heat. Be very careful to space them out, because if they touch each other the rice paper will rip when you try to separate them, and then you’ll have filling in your oil, which will burn up into little dark bits and cover the outside of your samosas. Look at the pictures and then ask me how I know, haha.
Samosas frying
Also, these are going to take so much longer than you imagine. I don’t know if its the rice paper or if it’s the moisture content in the potatoes, but expect to be frying for some time. Also, don’t go any higher than medium on the heat, otherwise you’ll get really big bubbles on your wrappers potentially causing holes and scorching. As you’re frying turn them occasionally with a pair of tongs to make sure they cook evenly. When the rice paper wrappers look like this, they’re done:
Fried Samosas
Yours will not have the little burned bits on the outside because you will be more careful about keeping them separated than I was, but if you do have little burned bits, they don’t affect the taste of your samosas. Although the rice paper wrapper is a different texture than a dough or pastry wrapper, they had a good bit of crunch and were yummy. Enjoy!
So I used to use Earth Balance Vegan Buttery Spread before the whole corn thing went down. But it’s got ingredients derived from corn. Supposedly the proteins are processed out of it, but I’ve heard that song and dance before and reacted, so my Earth Balance got stricken from the list things that were okay to eat. Also, most shortenings are also now out the window for me as they they have corn, flax, or palm, which is cross reactive with coconut (allergic), and for which I’ve had little sneaky reactions. Quite a while back I tried to make some vegan margarine using cocoa butter. It was a great idea, but the reality of the product left something to be desired, as it just didn’t taste like margarine. For a while I ignored the issue and just dumped olive oil on stuff, and made wine-herb-olive oil sauces for dipping things like lobster, but I missed margarine/butter.
About a month or so ago, I started thinking about baking again, or more accurately, chocolate chip cookies, and the fact that I didn’t really have a safe margarine or shortening to make them with. I started wondering about lard, since you can make pie crust from it, and started doing some Google-fu. Turns out most commercial lards have citric acid (corn) or other additives that are problematic. Sigh. So I started wondering if you could DIY it somehow, like saving your bacon fat. I found this article on rendering your own lard. I began considering whether I could use the lard to make margarine. Then in the process of making the Roasted Beef Stock and discussing the use of the beef tallow skimmed from the stock to use to caramelize the onions with Mary Kate for her French Onion Soup, we considered whether beef tallow might have a closer to dairy taste and feel. So I went searching for recipes to render beef tallow and found this article.
So then it was a matter of trying to get my hands on some pork leaf lard to render down into lard and some suet to render down into beef tallow. I found a local source, the Miles Smith Farm, where they are able to get pastured pork from another supplier and they have grass fed beef. Once I rendered down my order in separate crock pots, I had a quart and half a pint of lard and a quart, a pint, and a half pint jar of beef tallow.
Beef Tallow and Pork Leaf Lard
I used the original recipe I had tried as a starting point for my attempts. I know what you’re thinking…Denise, you’re going to hell for using a vegan recipe to make margarine out of animal fats. And you’re probably right. If I had a viable vegetable alternative, I’d take it, even though I’m not vegan. But I’m not vegan, and I don’t have a viable vegetable alternative. I used the recipe as a guide, for amounts, but I switched out almost every ingredient. I don’t like soy or hemp milk and I’m allergic to almonds. I didn’t want to use canola oil because of cross contamination with corn and sunflower oil is out because I’m allergic to sunflower. Also, I didn’t want to use the soy lecithin because if you’ve read how that’s made, you won’t want to eat it, and sunflower lecithin is out because I’m allergic to it. The cocoa butter doesn’t taste right, and I can’t use xanthan gum (corn/wheat) and I didn’t want to use guar gum. So I googled substitutions for emulsifiers and came up with the suggestion of psyllium husk as a substitute for soy lecithin. This is what I came up with for a recipe to test:
2 ounces of fat (either all lard, all beef tallow or 1 ounce of each)
one half of ⅛ tsp of turmeric (for color, you could skip it if you want, but I was hoping to fool my brain a bit)
Melt lard and beef tallow together in a double boiler. Put all the other ingredients except the olive oil in a blender or food processor.
Once the lard and beef tallow are melted, add the olive oil and remove the double boiler from the heat. Add the lard, tallow and olive oil mixture to the blender or food processor and blend until completely mixed. You will need to scrape down the sides at least once.
Once it’s completely mixed, pour into a silicone ice cube tray or other silicone mold, and place in the freezer until it sets.
The first version I did used all lard as the 2 ounces of fat. Lard is less solid at room temperature than the beef tallow. When I took a cube out of the freezer and put it on the plate (room temperature plate) to take a photo, it immediately began to melt at the contact point of the plate.
Lard only version
The second version I did used all beef tallow as the 2 ounces of fat. Beef Tallow is more solid at room temperature than the lard, and it less readily melts in your mouth. It sort of coats your mouth with a waxy feel.
Beef Tallow only version
Lastly, just for the heck of it, I decided to mix them both together, and used one ounce of lard and one ounce of beef tallow in the third version. This one ended up being the winner. The beef tallow gave it a little bit more structure and a little bit more creamy dairy flavor, and the leaf lard balanced out the waxiness of the tallow and made the product more melt-able.
Once all versions were completed and had set in the freezer, my husband (who is not dairy free) and I tested them on hot white rice, so that we could see the melting quality and evaluate the taste without too much interference from the food.
Testing Margarine samples on rice
So now I have something that’s pretty close to margarine that I can use on rice, baked potatoes and veggies. I won’t use it a lot because it’s lard and beef tallow, although I’m guessing that real fats are probably healthier than hydrogenated crap. My next set of experiments will be using plain lard in chocolate chip cookies and trying the “margarine” in a small batch as well.
Anyway, I thought I’d post this both as an illustration of what some of us have to do to get safe food, and for those of you who might have my particular combination of food allergies that makes commercial butter, shortening, and margarine impossible.
Anyone else want to share their weirdest food allergy experiments?
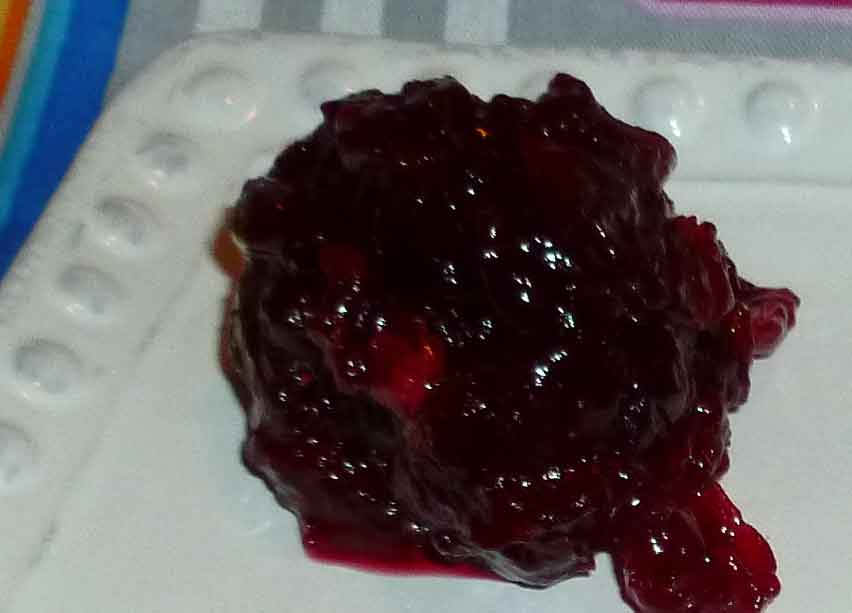
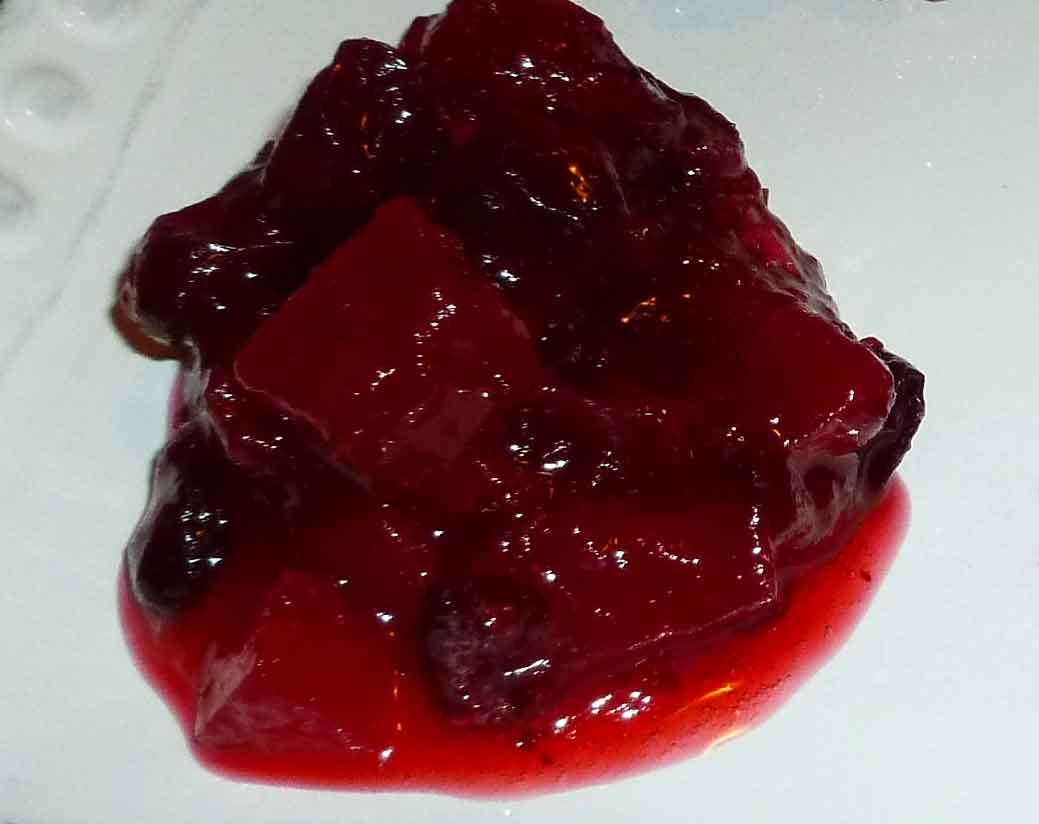
Homemade Cranberry Sauce – starting from upper left going clockwise, whole, jelled, orange, and apple
So, as some of you may remember from last year’s Turkey, Turkey Stock, and Turkey Rice Soup with Kale – Denise’s Annual Insanity, or if you know me in real life, I tend to be a lunatic about Thanksgiving. I make food in quantities and amounts that bear no rational relation to the number of people coming, and I go overboard about everything. One of those things is cranberry sauce. When I was growing up, my grandmother owned (still owns, actually) a farm which had a small lake and there were some cranberries growing in one end of it. She always made several kinds of cranberry sauce at Thanksgiving. Now the cranberry bog has been taken over by brush, but I still make multiple cranberry sauces every year. Also, it’s one of those things that looks really hard, but is a piece o’cake (if you’re not a crazed lunatic who is making 40 million other side dishes as well). I usually do the cranberry sauce a couple of days ahead, because you can, and because it needs to cool. If you want some cranberries on hand year round, buy a few bags and throw them in the freezer as is, and just use them frozen, i.e. don’t thaw them out first.
Whole Berry Cranberry Sauce
Whole Berry Cranberry Sauce
1 cup of water
1 cup of sugar
1 – 12 ounce bag of cranberries
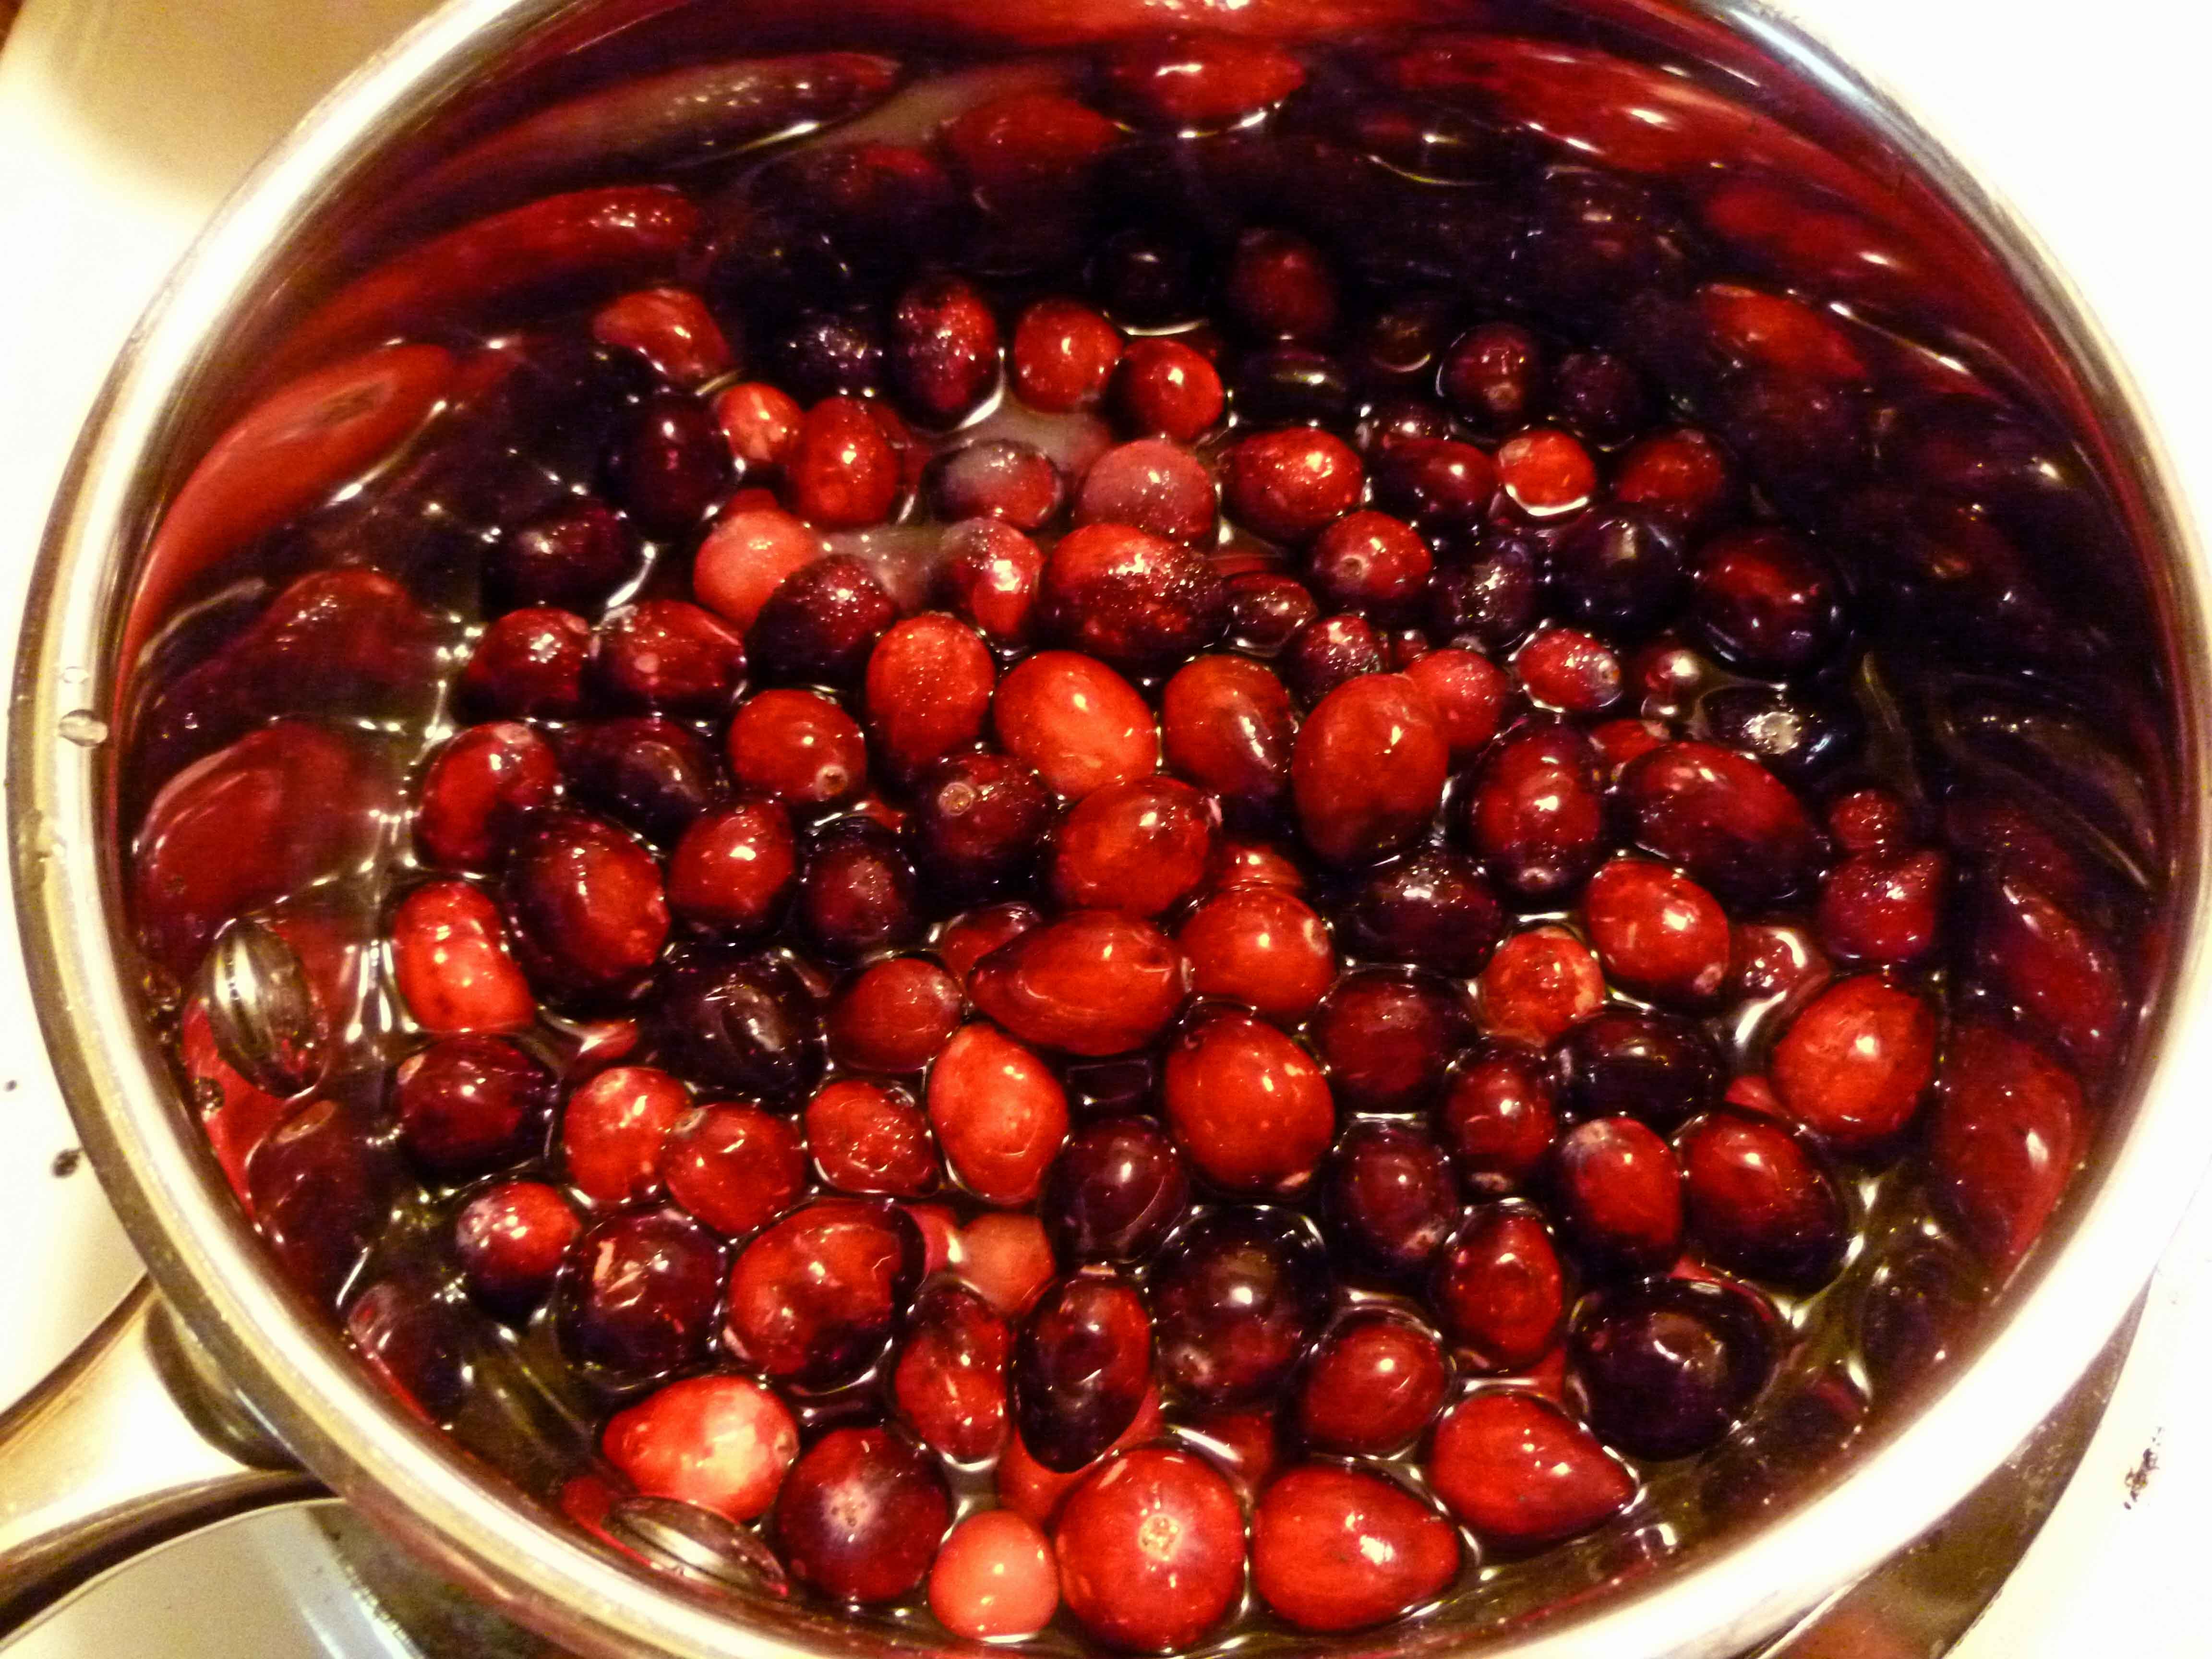
Wash the cranberries and pick out the soft, crushed and/or bad ones. Put the water and sugar in an nonreactive sauce pan and bring it to a boil over high heat.
Cranberries in Sugar and Water
Once the water and sugar is boiling, add the cranberries and let it come back to a boil. Reduce to the heat to medium and boil gently for 10 minutes. Pour into a heat safe bowl and let cool in the fridge.
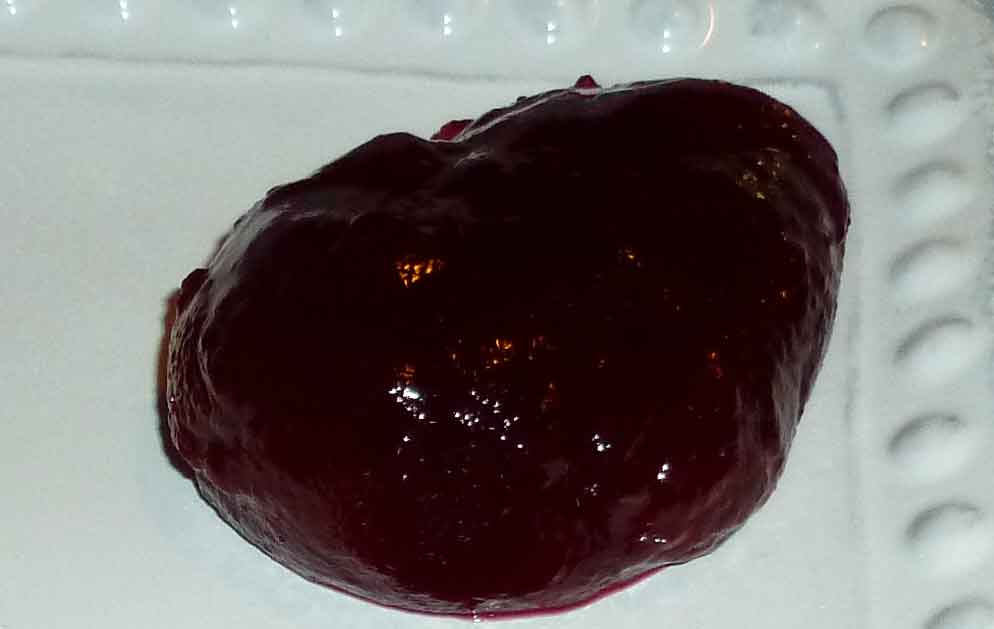
Jelled Cranberry Sauce
Jelled Cranberry Sauce
1 cup of water
1 cup of sugar
1 – 12 ounce bag of cranberries
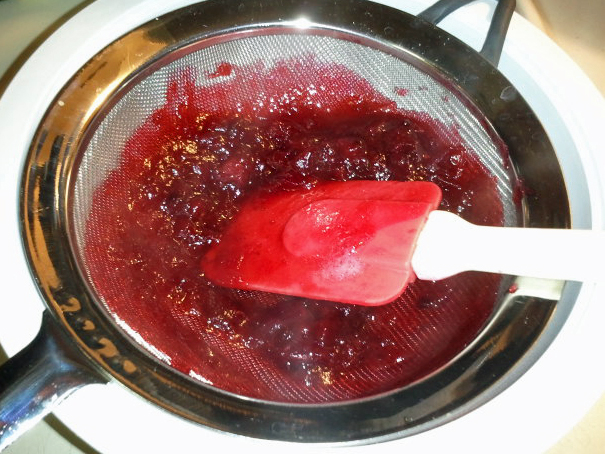
Do everything for the Whole Berry Cranberry Sauce above, except when you’ve finished boiling it gently for the 10 minutes, place a wire mesh strainer over a bowl, pour the sauce into the strainer, and use a spatula to press the sauce through it into the bowl, leaving the seeds and skin behind in the strainer.
Using Strainer to remove seeds and skin
Make sure you get as much of the sauce as you can through the strainer until there’s nothing left but seeds and skin. Frankly, I almost never make this because I don’t care, and not eating the skins and seeds seems like a colossal waste, but to each their own.
Apple Cranberry Sauce
Apple Cranberry Sauce
1 cup of water
1 cup of sugar
1 – 12 ounce bag of cranberries
1 peeled, cored and chopped apple
Follow the directions for the Whole Berry Cranberry Sauce above, but just adding the apple at the same time as the cranberries.
Orange Cranberry Sauce
Orange Cranberry Sauce
1 cup of water
1 cup of sugar
1 – 12 ounce bag of cranberries
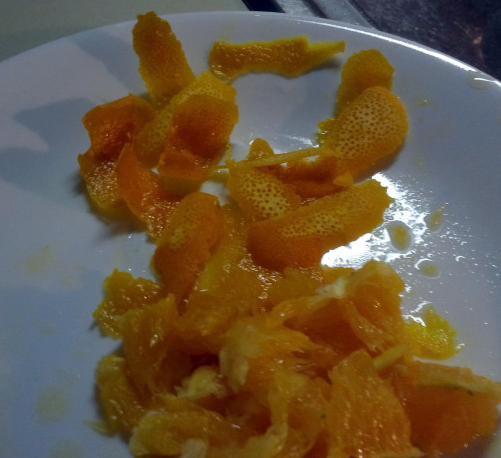
1 orange, zested, and then peeled and sectioned
Wash and scrub your orange. Zest your orange, either with a micro-planer or use a vegetable peeler to take off very, very thin strips. Make sure there is NO white pith at all, as it will cause the sauce to be bitter. Peel your orange and then remove the outer skin from each of the sections.
Zest and Sectioned Orange Pieces
Follow the directions for the Whole Berry Cranberry Sauce above, but just adding the orange at the same time as the cranberries.