Notice: Function _load_textdomain_just_in_time was called incorrectly. Translation loading for the wp-ultimate-recipe domain was triggered too early. This is usually an indicator for some code in the plugin or theme running too early. Translations should be loaded at the init action or later. Please see Debugging in WordPress for more information. (This message was added in version 6.7.0.) in /home/maryzahc/public_html/adultfoodallergies.com/wp-includes/functions.php on line 6131 Breakfast – Page 2 – surviving the food allergy apocalypse (archive)
Breakfast [brek-fuh st], noun: the food eaten at the first meal of the day. These recipes will not contain dairy, eggs, gluten, wheat or hazelnuts. If we use a top 8 allergen, we will use a tag warning of its use.
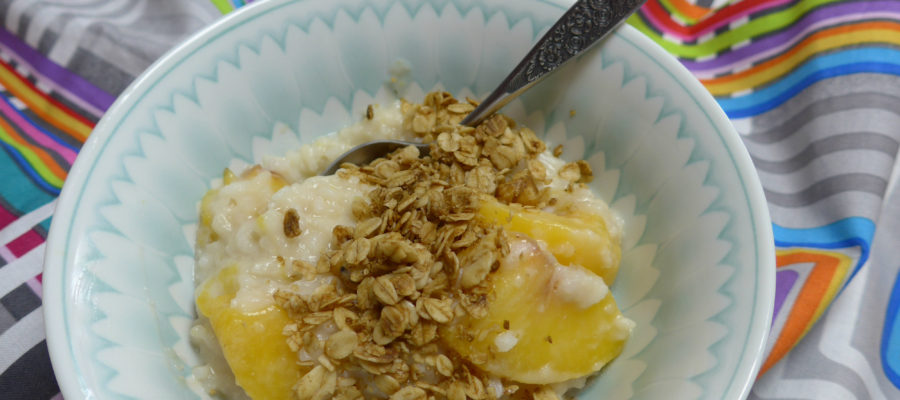
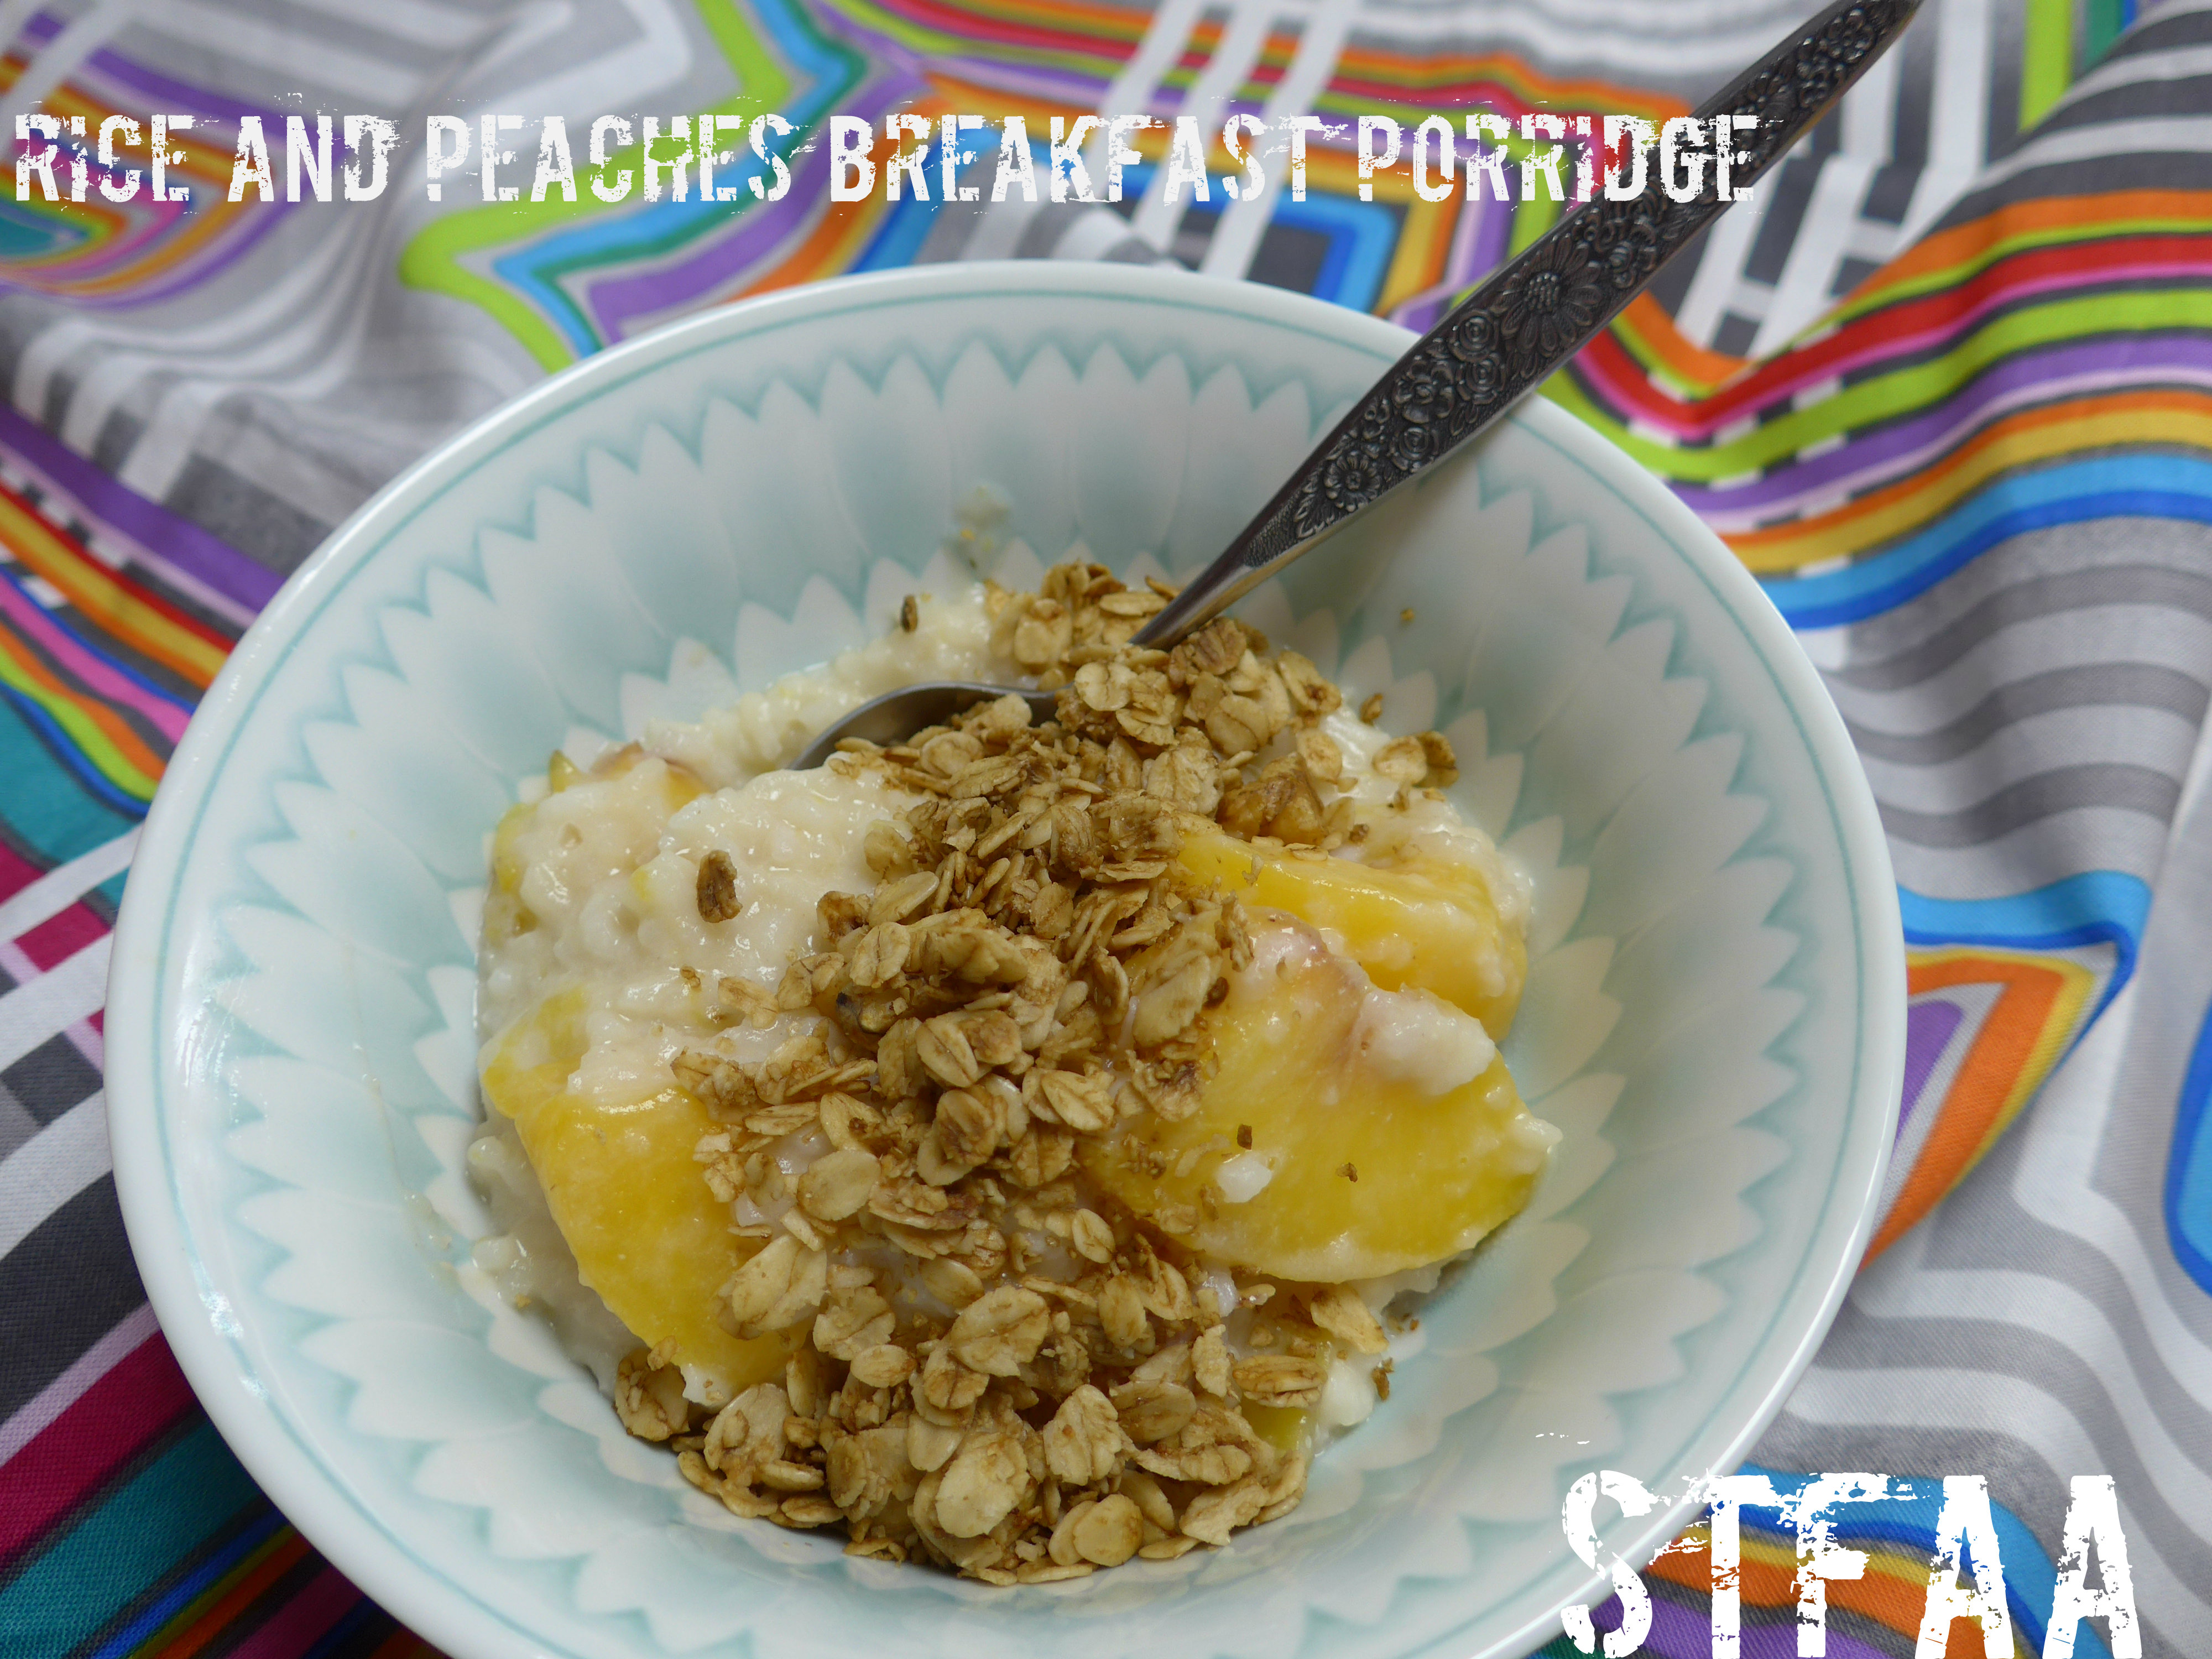
Originally, my plan for this week had been to post a granola recipe, but I’m still fighting with it. I’ve made granola! It’s perfectly edible. It’s cheaper than the stuff at the store. But it’s still rather boring. So instead, while I perfect that, I’ve made a porridge that you can top with rather uninspired granola. This porridge is based on things I normally have in the house — for some reason, I almost always have frozen peaches. I also frequently have leftover rice. Ta-da! Rice porridge — with a hint of vanilla, and some granola on top for crunch. Bonus for tax day — this is a cheap breakfast.
I imagine most types of fruit would work well in this, and any type of milk (even cow’s milk, if that’s your thing). The only key is to cook the whole thing slowly, over lower heat, for slightly longer time. That way, the milk doesn’t burn, the rice breaks down, and the fruit retains its texture. Top this with your granola, nuts if you eat them, different fresh fruit, or anything else that excites you. It’s morning — may as well do whatever will make you happy, right? Enjoy a slightly different take on breakfast.
rice and peaches breakfast porridge Notice: Trying to access array offset on value of type bool in /home/maryzahc/public_html/adultfoodallergies.com/wp-content/plugins/wp-ultimate-recipe/helpers/models/recipe.php on line 254
Mix all ingredients in a medium saucepan over medium low heat. Cook, stirring frequently, until fruit is cooked and rice has thickened the non-dairy milk.
Top with granola, nuts, or more fruit, and serve warm. Also great reheated.
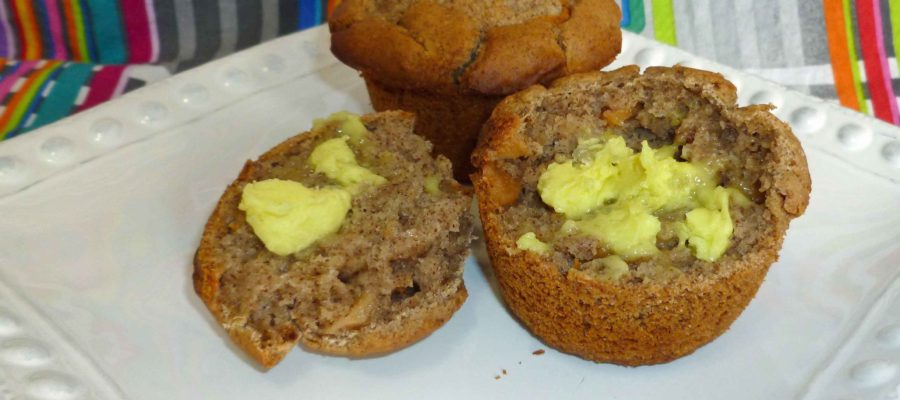
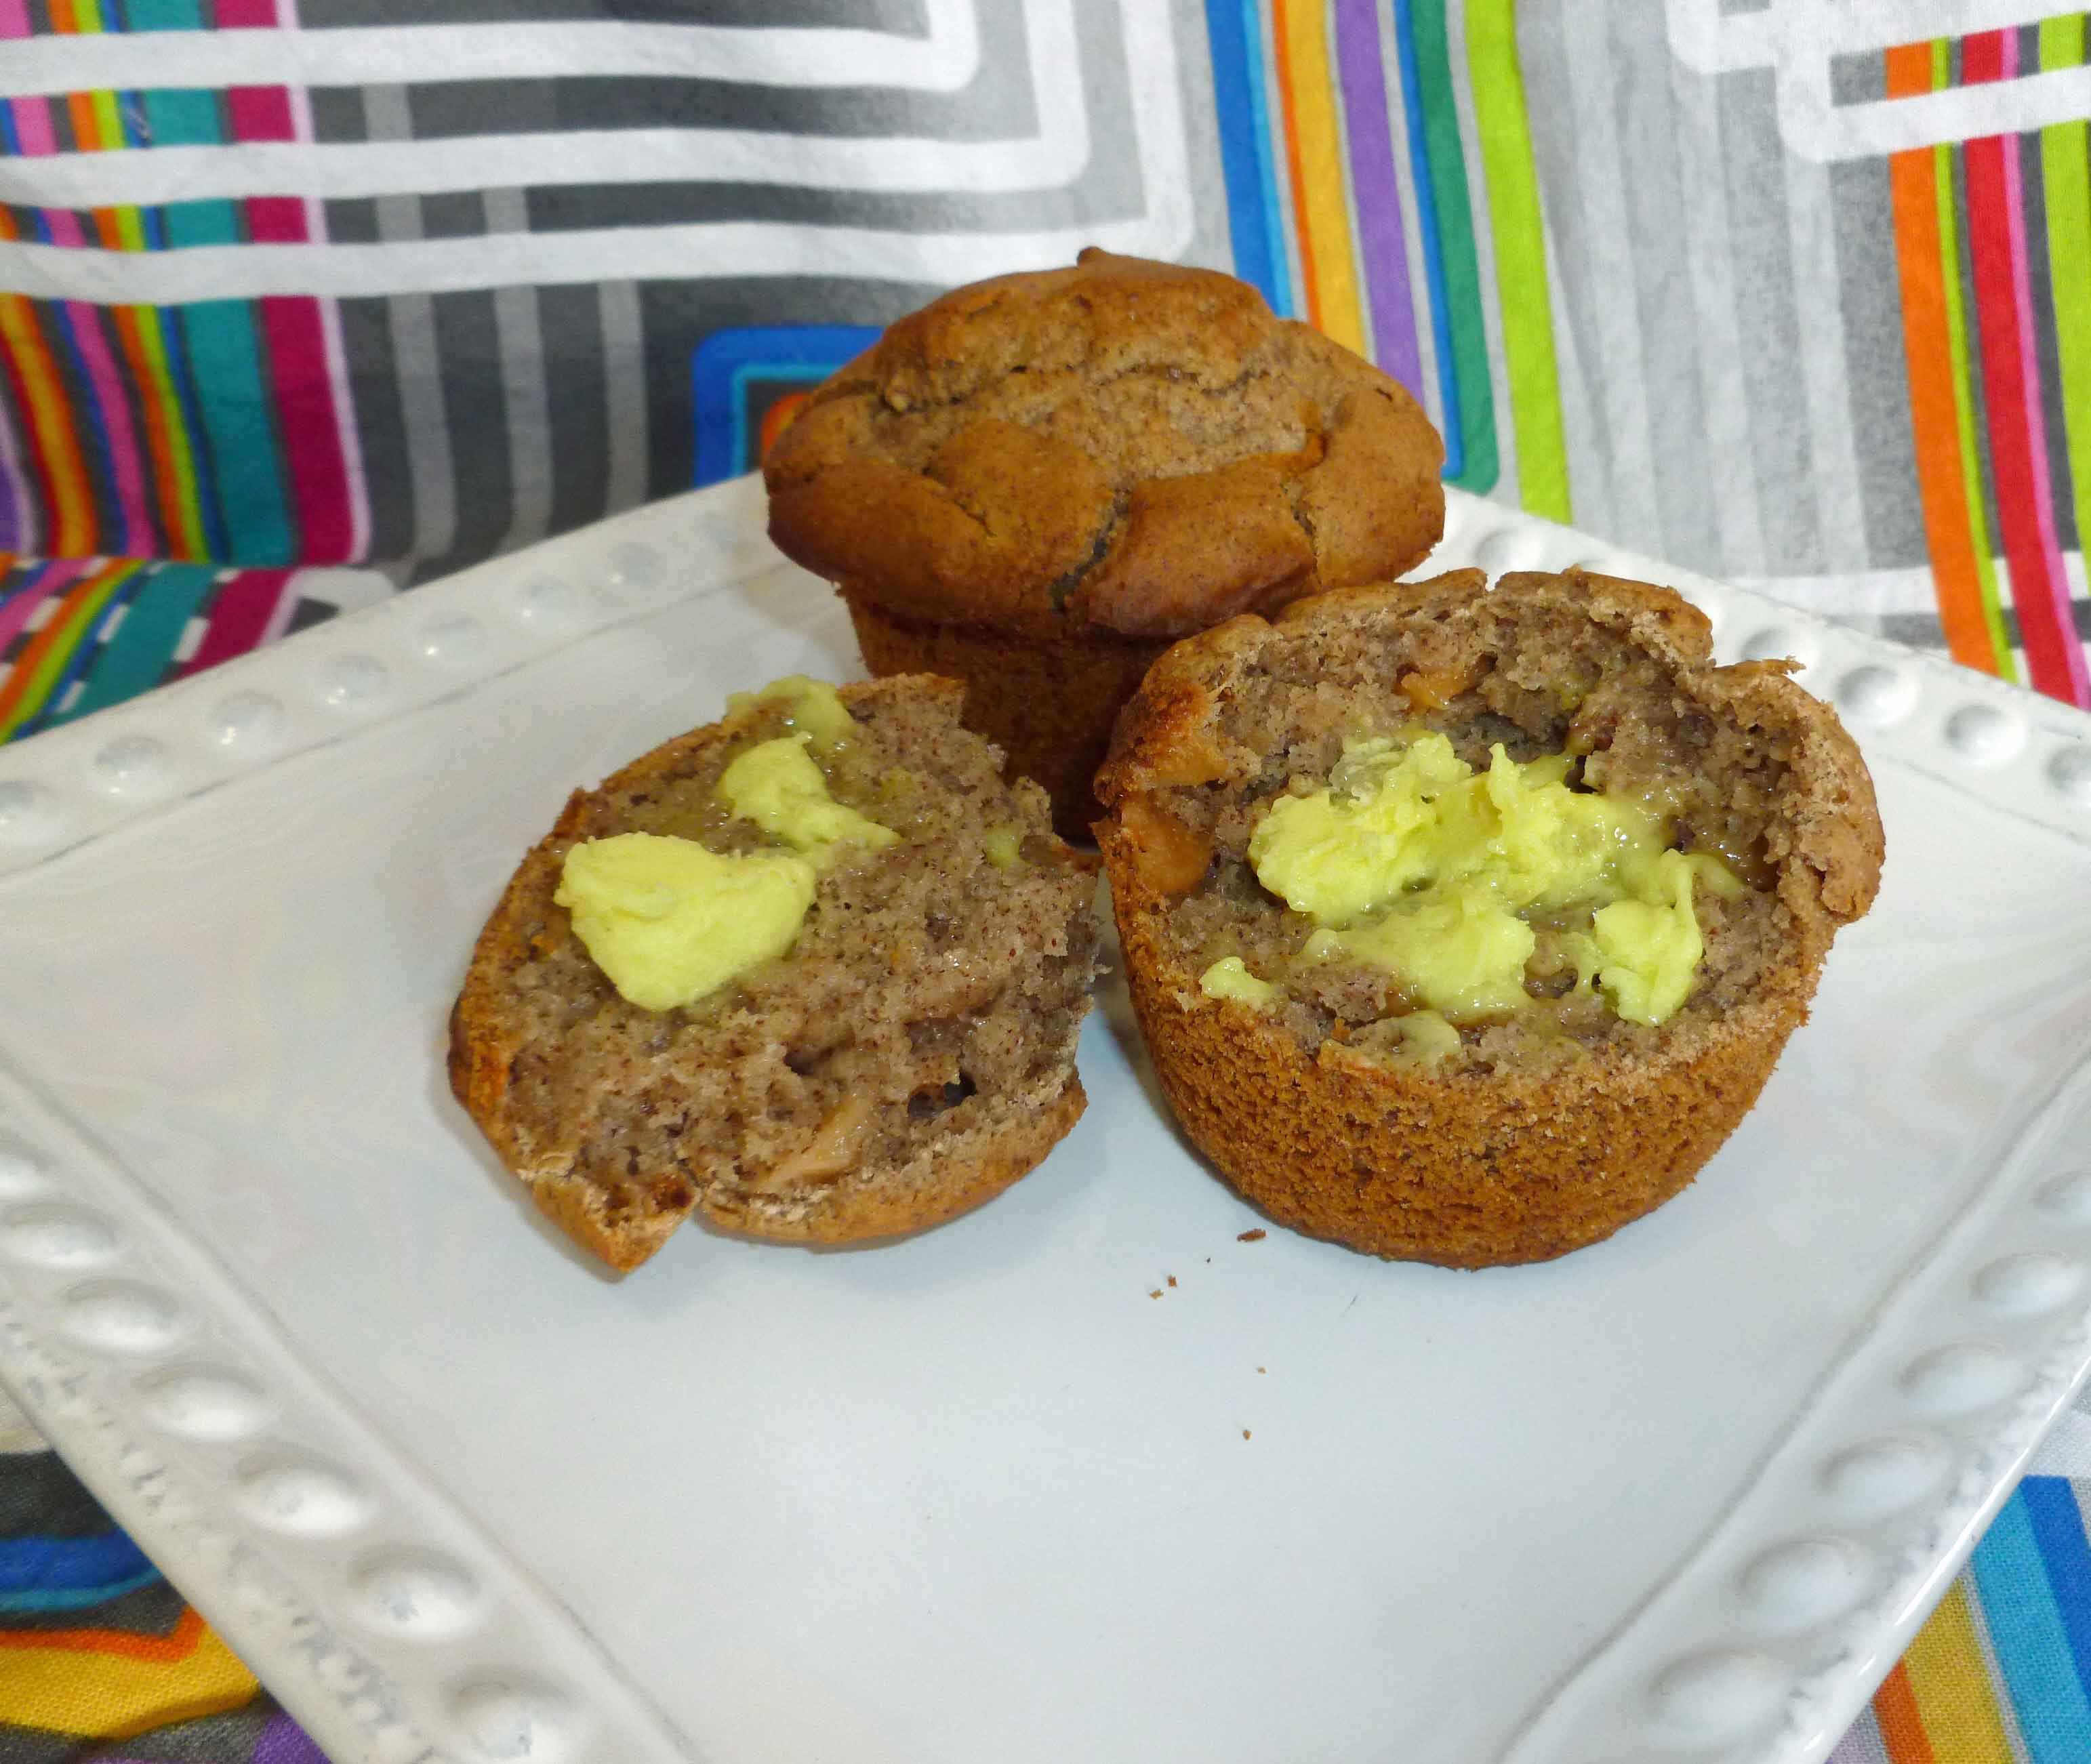
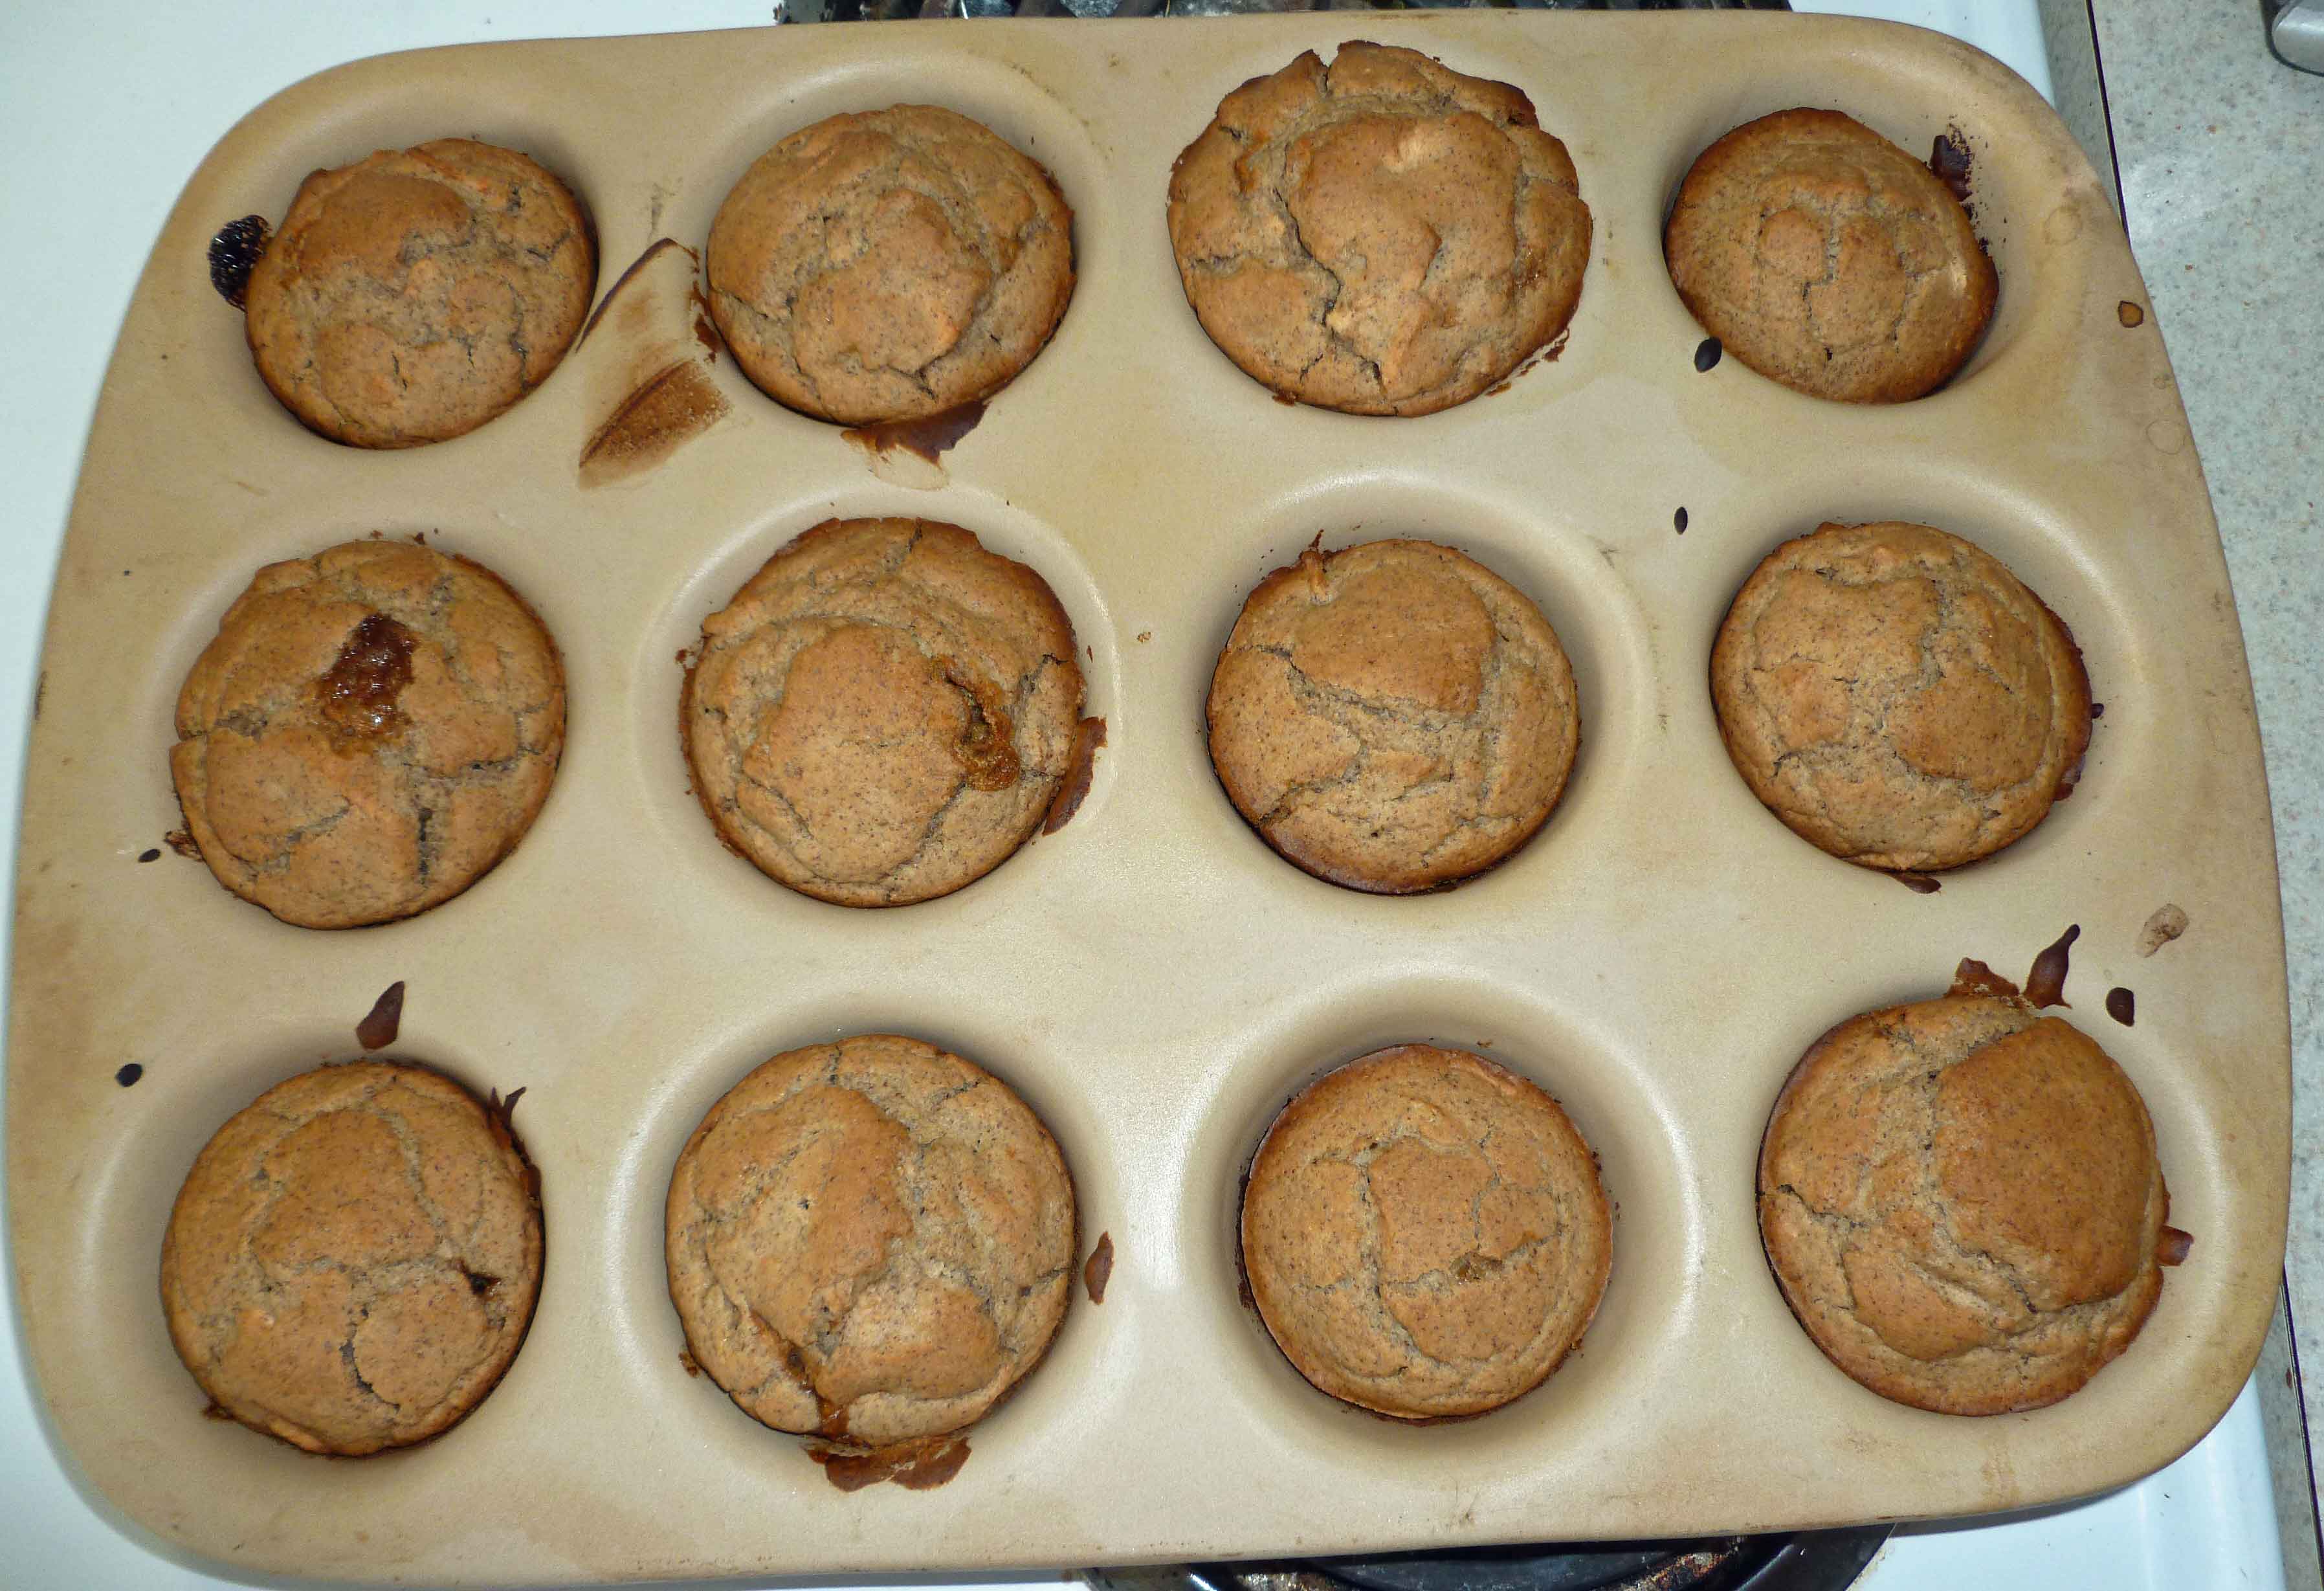
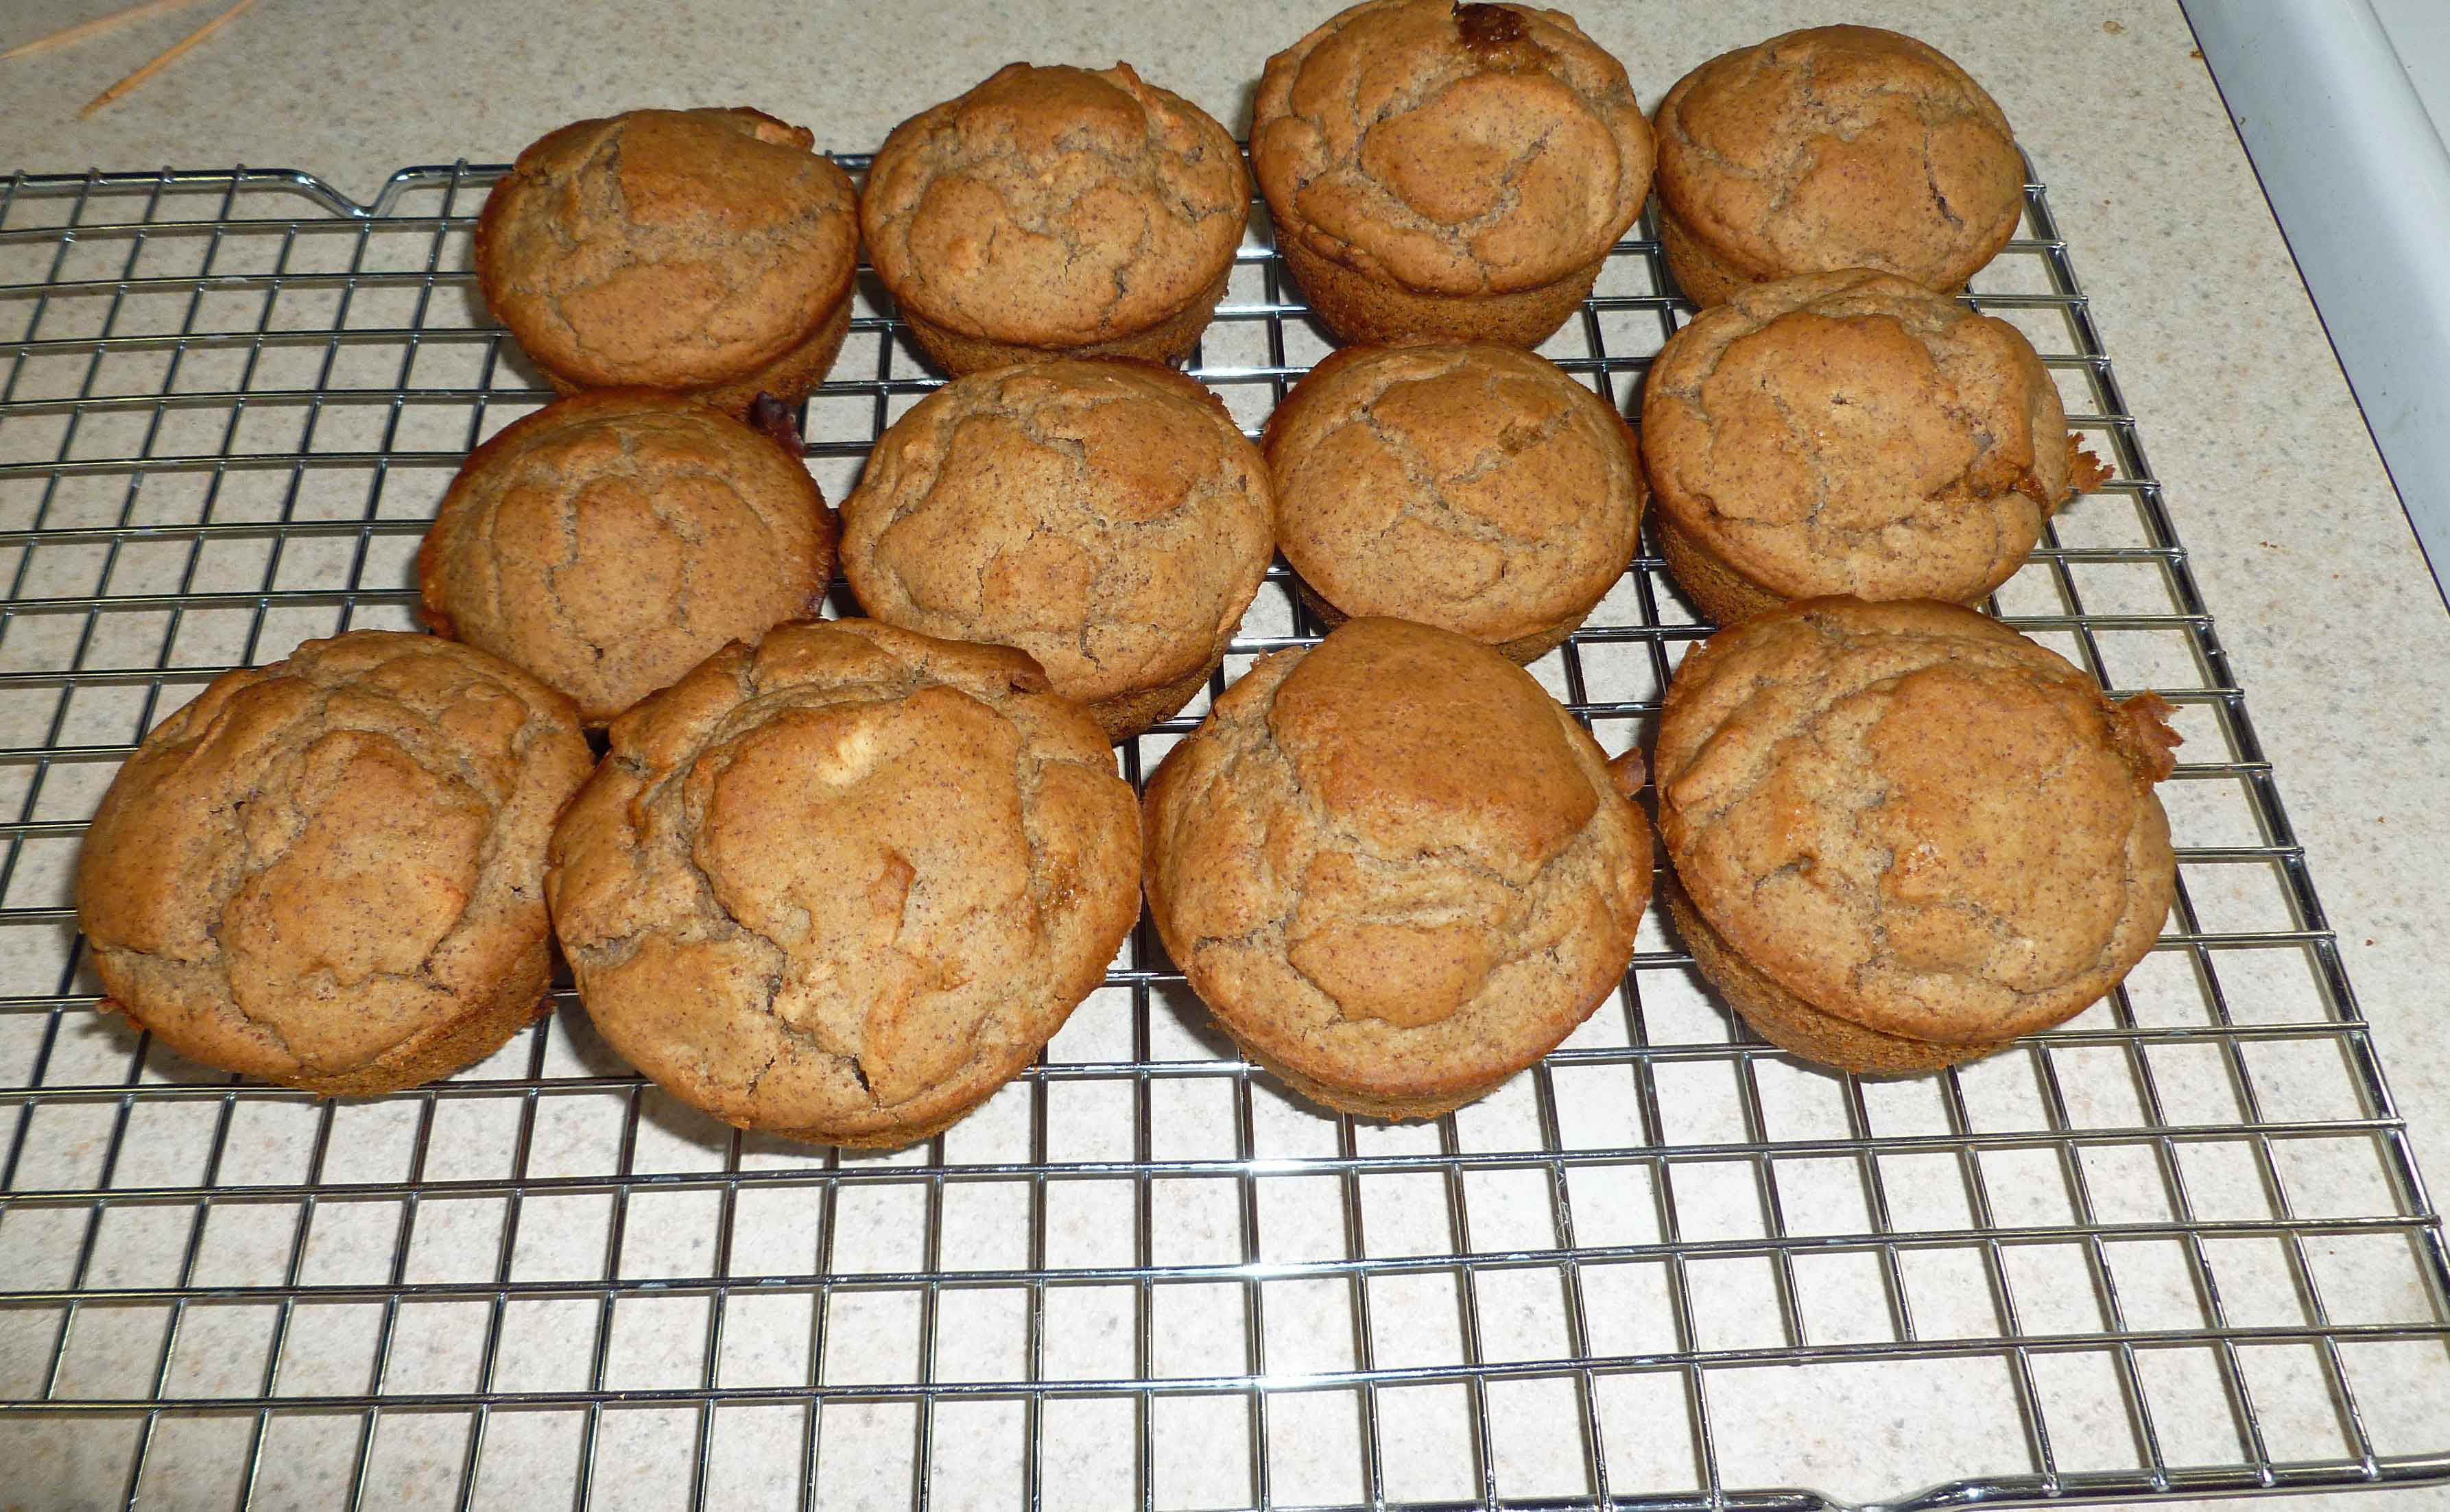
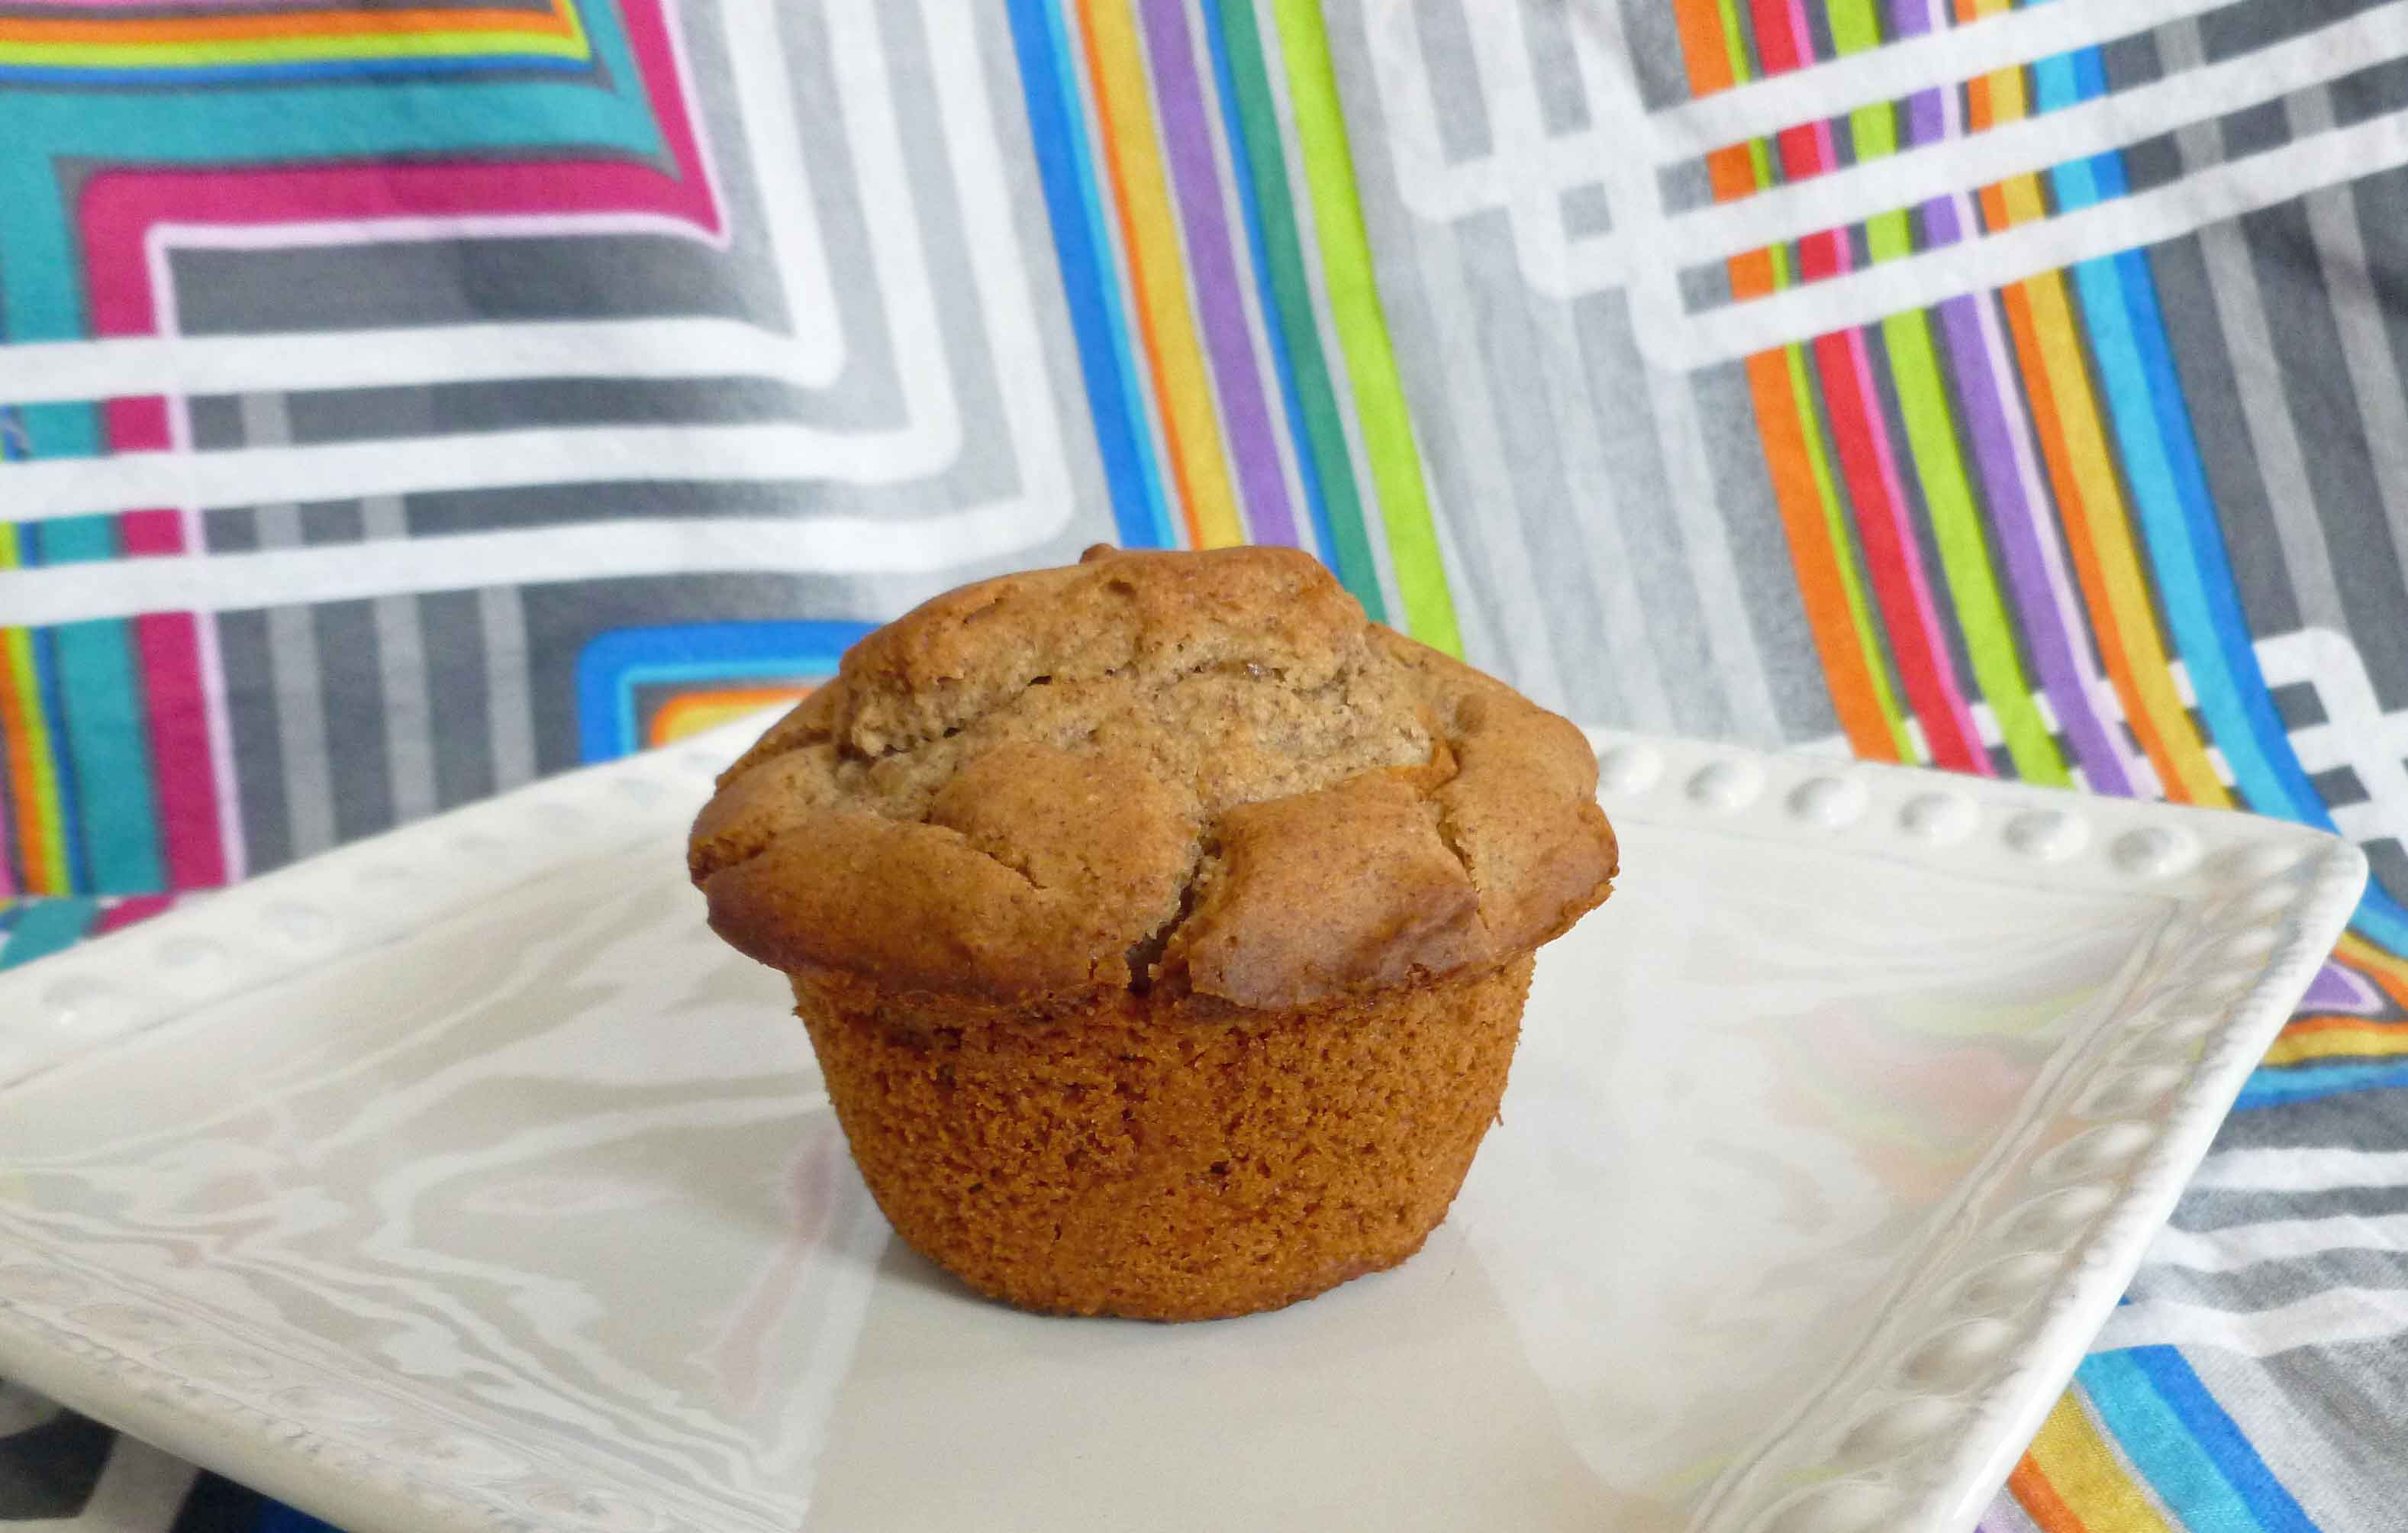
It’s breakfast month on the blog. And let’s face it, when you have multiple allergies (17 so far), and they include, dairy, eggs, wheat, and corn, breakfast can be a major problem. Many allergy peeps argue that it’s just better to get past the idea of breakfast food, and just eat safe food in the morning no matter what it is, but I still have a mental block about it–I just don’t want to eat dinner food or lunch for breakfast. This is kind of ridiculous given that I used to eat breakfast food for dinner or lunch all the time in the long, long ago before food allergies. But anyway, given the above constraints, my easy breakfast food has been cooked oatmeal, which I am frankly sick to death of at this point. So when we decided to make April be breakfast month, I decided I needed another easy breakfast that I could make ahead and carry with me.
I started with the Basic Muffin Recipe from King Arthur Flour, which is actually a real wheat, real dairy, real egg, and real butter recipe, and converted it to something safe for my allergies. I had to give it a couple of tries, but I have it where I want it now, and it rises and looks like real muffins instead of sadly deflated hockey puck looking things. I used my Homemade Margarine, New and Improved (which is not vegan for our vegan followers) on them, and it was bliss! Yay! Also they are really good cut in half and grilled on a cast iron skillet, diner style as well.
1 1/2cupsGluten-free, Rice-free, Potato-free flour mix(see our post here for the recipe – http://adultfoodallergies.com/whoopie-pies-gluten-free-with-vegan-option/
1/2 cupsorghum flour
1/2teaspoon cake spice(I use Penzey’s but blends are not always safe for all those allergic to corn. Use a blend of ground cinnamon, cloves, nutmeg, allspice, ginger, and star anise.)
1/4cup sugar
1/4cupbrown sugar
1/2teaspoonsea salt
1Tablespoonbaking powder(here’s a recipe for a corn-free one – http://wholenewmom.com/health-concerns/make-your-own-baking-powder/)
Wet Ingredients
1cupnon-dairy milk(I used homemade rice milk)
1/4cupsafe for you oil(I’ve used both olive and grapeseed oil)
1/4cupapplesauce(I use my homemade, home canned applesauce)
3Tablespoonsaquafaba(see http://aquafaba.com/)
1teaspoonvanilla extractvanilla extract (I make my own with vanilla beans and vodka made from potatoes, as most commercial extract contains corn)
Muffin additives
1applepeeled, cored, and diced(or 1/2 cup of dehydrated apples, soaked in water for half an hour and drained, or any other fruit or berry you want to use)
Servings: muffins
Instructions
Preheat oven to 425°F. Grease a 12 cup muffin pan with some of your safe oil.
Add all the dry ingredients to a large bowl and whisk together until well combined. In another bowl, add all the wet ingredients and whisk together until well combined.
Pour the wet ingredients into the dry ingredients, and using a fork or a wire whisk, blend the two about 20 seconds or so, do not over mix. Add the apples, and fold in gently, don’t over mix. Fill the muffin cups about two thirds to three quarts full.
Bake 20-30 minutes depending on your pan (metal needs less time, stoneware needs more) or until a toothpick inserted into the middle of one of the center muffins comes out clean. Remove them from the oven, and as soon as they are cool enough to handle, turn them out of the pan onto a rack to cool.
Welcome to BREAKFAST MONTH here at Surviving the Food Allergy Apocalypse. While Denise is generally up way before I am (and not just because she’s in a time zone that is three hours earlier), neither of us is big on cooking first thing in the morning. How do you cook before coffee? But we’re both big on eating first thing in the morning. Denise’s go-to is oatmeal. Mine is hash brown patties from the freezer, although when I find the time to make them, I love these Eat Your Veggies for Breakfast Patties). Most of the time, that’s fine, but I do occasionally get bored.
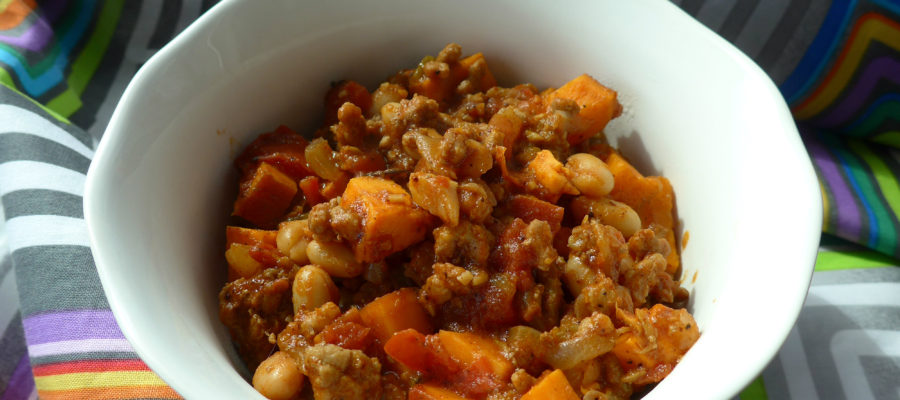
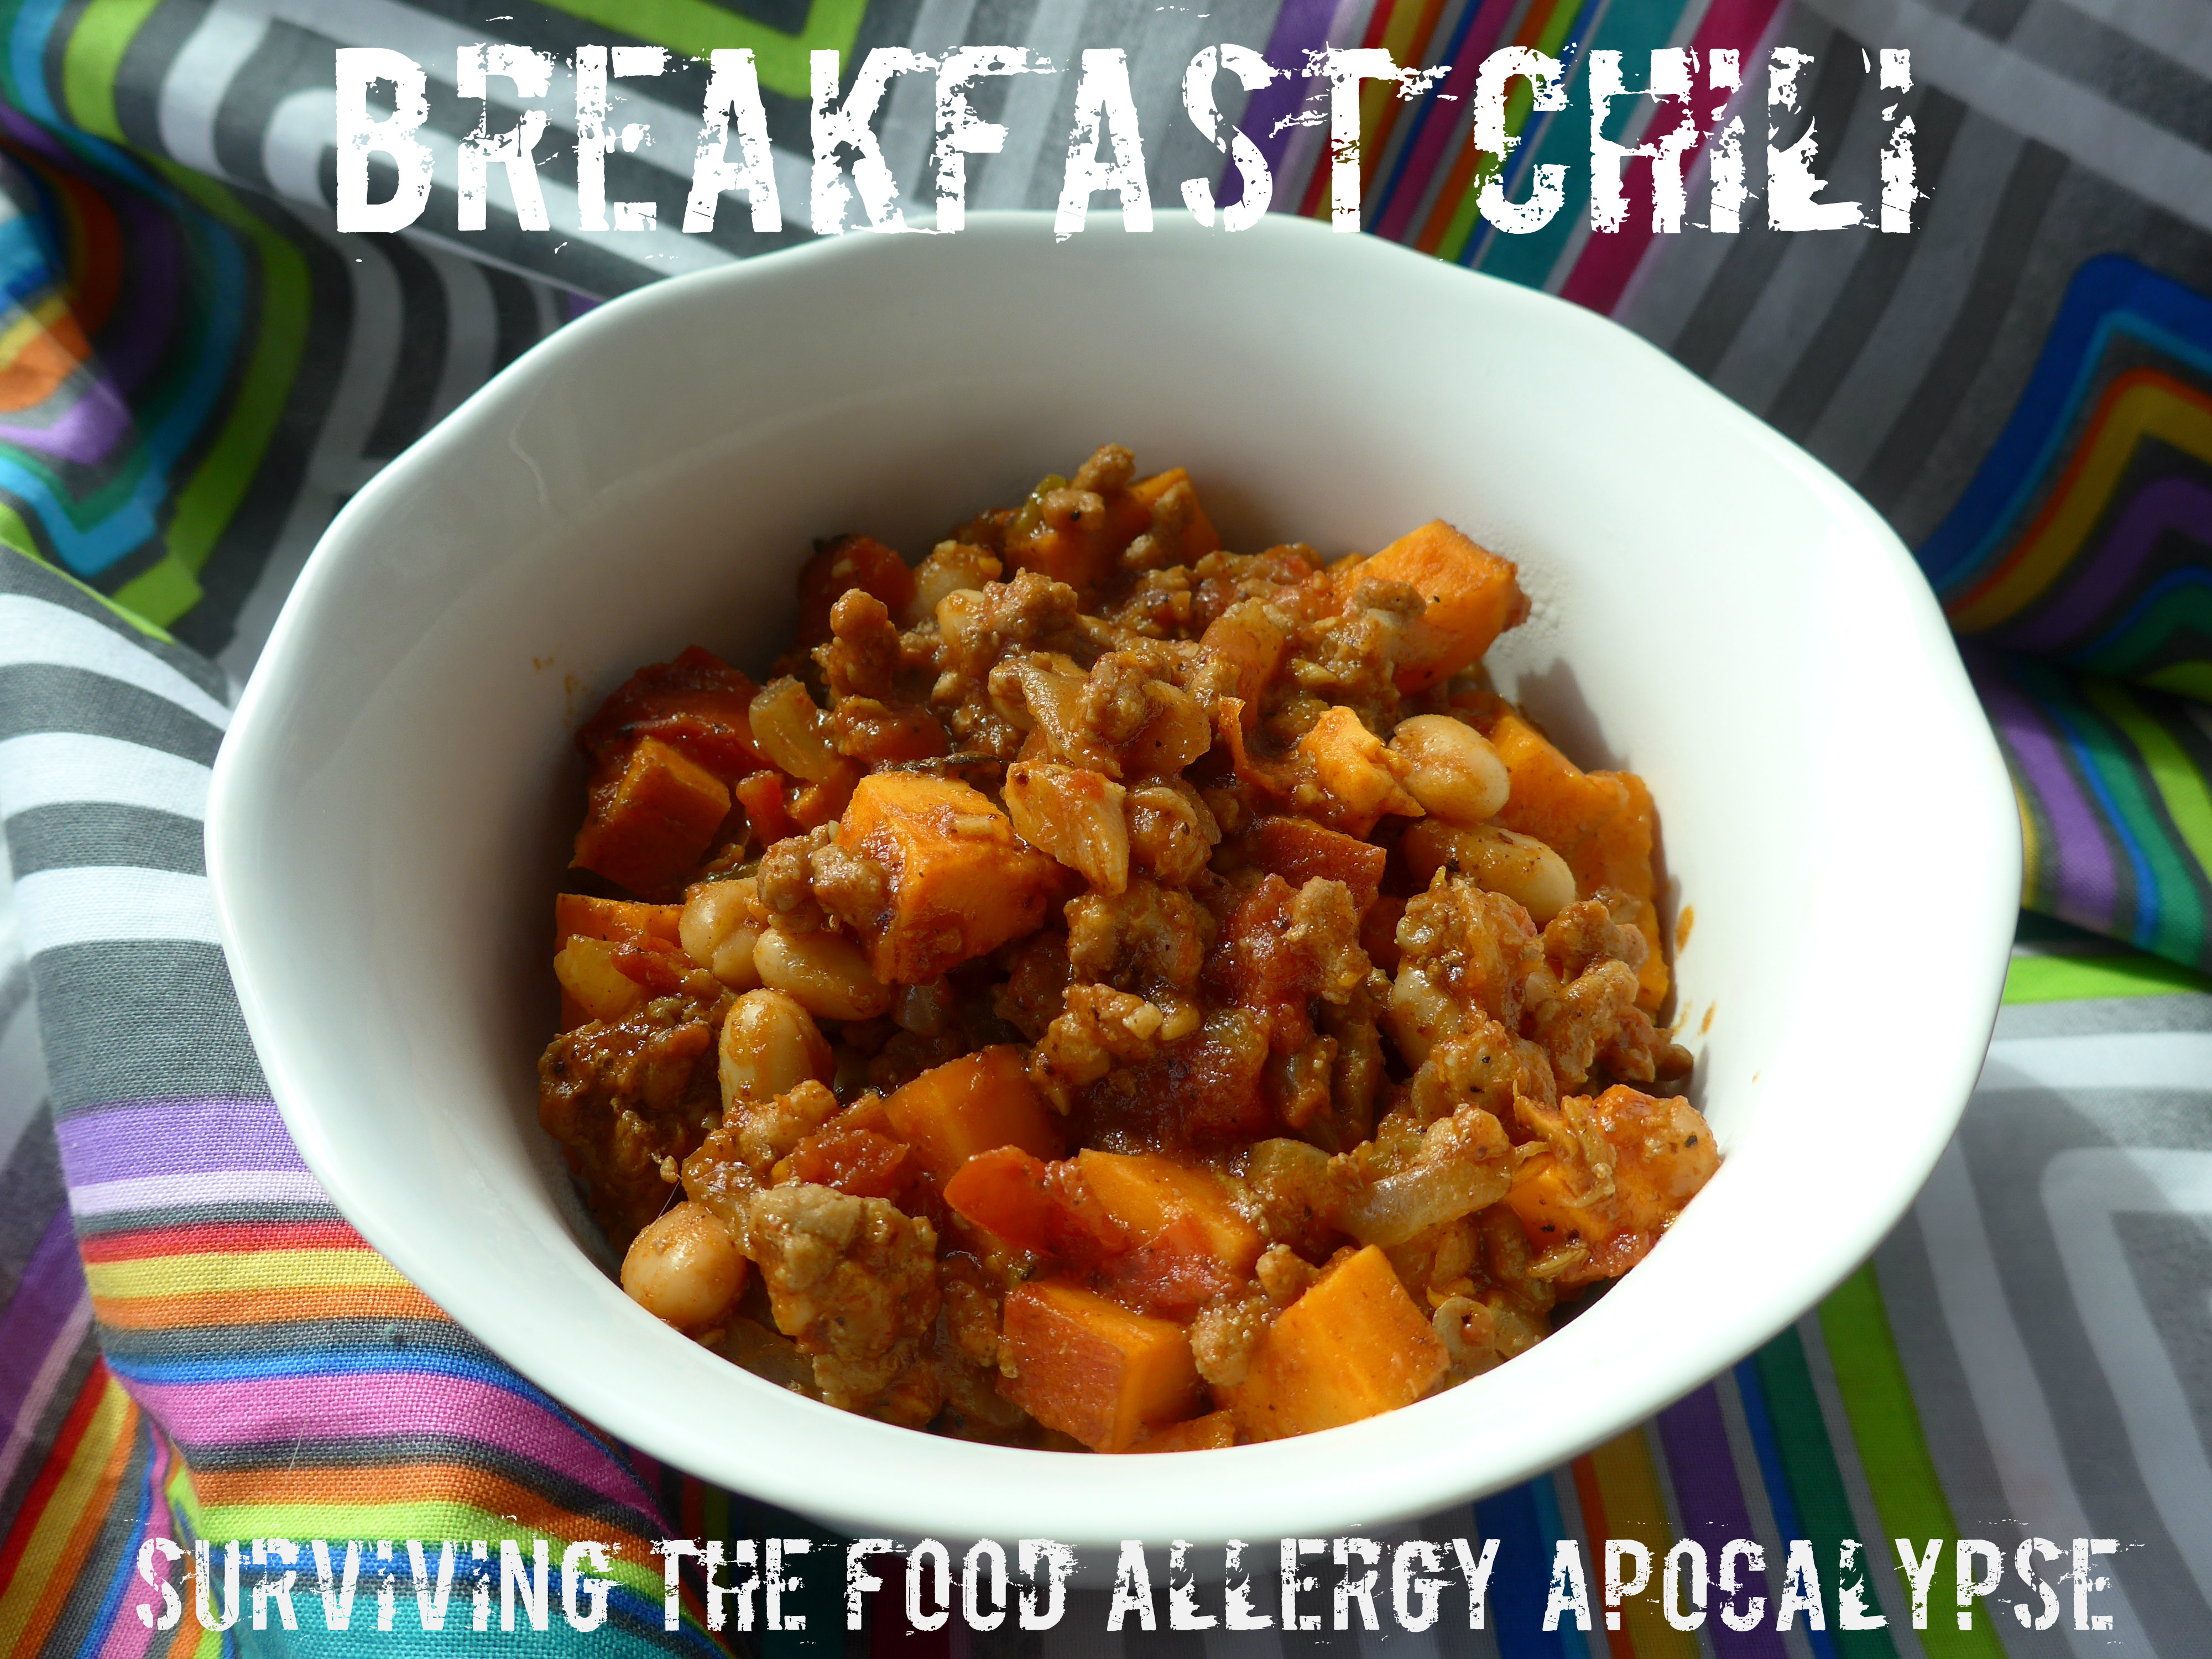
This recipe was for Eliza, not from Eliza. One morning at work, while waiting for the coffee, she was considering whether or not to eat chili for breakfast, and we wondered why there wasn’t a thing that actually was breakfast chili. I spent the next three weeks thinking about it, and then I had to make breakfast chili. And it was good.
This recipe uses ground pork, seasoned with molasses, garlic, onion, and fennel for a sausage-esque flavor. The chili part comes from ancho chili powder, tomatoes, and beans — though you could skip the beans if they aren’t your thing. I do highly suggest that you find plain chili powder. I guess that most people don’t know that “chili powder” is actually a blend of spices that usually includes onion, garlic, and oregano — ancho chili powder is just the chilis, which gives you more latitude on other seasonings. You can order if from Penzey’s if you can’t get it locally.
I highly suggest serving this with hash browns if you’re like me. Toast would also work if you have some. Toppings could include the typical chili things — I think avocado would be particularly nice, though I haven’t tried it. It doesn’t NEED anything else, but feel free.
Notice: Trying to access array offset on value of type bool in /home/maryzahc/public_html/adultfoodallergies.com/wp-content/plugins/wp-ultimate-recipe/helpers/models/recipe.php on line 254
2teaspoonsancho chili powderNOT regular chili powder!
1teaspooncinnamon
1/4teaspoon fennel seeds,crushed with mortar and pestle or flat side of large knive
1Tablespoonmolasses
15ozcan of diced tomatoes
1.5-2lbsweet potatoes,cubed
1/4cupwater
1canwhite beansif desired
1handfulspinach per servingif desired
Servings: servings
Instructions
Over medium heat, add onions to a large pan. If the pan is non-stick, don’t add any oil. If it isn’t non-stick, either add a bit of the pork or a bit of oil. Stir well and sautee for 2-3 minutes to get the onions started cooking.
Add pork and stir frequently to break up the meat.
When the pork is mostly cooked (there is little to no pink left, add the rest of the ingredients in the order listed, from garlic through the beans, if you’re using them. Don’t add the spinach. Stir well after each addition, and the cover until the pot begins to simmer.
When your chili is simmering, turn the heat down to low and cook, covered but stirring regularly, until the sweet potato cubes are cooked. Depending on the size of your cubes, you’re looking at 20-45 minutes.
For serving, I originally conceptualized this to be served with hashbrown patties, but I threw it over spinach to add more vegetables to the dish. Avocado on top would also be great. It’s your breakfast — top it up your way.
Recipe Notes
Peel the sweet potatoes if you want — I didn’t, as I like the texture of the peel.
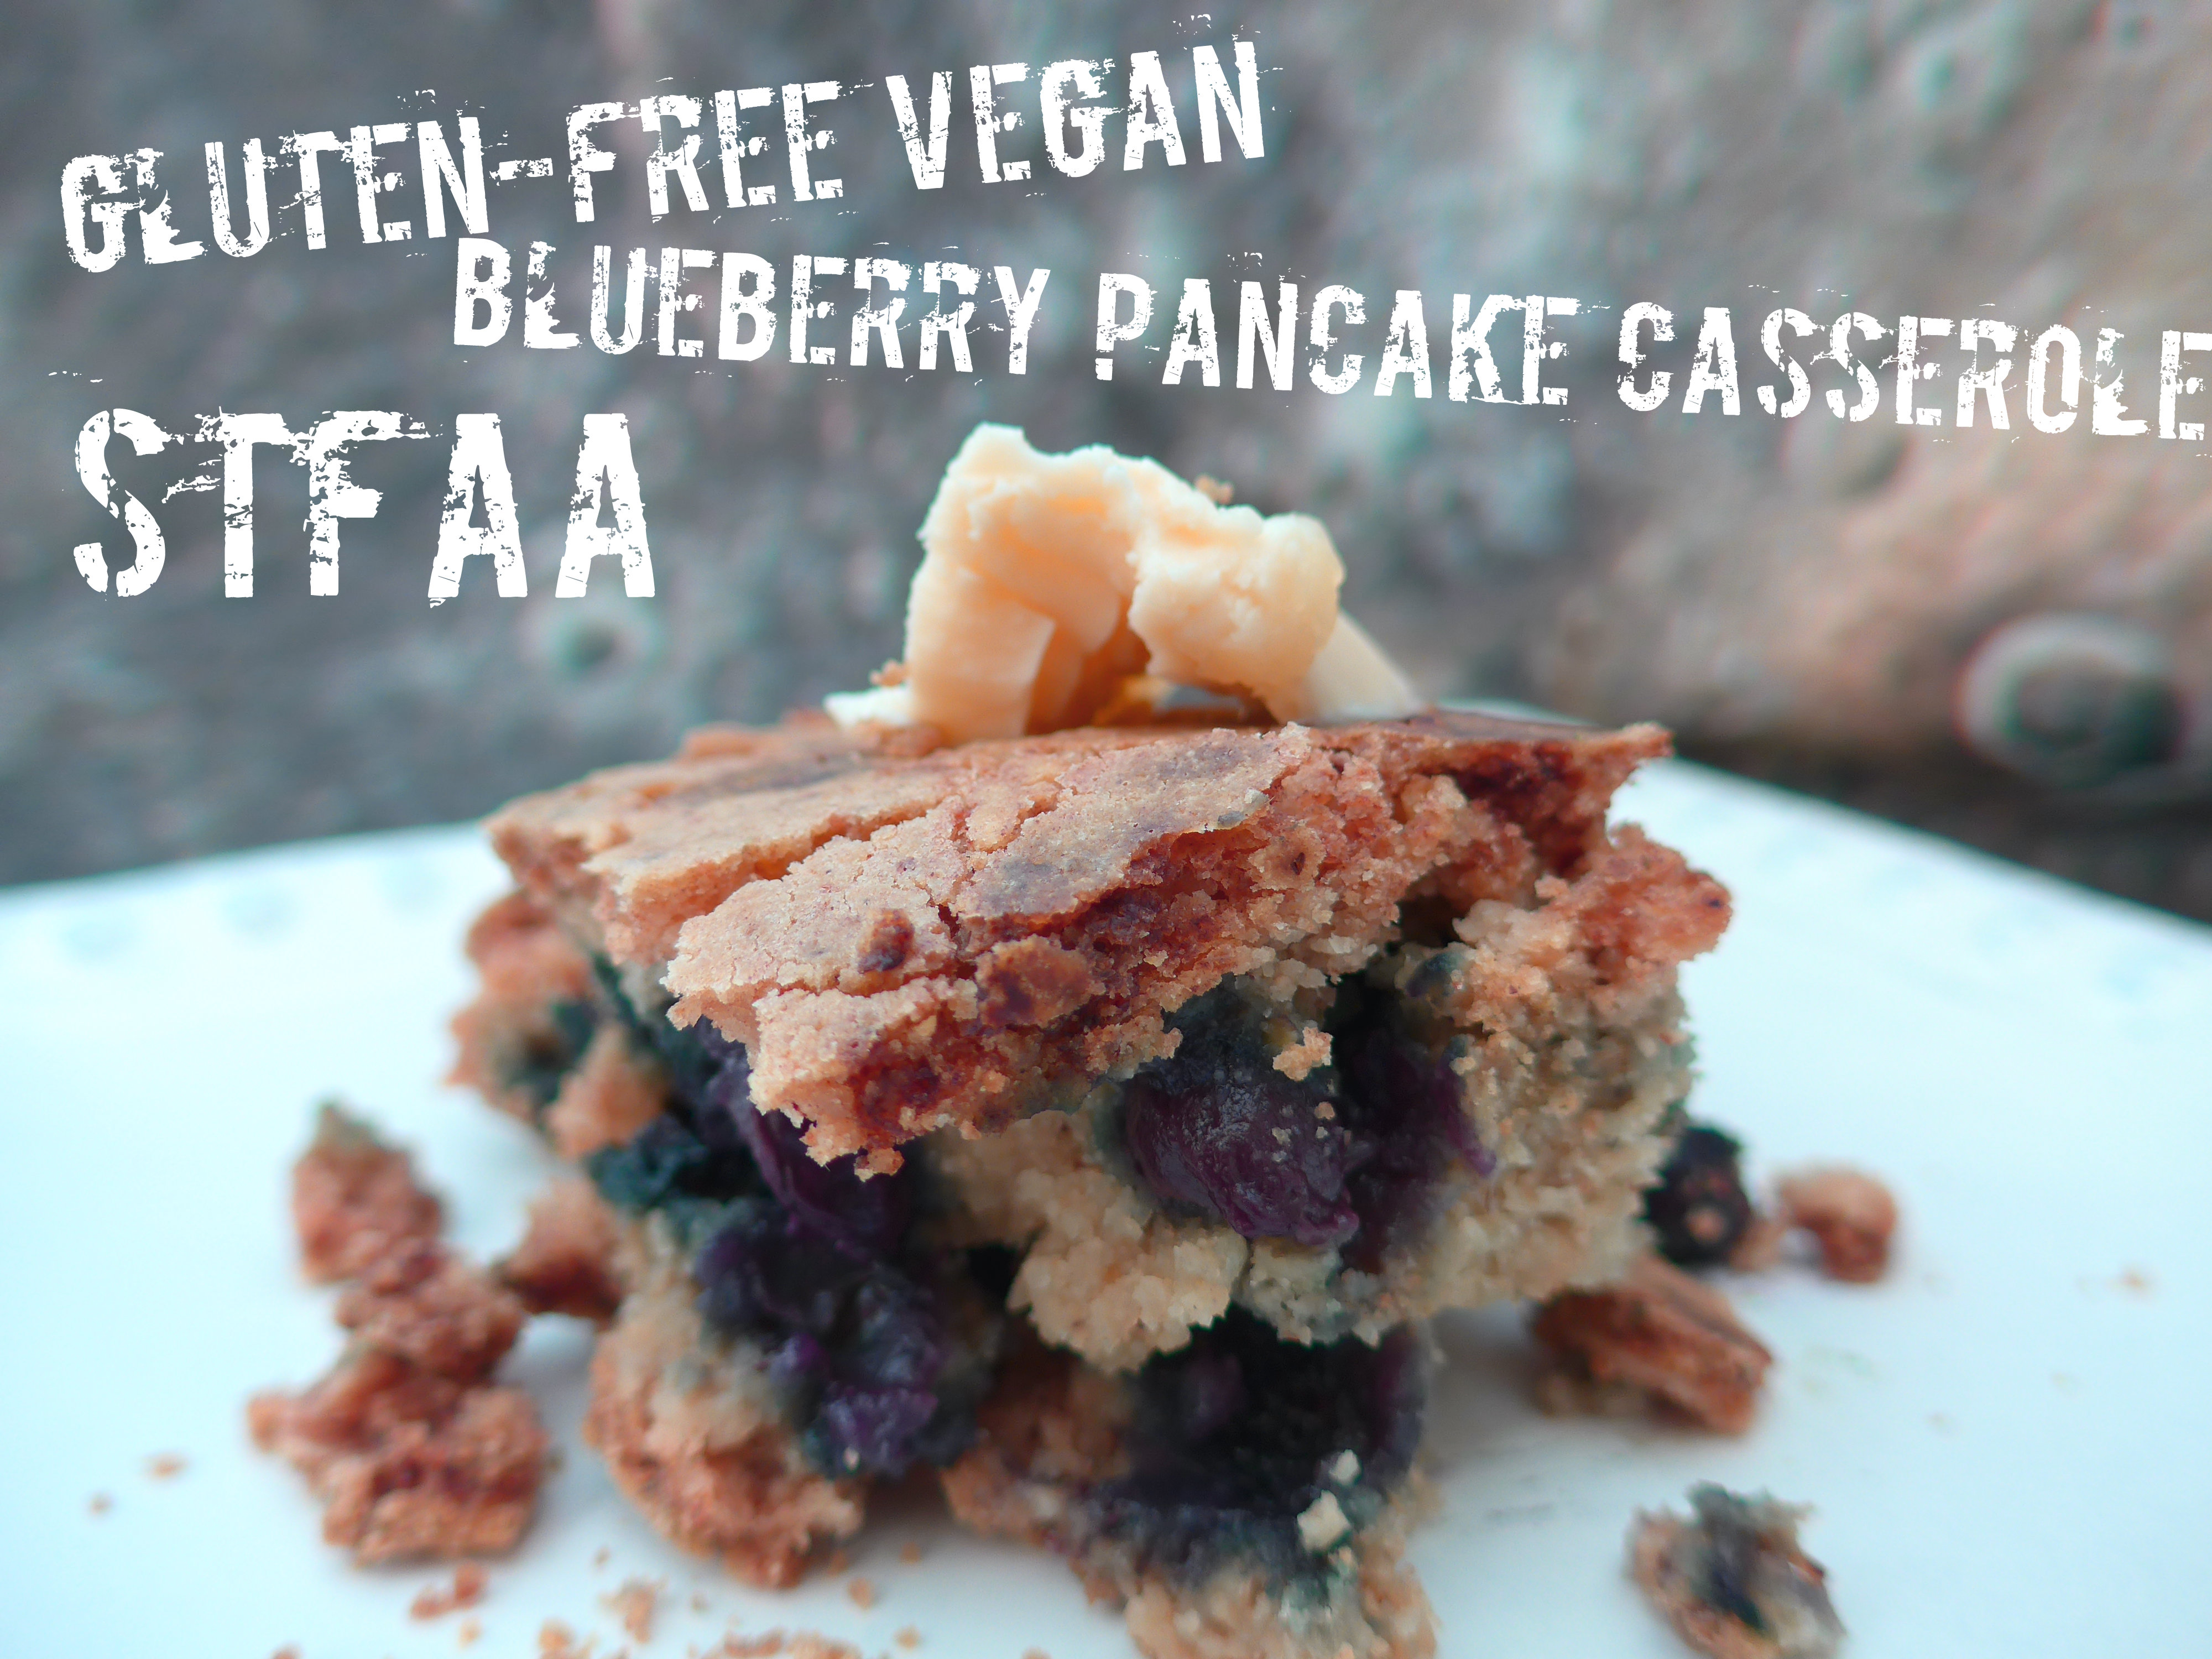
This is a recipe re-make. As I posted on Friday, I do use existing recipes as starting points for creating allergy-friendly dishes sometimes. I read this blueberry pancake casserole recipe on The Kitchn and could not. stop. thinking. about. it. Drooling.
I love pancakes, but after I’ve made the second one, I’m ready to eat and be done cooking. Casserole seemed the perfect fix. But the recipe. It’s probably great, but it was mostly made up my things that make me ill. All-purpose (wheat) flour. Eggs. Buttermilk. Whole Milk. More flour. Butter. It did seem like a lot of things to fix.
After a few experiments, let me say that it’s possible. Also, for some wonderful reason, this casserole actually tastes better re-heated. So you can absolutely make it the night before — I encourage you to.
To be clear: This is not an original recipe. This is a heavily-modified version of this recipe at The Kitchn. I really wanted to eat this pancake casserole, so I figured out how to make it safe for me. Maybe you can do the same. I have not listed this as a tree nut-free recipe, as I used almond milk in every test, and I used creamed coconut in at least one version as a replacement for vegan margarine (weird sub, I know, but it worked). I have not noticed substantially different outcomes using different non-dairy milks, and if you can use soy milk, I have a feeling it will work well in this recipe. But if you try something different, please tell me how it works!
Notice: Trying to access array offset on value of type bool in /home/maryzahc/public_html/adultfoodallergies.com/wp-content/plugins/wp-ultimate-recipe/helpers/models/recipe.php on line 254
2Tablespoonsground flax seeds or ground chia seeds
6Tablespoons water
2 1/2cupsgluten-free flour blenddivided — 2 c and 1/2 cup
1teaspoonbaking powder
1 teaspoonbaking soda
1teaspooncinnamon
2Tablespoonssugar
1/2teaspoonkosher salt
2 1/2cupsnon-dairy milk(I usually use almond)
2Tablespoonslemon juice
4Tablespoonsvegan margarine or creamed coconut(I know this seems like an odd alternative, but it works)
1 1/2cupsblueberries(works okay with fresh or frozen — do not defrost)
Servings: servings
Instructions
Grease a 13×9 baking dish. Pre-heat oven to 350°F.
In a small bowl, mix the chia or flax seeds with the 6T water. Set aside.
In a separate small bowl, whisk together the 1/2 cup GF flour, the baking soda, the baking powder, and the cinnamon.
In a large bowl, mix 2 cups of gluten-free flour, sugar, salt, non-dairy milk, lemon juice, and the flax or chia “gel.” When well mixed, fold in the second flour mix.
Pour into the prepared pan, and then sprinkle the blueberries over the top.
Bake for about 45 minutes, until the top is dry. This casserole doesn’t pass the touch test (where the “cake” springs back if you poke it lightly) or the toothpick test (the blueberries mess it up, especially if they were frozen), but it should looke baked and done. Let it rest 10-15 minutes before cutting into it if you plan to eat right now. Otherwise, let it cool completely and cover it. Then re-heat for 10 minutes (if at room temp) or 20 minutes (if it was in the refrigerator) at 300°F in the morning.
Serve with vegan margarine, if desired, and maple syrup (really not optional, as maple syrup is the point of pancakes).
Okay we’re back from break. Not sure I’ve gotten all the garden stuff done that I need to get done, but so be it.
Without wheat, dairy, egg, and corn, breakfast foods are pretty hard to manage around here. I eat a lot of oatmeal. A lot. More than I ever wanted to. And I miss quiche. So when I made the Burmese Tofu, and realized I could try to modify it to make it more “egg-y”, I decided to try to use it to make a quiche-like thing. You’re going to need to make our recipe for “Eggy” Burmese Tofu about 24 to 48 hours ahead of time, so be prepared. It doesn’t have quite the same texture as quiche, but it’s a good breakfast dish, if somewhat filling.
4 cups of cubed “Eggy” Burmese Tofu (which is about half of the recipe, make half if you don’t want leftovers)
1 medium onion, peeled and diced
1 teaspoon of olive oil or other safe-for-you oil
Preheat your oven to 400°F. Grease a pie pan or round baking pan with your oil.
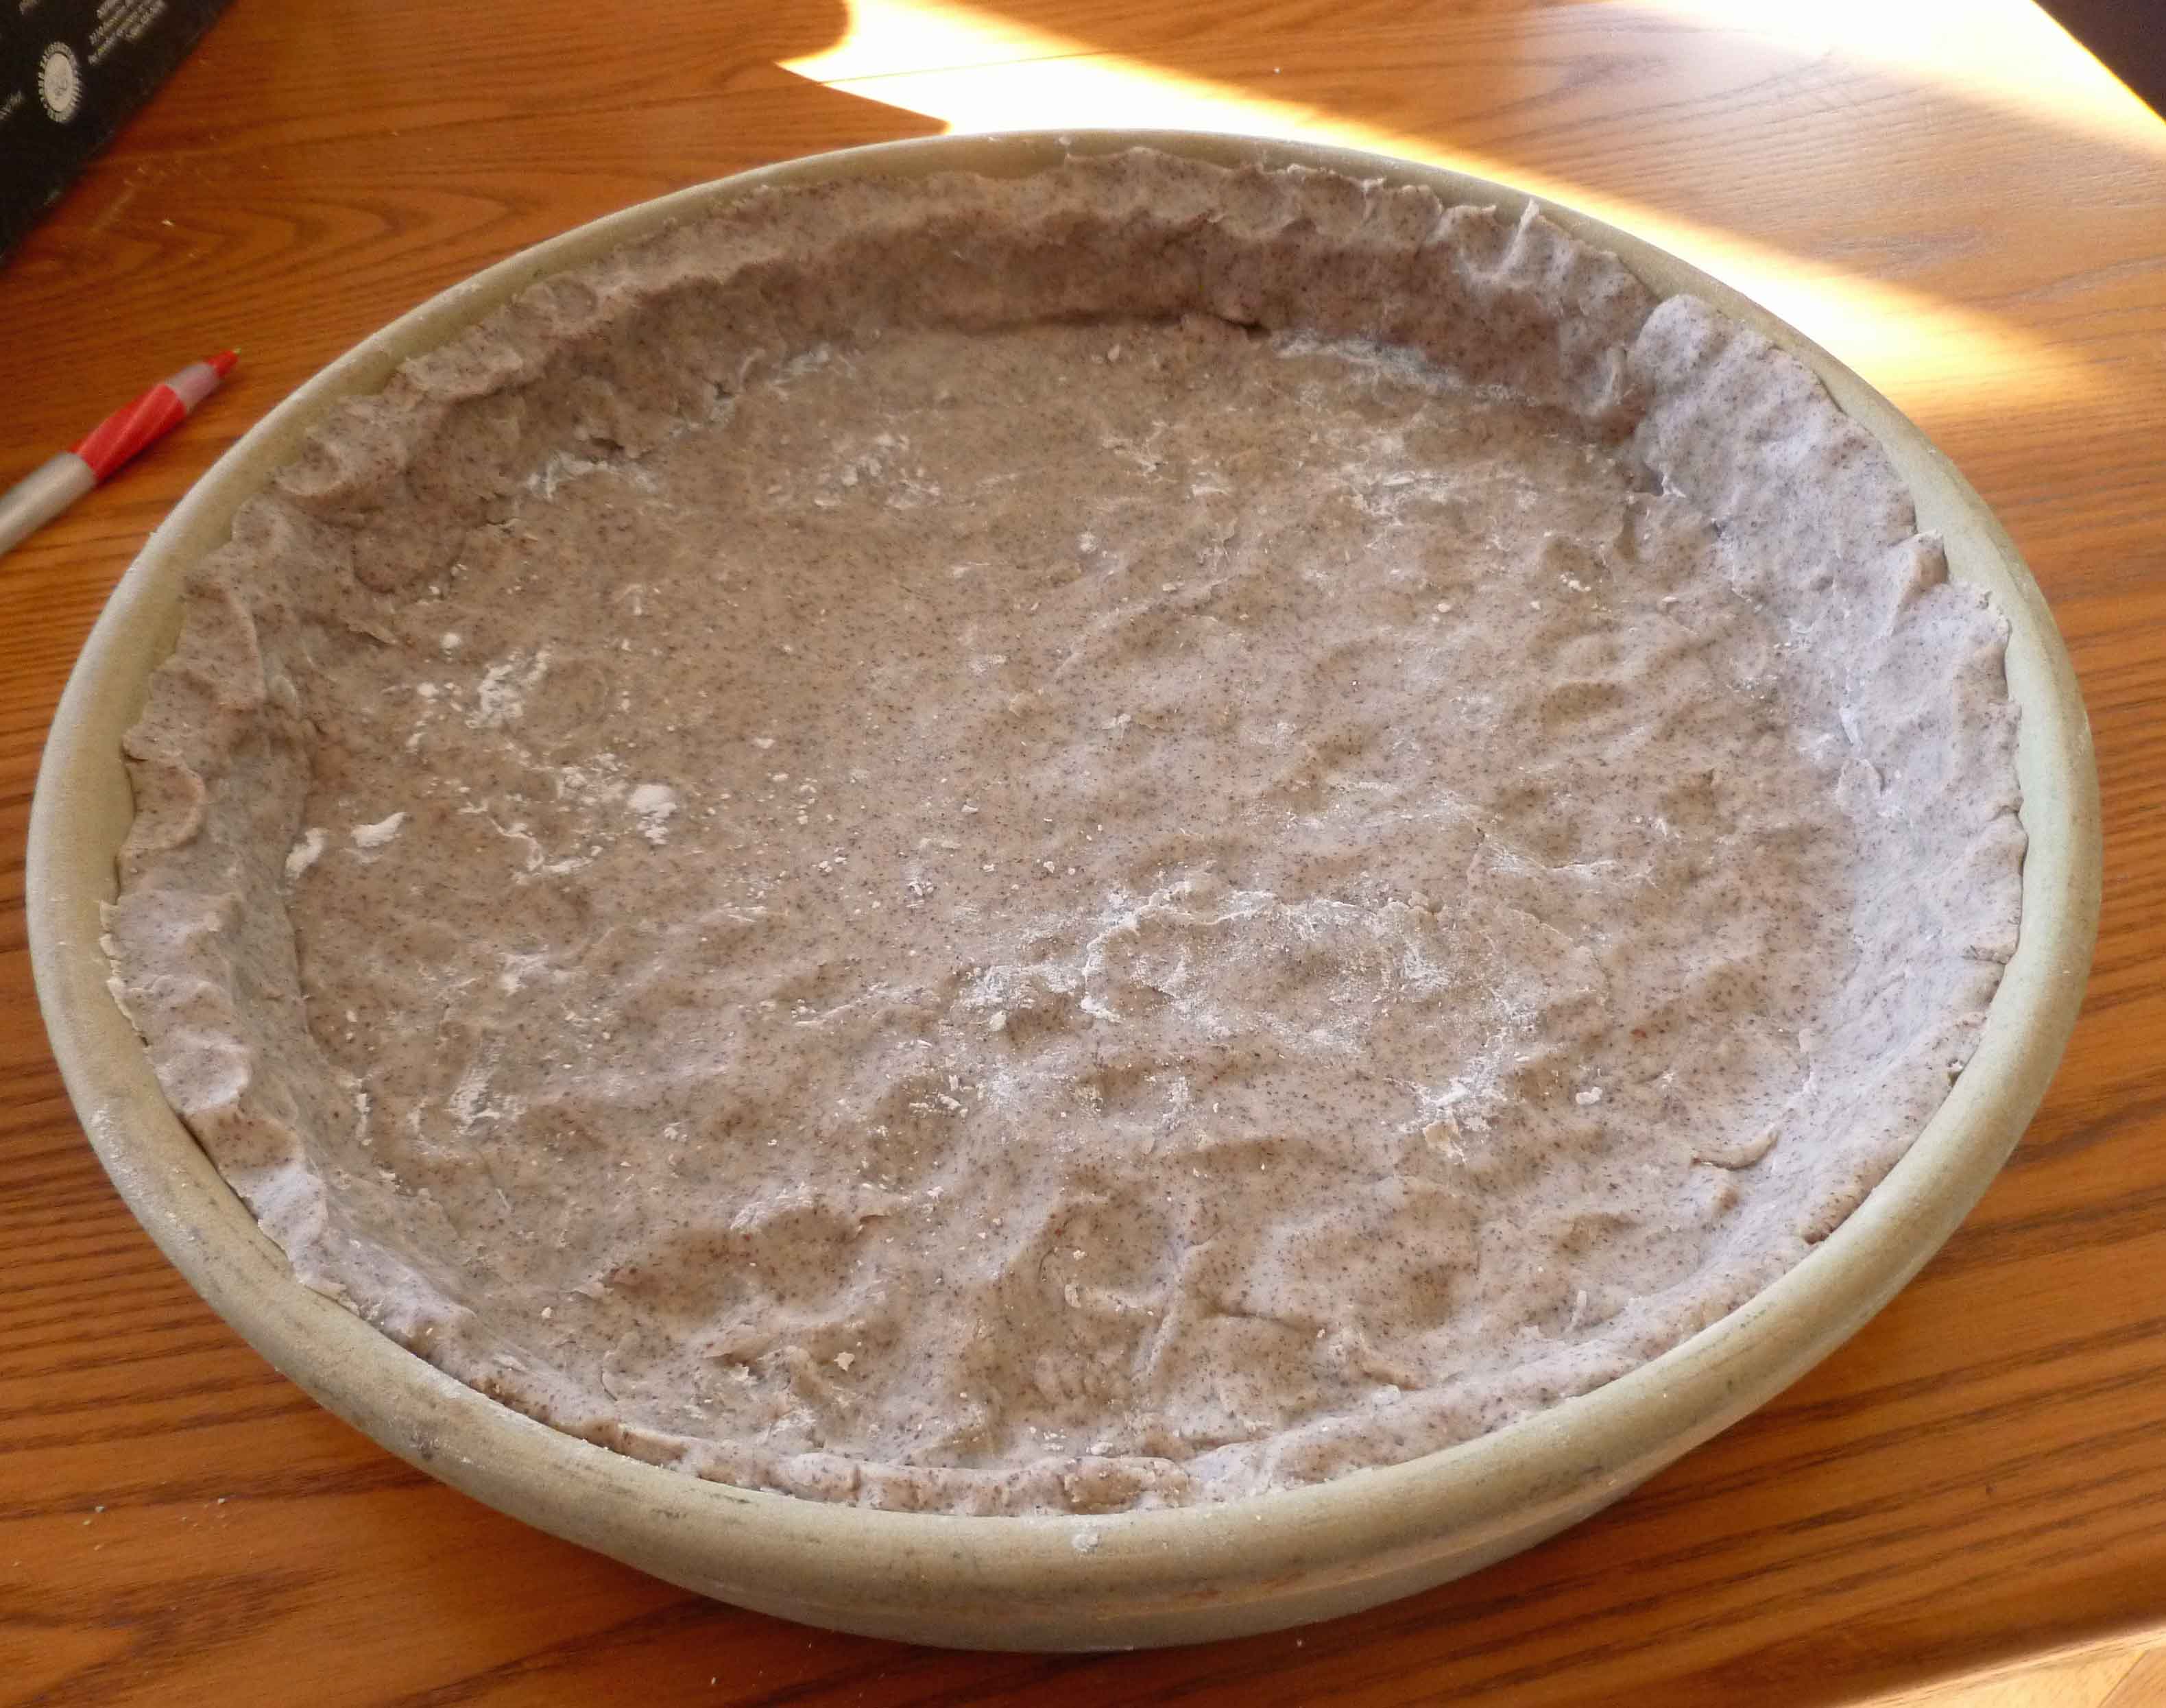
Roll out the dough and place in your pan. I had trouble rolling out my dough and was impatient, so I added it to the pan in patchwork bits, pressing the pieces together.
Crust, piecemeal style
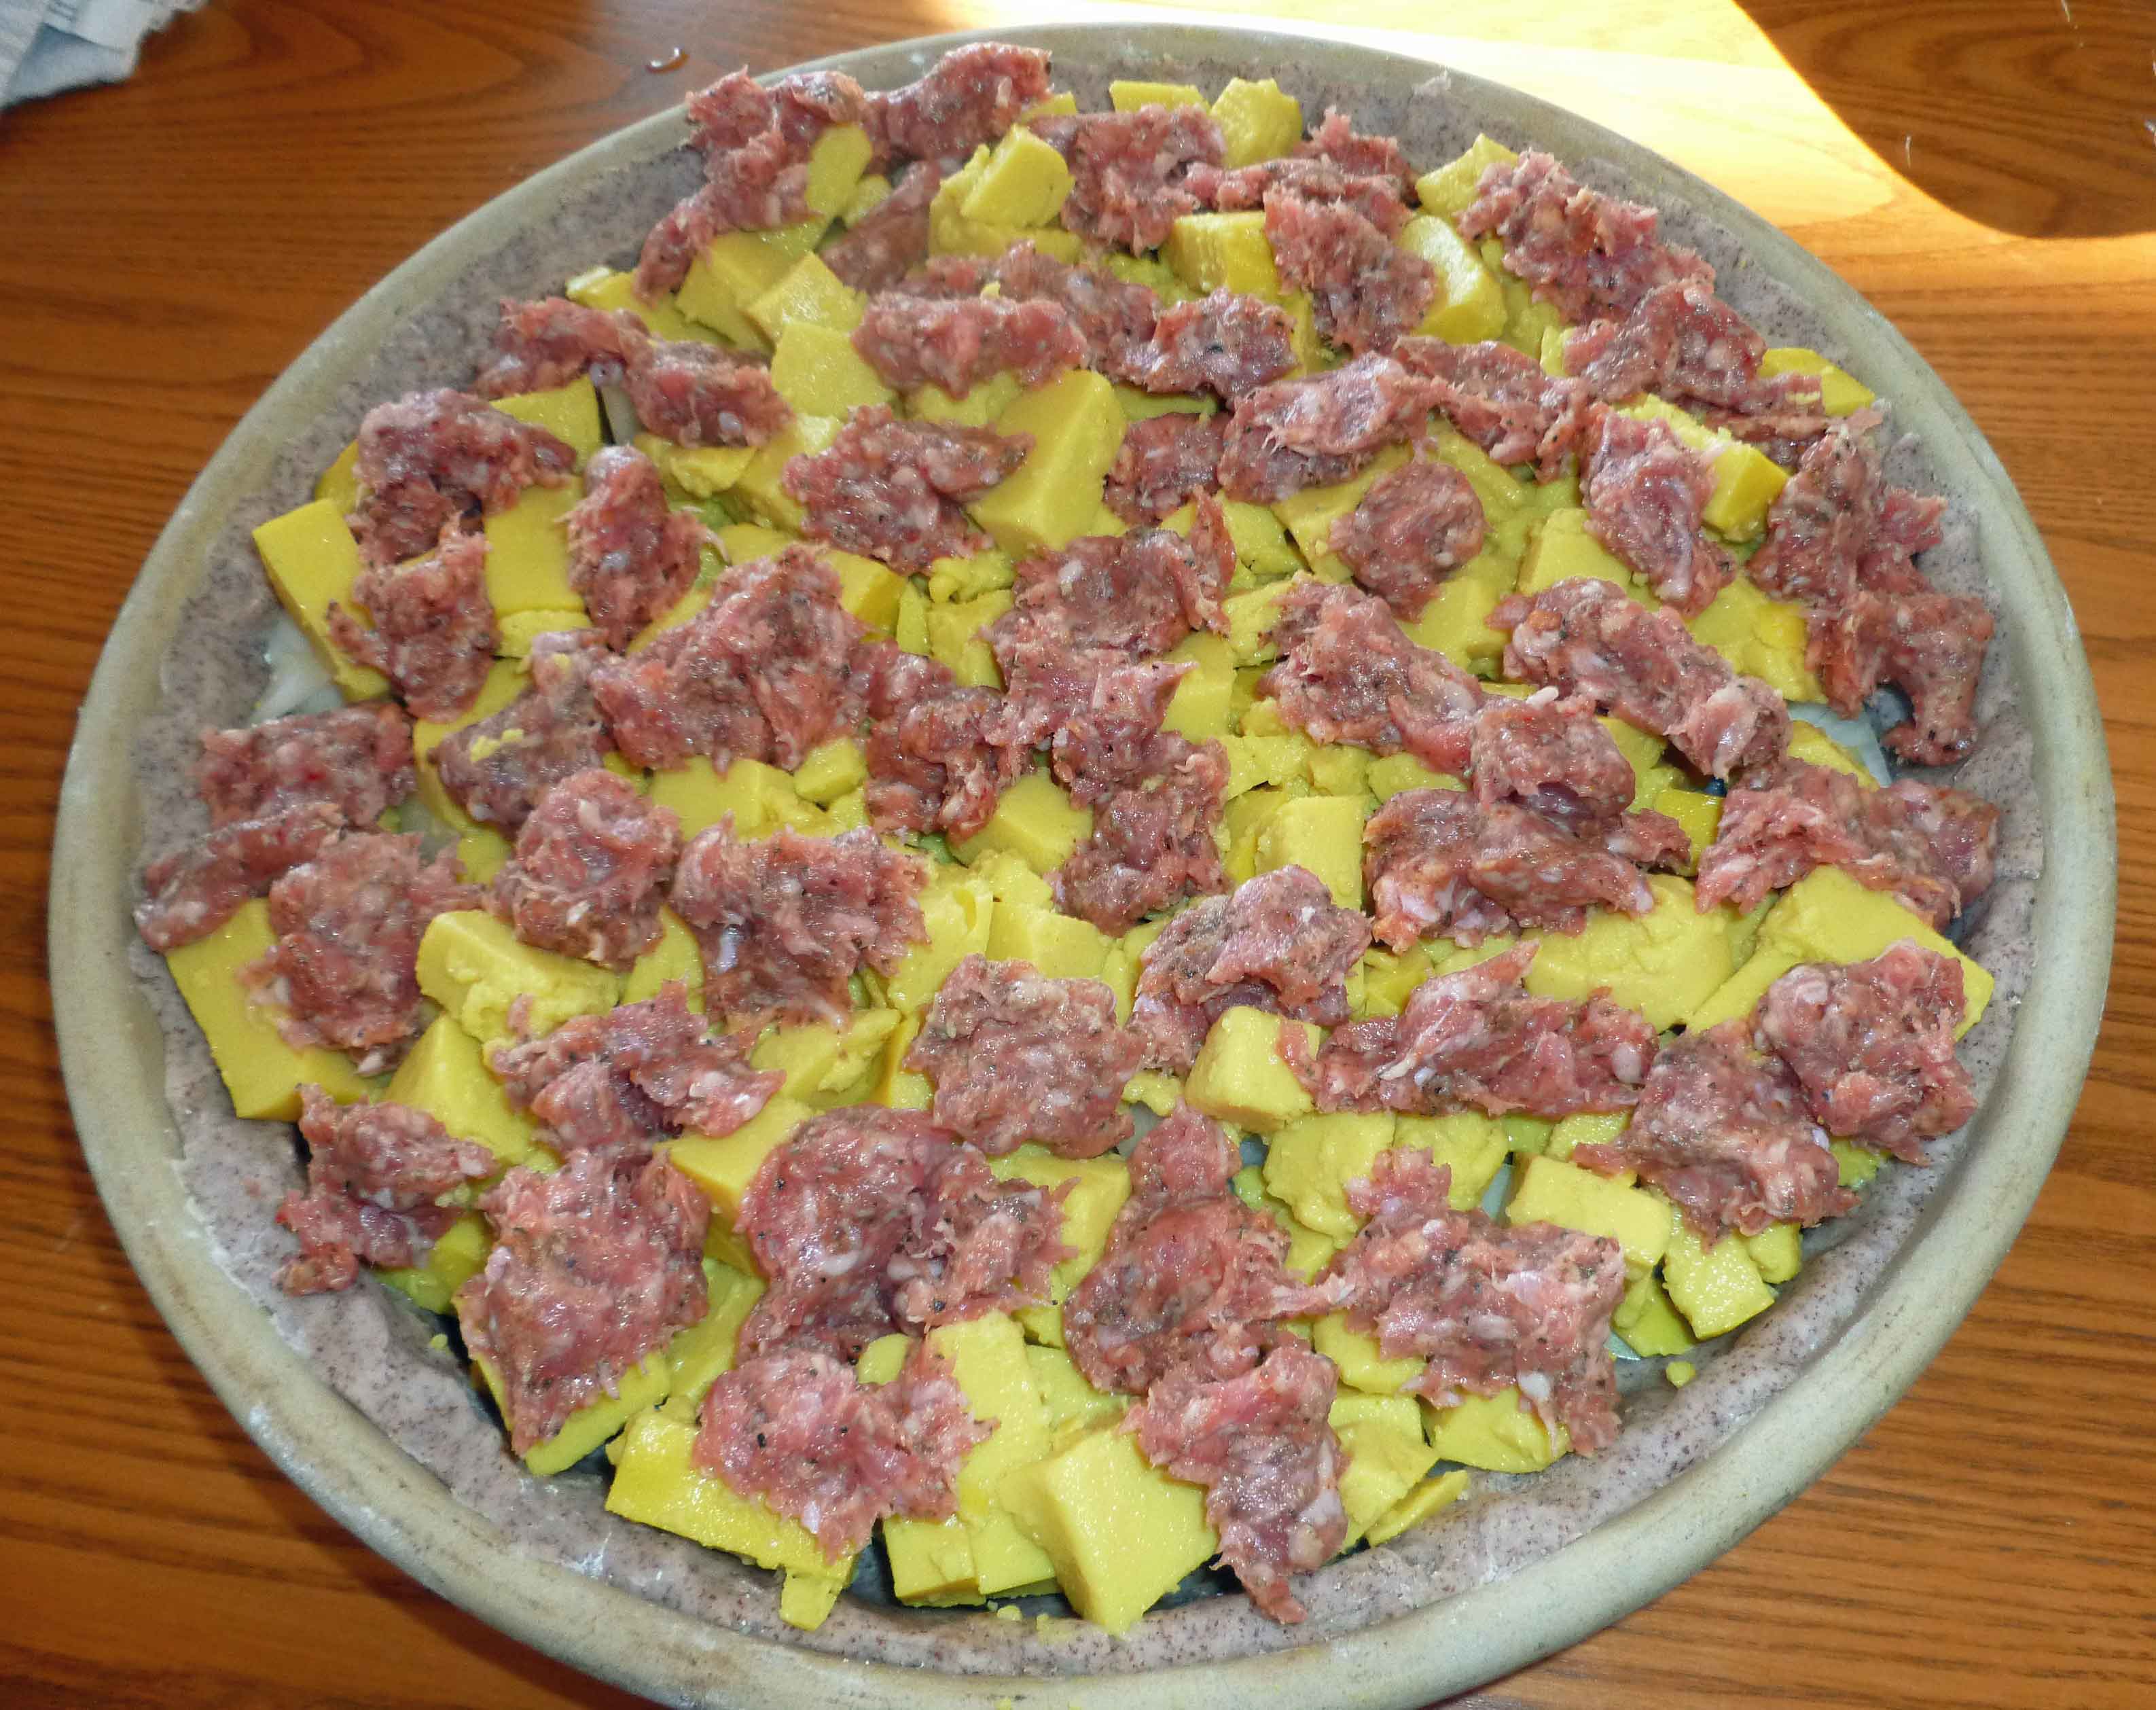
Once your crust is together, sprinkle your onions over the bottom of the crust. Pour the 4 cups of cubed “Eggy” Burmese Tofu over the top of the onions and spread evenly over the crust. Break off pieces of your sausage about the size of a grape and arrange them over the top of the casserole.
Breakfast Casserole before baking
Place your pan in the oven and bake for 1 hour.
Breakfast Casserole
Enjoy!
Notice: Trying to access array offset on value of type bool in /home/maryzahc/public_html/adultfoodallergies.com/wp-content/plugins/wp-ultimate-recipe/helpers/models/recipe.php on line 254
Preheat your oven to 400°F. Grease a pie pan or round baking pan with your oil.
Roll out the dough and place in your skillet. If you can’t roll it out smoothly, you can do it in patchwork bits, pressing the pieces together.
Once your crust is together, sprinkle your onions over the bottom of the crust. Pour the 4 cups of cubed “Eggy” Burmese Tofu over the top of the onions and spread evenly over the crust. Break off pieces of your sausage about the size of a grape and arrange them over the top of the casserole.
My friend Laurie sent me the sample packet of Anti-Grain flours for my birthday, and the first thing that came to mind for apple flour (which is literally just dehydrated apples — an easy ingredient list to tackle) was pancakes. I love pancakes. Denise did pancakes a while back, but I thought pancakes with an apple flour base would be a nice change of pace.
I also wondered if aquafaba (chickpea brine) as an egg replacer might make a lighter, fluffier pancake, than chia or flax eggs. I tried it, but wasn’t thrilled with the results — I mean, it tasted great, but the texture wasn’t what I wanted. So I whipped the brine, which made all the difference. Admittedly, this adds an extra step and an extra bowl to your pancake adventure. As much as I hate dishes (and I don’t own a dishwasher), this extra bowl is worth it.
I’ve used a mix of oat flour and sorghum flour. If you cannot tolerate gluten-free oats, use all sorghum.
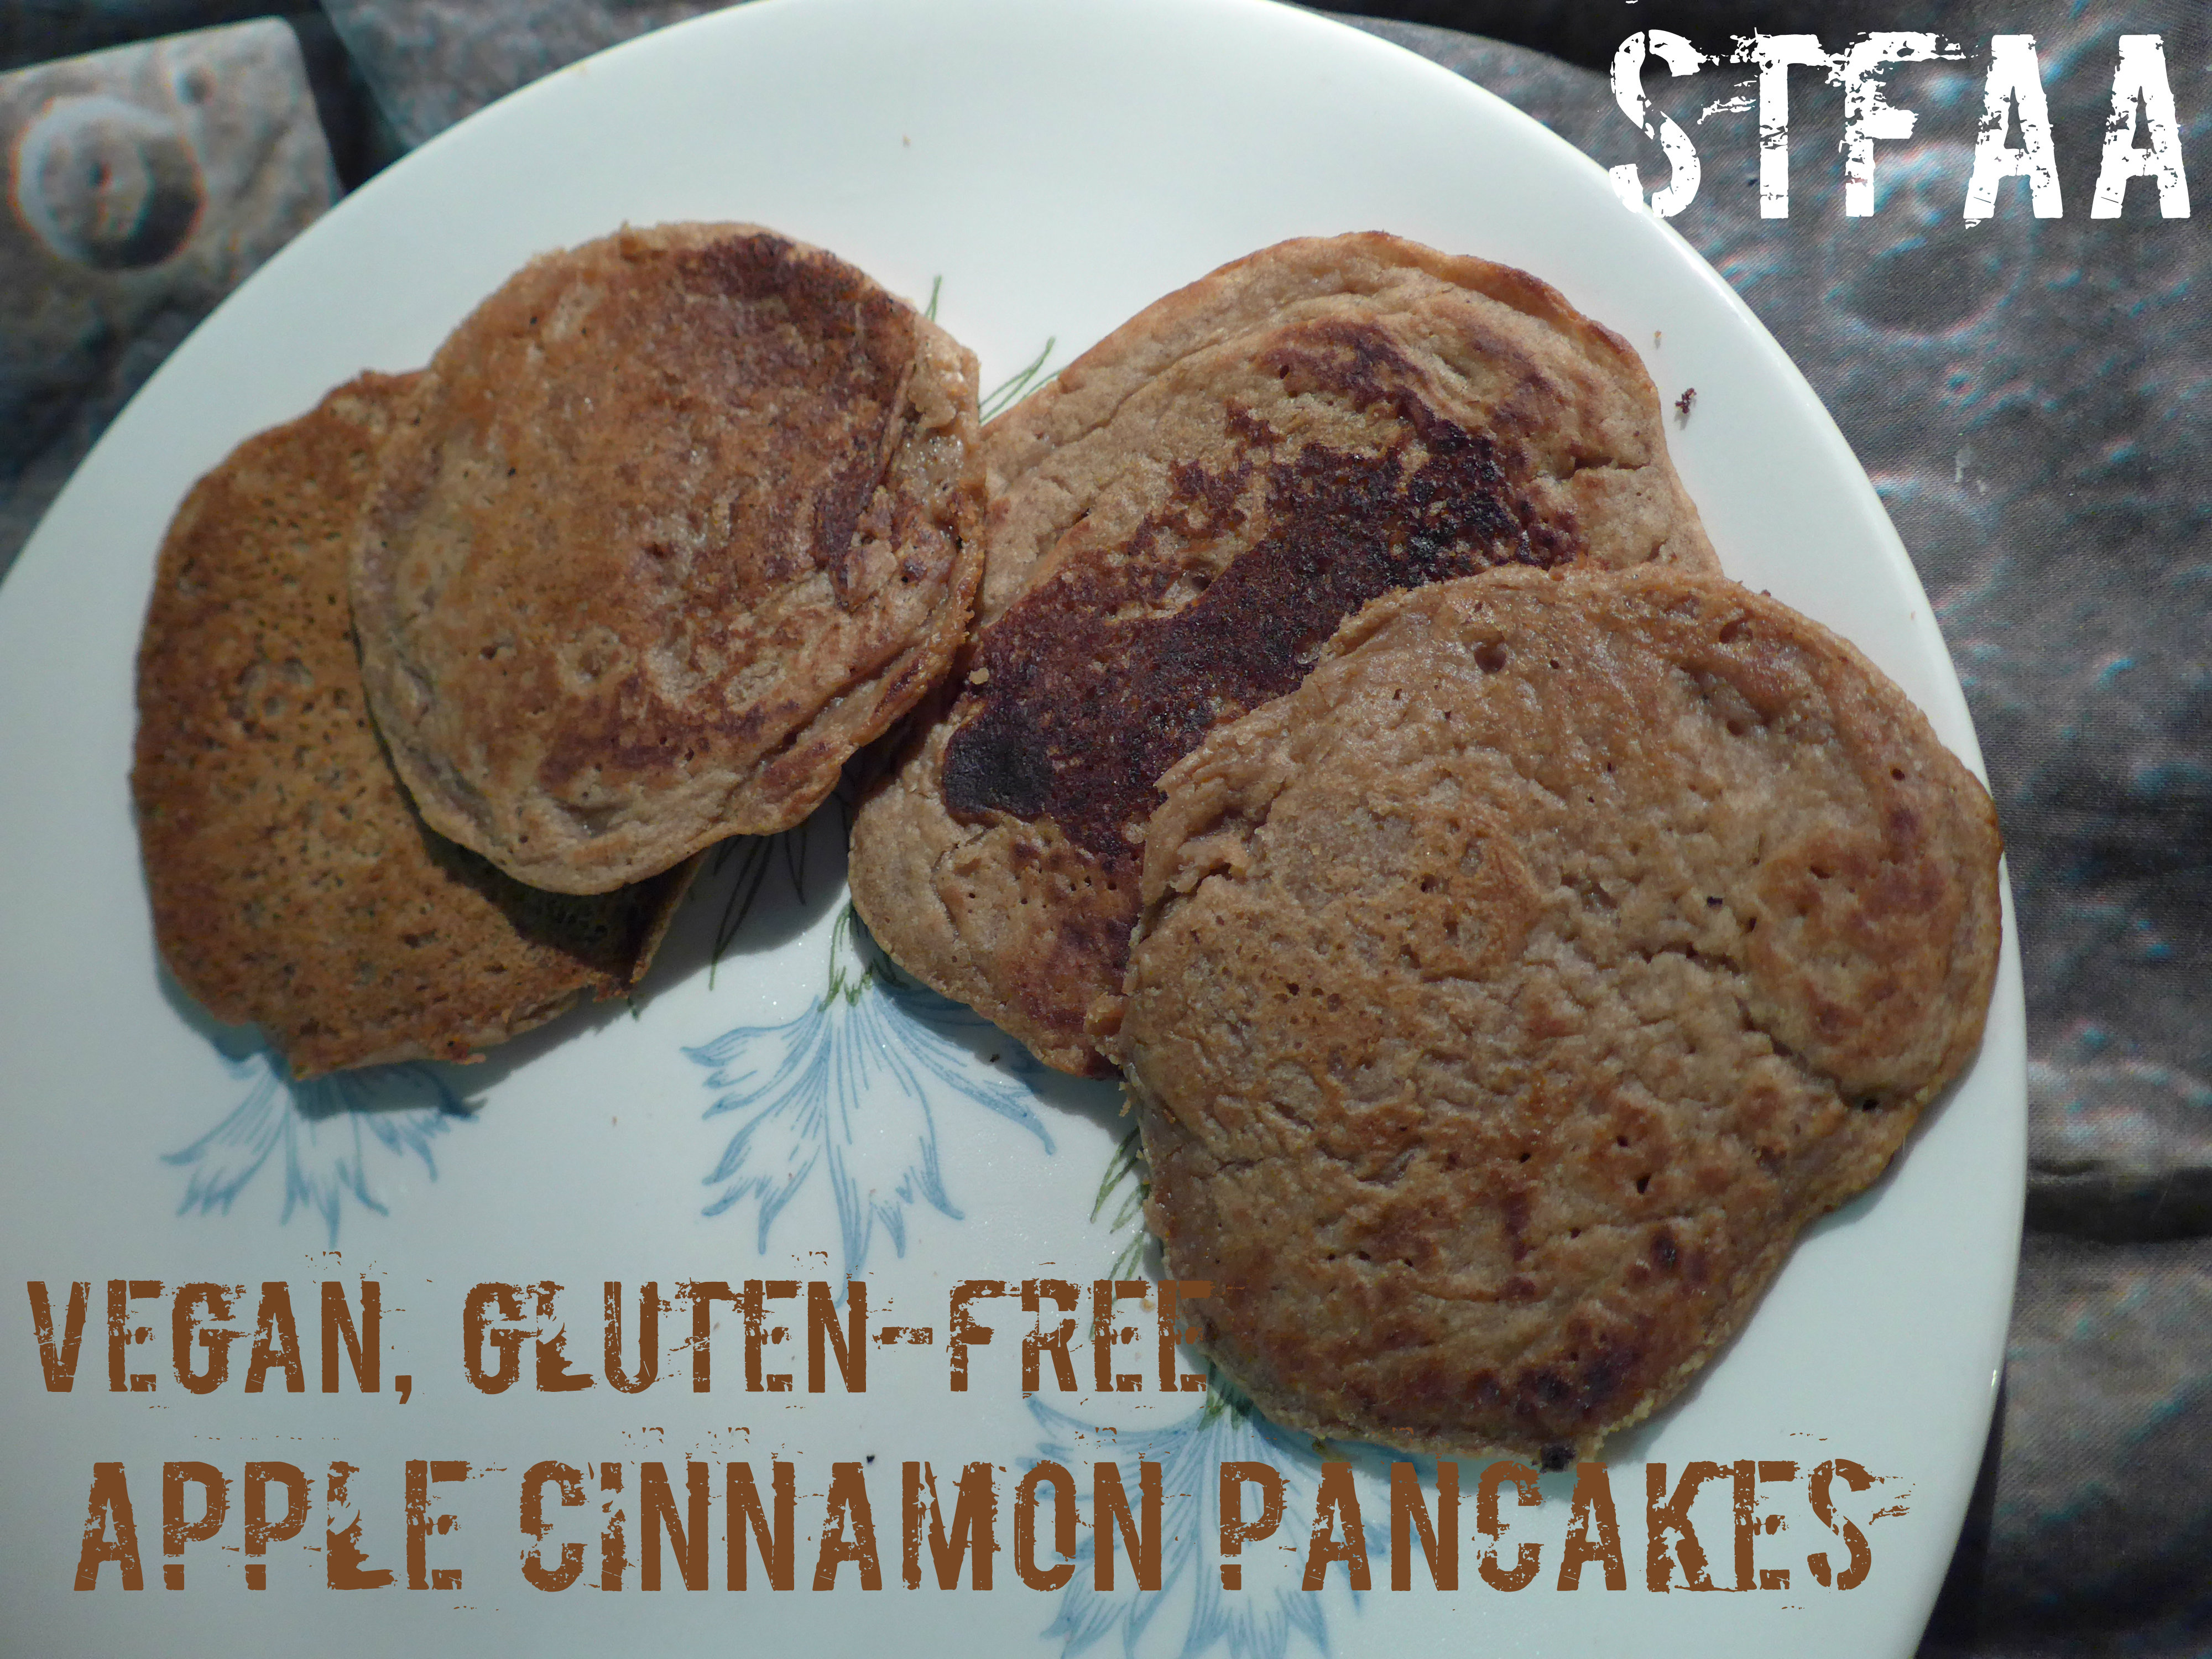
Apple Cinnamon Gluten-Free Vegan Pancakes
serves 4
1/2 cup gluten-free oat flour (can sub sorghum, if you can’t tolerate oats)
1/4 cup apple flour
1/4 cup sorghum flour
1 Tablespoon tapioca starch
1 teaspoon baking powder
1/8 teaspoon baking soda
1/8 teaspoon salt
1 teaspoon cinnamon
1 1/2 Tablespoons brown sugar
2 Tablespoons oil (I prefer the flavor of coconut, but use what works for you)
1 cup non-dairy milk (I generally use almond)
1/2 cup of whipped aquafaba foam (chickpea brine whipped into an airy foam)
Oil for the skillet or pan
Whisk the dry ingredients together.
Add the oil and non-dairy milk and whisk.
Fold in the aquafaba foam.
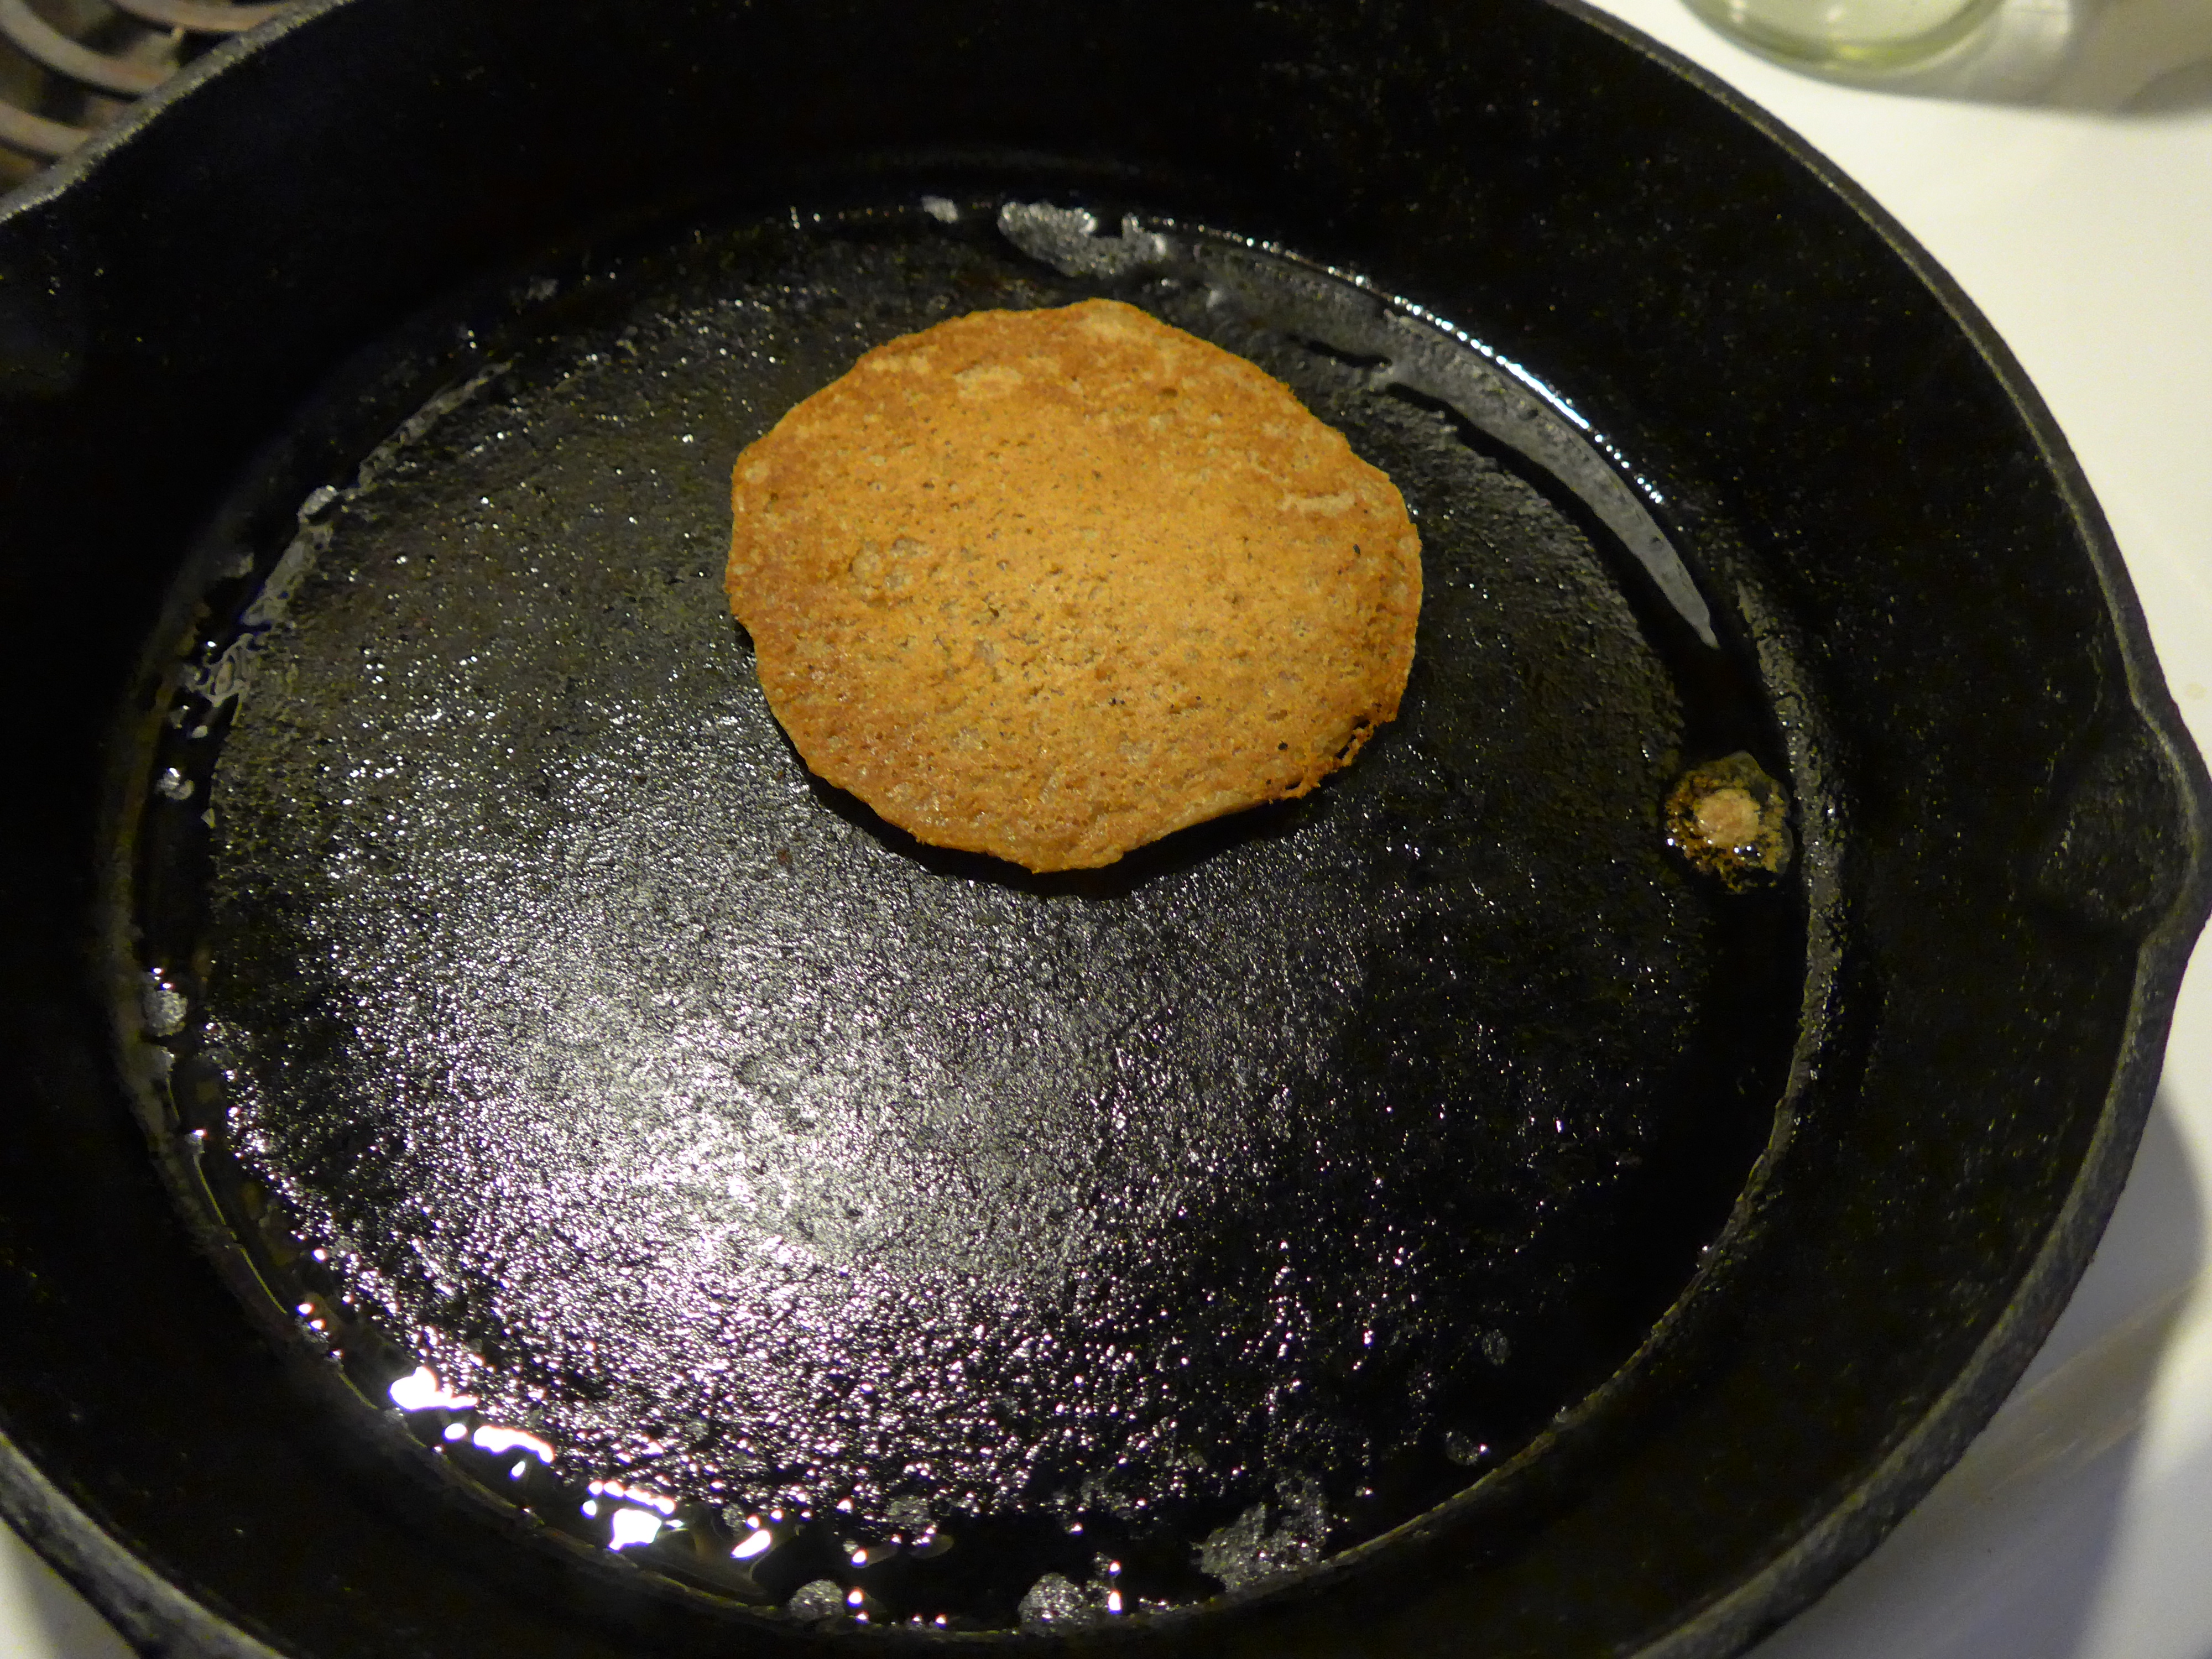
Heat the skillet or pan over medium heat and lightly oil it. Pour batter in , about 2 Tablespoons at a time. About like this:
(That’s a 12-inch cast iron skillet, for reference).
When the pancake is slightly dry at the edges, that is usually when you can flip it. I’d give you cooking times, but it seems to vary so much from batch to bath that it’s better to look for doneness. If you want to make all the pancakes and keep them warm, put them in a pan in a low (200ºF) oven to keep them warm.
This makes about 4 servings, depending on how hungry you are. I’m really not sure what a “proper” serving of pancakes is — enough that you’re not hungry when you’re done, I suppose. Top with whatever butter or margarine is safe for you, and maple syrup, if you can have it. Jam is also quite nice on pancakes.
IF you have leftover pancakes, these reheat well, and also taste pretty great cold.
I have to admit, I spend a lot of fall jealous of people eating cider doughnuts and apple treats of all sorts. It’s part of a day out in the fall — stop at an orchard, get some fried appley things, eat bliss. Nowadays, I get cider, which is great, but somehow not as filling. Lucky for me, I think apple crisp is the pinnacle of baked apple dishes, as that’s super easy to take the gluten out of — it’s not meant to hold together. It’s meant to go in a bowl with ice cream and just be brilliant. But it’s not a fried apple treat of any kind, and I missed those.
So when Denise and I decided to have another day of frying everything, apple fritters were on my mind. I think it’s been years and years since I had one, so I’m not entirely sure these are “traditional,” but they were tasty, and they kept well in the oven (set down at 170ºF) while we made the rest of the fried things. I’d love to tell you how they did a day later or frozen, but I can’t. We ate them all. I’m not big on food guilt anyway, but I can say that if you fry things maybe three times a year, you can’t really feel bad about eating everything.
How many fritters you get will depend on how big you make them, and there’s really not a lot of measuring the mess into the oil. Just try to make them similar sizes so that they can be done about the same time. I’m not sure an exact count would be possible anyway — you’ll be eating them as soon as they are cool enough, way too fast to count, anyway, unless you have inhuman strength. The recipe is loosely based on the Chai-Spiced Pancakes recipe on The Canary Files, which is my go-to pancake recipe (my favorite thing about it is that you need to make it the night before and let it sit in the fridge overnight. I LOVE that. I don’t really do mornings so much as mornings happen to me.) For a fritter batter, though, I’ve altered it quite a bit, and then dunked it in hot oil; I’m just saying don’t expect health food.
Batter, Frying, Draining (and absorbing sugar)
Gluten-free, Vegan Apple Fritters
3/4 cup gluten-free all-purpose flour, blend of your choice (THIS is my go-to)
1 Tablespoon sugar
1 Tablespoon baking powder (corn-free, if you need it)
1/4 teaspoon salt
2 teaspoons cinnamon
1/8 teaspoon nutmeg
2 1/2 cups rice milk, DIVIDED (if you make this by hand, add slightly less water than called for, about a 1:1 ratio of cooked rice to water, and strain it really well for a thicker texture that is so much better for baking)
1 Tablespoon of chia seeds, ground, mixed with 3 Tablespoons warm water to form a chia egg
2 Tablespoons light olive oil (regular will be fine, you just might taste it a bit)
1 1/2 teaspoons ground psyllium husk
4 medium apples, peeled, cored, and shredded (medium=baseball-sized)
powdered sugar for dusting. Really, don’t even bother to mention this, just sift or sprinkle it on.
Mix the dry ingredients (AP flour to nutmeg) together well. Add 1 1/2 cups rice milk, chia egg, vanilla bean, olive oil, and psyllium. Mix well, adding more rice milk if needed. Then put in the fridge for an hour. It will thicken considerably. Add the rest of the rice milk and stir in the apples. You want a thick dough, sort of like regular gluten-containing muffin batter would be, so pay attention as you add the liquids.
Heat a pot of oil to 370ºF. Drop the fritter batter in by spoonfuls, making sure not to crowd the fritters. If you use two spoons, you can sort of flatten or spread the fritters as you form them, making them more UFO saucer shape than rounds, and this will mean the insides cook better. They WILL stick together or stick to the sides of the pot, so bounce them around enough to make sure they don’t. Flip a few times, and see how they brown. You may have to test a few — I’m not giving you a cooking time as it varies widely based on how thick each fritter is, but after 3 or 4, you’ll have the hang of it.
When they are nicely golden brown, remove them to a paper towel-lined plate or tray to drain. Let the oil return to 370ºF, if need be, before doing the next batch. An oven turned down as low as it goes (170ºF on my oven) will keep them nicely warm until you’ve finished all of them.
Dust liberally with powdered sugar and no longer feel left out.
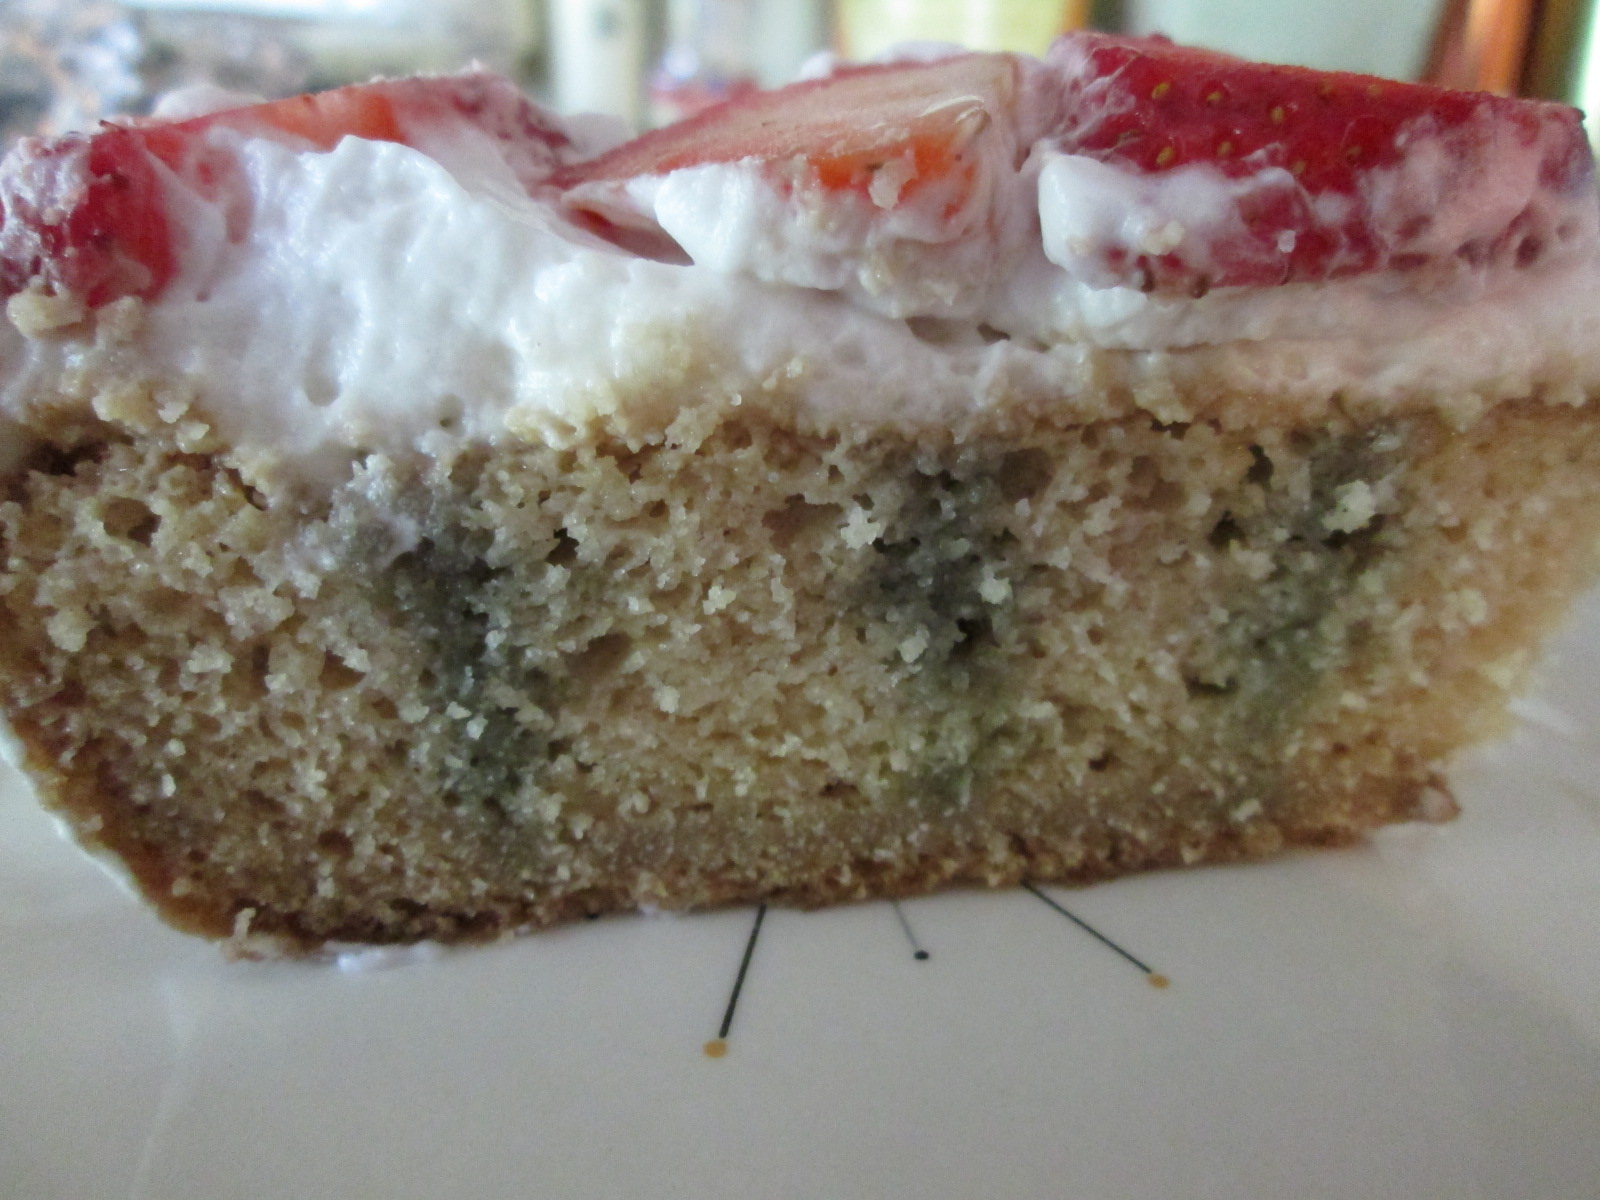
So this week is the both the classic summer holiday of Independence Day in the US. I know maybe cake isn’t the first thing one thinks of when you think of summer holiday picnics, but this week is also my birthday, so cake is important. So your theme is: BERRIES. Hah. Actually, berries are one of the more awesome things about summer, and cake is the one truly awesome thing about birthdays, so here’s a berry-themed cake that also just happens to be color-appropriate for a few upcoming holidays — nicely, this works as well for Bastille Day as it does for Independence Day. It’s multi-purpose. This is good, because every day is better with cake.
This is a riff on a cake my mother used to make — a poke cake, where you soak your cake with gelatin. Her “recipe” came from a magazine recipe (I’m going to guess Better Homes and Gardens, but it might have been the Parade magazine section from the Sunday paper) and involved box cake mix, a box of Jell-O, Cool Whip (which I absolutely adored for all of my formative years) and berries on top. My FrankenCake version involves other people’s recipes instead of boxes, but combined to make “classic” poke cake that is gluten-free, vegan, and completely without preservatives or weird flavorings. This is a dense, moist cake, flavored by the gel, topped with a whipped cream and berries. Served cold, this is great for summer. I mean, it’s berries. What is there not to love?
You’ll make the cake, cool it, poke holes in it, make a fruit gel, pour it on, cool it, and the “frost” and decorate it. Because it needs to cool completely, twice, this is a good make-ahead recipe. The day before is a good idea, adding the “frosting” and berries not long before serving.
Cake Assembly
IMPORTANT NOTE: In case you skipped reading to go straight to the recipe, this is not a “day of” recipe. You need to cool this twice, and the coconut milk for the topping must be refrigerated overnight.
Patriotic Berry Poke Cake
1 carton of strawberries or other fresh berries is also needed to decorate the top of the cake.
4 oz (1/2 cup) unsweetened applesauce (I use the snack pack sizes)
Preheat oven to 375ºF. Lightly grease an 8″x11.5″ pan, or a 9″ square pan.
Add lemon juice to almond milk and set aside.
Mix dry ingredients. Then add wet ingredients and mix thoroughly.
Pour into prepared pan and bake 35 minutes or so — cake is done when lightly browned on top.
Cool completely, and then poke holes all over the cake with a fork. The more holes, the more your fruit gel will penetrate, so I’d suggest holes no more than 1/2 inch apart, all over the cake.
Vegan Fruit Gel (I used this recipe from Manjula’s Kitchen)
Poke and Gel the Cake
1/2 cup blueberry juice
1/2 cup water
2 Tablespoons sugar
1/4 teaspoon agar agar powder
If you need to, juice and strain blueberries to get blueberry juice. I just had a bag of frozen berries I picked last summer, so I defrosted them and ran them through a food mill and then a strainer. This made more juice than I needed, but this also makes more gel than you need for the cake.
Mix the agar agar into your water. Add all the ingredients to a saucepan and bring to a boil over medium heat, stirring occasionally. Boil for three minutes.
Pour very slowly over the top of your hole-poked cake (this is easier to do if you aren’t taking photos while pouring), letting it soak in, and stop when the gel stops soaking in. You may have a little leftover, so just make a serving of gel for later.
Put the gel-soaked cake in the fridge and chill for 3-4 hours or overnight.
Coconut Whipped Cream (see recipe here at Oh She Glows)
1 can full-fat coconut milk without guar gum, refrigerated over night
3 teaspoons sugar
1/2 teaspoon vanilla
OR 3 teaspoons of vanilla sugar
A chilled metal bowl and electric mixer, with whisk attachment if you have it.
Flip your can upside down in the fridge. To open it, flip it back upright and open it. Pour off the watery part (you can use this for things, but I don’t like it much, personally.)
Put JUST the solid part in your chilled bowl and whip it with your whisk attachment or mixer.
Add the sugar and vanilla (or vanilla sugar) and whip again. Taste it. It’s amazing. Add sugar or vanilla if needed.
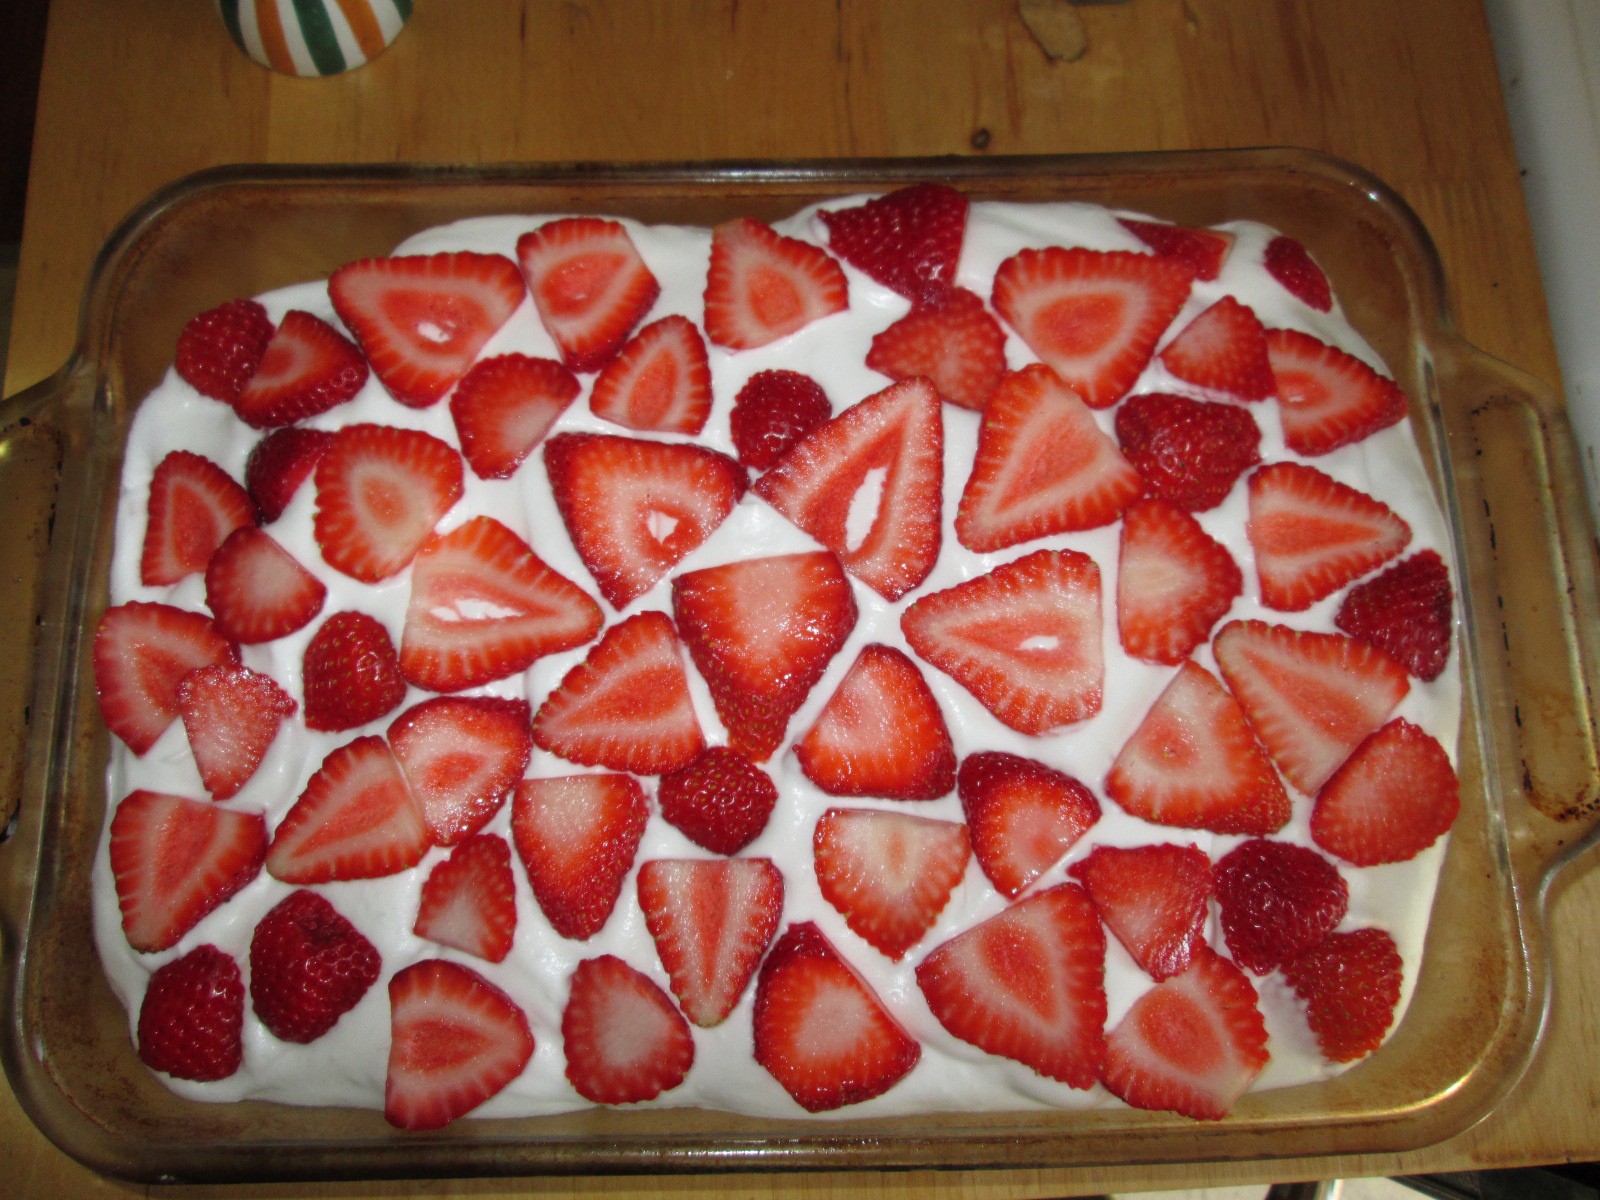
Use the coconut whipped cream to frost the cake, being generous in your application. Top the cake with berries and keep refrigerated until ready to serve.