Notice: Function _load_textdomain_just_in_time was called incorrectly. Translation loading for the wp-ultimate-recipe domain was triggered too early. This is usually an indicator for some code in the plugin or theme running too early. Translations should be loaded at the init action or later. Please see Debugging in WordPress for more information. (This message was added in version 6.7.0.) in /home/maryzahc/public_html/adultfoodallergies.com/wp-includes/functions.php on line 6121
Appetizers – Page 4 – surviving the food allergy apocalypse (archive)

Category: Appetizers

Appetizer [ap-i-tahy-zer], noun: a small portion of a food or drink served before or at the beginning of a meal to stimulate the desire to eat. These recipes will not contain dairy, eggs, gluten, wheat or hazelnuts. If we use a top 8 allergen, we will use a tag warning of its use.

  • Miraculous ALLERGEN-FRIENDLY Fried Cheez Nuggets

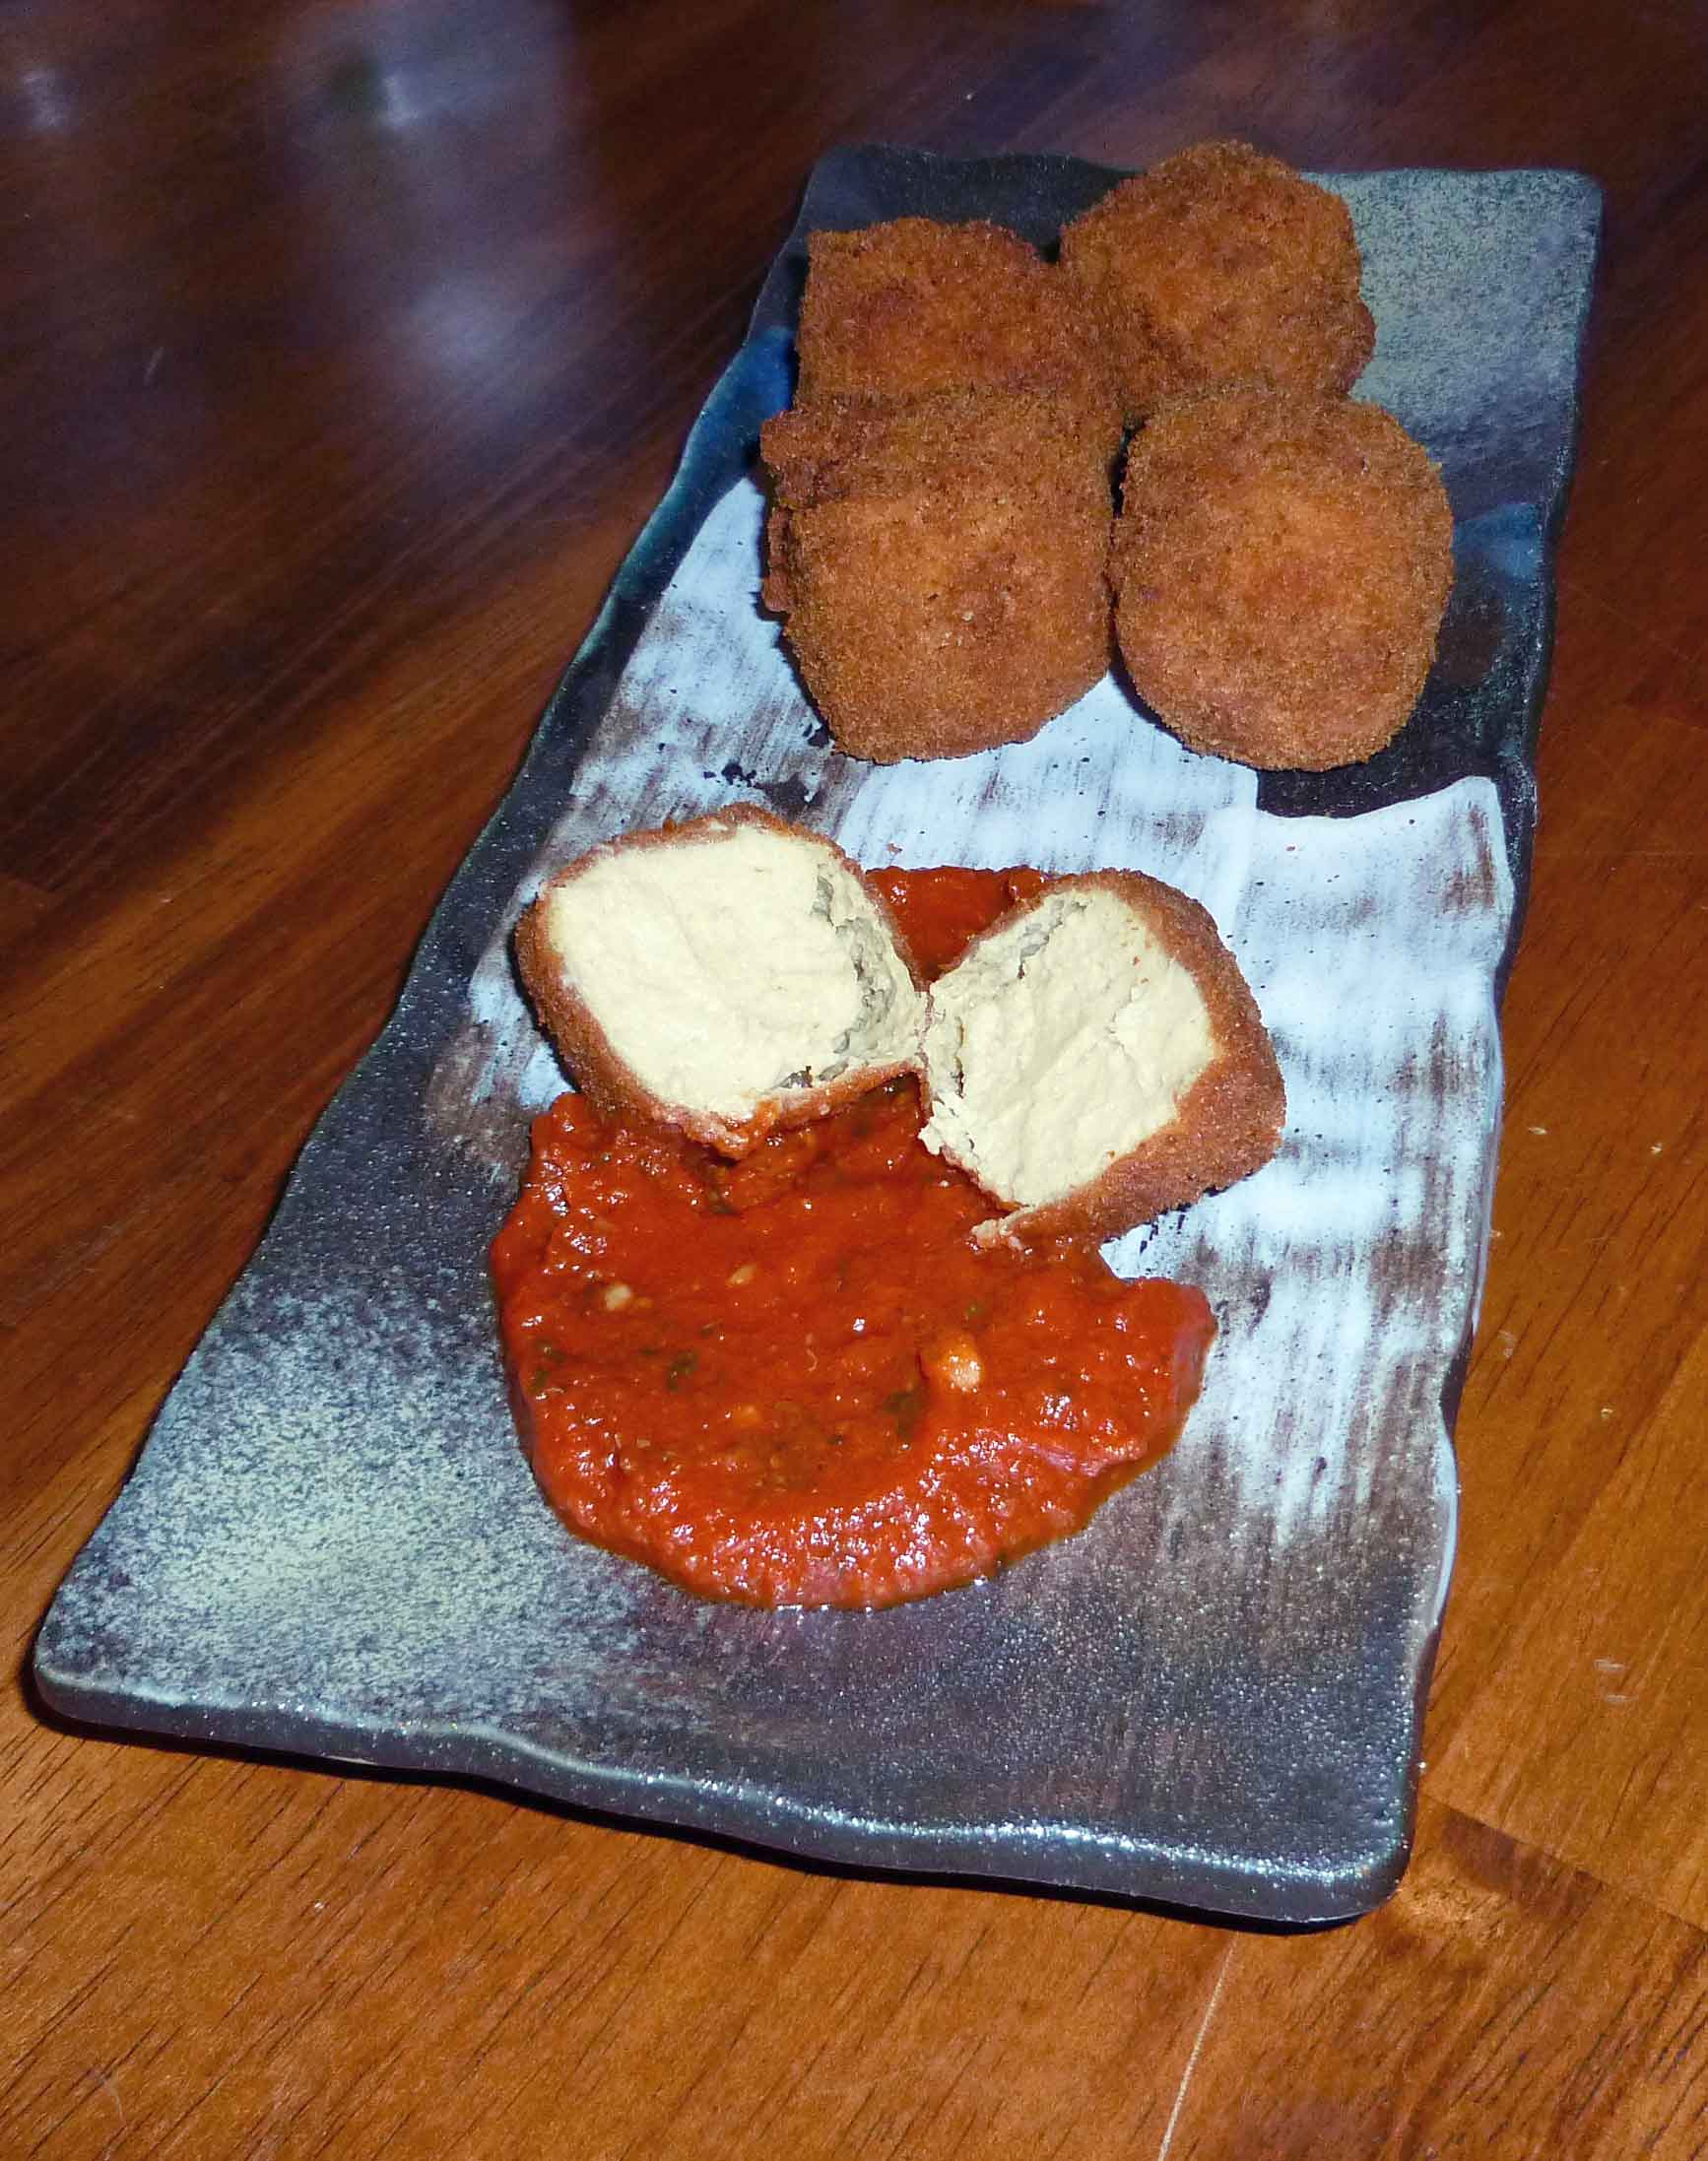
    Fried Cheez Nuggets with Marinara Sauce
    Fried Cheez Nuggets with Marinara Sauce

    When Denise and I sat down to discuss things we needed to learn to make, things we could not longer eat “normal” versions of, one of the things that popped to the top of the list was what my college roommate called “bar food” — fried foods that tasted great and had little or no nutritional value.  I can still have french fries, which are my favorite of the genre, but Denise missed mozzarella sticks (to the point that I had dreams about them – D). 

    As anyone who is vegan, allergic to milk, lactose-intolerant knows, cheese is one of the harder flavors to replicate without actual dairy products.  Many have tried, but the majority of “non-dairy” cheeses on the market actually contain some dairy, and therefore aren’t suitable for anyone vegan or with allergies.  There is nothing on the market that really would work for a fried cheese product.

    But we do have the wonder of Joanne Stepaniak’s The Uncheese Cookbook, which has an amazing variety of cheesy flavors (including the basis for the nacho cheese used in the Happy Layers Nacho Dip).  We figured that if we made the mozzarella recipe, made sure it was structurally sound enough to batter and fry, and then figured out a breading, we’d be set.  Easy, right?

    Not exactly.  We had no problems with the cheez, though we made three or four recipes before determining which worked best, and tried several different “egg wash” and breading options, too, before determining which worked best.  But even our less perfect attempts were edible, and we’ve shared these with regular omnivorous eaters, and while they wouldn’t mistake them for mozzarella sticks, they did enjoy them.  This recipe was our first resounding success, and it’s kept us going for a while.

    This is NOT an every day recipe!  And frankly, given that it’s fried “cheez,” it really shouldn’t be anyway.  There is preparation involved, and then deep frying, but they taste good at room temperature and could easily be re-warmed or kept warm in a low oven.

    Before we get started, you will need the proper equipment.  You decide how much you can fudge this stuff, but remember you’ll be playing with oil.

    For making cheez:

    • 2 qt. saucepan
    • whisk
    • silicone ice cube trays or molds with a capacity of about 1 Tablespoon each (cubes are approximately 1 inch square)
    • plastic wrap
    • freezer space so they can set

    For the frying:

    • pot deep enough to accommodate about 3 inches of oil and the frying thermometer, a thick stainless steel or a enameled dutch oven would be best. You also want a pot that’s tall enough that the edge is 2 or more inches above the oil level. It’s safer and there’s less splatter all around. The pot we used was 5 inches tall and about 8  inches across.  We do not recommend using anything with Teflon or nonstick coatings. Of course, if you have an actual deep fryer appliance, use that.
    • frying thermometer (the link goes to the one we used)
    • splatter screen (trust us, don’t go forth without this one)
    • tongs and/or slotted frying spoon/spider (we used a silicone one rather than the traditional wire and bamboo, but I can’t find a picture of ours)
    • cookie cooling rack and cookie sheet, lined with paper towels
    • probe-style thermometer
    • For recapturing the oil for re-use (with proper care, you can use this oil at least 6 times)
    • Mason jars
    • coffee filters
    • funnel

    Ingredients, all in one list:

    • 2 cups rice milk
    • ½ cup nutritional yeast flakes
    • 7 Tablespoons oat flour (if you can’t get gluten free certified oat flour, grind gluten free certified rolled oats in a blender, food processor or coffee grinder until you have flour)
    • ¼ cup tahini
    • ¼ cup cornstarch
    • 4 Tablespoons lemon juice
    • 1 Tablespoon onion powder
    • 1 teaspoon kosher salt
    • 2 Tablespoons Ener-G egg replacer powder
    • 1/2 cup warm rice milk
    • one loaf of white rice bread, turned into bread crumbs, or about 1 1/2 cups of bread crumbs
    • a large jug of canola oil, for frying
    • marinara or tomato sauce for dipping (optional)

    Miraculous Cheez Nuggets

    There are two things you need to do in advance — make the cheez and make the bread crumbs.  You could buy bread crumbs, but it may be easier to make your own and control the bread.  For gluten-free bread crumbs, we suggest either Ener-G White Rice Bread or Food for Life White Rice Bread.  In my opinion (MK), neither one is a fantastic sandwich bread, but the white rice breads do make excellent bread crumbs for frying.

    For either one, lay the slices out on the oven rack and bake for about 2 hours at 200°F.  Let cool completely, and then put through the food processor.  You won’t use the whole loaf’s worth of crumbs, but why not keep the rest on hand?  They keep well in a plastic bag or other sealed container.

    Make cheez:

    Place the following ingredients in the saucepan:

    • 2 cups rice milk
    • ½ cup nutritional yeast flakes
    • 7 Tablespoons oat flour (if you can’t get gluten free certified oat flour, grind gluten free certified rolled oats in a blender, food processor or coffee grinder until you have flour)
    • ¼ cup tahini
    • ¼ cup cornstarch
    • 4 Tablespoons lemon juice
    • 1 Tablespoon onion powder
    • 1 teaspoon kosher salt

    Whisk all ingredients together until well combined.

    Cheez Ingredients mixed before heating
    Cheez Ingredients mixed before heating

    Cook over medium-low heat, whisking occasionally until mixture starts to thicken. Turn heat to low, whisk constantly until mixture starts to pull together and away from sides of pan.

    Cheez after cooking
    Cheez after cooking

    Spoon into silicone molds or ice cube trays, approximately 1 tablespoon per cube.  Try your best to smooth out the tops.

    Cheez in Silicone Ice Cube Trays
    Cheez in Silicone Ice Cube Trays

    Cool in fridge.  Then cover with plastic wrap and freeze the cheez over night. The cheez must be frozen to hold up to frying without becoming a really nasty mess. The last batch we made we had intended to fry the the next day but couldn’t, so the cheez was in the freezer for a week or so with no ill effect. To save time, you could keep some cheez made ahead of time in the freezer and then just bread and fry when you want some.

    Frying Fun!

    Fill the frying pot (described above) with about 3 inches of canola oil, and put your frying thermometer in place.  Start heat over medium-low and aim for 360ºF.

    Frying Set Up
    Frying Set Up

    While waiting for your oil to heat, you will bread your cheez.  Make an “egg” mix by mixing the following:

    • 2 Tablespoons Ener-G egg replacer powder
    • 1/2 cup warm rice milk

    Place egg mix in a deep enough container or bowl that you can dip the cheez nuggets in it and coat them easily.  Place bread crumbs in a low flat container so that you can easily roll the nuggets to coat them in the bread crumbs.

    Remove cheez nuggets from silicone molds. One at a time, dip nuggets in egg mix, then in bread crumbs. Place on a tray to until you are ready to fry them.

    Coating Cheez in Bread Crumbs
    Coating Cheez in Bread Crumbs
    Cheez Nugget Coated in Bread Crumbs
    Cheez Nugget Coated in Bread Crumbs
    Tray of Breaded Cheez Nuggets
    Tray of Breaded Cheez Nuggets


    Fry them! Drop nuggets (gently!) in the hot oil and then cover the pot with the splatter screen.

    Putting Cheez Nuggets into Oil
    Putting Cheez Nuggets into Oil
    Cheez Nuggets Frying
    Cheez Nuggets Frying
    Using Splatter Screen
    Using Splatter Screen


    Our pot was about 8 inches in diameter, with 3 inches of oil, and we could fry 5 nuggets at a time.  Each batch took approximately 5 minutes with the starting oil temperature at 360-370ºF.  We were able to test the interior temperature (remember, these will still be frozen when you drop them in the oil) with the probe thermometer — anything over 70ºF is good (take a nugget out of the oil and test it on a plate. DO NOT TRY TO PROBE A NUGGET WHILE FRYING). You can also just cut one open and feel it.

    Blurry Photo of using Probe Thermometer
    Blurry Photo of using Probe Thermometer

    If you put too many nuggets in the oil at once, you will drop the temperature too far down (don’t go below 330ºF), and you won’t get a golden brown outside with a warm cheezy center.  If your oil drops more than 15 degrees, put fewer nuggets in the next time around.  You can also adjust your stove temperature to try to keep the oil temperature consistent.

    When the nuggets are done, lay them on the cookie sheet that you’ve prepared — cover the cookie sheet with paper towels and lay your cooling rack upside down on the paper towels.  The fried nuggets will be kept up off the paper towels, and the towels will draw the oil down.  These nuggets are NOT greasy if you’re doing all this right, and they are wonderful.

    Taking out Cheeze Nuggets to Put on Rack
    Taking out Cheeze Nuggets to Put on Rack
    Cheez Nuggets on Rack
    Cheez Nuggets on Rack

    Serve while still warm, with marinara if you so wish.

    You can freeze any leftovers, but reheat them low and slow — 250ºF for about 30 minutes seems to work.  We only tested reheating them once, though, so if you do it, let us know how it goes!
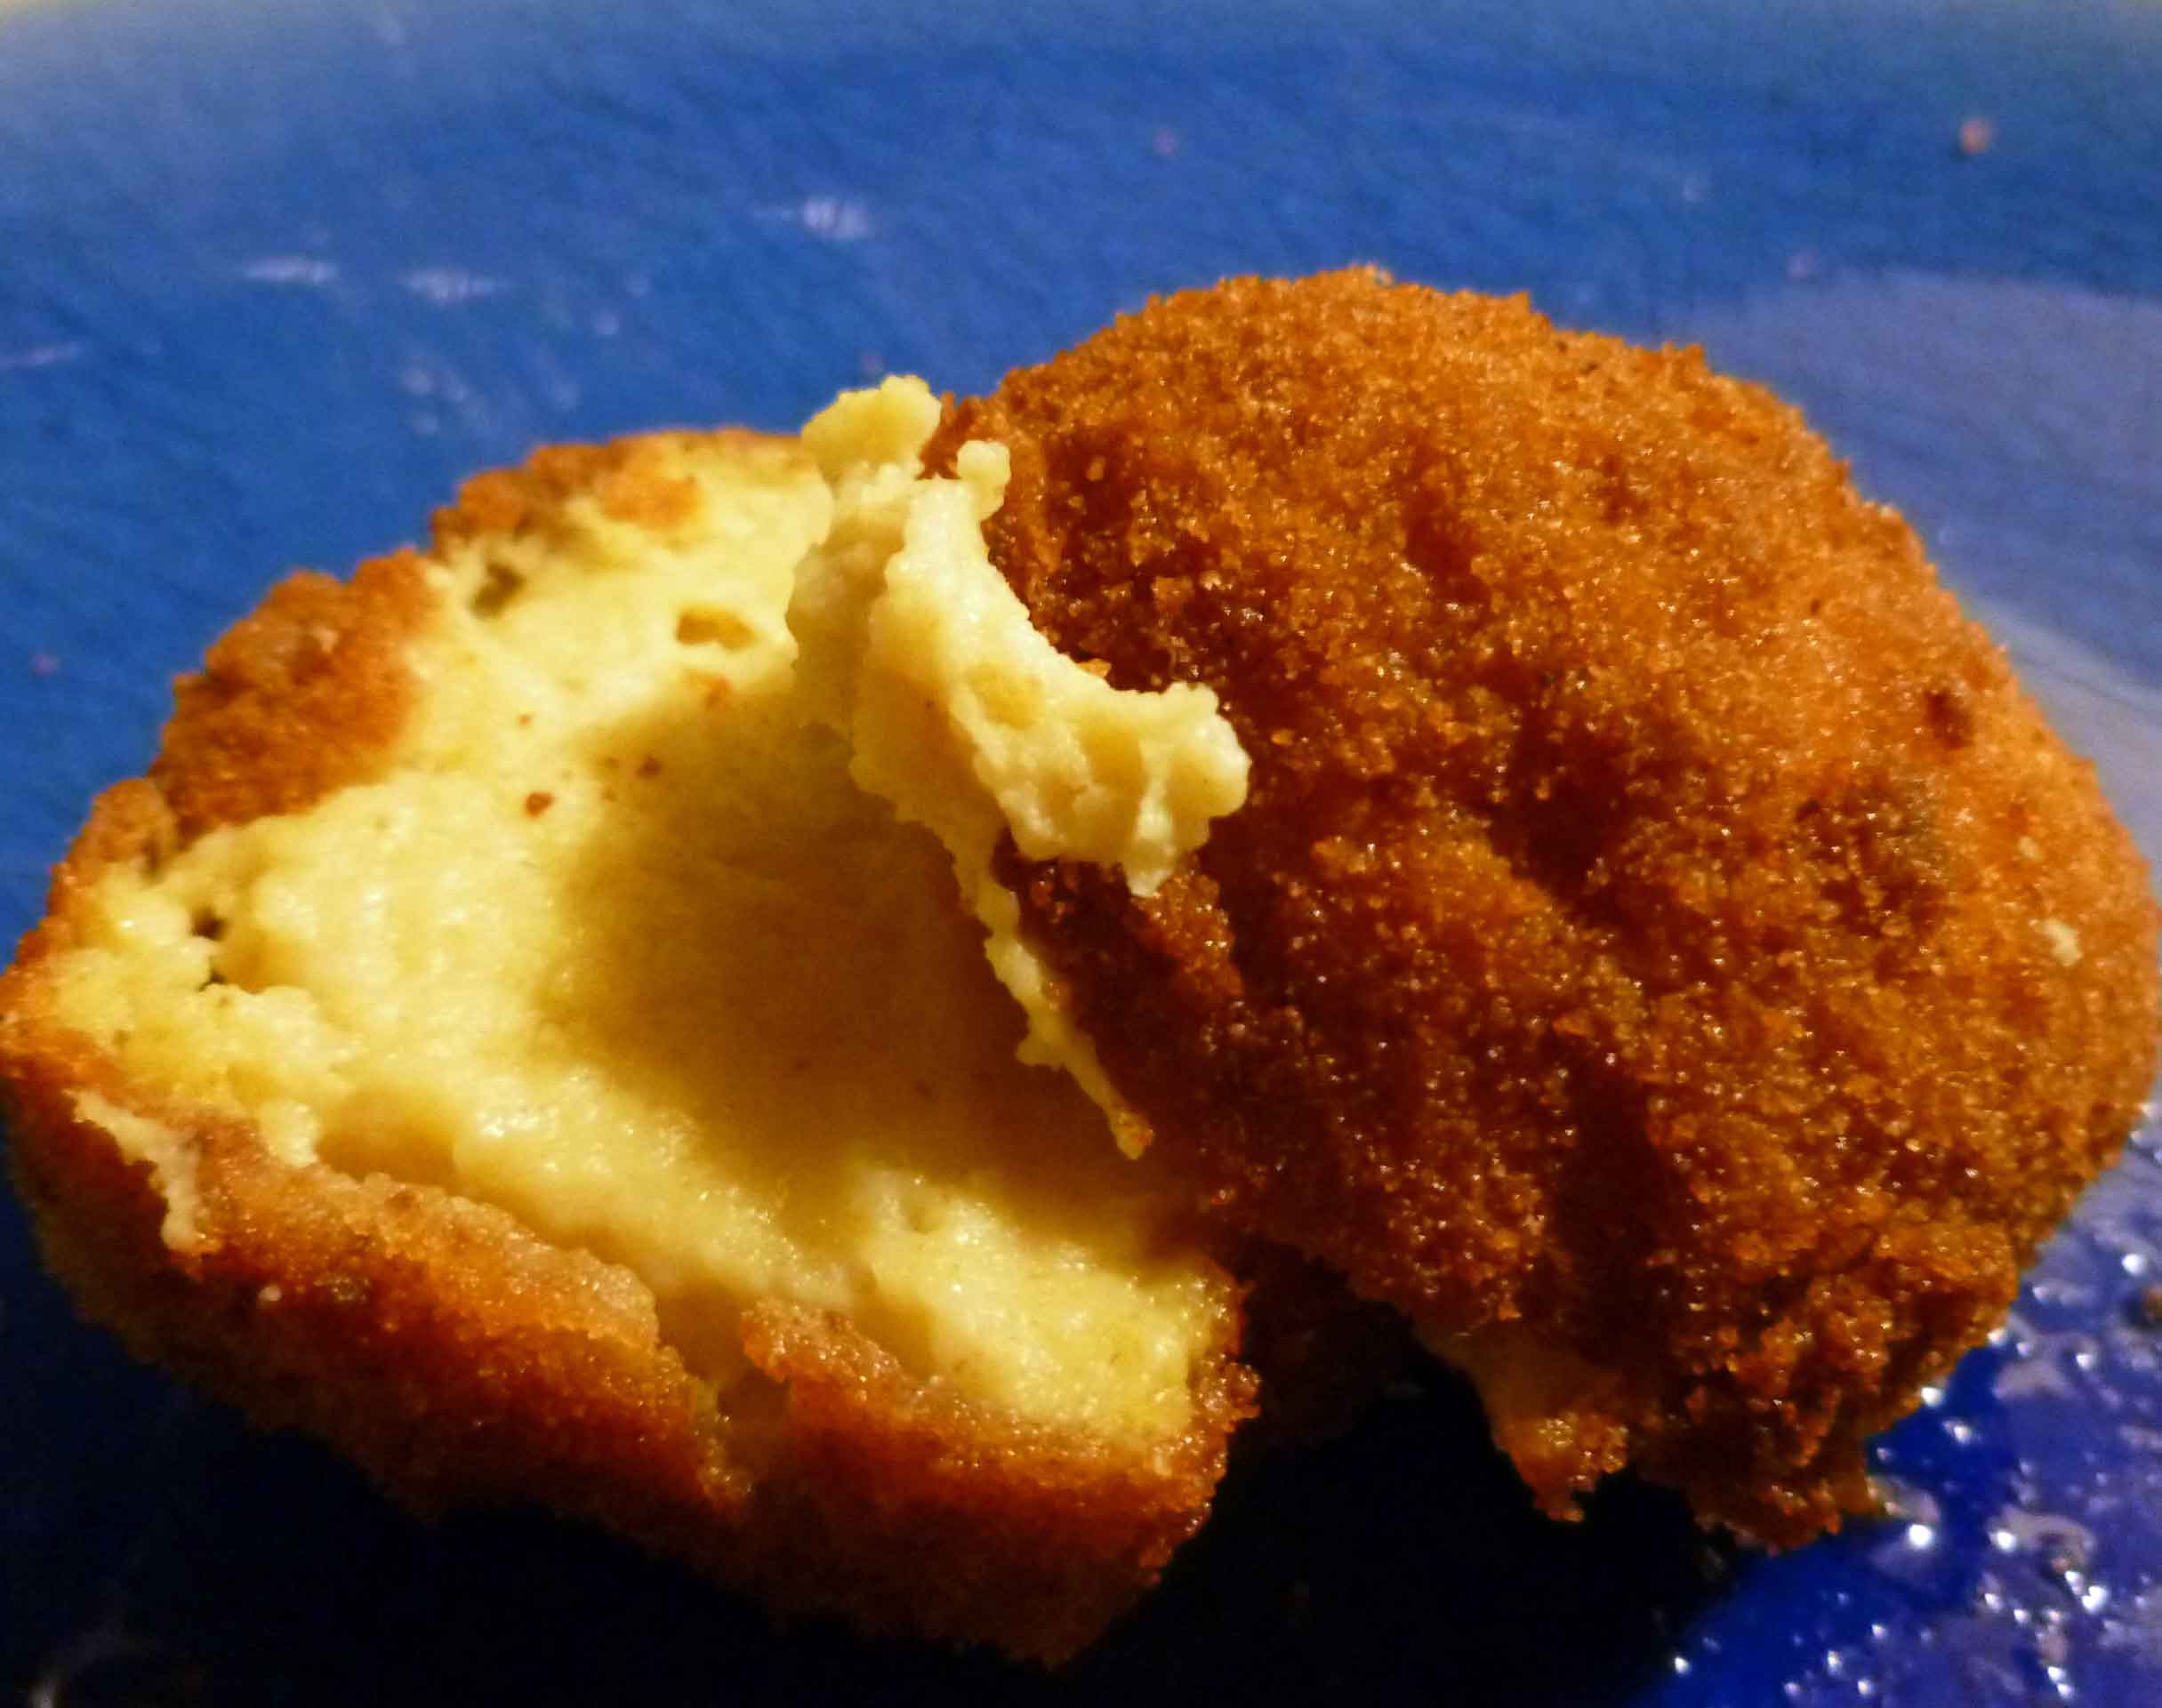
    Yummy Cheez Nugget!!
    Yummy Cheez Nugget!!
  • Kiss Me if You Dare Onion Dip

    mmmmm...onion dip
    mmmmm…onion dip

    If I’m completely honest, that mayo or sour cream based French onion dip (one package of dip mix plus a carton of sour cream, I think?) wasn’t something I made all that often or bought all that often in my pre-allergen days.  But I liked it at parties, and maybe that was enough for me back then?  I don’t know.

    But last year, I wanted onion dip.  With potato chips — salty, greasy, oniony madness.  I tried a few things, and when I still ate soy, tofu-based sour cream with a packet of stuff wasn’t too bad.  Some of the mixes are free of some allergens, but reading the ingredients so carefully is a real turn off, honestly.   So.  Onion dip.  Now that soy is out and I really don’t want to use a packaged mix, it was time to come up with a good substitute based as much as possible on real foods.

    Earth Balance, refugeof the dairy-free for decent, actually dairy-free margarine, has come out with a vegan AND soy-free mayonnaise!  You can read our review of this miracle HERE.  I am going to assume that this recipe will more-or-less work with regular mayo, or any of the vegan versions that contain soy.  It’s been tested only with Earth Balance mindful mayo because neither of us eat those others.

    As wonderful as the mayo substitute is, a dip based on mayo alone, to be eaten with thick, ridged greasy and salty potato chips seemed overkill, so the base of this is actually pureed canned cannellini beans, with mayo-sub added for creaminess.  The onion flavor comes from scallions and caramelized onions.  This is onion dip to revel in.  Even if it doesn’t photograph like anything other than a dip.

    Kiss Me if You Dare Onion Dip

    First, get on caramelizing your onions.  You want a softball-sized onion or two smaller ones, and if you can get a sweet onion (Maui, Vidalia, Walla Walla), it will be even better.  Cut it in quarters and slice it thinly.

    Heat about a tablespoon of olive oil in a large skillet over medium heat.  I always use my cast iron, which is 12 inches, and I need to do two rounds of this.  You want a good sloppy coat of oil over the bottom of the pan, heated until shimmering, and add only enough onions for a single layer.  Add a good sprinkle of salt, 1/2 teaspoon or so for my pan size.

    If you’ve never caramelized onions, it takes some time to do it right.  I could tell you all about it, but I’m going to kick you over to Slate, as Tom Socca’s already covered it.

    Set the onions aside to cool.  I do not drain the oil off, as this dip is supposed to be rich.

    Into your food processor (or blender, if you have a high powered one), add:

    • 1 can of cannellini beans, rinsed and drained
    • 1 scant cup of Earth Balance Mindful Mayo, original
    • 3-4 cloves of roasted garlic
    • 1-2 Tablespoons of lemon juice, fresh-squeezed if you can

    Spin it through the food processor until all smooth and well combined.  IF you are using a blender, I’d suggest doing the beans first, and then adding the mayo as a second step.

    Add the onions and pulse until they are chopped up and well mixed in to your dip.

    Dump dip into a serving bowl, and mix in about 1/4 cup of chopped scallions, green and light green parts only, reserving some for garnish if you wish.  Refrigerate for a few hours before serving with lots of salty potato chips.  Ruffles are my choice.

    a bit of onion dip left after the party
    a bit of onion dip left after the party

    Kiss Me if You Dare Onion Dip

    • 1 softball-sized sweet onion, quartered and sliced thin
    • 2 Tablespoons (+) olive oil (not extra-virgin) or canola oil
    • about 1 teaspoon kosher salt
    • 1 can of cannellini beans, rinsed and drained
    • 1 cup Earth Balance Mindful Mayo, original
    • 3-4 cloves of roasted garlic
    • 1-2 Tablespoons of freshly-squeezed lemon juice
    • 1 bunch of scallions, sliced thin, green and light green parts only

    Caramelize onions, then mix everything else in a food processor or high-speed blender, adding onions last, and garnishing with some of the green scallions if you remember.

    Enjoy!

  • Sheer Magic Spinach Dip

    Spinach Dip in a Bowl

    I found this recipe, which I’ve now modified to fit my tastes, on the back of a silken tofu package. I had bought a couple of packages of silken tofu to try as an egg replacement in brownies. Silken tofu might work for others in brownies but not for me, and since I had to now find something else to do with the extra silken tofu, I noticed the recipe on the back of the package and decided to try it. I think I’ve now got it just about where I want it. I know it won’t work for those of you who can’t do soy, but Mary Kate’s going to post an onion dip that’s fabulous and maybe you can throw some spinach in it.

    Spinach Dip

    • 1 – 12 ounce package of Mori-Nu Silken Lite Firm Tofu
    • 1/2 cup of Earth Balance Mindful Mayo (or regular mayonnaise if you can have eggs)
    • 1 package/envelope of French onion soup mix (check labels for possible dairy, I have better luck with a store brand for dairy free or make your own mix, here’s a recipe)
    • 1 – 10 ounce package of fresh spinach, steamed, cooled and squeezed dry
    • 2-3 medium green onions, about a 1/4 cup when chopped (use green part too)
    • 1 – 8 ounce can water chestnuts, coarsely chopped
    • 4 cloves of garlic minced or just process in food processor
    • Several splashes of Tabasco sauce to taste
    • Salt and pepper to taste

    Steam spinach in a covered container in the microwave with two tablespoons of water for approximately 5 minutes. Drain and when spinach is cool enough to touch, squeeze spinach dry, and place in fridge until cool.

    Drain tofu, and place in a food processor or blender with soup mix. Blend until smooth. Add mayo and garlic and blend, scraping down sides until all ingredients are well blended.  Add cooled spinach to blender or food processor and blend with short pulses until spinach is mixed in, but is still a bit chunky.  Then add the spring onions and the water chestnuts and do two short pulses just to mix it up, you don’t want the spring onions and water chestnuts obliterated, just mixed in.  (You could just put the spinach and tofu mixture, the spring onions and water chestnuts in a bowl and mix up with a spoon, if you want it chunkier).

    Remove mixture from food processor or blender and put it into a bowl.  Add Tabasco, salt and pepper to taste.  Refrigerate for at least an hour, but overnight is best to let the spices blend.

    Enjoy with veggies or chips 🙂

  • Ranch Dip Using a Cashew Base

    Ranch Dip Using a Cashew Base

    Ranch dressing. It’s one of those things that seems really, really hard to replace. And you miss that creaminess, salty, tart flavor, especially on salads, buffalo, wings, or just with a veggie tray at a party. When Mary Kate and I started this blog, we began a list of things we missed desperately (okay, so it was a spreadsheet divided up by category, but anyway). I don’t think ranch even made the list. I don’t think it was even something that we considered being able to replace. But while I was researching replacement mayo recipes, I came across a recipe on Yummly.com that used cashew nuts to make a ranch dressing. Mary Kate and I didn’t think the flavor profile was quite right, so we messed around a bit with the spices. It was one of our first real successes and even people who can have real ranch dressing seemed to be shocked at how much they liked it. And it’s really pretty easy. I know this recipe won’t help those of you who can’t have tree nuts, but we’re posting another ranch recipe that will help.

    Ranch Dip Using a Cashew Base

    • 1 1/4 cups cashews (raw, unsalted, and if you buy cashew pieces it’s cheaper)
    • 3/4 cup rice milk (original, unsweetened, or use rice milk powder following directions on container)
    • 1 tablespoon lemon juice
    • 1/3 cup cider vinegar
    • 1/3 cup extra virgin olive oil
    • 4 garlic cloves
    • 1 teaspoon garlic powder
    • 3 teaspoons onion powder
    • 1 teaspoon dill
    • 2 teaspoons salt
    • 1/2 teaspoon basil
    • 1/2 teaspoon of red bell pepper flakes.

    Grind cashews in spice grinder or coffee grinder, in small batches until the cashews are a nearly a powder, but not to the point they become a butter.

    Place the ground cashews and all remaining ingredients into a blender and blend until combined and until mixture thickens a bit. Taste mixture and adjust spices as needed. Let sit for a couple hours before serving and the flavors will develop and the mixture will thicken further.

    Some of the testers have found that this recipe does not hold up well overnight as it becomes more salty, but there’s been some debate about that. Also some of us preferred less salt and others preferred more. The recipe as written is using less salt.

    Let us know what you think 🙂

  • Latkes

    latke
    latke

    This season seems to be full of tradition on so very many levels, including food, food, and food.  I think this can make the holidays difficult for adults with newly diagnosed food allergies.  This was me last year — going to holiday gatherings where I could not safely eat anything.  Missing traditional foods, wanting to indulge, not wanting to ruin the holidays by eating the wrong thing and getting sick.  ARGH.

    Lucky for me, our only real family tradition is trying new things for the holidays.  Doesn’t mean I don’t miss some of the traditional cookies, but it does mean that I don’t feel left out of the traditions — in fact I now get to drive them

    How many foods are traditional celebratory foods that are also, in and of themselves, a reason for celebrating?  Well, if potatoes are your personal proof that there is some order in the universe?  Latkes are that food.

    Also, they are amazing.

    Traditionally served for Hanukkah, the symbolic importance of the latke is the oil in which the potatoes are fried, not the potatoes themselves.  Also traditionally, the potatoes are mixed with onions, flour, and eggs (though the flour doesn’t appear in every recipe, so traditions vary.  Here’s your primer, if you are interested in Chanukkah.  (See, even the spellings differ!)  Hanukkah is not as major of a holiday in the Jewish calendar as those who are not Jewish often think or assume, but it may have my favorite food traditions.

    The substitutes for the allergenic ingredients in latkes are pretty easy.  Instead of flour, potato starch works just fine.  Instead of eggs, ground flax or ground chia seeds, mixed with water, make a good stand in.  Ground flax gel will mix in easily.  Ground chia seeds require a little extra work, as the gel is a bit stiffer; massage it in and around the potatoes and you’ll be fine.

    Serve with applesauce, and you’re set.  I know this should likely be considered a side dish, but I eat it as a main dish because that’s the way I roll.

    This recipe is for a small batch, but double, triple, make as many as you can manage.

    latkes
    latkes

    Latkes

    • 2 medium baking potatoes potatoes
    • 1 baseball-sized onion
    • 3 Tablespoons potato starch
    • 1 Tablespoon chia seeds or flax seeds, ground, and added to 3 Tablespoons water (4 if using chia)
    • 1 teaspoon salt
    • canola oil, enough to thickly coat bottom of skillet
    • applesauce for serving

    Shred potatoes andIMG_0163 onion.  The photo to the left includes the Sharpie for scale.  I’d love to tell you how many pounds of potato to buy, but I hate those recipes as I never remember to weigh the potatoes and I don’t have a scale at home.

    Shredded, you should have 4 cups of vegetable matter.  If your food processor is like mine, pick out any big chunks of onion that somehow get through.


    Place the shredded veg in a colander lined with a large, thin clean dish towel.  This step is extremely annoying and extremely necessary.  Fold the towel over the top of the potatoes in the colander and press down with as much force as you can muster, multiple times.  When that seems to be done, twist the top of the towel and pick up the bundle and squeeze out more liquid.  Do this until it’s not very effective anymore (or, in essence, until you’ve squeezed out as much water as your strength allows).  I find that my hands aren’t extremely strong, so I push against the divider in my sink.

    step 1step 2step 3


    Put the oil in your skillet over medium heat about now.  Also turn your oven on to 200F so that you can keep the whole batch warm.

    Dump your well-squeezed shreds into a bowl, add the potato starch and chia egg (add a touch of water if you need to to get the chia gel mobile again), and salt.  Mix this really really thoroughly, making sure the starch and chia are spread all throughout the veg shreds.

    ground chia gel
    ground chia gel
    potato and onion shreds
    potato and onion shreds


    Now start making latkes.  Taking about 2 Tablespoons, make patties in your hands, flattening them out, and not worrying about the raggedy edges.  DO, however, worry about the tendency of hand-made patties to dome in the middle — work on making yours FLAT so they cook all the way through.  The mound-shaped ones are still edible, but not as good.  This does take practice, however, so be kind to yourself and remember that fried potatoes are fried potatoes and they are good.

    IMG_0173

    Lay patties down in the oil carefully.  If you’ve squeezed well, there won’t be a splatter of oil caused by water meeting the hot oil.  Watch the edges and when one side is browned, flip ’em.  Rinse and repeat.  When you get to the last batch or so, the mix will be wet.  Take your patty scoops and squeeze the water out before throwing them in the oil.

    Latkes
    Latkes


    Put the cooked latkes on a sheet pan and throw them in the oven until you’re done.  Serve with applesauce.

    Honestly, each time you make these, they get better.  The ingredients are so simple that their awesomeness is based on your technique, so keep practicing!  Only about a third of my latkes come out awesomely golden brown all over, evenly.  I blame my stove, but likely it’s at least partially my fault.  Guess I’ll have to keep practicing.  OH THE HARDSHIP!  (This is where a sarcasm font would come in handy).

    Do you have any tips for great latke making?

  • Easy Buffalo Wings (Two Versions, One Gluten Free)

    Why buffalo wings?  Because I love them, and I can’t eat them out anymore. Buffalo wing sauce is generally made with butter or margarine, and therefore contains milk. And depending on the particular restaurant, the breading may contain milk and they might use an egg to coat the chicken before breading it. And many restaurants use wings that are delivered to them already breaded/coated so they have no clue what’s in them unless they still have a box kicking around with the label on it. You can imagine just how much fun this conversation with restaurant servers would be and why it’s not even worth the bother to try – Oh, can you make me a special sauce that doesn’t contain any milk or milk products, and by the way, margarine contains dairy.  And even though you get the wings pre-breaded, can you find some wings that aren’t coated and cook them for me? Yeah, right. Not happening in this universe. Secondly, although I learned how to deep fry with a stockpot and a candy/frying thermometer while we were working on one of our recipes, I’m not frying on a work night and cleaning that up. So the recipe had to be baked. I started with this recipe and modified it to be dairy free, and then did a gluten-free version too, even though Mary Kate doesn’t really care for buffalo wings. The nice thing about this recipe is that you can take the cooked chicken wings and make any sauce you want and then coat them with it. So if you don’t like buffalo wings, experiment. Tell us what you used for alternate sauces.

    Easy Buffalo Wings (Dairy-free, BUT NOT gluten-free version)

    Easy Buffalo Wings (Dairy-free, BUT NOT gluten-free version)

    Wings and Coating:

    • 36 chicken wing pieces
    • 2 Tablespoons canola oil
    • 1 teaspoon salt or spicy seasoned salt, such as Penzey’s Spicy 4/S Salt or Slap Ya Mama Cajun Seasoning
    • 1 cup all-purpose flour
    • 1 teaspoon of Penzey’s Forward Seasoning (If you don’t have this, mix some black pepper, onion powder, paprika, garlic powder, and turmeric together to equal 1 teaspoon)

    Buffalo Wing Sauce:

    • 1 1/2 Tablespoons cider vinegar
    • 1/4 teaspoon cayenne pepper
    • 1/4 teaspoon crushed garlic
    • 1/4 teaspoon Worcestershire sauce
    • 1 teaspoon Tabasco sauce
    • 1/4 teaspoon salt
    • 6 Tablespoons Frank’s Red Hot
    • 6 Tablespoons Earth Balance Soy Free Vegan margarine
    Wings Coated on Baking Sheet
    Cooked Wings on Baking Sheet

    Preheat oven to 425 degrees F.  In a bowl toss the wings with the oil, and salt. Place flour and Forward seasoning into a gallon zip lock bag and seal closed.  Shake to evenly distribute flour and Forward seasoning.  Add a few wing pieces and shake to coat evenly. Remove wings from the bag, shaking off excess flour, and spread out evenly on oiled baking pan(s). Do not crowd. Repeat until all wings are coated. Bake for about 20-25 minutes, turn the wings over, and cook another 20-25 minutes, or until the wings are cooked through and browned.

    Sauce Ingredients in Saucepan
    Completed Buffalo Sauce

    While the wings are baking, mix all the ingredients for the sauce in a pan, and over low heat bring to a simmer, stirring occasionally, and then turn off.

    (more…)

  • Happy Layers Nacho Dip

    Happy Layers Nacho Dip
    Happy Layers Nacho Dip

    This is that layered Mexican dip that someone always brings to a potluck.  I don’t recall being a huge fan of it in the pre-diagnosis days, but it was one of the random things I really missed when I suddenly couldn’t have it.  This version is only 4 layers (no sour cream and no olives), but feel free to add the olives if that’s your scene.  Neither Denise nor I have found a good substitute for sour cream if you’re dairy and soy free (I liked the Tofutti when I still was eating soy).

    Two of the layers are adapted recipes — the nacho cheez is my final version of Joanne Stepaniak’s nacho cheese from  The Uncheese Cookbook.   Go check out the original and play around with it — it offers a lot of latitude in choice of flours and non-dairy milk.  This is one of my go-to comfort food recipes on work days now (the cheez alone, with chips, not this dip).  The red lentil “refried beans” are slightly adapted from Heather Van Vorous’ Eating for IBS.

    This was one of my first experiments for allergen-free cooking for parties, and I’m pretty happy with it.  Make sure to plan ahead — you need perfectly ripe avocados for this recipe, a bit soft, but not yet squishy.  Leftovers will keep for 4-5 days, but they do get a little squishy and the avocado will brown a little.  Just a little though, because of the layering.

    A note on formatting — this is how I write out recipes for myself, with ingredients grouped by step, not all at the beginning.  I find I’m less likely to get lost in the recipe this way.  I would love to know what you think of it.  I’ve put a full ingredient list at the bottom, for those of you who are traditionalists.

    Happy Layers Nacho Dip

    This is a four layer dip.  The recommended layer order is important to the structural integrity of the dish, as well as its freshness.

    Grease a 11×8 glass pan.

    Layer One: “Refried” Beans

    In saucepan, mix:

    red lentils
    red lentils
    • 1 cup red lentils, rinsed and sorted
    • 2 ¾ cups water
    • ½ teaspoon onion powder
    • ½ teaspoon garlic powder
    • ½ teaspoon cumin
    • 1 teaspoon chili powder
    • ½ teaspoon kosher salt

    Bring to boil.  Reduce heat to simmer.  Whisk occasionally, cooking until smooth consistency, about 40 minutes.

    "Refried" lentils
    “refried” lentils

    Let briefly cool, and then smooth into pan.  Let cool completely.  If you want to do this step the night before, go ahead.

    Layer Two: Guacamole

    Homemade Guacamole
    homemade guacamole

    Best to keep this one simple.  Smash together:

    • 2-3 ripe Haas avocados
    • large pinch of kosher salt
    • juice of ½ to 1 fresh lime (use your judgement — you want smooth, but not liquidy)

    You can use a potato masher, a pastry cutter, or a fork to smash avocados.  I prefer a fork.  You could use the large Florida avocados, if you get them, but I find them too often bad up here.  Could just be the distance.  They are enough bigger that you’d likely only need one.  Smooth guac over top of the beans in the pan.

    Layer Three: Nacho Cheeze

    In medium saucepan, over medium heat, whisk together:

    • ½ cup garbanzo bean flour
    • ½ cup nutritional yeast flakes
    • ½ teaspoon kosher salt
    • 1 ½ teaspoons chili powder
    • ½ teaspoon onion powder
    • ½ teaspoon smoky Spanish paprika (pimentón), or, if you do not have this, use regular paprika
    • ¼ teaspoon garlic powder
    • ¼ teaspoon dried mustard
    • 2 teaspoons dried oregano
    • ⅛ teaspoon cayenne pepper (more if you are Denise or just like it really hot)

    Whisk together all dry ingredients first.  Then add

    • ¼ cup olive oil

      Nacho Cheez dip in its primordial state
      Nacho Cheez dip in its primordial state

    Whisk together

    • Add 2 cups unsweetened rice milk

    Cook over medium heat until mixture reaches a boil and starts to thicken.

    • Add either fresh chopped cilantro or about 2 teaspoons (two cubes) of frozen herbs.

    Pour over the first two layers and smooth on carefully — getting sort of a seal of the cheez layer is what keeps the guacamole layer green.  Cover and chill.

    Top with a final layer of salsa just before serving — tomatillo salsa (the green one) highly recommended for flavor, but traditional red salsa provides more color contrast. Or hey, get festive like I did in the top photo, and attempt stripes! Note: Salsa is not easily constrained to your decorative purposes.

    Serve cold, with tortilla chips.

    Dip on Chips
    Happy Layer Nacho Dip on chips (with ominous camera shadow)

    Full Ingredients List in Traditional Cookbook Order:

    Refried Lentils
    1 cup red lentils, rinsed and sorted
    2 ¾ cups water
    ½ teaspoon onion powder
    ½ teaspoon garlic powder
    ½ teaspoon cumin
    1 teaspoon chili powder
    ½ teaspoon kosher salt

    Guacamole
    2-3 ripe Haas avocados
    large pinch of kosher salt
    juice of ½ to 1 fresh lime (use your judgement — you want smooth, but not liquidy)

    Nacho Cheez
    ½ cup garbanzo bean flour
    ½ cup nutritional yeast flakes
    ½ teaspoon kosher salt
    1 ½ teaspoons chili powder
    ½ teaspoon onion powder
    ½ teaspoon smoky Spanish paprika (pimentón), or, if you do not have this, use regular paprika
    ¼ teaspoon garlic powder
    ¼ teaspoon dried mustard
    2 teaspoons dried oregano
    ⅛ teaspoon cayenne pepper (more if you are Denise or just like it really hot)
    ¼ cup olive oil
    2 cups unsweetened rice milk
    2 teaspoons chopped cilantro (I use the convenient frozen cubes). Add more if you like.

    Jar of salsa for topping. Takes about 1/3 to 1/2 of a regular-sized jar.