Notice: Function _load_textdomain_just_in_time was called incorrectly. Translation loading for the wp-ultimate-recipe domain was triggered too early. This is usually an indicator for some code in the plugin or theme running too early. Translations should be loaded at the init action or later. Please see Debugging in WordPress for more information. (This message was added in version 6.7.0.) in /home/maryzahc/public_html/adultfoodallergies.com/wp-includes/functions.php on line 6121
denisedaniel – Page 9 – surviving the food allergy apocalypse (archive)

Author: denisedaniel

  • Apple Cake, Vegan and Gluten-Free

    Apple Cake, Vegan and Gluten-Free
    Apple Cake, Vegan and Gluten-Free

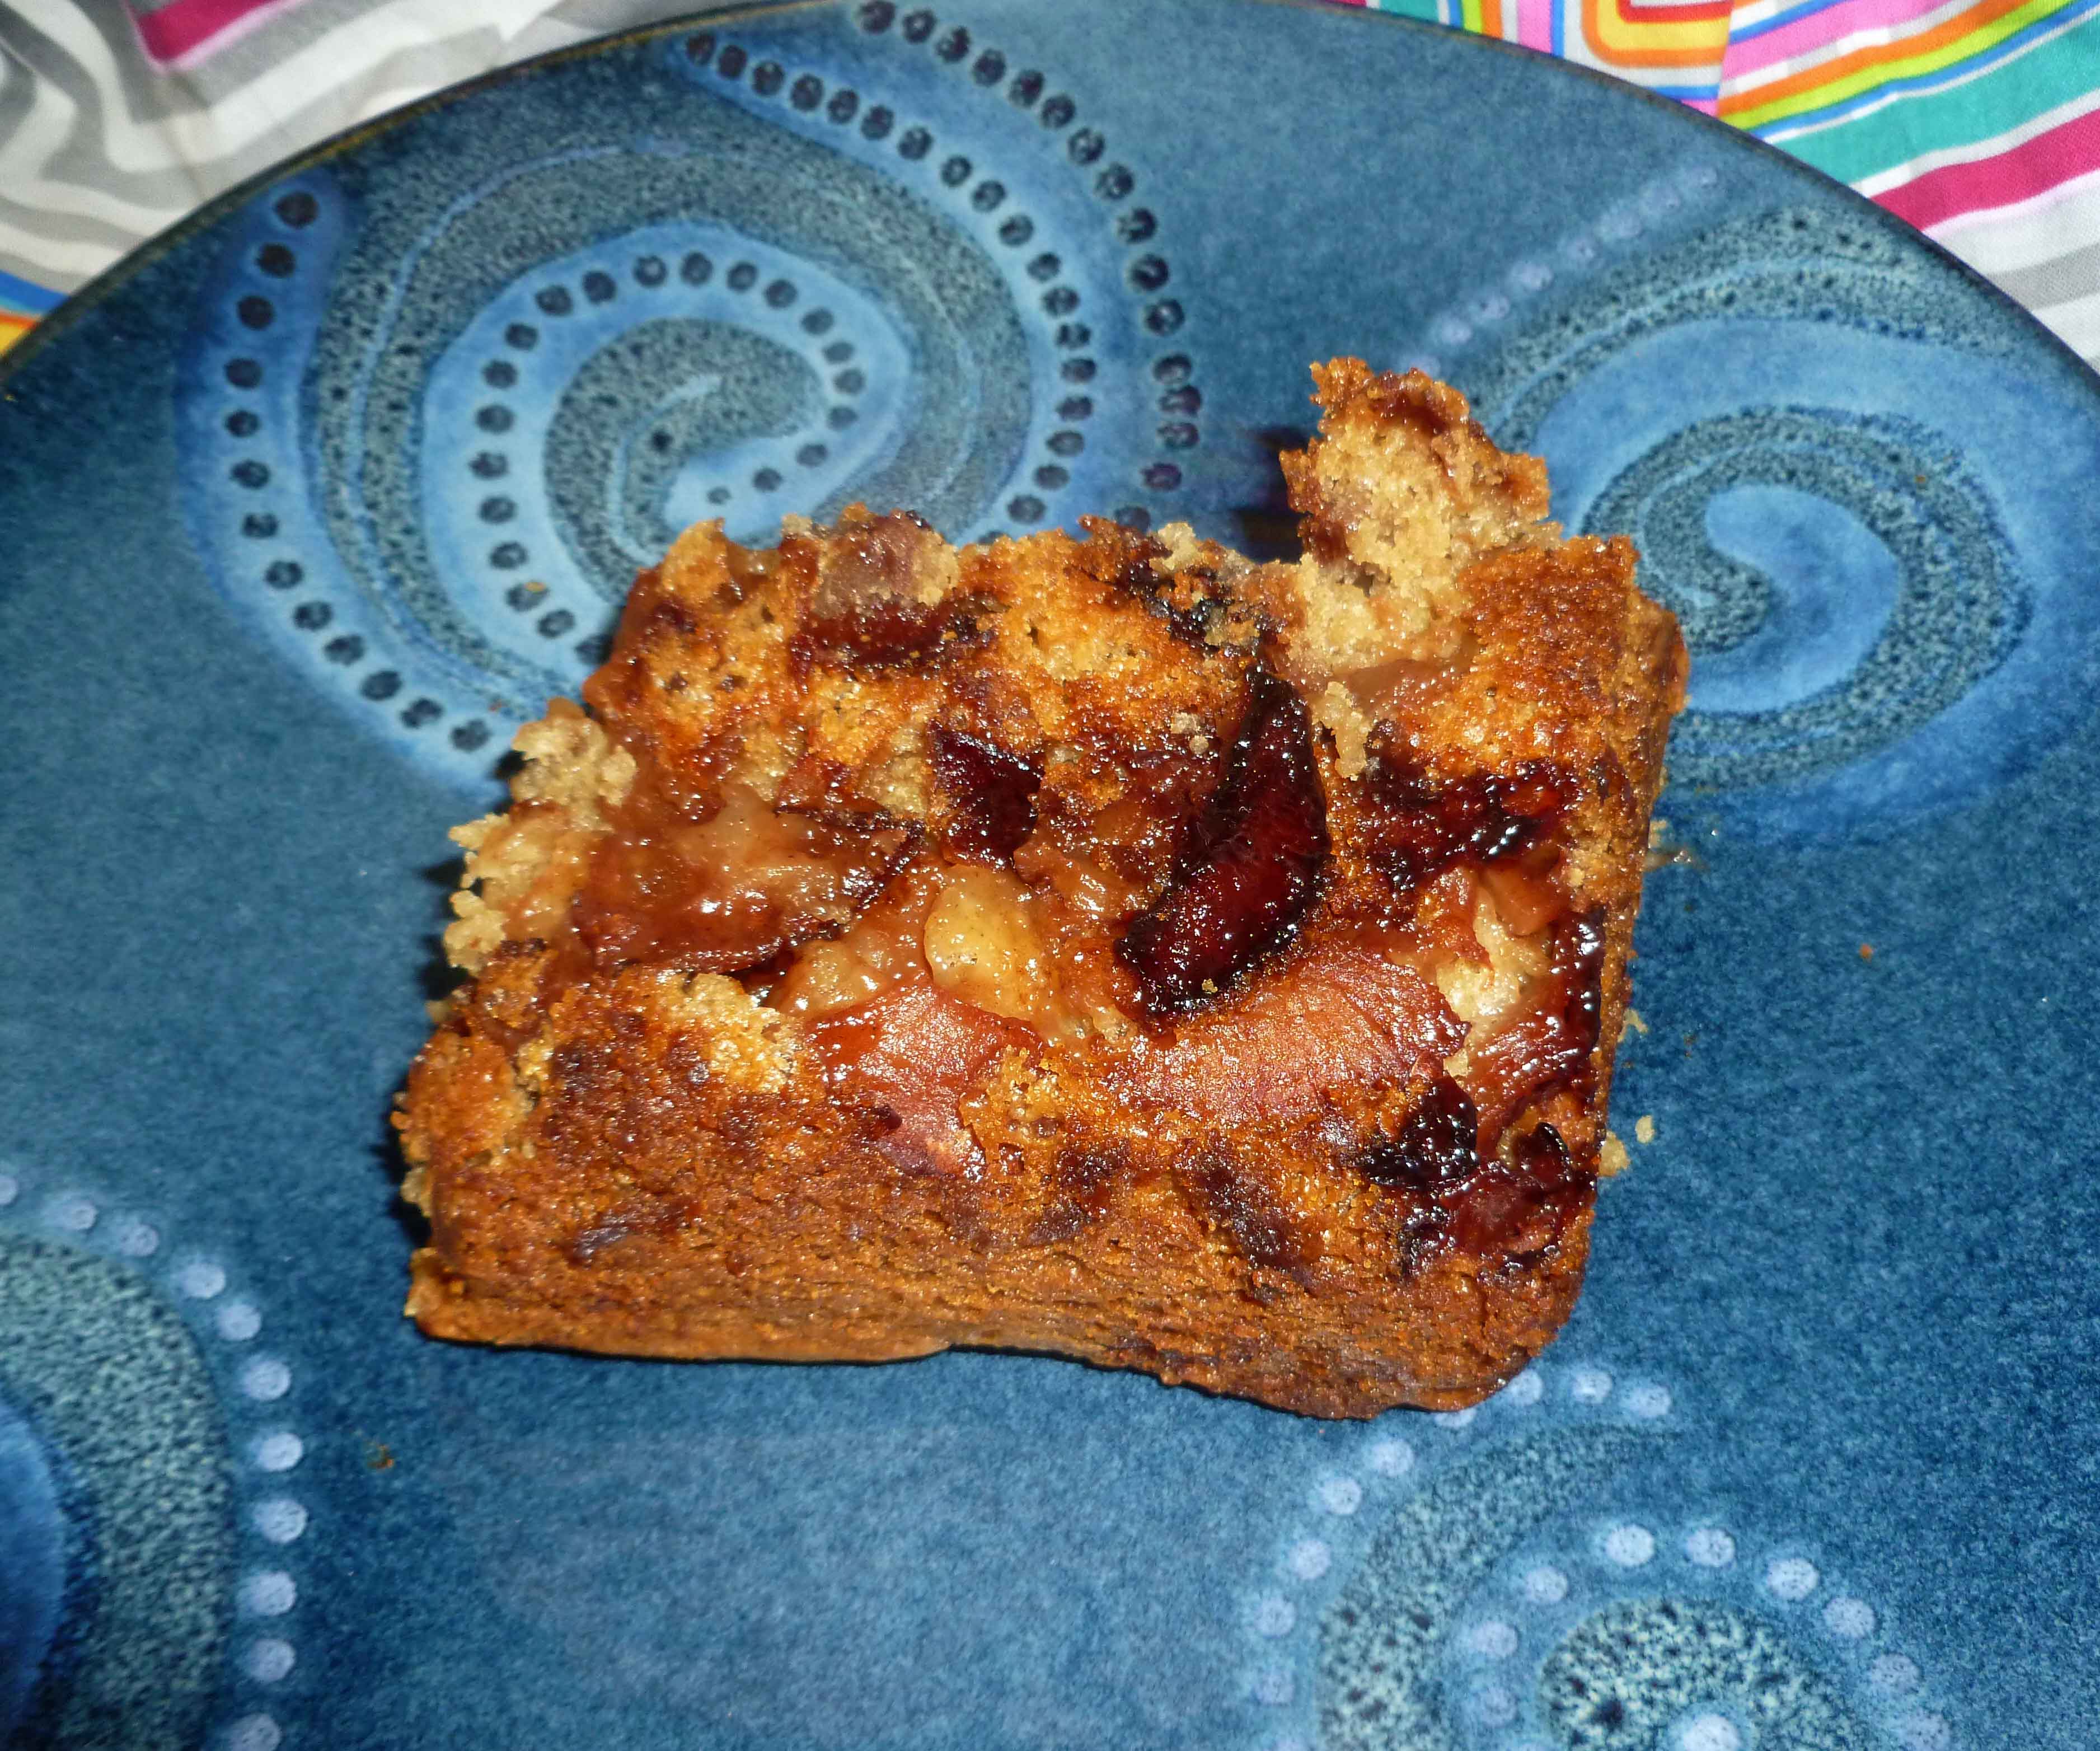
    You guys are noticing a trend, right? It’s apparently a bumper crop year for apples. When I was trying to figure out how to use up apples, my friend Erika sent me a link for this recipe for Mom’s Apple Cake from Smitten Kitchen. For obvious reasons, I had to change the original, and I tried making it more like an upside down cake.  It took a couple of tries, but I have it where I like it now.

    Apple Cake, Vegan and Gluten-Free

    Apple mixture:

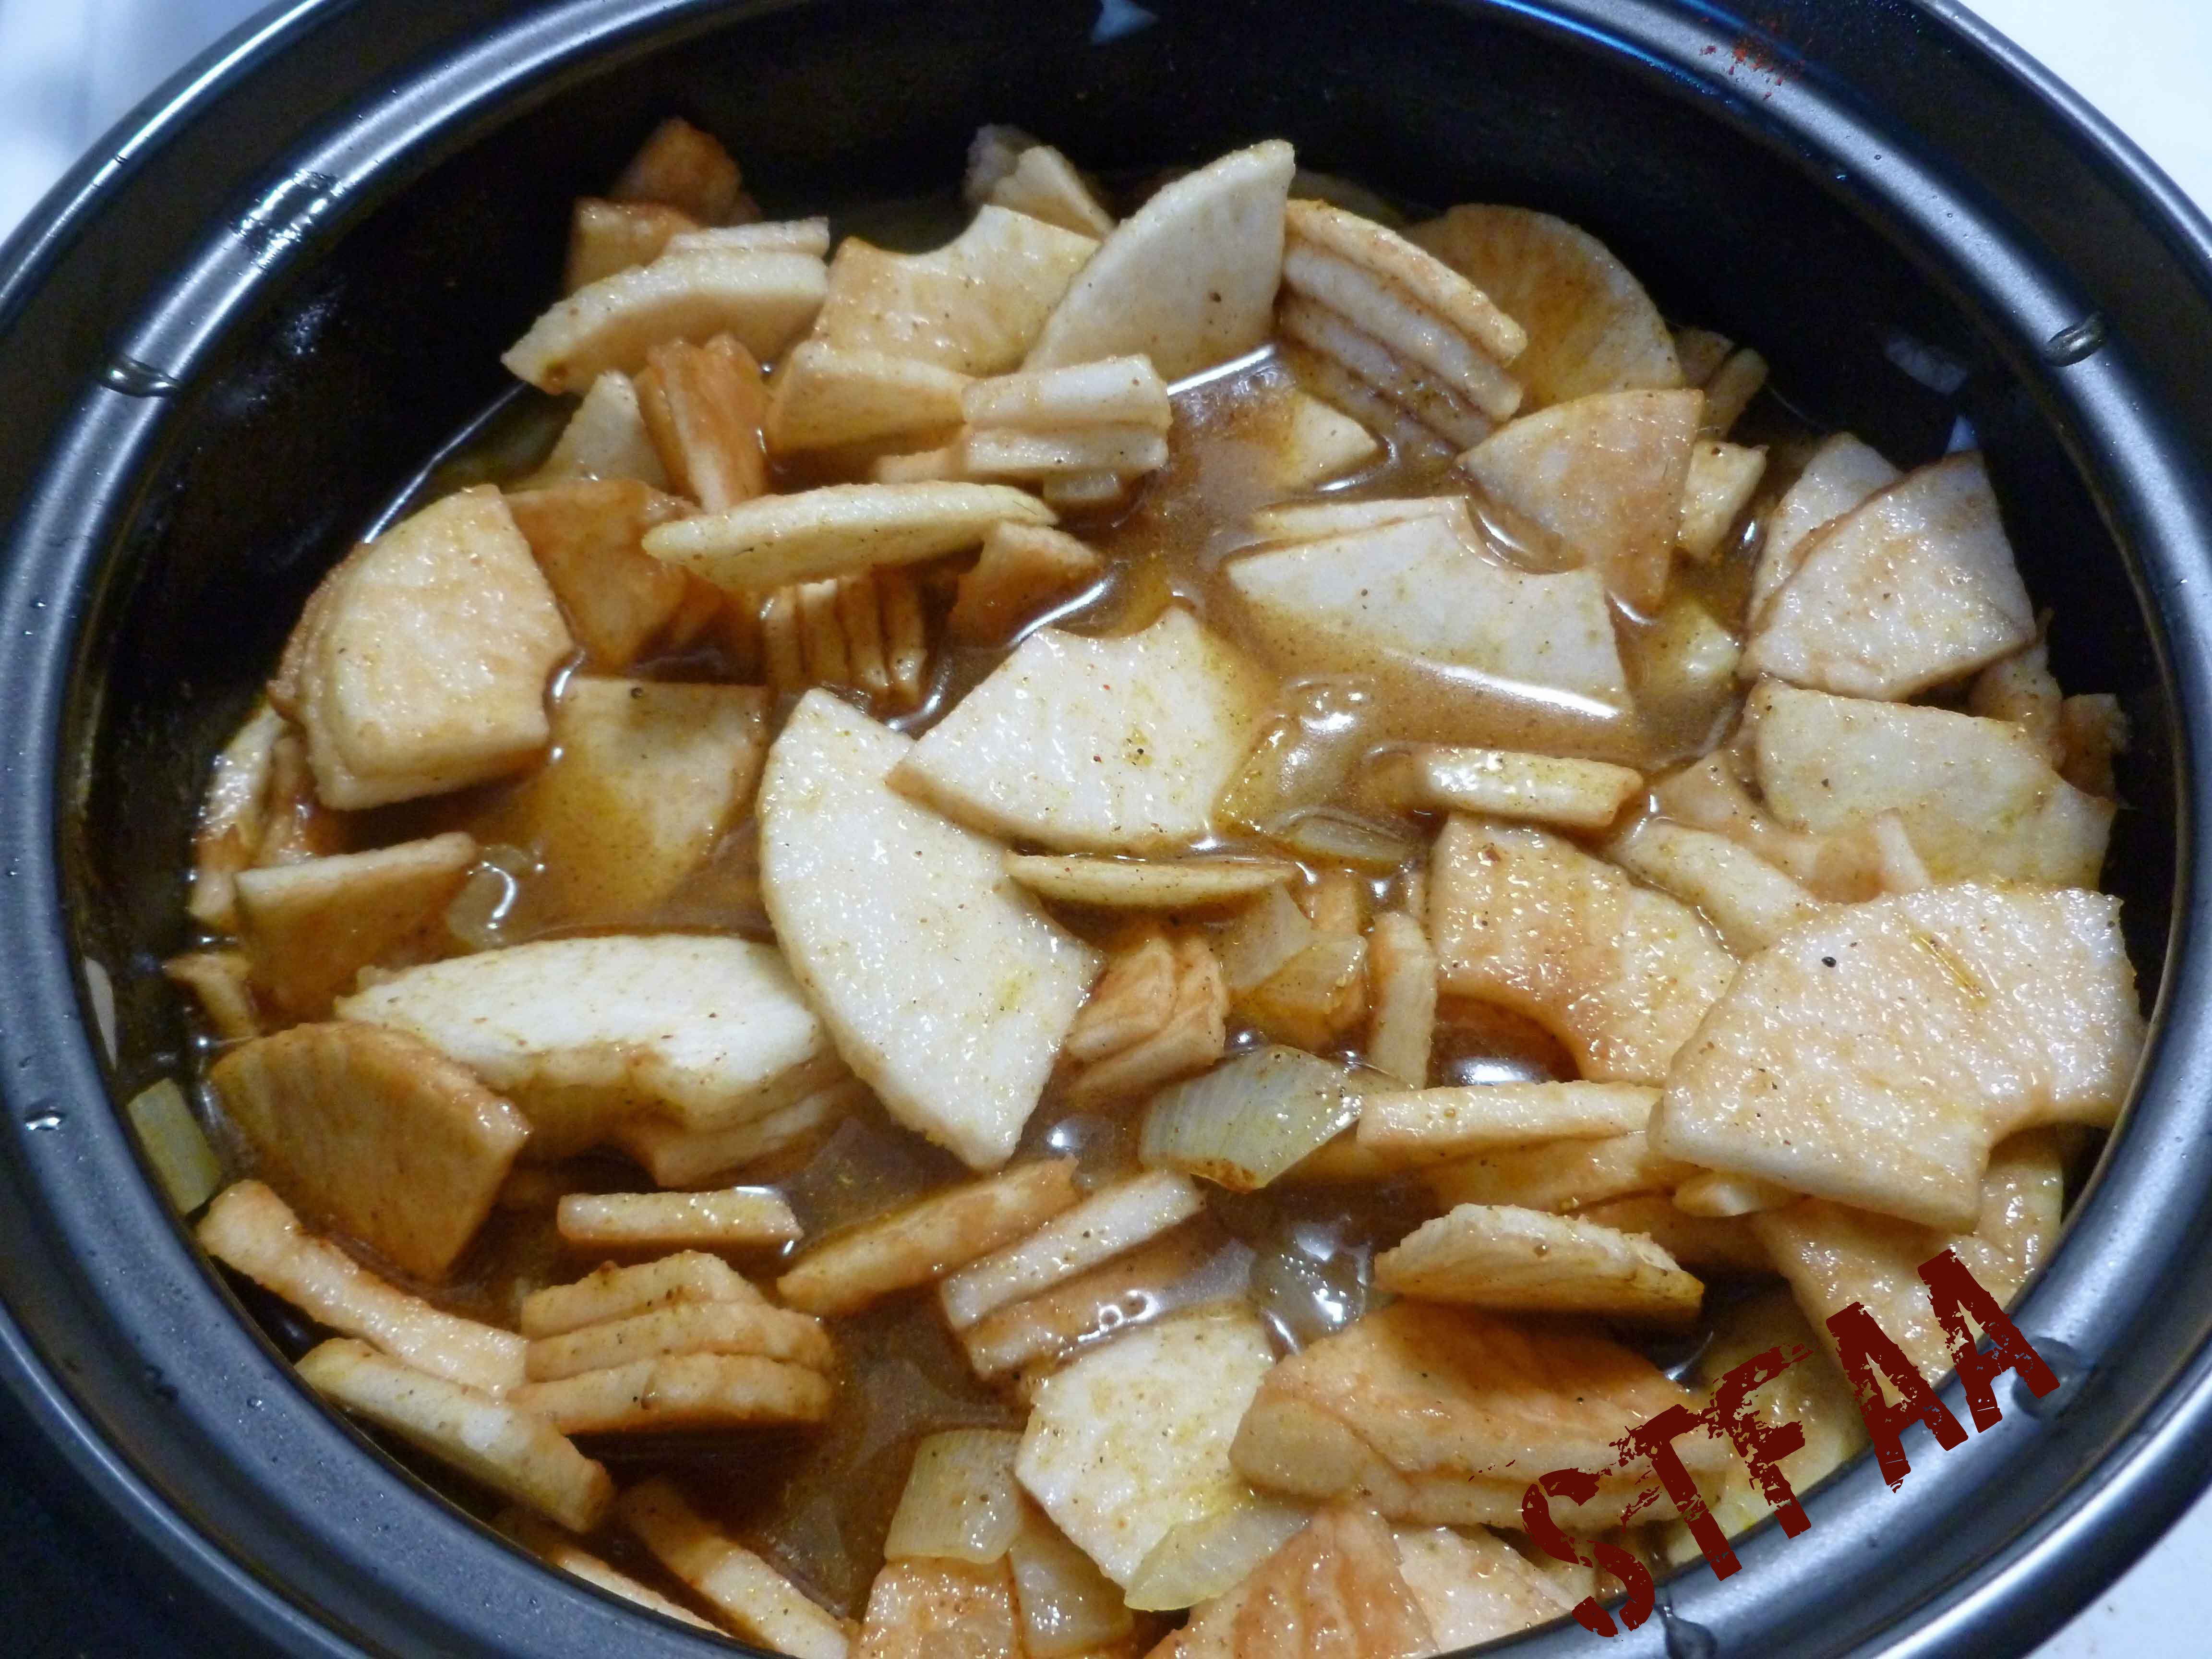
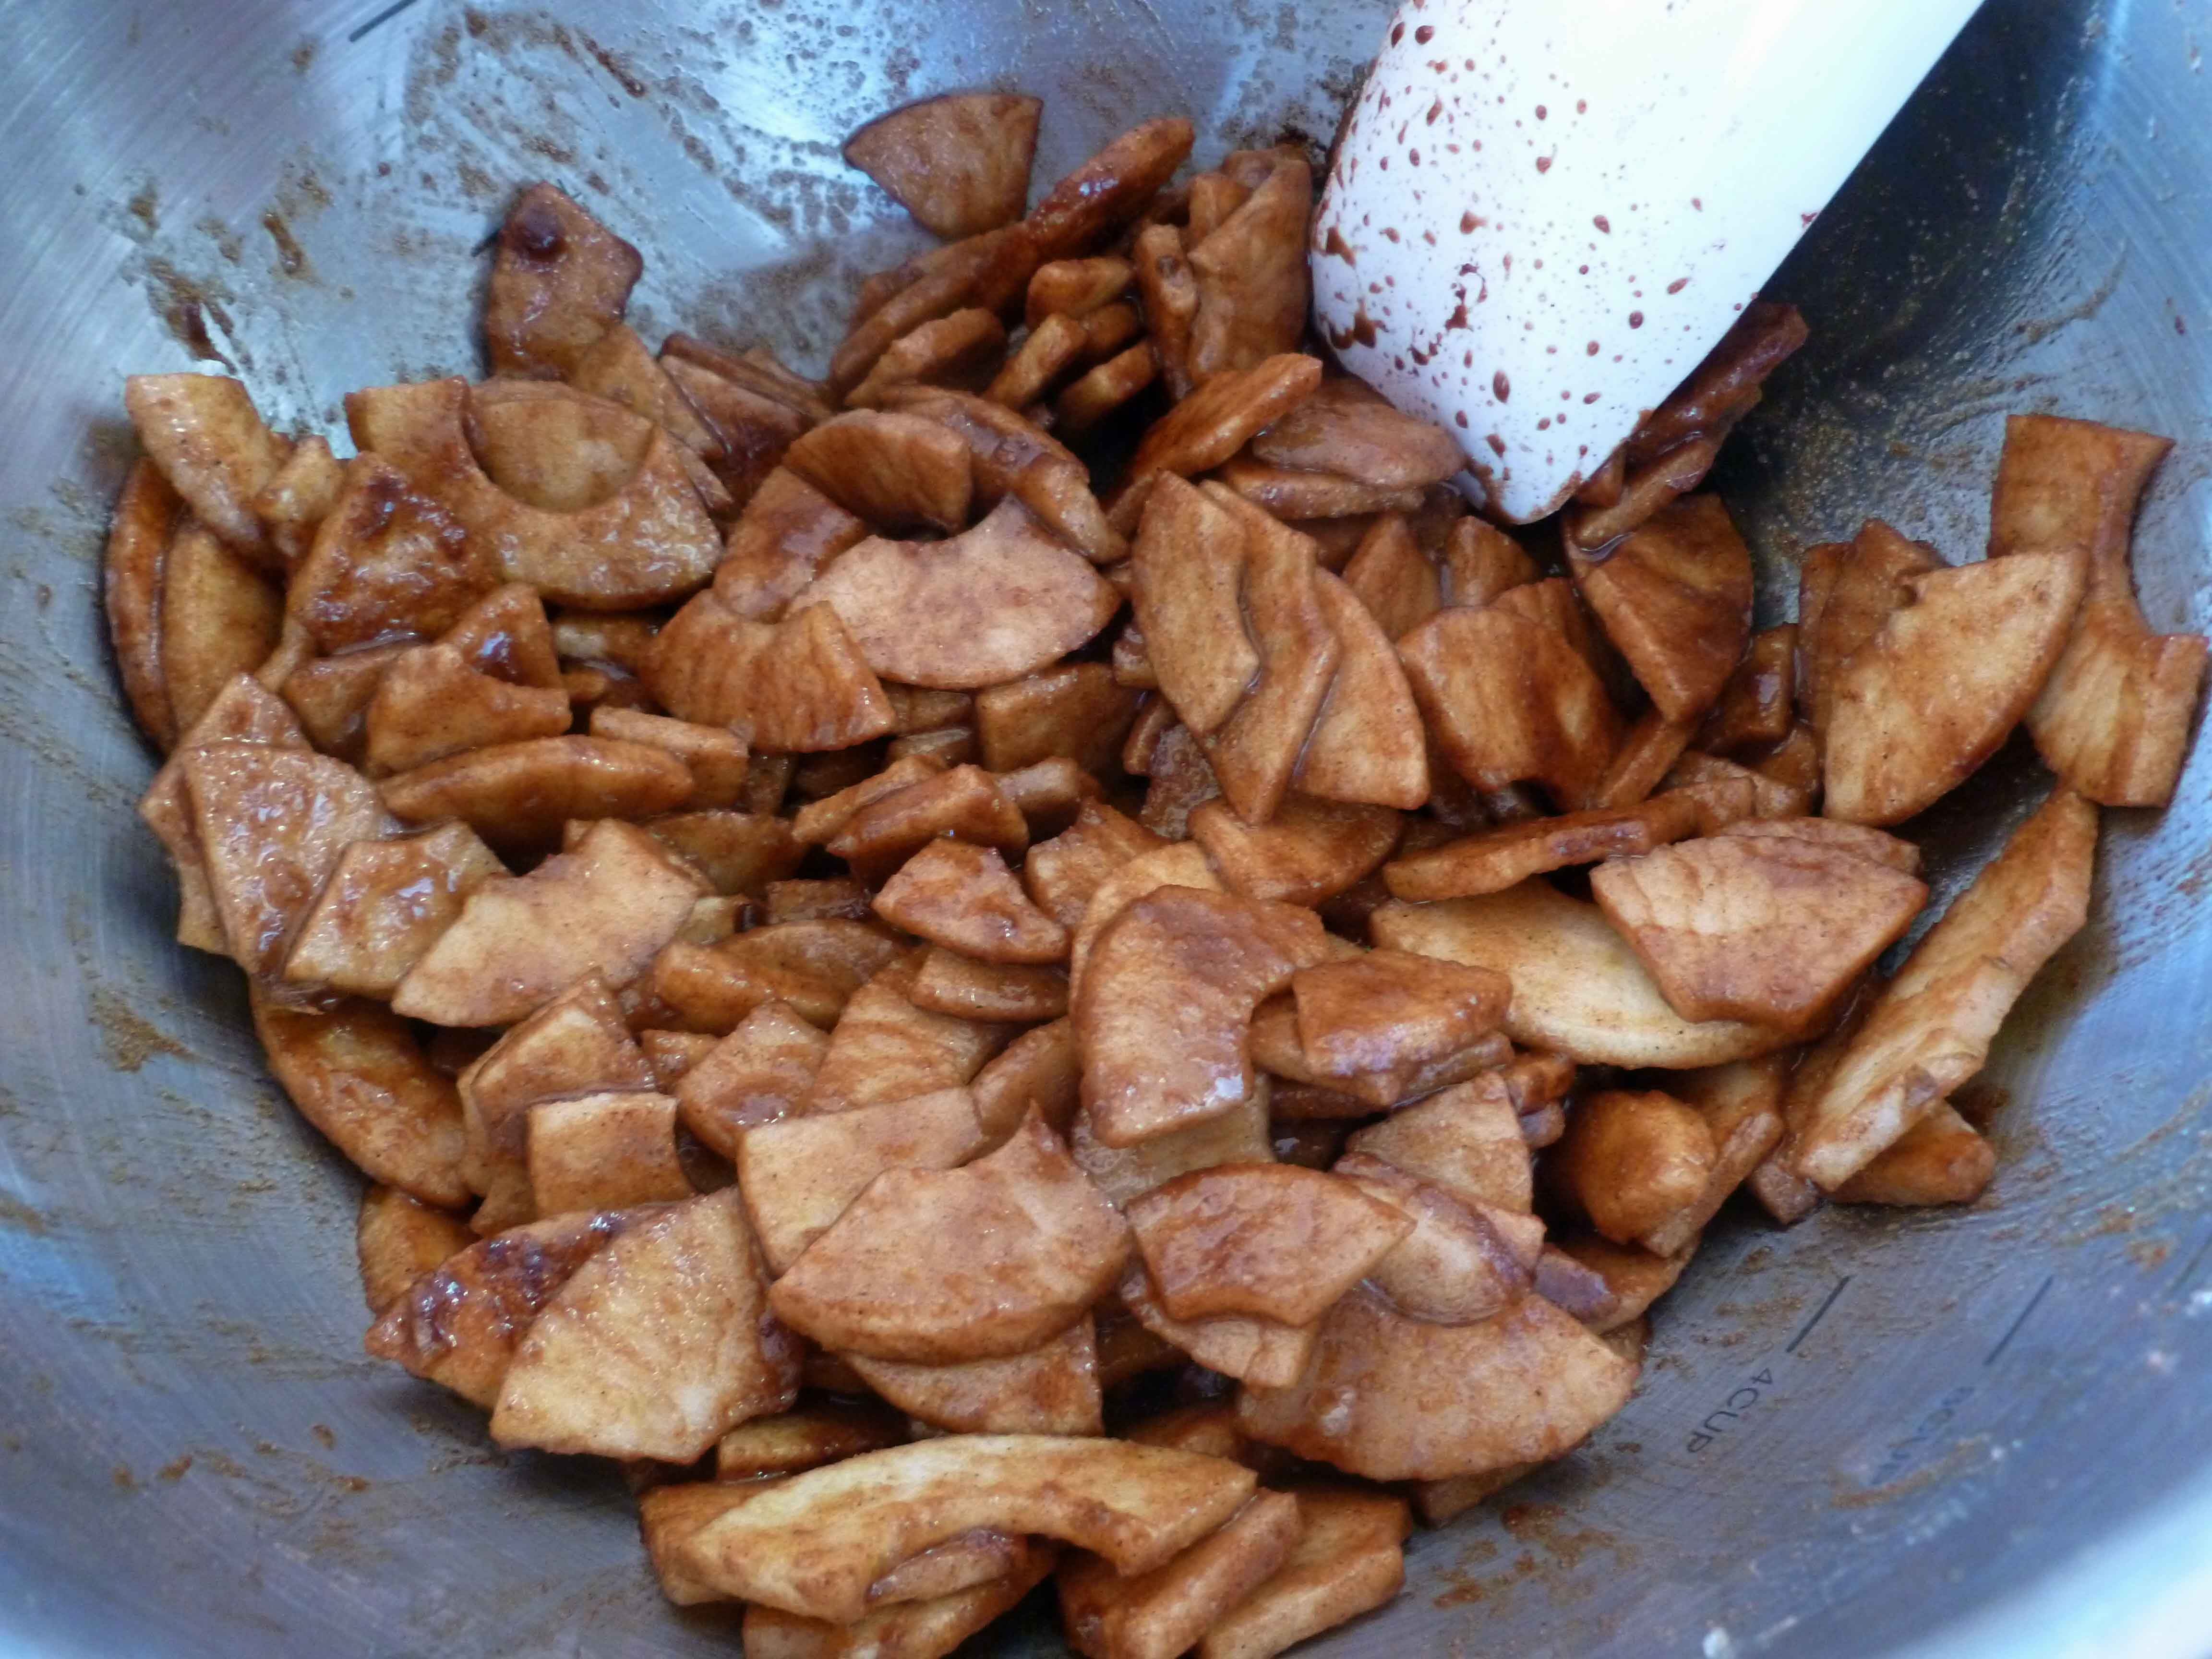
    • 6 large apples or 7 medium apples (I used a mix from my apple trees out back, mostly McIntosh and Galas.)
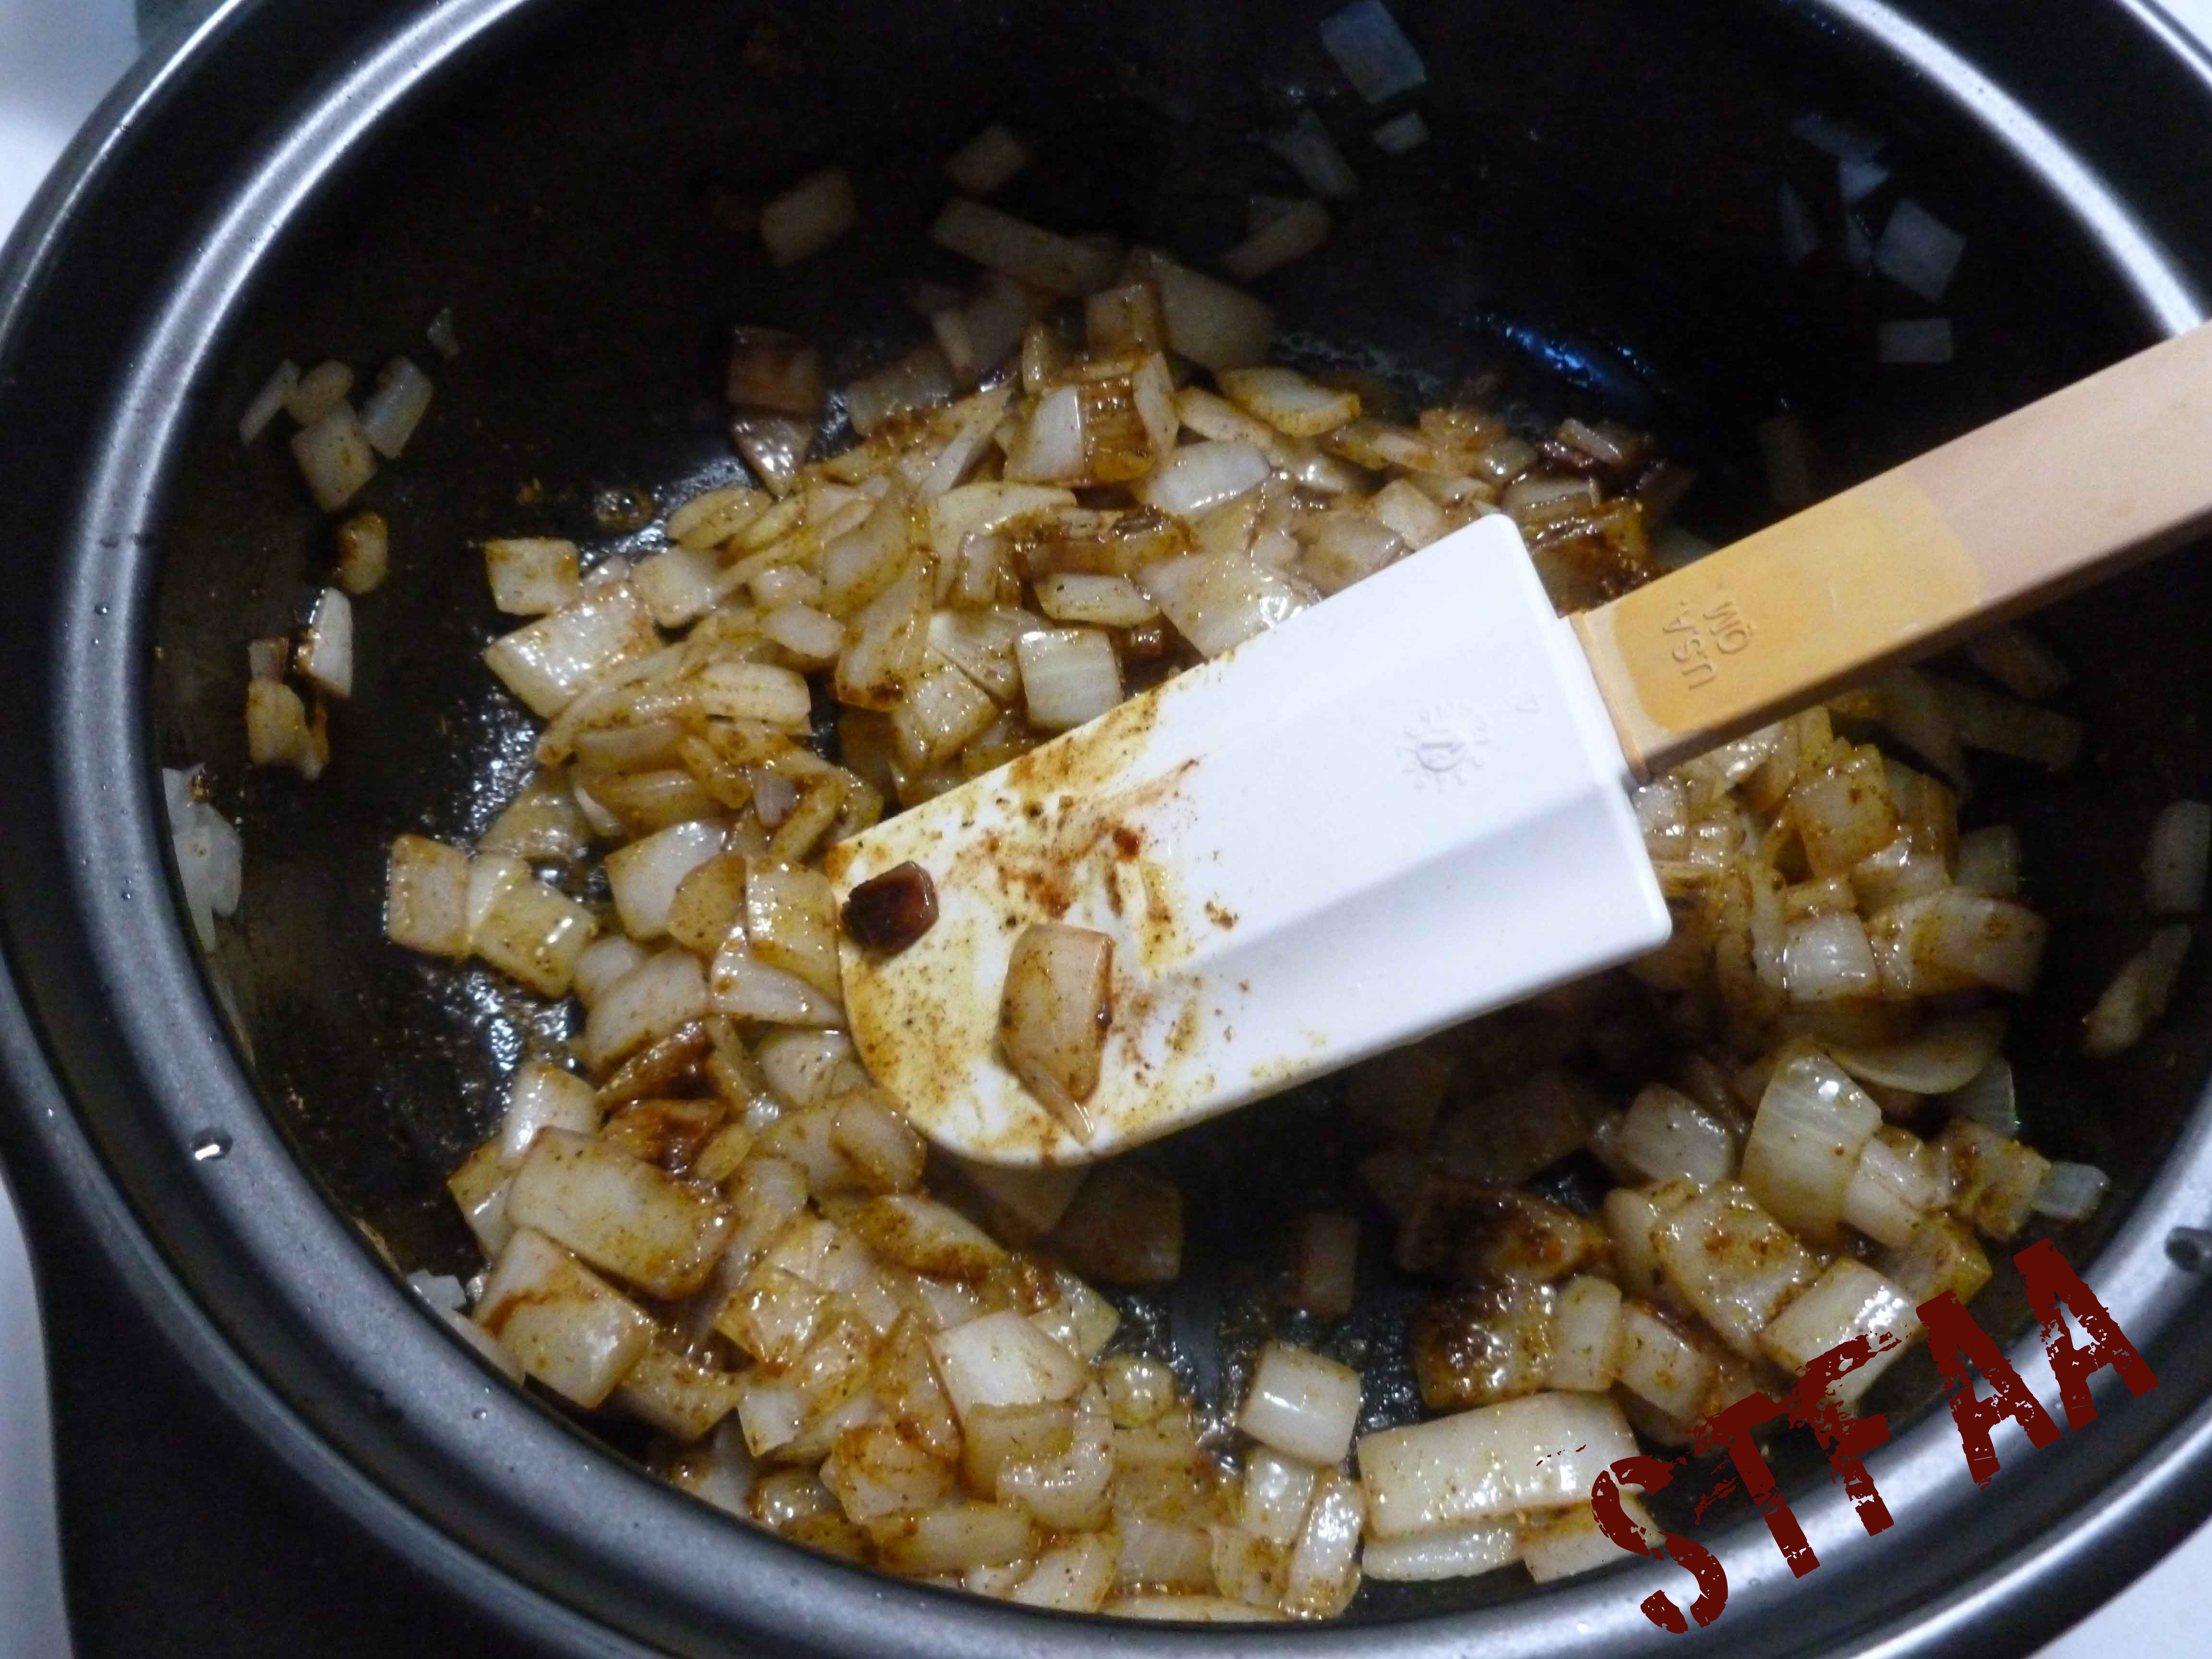
    • 1 Tablespoon of ground cinnamon
    • 5 Tablespoons of brown sugar

    Cake batter:

    • 2 and 3/4 cups of all purpose gluten-free flour mix (I used Cara Reed’s mix from her blog, Fork and Beans)
    • 1 Tablespoon of baking powder (For corn free baking powder you can use this recipe.)
    • 1 teaspoon of salt
    • 1 cup of safe for you oil (I used olive oil and grape seed oil, mostly because I ran out of olive oil and had to top it off with grape seed oil.) 
    • 1 cup of sugar
    • 1 cup of brown sugar
    • 1/4 cup of orange juice (I don’t have a safe orange juice so I squeezed mine myself.)
    • 1 Tablespoon vanilla extract (Here’s a bunch of recipes for vanilla extract, make sure to use safe alcohol if corn or wheat are an issue for you. I used a vodka made only from potatoes,  be careful as some vodkas may also use grain or corn.)
    • 1/2 cup of applesauce (I used my home canned but use any safe applesauce you have.)
    • 1/4 cup of aquafaba (The liquid from a can of garbanzo beans or chick peas. I used my home canned garbanzo bean liquid.)
    • 1 Tablespoon of ground chia seed

    Preheat oven to 350°F. Grease an 8 inch by 8 inch baking pan with some safe for you oil.

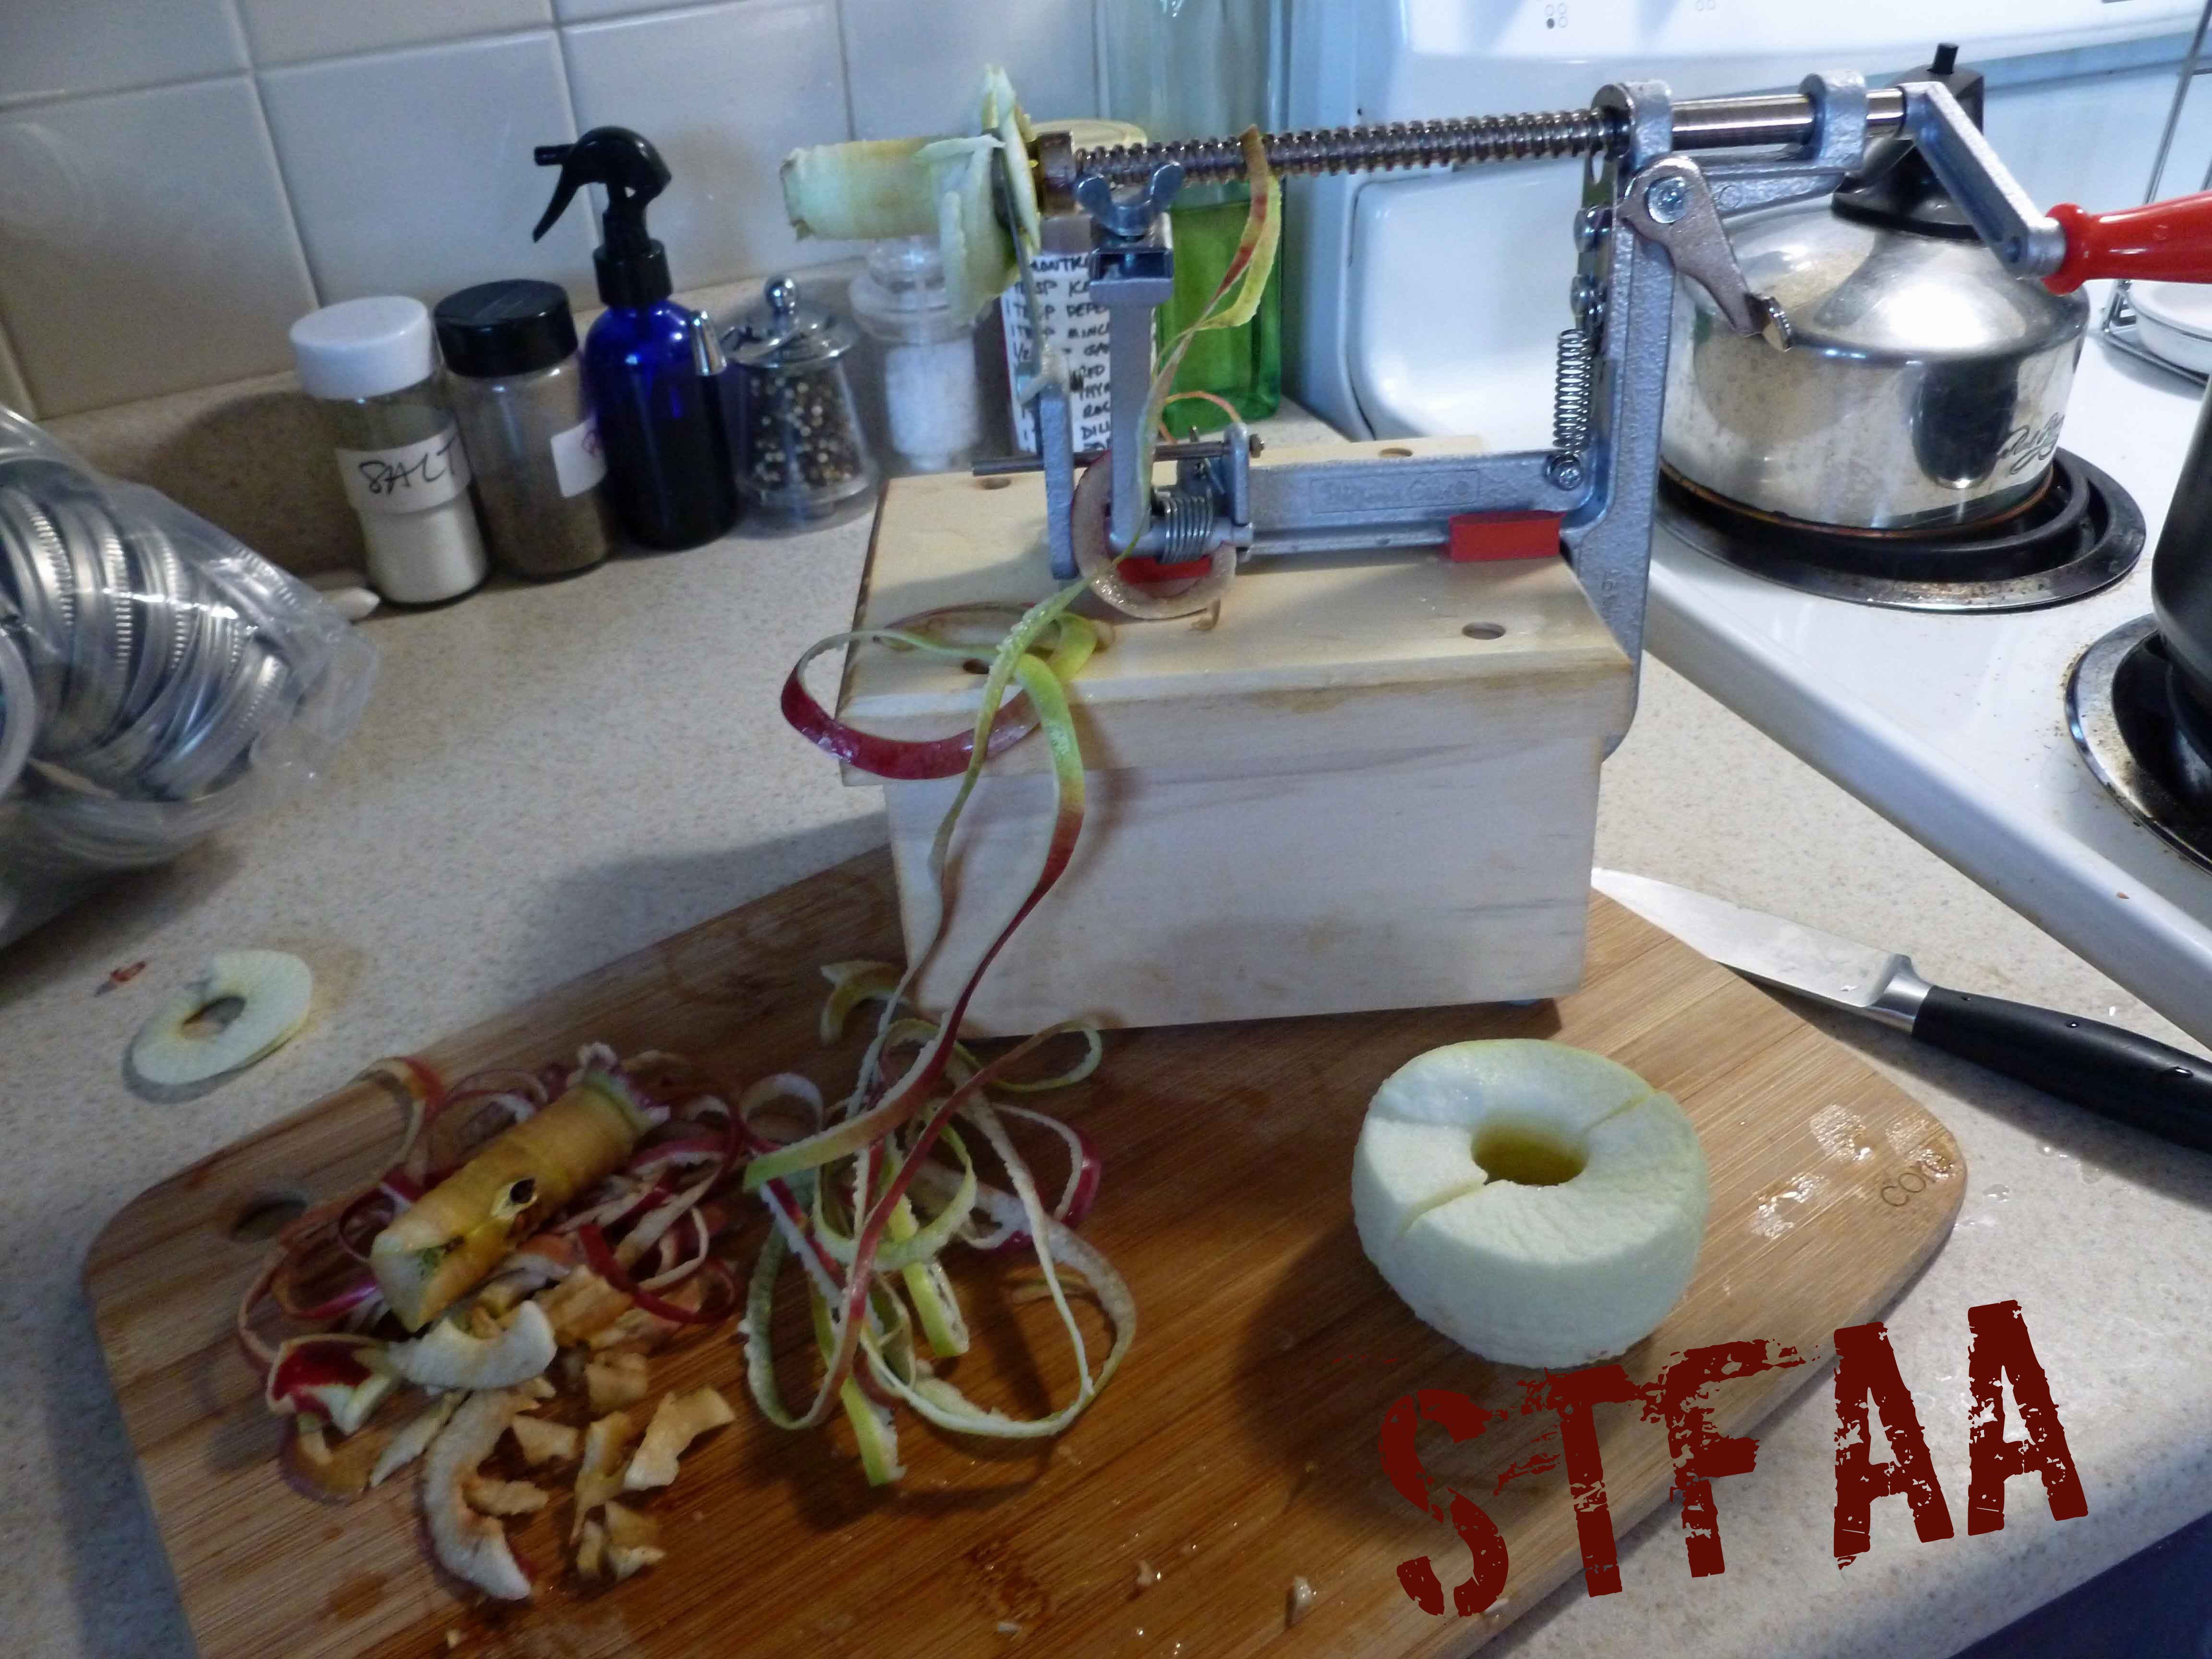
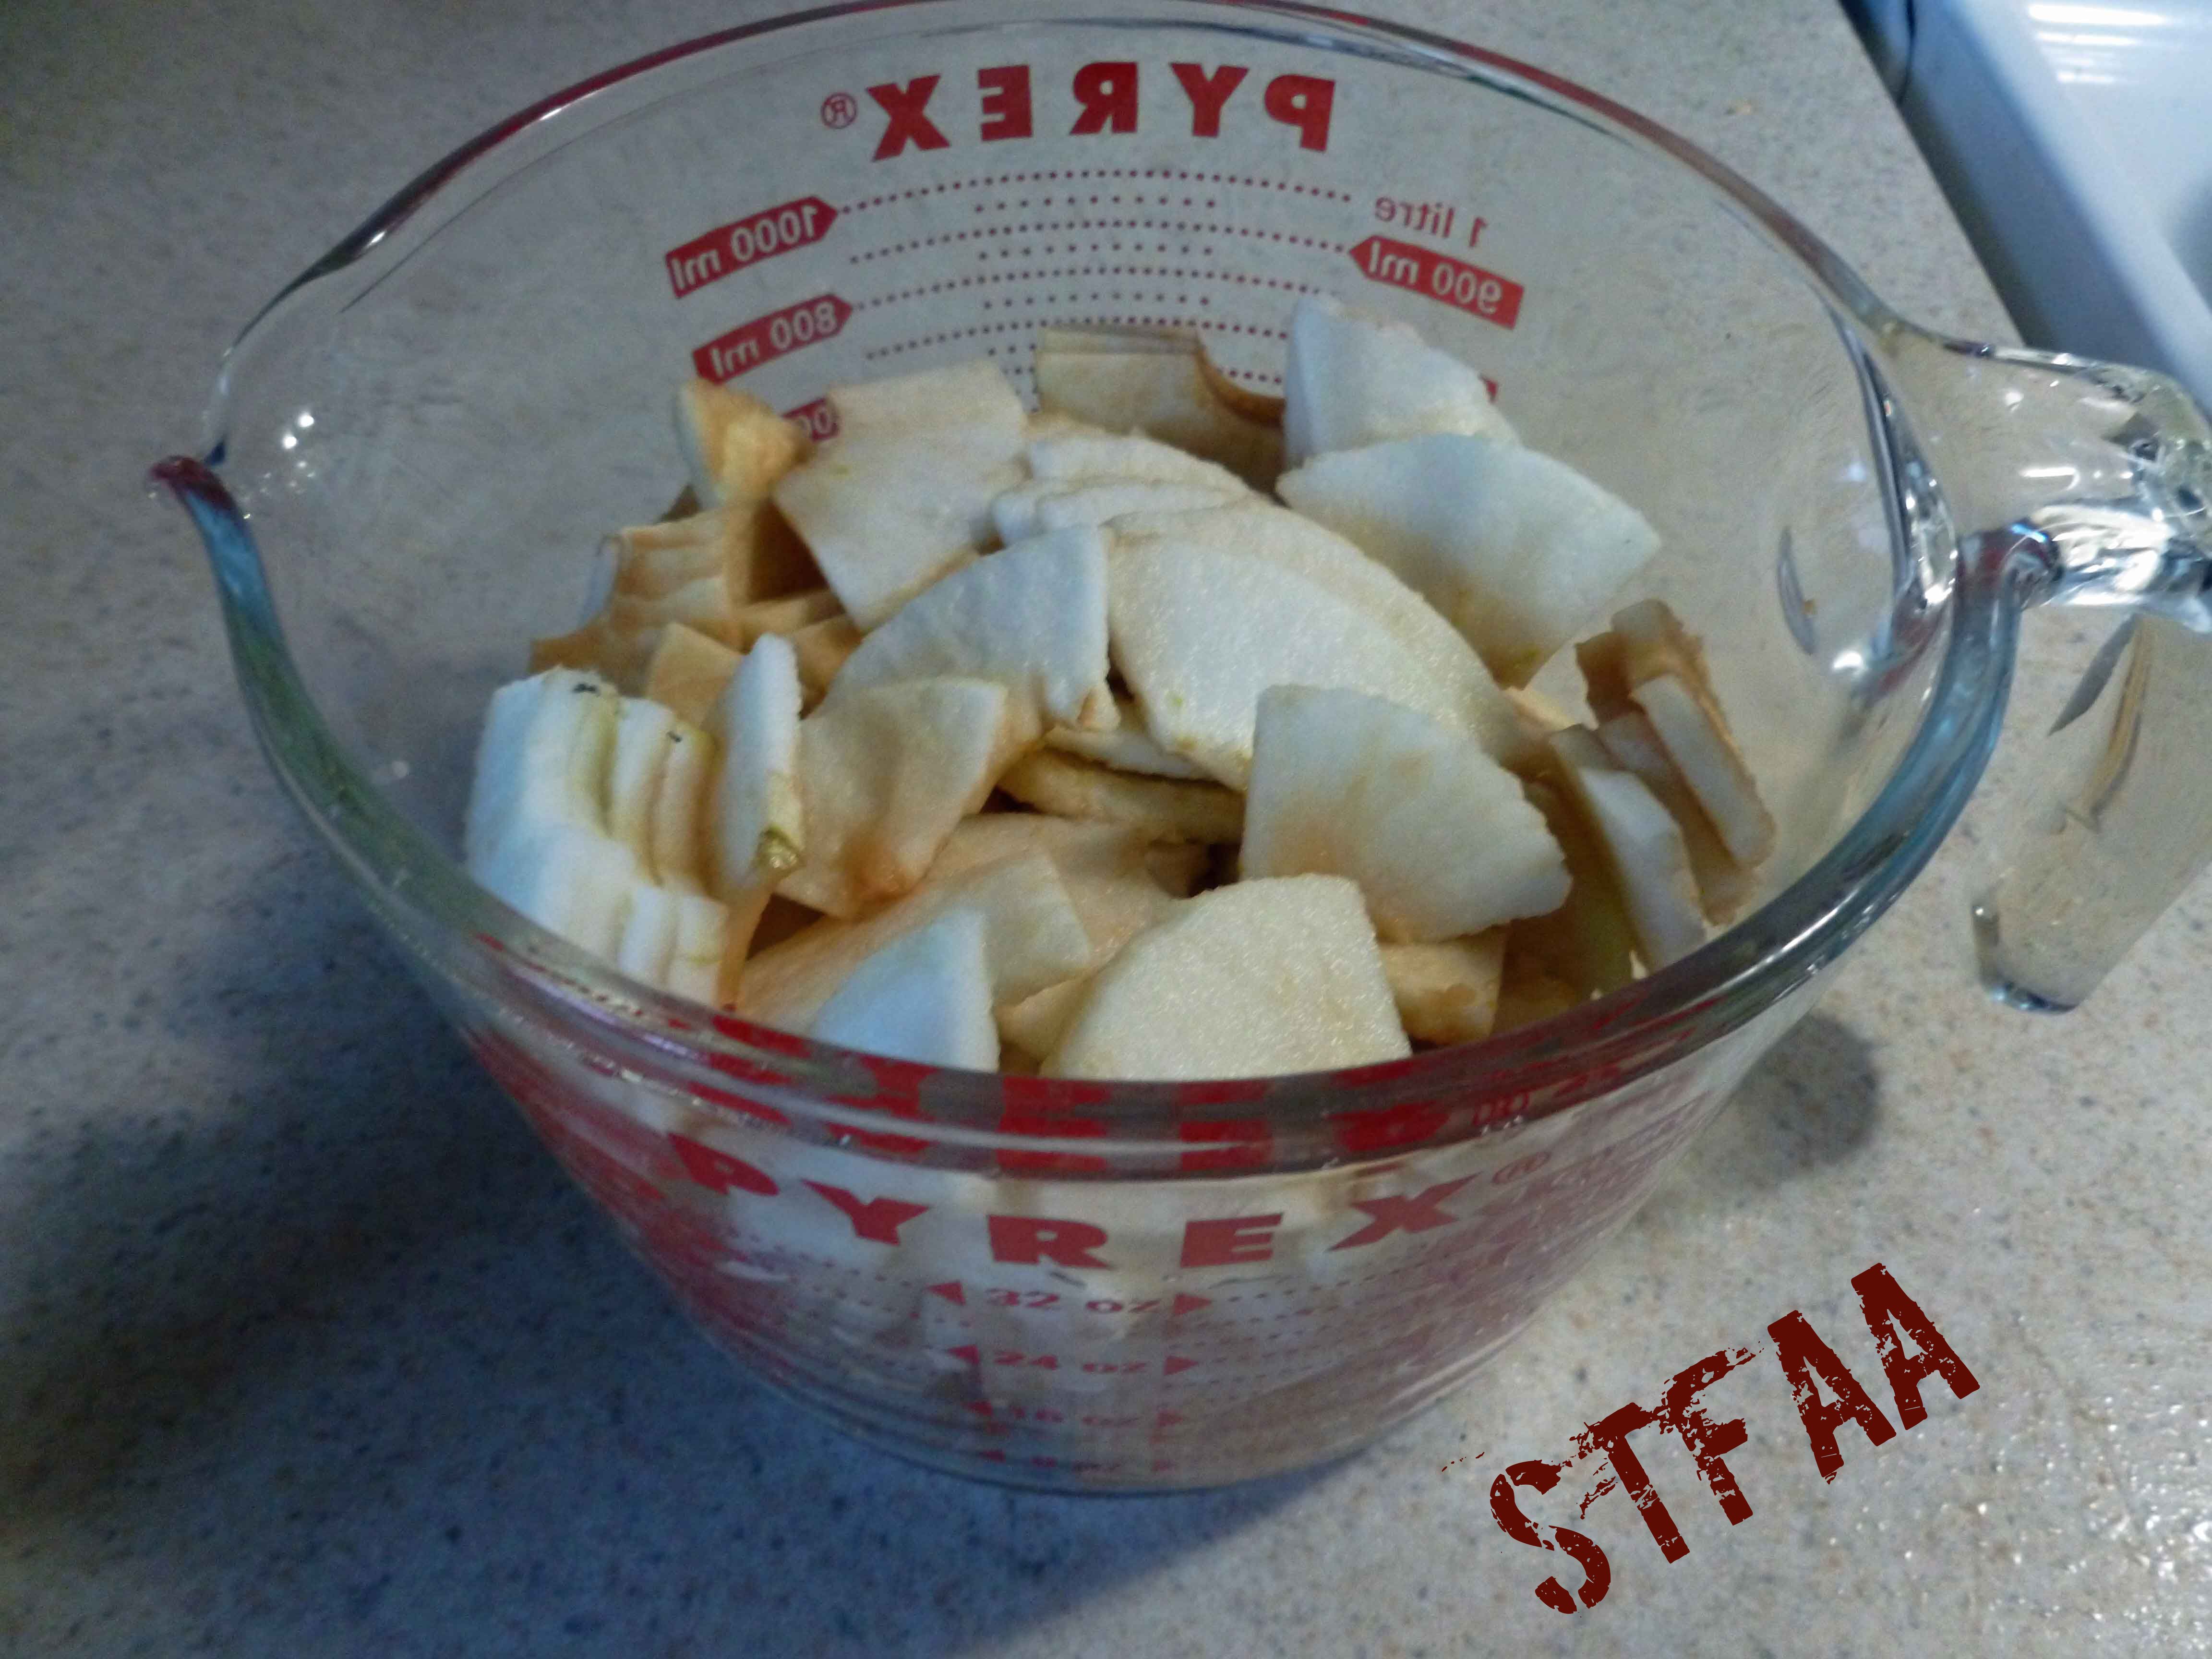
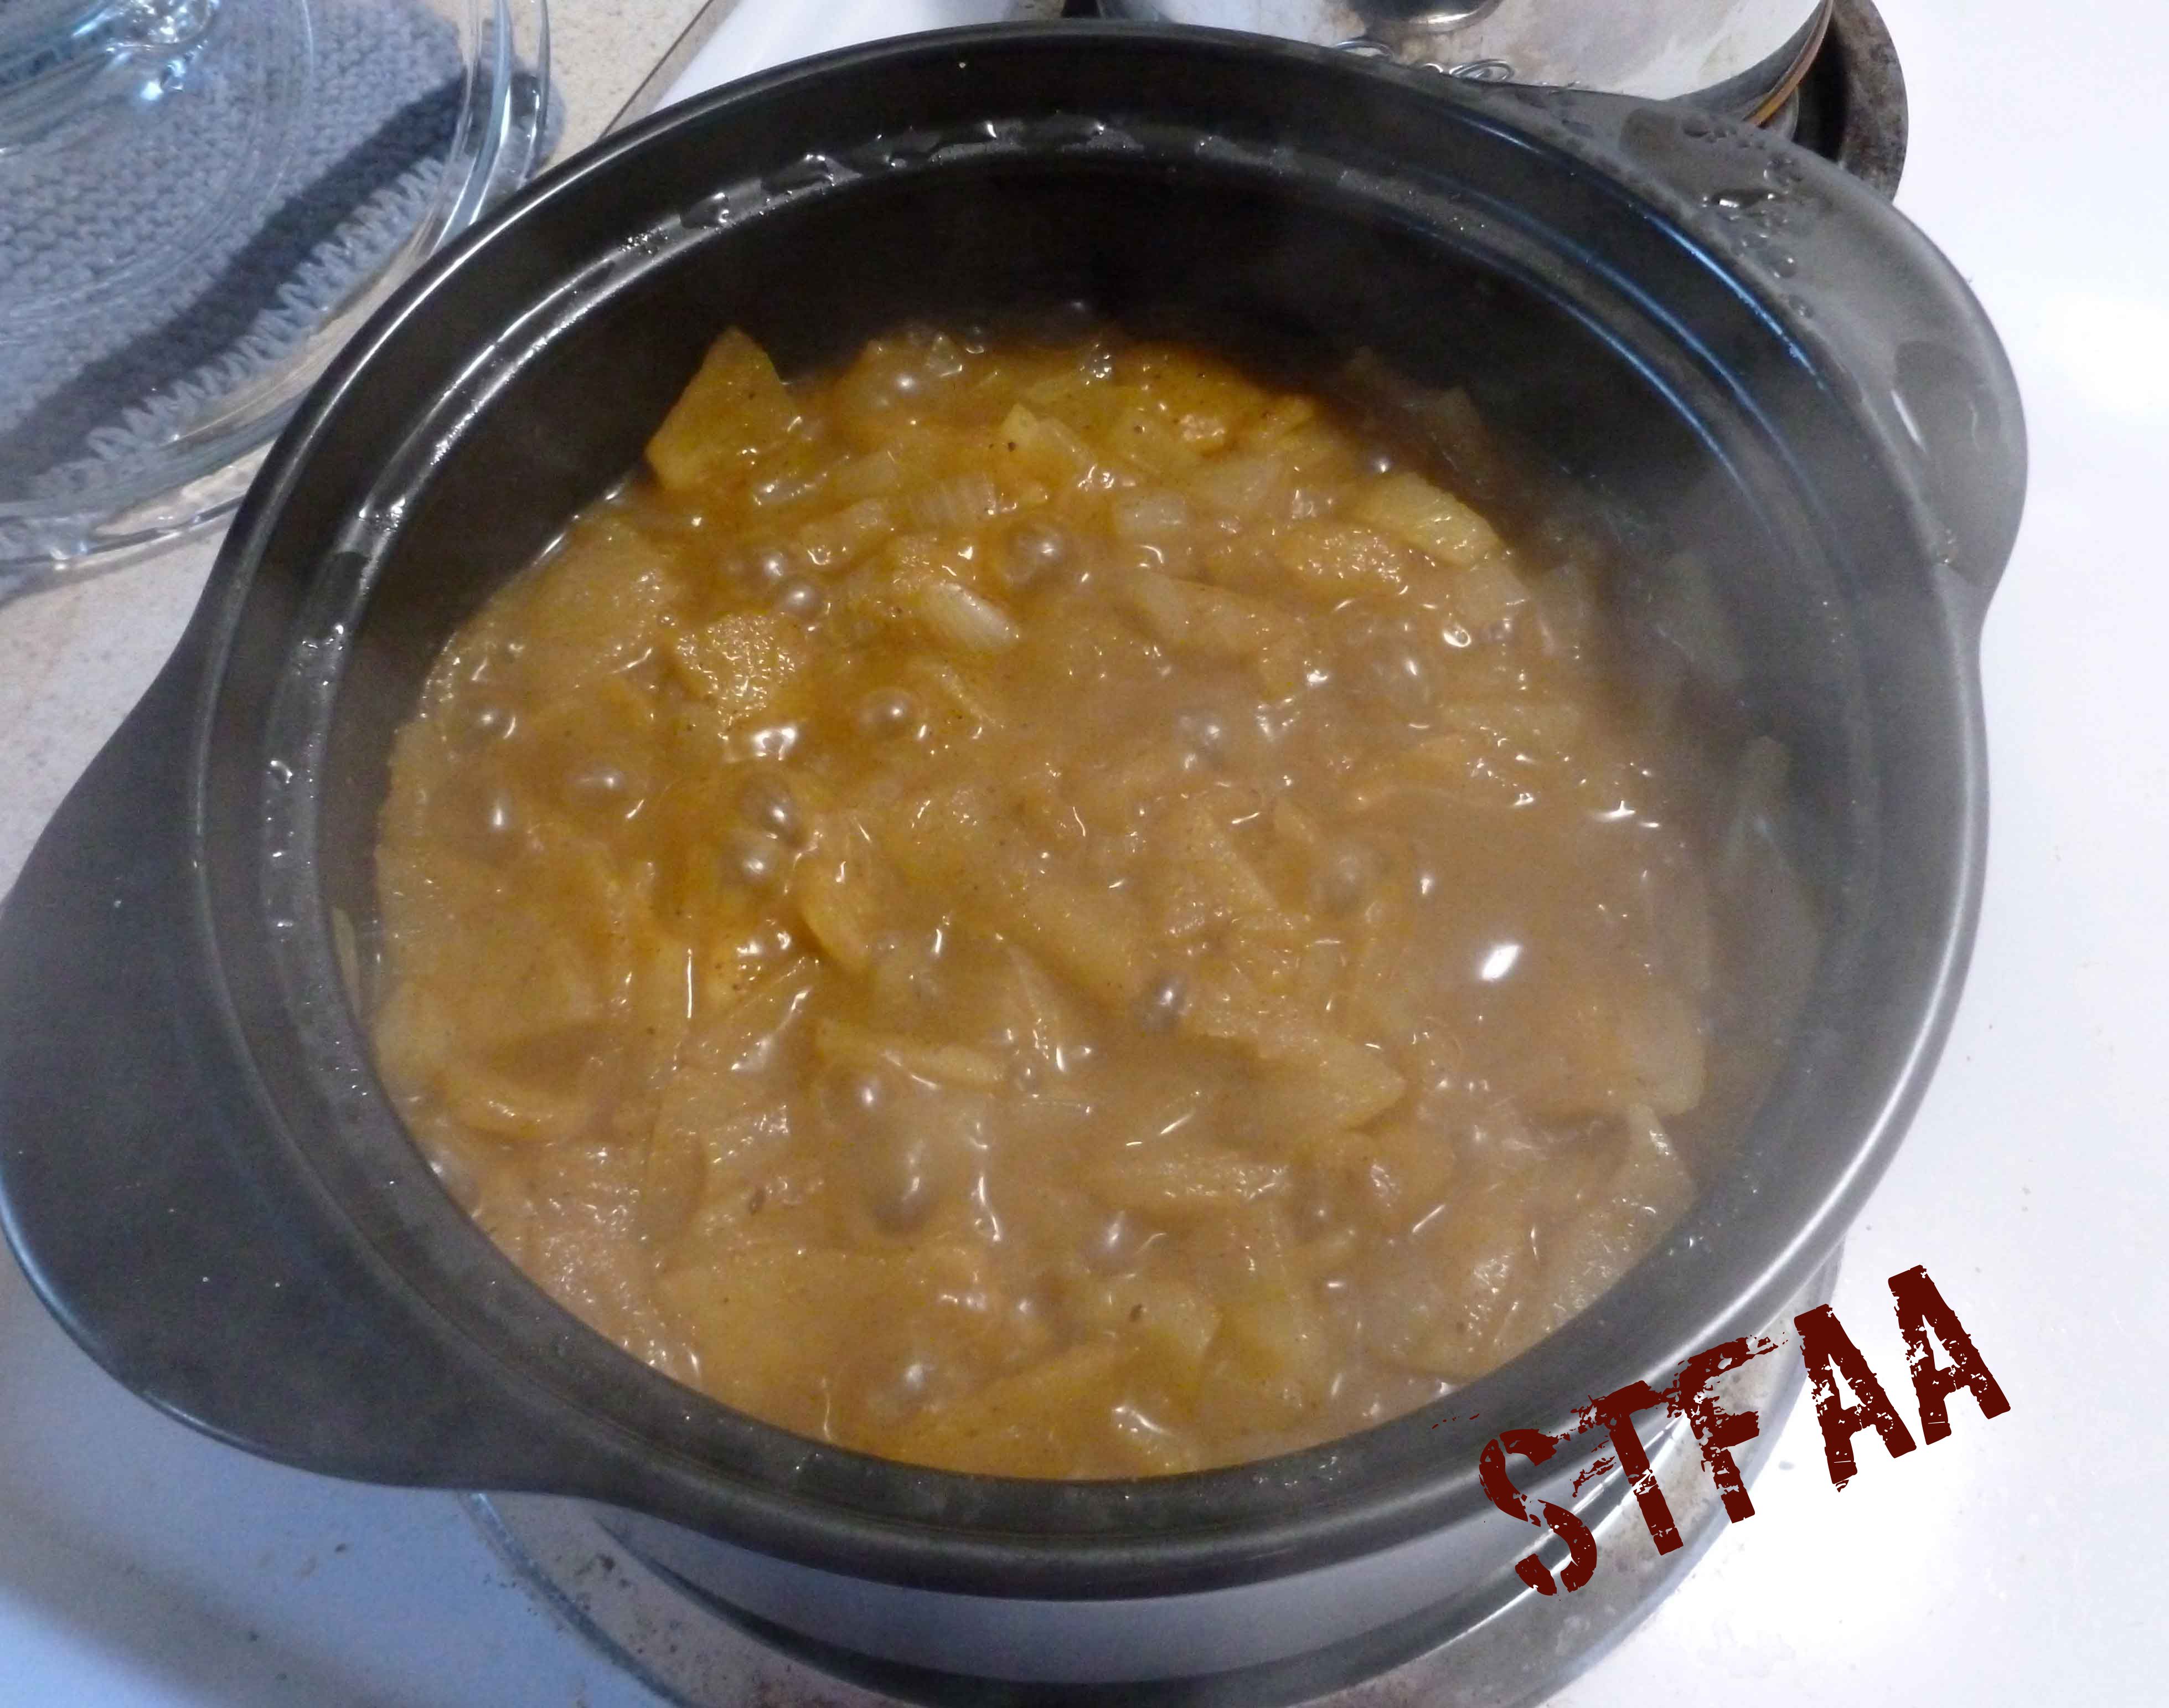
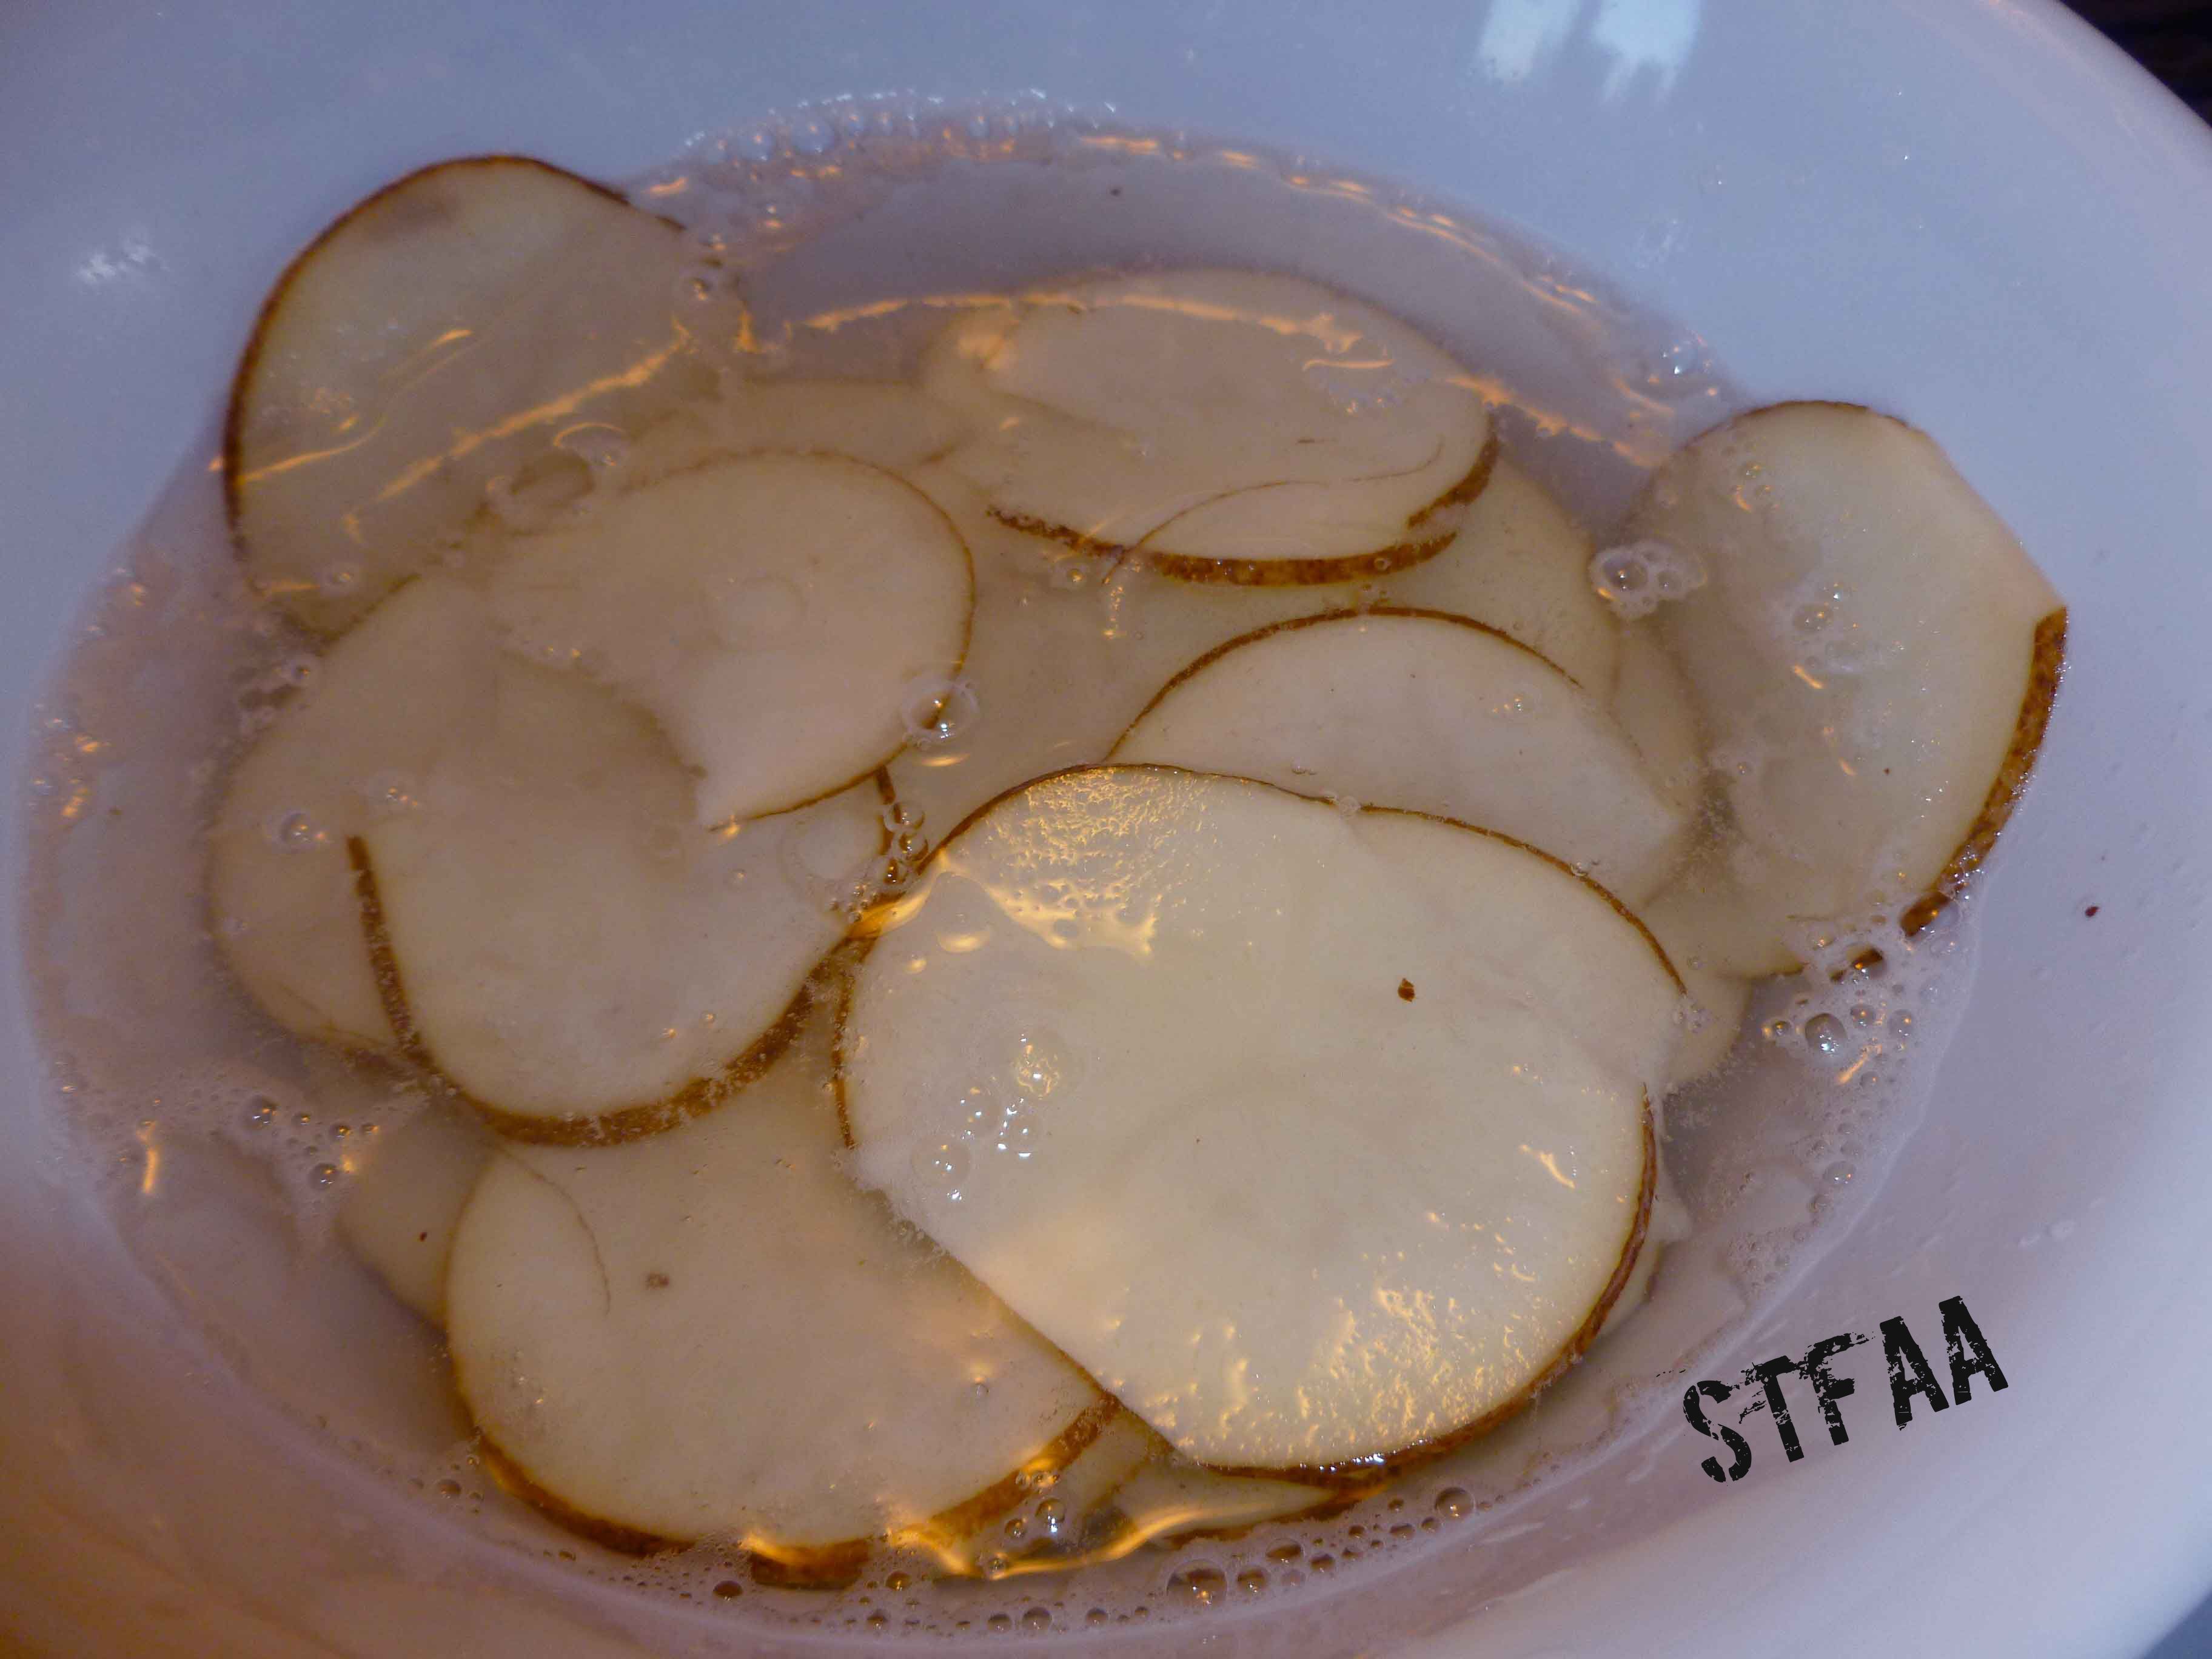
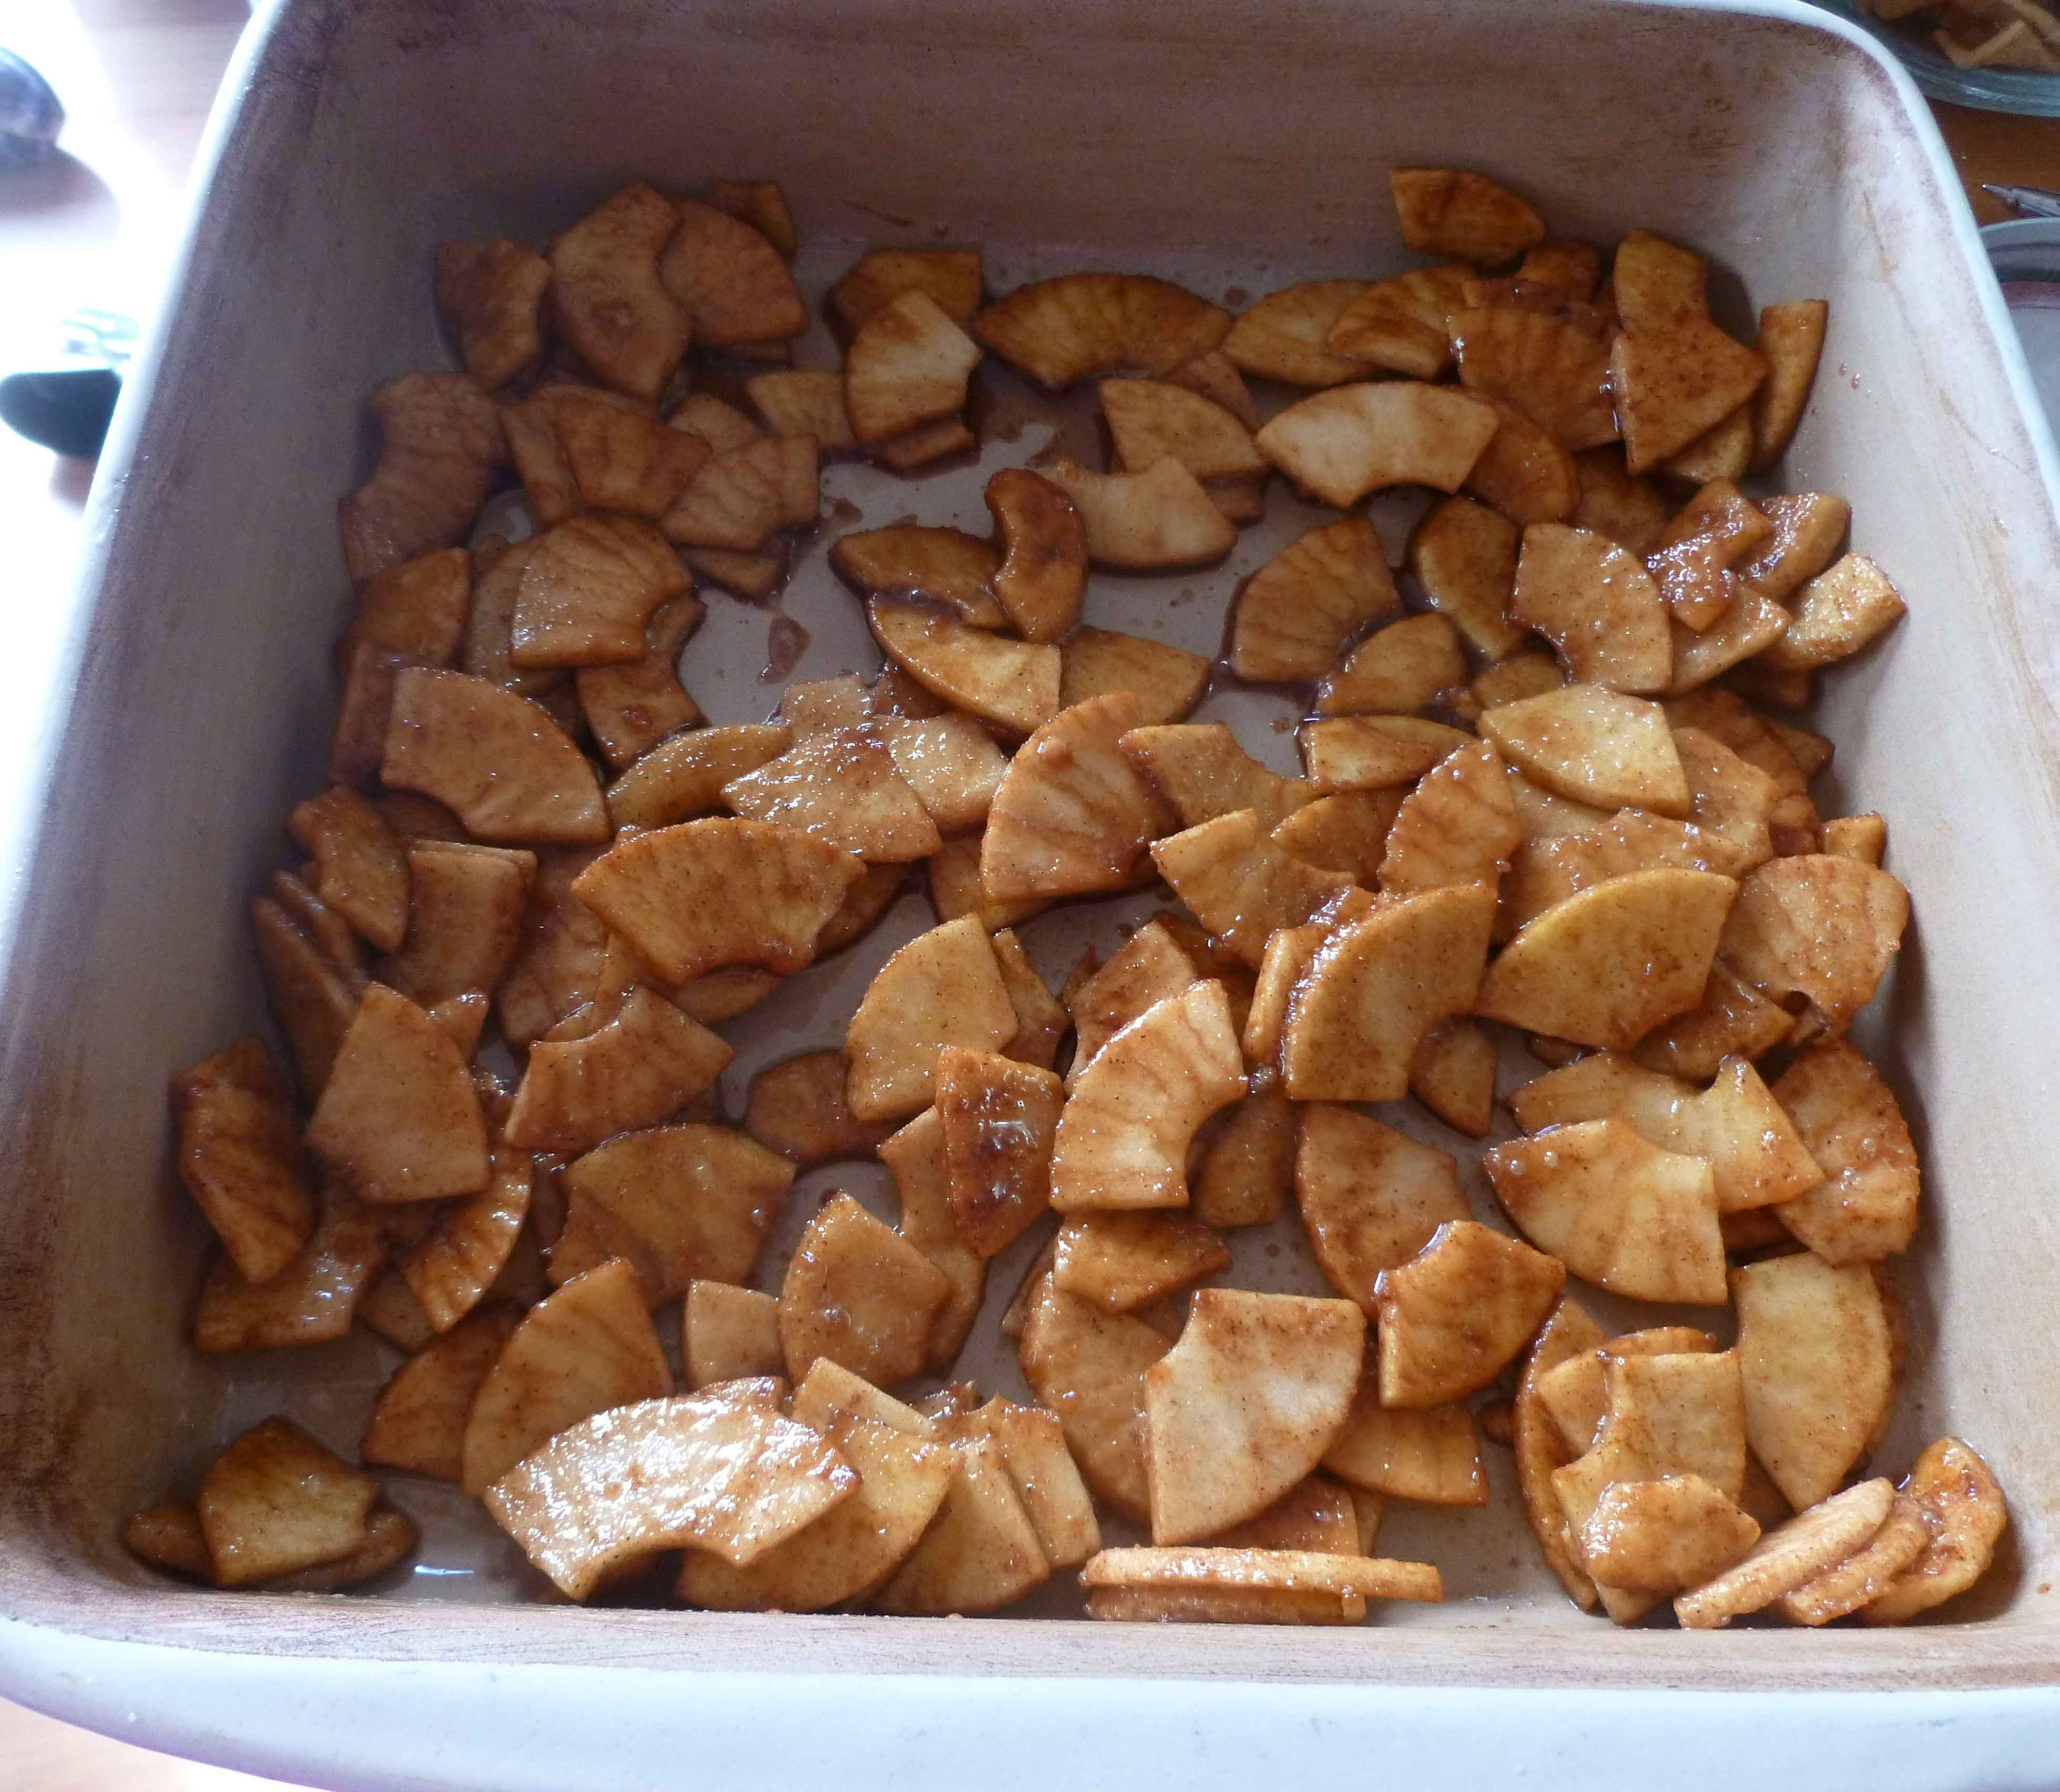
    Peel, core and slice apples. Place them in a bowl and toss them with the 5 tablespoons of brown sugar and the cinnamon. Set the apple mixture aside for now.

    Apple mixture
    Apple mixture

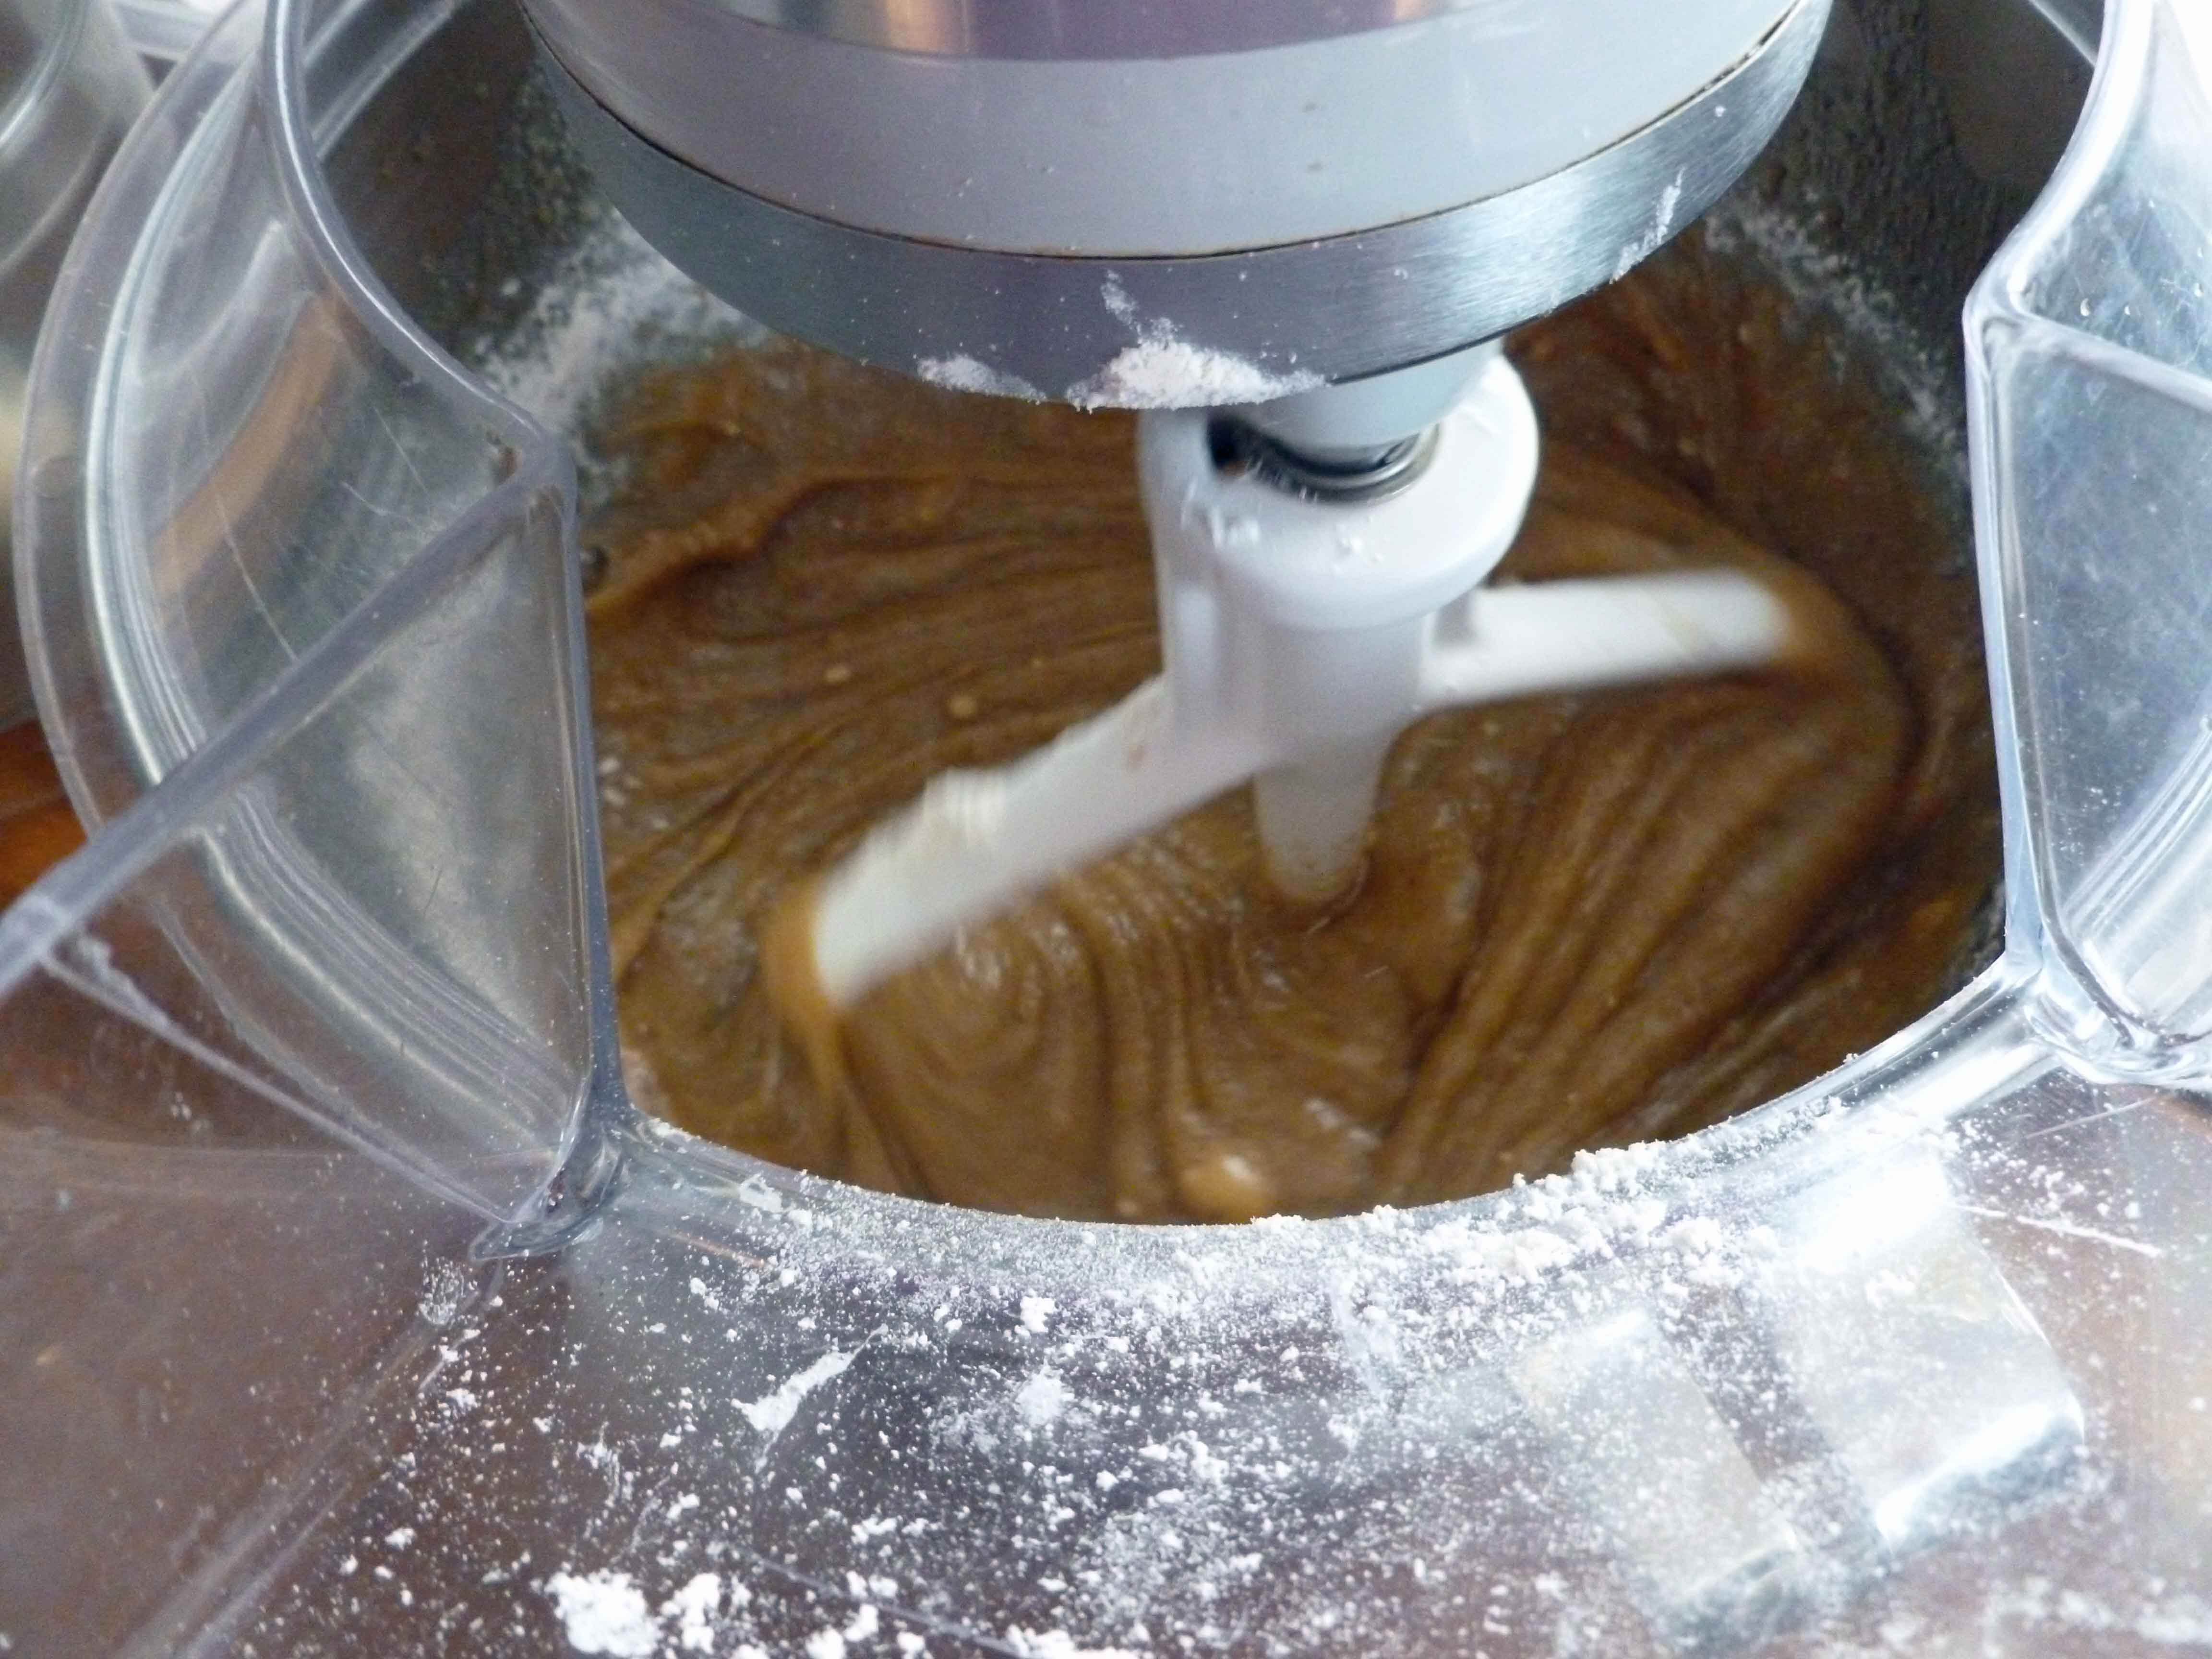
    Stir gluten-free flour mix, baking powder and salt together in a bowl.

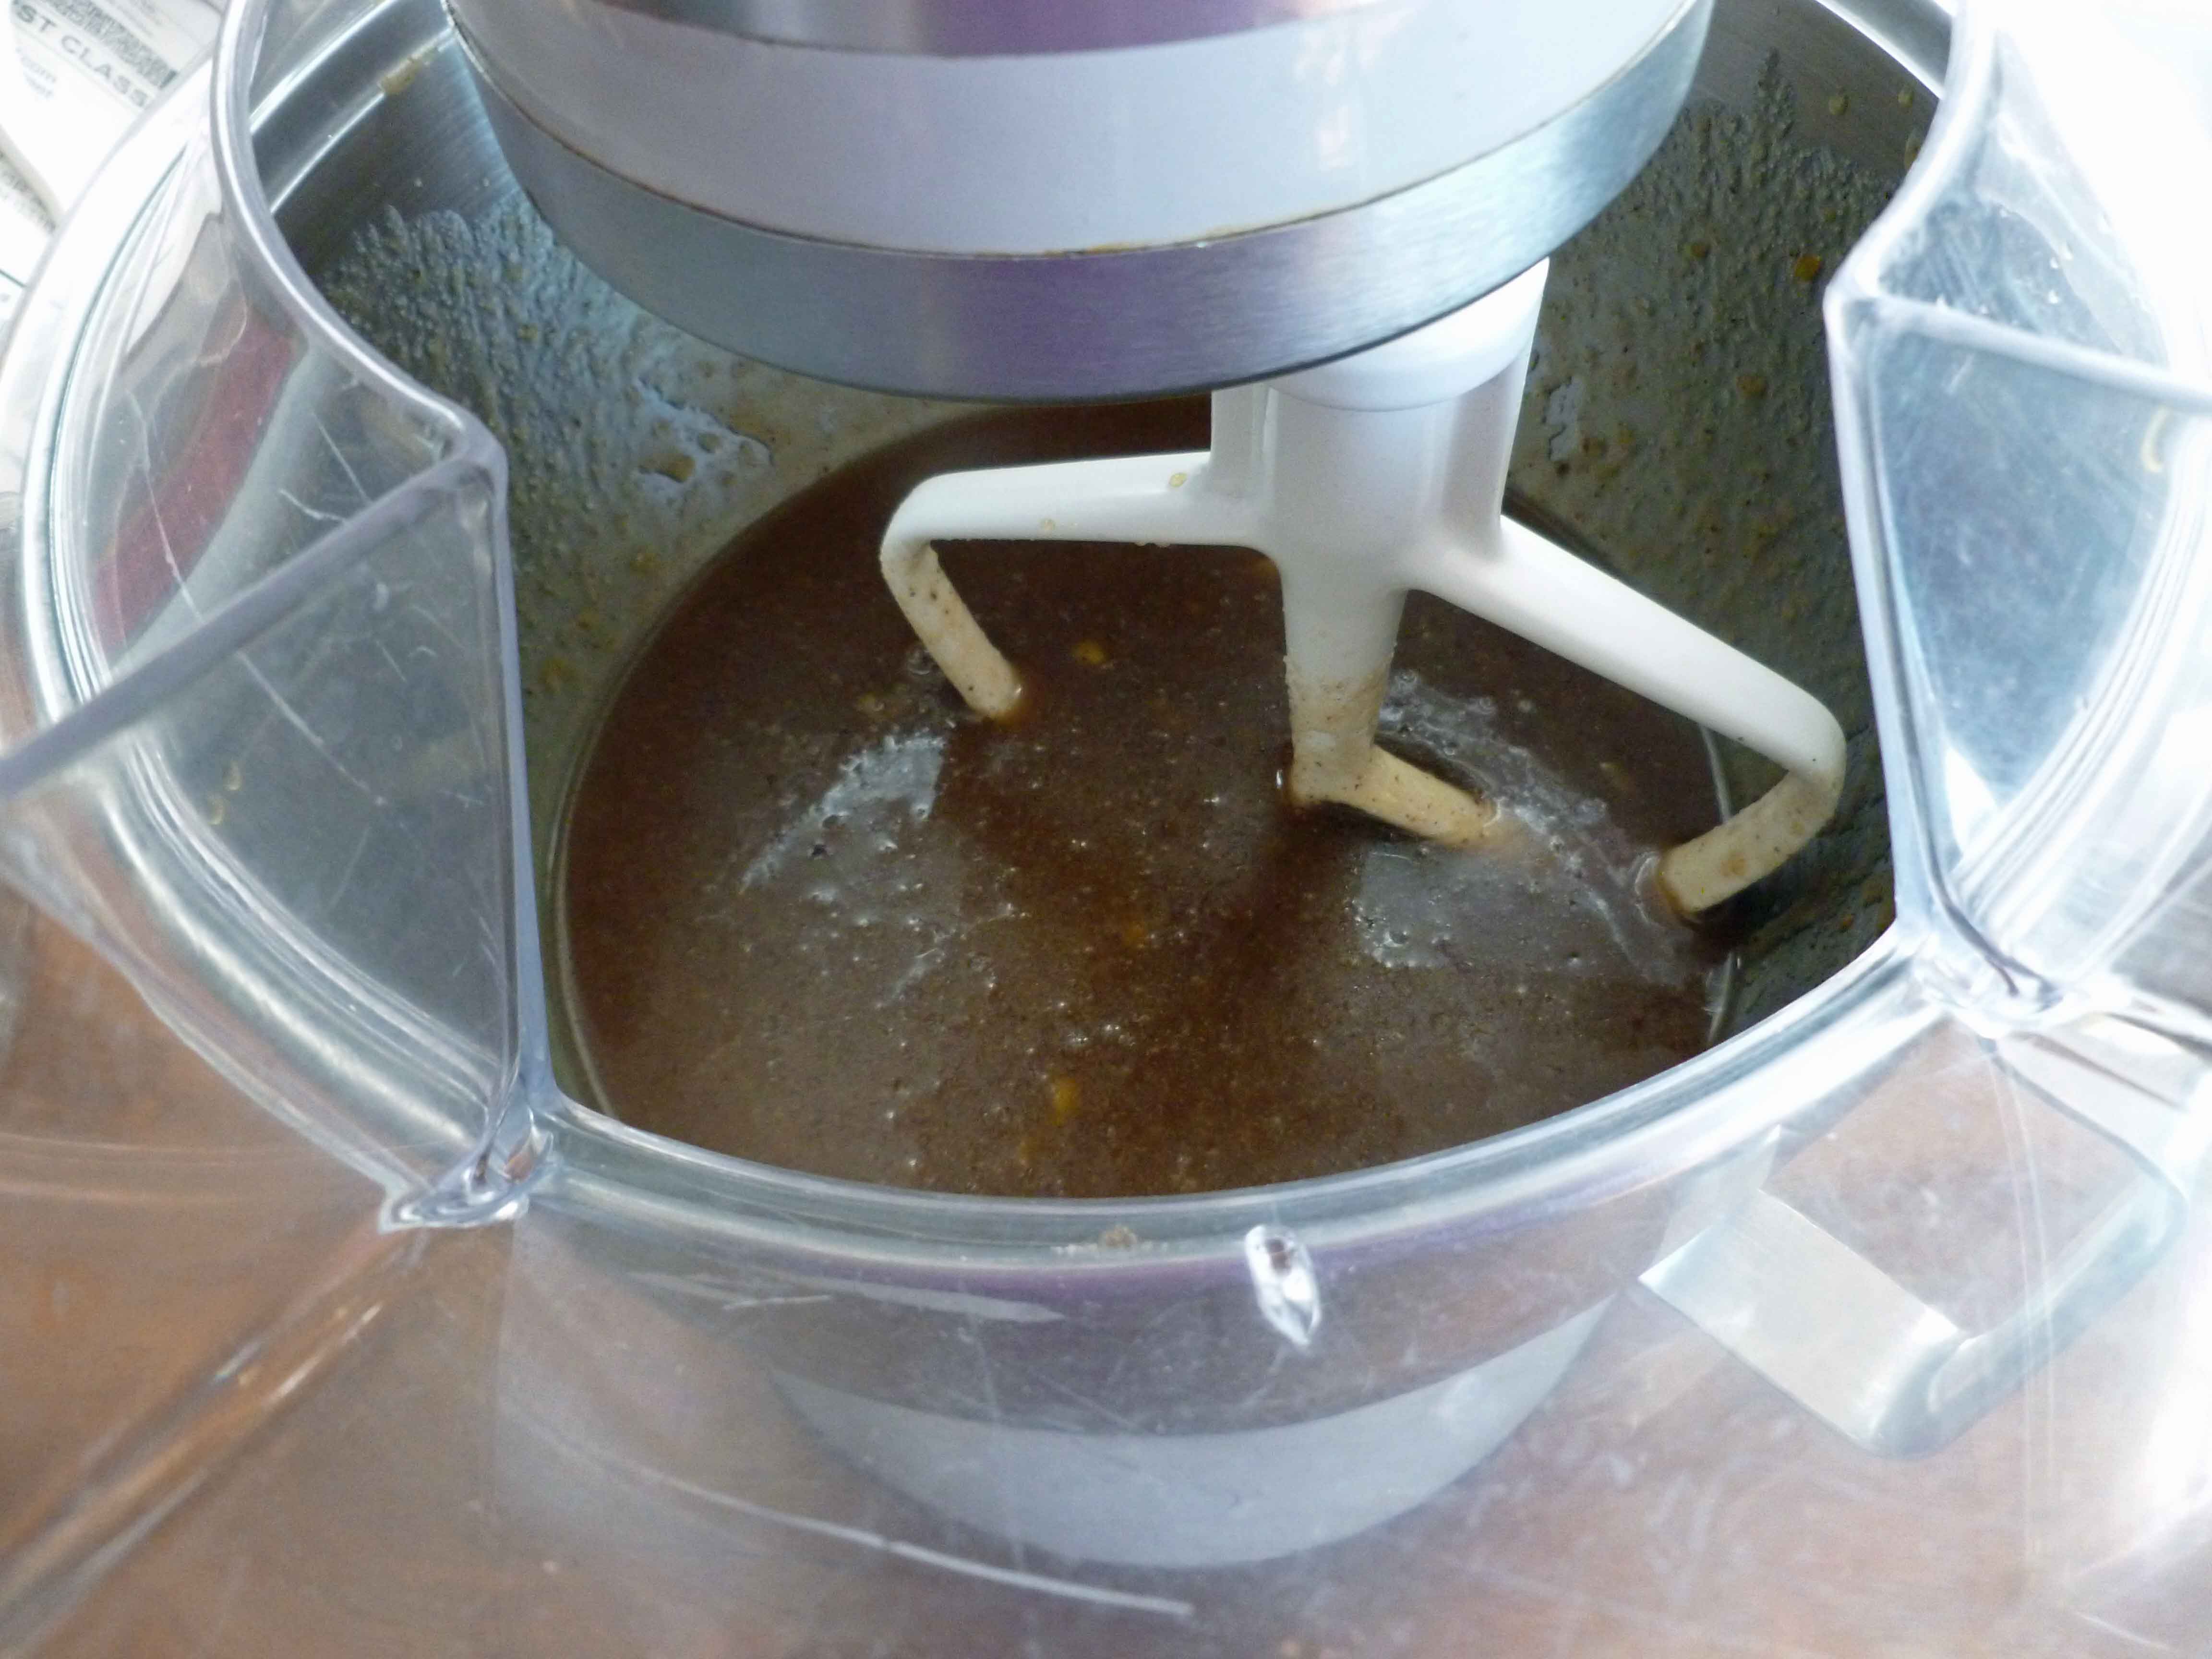
    In a separate bowl, mix together the oil, orange juice, sugar, the remaining brown sugar, vanilla, applesauce, aquafaba and ground chia seed. I use a stand mixer with flat beater to do this.

    Wet mixture
    Wet mixture

    Once these ingredients are fully incorporated together, add the flour mixture slowly to your wet mixture, with the mixer speed on low. You could also mix this manually, but the stand mixer makes my life a lot easier.

    Cake batter after mixing wet and dry ingredients
    Cake batter after mixing wet and dry ingredients

    Pour half of the apple mixture into your greased baking pan, spreading them evenly across the bottom of the pan.

    Pouring half apples in bottom of baking pan
    Pouring half apples in bottom of baking pan

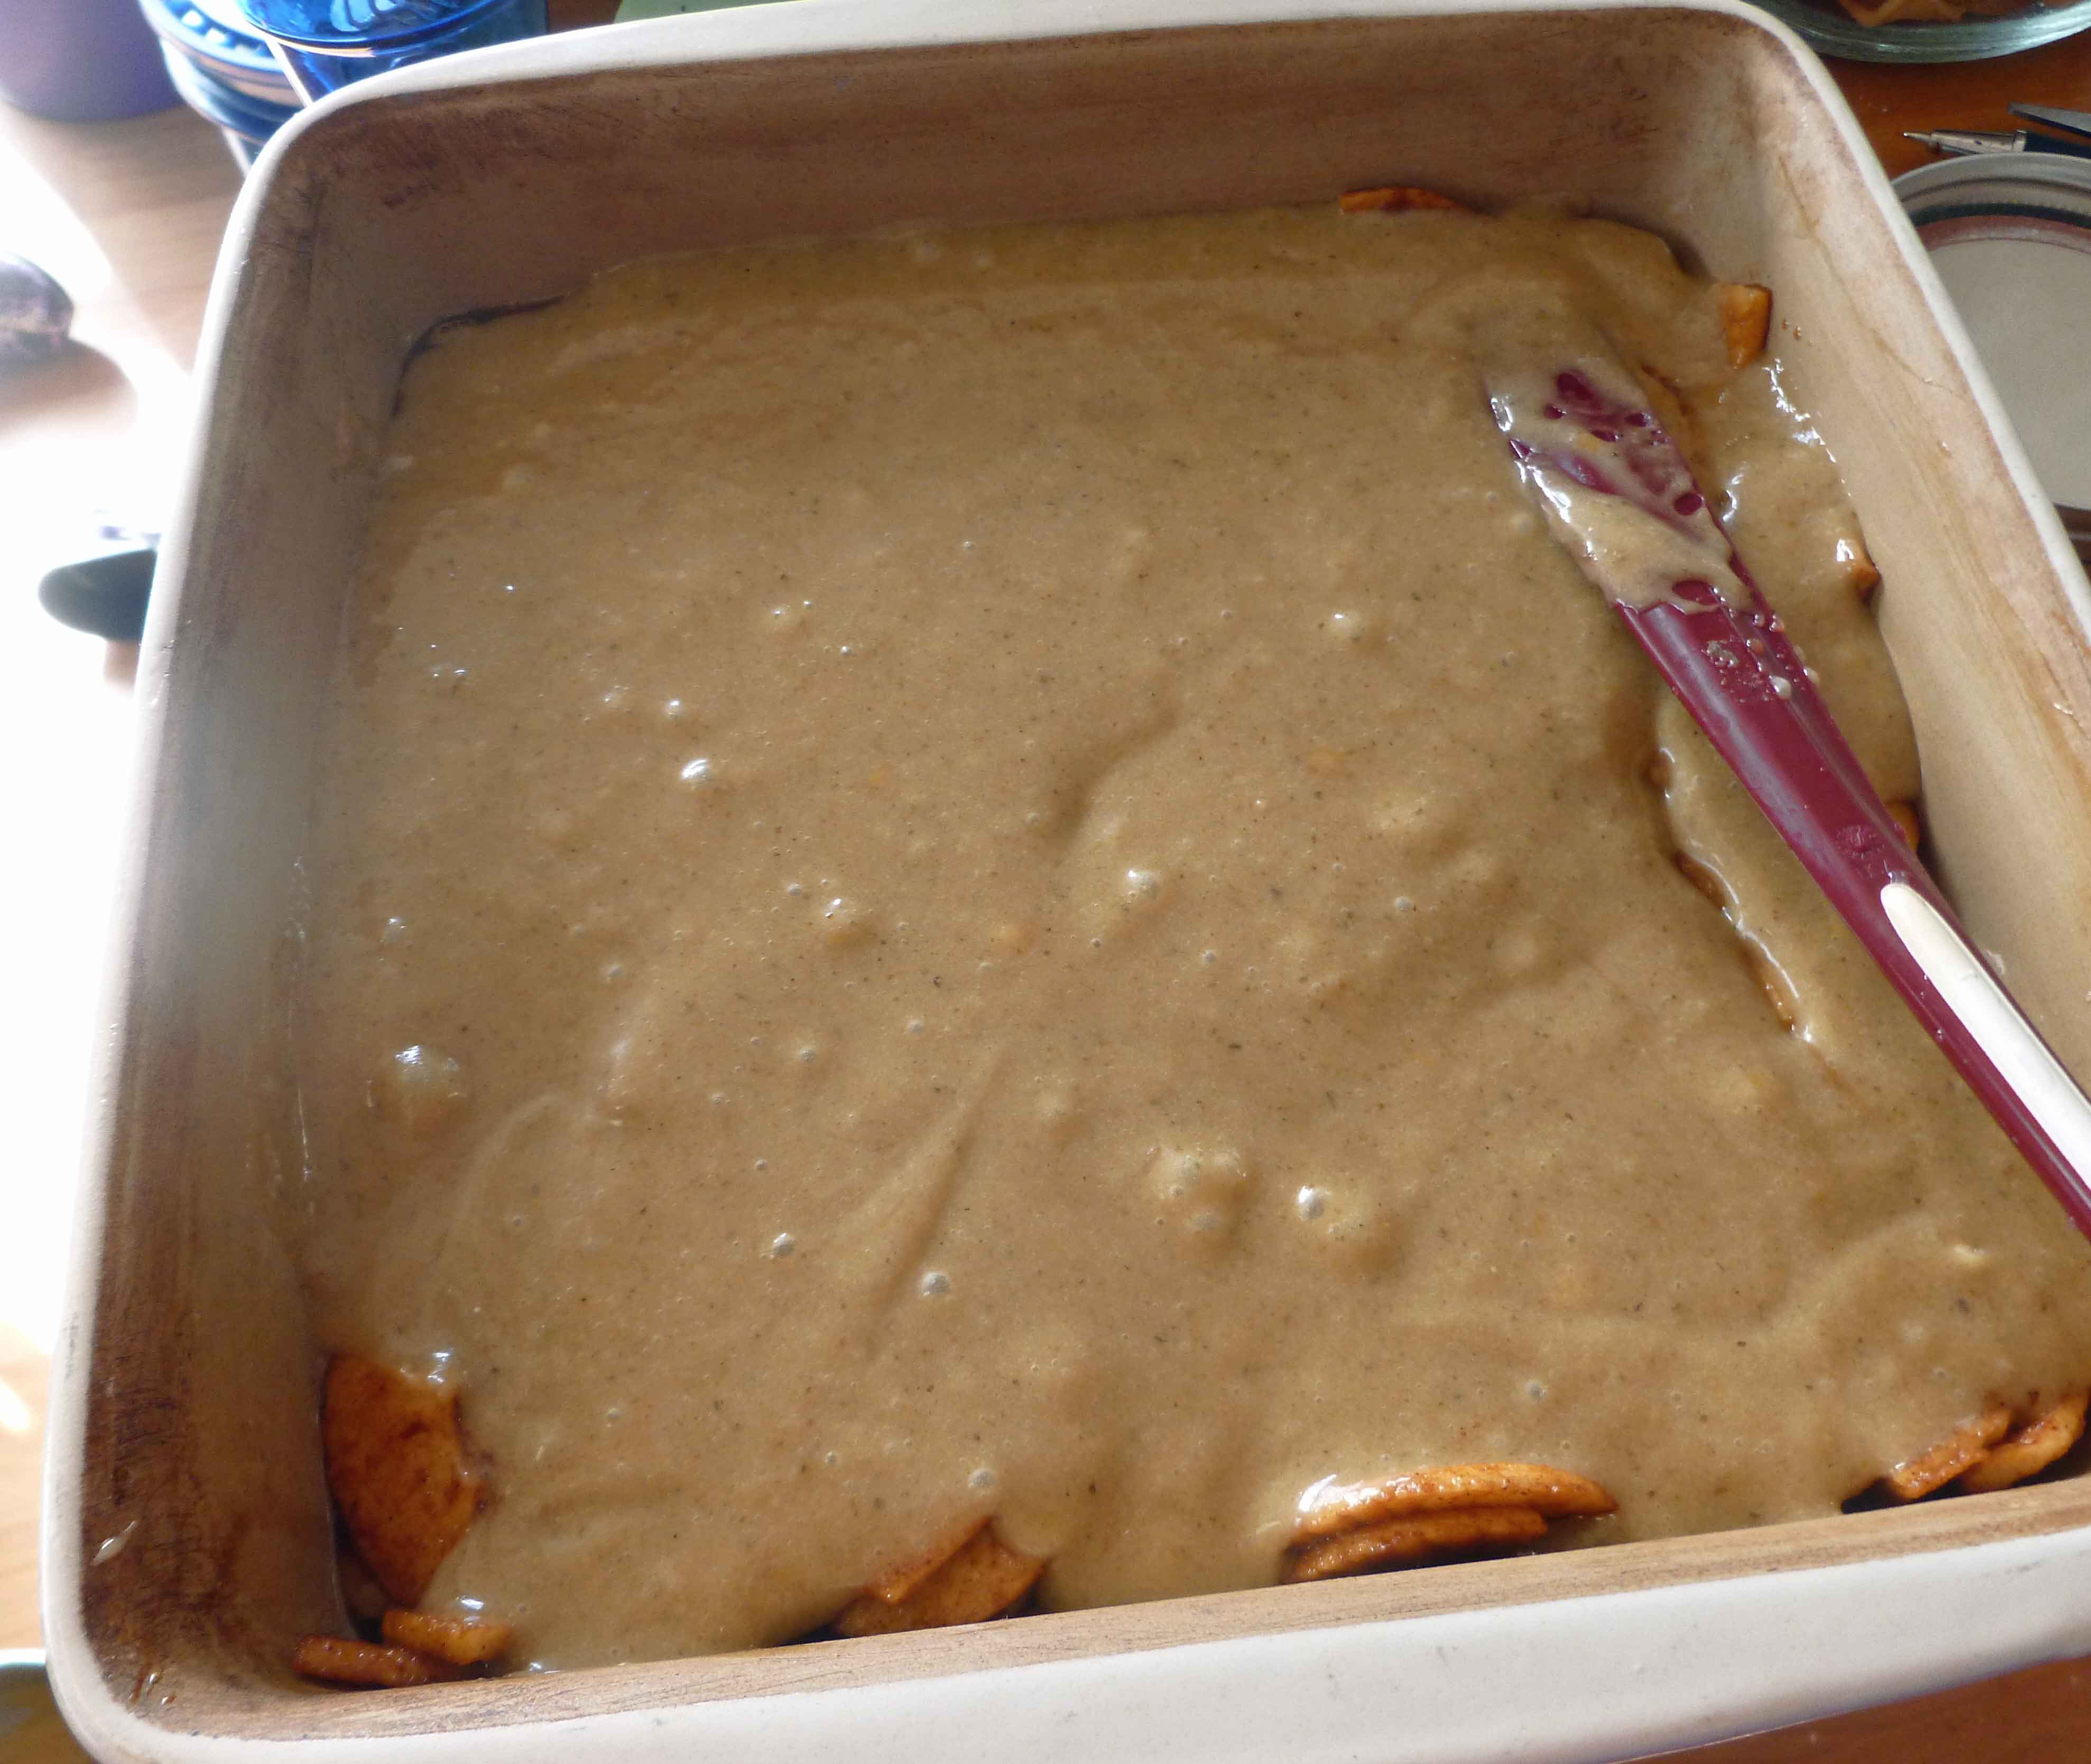
    Pour half of the cake batter over the apples, spreading it evenly across the pan.

    First layer of batter over apples
    First layer of batter over apples

    Then pour the remaining apple mixture over the batter evenly.

    Second layer of apples over first layer of batter
    Second layer of apples over first layer of batter

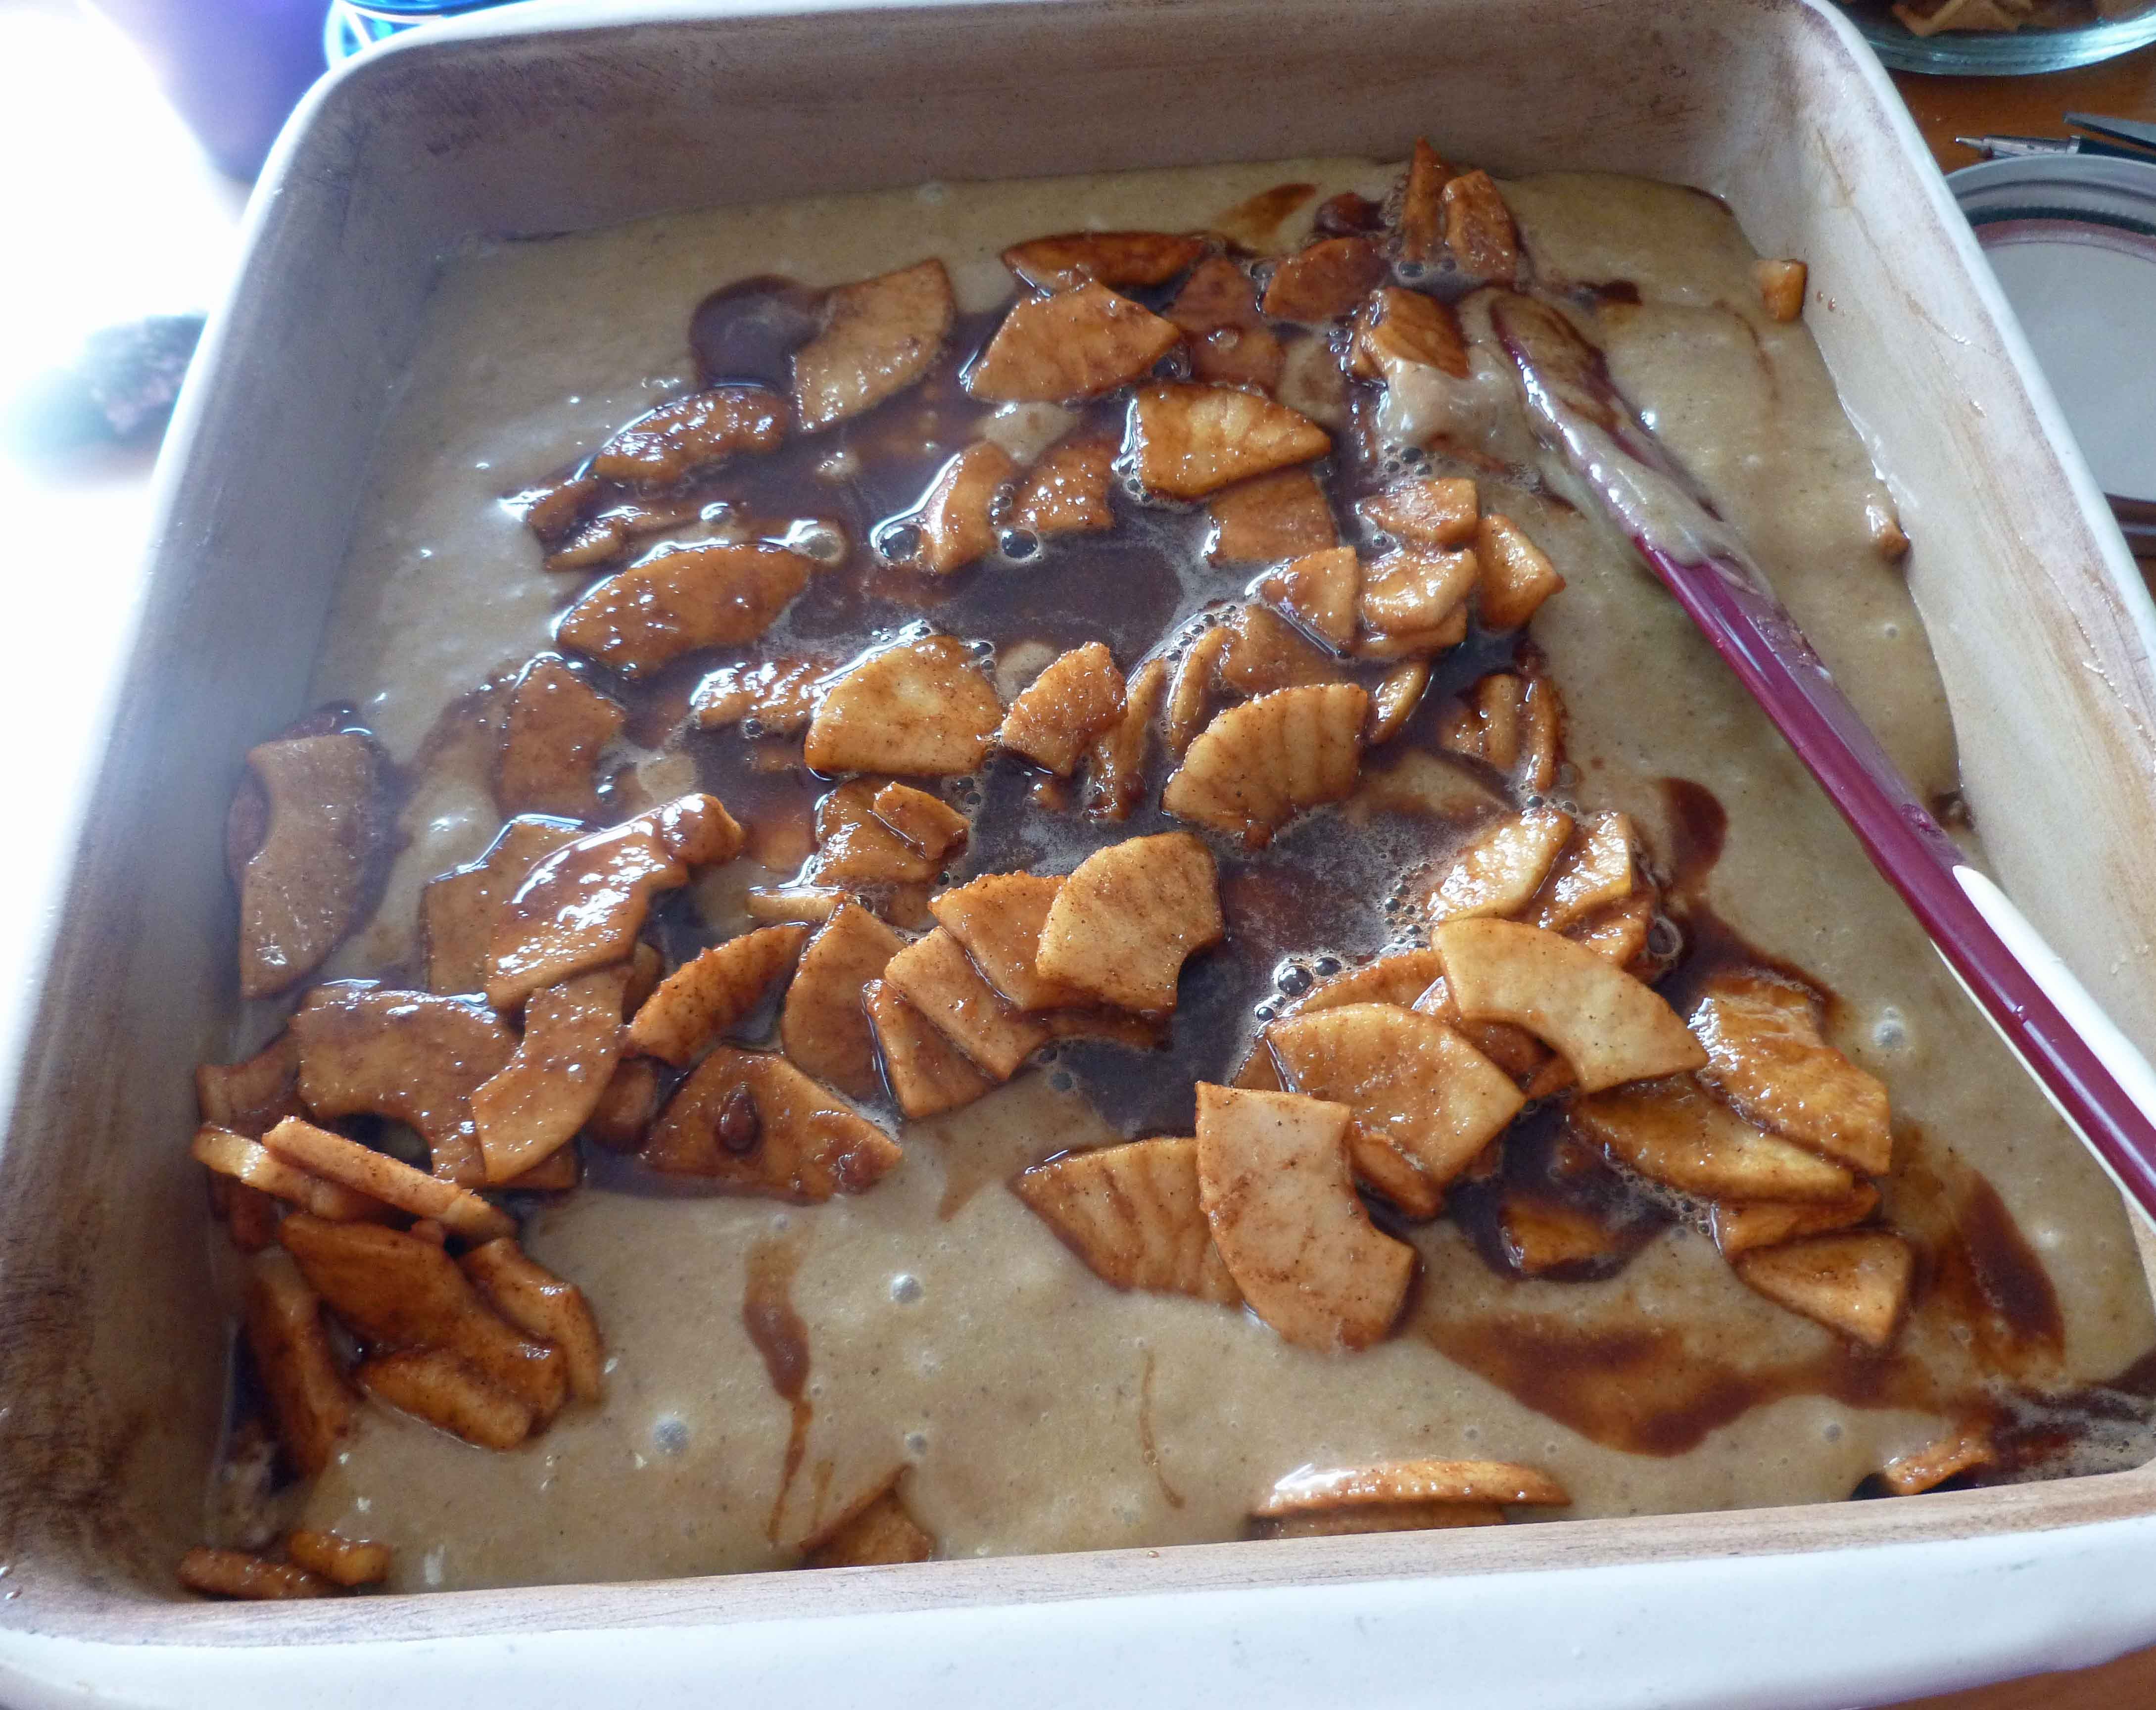
    Cover the apple mixture with the remaining cake batter.

    Second layer of batter over second layer of apples
    Second layer of batter over second layer of apples

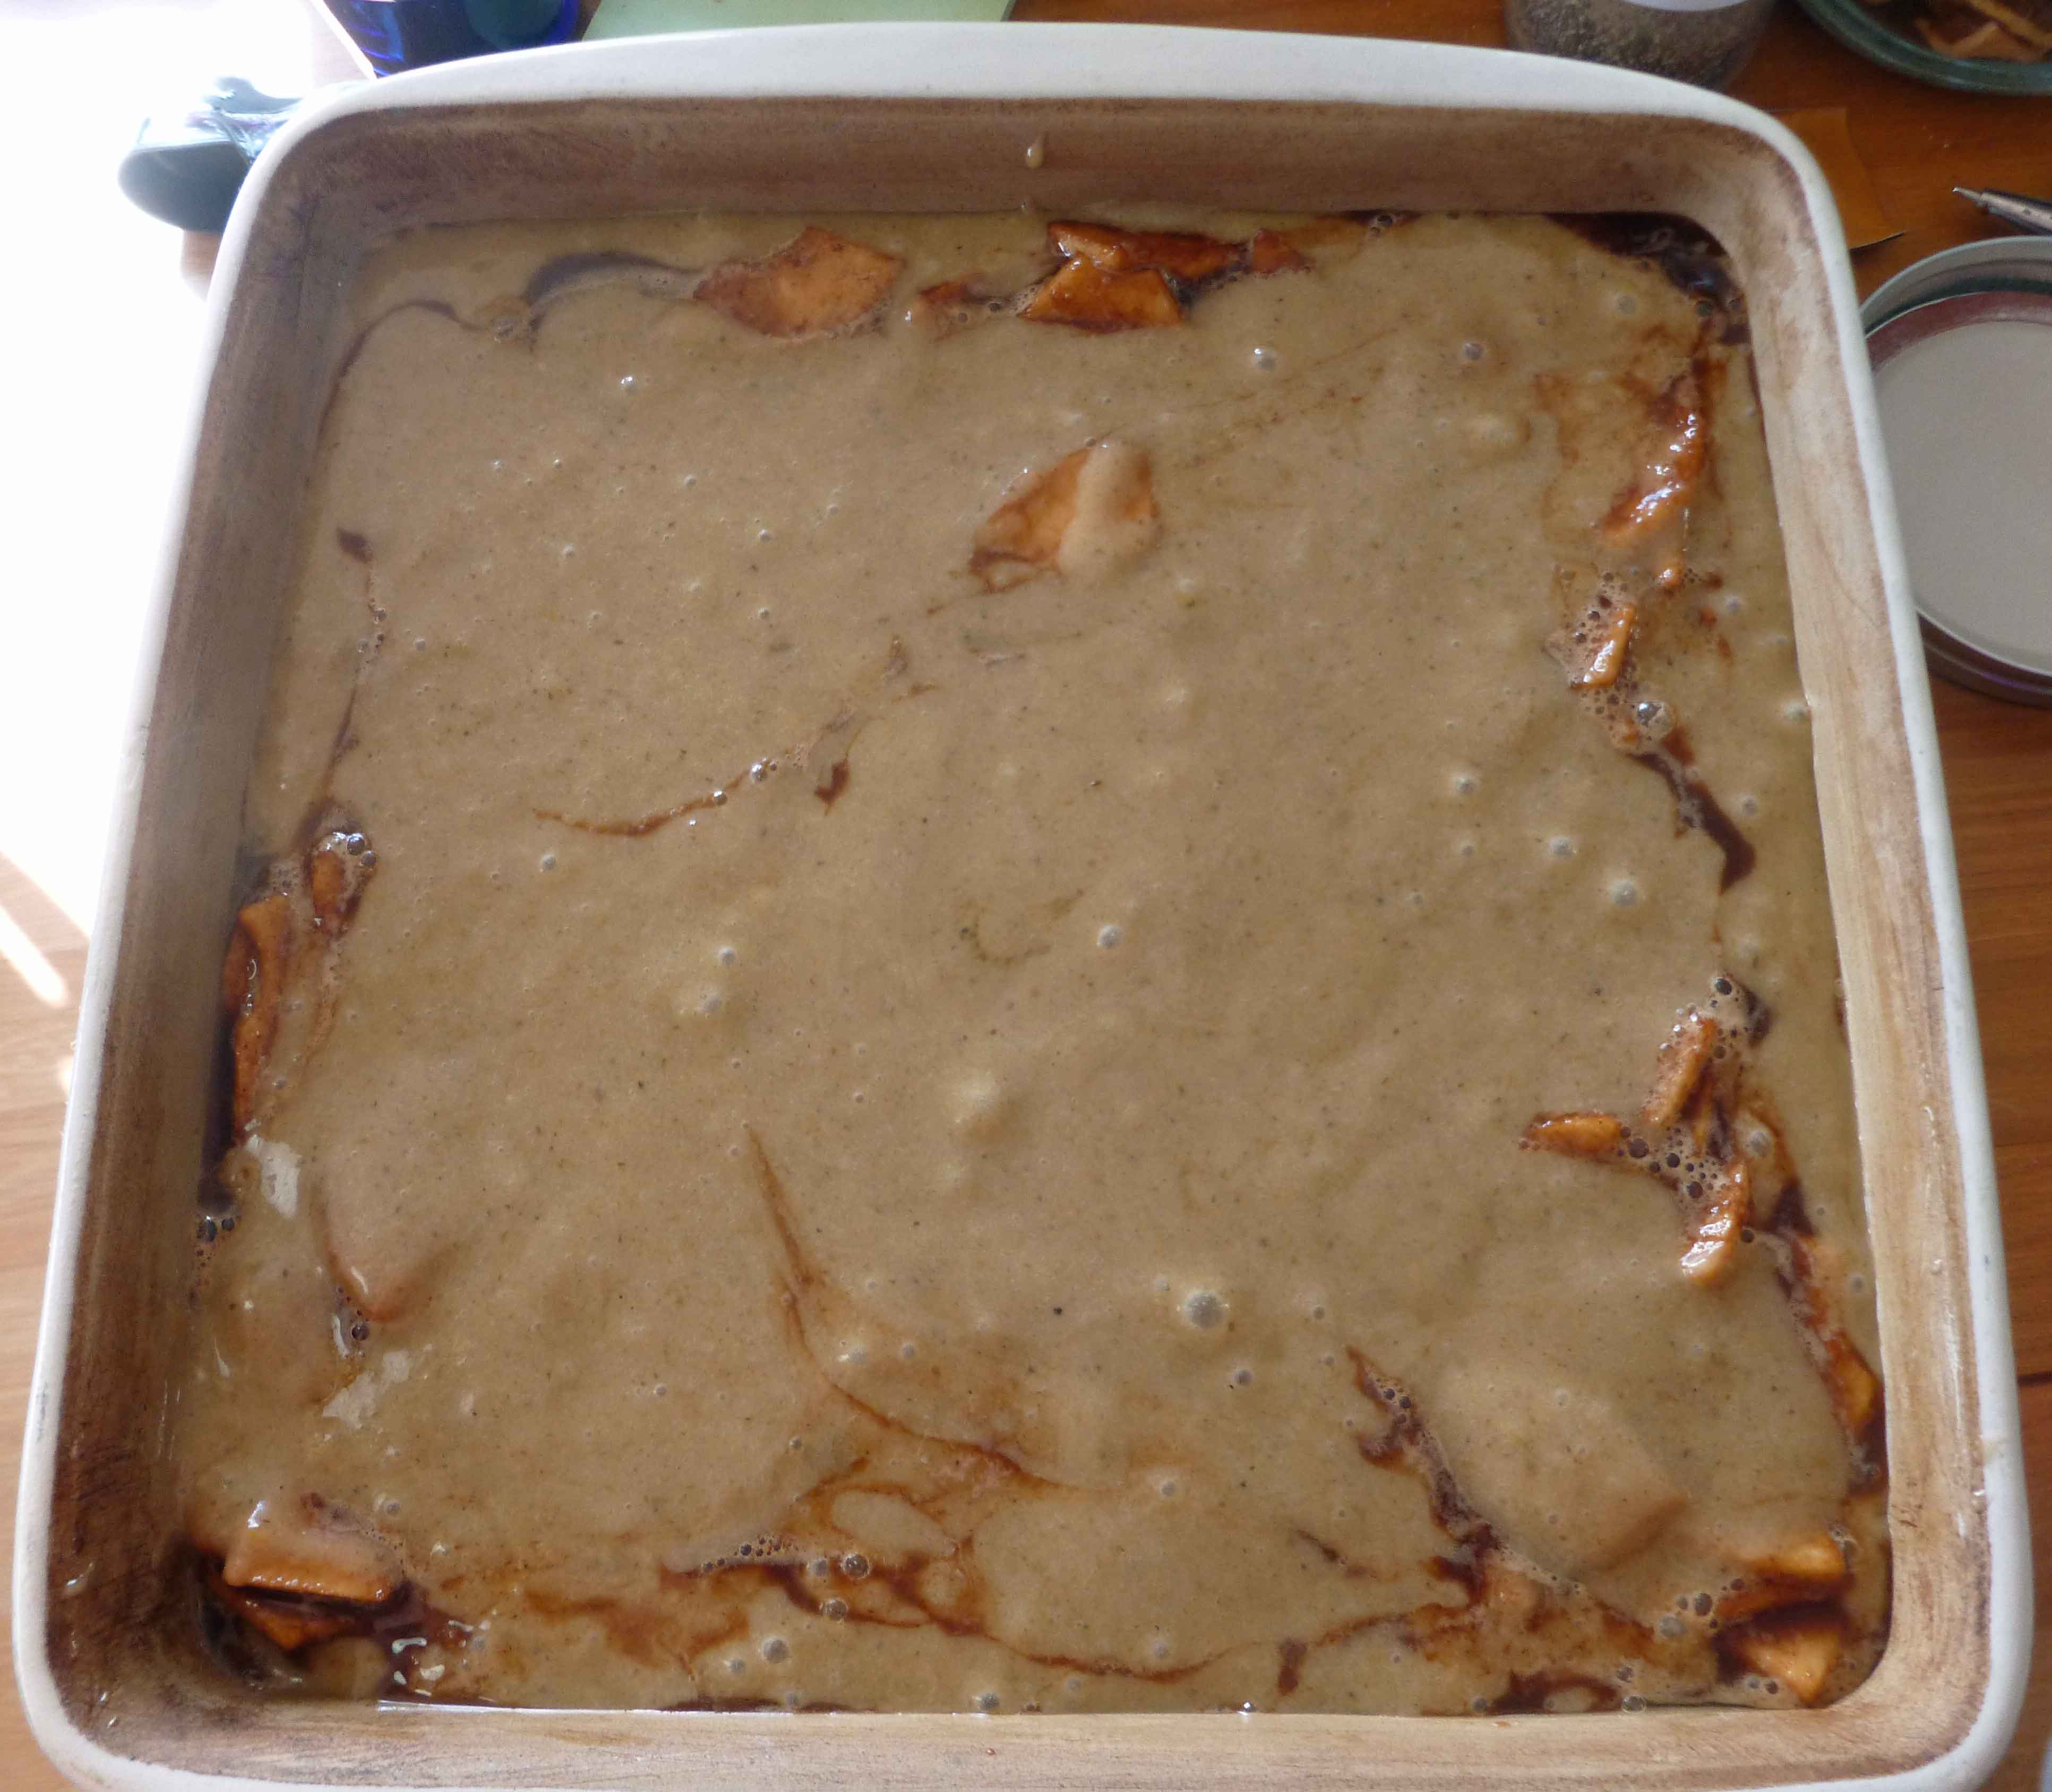
    Bake for about an hour and half or until a tooth pick comes out clean.

    Apple Cake after baking
    Apple Cake after baking

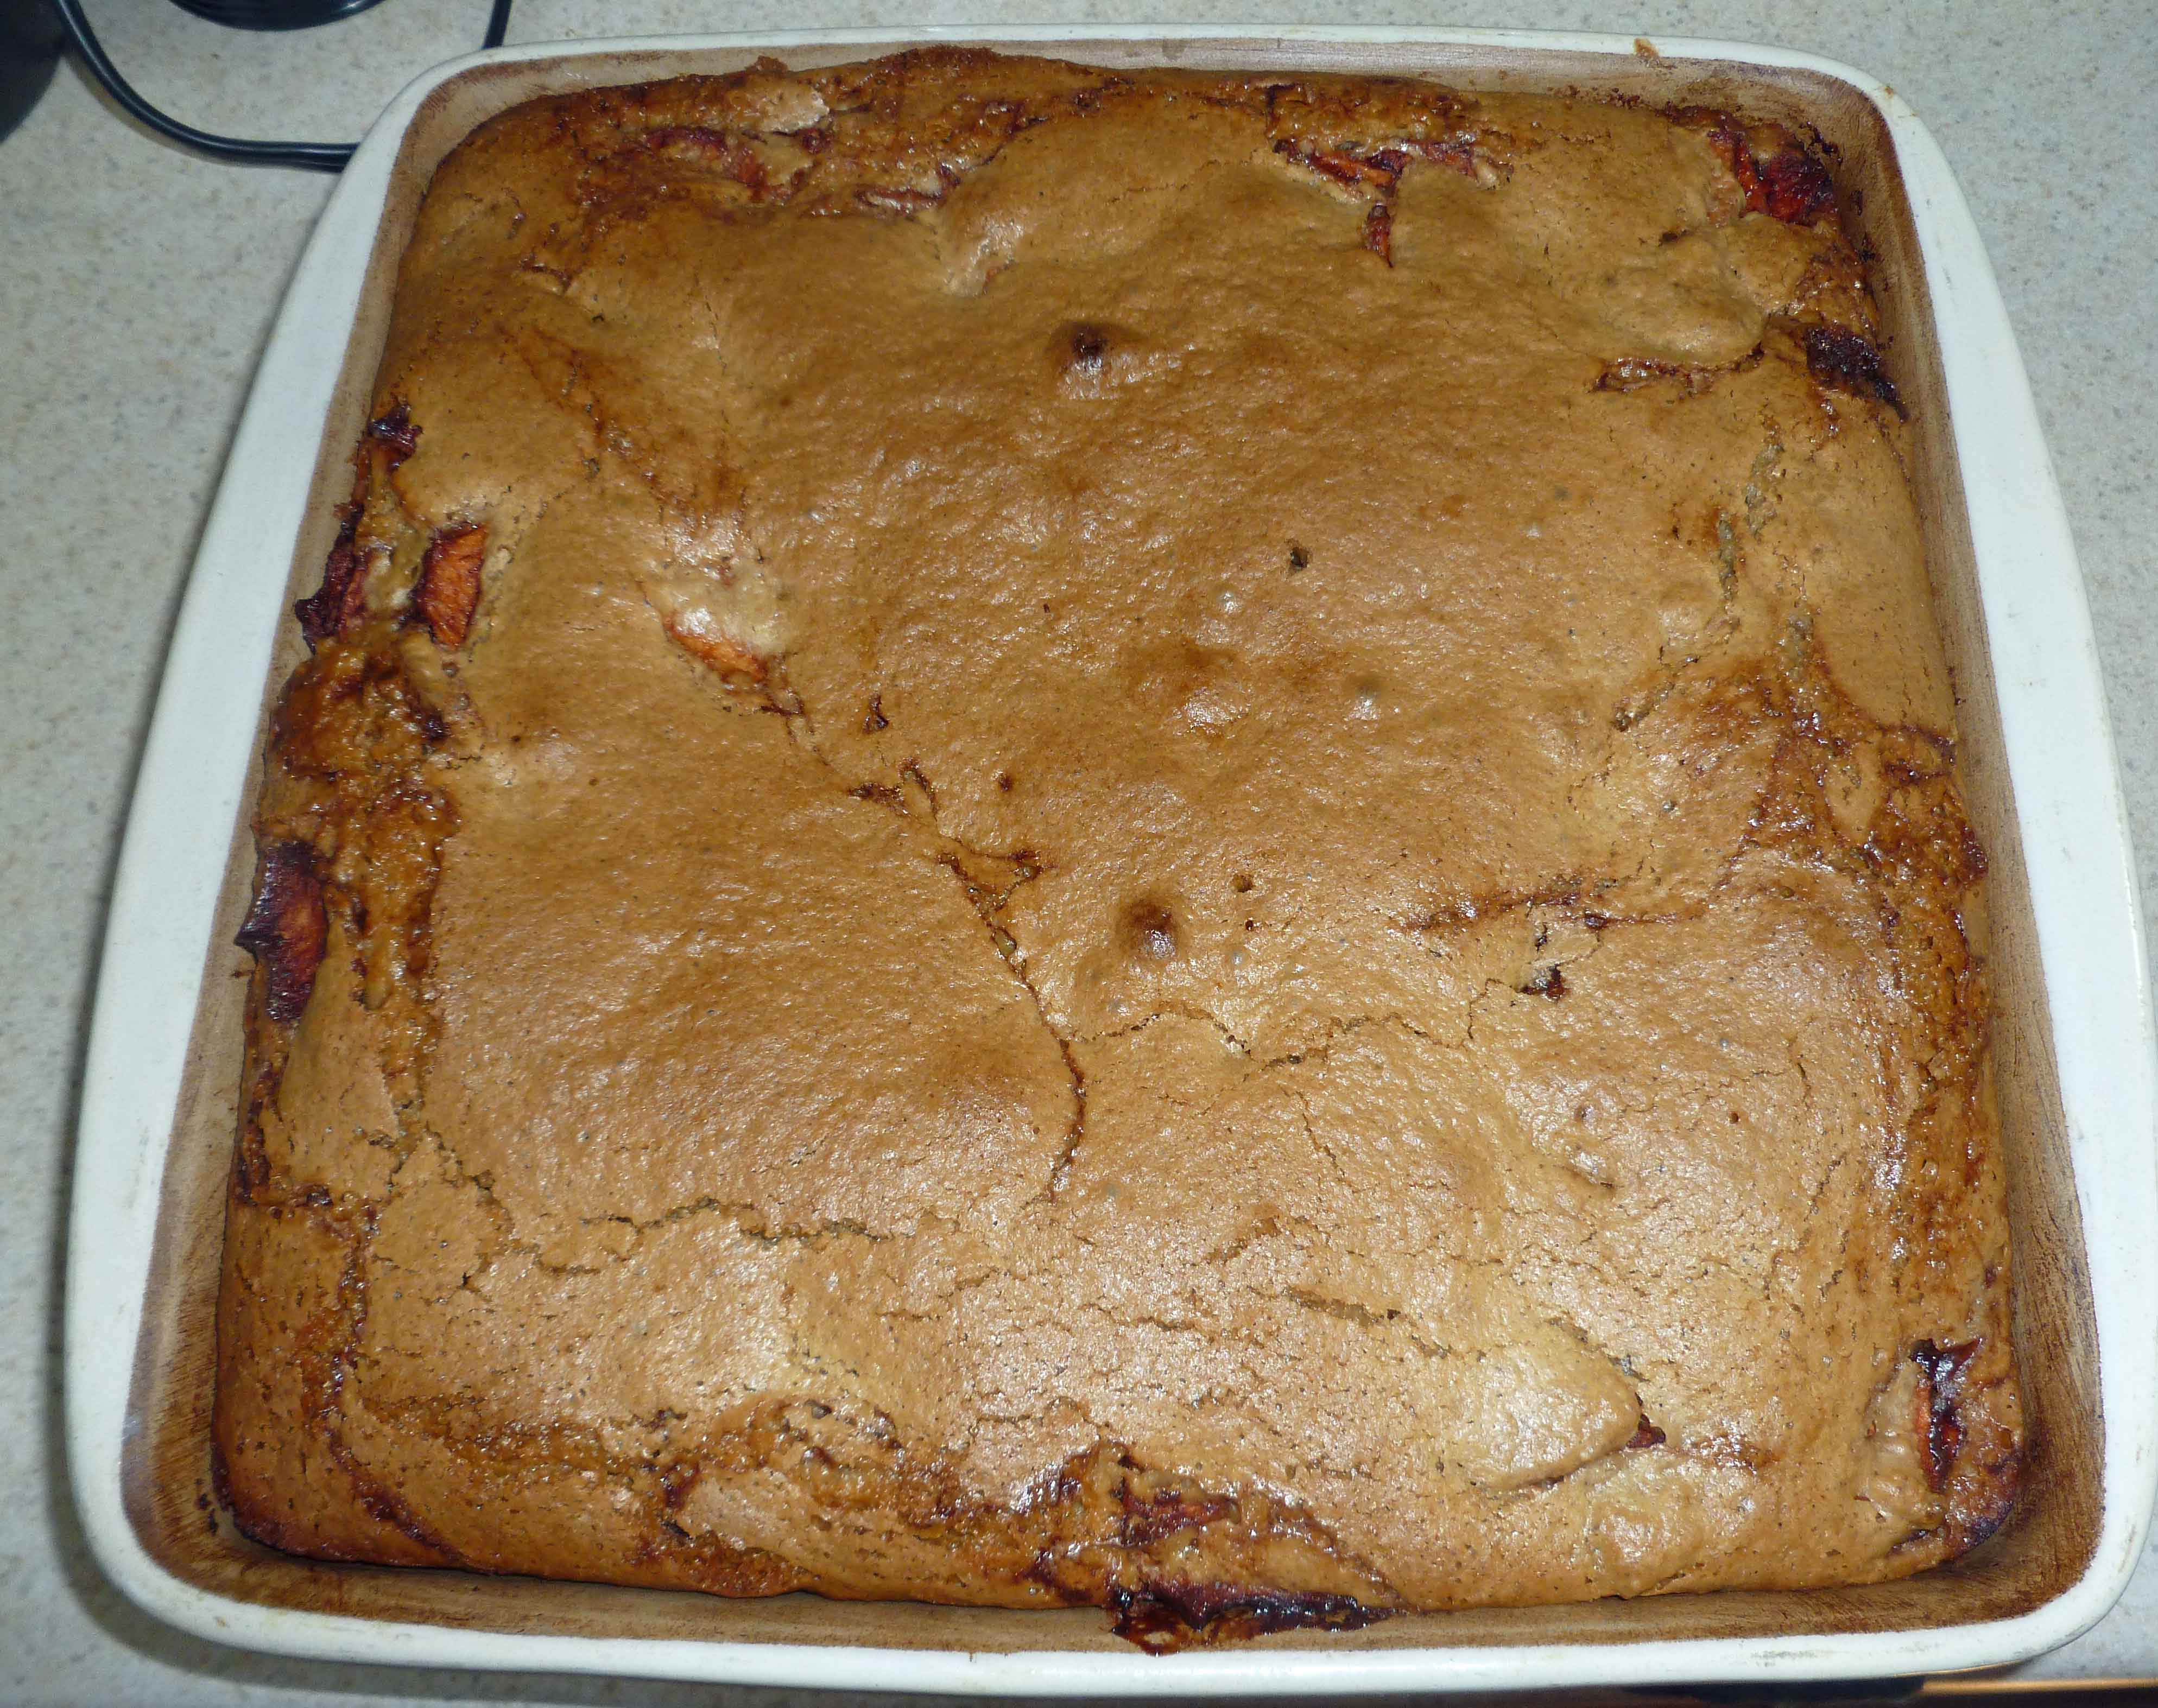
    Cool in pan on wire rack for 5 minutes. Loosen edges around the pan with a butter knife, and then invert the baking pan onto platter. Don’t let it cool too long or it will stick and be harder to remove from the pan (which you can tell mine did because I got distracted.)
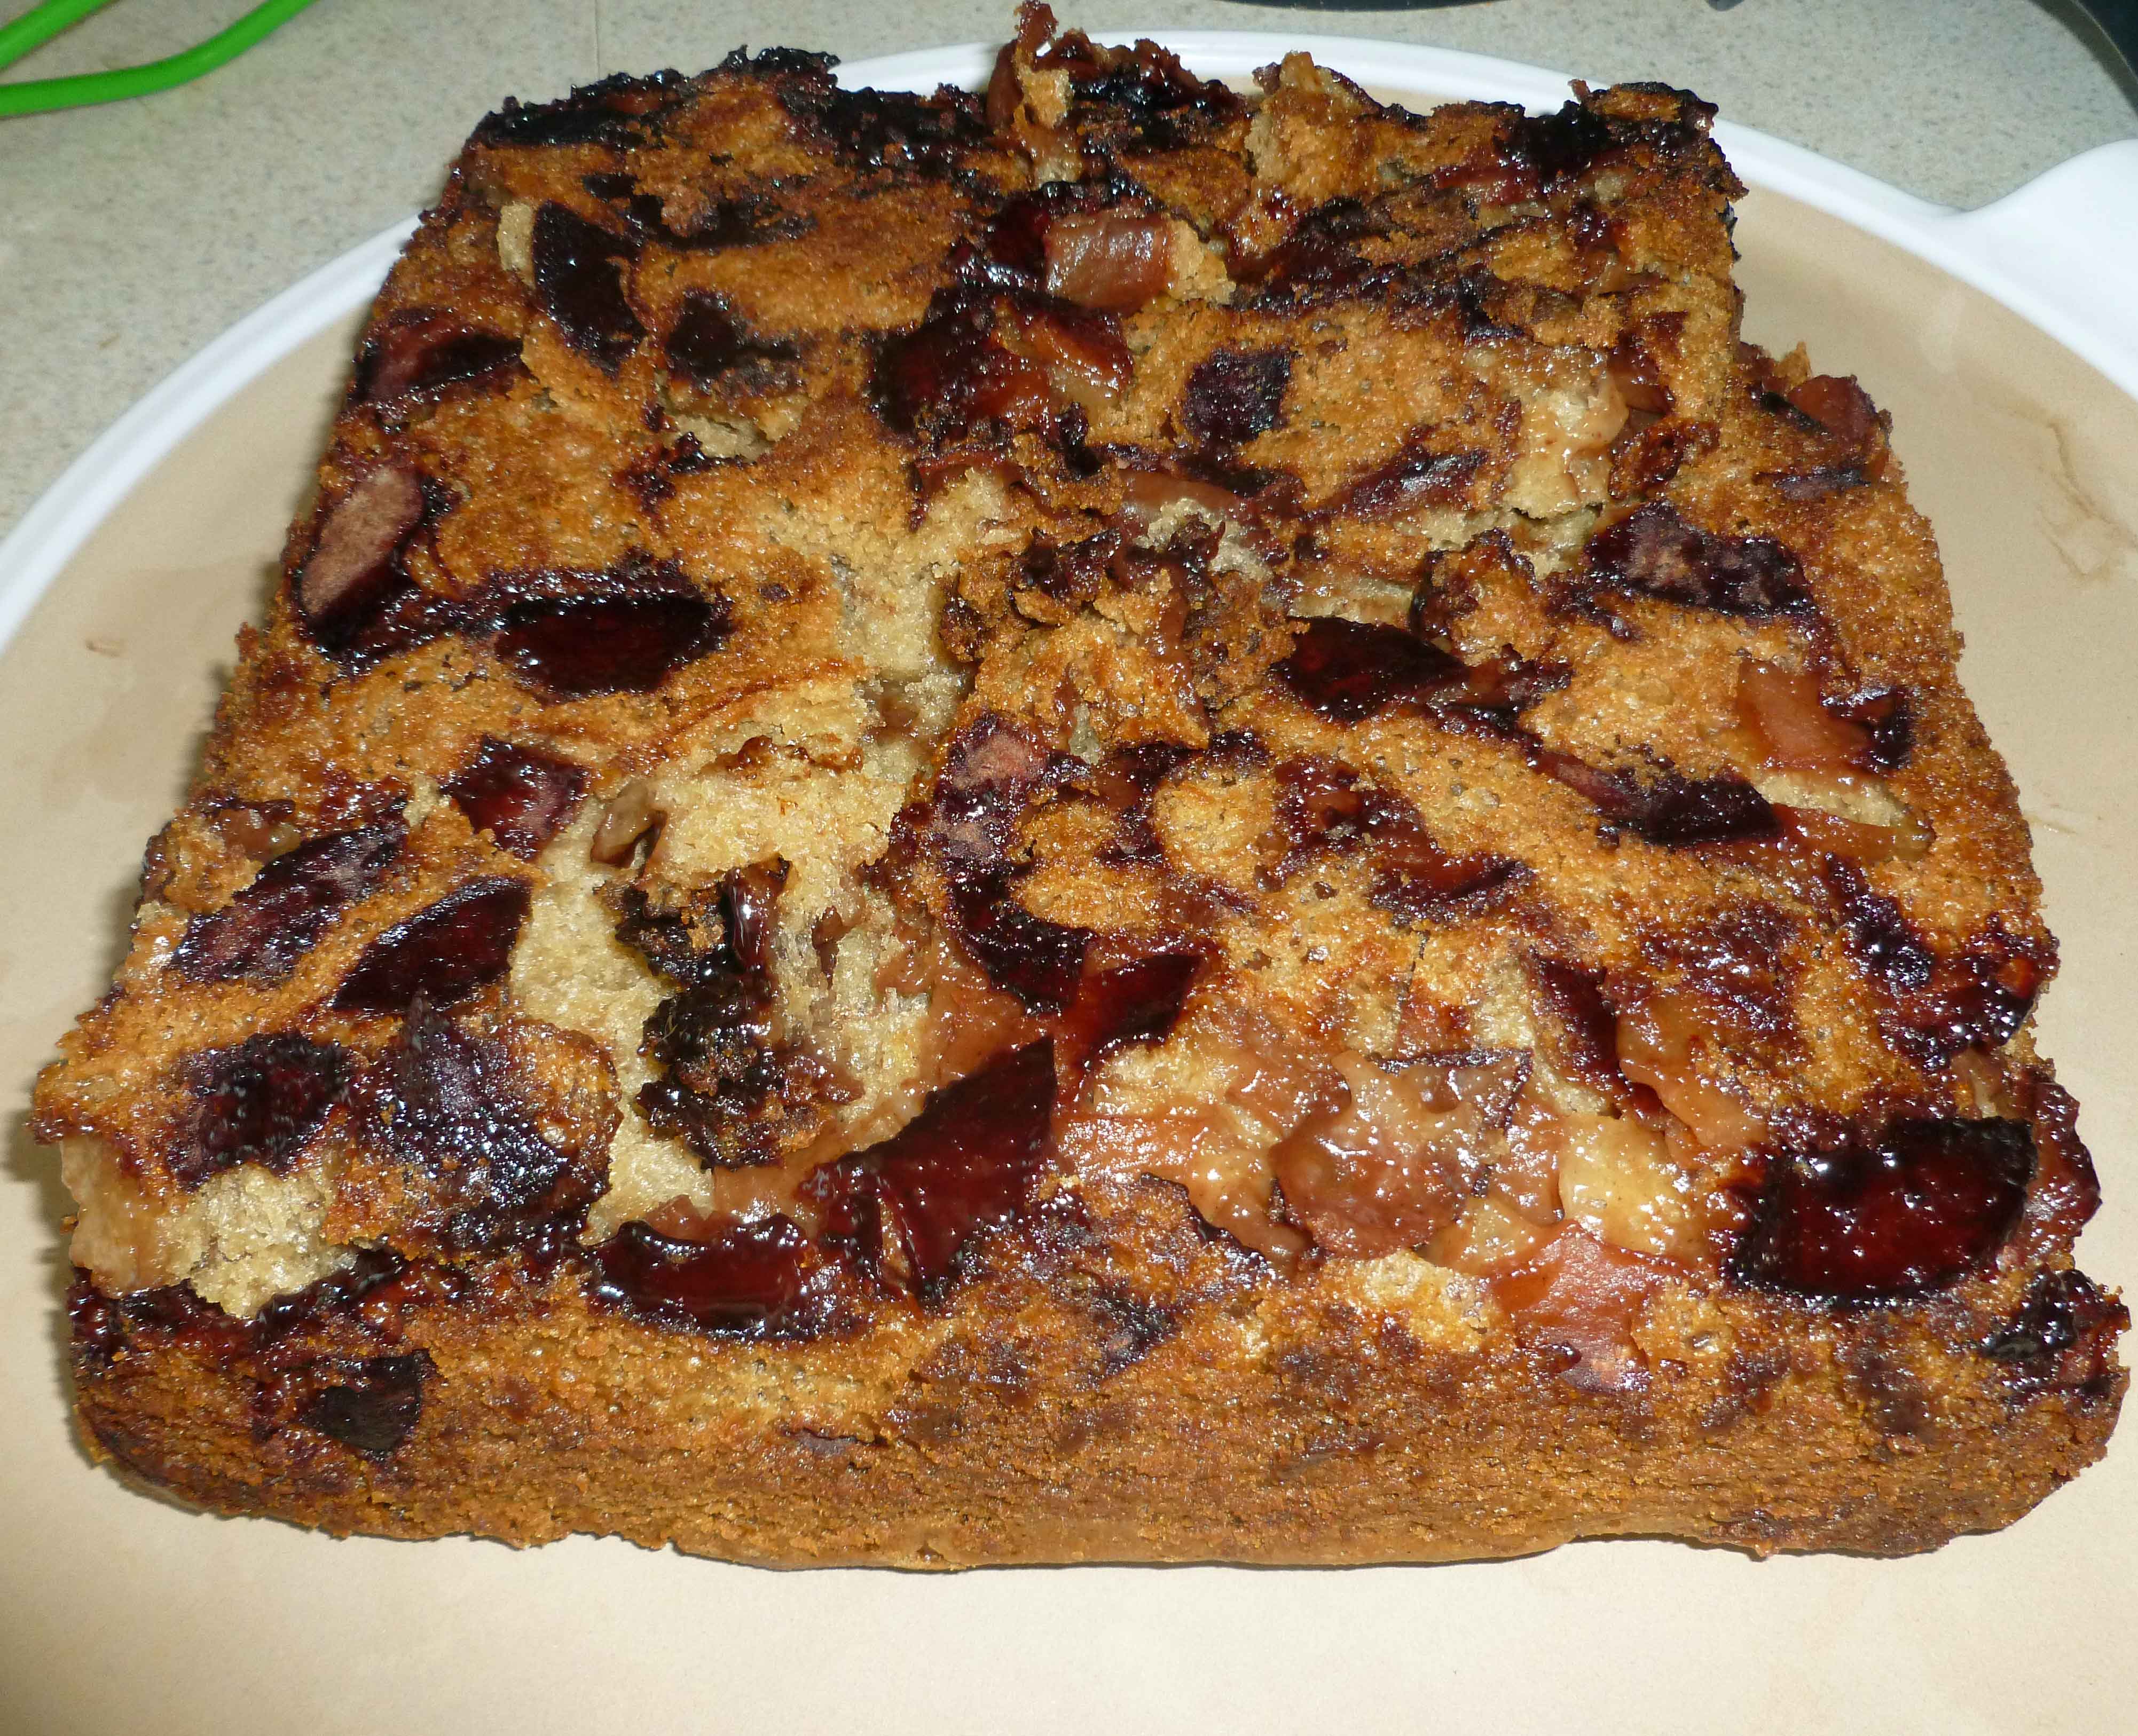
    Apple Cake after removal from pan
    Apple Cake after removal from pan

    Enjoy!

  • Autumn Spiced Pork Loin

    Autumn Spiced Pork Loin
    Autumn Spiced Pork Loin

    As I said a couple of weeks ago, I’m drowning in apples. In addition to all the apple canning projects I’ve been doing, I’m trying to cook with them too.  So I came up with doing a pork loin with a rub using apple pie/mulled cider spices on a bed of onions and apples.

    Autumn Spiced Pork Loin

    • 4 pound whole pork loin
    • 2 large or 3 medium onions, peeled and diced into 1/2 inch pieces
    • 2 large or 3 medium apples, peeled, cored and diced into 1/2 inch pieces.
    • Small amount of safe for you oil to grease a 9 inch by 13 inch roasting pan with.

    Rub for pork loin:

    • 3 Tablespoons of brown sugar
    • 1/2 teaspoon of sea salt
    • 1/2 teaspoon of ground black pepper
    • 1/2 teaspoon of ground cinnamon
    • 1/4 teaspoon of ground nutmeg
    • 1/4 teaspoon of ground allspice

    Preheat oven to 375°F.  Use your safe oil to grease a roasting pan.  Place ingredients for the rub (brown sugar, sea salt, black pepper, cinnamon, nutmeg and allspice) in a small bowl and mix thoroughly with a fork.

    Place diced onions and apples in the bottom of the roasting pan.

    Apples and onions in roasting pan
    Apples and onions in roasting pan

    Place pork loin on top of diced onions and apples.

    Pork loin in roasting pan on apples and onions
    Pork loin in roasting pan on apples and onions

    Cover top of pork loin with spice rub.  It’s okay if you get a bit on the apples and onions.

    Pork loin with rub
    Pork loin with rub

    Place the roasting pan in oven and cook until the internal temperature is at least 161°F.  In order to get the correct internal temperature in my oven with a four pound pork loin, it took 1 hour and 45 minutes. If you have a much smaller pork loin, like the one to two pound pork loins you generally find at the grocery store, I’d start with 45 minutes and check the temperature at that time.

    Once you’ve reached the correct internal temperature, remove the pork loin from the oven and let it rest for a few minutes.

    Pork loin after roasting
    Pork loin after roasting

    Slice the pork loin and serve with some of the roasted apples and onions.

    Autumn Spiced Pork Loin
    Autumn Spiced Pork Loin

    Enjoy!


  • Curried Apple Bisque

    Curried Apple Bisque
    Curried Apple Bisque

    As some of you know, I bought a house in January with a lot of fruit trees. So now I have a lot of apples. I may very well drown in them.  Besides the massive amounts of canning I’ve been doing, I thought I’d looking into using them in a savory dish too.  And since I needed to use my DIY Curry Powder in something, I figured why not shoot two birds with one stone. After looking at a few different recipes I decided I wanted less of a soup feel and more of a bisque feel, so I decided to use the homemade cashew milk I had in the freezer. If you have a safe commercial dairy replacement product, feel free to use it (I don’t) or if you can have coconut milk (I can’t) that might also work well. Free feel to make it work for you.

    Curried Apple Bisque

    • I medium onion, finely diced
    • 2 Tablespoons of olive oil (or other safe for you oil)
    • 1 teaspoon of curry powder (I used my DIY Curry Powder)
    • 1/4 teaspoon of ground cinnamon
    • 1/8 teaspoon of salt
    • a dash or two of cayenne pepper (depending on your spice needs)
    • a dash of ground cloves
    • 3 1/2 cups of peeled, cored, and sliced McIntosh apples  (about 3-4 apples)
    • 2 cups of vegetable stock (I used my home canned version of our Roasted Vegetable Stock)
    • 1 1/2 cups of homemade cashew milk or other replacement dairy product (for cashew milk, I use this recipe, except I leave everything out except the cashews and water)
    • a bit of cinnamon to garnish if you wish

    Peel, core and slice your apples. I have this lovely apple peeler, corer, and slicer, that makes it really easy to do, but a knife works fine too.

    Peeling and coring apples
    Peeling and coring apples


    Peeled, cored and sliced apples
    Peeled, cored and sliced apples

    In a small saucepan, saute the onion in the olive oil, until tender and it starts to look translucent.

    Sauteed onions
    Sauteed onions

    Once the onions are sauteed, add the curry powder, cinnamon, salt, cayenne pepper, and ground clove to the onions.  Mix the spices in well and cook for a minute or so. It’s going to smell amazing.

    Onion and spice mixure
    Onion and spice mixure

    Add the apples and the vegetable stock to the broth.

    Apples and vegetable stock added to the onion and spice mixture
    Apples and vegetable stock added to the onion and spice mixture

    Bring the mixture to a boil and then reduce the heat and simmer.  Simmer until the apples are tender and soft.

    Apples cooked until tender and soft
    Apples cooked until tender and soft

    Add your cashew milk and either place the bisque into a blender and puree, or use a stick blender to puree the apples in the pot. I used a stick blender.  If you used a blender, return the pureed mixture to the pot. In either case, once you’ve blended the apples, bring the bisque back to a simmer and then serve.

    You can garnish with a shake of cinnamon if you like.

    Curried Apple Bisque
    Curried Apple Bisque

    Enjoy!

  • DIY Curry Powder

    DIY Curry Powder
    DIY Curry Powder

    Besides the fact that I have a spice obsession (as outlined in my post, WW Kitchen Stories: Rosemary or Denise’s Spice Issues) and it seems dumb to pay for blends when you already have all the stuff to make the blend, I’m getting to the point after the cumin scare that I’m going to try to make as much stuff from whole spices as I can, so that there’s less chance for adulteration with undisclosed allergens, anti-caking agents, or cross contamination. There’s only a few ground spices in here, but my plan is to eventually only buy whole spices and grind all my own stuff.

    I tried to keep it reasonable for non-fire breathers, but you control how much curry powder you add to stuff. Start small and then taste, you can always add more, but you can’t really subtract easily. Also, if you want to make it a bit hotter, add 3 or 4 more dried chiles to the mix.  Be aware that you will need a blender or a coffee/spice grinder to make this.

    DIY Curry Powder

    Makes about 1 cup.

    • 6-8 dried chiles (I used Sanaam, but Arbol or Japones would work fine)
    • 5 Tablespoons of coriander seed
    • 4 Tablespoons of cumin seeds
    • 2 Tablespoons of fennel seeds
    • 2 teaspoons of black mustard seed
    • 4 green cardamom pods
    • 1/2 teaspoon of whole cloves
    • 1/4 teaspoon of black peppercorns
    • 1″ piece of cinnamon stick
    • 1 Tablespoon of ground Turmeric
    • 1 teaspoon of ground ginger
    • 1 teaspoon of ground fenugreek seed
    • 1/4 teaspoon of ground nutmeg

    Destem the chiles if necessary. Place the chiles, coriander seed, cumin seeds, fennel seeds, black mustard seed, green cardamom pods, cloves, black peppercorns, and cinnamon stick in a skillet over medium heat.

    Seeds, spices, and chiles in skillet before toasting
    Seeds, spices, and chiles in skillet before toasting

    Move the skillet around constantly to shift the seeds, spices and chiles until you smell the cumin seed toasting, some of the seeds popping and the spices darken.

    Seeds, spices, and chiles in bowl after toasting
    Seeds, spices, and chiles in bowl after toasting

    Remove the spices, seeds, and chiles from the skillet, and allow them to cool completely.

    Once cool, place the spices, seeds, and chiles from the skillet and the ground turmeric, ginger, fenugreek, and nutmeg into a blender, and blend until you have a fine powder. Before opening the blender, let the powder settle for a few minutes so that you don’t gas yourself.

    If you are using a coffee/spice grinder, place the ground turmeric, ginger, fenugreek, and nutmeg into a bowl. Grind the spices, seeds, and chiles from the skillet in coffee/spice grinder in batches, adding the batches to the bowl until you have ground all of the spices, seeds, and chiles. Using a wire whisk, mix well so that the ground turmeric, ginger, fenugreek, and nutmeg are fully incorporated into the newly ground spices, seeds, and chiles from the skillet.

    Store in an air-tight container and use where you would use curry powder. Stay tuned for some recipes using it in the coming weeks.

    Enjoy!


  • Aquafaba Vegan Salad Dressing

    Aquafaba Vegan Salad Dressing
    Aquafaba Vegan Salad Dressing

    So with the corn allergy all of the vegan mayonnaise products are a big no-no for me, as canola is notoriously cross-contaminated with corn, and I started to react to my favorite product. I haven’t had a safe mayonnaise in over a year. When I saw the aquafaba experiments with mayo, it rang a bell as a lot of the vegan products have pea protein, so I thought I’d give it a go. Only problem was, in order to get some aquafaba, I had to find time to pressure can some garbanzo beans at home, as I don’t really have a safe commercial garbanzo bean product I can buy. A few weeks ago I canned some garbanzo beans, but I just managed to find time to do the experiment recently. I used this recipe to start, but I modified it a bit because I was looking for a flavor that was more like Miracle Whip, as that was my mayo/salad dressing product of choice when I could still eat eggs, milk, and corn (I have more allergies, but those are the problem children for commercial mayo products). When I think of all the things I can make again, I seriously want to cry. Many thanks to Peanut Butter & Vegan for the post on using aquafaba for mayo to get me started. As suggested by the original post, I used an immersion (stick) blender, but if you try it in a regular blender, let me know how that goes.

    Aquafaba Vegan Salad Dressing 

    Makes about 1 cup.

    • about 1/4 cup of aquafaba (the liquid from a can of garbanzo beans)
    • 1/2 Tablespoon of lime or lemon juice (I used lime because I had limes in the house, but no lemons)
    • 1/2 Tablespoon and 1/2 teaspoon of apple cider vinegar (I used Bragg’s as it is generally safest for people with corn allergies)
    • 3/4 teaspoon of salt
    • 1/2 teaspoon of ground mustard
    • 1/4 teaspoon of sugar
    • dash of paprika
    • 3/4 cup of safe for you, neutral tasting oil (I used grapeseed oil)

    In a small bowl or measuring cup that isn’t much bigger in circumference than your immersion blender, add the aquafaba, lime juice, apple cider vinegar, salt, mustard, sugar and paprika. Mix with the immersion blender for a few seconds so that the ingredients are all combined. Slowly drizzle in the oil, while the immersion blender is running, moving the immersion blender around when the mixture becomes thick to make sure all the oil gets incorporated. Once the mixture is nice and thick, place the salad dressing in a container and place it in the fridge, where it will continue to thicken.

    Aquafaba Vegan Salad Dressing
    Aquafaba Vegan Salad Dressing

    Yay!! You have salad dressing! Go forth and make yummy dishes that require mayo/salad dressing like substances!

  • Chili Flavored Russet and Sweet Potato Chips

    Chili Flavored Sweet Potato Chips
    Chili Flavored Sweet Potato Chips
    Chili Flavored Russet Potato Chips
    Chili Flavored Russet Potato Chips

    I’ve been meaning to fry stuff for sometime, because I miss fried food and the last time Mary Kate and I had a fry-a-palooza was this past Thanksgiving. And I wanted potato chips. I tried a recipe where you baked them, but it took two hours of prep, and seriously, I can fry them faster than that, with less aggravation. This is one of those recipes where having good tools helps. I used a mandoline to slice the russet potato and sweet potato, and I used a Thermopop thermometer to keep track of the temperature of the oil.  Also, I used a cast iron wok to fry in, because I like it and it uses less oil, but you can use a regular skillet or stock pot if you use enough oil.

    Chili Flavored Russet and Sweet Potato Chips:

    Serves 1 (let’s be realistic about this…I ate them all in 10 minutes).

    • 1 Russet Potato, sliced extremely thin
    • 1 Sweet Potato, sliced extremely thin
    • a pinch of DIY Chili Powder
    • a pinch of salt
    • safe oil for frying enough to fill the pot about 3 to 4 inches deep

    For the frying:

    • A pot deep enough to accommodate about 3 inches of oil and the frying thermometer, a thick stainless steel stock pot or an enameled dutch oven would be best, although I used a cast iron wok and just fried less chips at a time. You also want a pot that’s tall enough that the edge is 4 or more inches above the oil level. It’s safer and there’s less splatter all around. We do not recommend using anything with Teflon or nonstick coatings. Of course, if you have an actual deep fryer appliance, use that.
    • frying thermometer (but you can’t use this one with a wok, in case you planned use a wok instead, I used this one and just stuck it in the oil periodically to check.)
    • tongs and/or slotted frying spoon/spider  (we used a silicone one rather than the traditional wire and bamboo, but I can’t find a picture of ours)
    • plate or cookie sheet, lined with paper towels

    Set up your frying pot, add your safe oil, and set up your thermometer. Start heating your oil over medium heat, as it will take some time to reach the right temperature.  You are aiming for about 380ºF.

    I used a mandoline, shown below, to slice my potatoes, but you can slice them with a knife if your knife skills are that good.

    Mandoline
    Mandoline

    The slices of your Russet potato will be wet and starchy. Place them in a bowl and water and agitate them a bit to rinse the starch off.

    Rinsing off the starch from the Russet potato slices
    Rinsing off the starch from the Russet potato slices

    Place the rinsed slices in between the folds of a clean kitchen towel to dry them off.

    Rinsed slices on clean kitchen towel
    Rinsed slices on clean kitchen towel
    Fold towel over slices to dry both sides
    Fold towel over slices to dry both sides

    The sweet potato slices should be dry enough after slicing as there is less water content than a Russet potato.

    Sweet Potato Slices
    Sweet Potato Slices

    When the oil temperature is 380°F, carefully add some of the potato slices to the pot. You don’t want to overcrowd them.

    Russet Potato frying
    Russet Potato frying
    Sweet Potato frying
    Sweet Potato frying

    Fry the potatoes, turning them occasionally with tongs until they are golden brown. They should be fried a bit darker in color than normal potato chips so that they are crispy. The mandoline does not quite cut the potatoes as thinly as a commercial potato chip, and in order to get some crisp, you need to cook them a little longer. The potatoes will start to wave and distort when they are close. if the potato chip seems pretty flat still, keep frying a bit.  When the potato slices are fried, place them on the plate or cookie sheet lined with paper towels to drain.

    Sweet Potato Chips
    Sweet Potato Chips
    Russet Potato Chips
    Russet Potato Chips

    Once the chips have cooled a little, place them in a bowl and sprinkle the salt and chili powder on them to taste and toss them a bit to coat them and distribute the seasoning.

    Chili Flavored Sweet Potato Chips
    Chili Flavored Sweet Potato Chips
    Chili Flavored Russet Potato Chips
    Chili Flavored Russet Potato Chips

    Enjoy!

  • WW: Homemade Tick Repellent

    Tick Identification chart
    Tick Identification chart

    So as many of you know, my husband and I bought a house in January so we could have a garden and grow food, have space to can and do food prep, and make all the things that I need, like soap, lard and tallow, that were really inconvenient to make in a second story balcony apartment. We now have a large garden, a huge lawn, and a lot of fruit trees.  And when spring came, we also had a crap ton of ticks.

    Because of my allergies and as I was trying to grow safe food, I didn’t want to use pesticides. I looked into diatomaceous earth, but I didn’t want to kill the bees. I looked into commercial stuff I could spray on my clothes, but they didn’t have the inactive ingredients listed, so I didn’t know if it was safe for me. I found an all-natural tick repellent at Blue Seal Feeds that used essential oils, but it had citric acid (corn) in it. I looked online for other all-natural repellents, but they had other corn or coconut derivatives. So I did a little googling, swiped some of the ingredient list from one of the all-natural repellents, and came up with a do-it-yourself version. Make no mistake, it reeks. But if I sprayed down my clothes and my rubber boots with it, I didn’t get ticks. Now, I don’t know if that was coincidence or not, but since I really don’t need Lyme disease in addition to my body deciding to be allergic to the world, I’ll keep using it. Also, if you want more information on ticks and tick-borne diseases, check out the information from the CDC.

    I used an essential oil 4 ounce spray bottle (shown only for illustration purposes, we have no affiliation with Amazon or the seller).

    Homemade Tick Repellant

    • 2 ounces of apple cider vinegar
    • 1 ounce of water
    • 20 drops of peppermint essential oil
    • 20 drops of Eucalyptus citradora essential oil
    • 15 drops of lemongrass essential oil
    • 15 drops of rosemary essential oil
    • 10 drops of tea tree essential oil

    Put all the ingredients in your 4 ounce spray bottle, put the sprayer top on and shake well.  Spray on clothes and shoes.  Make sure you don’t get it into your eyes, it would not be fun.

    It also seemed to help with the black flies, but I’ve not yet tried it with mosquitoes. When I do, I’ll let you know how it goes.

    Be safe out there!

  • Garlic Scape Pesto Sauce

    Garlic Scape Pesto Sauce
    Garlic Scape Pesto Sauce

    My friend Mary S, of the green thumb, has been gifting me garlic scapes. Since her garlic was planted in the fall and is almost as tall as me, her garlic has lots of scapes, whereas my garlic was planted in the spring, and the tallest plant might be, oh, six inches high, and there are no scapes to be seen. Since I had some basil leftover from another dish, I decided to make a sauce. You will need a blender for this recipe.

    Garlic Scape Pesto Sauce

    • 1 cup of tightly packed basil leaves
    • 1 cup of garlic scapes, chopped into 1 to 2 inch pieces
    • 1 cup of olive oil (make sure it’s safe for you, I do well with California Olive Ranch)
    • 1/4 cup of white wine vinegar (make sure it’s safe for you)
    • 1/2 teaspoon of salt

    Roughly chop up the basil leaves. Add the basil, garlic scapes, olive oil, and vinegar to the blender.  Process until the sauce is pulverized to your liking. I like mine pretty smooth.

    This is a pretty versatile sauce. It can be used mixed into cooked hot rice noodles or even just brown rice to use as a savory side dish. You can use it as a dipping sauce for grilled meat, or toss it with steamed veggies. You can thin it down with a little more vinegar and use it as a salad dressing.  If you come up with other ways to use it, please let us know.

    Enjoy!

    Garlic Scape Pesto Sauce mixed with rice noodles
    Garlic Scape Pesto Sauce mixed with rice noodles