Notice: Function _load_textdomain_just_in_time was called incorrectly. Translation loading for the wp-ultimate-recipe domain was triggered too early. This is usually an indicator for some code in the plugin or theme running too early. Translations should be loaded at the init action or later. Please see Debugging in WordPress for more information. (This message was added in version 6.7.0.) in /home/maryzahc/public_html/adultfoodallergies.com/wp-includes/functions.php on line 6121
denisedaniel – Page 5 – surviving the food allergy apocalypse (archive)

Author: denisedaniel

  • Garlic Double Header: Toum Sauce and Garlic Sorghum Flatbread

    Garlic Double Header: Toum Sauce and Garlic Sorghum Flatbread

    Toum Sauce & Garlic Sorghum Flatbread
    Toum Sauce & Garlic Sorghum Flatbread

    It’s our last garlic post of Keeping the Vampires Away month, so I decided to do a double header. And they actually go great together, although you’re going to have to make heroic efforts to get rid of the aroma once you’re finished eating. The great thing about these two recipes is that they use very few ingredients, which is fairly infrequent in allergy cooking.

    Toum Sauce (Lebanese Garlic Sauce)

    The toum sauce is pretty easy and the only ingredient that’s a bit out of the mainstream is the aquafaba which helps it emulsify easily. In researching recipes for toum sauce, some state that using extra virgin olive oil can result in the sauce having a bit of a bite and that grape seed oil doesn’t emulsify well. Since those are my only two safe oils, I chose extra virgin olive oil, and I didn’t mind a bit of a bite.  However, if you have a lighter safe oil, you might want to try it. It’s great to use on sandwiches, falafel, grilled foods, and flatbread. I even put it on salad.

    I didn’t want to make huge amounts so I used an immersion blender, but I think there is enough volume that you can try it in a regular blender as well. I also used the elephant garlic that MaryKate sent me from Seattle, but regular garlic will work.

    Toum Sauce (Lebanese Garlic Sauce)
    Toum (Lebanese Garlic Sauce)
    Print Recipe
    An allergy friendly version to use on shawarma, falafel, grilled foods, and flatbread. I even put it on salad.
    Servings Prep Time
    1 1/2 cups 15 minutes
    Servings Prep Time
    1 1/2 cups 15 minutes
    Ingredients
    • 6-8 cloves garlic (or 1 clove of elephant garlic)
    • 1 teaspoon salt
    • 2 Tablespoons aquafaba (see http://aquafaba.com/)
    • 1 Tablespoon water
    • 1 teaspoon lemon juice (I used freshly squeezed)
    • 1 cup olive oil
    Servings: cups
    Instructions
    1. Peel and trim ends of garlic cloves and roughly chop. Place in small container if using a stick blender or in the blender if using a regular blender. Add salt, aquafaba, water, and lemon juice.
    2. Blend until the garlic, salt, aquafaba, water, and lemon juice is a thick paste. You want the garlic to be completely pureed.
    3. Once the garlic is completely pureed, continue to blend, and very slowly pour olive oil into the mixture as it blends, and the mixture will thicken. Store in the refrigerator.
    Share this Recipe
    Powered byWP Ultimate Recipe
    One clove of the elephant garlic MaryKate sent me with a steak knife for size reference
    One clove of the elephant garlic MaryKate sent me with a steak knife for size reference
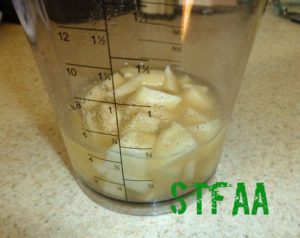
    Garlic, salt, aquafaba, water, and lemon juice before blending
    Garlic, salt, aquafaba, water, and lemon juice before blending
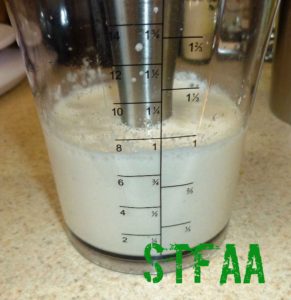
    Garlic, salt, aquafaba, water, and lemon juice after blending
    Garlic, salt, aquafaba, water, and lemon juice after blending
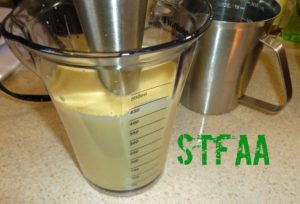
    Blending garlic mixture with olive oil
    Blending garlic mixture with olive oil
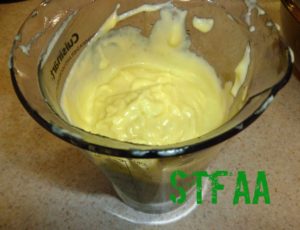
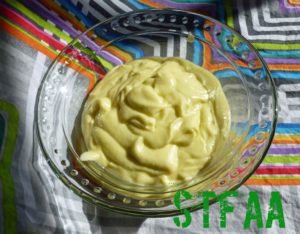
    Finished toum sauce after blending
    Finished toum sauce after blending
    Toum Sauce (Lebanese Garlic Sauce)
    Toum Sauce (Lebanese Garlic Sauce)

    Garlic Sorghum Flatbread

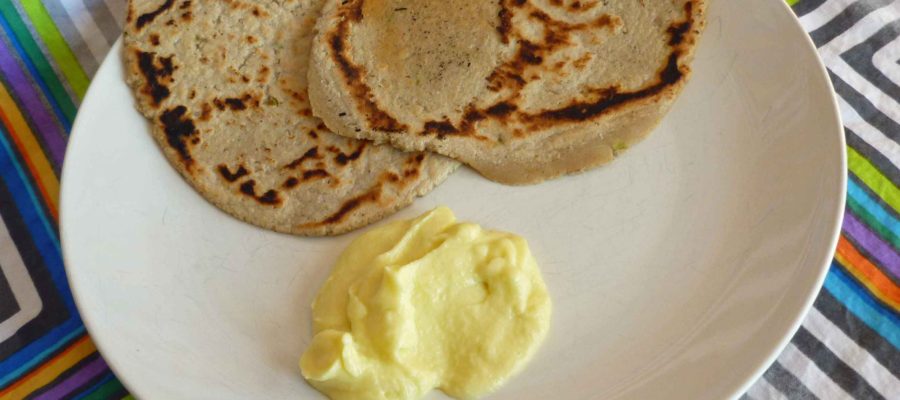
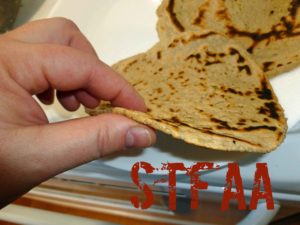
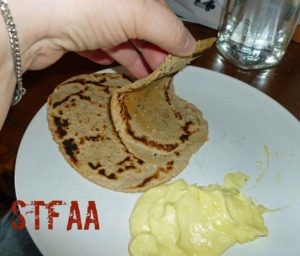
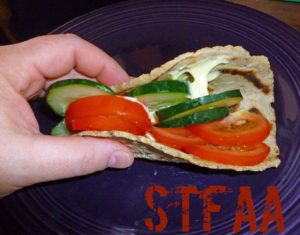
    Although I’ve modified this recipe from Book of Yum a bit by adding garlic and scallions, I’ve got to give credit where credit is due. I’ve made flatbreads (or roti in Indian cuisine) from other recipes and have not been as successful. Although the recipe is very simple, the technique of cooking half the flour with water is what makes the resulting flatbread nicely pliable. I was able to make them very thin and wrap them around some veggies without them breaking. Plus they were really awesome just dipped in the toum sauce by themselves.

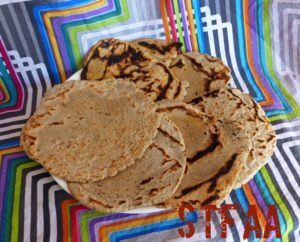
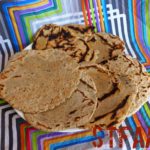
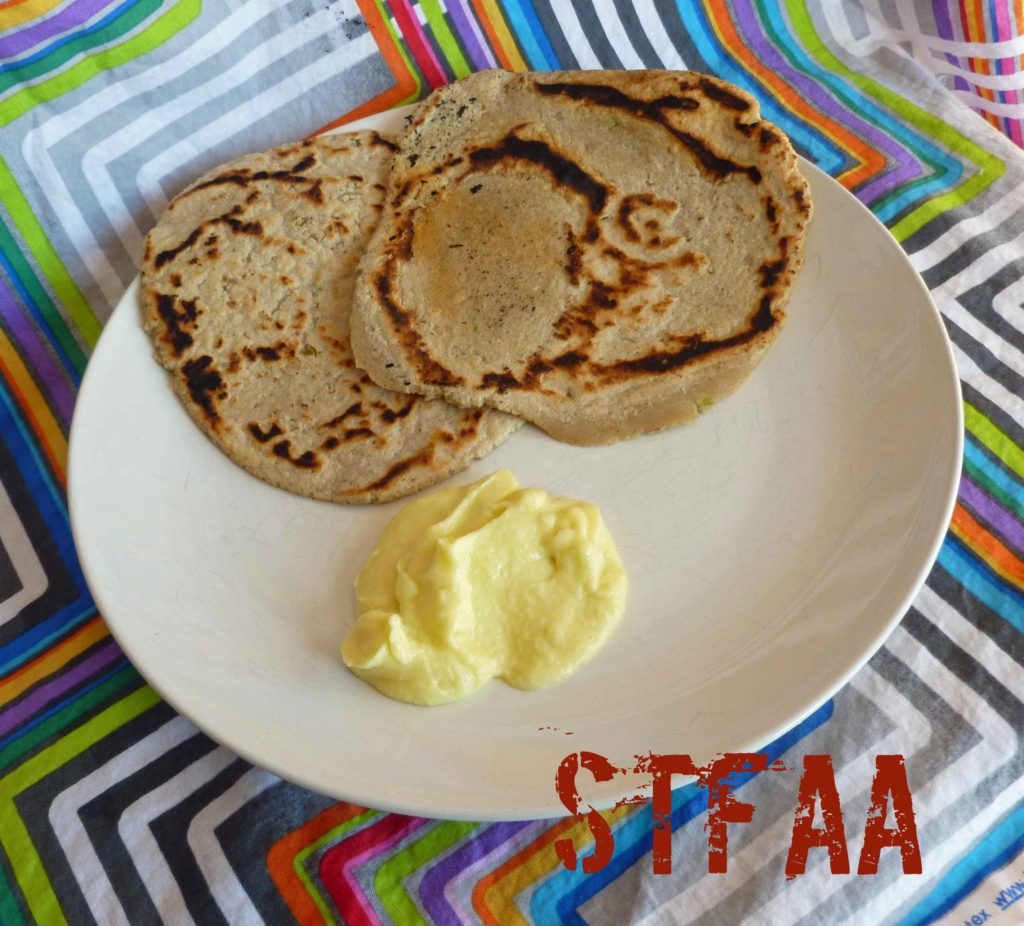
    Garlic Sorghum Flatbreads except the two I ate while cooking :)
    Garlic Sorghum Flatbread
    Print Recipe
    A simple flatbread you can use as a wrap, tortilla, or just to munch on.
    Servings Prep Time
    6-8 flatbreads 20 minutes
    Cook Time Passive Time
    3-5 minutes 10-15 minutes
    Servings Prep Time
    6-8 flatbreads 20 minutes
    Cook Time Passive Time
    3-5 minutes 10-15 minutes
    Ingredients
    • 2 cups sorghum flour
    • 2 cups water
    • 1 teaspoon salt
    • 6-8 cloves garlic or 1 clove of elephant garlic
    • 2 scallions
    • roux whisk (helpful to have)
    Servings: flatbreads
    Instructions
    1. Peel and trim your garlic. Trim the ends of the scallions and any wilted bits of green. Chop garlic and scallions very finely, you want very small pieces but not a paste. I used a manual food processor but you can do it with a knife.
    2. Measure place one cup of the sorghum flour in two bowls, so that the flour is divided to add as needed. In a sauce pan or deep skillet, add the garlic and scallions, salt, and two cups of water. Bring the water to just below a boil in the pan, and add one cup of the flour to the water in a slow stream, using the roux whisk to blend in the flour.
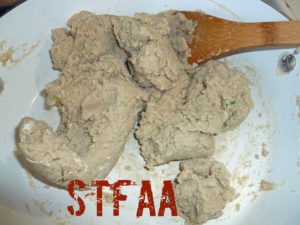
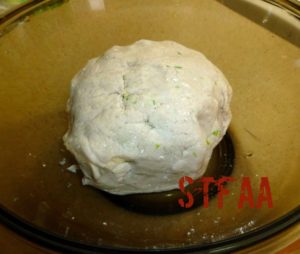
    3. Reduce the heat to low. Using a wooden spoon, stir the other cup of flour into the pan, until it forms a dough ball. Keep stirring and mixing until the dough forms a rubbery texture. Remove the dough and place in a heat safe bowl. Let the dough rest for 10-15 minutes or until it is cool enough to touch.
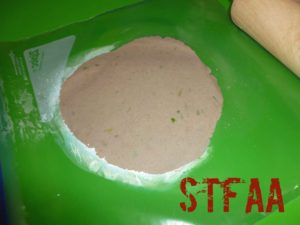
    4. Form into small balls, a little bigger than the size of a ping pong ball, and place back into the bowl. I used a gallon size freezer safe ziptop bag, with the sides cut out to roll the dough out between with a rolling pin. You could also use a tortilla press, but I don’t have one. Roll the dough out to about an 1/8th of an inch.
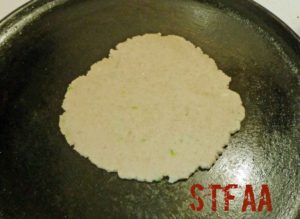
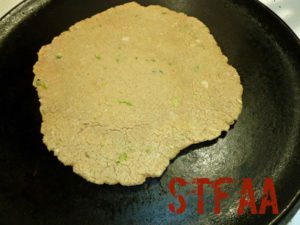
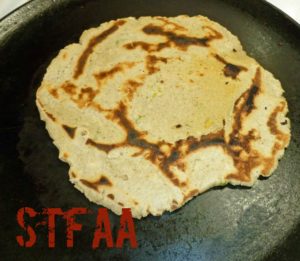
    5. Place a cast iron skillet over medium-low to medium heat (depends on your stove and your skillet, you may need to adjust. Cook until the texture changes on the top of the flatbread (it will look a bit dry and cracked) and until you have light brown spots on the side being cooked. Turn the flat bread and cook the other side. Repeat until all your flatbreads are cooked.
    Share this Recipe
    Powered byWP Ultimate Recipe
    Mince garlic and scallions very finely
    Mince garlic and scallions very finely
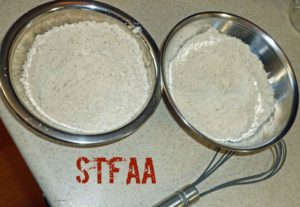
    Measure out sorghum, one cup in each bowl and get roux whisk ready
    Measure out sorghum, one cup in each bowl and get roux whisk ready
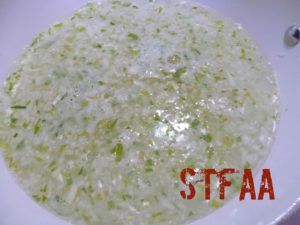
    Add water to saucepan and add garlic and water, bringing just below boiling.
    Add water to saucepan and add garlic and water, bringing just below boiling.
    Slowly add one cup of sorghum flour and mix in with whisk
    Slowly add one cup of sorghum flour and mix in with whisk
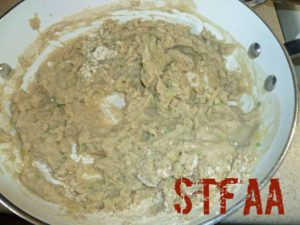
    Turn heat to low and mix in second cup with wooden spoon until it forms a rubbery dough
    Turn heat to low and mix in second cup with wooden spoon until it forms a rubbery dough
    Let dough rest in heat safe container
    Let dough rest in heat safe container
    Roll out dough between a ziptop bag with the sizes cut out once cool enough to handle
    Roll out dough between a ziptop bag with the sizes cut out once cool enough to handle
    Cook on cast iron skillet over medium heat
    Cook on cast iron skillet over medium heat
    Flatbread ready to flip (note dry texture around edges)
    Flatbread ready to flip (note dry texture around edges)
    Flatbread after flipping
    Flatbread after flipping
    Garlic Sorghum Flatbreads except the two I ate while cooking :)
    Garlic Sorghum Flatbreads except the two I ate while cooking 🙂

    Enjoy!

  • Garlic and Onion Pakoras

    Garlic and Onion Pakoras

    Garlic and Onion Pakoras
    Garlic and Onion Pakoras

    Garlic and Onion Pakoras

    MaryKate and I were on the same wave length about our first recipe, in that garlic must be fried somehow. I’ve looked at doing pakoras several times, but hadn’t gotten around to it. I mean, fried veggie fritters with Indian spices? How can that be bad? So when MaryKate sent me some extreme elephant garlic from Seattle, I knew this would be a great use for it.

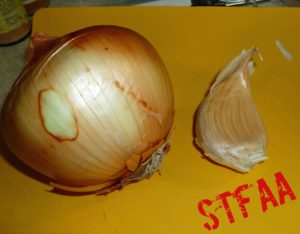
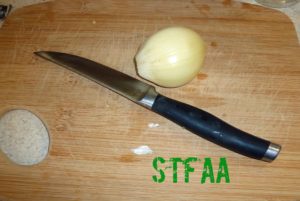
    Onion and Elephant garlic clove
    Onion and Elephant garlic clove

    Look that the elephant garlic in the picture. For scale, that onion is a bit larger than a baseball, but not as big as a softball. Crazy huge right? If you don’t have access to elephant garlic, just use an entire bulb of regular garlic. (Oh, and to resolve the unfortunate aroma later, I swished with a glass of water with a couple of tablespoons of peroxide and a drop of peppermint essential oil mixed in it, after lots of brushing teeth and tongue.)

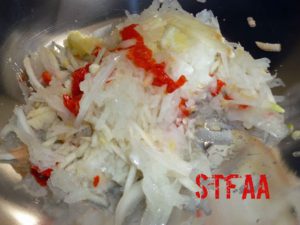
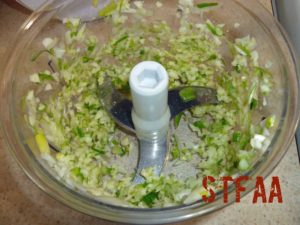
    The garlic clove was actually large enough that I could put it through the grater on my food processor. I grated the onion, garlic and cayenne in the food processor and used my Pampered Chef ginger grater for the ginger (you could also use a microplaner).

    Onion, garlic, cayenne pepper, and grated ginger
    Onion, garlic, cayenne pepper, and grated ginger

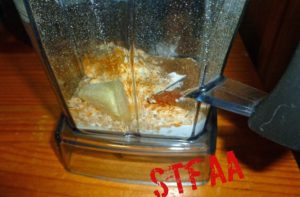
    The batter ingredients go in the blender, and you blend before adding water, but keeping it to a thick paste.

    Batter paste ingredients in blender
    Batter paste ingredients in blender

    After you’ve made the paste, mix in the veggies and your batter for the Garlic and Onion Pakoras is ready to fry.

    complete Garlic and Onion Pakora batter
    Completed Garlic and Onion Pakora batter

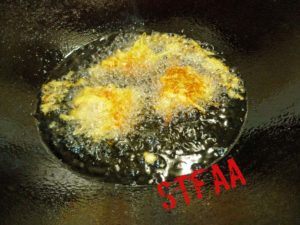
    I’ve learned to deep fry in a stainless steel or cast iron pot using a thermometer. Deep fryers generally have nonstick interiors which could potentially give off fumes that would kill my parrot. Also, once you get used to it, it’s really no big deal to fry on the stove top. Just use a pot that’s nice and deep to prevent splattering. I use a Lodge cast iron wok and I love it for frying. High walls to prevent splatter, but large open surface and it uses less oil than a regular stock pot.

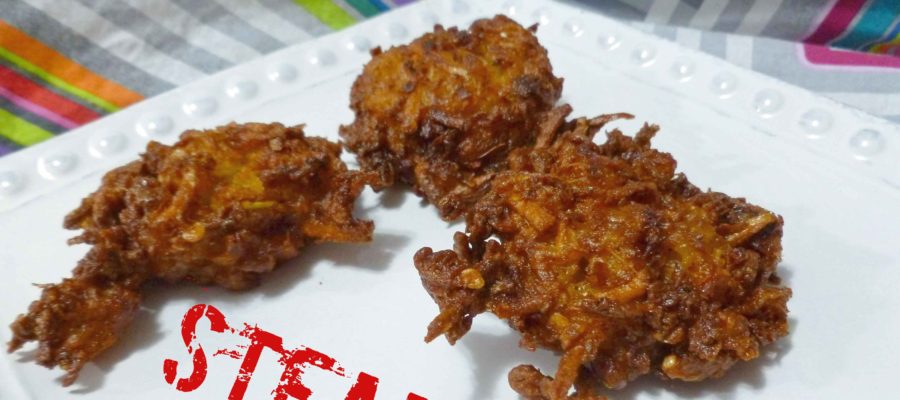
    Garlic and Onion Packoras being fried
    Garlic and Onion Packoras being fried

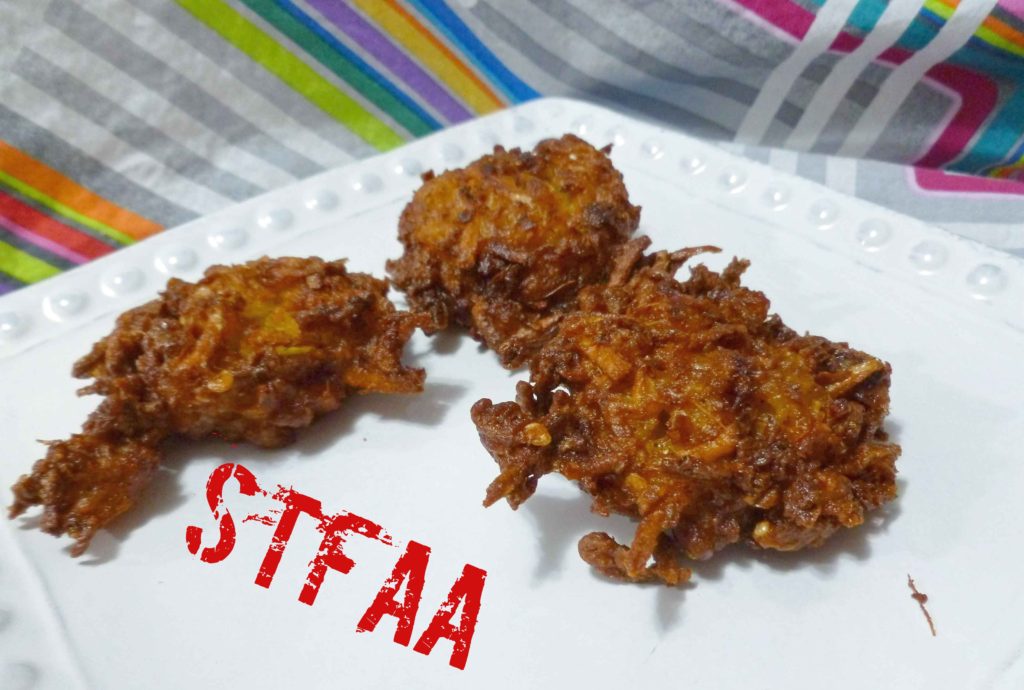
    Once they are golden brown, you want to drain off the excess oil. Conventional wisdom says its best to drain on a rack over paper towels, but…that’s just one more damn thing I’m going to have to wash, and I don’t care enough.

    Garlic and Onion Packoras draining after being fried
    Garlic and Onion Packoras draining after being fried

    Serve with ketchup or a chili sauce or you can mix up some chaat masala to sprinkle on them. Enjoy!
    Garlic and Onion Pakoras
    Garlic and Onion Pakoras

    Notice: Trying to access array offset on value of type bool in /home/maryzahc/public_html/adultfoodallergies.com/wp-content/plugins/wp-ultimate-recipe/helpers/models/recipe.php on line 254
    Garlic and Onion Pakoras
    Print Recipe
    A lovely fried garlic and onion snack or appetizer when you’re playing with deep frying.
    Servings Prep Time
    4 people 15 minutes
    Cook Time
    5 minutes
    Servings Prep Time
    4 people 15 minutes
    Cook Time
    5 minutes
    Garlic and Onion Pakoras
    Print Recipe
    A lovely fried garlic and onion snack or appetizer when you’re playing with deep frying.
    Servings Prep Time
    4 people 15 minutes
    Cook Time
    5 minutes
    Servings Prep Time
    4 people 15 minutes
    Cook Time
    5 minutes
    Ingredients
    • 1 medium onion
    • 1 clove elephant garlic (if you don’t have elephant garlic, use an entire bulb of regular garlic)
    • 1 hot pepper, destemmed and deseeded (use a jalapeno, serrano, or cayenne pepper depending on your preferred level of heat)
    • 2 teaspoons ginger grated
    • 4 Tablespoons garbanzo bean flour (besan)
    • 1 Tablespoon rolled oats
    • 1 Tablespoon rice flour
    • 1/2 teaspoon sea salt
    • 1/8 teaspoon ground turmeric
    • 1/4 teaspoon crushed red pepper
    • 1/4 teaspoon ground cumin
    • 1/4 teaspoon ground garam masala
    • 1/2 inch piece of peeled ginger
    • water
    • safe oil for frying
    • thermometer
    • stainless steel or cast iron pot
    Servings: people
    Instructions
    1. Thinly chop up the onion, garlic, and pepper, and grate 2 teaspoons of ginger. I used the grater blade in my food processor for the vegetables, and grated my ginger with a ginger grater (you could use a microplaner). If you are using a knife, wear safe for you food prep gloves to prevent you from burning your hands when chopping the pepper.
    2. In a blender, place the garbanzo bean flour, oats, rice flour, salt, turmeric, crushed red pepper, cumin, garam masala, 1/2 inch piece of peeled ginger. Blend. Add enough water, teaspoon by teaspoon to form a thick paste, scraping down the sides as necessary. Keep the paste thick as more water will be added when you add the vegetables.
    3. Add the chopped vegetables, and blend for only a few seconds, just enough to incorporate the veggies with the paste. You do not want the vegetables pureed. Empty the blender into a bowl or container and make sure the mix is well combined.
    4. Place safe oil into a stainless steel or cast iron pot, two inches deep. Heat oil until the temperature is 360°F. Using a tablespoon or small scoop, place a spoonful or scoop into the hot oil and deep fry a few minutes on each side until golden brown.
    5. Place on plate with paper towels to drain off excess oil. Serve warm with a ketchup or chili sauce, or try making up your own chaat masala mix. Enjoy!
    Share this Recipe
     
    Powered byWP Ultimate Recipe
  • Whoopie Pies – Gluten-Free with Vegan Option

    Whoopie Pies – Gluten-Free with Vegan Option

    Whoopie Pies - Gluten-Free with Vegan Option
    Whoopie Pies – Gluten-Free with Vegan Option

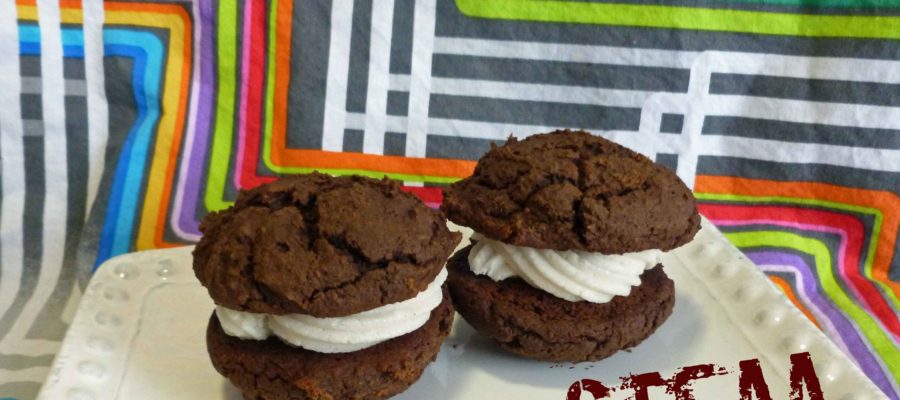
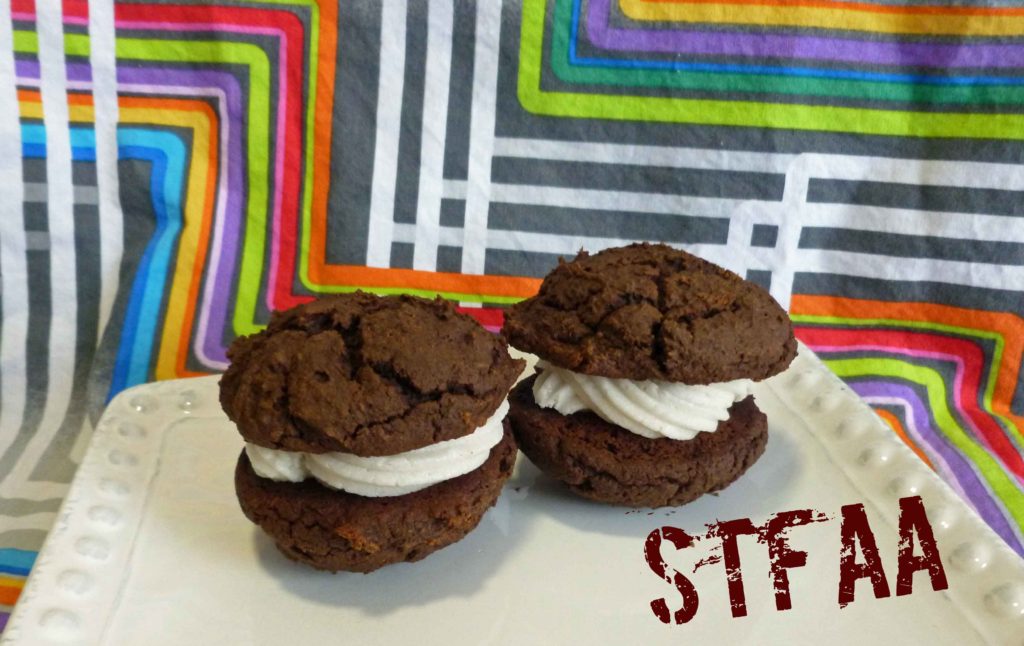
    To cap off our Treat. Yo. Self. January. theme, I give you a big treat, Whoopie Pies. I’m fairly certain I’ve mentioned this before, but I’m originally from Maine. The whoopie pie is the official state treat of Maine and apparently the town of Dover-Foxcroft, Maine, has hosted the Maine Whoopie Pie Festival since 2009, according to Wikipedia. I’ve seriously missed them since the onset of my dairy, egg, wheat and corn allergies.  

    My recipe uses my home rendered lard because it’s my only safe solid fat, but you can substitute it with vegetable shortening if you have one you can use safely.  There are three recipe cards listed below, one that provides the flour mixture I use in the whoopie pies, one for the frosting, and one to bake the pies themselves.  I used a Pampered Chef Easy Accent Cake Decorator to pipe the frosting into the whoopie pies, but you could just use a safe for you zip top bag with a corner cut off as well. I don’t recommend a spreader or a knife as gluten-free pies don’t have the same sturdy structure as the wheat ones do.

    Whoopie Pies – Gluten-Free with Vegan Option

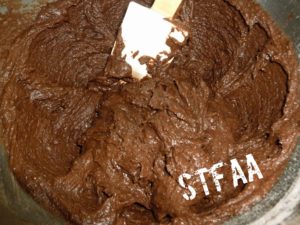
    Whoopie Pie batter
    Whoopie Pie batter
    Whoopie Pie batter on parchment lined cookie sheets
    Whoopie Pie batter on parchment lined cookie sheets
    Whoopie Pies after baking
    Whoopie Pies after baking
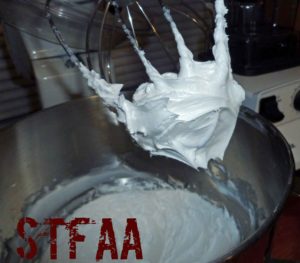
    Lard after being whipped
    Lard after being whipped
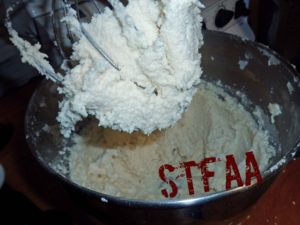
    Vanilla Frosting after adding powdered sugar
    Vanilla Frosting after adding powdered sugar
    Whoopie Pies - Gluten-Free with Vegan Option
    Whoopie Pies – Gluten-Free with Vegan Option

    Notice: Trying to access array offset on value of type bool in /home/maryzahc/public_html/adultfoodallergies.com/wp-content/plugins/wp-ultimate-recipe/helpers/models/recipe.php on line 254
    Gluten-free, Rice-free, Potato-free Flour Mix
    Print Recipe
    Servings Prep Time
    9 cups 15 minutes
    Servings Prep Time
    9 cups 15 minutes
    Gluten-free, Rice-free, Potato-free Flour Mix
    Print Recipe
    Servings Prep Time
    9 cups 15 minutes
    Servings Prep Time
    9 cups 15 minutes
    Ingredients
    • 2 cups sorghum flour
    • 2 cups oat flour
    • 2 cups millet flour
    • 2 cups tapioca starch
    • 1 cup arrowroot starch
    Servings: cups
    Instructions
    1. Measure all ingredients and place in a large mixing bowl. Using a whisk, mix the ingredients until well combined. Place in an air tight storage container and use in baking recipes.
    Share this Recipe
     
    Powered byWP Ultimate Recipe


    Notice: Trying to access array offset on value of type bool in /home/maryzahc/public_html/adultfoodallergies.com/wp-content/plugins/wp-ultimate-recipe/helpers/models/recipe.php on line 254
    Vanilla Frosting (made with lard)
    Print Recipe
    When you don’t have any other safe solid fats and you need to make frosting somehow. If you have a safe vegetable shortening (I don’t), feel free to use it as a substitute. Makes enough for two batches of whoopie pies or cupcakes but you can also freeze it to have on hand.
    Servings Prep Time
    2 batches 30 minutes
    Cook Time
    5 minutes
    Servings Prep Time
    2 batches 30 minutes
    Cook Time
    5 minutes
    Ingredients
    • 1 cup lard or shortening (I use my home rendered lard, as store bought often has citric acid, and I have no safe shortening)
    • 4 cups powdered sugar (I make mine with my Vitamix as powdered sugar often has corn starch in it)
    • 1 teaspoon vanilla extract (I make my own with vanilla beans and vodka made from potatoes, as most commercial extract contains corn)
    • 0-4 Tablespoons water
    Servings: batches
    Instructions
    1. Measure out 1 cup of lard and place it in a stand mixer bowl. Allow your lard to come up to room temperature.
    2. Using a whisk attachment, whip the lard in a stand mixer until it doubles almost twice its size.
    3. Add powdered sugar slowly, while whipping at slow to medium speed, scraping down the sides of the mixture as needed. Add vanilla extract and blend in. If your frosting appears too thick, add a tablespoon of water at a time, mixing it in thoroughly.
    Share this Recipe
     
    Powered byWP Ultimate Recipe


    Notice: Trying to access array offset on value of type bool in /home/maryzahc/public_html/adultfoodallergies.com/wp-content/plugins/wp-ultimate-recipe/helpers/models/recipe.php on line 254
    Whoopie Pies – Gluten-Free with Vegan Option
    Print Recipe
    Traditional Whoopie Pies but free of some my allergens! While I have to use lard because I have no other safe fats, if you can use Earth Balance or a vegetable shortening, you can substitute that for the lard.
    Servings Prep Time
    12-15 whoopie pies 15 minutes
    Cook Time
    10-13 minutes
    Servings Prep Time
    12-15 whoopie pies 15 minutes
    Cook Time
    10-13 minutes
    Ingredients
    Dry Ingredients
    • 2 cups Gluten-free, Rice-free, Potato-free flour mix (see recipe in post)
    • 1/2 cup cacao powder (I do well with Wilderness Family Naturals Cacao Powder)
    • 1 tsp baking soda
    • 1 tsp baking powder (here’s a recipe for a corn-free one – http://wholenewmom.com/health-concerns/make-your-own-baking-powder/)
    • 1 tsp sea salt
    Wet Ingredients
    • 1 cup non-dairy milk (I use homemade cashew or rice milk)
    • 2 tbsp apple sauce (I use homemade, home canned applesauce)
    • 1 tsp apple cider vinegar (most with corn allergies can tolerate Bragg’s)
    • 2 tsp vanilla extract (I make my own with vanilla beans and vodka made from potatoes, as most commercial extract contains corn)
    • 1 tsp psyllium husk
    Sugar Mixture
    • 1/3 cup lard (I use my home rendered lard, as store bought often has citric acid, and I have no safe shortening)
    • 1/3 cup sugar
    • 1/3 cup brown sugar
    Frosting
    • 1 batch Vanilla Frosting (made with lard or shortening)
    Servings: whoopie pies
    Instructions
    1. Pre-heat oven to 375°F.
    2. Place dry ingredients (Gluten-free, Rice-free, Potato-free flour mix, cacao powder, baking soda, baking powder, and salt) in a large bowl and whisk together until well combined.
    3. Place wet ingredients (non-dairy milk, apple sauce, apple cider vinegar, vanilla extract, and psyllium husk) in small bowl and whisk together until well combined.
    4. Place sugar mixture ingredients (lard, sugar, and brown sugar) in stand mixer bowl and using beater attachment, beat until until creamy, scraping down sides as necessary.
    5. Add wet ingredients to sugar mixture, and beat until well combined, scraping down sides as necessary. Slowly add dry ingredients, continuing to beat until well combined.
    6. Line cookie sheets with parchment paper. Using a medium scooper or a rounded tablespoon, drop the whoopie pie batter on the parchment lined cookie sheet 2 inches apart from one another. Place in the oven and bake for 10-12 minutes if using a metal cookie sheet or 12-14 if using stoneware cookie sheets. Take out and let cool on baking racks (I just lifted up the parchment paper and moved them onto racks.
    7. While the whoopie pie halves bake and cool, make a batch of the Vanilla Frosting (made with lard or shortening) also contained in this post.
    8. Once whoopie pie halves are cool, pipe frosting onto the flat side of one pie and and put a second on top of piped frosting. It is best to pipe frosting on pie halves as gluten-free pie halves are not as sturdy as the wheat version. Enjoy!
    Share this Recipe
     
    Powered byWP Ultimate Recipe
  • Cajun Seasoned Shrimp Skewers

    Cajun Seasoned Shrimp Skewers


    Cajun Seasoned Shrimp Skewers
    Cajun Seasoned Shrimp Skewers

    As part of our Treat. Yo. Self. month, treating myself means seafood since I’m from Maine originally. I can still eat shrimp, but I have other shellfish allergies so I may lose shrimp eventually. But for now, I use them as an occasional treat. The recipe should be enough for about 8 skewers of shrimp with 6 or so shrimp on a skewer. But since I only had 4 stainless steels skewers and was too lazy to soak the bamboo ones in water for 30 minutes, the pictures show extreme shrimp skewers. So I really did treat myself, ha! This is a great appetizer dish for a dinner party or cook out and you can cook them under the broiler in your oven or on the grill. Or if you wish, use them in salad or as a special garnish on soup.

    This recipe isn’t for those of you who are allergic to shellfish or who are vegetarian or vegan. But if you are allergic to shellfish and you can eat chicken, try it with chicken. For those of you who are vegetarian or vegan, try it with veggies. The seasoning mix by itself should be vegan with appropriately sourced sugar. You will have to cook the skewers much longer if you chicken or veggies, shrimp cooks very quickly.

    For those of you that may have issues with buying spice blends due to anti-caking agents or cross contamination, I’ve developed a version of Cajun Seasoning below which I use now. If you can still use a blend, I recommend the Penzey’s Cajun Seasoning (no affiliation). I love Penzey’s and I can still use their single spices without issue.

    Cajun Seasoning:


    Notice: Trying to access array offset on value of type bool in /home/maryzahc/public_html/adultfoodallergies.com/wp-content/plugins/wp-ultimate-recipe/helpers/models/recipe.php on line 254
    Cajun Seasoning
    Print Recipe
    Here’s a blend to use if you don’t have a safe version. I usually double the recipe so I don’t have to mix it as often.
    Servings Prep Time
    2/3 cup 5 minutes
    Servings Prep Time
    2/3 cup 5 minutes
    Cajun Seasoning
    Print Recipe
    Here’s a blend to use if you don’t have a safe version. I usually double the recipe so I don’t have to mix it as often.
    Servings Prep Time
    2/3 cup 5 minutes
    Servings Prep Time
    2/3 cup 5 minutes
    Ingredients
    • 4 tbsp smoked paprika use regular paprika if you don’t have smoked
    • 2 tbsp salt
    • 1 tbsp sugar
    • 1/2 tsp celery seed
    • 1/2 tsp garlic powder
    • 1/2 tsp black pepper
    • 1/2 tsp onion powder
    • 1/2 tsp cayenne pepper
    • 1/2 tsp caraway seed
    • 1/2 tsp dill seed
    • 1/2 tsp turmeric
    • 1/2 tsp ground cumin
    • 1 bay leaf broken into small pieces
    • 1/2 tsp ground nutmeg
    • 1/4 tsp ground cardamom
    • 1/4 tsp basil
    • 1/4 tsp marjoram
    • 1/4 tsp rosemary
    Servings: cup
    Instructions
    1. Place all ingredients in a blender and blend until fine. You can also use a coffee grinder dedicated to spice grinding and do it in batches. If you do, pour all the spices into a bowl and mix well after grinding.
    Share this Recipe
     
    Powered byWP Ultimate Recipe

    Cajun Seasoned Shrimp Skewers:

    The whole recipe is in the recipe card below, but here’s my process pictures and some tips.

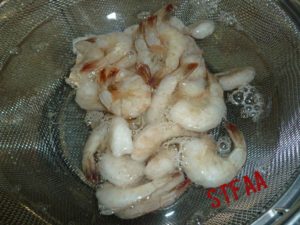
    I defrost my shrimp in a colander set in a bowl of cold water for about 10 minutes. Then I can just lift the colander out.

    Shrimp defrosting in cold water
    Shrimp defrosting in cold water

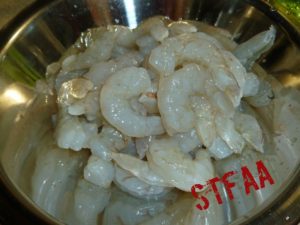
    When peeling the shells off the shrimp I take the tails off because I don’t want my guests to have to do it, and half the time they’ll just nibble up to the tail, and leave the tail meat in the tail shell. That’s a waste of seafood which is unconscionable to me. So I take the tails off. I usually buy my shrimp de-veined already, but if yours is not, here’s how to do it.

    Shrimp de-veined and peeled
    Shrimp de-veined and peeled
    Cajun Seasoning mixed with oil for shrimp
    Cajun Seasoning mixed with oil for shrimp

    I’m loving these stainless steel skewers. They are flat so that the food does not spin on them when you are turning them over. I’m not sure where I got these and why there are only four in my possession. However, I did go poking around and pop some more on my Amazon wish list (no affiliation) so I can get some for cook out season.

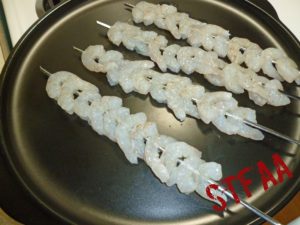
    Shrimp on stainless steel skewers
    Shrimp on stainless steel skewers
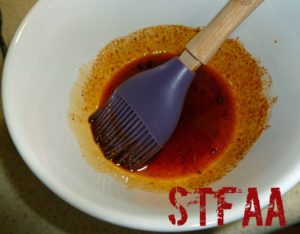
    Using a basting brush to coat shrimp with Cajun Seasoning oil mixture
    Using a basting brush to coat shrimp with Cajun Seasoning oil mixture

    Before you cook your shrimp you should notice that they have a translucent quality to them.  Once they are cooked they will look opaque. They really only need 2-3 minutes a side depending on your oven or grill. If you overcook them, they will become rubbery and unpleasant.

    Cajun Seasoned Shrimp Skewers after cooking
    Cajun Seasoned Shrimp Skewers after cooking

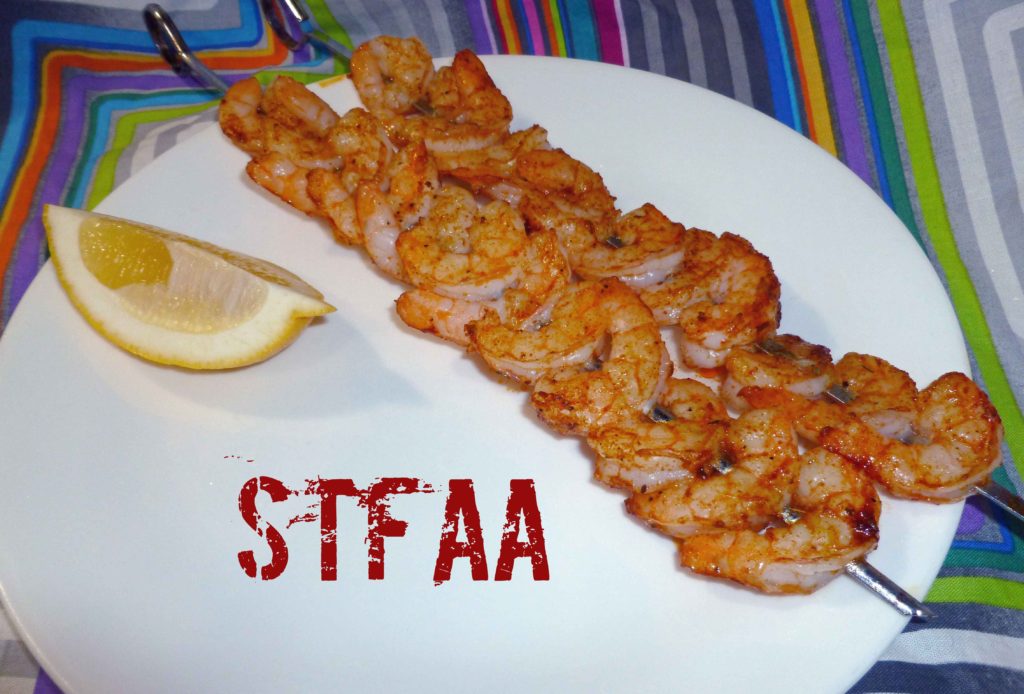
    When ready to serve, use one of the lemon quarters to squeeze lemon juice over the skewer or let your guests do it.

    Enjoy!
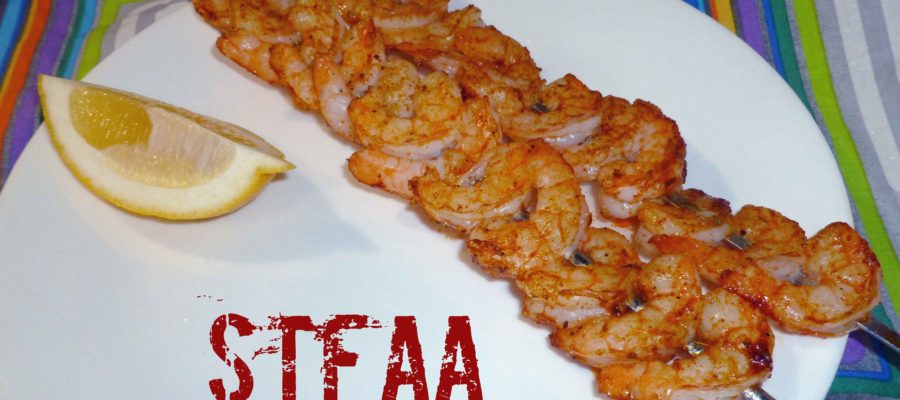
    Cajun Seasoned Shrimp Skewers with Lemon
    Cajun Seasoned Shrimp Skewers with Lemon

    Notice: Trying to access array offset on value of type bool in /home/maryzahc/public_html/adultfoodallergies.com/wp-content/plugins/wp-ultimate-recipe/helpers/models/recipe.php on line 254
    Cajun Seasoned Shrimp Skewers
    Print Recipe
    A nice appetizer to broil or grill to serve at dinner parties or cook outs.
    Servings Prep Time
    8 people 15 minutes
    Cook Time
    4-5 minutes
    Servings Prep Time
    8 people 15 minutes
    Cook Time
    4-5 minutes
    Cajun Seasoned Shrimp Skewers
    Print Recipe
    A nice appetizer to broil or grill to serve at dinner parties or cook outs.
    Servings Prep Time
    8 people 15 minutes
    Cook Time
    4-5 minutes
    Servings Prep Time
    8 people 15 minutes
    Cook Time
    4-5 minutes
    Ingredients
    • 1 pound raw shrimp peeled and de-veined
    • 2 tsp Cajun Seasoning (if you can use Penzey’s great! If not, we have a version on the blog.)
    • 3 tbsp grape seed oil (I used grape seed, but use what’s safe for you.)
    • dash salt
    • 1 lemon cut in quarters
    • 8 skewers stainless steel or bamboo
    Servings: people
    Instructions
    1. Preheat the broiler in your oven or your grill. If using a grill, preheat to 500°F. If you are using bamboo skewers, you will need to soak them in water for 30 minutes before using.
    2. Thaw shrimp if frozen. Peel shells and de-vein. I prefer to take the tail shells off, but that’s up to you. Place shrimp on skewers and place skewers on a broiler safe pan.
    3. Mix Cajun Seasoning and a dash of salt with the grape seed oil in a small bowl. Use a basting brush to brush the mixture on both sides of the shrimp skewers.
    4. Broil or grill 2 minutes on each side. The shrimp should turn opaque when cooked. Squeeze lemon quarter over shrimp before serving. Enjoy!
    Share this Recipe
     
    Powered byWP Ultimate Recipe
  • Orange Chai Spiced Wine

    Orange Chai Spiced Wine

    Orange Chai Spiced Wine
    Orange Chai Spiced Wine

    To set the scene, it’s New Hampshire. It’s December. We got about a foot of snow in the past week and we’re expected to get a bit more soon. It’s freaking cold.  So I need a hot drink, preferably with alcohol. I’ve been seeing posts about chai hot chocolate and hot chocolate red wine, but those sounded a bit heavy. So I decided to try an orange chai red wine, sort of like a mix between sangria and mulled wine, but with a chai spice flavor profile. I didn’t know that my idea was actually pretty close to a German spiced wine called Glühwein until I started poking around. Mine doesn’t have brandy or other spirits in it, and I have a few more spices in mine. It’s a pretty thing on a cold afternoon, and great for a wintry get-together. For those of you who are vegan, you’ll need to investigate your wine carefully, and for those of you who are more sensitive than I am corn-allergy wise, you’ll need to be careful in your wine choices. I do well about 75% of the time as long as I avoid American wines, but your mileage may vary.

    Orange Chai Spiced Wine

    The complete recipe is in the card below, but this is a pretty easy one. Juice and zest some oranges (I used a julienne peeler for removing the zest easily with a strainer), slice part of an orange, and throw the zest, juice, orange slices, spices, sugar and wine in a crock pot on low for a hour. After cooking, I strained out the spices and used the orange slices for garnishing the glasses. I have a bit left over, and I may braise some pork in it because it was totally delicious.

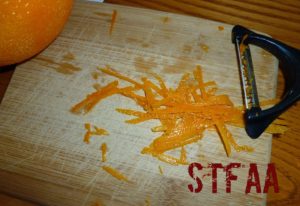
    Using a julienne peeler to zest the oranges
    Using a julienne peeler to zest the oranges
    Slices and spices in crockpot
    Slices and spices in crockpot
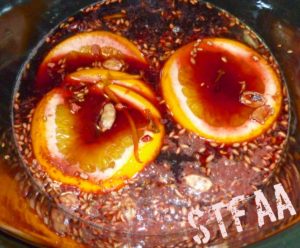
    Orange Chai Spiced Wine after cooking
    Orange Chai Spiced Wine after cooking but before straining
    Orange Chai Spiced Wine
    Orange Chai Spiced Wine after straining with an orange slice for garnish

    Notice: Trying to access array offset on value of type bool in /home/maryzahc/public_html/adultfoodallergies.com/wp-content/plugins/wp-ultimate-recipe/helpers/models/recipe.php on line 254
    Orange Chai Spiced Wine
    Print Recipe
    A lovely drink for cold winter parties in the crock pot.
    Servings Prep Time
    6 people 5 minutes
    Cook Time
    1 hour
    Servings Prep Time
    6 people 5 minutes
    Cook Time
    1 hour
    Orange Chai Spiced Wine
    Print Recipe
    A lovely drink for cold winter parties in the crock pot.
    Servings Prep Time
    6 people 5 minutes
    Cook Time
    1 hour
    Servings Prep Time
    6 people 5 minutes
    Cook Time
    1 hour
    Ingredients
    • 3-4 oranges
    • 1 bottle red wine 24.5 ounce or 750 ml, fruity red wine such as Merlot, Zinfandel, or Cabernet Sauvignon
    • 1 cinnamon stick
    • 1 tsp whole fennel seed
    • 1/2 tsp whole cloves
    • 2 whole black peppercorns
    • 1 star anise whole
    • 5 green cardamom pods, smashed
    • 1/2 tsp cracked dried ginger
    • 4 tbsp brown sugar
    • 3-4 quart crock pot
    Servings: people
    Instructions
    1. Wash your oranges carefully. Using a julienne peeler or a regular vegetable peeler, peel thin strips of the zest off of the orange, being careful not to peel too deeply and get into the white pith. Add about a tablespoon’s worth of peeled zest to the crock pot.
    2. Cut one of the oranges in half, and slice one half thinly to add slices to the crockpot. Juice the remaining oranges until you have about 1 cup of orange juice to add to the crock pot.
    3. Add all spices, brown sugar and wine to the crock pot, and put on low for 1 hour.
    4. Strain out spices, but save orange slices for garnish. Add an orange slice to glass and pour wine into glass and serve. Enjoy!
    Share this Recipe
     
    Powered byWP Ultimate Recipe


  • Spritz or Cookie Press Cookies – Gluten-Free, Dairy-Free, and Egg-Free

    Spritz or Cookie Press Cookies – Gluten-Free, Dairy-Free, and Egg-Free

    Spritz or Cookie Press Cookies - Gluten-Free, Dairy-Free, and Egg-Free
    Spritz or Cookie Press Cookies – Gluten-Free, Dairy-Free, and Egg-Free

    I’m not a baker in general. MaryKate is a much better baker than I am and she’s more into it. I’m more of a “get an appetizer instead of dessert” kind of woman. But around the holidays I kind of want some sort of cookie. A couple of weeks ago when I was developing my Homemade Pasta, Gluten-Free, Vegan & Gum-Free recipe, I was going through my assortment of kitchen toys looking for the pasta attachments for the KitchenAid, and I came across my Pampered Chef Cookie Press that I bought years ago out of nostalgia. My mom had one (which she probably doesn’t even remember having) that I used to use when I was a kid. And after I found it, I kept thinking about it, so I developed this recipe. It’s probably the closest I will ever get to having a shortbread buttery kind of cookie again. If you don’t have a cookie press, Pampered Chef has one that is a twist style now, but I like the gun ones better. Here’s an example of the gun style (no affiliation with Amazon), which is very similar to the one I have.

    Full disclosure: I’m using psyllium husk in this recipe instead of chia, because chia is currently on the suspect list as a potential new allergy. Sigh. If you can still use chia (or flax, I’m allergic to flax too), I’m pretty sure that would work too. Also, I’m using my Homemade Margarine, New and Improved in this recipe because it’s all I have (note: I use cashew milk in my margarine recipe, but you can use any non-dairy milk in it). If you don’t have a corn or coconut allergy or react to palm, and you can use either Earth Balance margarine or a vegetable shortening, give it a go. If you decide to use shortening, I’d add a tablespoon of water or non-dairy milk because shortening is dryer than margarine.

    I modified my normal all purpose gluten-free flour blend because the millet gave the cookies more of a whole grain taste than I was going for. The mix below makes 4 1/2 cups, but you only need 3 1/2 cups for the cookies.


    Notice: Trying to access array offset on value of type bool in /home/maryzahc/public_html/adultfoodallergies.com/wp-content/plugins/wp-ultimate-recipe/helpers/models/recipe.php on line 254
    Gluten-Free Flour Blend for Spritz or Cookie Press Cookies
    Print Recipe
    Servings Prep Time
    4 1/2 cups 5 minutes
    Servings Prep Time
    4 1/2 cups 5 minutes
    Gluten-Free Flour Blend for Spritz or Cookie Press Cookies
    Print Recipe
    Servings Prep Time
    4 1/2 cups 5 minutes
    Servings Prep Time
    4 1/2 cups 5 minutes
    Ingredients
    • 1 1/2 cups sorghum flour
    • 1 1/2 cups oat flour
    • 1 cup tapioca starch
    • 1/2 cup arrowroot starch
    Servings: cups
    Instructions
    1. Measure all ingredients into a large bowl and whisk together. Store in a tightly sealed container.
    Share this Recipe
     
    Powered byWP Ultimate Recipe
    Gluten-Free Flour Blend for Spritz or Cookie Press Cookies
    Gluten-Free Flour Blend for Spritz or Cookie Press Cookies

    Notice: Trying to access array offset on value of type bool in /home/maryzahc/public_html/adultfoodallergies.com/wp-content/plugins/wp-ultimate-recipe/helpers/models/recipe.php on line 254
    Spritz or Cookie Press Cookies – Gluten-Free, Dairy-Free, and Egg-Free
    Print Recipe
    You can still have a holiday classic, even with allergies
    Servings Prep Time
    3-4 dozen 15 minutes
    Cook Time
    15-20 minutes
    Servings Prep Time
    3-4 dozen 15 minutes
    Cook Time
    15-20 minutes
    Ingredients
    • 3 tbsp aquafaba (see http://aquafaba.com/)
    • 1 tsp psyllium husk (or ground chia seed or flax seed)
    • 2 tsp vanilla extract (I make my own with vanilla beans and vodka made from potatoes, as most commercial extract contains corn)
    • 1 tsp water (if using shortening, add a tablespoon)
    • 1 1/2 cups homemade margarine, Earth Balance margarine or vegetable shortening (Earth Balance margarine and vegetable shortening are generally not safe for corn, coconut, or palm allergies)
    • 1/4 cup brown sugar
    • 3/4 cup white sugar
    • 1/4 tsp sea salt
    • 3 1/2 cups Gluten-Free Flour Mix for Spritz or Cookie Press Cookies
    Servings: dozen
    Instructions
    1. Preheat oven to 375°F.
    2. Mix aquafaba, psyllium, vanilla extract, and water in a small bowl and set aside to let it gel. Add salt to flour mixture in a large bowl and set aside.
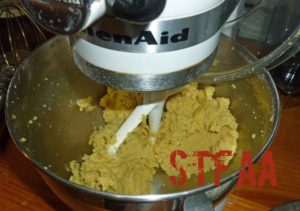
    3. Using a stand mixer and the beater blade, cream margarine or shortening with brown sugar and white sugar until well combined. Scrape down sides and add aquafaba/psyllium/vanilla extract/water mixture to the bowl. Beat together until well combined, scraping down the sides as necessary.
    4. Add the flour mixture a cup or so at a time, beating it in as you go, scraping down the sides as necessary. Once all the flour is well incorporated, put the dough in your cookie press and spritz/press your cookies onto cookie sheets.
    5. If you are baking on metal cookie sheets, bake for 15-17 minutes depending on your oven. If you are using baking stones, bake for 19-21 minutes, depending on your oven.
    6. Let cool on cookie sheet or baking stone for two minutes before removing to cool on a rack.
    Share this Recipe
     
    Powered byWP Ultimate Recipe
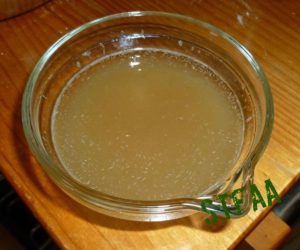
    Aquafaba/Psyllium mixture
    Aquafaba/Psyllium mixture
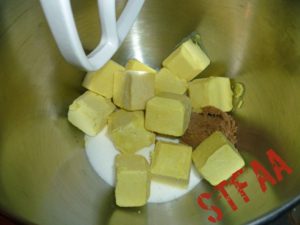
    Homemade Margarine and Brown and White Sugar before mixing
    Homemade Margarine and Brown and White Sugar before mixing
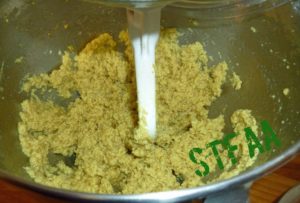
    Homemade Margarine and Sugar Mixture after beating
    Homemade Margarine and Sugar Mixture after beating
    Homemade Margarine and Sugar Mixture, after adding Aquafaba/Psyllium Mixture
    Homemade Margarine and Sugar Mixture, after adding Aquafaba/Psyllium Mixture
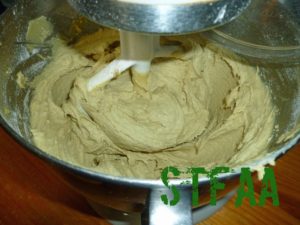
    Spritz or Cookie Press Cookie dough after all flour mixture has been added
    Spritz or Cookie Press Cookie dough after all flour mixture has been added
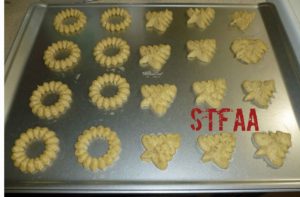
    Spritz or Cookie Press Cookie dough after pressed onto cookie sheets before baking
    Spritz or Cookie Press Cookie dough after pressed onto cookie sheets before baking
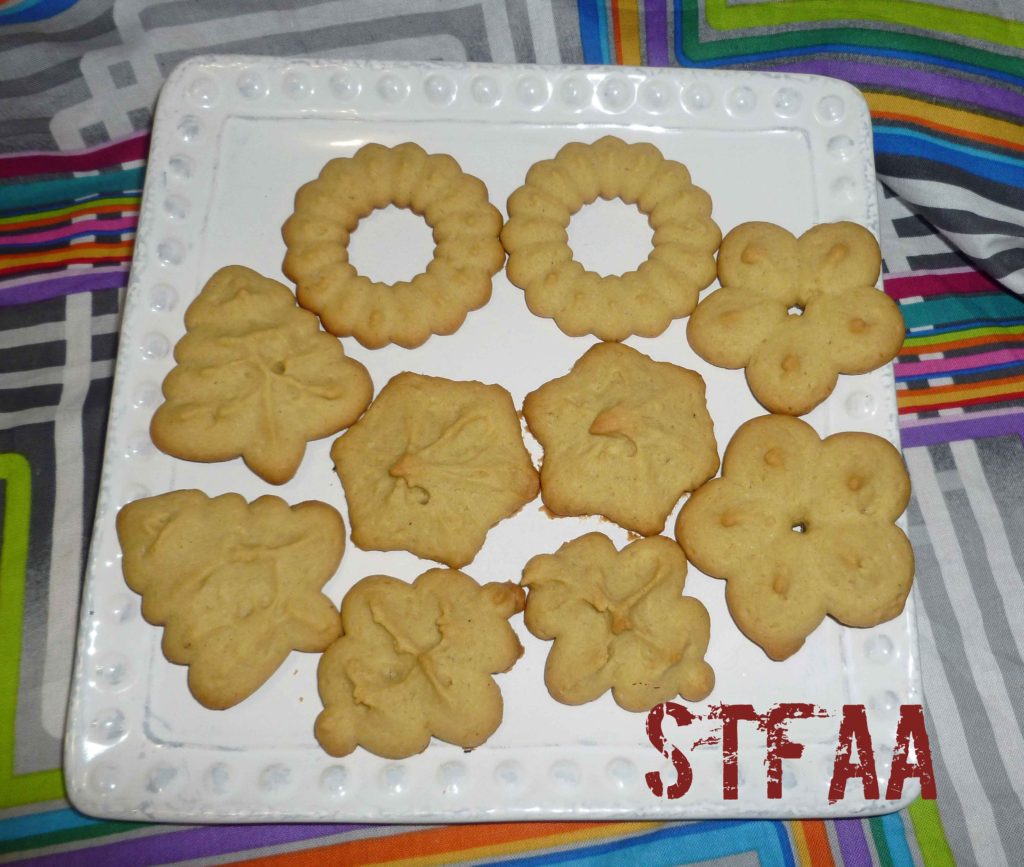
    Spritz or Cookie Press Cookies after baking
    Spritz or Cookie Press Cookies after baking
    Spritz or Cookie Press Cookies after baking
    Spritz or Cookie Press Cookies after baking
    Spritz or Cookie Press Cookies cooling on rack
    Spritz or Cookie Press Cookies cooling on rack
    Spritz or Cookie Press Cookies - Gluten-Free, Dairy-Free, and Egg-Free
    Spritz or Cookie Press Cookies – Gluten-Free, Dairy-Free, and Egg-Free

    Enjoy!
  • Cure Your Own Whole Ham

    Cure Your Own Whole Ham

    Cure Your Own Whole Ham
    Cure Your Own Whole Ham

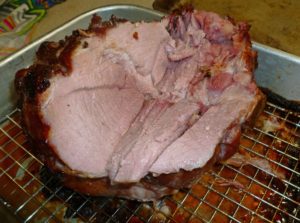
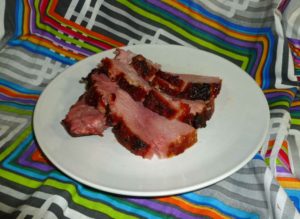
    Okay, so remember when I made a bunch of ham on the outside, but roast pork on the inside, roasts in an attempt to make ham? And I gave up and made Cure Your Own Ham Steaks? I found this post on Pelletsmoking.com that has a Ham Brining 101 post that finally helped me wet cure a whole ham that’s ham all the way through. I can make a whole ham for the holidays again!

    Pelletsmoking.com uses commercial curing salt in its recipe, but all commercial curing salt is dyed pink for safety and contains dextrose which is generally derived from corn. As I discussed in my Cure Your Own Pastrami post, I ended up having to make my own. If you’re not allergic to corn, use the commercial stuff. If you are allergic to corn, make your own below, but be aware you’re messing with dangerous stuff and do it exactly as I describe below, so you don’t poison yourself.

    Making Curing Salt:

    To make Curing Salt #1, or Prague Mix #1, or Instacure #1, you need a scale, with a digital readout going out two places. You need to be absolutely precise. The mixture must be 6.25% sodium nitrite (I got mine on Amazon, make sure it’s food grade) and 93.75% salt. To make 4 ounces of Curing Salt #1, you need to weigh out 0.25 ounces of sodium nitrite making sure you tare out or zero out your container, and 3.68 ounces of salt (I used Diamond Crystal Fine All Natural Sea Salt, again no affiliation with Amazon). Mix these together well, and store in a container that’s very clearly marked so that there is no confusion as to what it is. Do not ask me for cups or teaspoon equivalents because I will not do it. This needs to be mixed as exactly as described, you cannot wing it or approximate. I cannot emphasize this enough, the proportions must be exactly as described here to be safe.

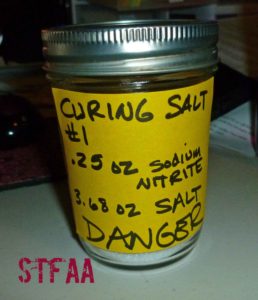
    Curing Salt #1
    Curing Salt #1

    Once you’ve made your Curing Salt #1, it’s time to make the ham!

    Cure Your Own Whole Ham

    Brining the Ham:

    • Fresh Picnic Pork Shoulder or Bston Butt, 8-10 pounds
    • 1 1/2 gallons of distilled or filtered water
    • 1 cup and 2 Tablespoons of kosher salt or sea salt
    • 2 cups of brown sugar, packed firmly
    • 3 tablespoons Curing Salt #1
    • marinade injector

    Rub Ingredients:

    • 4 tablespoons brown sugar, packed firmly
    • 1/4 teaspoon of ground nutmeg
    • 20 or so whole cloves

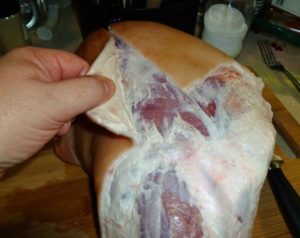
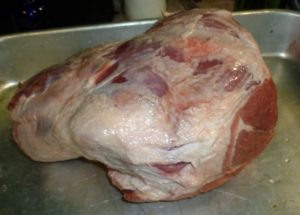
    To prepare the pork shoulder for brining, the skin and some of the fat should be removed.  Use a boning knife to trim the skin from the shoulder.

    Trimming the skin and fat from the pork shoulder
    Trimming the skin and fat from the pork shoulder
    Pork shoulder after skin and fat has been trimmed
    Pork shoulder after skin and fat has been trimmed

    Mix your water, salt, brown sugar and curing salt together in a container large enough to submerge your pork shoulder completely under the surface. I frequent restaurant supply stores and use 12 quart Cambro food storage containers (again, no affiliation with Amazon).  Mix all ingredients until they have dissolved completely to form your brine.

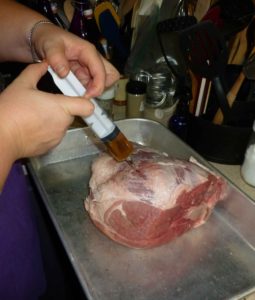
    Measure out 32 ounces of the brine into a separate container.  This is going to be injected into the pork. Place your pork into a container or roasting pan that will hold any brine run off. Use your marinade injector to inject the entire 32 ounces of brine into the pork, injecting evenly across and on both sides. Make sure that you inject thoroughly around the bones if you have them, to prevent bone souring. Also, if a some of the brine seeps out, that’s okay, but if it’s a lot, collect it and re-inject it.

    Brine being injected into the pork
    Brine being injected into the pork

    After injecting the pork with your brine, submerge the pork in your large container with the brine, using a heavy plate to weigh it down if necessary. Cover the container and place in a 37°- 40°F refrigerator to cure for 4-7 days. Turn the ham over halfway through the curing process.

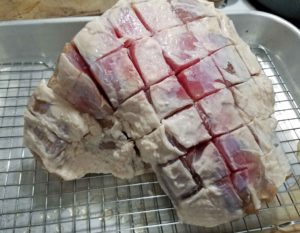
    After you’ve completed brining the pork, take the ham out of the brine and place it in a roasting pan. Score the shoulder in a grid pattern with your knife.  This is decorative but it gives a good outline for where to place your cloves.

    Ham scored
    Ham scored

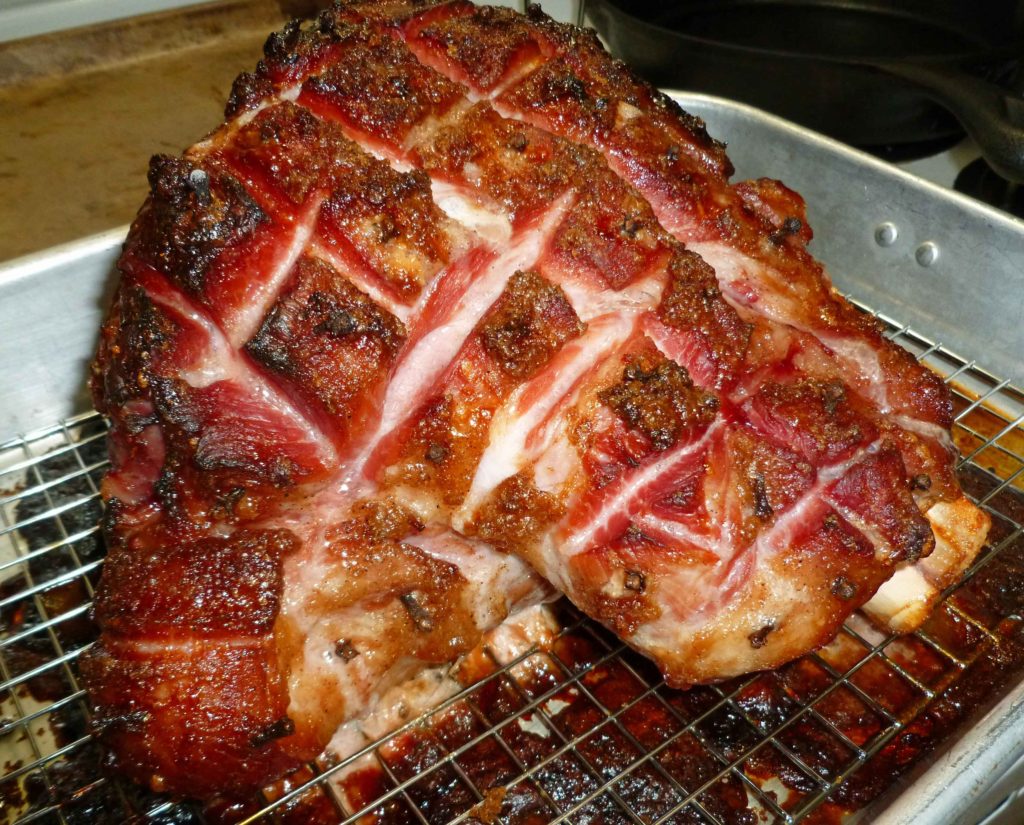
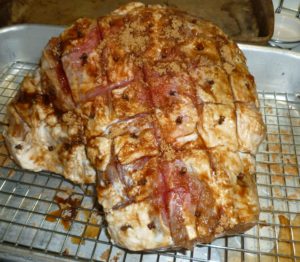
    Mix the brown sugar and nutmeg listed in your rub ingredients together in a small bowl.  Cover the surface of the ham with your rub.  Then insert a clove in each scored square in the ham.

    Ham after rub and cloves inserted before cooking
    Ham after rub and cloves inserted before cooking

    Bake at 325°F for 35-40 minutes a pound until the internal temperature is 165°F.

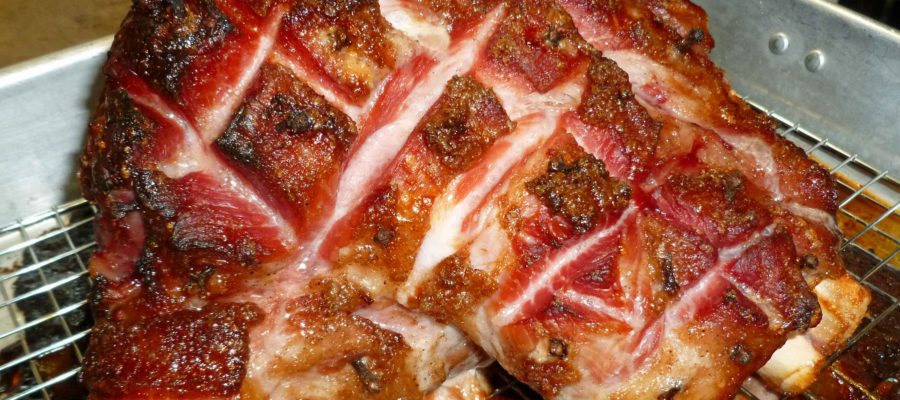
    Cure Your Own Whole Ham
    Cure Your Own Whole Ham
    Cure Your Own Whole Ham
    Cure Your Own Whole Ham

    Enjoy!

    Notice: Trying to access array offset on value of type bool in /home/maryzahc/public_html/adultfoodallergies.com/wp-content/plugins/wp-ultimate-recipe/helpers/models/recipe.php on line 254
    DIY Curing Salt #1
    Print Recipe
    Make Curing Salt #1, or Prague Mix #1, or Instacure #1, without dextrose which is corn derived, so that you can cure your own safe meat.
    Servings Prep Time
    4 ounces 5 minutes
    Servings Prep Time
    4 ounces 5 minutes
    DIY Curing Salt #1
    Print Recipe
    Make Curing Salt #1, or Prague Mix #1, or Instacure #1, without dextrose which is corn derived, so that you can cure your own safe meat.
    Servings Prep Time
    4 ounces 5 minutes
    Servings Prep Time
    4 ounces 5 minutes
    Ingredients
    • 1 kitchen scale
    • 0.25 ounces sodium nitrite
    • 3.68 ounces fine sea salt
    Servings: ounces
    Instructions
    1. To make Curing Salt #1, or Prague Mix #1, or Instacure #1, you need a scale, with a digital readout going out two places. You need to be absolutely precise. To make 4 ounces of Curing Salt #1, you need to weigh out 0.25 ounces of sodium nitrite making sure you tare out or zero out your container, and 3.68 ounces of fine sea salt. Mix these together well, and store in a container that’s very clearly marked so that there is no confusion as to what it is. Do not ask for cups or teaspoon equivalents because I will not do it. This needs to be mixed as exactly as described, you cannot wing it or approximate. I cannot emphasize this enough, the proportions must be exactly as described here to be safe.
    Share this Recipe
     
    Powered byWP Ultimate Recipe

    Notice: Trying to access array offset on value of type bool in /home/maryzahc/public_html/adultfoodallergies.com/wp-content/plugins/wp-ultimate-recipe/helpers/models/recipe.php on line 254
    Cure Your Own Whole Ham
    Print Recipe
    Have ham for the holidays!
    Servings Prep Time
    6-8 people 1 hour
    Cook Time Passive Time
    5-6 hours 7 days
    Servings Prep Time
    6-8 people 1 hour
    Cook Time Passive Time
    5-6 hours 7 days
    Cure Your Own Whole Ham
    Print Recipe
    Have ham for the holidays!
    Servings Prep Time
    6-8 people 1 hour
    Cook Time Passive Time
    5-6 hours 7 days
    Servings Prep Time
    6-8 people 1 hour
    Cook Time Passive Time
    5-6 hours 7 days
    Ingredients
    Brining the Ham
    • 8-10 pound picnic pork shoulder or Boston butt
    • 1 1/2 gallons distilled or filtered water
    • 1 1/8 cups kosher or sea salt (1/8 cup is 2 Tablespoons)
    • 2 cups brown sugar packed firmly
    • 3 tbsp Curing Salt #1
    • 1 Marinade Injector
    Rub Ingredients
    • 4 tbsp brown sugar
    • 1/4 tsp ground nutmeg
    • 20 whole cloves
    Servings: people
    Instructions
    1. Use a boning knife to trim the skin from the shoulder.
    2. Mix water, salt, brown sugar and curing salt together in a container large enough to submerge your pork shoulder completely under the surface. Measure out 32 ounces of the brine into a separate container. Use your marinade injector to inject the entire 32 ounces of brine into the pork, injecting evenly across and on both sides. Make sure that you inject thoroughly around the bones if you have them, to prevent bone souring.
    3. Submerge the pork in your large container with the brine, using a heavy plate to weigh it down if necessary. Cover the container and place in a 37°- 40°F refrigerator to cure for 4-7 days. Turn the ham over halfway through the curing process.
    4. To cook the ham after brining, score the shoulder in a grid pattern with your knife. Mix the brown sugar and nutmeg listed in your rub ingredients together in a small bowl. Cover the surface of the ham with your rub. Then insert a clove in each scored square in the ham.
    5. Bake at 325°F for 35-40 minutes a pound until the internal temperature is 165°F.
    Share this Recipe
     
    Powered byWP Ultimate Recipe


  • Homemade Pasta, Gluten-Free, Vegan & Gum-Free

    Homemade Pasta, Gluten-Free, Vegan & Gum-Free

    Homemade Pasta, Gluten-Free, Vegan & Gum-Free

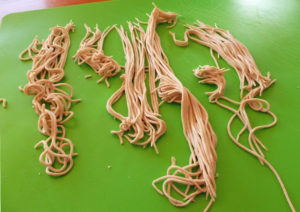
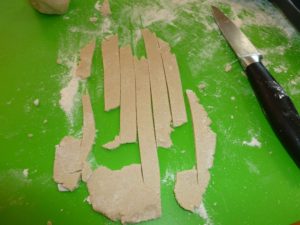
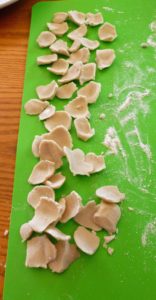
    This was not an easy one, dear readers. It took nine (NINE!) attempts to get one I thought was blog worthy, and that could be done hand rolling or hand shaping the dough for those of you that aren’t crazy enough to buy every little kitchen gadget available.  We made spaghetti with the KitchenAid SNPA Pasta Maker Plates for Food Grinder Attachment kit (no affiliation with Amazon) that I bought literally 20+ years ago. I’m pretty sure it isn’t being made anymore, and those that are available second hand seem to be ridiculously exorbitantly priced. We made the fettuccine by rolling the dough out with a rolling pin and cutting it with a knife, and the little shell like things, vaguely reminiscent of Orecchiette, by forming them over my thumb. But if you’re looking for new kitchen toys, the new KitchenAid Pasta Press looks cool.

    I used a kitchen scale to weigh out the flours, as I found it easier to get a consistent result. I make my husband Shawn taste stuff because he still eats regular, non-allergy food so he has a more recent recollection of how stuff actually tastes, whereas I haven’t had wheat pasta in several years.  As we taste tested the attempts, we tasted it cooked plain, and then dressed it with a little olive, white pepper, and salt, as we didn’t want a sauce to interfere with the taste of the pasta. And lo, the version I am about to give you is good. I may want to try making a couple of batches and dehydrating it to see if I can get a shelf stable pasta to have in a pinch. If I do, and it works, I’ll let you all know.

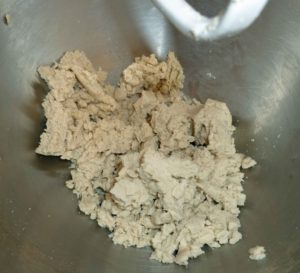
    Dough when the right consistency to form into a ball
    Dough when it is the right consistency to form into a ball
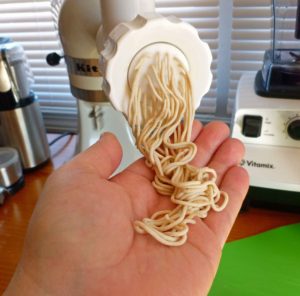
    Spaghetti being extruded from the KitchenAid
    Spaghetti being extruded from the KitchenAid
    Spaghetti before cooking
    Spaghetti before cooking
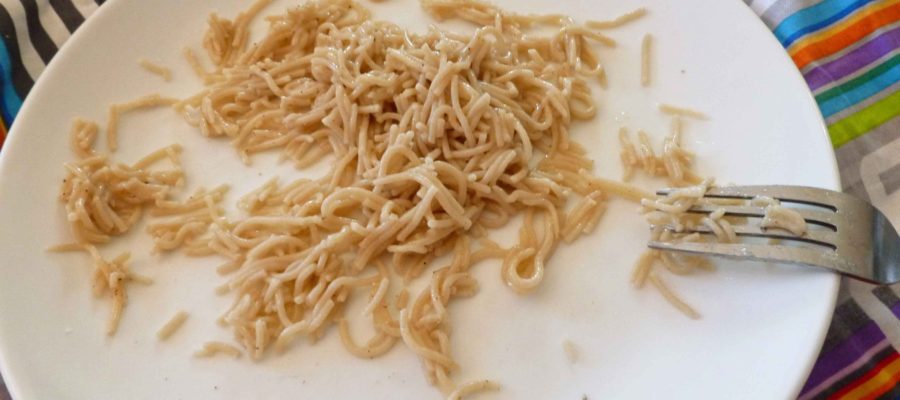
    Spaghetti after cooking
    Spaghetti after cooking
    Hand rolling and cutting fettuccine noodles
    Hand rolling and cutting fettuccine noodles
    Homemade Pasta, Gluten-Free, Vegan & Gum-Free
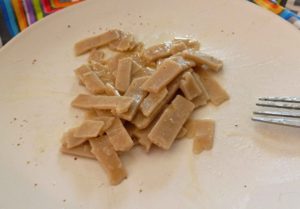
    Fettuccine after cooking
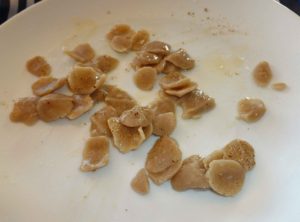
    Orecchiette-esque pasta
    Orecchiette-esque pasta before cooking
    Homemade Pasta, Gluten-Free, Vegan & Gum-Free
    Orecchiette-esque pasta after cooking

    Notice: Trying to access array offset on value of type bool in /home/maryzahc/public_html/adultfoodallergies.com/wp-content/plugins/wp-ultimate-recipe/helpers/models/recipe.php on line 254
    Homemade Pasta, Gluten-Free, Vegan & Gum-Free
    Print Recipe
    Servings Prep Time
    2 people 15 minutes
    Cook Time
    1-3 minutes
    Servings Prep Time
    2 people 15 minutes
    Cook Time
    1-3 minutes
    Homemade Pasta, Gluten-Free, Vegan & Gum-Free
    Print Recipe
    Servings Prep Time
    2 people 15 minutes
    Cook Time
    1-3 minutes
    Servings Prep Time
    2 people 15 minutes
    Cook Time
    1-3 minutes
    Ingredients
    • 50 grams sorghum flour
    • 50 grams superfine brown rice flour
    • 25 grams Otto’s Cassava flour
    • 1 tbsp grape seed or olive oil (or other safe for you oil)
    • 3 tbsp water
    • 3 tbsp aquafaba (see http://aquafaba.com/)
    • 1 tsp oil (for cooking water)
    • 1 tsp salt (for cooking water)
    Servings: people
    Instructions
    1. Mix sorghum, brown rice flour, and cassava flour in a bowl until well combined. Make a well in the center of the flour and add the oil, water, and aquafaba. Using a stand mixer with a paddle or a fork, mix well until the dough will hold together when kneaded.
    2. Use the dough in your pasta machine or extruder. If you don’t have any pasta machine or extruder, just roll out the dough with a rolling pin on a floured surface and cut your own noodles, or hand shape pieces of dough into various shapes. Here’s a neat site for hand shaping pasta -http://www.recipetips.com/kitchen-tips/t–793/cutting-and-shaping-pasta-by-hand.asp (Not all of them will work without gluten, but there’s some neat things to try.)
    3. Bring a pot of water to a hard rolling boil. Add salt and oil to the pot, and add the noodles. Boil for 1-3 minutes, and drain quickly. Fresh pasta cooks very quickly. Spaghetti cooked in a minute, and the hand rolled fettucine and hand shaped shell pieces took 3 minutes.
    Share this Recipe
     
    Powered byWP Ultimate Recipe