Notice: Function _load_textdomain_just_in_time was called incorrectly. Translation loading for the wp-ultimate-recipe domain was triggered too early. This is usually an indicator for some code in the plugin or theme running too early. Translations should be loaded at the init action or later. Please see Debugging in WordPress for more information. (This message was added in version 6.7.0.) in /home/maryzahc/public_html/adultfoodallergies.com/wp-includes/functions.php on line 6131 denisedaniel – surviving the food allergy apocalypse (archive)
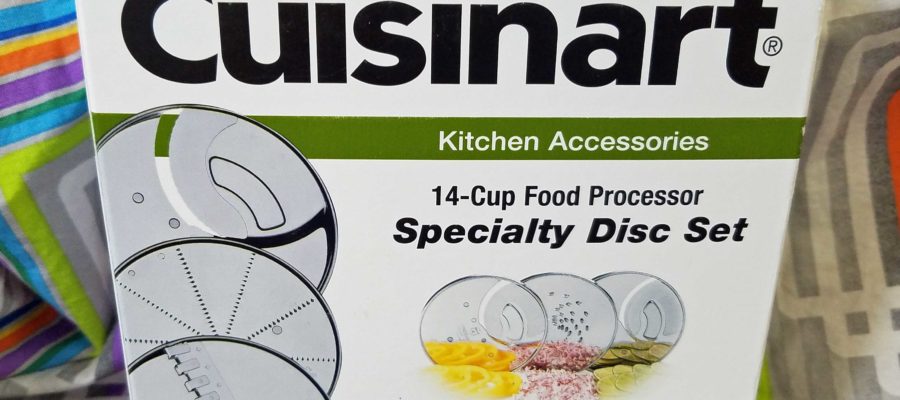
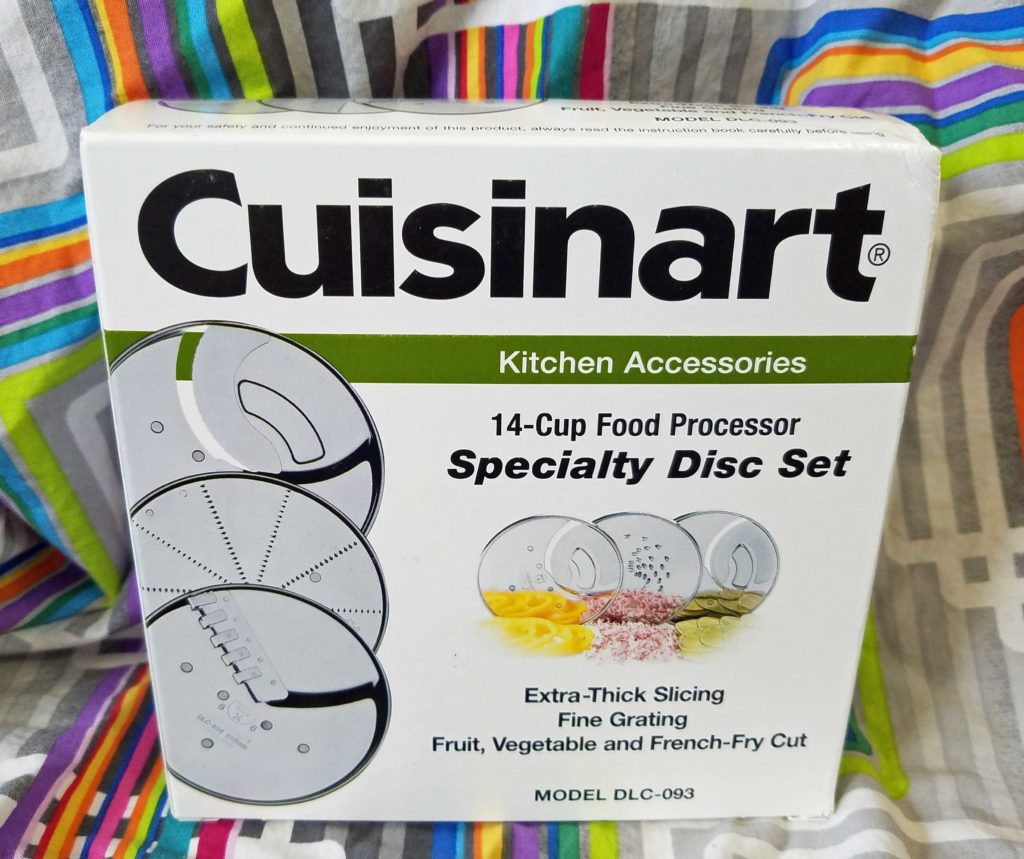
Cuisinart 3-Piece Specialty Disc Set – Extra Thick Slicing disc, Fine Grating disc, and French-Fry Cut disc.
Let me start out by saying, I’m fundamentally lazy. Many of my friends would disagree with me because I do a ton of work to make safe food, and yeah, maybe I could eat with less variety, so that I don’t have as much I have to do. The thing is, I love food and I love variety, and the thought of eating the same thing day after day after day, just makes me shudder. So yeah, I do the work, but anything I can do to lessen the work, I’m going to do. Or maybe I should say, anything I can do to be more efficient, I’m going to do. I do use my 14 cup Cuisinart food processor for canning season, but I wasn’t happy with using it for pickles because the slices were coming out too thin on the slicing disc I had. So when I saw this specialty disc set, I thought it might be worth a try since it had a thicker slicing disc. And it didn’t hurt that it came with a french fry cutter disc either. The last blade is a fine grating disc.
The first thing I did was try the thicker slicing disc and compare it to the one that came with the food processor. The thicker disc is labeled as 8 millimeters and the original disc is labeled as 4 millimeters. It may not look like much of a difference, but I think it’s enough that I won’t have to use a knife to slice my cucumbers for pickles this year.
Thicker slices on left, thinner slices on right.
The second thing I did was try the fine grating disc. I didn’t really have anything to finely grate. The box said that fine grater is used with especially hard foods such as nutmeats, Parmesan cheese, ginger, and horseradish. Well, I didn’t have any fresh ginger and or anything else it suggested and I’m allergic to cheese, so I tried a potato. Yeah, that didn’t work out so much.
Potato mush after using the fine grater.
Since I did have some ginger I had peeled and frozen solid in chunks, I dug it out of the freezer and tried it with the fine grating disc. It worked out pretty well. I also think the next time I get fresh ginger, I’ll just peel the whole thing, run it through the fine grater disc and freeze it in an ice cube tray so that I’m not throwing old ginger away or trying to cut frozen pieces up. It also occurred to me as I write this, that this might be a good way to grate nutmeg as well.
Frozen ginger after going through the fine grating disc.
Okay, now the part that everyone has been waiting for: the french fry disc. I was very curious about this. I have a french fry cutter from Pampered Chef and there’s nothing wrong with it, except it is manual, very sharp, and I cut myself when I wash it most of the time. You also have to use a fair amount of muscle to force your way through the potato. The french fry disc for the food processor worked pretty well. There are some odd thin cuts, and some broken pieces, but given how fast it goes through three potatoes, I have no objections.
Fries cut using the french fry disc.
Of course, once I have potatoes cut like fries, I had to make fries. I had chatted with MaryKate as the potato aficionado and/or obsessed one in our duo about an experiment I intended to undertake, and she proposed a counter method, so I did both to see what liked better. I soaked the potatoes cut like fries in water for a few minutes, drained them, and then dried them with a towel.
When I first lost dairy, I also lost McDonald’s fries because they coat them with powdered dry milk to give them extra crisp. I don’t know if that’s still true, but it was at the time I lost milk, which was years ago. So I wondered if I could use tapioca starch to do the same thing, because I hate double frying, and if there is a way to shortcut the process, I’m going to take it. So I tossed the fries with a bit of tapioca starch in a strainer so I wouldn’t have any clumping.
Potatoes cut like fries tossed with tapioca starch.
I heated my oil to 350° F and fried them until they were golden brown. They were good, crisp, and I didn’t have to fry twice.
Next, I did the double frying method. I heated my oil to 325° F and cooked them for 6 minutes in batches. When I had cooked them all, I heated my oil to 400° F and refried them in batches until they were golden brown. I admit that MaryKate was right and this version was better. A little bit better color, a little bit more crisp, but not worth the pain of double frying for one who is less obsessed with potatoes.
I don’t think this set is essential if you are a standard cook, but it’s a nice thing to have. And for me, the thicker slicing disc alone is worth it for me for canning season. All in all, I’m pleased I bought it.
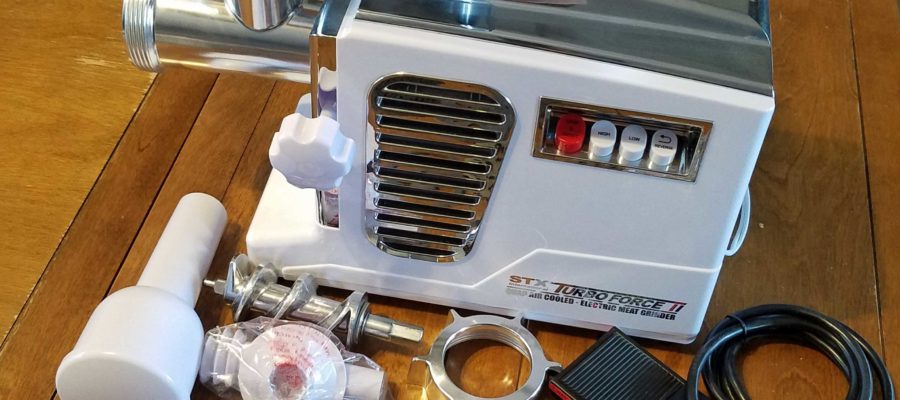
STX Turboforce II 4000 Series Quad Air Cooled Electric Meat Grinder
As some of you may know, in order to have a margarine/butter like spread, I end up rendering my own lard and tallow from pork leaf lard and beef suet, respectively, and I use my home rendered lard often in my baking as I don’t have a safe shortening. I’d been using a KitchenAid meat grinder attachment on my stand mixer to grind the pork leaf lard and suet, which is great for regular, normal occasional meat grinding, but I’m not regular or normal anymore. I pushed it a little too hard with the suet (which is very solid and waxy at room temperature) and cracked the plastic housing. It still works (yay KitchenAid!) and I can use it with the vegetable strainer for apple sauce and tomato sauce just fine, but I thought maybe it was time to stop tempting fate and get a real meat grinder. My KitchenAid is only 30+ years old, and I want it to keep plugging.
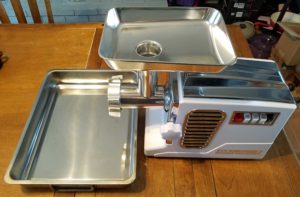
STX Turboforce II 4000 Series Quad Air Cooled Electric Meat Grinder set up and ready to roll with a pan set under the grinder head.
So I bought the STX Turboforce II 4000 Series Quad Air Cooled Electric Meat Grinder in December of 2017. This model now appears to be unavailable on Amazon and sold out on the manufacturer’s website (no affiliation with either), but there are other models available. I meant to do this review last summer, but you all know how that goes. I used it to grind pork leaf lard before rendering it in crock pots (grinding it helps with clean up exponentially, just cubing it is a disaster to scrub off the crock pots). I used it to grind pork liver up to mix with ground pork to make pork liver meatballs. But both pork leaf lard and pork liver are pretty easy to grind, so I felt like I hadn’t really had a fair test yet. I needed to grind something a little tougher.
Frankly, as someone with a corn allergy, buying ground meat is really not a good idea. There’s just an exponential increase in the chances for corn contamination due to the cleaners and sanitizers used on the grinders, and on the meat itself (see article where they allow ammonia gas to be puffed on the meat). And even if I get ground beef from what I consider a reputable source that would not use “lean finely textured beef” with puffs of ammonia gas on it, I’m still risking cross contamination from cleaners since I don’t have safe commercial products I can use. So now that the USDA is allowing “lean finely textured beef” to be classified “ground beef,” I’ve finally hit my threshold. It was time to face reality and let the convenience of pre-ground meat go.
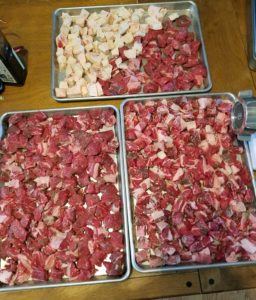
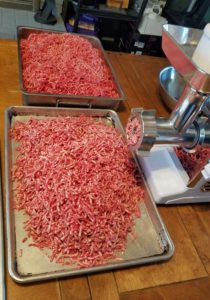
When I used up my last package of ground beef from a store in the freezer, I decided it was time to give the meat grinder a workout. I purchased 12 pounds of chuck roast, and 2 pounds of suet to make sure I had a sufficient fat ratio. You need some fat to have a decent tasting burger. I cut everything up into 1 inch chunks. spread them to a single layer on sheet pans, and threw them in the freezer for an hour. It’s also a good idea to throw the grinder head pieces, the worm, the blade, grind plate, in the freezer too so that they are very cold when you start grinding. I didn’t do this for the beef, but it really helped with grinding pork. On high, I was able to grind all 14 pounds within 20 minutes. I carefully interspersed the suet with the meat so it would be mixed in.
Beef and Suet ready to grind
When I decided to go ahead and do some ground pork to have on hand to use in recipes and so I can eventually make some sausage, I used a Boston butt, a fresh picnic ham/pork shoulder, and some fatback I had in the freezer. Once I had thawed them out in the fridge for a few days, I skinned the picnic ham and boned the Boston butt and picnic ham, and cut the pieces into 1 inch chunks, following the same procedure as I did for the ground beef, and putting the grinder head pieces in the freezer with the chunks beforehand. On high, I ground what ended up being 13 and half pounds in less than 20 minutes.
Beef and Suet after grinding
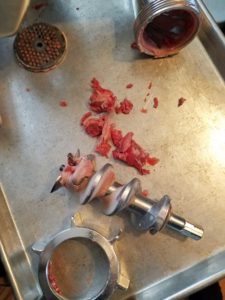
I’ve been fairly impressed with the ease of use, and it has very little left in the worm at the end. It’s a workhorse and for me, that’s important. I know that most people would grind their meat as they use it, but I don’t have time for that. I’m going to grind a ton at once and package it in one pound increments in the freezer, because then I’m only grinding once, and cleaning the meat grinder once. I’m sure most of our regular readers have guessed, but I’m all about economies of scale.
The meat left in the grinder after grinding
My only quibbles are that it is loud, the grinder head is not dishwasher safe as it’s aluminum and would discolor, and that it has to be hand washed and dried immediately for the same reason. The foot pedal is a nice option, so that you can operate hands free and not get meat all over the push buttons. I haven’t used the sausage stuffing tubes or the kubbe/kibbe attachments, as I’ve not yet found safe casings, and most kubbe recipes contain wheat. Maybe I’ll work on sourcing safe casings this summer, in between gardening, food preservation, and soap making (or it’ll get put off again, hahaha).
Video of STX Turboforce II 4000 Series Quad Air Cooled Electric Meat Grinder in operation
The verdict: Great machine for me, might be too much for most users.
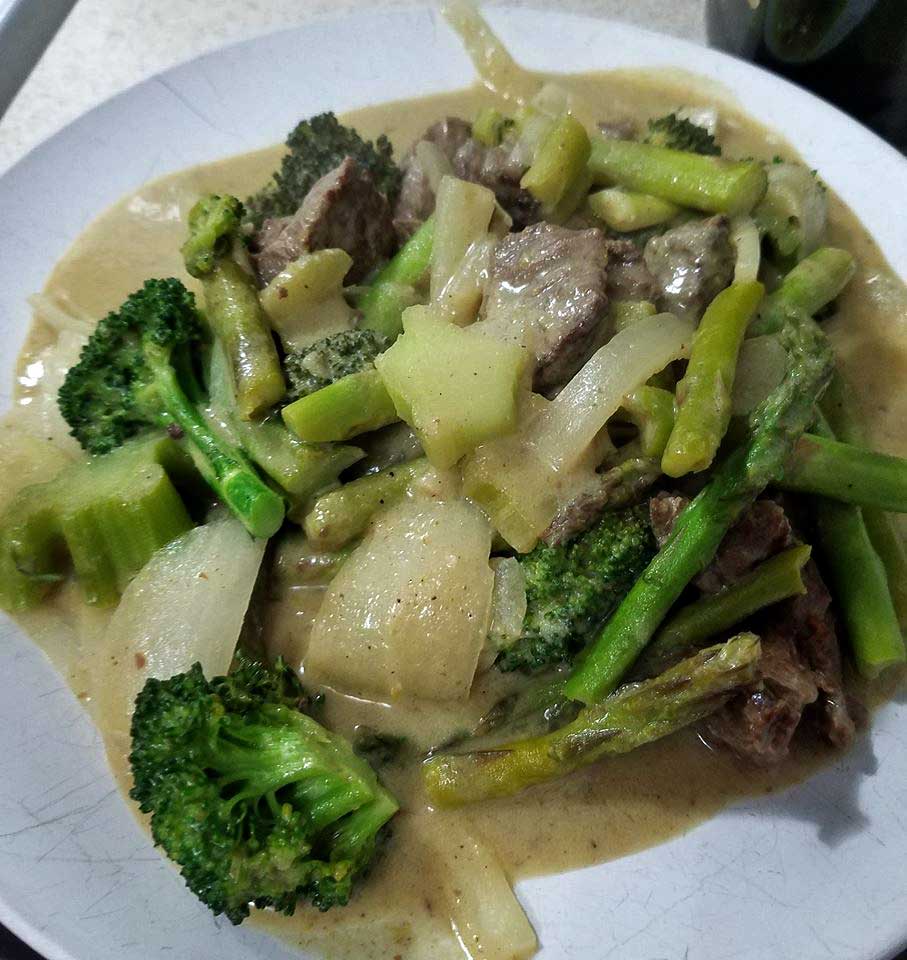
Thai Style Green Curry Paste in use for a quick dinner
This past summer, I ended up harvesting a lot of chilies. When I say a lot, I estimate that I harvested about 50 pounds of chilies based on what I canned, fermented, dehydrated whole, dehydrated and ground into powders, froze, and so on. I grew 20 different kinds of peppers. I grew half in the greenhouse and half in the garden, and I started an obscene amount of seedlings because some of them were saved seed and I didn’t know if they would grow. (They did. All of them.) The greenhouse experiment went well. I harvest probably 3 to 5 times what I harvested in the garden. At the end of the pepper harvest, I was running out of things to do, and it occurred to me while I was scouring recipes that I could make Thai style curry pastes.
In the beginning of my corn allergy journey, the denial was strong and I decided that I was tolerating some commercial Thai curry pastes. The reality was, yeah, not so much. This summer also resulted in more freezer space as I had a new bigger chest freezer in addition to my small chest freezer, my friend Kristin’s family had given me another fridge, and so now I had room to freeze some curry pastes. So I did some research, cobbled together the things I liked from several recipes, and voila, Thai Style Green Curry Paste. You can use it this recipe for Quick Thai-Inspired Curry Noodle Stir Fry (rice is no longer safe for me, but feel free to try it with sweet potato or mung bean noodles) or just put a cube or two of curry paste in some safe non-dairy milk, add veggies and/or a protein, and go to it.
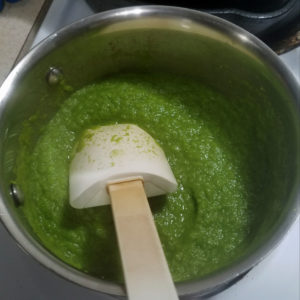
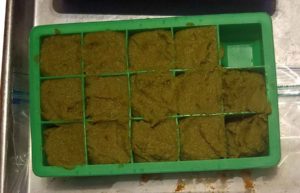
Thai Style Green Curry Paste before cooking down to a thick paste
Thai Style Green Curry Paste after cooking down and in a silicone ice cube tray for freezing
THAI STYLE GREEN CURRY PASTE
Print Recipe
Thai style green curry paste to use in Thai dishes calling for green curry paste.
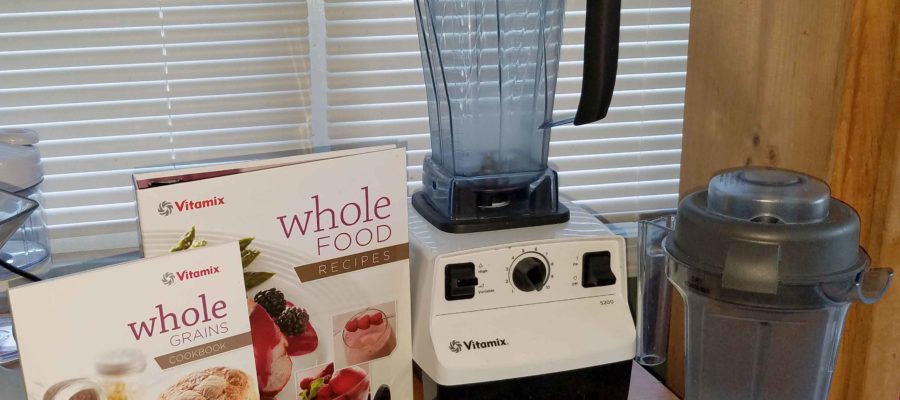
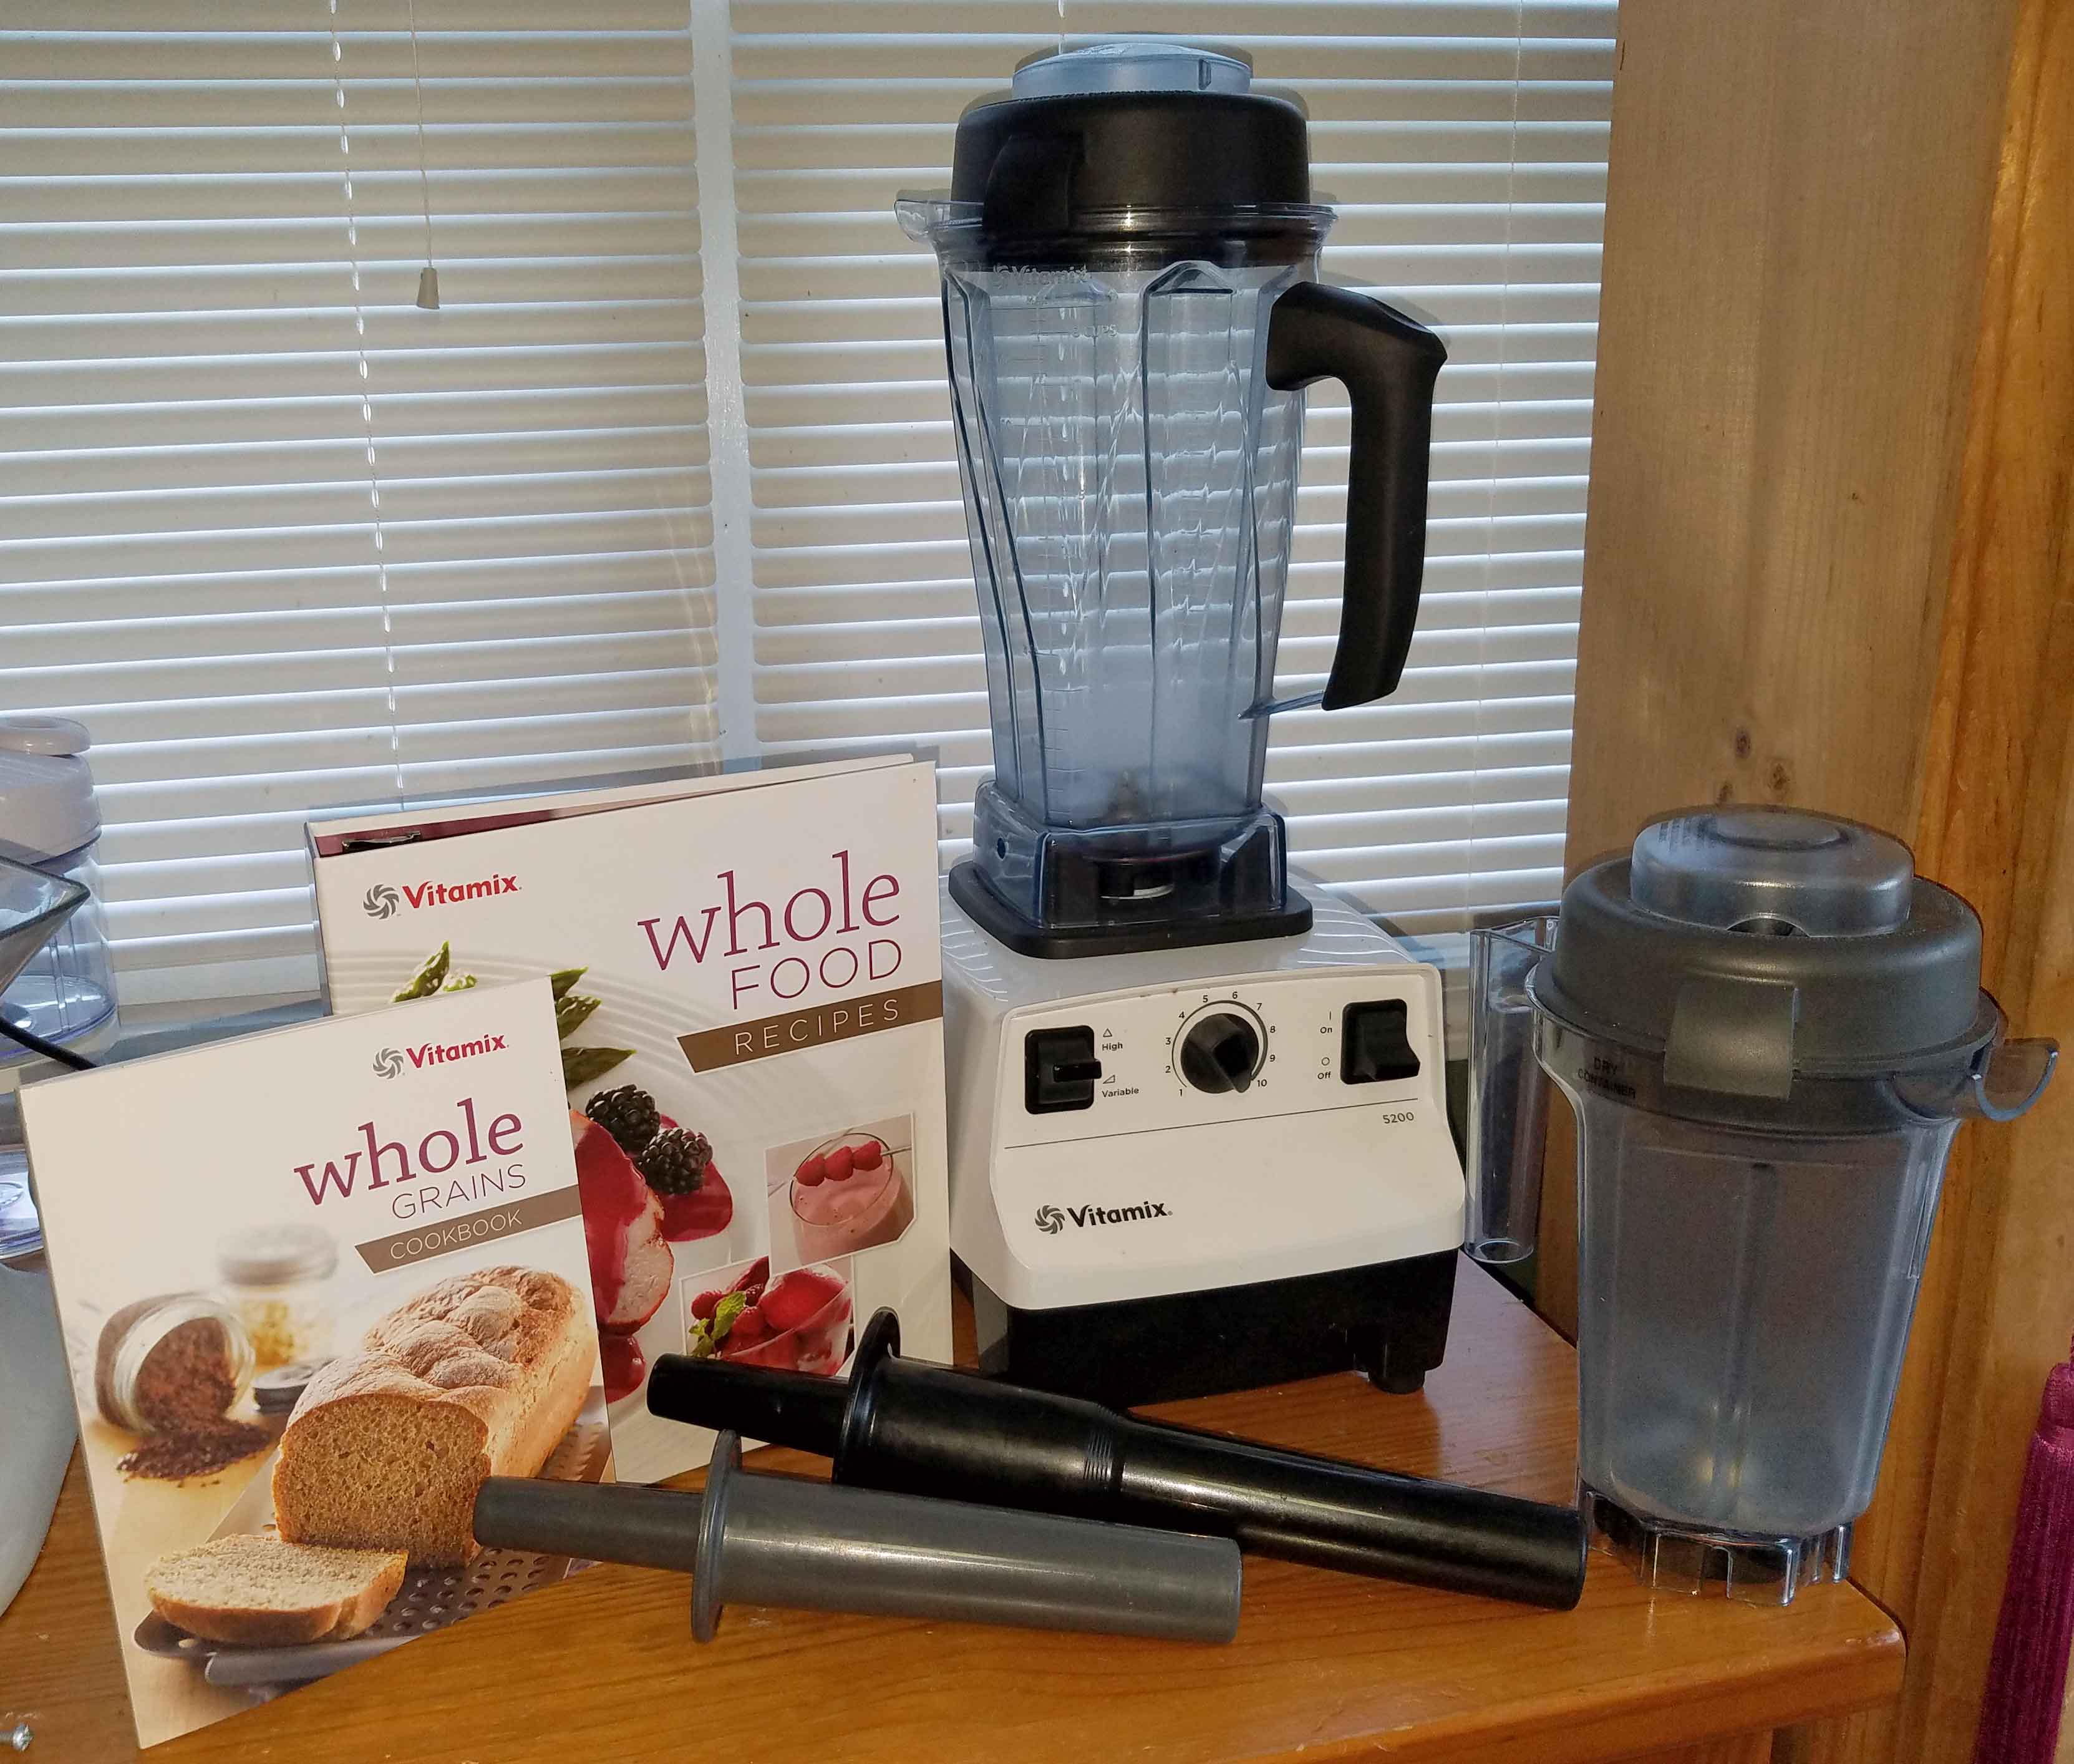
I’m still in the final throes of planting season. This means that if it’s daylight, I’m pretty much outside, unless I’m too exhausted and/or my legs are in too bad shape to keep going without giving out (long story, some other time), in which case, I’m not cooking stuff either. So you all get to benefit from a product review of my Vitamix blender. I know I discussed my Vitamix in my post on Money, but I wanted to do something more in depth. I purchased the Vitamix 5200 Blender Super Package from Costco (no affiliation, or even a membership) almost three years ago. The package currently includes:
Introduction to High Performance Blending book – includes over 60 recipes
Whole Grains Cookbook – it does include some gluten-free foods
Accelerator tool – used to assist the blender in processing thicker mixtures
64-oz. wet-blade container with stainless steel hammermill and cutting blades
32-oz. dry-blade container with stainless steel hammermill and cutting blades designed for dry-grinding
One 2-part vented lid with measurements for the 64-oz. container – this is the “wet” container
One 2-part vented lid with measurements designed for the 32-oz. container – this is the “dry” container for grinding grains, beans, rice and soybeans into fresh flour
7-year warranty
Mine came with a different book which is the Whole Food Recipe book, which appears to have a lot more recipes than the books that come with the current version of the package.
As I said in my post on Money, it’s the the one thing that honestly I probably should have bought from day one of food allergy life. If you’ve never used a high performance blender, compared to the $20-30 blender you had in college, or even the $100 Cuisinart that that I killed in a year, this thing is like driving a brand new loaded Porsche after driving a 15 year old Subaru that you had to add two quarts of oil a week, that you could put several fingers through the rust holes without touching the sides of the holes, and that the brakes that were so bad you had to downshift to slow down because the rotors were gone.
I use the Vitamix wet container to make cashew milk and I don’t even have to soak or strain any more. I may soak for 20 minutes just to make sure they are clean, but the Vitamix obliterates the cashews so thoroughly that you don’t have to soak them. Same thing with rice milk. Cooked rice and water, and no more straining, the rice is just completely gone into the rice milk. I also use the wet container to make salad dressings. It emulsifies vinaigrette so well that it stays together in the fridge for days with the help of a little mustard (I use my home canned). I use the wet container to make hot sauces, it does an amazing job of pureeing peppers and other ingredients into a beautiful, consistent sauce. (See Chili Lime Hot Sauce, Cilantro Lime Green Cayenne Hot Sauce, Pink Grapefruit Sarit Gat Hot Sauce, and Curry Spiced Hot Sauce) I also use the wet container to make batters, such as for deep frying or when I make my “fake eggs” from garbanzo bean flour and black salt. If I use a bowl and a whisk, it takes me forever to get the lumps out. If I just throw everything in the Vitamix for a minute, it’s perfectly blended. I also use the wet container to make fruity drinks from my safe vodka or rum, my homemade jams, and ice. The wet container can almost make blackberry seeds in jam disappear when you put it in a fruity drink. You can also make soup in it, as the blender will heat the contents if processed long enough, although I’ve not tried this feature.
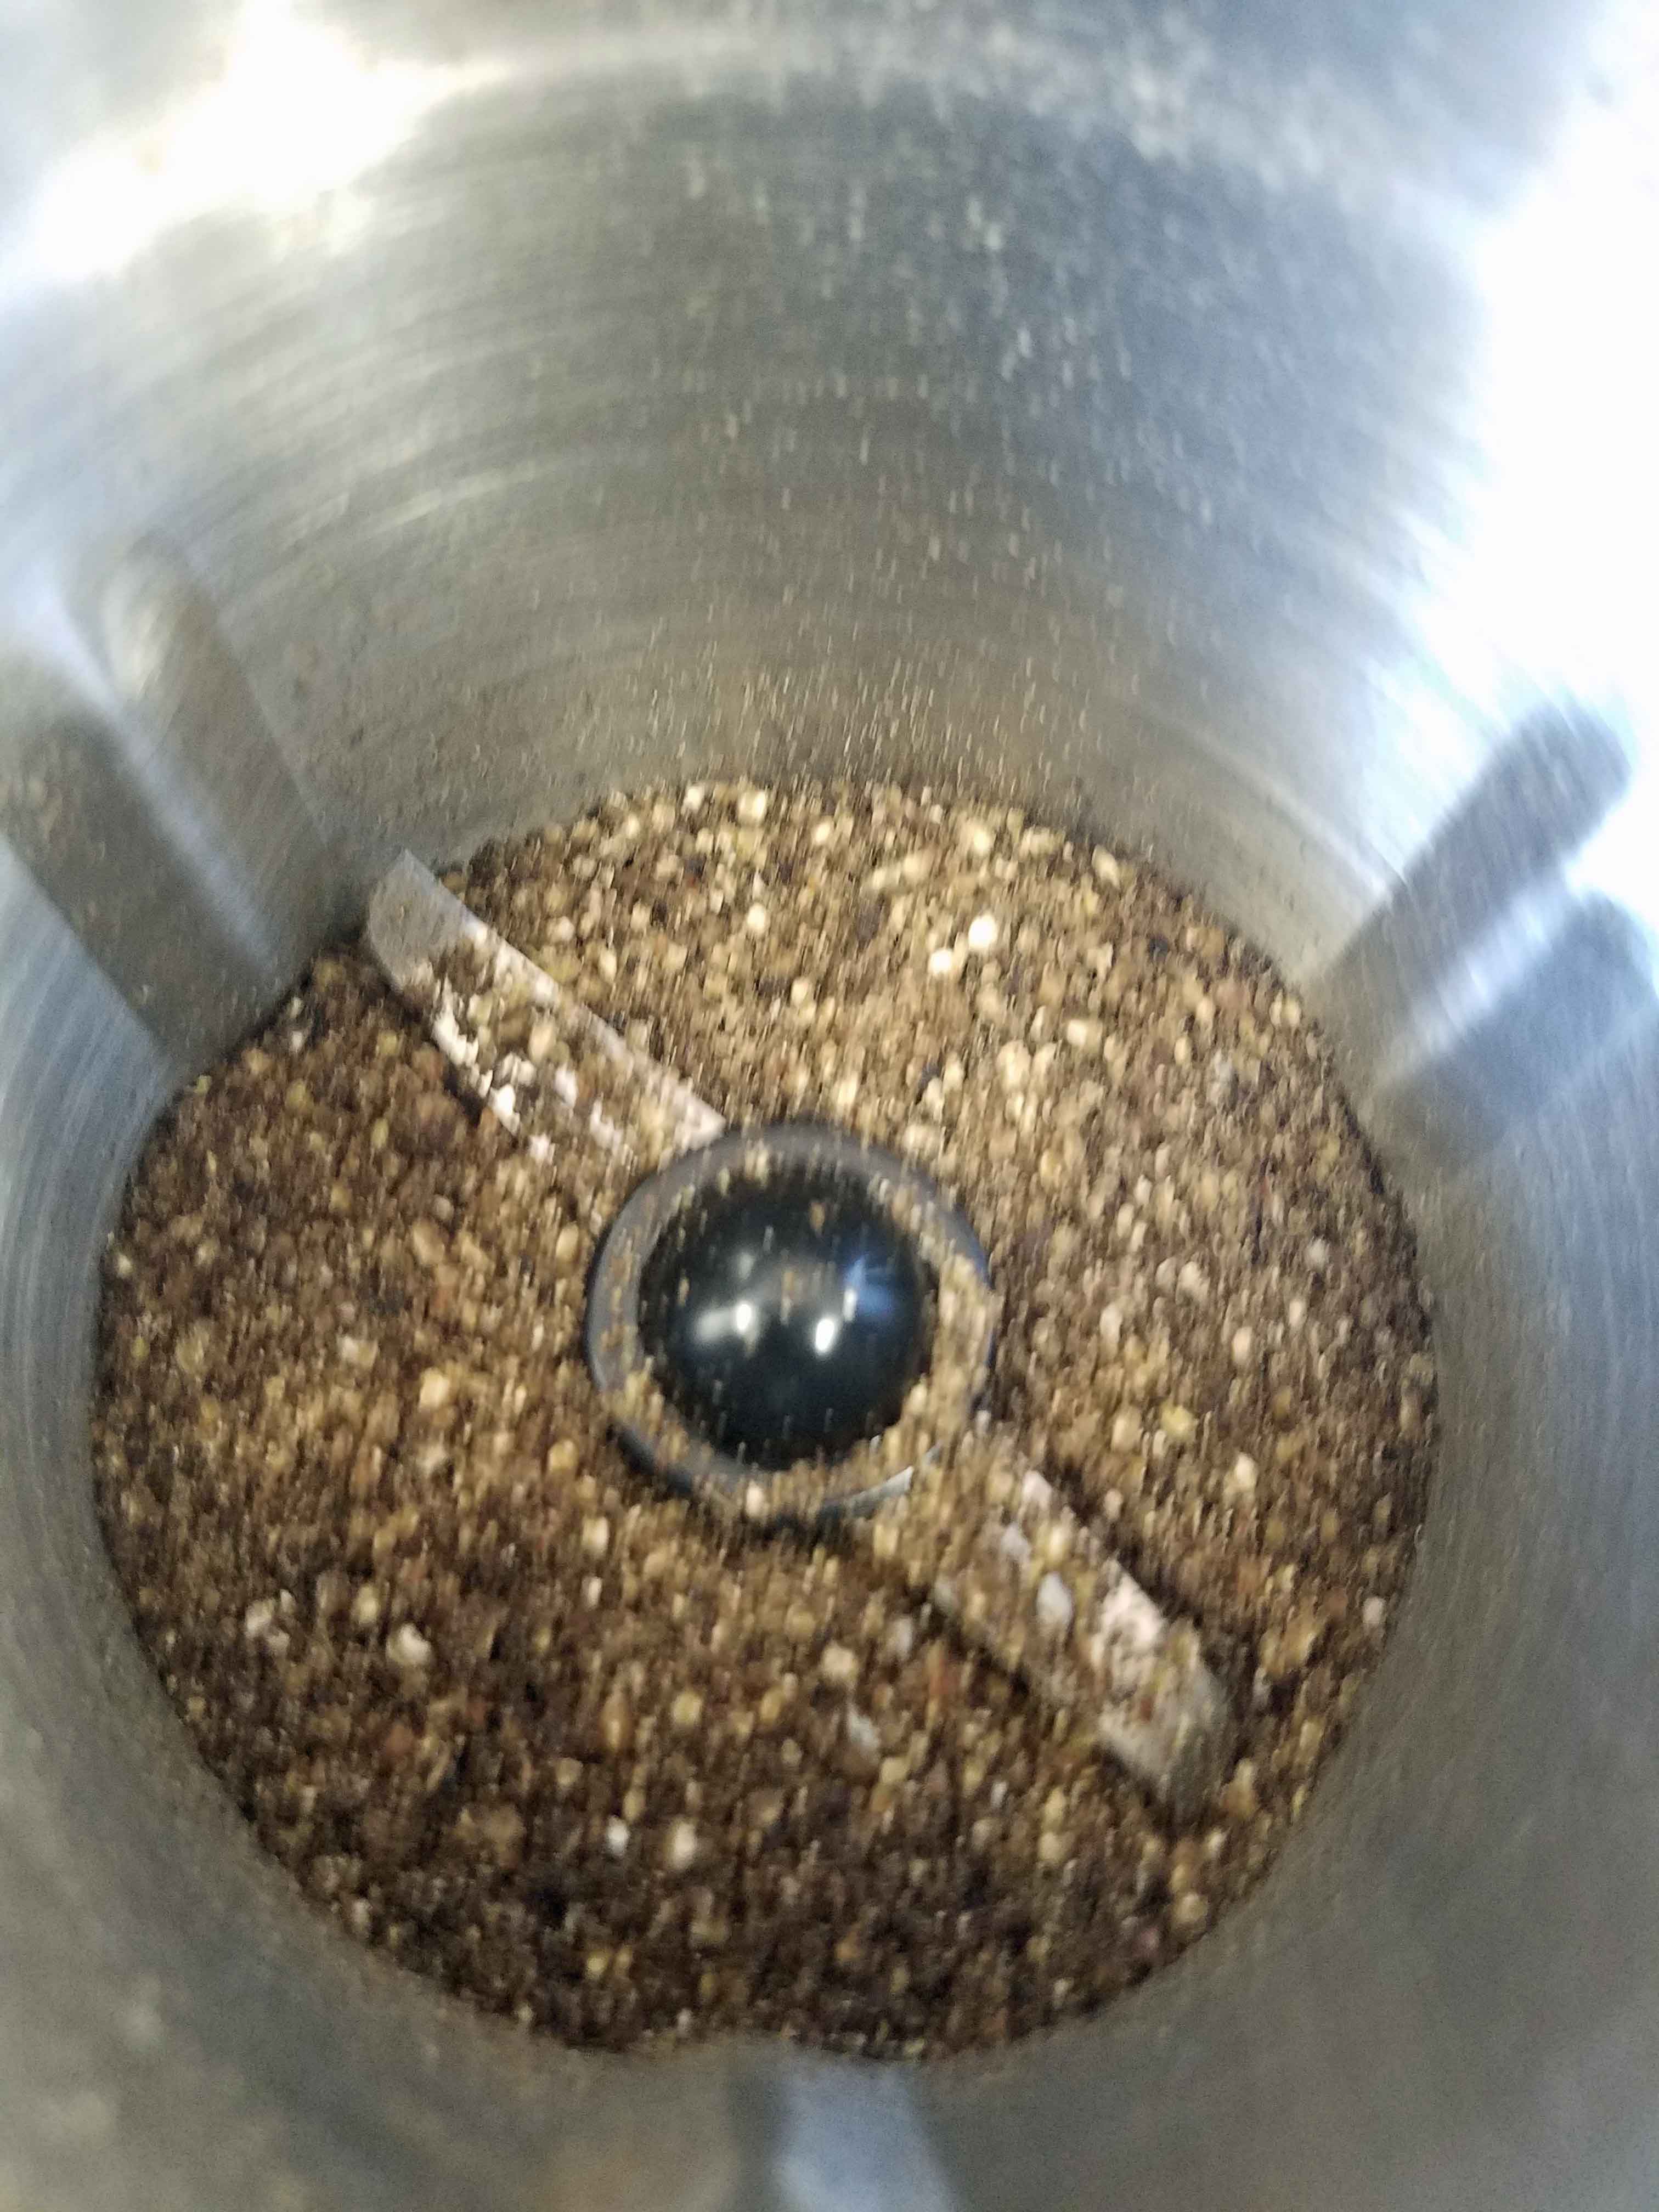
I use the dry container to make my own flours from dried beans and rice. You can literally throw a cup of dried black beans into the dry container blender, and presto, black bean flour. I use these flours to do gluten free baking. I’ve also used them in cooking, and I’ve used ground soy bean flour to make my own corn free tofu. I also use the dry container to make my own chili powder, curry powder, and garam masala from whole spices and dried chilies. I often toast the whole spices, let them cool and then grind them in the dry container. I also grind my own whole spices into powders as needed. (Powdered spices are often cross contaminated or have anti-caking agents which are a problem.) I often break up cinnamon sticks into pieces and grind the pieces into powder. I also grind my own cumin seed, cardamom, and coriander. Once my spices are ground, I use the wet container to make my own spice blends. I make my own versions of Montreal steak seasoning, taco seasoning, Greek seasoning, Italian seasoning, and so on. (See Another DIY Spice Blend Round Up: Greek Seasoning, Prime Rib Seasoning, and Italian Seasoning, DIY Spice Mix Day: Montreal Steak, Creamy Peppercorn, Singapore, and Full of Flavor Herb Mix, and Taco Beef for Tacos, Salads, and Nachos)
I know that there are other high performance blenders out there, but I haven’t used them. If you don’t need to grind your own flour, you might want to choose something not quite so high test. But that being said, this blender is in my top three for kitchen tools I would bring to a desert island, presuming that the desert island had electricity.
Let us know if you’ve got suggestions for blenders for our readers in the comments!
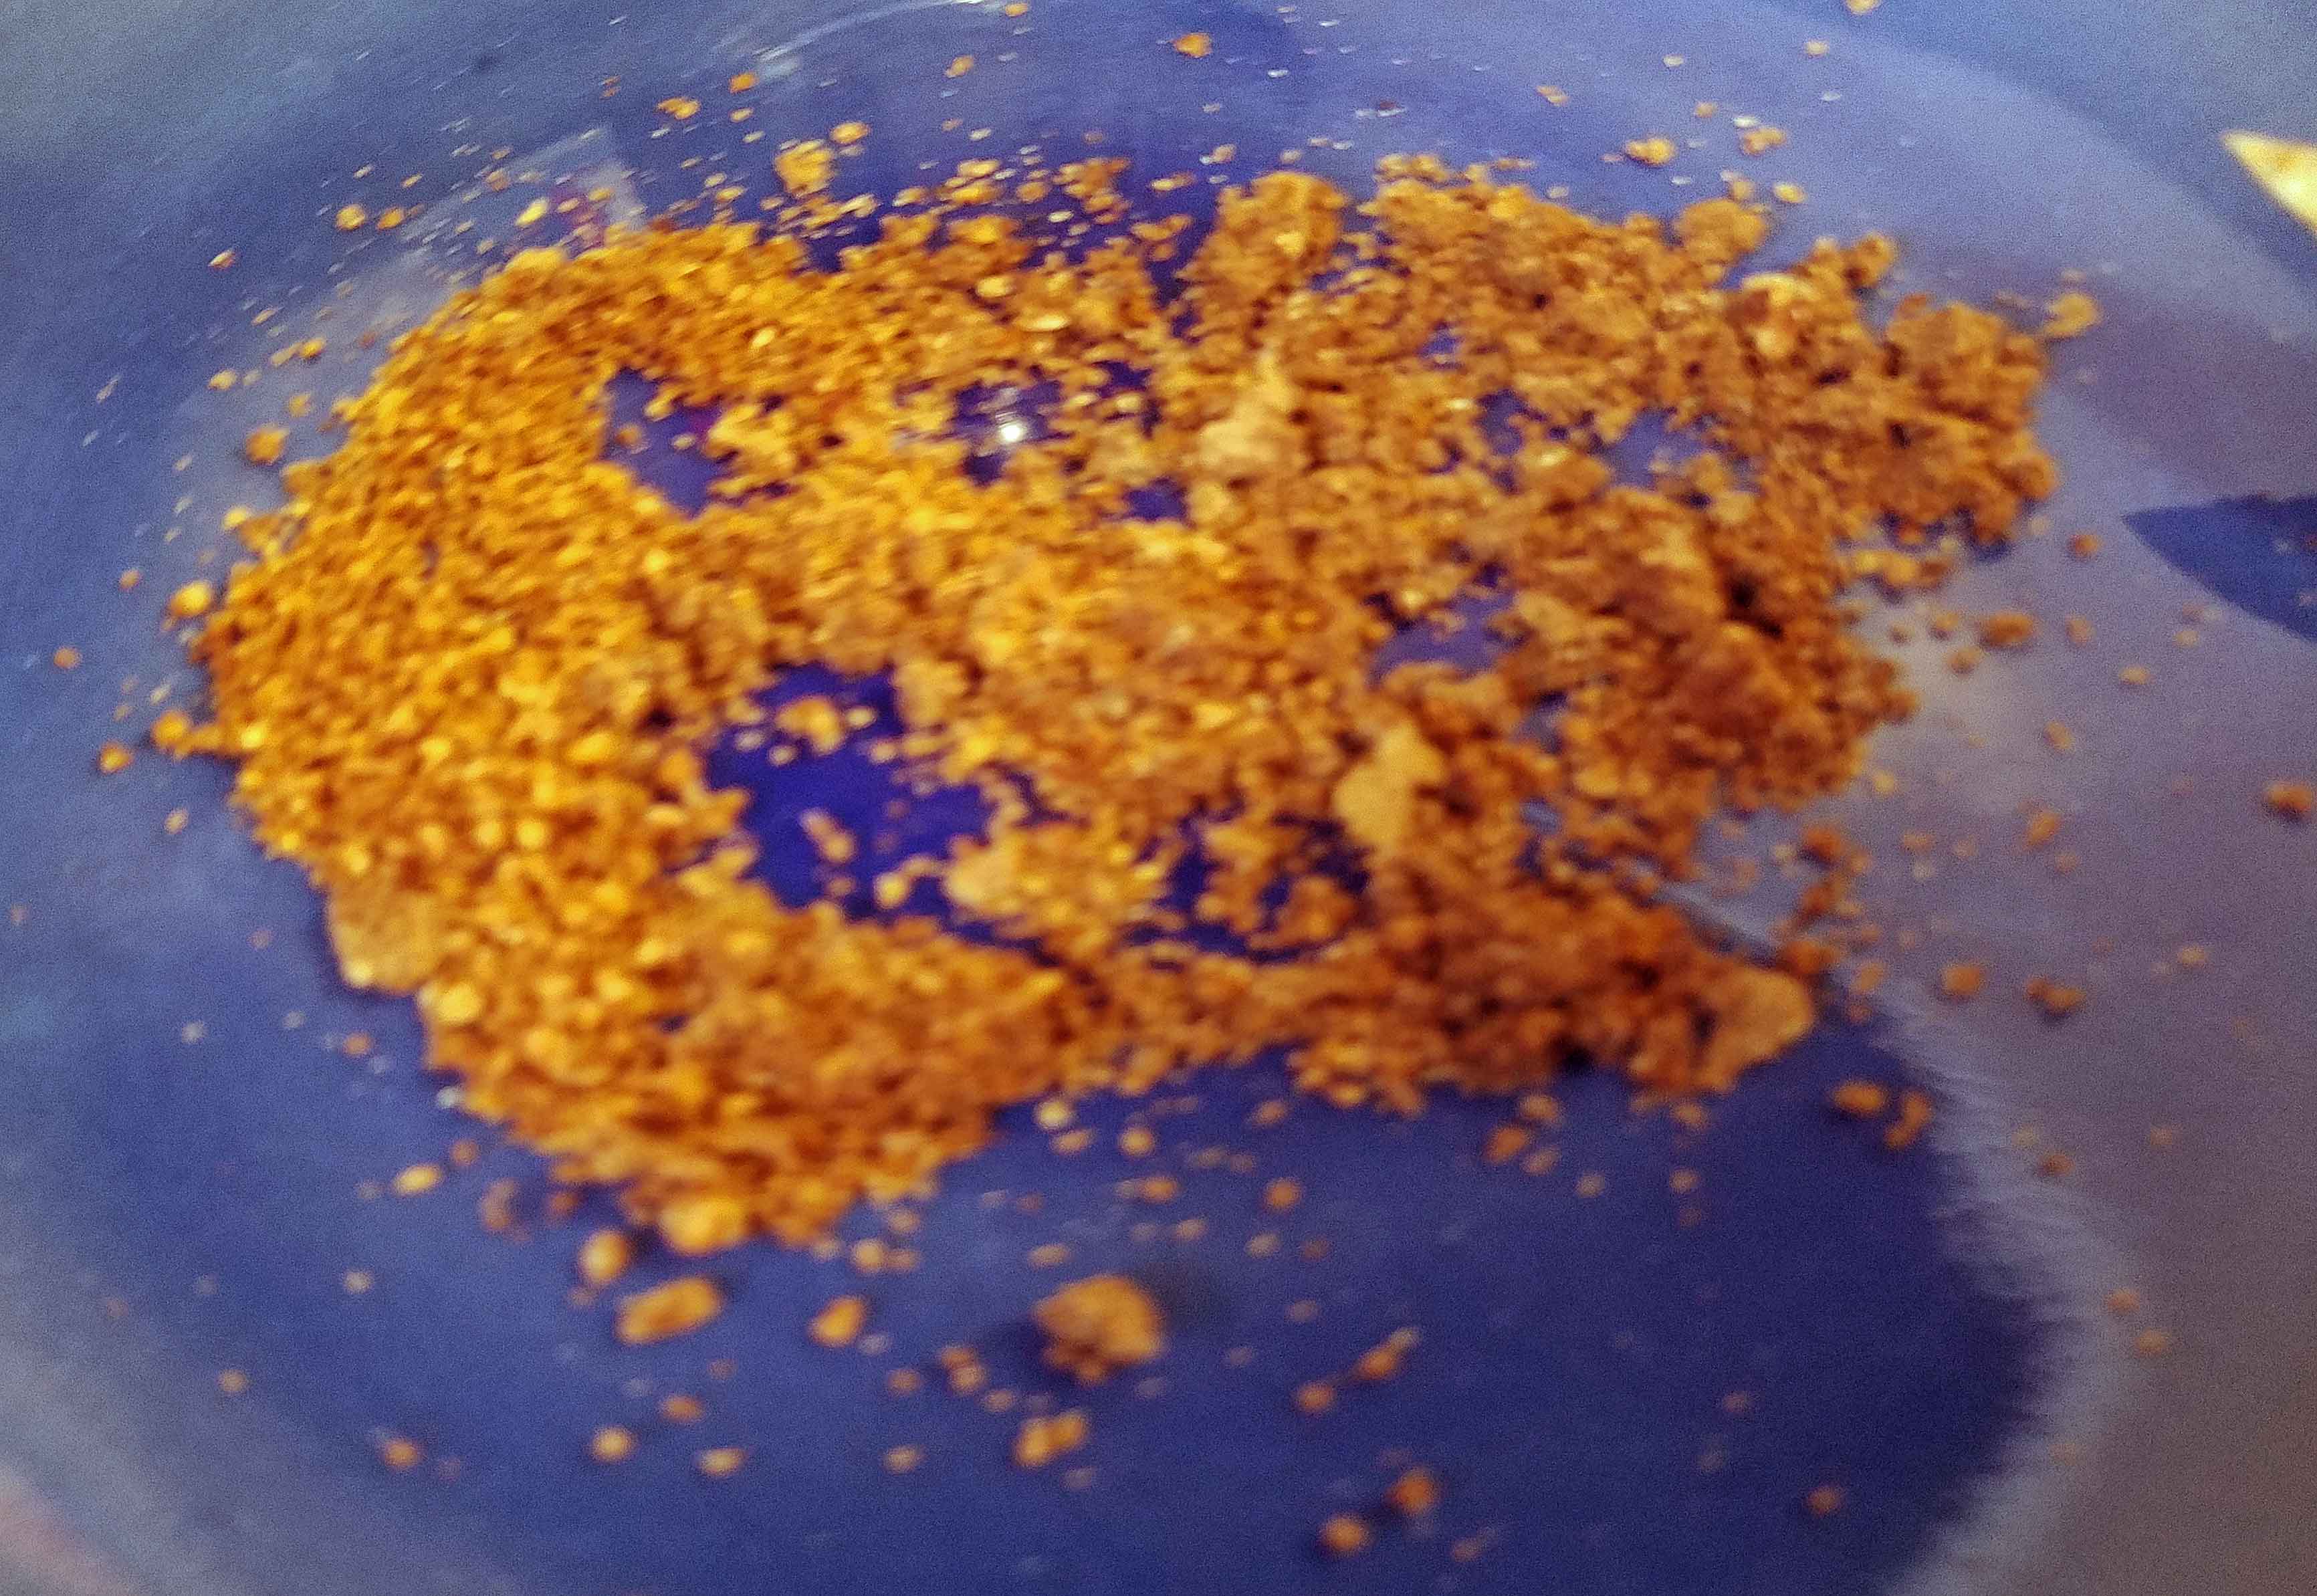
So when your food allergies cause you have concerns about anti-caking agents or you’re just tired of hearing about stuff in the news where food is counterfeited, or cut with unknown products (think the cumin and peanut problem a few years ago), you end up grinding your own spices. I end up grinding spices in two ways: just a when I need a bit for something, and when I grind larger amounts for to have on hand for convenience. For example, I don’t generally use ground coriander. But when I make pastrami, I need some for the rub, and I’ll grind a couple of tablespoons or so. In contrast, I use chili powder all the time. Making chili powder is a process, as I toast many of the ingredients and whole dried peppers first, then let them cool, and then grind them. So I tend to make chili powder in large quantities, so that it’s available when I need it. When I’m grinding in large quantities, I’m going to use my Vitamix. That being said, there are times when you just need a bit of something and it isn’t enough to grind well in the Vitamix.
I had a KitchenAid Coffee and Spice Grinder Combo Pack before I broke it. I liked the idea of it having two spice grinding cups, but coffee cup was only good for grinding coffee, and I had a Krups already that I liked so I didn’t use it for coffee. The mechanism to attach the cups to the motor was not designed well, and had rubbery fins that spun the blades. Which easily ended up degrading if you didn’t get the cup attached right and then it would only grind for a bit before the cup detached itself and so on. Suffice it to say, it was not a grinder built for people like me in mind.
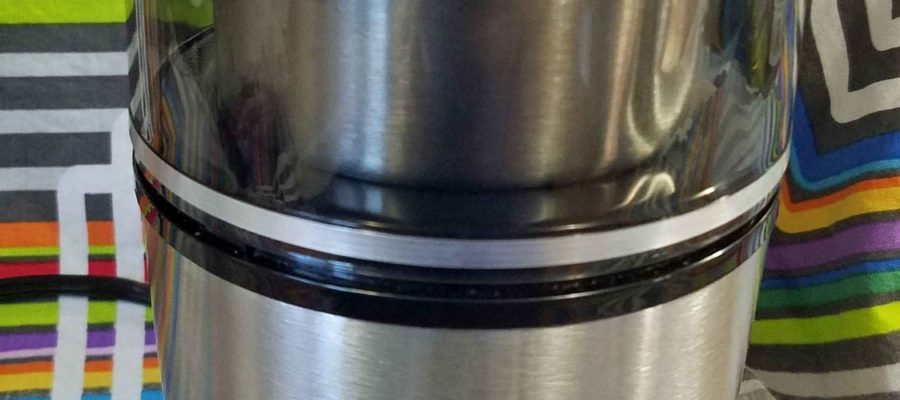
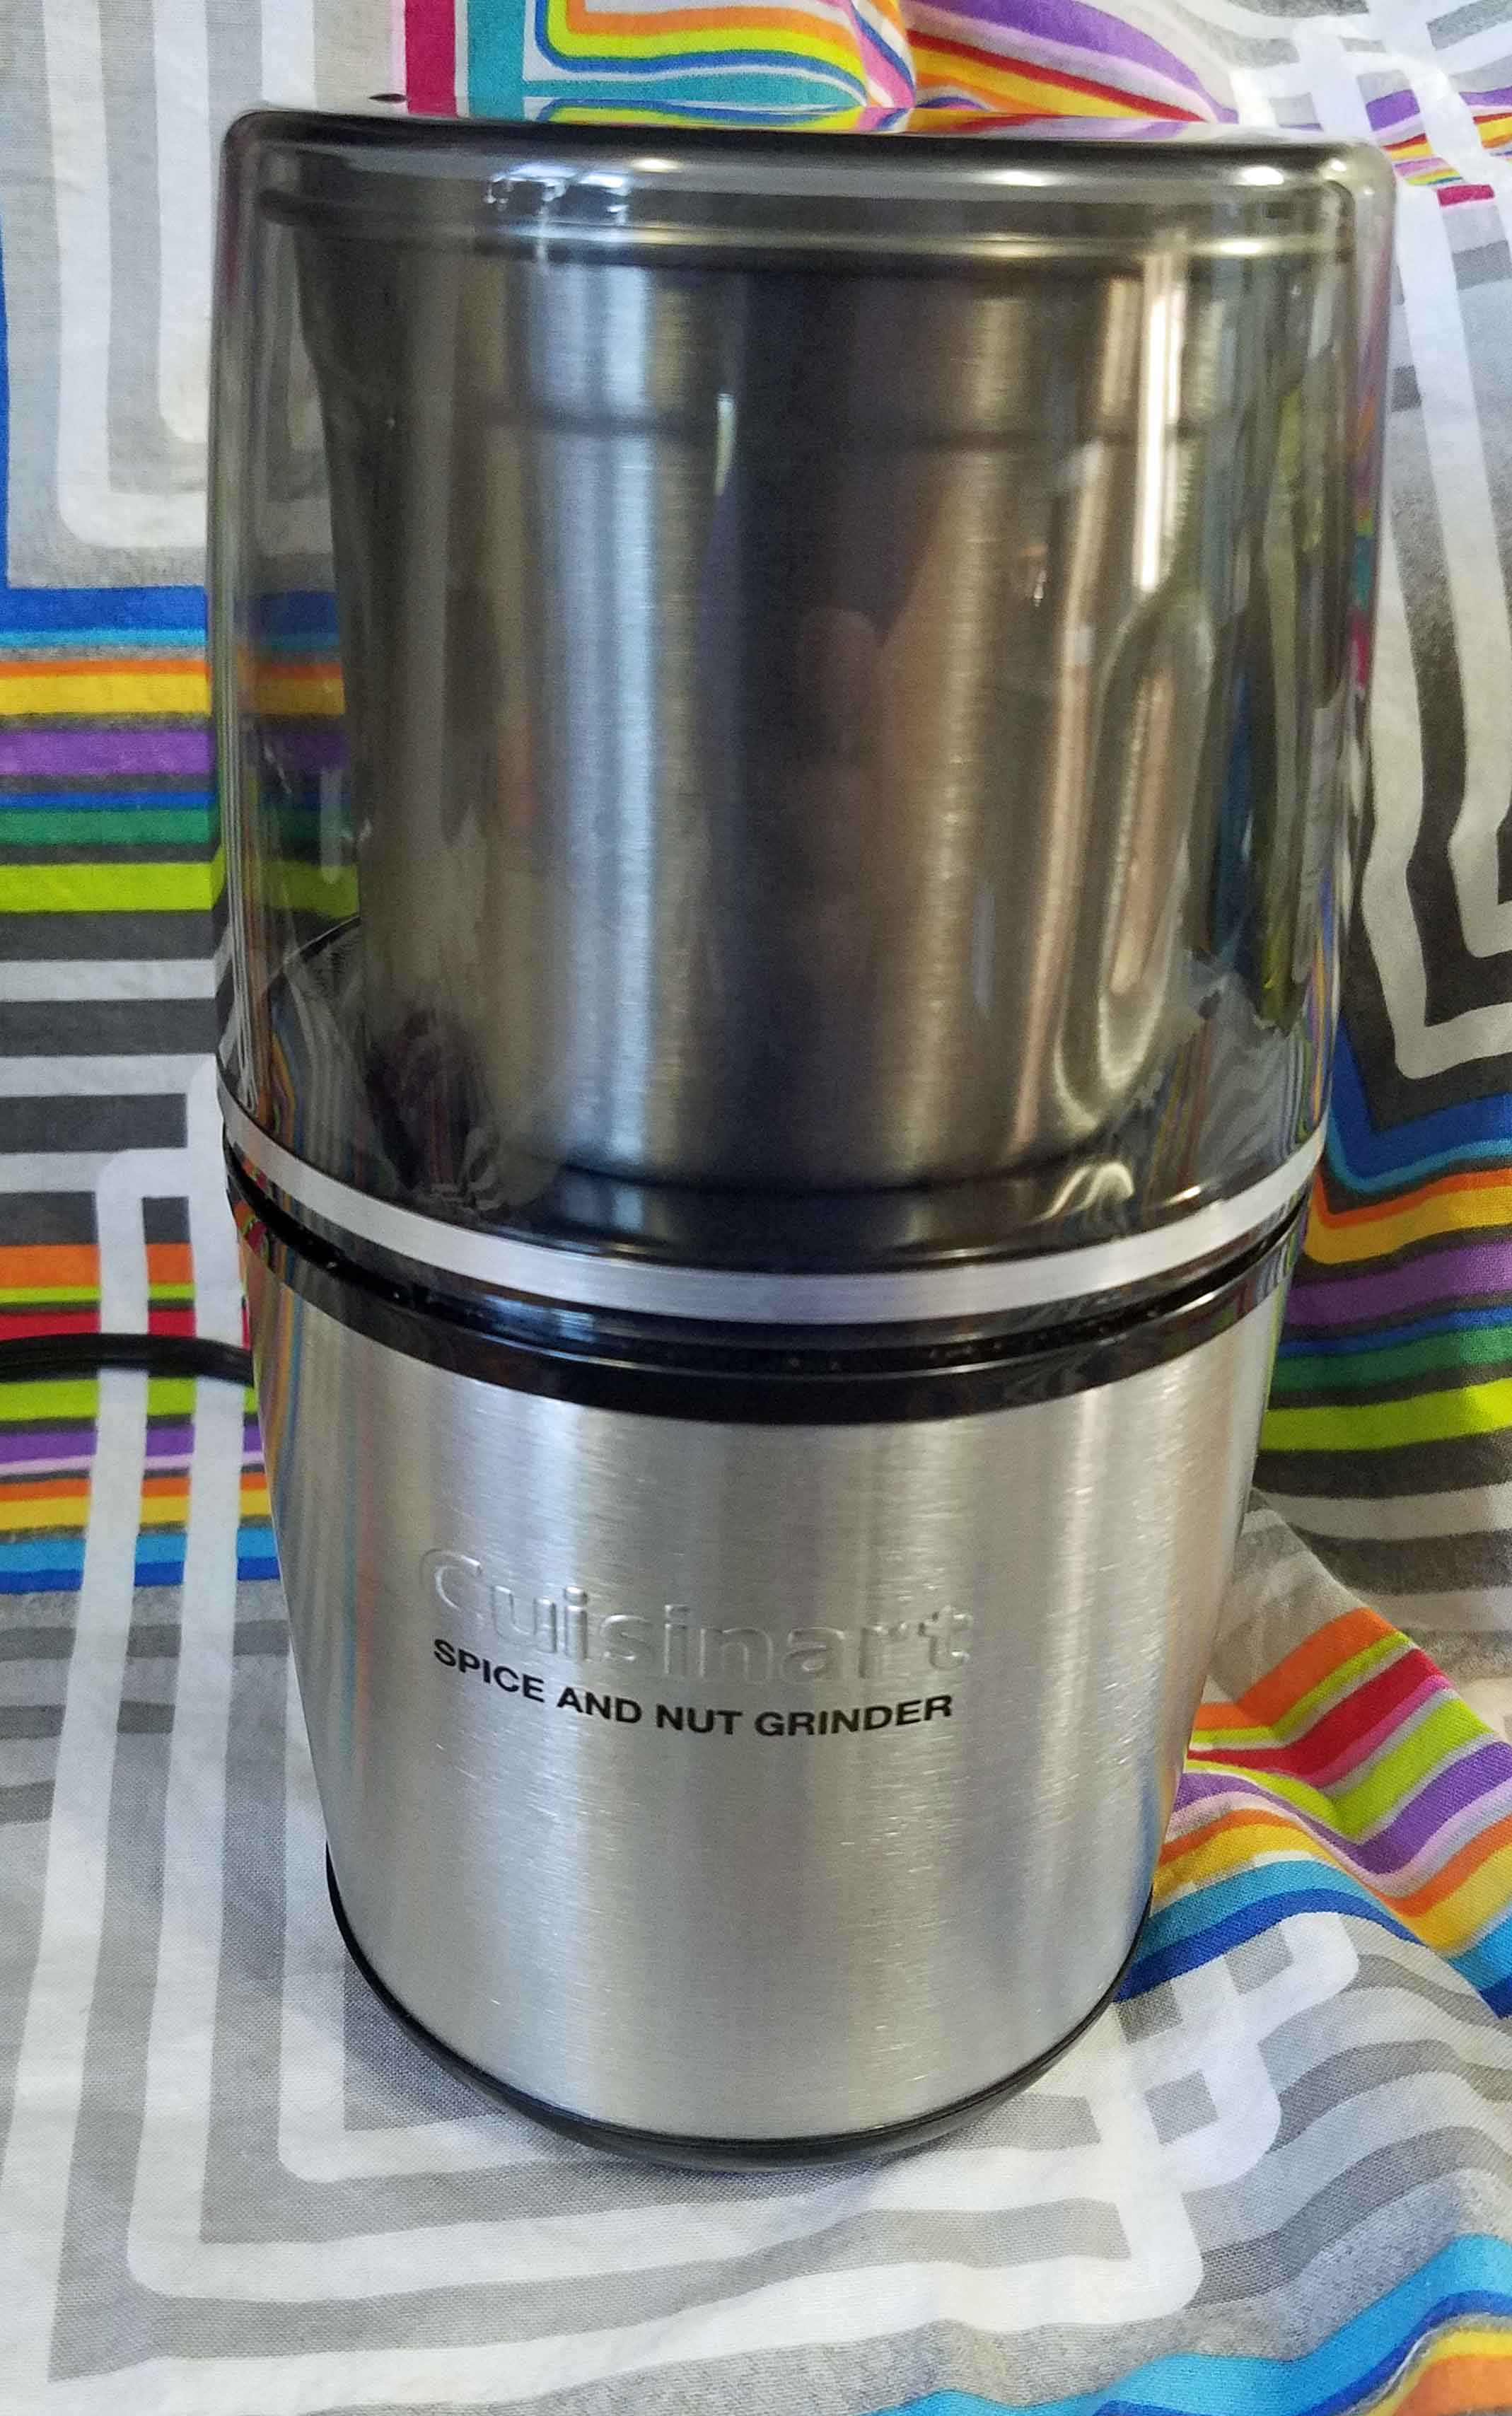
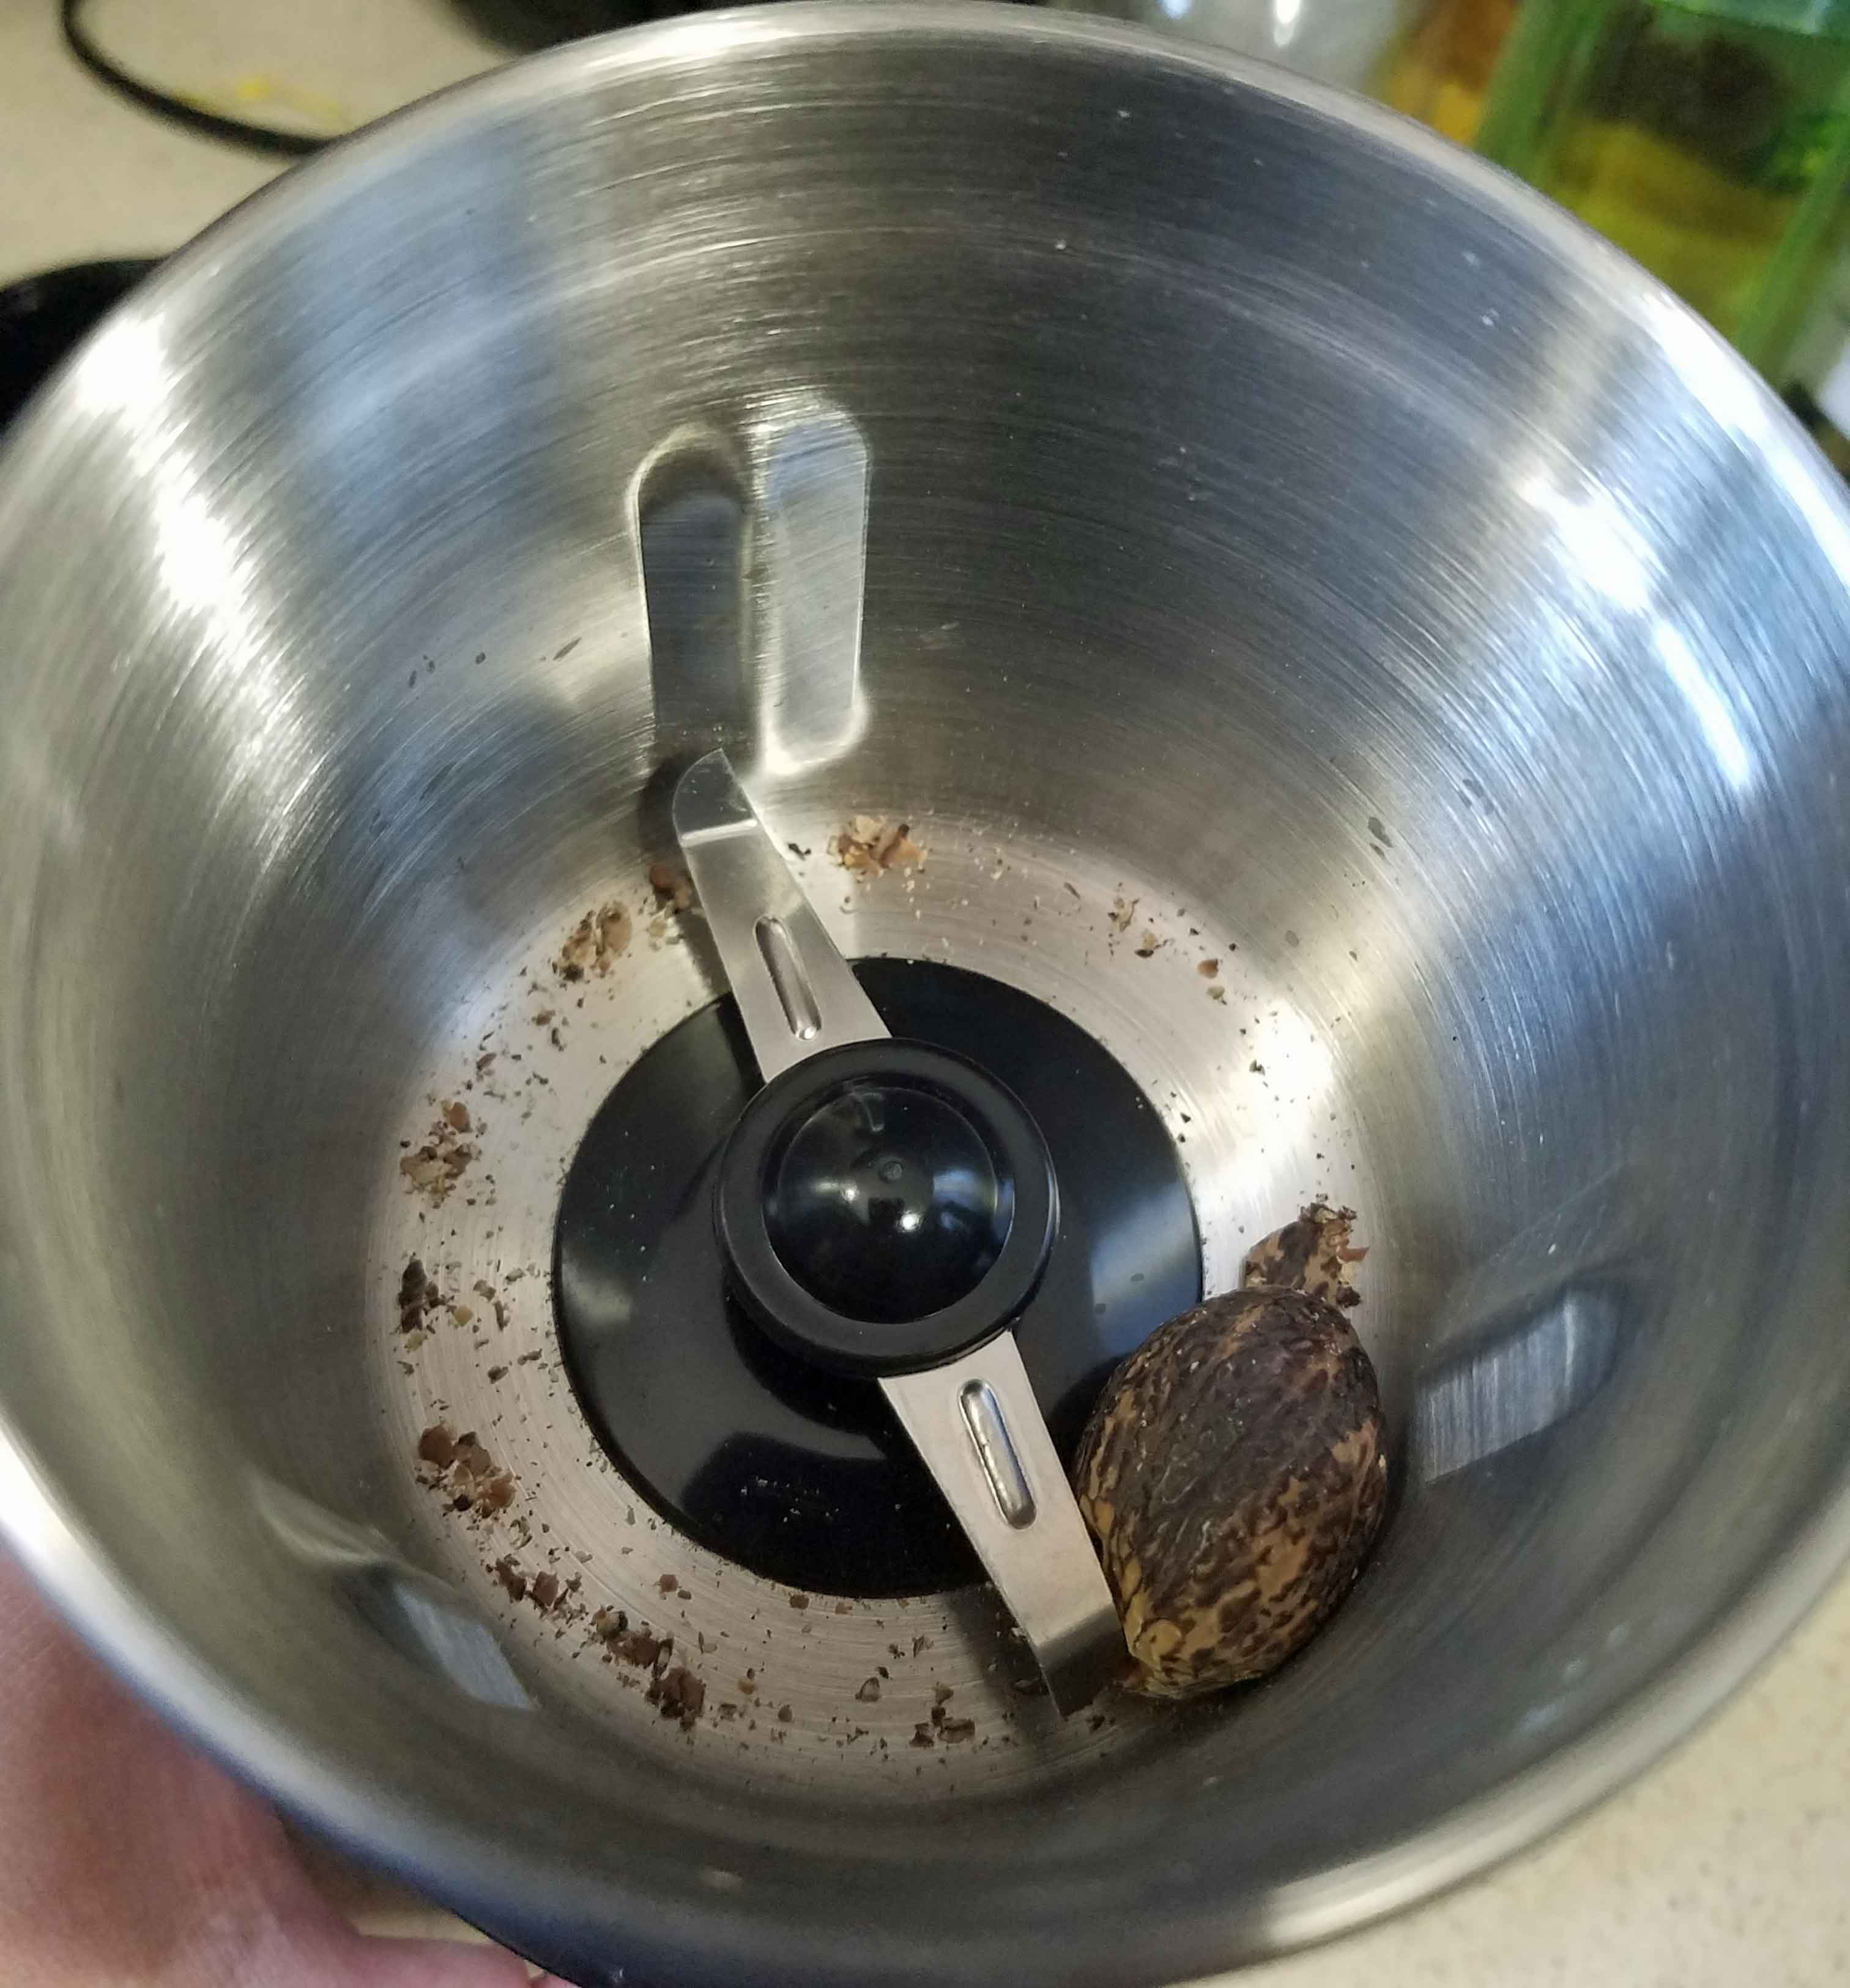
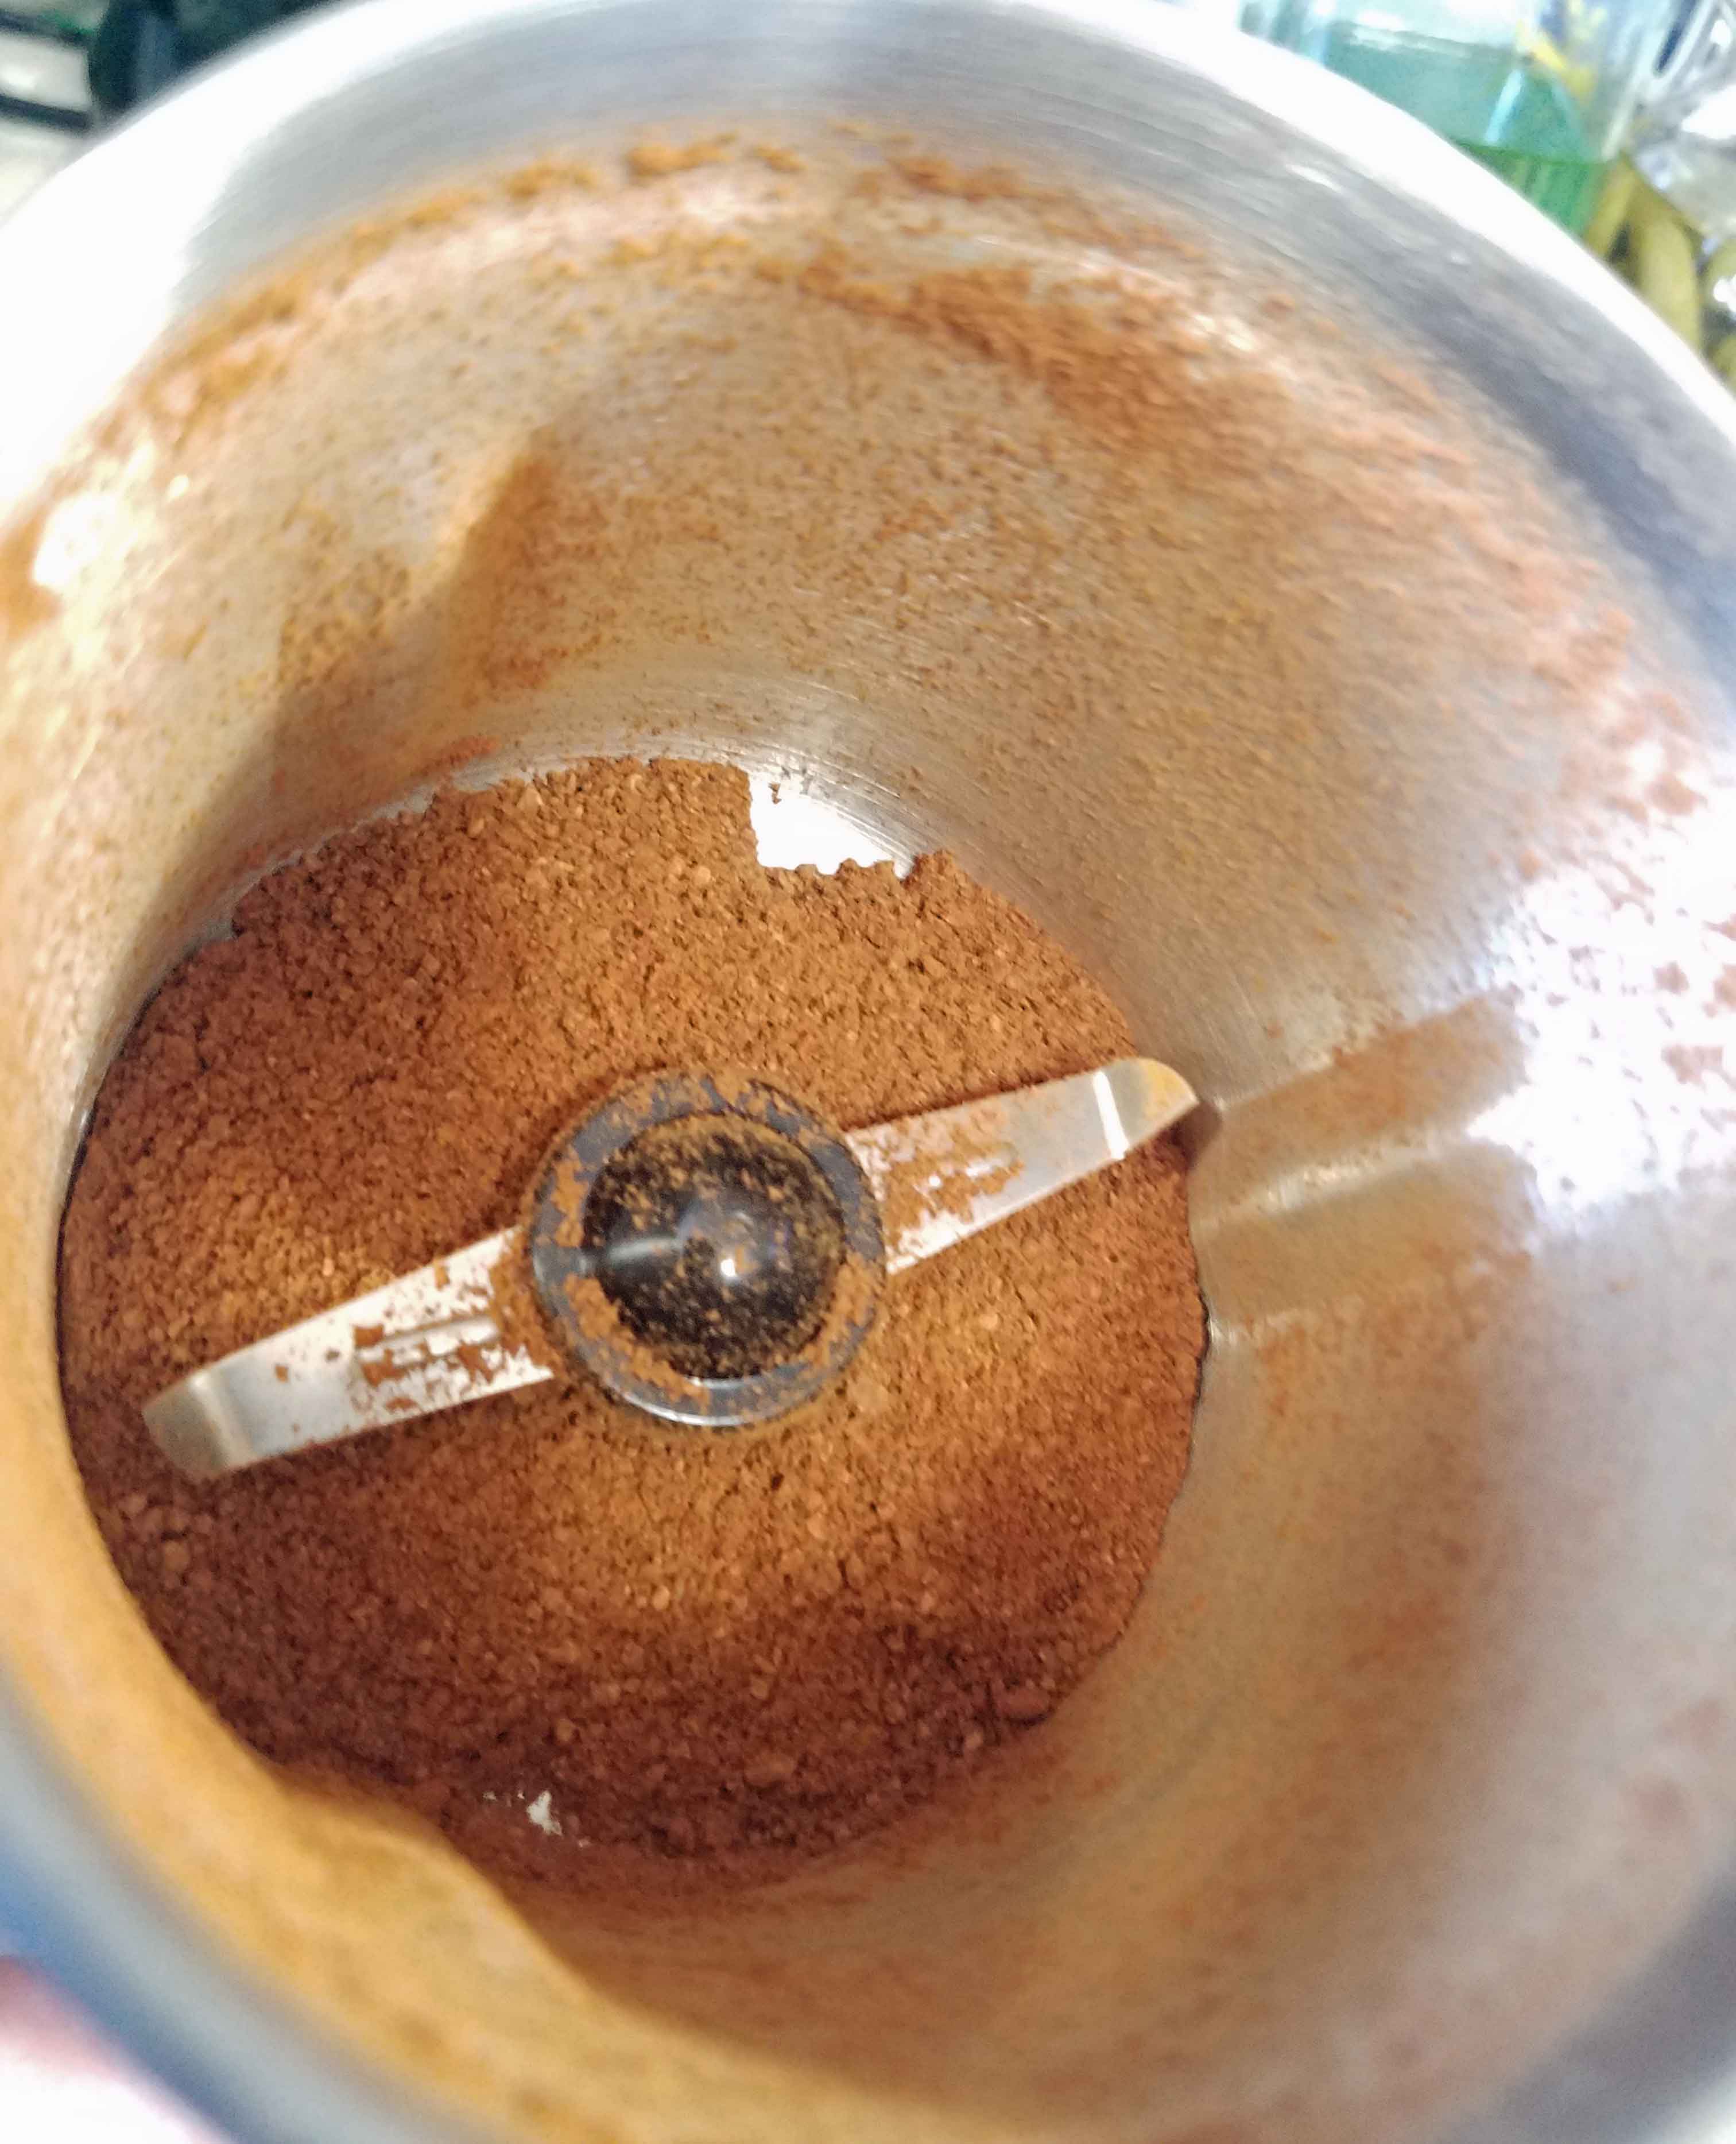
Once I killed the KitchenAid, I decided that I’d look for a different grinder this time. I ended up with the Cuisinart Spice and Nut Grinder – Model SG-10. Supposedly you can grind a whole nutmeg into a powder. It does, sort of. It ended up being more of a paste, and the large piece of nutmeg kept getting stuck on the cutting blades. I would have been surprised if this had actually worked well though. I think I’ll stick to my microplane grater for nutmeg.
Nutmeg before grinding
Nutmeg after grinding
Next I tried two tablespoons of black peppercorns. It did a respectable job.
Ground Black Peppercorns
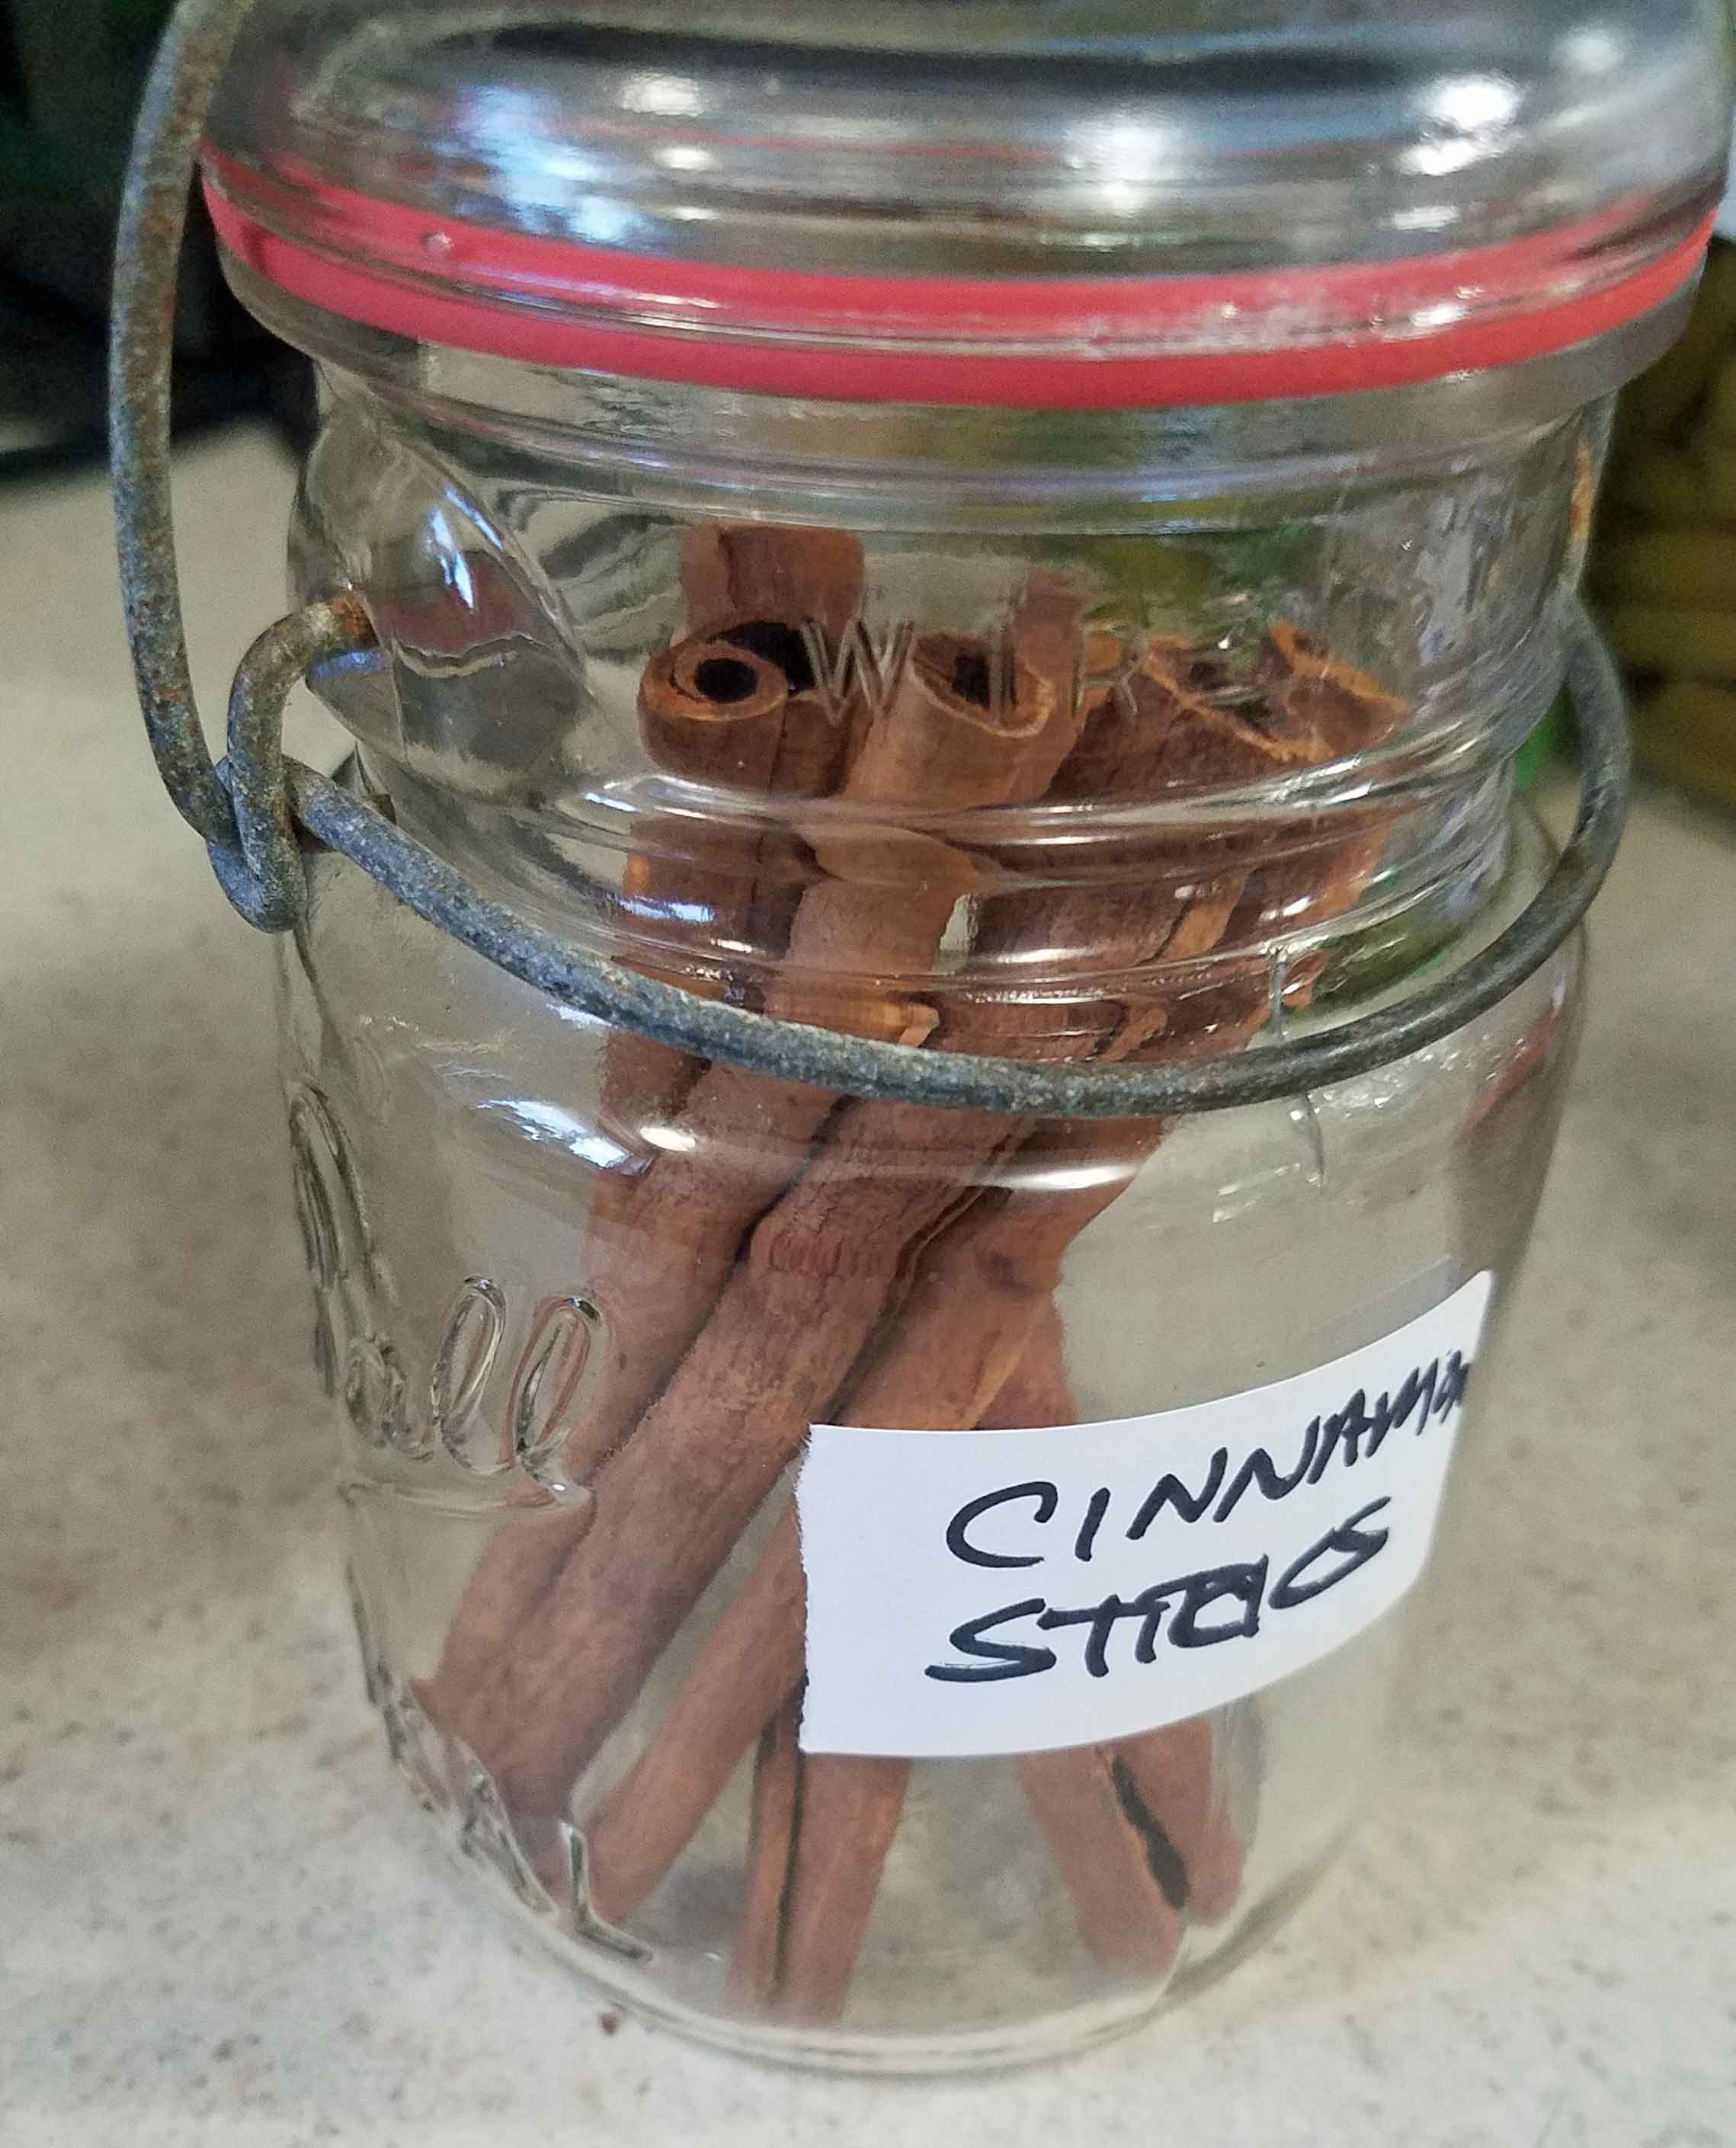
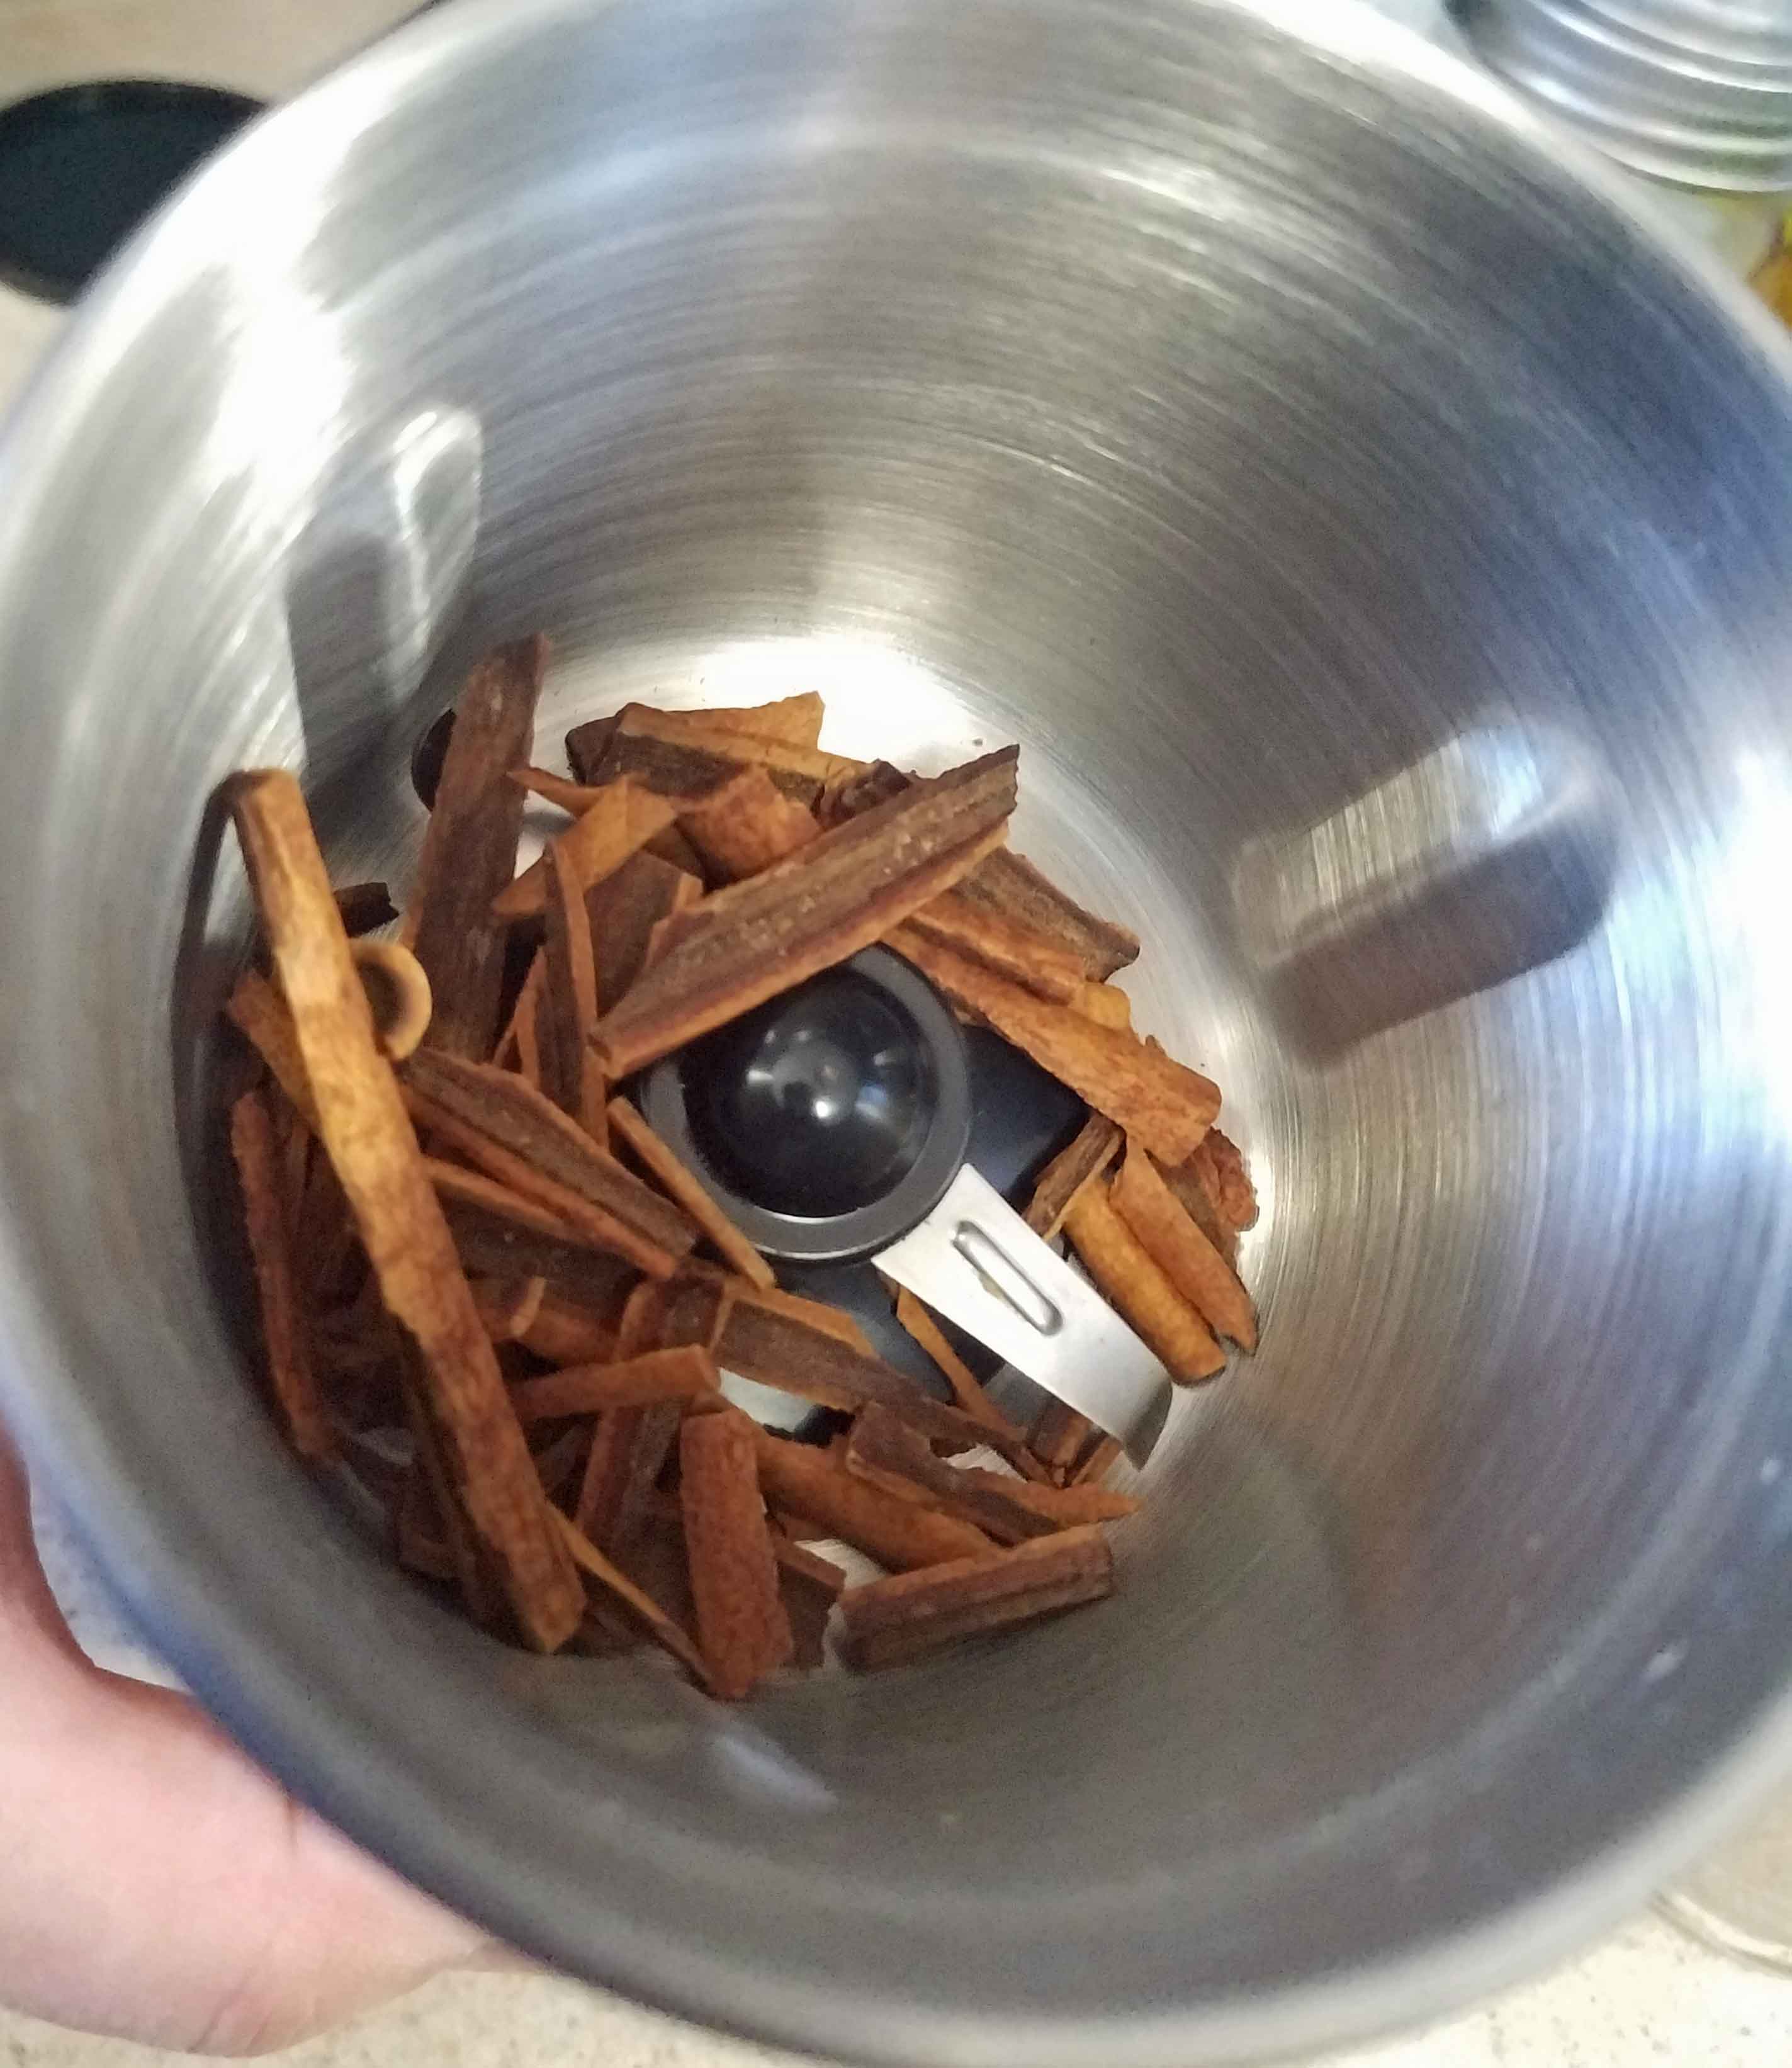
Then I did two cinnamon sticks, broken up into pieces. Again, not too bad.
Cinnamon Sticks
Broken cinnamon sticks
Ground Cinnamon
I like that the size of the cup is larger (half a cup capacity), but I’m not sure about the drive mechanism on it. I guess time will tell as to whether I manage to break it or not. I also note that a little bit of the spice dust gets on the lip of the base and in the base, although this was a problem with the KitchenAid as well. As of yet, I haven’t been wowed with any spice grinder/coffee grinder that I’ve owned up to this point. If you have a great one out there, let me know.
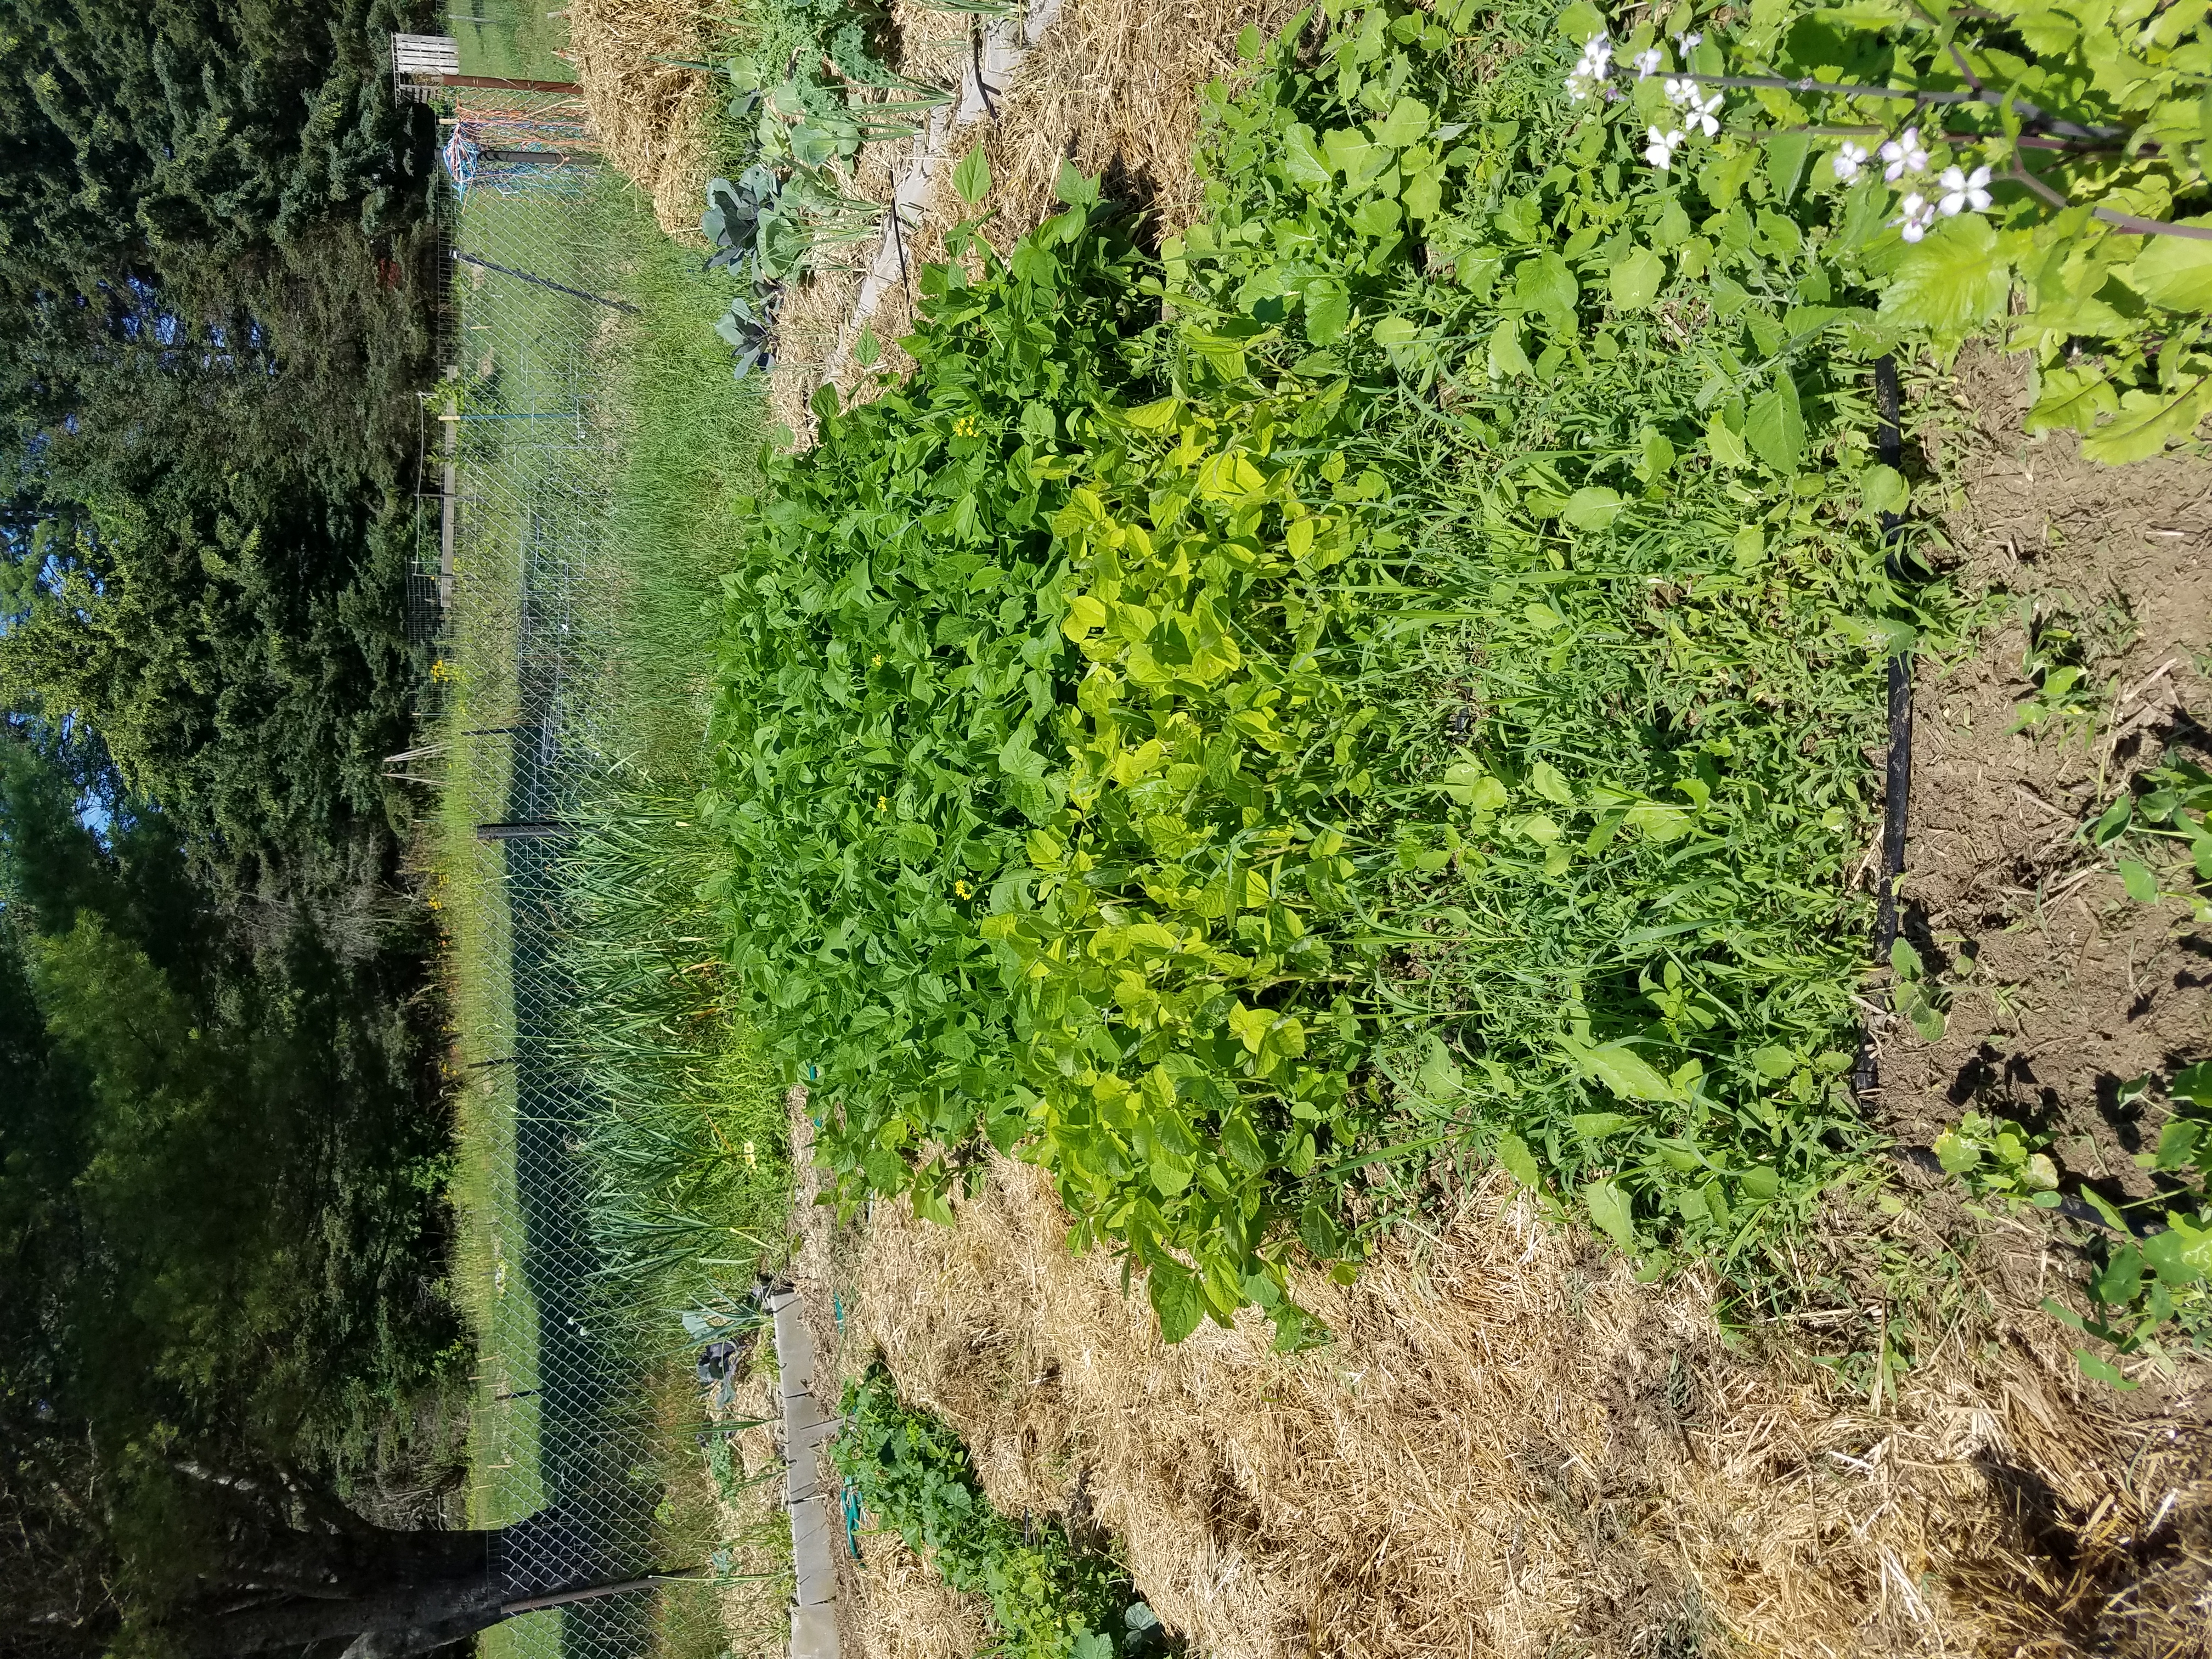
Green beans, soybeans and radishes in last years garden
So since tax day is almost here, MaryKate and I were talking about money. Besides more expensive food, you end up buying a lot of kitchen equipment, and if you have a corn allergy, you might end up buying a lot of food preservation equipment, freezers, and in my case, a house so you can grow a lot of your own spray free food (see my post on buying the house – WW: Living with Food Allergies – Making Unexpected and/or Unwanted Lifestyle Changes and my post on gardening – WW: Gardening due to Food Allergies & Planning your Garden & Starting Seedlings). These expenses have been gradual and over a period of time, and this isn’t everything, since I’m leaving out a lot of the specialty food expenses and some kitchen stuff I already owned, but I thought that talking about it may help some people.
Kitchen tools:
Crock pots – I have one of almost every size, and two of the seven quart ones. I use them to cook meals, and I use them to cook down apple butter, pear butter, tomato paste, and tomato sauce, although I did buy a Oster 20 quart roaster to use this upcoming canning season to try to cut down on extension cords and the number of Crock pots running at the same time. All of my Crock pots are manual, as I find the digital ones cook too hot.
1.5 quart – $16
3 quart – $22
4.5 quart – $30
Two 7 quart – $45 each
20 quart Oster roaster $40 (on sale)
Meat slicer – We actually got this as a wedding present because my husband wanted one because he used to work at a deli, and we already had a lot of stuff because we were older when we got married and we were already living together. I use it when I cure pork belly into bacon, and when I cure brisket into pastrami to slice things evenly. We didn’t use it much before food allergies but we use it quite a bit now.
Stand Mixer and attachments – I’ve posted about my KitchenAid mixer in the past (WW Kitchen Stories: Denise’s KitchenAid Mixer) but it predates my food allergies. I use the Food Grinder attachment in conjunction with the KitchenAid Fruit and Vegetable Strainer attachment to make vats of home canned applesauce and tomato sauce. I also use it in baking muffins, cookies, cakes, and pie dough. I use it to make Aquafaba whipped cream, and I use it to make pasta. I really want the KitchenAid KSMPEXTA Gourmet Pasta Press Attachment with 6 Interchangeable Pasta Plates and I may buy the KitchenAid KSM2APC Spiralizer Plus Attachment with Peel, Core and Slice, Silver, to process my apples, so that I don’t have to use a hand crank apple peeler for my apple harvest (I have 18 trees), but I have not yet purchased them. I’m trying to be restrained here, even though I’m a kitchen gadget junkie.
KitchenAid Mixer Kit 4.5-Quart Tilt-Head Stand Mixer – $200
KitchenAid Food grinder attachment $40
KitchenAid FVSP Fruit and Vegetable Strainer Parts for Food Grinder $23
High Performance Blender – I waited three years to buy my Vitamix blender because I’m wicked cheap and the price tag was killing me. I got the Vitamix 5200 Blender Super Package from Costco which has the dry container for grinding grains, beans, rice and soybeans into fresh flour and the regular wet blender container. It’s the the one thing that honestly I probably should have bought from day one. I use it to make cashew milk and rice milk without having to strain it. I use it to make salad dressings. I use it to grind my own chili powder, curry powder, garam masala and other spice blends from whole spices in large quantities, as well as grind whole spices into powder. (Powdered spices are often cross contaminated or have anti-caking agents which are a problem.) I use it to make my own flours from dry beans and rice. I use it to make fruity drinks from my safe vodka or rum, my homemade jams, and ice. I use it to puree the peppers I ferment to make hot sauces. I use this thing almost every day.
Vitamix 5200 Blender Super Package $500
Spice Grinder – Sometimes you need to just grind a small amount of something for a recipe. When you only need to process a tablespoon of something, the Vitamix is the wrong tool because you need a larger amount for it to work well. I had a spice grinder before I had the Vitamix and I still use it after the Vitamix.
Cuisinart SG-10 Electric Spice-and-Nut Grinder $36.00
Meat Grinder – I can hear you now. Why does Denise need a meat grinder if she has the grinder attachment for the KitchenAid? My answer is that the KitchenAid Food Grinder works great for once in a while grinding of meat in small amounts. However, I’m sort of beyond that level at this point. I need to grind tallow and leaf lard to render down my own tallow and lard for cooking and to make my own margarine. Fats are tough products to grind, and I needed more muscle since I cracked the plastic housing on the Food Grinder last time I ground tallow (still works for now, ugh), and my KitchenAid motor really struggles with grinding the tallow and leaf lard and overheats. With the meat grinder, I can grind 5 pounds of frozen leaf lard in about a quarter of the time that I took me with the KitchenAid.
STX-4000-TB2 Turboforce II “Quad Air Cooled” White Electric Meat Grinder & Sausage Stuffer $240
Dehydrator – I bought a dehydrator during the year of the great pepper harvest. My friend Mary S. agreed to grow peppers for me before we had the house, and well, she harvested 11 pounds of various chilies. I couldn’t manage to can or ferment all that before it went to waste and we didn’t have freezer space at that time, so I ordered a dehydrator to preserve the harvest. Now I use the dehydrator to make fruit leather using left over apple pulp when I steam juice apples to get juice to make jelly or apple juice. I dry herbs, peppers, and kale from the garden to use during the winter. I also use it to dry peanuts and cashews after soaking them so that I can make my own nut butters. I use it to make raisins, dried apples, and other dried fruits. It’s getting quite a lot of use for a spur of the moment, desperation purchase.
Food processor – I had a smaller food processor, but I sort of melted the container when I left it too close to a burner on the stove, so I now use it to shred soap to make my laundry detergent. I replaced it with a 14 cup model. I use it for slicing vegetables to make pickles and shredding vegetables to make pickles and relishes, and dicing vegetables to make salsas. This gets a workout during canning season. I also use it to make larger batches of nut butters.
Cuisinart DFP-14BCNY 14-Cup Food Processor $150
Juicer – I use a cheapo juicer to juice apples to make hard cider. Remember that I have 18 apple trees and I need to get rid of a lot of apples. I really want a cider press, but that will run me about $500, so the small juicer is working fine for now, if time consuming. Please remember that almost every commercial juice will be corny in some way, so if you need fruit juices it’s best to juice your own.
Hamilton Beach Juice Extractor, Big Mouth, Metallic $60
Pressure Cooker – I have big pressure canners that I can use to cook in, but they are way too large to deal with on a day to day basis. I use this to make yogurt from cashew milk, make rice, steam vegetables, and I make a lot of soups, stews, and other dishes in it quickly, without having to stir or babysit them. I like it better for weekday use than a slow cooker because I don’t have to plan ahead or leave things on a timer. We use it enough that I ordered an extra pot for it so that we can make things back to back without having to empty the pot and wash it right away.
Instant Pot DUO60 6 Qt 7-in-1 Multi-Use Programmable Pressure Cooker, Slow Cooker, Rice Cooker, Steamer, Sauté, Yogurt Maker and Warmer $70 (on sale)
Extra pot $30
Knife Sharpener – Sharp knives work better and you’re less likely to get hurt, allegedly. For a long time, I kept thinking I would take my knives in to be sharpened at a local kitchen place, but the reality is, I don’t feel like I can be without my knives that long, so I don’t. I cook every single day and I need the knives. I know that electric knife sharpeners are not as good as professional knife sharpening, but sometimes something is better than nothing.
Presto Professional Electric Knife Sharpener $36
Cast iron wok – I use this primarily for deep frying. When MaryKate and I originally learned to deep fry, we used stainless steel pots, but the wok uses so much less oil and you have much less splatter everywhere. I have a big Lodge wok and a smaller Utopia Kitchen wok. I use the larger one when I am frying a lot of food in quantity to freeze for later, and the smaller when I just have a yen for a little something. I also use both for stir frying as well. You don’t need both, and neither do I, but I like the flexibility.
Lodge Pro-Logic Cast Iron Wok, Black, 14-inch $45-50 (on sale)
Utopia Kitchen Cast Iron Shallow Concave Wok, Black, 12 Inch $18.00
Digital Kitchen scale – If you’re doing any sort of gluten free baking, a digital kitchen scale is helpful. I also use it quite frequently in canning, as recipes will call for so many pounds of an ingredient. I prefer to have one that measures at least up to 10 pounds and reads in pounds, ounces and grams. Mine is a cheap one I ordered online.
Etekcity 15lb/7kg Digital Kitchen Food Scale, 0.01oz Resolution $12
Digital Meat Thermometer – This made a real difference in our cooking. Since every meal is at home, we want our food to be done right. I can now cook a steak that compares with a restaurant cooked steak, and we don’t have overdone dry pork chops any more (unless someone isn’t paying attention).
ThermoWorks ThermoPop Super-Fast Thermometer with Backlit Rotating Display (Purple) $30
Canning stuff:
After my corn allergy diagnosis, when I realized that I would literally have to make everything from scratch, and we were living in an apartment and did not have freezer space to freeze everything and we were having winter power outages that lasted 4-5 days every other winter, canning looked really attractive because it’s shelf stable. If you have a corn allergy and decide to can, be aware that some of us react to the Ball canning lids, and the Tattler canning lids. Don’t invest in a lot of stuff until you know whether you react or not. Luckily, I’m still doing okay.
Pressure Canners: Pressure canners allow you to can low acid food safely without getting botulism. If you take up canning, you need to do a lot of research and follow safe recipes in order to be safe. I originally ordered the smaller pressure canner, but realized that it was costing me a ton of time to do two batches, and I ended up ordering the larger one. I can do 10 pints in the smaller canner, but 19 in the larger canner. Now sometimes I run both of them at the same time, particularly when I’m canning quarts, as I can do 14 quarts at once between the two of them. I also use the larger canner as a cooker to make bone broth and vegetable stock in a very short period of time. You can buy cheaper pressure canners in the range of $80, but then you have to buy a new gasket every season which runs about $50. The All Americans have a metal to metal seal, and you just need to get a new rubber over-pressure safety plug every year which is about $7. The All Americans are very heavy cast aluminum and they will last forever. If I were to do it over, I’d have ordered the larger one first, and probably not have two.
All-American 15-1/2-Quart Pressure Cooker/Canner $175 (on sale)
All American 921 21-1/2-Quart Pressure Cooker/Canner $210 (on sale)
Water Bath Canning Pots – Water bath canning is for high acid foods like jams, jellies, pickles and salsa. I was using a Granite Ware 21.5-Quart canning pot, which are only about $20, but I literally wore two of them out because they are so flimsy. You can use any large stock pot (10 quarts or larger) to do water bath canning, but I like to do large batches so I have a 20 quart and a 32 quart pot.
20 quart stainless steel pot $61
32 quart stainless steel pot $91
Canning Element Kit for electric stoves – This replaces your electric burner element to have more heavy duty support (canning pots are freaking heavy) and a higher wattage burner. I’m on my third. Because of the volume I do, I keep wearing them out.
Canning element kit $37
Extra burner – I often need an extra burner because if I have two pressure canners going, I wouldn’t have room to cook the thing I’m canning on the stove. This burner is high enough wattage to run a canner on it.
Cadco PCR-1S Professional Cast Iron Range $130
Steamer Juicer – This is the easiest way to juice fruit to make jams and jellies and can fruit juice. It’s an expensive toy, but the time and hassle it saves makes it worth it for me.
Cook N Home NC-00256 11-Quart Stainless-Steel Juicer Steamer $95
Canning tools – You’ll need some canning tools, a canning funnel, bubble remover, jar lifter, and so on.
Presto 7 Function Canning Kit $15
NORPRO 591 Bubble Popper/Measurer $5
Canning books – You’ll need some canning books to learn safe canning techniques and safe recipes. My canning book collection is about $200 at this point.
Canning Jars – Depending on the size, canning jars range from $8 to $12 a case retail. Because I can in high volume and I store spices, rice, beans, and flours in jars, I probably have close to 2,000 jars in the house, as there were nearly 1,500 in canned goods alone at the end of the canning season last year. I didn’t pay for them all, as I’ve been gifted jars when people stop canning and downsize, and I got quite a few cases on very deep discount during sales, but it’s an expense when you start.
Ball Canning Lids – Canning lids can only be used to can food once. I reuse lids for dry storage, but you can’t reuse them for canning. I generally spend about $50 to $100 a season on lids. The cheapest I can find them is sadly Walmart where I’m able to get a pack of 12 for between $1.79 to $1.97 depending on the sale. I generally buy a 24 pack case at a time if I get a good price.
Fermenting stuff:
I learned how to ferment because when I lost corn I wasn’t going to go without Sriracha and my other hot sauces. It just wasn’t going to happen. Once I got my feet wet with hot sauces, I started making sauerkraut and kimchee, and then progressed to hard cider, my own really bad wine, and my own apple cider and wine vinegar.
I primarily ferment in quart mason jars and half gallon jars depending on the volume of what I’m making. You can buy fermenting caps for jars online. When I first started, I bought some premade stuff, and then later I made my own as it was cheaper, when I needed to have more caps available as I fermented more stuff. I also found having a tamper for packing vegetables in jars to be helpful. When I make cider, I ferment in a three gallon carboy and a 1 gallon carboy I got from a wine kit, and when the cider is done fermenting I store in it in 32 ounce swing top bottles.
STARTER KIT 6 Mason Jar Fermentation Lids with Food Grade Grommets, Airtight Seals, and Stoppers AND 2 3-Piece Airlocks (REGULAR MOUTH) $30
Kraut Kaps 3 Pack – Platinum $30
Small Wooden Cabbage Tamper for sauerkraut $10
airlocks $6
3 Piece Econo-Lock with Carboy Bung (Set of 2) $6
1 Gallon Wine from Fruit Kit $40
3 Gallon Glass Carboy $30
Cobalt Blue 32 oz. EZ Cap Beer Bottles, CASE OF 12 $43
Stuff to make cleaning and personal care products:
So when you’re allergic to corn and coconut, and their derivatives are in everything, you make your own everything (bar soap, liquid soap, dishwasher detergent, lotions, makeup, etc.) I’m not going to list every ingredient I use to make stuff (a lot of this stuff is on the blog if you search), but suffice it to say, there’s an awful lot of essential oils, various oils, beeswax, shea butter, borax, washing soda, and so on in this house. Frankly, I’m feeling like this post is going on forever, and I’m too lazy to go look up what I paid for all that. So here’s what I think are the hard equipment items that you’d need to have around to make this stuff.
fabric and snaps to make monthly feminine supplies (see post here) $70
Two 7 quart crock pots for soap (get them from garage sales as you won’t use them for food ever again) $10-20
2 cheap immersion blenders I got at Ocean State Job Lots (again you can’t use these for food ever again) $20
old pyrex casserole dishes to use as molds $10 (bought from an estate sale)
Playtex Gloves Living – Large – 3 Pairs – $10
Crews 2230R Chemical Splash Goggle w/ Indirect Ventilation and Adjustable Strap, Clear $4
Rooto No. 4 Household Drain Opener 100% Lye $2
6 lb Potassium Hydroxide Meets Food Chemical Codex High Grade Red Hot Devil Caustic Potash Flakes $35
A garage sale blender to make lotions $15
A garage sale coffee grinder to mix mineral makeup $5
Garden stuff:
So now we have the big one, haha! First, I bought a house to have land. Luckily for me, the land came with 18 apple trees, a cherry tree, 3 pear trees, blueberry bushes and grapevines already on the property, and a garden space already established. Of course, I’ve felt the need to expand and improve the garden, so there’s been some costs. Also to start seeds inside I needed lights, and I’ve added some plants here and there.
House and land – $170,000
Rototilling services $300 (I’m generally using no till, but I’ve tilled garden expansions to get started)
Garden dirt 10 yards $470
150 cement blocks for raised beds $200
Garden fencing $233
Two sets of Vegetable Drip Tape Kit for up to 25 Rows each 20 ft. Long $220
12 x 16 foot Greenhouse courtesy of my sister $1,500
Concrete pavers, bricks and landscape fabric to put the floor in the greenhouse $280
5 pound bag of cayenne pepper to dust plants to deter voles $27
Mouse/Vole traps – they break frequently so I spend $30-40 a year
Three five gallon buckets to make mouse/vole traps $9
Annual garden seeds, transplants, additional fruit bushes, trees, and vines, and perennial vegetables and flowers $120-500 a year (depending on what I decide to add, and what seeds I have left from the previous year)
Straw bales as mulch $200 a year
Black cow compost 50 lb bags about $50 a year
So there you have it. Money I spend/spent because of my food allergies. Let us know if you have kitchen tools you can’t live with out, or if you have great gardening ideas.
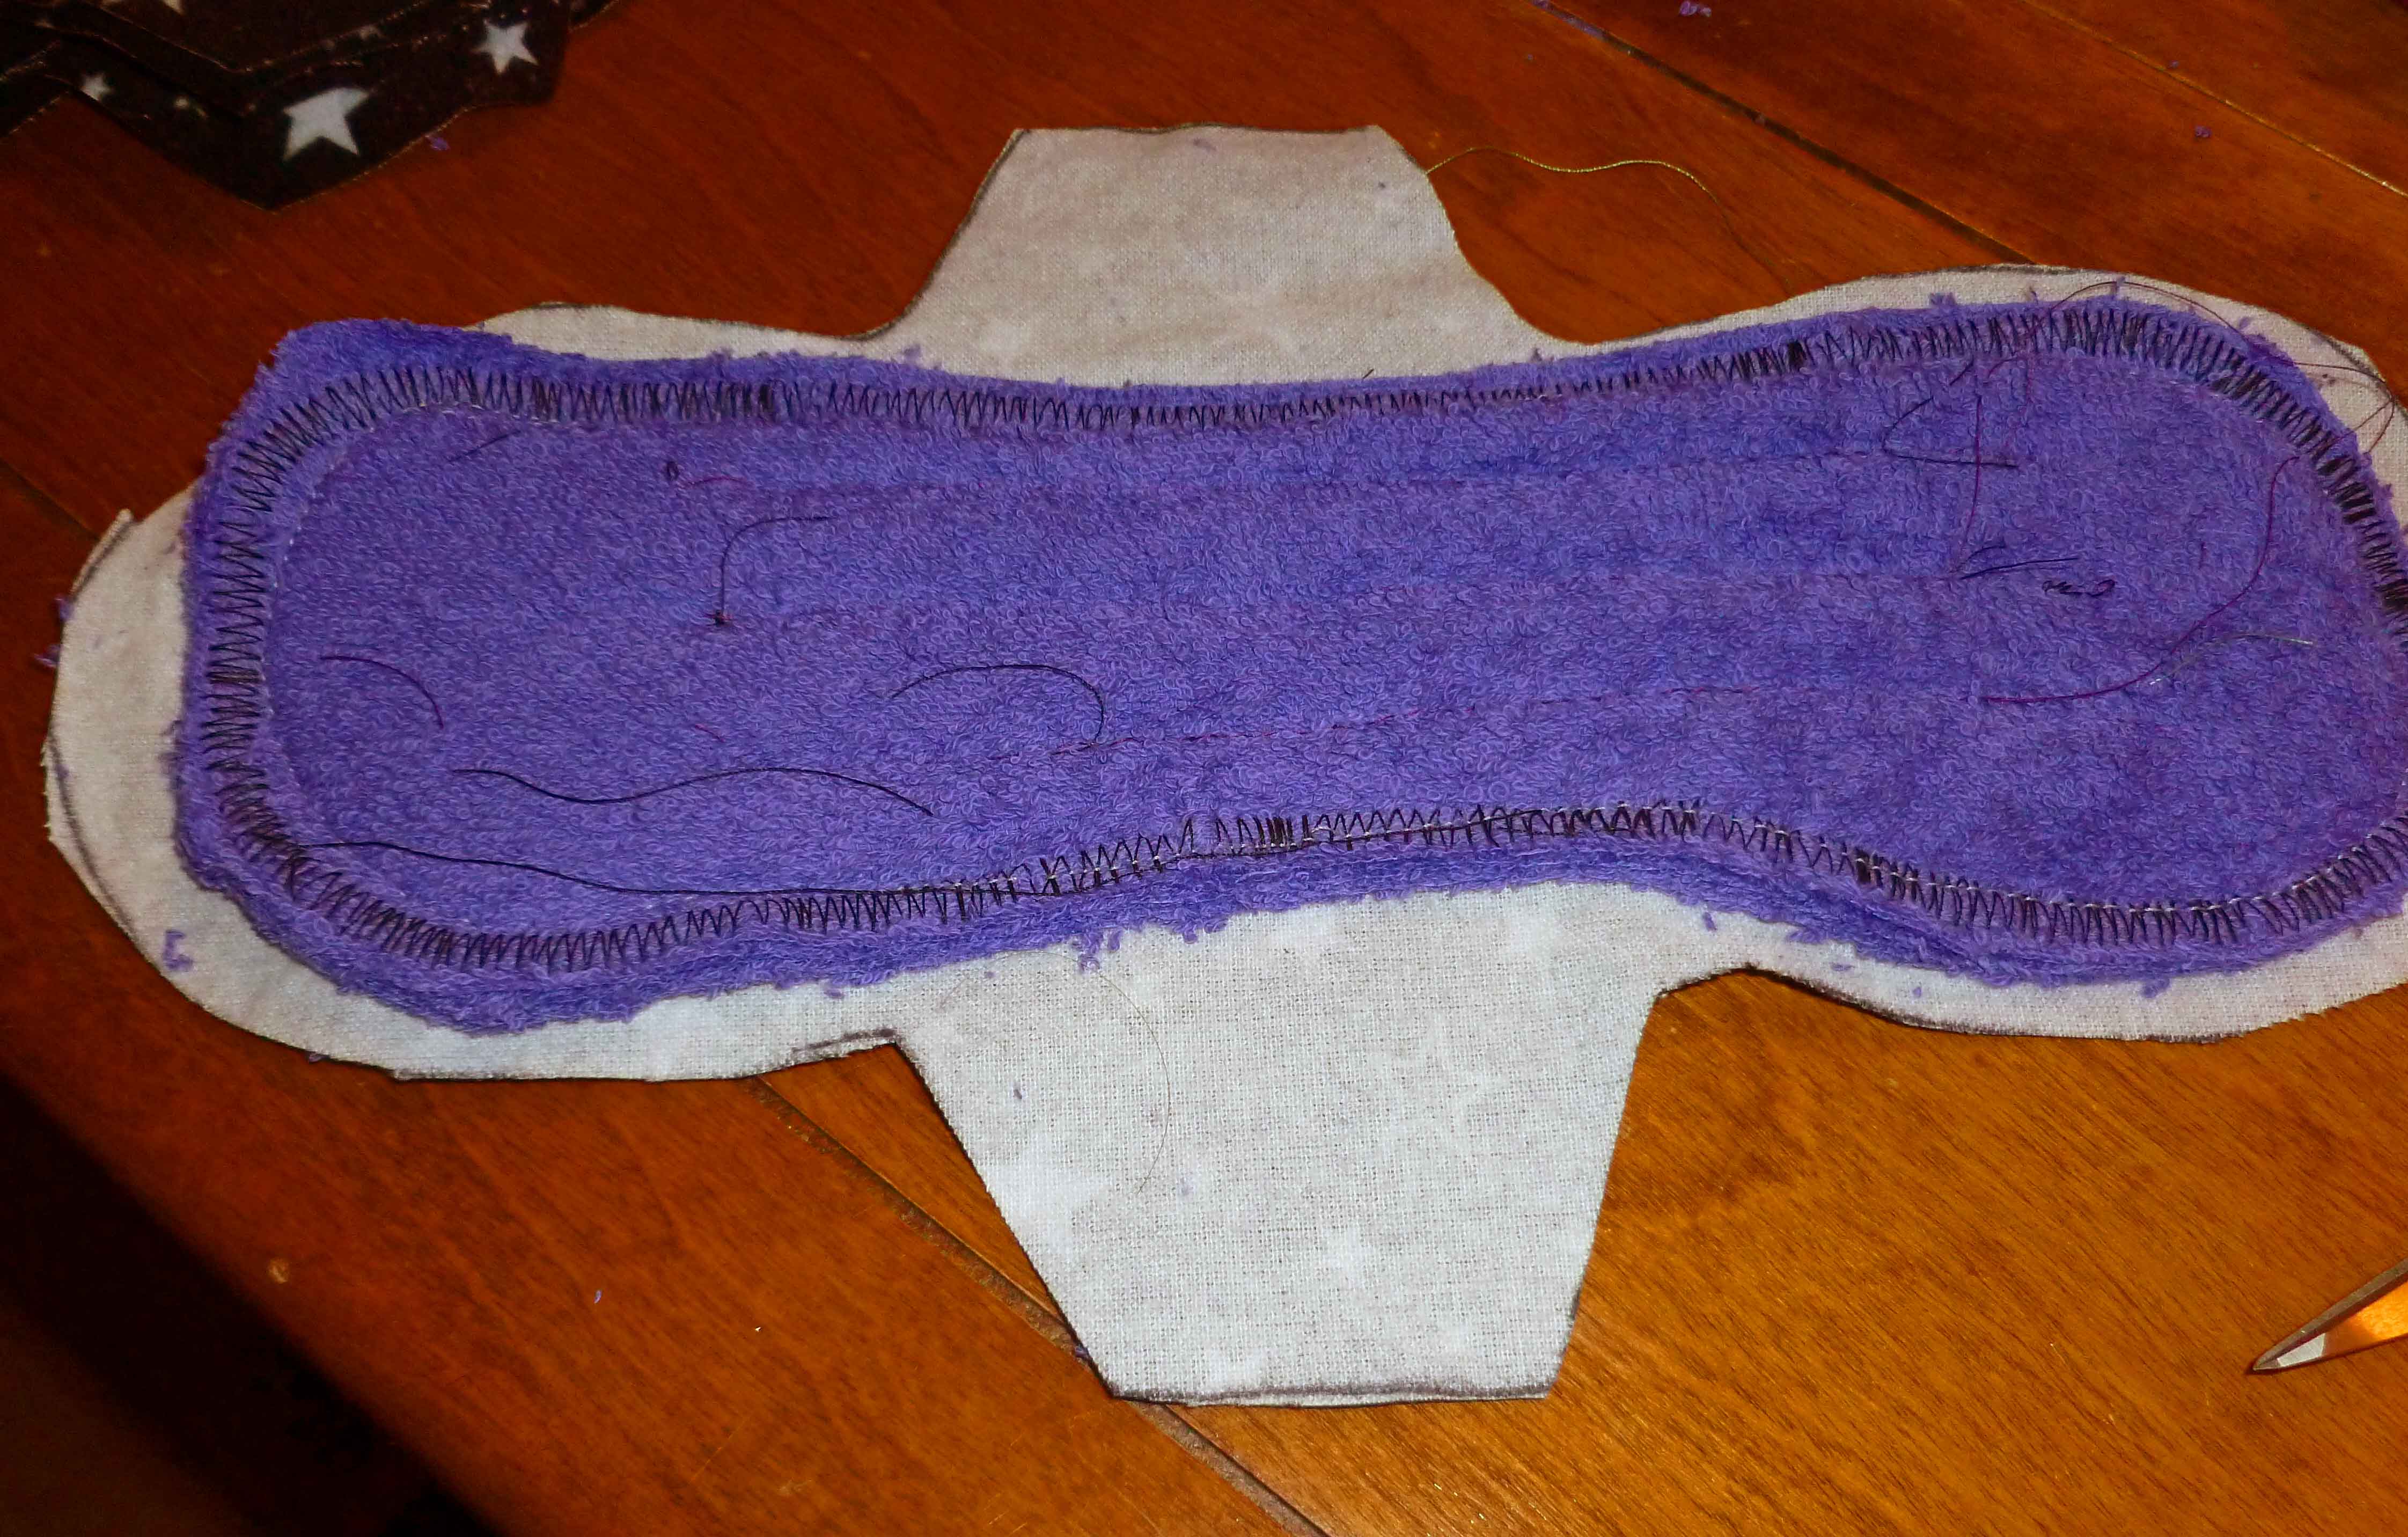
Last week we said we’re heading in new directions with the blog. Besides the actual recipes, we said we’re going to talk about every day life issues, including how we cook, plan, and deal with personal care stuff, besides just giving you recipes. So this post is my first swing at bat. I’ve contemplating writing it for a couple of years, but I hadn’t done so because it makes me squeamish, and I just hadn’t wanted to share my own personal hell with the world. But maybe it’ll help someone else out there who is facing the same issues I do. To start, it’s just really not fun to have contact reactions to commercial feminine monthly supplies. Most of the issue for me appears to stem from my corn allergy, but it could also be related to my coconut allergy. So what do you do? There’s some other options out there, like the diva cup, but that would not be my thing (yeah, that’s putting it diplomatically). There’s some 100% organic cotton tampons without an applicator I could try, but I wasn’t a tampon user before and I’d prefer not. (Applicators are an issue due to the potential for corn or coconut in the waxes and coatings if cardboard, or the plastics themselves if not.) There’s also some organic cotton pads out there but they also state they have “plant-based” materials in the waterproof backing. While I haven’t contacted the company to inquire, “plant-based” is usually a screaming red flag for corn. Since I think they’re expensive, and I’m cheap as hell about stuff I’m going to throw out, I haven’t bothered. So I ended up looking into reusable cloth pad options.
You can buy reusuable cloth pads on Etsy and on the internet. Some people do use reusable cloth pads because of the environment, much like some parents choose to use cloth diapers. I really was not aware this was a thing until I developed my issues. However, because some of the materials being used are not particularly safe for me (polyester and microfibers may cause skin reactions), because I can sew even though I pretty much hate it, and because I’m really cheap, I decided that if I made mine I would be in control of the materials and it would be less expensive per pad. Control was always a big issue for me, and the food allergies have made it much worse, haha!
The first set of pads I made contained Zorb as the absorbent lining, which is made of “an optimum blend of cellulosic fibers from cotton/tencel/bamboo/other interspersed with polyester nylon.” I chose it because it’s supposed to be super absorbent compared to terry cloth, I was freaking out about not using commercial pads and worried about leaks, and I figured that it would be okay because I was encasing it in 100% pure cotton flannel. But over time, I became more concerned about the fibers working through the flannel fabric as they got itchier, and potentially escaping where seam edges opened after some wear and washing. I used them for about two years before I decided that I needed to replace them. I decided that in the next round, I would not use the Zorb, and I would use 100% cotton terry cloth layers as the core. I did use a layer of Polyurethane Laminate on top of the bottom layer of flannel under the core to prevent leaking in the first batch of pads, but since this is a smooth fabric and does not contain loose fibers the way the Zorb does and it would be covered by the 100% cotton flannel, I decided it was an acceptable risk for the second batch as well. So far, I am much preferring the second batch I made with the terry cloth cores rather than the Zorb. They seem much less itchy.
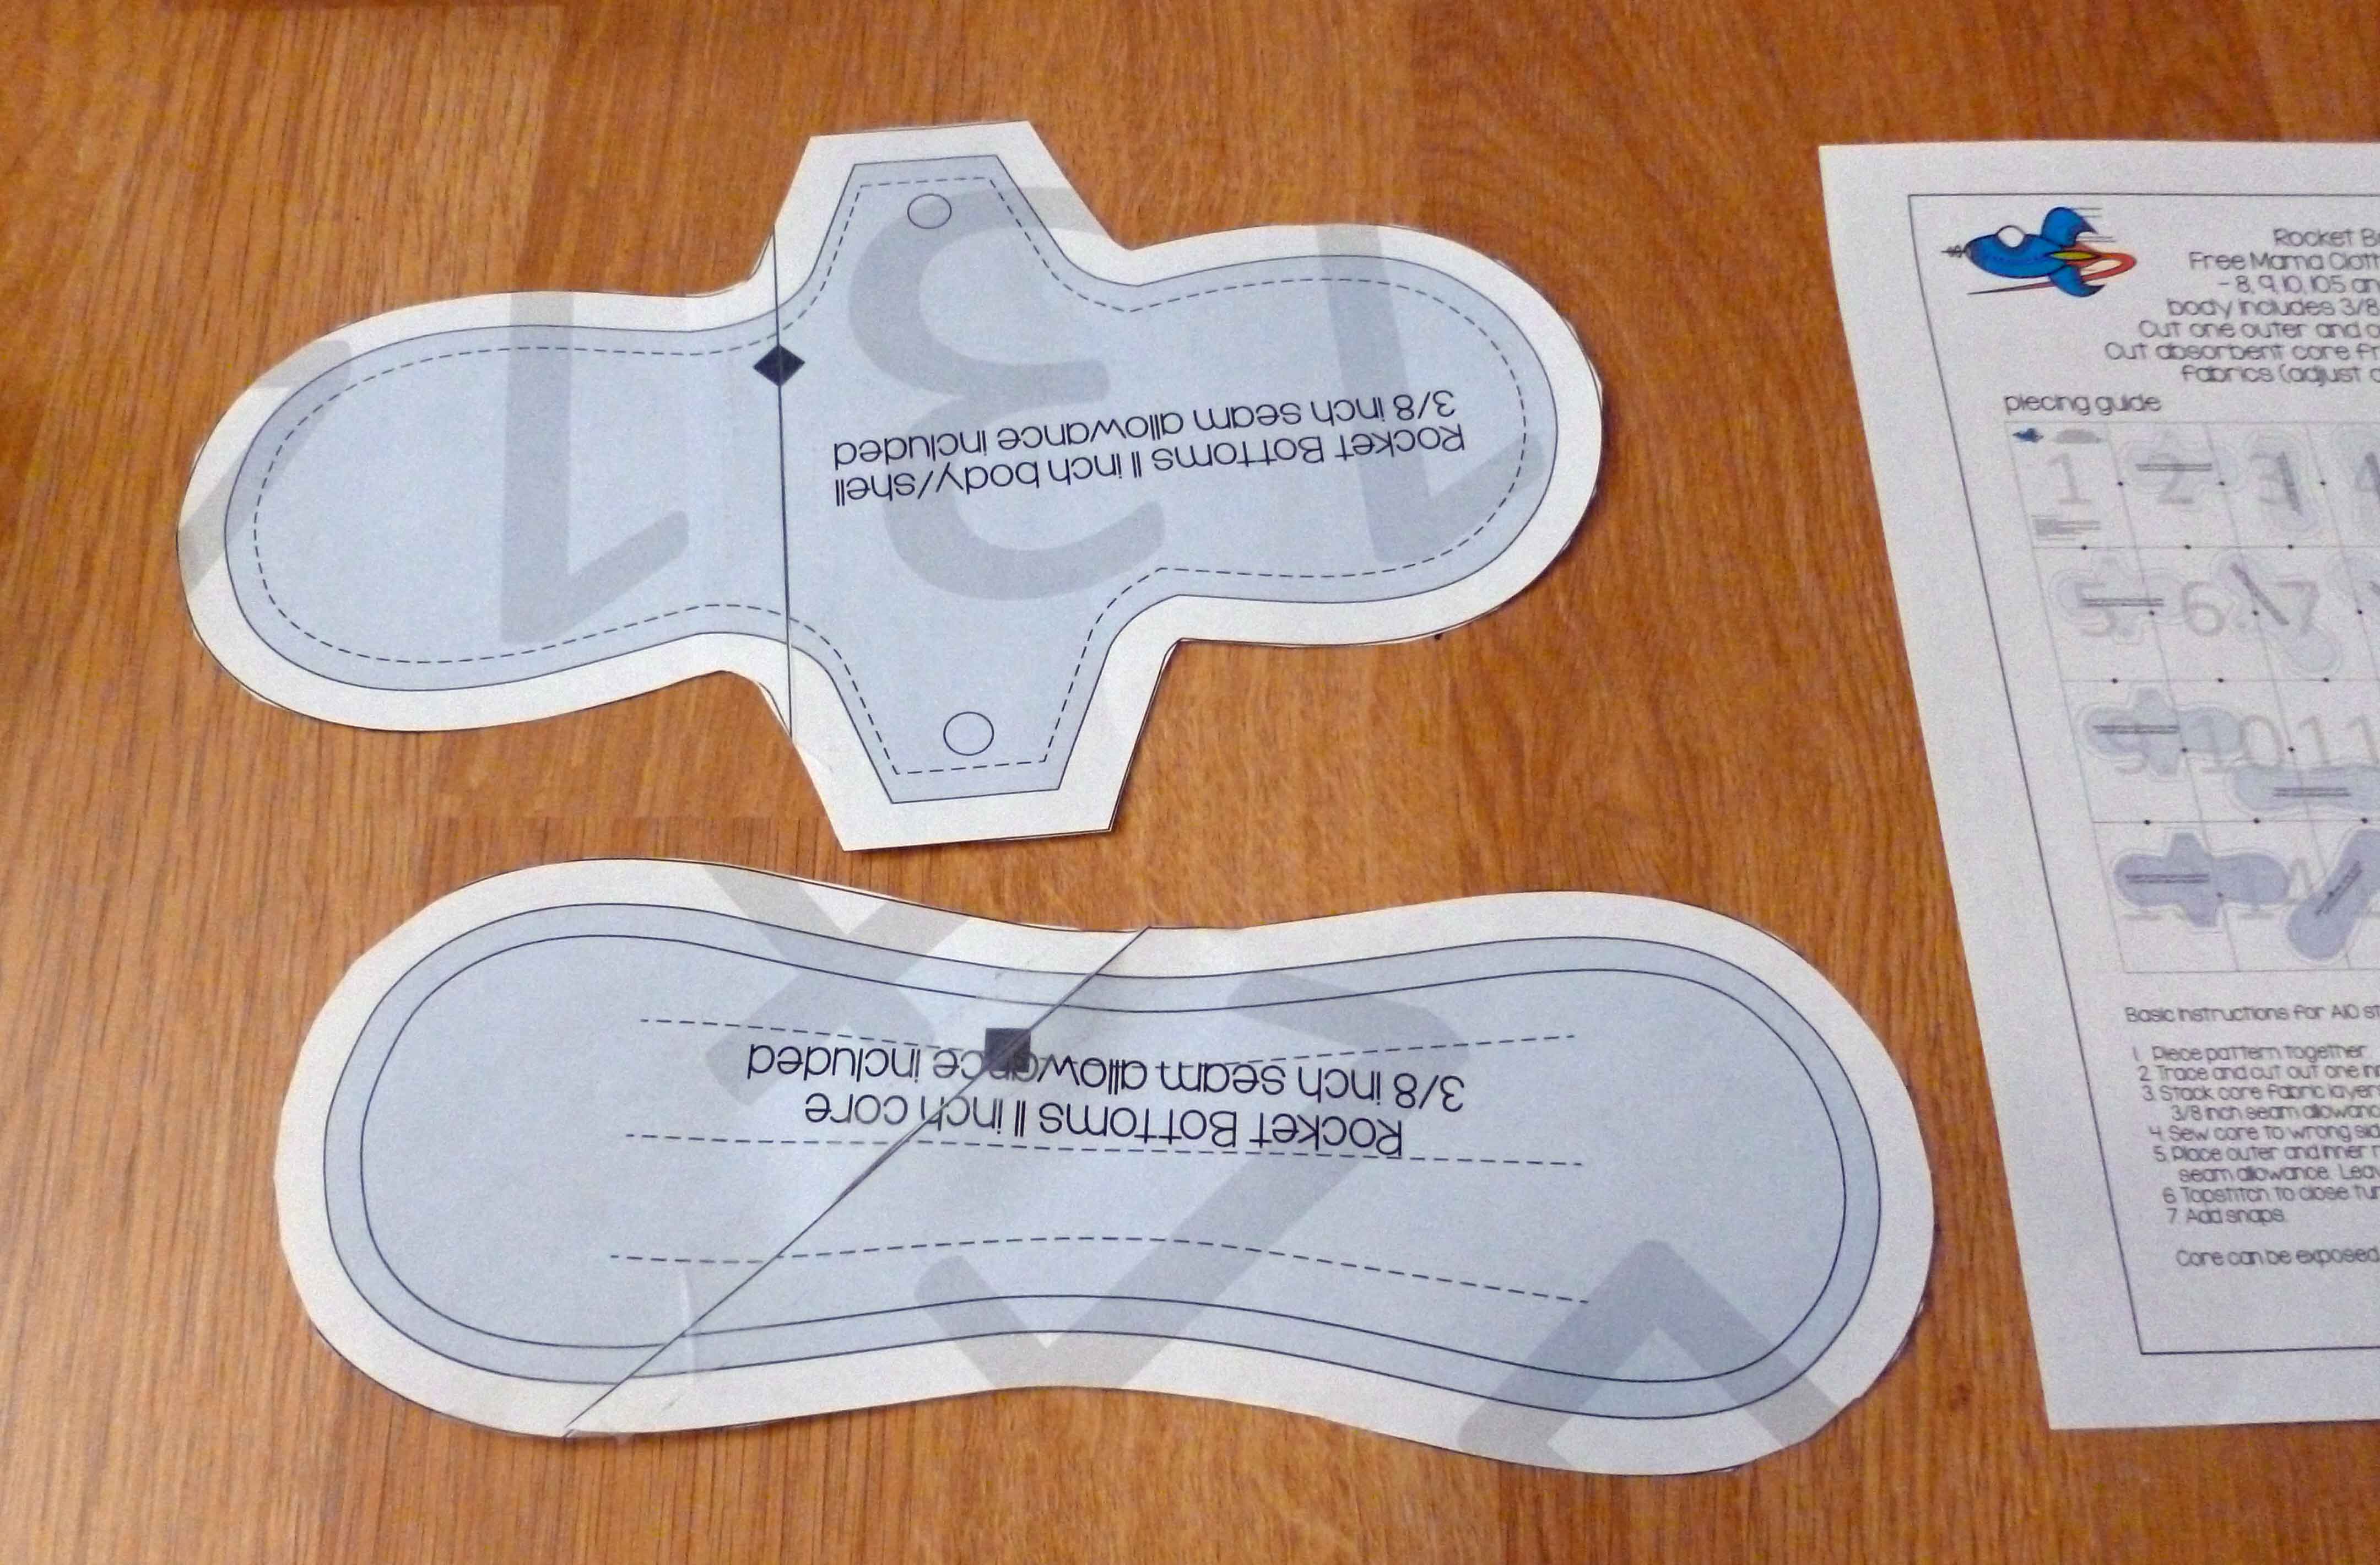
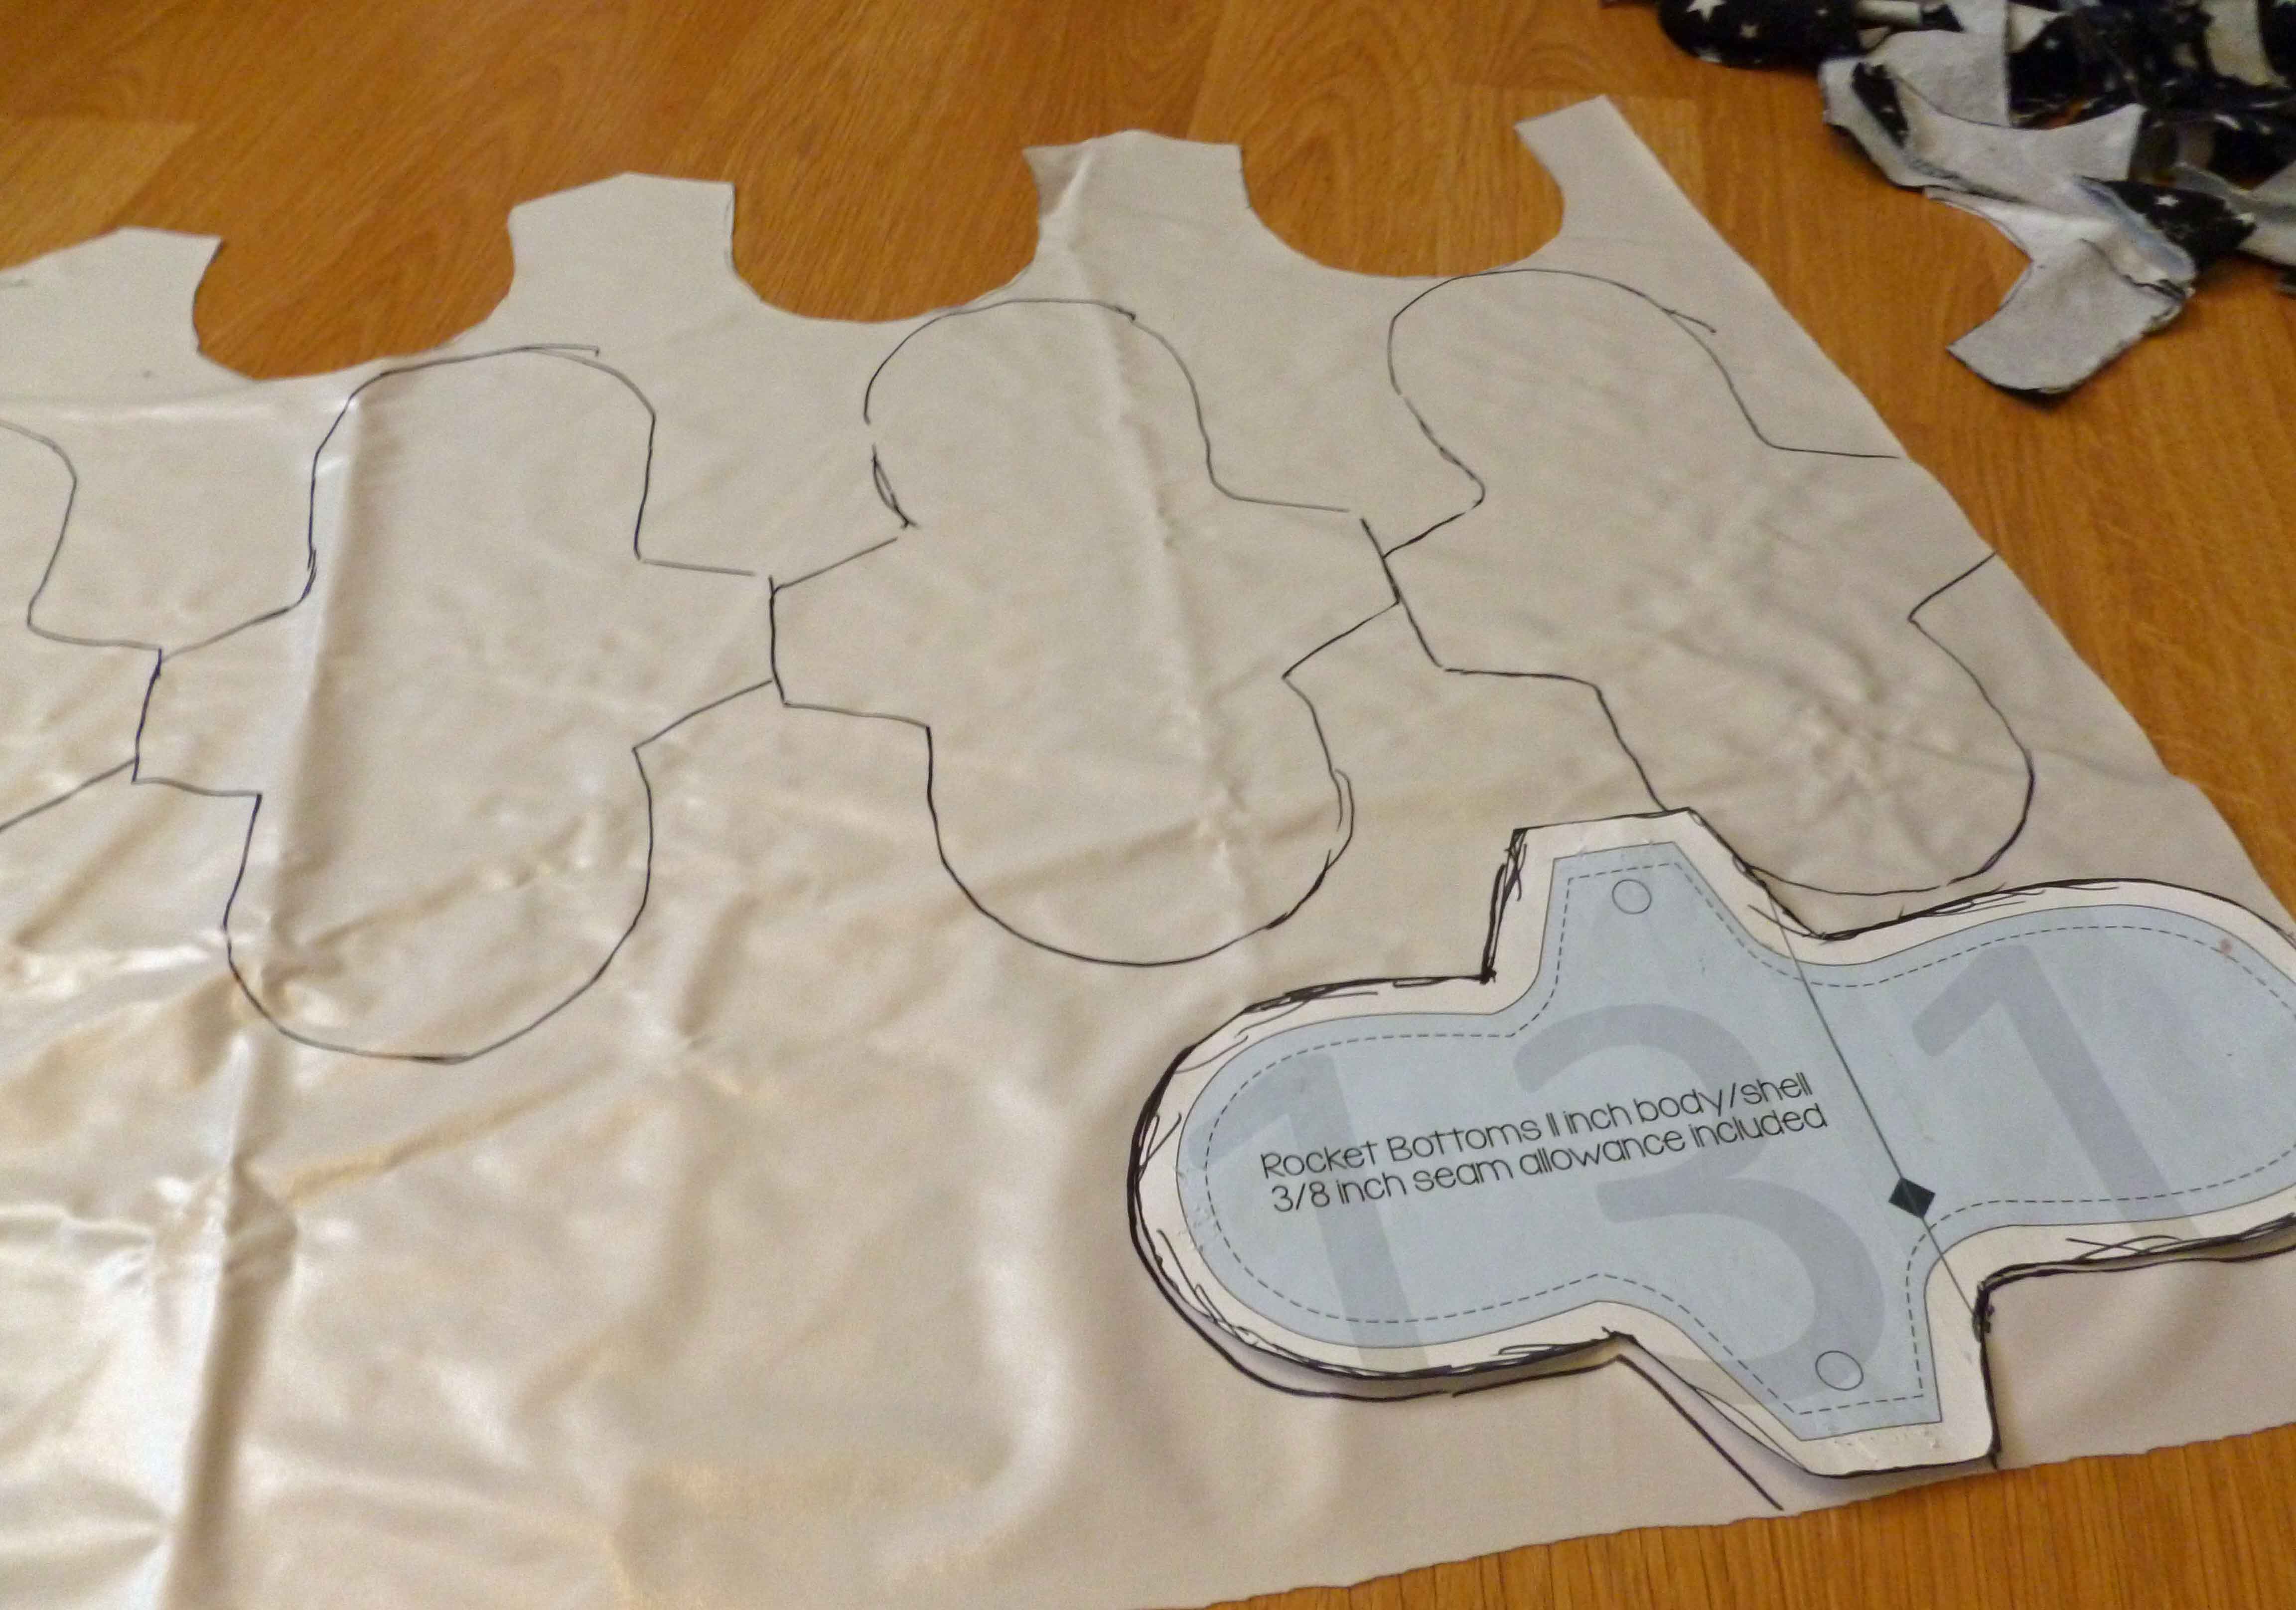
I got my pattern from Nature’s Fabrics. It is a pattern for a pad with wings, and has contoured flared options and several options for the length of the pad.
Relevant pattern pages
Pattern cut out and assembled
I also purchased a kit to attach plastic snaps to the wings to snap them pad together around my underwear. (As a side note, I have a bunch of cloth napkins and bar towels that I decided to add snaps to them to make a roll of “unpaper” towels to put on my paper towel rack in the kitchen. Yes, most paper towels have corn in them.) You can also get refill snaps, but I had enough to do both batches of pads with a ton leftover.
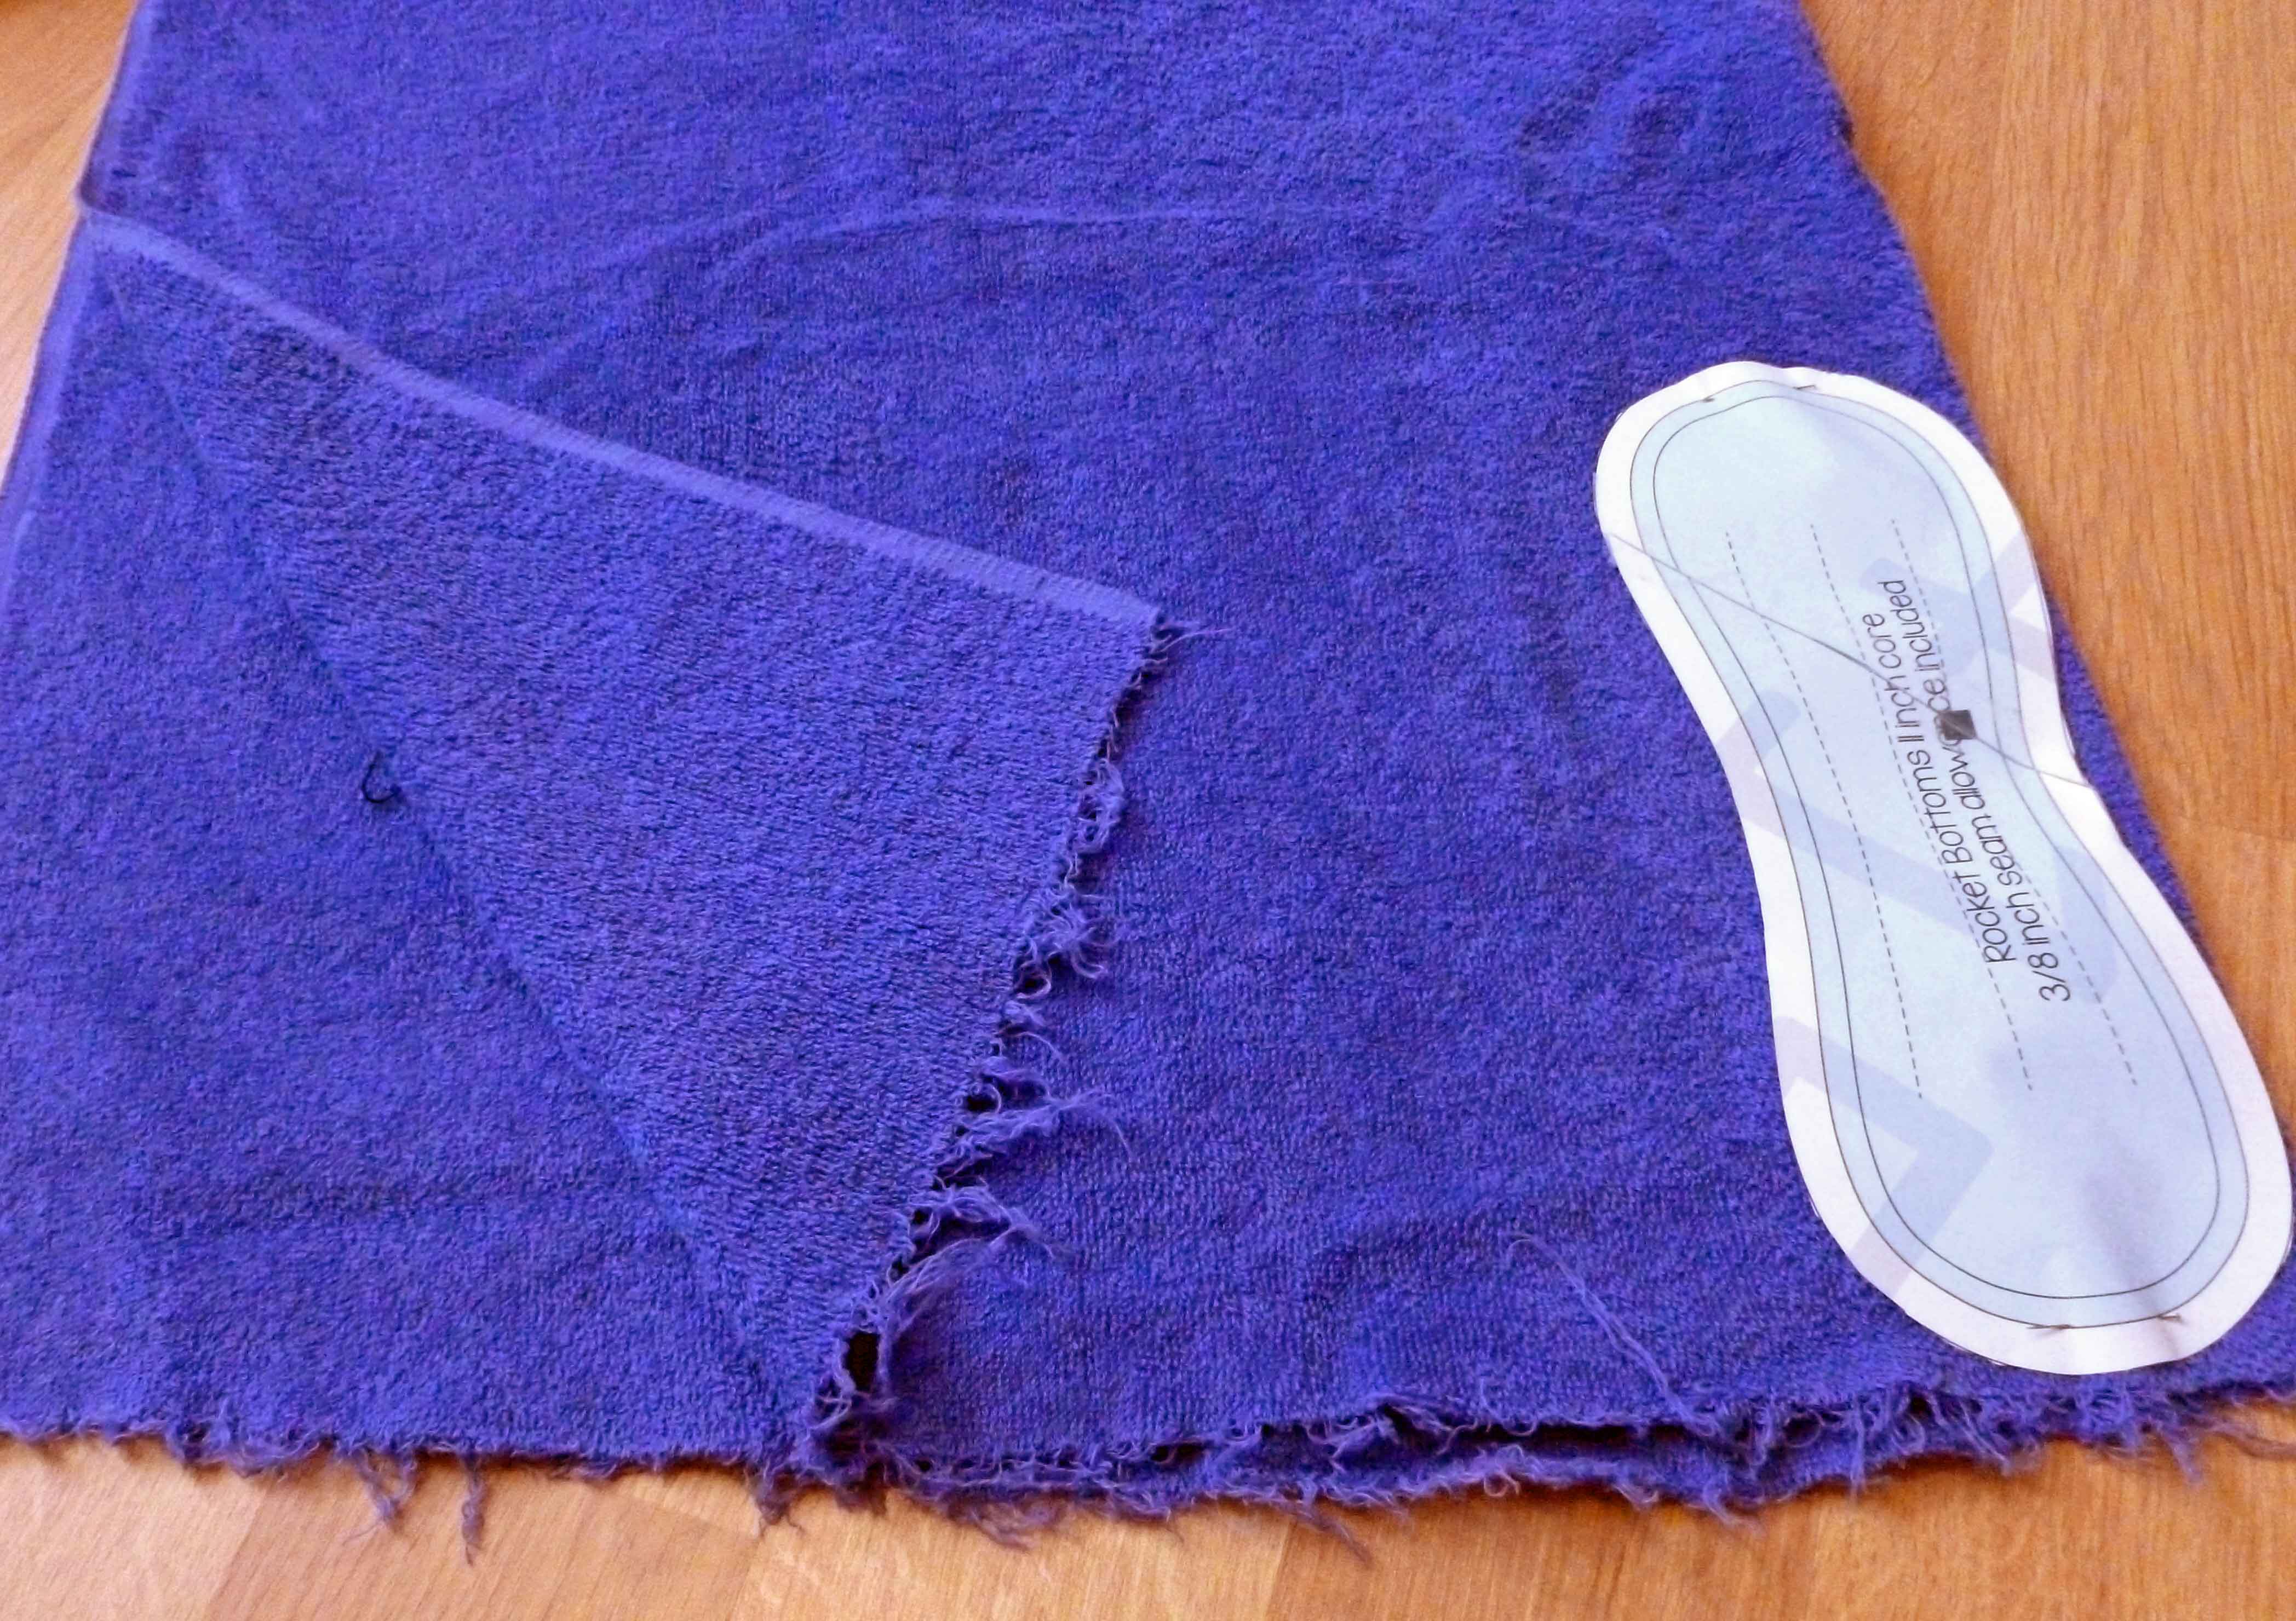
I ordered most of my fabrics from Fabric.com, no affiliation. I ordered two different colors of the flannel because it made it easier for me to tell which is the top and the bottom when dealing with the layers. You may not be so challenged. Depending on how well you lay out the pattern on the fabric, I was able to get 18 pads out of the following fabric with a fair bit of the terry cloth left over:
The pattern, the snaps, and the fabric ends up being about $73, depending on pricing, sales and so on, which ends up being about $4 a pad if you get 18 from your cutting layout. I’m mostly seeing prices on Etsy for around $10 bucks a pad for the length I would want. Of course, then you don’t have to spend time doing the sewing, but I’m still too cheap for that and I don’t have the control over the materials. It takes me about 14-16 hours to do a whole batch.
Fabrics and snap kit
Before starting, I washed the flannels and terry cloth so that it could shrink. I didn’t iron the fabric, because seriously, I’m making cloth pads, it’s not like anyone is going to see them. I also didn’t worry about matching colors of thread for much the same reason, and used it as an opportunity to use up a bunch of random leftover threads on bobbins from past sewing projects and free them up.
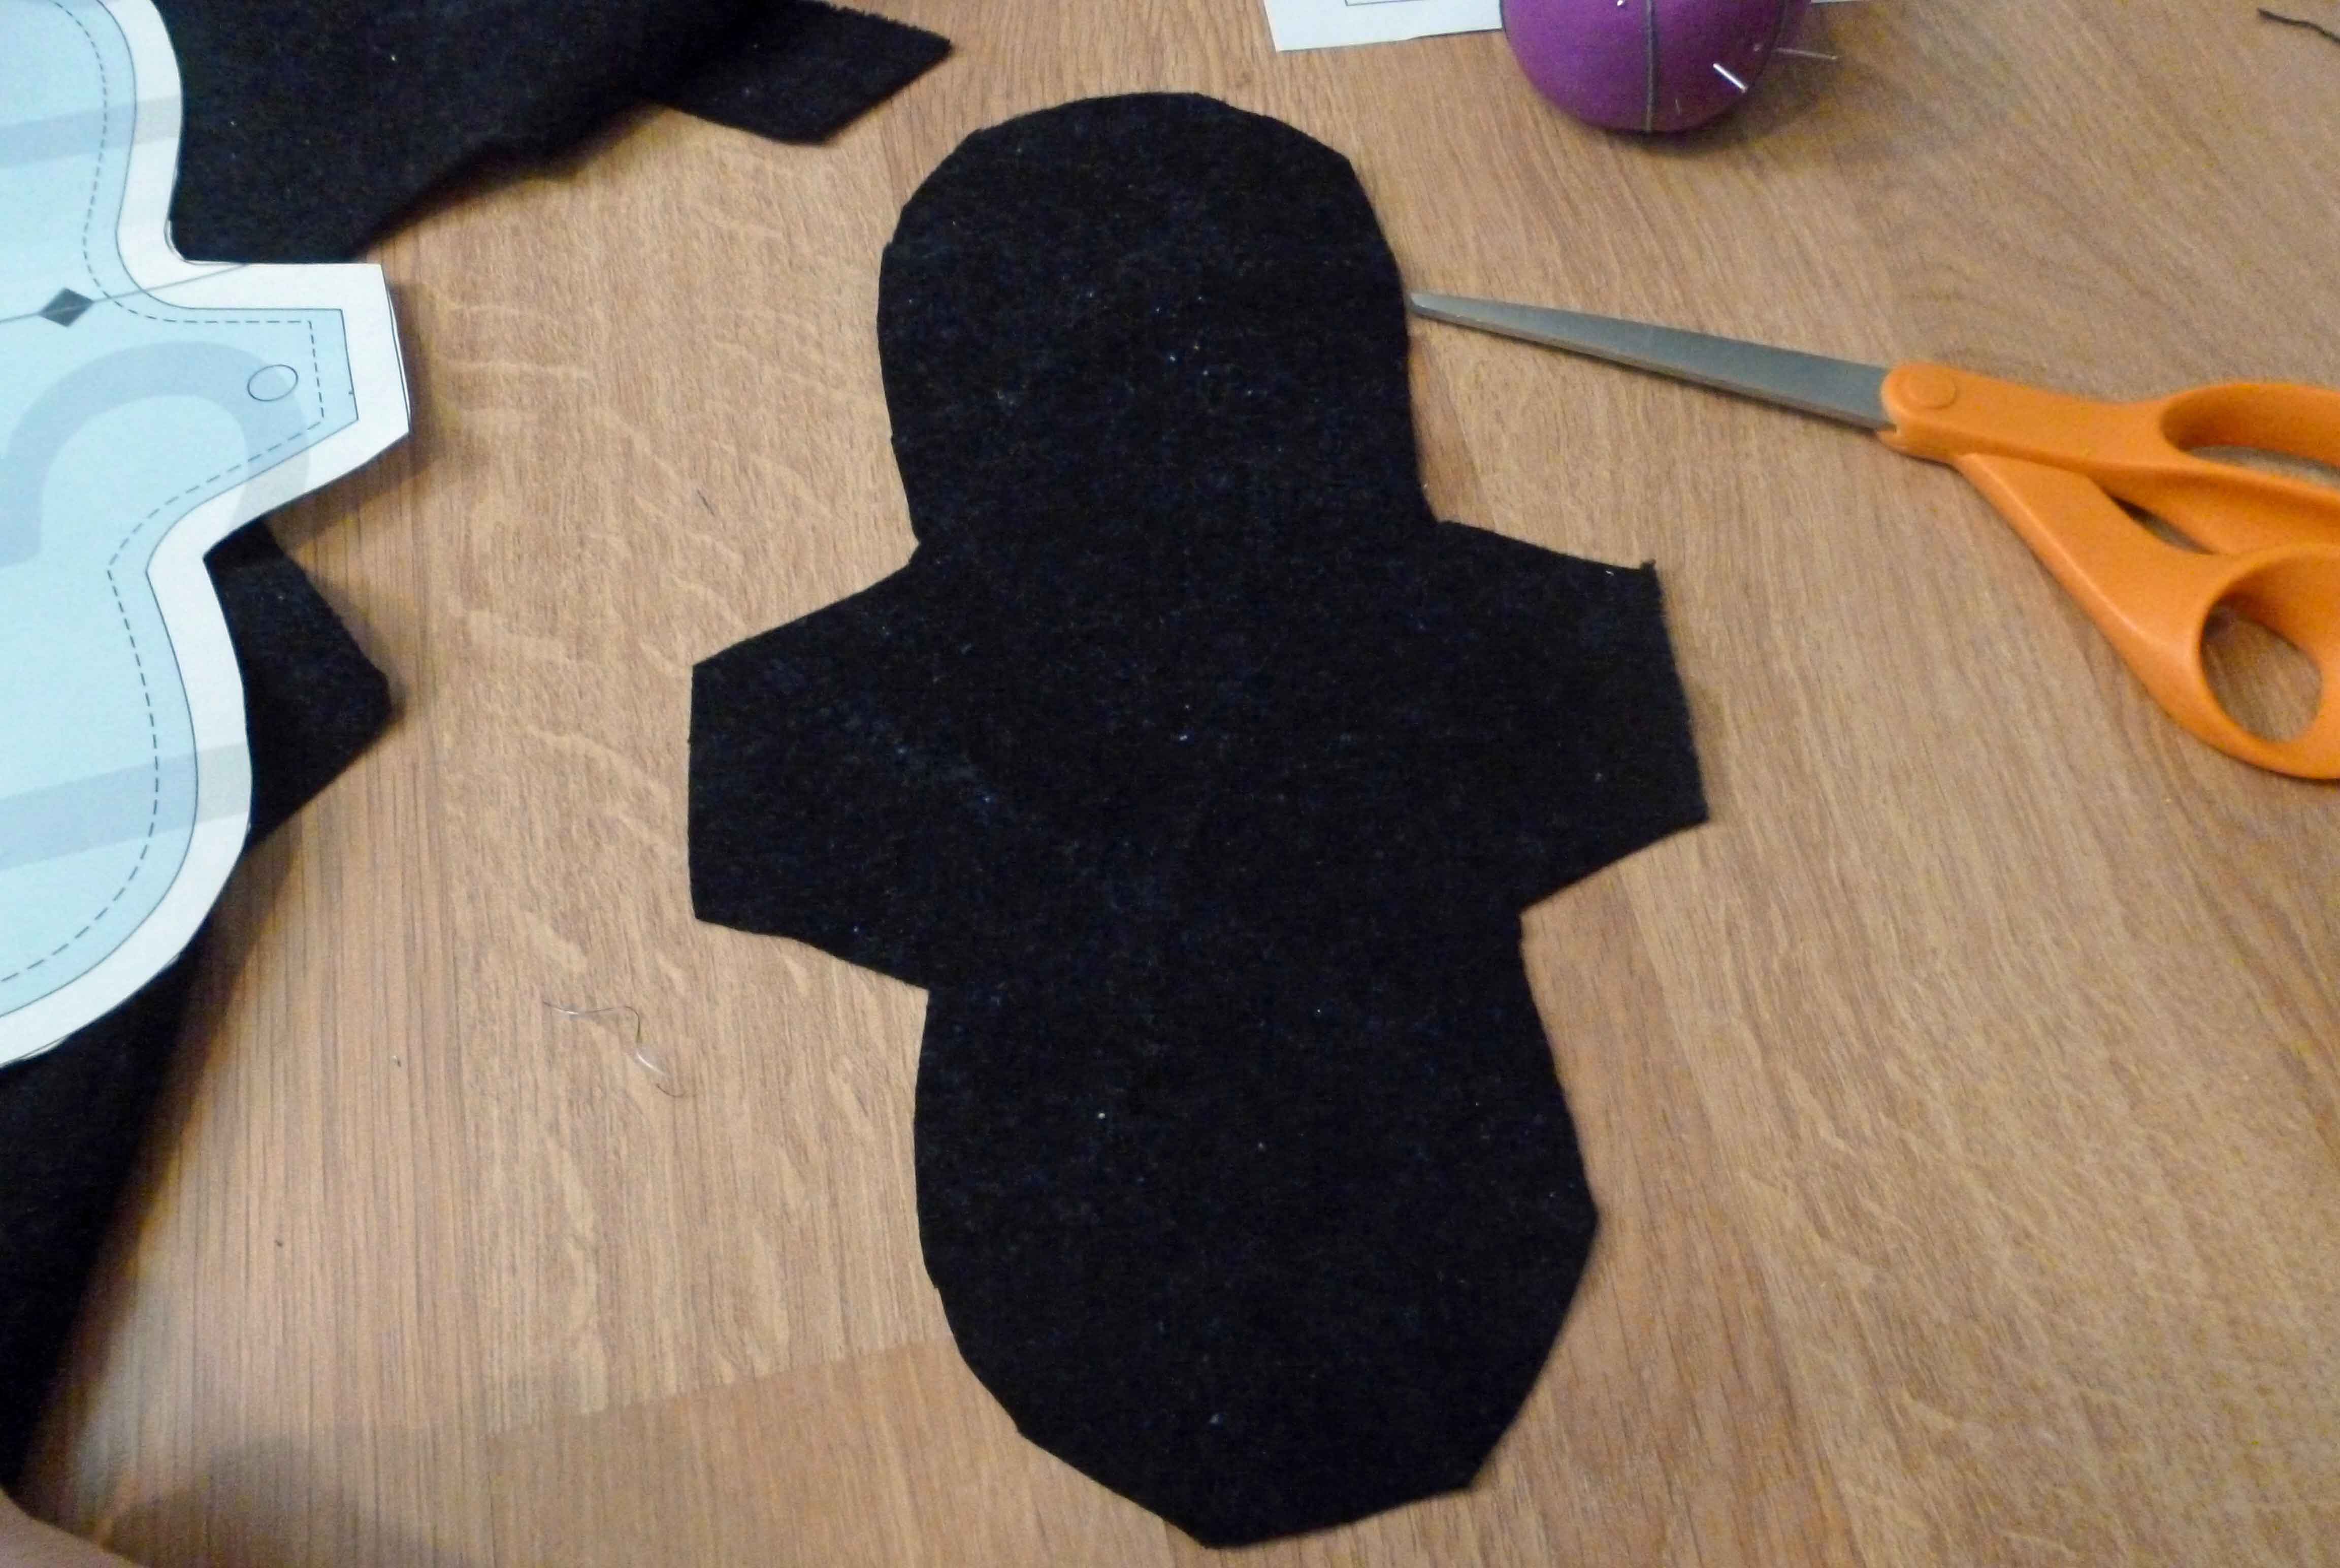
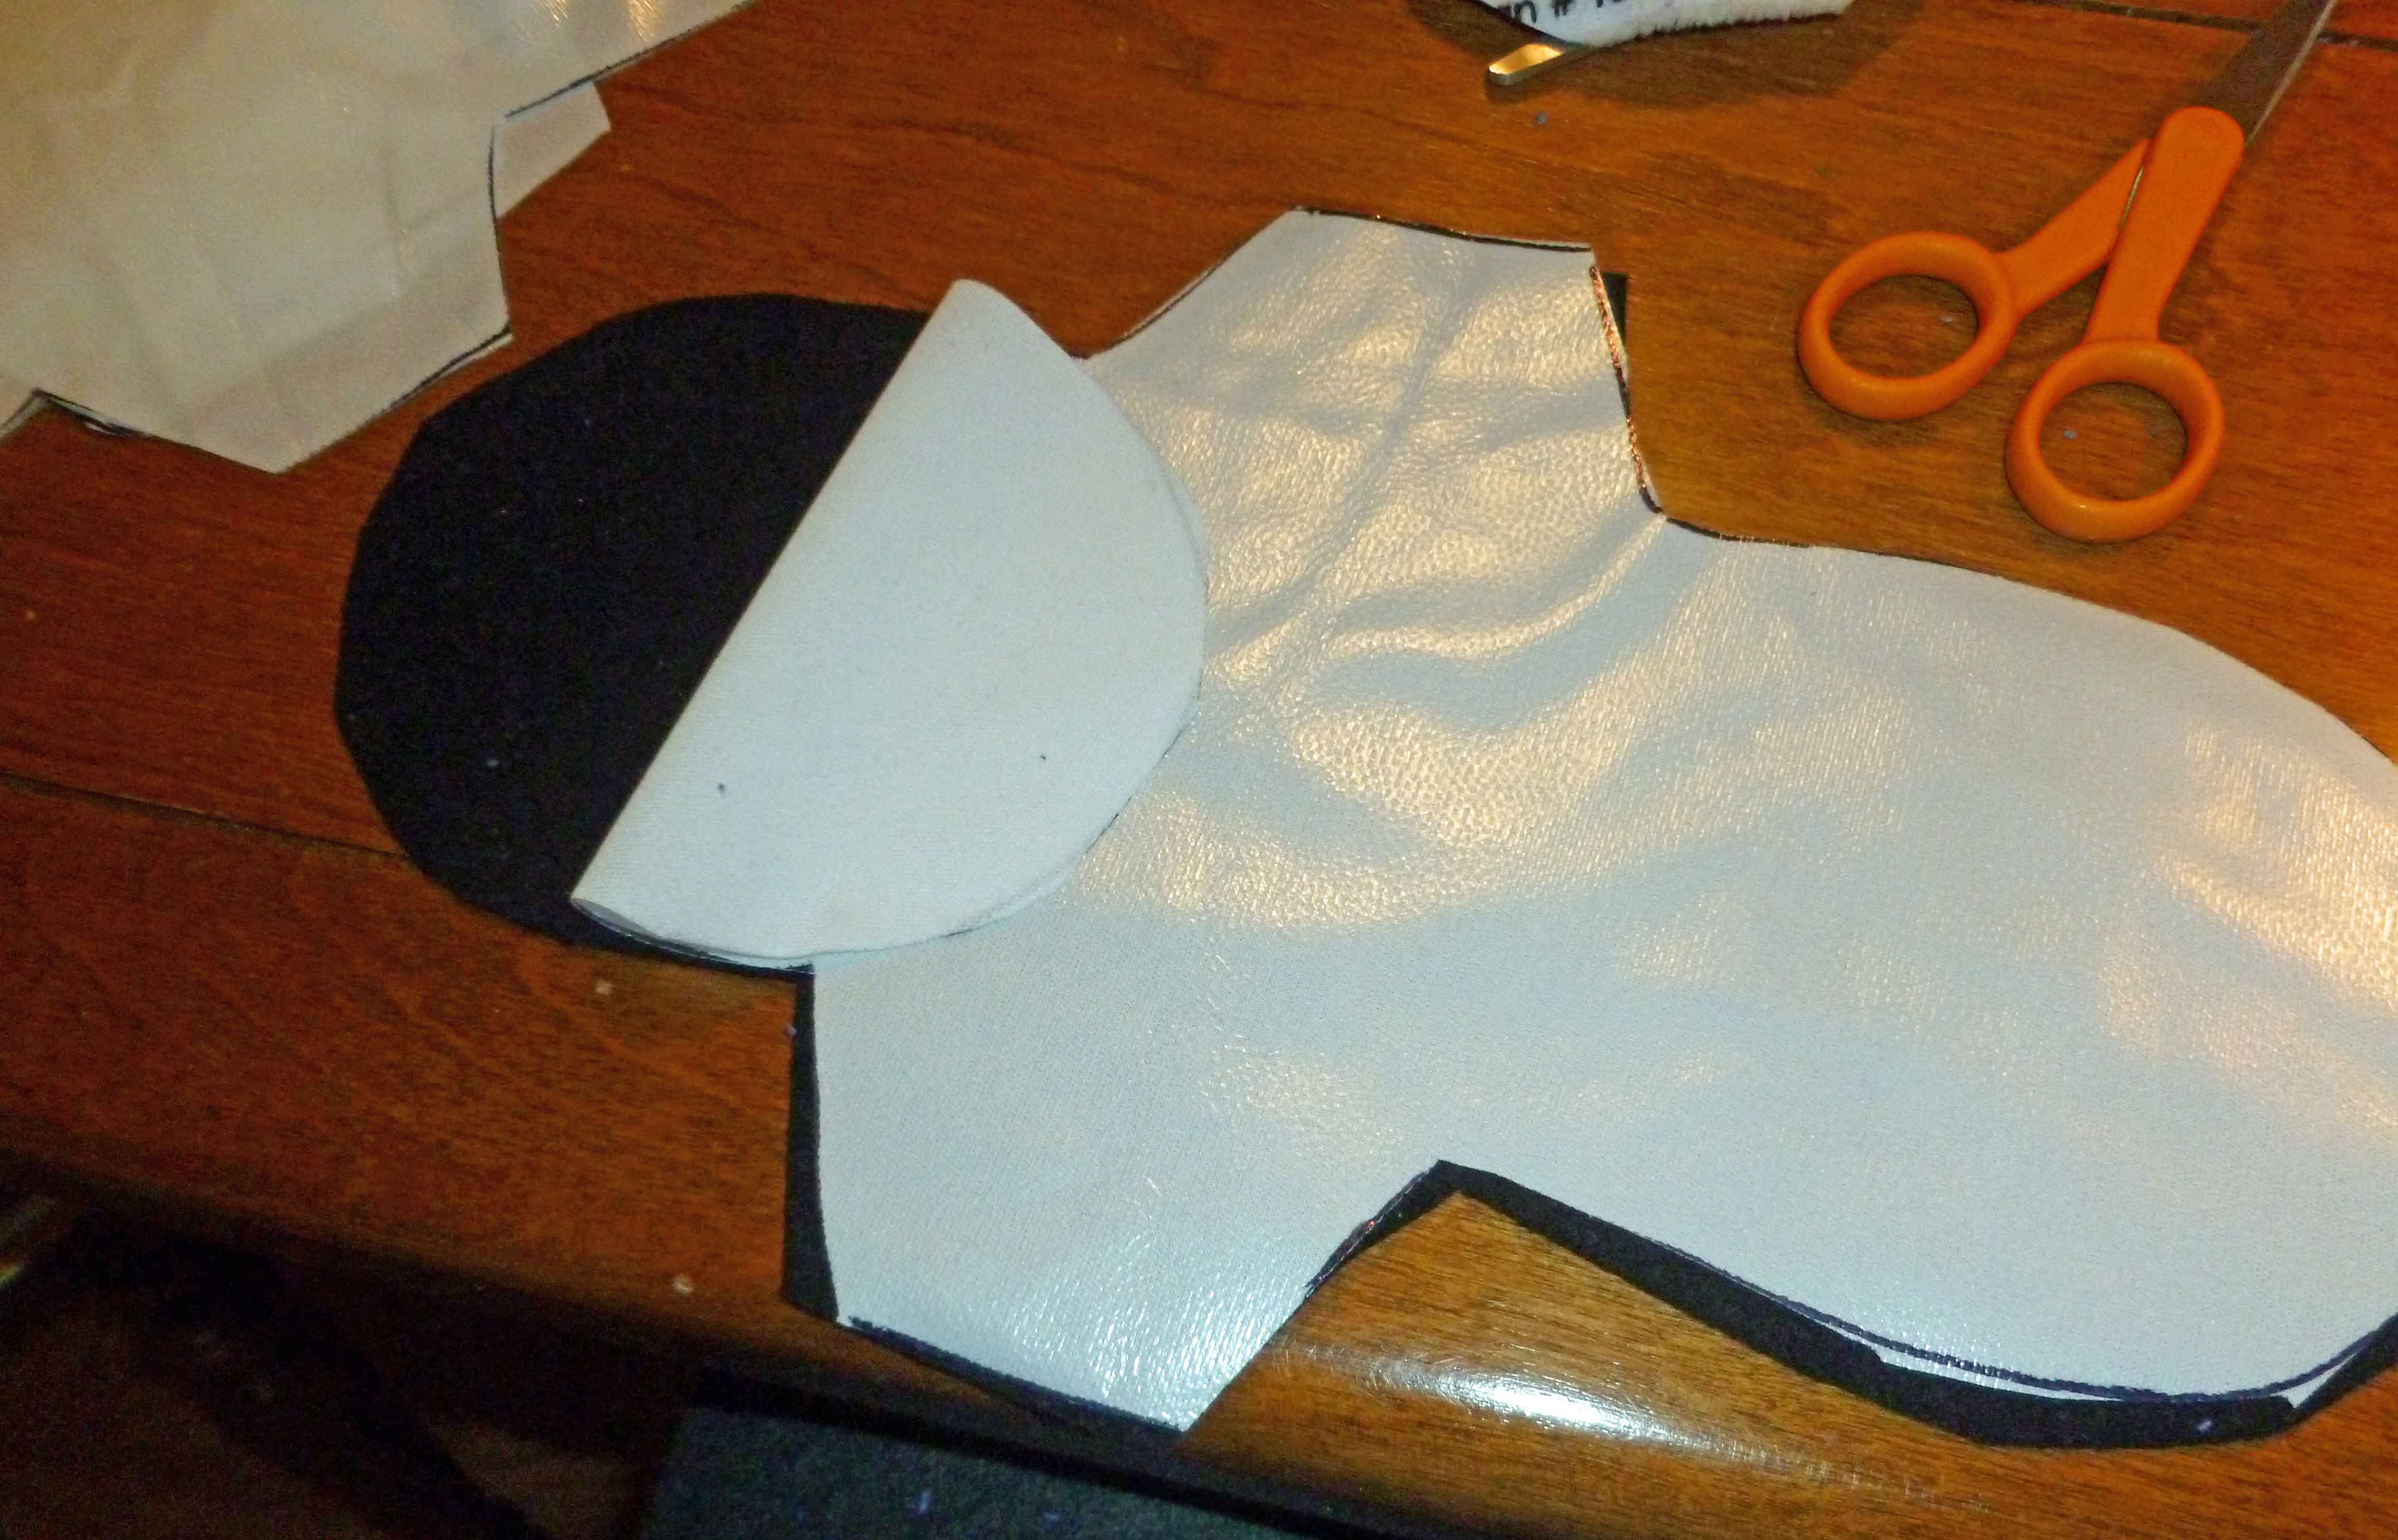
For each pad, I cut 3 pieces of the core pattern out of the terry cloth (to be stacked together to form the core of the pad). I cut one piece of the wing pattern from each of the flannels and from the polyurethane laminate (this is not included in the pattern, I added it because I over-engineer everything). Yes, I used a sharpie to trace the pattern on the polyurethane laminate instead of pinning it because (a) I’m lazy which is why I’m not a good seamstress, and (b) it’s going inside the pad and no one is going to see it.
Cutting outer winged pattern pieces
Cutting outer winged pattern pieces
Cutting winged Polyurethane Laminate pieces
Cutting core pieces in a double layer to reduce amount of cutting
All pieces for 18 pads cut out
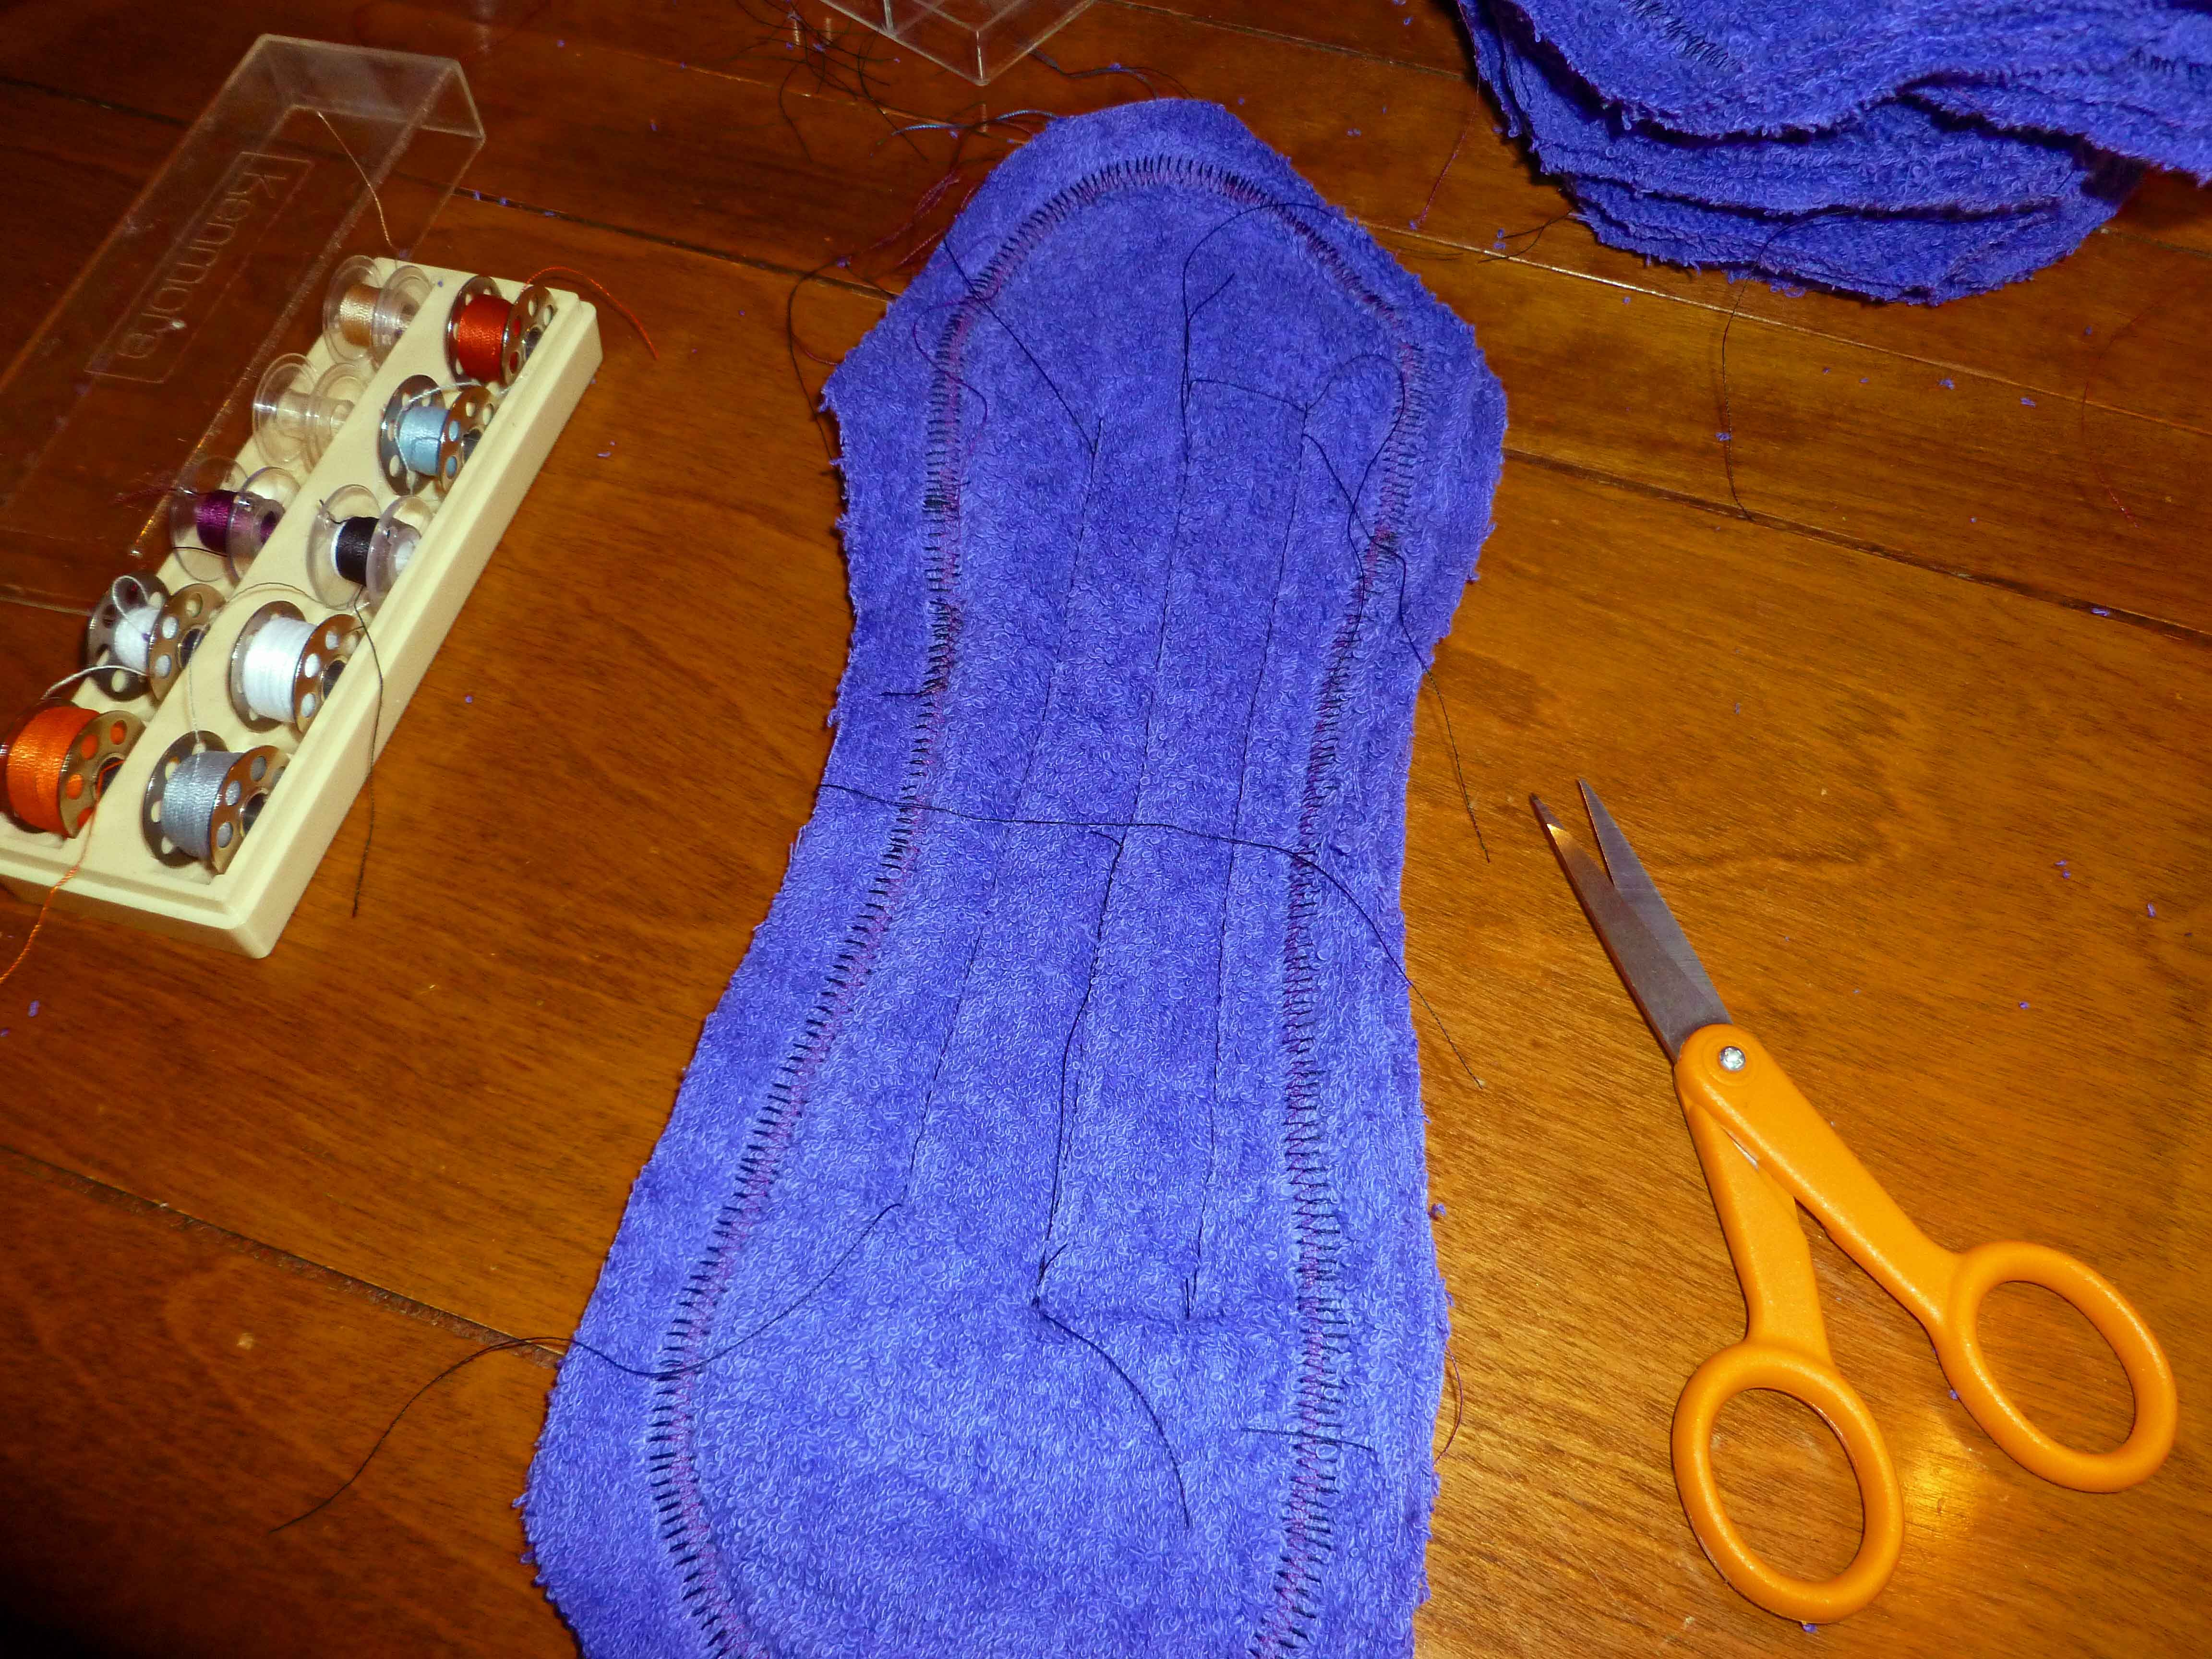
To begin, I stacked the three core layer pieces, seamed around the seam allowance with zigzag stitch, and sewed down the middle lines in the pattern to attach the layers with straight stitch.
3 core pattern pieces stacked, sewn with zigzag at seam allowance and sewn down in middle with straight stitch.
Core layer after trimming seam allowance.
I then trimmed the seam allowance off back to the zigzag stitch. The next step is to sew the core layer to the wrong side of the top of the pad (this is the side that will touch your skin, not your the side that touches your underwear).
Core layer sewn to wrong side of top pad layer
Core sewn to wrong side of top layer of pad (right side view)
Now I place the shiny side (right side up) of the Polyurethane Laminate on the wrong side of bottom flannel layer.
Polyurethane Laminate placed right side up (shiny side) on wrong side of bottom flannel layer
I then placed the right side of the top layer of the pad against the right side of the bottom pad. This leaves the Polyurethane Laminate on the outside and the core layer on the outside. Sew them together leaving one end open so that you can turn them inside out. Once you have turned them inside out, top stitch the opening closed, tucking in the edges in the seam.
A finished pad before adding the snaps.
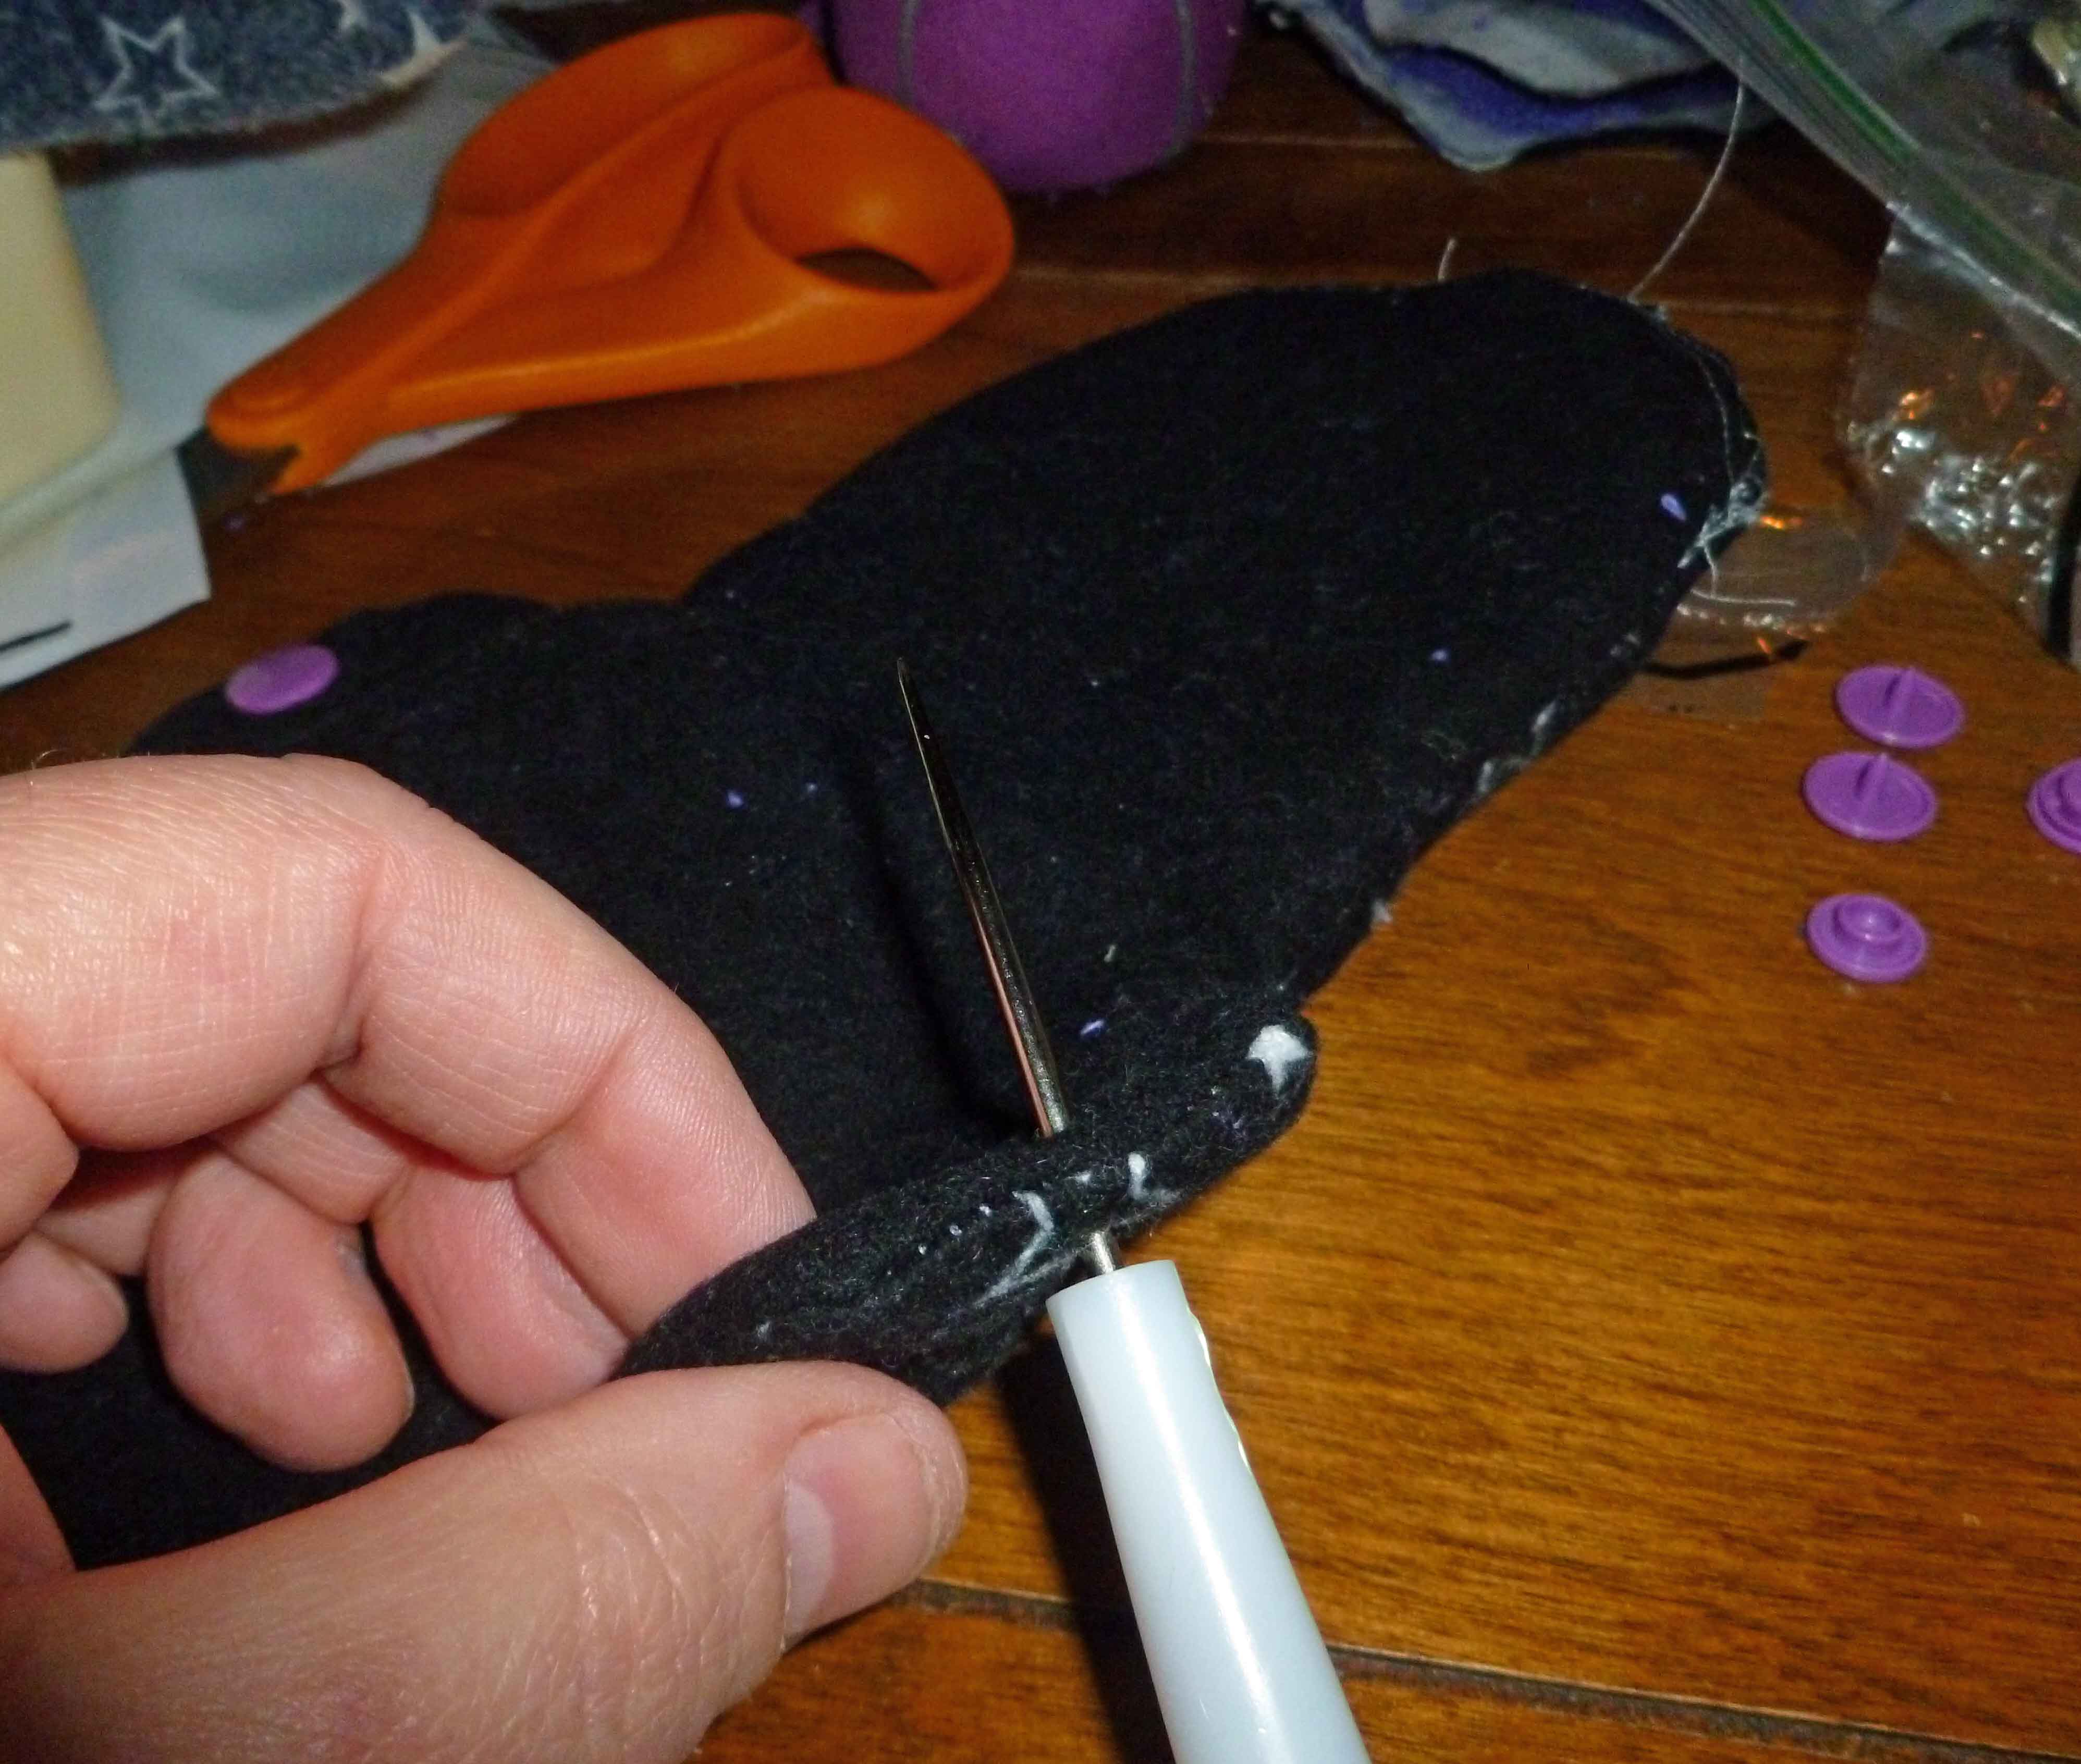
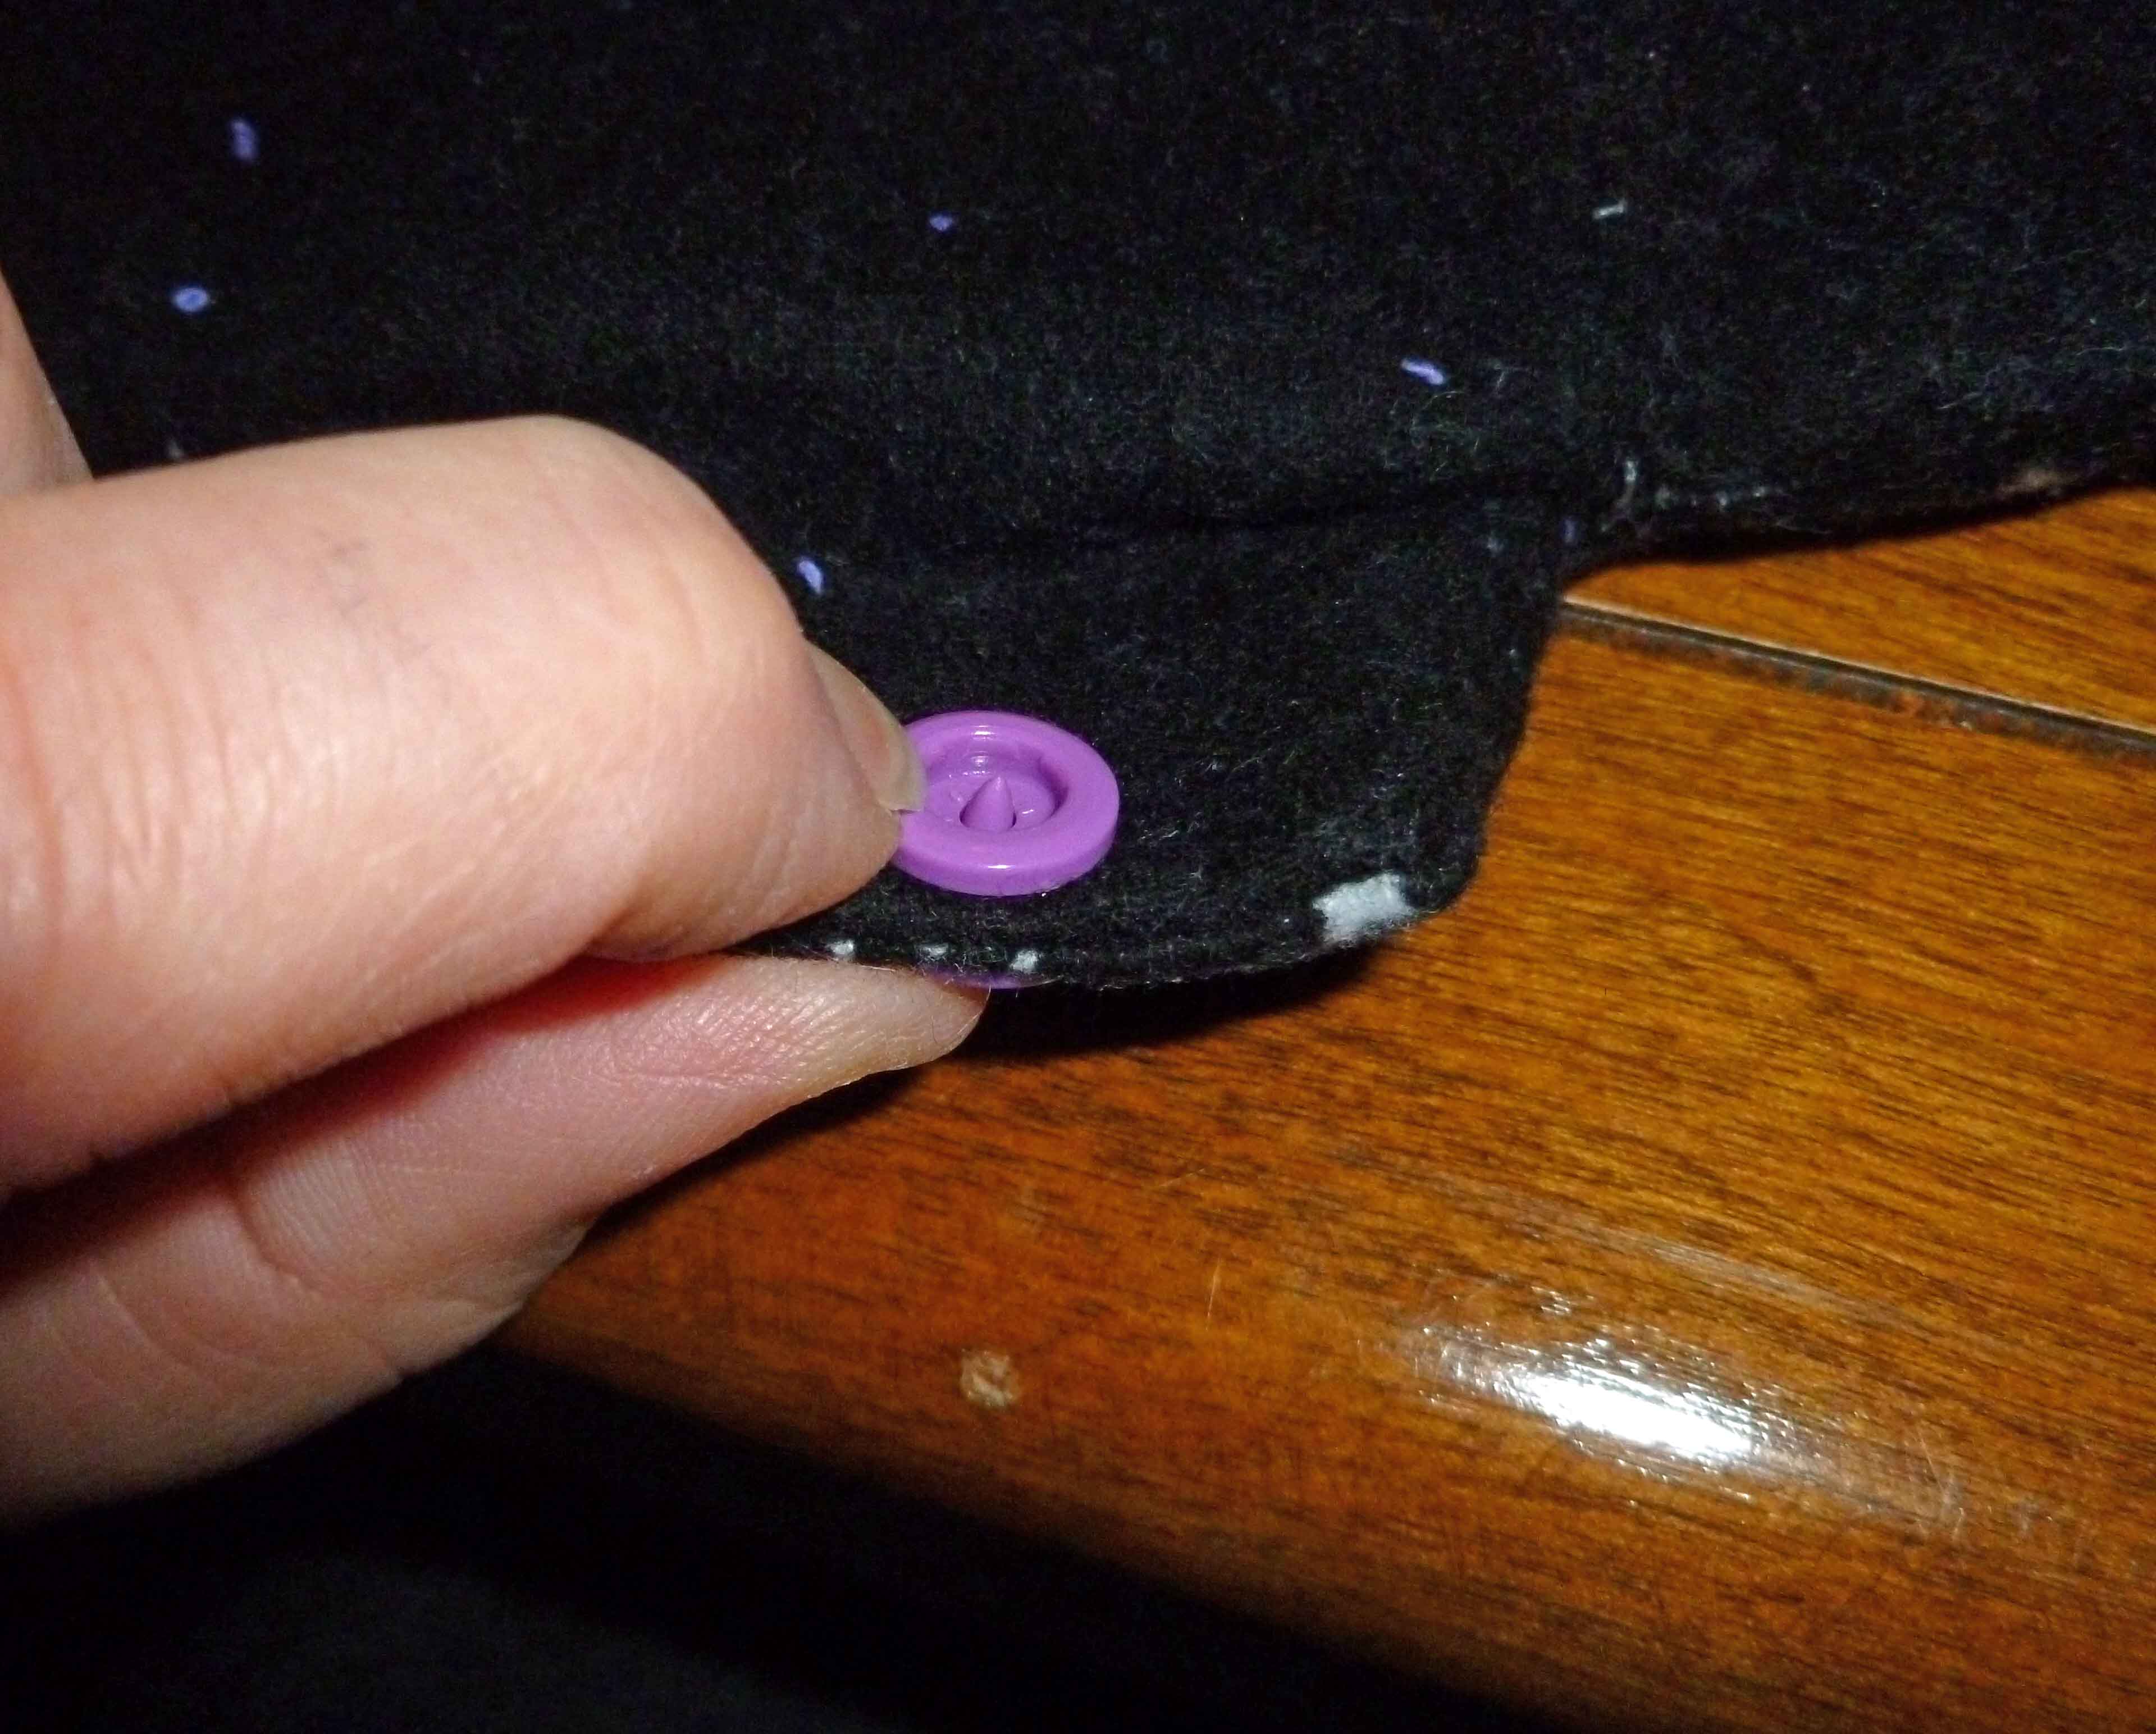
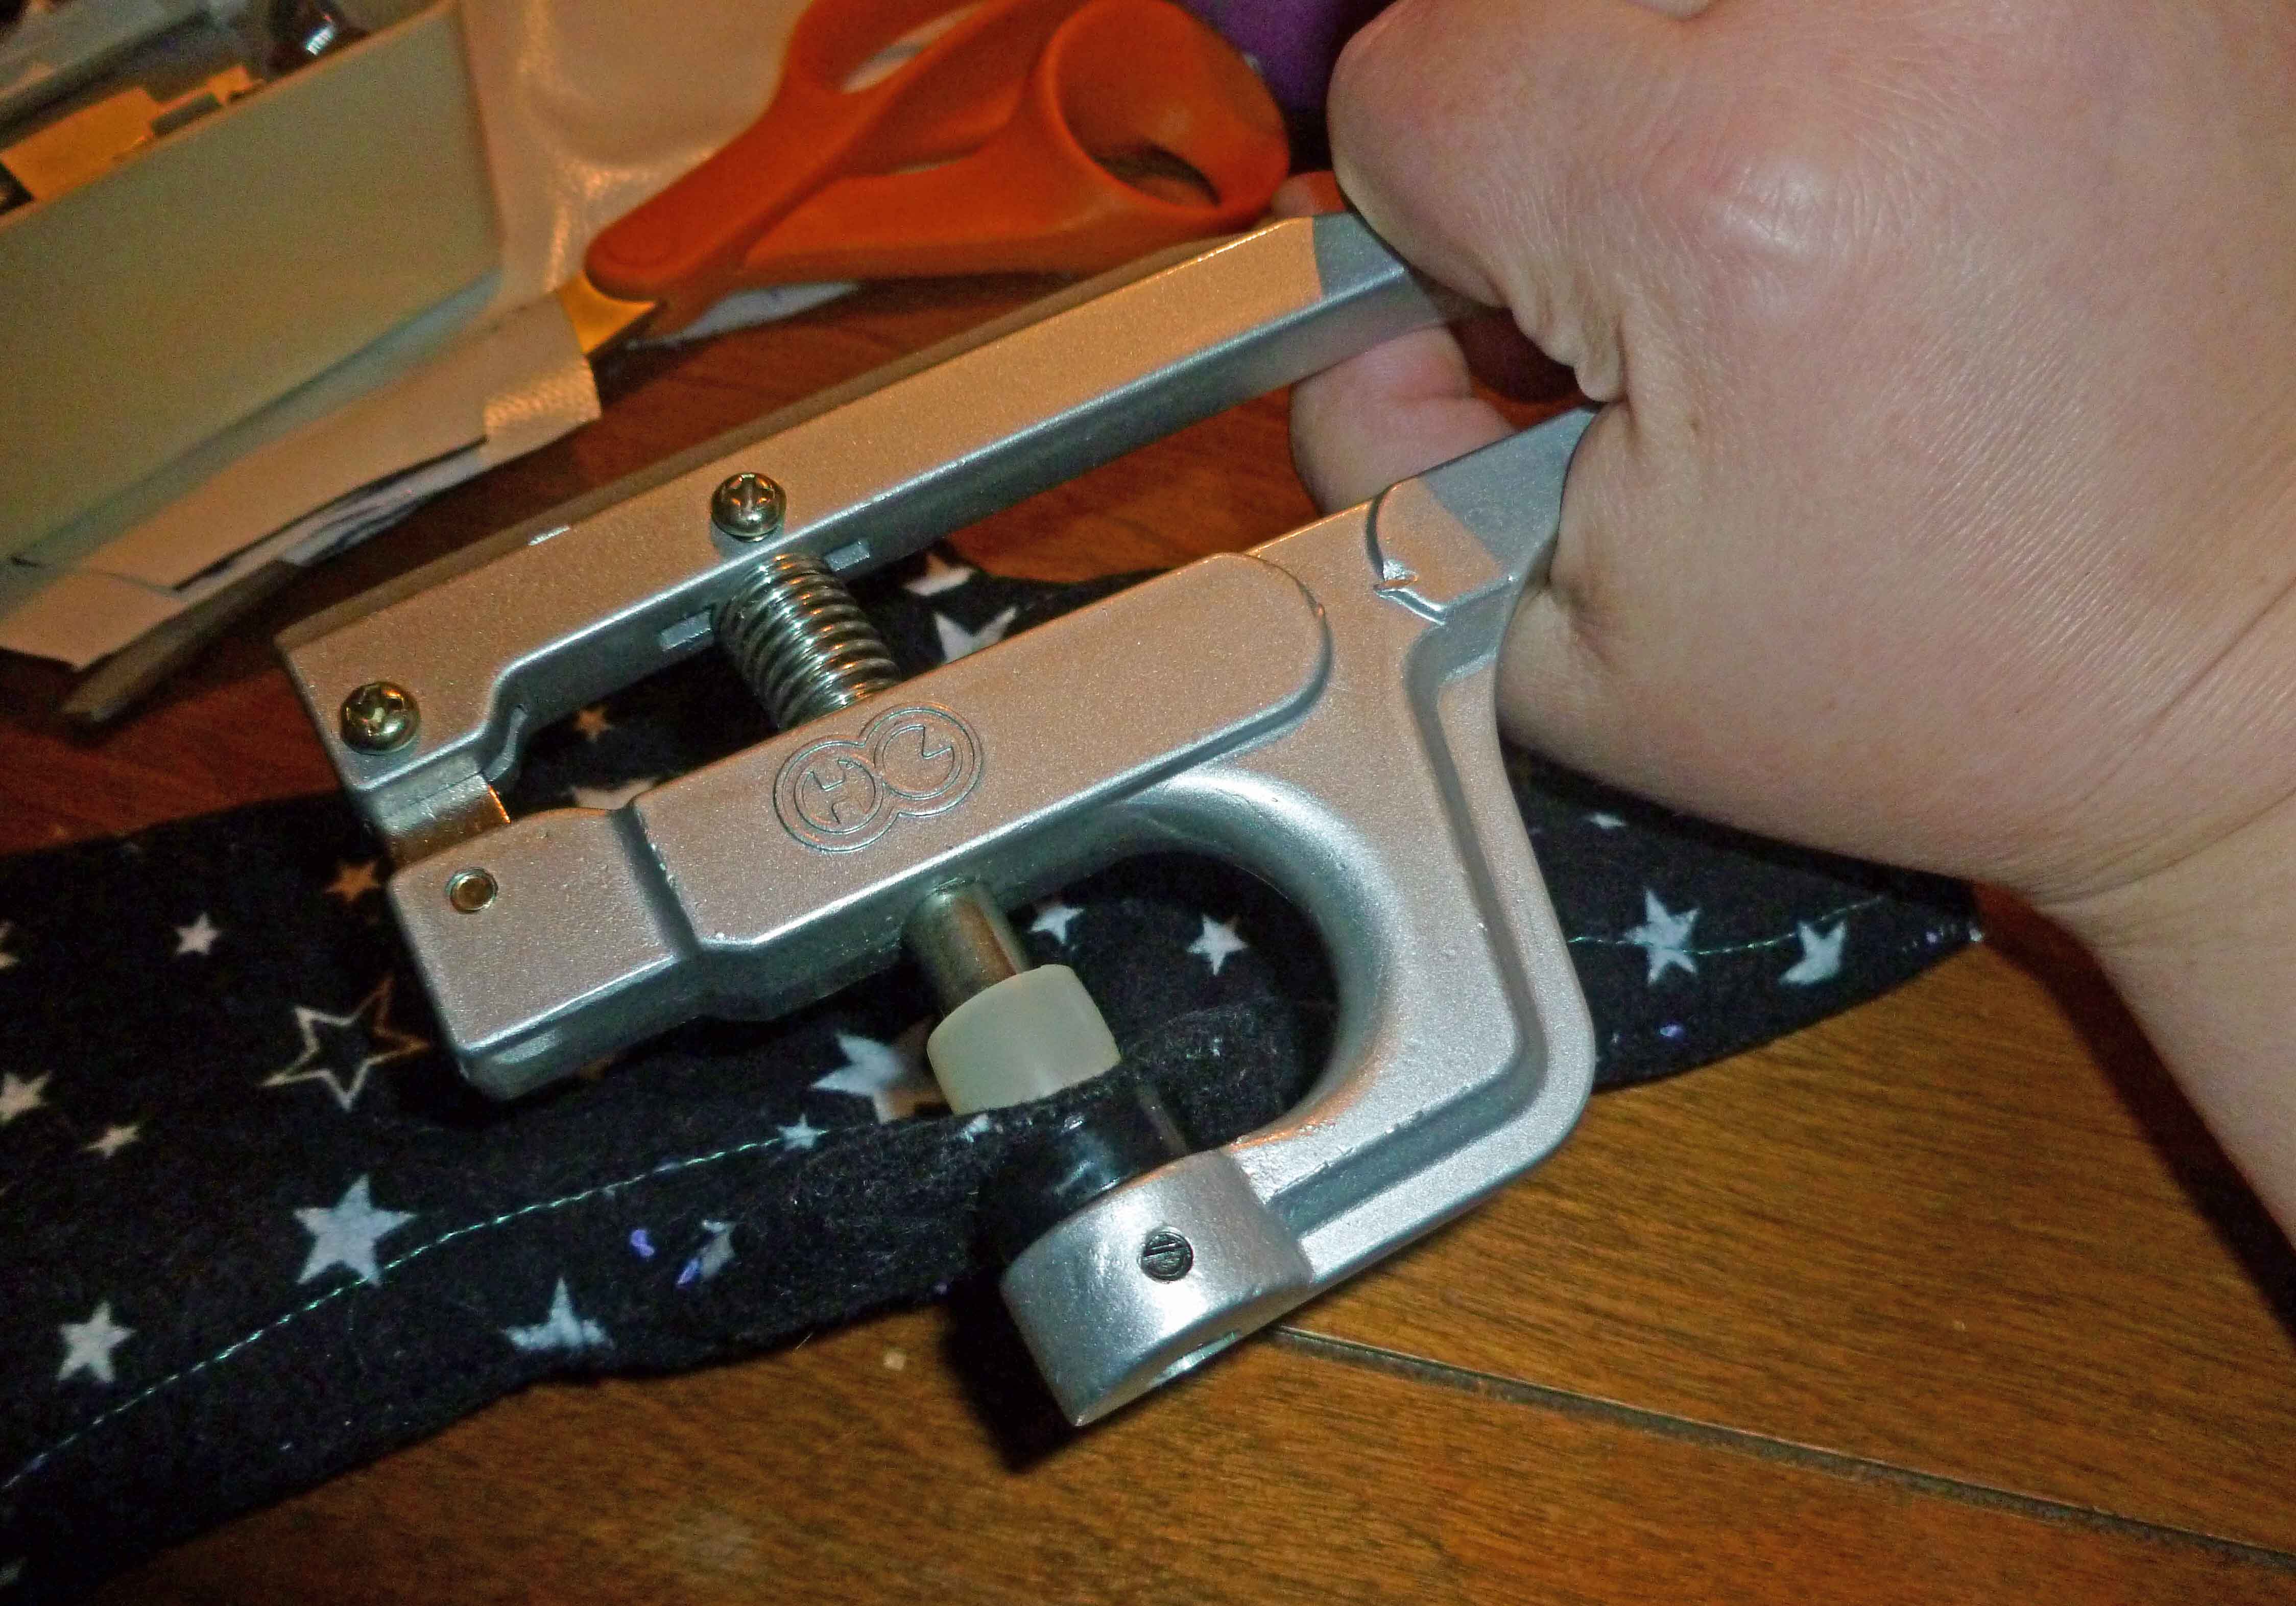
Then I add the snaps.
Use the awl to poke hole, where you can insert your snaps.
Place the bottom and top of the snaps on each side of the fabric.
Use the snap setting pliers to set the snap in place
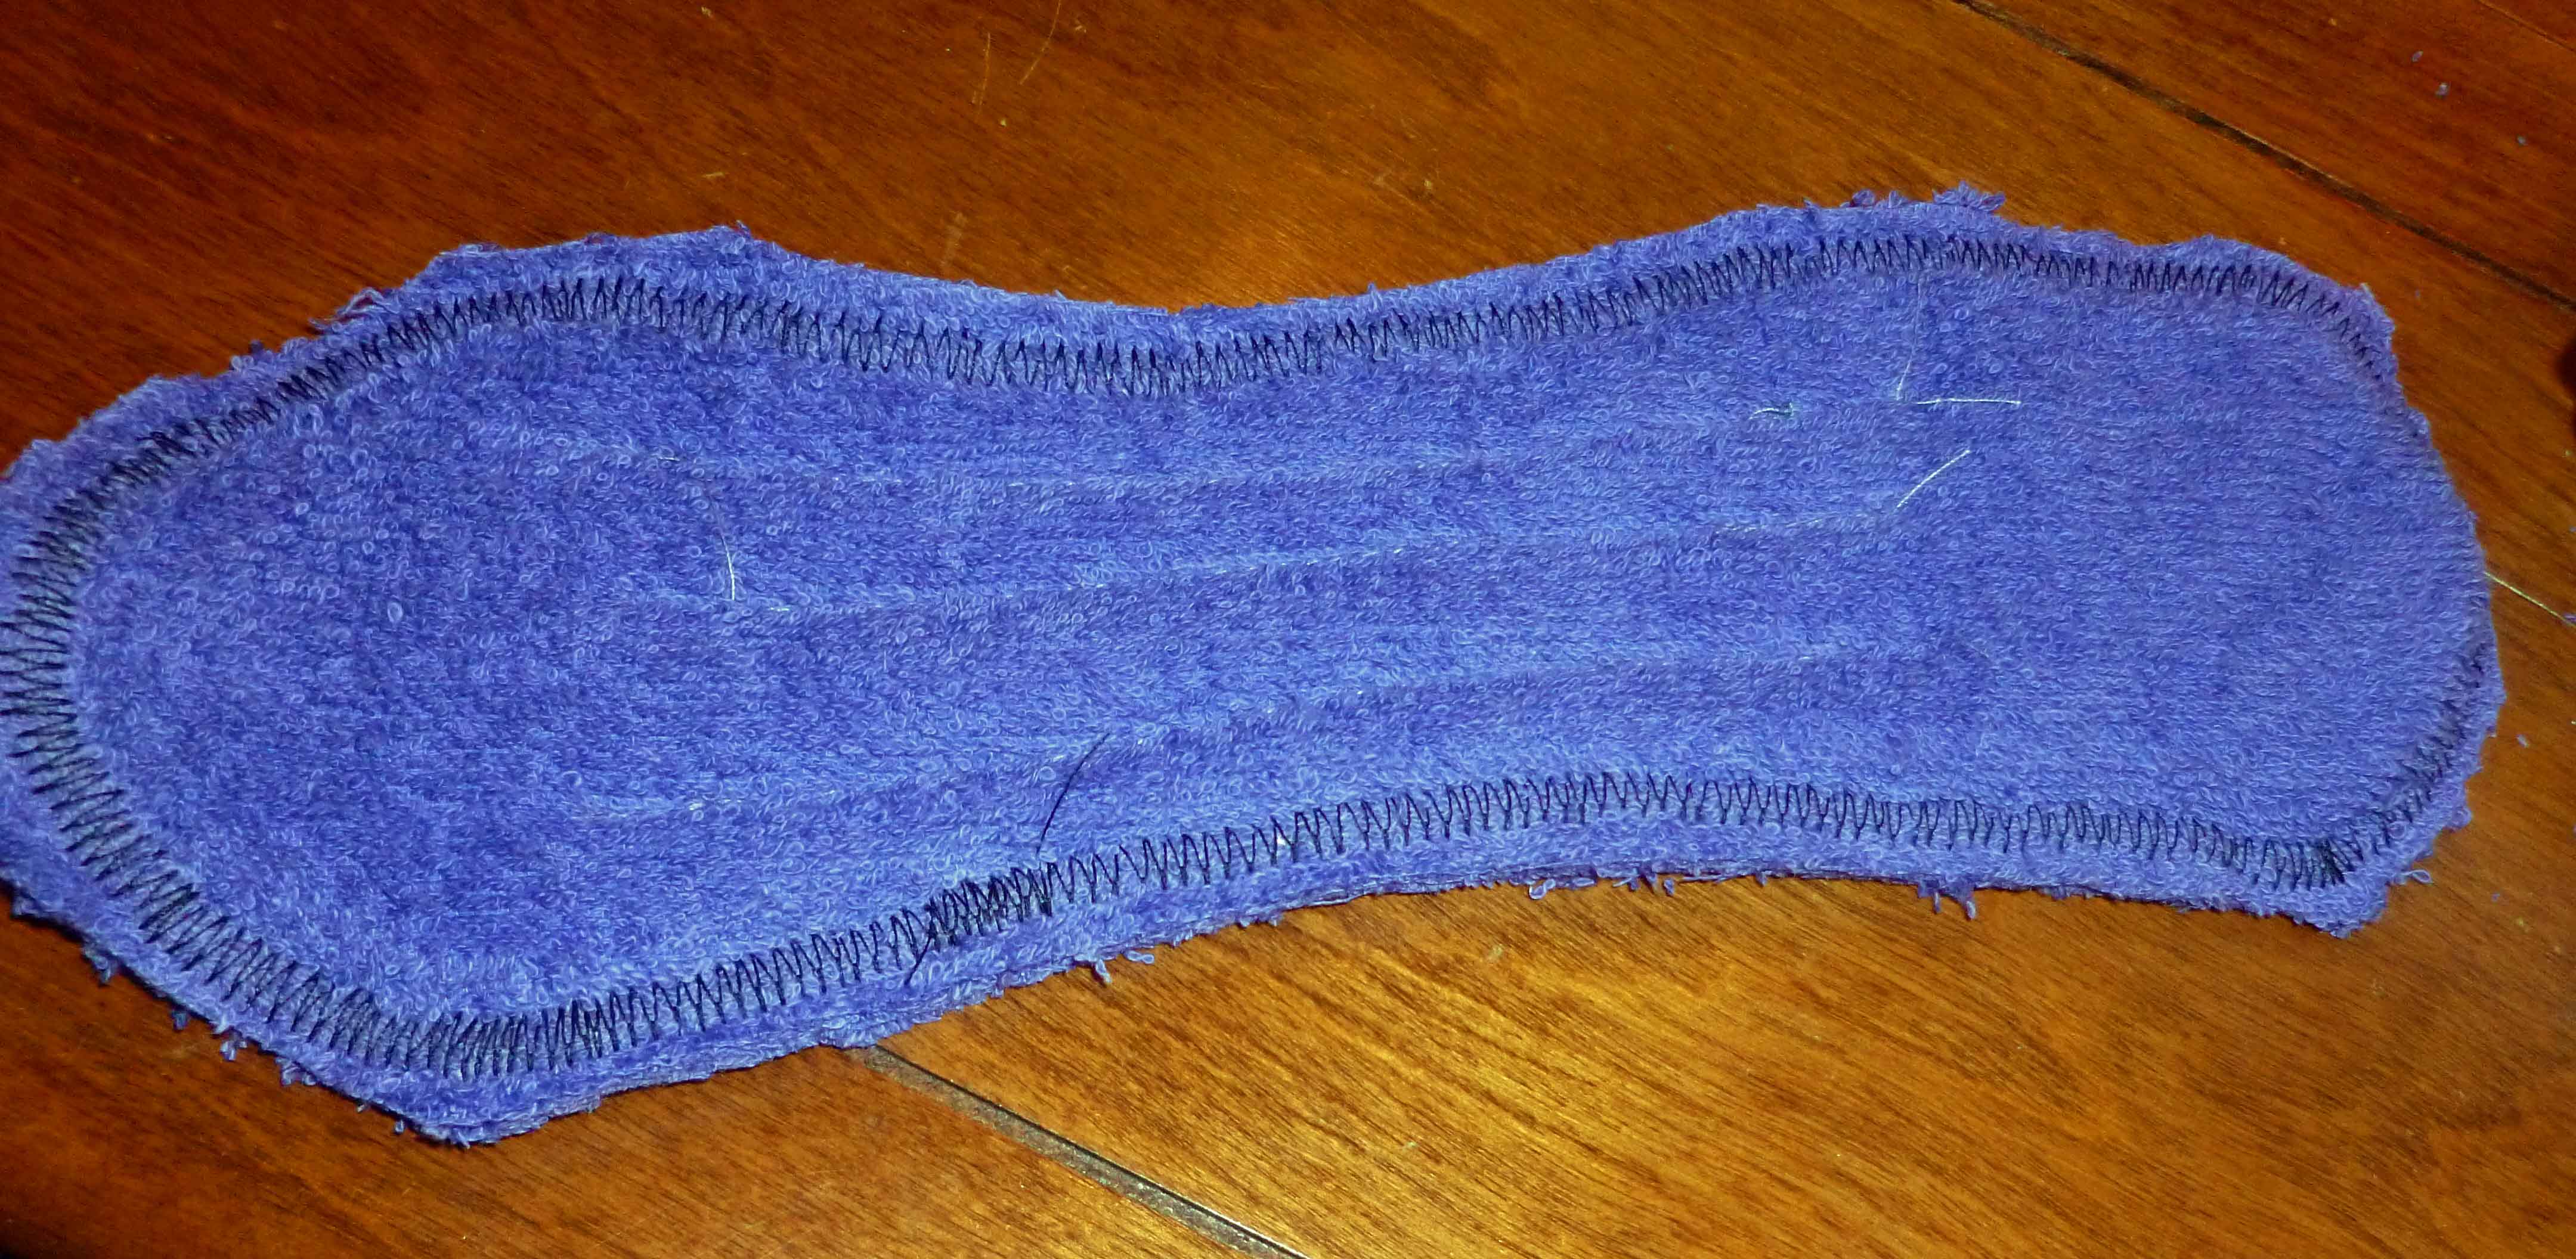
Voila! You have a completed reusable cloth pad with snaps to hold it in place!
Completed Reusable Cloth Pad
Completed Reusable Cloth Pad
To wash these, I use the soak cycle on my washing machine along with some of my homemade laundry detergent. Once that has completed, I add more laundry, more laundry detergent, and wash them in a normal cycle and dry them along with the load of laundry.
Whatever your concerns are with conventional monthly supplies, I hope this is helpful.
I miss the convenience of buying a Nature Valley Granola bar, and calling it good for breakfast. Since they’re not safe for me, and since I needed to trial some cane syrup I bought, I went poking around the Interwebs and found this recipe that I modified. Sadly, the cane syrup was a big fail and caused a reaction. Yes, I know I can make cane syrup and I do. I just don’t want to. I was just hoping to have one damn ingredient component that I don’t have to make before I make the actual recipe. It was a big disappointment, although frankly, I was pretty sure it was going to be a fail as they use corn syrup in the facility where it is made. The original recipe uses honey (I don’t currently have a safe source), but homemade cane syrup will work since the commercial version did, and I’d be willing to try it with my safe molasses. You could also try maple syrup as a substitute, but I’m allergic to maple pollen so I haven’t bothered to trial a maple syrup from a safe source that doesn’t use canola or dairy as a defoamer as it’s boiling down to see if I can manage maple syrup if it’s pure. Anyway, let us know if you try different things and it works.
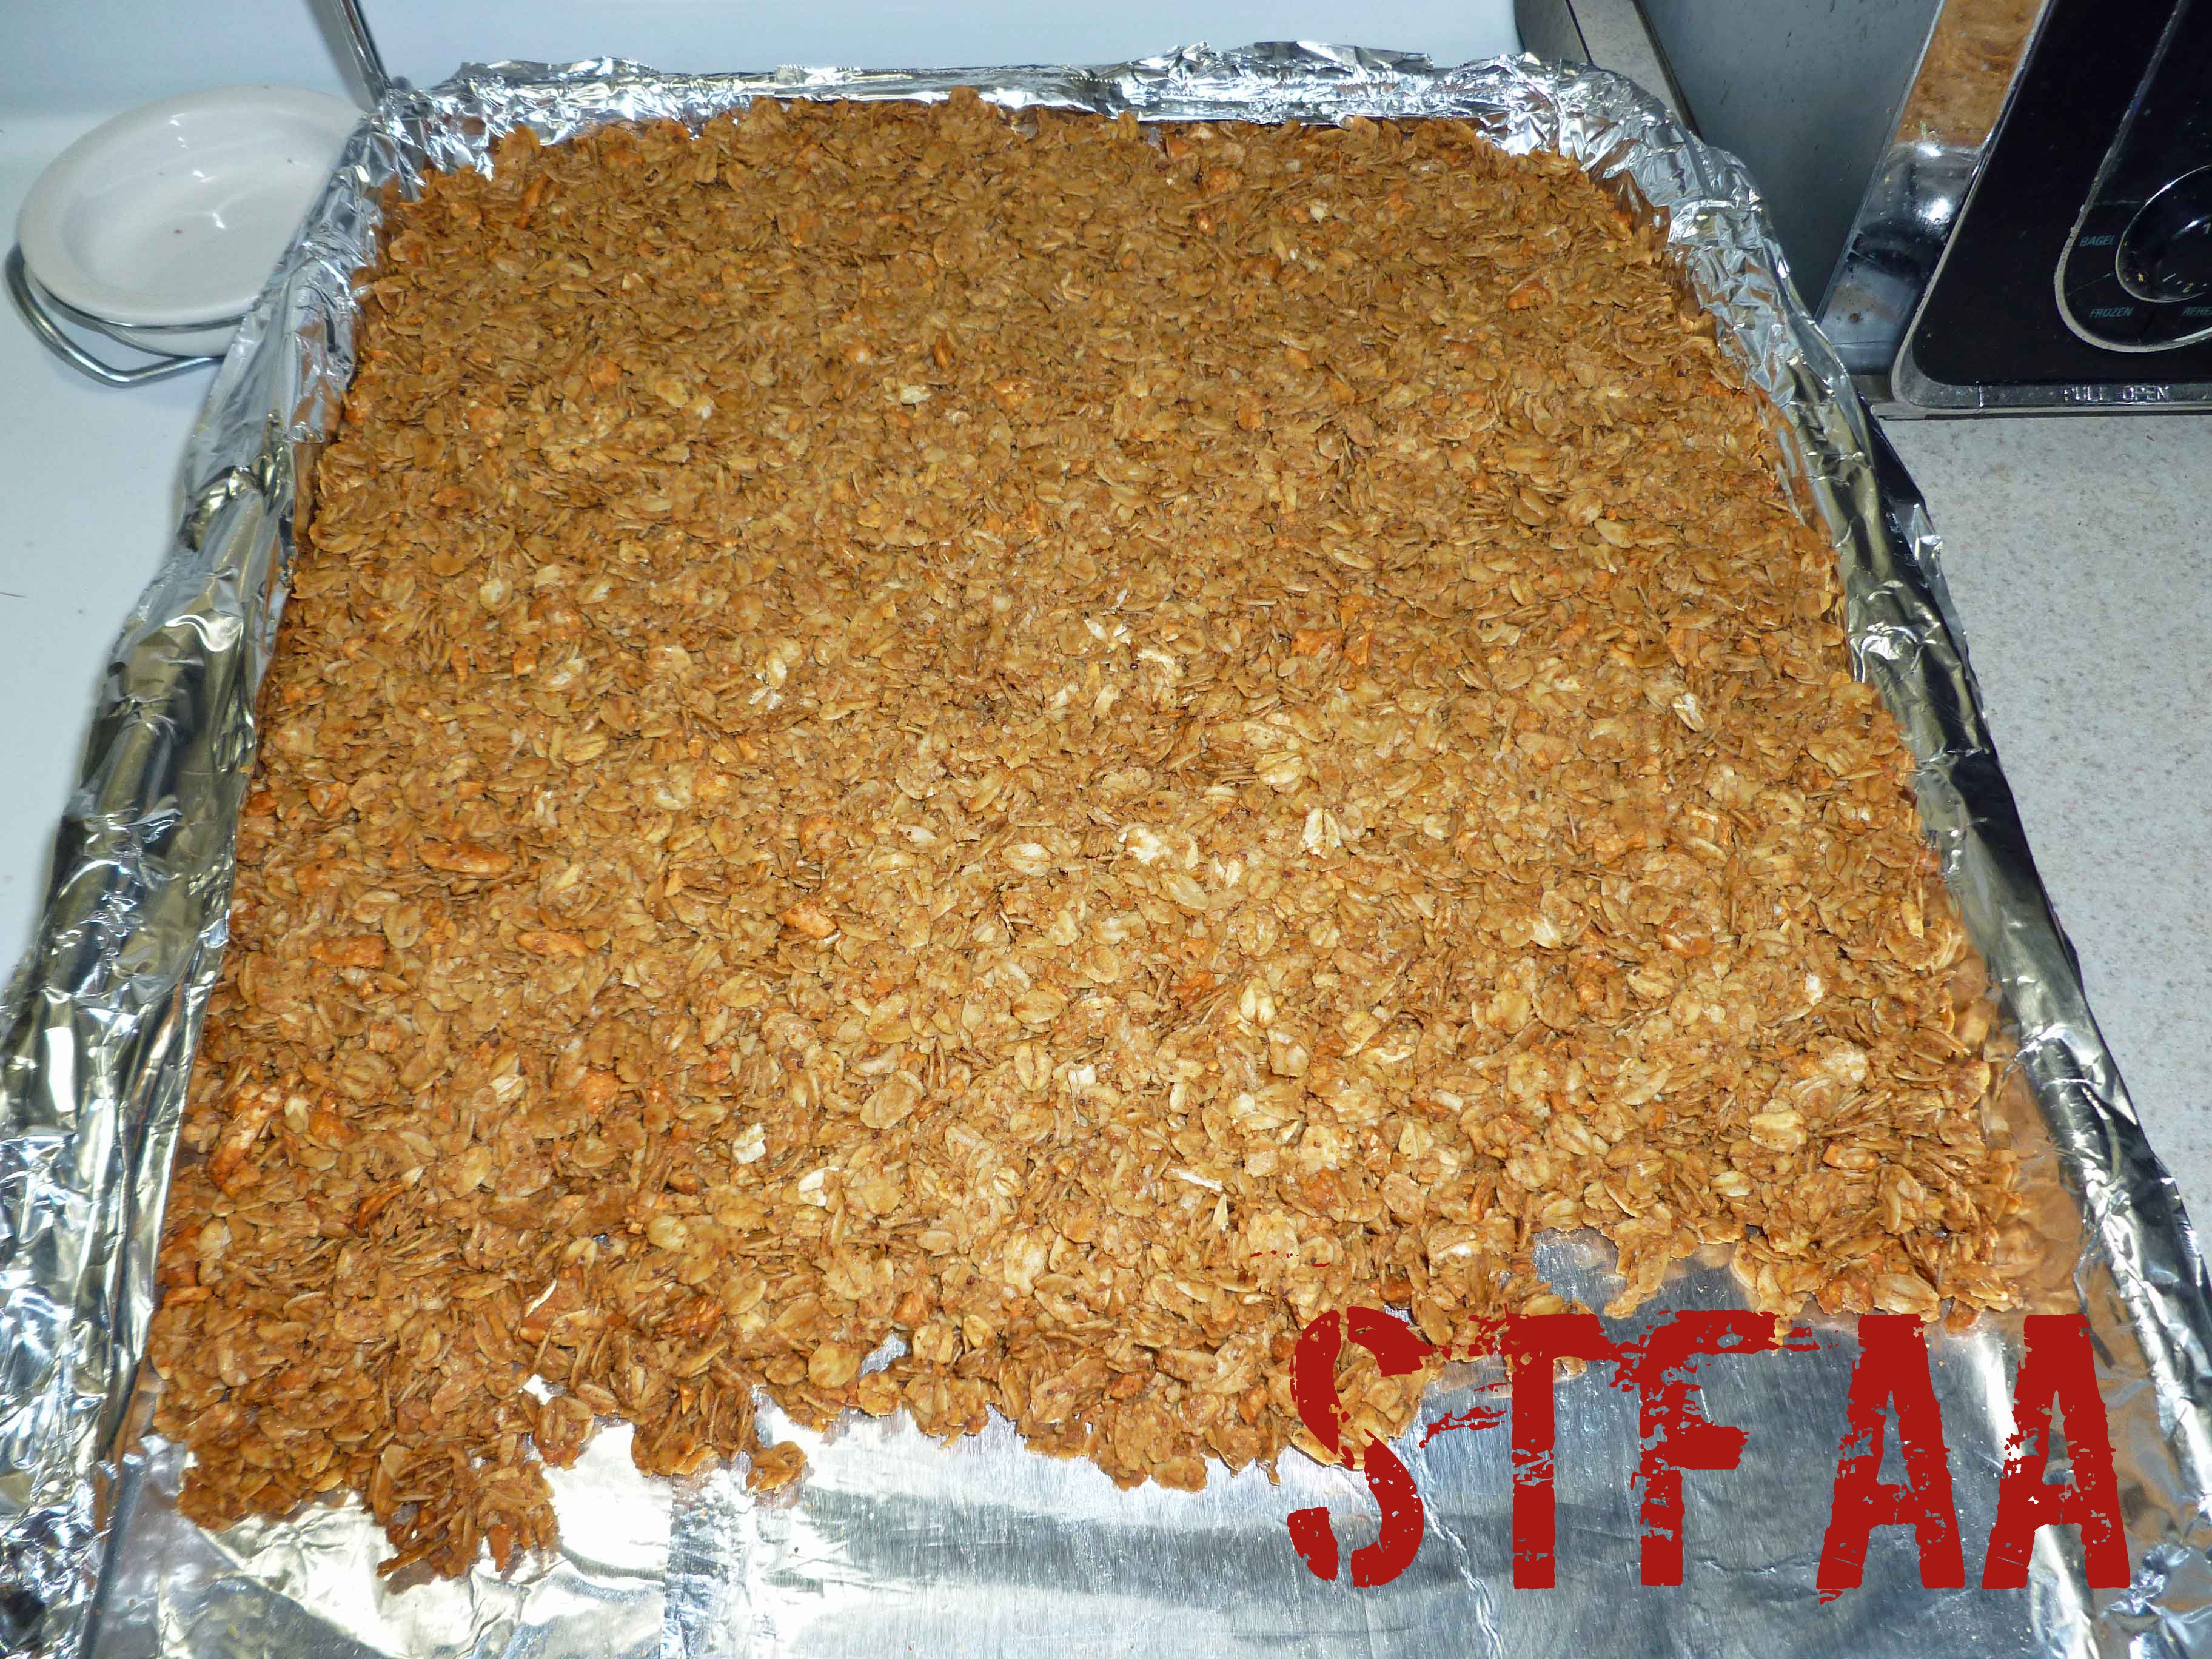
I used cashews in this recipe, because it’s one of my safe nuts, but if you don’t do tree nuts, you could substitute other seeds, such as sunflower or pumpkin, or you could use dried fruit, such as raisins or dried cranberries. To give you another helpful hint, I made my bars way, way too thick. So they were sort of brick-like and broke into small pieces as I was cutting them. Which is good if you want granola cereal but not so much if you want them to be bars and you don’t want to try to gnaw on a brick. Make them thin. Spread them out across that whole cookie sheet.
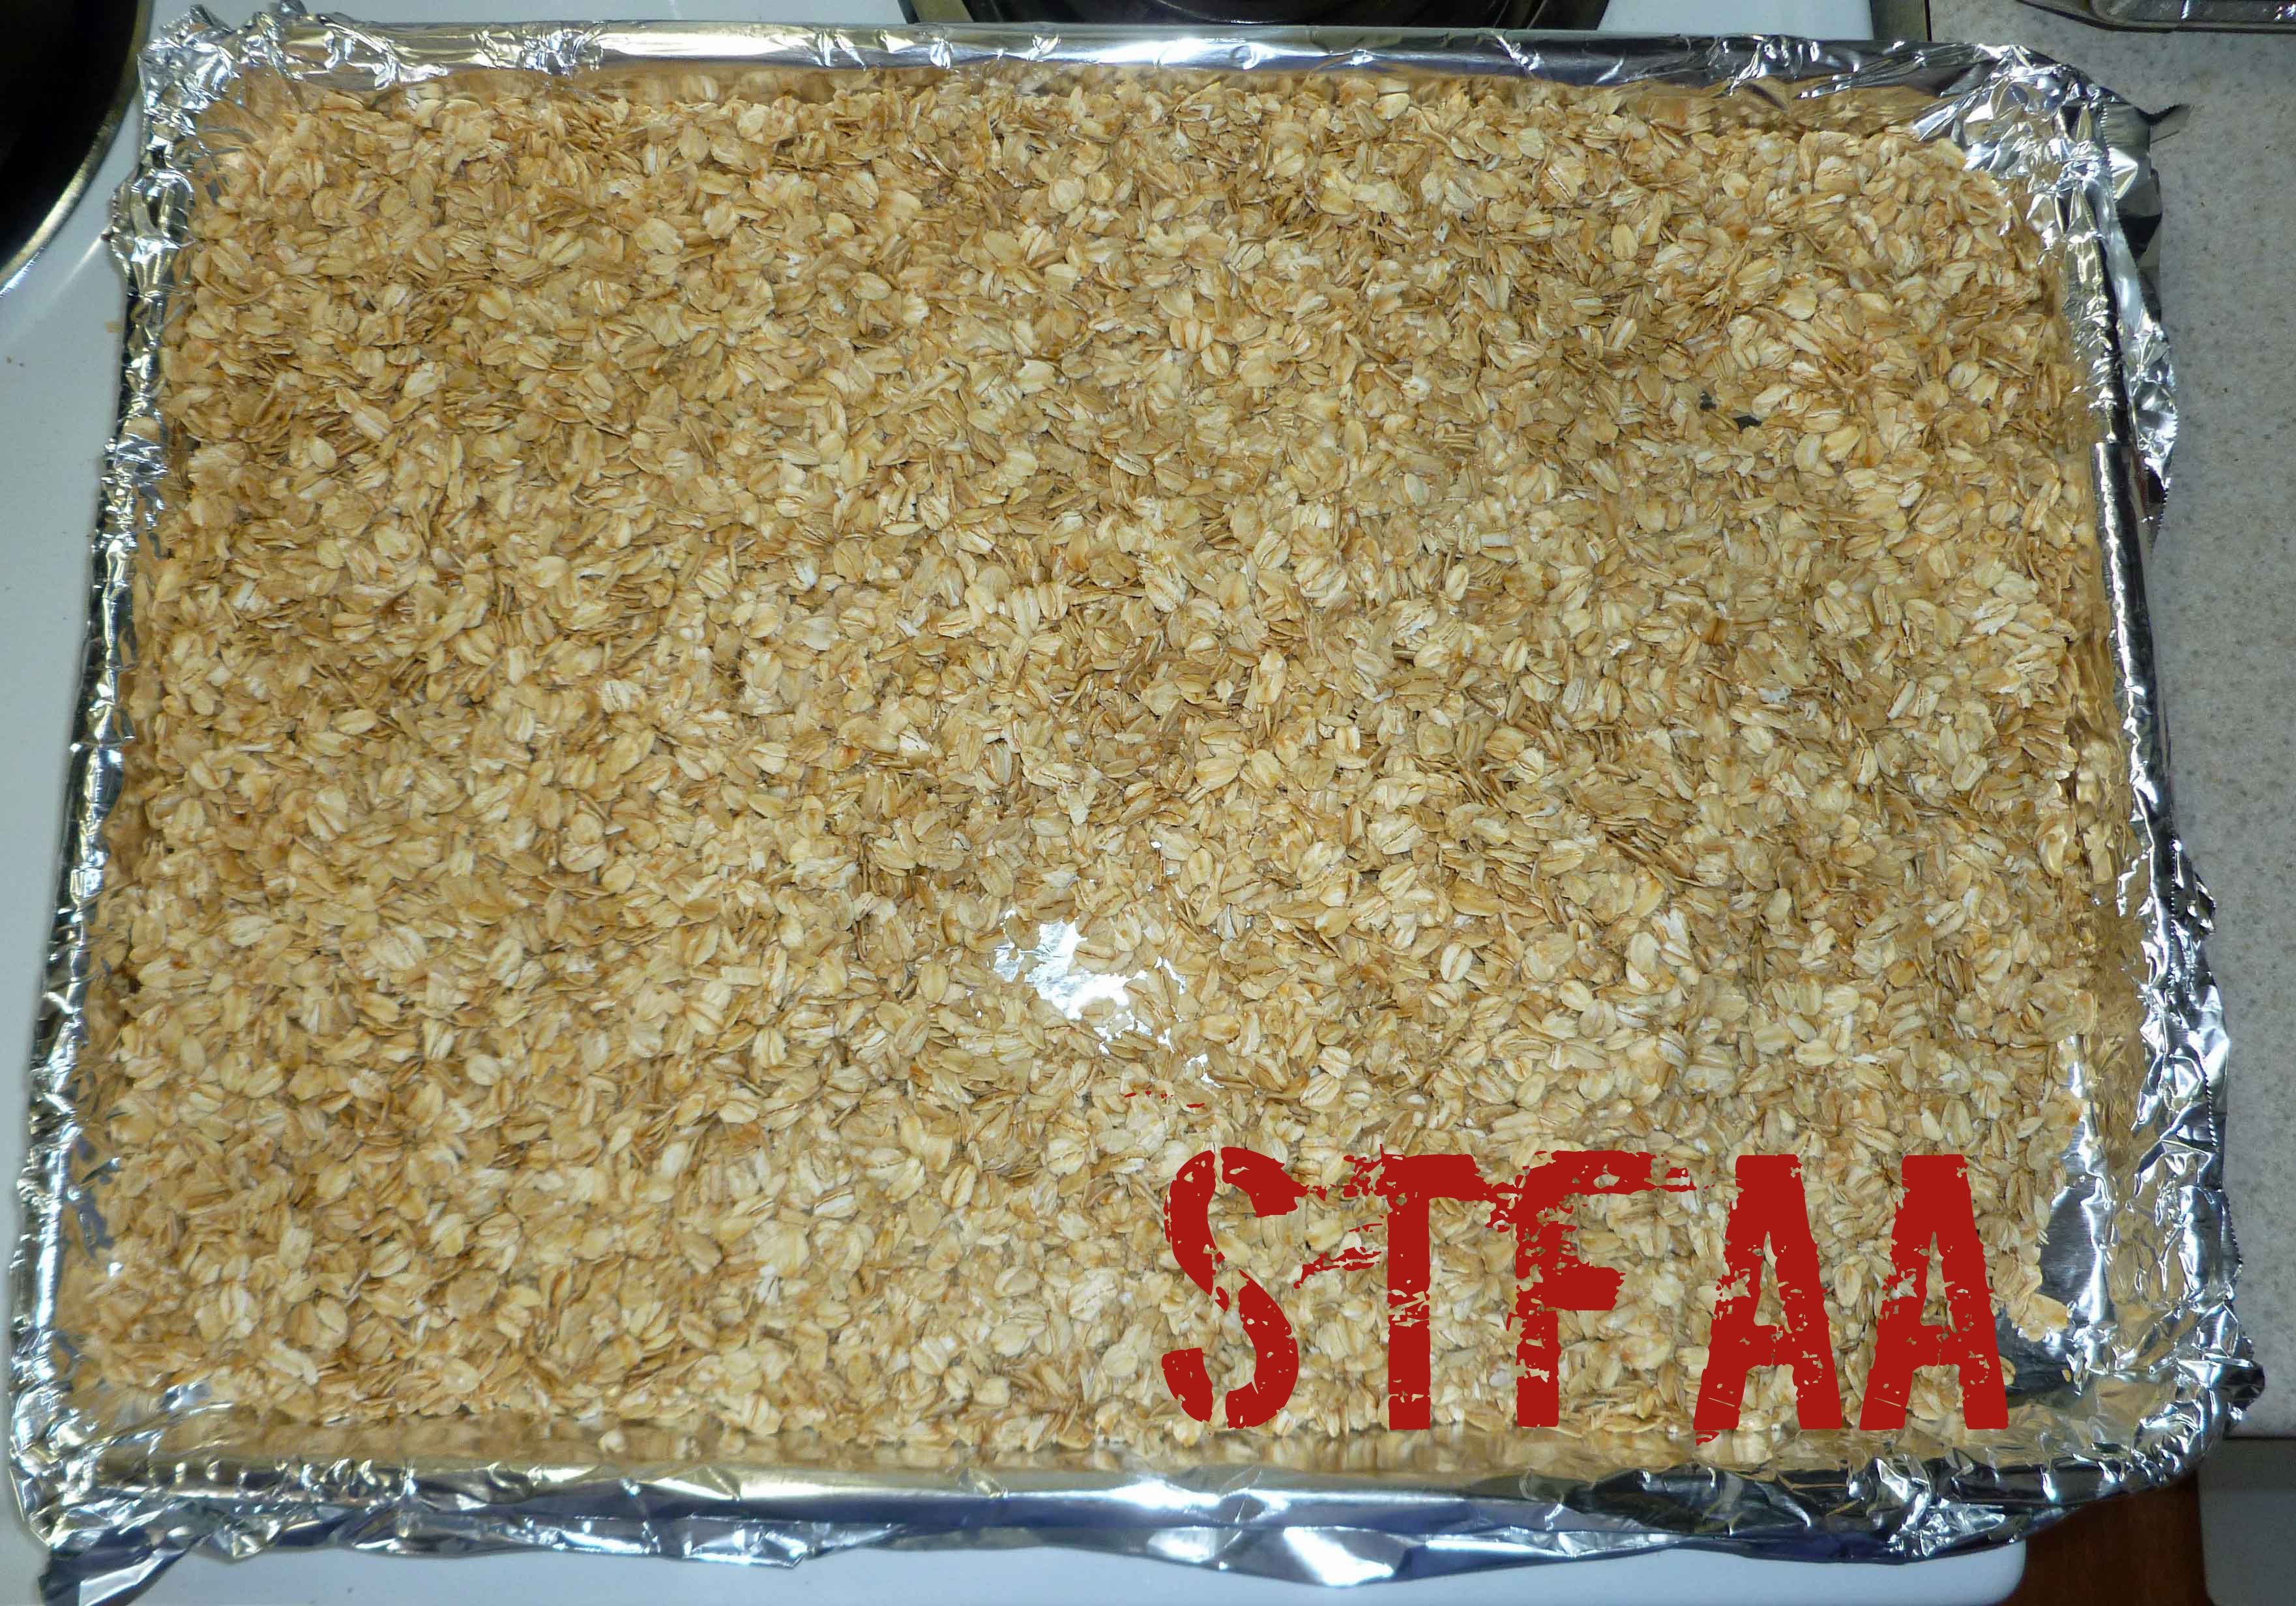
Oats before toasting
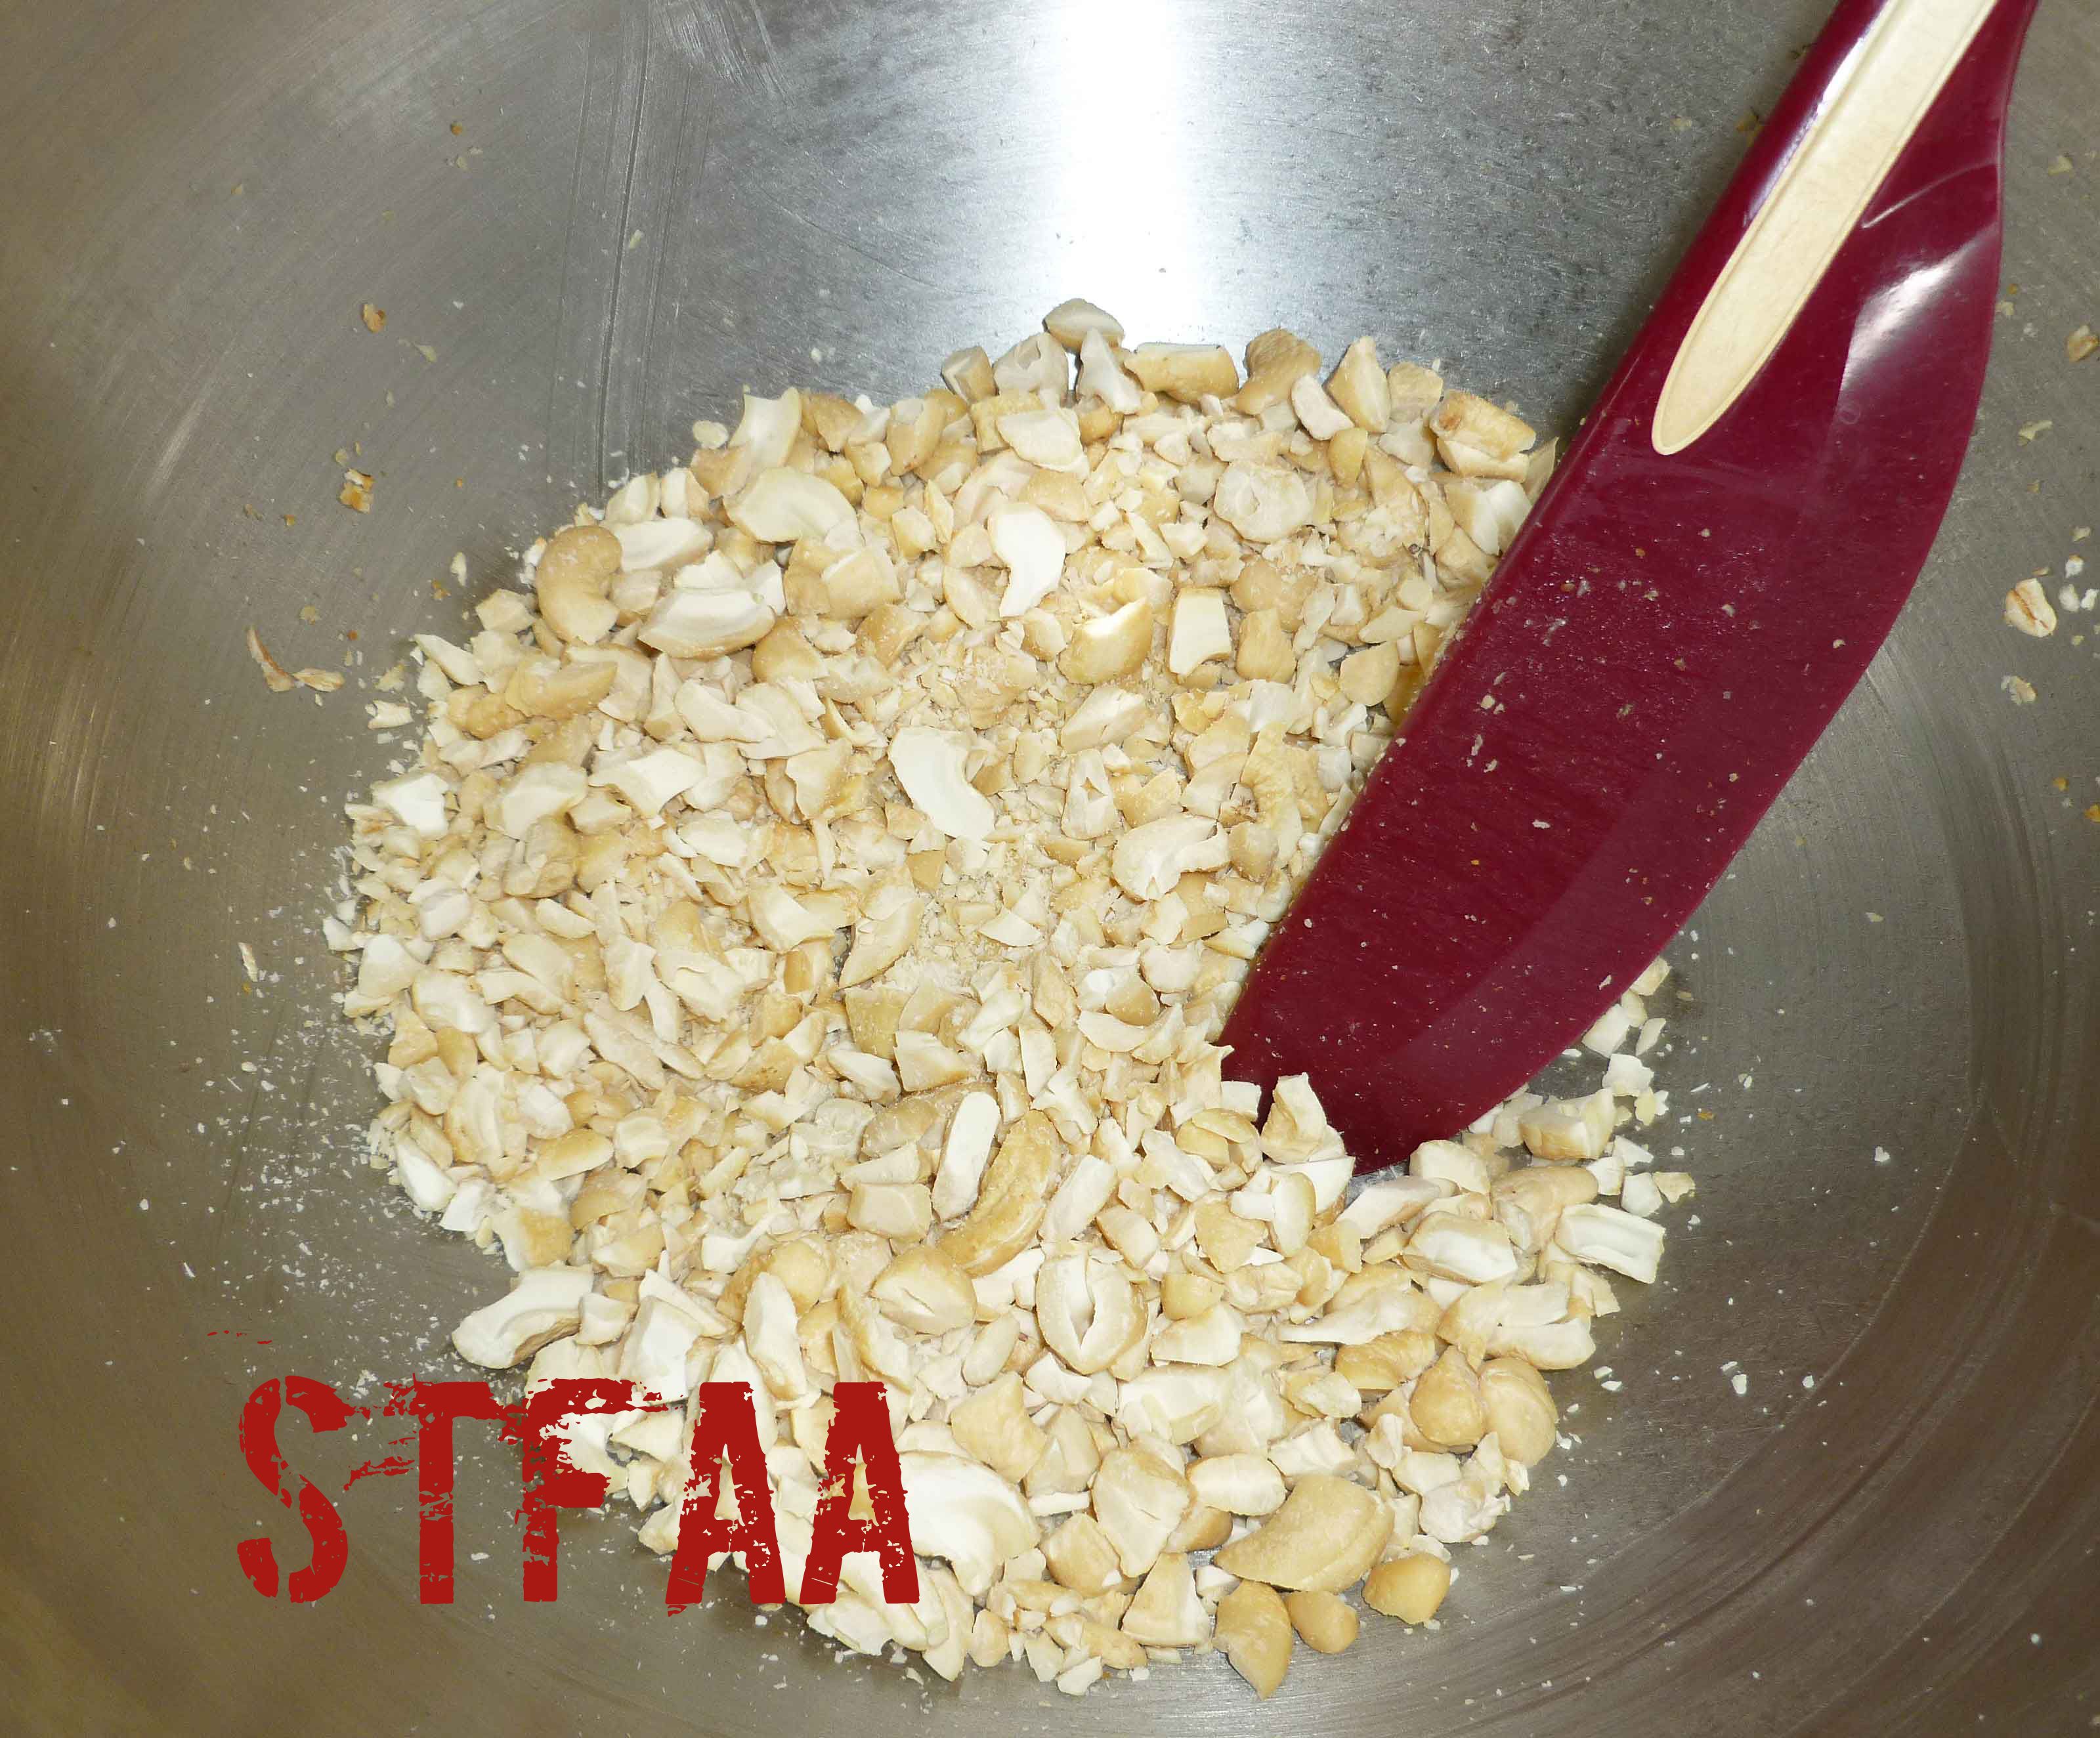
Chopped cashews
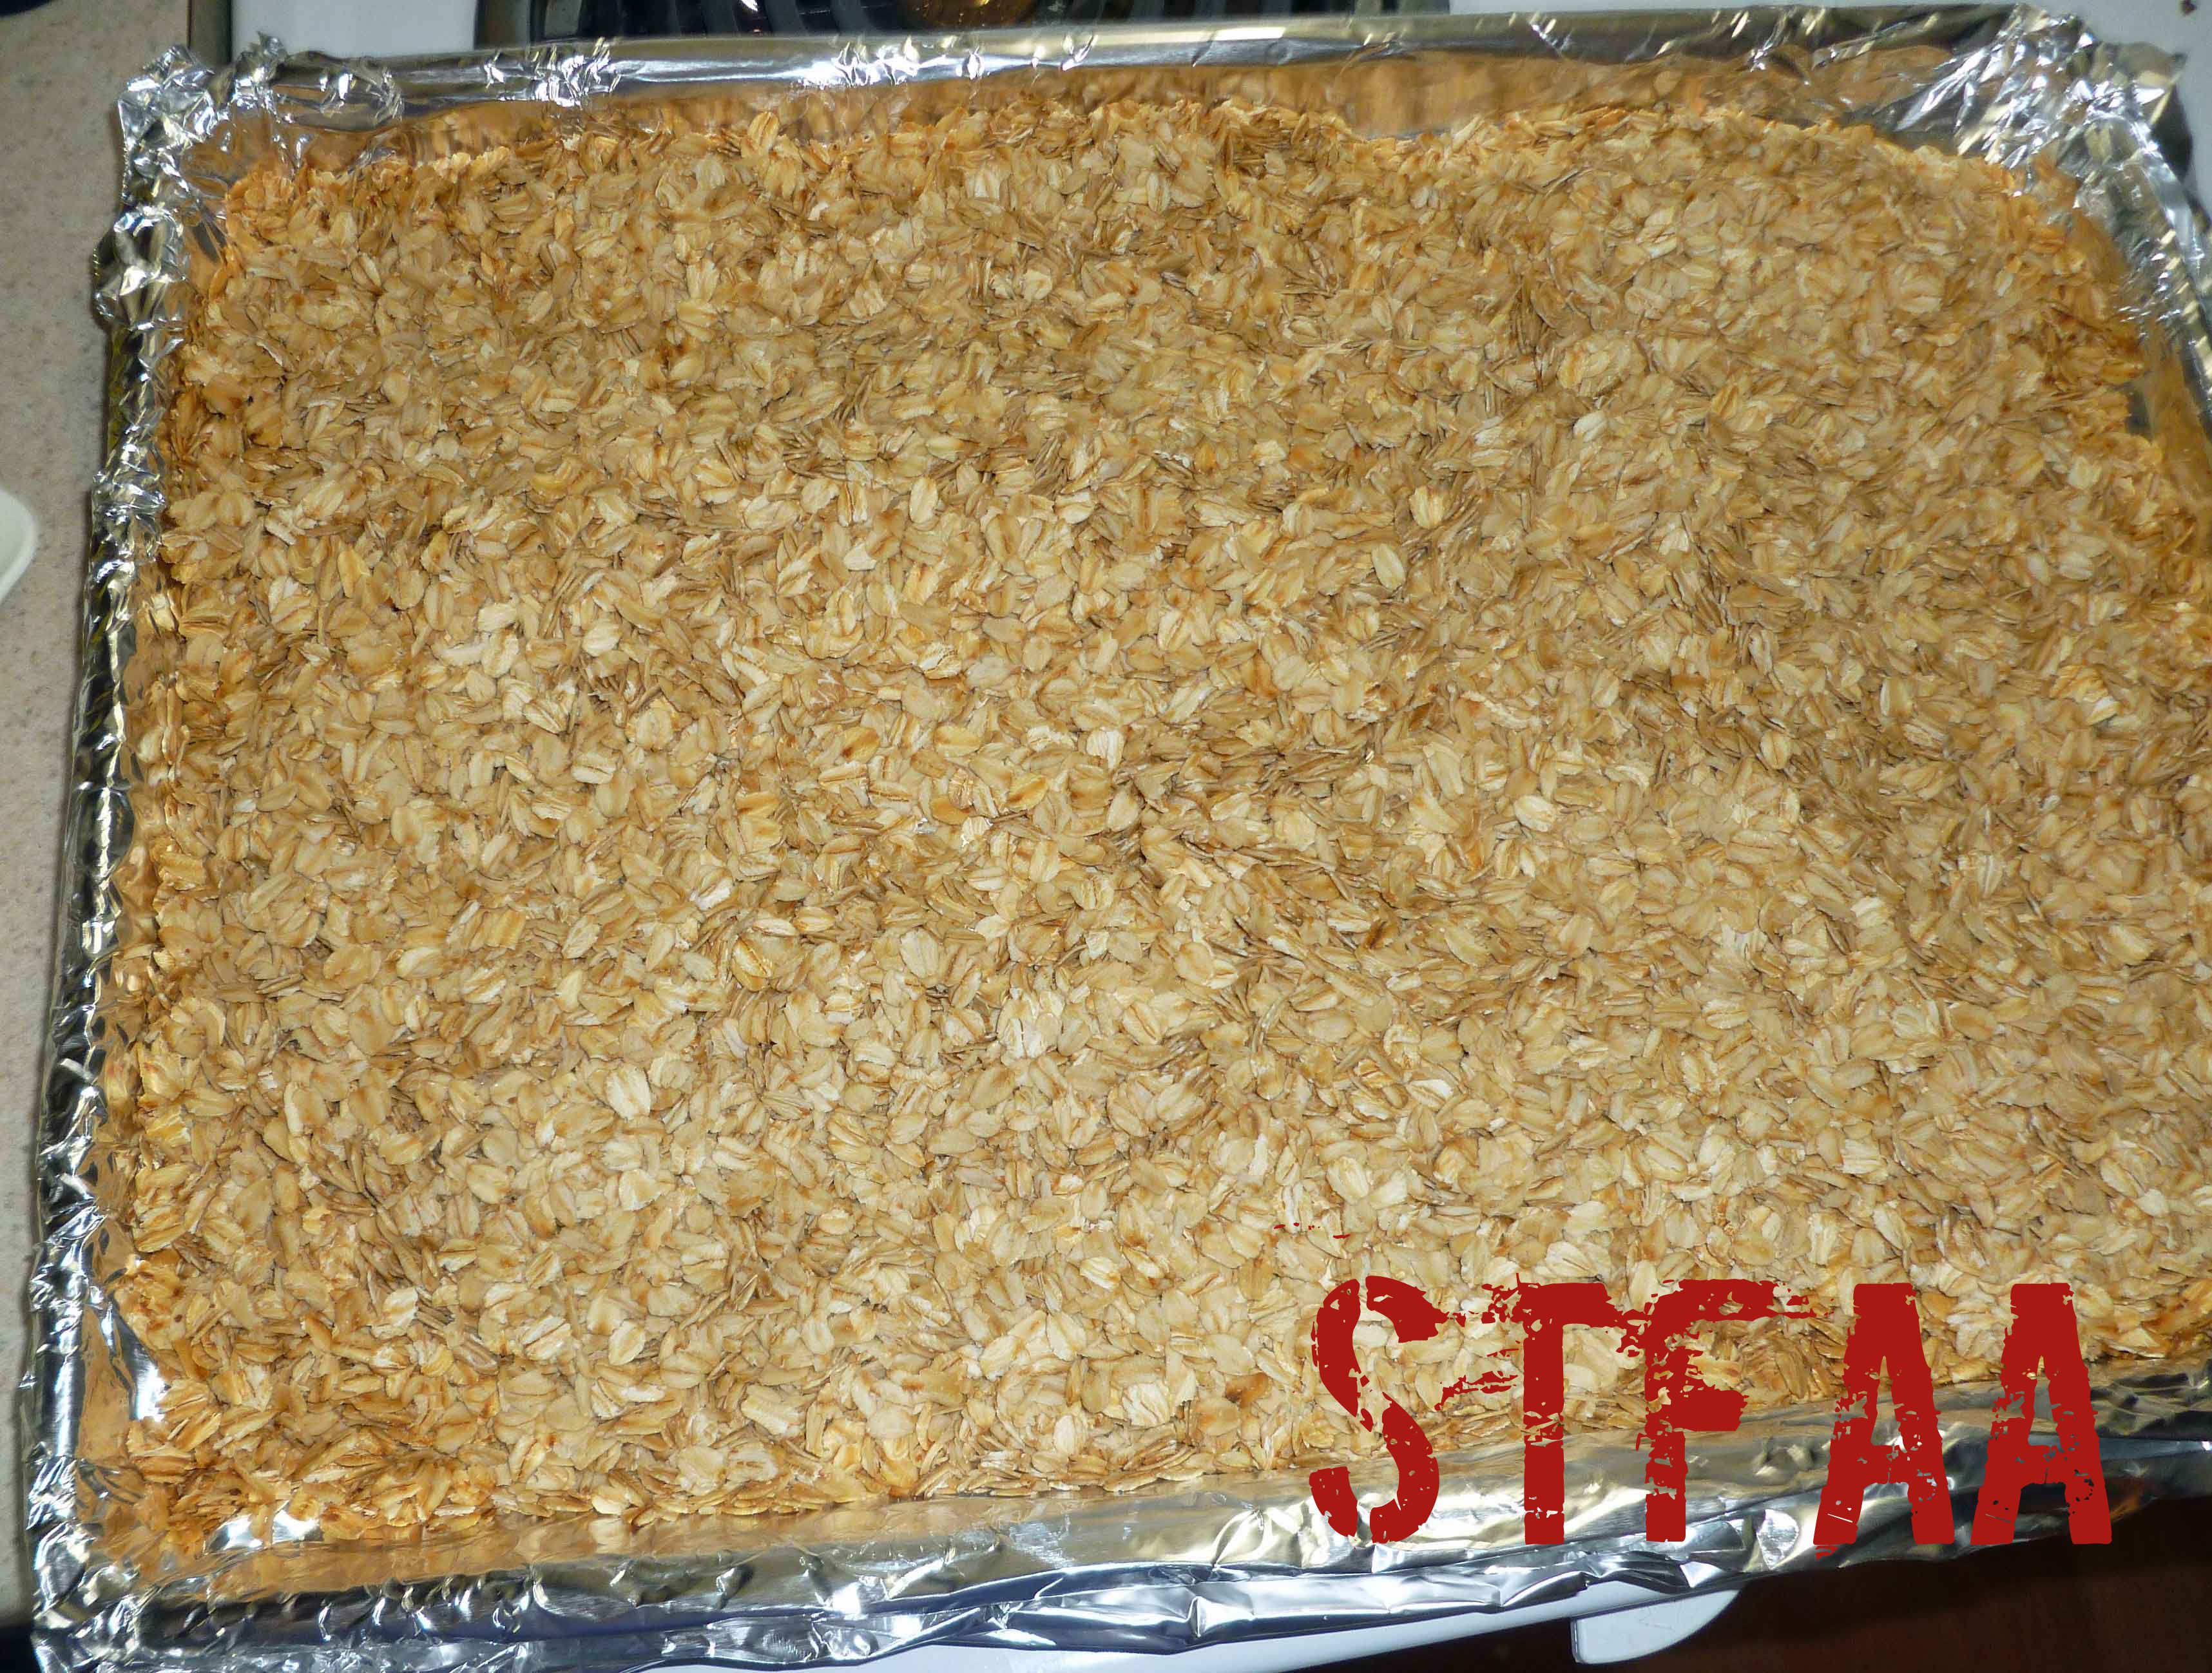
Oats after toasting
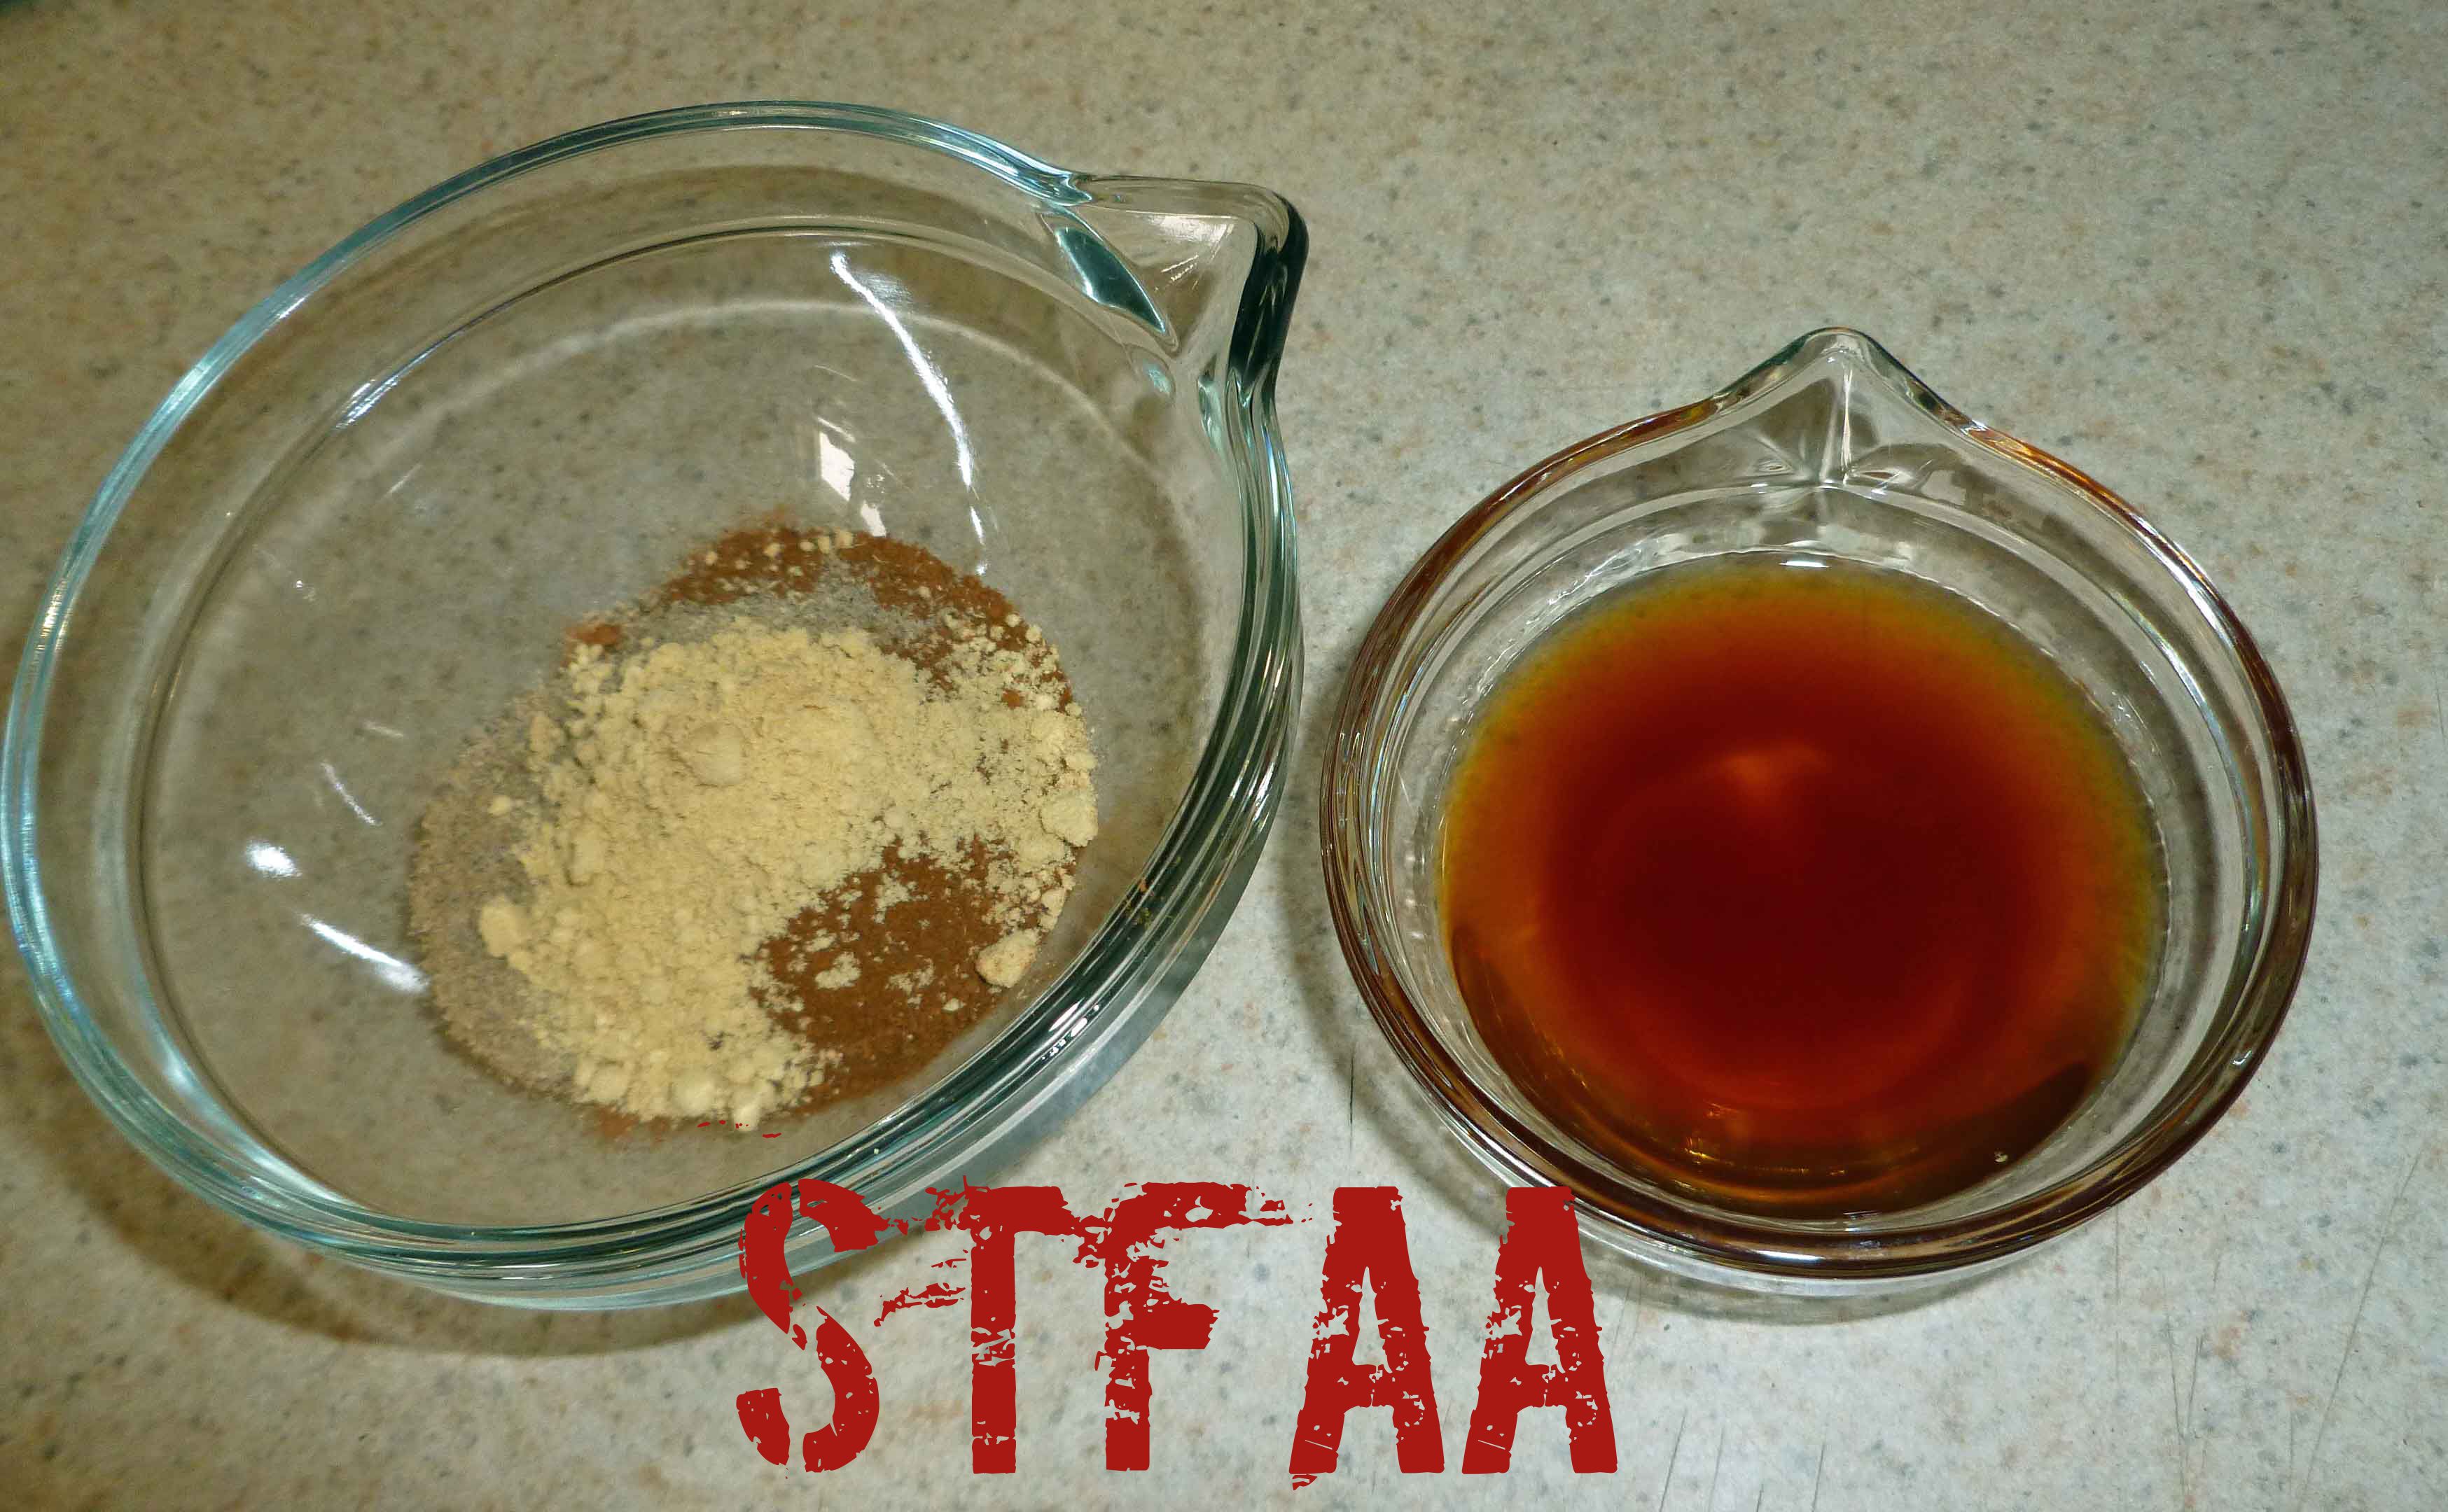
Spices and vanilla extract to be added to the syrup and sugar mixture
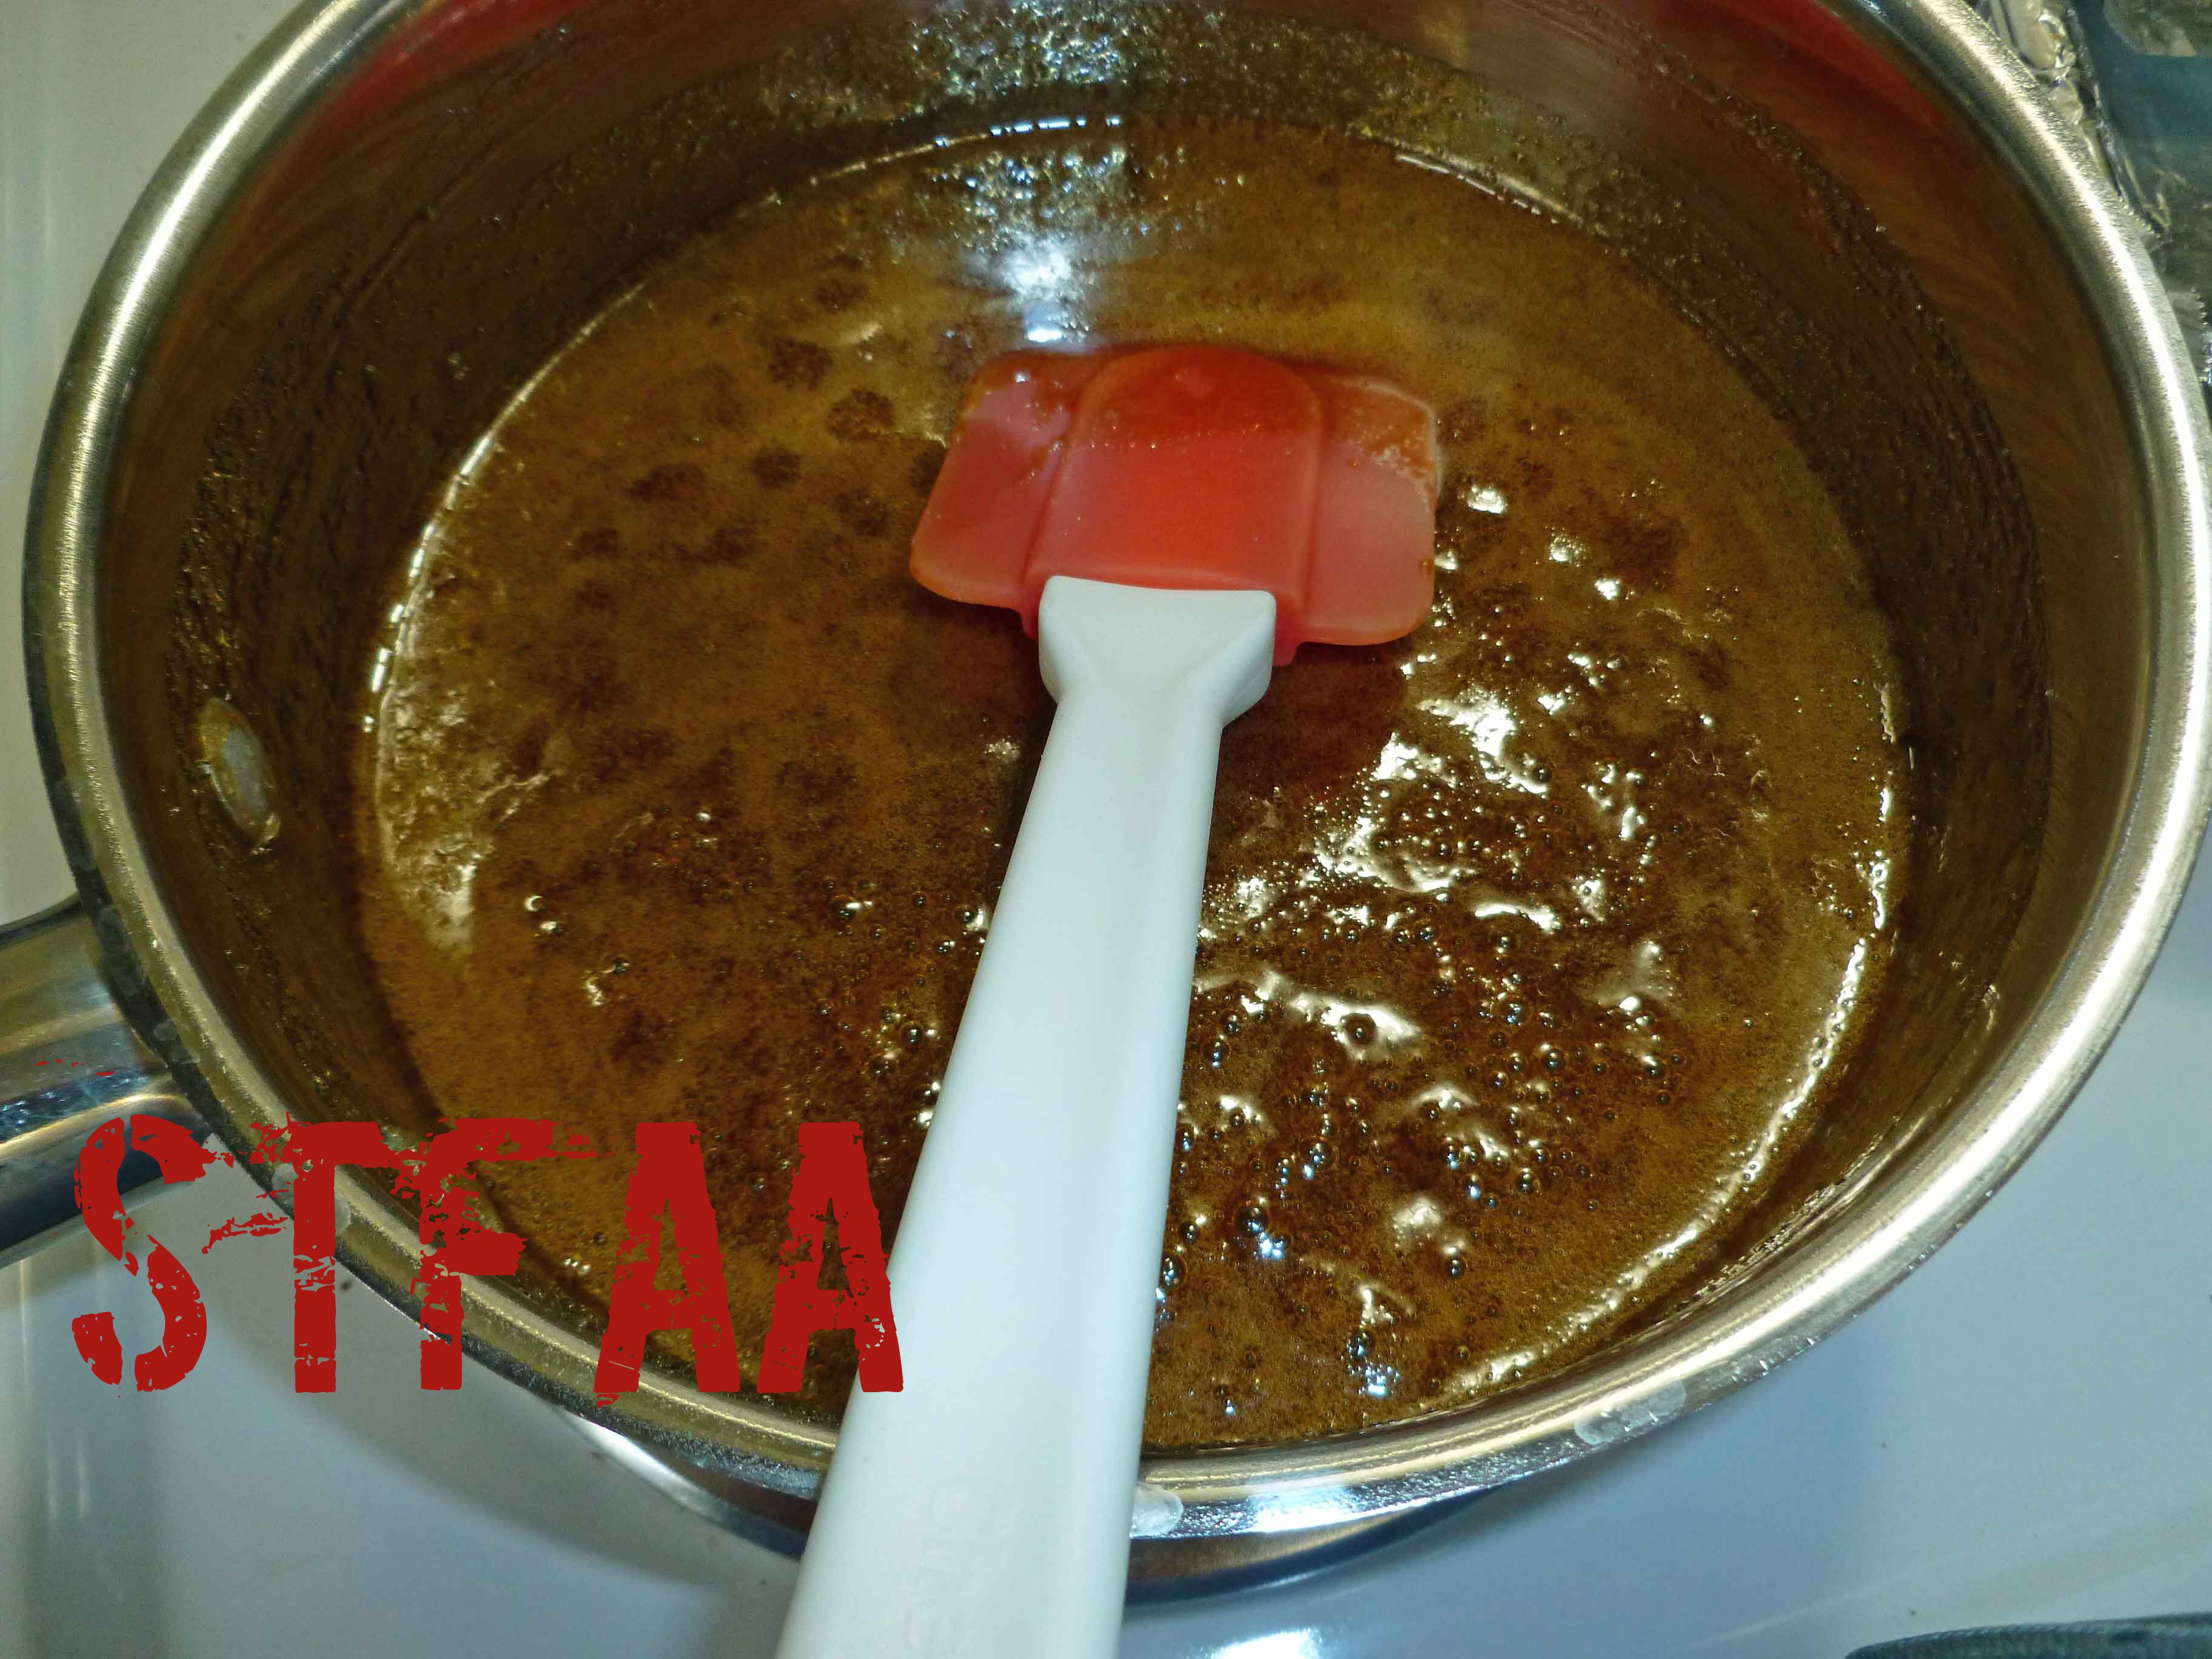
Sugar and syrup mixture
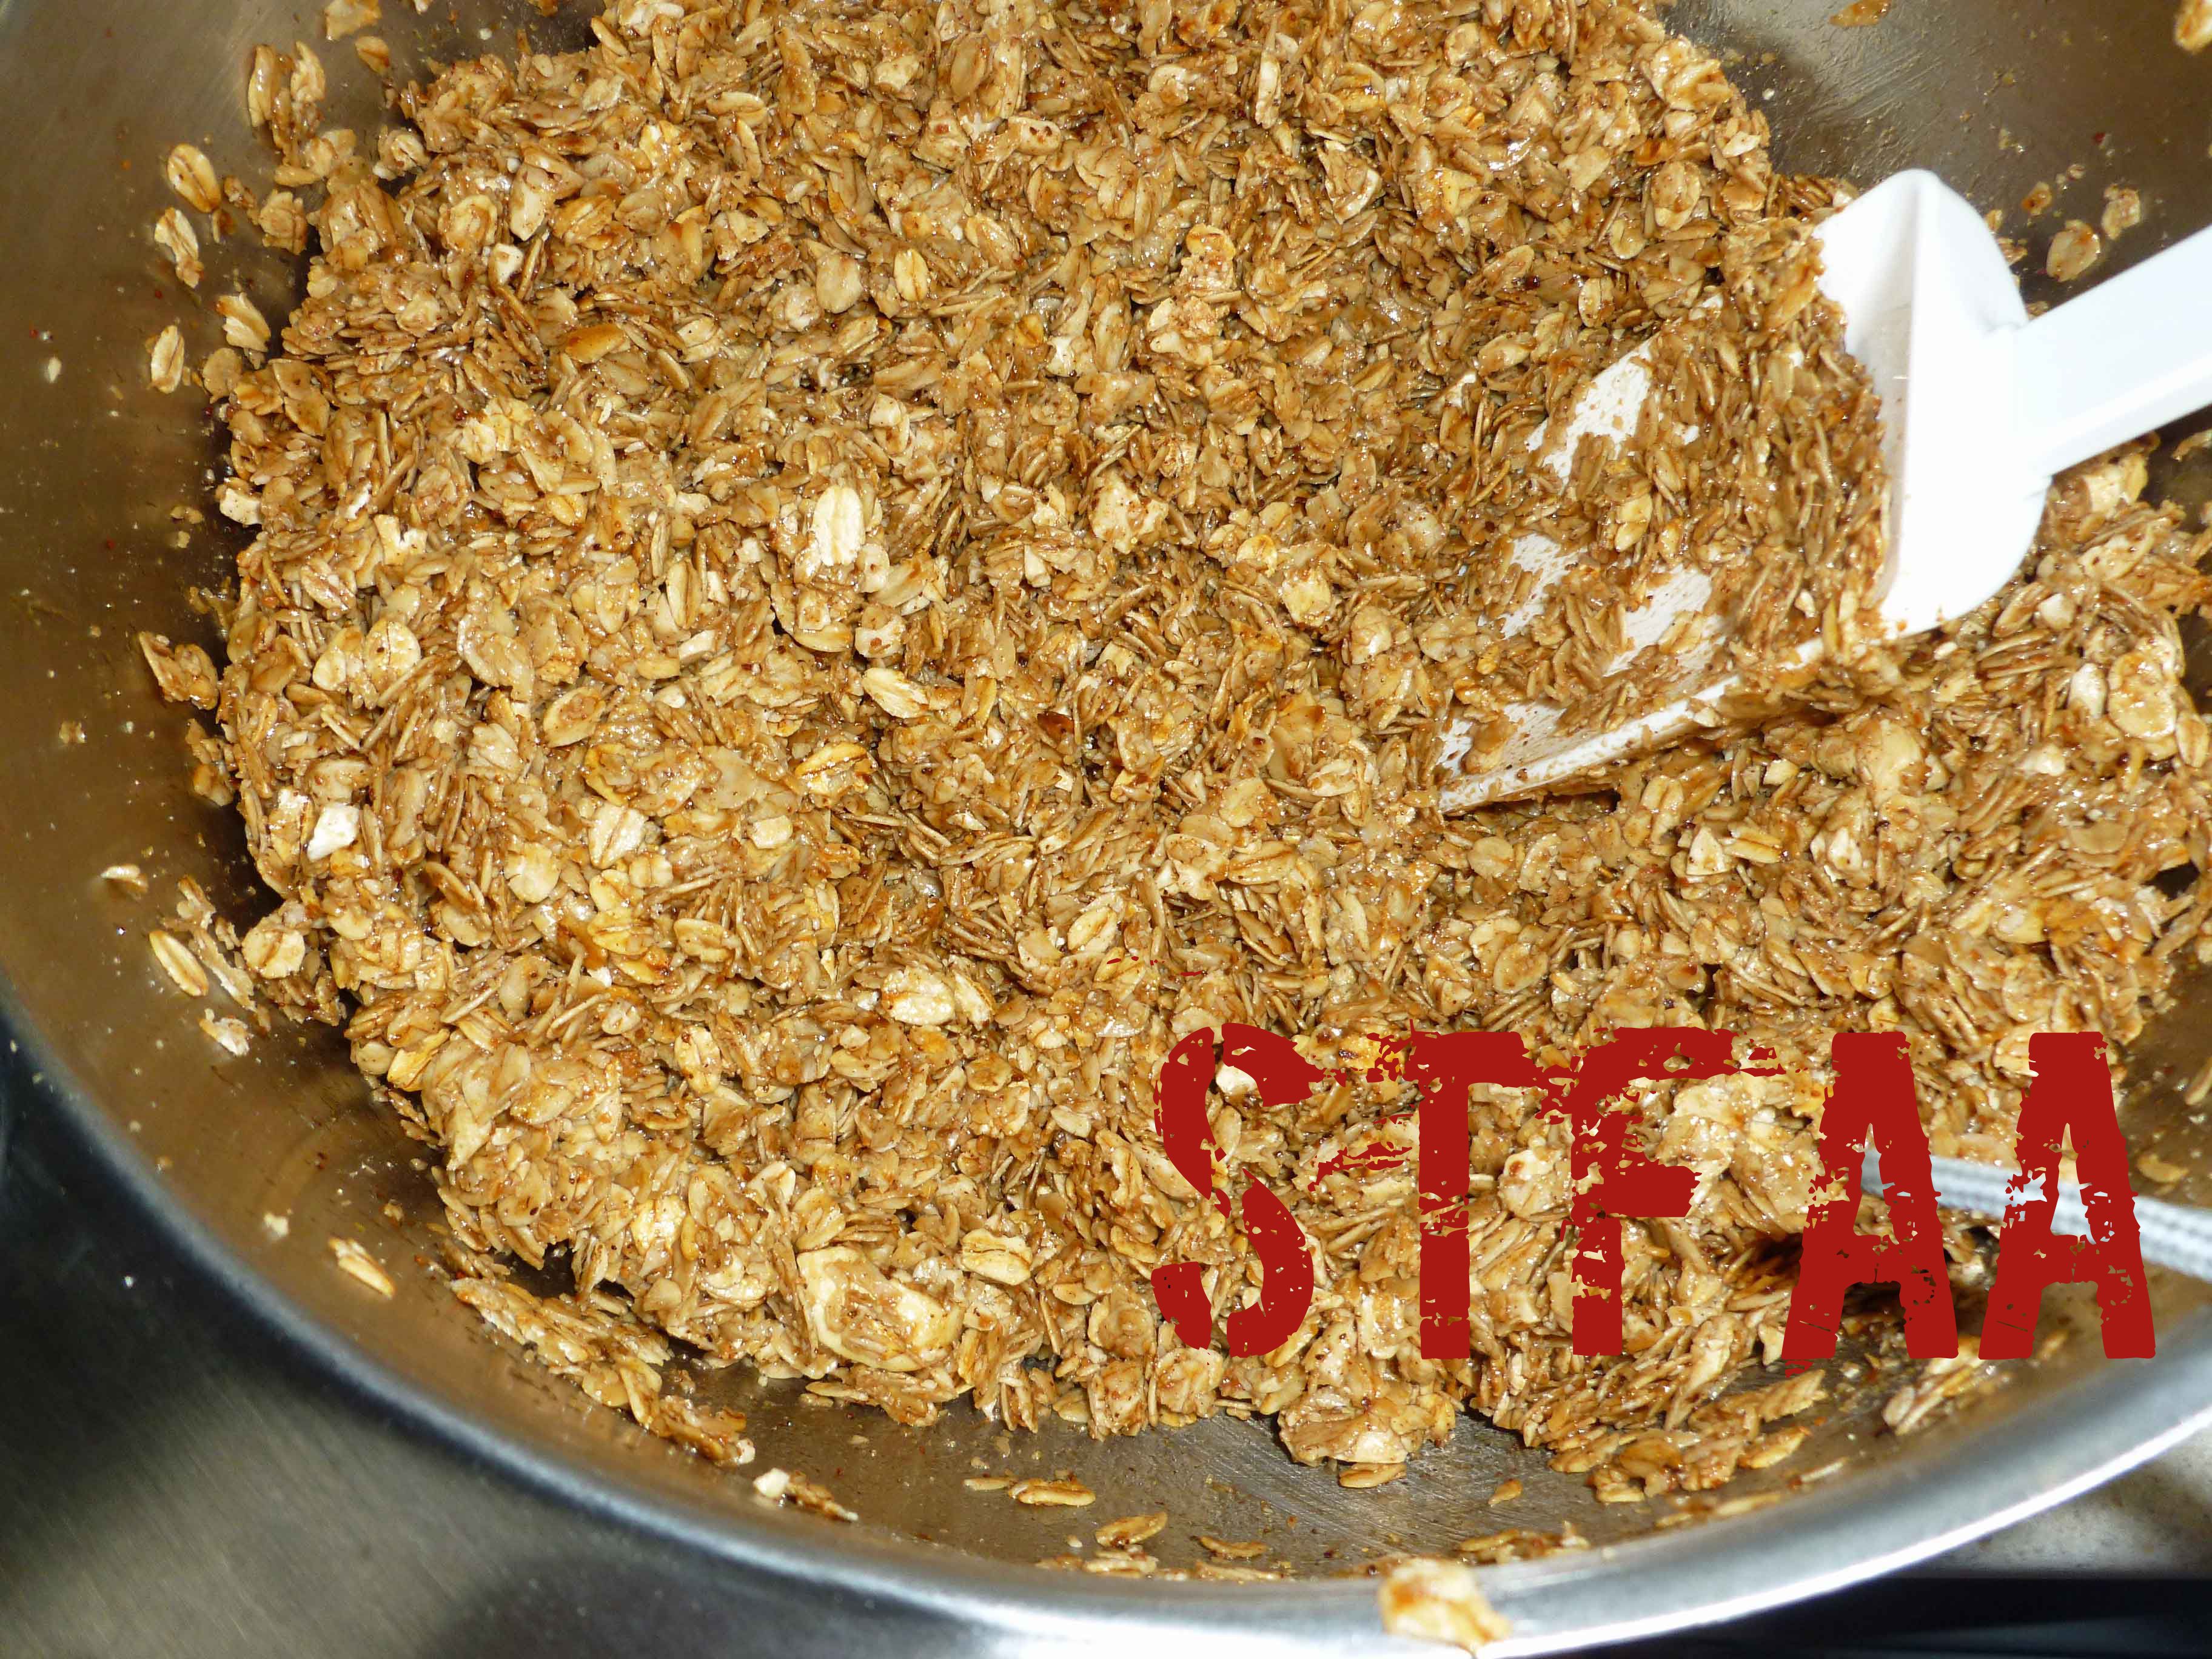
Toasted oats and cashews coated with the syrup and sugar mixture
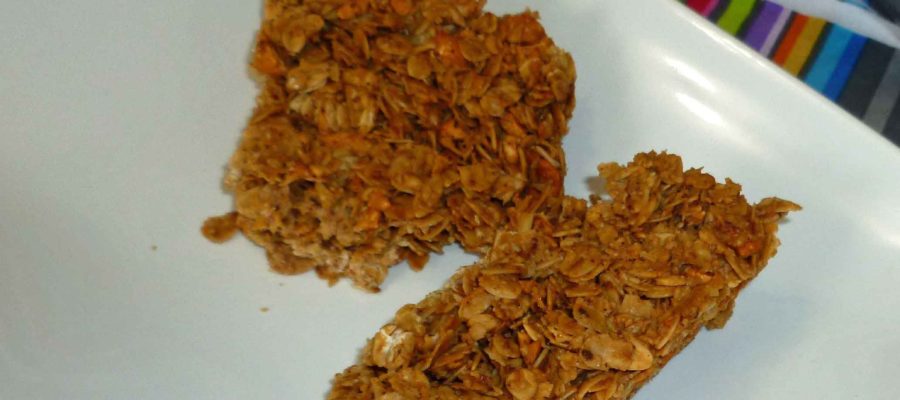
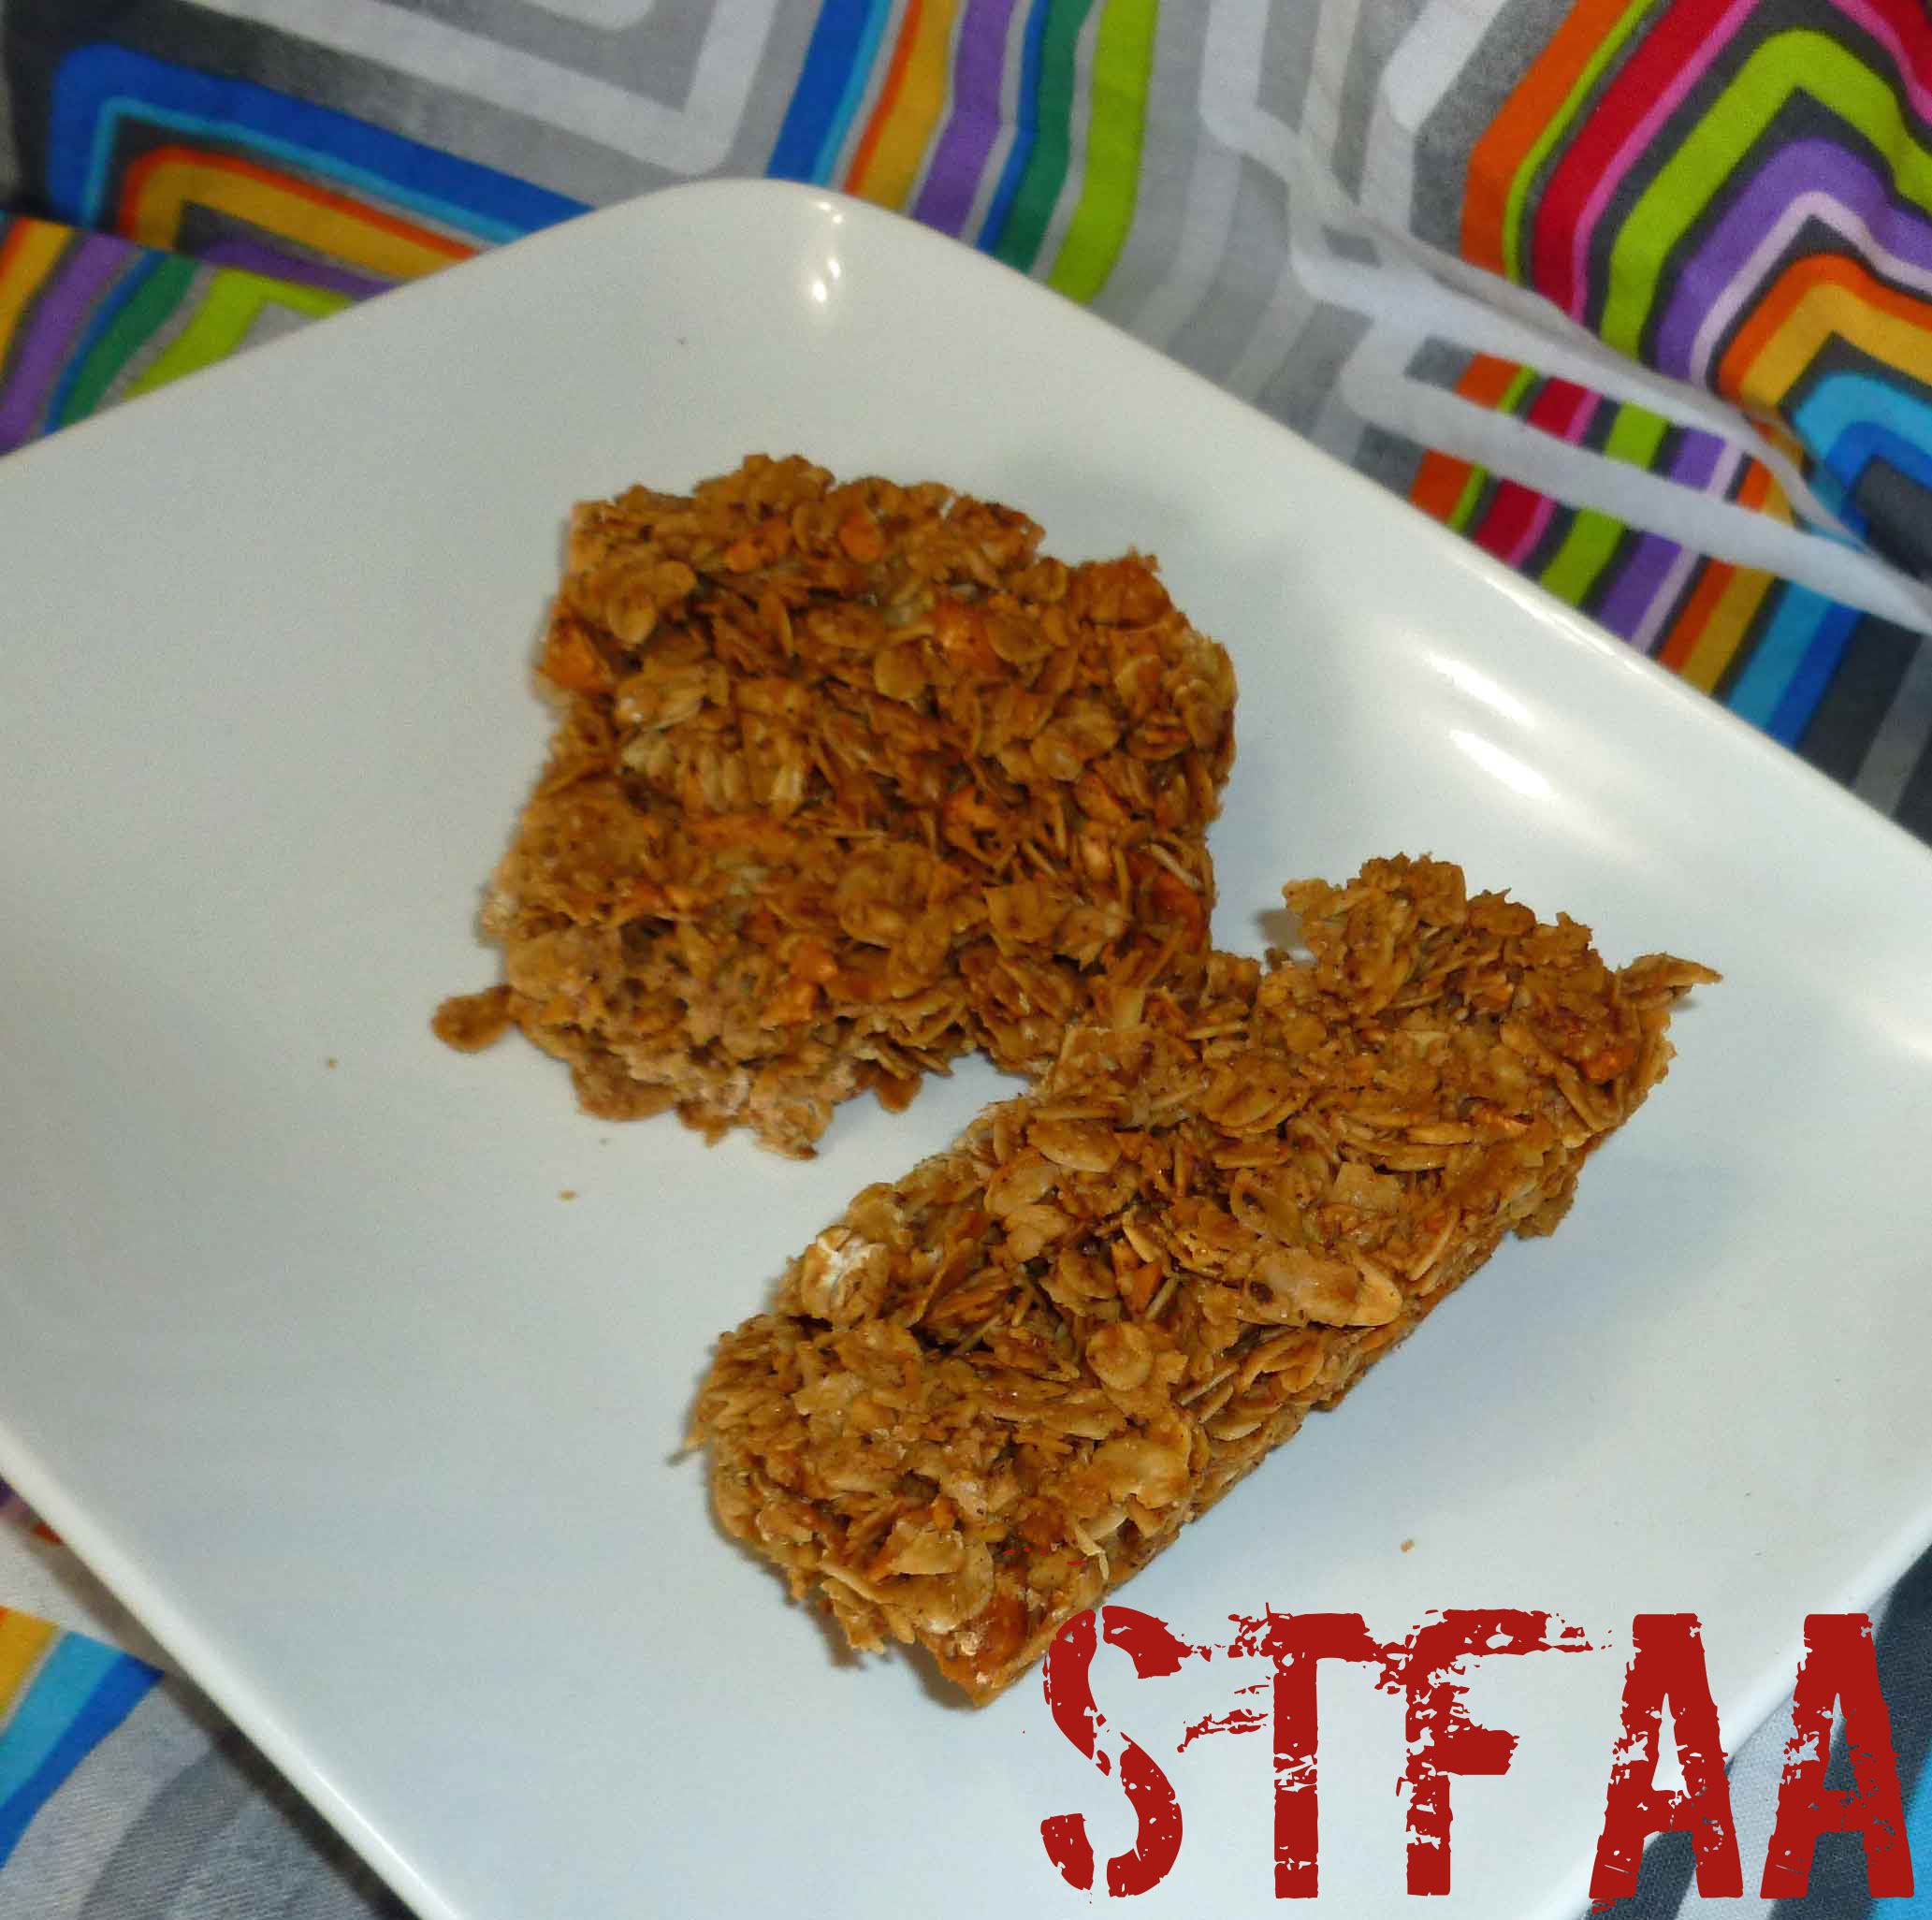
Chai Spiced Granola Bars after baking (don’t make them this thick!!)
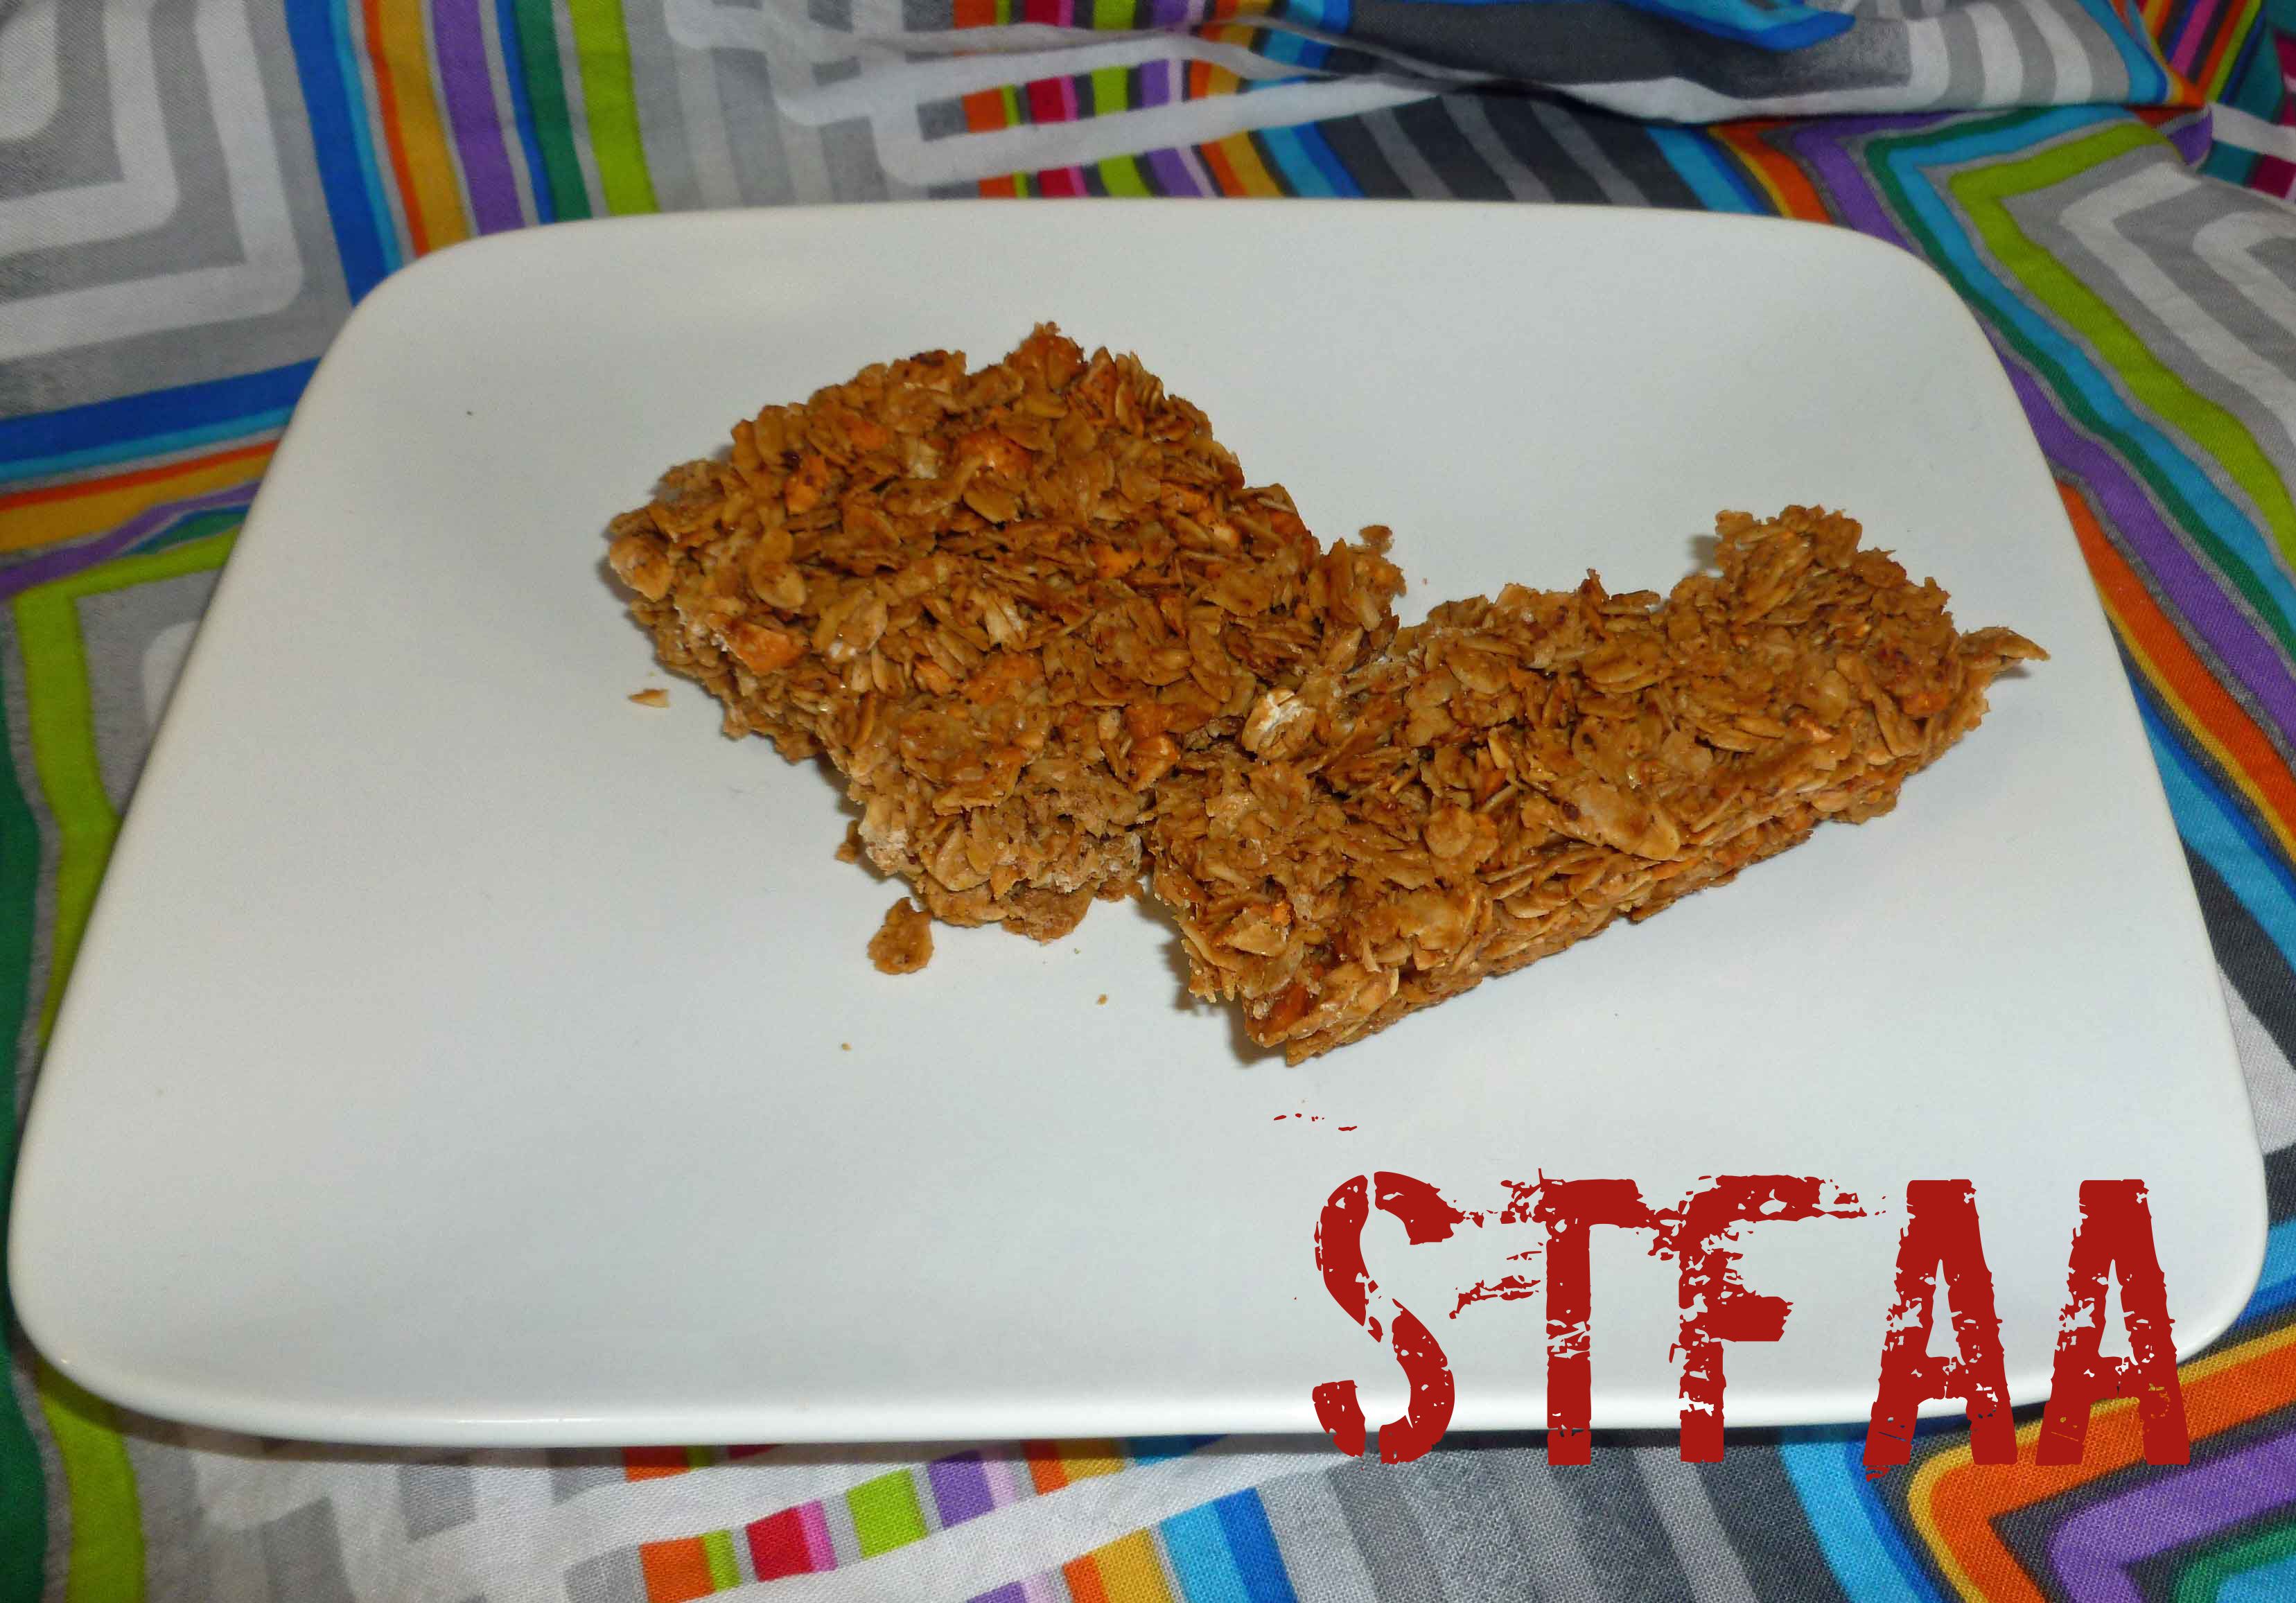
Chai Spiced Granola Bars
Chai Spiced Granola Bars
Print Recipe
Crunchy granola bars for a quick, easy breakfast or to use as shelf stable snacks while traveling.
1 1/2cupscashews(or mix of other safe for you nuts, seeds and/or dried fruit) chopped
3/4cupcane syrup(or other safe for you molasses, honey, maple syrup, rice syrup or here’s how to make it https://www.thekitchn.com/pantry-staples-diy-cane-sugar-131934 )
3/4cupbrown sugar
1Tablespoonvanilla extract(I make my own with vanilla beans and vodka made from potatoes, as most commercial extract contains corn)
2teaspoonsground cinnamon
1teaspoonground ginger
1teaspoonground cardamom
Equipment
1half size baking sheet (13×18 inches)
Servings: bars
Instructions
Place your oven rack in the center of your oven and preheat it to 375°F degrees. Line your half size baking sheet with aluminum foil.
Place oats, oil and sat in a large bowl and mix thoroughly until the oats are coated with the oil. Spread the oats on your baking sheet in an even layer and place in the oven. Stir them every 10 minutes or so until they are pale gold, which took me about 35 minutes in my oven. Take the oats out of the oven, and reduce your oven temperature to 300°F degrees.
Place the chopped cashews (or other nuts, seeds or dried fruit) and the toasted oats in a large bowl. Keep the foil on the half size baking sheet, you’re going to use it later.
Place the cane syrup (or other substitute) and brown sugar in a small saucepan over medium head, stirring frequently until the sugar is dissolved, about 10 minutes.
Remove the syrup and sugar mixture from the heat, and add the vanilla, cinnamon, ginger and cardamom, stirring well.
Add the syrup and sugar mixture to the bowl containing the cashews and toasted oats, and stir with a silicone spatula until the oats are completely coated with the syrup and sugar mixture.
Pour the oat mixture on the baking sheet lined with foil, spreading it out into a thin even layer. Use a large metal spatula sprayed with safe for you oil and press the mixture into the baking sheet. Make sure your later is thin, flat and very tightly pressed together. Bake until golden about 40 minutes.
Remove the baking sheet from the oven, and place it on a wire rack for about 10 minutes. Cut the bars using a metal spatula or a bread dough cutter/scraper, making sure you cut all the way through. Do not wait to cut the bars, or they won’t cut. Don’t remove the cut bars from the baking sheet until they cool all the way.