Notice: Function _load_textdomain_just_in_time was called incorrectly. Translation loading for the wp-ultimate-recipe domain was triggered too early. This is usually an indicator for some code in the plugin or theme running too early. Translations should be loaded at the init action or later. Please see Debugging in WordPress for more information. (This message was added in version 6.7.0.) in /home/maryzahc/public_html/adultfoodallergies.com/wp-includes/functions.php on line 6121
July 2017 – surviving the food allergy apocalypse (archive)

Month: July 2017

  • Gluten-free Vegan Sprinkle Cookies

    Gluten-free Vegan Sprinkle Cookies

    Gluten-free Vegan Sprinkle Cookies
    Gluten-free Vegan Sprinkle Cookies

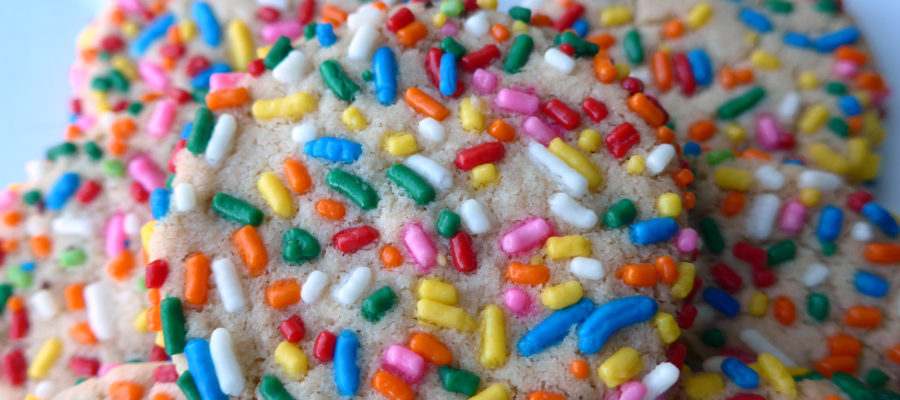
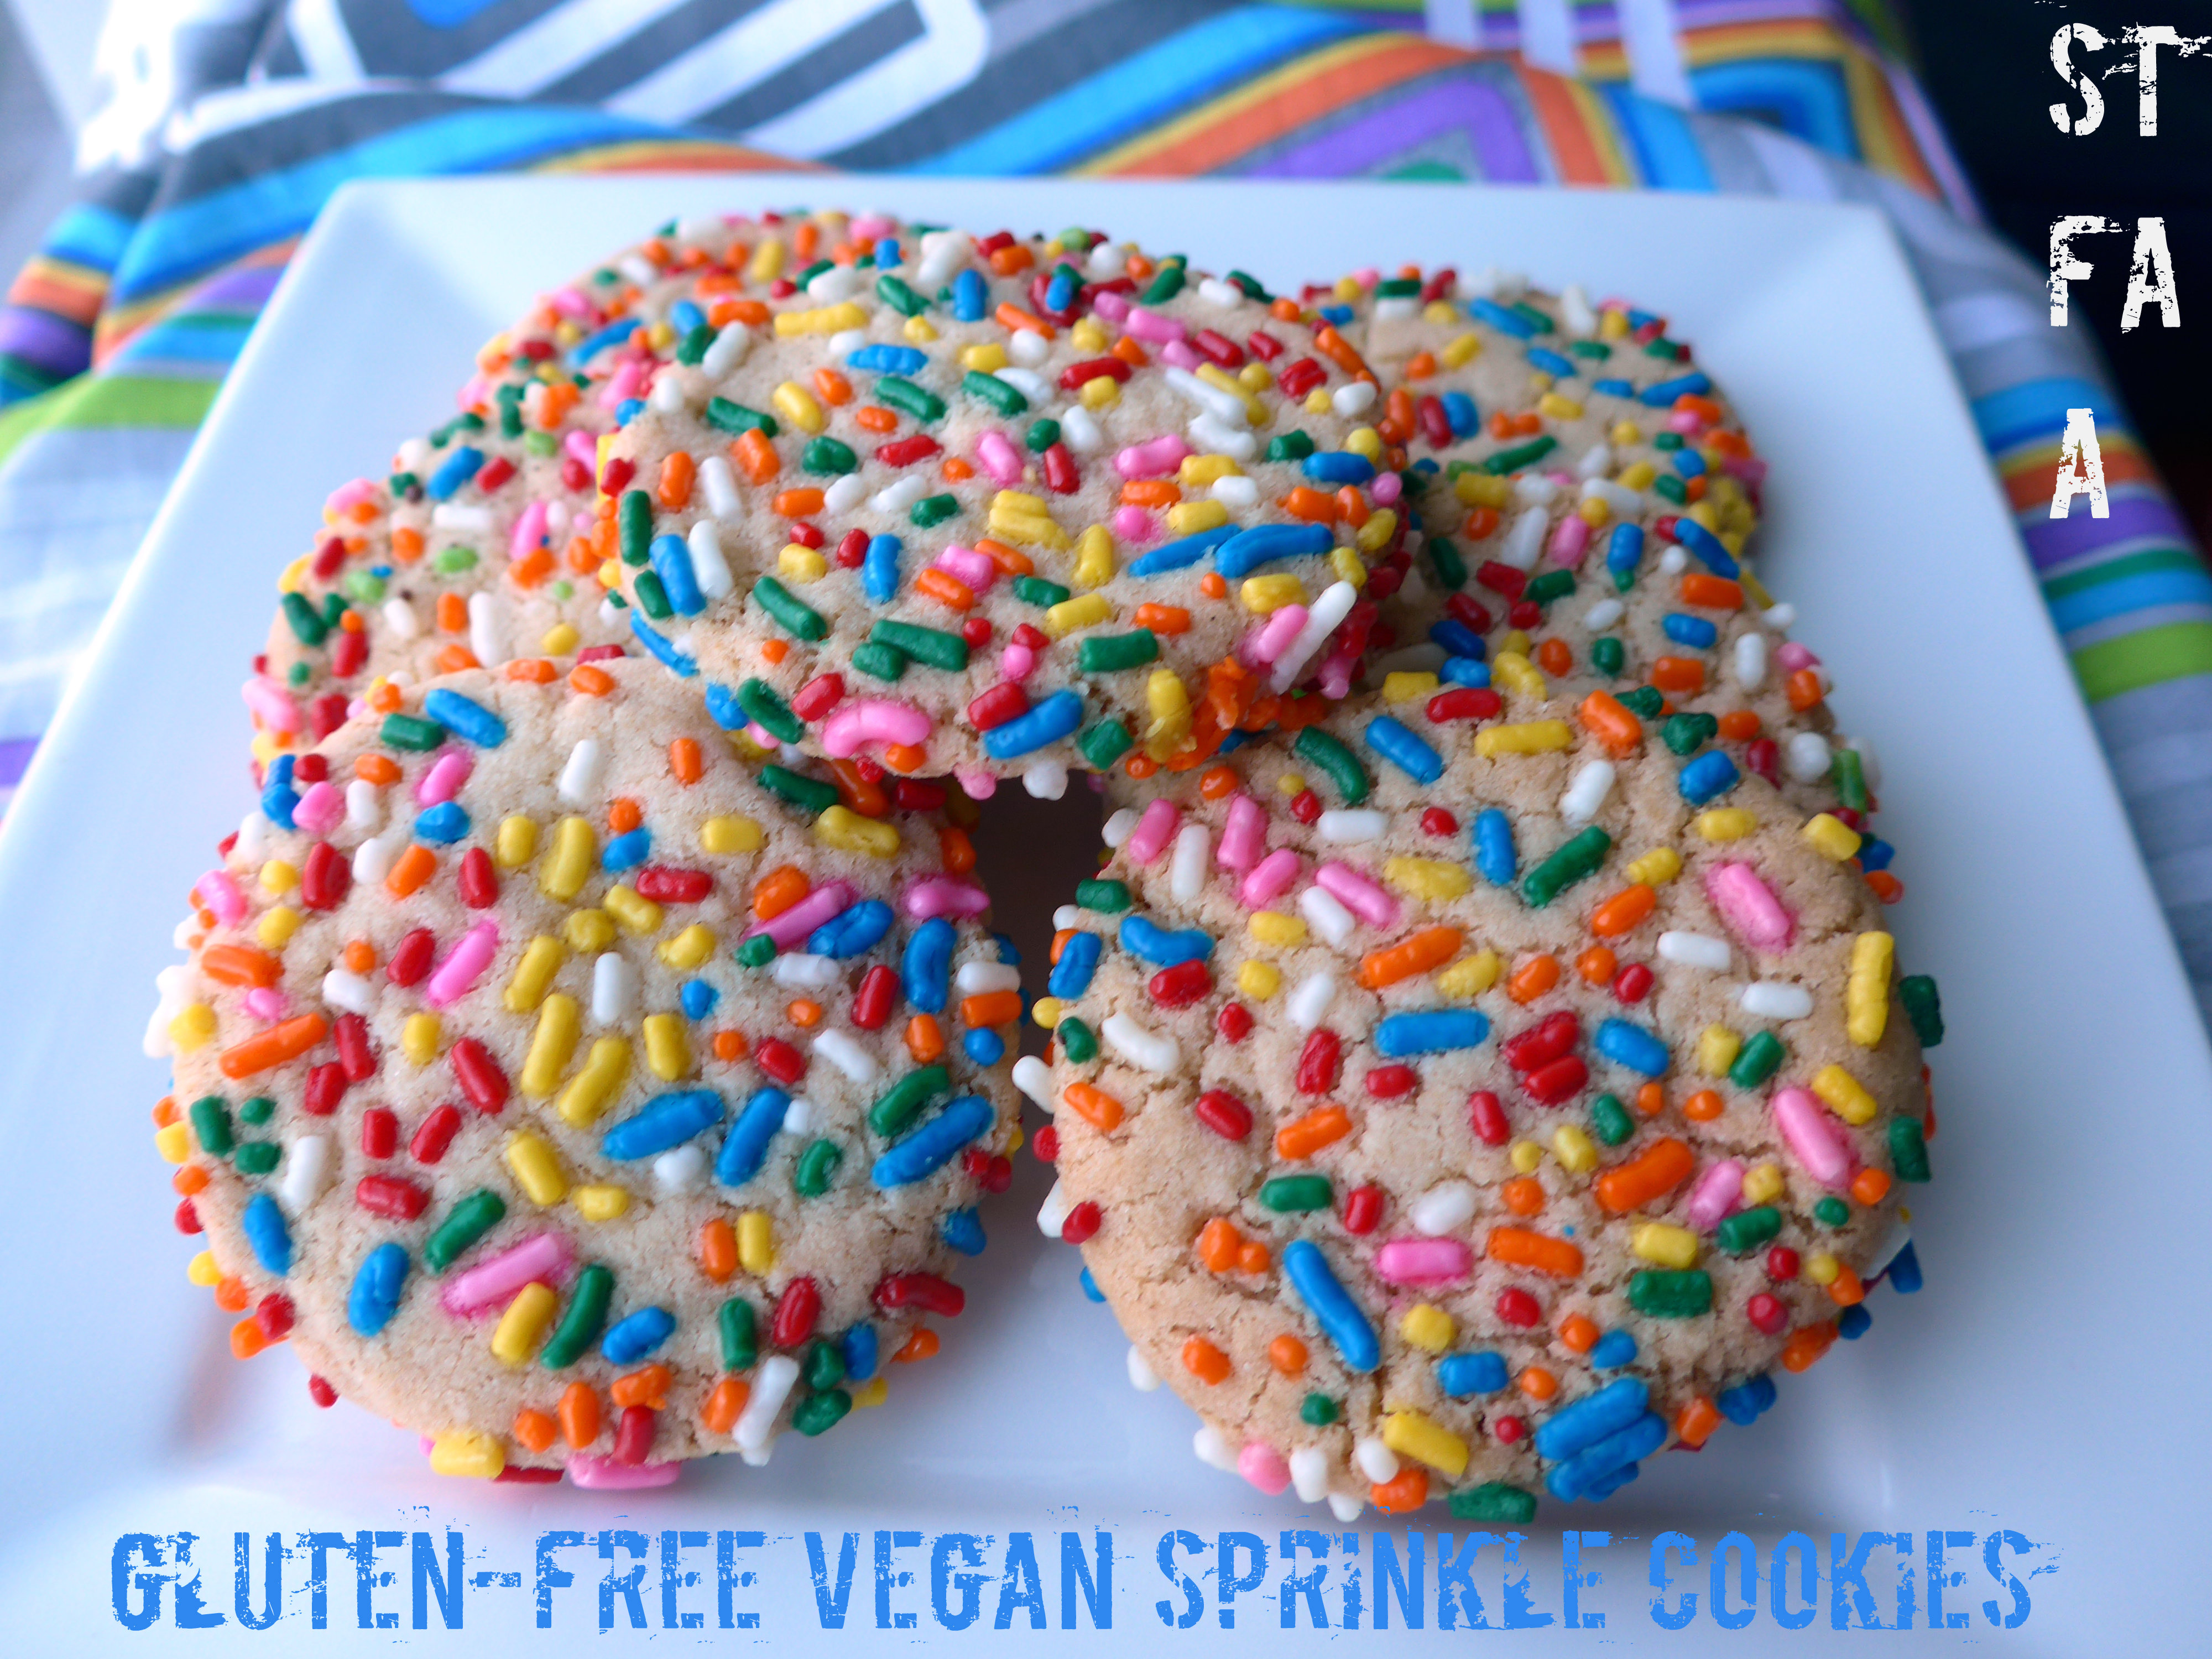
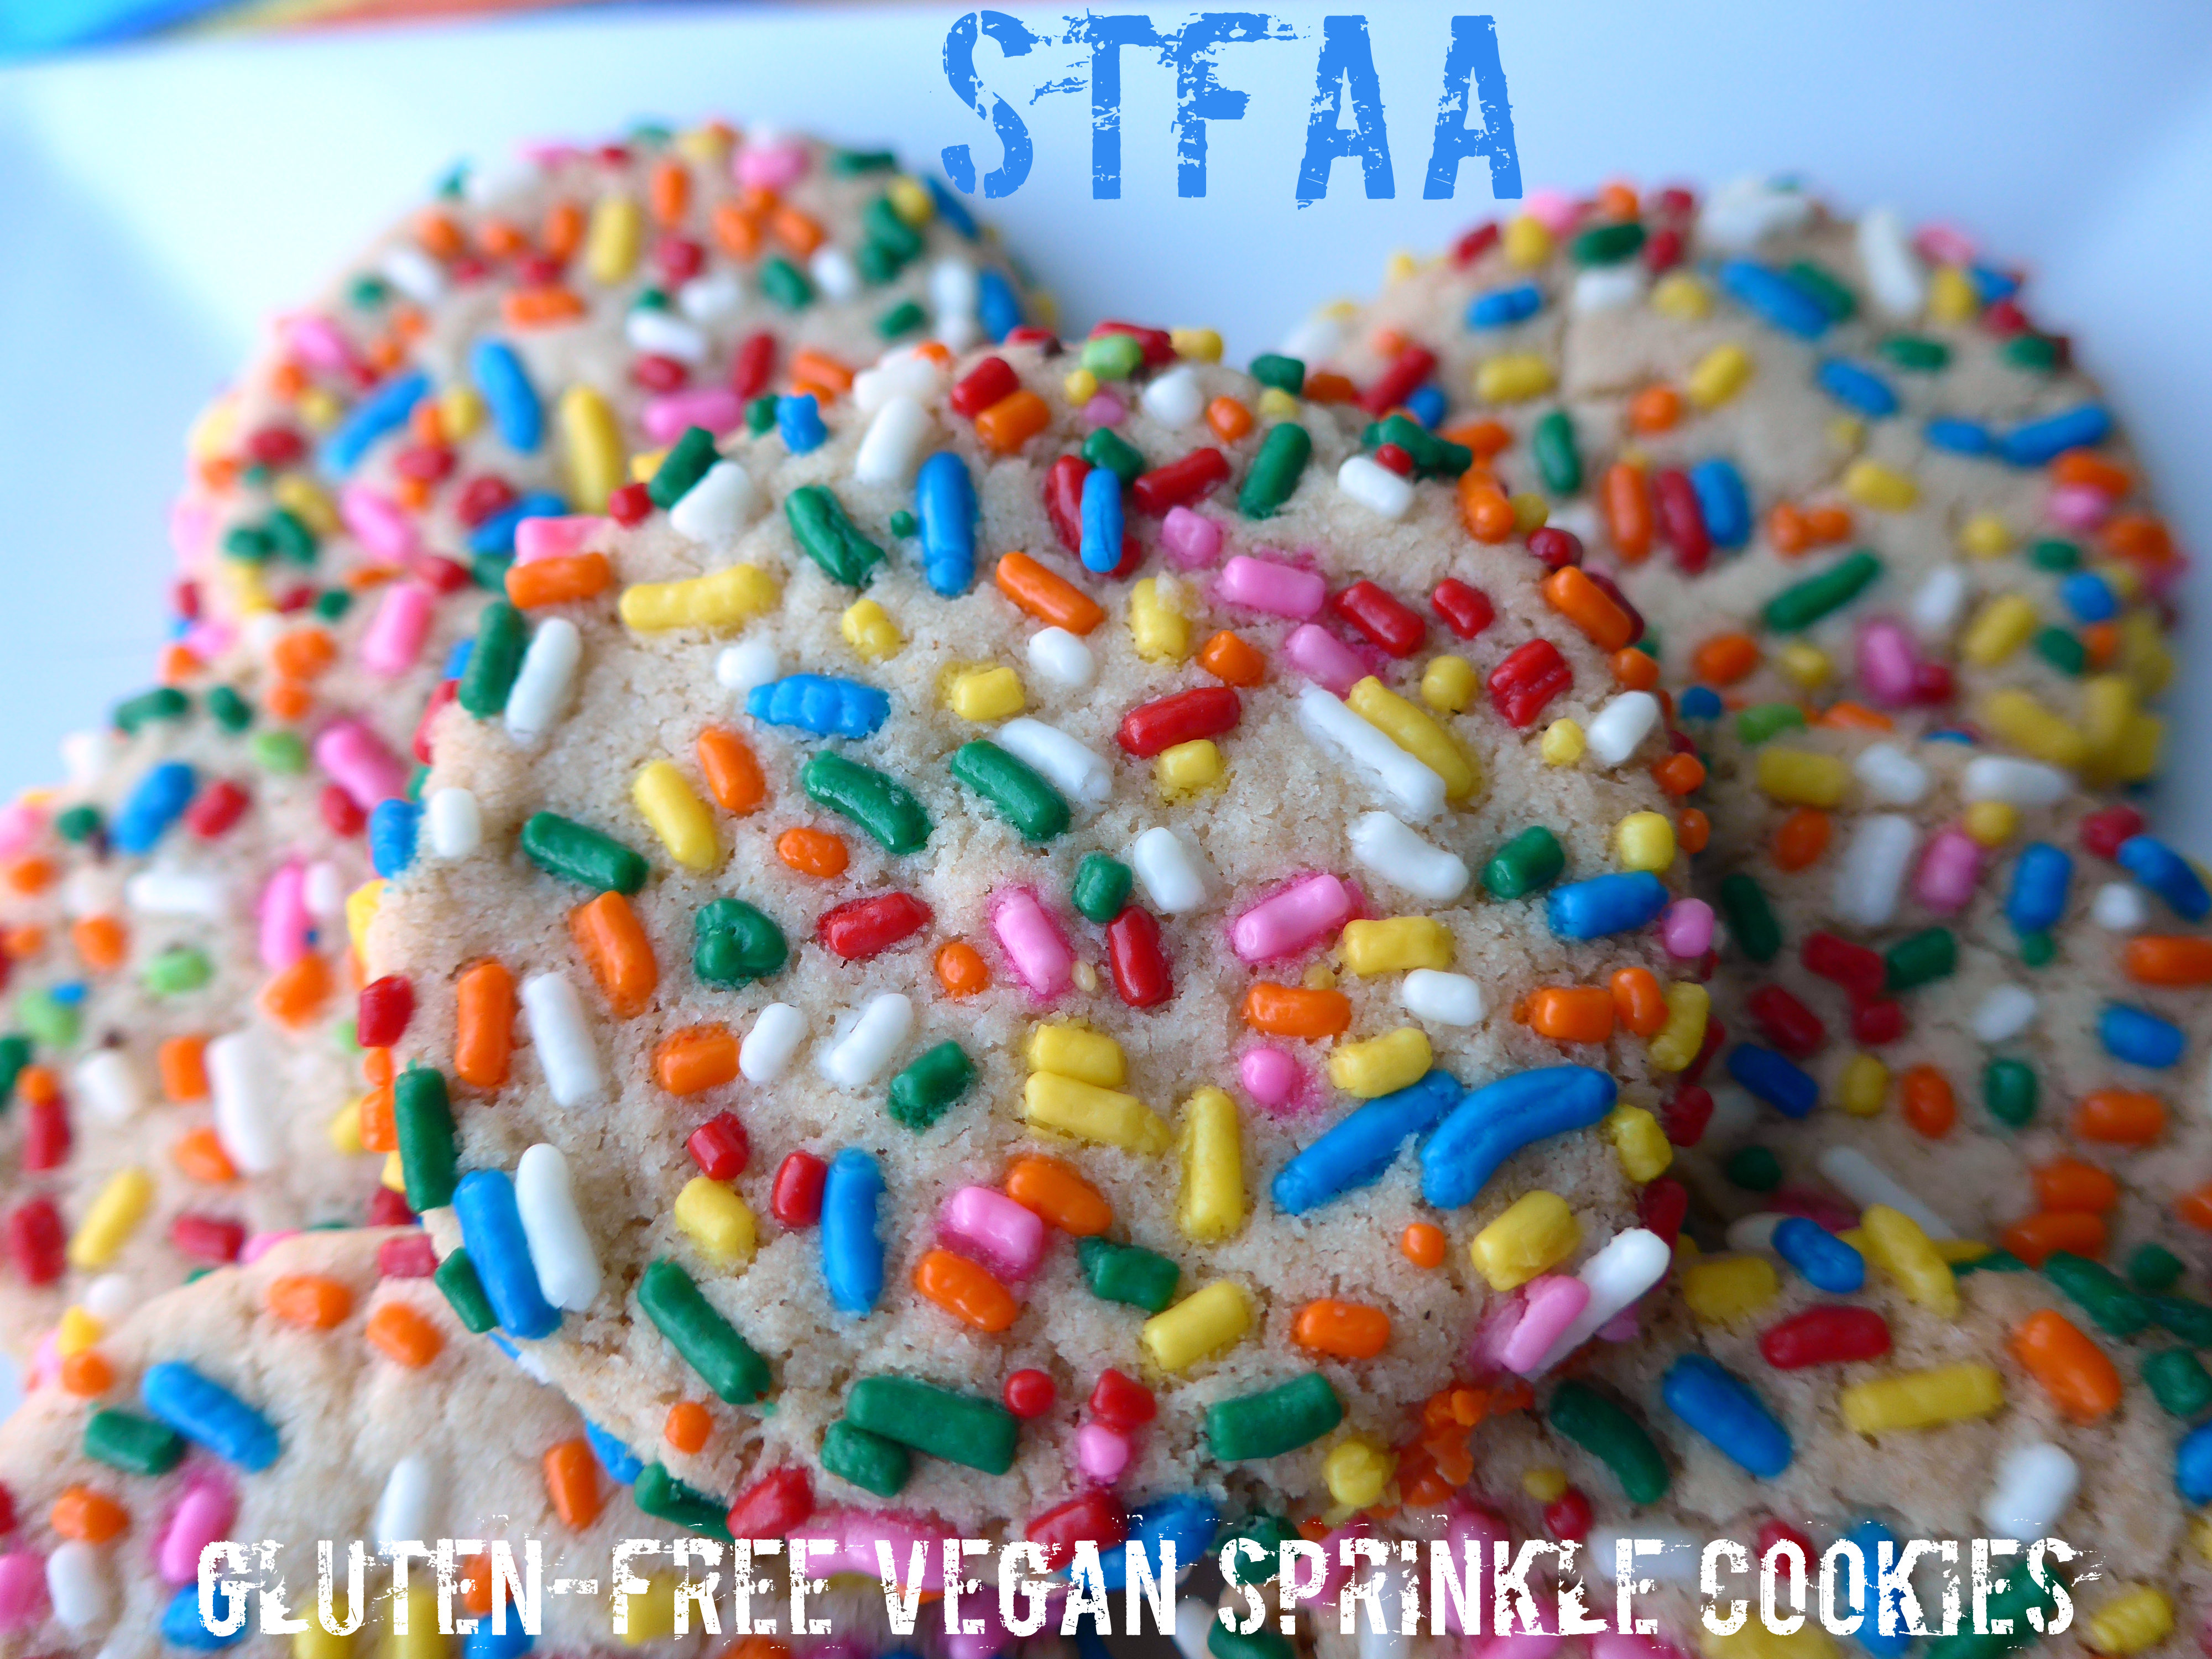
    We were supposed to rework recipes this month, but nothing I want to work with  is actually lending itself to rehabilitation. I was stuck. Then my friends at Treehouse Bakery in Phoenix posted this amazing photo of stacks of sprinkle cookies (see July 28th) and I was obsessed. The bakery is vegan, but I don’t think this recipe was gluten-free, so I started digging. And baking. And running out of sprinkles.* ALL THE SPRINKLES. Which is kind of the whole point of this whole recipe.

    I modified this not allergy-safe/friendly recipe to make it gluten-free, dairy-free, and egg-free. To make this easier, I’ve used a commercial baking mix from Bob’s Red Mill (the 1-to-1 rather than their original bean-based recipe, and this one contains xanthan), psyllium as the egg replacer, and Earth Balance margarine.

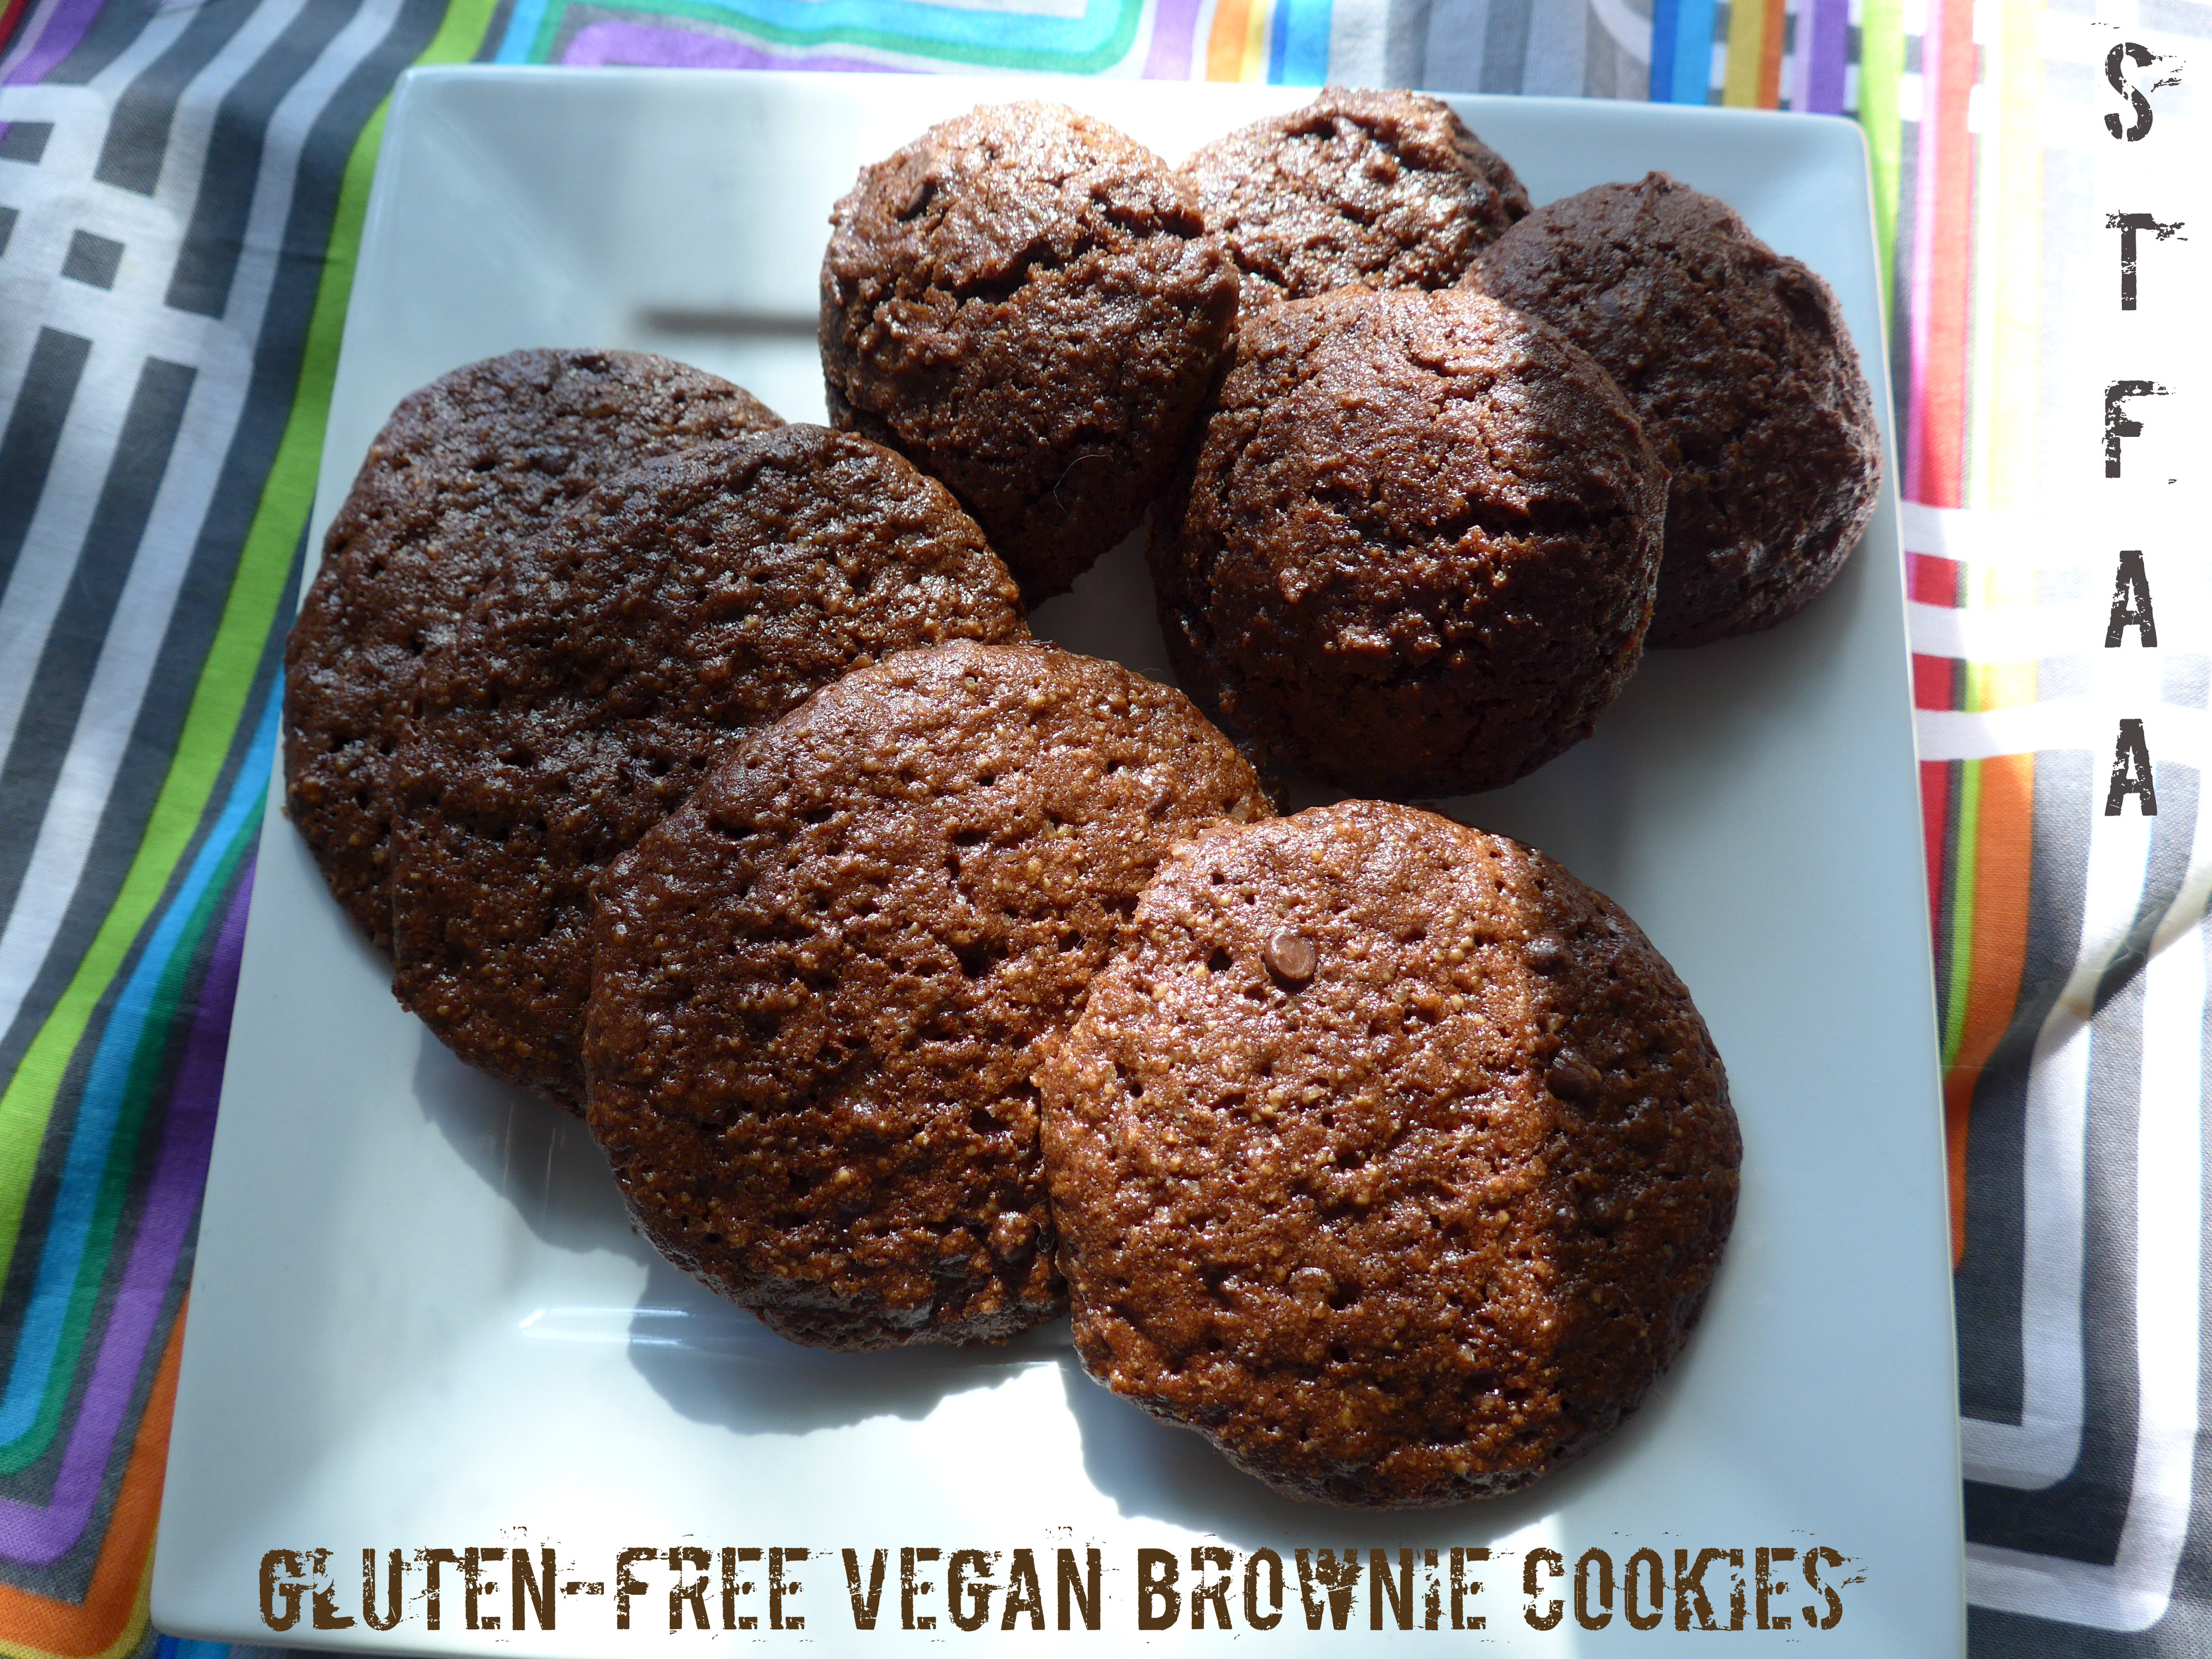
    This results in a thick crispy cookie that is also light and airy. I’m not sure that’s the traditional texture (I’m not sure I ever had a sprinkle cookie?), but I quite liked it. If you make a lot of cookies, I can highly recommend getting a 1 tablespoon serving scooper — it makes the fussy part of making cookies much less finicky. Any restaurant supply store has every possible size serving scoop you could ever want.

    Gluten-free Vegan Sprinkle Cookies
    Gluten-free Vegan Sprinkle Cookies

    Notice: Trying to access array offset on value of type bool in /home/maryzahc/public_html/adultfoodallergies.com/wp-content/plugins/wp-ultimate-recipe/helpers/models/recipe.php on line 254
    Gluten-free Vegan Sprinkle Cookies
    Print Recipe
    Gluten-free Vegan Sprinkle Cookies
    Print Recipe
    Ingredients
    • 3/4 cup Earth Balance soy-free margarine
    • 1/2 cup sugar
    • 1/2 cup confectioners sugar
    • 1/4 cup oil
    • 2 teaspoons vanilla
    • 2 cups gluten-free flour mix (I used Bob’s 1-to-1 Mix, which contains xanthan gum)
    • 1/2 teaspoon baking soda
    • 1/2 teaspoon salt
    • 1 Tablespoon psyllium husk ground
    • rainbow sprinkles check that they are safe for you!
    • cup About 1rainbow sprinkles
    Servings:
    Instructions
    1. Pre-heat oven to 350°F.
    2. Mix together the margarine and sugars until well-blended. Don’t soften the margarine — it is soft enough!
    3. Add oil and vanilla and mix well.
    4. In a separate bowl, mix together the dry ingredients EXCEPT sprinkles. Add to the margarine/sugar mix in two batches, mixing well. You should have a relatively stiff dough, but very malleable.
    5. In 1 Tablespoon lumps, make round balls and roll in sprinkles. Flatten slightly and space evenly on a cookie sheet lined with parchment or silicone mats.
    6. Bake at 350F for 25-30 minutes. Cookies *will not* brown. Do not overbake — they will look slightly dry on top, but still be soft.
    Share this Recipe
     
    Powered byWP Ultimate Recipe

    *I did not use up all the sprinkles, but dinosaur sprinkles weren’t what I was going for.

  • Revisited Better than Sex Rum Caramel Sauce

    Revisited Better than Sex Rum Caramel Sauce

    Revisited Better than Sex Rum Caramel Sauce
    Revisited Better than Sex Rum Caramel Sauce

    Well, I loved the original version of out Better Than Sex Vegan Rum Caramel Sauce. Loved it. Seriously. And then the corn allergy reared its ugly head, and then I had to put maple syrup on the suspect list because of a few odd reactions (and I’m already allergic to maple pollen), so using corn syrup, Earth Balance, and maple syrup became a problem for me. I still haven’t verified the maple issue because most maple syrups use dairy or canola (which is a problem for those with corn allergies) as a defoamer and I’ve not bothered to track down a producer that doesn’t use a defoamer yet. So since I had to rework the recipe due to corn anyway, I left out the maple syrup. If you don’t have issues with either corn or maple, feel free to use the old recipe — it was great. This recipe requires that you make dark cane syrup ahead of time, but the recipe makes extra so you can have it on hand.

    Dark Cane Syrup (Dark Corn Syrup Substitute)
    Dark Cane Syrup (Dark Corn Syrup Substitute)
    Print Recipe
    Servings Prep Time
    2 cups 5 minutes
    Cook Time Passive Time
    10 minutes 60 minutes
    Servings Prep Time
    2 cups 5 minutes
    Cook Time Passive Time
    10 minutes 60 minutes
    Dark Cane Syrup (Dark Corn Syrup Substitute)
    Dark Cane Syrup (Dark Corn Syrup Substitute)
    Print Recipe
    Servings Prep Time
    2 cups 5 minutes
    Cook Time Passive Time
    10 minutes 60 minutes
    Servings Prep Time
    2 cups 5 minutes
    Cook Time Passive Time
    10 minutes 60 minutes
    Ingredients
    • 1 cup white sugar
    • 1 cup brown sugar
    • 3/4 cup water
    • 1/4 teaspoon cream of tartar
    • 1 dash sea salt
    • 1 candy thermometer
    Servings: cups
    Instructions
    1. Combine all ingredients in a saucepan which has a cover. Stir and bring to a boil. Reduce heat to simmer, place the lid on the saucepan, and simmer for three minutes.
    2. Remove the lid of the saucepan, and using a candy thermometer, boil until the syrup reaches 235°F to 240°F (soft ball stage). It is better to be a few degrees under than to go over 240°F.
    3. Once it has reached 240°F, remove the sauce pan from the heat, and allow to cool for at least an hour. Then pour the syrup into glass jars to store, place the lids on the jars, and store them in your cupboard.
    Share this Recipe
    Powered byWP Ultimate Recipe

    Revisited Better than Sex Rum Caramel Sauce

    Revisited Better than Sex Rum Caramel Sauce
    Revisited Better than Sex Rum Caramel Sauce
    Revisited Better than Sex Rum Caramel Sauce
    Revisited Better than Sex Rum Caramel Sauce
    Print Recipe
    A great sauce to use on desserts or as a fruit dip.
    Servings Prep Time
    2 cups 5 minutes
    Cook Time
    5 minutes
    Servings Prep Time
    2 cups 5 minutes
    Cook Time
    5 minutes
    Revisited Better than Sex Rum Caramel Sauce
    Revisited Better than Sex Rum Caramel Sauce
    Print Recipe
    A great sauce to use on desserts or as a fruit dip.
    Servings Prep Time
    2 cups 5 minutes
    Cook Time
    5 minutes
    Servings Prep Time
    2 cups 5 minutes
    Cook Time
    5 minutes
    Ingredients
    • 1 cup brown sugar
    • 1/2 cup dairy free margarine (You can use Earth Balance, your own homemade vegan version, or if you aren’t vegan and have a corn and coconut allergy, you can use our homemade margarine – http://adultfoodallergies.com/homemade-margarine-new-and-improved/)
    • 1/2 cup dark cane syrup (See recipe in post.)
    • 1 Tablespoon vanilla extract (I make my own with vanilla beans and vodka made from potatoes, as most commercial extract contains corn)
    • 4 Tablespoons rum (Be very careful, as many alcohols can have corn and wheat/gluten. I do well with Rhum Barbancourt Reserve Speciale.)
    Servings: cups
    Instructions
    1. Place all ingredients in sauce pan. Stir ingredients over low-medium heat and stir until all ingredients dissolve.
    2. Sauce will thicken and it is ready when it coats the back of a metal spoon and drips off it in long slow drips. Do not let it get too hot or have it on the heat for too long or it will begin to sugar back out. If it does, lower the temperature and add a couple of teaspoons of water.
    Share this Recipe
    Powered byWP Ultimate Recipe
    Revisited Better than Sex Rum Caramel Sauce
    Revisited Better than Sex Rum Caramel Sauce
  • Gluten-free Vegan Almond or Cashew Brownie Cookies

    Gluten-free Vegan Almond or Cashew Brownie Cookies

    Gluten-free vegan brownie cookies -- cashew cookies on the left, almond cookies on the right
    Gluten-free vegan brownie cookies — cashew cookies on the left, almond cookies on the right

    So, back in 2012, I thought I’d achieved brownie nirvana with my At Last Brownies recipe. I’d perfected a “normal” baking brownie in the year before, and this was my great gluten-free version. Then Denise posted her Killer Brownies recipe, adjusted for her then-allergies.

    Lately, neither of these versions is working great for me. I find the flour mix in the At Last brownies no longer to my tastes, and Denise likes a more fudgy texture than I do. So for our update/re-do month, I thought I’d take on brownies again. Why not? Can you ever have too many brownie recipes?

    Changes from the original recipe include omitting the coconut, simplifying the flour mix, deciding not to measure the chocolate chips precisely, oh, and making cookies out of the mix. I kept the nut flour, as I like the richness and I’m not allergic to most tree nuts, but I’ve done two versions — one with almond, one with cashew. If you can’t do nuts, check out Denise’s prior recipe.

    On the cookies — this was more of a practical concern. Either my 8×8 brownie pan was gross and I got rid of when I moved, or it ended up in Oregon with a different family (our movers were… not great.) So I don’t have one. I did, however, have all the ingredients I wanted to work with, and I was too lazy to go out and buy one. So, cookies. On the upside, this gives you very portable and non-crumbly brownie-like food. On the downside, you don’t get the edges (which I love). I still love this recipe, but if you try it out in a brownie pan, please let me know how it went (and how long you baked it!).

    If you can eat both almond and cashews, how do you choose? Depends on what you want! The cashew brownie cookies will be thinner and more cookie-like. The almond brownie cookies will be thicker and more cake-like. They are both incredibly tasty. Maybe try both and tell me which you prefer.


    Notice: Trying to access array offset on value of type bool in /home/maryzahc/public_html/adultfoodallergies.com/wp-content/plugins/wp-ultimate-recipe/helpers/models/recipe.php on line 254
    Gluten-free Almond or Cashew Brownie Cookies
    Print Recipe
    Servings
    24-25 cookies
    Cook Time
    20 minutes
    Servings
    24-25 cookies
    Cook Time
    20 minutes
    Gluten-free Almond or Cashew Brownie Cookies
    Print Recipe
    Servings
    24-25 cookies
    Cook Time
    20 minutes
    Servings
    24-25 cookies
    Cook Time
    20 minutes
    Ingredients
    • 1 Tablespoon ground chia seeds
    • 4 Tablespoons water
    • 1.5 cups almond or cashew flour (ground nuts — Trader Joe’s sells both, and Bob’s Red Mill sells almond flour)
    • 1/2 cup sorghum flour
    • 1/2 cup + tapioca starch ADD ADDITIONAL 2 TABLESPOONS IF USING CASHEW (can sub with another starch if you don’t have tapioca, but this is one of the cheapest)
    • 1/2 cup cocoa powder
    • 1/2 teaspoon salt
    • 1/4 teaspoon baking soda
    • 1 cup brown sugar packed
    • 1/3 cup non-dairy milk (does not matter what kind — use what you like)
    • 1/4 cup oil (use a neutral-flavored oil. I’m playing with rice bran oil these days and I love it. Safflower or vegetable oil should also work fine)
    • 1 Tablespoon vanilla extract safe-for-you
    • 1/4-1 cup chocolate chips mini-chips work best, dark chocolate taste best, use whatever you have, is safe for you, and you like
    Servings: cookies
    Instructions
    1. Pre-heat oven to 350°F
    2. Mix the chia seeds and water together and set aside to gel.
    3. Mix dry ingredients — almond or cashew flour through sugar (REMEMBER TO ADD 2 TABLESPOONS OF STARCH IF USING CASHE FLOUR).
    4. Add the milk, oil, vanilla, and chia gel to the dry ingredients and mix until well-incorporated. Love the fact that you can’t over-mix gluten free batters. Add in the chocolate chips and mix well. This recipe is pretty forgiving for how many. I usually go for a generous 1/2 cup, plus a bit for luck.
    5. Portion out cookies — I use a 1 Tablespoon cookie scoop to make it as easy as possible — onto a cookie sheet lined with a silicon sheet or parchment paper. You will get 24-25 cookies, so two half sheets.
    6. Bake both sheets at once using two oven racks. Bake for 10 minutes, then switch the sheets (move the middle one to the top and top one down) and also spin them around at the same time. Bake for another 10 minutes.
    7. Remove from the oven and let them cool for 3-5 minutes before putting the cookies on a rack to cool completely.
    8. (Goes really well with ice cream.)
    Share this Recipe
     
    Powered byWP Ultimate Recipe


  • Revised Gluten-Free and Dairy-Free Pancakes

    Revised Gluten-Free and Dairy-Free Pancakes

    Revised Gluten-Free and Dairy-Free Panackes
    Revised Gluten-Free and Dairy-Free Panackes

    When we first started the blog, I was allergic to less stuff than I am now. When I first devised this recipe, I wasn’t allergic to corn yet, and I didn’t suspect chia seed as being potentially problematic (it’s on the suspect list, but I haven’t done a food challenge to verify yet). As a result, the original version of my Gluten-Free and Dairy-Free Pancakes recipe contains a bunch of stuff that I can’t eat now. Recently I was craving pancakes and realized that I hadn’t revised the recipe on the blog to be safe for my current allergies when I tried to harass my poor, long suffering husband into making them for me.  So then, hey, pancake recipe revision! You can also dress these up anyway you want, add blueberries, apples and cinnamon, and use whatever jam, jelly or syrup might be safe for you as a topping. You can also make up a batch, let them cool, put plastic wrap or parchment paper in between them and put them in a container in the freezer and then warm them up in the oven or microwave when you want an easy breakfast.

    I used the Gluten-free, Rice-free, Potato-free Flour Mix below, which I actually use as an all purpose flour, and I’m quite happy with it. I make a batch and store it in mason jars so that I have it on hand.


    Notice: Trying to access array offset on value of type bool in /home/maryzahc/public_html/adultfoodallergies.com/wp-content/plugins/wp-ultimate-recipe/helpers/models/recipe.php on line 254
    Gluten-free, Rice-free, Potato-free Flour Mix
    Print Recipe
    Servings Prep Time
    9 cups 15 minutes
    Servings Prep Time
    9 cups 15 minutes
    Gluten-free, Rice-free, Potato-free Flour Mix
    Print Recipe
    Servings Prep Time
    9 cups 15 minutes
    Servings Prep Time
    9 cups 15 minutes
    Ingredients
    • 2 cups sorghum flour
    • 2 cups oat flour
    • 2 cups millet flour
    • 2 cups tapioca starch
    • 1 cup arrowroot starch
    Servings: cups
    Instructions
    1. Measure all ingredients and place in a large mixing bowl. Using a whisk, mix the ingredients until well combined. Place in an air tight storage container and use in baking recipes.
    Share this Recipe
     
    Powered byWP Ultimate Recipe

    Revised Gluten-Free and Dairy-Free Pancakes

    Revised Gluten-Free and Dairy-Free Panackes
    Revised Gluten-Free and Dairy-Free Pancakes
    Print Recipe
    Makes about 10 to 12 – 4 inch pancakes.
    Servings Prep Time
    4 people 10 minutes
    Cook Time Passive Time
    20 minutes 30 minutes
    Servings Prep Time
    4 people 10 minutes
    Cook Time Passive Time
    20 minutes 30 minutes
    Ingredients
    Dry Ingredients
    • 1 1/2 cups Gluten-free, Rice-free, Potato-free flour mix (see recipe card in the post or you can try your normal gluten free flour mix)
    • 1 teaspoon sea salt
    • 3 Tablespoons brown sugar
    • 1 3/4 teaspoons baking powder (here’s a corn free version – https://wholenewmom.com/health-concerns/make-your-own-baking-powder/)
    Wet Ingredients
    • 1/3 cup water
    • 1 teaspoon vanilla extract (I make my own with vanilla beans and vodka made from potatoes, as most commercial extract contains corn)
    • 1 1/4 cup non-dairy milk (I use homemade cashew or rice milk)
    • 3 Tablespoons safe oil (I used grape seed oil or olive oil)
    • 1 teaspoon psyllium husk powder
    Other equipment
    • oil for greasing the skillet
    • skillet
    Servings: people
    Instructions
    1. Place water, vanilla extract, non-dairy milk, oil, and psyllium husk powder (Wet Ingredients) in a smaller bowl and whisk together until smooth. Let mixture sit for about 30 minutes so that the psyllium can gel.
    2. Measure out flour, salt, baking powder and brown sugar (Dry Ingredients) and place in a large bowl. Whisk ingredients together until they are well incorporated into each other.
    3. When psyllium in wet ingredients has gelled, pour wet ingredient mixture into the dry ingredient mixture and whisk them together until most of the lumps are gone.
    4. Heat your skillet over medium low to medium heat, depending on your burner strength.  When your skillet is hot, add a bit oil to the skillet and grease it. Then scoop some of the pancake batter into the skillet.  I used a Pampered Chef large scoop that holds about 3 Tablespoons of batter to portion out the pancakes into the skillet.
    5. Cook until the edges of the pancake look dry and there are bubbles in the batter.  You can use a spatula to gently lift up an edge to see how brown the pancakes are underneath. When they are a nice deep golden brown, flip them and cook until the other side is a nice deep golden brown.
    Share this Recipe
    Powered byWP Ultimate Recipe
    Wet Ingredients after psyllium husk gels
    Wet Ingredients after psyllium husk gels
    Pancake batter
    Pancake batter
    Pancakes on skillet
    Pancakes on skillet
    Pancakes after flipping
    Pancakes after flipping


  • 2017-07-07 Fabulous Food Allergy Friday

    2017-07-07 Fabulous Food Allergy Friday

    Flowers in Denise's backyard
    Flowers in Denise’s backyard

    AND… we’re back. Hope you all had a good June — not sure what happened, given that it flew by faster than time should ever go.

    So, what have we been reading? I, MaryKate, have been checking out more food allergy bloggers like “Nope, Can’t Eat That Either” (a title I absolutely love). I’m also reading Civil Eats, for people who are into food and the politics and production of food (start with that link about the Amazon purchase of Whole Foods). More recipes coming from us starting next week.

    The garden is in and we’ll see what I (Denise) get. We’ve had storms, I’ve had a lot of vole damage, and I’m being stalked by deer and rabbits. But while I wait for the summer and fall harvests, the garlic I put in last year have produced a ton of garlic scapes and I’m looking for new ways to use them.  I found this White Bean and Garlic Scape Dip that looks simple and yummy and an easy refrigerator pickle, which will make them last longer, Pickled Garlic Scapes.

    Have a great weekend everyone!