Notice: Function _load_textdomain_just_in_time was called incorrectly. Translation loading for the wp-ultimate-recipe domain was triggered too early. This is usually an indicator for some code in the plugin or theme running too early. Translations should be loaded at the init action or later. Please see Debugging in WordPress for more information. (This message was added in version 6.7.0.) in /home/maryzahc/public_html/adultfoodallergies.com/wp-includes/functions.php on line 6121
October 2015 – surviving the food allergy apocalypse (archive)

Month: October 2015

  • Seared Tuna Steak Salad

    Seared Tuna Steak Salad
    Seared Tuna Steak Salad

    This is one of those areas where Denise and I diverge — neither of us is allergic to fish, but I love tuna, and she hates it. Conversely, she loves haddock, and I, eh, can’t get excited about it. If you’re pro-tuna, this might be your recipe.

    The first time I had tuna — and liked it — was when I was in Greece in college. The whole experience was amazing, and so was the food. I had a simple salad one day, when I wasn’t feeling great and wanted something light. It was just lettuce, with canned tuna in oil and a few tomatoes. So simple, but so amazing. It was such a difference from the mayo-covered tuna salads I’d seen growing up, and it opened me up to tuna.

    I first tried fresh tuna in sushi, and it’s still one of my favorites. But ordering tuna at a restaurant made me  consider making it at home. Once you get more used to not cooking it all the way through (that dries it out!), it is SUPER EASY and seems pretty fancy.

    This dish actually came out of leftover seared tuna. Normally, I make tuna for just me, as an occasional indulgence. But my grocery store was having a sale on some great-looking frozen tuna steaks, so I thought I’d give it a whirl as a mid-week dinner for me and my boyfriend.  I cooked the fish and served it with steamed asparagus and bamboo rice — it was quick and easy, even though I got home late that night.

    I overshot the amount of fish I needed, though. I’ve never had a leftover tuna steak before! Turns out, fresh tuna also makes an amazing salad. THAT is the recipe you’re getting today. But feel free to just buy too much fish for one dinner and make this salad the next day. Just scale the marinade up.

    This recipe serves ONE. Scale up appropriately.
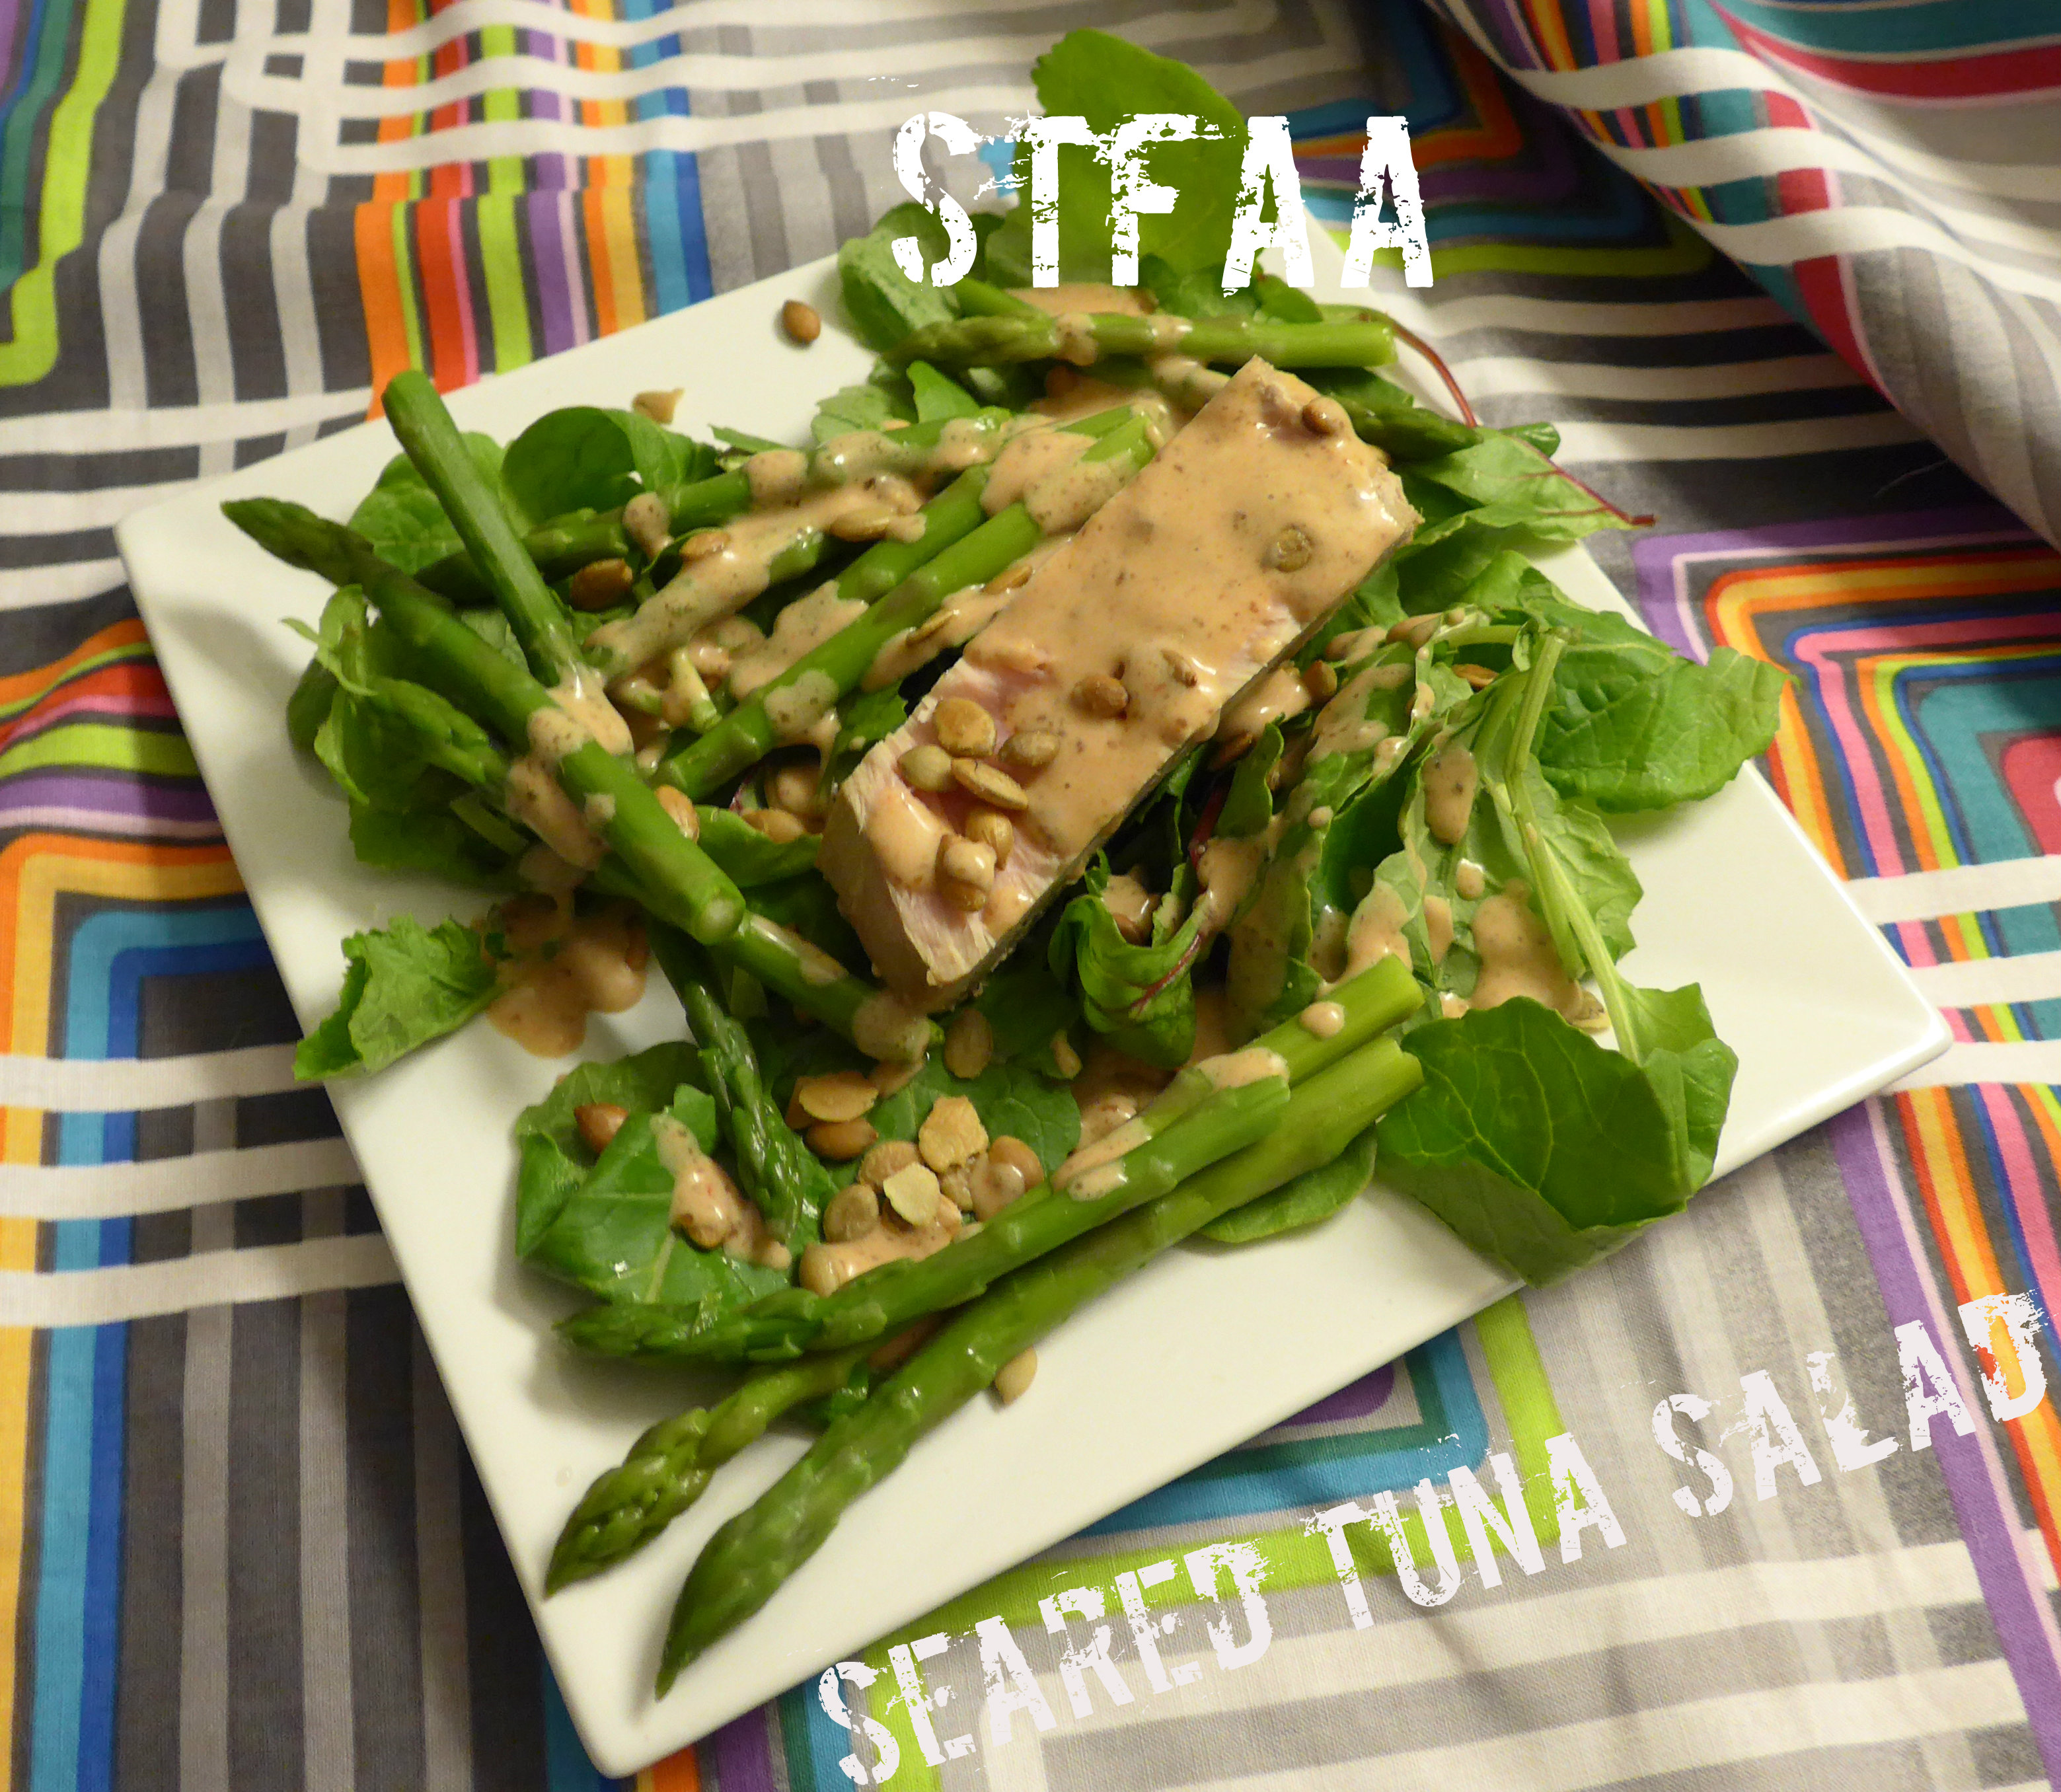
    Seared Tuna Salad with unmixed dressing
    Seared Tuna Salad with unmixed dressing

    Tuna Steak Salad

    • 1/3 lb. tuna steak, about 1 1/4 inch thick (the exact amount of tuna is up to you! But if your steak is substantially thicker or thinner, adjust your cooking time accordingly)

    Marinade

    • 1/4 cup rice wine vinegar (look for unsweetened, unseasoned, for the most flexible version)
    • 1/4 cup faux tamari, or gluten-free soy sauce
    • 1/4 teaspoon (generous) garlic powder (I used roasted, from Penzey’s, as it’s my new favorite)
    • 1/4 teaspoon powdered ginger

    Salad Ingredients

    • 10 stalks or so steamed asparagus
    • 1 cup mixed greens (I don’t like lettuce, so I used a mix of baby kale, baby Swiss chard, and baby spinach, but the crunch of lettuce would be great)
    • 1 Tablespoon of pumpkin seeds, roasted and salted

    Dressing

    If your fish is vacuum-packed, slit the packaging before you defrost it (put it on a plate first, of course) in the fridge. I usually take it out the night before and give it the night and day in the fridge.

    Marinate the fish for about 20 minutes, 10 minutes per side. If I’m serving the fish with rice, this is about the perfect cooking time for rice. The fish takes about 5 minutes to cook, so get everything else ready before you start the cooking.

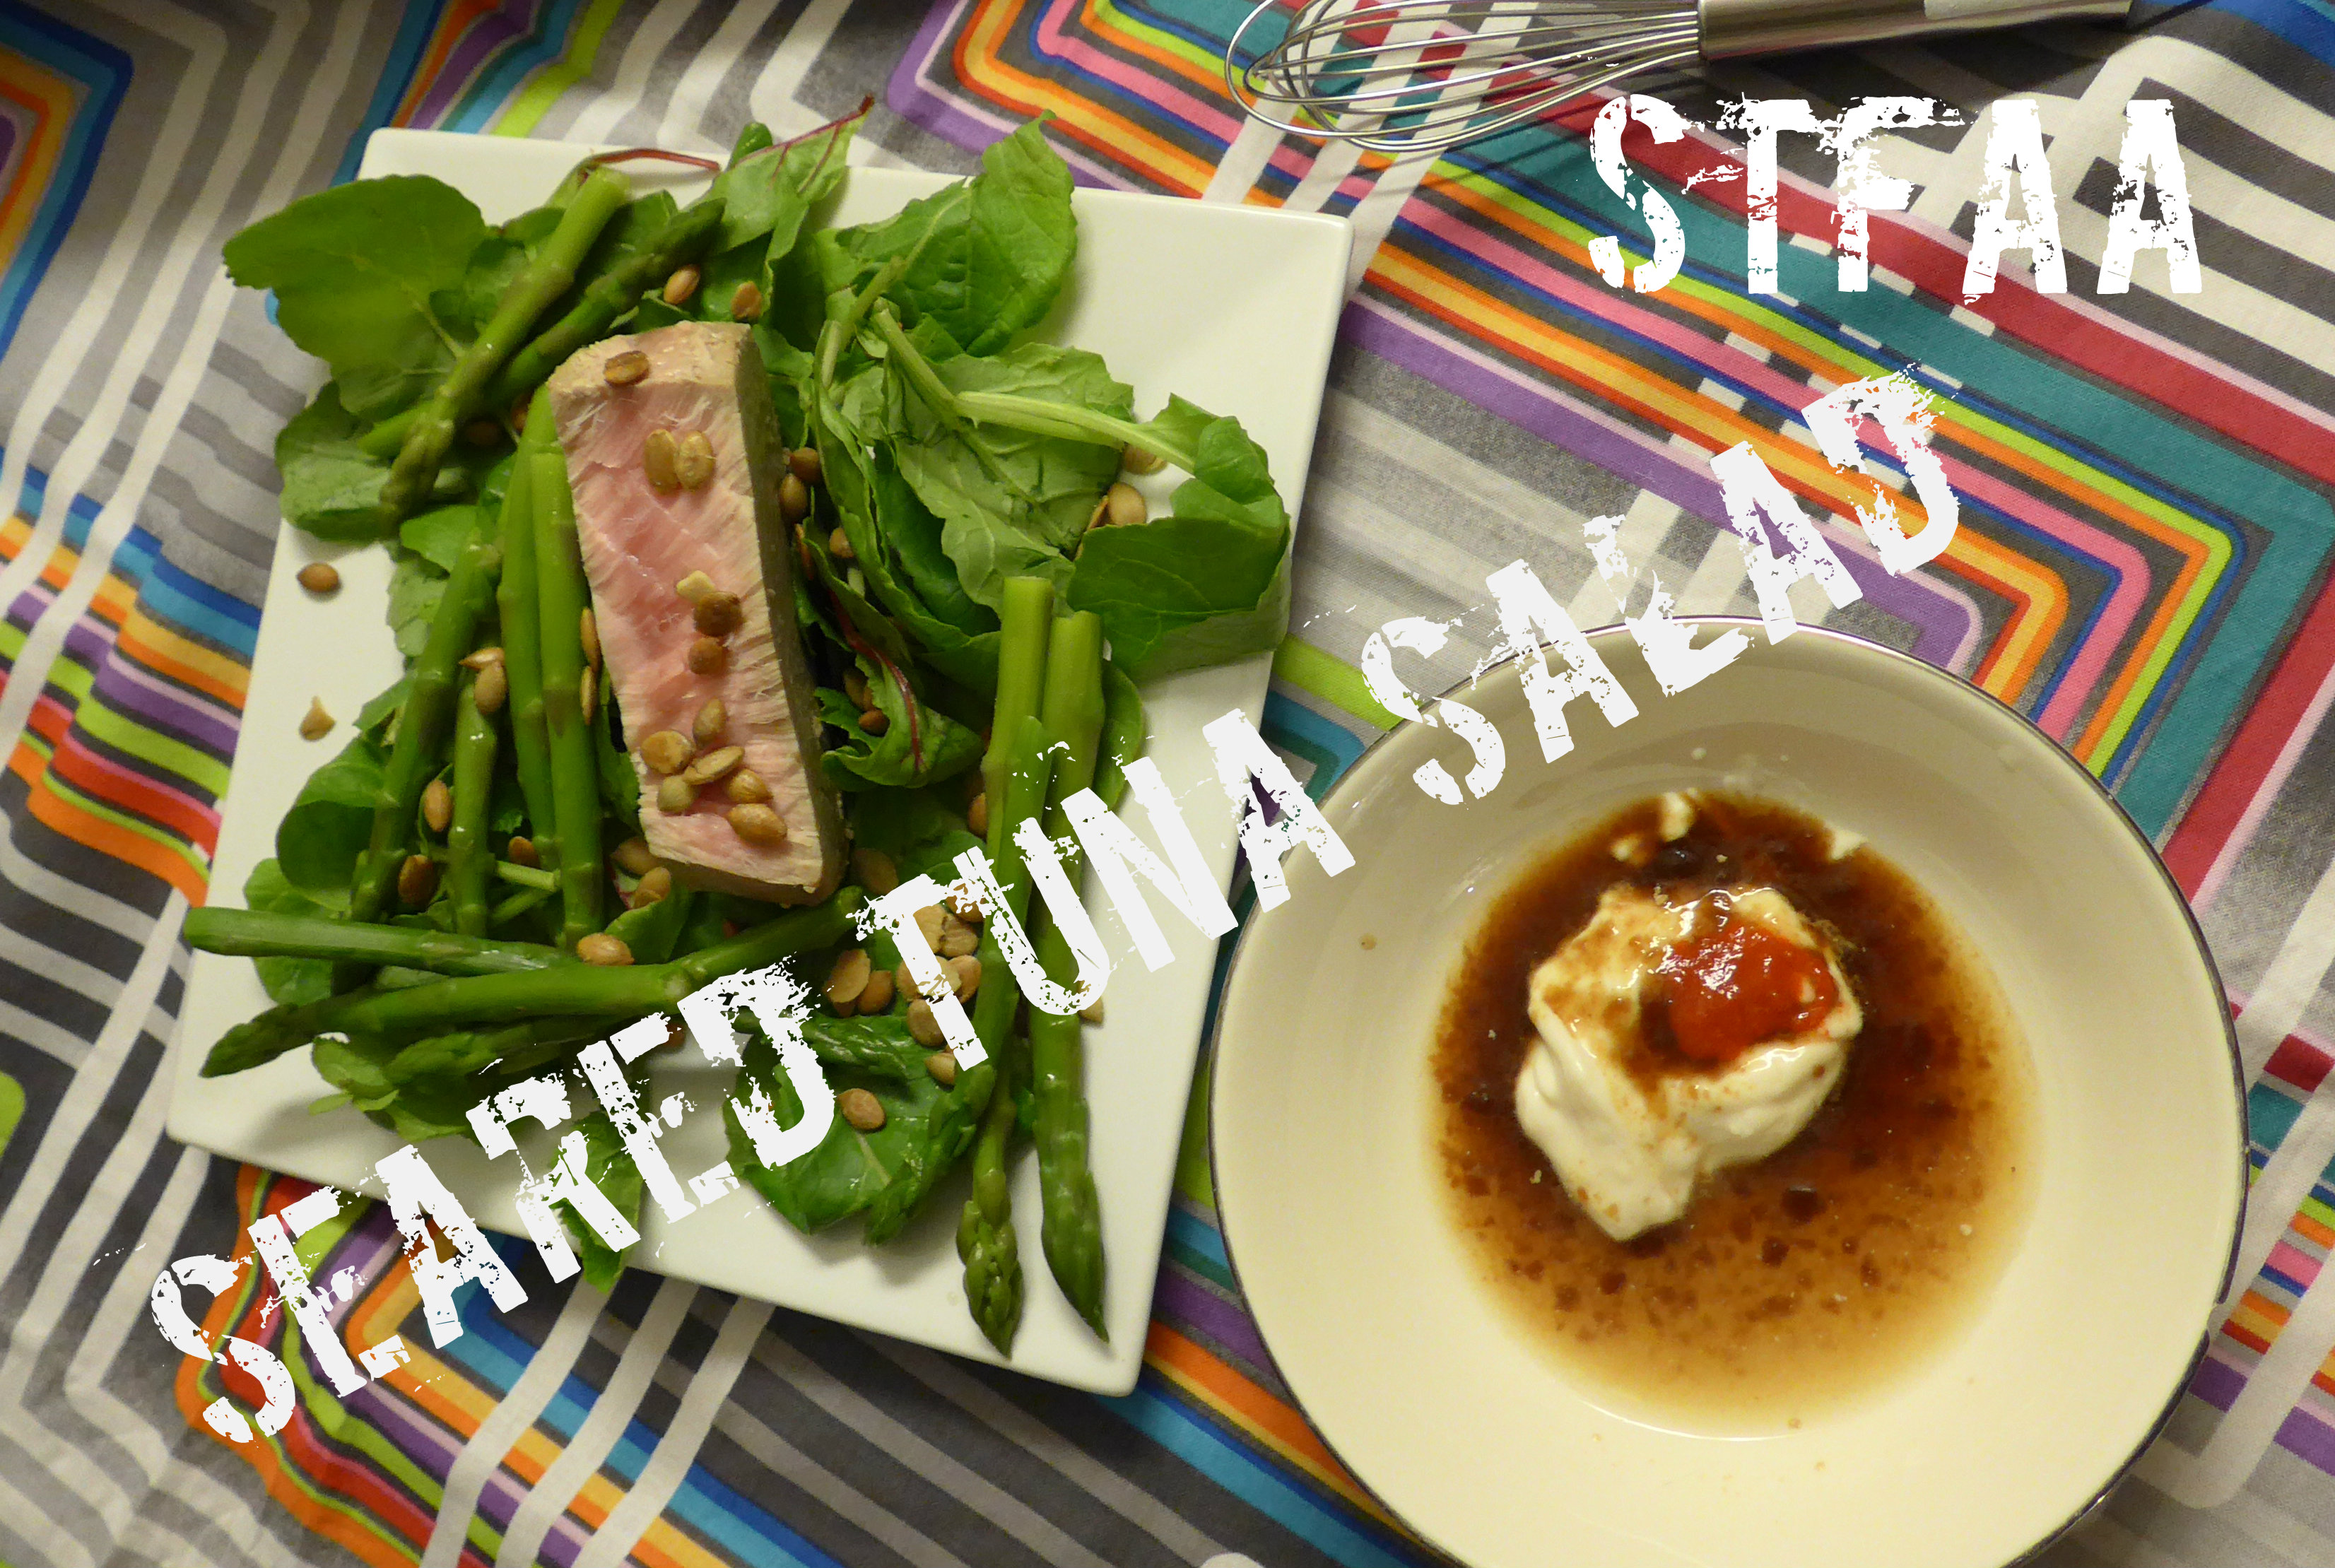
    The salad is easy — steam the asparagus, heap it and the greens on a plate. Make the dressing by mixing all the ingredients together with a whisk or fork — taste and adjust the seasonings as needed. If you are using salted pumpkin seeds, you won’t need more salt. If you aren’t, you might want a dash of salt at the end.

    Heat a well-seasoned cast iron skillet over medium-high heat until it is good and hot. You are going to sear the fish quickly, so make sure the pan is hot. If it’s a well-seasoned pan, you won’t need to add more oil.

    Sear the first side of the fish. For cooking steaks an inch and a quarter thick, 3 minutes the first side and 2 minutes the second should be about perfect. Baste it with the marinade right before you flip it. Because tuna changes color as it cooks, you can watch the fish to get the timing correct — watch the cooking up the side and flip it when it’s cooked about 1/4 of the way through.  Then take it off when it’s 1/4 of the way through the other side. The center of your fish should be warm, but pink.  That is perfect tuna.

    Add the tuna to the salad, sprinkle the salad with pumpkin seeds, and drizzle on the dressing.

    Enjoy!


  • Apple Cranberry Habanero Hot Sauce

    Apple Cranberry Habanero Hot Sauce
    Apple Cranberry Habanero Hot Sauce

    In attempting to use up my glut of apples (they are finally all gone!!!), I wanted to do a chutney of some sort. But most of the recipes call for raisins, and at the moment, I don’t have safe raisins I can buy at the store because most of them have sunflower oil all over them. I thought about it, but I drew the line at dehydrating some grapes so I could have chutney.  So I considered other options. I found an apple habanero hot sauce recipe, but I also wanted another flavor in it. I had some cranberries in the freezer, so I decided they’d be good. This hot sauce is lovely, but really vicious. I used six fairly large habanero peppers, but you can switch them out for milder peppers or cut the number back a bit.  This recipe makes about 3 cups, so depending on your hot sauce usage, you may want to cut the recipe in half.

    Apple Cranberry Habanero Hot Sauce

    • 2 large cloves of garlic, diced
    • 1 shallot or small onion, diced
    • 1 Tablespoon of fresh ginger, diced
    • 3 cups of peeled, cored and chopped apples (I used a mix from my apple trees out back, mostly McIntosh and Galas.)
    • 1 cup of fresh or frozen cranberries
    • 1 cup of apple cider vinegar (I used Bragg’s as it is generally safest for people with corn allergies)
    • 2/3 cup of white sugar
    • 2/3 cup of brown sugar
    • 6 large habanero peppers, destemmed, deseeded and chopped
    • 2 teaspoons of salt
    • a small amount of safe for you oil to cook with (I used grape seed oil)

    In a large saucepan, over medium high heat, sauté the garlic, shallot/onion, and in ginger in your safe oil until soft.

    Garlic, ginger, and onion cooked until soft
    Garlic, ginger, and onion cooked until soft

    Add the apples and cranberries and cook for another 5 minutes.

    Add the vinegar and bring the mixture to a boil. Then add the white and brown sugar and stir until it dissolves.

    Add the habanero peppers and simmer over medium low heat for 30 minutes.

    Cooking complete
    Cooking complete

    Put the mixture in a blender and puree it until smooth.

    Apple Cranberry Habanero Hot Sauce pureed until smooth
    Apple Cranberry Habanero Hot Sauce pureed until smooth

    At this point, you can use the sauce as it is, or you can strain it to remove any seeds, pepper and cranberry skins that haven’t been broken down. You may need to use a spatula to press the sauce through the strainer.

    Straining Apple Cranberry Habanero Hot Sauce
    Straining Apple Cranberry Habanero Hot Sauce
    Straining Apple Cranberry Habanero Hot Sauce
    Straining Apple Cranberry Habanero Hot Sauce

    Refrigerate the sauce and use often. You can also freeze it if you think you won’t use it soon enough.

    Enjoy!

  • Chai-Spice Brined Pork Chops

    Chai-Spice Brined Pork Chops
    Chai-Spice Brined Pork Chops

    I don’t know if we’ve ever mentioned it, but Denise and I do have a plan for the blog. We have a calendar and recipes we’re working on, and sometimes what is on the calendar finds its way on to the blog on the day we scheduled it. Often, though, we’re working on things and they just aren’t ready to go when the calendar says. We have some exciting things in the works right now, but this week, you’re getting a quick, simple, but amazing weeknight dinner.

    I mentioned a few weeks ago that I had found, tried, and loved this stovetop-to-oven method of cooking pork chops.  I have messed with it a few times, and want to share my version of the recipe as I think it’s turned out great. These pork chops are juicy and flavorful, with an unusual (to me, at least) but subtle spice flavor to them. They are, even with the brining, a meal quick enough to make on a weeknight for dinner. And the meat is so juicy that they reheat well OR make a great sandwich the next day.

    The spice blend in here is inspired by what I remember of a homemade chai recipe I made a few times years ago. It’s the reason I bought star anise in the first place. I never made chai with actual peppercorns, but this is a savory dish, so it suits — I’ve done this with regular and Sichuan peppercorns, and both work well.

    Chai-spice brined pork chops

    For brine:

    • 1 cup boiling water
    • 2 Tablespoons salt (I used kosher salt here)
    • 2 whole star anise (or pieces to make up about 2 whole)
    • 3 whole cardamom pods, smashed to open the pod (but not crush the seeds)
    • 1 2-inch cinnamon stick
    • 2 pinches whole cloves (about 6-8)
    • 1 pinch whole peppercorns (about 4-6)
    • 2 cups cold water
    • 2 bone-in pork chops, about 3/4″ thick (I used center cut, as that’s what looked good)

    Take the pork chops out of the fridge and let them rest at room temp while you make the brine. You will need a baking dish or something comparable to brine the chops. Lay them out in a single layer in the pan.

    Put all the spices (salt through peppercorns) into a heat-safe container. I use a Pyrex measuring cup. Bring your water to a boil and pour 1 cup over all the spices and salt. Stir to dissolve the salt, and let it steep for 5 minutes. Add the two cups of cold water.

    Pour the spice “tea” over the chops. You are aiming for room temperature brine, and your chops should be covered completely. Add more water to make this happen, if needed. Leave all the spices floating.

    Let the chops brine for 30 minutes to an hour. According to the original recipe, you can brine them for up to four hours (in the fridge), but I’ve not tried this.

    When your chops are brined, turn the oven up to 400ºF, with a cast iron skillet on the middle rack. When the oven is up to temperature, carefully remove the skillet and put it over medium-high heat on the stovetop.

    Remove the chops from the brine and pat them dry. Season with salt and pepper — but remember the brine was salty, so don’t go overboard with the salt.

    Carefully add the chops. Brown 3-5 minutes on one side, getting good browning, but not burning the chops. This may cause smoke, so be ready, but it’s worth the hassle.

    Flip the chops and immediately put them in the pre-heated oven. Bake for 6-8 minutes, aiming for an internal temperature of about 142ºF. Remove them to rest for 5 minutes. You want your final temperature to be 145ºF, but remember that they keep cooking while resting, so don’t overshoot.

    I served mine with simple boiled broccoli and sweet potatoes I’d thrown in the oven earlier to roast. If you want to do a side dish in the oven, consider turning it on and starting the side(s) while the pork chops brown. This is an excellent use of the brining time.

    Enjoy the subtle spice flavors in your perfectly cooked pork chops.

  • Apple Cake, Vegan and Gluten-Free

    Apple Cake, Vegan and Gluten-Free
    Apple Cake, Vegan and Gluten-Free

    You guys are noticing a trend, right? It’s apparently a bumper crop year for apples. When I was trying to figure out how to use up apples, my friend Erika sent me a link for this recipe for Mom’s Apple Cake from Smitten Kitchen. For obvious reasons, I had to change the original, and I tried making it more like an upside down cake.  It took a couple of tries, but I have it where I like it now.

    Apple Cake, Vegan and Gluten-Free

    Apple mixture:

    • 6 large apples or 7 medium apples (I used a mix from my apple trees out back, mostly McIntosh and Galas.)
    • 1 Tablespoon of ground cinnamon
    • 5 Tablespoons of brown sugar

    Cake batter:

    • 2 and 3/4 cups of all purpose gluten-free flour mix (I used Cara Reed’s mix from her blog, Fork and Beans)
    • 1 Tablespoon of baking powder (For corn free baking powder you can use this recipe.)
    • 1 teaspoon of salt
    • 1 cup of safe for you oil (I used olive oil and grape seed oil, mostly because I ran out of olive oil and had to top it off with grape seed oil.) 
    • 1 cup of sugar
    • 1 cup of brown sugar
    • 1/4 cup of orange juice (I don’t have a safe orange juice so I squeezed mine myself.)
    • 1 Tablespoon vanilla extract (Here’s a bunch of recipes for vanilla extract, make sure to use safe alcohol if corn or wheat are an issue for you. I used a vodka made only from potatoes,  be careful as some vodkas may also use grain or corn.)
    • 1/2 cup of applesauce (I used my home canned but use any safe applesauce you have.)
    • 1/4 cup of aquafaba (The liquid from a can of garbanzo beans or chick peas. I used my home canned garbanzo bean liquid.)
    • 1 Tablespoon of ground chia seed

    Preheat oven to 350°F. Grease an 8 inch by 8 inch baking pan with some safe for you oil.

    Peel, core and slice apples. Place them in a bowl and toss them with the 5 tablespoons of brown sugar and the cinnamon. Set the apple mixture aside for now.

    Apple mixture
    Apple mixture

    Stir gluten-free flour mix, baking powder and salt together in a bowl.

    In a separate bowl, mix together the oil, orange juice, sugar, the remaining brown sugar, vanilla, applesauce, aquafaba and ground chia seed. I use a stand mixer with flat beater to do this.

    Wet mixture
    Wet mixture

    Once these ingredients are fully incorporated together, add the flour mixture slowly to your wet mixture, with the mixer speed on low. You could also mix this manually, but the stand mixer makes my life a lot easier.

    Cake batter after mixing wet and dry ingredients
    Cake batter after mixing wet and dry ingredients

    Pour half of the apple mixture into your greased baking pan, spreading them evenly across the bottom of the pan.

    Pouring half apples in bottom of baking pan
    Pouring half apples in bottom of baking pan

    Pour half of the cake batter over the apples, spreading it evenly across the pan.

    First layer of batter over apples
    First layer of batter over apples

    Then pour the remaining apple mixture over the batter evenly.

    Second layer of apples over first layer of batter
    Second layer of apples over first layer of batter

    Cover the apple mixture with the remaining cake batter.

    Second layer of batter over second layer of apples
    Second layer of batter over second layer of apples

    Bake for about an hour and half or until a tooth pick comes out clean.

    Apple Cake after baking
    Apple Cake after baking

    Cool in pan on wire rack for 5 minutes. Loosen edges around the pan with a butter knife, and then invert the baking pan onto platter. Don’t let it cool too long or it will stick and be harder to remove from the pan (which you can tell mine did because I got distracted.)

    Apple Cake after removal from pan
    Apple Cake after removal from pan

    Enjoy!