Notice: Function _load_textdomain_just_in_time was called incorrectly. Translation loading for the wp-ultimate-recipe domain was triggered too early. This is usually an indicator for some code in the plugin or theme running too early. Translations should be loaded at the init action or later. Please see Debugging in WordPress for more information. (This message was added in version 6.7.0.) in /home/maryzahc/public_html/adultfoodallergies.com/wp-includes/functions.php on line 6121
Whatever Wednesday – surviving the food allergy apocalypse (archive)

Tag: Whatever Wednesday

  • Money

    Money

    Green beans, soybeans and radishes in last years garden
    Green beans, soybeans and radishes in last years garden

    So since tax day is almost here, MaryKate and I were talking about money. Besides more expensive food, you end up buying a lot of kitchen equipment, and if you have a corn allergy, you might end up buying a lot of food preservation equipment, freezers, and in my case, a house so you can grow a lot of your own spray free food (see my post on buying the house – WW: Living with Food Allergies – Making Unexpected and/or Unwanted Lifestyle Changes and my post on gardening – WW: Gardening due to Food Allergies & Planning your Garden & Starting Seedlings). These expenses have been gradual and over a period of time, and this isn’t everything, since I’m leaving out a lot of the specialty food expenses and some kitchen stuff I already owned, but I thought that talking about it may help some people.

    Kitchen tools:

    Crock pots – I have one of almost every size, and two of the seven quart ones. I use them to cook meals, and I use them to cook down apple butter, pear butter, tomato paste, and tomato sauce, although I did buy a Oster 20 quart roaster to use this upcoming canning season to try to cut down on extension cords and the number of Crock pots running at the same time. All of my Crock pots are manual, as I find the digital ones cook too hot.

    • 1.5 quart – $16
    • 3 quart – $22
    • 4.5 quart – $30
    • Two 7 quart – $45 each
    • 20 quart Oster roaster $40 (on sale)

    Meat slicer – We actually got this as a wedding present because my husband wanted one because he used to work at a deli, and we already had a lot of stuff because we were older when we got married and we were already living together. I use it when I cure pork belly into bacon, and when I cure brisket into pastrami to slice things evenly.  We didn’t use it much before food allergies but we use it quite a bit now.

    • Chef’s Choice 6090000 Food Slicer (Aluminum version) $99

    Stand Mixer and attachments – I’ve posted about my KitchenAid mixer in the past (WW Kitchen Stories: Denise’s KitchenAid Mixer) but it predates my food allergies. I use the Food Grinder attachment in conjunction with the KitchenAid Fruit and Vegetable Strainer attachment to make vats of home canned applesauce and tomato sauce. I also use it in baking muffins, cookies, cakes, and pie dough. I use it to make Aquafaba whipped cream, and I use it to make pasta. I really want the KitchenAid KSMPEXTA Gourmet Pasta Press Attachment with 6 Interchangeable Pasta Plates and I may buy the KitchenAid KSM2APC Spiralizer Plus Attachment with Peel, Core and Slice, Silver, to process my apples, so that I don’t have to use a hand crank apple peeler for my apple harvest (I have 18 trees), but I have not yet purchased them. I’m trying to be restrained here, even though I’m a kitchen gadget junkie.

    • KitchenAid Mixer Kit 4.5-Quart Tilt-Head Stand Mixer – $200
    • KitchenAid Food grinder attachment $40
    • KitchenAid FVSP Fruit and Vegetable Strainer Parts for Food Grinder $23

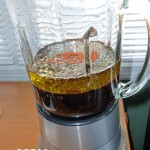
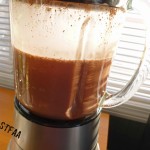
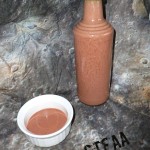
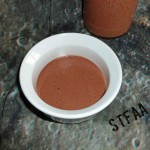
    High Performance Blender – I waited three years to buy my Vitamix blender because I’m wicked cheap and the price tag was killing me. I got the Vitamix 5200 Blender Super Package from Costco which has the dry container for grinding grains, beans, rice and soybeans into fresh flour and the regular wet blender container. It’s the the one thing that honestly I probably should have bought from day one. I use it to make cashew milk and rice milk without having to strain it. I use it to make salad dressings. I use it to grind my own chili powder, curry powder, garam masala and other spice blends from whole spices in large quantities, as well as grind whole spices into powder. (Powdered spices are often cross contaminated or have anti-caking agents which are a problem.) I use it to make my own flours from dry beans and rice. I use it to make fruity drinks from my safe vodka or rum, my homemade jams, and ice. I use it to puree the peppers I ferment to make hot sauces. I use this thing almost every day.

    • Vitamix 5200 Blender Super Package $500

    Spice Grinder – Sometimes you need to just grind a small amount of something for a recipe. When you only need to process a tablespoon of something, the Vitamix is the wrong tool because you need a larger amount for it to work well. I had a spice grinder before I had the Vitamix and I still use it after the Vitamix.

    • Cuisinart SG-10 Electric Spice-and-Nut Grinder $36.00

    Meat Grinder – I can hear you now. Why does Denise need a meat grinder if she has the grinder attachment for the KitchenAid? My answer is that the KitchenAid Food Grinder works great for once in a while grinding of meat in small amounts. However, I’m sort of beyond that level at this point. I need to grind tallow and leaf lard to render down my own tallow and lard for cooking and to make my own margarine. Fats are tough products to grind, and I needed more muscle since I cracked the plastic housing on the Food Grinder last time I ground tallow (still works for now, ugh), and my KitchenAid motor really struggles with grinding the tallow and leaf lard and overheats. With the meat grinder, I can grind 5 pounds of frozen leaf lard in about a quarter of the time that I took me with the KitchenAid.

    • STX-4000-TB2 Turboforce II “Quad Air Cooled” White Electric Meat Grinder & Sausage Stuffer $240

    Dehydrator – I bought a dehydrator during the year of the great pepper harvest. My friend Mary S. agreed to grow peppers for me before we had the house, and well, she harvested 11 pounds of various chilies. I couldn’t manage to can or ferment all that before it went to waste and we didn’t have freezer space at that time, so I ordered a dehydrator to preserve the harvest. Now I use the dehydrator to make fruit leather using left over apple pulp when I steam juice apples to get juice to make jelly or apple juice. I dry herbs, peppers, and kale from the garden to use during the winter. I also use it to dry peanuts and cashews after soaking them so that I can make my own nut butters. I use it to make raisins, dried apples, and other dried fruits. It’s getting quite a lot of use for a spur of the moment, desperation purchase.

    • Nesco FD-1018A Gardenmaster Food Dehydrator, 1000-watt $140
    • extra dehydrator trays $30

    Food processor – I had a smaller food processor, but I sort of melted the container when I left it too close to a burner on the stove, so I now use it to shred soap to make my laundry detergent. I replaced it with a 14 cup model. I use it for slicing vegetables to make pickles and shredding vegetables to make pickles and relishes, and dicing vegetables to make salsas. This gets a workout during canning season. I also use it to make larger batches of nut butters.

    • Cuisinart DFP-14BCNY 14-Cup Food Processor $150

    Juicer – I use a cheapo juicer to juice apples to make hard cider. Remember that I have 18 apple trees and I need to get rid of a lot of apples. I really want a cider press, but that will run me about $500, so the small juicer is working fine for now, if time consuming. Please remember that almost every commercial juice will be corny in some way, so if you need fruit juices it’s best to juice your own.

    • Hamilton Beach Juice Extractor, Big Mouth, Metallic $60

    Pressure Cooker – I have big pressure canners that I can use to cook in, but they are way too large to deal with on a day to day basis. I use this to make yogurt from cashew milk, make rice, steam vegetables, and I make a lot of soups, stews, and other dishes in it quickly, without having to stir or babysit them. I like it better for weekday use than a slow cooker because I don’t have to plan ahead or leave things on a timer. We use it enough that I ordered an extra pot for it so that we can make things back to back without having to empty the pot and wash it right away.

    • Instant Pot DUO60 6 Qt 7-in-1 Multi-Use Programmable Pressure Cooker, Slow Cooker, Rice Cooker, Steamer, Sauté, Yogurt Maker and Warmer $70 (on sale)
    • Extra pot $30

    Knife Sharpener – Sharp knives work better and you’re less likely to get hurt, allegedly. For a long time, I kept thinking I would take my knives in to be sharpened at a local kitchen place, but the reality is, I don’t feel like I can be without my knives that long, so I don’t. I cook every single day and I need the knives. I know that electric knife sharpeners are not as good as professional knife sharpening, but sometimes something is better than nothing.

    • Presto Professional Electric Knife Sharpener $36

    Cast iron wok – I use this primarily for deep frying. When MaryKate and I originally learned to deep fry, we used stainless steel pots, but the wok uses so much less oil and you have much less splatter everywhere. I have a big Lodge wok and a smaller Utopia Kitchen wok. I use the larger one when I am frying a lot of food in quantity to freeze for later, and the smaller when I just have a yen for a little something. I also use both for stir frying as well. You don’t need both, and neither do I, but I like the flexibility.

    • Lodge Pro-Logic Cast Iron Wok, Black, 14-inch $45-50 (on sale)
    • Utopia Kitchen Cast Iron Shallow Concave Wok, Black, 12 Inch $18.00

    Digital Kitchen scale – If you’re doing any sort of gluten free baking, a digital kitchen scale is helpful. I also use it quite frequently in canning, as recipes will call for so many pounds of an ingredient. I prefer to have one that measures at least up to 10 pounds and reads in pounds, ounces and grams. Mine is a cheap one I ordered online.

    • Etekcity 15lb/7kg Digital Kitchen Food Scale, 0.01oz Resolution $12

    Digital Meat Thermometer – This made a real difference in our cooking. Since every meal is at home, we want our food to be done right. I can now cook a steak that compares with a restaurant cooked steak, and we don’t have overdone dry pork chops any more (unless someone isn’t paying attention).

    • ThermoWorks ThermoPop Super-Fast Thermometer with Backlit Rotating Display (Purple) $30

    Canning stuff:

    After my corn allergy diagnosis, when I realized that I would literally have to make everything from scratch, and we were living in an apartment and did not have freezer space to freeze everything and we were having winter power outages that lasted 4-5 days every other winter, canning looked really attractive because it’s shelf stable. If you have a corn allergy and decide to can, be aware that some of us react to the Ball canning lids, and the Tattler canning lids. Don’t invest in a lot of stuff until you know whether you react or not. Luckily, I’m still doing okay.

    Pressure Canners: Pressure canners allow you to can low acid food safely without getting botulism. If you take up canning, you need to do a lot of research and follow safe recipes in order to be safe. I originally ordered the smaller pressure canner, but realized that it was costing me a ton of time to do two batches, and I ended up ordering the larger one. I can do 10 pints in the smaller canner, but 19 in the larger canner. Now sometimes I run both of them at the same time, particularly when I’m canning quarts, as I can do 14 quarts at once between the two of them. I also use the larger canner as a cooker to make bone broth and vegetable stock in a very short period of time. You can buy cheaper pressure canners in the range of $80, but then you have to buy a new gasket every season which runs about $50. The All Americans have a metal to metal seal, and you just need to get a new rubber over-pressure safety plug every year which is about $7. The All Americans are very heavy cast aluminum and they will last forever. If I were to do it over, I’d have ordered the larger one first, and probably not have two.

    • All-American 15-1/2-Quart Pressure Cooker/Canner $175 (on sale)
    • All American 921 21-1/2-Quart Pressure Cooker/Canner $210 (on sale)

    Water Bath Canning Pots – Water bath canning is for high acid foods like jams, jellies, pickles and salsa. I was using a Granite Ware  21.5-Quart canning pot, which are only about $20, but I literally wore two of them out because they are so flimsy. You can use any large stock pot (10 quarts or larger) to do water bath canning, but I like to do large batches so I have a 20 quart and a 32 quart pot.

    • 20 quart stainless steel pot $61
    • 32 quart stainless steel pot $91

    Canning Element Kit for electric stoves – This replaces your electric burner element to have more heavy duty support (canning pots are freaking heavy) and a higher wattage burner. I’m on my third. Because of the volume I do, I keep wearing them out.

    • Canning element kit $37 

    Extra burner – I often need an extra burner because if I have two pressure canners going, I wouldn’t have room to cook the thing I’m canning on the stove.  This burner is high enough wattage to run a canner on it.

    • Cadco PCR-1S Professional Cast Iron Range $130

    Steamer Juicer – This is the easiest way to juice fruit to make jams and jellies and can fruit juice. It’s an expensive toy, but the time and hassle it saves makes it worth it for me.

    • Cook N Home NC-00256 11-Quart Stainless-Steel Juicer Steamer $95

    Canning tools – You’ll need some canning tools, a canning funnel, bubble remover, jar lifter, and so on.

    • Presto 7 Function Canning Kit $15
    • NORPRO 591 Bubble Popper/Measurer $5

    Canning books – You’ll need some canning books to learn safe canning techniques and safe recipes. My canning book collection is about $200 at this point.

    Canning Jars – Depending on the size, canning jars range from $8 to $12 a case retail. Because I can in high volume and I store spices, rice, beans, and flours in jars, I probably have close to 2,000 jars in the house, as there were nearly 1,500 in canned goods alone at the end of the canning season last year. I didn’t pay for them all, as I’ve been gifted jars when people stop canning and downsize, and I got quite a few cases on very deep discount during sales, but it’s an expense when you start.

    Ball Canning Lids – Canning lids can only be used to can food once. I reuse lids for dry storage, but you can’t reuse them for canning. I generally spend about $50 to $100 a season on lids. The cheapest I can find them is sadly Walmart where I’m able to get a pack of 12 for between $1.79 to $1.97 depending on the sale. I generally buy a 24 pack case at a time if I get a good price.

    Fermenting stuff:

    I learned how to ferment because when I lost corn I wasn’t going to go without Sriracha and my other hot sauces. It just wasn’t going to happen. Once I got my feet wet with hot sauces, I started making sauerkraut and kimchee, and then progressed to hard cider, my own really bad wine, and my own apple cider and wine vinegar.

    I primarily ferment in quart mason jars and half gallon jars depending on the volume of what I’m making. You can buy fermenting caps for jars online. When I first started, I bought some premade stuff, and then later I made my own as it was cheaper, when I needed to have more caps available as I fermented more stuff. I also found having a tamper for packing vegetables in jars to be helpful. When I make cider, I ferment in a three gallon carboy and a 1 gallon carboy I got from a wine kit, and when the cider is done fermenting I store in it in 32 ounce swing top bottles.

    • STARTER KIT 6 Mason Jar Fermentation Lids with Food Grade Grommets, Airtight Seals, and Stoppers AND 2 3-Piece Airlocks (REGULAR MOUTH) $30
    • Kraut Kaps 3 Pack – Platinum $30
    • Small Wooden Cabbage Tamper for sauerkraut $10
    • airlocks $6
    • 3 Piece Econo-Lock with Carboy Bung (Set of 2) $6
    • 1 Gallon Wine from Fruit Kit $40
    • 3 Gallon Glass Carboy $30
    • Cobalt Blue 32 oz. EZ Cap Beer Bottles, CASE OF 12 $43

    Stuff to make cleaning and personal care products:

    So when you’re allergic to corn and coconut, and their derivatives are in everything, you make your own everything (bar soap, liquid soap, dishwasher detergent, lotions, makeup, etc.) I’m not going to list every ingredient I use to make stuff (a lot of this stuff is on the blog if you search), but suffice it to say, there’s an awful lot of essential oils, various oils, beeswax, shea butter, borax, washing soda, and so on in this house. Frankly, I’m feeling like this post is going on forever, and I’m too lazy to go look up what I paid for all that. So here’s what I think are the hard equipment items that you’d need to have around to make this stuff.

    • fabric and snaps to make monthly feminine supplies (see post here) $70
    • Two 7 quart crock pots for soap (get them from garage sales as you won’t use them for food ever again) $10-20
    • 2 cheap immersion blenders I got at Ocean State Job Lots (again you can’t use these for food ever again) $20
    • old pyrex casserole dishes to use as molds $10 (bought from an estate sale)
    • Playtex Gloves Living – Large – 3 Pairs – $10
    • Crews 2230R Chemical Splash Goggle w/ Indirect Ventilation and Adjustable Strap, Clear $4
    • Rooto No. 4 Household Drain Opener 100% Lye $2
    • 6 lb Potassium Hydroxide Meets Food Chemical Codex High Grade Red Hot Devil Caustic Potash Flakes $35
    • A garage sale blender to make lotions $15
    • A garage sale coffee grinder to mix mineral makeup $5
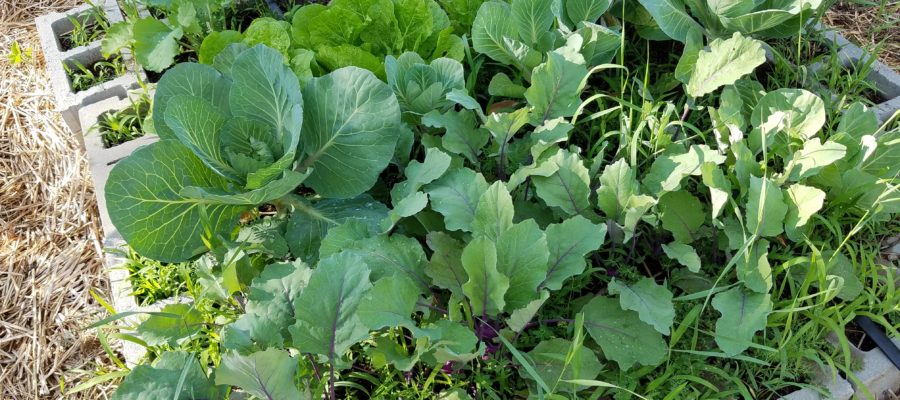
    Garden stuff:

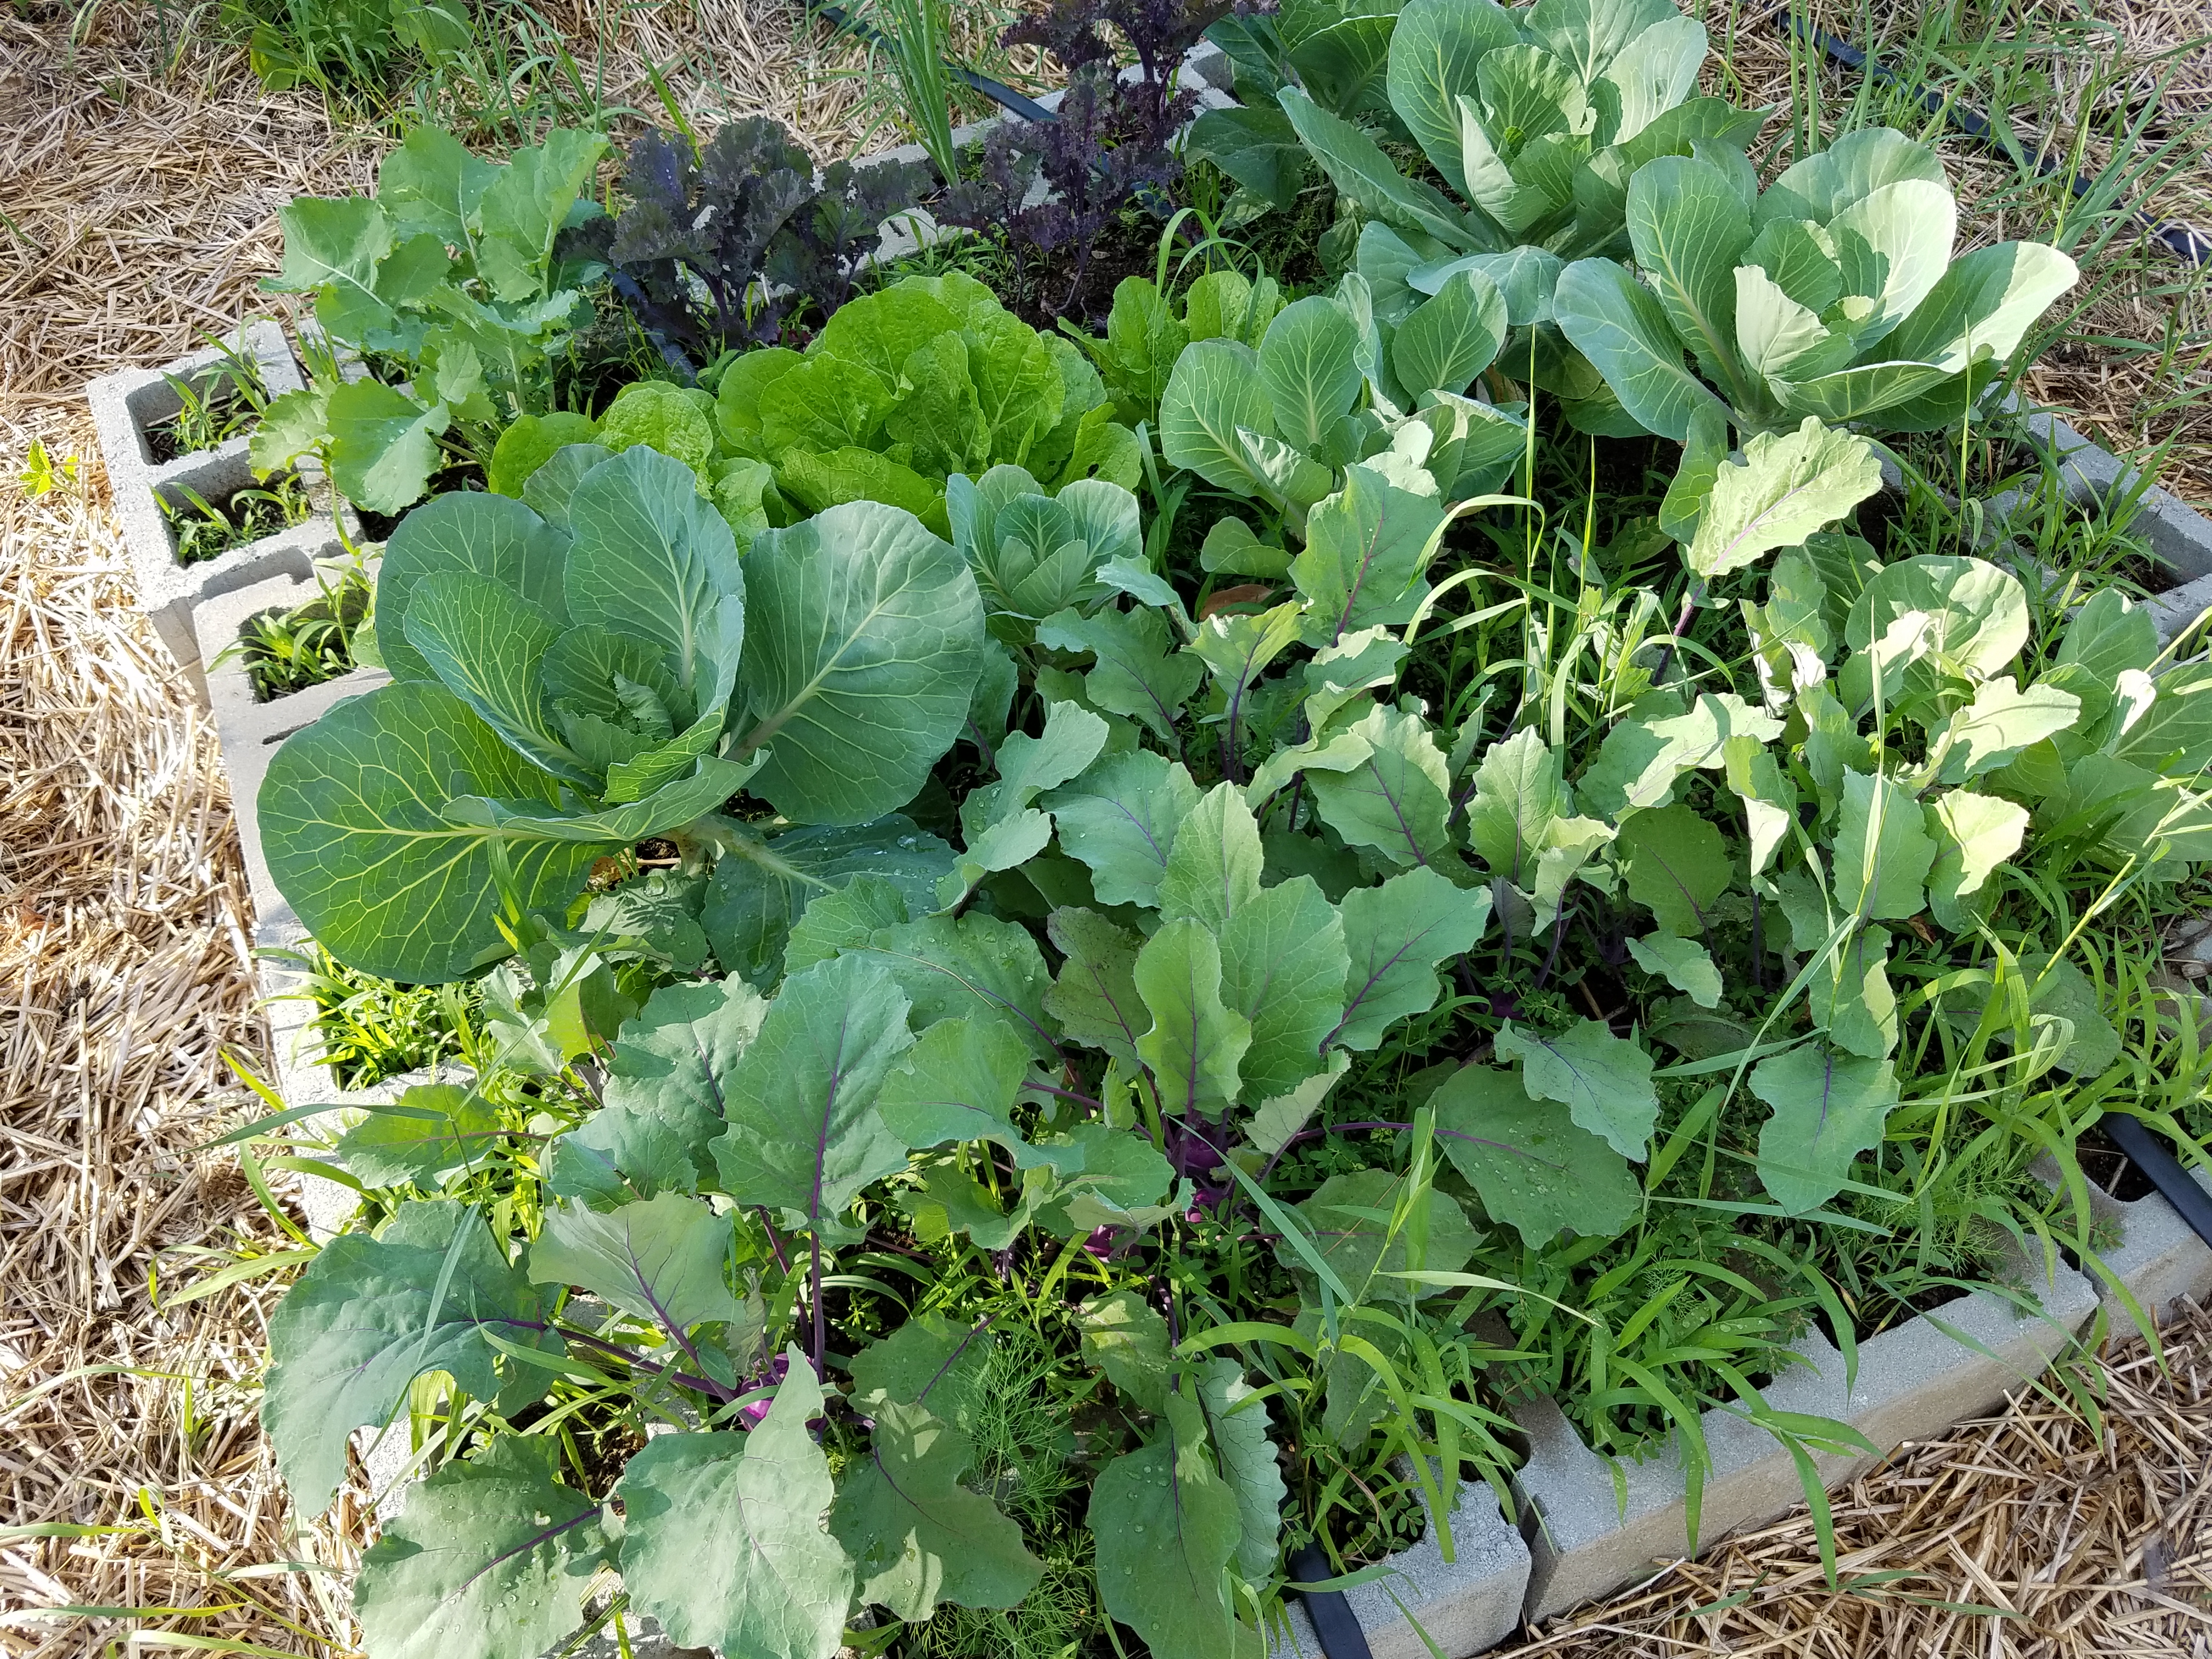
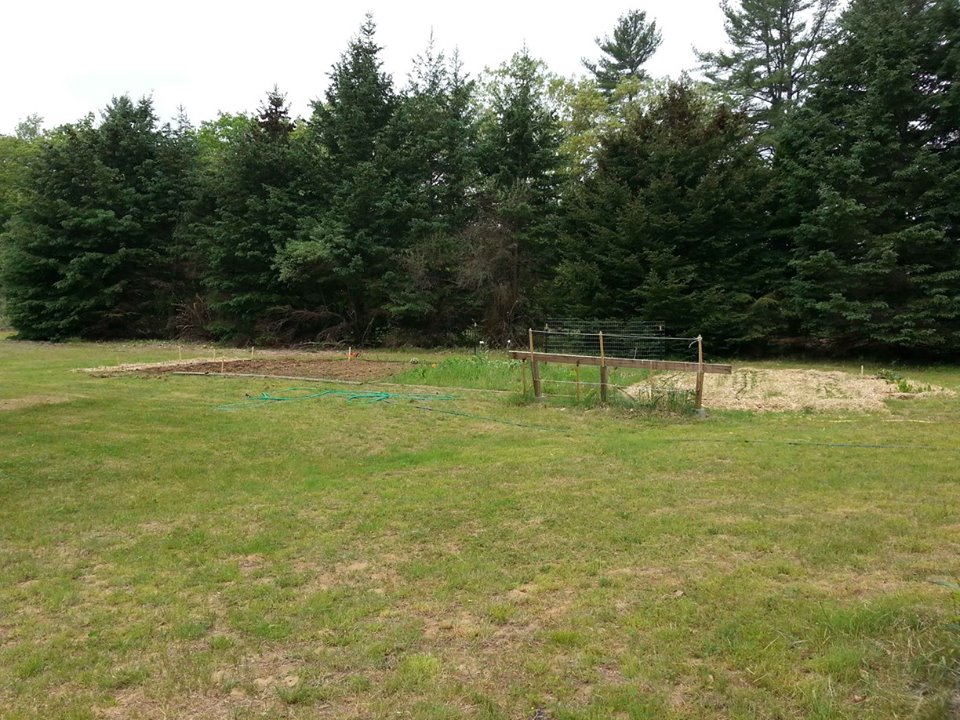
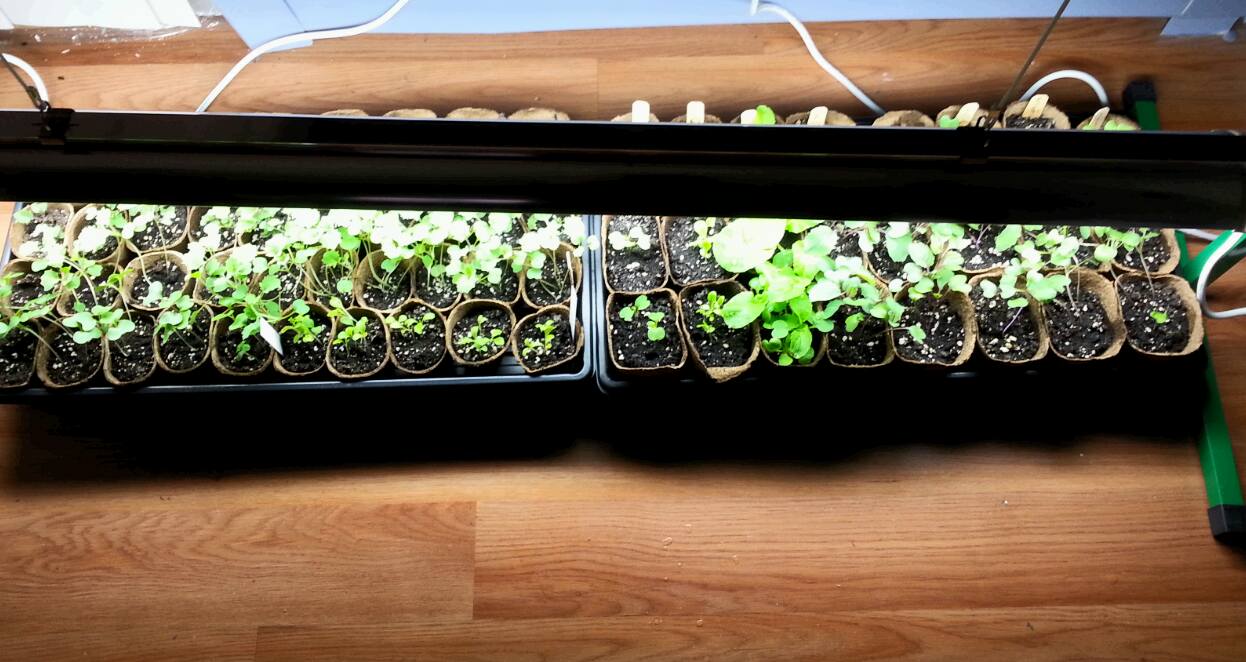
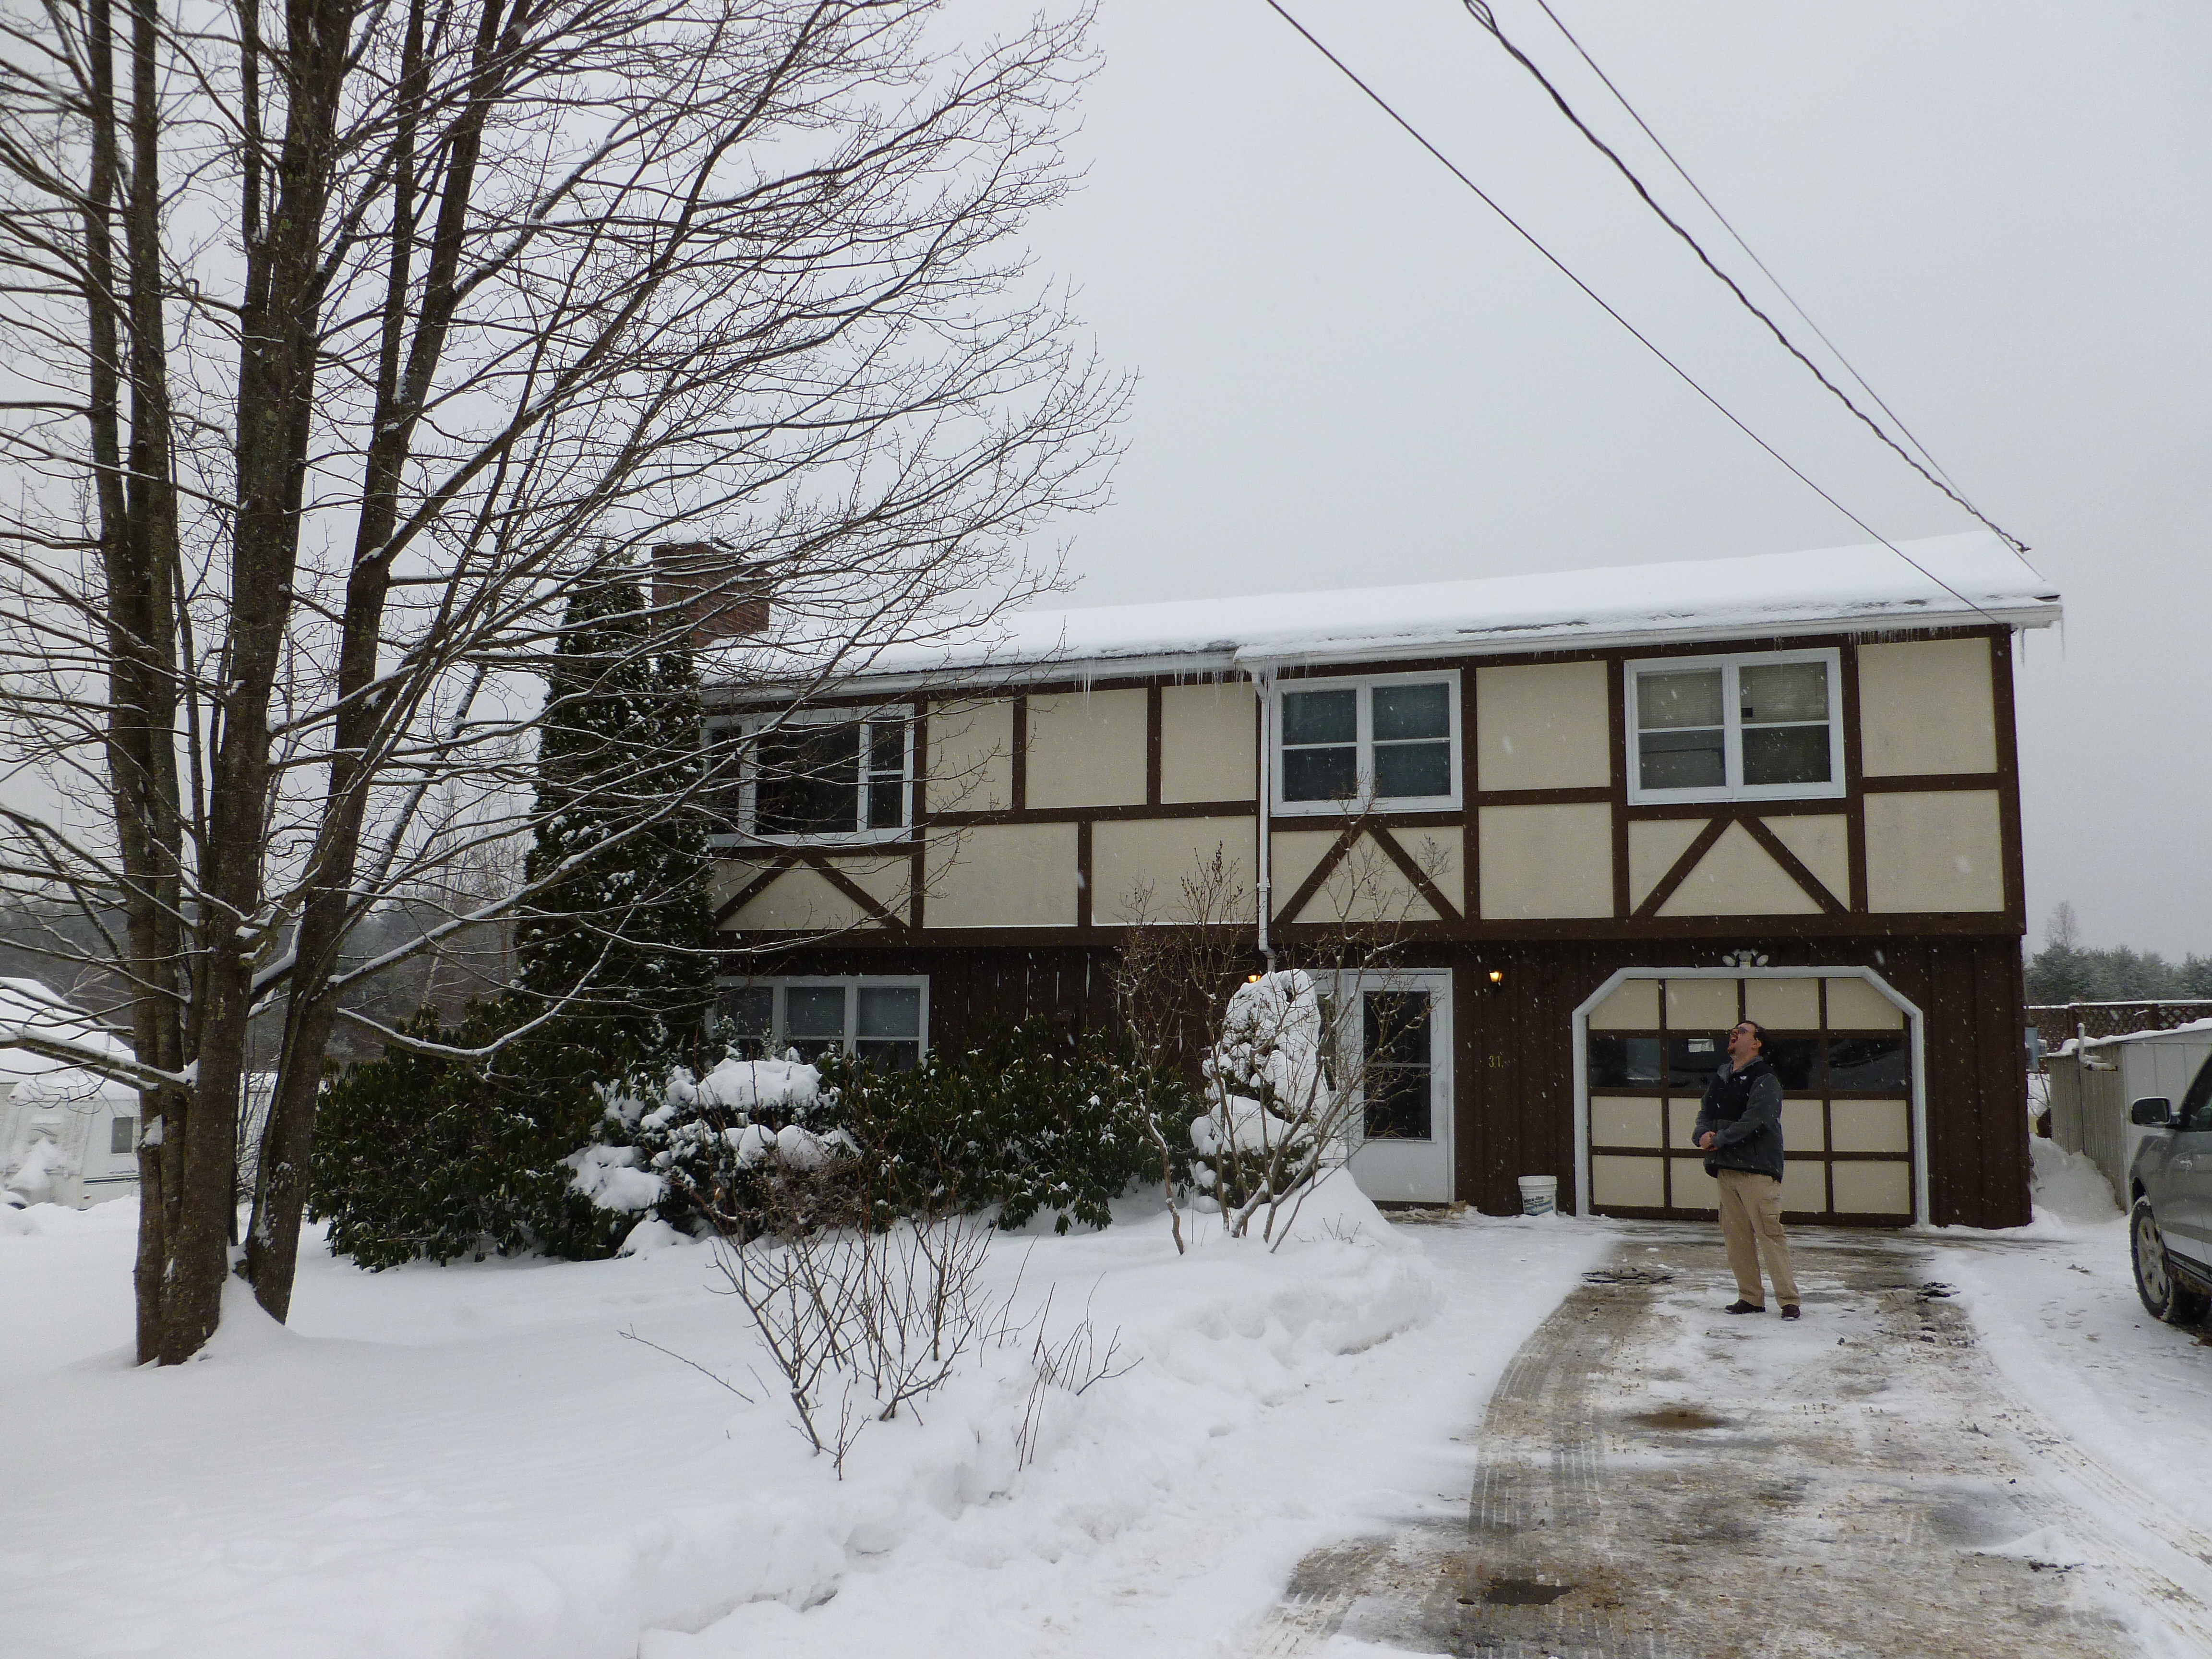
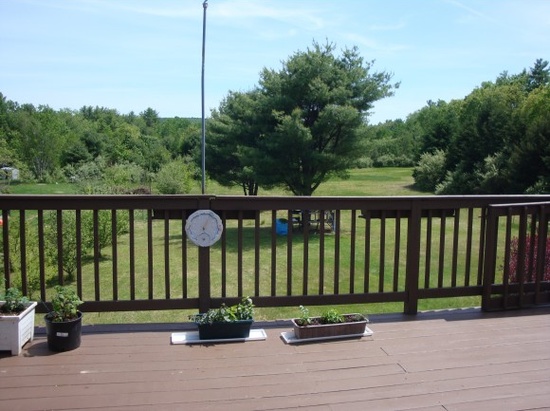
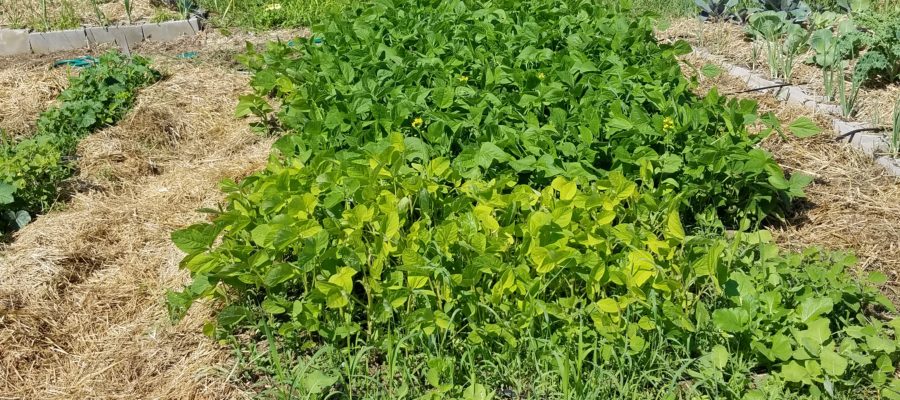
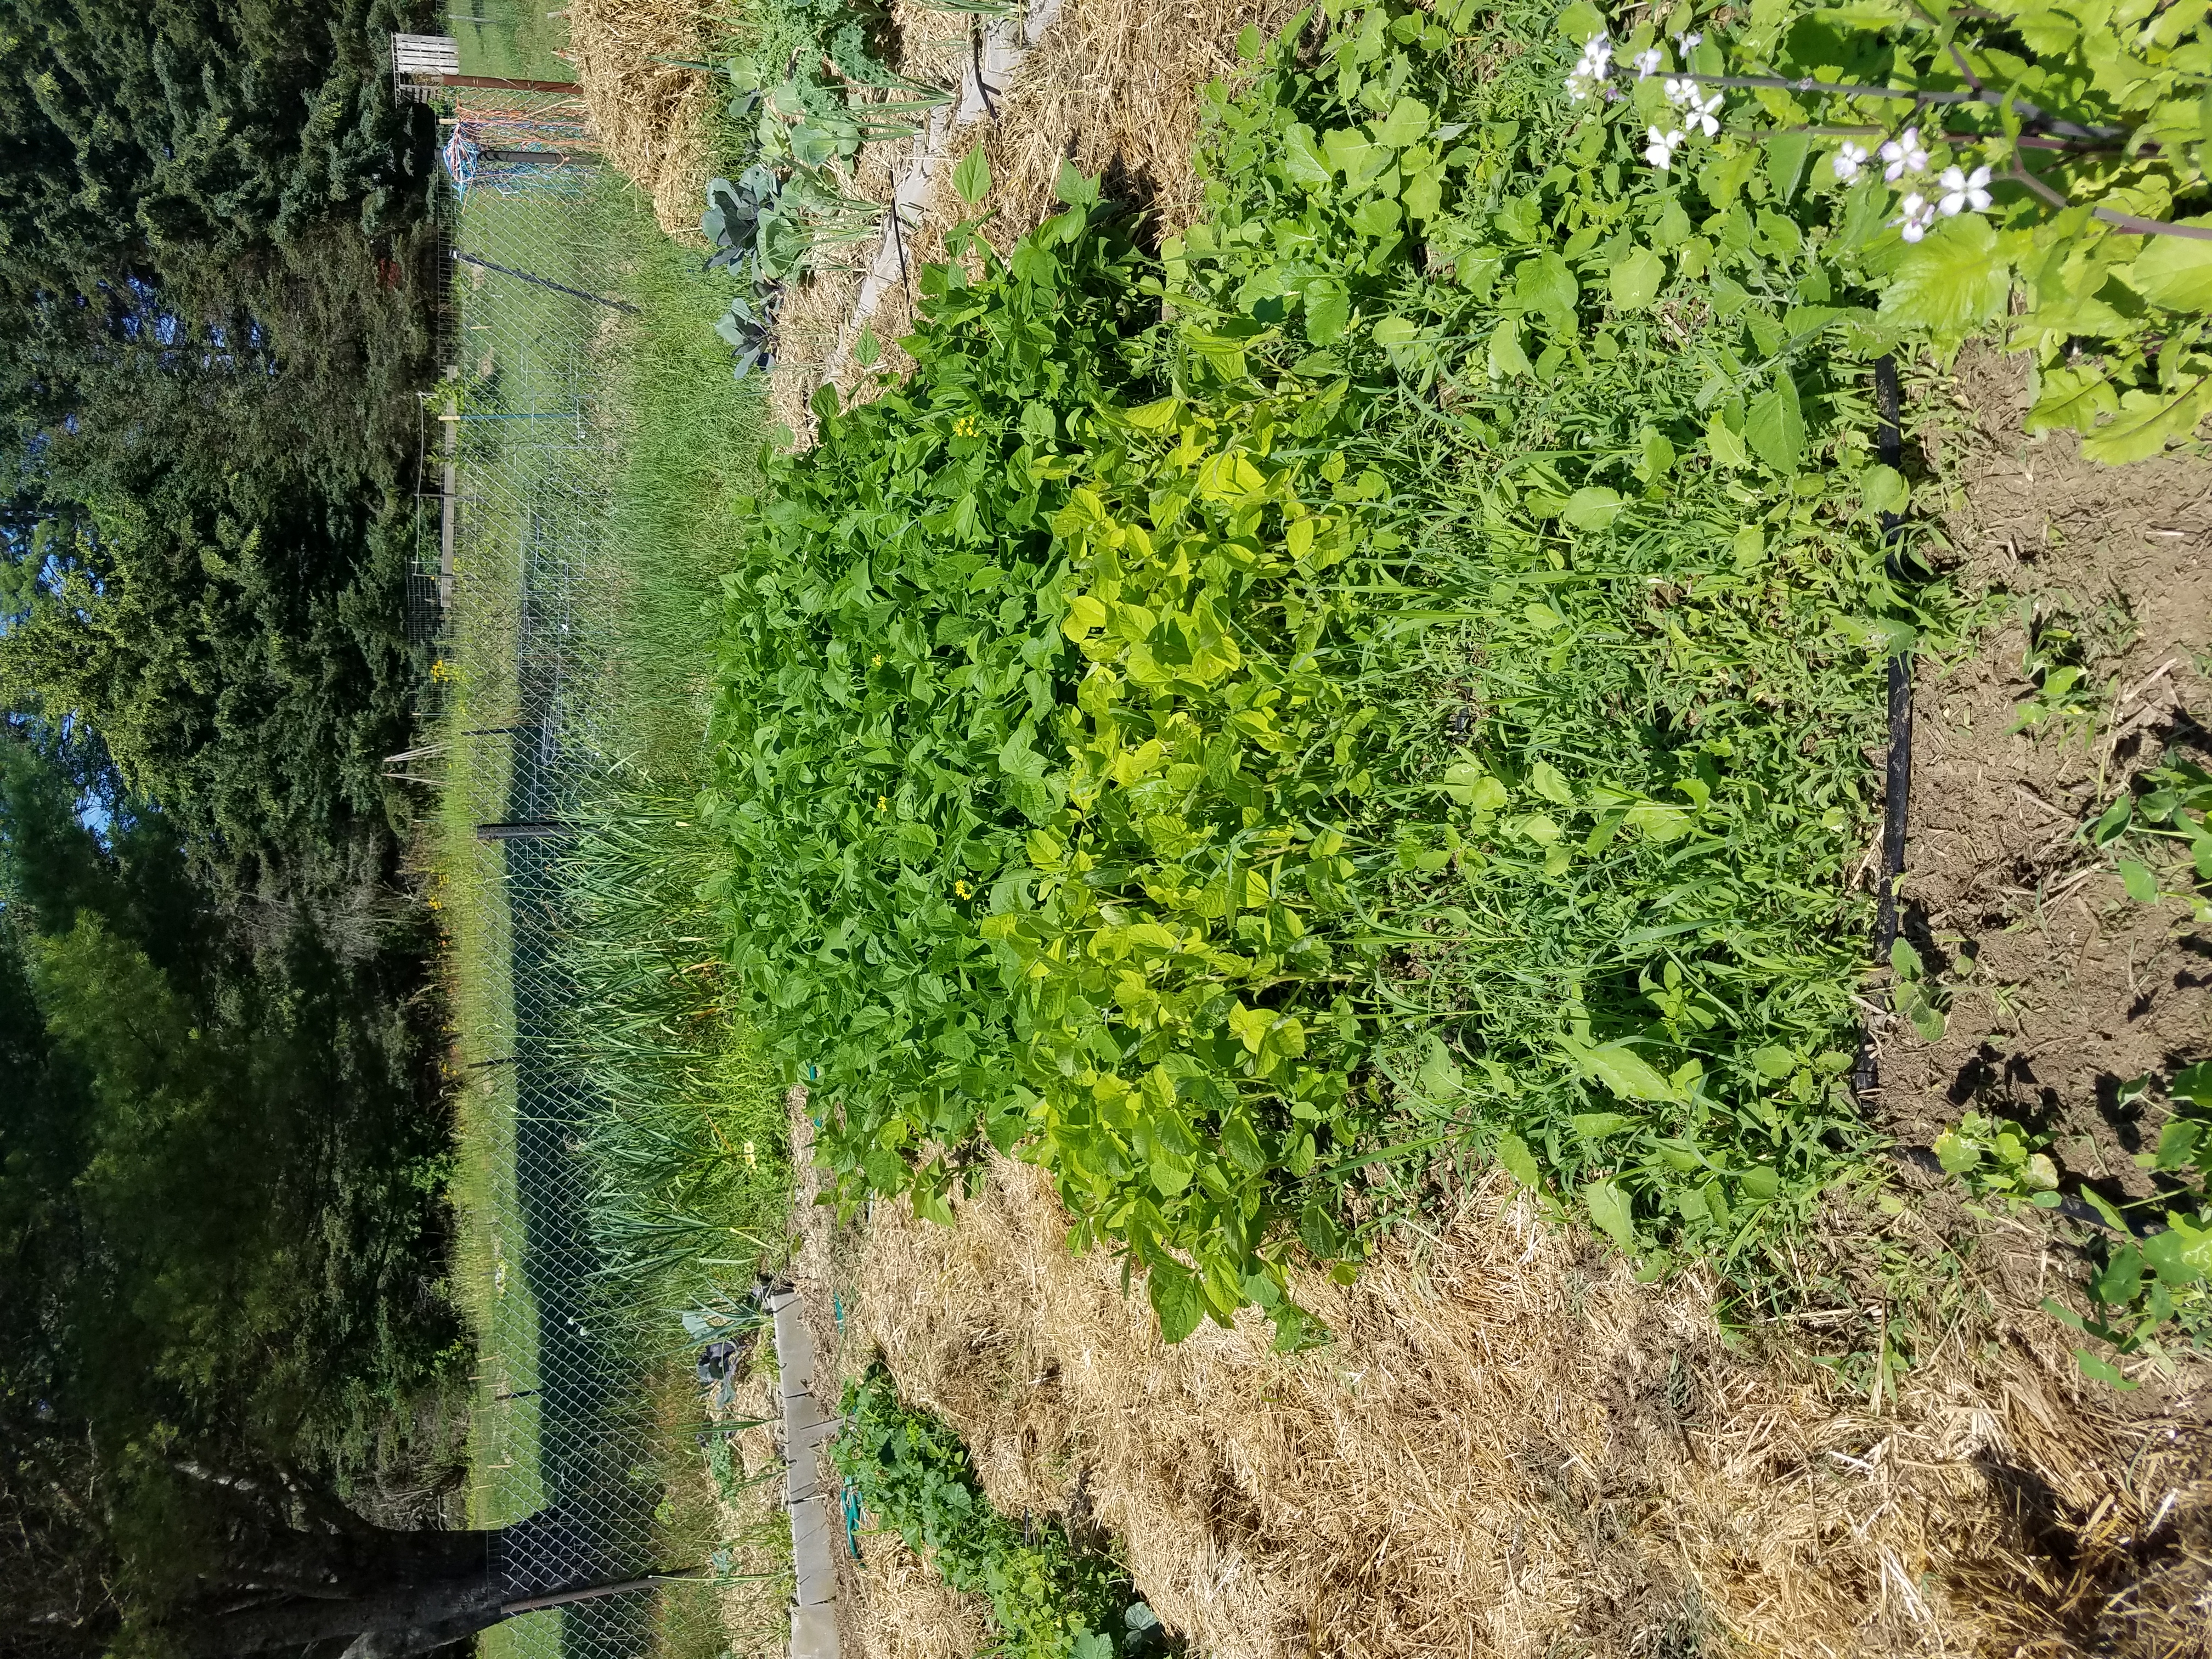
    So now we have the big one, haha! First, I bought a house to have land. Luckily for me, the land came with 18 apple trees, a cherry tree, 3 pear trees, blueberry bushes and grapevines already on the property, and a garden space already established. Of course, I’ve felt the need to expand and improve the garden, so there’s been some costs. Also to start seeds inside I needed lights, and I’ve added some plants here and there.

    • House and land – $170,000
    • Rototilling services $300 (I’m generally using no till, but I’ve tilled garden expansions to get started)
    • Garden dirt 10 yards $470
    • 150 cement blocks for raised beds $200
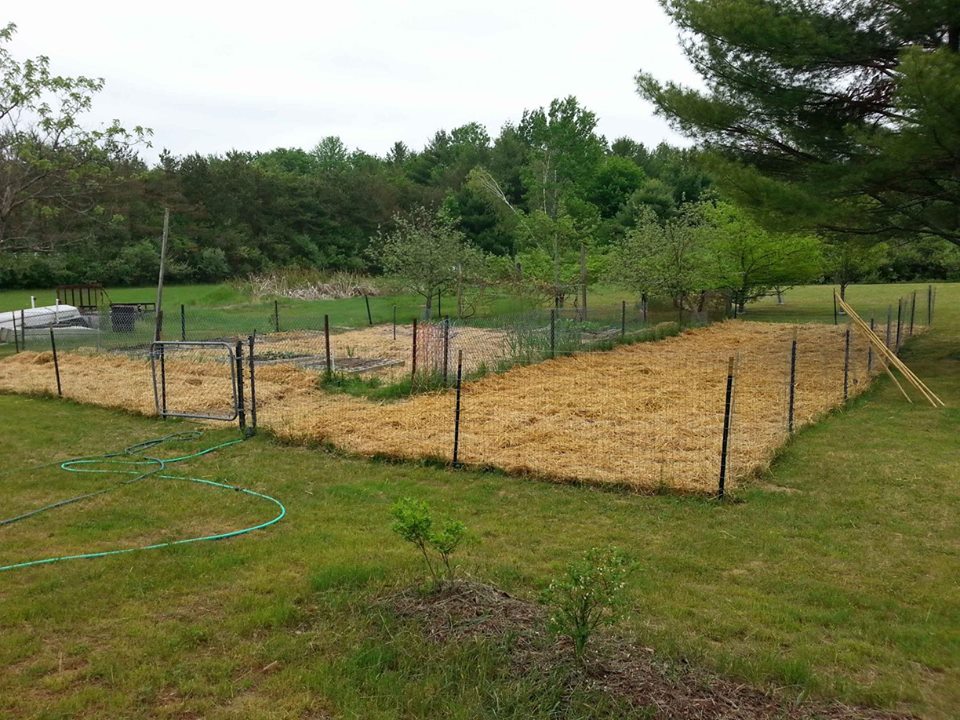
    • Garden fencing $233
    • Two sets of Vegetable Drip Tape Kit for up to 25 Rows each 20 ft. Long $220
    • Orbit 56082 3-Outlet Programmable Hose Faucet Timer $52
    • Gilmour D1 1-Pound-Capacity Dry Application Garden Duster to apply copper dust for tomato blight $24
    • Bonide Chemical 772 Number-4 Copper Dust or Spray,4 lbs $20
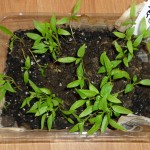
    • 6 four foot grow lights $300
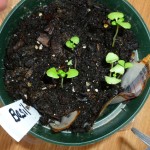
    • seed starting cells, two sizes $50
    • 4 inch nursery pots 200 $18
    • 1020 plant trays $40
    • Humidity domes for plant trays $30
    • Johnny’s 512 Mix – 60 Qt (soil for seed starting) $34
    • 12 x 16 foot Greenhouse courtesy of my sister $1,500
    • Concrete pavers, bricks and landscape fabric to put the floor in the greenhouse $280
    • 5 pound bag of cayenne pepper to dust plants to deter voles $27
    • Mouse/Vole traps – they break frequently so I spend $30-40 a year
    • Three five gallon buckets to make mouse/vole traps $9
    • Annual garden seeds, transplants, additional fruit bushes, trees, and vines, and perennial vegetables and flowers $120-500 a year (depending on what I decide to add, and what seeds I have left from the previous year)
    • Straw bales as mulch $200 a year
    • Black cow compost 50 lb bags about $50 a year

    So there you have it. Money I spend/spent because of my food allergies. Let us know if you have kitchen tools you can’t live with out, or if you have great gardening ideas.

  • Reading Restaurant Menus: the despair and the glory

    Reading Restaurant Menus: the despair and the glory

    MaryKate and Corinne of sparecake.com at some taqueria in Denver
    MaryKate and Corinne of sparecake.com at some taqueria in Denver

    I just read this in an online menu:

    SHRIMP & GRITS

    spicy New Orleans garlic sauce, poached eggs, Cajun seasoned baked grits

    peanut-free, tree-nut-free, gluten-free, egg-free, soy-free. ALLERGENS  dairy

    The menu writer appears to be working from the top 8 allergens list, which is fair, except they’ve failed to acknowledge two of the 8. Of the final two, fish and shellfish, one of these is in this dish. And this dish lists “poached eggs” on the line before it says “egg-free.” So as to not distract you from the important parts of the menu listing, I’ve also corrected three typographic errors.

    The restaurant’s website description talked about their seasonal inspirations, local sourcing, and vegetarian, vegan, and gluten-free options. But the subsequent menus were inconsistently marked. Only one was marked like the entry above, with allergens. The others just marked “vegetarian” options (which, in my experience, usually means they contain dairy, eggs, or both). Some of them listed ingredients, some did not.

    I read this menu and assume that this restaurant will try to kill me. I assume that the owners and managers do not at all know what the hell they are doing. I don’t trust this restaurant at all. But I worry about someone new to their own allergy apocalypse or to their child’s allergies, because when you’re new to this world, you might look at that and think the opposite — that this is a place that you could eat in safely because, look, they listed allergens.

    This is one of the reasons that I prefer to check out menus online before visiting restaurants. I can look at how they label their menus. I can look for obvious errors like this. I can look for restaurants that either label dishes “gluten-free” or even have full gluten-free menus — but that also have a disclaimer about not being celiac-safe, or discuss how they can’t prevent cross-contamination in a way that leads me to believe that their kitchen staff has no training. I make a lot of value judgements based on how things are worded, and I am comfortable with that because this is my health.

    Even with this pre-vetting, it doesn’t prevent experiences like the one Jack had the other day. I was having serious transit issues and was running late, so he ended up ordering food for me at a new-to-us restaurant that I had pre-vetted online but had not called. (I do not usually call. I am not always my own best advocate, I know. I should call.) They advertised “gluten-free buns” for their burgers and a dedicated fryer for fries, as well as all their locally-sourced ingredients. This made me hopefully that they’d carry one of the local gluten-free buns like two other burger places we’ve visited. In Seattle, both Olivia’s and NuFlours sell wholesale gluten-free vegan buns that are safe for me and tasty. They are local dedicated gluten-free bakeries, and their products are excellent. There is one other local option I’m aware of, the large Franz Bakery company, but their buns contain eggs & aren’t safe for me.

    Jack asked about the gluten-free buns, and no one knew. One employee brought out a box with an ingredient list on it, but it was a Sisco box for the regular buns. Given the lack of knowledge, he smartly ordered me a bunless burger. Both other burger joints we’ve been to have had the ingredient list on a card or taped up near the register so they can answer questions, as they know that many (not all, but many) people ordering a special bun may have a need to know the ingredients. Simple, but remarkably uncommon.

    I am amazed at the number of businesses advertising gluten-free or allergy-friendly products who do not have information about their ingredients on their promotional materials, on their websites, or even in their stores. If you are trying to cater to this market, you are not doing it well. When I’m visiting a city other than my own, I’m looking for these types of businesses, but if I can’t even find a sample menu on your Facebook page or website, I’m probably not going to take the time to call you to find out what you have. And I definitely won’t go out of my way to visit.

    I do understand that the majority of the restaurants and bakeries I’ve tracked down to visit are small businesses with limited capacity. The food allergy market is small, and so is the celiac market, though the “gluten-lite/-friendly/-aware” market is large. But it seems to me, as a patron instead of owner, that small businesses catering to this market should maximize the utility of their websites by making sure they provide as much information as possible — including how best to contact someone. If you want the food allergy market, be clear about what you do and what you don’t.

    “Dedicated gluten-free facility” or “dedicated peanut/nut-free facility” are important distinctions, as cross-contamination issues for these two allergens seem to be a greater concern than many others. I haven’t seen a lot of other “dedicated free” facilities, personally, but would be interested to know if others have.

    But rather than track down the bad websites, which are mostly businesses I did not bother to visit (or “out” the business whose menu I copied above, which isn’t productive — although if you recognize yourself or your business in this description — fix it!), I thought I would link you to a few businesses I’ve found in my travels that have done it right — including a few that told me clearly that driving way out of my way wasn’t worth my while, which I appreciated. List the ingredients. Be transparent. That’s all we want.

    Taffets bakery in Philadelphia has done an excellent job of listing all their ingredients and being open about their processes. Because most of their breads have eggs, we didn’t make a special trip to visit, but their website was really informative and allergy-friendly.

    Sweet Freedom in Philly also does a great job of listing ingredients for most of their standard recipes, and in the store they have carried through in labeling what’s in the case, as well. They do claim to be “corn-free” but I know that those of you who are corn-allergic would have some questions. If you’ve asked them, feel free to chime in.

    My two favorite dedicated gluten-free restaurants in Seattle are Capitol Cider and Ghostfish, both of whom do decent jobs on their online menus. Both are clear, upfront, that they are dedicated gluten-free businesses, which helps. Ghostfish lists ingredients, and marks what is vegetarian, vegan, and dairy-free. Their staff, from experience, is well-trained to not guess but check with the chef any time a diner has questions. (And their corn chowder made me ask my server if it was really vegan — but it is.)  Capitol Cider‘s menu is done similarly – not all menu items list potential allergens, which has made me ask extra questions about some of them, but the ingredients lists and allergens on most things are super-helpful and confidence-boosting.

    And for dessert, Seattlites, check out Frankie & Jo’s (vegan ice cream, gluten-free, but mostly nut-based, all ingredients listed for all flavors).

    Because we want good things for all of you who read this blog because you have allergies or someone you love does, I also offer the following tips:

    Be clear about what type of business you are. If you are a vegan business, a gluten-free business, or both, state it clearly. Don’t make a reader guess. If you’re worried about scaring away customers, you don’t have to make it your headline, but put it in your “about” page. We are reading most of the website.

    If you are a gluten-free business, tell me whether your store and cooking space are dedicated gluten-free spaces. Same if you are a nut-free or peanut-free business. Cross contamination for these particular allergens seem to be a bigger problem than for other ingredients.

    If you want to claim you are corn-free, consider reading our page on why we don’t declare recipes “corn-free.” See if you still feel comfortable with that designation.

    If your products are mixed — some are gluten-free, some aren’t, some are nut-free, some aren’t, you serve seafood but also non-seafood, some of your dishes are vegetarian and some aren’t — tell us how you insure that things aren’t screwed up in the kitchen. Do you have dedicated prep and/or cooking spaces? If you fry foods, do you have a “safe” fryer — do you have a dedicated gluten-free fryer or a non-seafood fryer? Do you use peanut oil to fry things? Do you train your staff using a specific protocol (Massachussetts has one)? Do you use particular dishes or serving protocols?

    If you’ve taken the time to do these things, TELL US. Advertise your work. Eating out is a big part of social lives in the US, and it’s a part that becomes a minefield when you have food allergies. We really want to go out to eat, but safely, and if you make it easier for us — let’s just say that we’re dedicated patrons.

    Readers, do you have good (or bad!) examples of allergen statements on menus? We’d love to know about them.

  • WW: Gardening due to Food Allergies – Planning your Garden & Starting Seedlings

    WW: Gardening due to Food Allergies – Planning your Garden & Starting Seedlings

    One of the raised garden beds made with cement blocks
    One of the raised garden beds made with cement blocks

    Okay, I’ve been telling MaryKate that I was going to do this post for a Whatever Wednesday since we bought the house.  Obviously, that hasn’t happened. But better late never, and I’m currently trying to ignore the blizzard raging outside while writing this post and dreaming of spring.

    Depending on your cocktail of allergies (corn, I’m looking at you), growing some of your own food may become something that you want or need to try, based on your local food resources, your sensitivities, and the failures of the food industry to properly label ALL food ingredients. I won’t get into my diatribes about the food industry and regulatory concerns as they are unlikely to be addressed in the near future. Instead, let’s get to playing in the dirt, and planning to play in the dirt.

    Here’s the original post about us deciding to buy the house – WW: Living with Food Allergies & Making Unexpected and/or Unwanted Lifestyle Changes.  To summarize, due to the amount of food preservation I needed to do, the costs of purchasing vegetables, having to make my own personal care products, and our storage needs, we needed to buy a house so I had room to do all that and garden. We were lucky enough to be able to buy a house that has three acres of land, an established set of fruit trees (18 apple, 4 pear, 1 cherry), grapevines, blueberry bushes, and Nankin cherry bushes, as well as an established garden plot. Since we bought the house, we’ve expanded the garden plot from its original foot print, added a side garden with a perennial herb garden and a perennial garlic bed, established an asparagus bed, planted 150 strawberry plants, planted a bed of perennial Egyptian walking onions, added two more grapevines, and installed some drip irrigation.

    Main garden and expansion
    Main garden and expansion
    Side garden
    Side garden

    This year, I’ll be adding another 100 asparagus plants, another 150 strawberry plants, 5 raspberry bushes, and 5 blackberry bushes. I’d like to add more blueberry bushes and a couple of fruit trees, but it depends on the budget – it may have to wait until next year.

    If you’re thinking about starting a garden, your local cooperative extension may have great information for you. New Hampshire has great resources, and I’ve gone to a couple of their classes to learn how to prune my fruit trees, blueberry bushes and grapevines, and to learn about Integrative Pest Management. Your local cooperative extension may also have fact sheets and online resources that are helpful.

    Unless you are container gardening, you should probably get your soil tested, so you know how to help your soil for particular crops. New Hampshire provides that service for a small fee, and your local cooperative extension may too. They give you recommendations for what to add to your soil for your particular crop. They also have fact sheets about growing various fruit and vegetable crops.

    Guessing at how much to plant of what to get decent yields to preserve through canning, freezing or dehydrating is another whole ball of wax, and is something I don’t have a good handle on yet, given the turnip and daikon incidents. The weather will also play a key role. You can plan all you want, but some years you’re going to get a great harvest, and some years you’re going to get nothing of a particular crop. My first apple crop here was amazing, apples were coming out of my ears and I gave bushels away. Due to a killer frost last February, I lost nearly all of the second crop, and had enough from 18 trees to do an apple cranberry crisp. Based on the up and down temperatures this year, I’m guessing I’m likely to lose most of this coming year’s apple crop as well. Gardening is the closest natural thing you can do to gambling, I think. Here are some articles that may help though:

    Once you’ve decided what you want to grow, and roughly how much of it, you need to decide when to plant and when to start seedlings. As New Hampshire has a short growing season, many vegetable plants must be started inside in order to get a harvest. You need to determine what zone you are in to determine when to start your seedlings and when to plant outside. I am in zone 5b. Once you know your zone, you can check out the Old Farmer’s Almanac Frost Calculator to determine your last spring frost. Although the last spring frost is listed as May 20th with a 50% probability, I use May 31st.  And because I’m me, I plug that information into a spreadsheet and using cultivation information on the seed packet or the website where I got my seeds, and make a plan. I’m in the process of revamping my spreadsheet for this year, as I plan to consolidate some of my raised beds and I still have to plan where some of my plants are going.  Since that’s not done, I’ll provide you with a copy of last year’s sheet here.

    You’ll note that there are lots of pages to the spreadsheet. The first sheet is the Planting Schedule. The first column heading “Plant” is the name of the vegetable, fruit, herb or flower that I’m planting. The second column heading “When to Start Inside” has two sub columns, the “Earliest Date” and the “Latest Date”. Starting too early can be just as bad as starting too late, as plants may get spindly and root bound. The third column “Safe time to set out plants relative to frost free date” based on the information on the seed packet. This information is then translated to the actual dates for my growing area based on the frost free date, as contained in column 4 “Setting out dates”.  Column 5, “Actual Planting Date” is the date I started my seeds. I tend to keep records to try to see what worked and what didn’t each year, which I might also note in the Column 9, “Notes”. Column 6 contains the number of seedlings planted, which we’ll discuss further later. I use a modified version of the square foot gardening method, and in Column 7, I’ve added the number of plants per square foot to help me plan the beds.  Column 8 is the date I actually set out or transplanted the plants in my garden.  As you go down the list of plants, you’ll also see that there’s some that say direct seed.  That means I am not transplanting, but sowing directly into the soil, on the earliest date in Column 4, “Setting out dates”. All of the dates are based on the frost date for my area, and the information on the seed packet. You would need to change this information based on the frost free date for your zone.

    The second sheet, titled “Bed Plan Numbers” is a place for me to calculate the total number of seedlings for each thing I’m growing so I know how many seedlings to plant.  This is the place that I aggregate the number of plants, once I’ve completed the plans for the garden and the raised beds.

    The next three sheets contain the plans for each garden (one square is a foot) area showing the larger plants that spread, and place holders for the raised beds. The following eleven sheets contain the plan for each raised bed. For example, if you look at the main garden plot plan, a blue hubbard squash plant requires a 3 foot by 3 foot area (9 square feet) and I have a big blue square denoting that in the upper left corner. In fact, the plan shows that I would plant 6 plants, although these are planted directly in the garden and are not started inside. If you looked at the following eleven raised bed plans, each contains a map of what I intend to plant in that bed that year.  So if you looked at the first line of the Bed Plan Numbers sheet for Basil, Aroma variety, it shows that I intend to plant 10 in Bed 1, 5 each in Bed 6 and 7, and 10 in Bed 10, which means I need to start 30 plants inside as seedlings. I might add a few extra to account for seedlings that don’t make it, or don’t germinate, or to account for the damned voles that keep eating my seedlings. But this is basically how I get a place to start. I then enter the total number into Column 6, # of seedlings planted, of the Planting Schedule so I know how many I planted.

    Each year I have to revamp the plans, because I rotate my crops.  You don’t want to plant the same plants or family of plants in the same area each year because it can allow encourage plant diseases and pests. In addition, I use companion planting principles as much as I can to help deter pests and disease as well. Which is why I use a new spreadsheet each year and save the last so I can review what I had and where in determining where things will go the following year.

    I buy my seeds and plants from a few sources, depending on what I’m looking for. The vast majority of my seeds and plants come from Johnny’s Selected Seeds. They also have a great grower’s library reference on their site. I also like Baker Creek Heirloom Seeds, for rare and interesting stuff. Occasionally I may pick up a thing or two from Burpee, but only if it looks interesting and I can’t get it from Johnny’s. I will also occasionally buy flower bulbs from various places, but we’re focusing on food here. Although I have my eye on some saffron crocuses…

    Because I don’t have enough natural light I use lights like these (no affiliation with Amazon). Their height adjustable so you can raise the lights as the seedlings grow. I use trays like this (no affiliation with Johnny’s), domes that cover the trays like this until the seedlings grow larger, Johnny’s 512 Mix soil, and either Seedling Starter Trays or Fertil Pots from Johnny’s.  The NH Cooperative Extension has a guide for growing plants from seed and some Tips for Growing Great Seedlings at Home.

    Seedlings under light
    Seedlings under light
    It’s really important that you follow the hardening off directions in the NH Cooperative Extension guide for growing plants from seed, otherwise you may do a lot of work for plants that wilt and die once you get them in the ground, or suffer so much transplant shock that you never get anything from them. Here’s a nice guide on transplanting as well. You can also get plants from the nursery, but that gets really expensive for the number of plants I’m growing.
    I’m not an expert gardener by any means, but I hope this helps a bit if you’re thinking about starting to growing more of your own food. Of course, there’s no reason that you have to be this crazy to start, you can just start with a couple of tomato plants and see how you do.
    Have fun getting dirty!
  • WW: Homemade Tick Repellent

    Tick Identification chart
    Tick Identification chart

    So as many of you know, my husband and I bought a house in January so we could have a garden and grow food, have space to can and do food prep, and make all the things that I need, like soap, lard and tallow, that were really inconvenient to make in a second story balcony apartment. We now have a large garden, a huge lawn, and a lot of fruit trees.  And when spring came, we also had a crap ton of ticks.

    Because of my allergies and as I was trying to grow safe food, I didn’t want to use pesticides. I looked into diatomaceous earth, but I didn’t want to kill the bees. I looked into commercial stuff I could spray on my clothes, but they didn’t have the inactive ingredients listed, so I didn’t know if it was safe for me. I found an all-natural tick repellent at Blue Seal Feeds that used essential oils, but it had citric acid (corn) in it. I looked online for other all-natural repellents, but they had other corn or coconut derivatives. So I did a little googling, swiped some of the ingredient list from one of the all-natural repellents, and came up with a do-it-yourself version. Make no mistake, it reeks. But if I sprayed down my clothes and my rubber boots with it, I didn’t get ticks. Now, I don’t know if that was coincidence or not, but since I really don’t need Lyme disease in addition to my body deciding to be allergic to the world, I’ll keep using it. Also, if you want more information on ticks and tick-borne diseases, check out the information from the CDC.

    I used an essential oil 4 ounce spray bottle (shown only for illustration purposes, we have no affiliation with Amazon or the seller).

    Homemade Tick Repellant

    • 2 ounces of apple cider vinegar
    • 1 ounce of water
    • 20 drops of peppermint essential oil
    • 20 drops of Eucalyptus citradora essential oil
    • 15 drops of lemongrass essential oil
    • 15 drops of rosemary essential oil
    • 10 drops of tea tree essential oil

    Put all the ingredients in your 4 ounce spray bottle, put the sprayer top on and shake well.  Spray on clothes and shoes.  Make sure you don’t get it into your eyes, it would not be fun.

    It also seemed to help with the black flies, but I’ve not yet tried it with mosquitoes. When I do, I’ll let you know how it goes.

    Be safe out there!

  • WW: Living with Food Allergies – Making Unexpected and/or Unwanted Lifestyle Changes

    The new digs
    The new digs on the day of purchase

    So, food allergies can change your life plan a bit. When I (Denise) was young, my witnessing and participation in family dysfunction and associated drama made me decide that I pretty much never wanted to own real estate. I viewed it as a trap, because if you rented, you could bug out at any time, and there were no strings other than some financial penalties for getting out of a lease early. In addition, it was limited responsibility, as it was the landlord’s problem to fix the sink, or whatever else came up, and plow and mow lawns and all that stuff I had very little interest in doing. Also, as a younger adult who owed $100,000 (which later ended up being $130,000 due to hardship forbearance interest capitalization) on my student loans, it’s not like anyone was going to loan me any money to buy a house. The only thing I missed about living in a single family house was being able to have a garden, but it wasn’t a priority at the time. Gardening was something I had done as a kid and a teenager for fun, but when I was still a practicing attorney, it’s not like I had time to spend in the garden when I was working 60 to 80 hour weeks.

    When I was diagnosed with food allergies, I wasn’t thinking that my living space needed to change. Most of the first round of foods I lost after testing positive and failing food allergy challenges just necessitated a change in cooking style. When the second round hit, yeah, I needed to make my own lotions, toothpaste, laundry detergent, shampoo, and so on, but it still wasn’t that bad. And then corn reared its golden, pointy head, and said, “Oh yeah? Watch this.” Because I love my condiments and because a corn allergy means no more processed food basically, and because I didn’t have tons of time to make stuff up from scratch each time I needed it, and there was limited freezer space in the apartment (not to mention the 4-5 day power losses we were experiencing every other winter), I elected to learn to water bath and pressure can. Picture over 500 jars of canned food in a two bedroom apartment. Also, picture processing 60 pounds of tomatoes into whole canned tomatoes that you paid a crap ton of money for at your local CSA farmer’s in a small two bedroom apartment kitchen with no windows. And then corn said “Oh, and hey? That Kiss My Face Soap you’re using that’s safe for your coconut allergy? I’ve managed to get myself in that too, although I’m not on the label.” So I started making my own soap, using lye and potassium hydroxide to make my own soap, bar and liquid respectively, to use for soap, shampoo, and laundry detergent. We did it in Mary Kate’s parking lot, and I made a couple of batches on my second floor balcony, with a board under the crock pot so as not to spill caustic lye solution on the downstairs neighbors. Hilarious right?

    I had known in the back of my mind since just after the corn diagnosis (about a year and a half before we started looking) that we needed to buy a house. But I just didn’t want to. I didn’t want to be a grown up and deal with all that responsibility, because I had enough stupid food allergy food prep and making-my-own-everything crap to do. So I ignored it for a really long time. But before Stitches East 2014 in October (huge yarn and knitting convention for the non-knitterly), just after picking up a microwave I was borrowing so that I could nuke all the safe food I had canned, wrapping the glass jars in towels in a suitcase because corn totally rules out restaurant eating, I saw a for sale sign and started thinking about it. Maybe because I was sick as a dog with a head cold, the strength of my denial as to the reality of the situation became weak. And then when I got back to the apartment, I went on some real estate sites, and two hours later called my Mom and asked if she thought I was crazy to even think about it. And when she said that she had been thinking that it was probably something I need to do, when she is also fairly anti-real estate, it was really annoying. Because I’d hoped she’d talk me out of it, and if she wasn’t, it was probably fairly obvious that that’s what I needed to do.

    So after getting referred to a mortgage company by a friend (if anyone in NH needs a mortgage guy, seriously, Frank is the man), and finding out that there were first time home buyer programs that I could take advantage of and I’d have to put very little money down, it appeared I could buy a house. Which was again, somewhat annoying, because I’d kind of secretly hoped that I couldn’t get financing. But the fact of the matter was, I just couldn’t continue doing what I was doing in my apartment space, spending what I was spending on safe vegetables, and hoping that the neighbors didn’t call the cops on me thinking I was making meth while I made soap on the balcony.

    So we signed a purchase and sale in November, negotiating a closing date at the end of January (my lease wasn’t up until the end of March and we were trying to mitigate the financial hit). The big draw on the house was that it has three acres, a good bit of it is cleared, and there are already apple, pear and cherry trees and grape vines, and there was already a fenced in garden area (the photos are from the real estate listing, it’s not close enough to spring yet):

    Garden photos
    Garden photos
    Garden photos
    Garden photos

    We had to paint the whole interior except the walls on one bathroom. These are the before pictures:

    These are in progress and finished painting pictures. Seriously, I never want to pick up a paint brush again. And if I ever tell anyone that I’m going to paint the entire interior of a house, including ceilings again, slap me. Even with vast amounts of help we got from our friends, for whom we will be forever grateful, it was a crazy undertaking.

    We moved in at the end of February. We unpacked for three weeks, and I got hives from the boxes again (thanks corn!). Here are the unpacked photos, except for the bedroom because I apparently forgot that, and I don’t feel like picking it up and making the bed now so that I can take a picture to put in the slide show:

    We’ve had to fix the insulation and ventilation in the roof, which we knew about, and we’ve fixed the furnace twice, which we didn’t know about, and we’re about to replace a water heater, which we didn’t know about either, and a tub and surround because the valve that goes between the shower and faucet decided to let go after we moved in (it’s stuck on the shower setting, so that’s good). And since the plumber’s going to be here, and the double sink in the kitchen is awful for canning, we’re replacing the sink and faucet in the kitchen as well. So, regular new homeowner stuff, except that’s kind of why I never really wanted to buy a house in the first place.

    But we’re settled, we have room to move and work now, I’m able to store my canning equipment and food in the garage, and we’ve been able to start our garden some of our seedlings, and we’ve been gifted a few by a friend (Thanks Mary R!):

    Okay, so maybe the Homer Simpson Chia Head isn’t for the garden, but now I have a place that gets enough light that I can have house plants that don’t die. Not that I’m sure that a Homer Simpson Chia Head counts as a house plant.

    Eventually, once the snow clears and I’m able to get the garden started in earnest, and I start working on projects again, as I’m low on my homemade liquid soap, and most of my canned food, I’m sure I’ll be much happier about the change. I’m think I’m still in the shell-shocked and exhausted phase, but I think this was the right move for us. I just wish that our street name was different – we now live on Corn Hill Road. Given that my corn allergy was the impetuous for buying this house, I really think I need to get a sign for the house to hang over the door. I want to call it “The House of Irony.”


  • WW: PSA — What's your anaphylaxsis plan?

    I know, you’re thinking that maybe a pre-holiday post should be cheerful or full of cookies or booze or something, yes? Well, instead we’re thinking more “tragedy prevention” and “preparedness.” We did name our blog “apocalypse,” after all. Being prepared lets me enjoy things.

    As great as the holidays can be, they are also potentially dangerous for those of us with food allergies. Potlucks, family dinners, travel, eating out … so many places we don’t fully control our own food. As much as we work to mitigate our own risks, accidents happen. So while we hate to pull this gloom cloud into your holidays, wouldn’t you rather discuss what to do IF something happens than deal with the tragedy of being unprepared?

    What is your plan for an accidental food allergy exposure? Do you have one? If you do, do the people around you know what it is and how to work it or help you? Do you AND the people around you know all the possible symptoms of an allergy exposure? It’s not just throat-closing sensations.

    DON’T ASSUME. MAKE SURE. HAVE THE CONVERSATIONS.

    FARE has an action plan you can use. Make sure your friends and family a) know your allergens, b) know your plan, and c) know where you keep your epinephrine injectors and/or your antihistamines. Make sure they know how to stab you if they need to, make sure they know what to do next. Don’t rely on the ER. You know you’re the only one who can properly advocate for your own care, but remember to do it before you need people to read your mind.

    I guess I always feel that if I’m prepared for the worst (you know, like anaphylaxsis) then you can relax and enjoy everything else.

    Safe and happy holidays, everyone.

  • WW Kitchen Stories: Mary Kate's Rice Cooker

    Mary Kate's Rice Cooker
    Mary Kate’s Rice Cooker

    If you are gluten-free, you might find that rice becomes an even more important staple in your diet. I actually discovered the variety of rices out there  when I tried out eating vegan for a while right after I cut out dairy (and as far as I know, my friend Cathy may still be eating all the random bits of rice I passed on to her when I moved, many years ago). With the right rice to pair with the right foods, rice becomes more than just a base for Chinese takeout. I still really do not like brown rice with “traditional” Chinese(American) style food; white rice tastes right. But brown rice with roasted veggies is fantastic, sushi rice with saucy foods, jasmine rice with delicate flavors. Rice is amazing. I can see why it’s a staple food in many parts of the world.

    But you may have noticed that, while I make a lot of rice dishes, my instructions for rice usually boil down to “cook it. However you can.” That’s because despite being reasonably adept in the kitchen, my sad truth is that I cannot cook rice on the stovetop. In a pot, with water, like a normal person.

    Or, as my college roommate put it in the birthday card that came with the rice cooker, “I don’t know why you can bake a 10-layer cake but not cook rice, but here, this should fix it.” That’s not verbatim. I may have the card somewhere, in a box, but it was along those lines (but possibly with more profanity. This is the same person who sent me Geritol for my 30th birthday.)

    This is true. My first baking “experiment” was a concoction called the “Heaven and Hell Cake.” Go ahead and Google it. I found it in a USA Today while my family was on vacation in Florida, along with a story about a chef whose parents ran a diner, and his childhood conundrum: angel food cake? Or devil’s food cake? So he combined them into an 8-layer cake, alternating angel food and devil’s food, with peanut butter mousse between and a chocolate ganache over it all. Ridiculous. And also full of so very many things that I cannot now eat, so I’m glad I got a chance to try it.

    But standard rice? Even of the Uncle Ben’s variety in the nice orange box with very specific cooking instructions on the side? Stymied me. It was always mushy or partly cooked, or otherwise barely edible.

    A rice cooker fixes that pretty solidly. You still need to measure the rice and the water. In my rice cooker, a spritz of oil on the bottom is necessary or it sticks pretty badly. But after that, you turn it on and let it go. It turns down to warm when it is done. Easy, right? Yeah, it still took me 6 months to get it right regularly.

    Rice cookers come in super-basic models which basically turn on when you plug them in, to super-fancy models that should be able to know when you’re getting home from work and have a 5-star meal on the table. When I took a Chinese cooking class from a local Chinese restauranteur in Bismarck, our instructor told us that spending a lot of money on a rice cooker was pointless (or at least unnecesary). His advice was to buy a basic cheap one, use it until it died, and then buy another. I think I’ve had this one 10 years and as long as I measure the water right, it has never failed me.

    I’m mostly in agreement with Alton Brown’s rants against the evils of single-use kitchen devices, but this one solves a very great need. My rice cooker not only fixes one of my basic culinary inadequacies, but it also frees me up to concentrate on the vat of stir-fry I’m making or the sushi salad veg I’m working on, or whatever else I am doing. In theory, I could also steam veggies in the basket that came with the rice cooker, but I’m not sure which box it’s in. This appliance may be a one-trick pony, but it’s a really good trick.

  • WW Kitchen Stories: Rosemary or Denise's Spice Issues

    My name is Denise and I have an addiction to spices and some sort of spacial evaluation dysfunction where I am unable to translate how much a quantity of spice I am ordering will actually be in real life. I have a free standing wooden cabinet that is five feet tall and about a foot wide and a foot deep in which I keep all the spices. Except that I ran out of room, so I now also have a banker’s box which is full of spices, and a plastic file folder box full of chilies, which are both kept next to the spice cabinet, circled below. Oh, and looking at the picture, I forgot about jars on top of the spice cabinet, and the string of chilies hanging on the side. Oops.

    My Spice Cabinet and Annexes
    My Spice Cabinet and Annexes

    I also have a spreadsheet on my Google Drive which has my spice inventory on it, so that I can keep track of what I have, and can access it on my phone so that I do not buy something I already have while I am out and about. The spreadsheet has 169 items on it.

    Screenshot of my Spice Inventory
    Screenshot of my Spice Inventory

    One day, I believed that I was out of rosemary, which was annoying since I had just received a massive order from Penzey’s Spices not a month before. But since I had just ordered from Penzey’s, I did not have enough items to order to get free shipping. So I looked for other sources with shipping and ending up deciding that it was a good idea to order a pound of rosemary because it was such a good price.

    What a one pound bag of rosemary looks like.
    What a one pound bag of rosemary looks like.

    The picture you see above, note the helpful measure tape to show you how big it is in real life, depicts a pound of rosemary. I’m not sure how I’m going to use this much rosemary in my lifetime. What is even more ironic, is that I had forgotten that my friend Mary, the kale whisperer, had put in an order with Penzey’s a couple of weeks after I did, and I had purchased a four ounce bag of rosemary in her order. However, I had forgotten to note it on my spreadsheet and forgotten to mark it off on my to-do list. So I ordered a pound of rosemary, because I thought I didn’t have any, even though I did. So now in addition to the behemoth bag of rosemary above, I also have a four ounce bag kicking around.

    We will not speak of the three pounds each of yellow and brown mustard seeds that may have been purchased before the rosemary incident and the two pounds of fennel seed that may have been purchased after. However, if anyone has some ideas for using massive quantities of fennel seed, I’d love to hear them.