Notice: Function _load_textdomain_just_in_time was called incorrectly. Translation loading for the wp-ultimate-recipe domain was triggered too early. This is usually an indicator for some code in the plugin or theme running too early. Translations should be loaded at the init action or later. Please see Debugging in WordPress for more information. (This message was added in version 6.7.0.) in /home/maryzahc/public_html/adultfoodallergies.com/wp-includes/functions.php on line 6121
WARNING – TREE NUTS – Page 5 – surviving the food allergy apocalypse (archive)

Tag: WARNING – TREE NUTS

Contains tree nuts such as cashews, almonds, walnuts, and pecans.

  • Chicken Primavera Alfredo

    Chicken Primavera Alfredo
    Chicken Primavera Alfredo

    Okay, first things first.  My good camera’s battery hit the skids half way through cooking this recipe, so I had to resort to my cell phone camera. Which means that some of these pictures are more terrible than they usually are. Now on to the subject at hand.

    Alfredo sauce. Seriously, before the food allergy apocalypse, this was one of my very favorite things. When I was first diagnosed, I tried to make a soy based Alfredo sauce, and I took one bite, and dumped the rest of it down the sink. I may have also spit the bite I took in the sink. (Yes, I’m that classy.) You may remember that I have mentioned that I’m not a fan of soy milk. So when Mary Kate and I decided to do this blog, Alfredo sauce was one of the first things that I put on the infamous spreadsheet for us to find a solution to. I think I’m finally there. Even my husband, who can still eat dairy, says that this is amazingly close. This recipe will not help those of you with a nut allergy, as the base is made of cashews. Although the sauce itself is gluten free, I did use regular pasta, which is not. So if you want to make this recipe gluten free, just use gluten free pasta (MK suggests Schar pasta (I’ve only had the penne), Quinoa pasta (here, only had the macaroni), and Trader Joe’s corn pastas).  This recipe will probably feed about 4-6 people depending on portion size.

    Alfredo Sauce:

    • 1 cup of raw cashews or cashew pieces (pieces are cheaper, buy those) 
    • 4 teaspoons of lemon juice (fresh is better but the bottled will work in a pinch)
    • 1 teaspoon of roasted minced garlic (you can get it in a jar at the grocery store)
    • 1 teaspoon of salt
    • 1/2 teaspoon of fresh ground black pepper
    • 1/4 teaspoon of nutritional yeast
    • dash of nutmeg
    • dash of paprika
    • dash of sage
    • 1 1/2 cups of boiling water
    • 1 tablespoon of Earth Balance Natural Buttery Spread Soy-free
    • 2 teaspoons of cool water
    • 2 teaspoons of corn starch

    Chicken Primavera Ingredients:

    • 1 to 1 1/2 pounds of chicken breast, sliced into strips
    • seasoned salt
    • black pepper
    • 2 tablespoons of canola oil
    • 2 cups of pasta (small shells, macaroni, etc.)
    • 1 – 16 ounce bag of frozen mixed vegetables
    • enough water to cook the pasta

    First, make the Alfredo sauce:

    Put the tea kettle on to boil your 1 1/2 cups of water first.  You will need your blender. Take your 1 cup of cashews and grind them into a fine powder.  You can do this in the blender, but I like to grind them in a coffee grinder that I use specifically food and spices.
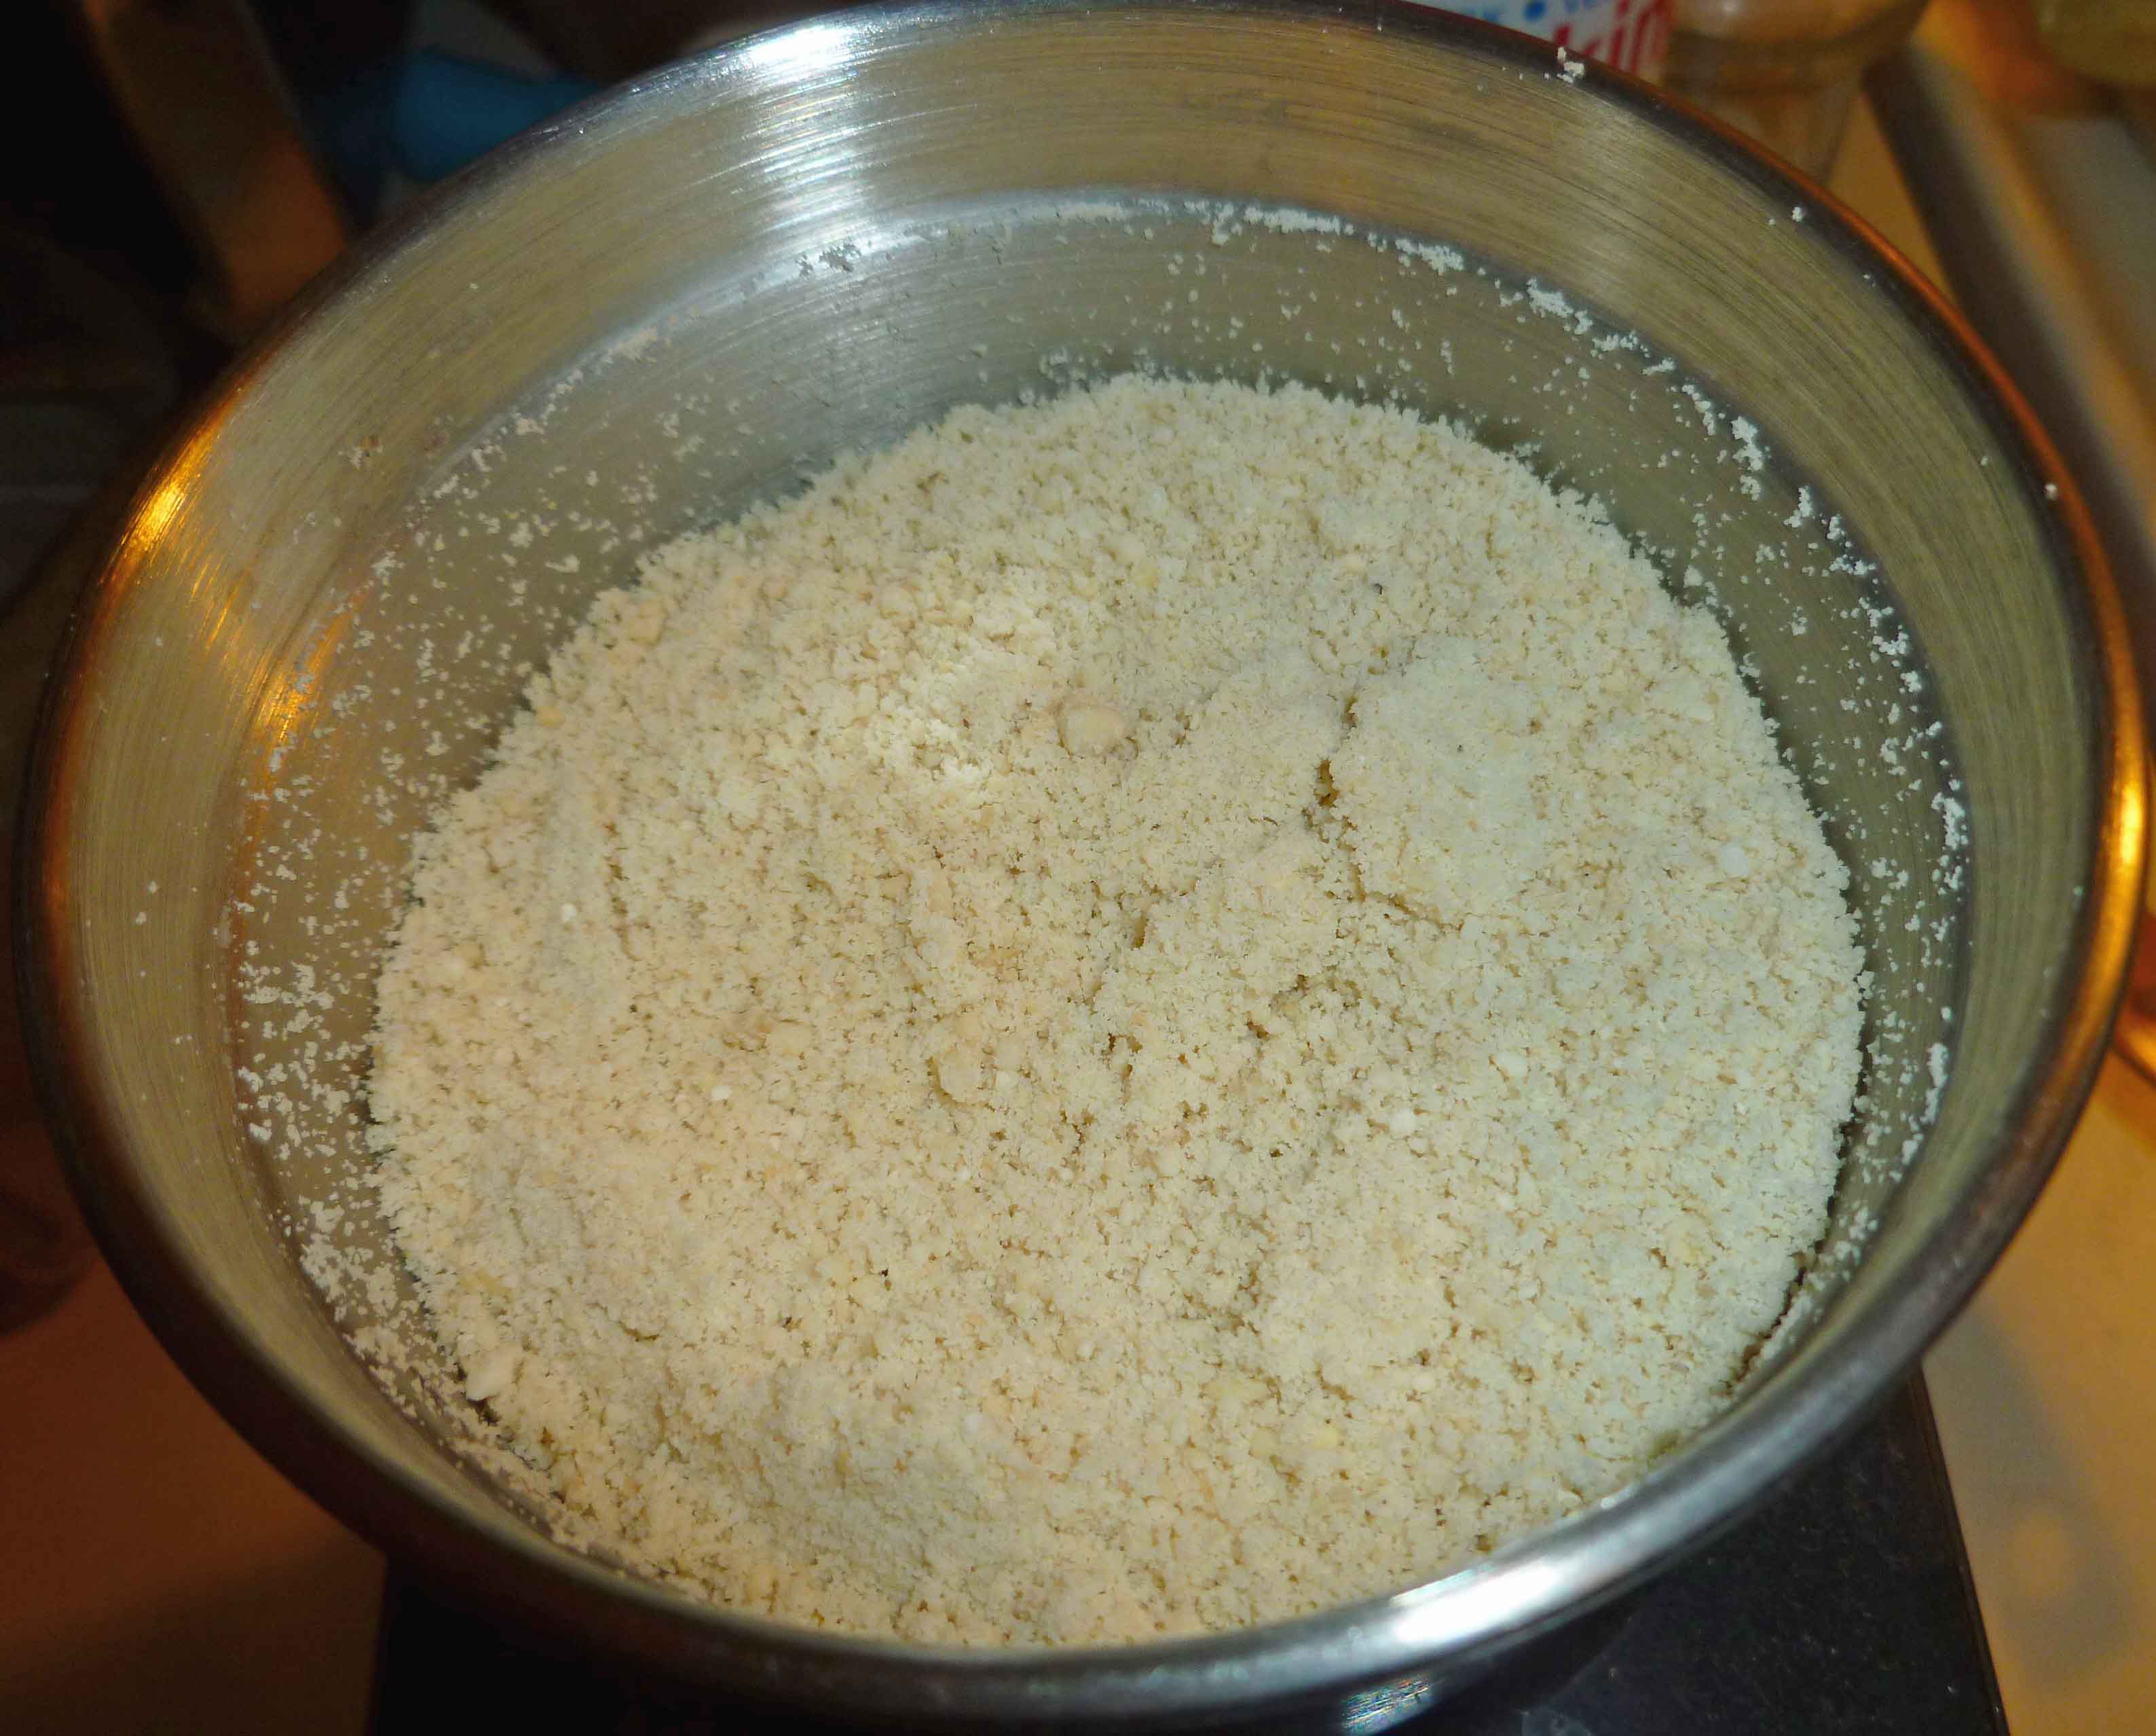
    Finely Ground Cashews
    Finely Ground Cashews

    It’s easier if you grind them in batches if you’re using the coffee grinder. Once they are finely ground, put the cashews in the blender. (If you’re grinding them up in the blender, put the cashews in blender and process them until they are finely ground before adding any other ingredients.)  Add the lemon, garlic, salt, black pepper, nutritional yeast, nutmeg, paprika, sage, and the boiling water in the blender with the cashews.  Put the cover on the blender and blend until smooth.  Let it blend for a while, the smoother the better.

    Once you think it’s blended enough, pour the mixture into a sauce pan, and put it on medium low.  Add the Earth Balance and let it melt into the mixture, while you mix the cornstarch and 2 teaspoons of cool water together in a small container.  Once the Earth Balance is melted, stir the mixture to incorporate the Earth Balance and then pour in the cornstarch mixture, while continually stirring (if you don’t stir continuously, you’ll have lumps). Put the sauce on the back burner on the lowest setting while you get everything else ready.
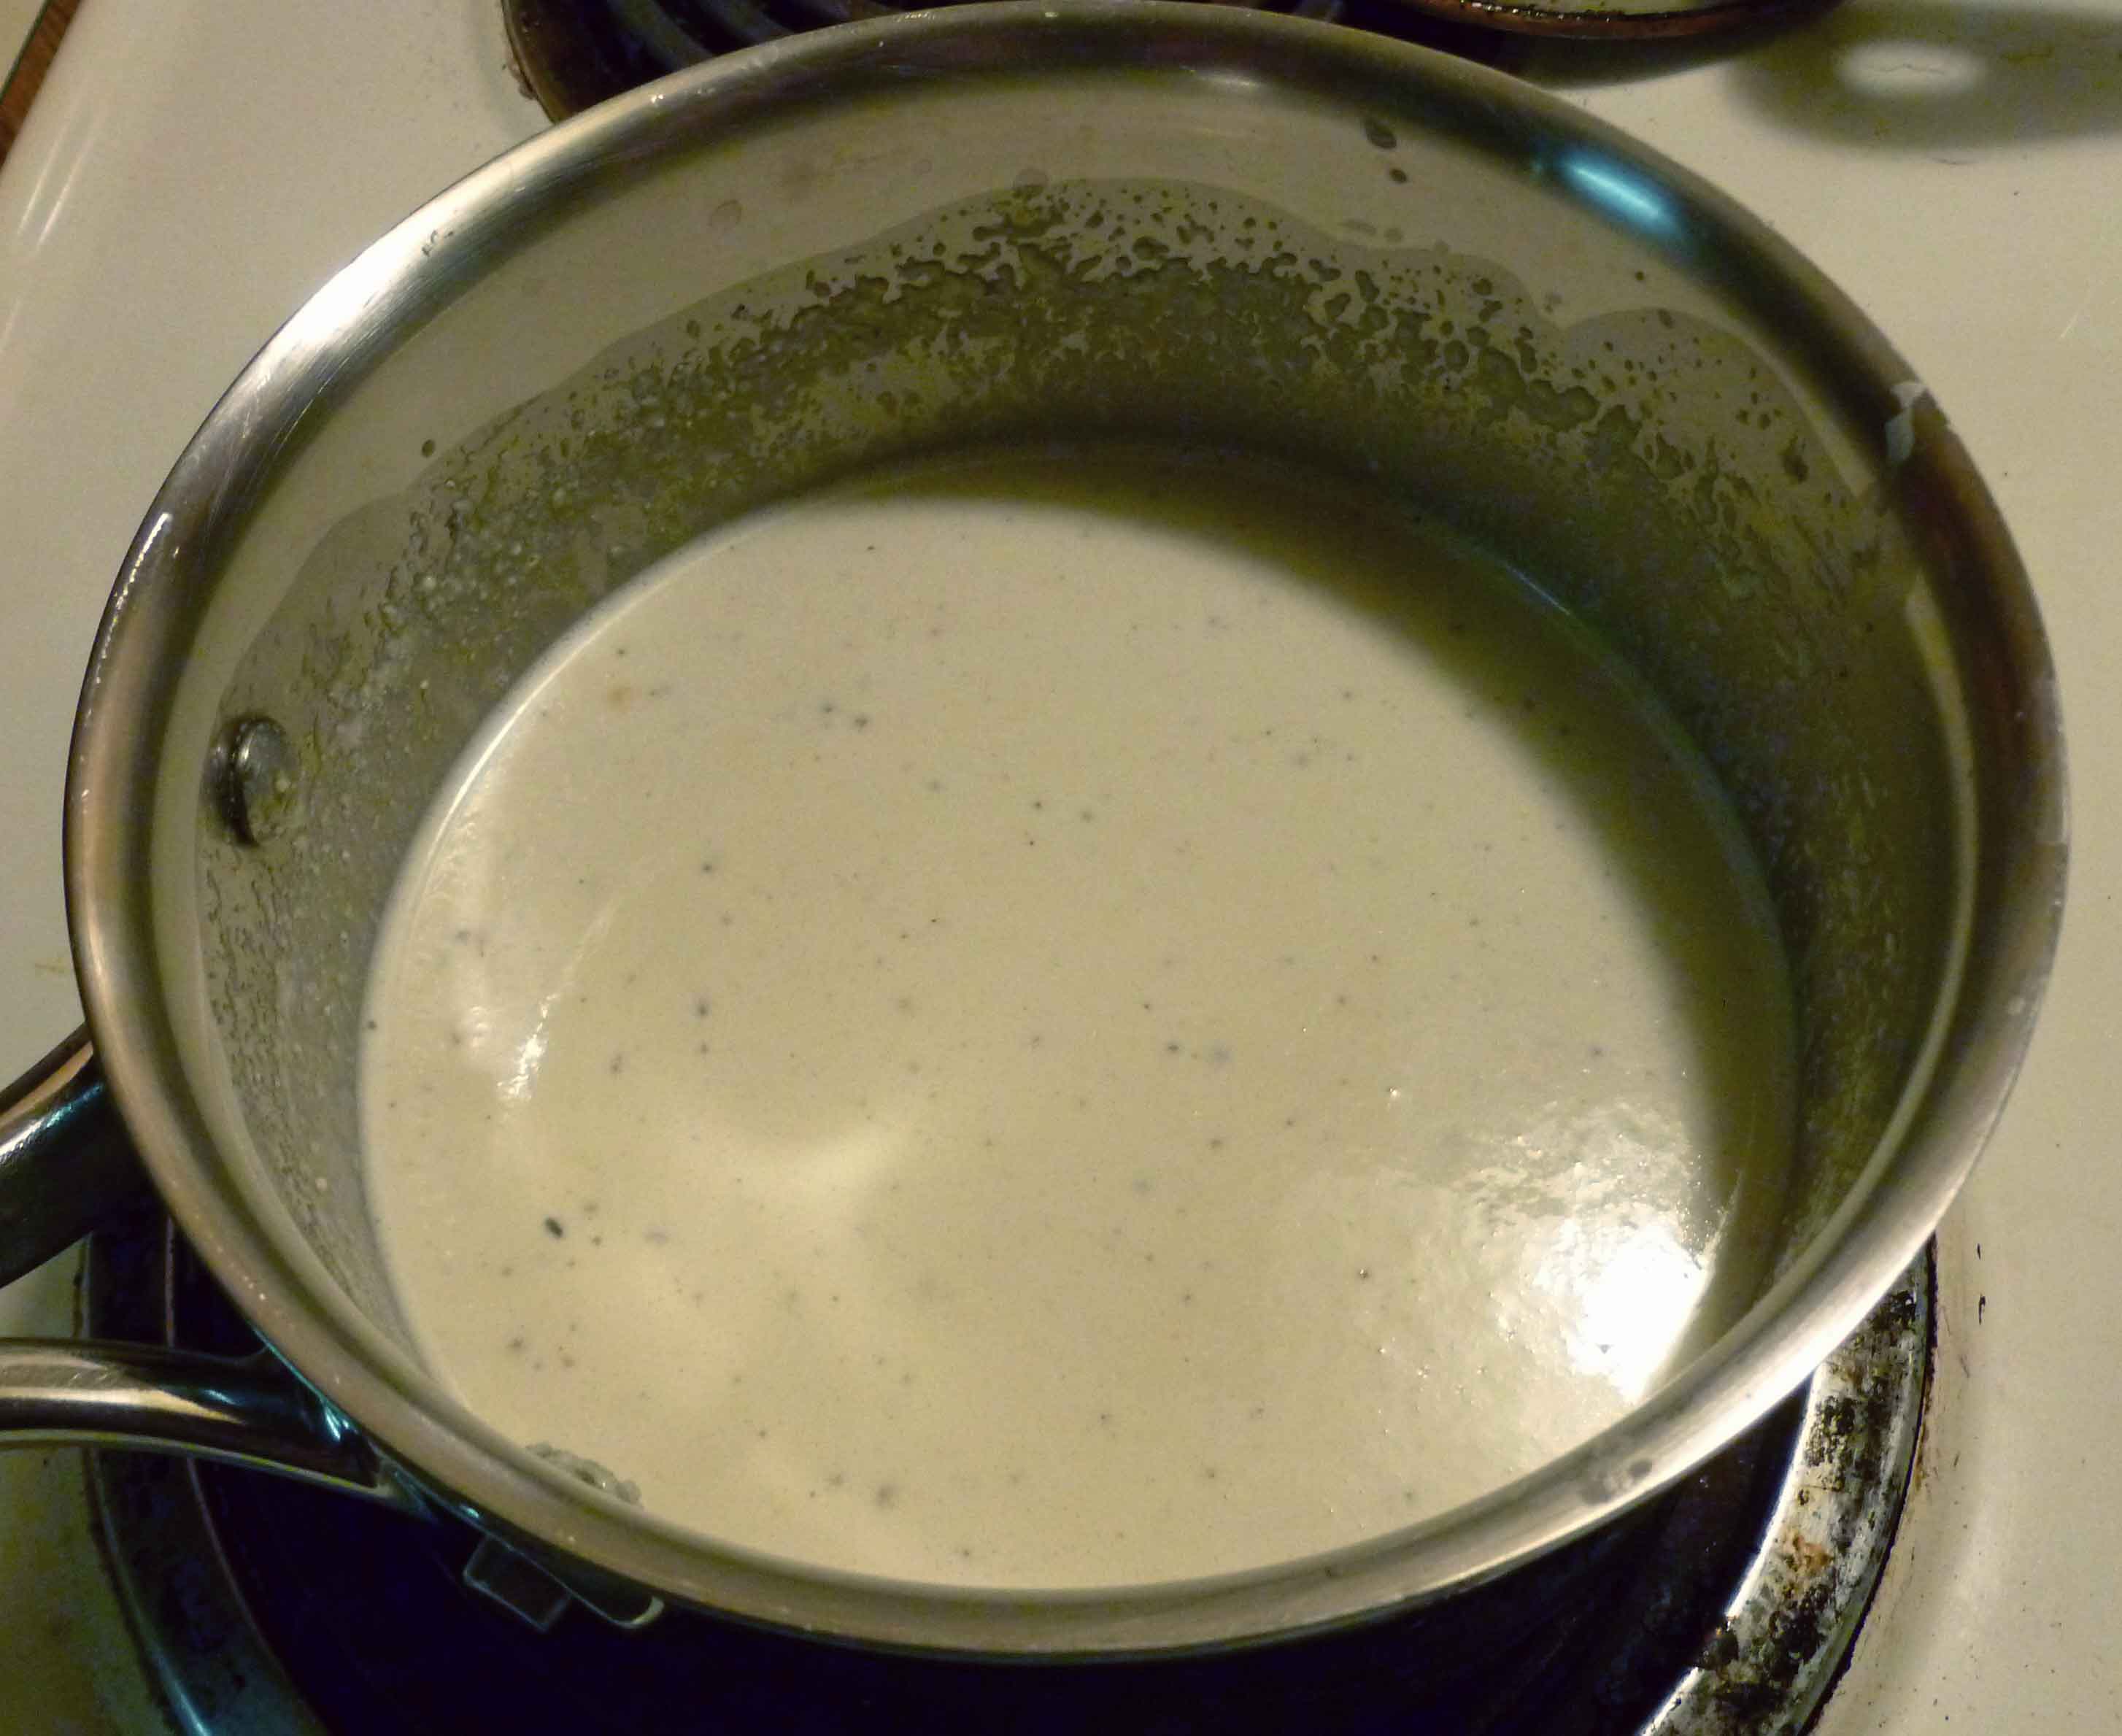
    Alfredo Sauce
    Alfredo Sauce

    Now it’s time to cook the chicken.  Slice the chicken breast into strips if you haven’t already done so, and season them with the seasoned salt and pepper (just sprinkle some over it).  Put the canola oil in a skillet and turn the burner onto medium high.  Put the chicken into the pan but don’t crowd the pieces.
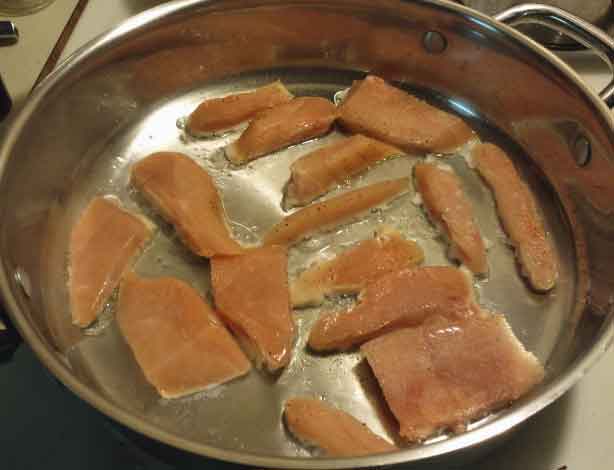
    Chicken properly spaced in frypan
    Chicken properly spaced in frypan

    Sear the chicken so you get a nice golden brown on the outside, and make sure your pieces get cooked without being overcooked. Easy for me to say right? I prefer to use dark meat, because it’s really hard to over cook dark meat, and because I like it better.  But, since my husband likes the breast meat, and I got a wicked deal on some chicken breast, that’s what we’re using here.  However, next time I’d probably use boneless chicken thighs.  Anyway, the picture below shows what you’re trying to get for a nicely seared outside, as it’ll add flavor to the dish.
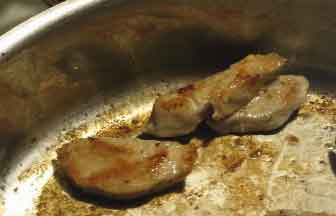
    Properly Seared Chicken
    Properly Seared Chicken

    Put the chicken aside once it is cooked.

    Now we need to cook the pasta and vegetables. Using a large pan, put enough water in to cook 2 cups of pasta, and a couple of dashes of salt. Bring the water to a boil, and add the two cups of pasta to the water.  When the pasta is almost ready but not quite tender enough to be considered done, pour the bag of frozen mixed vegetables into the pan with the pasta.
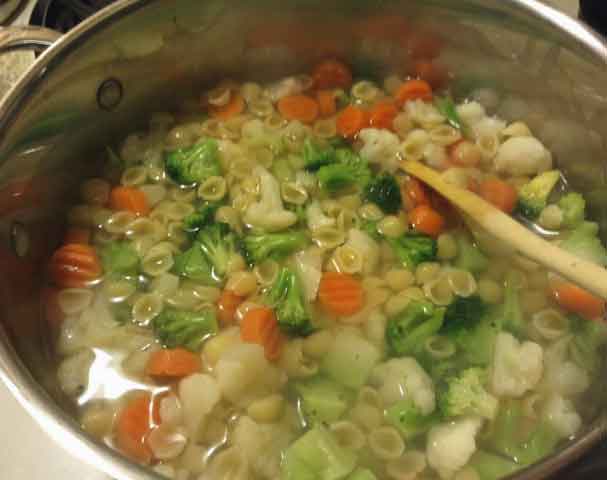
    Pasta and Vegetables Cooking
    Pasta and Vegetables Cooking

    Bring the water back to a boil and let it cook for two or three minutes after that.  Once the vegetables are done, the pasta should also be ready.  Drain the water.

    Spoon some of the pasta and vegetables onto a plate, and place some chicken on top of the pasta and vegetables.
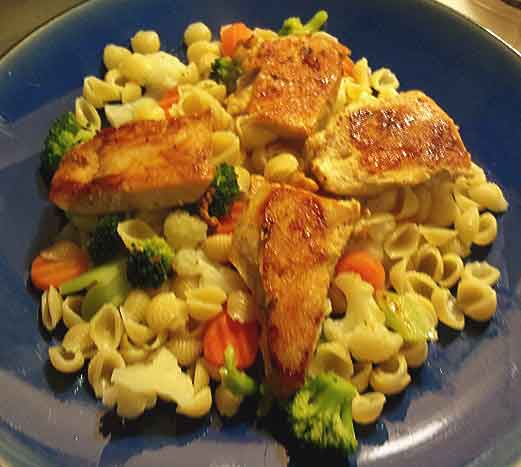
    Chicken, Pasta and Vegetables on a plate
    Chicken, Pasta and Vegetables on a plate

    Then ladle some of the Alfredo sauce over your chicken, pasta and vegetables.  And Voila! Yay Alfredo Sauce!!
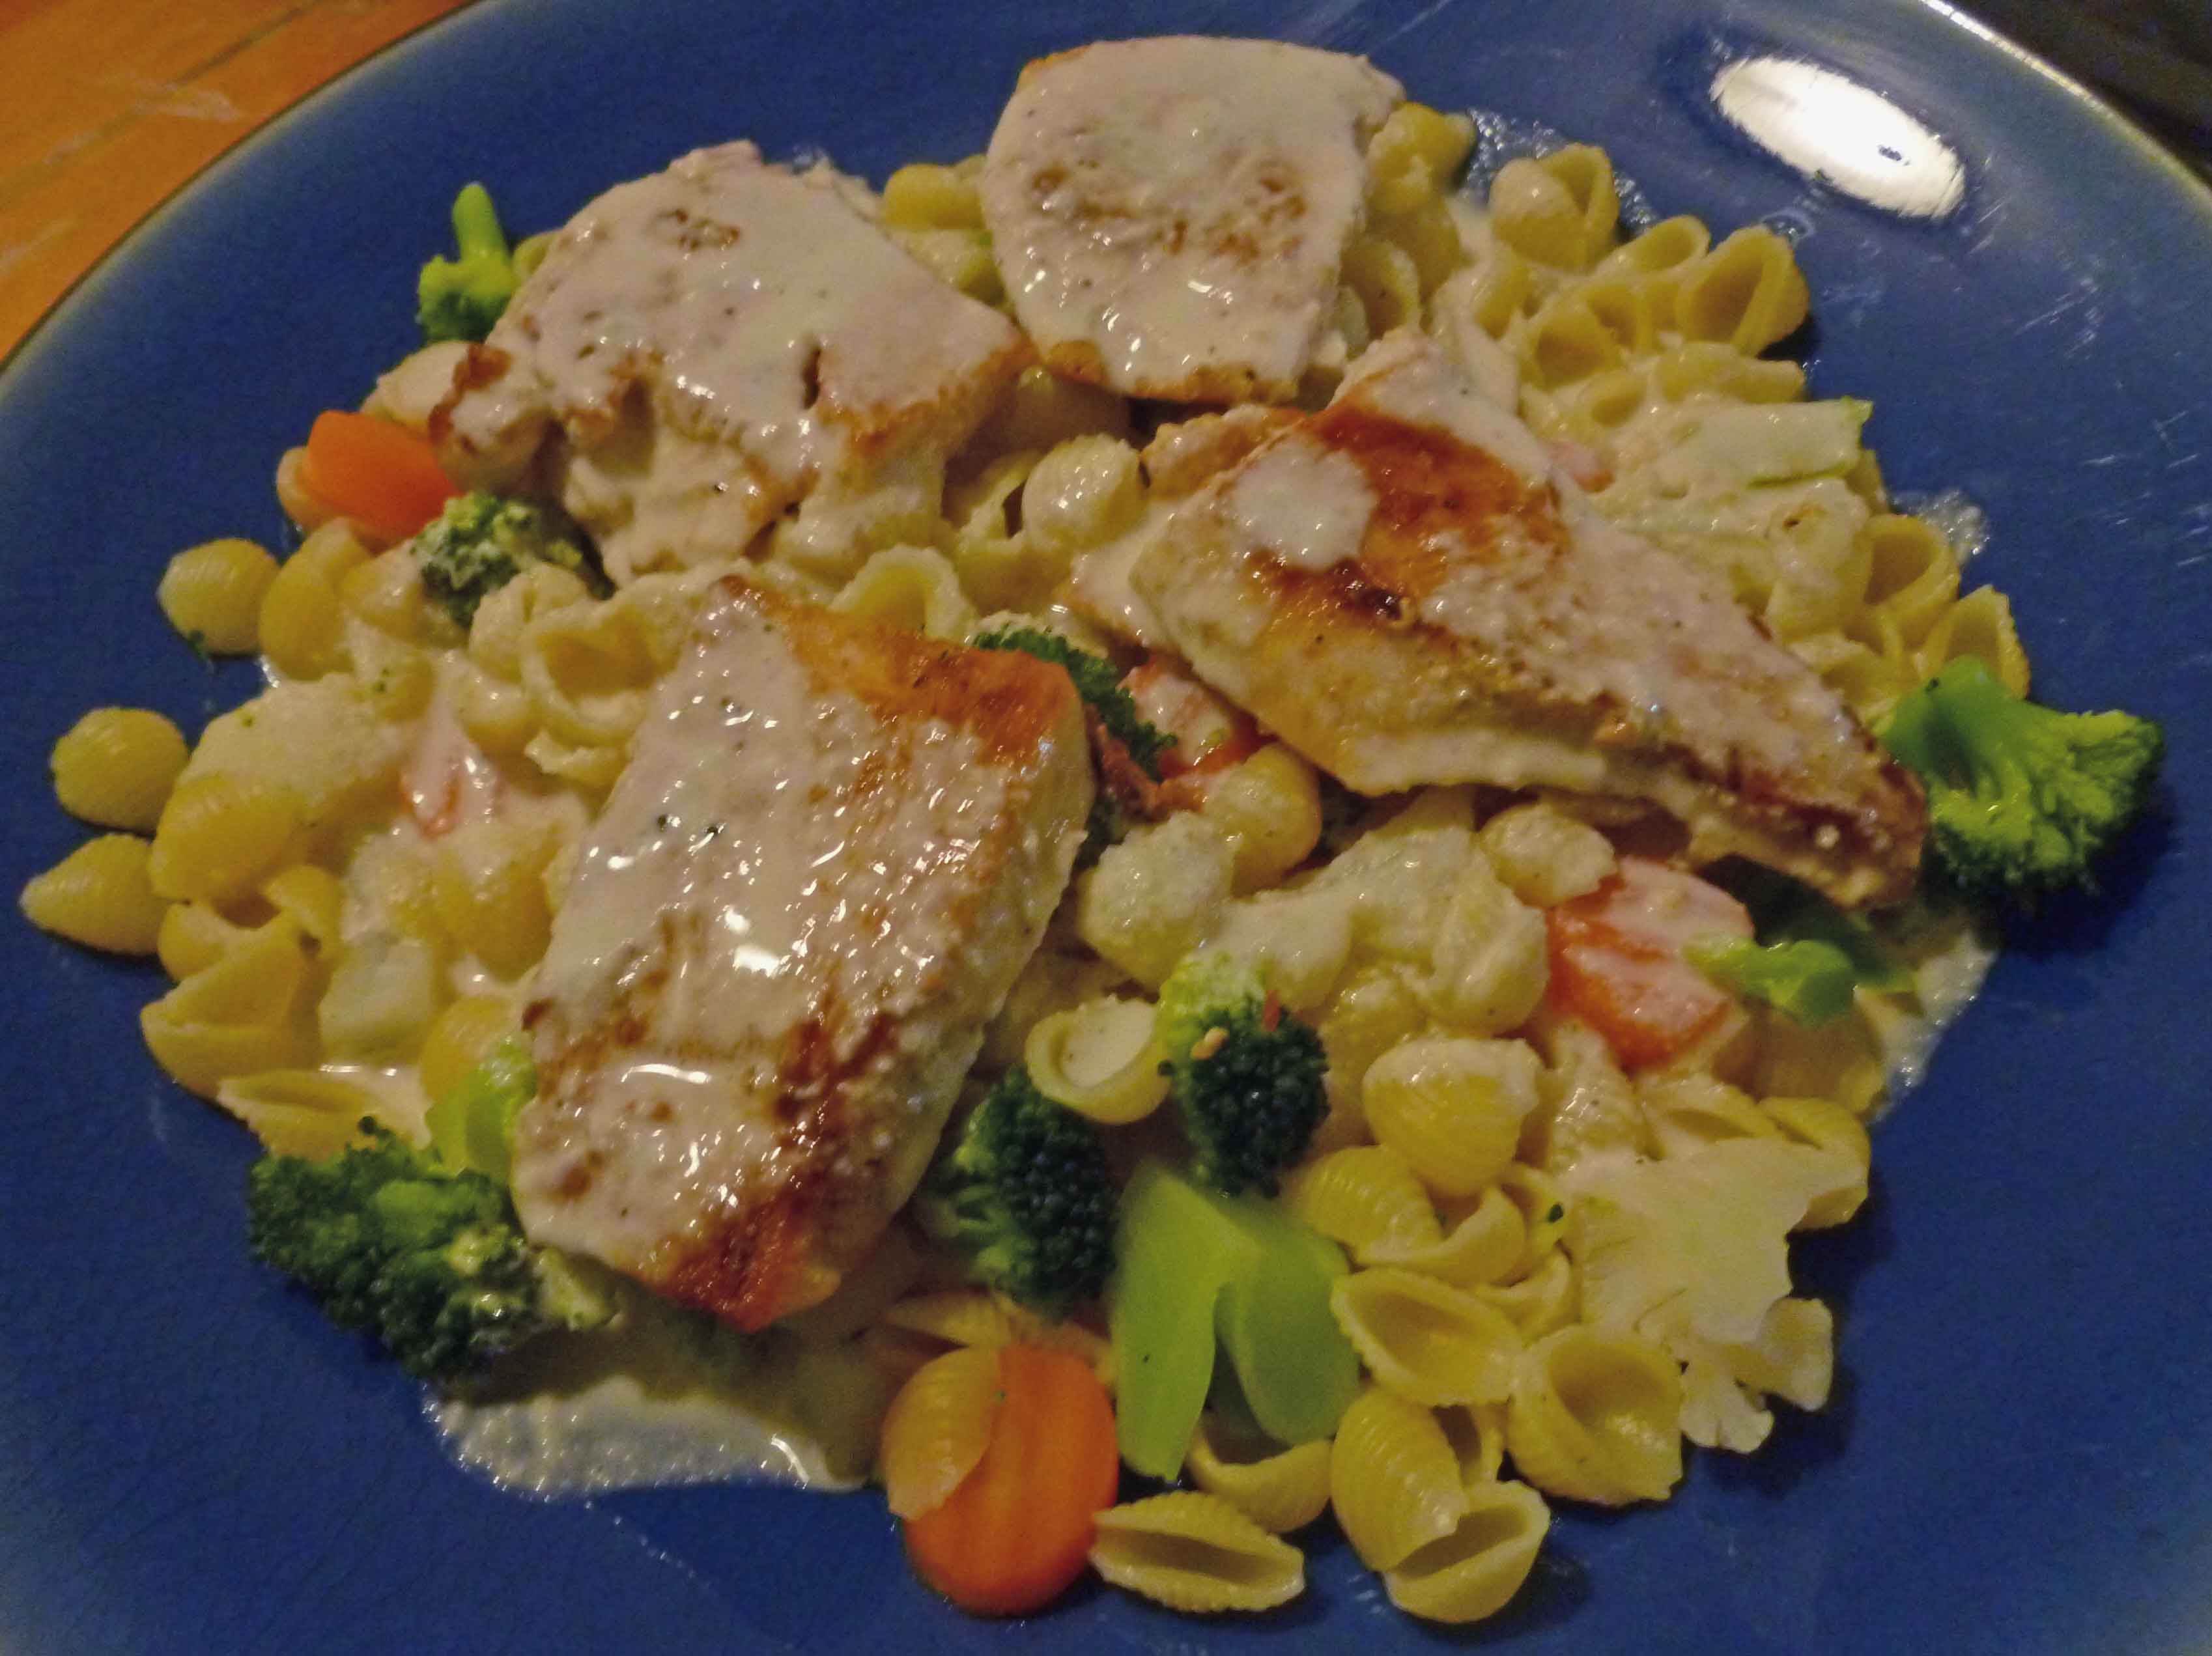
    Chicken Primavera Alfredo
    Chicken Primavera Alfredo
  • No-Bake Cookies Revisited — with a Nut-free Variation

    No Bake Cookies
    No Bake Cookies

    This was one of my favorites when I was a kid, and it’s also really fast if you were  supposed to bring something to a potluck/holiday party/family dinner and maybe you didn’t get it together because the holiday season is so crazy and if you have to find time to do one more thing you’re going to go off your head.  Not that I’ve been there (repeatedly) or anything.

    No Bake Cookies

    • 1/4 cup of evaporated rice milk (there are two ways to make this at home using either rice milk or rice powder to be explained below or, if you can have and/or like soy, you can use soy creamer).
    • 1 stick of Earth Balance Vegan Buttery Sticks (if you can have soy) or 1/2 cup of Earth Balance Soy Free Natural Buttery Spread (if you can’t have soy and/or flax).
    • 1 cup of sugar
    • 1 1/2 Tablespoons of unsweetened cocoa powder
    • 1/2 cup of crunchy peanut butter (see Nut-free sunbutter variation below)
    • 1 teaspoon of vanilla extract (if you’re out of vanilla and desperate, Goslings Black Seal Rum works nicely too).
    • 1 3/4 cups to 2 cups of quick oats (get certified gluten free if you need them gluten free).

    This makes about 12 cookies about two inches across.

    First, you need to make yourself some evaporated rice milk.

    Method 1: You can take unsweetened rice milk (or other unsweetened alternative milk product of your choice) and measure out 1/2 a cup into a very small sauce pan.  Place it over medium heat and stir frequently until it has reduced in half. (You could make more than you need and keep in the fridge for other holiday baking).

    Method 2 (and the one I used): Put 1 1/2 Tablespoons of rice milk powder in a glass measuring cup.  Pour boiling water into the glass measuring cup until it measures 1/4 of a cup of milk powder and water.  Whisk powder and water together until well combined.

    Thanks to Alisa Fleming’s Go Dairy Free cookbook for both of these options.  For most baking you would need to wait for the resulting evaporated rice milk cooled, but not for this recipe.

    Melt the Earth Balance in a 4 quart pan.  Once it has melted completely, add the sugar, evaporated milk, and the cocoa powder.  Stir mixture to incorporate all the ingredients completely, and bring the mixture to a boil for one minute, continuing to stir frequently.  Remove the pan from the heat, and add the peanut butter and vanilla.  Stir until the peanut butter, except the crunchy bits have dissolved into the mixture.  Add the oats and mix thoroughly.  Cover cutting board or a cookie sheet with wax paper.  Using spoon, portion out the mixture into two inch wide cookies on the cookie sheet and let them harden for at least 10 minutes.  I cheat and do it in the fridge, they harden faster. Or just skip the cookie part and eat them out of the pan.  I’m not here to judge.

    Enjoy 🙂

    NUT-FREE Sunbutter Variation!

    • 1/2 cup soy-free Earth Balance
    • 1 cup brown sugar, packed
    • 2 Tablespoons cocoa powder
    • 1/4 cup evaporated rice milk
    • 1/2 cup crunchy Sunbutter or other sunflower seed butter
    • 2 1/4 cup quick oats
    • 1 teaspoon vanilla
    • 1/4 — 1/2 cup mini chocolate chips
    • Generous pinch of salt (less than 1/4 teaspoon)
    • Follow the directions above.
    Sunbutter No-Bake Cookies
    Sunbutter No-Bake Cookies
  • At Last Gluten-Free Brownies

    At Last! Gluten-free Brownies
    At Last! Gluten-free Brownies

    So the year before I got my allergy diagnoses, I spent time perfecting a brownie recipe.  Which was, of course, based on wheat flours, and which did not, of course, translate well to gluten-free.  It was my first attempt at my own gluten-free recipe — I replaced the flour in the recipe with a GF baking mix and made the first and only baked good that was not completely devoured by my office mates.  It was sad; I was sad.

    And yet, I kept trying because brownies are something that is almost universally loved.  A very special group of my friends has cannonized my friend Michelle’s *special recipe* brownies, which I’ve added as a decadent alternative at the end of this recipe — “Book Club” Brownies should be reserved for very special occasions, and only for those who are worthy of such decadence.

    [youtube http://www.youtube.com/watch?v=KhSWM_CK94M&w=560&h=315]

    And now, I bring you this recipe.  I am sorry it’s not nut-free, but I have not yet found the right combination for nut AND gluten free.

    I’d also like to introduce my new love, George, the best Christmas present ever.  To clarify some confusion from my FB post — George is a girl, named in part after the Bugs Bunny Abominable Snowman cartoon and in part for George in the Nancy Drew books.  Now that that’s cleared up, meet George!

    GEORGE!
    GEORGE! I made a video, but it was really really boring.

    At Last Gluten-Free Brownies

    Line a square pan with parchment paper.  Make sure you know if you have an 8×8 or 9×9 pan, as it will affect baking times below.

    Pre-heat oven to 350F.

    • 1 Tablespoon chia seeds, preferably white
    • 4 Tablespoons water

    Grind your chia seeds.  I use a coffee grinder for spices, flax, and now chia — grind it good and fine.  With a fork or small whisk, mix the ground seeds in a small bowl with 4 tablespoons of water.  Set this aside — it will turn into a pretty stiff gel.

    • 1/4 cup soy-free Earth Balance
    • 2 Tablespoons coconut oil

    Melt the oils together in a small pan.  Because I wander off measuring other things, I always do this in my ad-hoc double boiler (small skillet on top of a saucepan).  It’s safer for me, but feel free to do it in a pan directly on the heat or even in a microwave if you own one.

    • 1.5 cups almond flour or almond meal (doesn’t seem to make a difference for this recipe)
    • 1/2 cup gluten-free oat flour
    • 1/4 cup coconut flour
    • 2 Tablespoons quinoa flour
    • 2 Tablespoons tapioca starch
    • 1/2 cup cocoa powder
    • 1/2 teaspoon salt
    • 1/4 teaspoon baking soda
    • 1 cup brown sugar, packed

    Mix all your dry ingredients together well — yes, including the brown sugar.  Now, to this, add your chia gel, the melted oils, and the following:

    • 1/3 cup almond milk
    • 3 teaspoons vanilla extract
    Dry ingredients with melted oils and chia gel
    Dry ingredients with melted oils and chia gel

    Mix well, adding a little more almond milk if necessary.  Dough should be stiff, but not dry — more like a cookie dough than a cake batter.  It should stick to the beaters, but not make it hard for them to run.

    Add your mix in ingredients.  The chocolate chips are not, in my opinion, optional.  The nuts absolutely are.

    • 1/2 cup allergen-free chocolate chips
    • 1/2 cup walnuts (optional)

    Brownie Batter

    Dump your batter into the lined brownie pan.  It should not spread out on its own — so use your spatula to smash it down and spread it out, getting it into the corners.  When it’s smooth, place a piece of parchment over the top and smooth it down onto the batter.

    parchment paper topper
    parchment paper topper

    Bake at 350F.  8×8 pan — 35-40 minutes (my oven takes 37.  It just does.) 9×9 pan — 25-35 minutes (again, 32.)

    Now, and this is really really really important:  DO NOT TRY TO EAT THESE BROWNIES HOT.  They don’t have any structural integrity at all when they are warm.  Peel the top sheet of parchment off.  Cool them in the pan for 10-15 minutes, then use the parchment to lift out the brownies as a whole and set them on a cooling rack.  Cool them completely.  Then do your thing.

    Bookclub Brownies variation

    This is really guilding the lily, but it’s a tradition, so here you go.

    In a double boiler (real, if you’ve got it, or fake it again), melt 2/3 cup of allergen-free chocolate chips with 3 Tablespoons of non-dairy milk.  That’s it.

    You could also make a frosting or even use a prepared frosting (many of Duncan Hines’ prepared frostings are allergen-free, though I don’t know about cross-contamination issues).  But I find that to be more work than really necessary to get the good flavor here.  Your mileage may vary.

    While brownies are still warm and in the pan, pour this chocolate ganache over them and smooth it out.  It won’t look like quite enough first, especially if you’re using a 9×9 pan, but it is.  Taking two toothpicks, or better yet, wooden bbq skewers, poke holes all over the brownies, through the ganache.  Follow through with the COMPLETE COOLING directive.  Enjoy your extra fudgy magic brownies.

    If you’d like to guild the guilding and make minty holiday brownies, top with crushed peppermint candies.

    Enough Ganache? Ganached Pepperminty goodness

    At Last Brownies, with “Book Club” variation

    • 1 Tablespoon chia seeds, preferably white
    • 4 Tablespoons water
    • 1.5 cups almond flour or almond meal (doesn’t seem to make a difference for this recipe)
    • 1/2 cup gluten-free oat flour
    • 1/4 cup coconut flour
    • 2 Tablespoons quinoa flour
    • 2 Tablespoons tapioca starch
    • 1/2 cup cocoa powder
    • 1/2 teaspoon salt
    • 1/4 teaspoon baking soda
    • 1 cup brown sugar
    • 1/4 cup soy-free Earth Balance
    • 2 Tablespoons coconut oil
    • 1/3 cup almond milk
    • 3 teaspoons vanilla extract
    • 1/2 cup allergen-free chocolate chips
    • 1/2 cup walnuts (optional)

    Ganache:

    • 2/3 cup allergen-free chocolate chips
    • 3 Tablespoons non-dairy milk (I used almond)
    • 3 mini candy canes, crushed
    mmmmm Brownies
    mmmmm Brownies
  • Ranch Dip Using a Cashew Base

    Ranch Dip Using a Cashew Base

    Ranch dressing. It’s one of those things that seems really, really hard to replace. And you miss that creaminess, salty, tart flavor, especially on salads, buffalo, wings, or just with a veggie tray at a party. When Mary Kate and I started this blog, we began a list of things we missed desperately (okay, so it was a spreadsheet divided up by category, but anyway). I don’t think ranch even made the list. I don’t think it was even something that we considered being able to replace. But while I was researching replacement mayo recipes, I came across a recipe on Yummly.com that used cashew nuts to make a ranch dressing. Mary Kate and I didn’t think the flavor profile was quite right, so we messed around a bit with the spices. It was one of our first real successes and even people who can have real ranch dressing seemed to be shocked at how much they liked it. And it’s really pretty easy. I know this recipe won’t help those of you who can’t have tree nuts, but we’re posting another ranch recipe that will help.

    Ranch Dip Using a Cashew Base

    • 1 1/4 cups cashews (raw, unsalted, and if you buy cashew pieces it’s cheaper)
    • 3/4 cup rice milk (original, unsweetened, or use rice milk powder following directions on container)
    • 1 tablespoon lemon juice
    • 1/3 cup cider vinegar
    • 1/3 cup extra virgin olive oil
    • 4 garlic cloves
    • 1 teaspoon garlic powder
    • 3 teaspoons onion powder
    • 1 teaspoon dill
    • 2 teaspoons salt
    • 1/2 teaspoon basil
    • 1/2 teaspoon of red bell pepper flakes.

    Grind cashews in spice grinder or coffee grinder, in small batches until the cashews are a nearly a powder, but not to the point they become a butter.

    Place the ground cashews and all remaining ingredients into a blender and blend until combined and until mixture thickens a bit. Taste mixture and adjust spices as needed. Let sit for a couple hours before serving and the flavors will develop and the mixture will thicken further.

    Some of the testers have found that this recipe does not hold up well overnight as it becomes more salty, but there’s been some debate about that. Also some of us preferred less salt and others preferred more. The recipe as written is using less salt.

    Let us know what you think 🙂

  • Mini-Thanksgiving, Casserole Style

    Mini-Thanksgiving Casserole
    Mini-Thanksgiving Casserole

    This past summer, one of my co-workers went through a phase of making Thanksgiving dinners — I don’t think she was cooking a whole turkey, but part of it, plus dressing and cranberries.  I think it happened more than once, and the craving turned out to be transferable.

    But for me?  Turkey, eh, whatever.  I don’t like it or dislike it, but I don’t feel excited enough to cook one if I don’t have to.  What I love about Thanksgiving are the side dishes, and while most of my family’s traditional foods are not allergen-free in their original formats, it is truly easy to make most of them safe with dairy alternatives (although, personally, I prefer vegetable broth to most non-dairy milks in mashed potatoes — less chance for an odd sweet flavor to happen).

    For my mid-summer Thanksgiving, I decided to do a casserole of all my favorite flavors, and since there is just one of me, I did individual casseroles so that I could freeze some of them.  If you wanted turkey, you could make it on the side.  If you wanted a full vegan meal and you’re not gluten-free, add diced seitan with the mushrooms in the gravy portion, but  be sure to leave some extra room for it at the top of your casseroles. Some sort of cranberries on the side?  Why not?  This can be the main dish, the centerpiece, the only dish, or a side.  Nothing but versatile, right?

    This casserole has a base of mashed rutabaga, a center of vegan, gluten-free chestnut and celery dressing, and a rich mushroom gravy, all baked in one lovely personal-sized casserole.  I’ve never made this as one large casserole, but I think doubling each layer and increasing the cooking time would work.

    Mini-Thanksgiving, Casserole Style

    3 servings

    Pre-heat oven to 350F, and spray three 1/2 cup mini-casserole dishes with cooking spray (note on cooking spray — the only one I’ve found free of all allergens including soy is Pam for Grilling).

    First, make the rutabaga:

    • 2 cups stock (veg or chicken) or 2 cups water and 2 bouillon cubes (watch for hidden gluten and soy in stock and especially bouillon — look for natural brands for boxed stock for the best selection of options)
    • about 2 cups of cubed rutabaga (look for it frozen and bagged)

    Boil rutabaga in stock until cooked through.  Takes 20-30 minutes for fresh rutabaga, but 10 or so for frozen.

    Drain rutabaga, and mash with:

    • 1+ Tablespoon soy-free Earth Balance
    • salt and pepper to taste — be generous with the pepper here.

    Spoon into bottom of dishes and press down with the back of the spoon.  Should be about 1/4 to 1/3 an inch at the bottom of each dish.  If you have leftovers, pack them in or eat them.

    Rutabaga base
    Rutabaga base

    Next, make the dressing.  In large skillet, over medium heat, heat

    • 1 Tablespoon olive oil.  When shimmery hot,

    Add:

    • 1 cup of diced onion.  Cook until translucent.
    • Add 1 cup celery, chopped, cook until hot, 3-4 minutes
    • Add one package of chestnuts, chopped (my package was 5.2 oz, and was about 15 chestnuts)
    • Heaping 1/2 teaspoon thyme, crushed as you add it.
    Chestnut-Celery Dressing
    Chestnut-Celery Dressing

    Cook everything about 5 minutes.  Onions should be entirely clear, celery should still retain a bit of crisp, the chestnuts don’t appear to change.

    • Stir in 1/3 cup gluten-free bread crumbs (I make my own from the leftover pieces of bread from each loaf, but if you need to buy some, the Ener-G loaves make good bread crumbs).

    Spoon over rutabaga, leaving just a bit of room (1/4 inch or so) at the top.  Scrape all the bits out of the skillet.

    Chestnut-Celery Dressing, stage 2
    Chestnut-Celery Dressing, stage 2

    Finally, make the gravy.  Into the same skillet you just used (really no need to wash it out), still over medium heat, add

    • 2 Tablespoons olive oil. When shimmery hot,
    • Add 1/4 cup onion, diced small.  Cook until translucent.
    • Add 1 3.5 oz package of shitaki mushrooms, washed, stemmed, and diced.  Cook until the liquid comes out of the mushrooms (watch, if you don’t know what I’m talking about — you’ll see it).  2-5 minutes.  Then add
    • 2 Tablespoons nutritional yeast
    • 2 Tablespoons garbanzo bean flour
    • 2 Tablespoons of soy sauce, gluten-free tamari, or coconut aminos

    Whisk these until you’ve made a slurry, good and thick.  Let it cook for a minute.  Begin to slowly drizzle in water, about 1 Tablespoon at a time, stirring and letting each addition thicken before adding the next drizzle.  Add at least 1 cup of water, and not more than 1.5 cups.

    Spoon gravy over casseroles.  At this point, you can cover the casseroles and refrigerate overnight, or you can bake them immediately.  If immediately, cover with foil and bake for 15 minutes.  If you are taking them out of the fridge, let them sit 15 minutes or so to come up towards room temperature, and then bake 25-30 minutes.  These freeze okay, but let them thaw thoroughly and then bake.

    Mmmmm, casserole
    Mmmmm, casserole

    Mini-Thanksgiving, Casserole Style, Ingredients only.

    • 2 cups stock (veg or chicken) or 2 cups water and 2 bouillon cubes
    • about 2 cups of cubed rutabaga
    • 1+ Tablespoon soy-free Earth Balance
    • salt and pepper to taste — be generous with the pepper here.
    • 1 Tablespoon olive oil
    • 1 cup of diced onion
    • 1 cup celery, chopped
    • 1 5.2 oz package of chestnuts, chopped (15 chestnuts)
    • Heaping 1/2 teaspoon thyme
    • 1/3 cup gluten-free bread crumbs
    • 2 Tablespoons olive oil
    • 1/4 cup onion, diced small
    • 1 3.5 oz package of shitaki mushrooms, washed, stemmed, and diced
    • 2 Tablespoons nutritional yeast
    • 2 Tablespoons garbanzo bean flour
    • 2 Tablespoons of soy sauce, gluten-free tamari, or coconut aminos

    (Final note — it seems to me that chestnuts are tree nuts, but did not confirm this.  Assuming this is so, this recipe is not nut-free. MK, and readers, I checked this morning and confirmed they are tree nuts -Denise)