Notice: Function _load_textdomain_just_in_time was called incorrectly. Translation loading for the wp-ultimate-recipe domain was triggered too early. This is usually an indicator for some code in the plugin or theme running too early. Translations should be loaded at the init action or later. Please see Debugging in WordPress for more information. (This message was added in version 6.7.0.) in /home/maryzahc/public_html/adultfoodallergies.com/wp-includes/functions.php on line 6121
WARNING – TREE NUTS – Page 3 – surviving the food allergy apocalypse (archive)

Tag: WARNING – TREE NUTS

Contains tree nuts such as cashews, almonds, walnuts, and pecans.

  • Tod Mun (Thai Fish Cakes)


    Tod Mun (Thai Fish Cakes)
    Tod Mun (Thai Fish Cakes)


    Have I ever said how much I love Thai food? And that my first date with my husband was at a Thai place?  Because of the corn, wheat, and coconut allergies, going out for Thai food really isn’t an option anymore. And I miss it, very much. I used to order this appetizer often in the long, long ago before food allergies, and when Mary Kate and I talked about doing a Fry-Day for Thanksgiving this year, I decided to give it a shot. I was very happy. I may have even teared up because it was just like our local Thai joint’s version.

    Tod Mun:

    Makes about 10-15 or so.

    Cucumber Salad/Dipping Sauce:

    • 1 cup of Thai Hot and Sweet Dipping Sauce
    • 1 cucumber peeled and diced
    • 1 cup of cashews, toasted in a skillet or roasted in the oven (If you can have peanuts, use roasted peanuts. If you can’t have nuts, just leave them out.)

    Tod Mun:

    • 1 pound of Haddock (or other mild white fish, such as Pollock or Halibut)
    • 5 ounces of uncooked shrimp, peeled and tail off.
    • 2 Tablespoons of Thai Red Curry Paste (If you can use a commercial version, great, but if not, here’s a recipe for it.)
    • 1 Tablespoon of safe for you fish sauce (If you don’t have one you can leave it out).
    • 1 bunch of scallions, trimmed and chopped into small pieces
    • 1 chia egg (1 Tablespoon of ground or milled chia seed mixed with 3 Tablespoons of water)
    • safe oil for frying enough to fill the pot about 3 to 4 inches deep

    For the frying:

    • A pot deep enough to accommodate about 3 inches of oil and the frying thermometer, a thick stainless steel stock pot or an enameled dutch oven would be best. You also want a pot that’s tall enough that the edge is 4 or more inches above the oil level. It’s safer and there’s less splatter all around. We do not recommend using anything with Teflon or nonstick coatings. Of course, if you have an actual deep fryer appliance, use that.
    • frying thermometer (the link goes to the one we used)
    • tongs and/or slotted frying spoon/spider  (we used a silicone one rather than the traditional wire and bamboo, but I can’t find a picture of ours)
    • plate or cookie sheet, lined with paper towels

    Set up your frying pot, add your safe oil, and set up your thermometer. Start heating your oil over medium heat, as it will take some time to reach the right temperature.  You are aiming for about 350ºF.

    Chop your toasted/or roasted cashews and place them in a bowl. Add your your peeled and diced cucumber and the Thai Hot and Sweet Dipping Sauce, and mix well to combine.  Set aside.

    Cucumber Salad/Dipping Sauce
    Cucumber Salad/Dipping Sauce

    Chop the haddock into pieces small enough to put in your food processor.  Place the haddock and the shrimp in a food processor with the regular cutting blade and process until the haddock and shrimp forms a smooth paste. Empty the mixture into a large mixing bowl, making sure you scrape down all the sides of the food processor bowl carefully.  Also, wash your food processor parts immediately. You really don’t want the fish mixture to dry to your food processor bowl, cover and blade.

    Mix in the Thai Red Curry Paste and fish sauce, until well combined. Then add the scallions and chia egg, and mix thoroughly.

    Tod Mun mixture before frying
    Tod Mun mixture before frying

    Once your oil is hot and has reached 350ºF.  Use two large spoons to form a rough patty, and drop it into the oil. Depending on the size of your pot, you may only be able to do a few at a time. I had a 10 quart stockpot and I was only able to do about five at time.

    Use large spoons to make rough patties
    Use large spoons to make rough patties

    Fry them for about 4-5 minutes or until golden brown.. Place them to drain on the paper towels.

    Fried Tod Mun (Thai Fish Cakes)
    Fried Tod Mun (Thai Fish Cakes)
    Fried Tod Mun (Thai Fish Cakes)
    Fried Tod Mun (Thai Fish Cakes)

    Once you have fried all of them, serve them with the cucumber salad/dipping sauce.

    Tod Mun (Thai Fish Cakes)
    Tod Mun (Thai Fish Cakes)


    Enjoy!


  • Pumpkin (or Butternut Squash) Bisque

    Pumpkin Bisque
    Pumpkin Bisque

    We hope you all made it through Thanksgiving okay. Mary Kate and I only set two smallish fires on her stove, but no harm, no foul. There will be more posted about the “Fry-Day” Thanksgiving later on.

    The reason I developed this recipe is because I had a pumpkin from the Community Supported Agriculture share I split with Mary Kate. I’m not a huge fan of pumpkin, I hated pumpkin pie in the long, long ago when I could still eat whatever I wanted. And I never eat pumpkin spice anything when the seasonal pumpkin spice everything starts. But I do like pumpkin bisque with a bit of onion, rosemary and sage. You could also do this with your left over butternut squash from Thanksgiving if you have any. I finished this soup just before the power went out on Wednesday the night before Thanksgiving, and the power did not return until Friday evening.  It warmed up really well in my Jetboil camp stove set up on my dining room table while we had no power and no heat. Yeah, I know I’m not supposed to use them inside, and I’m not advocating that anyone else follow my poor example (don’t sue me if you do something dumb just because I did).

    Pumpkin (or Butternut Squash) Bisque

    • 1 large onion, diced
    • 1 Tablespoon of olive oil (or other safe for you oil)
    • 2 cups of vegetable stock (I used homemade, here’s a link on how to make vegetable stock, or if you can buy safe commercial stock, have at it)
    • 4 cups of cooked pumpkin or butternut squash (here’s a link on how to roast and make puree, also if you’re using pumpkin, make sure you use pie pumpkins or your bisque might be a little blah)
    • 1/2 teaspoon of rosemary
    • 1/2 teaspoon of sage
    • 2 Tablespoons of non-dairy safe for you margarine (I make my own margarine due to the corn thing, but if you can use Earth Balance, go for it)
    • 1/2 cup of cashew milk (or other safe for you non-dairy milk, I make my own from this recipe but I skip the added ingredients other than water and cashews)
    • Salt and black pepper to taste
    • 1 Tablespoon of brown sugar (optional – you might not need it if you’re using butternut squash)
    • A couple of squirts of your favorite hot sauce (optional)
    • A bit of minced parsley as a garnish (optional)

    In a large stock pot or dutch oven, saute your onions in the olive oil until they have some color, and they are softer, as shown below.

    Sauteed Onions
    Sauteed Onions

    Once your onions are ready, add the vegetable stock. Make sure to mix in all the brown bits on the bottom of the pan into the stock to get all the flavor you can.

    Vegetable stock and onions
    Vegetable stock and onions

    Add the pumpkin puree (you’ll note mine wasn’t that pureed), the sage and the rosemary.

    Pumpkin, vegetable stock and onions
    Pumpkin, vegetable stock and onions

    I simmered mine for a bit to make sure my roasted pumpkin was tender, and for the onions to cook and soften further.  Once I thought the pumpkin and onions were tender enough, I used my immersion/hand/stick blender to puree everything nicely.

    Pureed Pumpkin Bisque
    Pureed Pumpkin Bisque

    Now add your margarine, and cashew milk, and stir well to incorporate.  Taste your soup and add the salt, pepper, brown sugar, and hot sauce as needed. Ladle some into a bowl, sprinkle with your parsley, and bask in the warmth of the soup.

    Pumpkin Bisque
    Pumpkin Bisque


  • Vegetable Lentil Chestnut Soup

    Vegetable Lentil Chestnut Soup
    Vegetable Lentil Chestnut Soup

    Looking in my fridge and freezer, apparently all I’ve made for weeks are soups and stews and chilis. It’s getting cold (maybe it just IS cold?) and soup is warming. This soup is based on a recipe title I read a year or so ago, possibly on a can. I can’t remember where, and I never could find it again. All I had was “lentil chestnut” and it sounded good.

    I figured this would be a quick and easy soup if I used canned lentils and packaged chestnuts, both of which I usually have on hand, and my standard trio of soup vegetables: onions, carrots, and celery. I also used homemade stock, as I try to do, because frankly, mine tastes better.

    This soup is hearty because of the lentils, a bit sweet because of the chestnuts, and full of vegetables for flavor, texture, and, hey, nutrition. I even had a lentil naysayer taste the soup, and it got a general approval. My vegetables were rather giant in relation to the chopped chestnuts and tiny lentils, and if that will bother you, consider chopping everything more finely. I kind of liked it, and it made for more interesting photographs (so did having a better camera to play with).

    Vegetable Lentil Chestnut Soup
    Vegetable Lentil Chestnut Soup

    Vegetable Lentil Chestnut Soup

    • 1 Tablespoon olive oil
    • 1 cup chopped onion (about 1/2 onion)
    • 1/4 teaspoon salt
    • 1 cup chopped carrot (three small carrots)
    • 1 cup chopped celery (2 larger stalks)
    • 1 teaspoon chopped garlic (2 cloves)
    • 1/2 teaspoon thyme
    • 1/2 teaspoon dill
    • 1/2 teaspoon tarragon
    • 1/2 teaspoon dry mustard
    • 5 oz cooked and shelled chestnuts, chopped (this is the size of package I can buy around here — cook and shell your own, if you like, but be warned, it’s more work than you think it will be!)
    • 2 cups cooked lentils — any type you like except red, which will not hold their shape. I used black.
    • 3 cups of vegetable broth, preferably unsalted. Add your own salt.

    In a large sauce pan, over medium heat, add the oil to a hot pan. When the oil is shimmering hot, add the onion and salt; cook, stirring occasionally, until translucent (about 5 minutes). Add the carrots and cook for 2-3 minutes. Do the same with the celery.

    Now season: Add the garlic and stir well. Then add the spices and stir again. Give it a minute to heat up — this seems to let the garlic really permeate this base of the soup.

    Add the chestnuts and lentils, stir, and then add the vegetable broth. Cover and bring to a boil. There are two ways to do this. If you’re feeling patient, leave the heat at medium and let it come up to a boil slowly. This is great for flavor, but honestly, not enough to insist that this is the right way to do it. You can also just turn the heat up to boil it fast. Either way, after you’ve had a boil, then reduce the heat and simmer for about 20 minutes.

    Enjoy soup.

    Vegetable Lentil Chestnut Soup
    Vegetable Lentil Chestnut Soup
  • Potato Curry Soup

    Potato Curry Soup (on the moon!)
    Potato Curry Soup (on the moon!)

    Apparently, I first made this recipe in September 2007 — I’m an historian, so I do tend to date all my notes. I never really finished it, though. Like so many things, I made it once, liked it enough to sketch down sorta kinda what I did and what I threw into the pot, and never looked back at it. But this is why good notes are important right?

    For this time of year, when “cool” feels “cold” because of transitions in temperature, a nice soup with warming spices might be the most perfect dinner. Also, the house smells amazing. As a finishing note, I add coconut milk, just a bit, to give it a richer, creamier curry flavor, though this is not necessary. I am reasonably sure that most non-dairy milks would work here, though I’m not sure rice milk would add much (and don’t use “light” coconut milk — it adds very little). But I think it’s fine without the added non-dairy milk, too. Because of the optional coconut milk, I’ve confusingly tagged this with a “tree nut warning” as well as “nut-free.” It depends on how you make it; do what works for you.

    I basically took my forever-perfect combination for soup (onions, potatoes, carrots, celery) and changed up the seasonings to a mad fantastic curry blend. The spice of this soup stays mainly in the broth, which is a nice play against the earthy vegetables and beans. When you taste it to adjust seasonings, taste the broth AND a potato or carrot; they balance.

    Because this is a big pot, mix it up as you work through the leftovers. A handful of spinach added before re-heating is pretty awesome. I’ve also used a serving, with lots of broth, poured over fish and simmered until the fish is done. I like to get a little creative with leftovers.


    Potato Curry Soup
    Potato Curry Soup

    Curry Potato Soup

    • 1-1 1/2 Tablespoons olive oil
    • 1/4 of an onion, softball-sized, chopped (between 1/2 and 3/4 cup)
    • 2 cloves of garlic, pressed or chopped finely
    • 1 good chunk of ginger, one inch around (size of a walnut), finely minced or micro-planed
    • 1 Tablespoon curry powder (choose sweet if you like it mild, hot if you like that)
    • 1/2 Tablespoon turmeric
    • 1 teaspoon cinnamon
    • 1/4 teaspoon cayenne (optional, but I’d suggest adding at least a pinch)
    • 1/2 teaspoon salt (if you’re using commercial broth, use 1/4 teaspoon then taste)
    • 1/4 of a bell pepper (about 1/2 a cup)
    • 4 stalks celery, chopped
    • 3 carrots, chopped
    • 3 medium potatoes, small cubed (smaller than dice, about 3 1/2 cups). If you want a super creamy soup, peel your potatoes. If you’re lazy like me, or want the fiber, leave the skins on. It’s up to you.
    • 2 cups or one can of cannellini beans, rinsed and drained
    • 6-8 cups broth or stock, vegetable or chicken
    • 1/4 cup coconut milk, unsweetened and unflavored, optional
    • additional hot sauce, if that’s your thing, optional

    Heat a large stock pot over medium heat. Add oil to your stock pot for a good thick coat (hence the range), and let that heat until shimmery. Add your onion and cook until translucent.

    Add the ginger and garlic, stir well, and cook until fragrant. Add about 1/4 of a cup of broth and stir well, making sure to scrape up any of the garlic and ginger that stuck to the bottom.

    Add all the spices and stir well.

    Add the pepper, celery, and carrots, stir well, and cook for 5 minutes or so. Add potatoes, stir until completely coated with spices, then add the beans and stir again. Add the rest of the broth, covering your soup ingredients completely, stir well, and cover until it comes to a boil. Do this over medium heat. When you’ve reached the boil, turn the heat down to low and simmer until the potatoes are fully cooked and starting to break down a little — about 30 minutes.

    Stir soup well, and taste. Add salt, if needed, and then add the coconut milk, if using (or use another non-dairy milk here) and hot sauce if everyone wants it. If you do like it really spicy, I’d recommend harissa here.

    Enjoy. This soup reheats fantastically, but I’ve never frozen it.


  • Berry Poke Cake (vegan, gluten-free)

    Vaguely Patriotic Poke Cake
    Vaguely Patriotic Poke Cake

    So this week is the both the classic summer holiday of Independence Day in the US. I know maybe cake isn’t the first thing one thinks of when you think of summer holiday picnics, but this week is also my birthday, so cake is important. So your theme is: BERRIES. Hah. Actually, berries are one of the more awesome things about summer, and cake is the one truly awesome thing about birthdays, so here’s a berry-themed cake that also just happens to be color-appropriate for a few upcoming holidays — nicely, this works as well for Bastille Day as it does for Independence Day. It’s multi-purpose. This is good, because every day is better with cake.

    This is a riff on a cake my mother used to make — a poke cake, where you soak your cake with gelatin. Her “recipe” came from a magazine recipe (I’m going to guess Better Homes and Gardens, but it might have been the Parade magazine section from the Sunday paper) and involved box cake mix, a box of Jell-O, Cool Whip (which I absolutely adored for all of my formative years) and berries on top. My FrankenCake version involves other people’s recipes instead of boxes, but combined to make “classic” poke cake that is gluten-free, vegan, and completely without preservatives or weird flavorings. This is a dense, moist cake, flavored by the gel, topped with a whipped cream and berries. Served cold, this is great for summer. I mean, it’s berries. What is there not to love?

    You’ll make the cake, cool it, poke holes in it, make a fruit gel, pour it on, cool it, and the “frost” and decorate it. Because it needs to cool completely, twice, this is a good make-ahead recipe. The day before is a good idea, adding the “frosting” and berries not long before serving.

    Cake Assembly
    Cake Assembly

    IMPORTANT NOTE: In case you skipped reading to go straight to the recipe, this is not a “day of” recipe. You need to cool this twice, and the coconut milk for the topping must be refrigerated overnight.


    Patriotic Berry Poke Cake

    1 carton of strawberries or other fresh berries is also needed to decorate the top of the cake.

    Cake (very lightly adapted from Gluten Mama’s GF Vegan Vanilla Cake)

    • ¾ cup sorghum flour
    • ¾ cup tapioca starch
    • ½ cup coconut flour
    • 1 cup sugar
    • ½ teaspoon salt
    • 1 teaspoon baking powder
    • 1 teaspoon baking soda
    • 1 teaspoon xanthan gum
    • ½ cup plain almond milk (or other non-dairy milk)
    • 1 teaspoon lemon juice
    • 1 cup warm water
    • 3 Tablespoons coconut oil
    • 1 Tablespoon vanilla
    • 4 oz (1/2 cup) unsweetened applesauce (I use the snack pack sizes)

    Preheat oven to 375ºF. Lightly grease an 8″x11.5″ pan, or a 9″ square pan.

    Add lemon juice to almond milk and set aside.

    Mix dry ingredients. Then add wet ingredients and mix thoroughly.

    Pour into prepared pan and bake 35 minutes or so — cake is done when lightly browned on top.

    Cool completely, and then poke holes all over the cake with a fork. The more holes, the more your fruit gel will penetrate, so I’d suggest holes no more than 1/2 inch apart, all over the cake.


    Vegan Fruit Gel (I used this recipe from Manjula’s Kitchen)

    Poke and Gel the Cake
    Poke and Gel the Cake


    • 1/2 cup blueberry juice
    • 1/2 cup water
    • 2 Tablespoons sugar
    • 1/4 teaspoon agar agar powder


    If you need to, juice and strain blueberries to get blueberry juice. I just had a bag of frozen berries I picked last summer, so I defrosted them and ran them through a food mill and then a strainer. This made more juice than I needed, but this also makes more gel than you need for the cake.

    Mix the agar agar into your water. Add all the ingredients to a saucepan and bring to a boil over medium heat, stirring occasionally. Boil for three minutes.

    Pour very slowly over the top of your hole-poked cake (this is easier to do if you aren’t taking photos while pouring), letting it soak in, and stop when the gel stops soaking in. You may have a little leftover, so just make a serving of gel for later.

    Put the gel-soaked cake in the fridge and chill for 3-4 hours or overnight.


    Coconut Whipped Cream (see recipe here at Oh She Glows)


    • 1 can full-fat coconut milk without guar gum, refrigerated over night
    • 3 teaspoons sugar
    • 1/2 teaspoon vanilla
    • OR 3 teaspoons of vanilla sugar
    • A chilled metal bowl and electric mixer, with whisk attachment if you have it.


    Flip your can upside down in the fridge. To open it, flip it back upright and open it. Pour off the watery part (you can use this for things, but I don’t like it much, personally.)

    Put JUST the solid part in your chilled bowl and whip it with your whisk attachment or mixer.

    Add the sugar and vanilla (or vanilla sugar) and whip again. Taste it. It’s amazing. Add sugar or vanilla if needed.

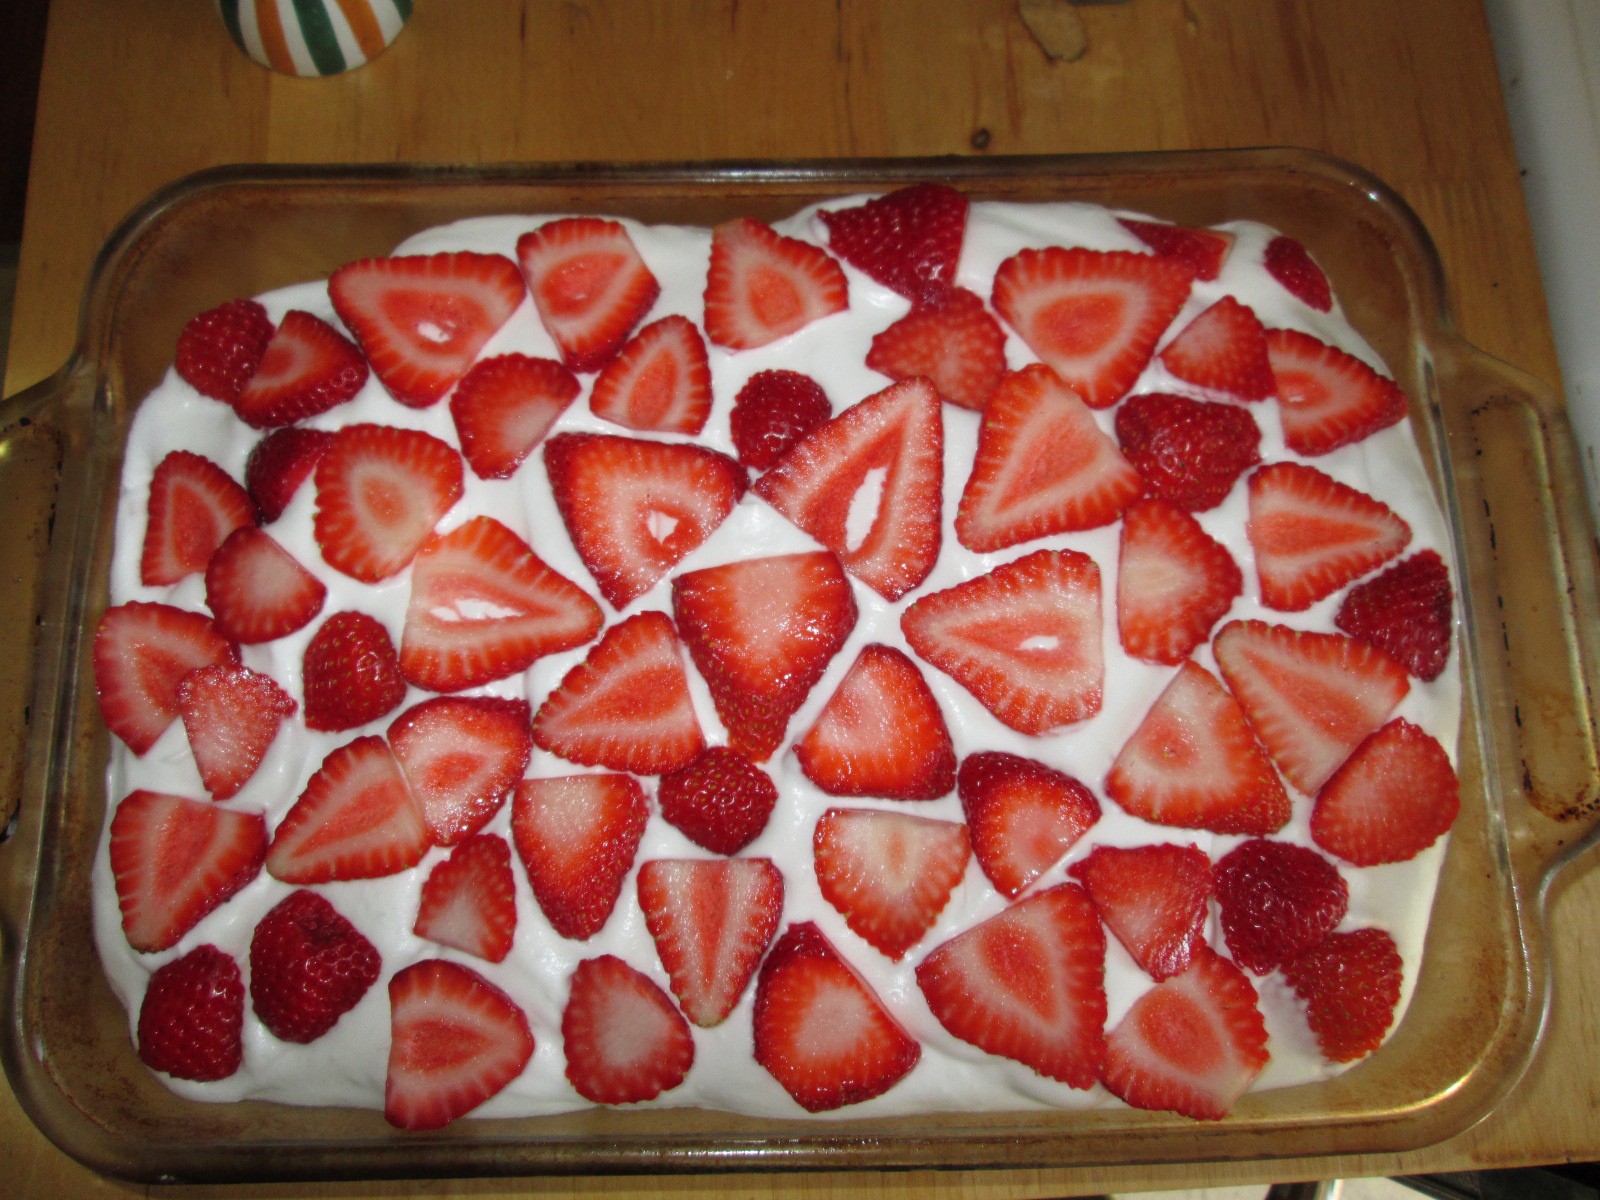
    Use the coconut whipped cream to frost the cake, being generous in your application. Top the cake with berries and keep refrigerated until ready to serve.

    This cake is ready for its close-up
    This cake is ready for its close-up
  • Quick Thai-Inspired Curry Noodle Stir Fry


    Quick Thai-Inspired Curry Noodle Stir Fry
    Quick Thai-Inspired Curry Noodle Stir Fry

    Thai food was one of the biggest losses for me.  My husband and I had our first date at a Thai restaurant, and I used to get delivery there so often that the staff knew it was me just from my voice on the telephone. It was not uncommon for us to have Thai once or twice a week, especially when I was still in private practice. But Thai’s kind of hard without coconut.

    This recipe’s kind of concept more than a recipe, because there are so many variables and and you can make so many curries, i.e. green, red, yellow, Massaman, etc. I used a commercial curry paste because it looked relatively safe for me, although we’ll see in the next few days whether I got corned or not (corned is like being gluten-ed but obviously with corn). However, there are tons of curry paste recipes on the internet that people can modify for their own diets, if the suggestions are not safe for you. Or you can use use a curry powder spice mix you like. I’ve also used the DIY Singapore Seasoning from our DIY Spice Mix Day post. Also, if you make curry paste, freeze it in an ice cube tray so you can grab a chunk when you want. You can use any meat you want, or not. You can also use whatever vegetables strike your fancy.

    Quick Thai-Inspired Curry Noodle Stir Fry

    Makes about 3-4 servings, depending on serving size.

    • 1/2 of a 1 pound package of rice noodles (I used the kind that I would use for pho, but you can pick the width of rice noodle you like)
    • 2 Tablespoons of olive oil, grape seed oil, or an oil that’s safe for you
    • 1 cup of cashew milk or other non-dairy milk (If you can have coconut milk, by all means use it. I can’t use commercial cashew milk so I make my own, soaking 1 cup of cashews in hot water for a couple of hours, draining the water, and putting them in the blender with two cups of new water. It’ll make more than you need, but it freezes well.)
    • 1/2 cup of water
    • 1 package of Kanokwan Green Curry Paste (they have other flavors too, make sure you read labels); or 1 or 2 Tablespoons of Thai Kitchen Green Curry Paste (they have other flavors as well, read labels); or 1 or 2 Tablespoons of Mae Ploy Thai Green Curry Paste (ditto, other flavors, read labels) or 1 or 2 Tablespoons of a curry spice mix you like, similar to those available from Penzey’s.
    • 1/2 pound of beef, pork or chicken cut into stir fry sized strips (Chicken’s out for me, but if you can eat it go for it.)
    • 3 scallions, sliced into quarter inch pieces
    • 1/2 cup of snow peas
    • 10-12 asparagus stalks, trimmed and cut into 1″ pieces
    • 2 carrots, julienned
    • 1 small onion or half a medium onion, cut in half and sliced thinly crosswise to form slices in a curved shape
    • 1 medium bok choy (about 6-8 inches long), sliced crosswise to form small bite size pieces
    • 2 Thai chilies, de-stemmed and sliced (optional, leave out if really spicy is not your thing)
    • 5-6 Thai basil leaves

    First up, prepare all your vegetables. Keep the bok choy or any other greens separated from the rest of the vegetables because they will cook quicker and need to be added at end. To do the carrots, I cheat and use a peeler that juliennes.

    Julienne Peeler
    Julienne Peeler


    Fill a large stock pot with water and bring to a boil. Add your rice noodles, boil for 6-8 minutes and then drain. If you’re using smaller rice noodles, you might not need as much cooking time, so check your package’s instructions. Place the noodles aside until the curry is finished.

    Prepared Rice Noodles
    Prepared Rice Noodles

    In a large skillet, add the oil, the cashew milk, water, and curry paste or spice mix.  Stir to combine over medium heat.

    Curry Paste and Cashew Milk Mixture
    Curry Paste and Cashew Milk Mixture

    Add your meat if you’re using it, and cook until the meat is cooked through. Then add your vegetables with the exception of the bok choy (or other green of choice).

    Curry before adding greens
    Curry before adding greens

    Cover your skillet with its lid and let it simmer for a few minutes to let the asparagus and carrots cook. Then add your bok choy and simmer until the bok choy is ready. When the bok choy is ready, mix in your Thai basil leaves.

    Completed Curry/Stir Fry Thing
    Completed Curry/Stir Fry Thing

    Place a bed of rice noodles on a plate and spoon your curry over it. If you have extra Thai basil leaves and want to be fancy, garnish your dish with them.

    Quick Thai-Inspired Curry Noodle Stir Fry
    Quick Thai-Inspired Curry Noodle Stir Fry

    Hope you enjoy it!


  • Macadamia-Pistachio-Cherry Raw Balls

    Macadamia-Pistachio-Cherry Raw Balls
    Macadamia-Pistachio-Cherry Raw Balls. Photo by J. Andrews

    Apologies to the nut-allergic. These are not for you. Come back next week for a nut-free recipe? For those of you who can have nuts, these are for you.

    I rely on a few travel snacks to get me through times when emergency rations are necessary. Lärabars are one of those snacks, and I usually have one in my bag (as well as a few at the office). But because they are “emergency” food that I eat several times a month, I frankly get a bit bored of the few flavors I like. I wanted to see if I could make something along the same lines, using things I had in the house, and have some snacks for this week at work. Dried fruit and nut things have a good combination of sugar, protein and fat that, for me, at least, makes for a good snack that knocks down hunger for an appropriate amount of time. You know, until your next snack. I eat on the hobbit schedule.

    Between occasional trips to Trader Joe’s and our local natural foods store, I have a great selection of seeds, nuts, and dried fruits. Sometimes they get used for cookies or oatmeal toppings or an attempt at trail mix (which I always think I’m going to like more than I actually do), but mostly, buying them sounds like a good idea. I pulled everything out of the cabinet for taste-testing before deciding on this combo of macadamia nuts, pistachios, and cherries, with some dates and cacao nibs thrown in. The macadamias and pistachios are pretty creamy, and the cherries are tart, and the combination works out well.

    My version might not be fully raw — I don’t know how the cherries or dates were dried — but if that’s important for you, find raw versions.

    Macadamia-Pistachio-Cherry Raw Balls
    Macadamia-Pistachio-Cherry Raw Balls. Photo by J. Andrews

    Macadamia-Pistachio-Cherry Raw Balls 

    makes 16

    • 1/4 cup raw pistachios, shelled
    • 1/2 cup raw macadamia nuts
    • 2 pitted Medjool dates
    • 1/4 cup dried Montmorency cherries (pretty sure any dried cherries will work, but I like the tartness of these)
    • 2 Tablespoons raw cacao nibs

    Rough chop the pistachios in the food processor, and set aside.

    Add the macadamia nuts and the Medjool dates to the food processor, and process until you’ve made a nut butter. Add the cherries, and pulse them into the mixture. Add the pistachios back in, and the cacao nibs. Pulse to mix.

    Dump the mixture out onto a sheet of parchment paper and knead it together. Chill at least 10 -15 minutes in the fridge, wrapped tightly in the parchment. Roll into balls, about 1/2 a Tablespoon each. Store tightly covered in the fridge.


    Macadamia-Pistachio-Cherry Raw Balls
    Macadamia-Pistachio-Cherry Raw Balls
  • WW: Homemade Margarine Experiments

    The winning version - using beef tallow and lard
    The winning version – using beef tallow and lard

    So I used to use Earth Balance Vegan Buttery Spread before the whole corn thing went down. But it’s got ingredients derived from corn. Supposedly the proteins are processed out of it, but I’ve heard that song and dance before and reacted, so my Earth Balance got stricken from the list things that were okay to eat. Also, most shortenings are also now out the window for me as they they have corn, flax, or palm, which is cross reactive with coconut (allergic), and for which I’ve had little sneaky reactions. Quite a while back I tried to make some vegan margarine using cocoa butter. It was a great idea, but the reality of the product left something to be desired, as it just didn’t taste like margarine. For a while I ignored the issue and just dumped olive oil on stuff, and made wine-herb-olive oil sauces for dipping things like lobster, but I missed margarine/butter.

    About a month or so ago, I started thinking about baking again, or more accurately, chocolate chip cookies, and the fact that I didn’t really have a safe margarine or shortening to make them with. I started wondering about lard, since you can make pie crust from it, and started doing some Google-fu. Turns out most commercial lards have citric acid (corn) or other additives that are problematic. Sigh. So I started wondering if you could DIY it somehow, like saving your bacon fat. I found this article on rendering your own lard. I began considering whether I could use the lard to make margarine. Then in the process of making the Roasted Beef Stock and discussing the use of the beef tallow skimmed from the stock to use to caramelize the onions with Mary Kate for her French Onion Soup, we considered whether beef tallow might have a closer to dairy taste and feel. So I went searching for recipes to render beef tallow and found this article.

    So then it was a matter of trying to get my hands on some pork leaf lard to render down into lard and some suet to render down into beef tallow. I found a local source, the Miles Smith Farm, where they are able to get pastured pork from another supplier and they have grass fed beef. Once I rendered down my order in separate crock pots, I had a quart and half a pint of lard and a quart, a pint, and a half pint jar of beef tallow.

    Beef Tallow and Pork Leaf Lard
    Beef Tallow and Pork Leaf Lard

    I used the original recipe I had tried as a starting point for my attempts. I know what you’re thinking…Denise, you’re going to hell for using a vegan recipe to make margarine out of animal fats. And you’re probably right. If I had a viable vegetable alternative, I’d take it, even though I’m not vegan. But I’m not vegan, and I don’t have a viable vegetable alternative. I used the recipe as a guide, for amounts, but I switched out almost every ingredient. I don’t like soy or hemp milk and I’m allergic to almonds. I didn’t want to use canola oil because of cross contamination with corn and sunflower oil is out because I’m allergic to sunflower. Also, I didn’t want to use the soy lecithin because if you’ve read how that’s made, you won’t want to eat it, and sunflower lecithin is out because I’m allergic to it. The cocoa butter doesn’t taste right, and I can’t use xanthan gum (corn/wheat) and I didn’t want to use guar gum. So I googled substitutions for emulsifiers and came up with the suggestion of psyllium husk as a substitute for soy lecithin. This is what I came up with for a recipe to test:

    • 2 ounces of fat (either all lard, all beef tallow or 1 ounce of each)
    • ⅓ cup of homemade cashew milk 
    • ¼ tsp of fresh lemon juice
    • ¼ tsp of apple cider vinegar (I used Bragg’s)
    • ½ cup of olive oil
    • ½ tsp of sea salt
    • ¾ tsp of psyllium husk powder
    • one half of ⅛ tsp of turmeric (for color, you could skip it if you want, but I was hoping to fool my brain a bit)

    Melt lard and beef tallow together in a double boiler. Put all the other ingredients except the olive oil in a blender or food processor.

    Once the lard and beef tallow are melted, add the olive oil and remove the double boiler from the heat.  Add the lard, tallow and olive oil mixture to the blender or food processor and blend until completely mixed.  You will need to scrape down the sides at least once.  

    Once it’s completely mixed, pour into a silicone ice cube tray or other silicone mold, and place in the freezer until it sets.

    The first version I did used all lard as the 2 ounces of fat.  Lard is less solid at room temperature than the beef tallow. When I took a cube out of the freezer and put it on the plate (room temperature plate) to take a photo, it immediately began to melt at the contact point of the plate.

    Lard only version
    Lard only version

    The second version I did used all beef tallow as the 2 ounces of fat. Beef Tallow is more solid at room temperature than the lard, and it less readily melts in your mouth. It sort of coats your mouth with a waxy feel.  

    Beef Tallow only version
    Beef Tallow only version

    Lastly, just for the heck of it, I decided to mix them both together, and used one ounce of lard and one ounce of beef tallow in the third version. This one ended up being the winner. The beef tallow gave it a little bit more structure and a little bit more creamy dairy flavor, and the leaf lard balanced out the waxiness of the tallow and made the product more melt-able.

    Once all versions were completed and had set in the freezer, my husband (who is not dairy free) and I tested them on hot white rice, so that we could see the melting quality and evaluate the taste without too much interference from the food. 

    Testing Margarine samples on rice
    Testing Margarine samples on rice

    So now I have something that’s pretty close to margarine that I can use on rice, baked potatoes and veggies. I won’t use it a lot because it’s lard and beef tallow, although I’m guessing that real fats are probably healthier than hydrogenated crap. My next set of experiments will be using plain lard in chocolate chip cookies and trying the “margarine” in a small batch as well.

    Anyway, I thought I’d post this both as an illustration of what some of us have to do to get safe food, and for those of you who might have my particular combination of food allergies that makes commercial butter, shortening, and margarine impossible.

    Anyone else want to share their weirdest food allergy experiments?