Notice: Function _load_textdomain_just_in_time was called incorrectly. Translation loading for the wp-ultimate-recipe domain was triggered too early. This is usually an indicator for some code in the plugin or theme running too early. Translations should be loaded at the init action or later. Please see Debugging in WordPress for more information. (This message was added in version 6.7.0.) in /home/maryzahc/public_html/adultfoodallergies.com/wp-includes/functions.php on line 6131 vegetables – surviving the food allergy apocalypse (archive)
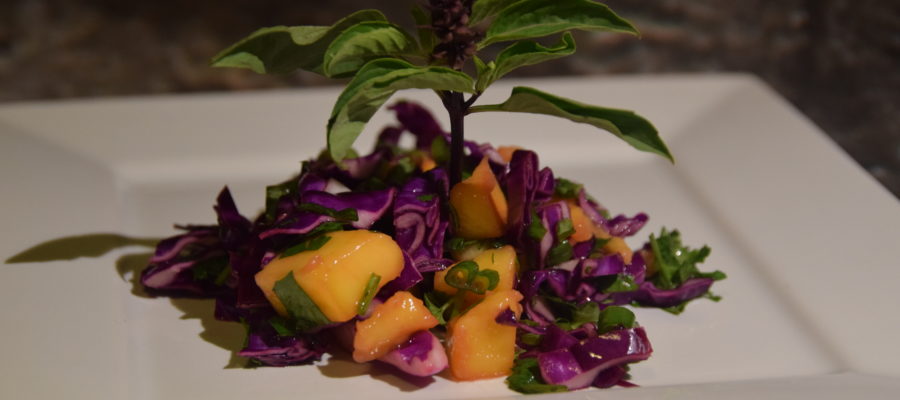
I just spent a week in Hawai’i, the Big Island, and came home to cold and dreary weather. We hit avocado season there, which was amazing, but also found lots of fresh papaya, some passion fruit, and some interesting varieties of dragon fruit. But back here on the mainland, the tropical fruit variety is less exciting. The grocery store did have some rather sad-looking papaya, but the mangoes looked pretty good. The smaller honey mangoes were ripe and ready to eat.
Beyond that, I have a recipe on my menu plan this week that required 1/4 of a head of red cabbage. I swear, recipes either require a whole cabbage or just a bit, and I hate wasting things. So I pulled this slaw together to go with several other meals and use up a bit more of the cabbage (that still only gets me to half the head, but I’ll stir-fry the rest).
This is a TART slaw, not creamy, and the only “dressing” is lime juice and the juice from the mangoes — this is why it needs to rest a bit. My mangoes were super sweet, and the dinner that this was a side dish for was rich enough that this made a good accompaniment as it was. You may want to adjust a bit — a pinch or two of salt or sugar or a drizzle of olive oil may be needed to perfect this crunchy tart dish. Adjust as needed, and enjoy.
Notice: Trying to access array offset on value of type bool in /home/maryzahc/public_html/adultfoodallergies.com/wp-content/plugins/wp-ultimate-recipe/helpers/models/recipe.php on line 254
So this post needs to be quick, as I’ve spent the past two weeks moving and I’m exhausted. But this dinner was also quick — and hot and comforting. Well, the prep work is quick. It does take about an hour to bake. Keep that in mind. This is the first thing I made in the oven of our new apartment, in the midst of trying to figure out where everything goes.
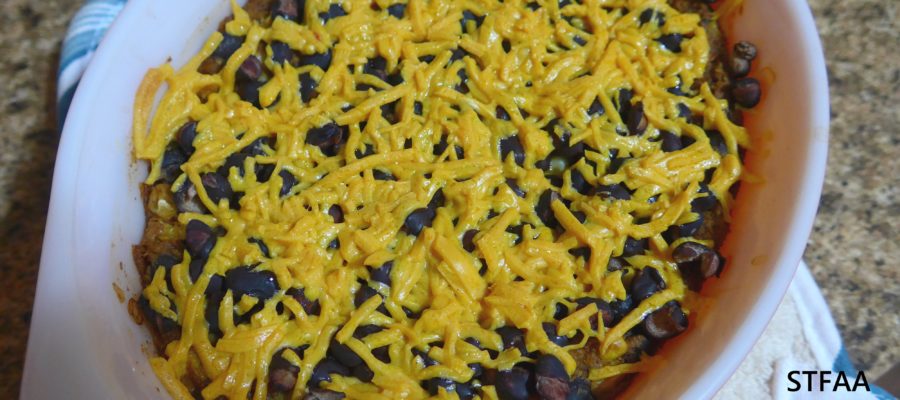
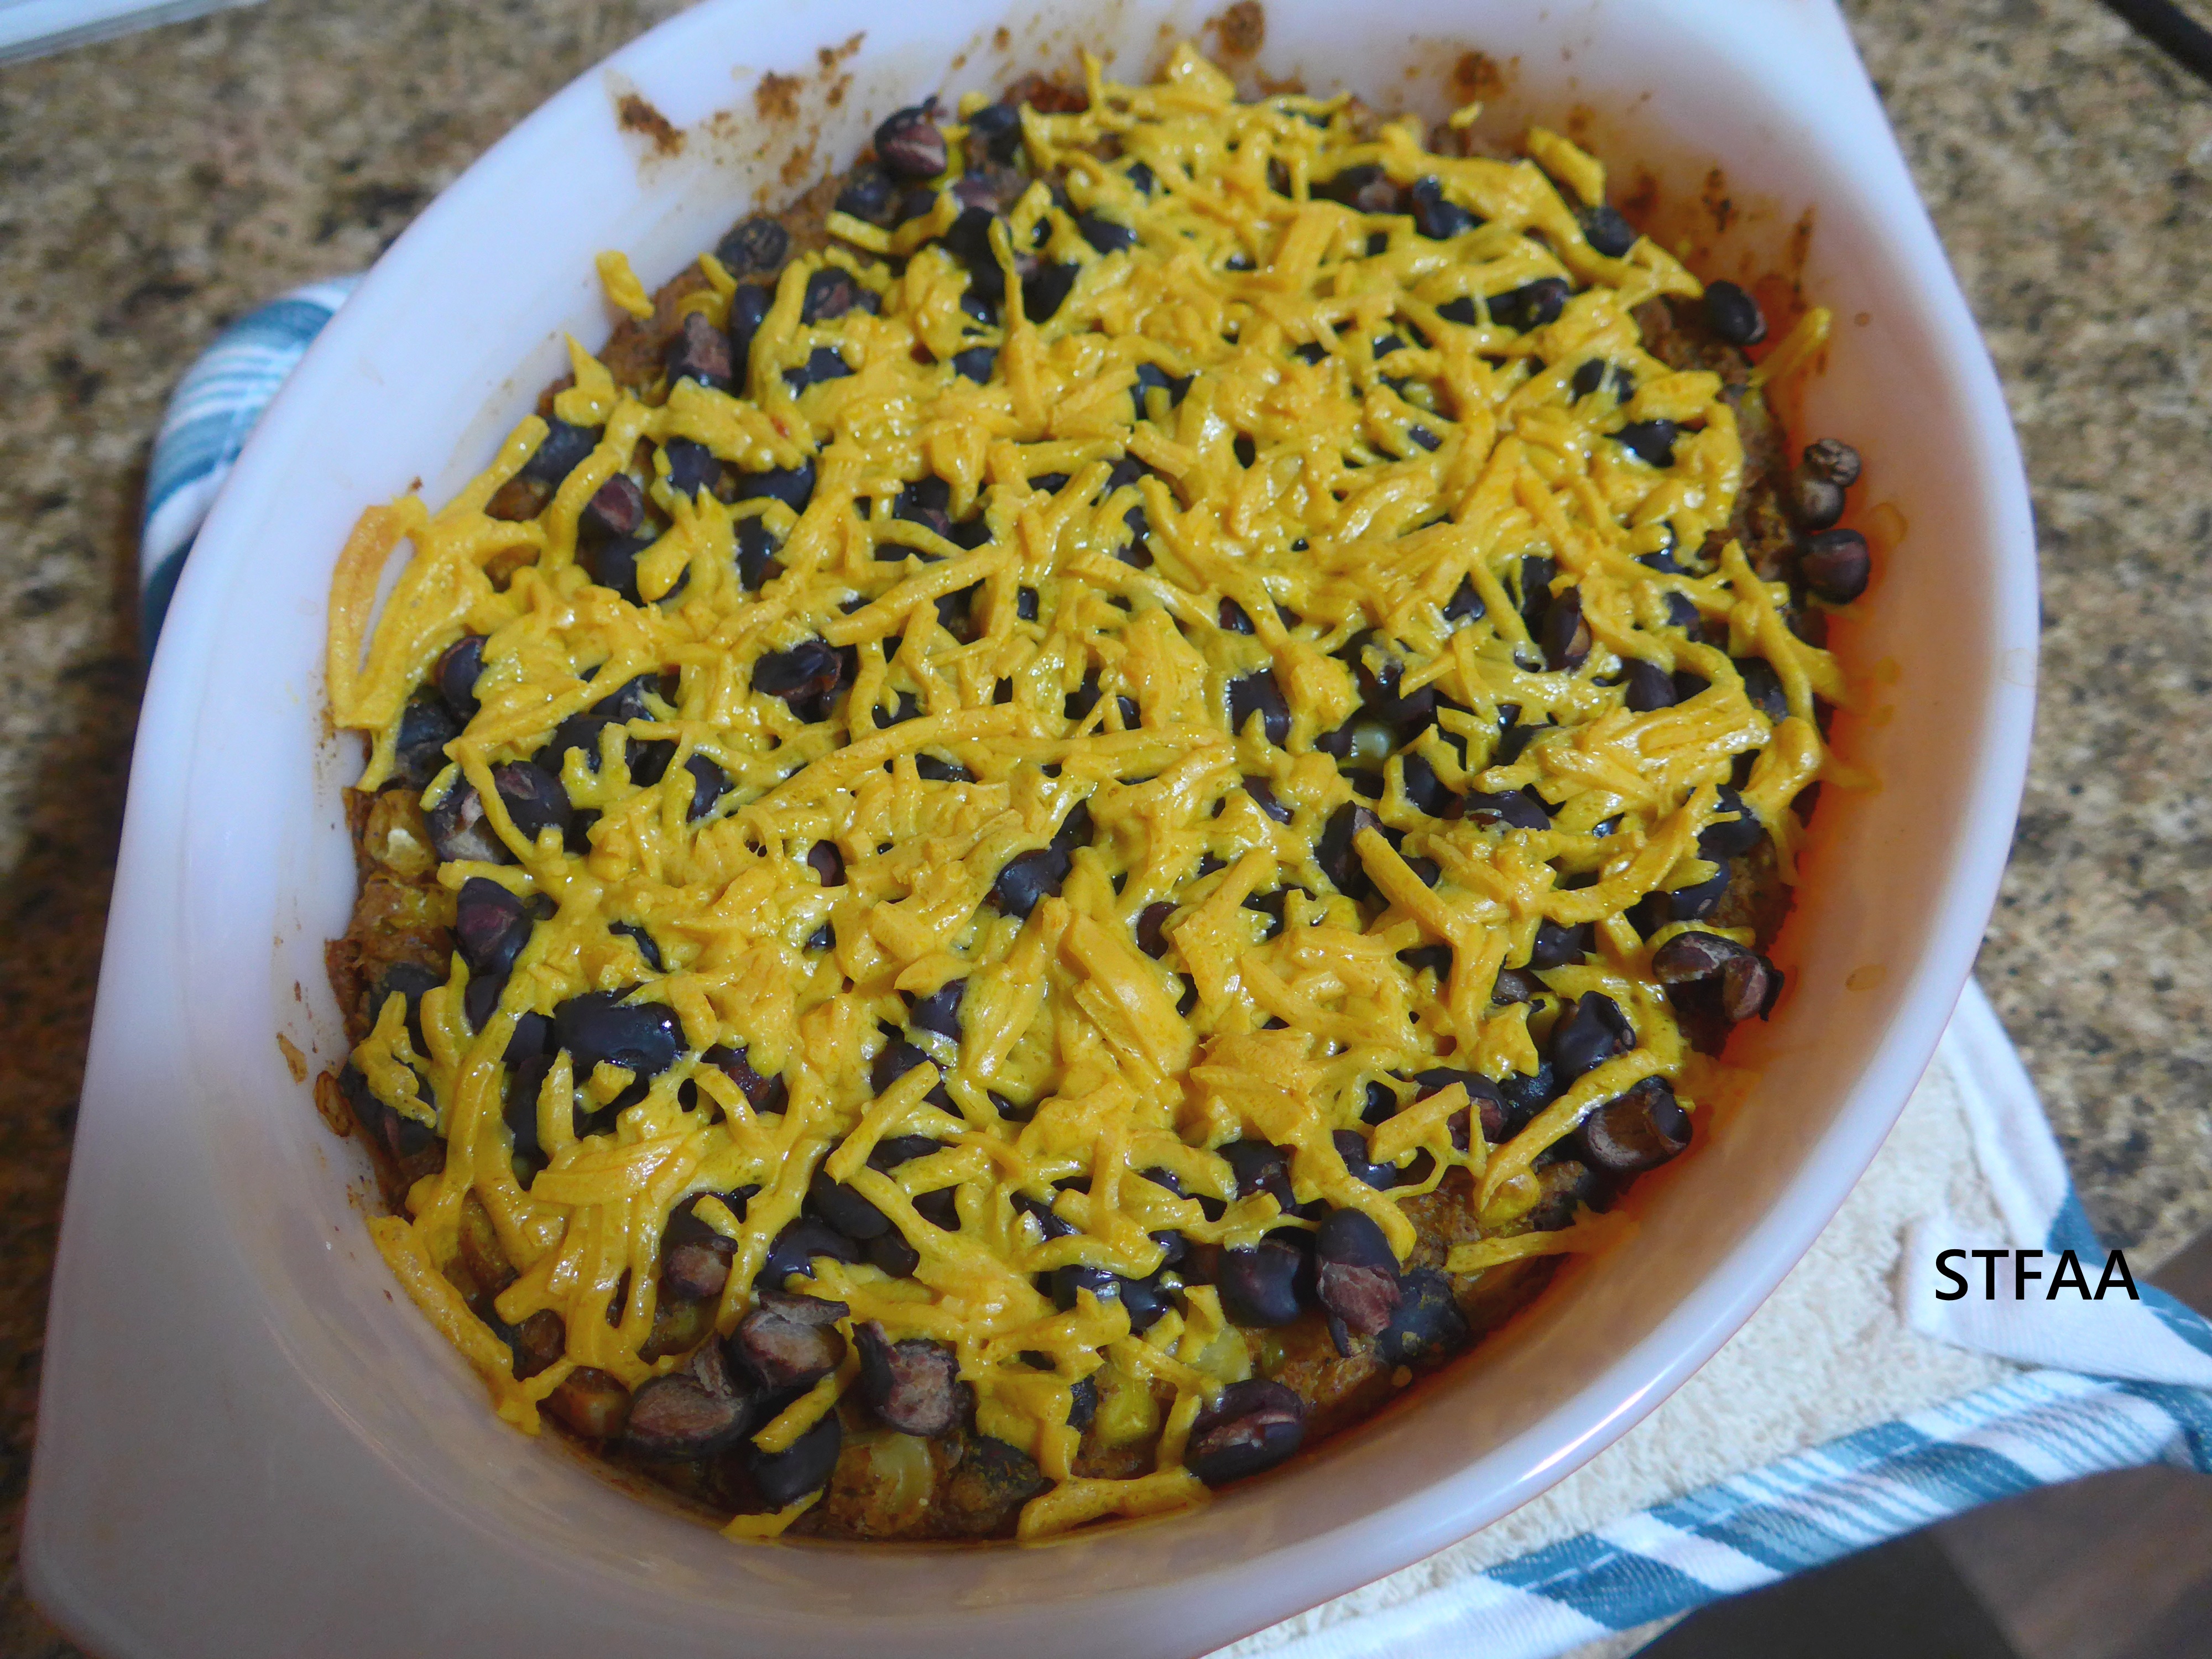
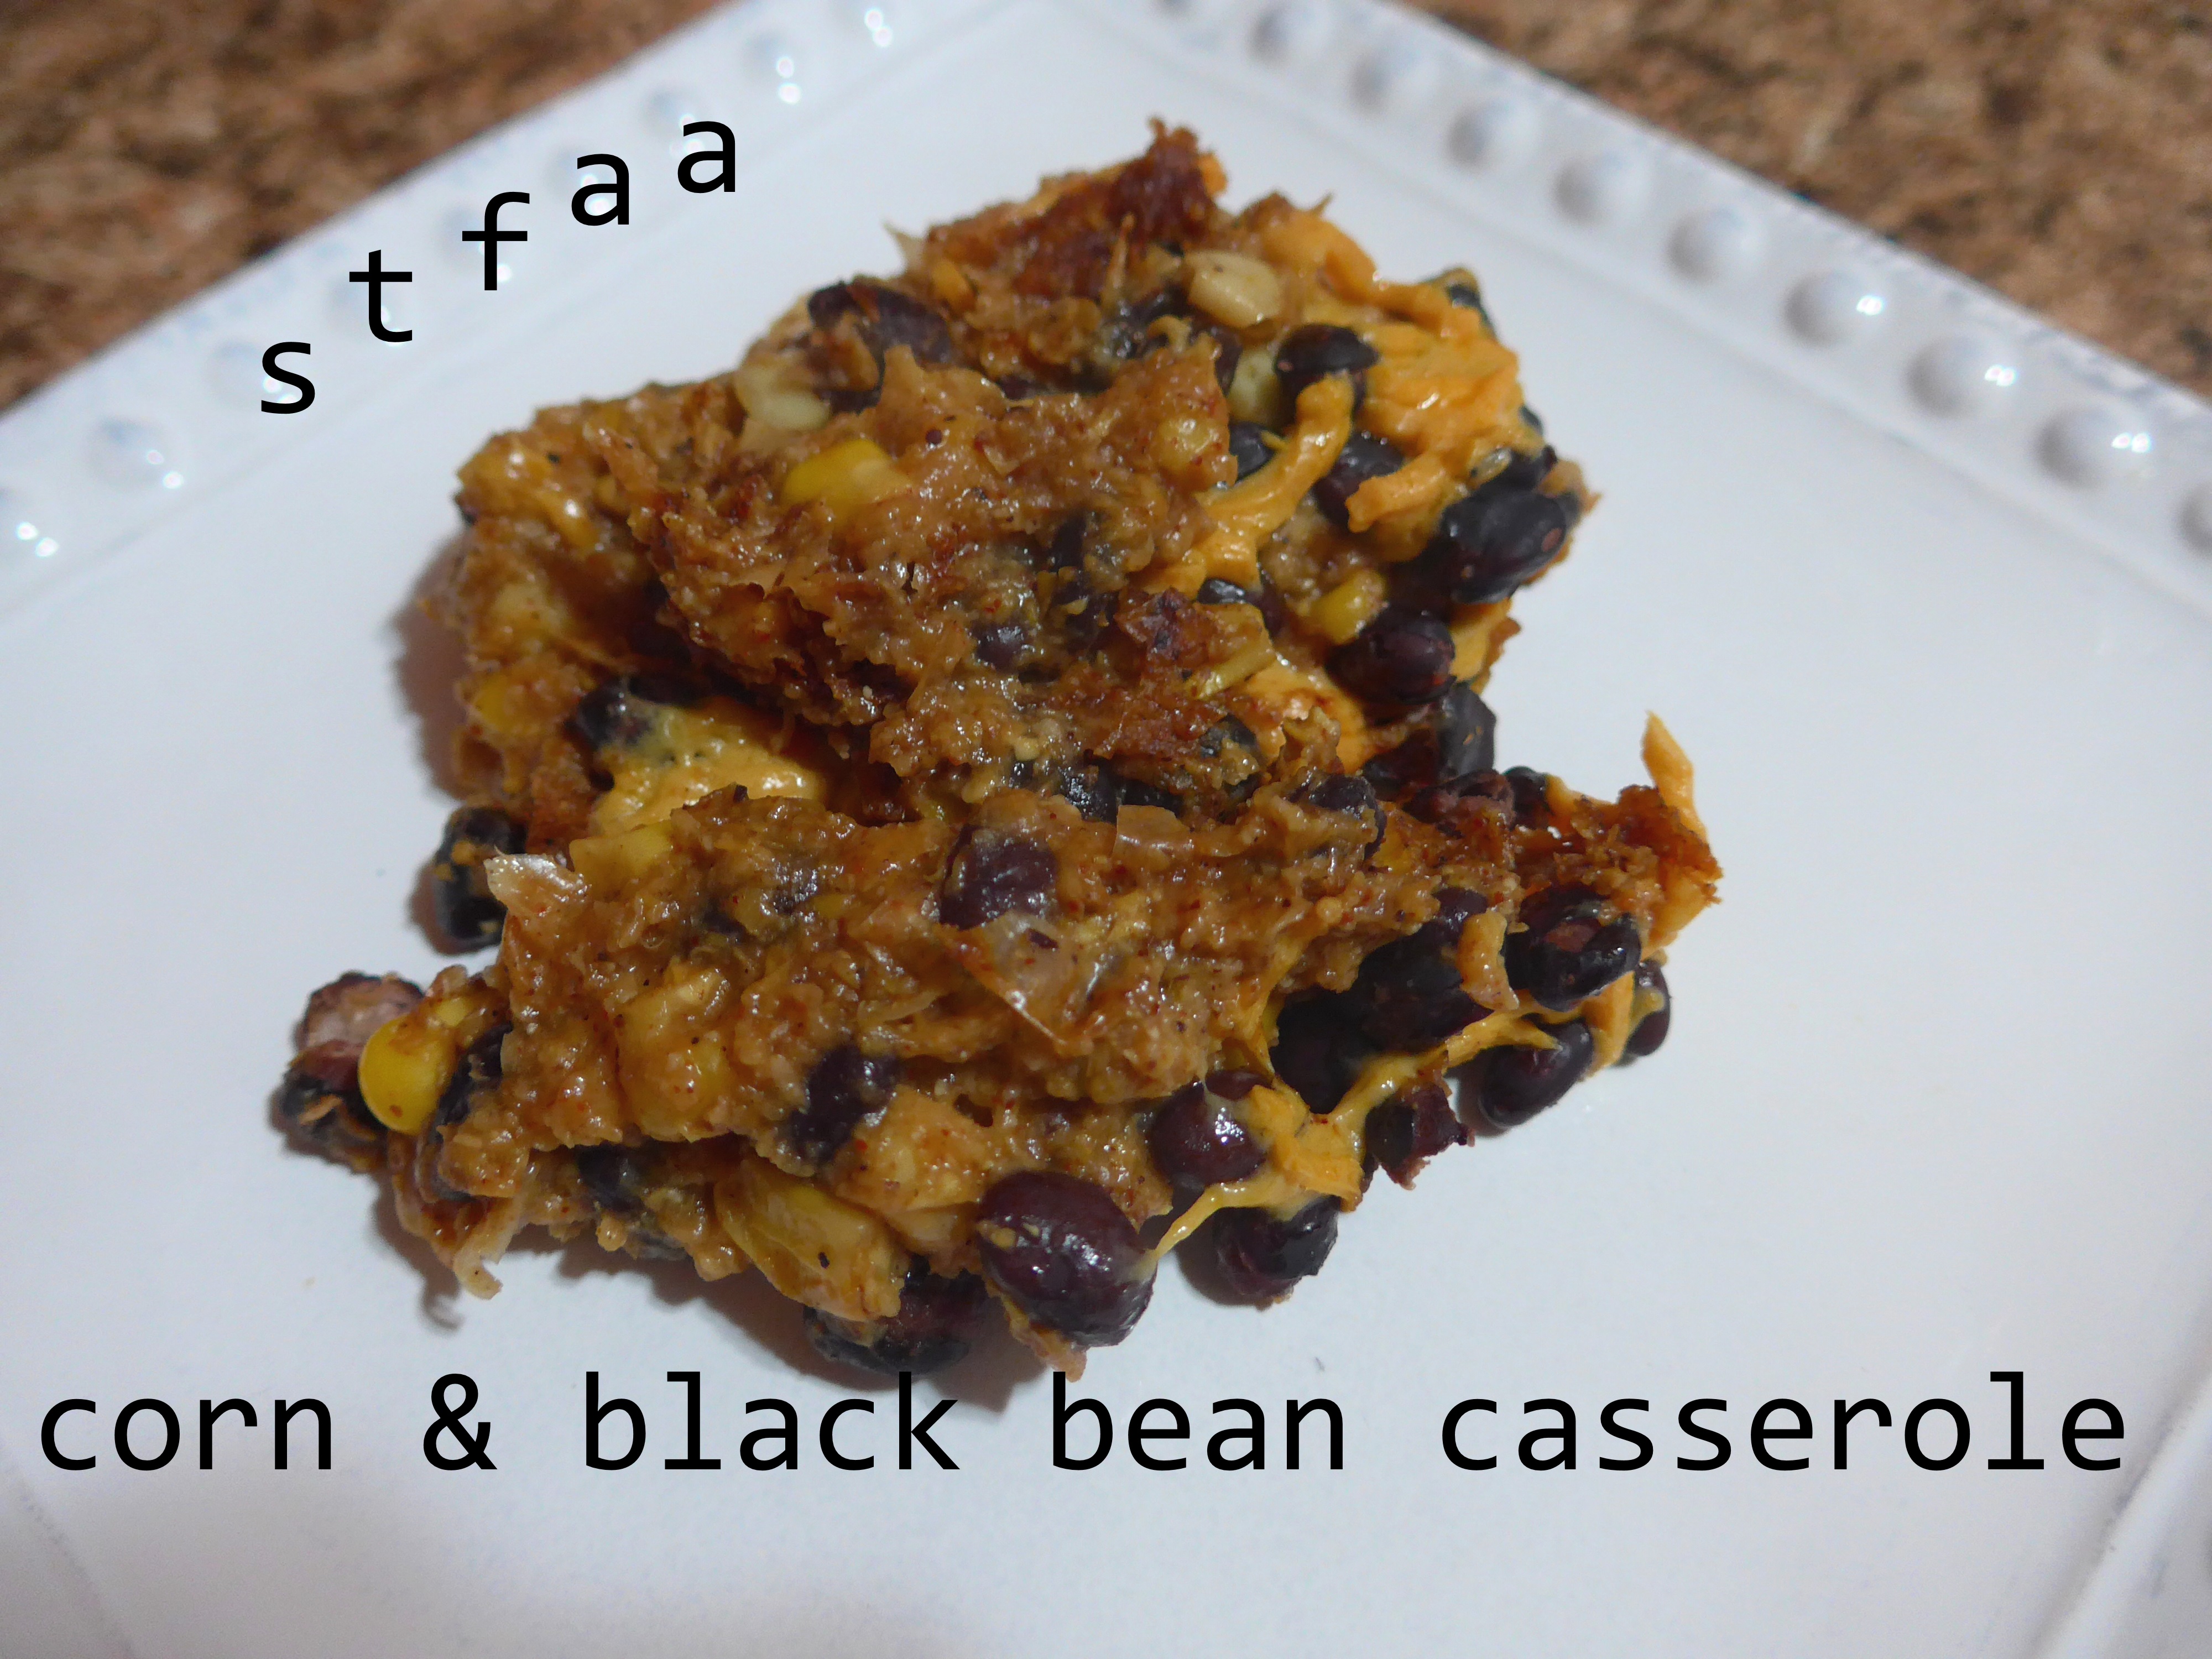
This casserole is based on a vegan corn casserole I made for Thanksgiving this year. Jack’s family makes some interesting corn dish for Thanksgiving based on ingredients that we don’t get out here on the west coast, but frozen corn is easy enough to find. I tweaked the original recipe only to use almond milk instead of soy. For a non-holiday, I’m too lazy to make a fancy side dish (by “fancy,” I mean something that takes an hour to bake and still requires a main course). But I thought it might be easy enough to turn this into a main dish with a few tweaks. Corn goes well with black beans, and that combination sort of screams chili powder to me, so that’s what I’ve added, along with a black bean, lime juice, and vegan cheese shred “topping” added at the end.
So this is a casserole approved for weeknight making, but not for nights you get home late or starving. Plan on maybe 15 minutes prep and an hour ten minutes baking. But your whole meal is done (feel free to add a salad on the side, of course).
(I hope I don’t need to say it, but this one is obviously not appropriate for the corn-allergic.)
Notice: Trying to access array offset on value of type bool in /home/maryzahc/public_html/adultfoodallergies.com/wp-content/plugins/wp-ultimate-recipe/helpers/models/recipe.php on line 254
3cupsfrozen corn(I will divide this below into 2 cups defrosted, one cup left frozen)
1Tablespoonchili powder
1Tablespoonneutral oil(I use safflower — just not olive or coconut here)
2teaspoonsbaking powder
2Tablespoons corn meal
2-3Tablespoonsnon-dairy milk(yes, this will be used separately later)
1canblack beansdrained and rinsed
1-2teaspoonslime juice
1/4-1/3cupshredded vegan cheese(I used Daiya brand cheddar style shreds)
Servings: people
Instructions
First, PREPARE:
Preheat oven to 350ºF.
Grease a 1.5 quart baking dish (you do not need a lid for this recipe).
Get out your blender.
Defrost 2 cups of your corn. I do this by rinsing it with hot water for a minute in a colander — I’m going to use the colander to drain black beans as well, and this is quicker than the microwave.
Add to the blender the arrowroot and non-dairy milk. Pulse this until mixed. I find adding the arrowroot first keeps it IN the milk.
Add the chili powder and 2 cups of defrosted corn. Pulse this down into a rough puree.
Then add the oil, baking powder, and corn meal. Blend well. Add the extra few tablespoons of non-dairy milk to get a pourable consistency. I want to say “like pudding,” but that’s wrong, as you want pudding to be smooth and you want this to be “sandy,” which sounds unappetizing until it’s baked.
Pour this into your prepared dish.
Take 1/2 cup of the black beans and set them aside. Add the rest of them, along with the last cup of corn, and mix that into your corn mush. Now into the oven, uncovered.
Bake 60 minutes.
Meanwhile, mix that last half cup of black beans with the lime juice. Let it sit, but you will pour out any extra lime juice before adding.
At 60 minutes, you should have a nicely baked top (and probably still need a few minutes in the center, which is fine). Drain the lime juice (the beans needn’t be dry, just don’t pour lime juice on your casserole) and spread the beans out on top. Then add a good sprinkle of the vegan cheese shreds — the range is because you want cheese everywhere, but not too thick, and the size of the casserole makes a difference here. Back into the oven for another 10-15 minutes, until the cheese is nice and melted. Then serve and enjoy!
Back in January when Denise and I outlined our year, I knew that “comfort food month” would include potatoes. My absolute go-to whenever I want comfort food is some form of potato. For me, the fries at 5 Guys are safe, so on a road trip, I’m likely to hit them up. I have made meals out of mashed potatoes, potato patties, tater tots, and any other form of potato you can think of. We have a lot of potato recipes! And they aren’t even all mine.
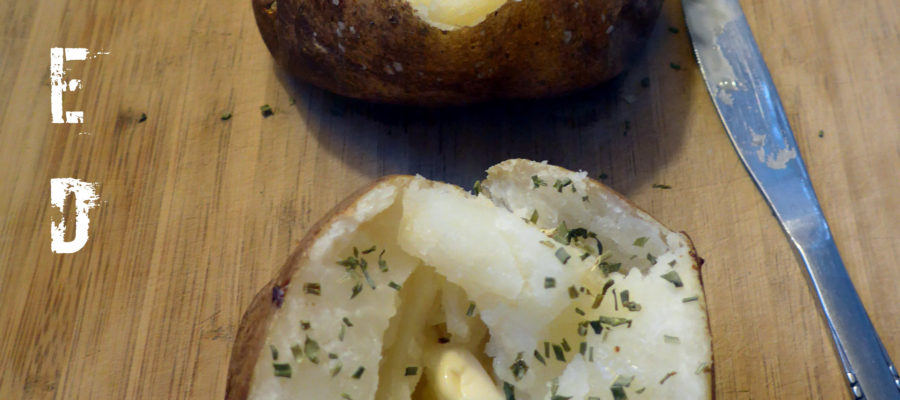
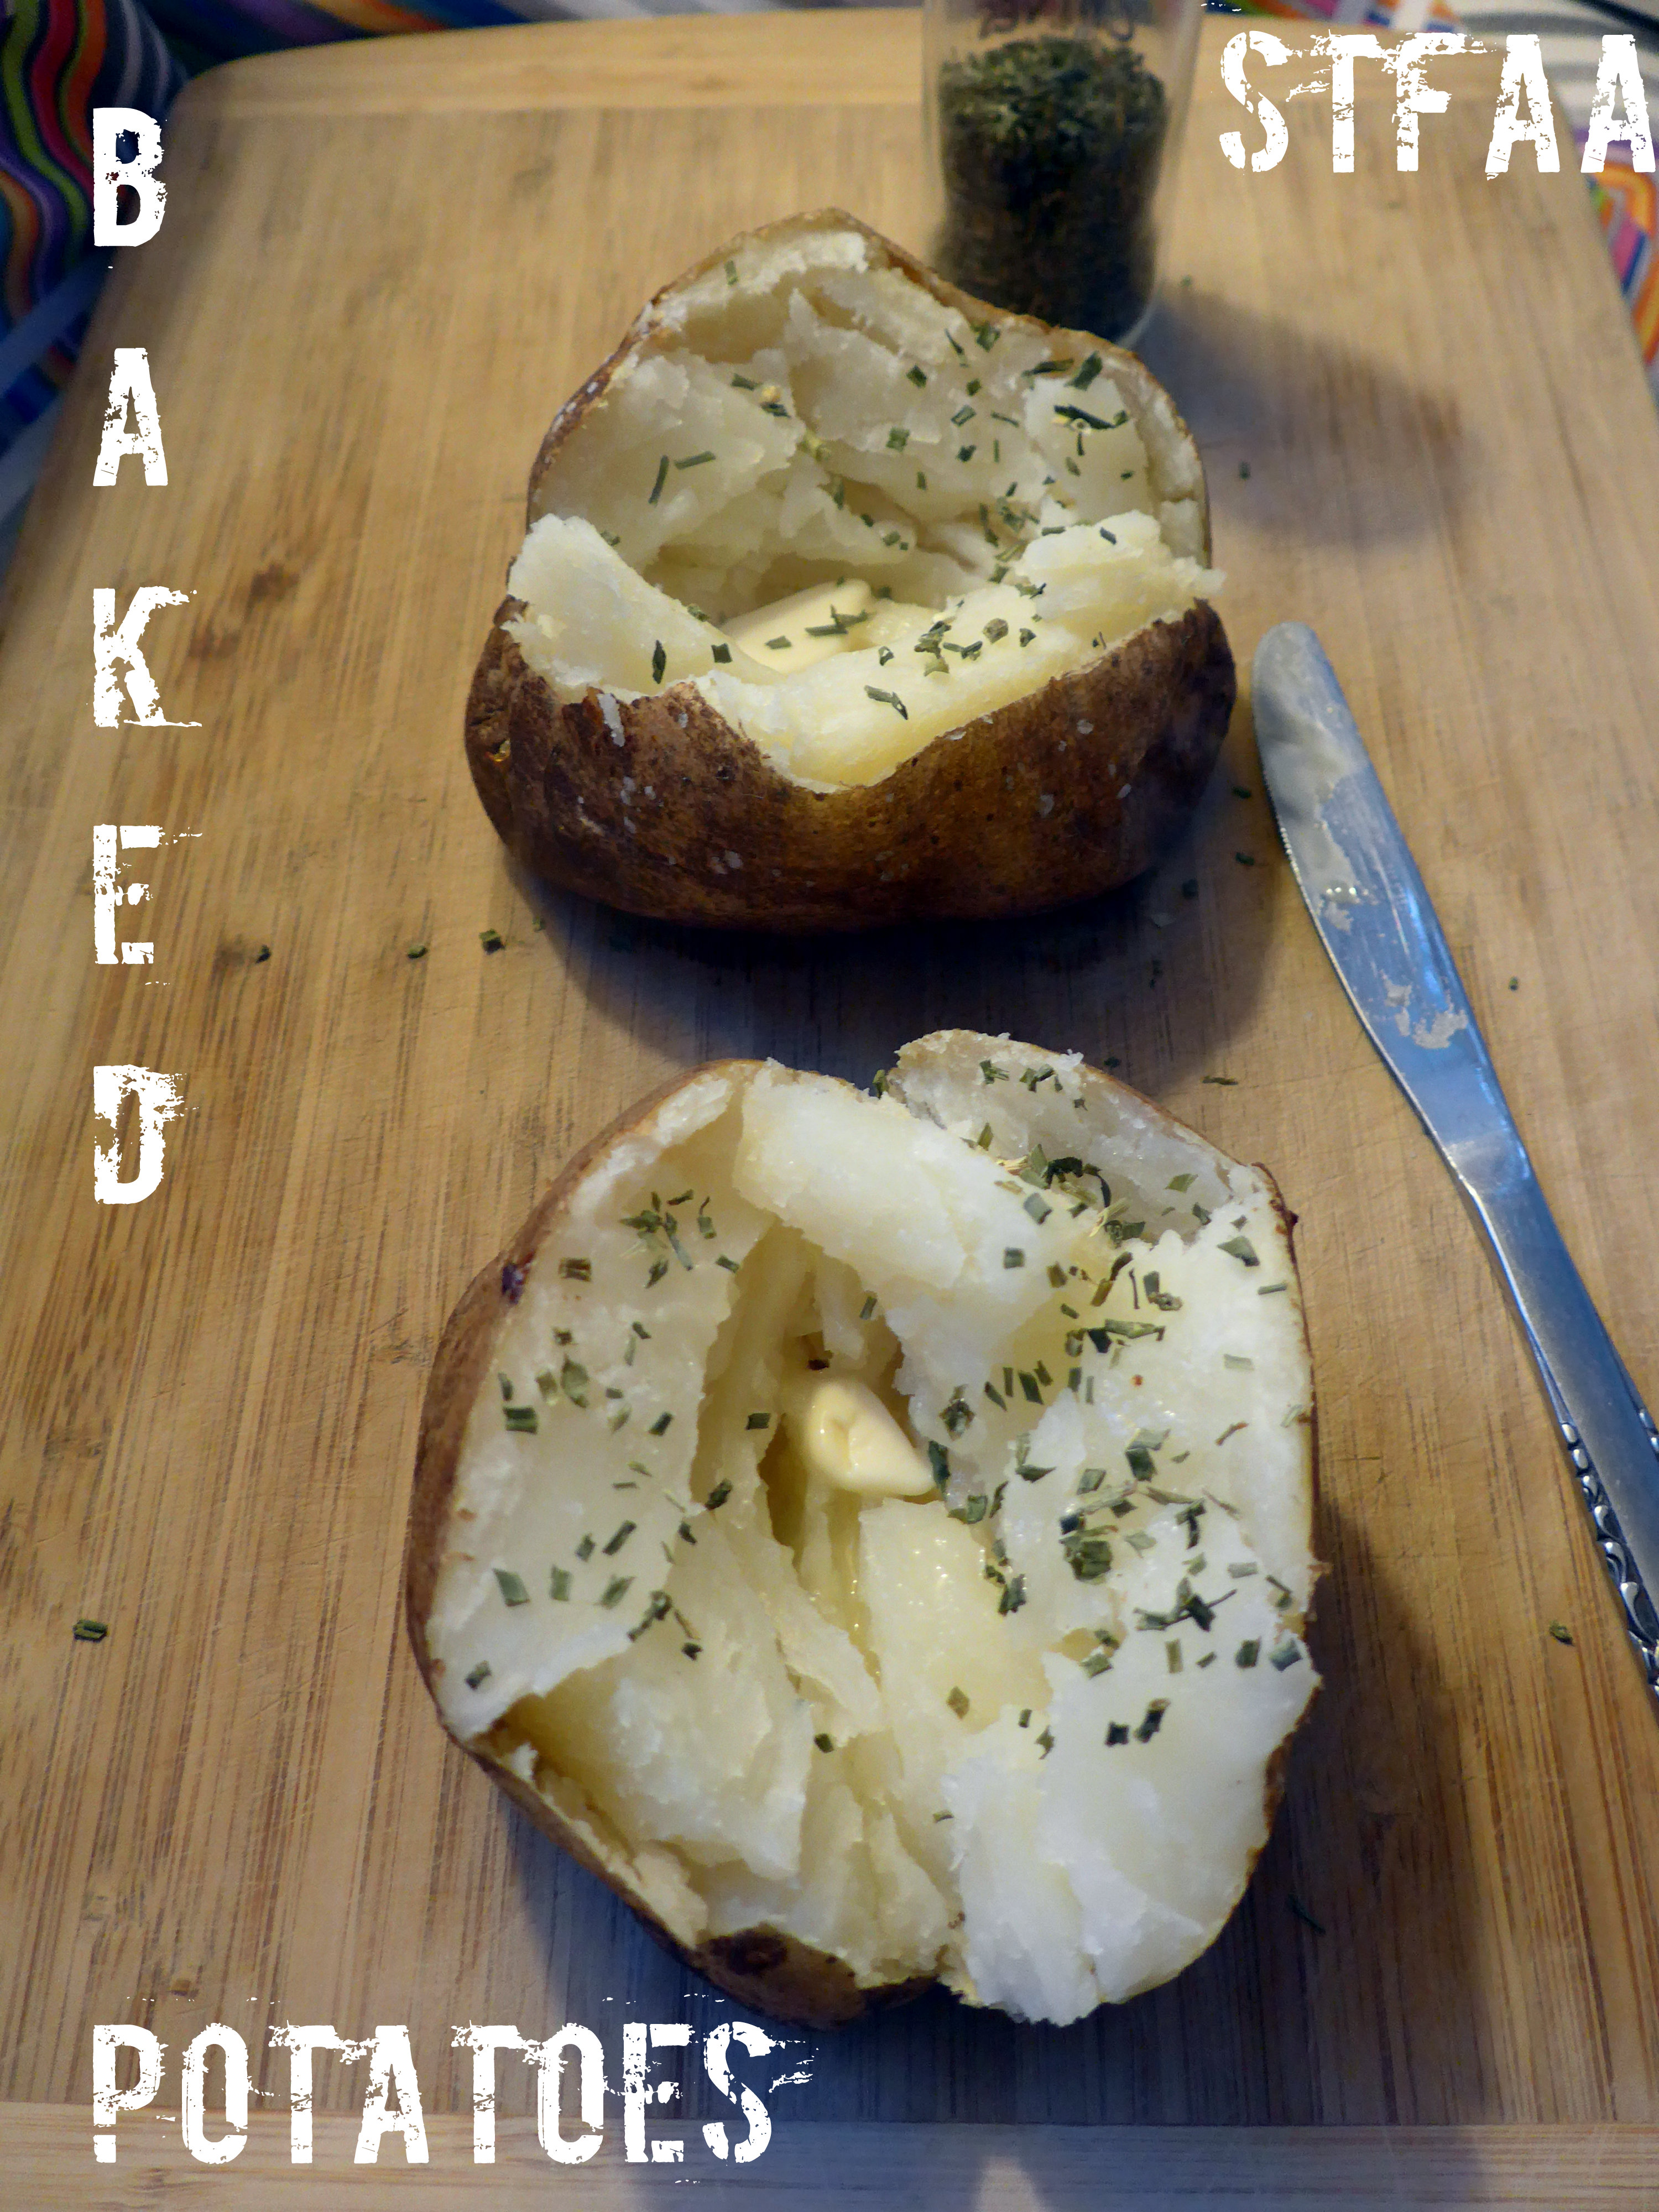
But what I eventually landed on were baked potatoes. So this isn’t really a recipe. You’ve probably baked a potato — you have, right? Maybe you loved it, maybe it was just okay. But if you bake a perfect baked potato and top it with enough stuff, you have a great dinner — warm and hearty and satisfying. And then you can eat the skin, like a reverse appetizer.
So I went looking for the “best” baked potato recipe and found that cookbooks and internet writers had SO MANY different ideas on what makes a perfect baked potato. Now almost none of them describe the intended results, so it’s hard to know what they see as perfect. For me, the perfect baked potato is soft and fluffy on the inside, with a tender and crispy skin.
People suggest a lot of different temperatures, but 350ºF and 425ºF come up more often than 375ºF and 400ºF, so I stuck with those two. Most recipes tell you to scrub the potatoes and poke holes in the skin with a fork, though the old Joy of Cooking has you poke holes only halfway through baking. While this makes some sense, the joy of baking potatoes is that, though it takes a long time, you don’t have to DO anything during that time. Try it if you want, but I’ll never remember to do that again. Coating the outside of the potato is also popular — wrapping it in foil, oiling the skin, oil and salting the skin, buttering the outside. My mom never did any of that, so I never did, but I’ve now tried them all.
So here’s my verdict:
First off, I think Alton Brown’s recipe worked the best for me. I think that 350ºF produces the fluffiest potatoes, but it takes 20 minutes longer than 450ºF. I think that lightly coating the skin with olive oil does actually produce a fluffier potato, but with a slightly less crispy skin than no coating. Vegan margarine will produce an even tenderer skin. I do not want to foil wrap my potatoes as it seems wasteful, so I didn’t try that. I think poking holes in the potatoes with a meat fork (long tines) makes a fluffier center than using a dinner fork. Two stabs with the fork seem to be enough; 4 stabs (2 per side) didn’t make a noticeable difference to me.
If you don’t have 85 minutes to wait for dinner (assuming 5 minutes of prep), a good compromise is to microwave the washed and stabbed potatoes for 10 minutes and then bake them at 425ºF for 20-30 minutes. I know this doesn’t save a bunch of time, but it is half. I do not coat the potatoes with anything when I do this, and I use the toaster oven because my big oven won’t heat up in 10 minutes. This is not AS good, but it is good.
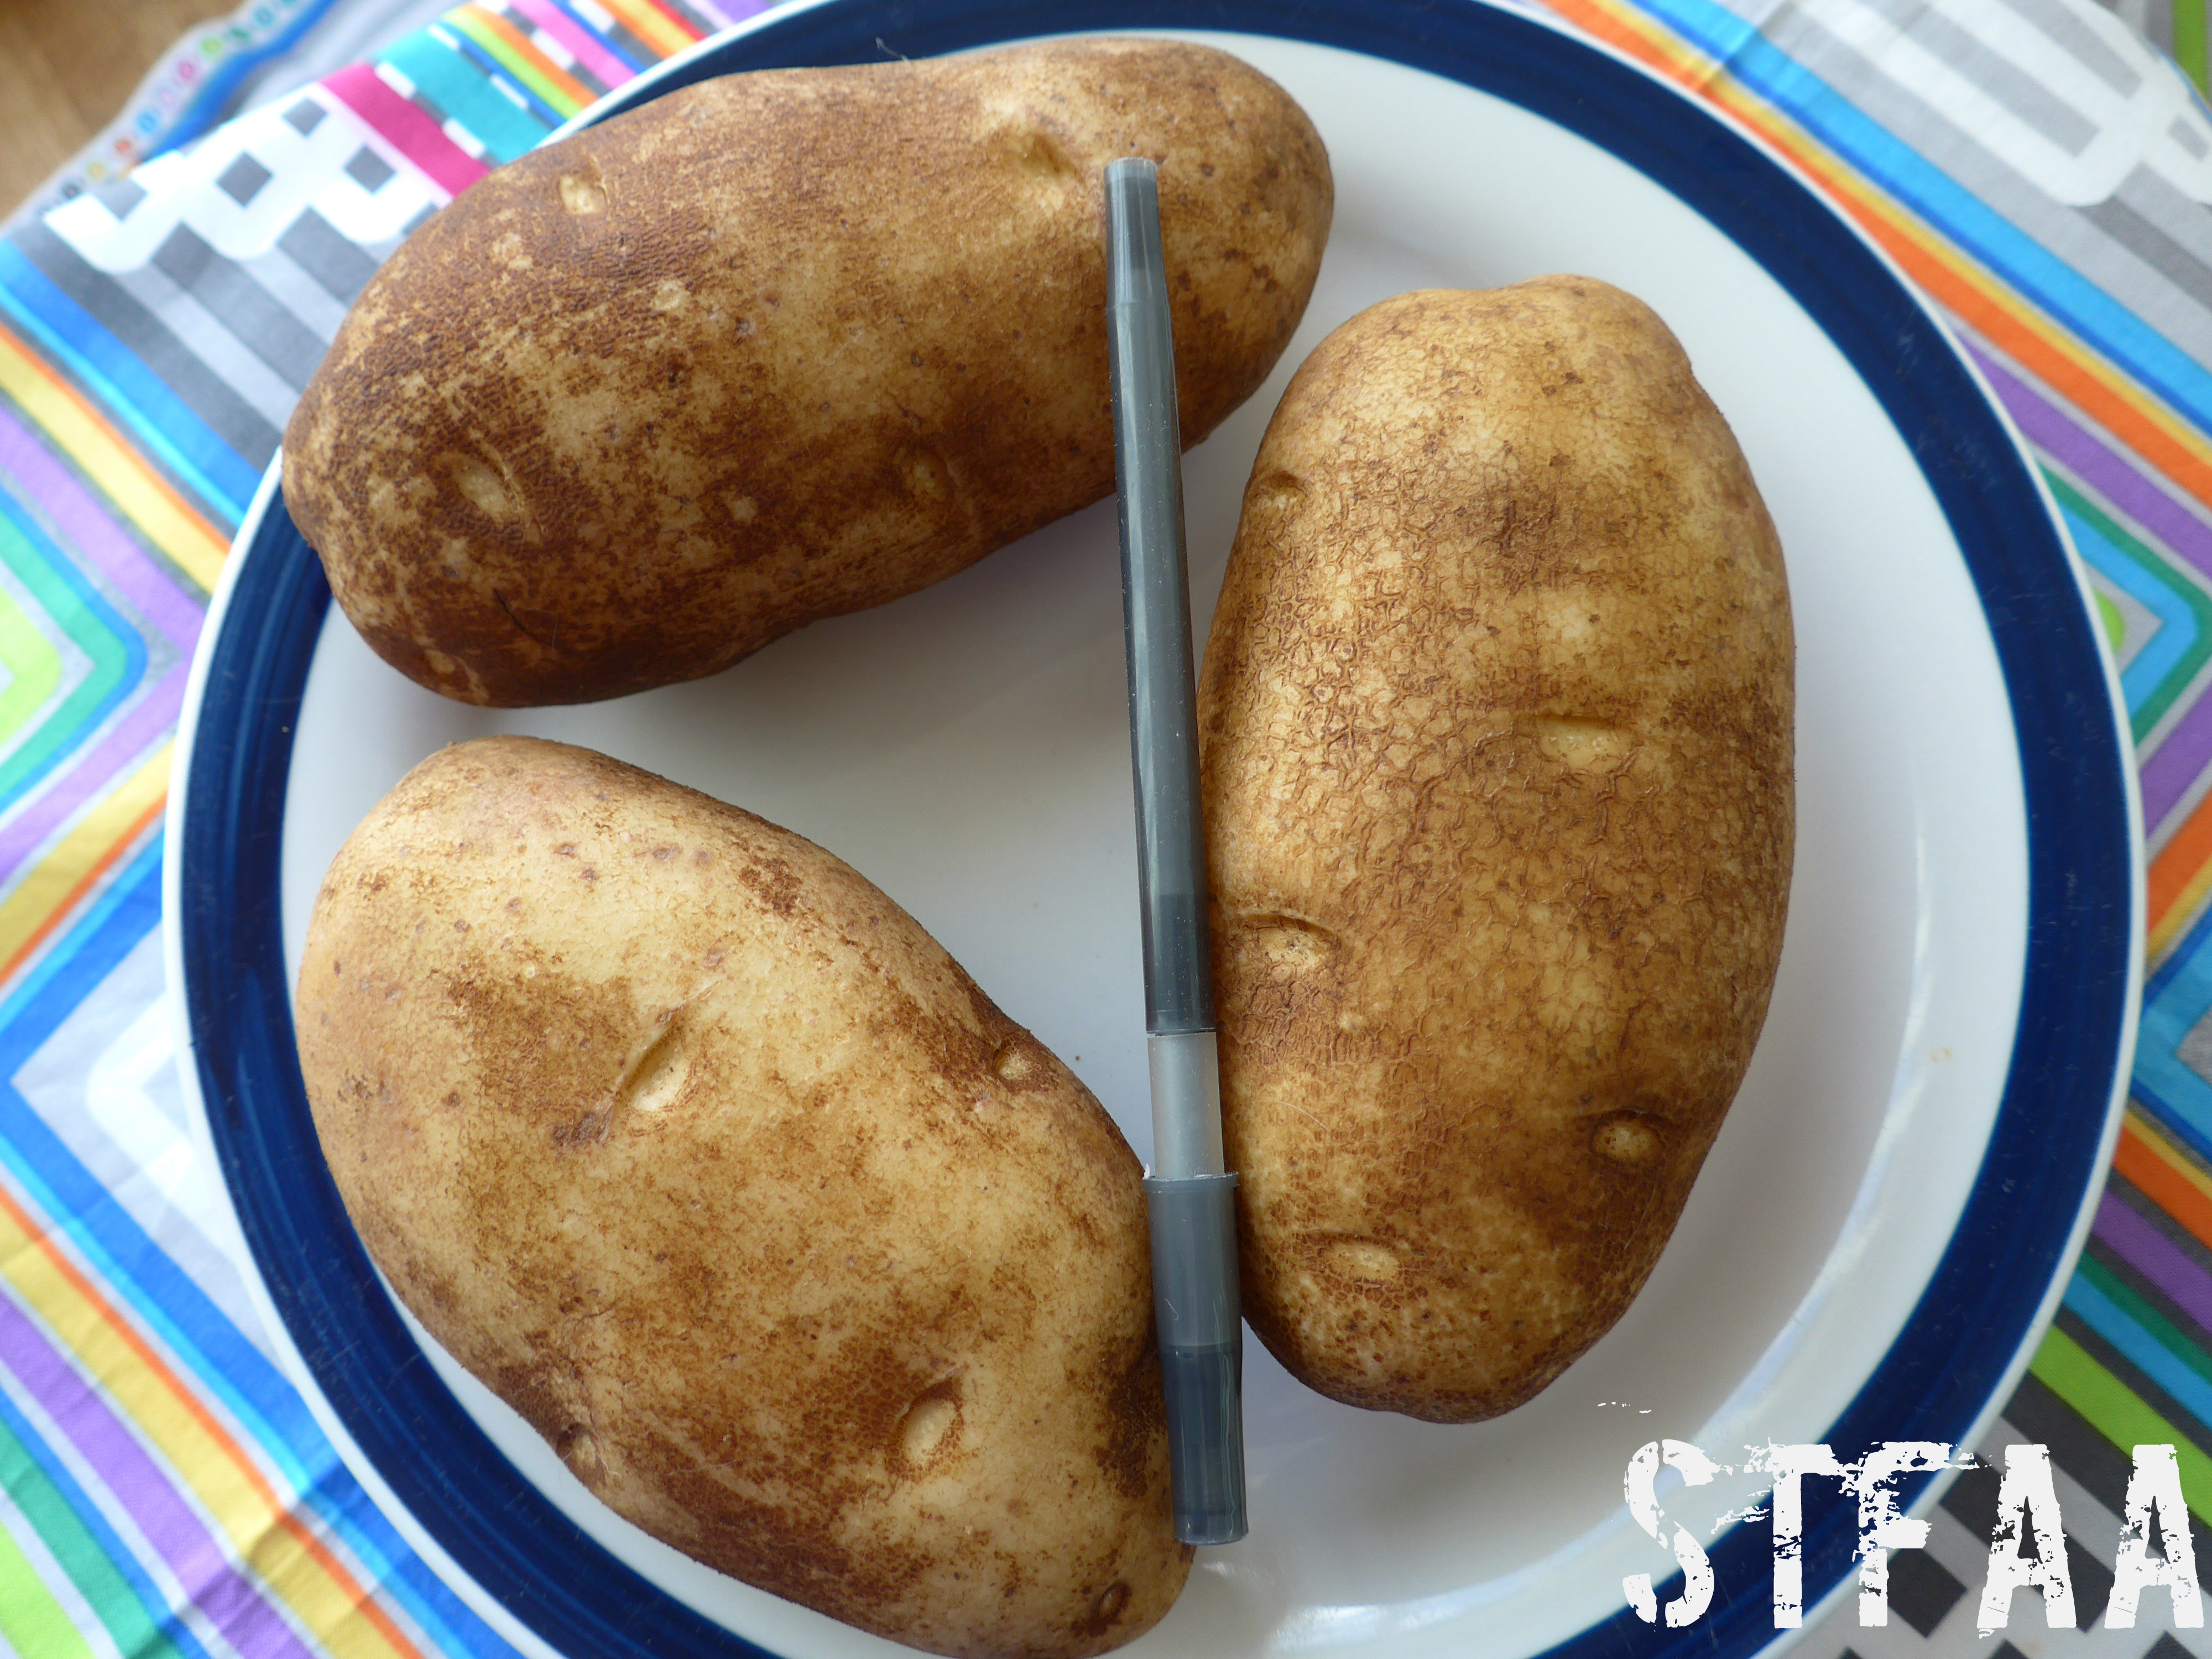
Perfect (Uncooked) Potatoes — standard ballpoint pen used for scale
As for topping the potato, here are just a few of my thoughts:
butter, vegan margarine, or a margarine that’s safe for you
cashew sour cream, tofu sour cream, or dairy sour cream
chives, salt, pepper
bacon
broccoli
any form of cheese or cheese substitute that is safe for you
any combination of the above that sounds good to you
anything else in the fridge that seems like it would taste good
Notice: Trying to access array offset on value of type bool in /home/maryzahc/public_html/adultfoodallergies.com/wp-content/plugins/wp-ultimate-recipe/helpers/models/recipe.php on line 254
Wash and scrub potatoes, being sure to remove any patches of dirt.
Dry the potatoes. Poke 1-2 times per side with a long-tined fork (as in one for serving meat) or a small paring knife — holes should go at least 1/3 of the way through the potato if possible.
Rub potatoes with the oil of your choice — olive oil will yield a slightly crunchy skin, vegan margarine gives a more tender skin. Alton Brown claims that the oil will help hold in more steam, making the potatoes fluffier, and my skepticism at that is now cured. It seems to work. Add a sprinkle of salt if you want it.
Place potatoes in oven, directly on the rack. Bake for 80 minutes. If you’re impatient, you can check them at 60. Using a pot holder, squeeze the potatoes to see if they give easily. If so, they’re done.
The way my mother taught me to open a potato gives you a good container for stuffing it full of fillings. Cut a slit lengthwise in the top of the potato, but leave 1/2 inch or so from either end. Push in at either end sort of “pop” the potato open. Pop the sides and the ends again if you need to — you should get a solid base and a wide open potato.
Stuff it with everything you love. When you’re finished with that part, add some margarine and salt and pepper to the skin and eat that, too.
Feel the potato joy.
Recipe Notes
I tend to buy potatoes that fit solidly in my hand. I like a nice regular oval shape, same thickness throughout. Buy the appropriate size for the part of the meal — I like them big because they ARE the meal. Potatoes should be firm, with no soft spots, irregular ends, eyes growing out of them, and no green hue to the skin. Use those for something else where you can cut away the questionable bits.
The potatoes in the photos above just have some vegan Earth Balance margarine and chives on them.
Last week was really not my week. I was in a bad mood and things kept happening to reinforce that, plus I was super busy and not sleeping well, and all around, it did not go well. I need my sleep, people. I am not a nice person without it. So I don’t know why I thought last minute tweaks to this recipe would work. They did not. It was disgusting. Jack ate some of it, but… nope. No more excuses — you want recipes, right?
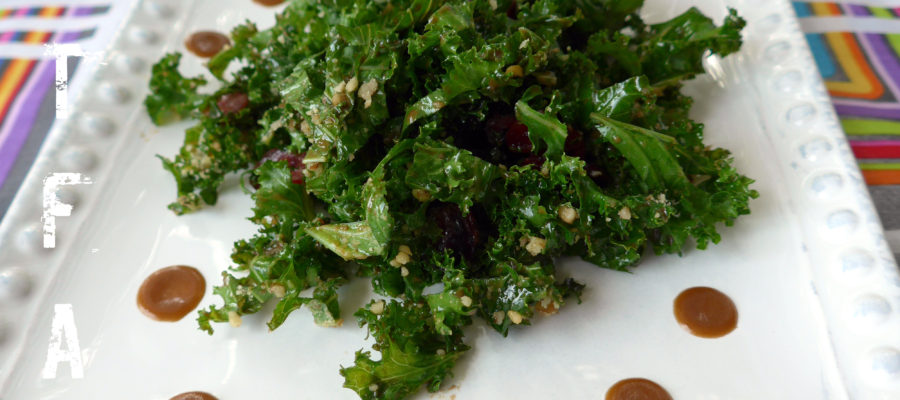
I went back to my original recipe and this is much better. This is not a fancy recipe — it’s a pretty simple kale salad with an easy vinaigrette dressing that plays up kale’s intense flavor and texture and dressed up with some dried cranberries. Now, I know kale’s had its day in the sun, but I love it and will keep eating it. I don’t really love how chewy raw kale is, so when I make salads, I microwave the kale really briefly just to soften it up. That’s perfect for me — let me know how it works for you. The dressing is super thick and intended to really stick to the kale leaves. The cranberries will sink to the bottom, though, so scoop up.
Notice: Trying to access array offset on value of type bool in /home/maryzahc/public_html/adultfoodallergies.com/wp-content/plugins/wp-ultimate-recipe/helpers/models/recipe.php on line 254
First, rehydrate the cranberries by just covering them with boiling water and letting them sit for 10 minutes.
Chop the kale. I tend to destem the whole bunch after washing and spin it through my salad spinner to dry it. Then I grab handsful and do a really rough chiffonade (slice thin). If the leaves were big, I then chop perpendicular to the original cuts a few times. About 1.5 leaves per person seems perfect for a side salad.
In a microwave-safe bowl, heat the kale on high for 10 seconds. Stir and do it again. In 20 seconds, your kale should be a bit brighter green and much more tender, but if not, do a few more seconds — microwave intensity varies widely.
Mix the dressing ingredients, except the oil, well. Then drizzle in the oil. Taste and adjust the seasonings — you might want more sugar if your balsamic is particularly intense.
Drain the cranberries, and toss the cranberries and lightly cooked kale with the dressing.
If you eat tree nuts, walnuts or almonds are a nice addition to this salad, but are totally optional.
We are definitely experiencing soup weather here in Seattle. I keep making the mistake of looking at the high temperature for the day and dressing as though it wouldn’t be cold and damp somehow. Seattle is more prone to wild swings of weather than I expected (thundersnow, anyone?), and I think soup weather might be around for a while. That works for me — soup is one of the easiest dishes to make ahead and eat all week. I have made a corn soup before, a brothy stew that capitalized on the end of summer fresh corn. This is an end-of-winter stew, hearty chowder, but using the breaking down potato starch and a can of creamed corn (which contains corn starch) to thicken up the soup and make it creamy.
This soup is quick enough for a weeknight meal, but reheats amazingly well so it also makes good lunch leftovers. I’ve said the recipe makes 3 servings, as that seems to be how it works out for us, but if you’re lighter eaters, or if this is an appetizer or side, it might make 4.
Notice: Trying to access array offset on value of type bool in /home/maryzahc/public_html/adultfoodallergies.com/wp-content/plugins/wp-ultimate-recipe/helpers/models/recipe.php on line 254
Heat oil over medium heat in a large saucepan. When hot, add chopped leeks and sautee 5-10 minutes.
Chop the potatoes unevenly. Cut about half of a cup of potatoes into a smaller dice so that they will start to break down by the time the larger potato cubes are cooked.
Add potatoes and spices and stir well. Then add stock. Bring to a boil and then turn down to a simmer. Cook until potatoes are soft, and then another 5-10 minutes until the smaller ones start breaking down.
Add the creamed corn and stir well. Then add the frozen or fresh corn. When the soup has returned to a boil, serve topped with scallion tops and pepper.
Recipe Notes
NOTE: In a pinch, you can replace the leek with the bottoms of the scallions with only a small difference in taste. I think the leek is a smoother taste, but the scallions were fine in a pinch. If you DO just use the tops, go ahead and regrow them by putting the root ends in a cup of water.
IMPORTANT CONTENT NOTE: Those of you who hate cilantro, sorry. Please go Google one of the 100,000 other root vegetable soups out there. I know, your condition is genetic, and I’m sorry for you. This soup lives and breathes cilantro, and if you leave it out, there will be no point in making this particular soup recipe. Come again?
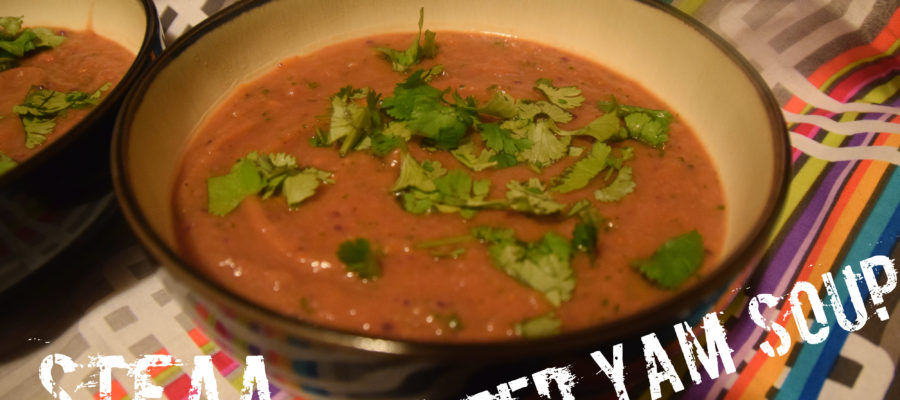
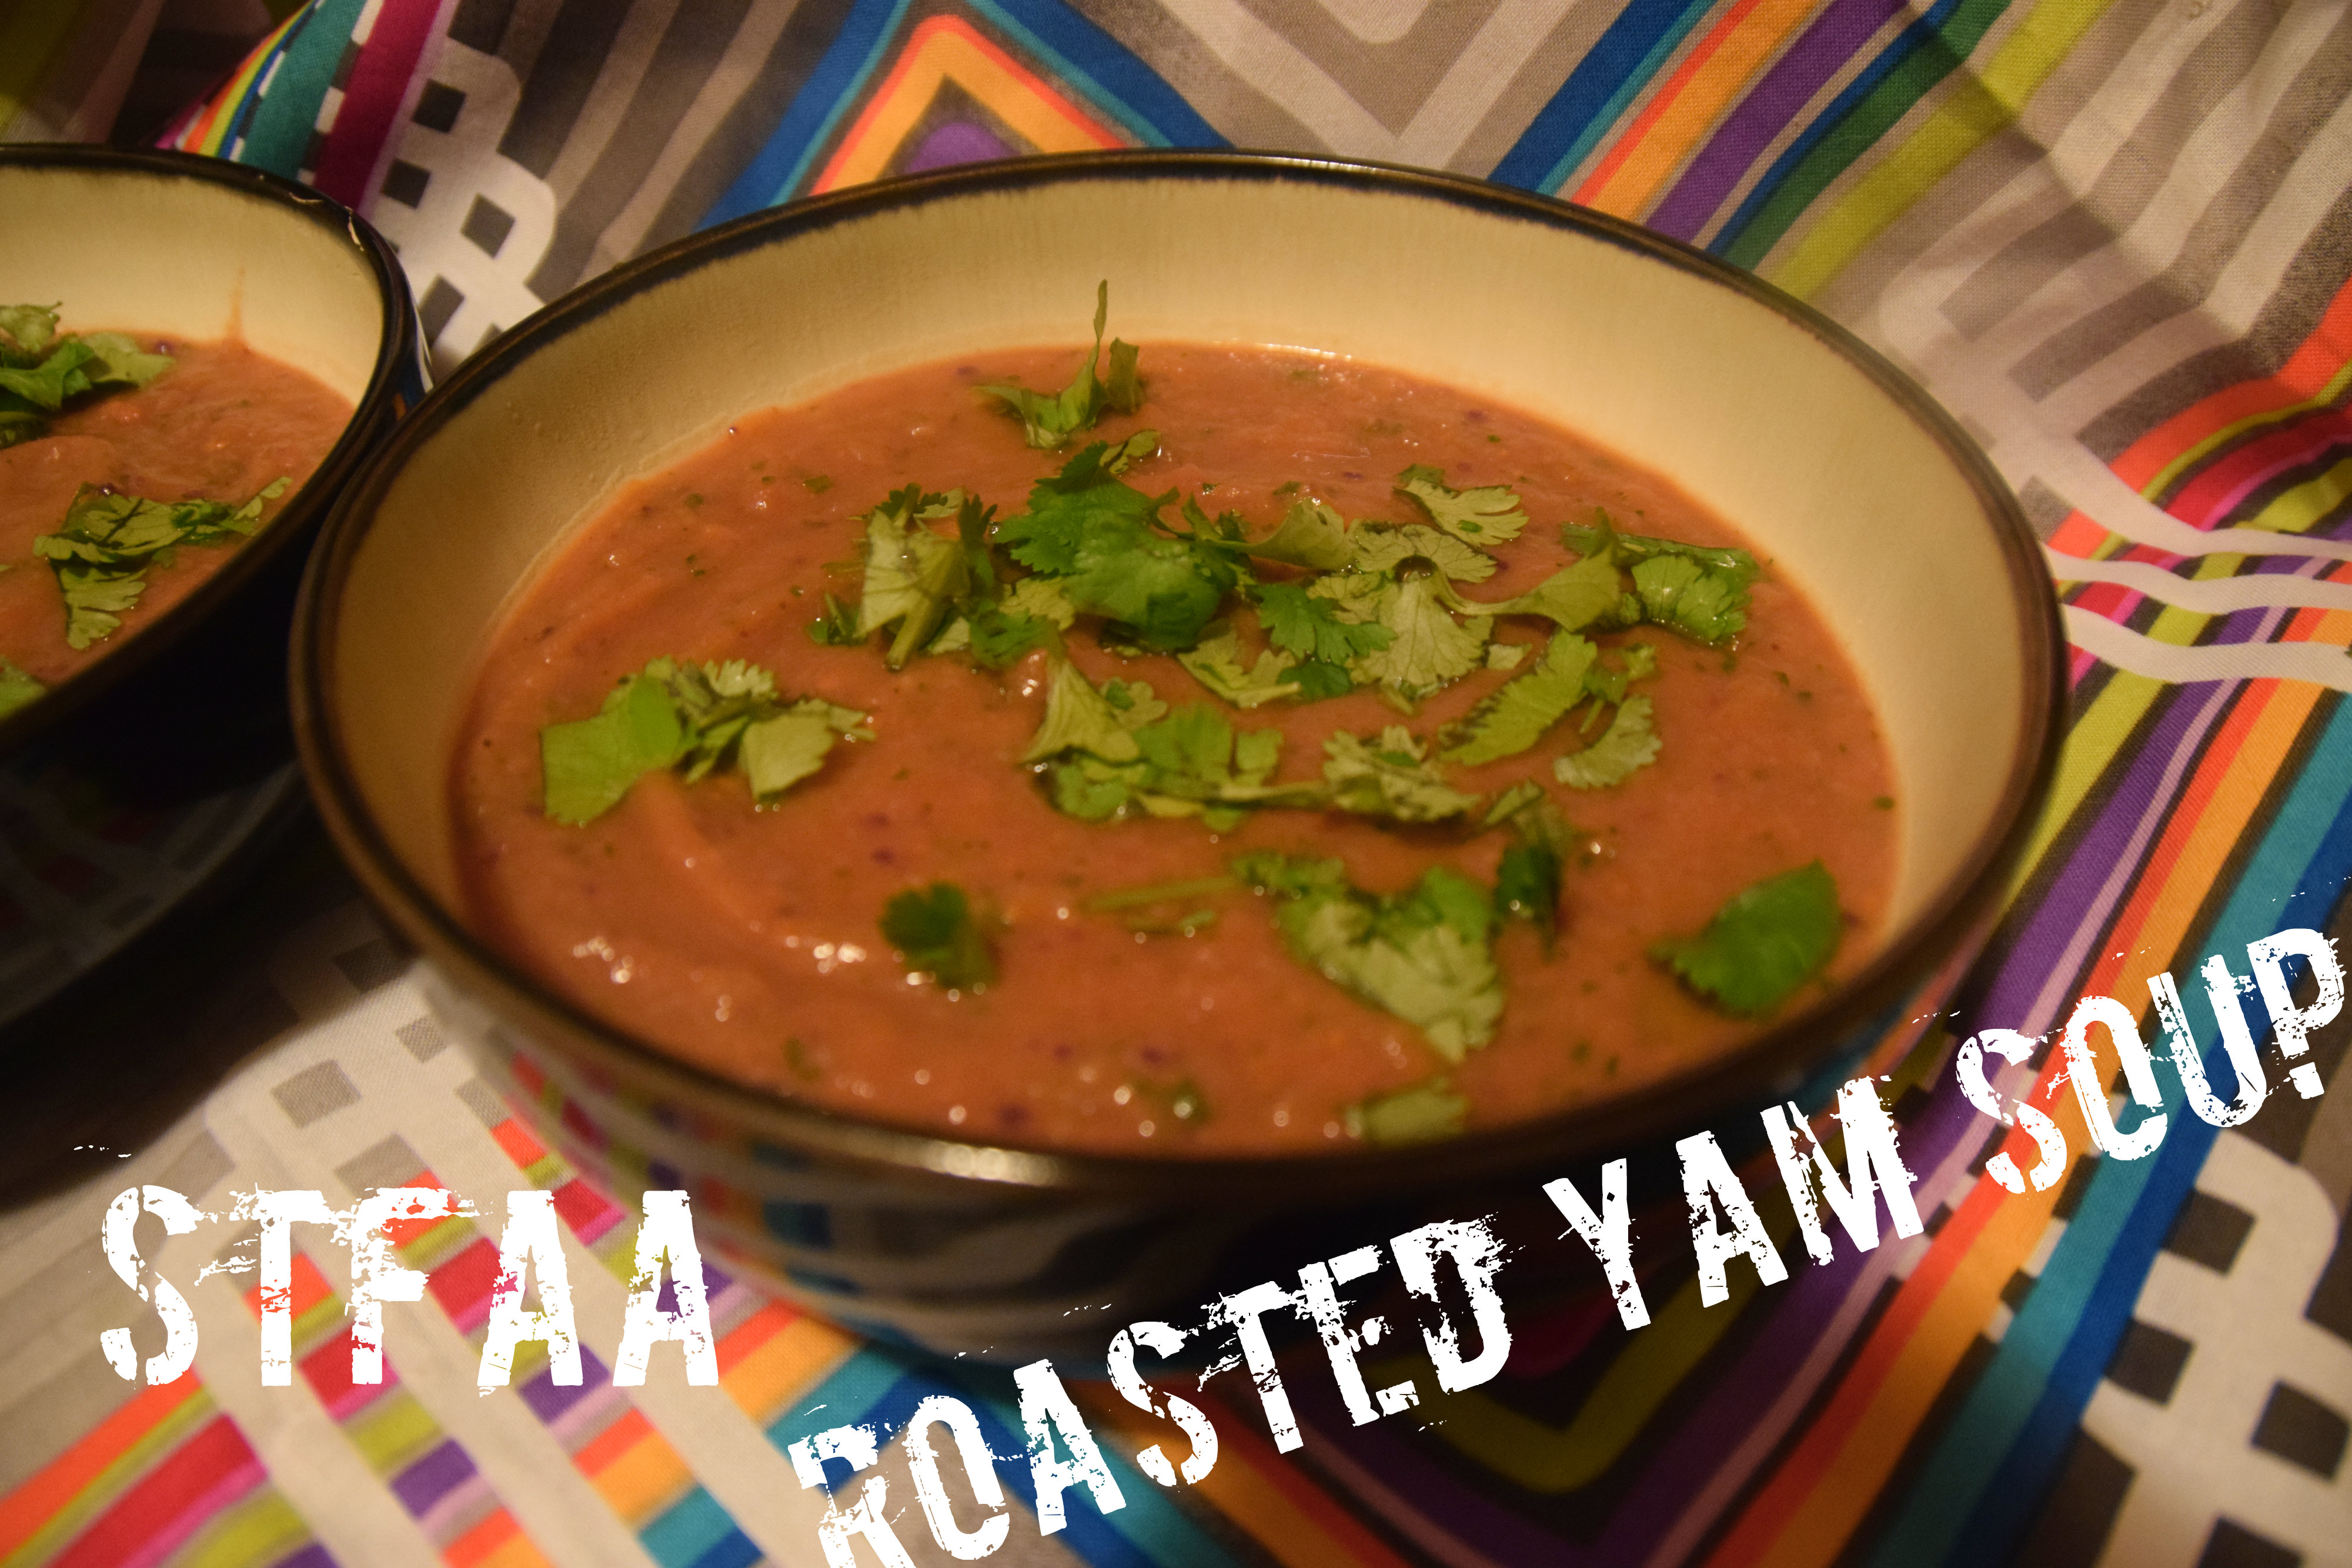
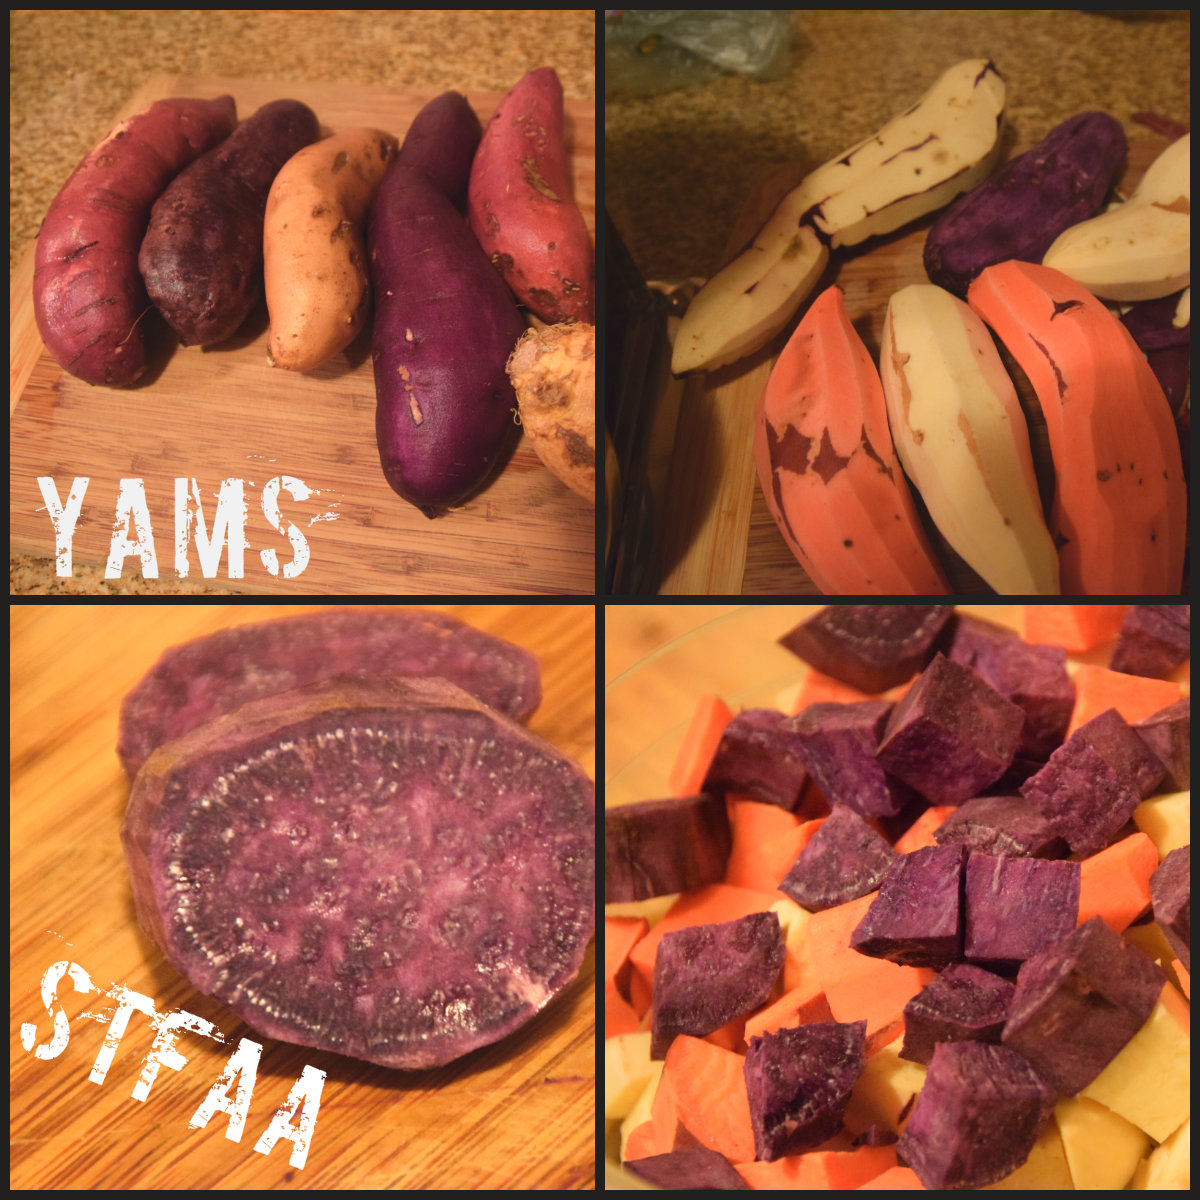
For those of you still here, hi. Welcome to another edition of “MaryKate made soup, and it’s not very pretty, but I swear it tastes good anyway.” I’m your host, MaryKate, and, yes. I made soup. In my first months here in Seattle, I’m exploring new grocery stores and new ingredients, and as it is fall, there are so many root vegetables out. Most of them I know, but I’m seeing so many different things beyond just “sweet potatoes” and “yams.” To be honest, I don’t care which they are — I buy and bake any of them. But recently, I’ve found myself with 1 or 2 each of 4 different kinds of tubers all labeled “yam” with no other identifying information. In order to compare them, I’ve roasted them — and they are different! Starchier, sweeter, more mild. And all the colors! Yam love. Honestly, the most impressive flavor were the boring white ones — a bit sweeter and starchier than regular sweet potatoes, and really tasty.
Blending these into soup was a great decision. The cilantro lightens the earthy flavor of the tubers and really makes it something different — hearty, but not heavy, and somehow, fresh.
Notice: Trying to access array offset on value of type bool in /home/maryzahc/public_html/adultfoodallergies.com/wp-content/plugins/wp-ultimate-recipe/helpers/models/recipe.php on line 254
3.5lbs.yams and sweet potatoesGet everything you can find — why not?
1/2lb.rutabega
1-2Tablespoonsolive oil
1teaspoonkosher salt
3/4cuponion
6cupsvegetable stock
1cup cilantrochopped + more for garnish
Servings: servings
Instructions
Preheat oven to 450ºF.
Peel and chop yams, sweet potatoes, rutabega, and onion. Go for about 1/2 inch cubes, but really, just try to get them all about the same size.
Put all chopped vegetables into a bowl. Add the olive oil and salt and stir to coat. Start with the smaller amount of olive oil, but add more if you need it. You don’t want greasy, but you do want everything fully coated.
Bake for 30-45 minutes, until all the vegetables begin to brown. This is where so much flavor is born.
When you have about 15 minutes left of cooking, heat your stock and cilantro in a large soup pot over medium-low heat.
When the roasted vegetables are done and the soup stock is simmering, add the veg to the stock. Stir well, and then puree. A stick blender is the easiest way to do this, but use a blender if that’s what you’ve got. When you have a nice thick puree, heat thoroughly (takes only a few minutes) and stir well.
Serve with an added sprinkle of cilantro for extra flavor.
When we were working on our editorial calendar, Denise said she was working on ham steaks, which you saw last week. We thought that ham seemed like a traditional Easter dish, so maybe we should also consider a side dish for it. I LOVE side dishes. The first thing that came to mind was scalloped potatoes, as that goes with ham. Actually, it’s what my mother used to make with leftover ham.
But I realized that I hated ham and scalloped potatoes! Until my 30s, I didn’t like ham at all. And I know it’s surprising, but scalloped potatoes are my least favorite preparation of potatoes. I tried to figure out why. I’m not opposed to creamy sauces, and potatoes are my favorite food by far, but I realized that the texture of the potatoes just isn’t to my liking. So I fixed it.
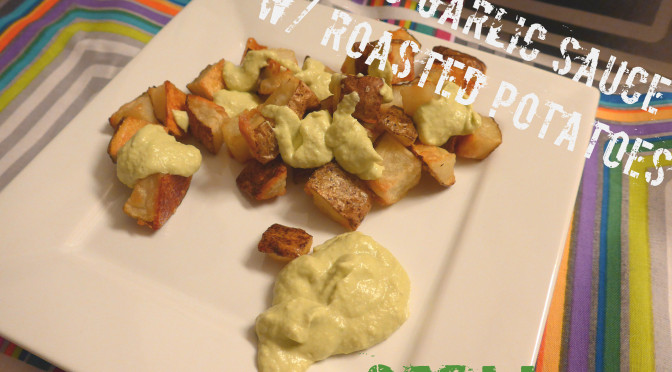
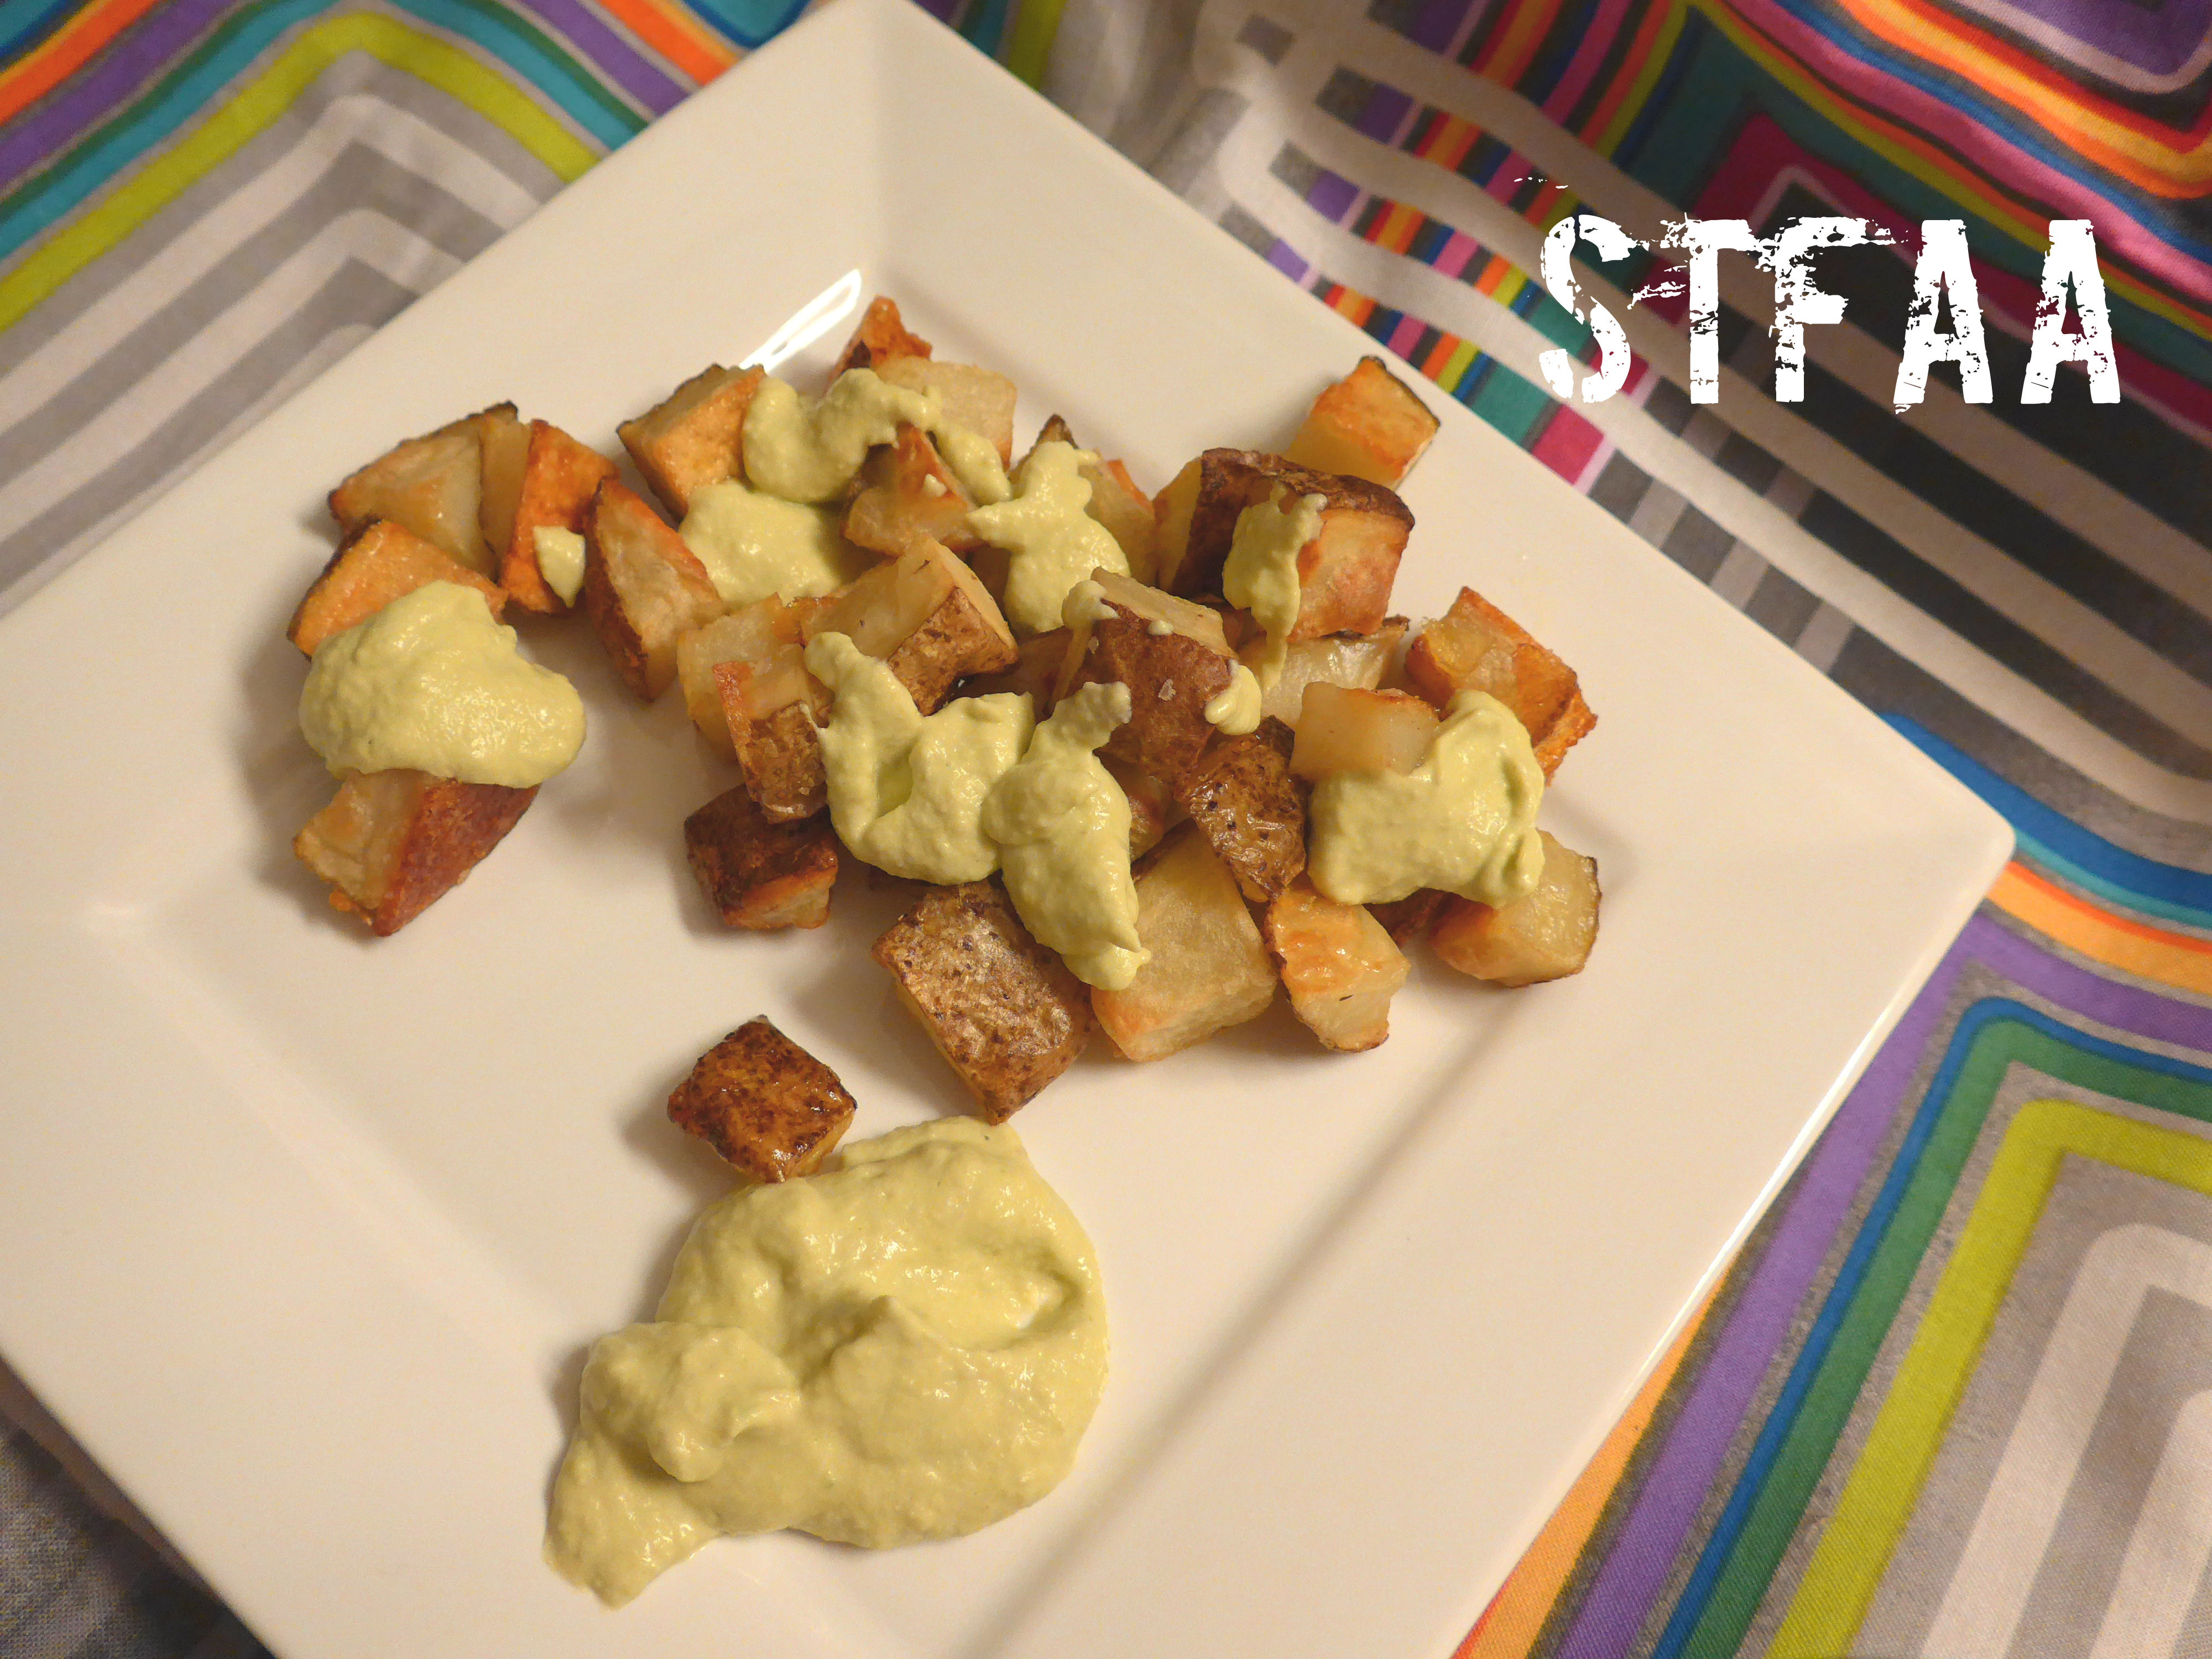
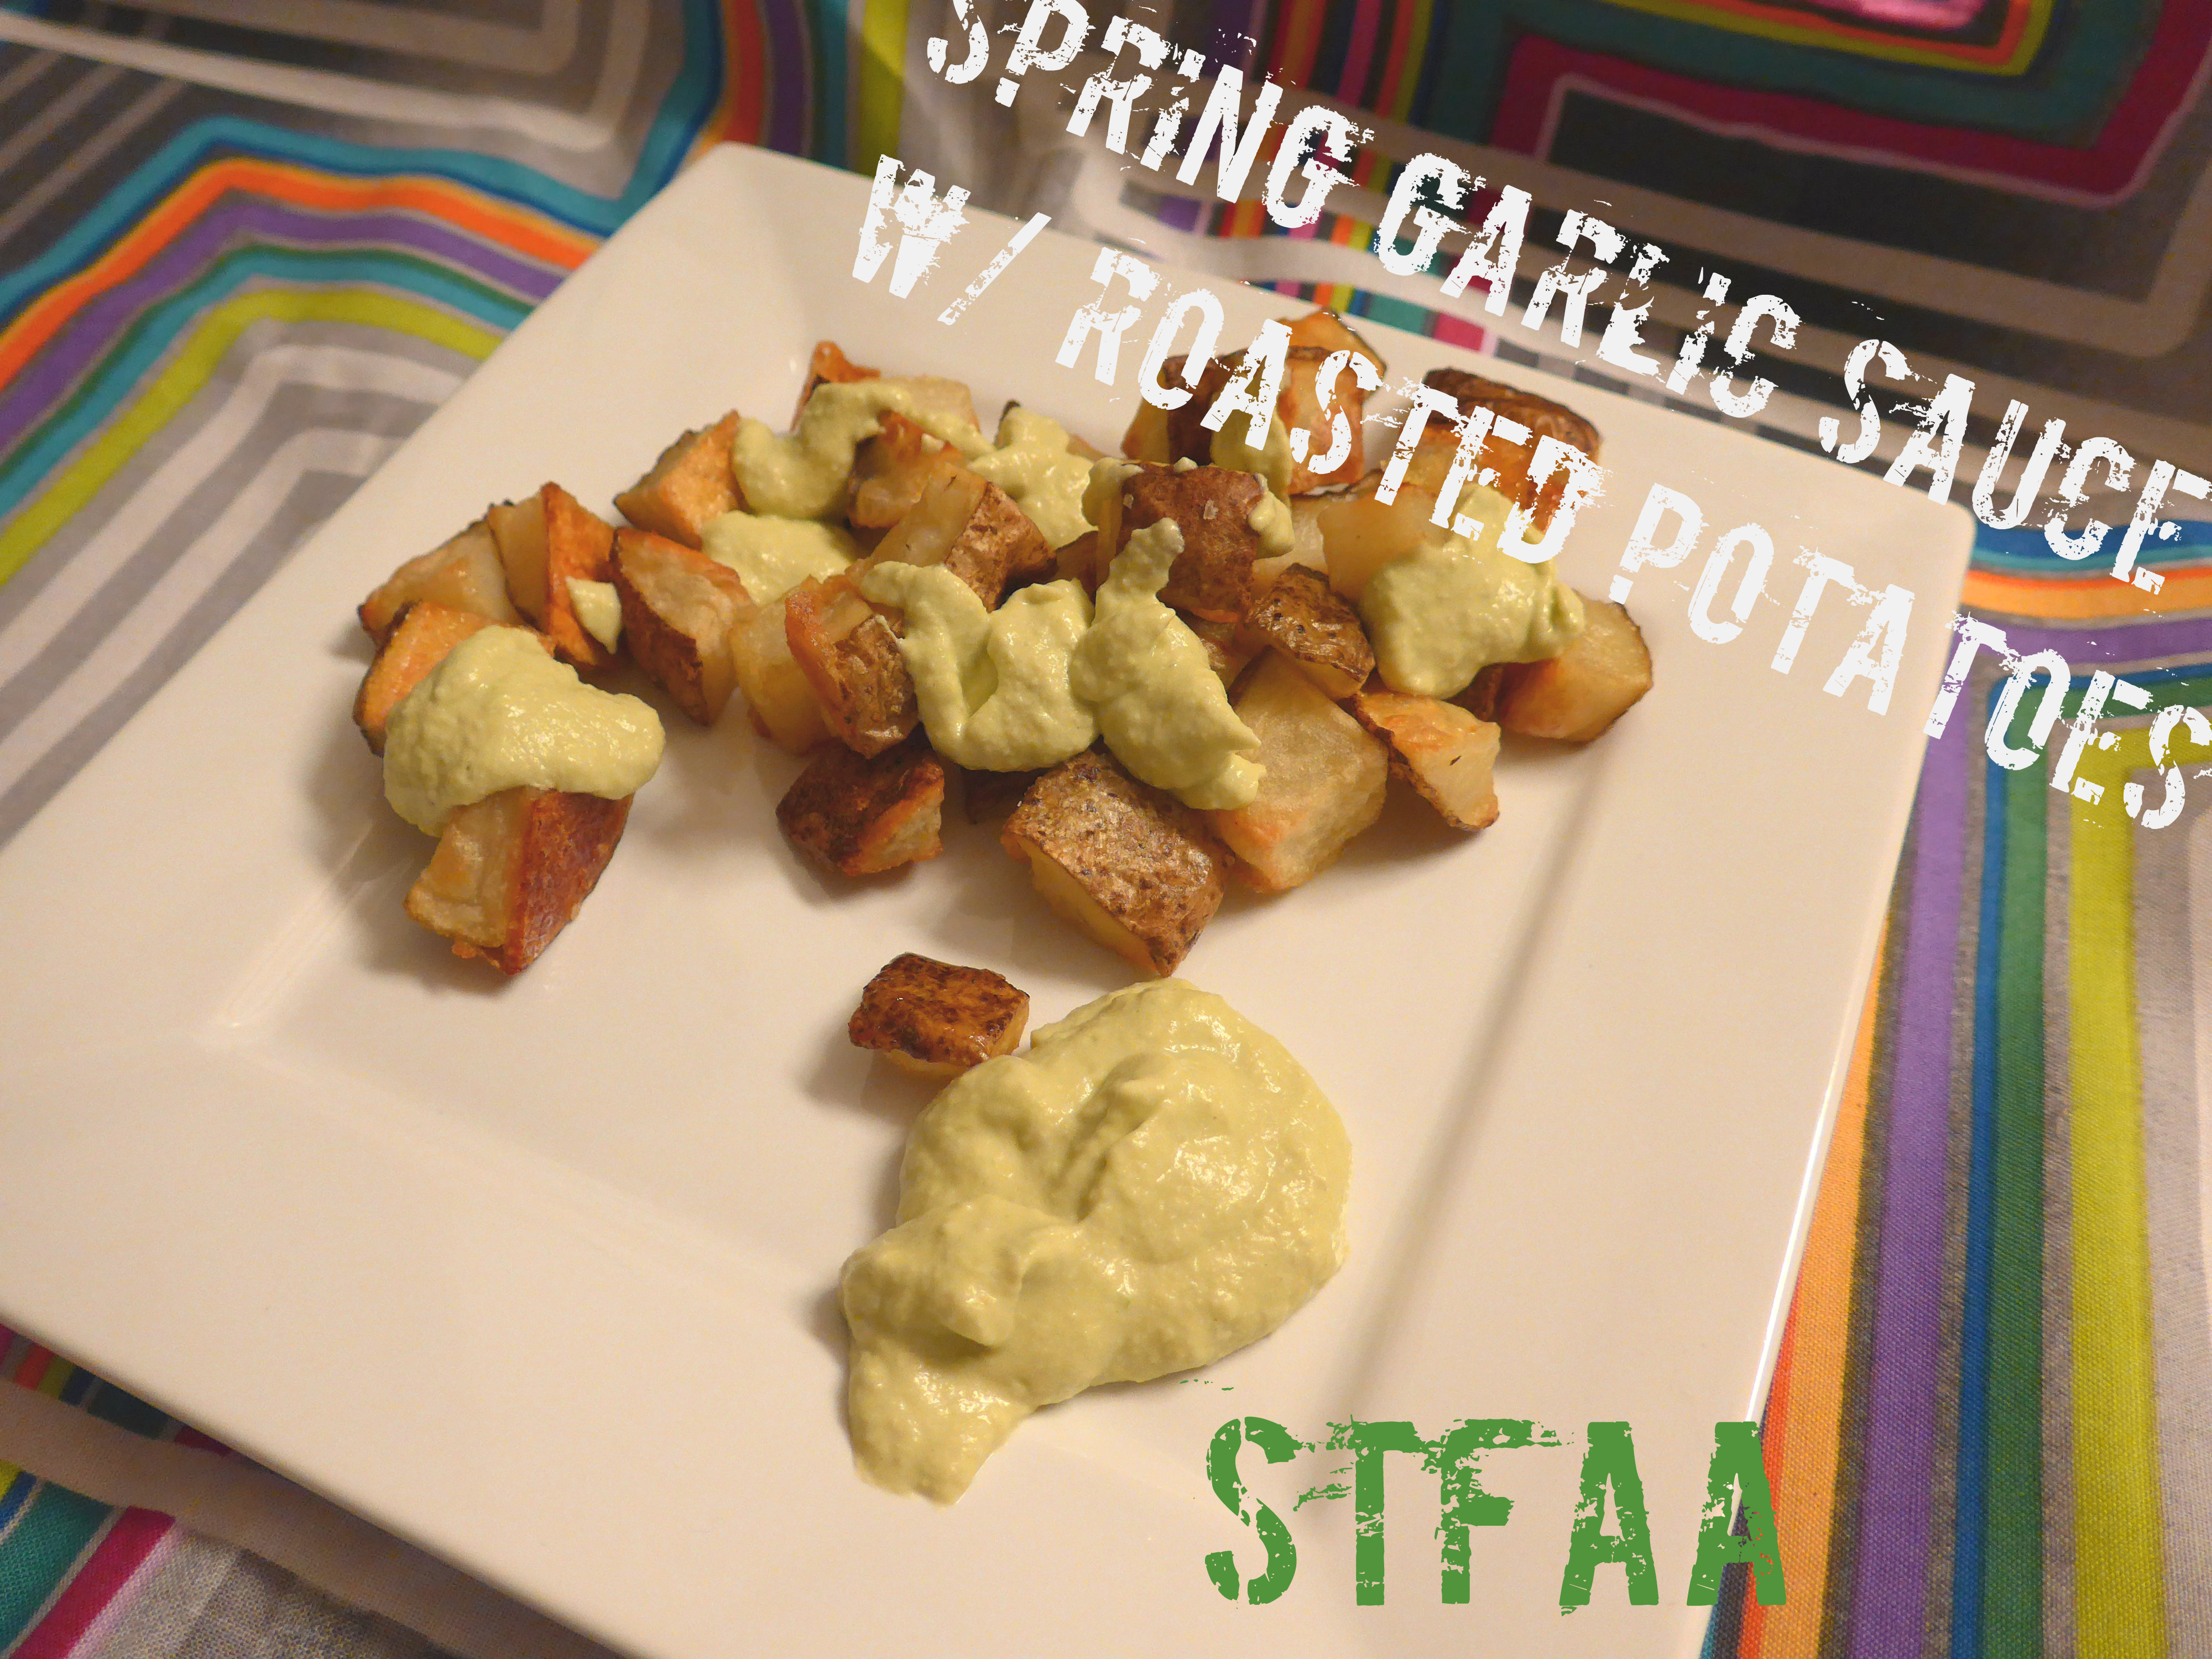
I fixed it by cooking the potatoes separately from the sauce. This dish is made of perfectly roasted potatoes, crisp on the outside, fluffy inside, topped with a creamy sauce made from cashews and white beans flavored with rich roasted garlic and fresh, green scallion tops. It’s a light spring green sauce that goes well with the roasted potatoes but is also good on other vegetables, chicken, and maybe even pasta (I didn’t try that, but I think it would work as a basis for a spring vegetable pasta sauce).
Spring Garlic Sauce with Roasted Potatoes
Notice: Trying to access array offset on value of type bool in /home/maryzahc/public_html/adultfoodallergies.com/wp-content/plugins/wp-ultimate-recipe/helpers/models/recipe.php on line 254
Spring Garlic Sauce with Roasted Potatoes
Print Recipe
This is a substitute for scalloped potatoes — roasted potatoes are fluffy inside, and are covered with a creamy garlic sauce made of cashews and white beans.
Servings
Prep Time
2servings
15minutes
Cook Time
Passive Time
40minutes
35minutes
Servings
Prep Time
2servings
15minutes
Cook Time
Passive Time
40minutes
35minutes
Ingredients
Roasted Potatoes
3cupsraw potatoes,cubed (2-4 potatoes, depending on size)
1-2Tablespoonsolive oil
1/2-1 teaspoonkosher salt
Spring Garlic Sauce
1/2 cupwhite beans
1/2cupraw cashews,soaked 8 hours or overnight
2clovesroasted garlic(taste and add more if you want more. Garlic varies greatly in intensity.)
1/4cupolive oil
1/3cupwater(you may need more — see the recipe itself)
1/2teaspoonsalt
1teaspoonlemon juice or mild vinegar
1bunchscallions, green tops only(4-6 scallions in a bunch, depending on size)
Servings: servings
Instructions
Preheat oven to 450F.
Scrub potatoes. Peel if desired. Cut into approximately 1/2-inch cubes. Toss with olive oil and salt — start with 1 tablespoon, and add more if needed. You don’t want to waste oil, but you do want everything decently coated to help the potatoes brown. Throw them into the oven and set a timer for 20 minutes.
While the potatoes are cooking, make the sauce. Throw all the ingredients except the scallions into a blender or food processor and pulse. Add more water, 1 tablespoon at a time, only if needed! You want this sauce to be thick. When the sauce is mostly smooth, add the scallion tops and blend until smooth.
Toss the hot potatoes with sauce to coat. Yes, this is different than the photos — I was aiming for “artistic arrangement of food,” though it didn’t really work.
Recipe Notes
You do need to roast garlic for this recipe. You could do this at the same time as the potatoes, but you will have to wait for it to cool off to get out the cloves, so this will take longer than estimated. I always roast extra garlic and keep it on hand in the freezer.
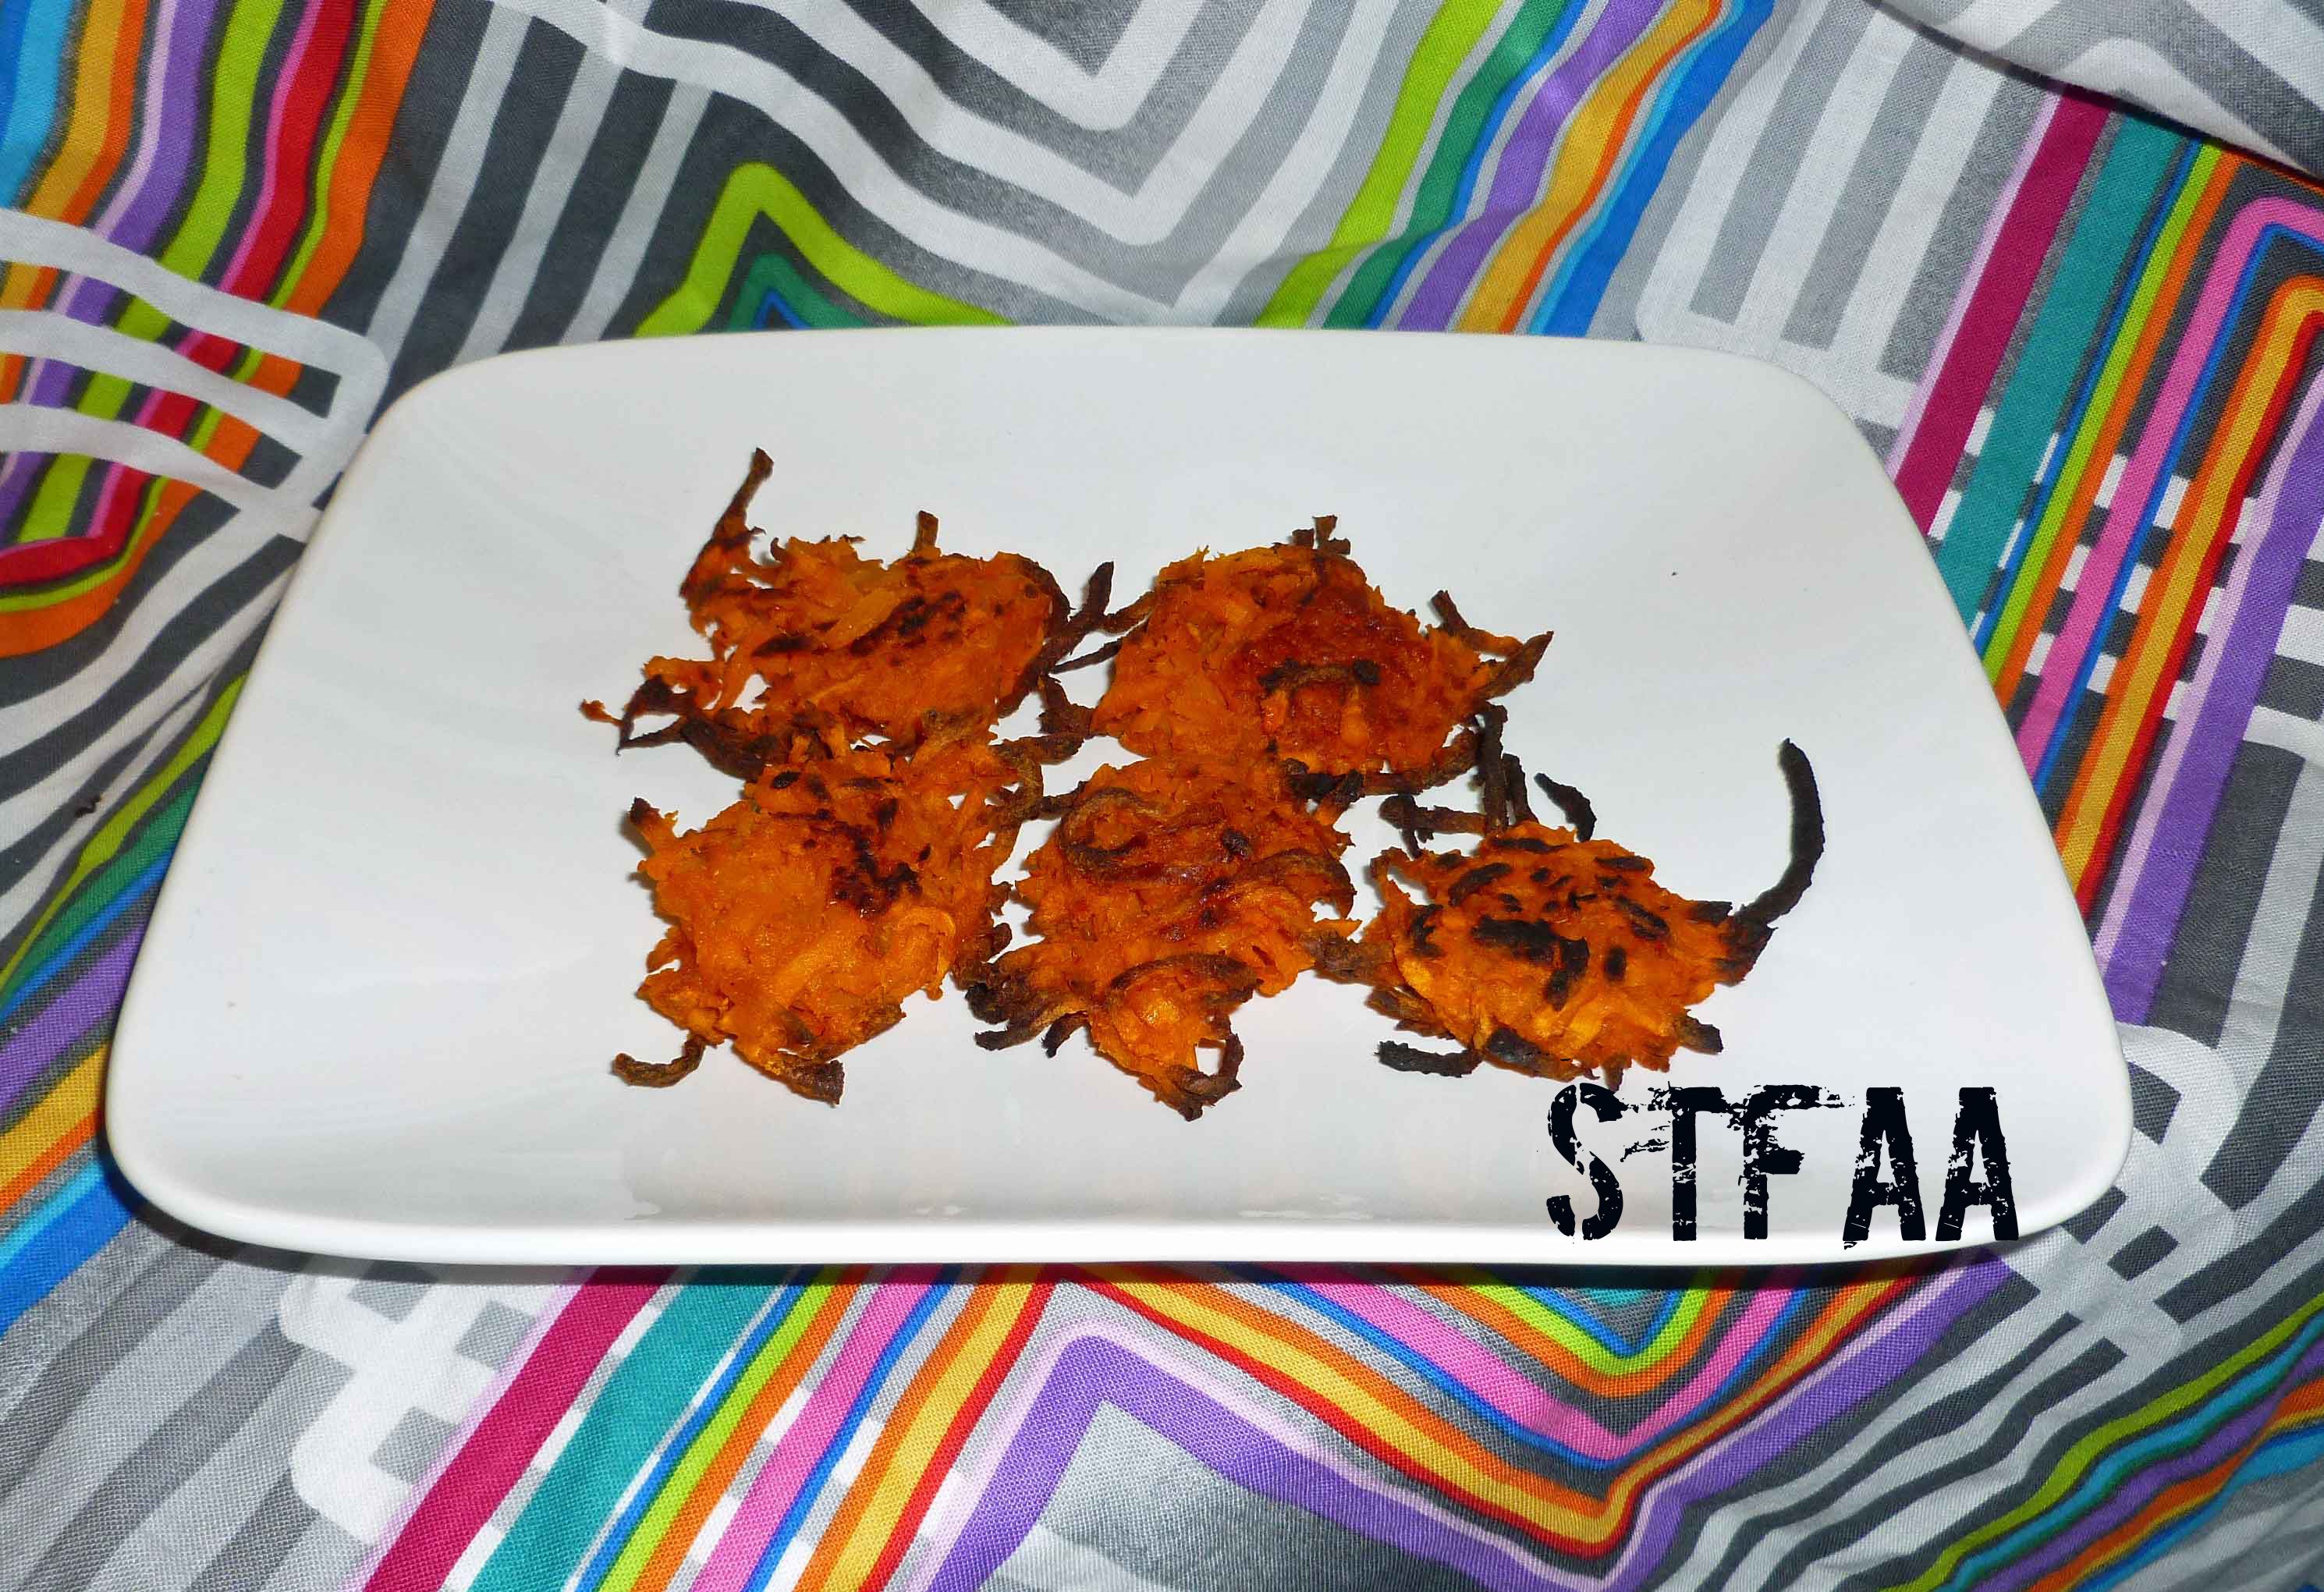
Okay, I know I already did a bunch of tater tots, but I had to do a chili head version. Seriously, you expected that I’d just leave it alone? I often use Sriracha (my homemade version, as I no longer can use the commercial version, sob, sob, although mine’s pretty close) instead of ketchup on fries or home fries. So why not put the Sriracha straight into the tater tot? It’s sweet and hot and yummy all at the same time. I didn’t take as many pictures this time, because there’s two other tater tot posts out there you can look at (Roasted Garlic and Pesto DIY Tater Tots and Chimichurri Spiced DIY Tater Tots) for reference, and mostly because I forgot. Oops.
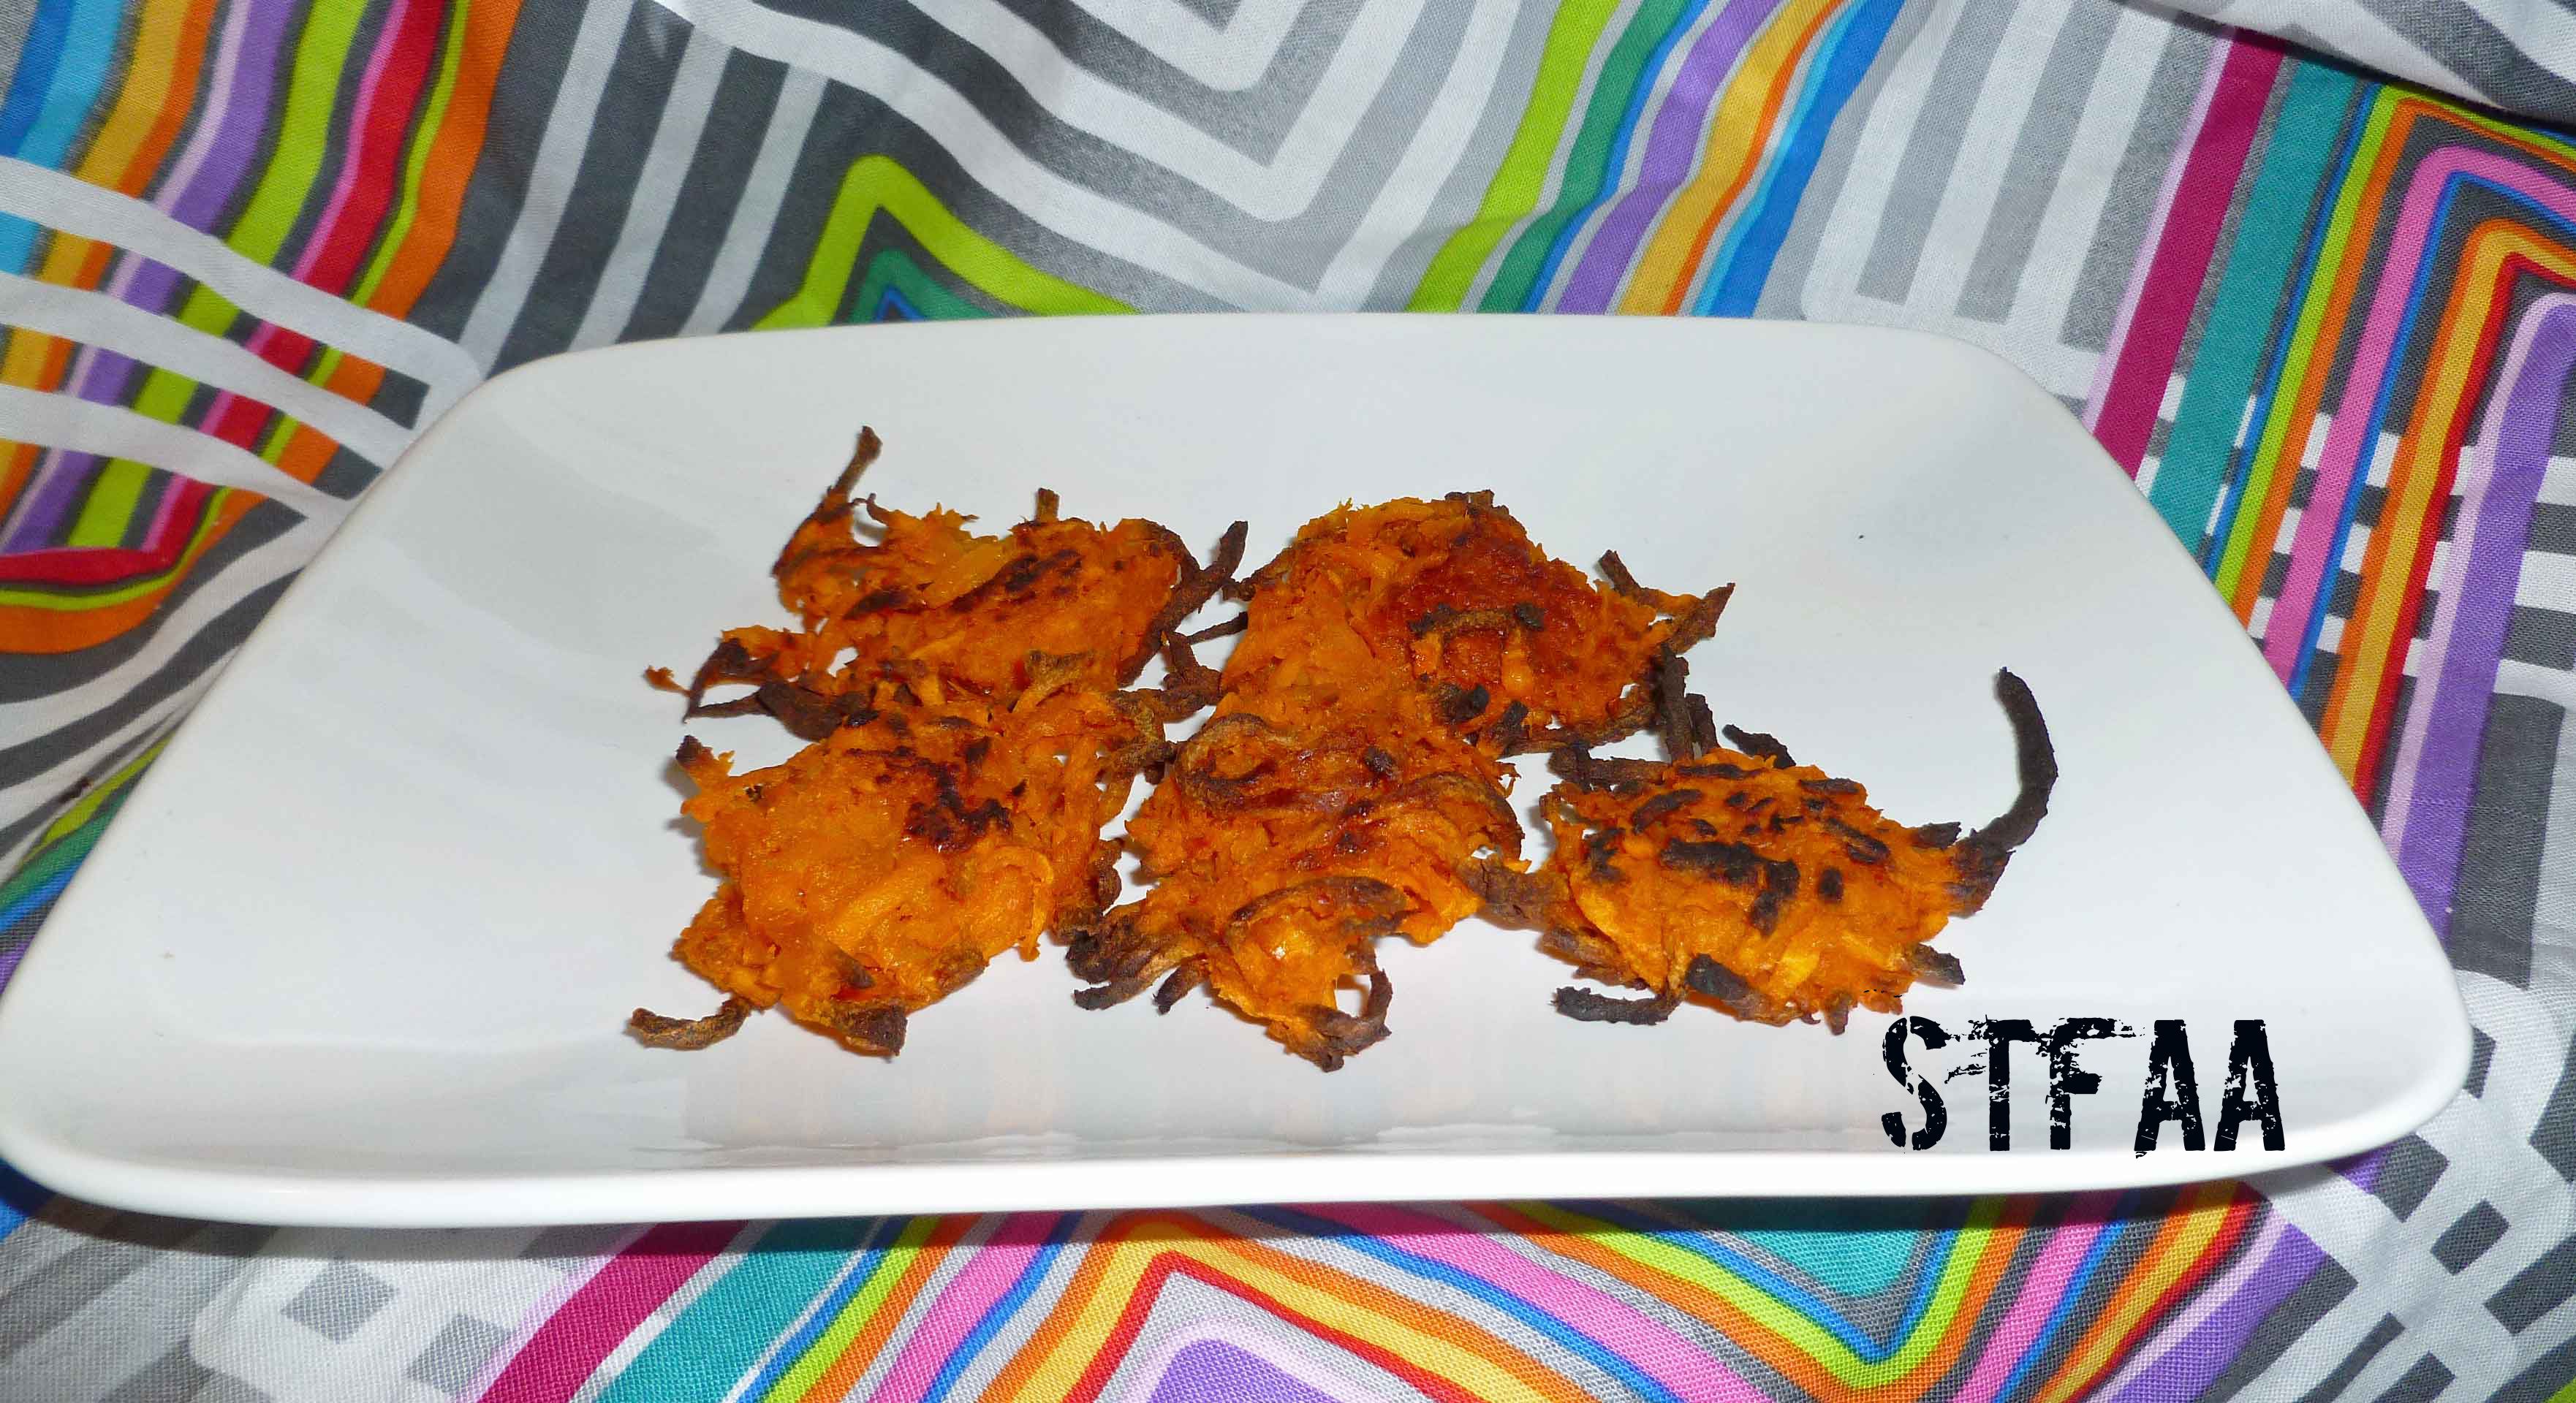
Sriracha Sweet Potato DIY Tater Tots
3 large or 4 medium sweet potatoes
2-4 Tablespoon(s) of Sriracha, depending on your spice tolerance (use a safe version for you, I ferment my own at home, since I don’t have a safe version)
2 Tablespoons of olive oil, or other safe for you oil, and some to put in a oil mister
1/4 teaspoon of salt
Preheat your oven to 400°F. Peel and wash your potatoes. Place the potatoes on a small baking sheet. Bake the potatoes for about an hour.
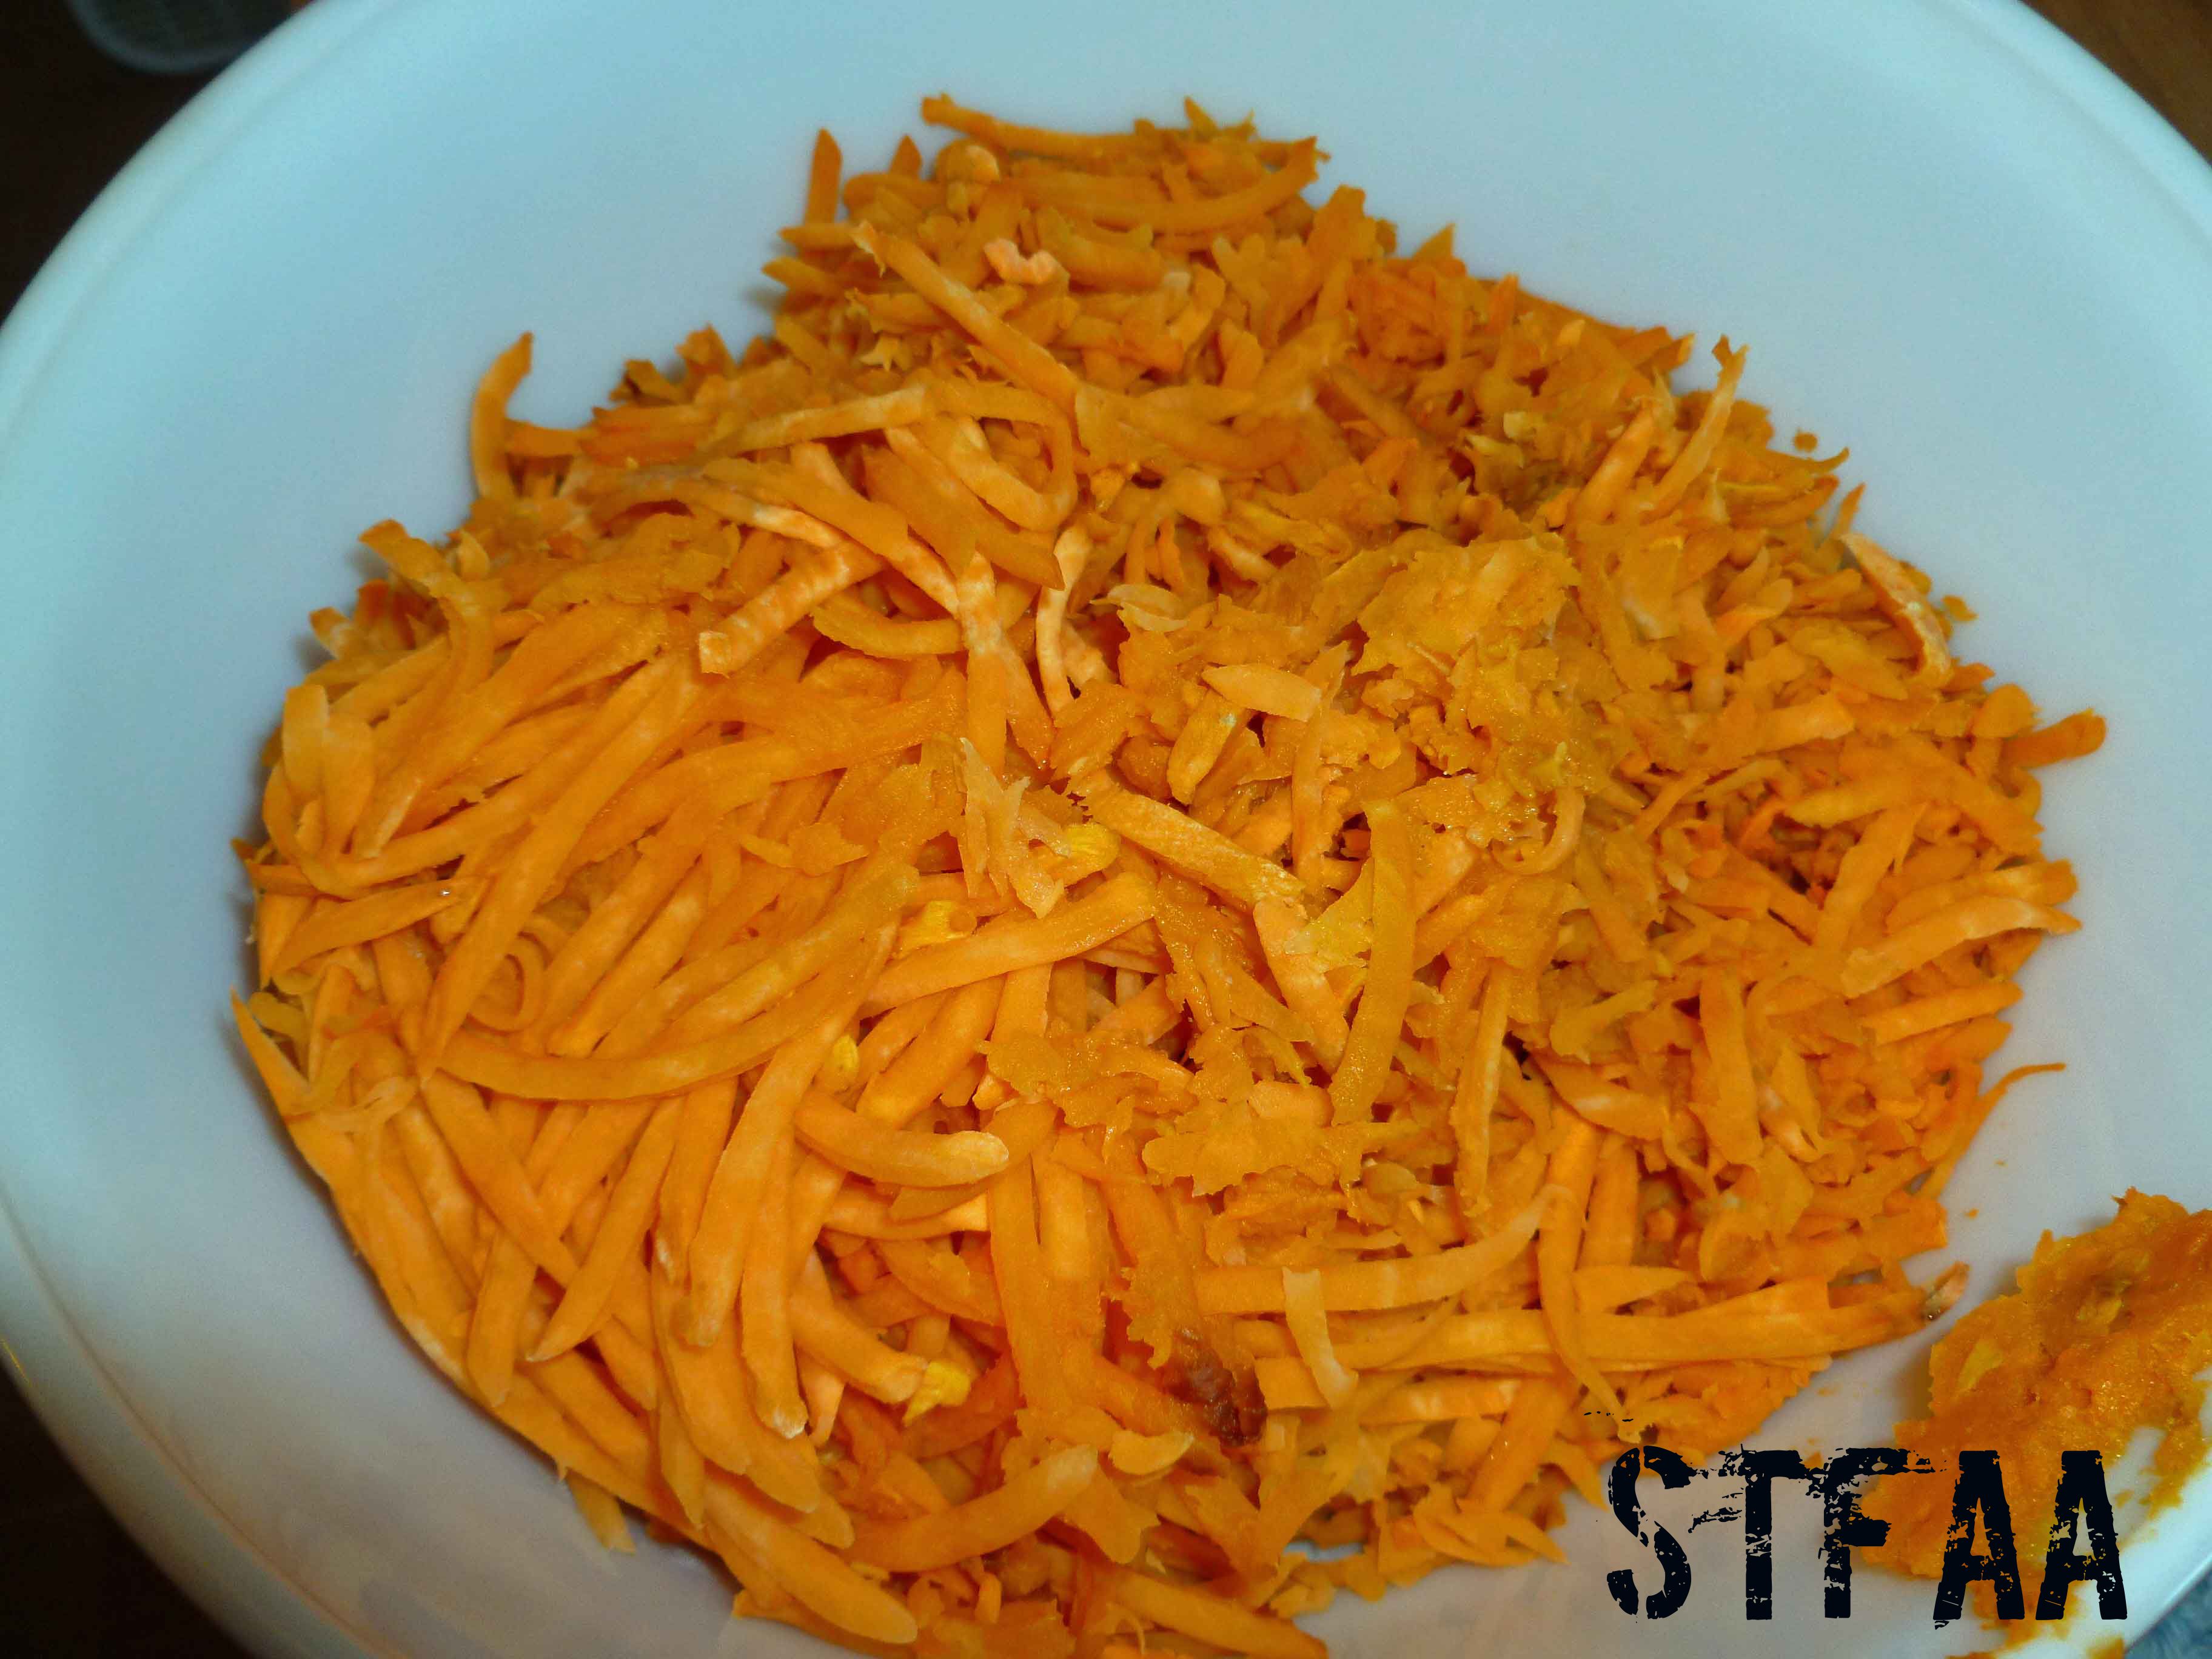
When the potatoes are ready to come out of the oven, remove the potatoes and turn the temperature on the oven to 425°F. If you’re using a large hand grater, you need to wait until the potatoes are cool so you don’t burn your fingers. Since I was using the grating blade on my food processor to grate the potatoes, I grated them while they were still hot. I sliced them lengthwise just enough to get them in the food processor, and grated them up.
Grated potatoes after baking
Some of the grated pieces may be too long, Feel free to chop them up a bit either with a knife or a potato masher. When the pieces are small enough for you, mix the Sriracha, salt, and the 2 Tablespoons of your safe oil into the potatoes until they are well combined.
Spray your baking sheet with your safe oil in a mister. I used a small cookie scoop to portion out the tater tots, but you could use two teaspoons to drop the mixture on your baking sheet.
Use your oil mister to mist the top of the tater tots, and place the baking sheet in the oven for 25-30 minutes. Use some tongs or a spatula to turn them over, and then bake them for another 25-30 minutes. You want to watch them closely, as you’ll notice mine were a little on the brown side.
Sriracha Sweet Potato DIY Tater Tots
Take them out of the oven, salt to taste, and enjoy!