Notice: Function _load_textdomain_just_in_time was called incorrectly. Translation loading for the wp-ultimate-recipe domain was triggered too early. This is usually an indicator for some code in the plugin or theme running too early. Translations should be loaded at the init action or later. Please see Debugging in WordPress for more information. (This message was added in version 6.7.0.) in /home/maryzahc/public_html/adultfoodallergies.com/wp-includes/functions.php on line 6121
Tree Nut-free – Page 6 – surviving the food allergy apocalypse (archive)

Tag: Tree Nut-free

Does not contain any tree nuts or coconut.

  • Stir-fried Potatoes with pork and cabbage

    Stir-fried Potatoes with pork and cabbage

    Stir-fried Potatoes with pork and cabbage

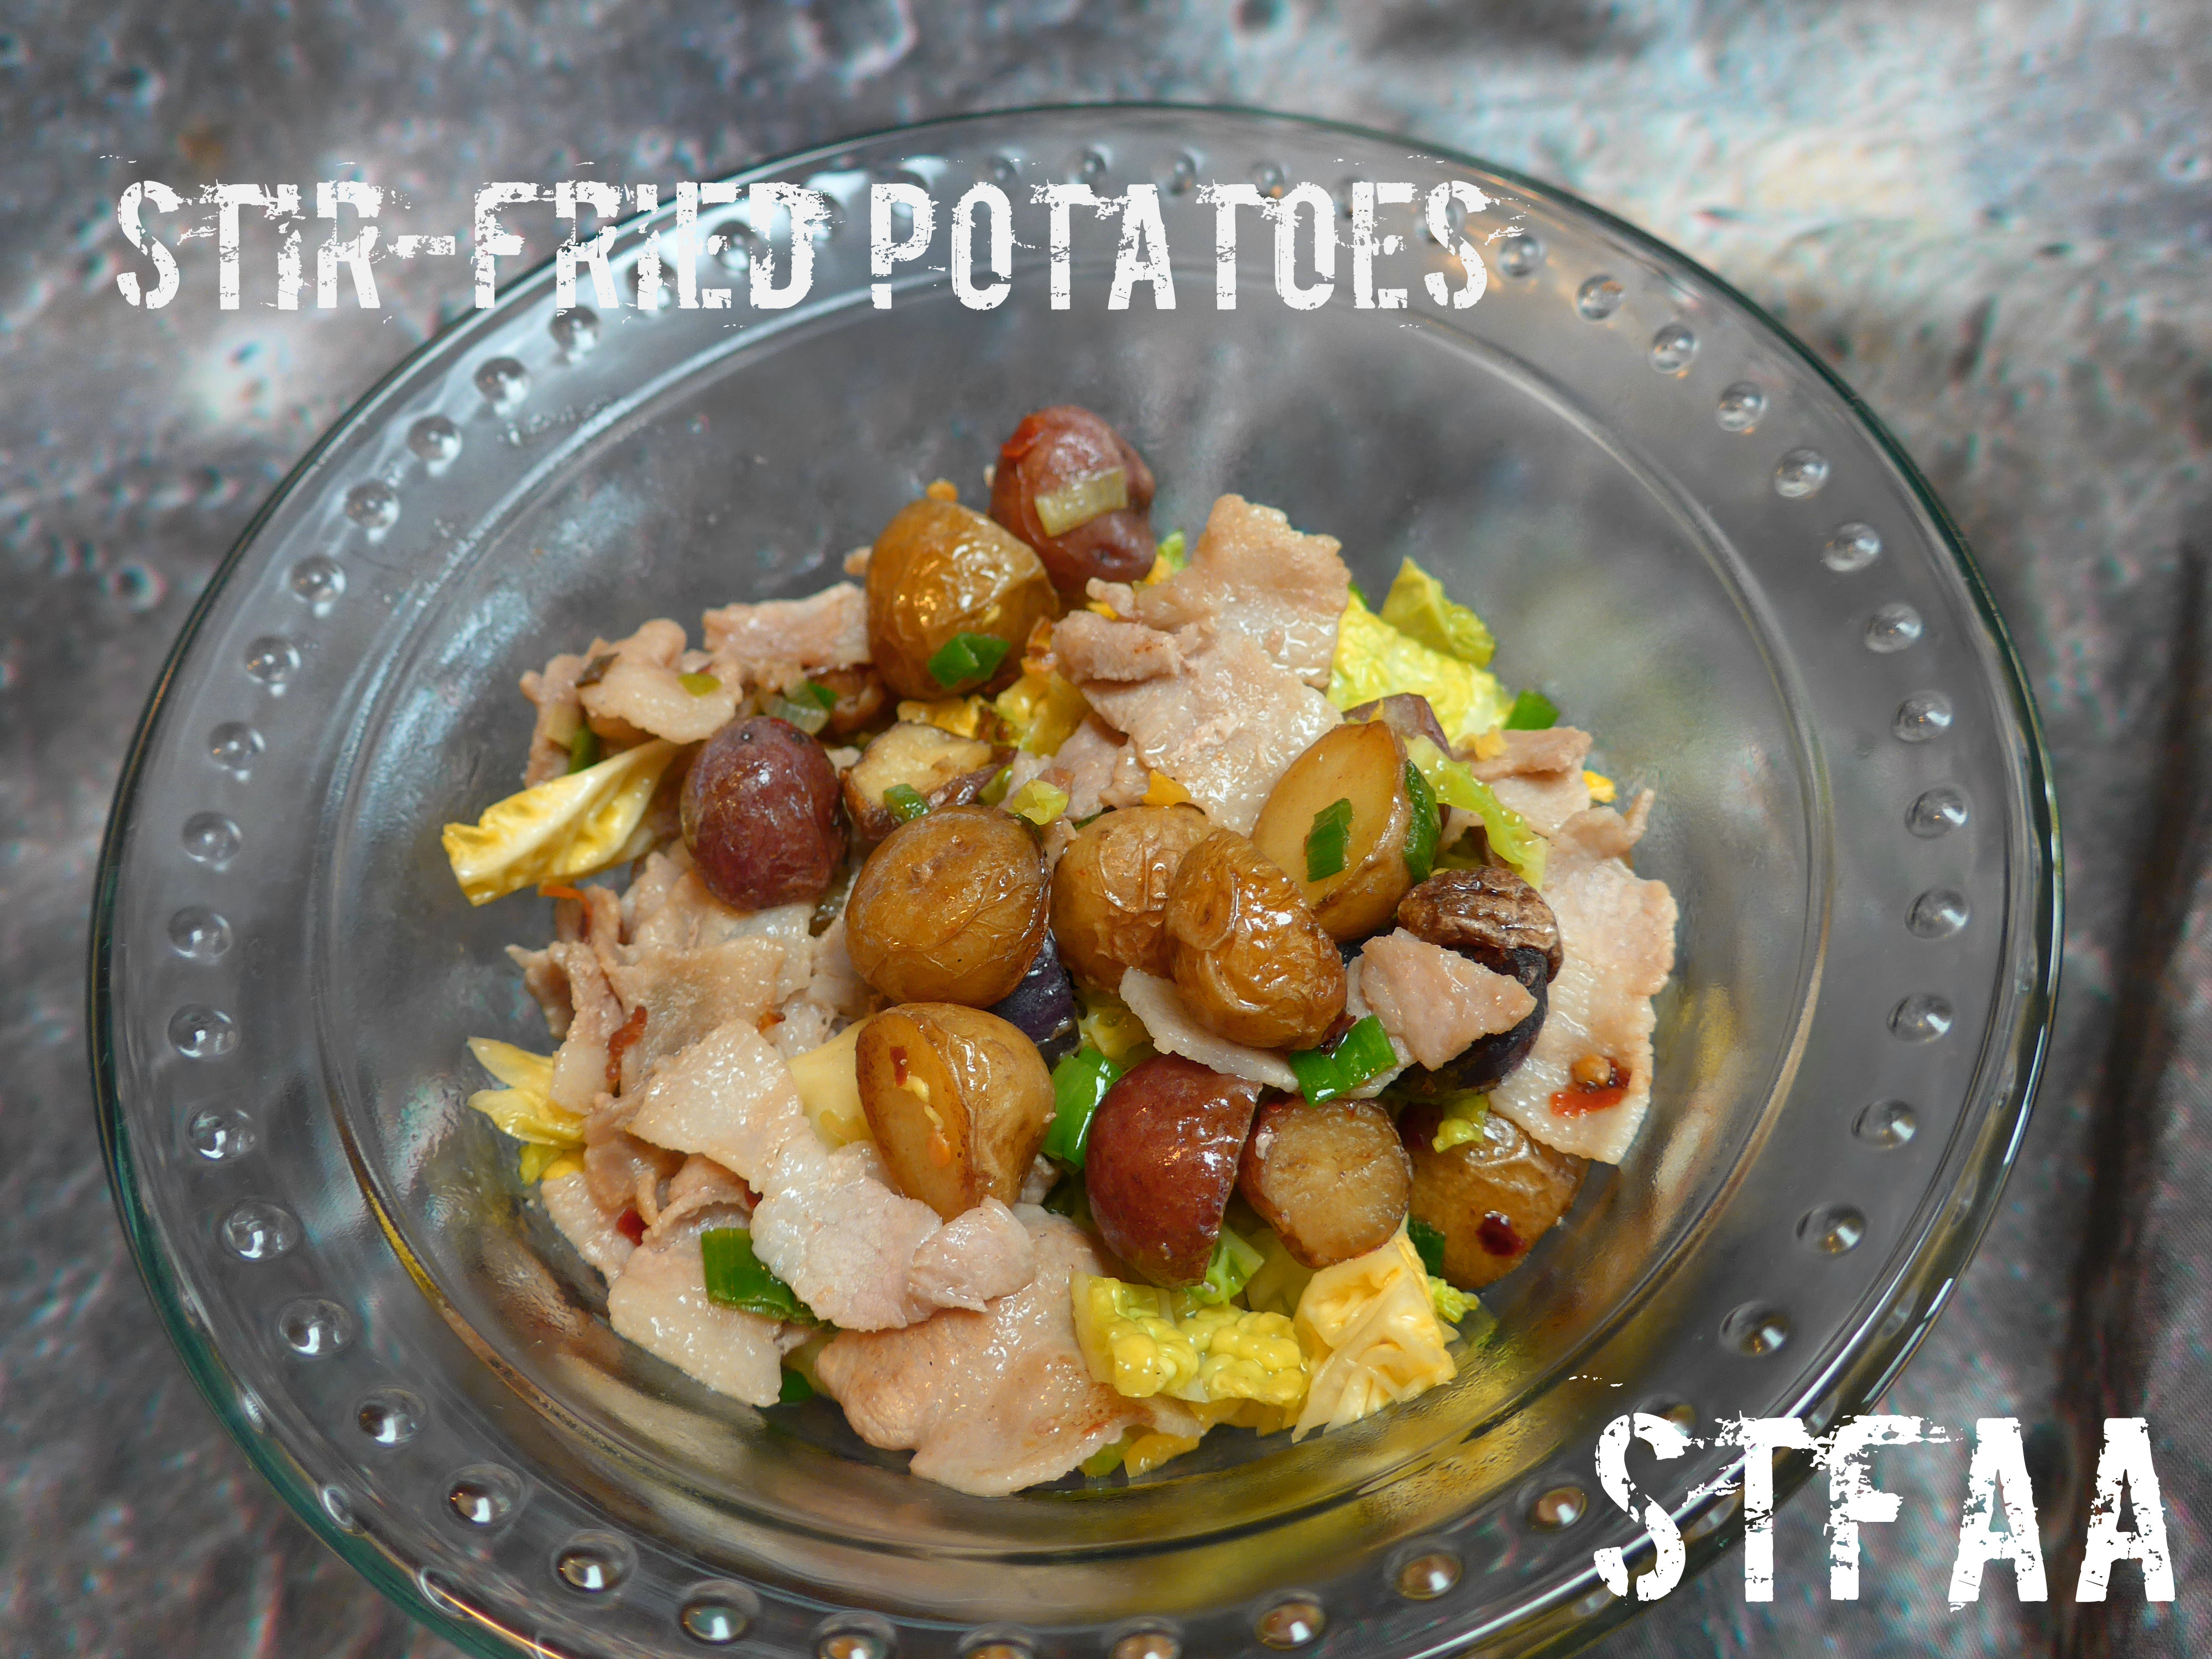
    This recipe is very loosely inspired by northern Chinese Hunan province recipes for spicy potatoes. I think it was end of winter, but I just wanted hot potatoes and cabbage with pork, and this dish definitely fit the bill.

    Finding the right meat was harder than I thought it would be — pork was the proper meat for the taste I was going for, but it does need to be a fatty cut. At one of our local grocers, I can get what I call “not bacon” because it looks just like bacon but isn’t. Side pork is the right cut for bacon, but this is unprocessed. It’s just the meat before it is seasoned and brined and aged or smoked or whatever you do for bacon (This. This is how you make bacon.) This cut is fatty, chewy, and with the added saltiness from tamari (the naturally gluten-free soy sauce) or amino acids, it is the perfect contrast to crunchy cabbage and creamy potatoes. Adjust the amount of pepper to suit your tastes, but go as spicy as you’ll eat it, as that’s kind of the point of the dishes that inspired this one. 1 teaspoon is about right for us.


    Notice: Trying to access array offset on value of type bool in /home/maryzahc/public_html/adultfoodallergies.com/wp-content/plugins/wp-ultimate-recipe/helpers/models/recipe.php on line 254
    Stir-fried Potatoes with pork and cabbage
    Print Recipe
    Servings
    3 people
    Servings
    3 people
    Stir-fried Potatoes with pork and cabbage
    Print Recipe
    Servings
    3 people
    Servings
    3 people
    Ingredients
    • .5 lb. thin-sliced side pork cut into chunks
    • 1 lb. marble potatoes or larger potatoes cut into 1/4 inch dice
    • 3 cups chopped napa or Chinese cabbage
    • 1 bunch scallions chopped, white and greens separated
    • 1 teaspoon tamari or amino acids
    • 1 teaspoon red pepper flakes (or less if you would like it to be not spicy)
    • 1 Tablespoon oil may not need this
    Servings: people
    Instructions
    1. The meat in this dish is not-bacon. What I mean is that it’s side pork, and where I buy it, it comes sliced like bacon, but it hasn’t been processed into bacon. It’s just thin fatty pork, and that’s what you want for this dish. You’ll use the rendered fat, but the remaining pork is a bit chewy and wonderful.
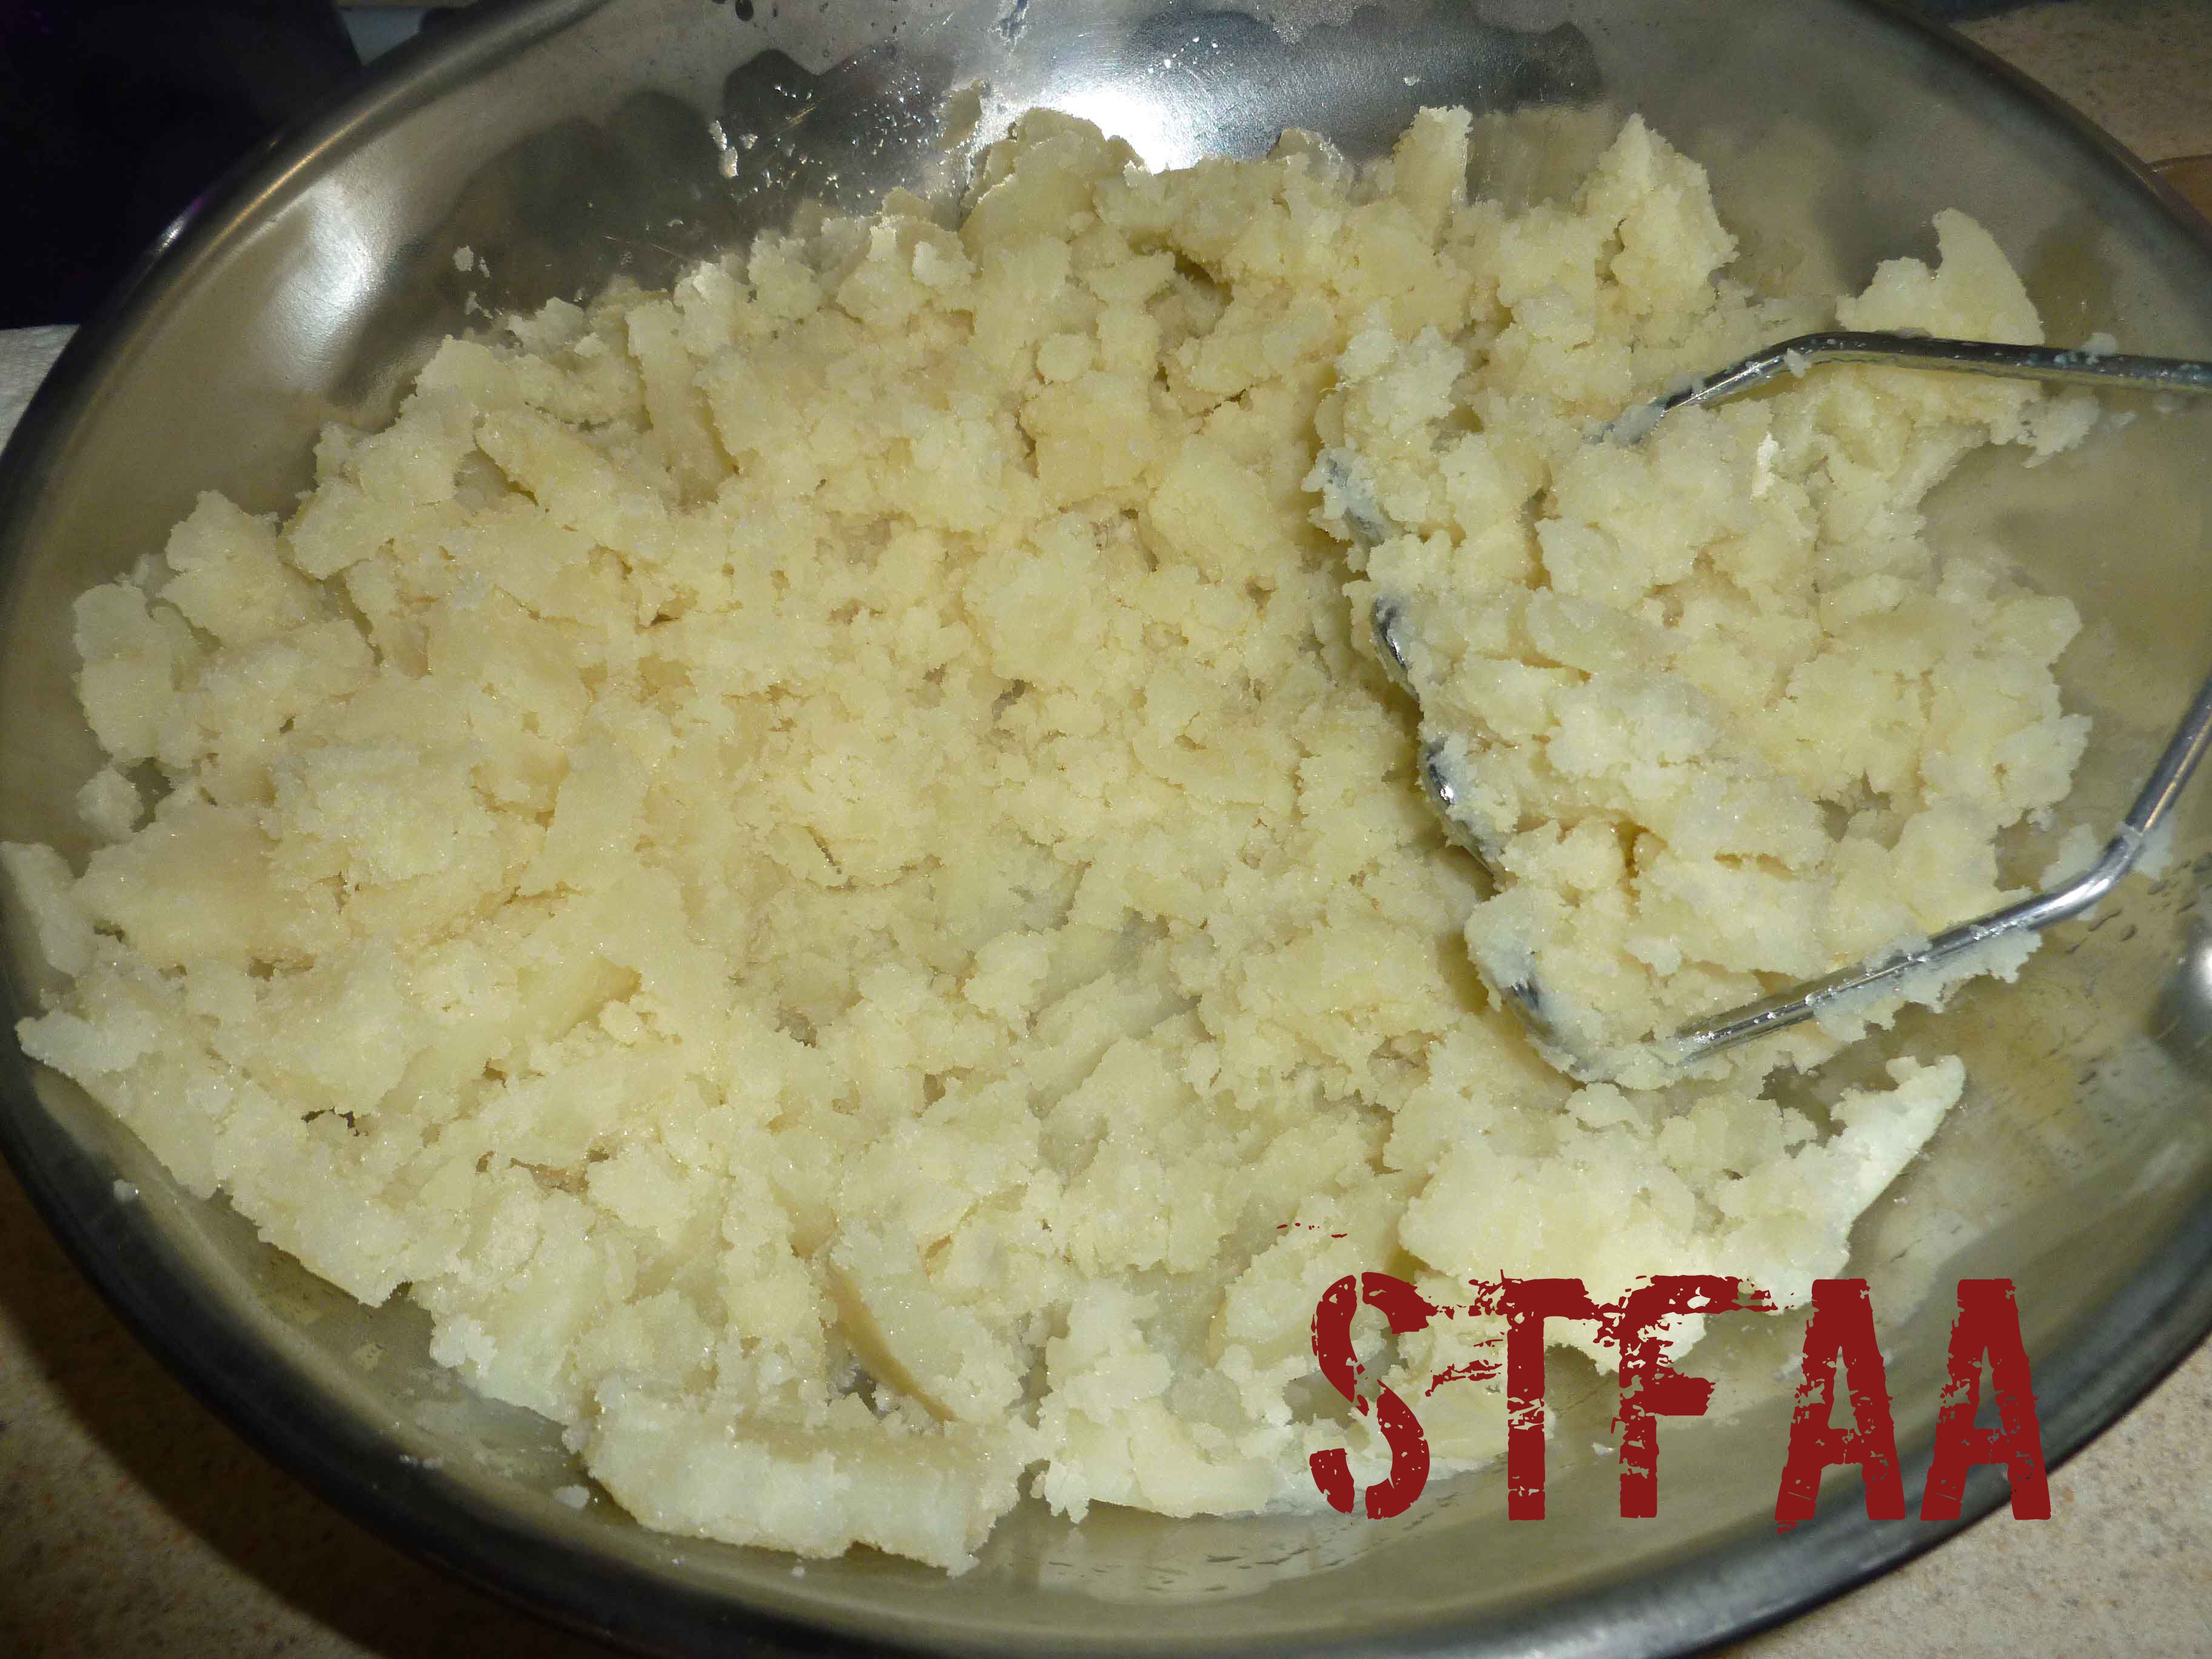
    2. Pre-cook your potatoes. I did this in the microwave, cooking them on high until they were fork-tender, about 8 minutes. You can also boil and drain them. Be cautious and undercook them slightly if you’re using larger cubed potatoes, as you don’t want them to fall apart as you fry them.
    3. Chop your meat into small bite-sized pieces and cook over medium heat in a skillet or wok. When it is almost done, add the tamari and pepper flakes and stir well.
    4. Remove cooked meat from pan to a paper towel-lined plate to drain. Leave the fat in the pan. If needed, add up to another tablespoon of oil to make about 2 Tablespoons total of oil.
    5. Add potatoes to oil — be careful, as they are wet and will splatter a bit if you’re not careful. Stir well and then cook until they brown, 10-15 minutes.
    6. Add cabbage and scallion whites and cook until cabbage starts to wilt.
    7. Add the pork back, along with the scallion tops, and stir until everything is good and hot.
    8. Serve with additional hot sauce if desired.
    Share this Recipe
     
    Powered byWP Ultimate Recipe
  • Samosa Spiced Potato Puffs

    Samosa Spiced Potato Puffs

    Samosa Spiced Potato Puffs
    Samosa Spiced Potato Puffs

    When I suggested to MaryKate when we were planning our theme months for the year (yes, we know we’re crazy) that we should do potatoes for March, I was kinda thinking potatoes fit with March because of St. Patrick’s Day. Somehow, instead of an Irish themed dish, I’ve managed to come up with an Indian inspired one instead.

    This recipe’s got a lot of fiddly bits, but they would be nice as appetizers for a party, or as a side dish for dinner party if you’re trying to be all fancy. And they’re quite yummy.

    Samosa Spiced Potato Puffs
    Samosa Spiced Potato Puffs
    Print Recipe
    Great as an appetizer or a side for a nice dinner party.
    Servings Prep Time
    24-30 puffs 35 minutes
    Cook Time
    45 minutes
    Servings Prep Time
    24-30 puffs 35 minutes
    Cook Time
    45 minutes
    Samosa Spiced Potato Puffs
    Samosa Spiced Potato Puffs
    Print Recipe
    Great as an appetizer or a side for a nice dinner party.
    Servings Prep Time
    24-30 puffs 35 minutes
    Cook Time
    45 minutes
    Servings Prep Time
    24-30 puffs 35 minutes
    Cook Time
    45 minutes
    Ingredients
    • 2 pounds russet potatoes peeled and cut into large pieces
    • 1 jalepeno or other hot green chile seeded and destemmed
    • 1 teaspoon fresh ginger finely grated
    • 3 scallions trimmed
    • 1 clove garlic
    • 2 Tablespoons olive oil (or other safe for you oil) and some extra to grease baking sheet
    • 1 Tablespoon lemon juice (I use fresh squeezed)
    • 2 Tablespoons aquafaba (see http://aquafaba.com/)
    • 1 teaspoon sea salt
    • 1 teaspoon coriander, dried or fresh cilantro (optional, if fresh, chop finely)
    • 1 teaspoon garam masala
    • 1/2 teaspoon ground cumin
    Servings: puffs
    Instructions
    1. Place potatoes in a pot of lightly salted water. Cover the pot, bring to a boil, then reduce heat to a simmer for 15-20 minutes, or until potatoes are soft. Or use your Instant Pot to cook them if you have one, using a trivet and a bowl or a steamer, adding a cup of water, and cooking on high pressure for 9 minutes.
    2. Preheat oven to 400°F. Chop scallions, garlic, and jalapeno pepper very finely. I used a Pampered Chef Manual food processor, but you can use a knife.
    3. You can also mix ingredients together manually but I used a stand mixer. Add all ingredients except the potatoes to the mixer bowl, and stir to combine well. Add the potatoes and mash them a bit before using your mixer. Using your mixer and the beater blade, mix until well combined and smooth.
    4. Grease a baking sheet. Spoon the potato mixture into to a pastry bag or a decorator set fitted with a large star shaped tip, and pipe the potato mixture into puffs on the baking sheet. You could also use a tablespoon or cookie scoop. Bake until golden, about 35 minutes on metal cooking sheets and 45 minutes on stoneware.
    Share this Recipe
    Powered byWP Ultimate Recipe
    Scallions, garlic and jalapeno chopped finely
    Scallions, garlic and jalapeno chopped finely
    All ingredients except potato combined well in mixer bowl
    All ingredients except potato combined well in mixer bowl
    Potatoes mashed
    Potatoes mashed
    Potatoes mixed with other ingredients in stand mixer
    Potatoes mixed with other ingredients in stand mixer
    Completed Potato Mixture
    Completed Potato Mixture
    Piping potato puffs onto baking sheet
    Piping potato puffs onto baking sheet
    Samosa Spiced Potato Puffs before baking
    Samosa Spiced Potato Puffs before baking
    Samosa Spiced Potato Puffs after baking
    Samosa Spiced Potato Puffs after baking
    Samosa Spiced Potato Puffs after baking
    Samosa Spiced Potato Puffs after baking
    Samosa Spiced Potato Puffs
    Samosa Spiced Potato Puffs
  • Potato Corn Chowder

    Potato Corn Chowder

    Potato Corn Chowder
    Potato Corn Chowder

    We are definitely experiencing soup weather here in Seattle. I keep making the mistake of looking at the high temperature for the day and dressing as though it wouldn’t be cold and damp somehow. Seattle is more prone to wild swings of weather than I expected (thundersnow, anyone?), and I think soup weather might be around for a while. That works for me — soup is one of the easiest dishes to make ahead and eat all week. I have made a corn soup before, a brothy stew that capitalized on the end of summer fresh corn. This is an end-of-winter stew, hearty chowder, but using the breaking down potato starch and a can of creamed corn (which contains corn starch) to thicken up the soup and make it creamy.

    This soup is quick enough for a weeknight meal, but reheats amazingly well so it also makes good lunch leftovers. I’ve said the recipe makes 3 servings, as that seems to be how it works out for us, but if you’re lighter eaters, or if this is an appetizer or side, it might make 4.


    Notice: Trying to access array offset on value of type bool in /home/maryzahc/public_html/adultfoodallergies.com/wp-content/plugins/wp-ultimate-recipe/helpers/models/recipe.php on line 254
    Potato Corn Chowder
    Print Recipe
    An easy, creamy, dairy-free vegan chowder
    Servings Prep Time
    3 servings 10 minutes
    Cook Time Passive Time
    30 minutes 30 minutes
    Servings Prep Time
    3 servings 10 minutes
    Cook Time Passive Time
    30 minutes 30 minutes
    Potato Corn Chowder
    Print Recipe
    An easy, creamy, dairy-free vegan chowder
    Servings Prep Time
    3 servings 10 minutes
    Cook Time Passive Time
    30 minutes 30 minutes
    Servings Prep Time
    3 servings 10 minutes
    Cook Time Passive Time
    30 minutes 30 minutes
    Ingredients
    • 1 Tablespoon olive oil
    • 1 whole leek white and light green only
    • 4 cups red potatoes diced
    • 1 teaspoon dill
    • 1/2 teaspoon roasted garlic powder (or 1/4 teaspoon garlic powder)
    • 4 cups vegetable stock
    • 1 can (15oz) creamed corn
    • 1 cup corn fresh or frozen
    • scallion tops
    • freshly ground pepper
    Servings: servings
    Instructions
    1. Heat oil over medium heat in a large saucepan. When hot, add chopped leeks and sautee 5-10 minutes.
    2. Chop the potatoes unevenly. Cut about half of a cup of potatoes into a smaller dice so that they will start to break down by the time the larger potato cubes are cooked.
    3. Add potatoes and spices and stir well. Then add stock. Bring to a boil and then turn down to a simmer. Cook until potatoes are soft, and then another 5-10 minutes until the smaller ones start breaking down.
    4. Add the creamed corn and stir well. Then add the frozen or fresh corn. When the soup has returned to a boil, serve topped with scallion tops and pepper.
    Recipe Notes

    NOTE: In a pinch, you can replace the leek with the bottoms of the scallions with only a small difference in taste. I think the leek is a smoother taste, but the scallions were fine in a pinch. If you DO just use the tops, go ahead and regrow them by putting the root ends in a cup of water.

    Share this Recipe
     
    Powered byWP Ultimate Recipe
  • Garlic Double Header: Toum Sauce and Garlic Sorghum Flatbread

    Garlic Double Header: Toum Sauce and Garlic Sorghum Flatbread

    Toum Sauce & Garlic Sorghum Flatbread
    Toum Sauce & Garlic Sorghum Flatbread

    It’s our last garlic post of Keeping the Vampires Away month, so I decided to do a double header. And they actually go great together, although you’re going to have to make heroic efforts to get rid of the aroma once you’re finished eating. The great thing about these two recipes is that they use very few ingredients, which is fairly infrequent in allergy cooking.

    Toum Sauce (Lebanese Garlic Sauce)

    The toum sauce is pretty easy and the only ingredient that’s a bit out of the mainstream is the aquafaba which helps it emulsify easily. In researching recipes for toum sauce, some state that using extra virgin olive oil can result in the sauce having a bit of a bite and that grape seed oil doesn’t emulsify well. Since those are my only two safe oils, I chose extra virgin olive oil, and I didn’t mind a bit of a bite.  However, if you have a lighter safe oil, you might want to try it. It’s great to use on sandwiches, falafel, grilled foods, and flatbread. I even put it on salad.

    I didn’t want to make huge amounts so I used an immersion blender, but I think there is enough volume that you can try it in a regular blender as well. I also used the elephant garlic that MaryKate sent me from Seattle, but regular garlic will work.

    Toum Sauce (Lebanese Garlic Sauce)
    Toum (Lebanese Garlic Sauce)
    Print Recipe
    An allergy friendly version to use on shawarma, falafel, grilled foods, and flatbread. I even put it on salad.
    Servings Prep Time
    1 1/2 cups 15 minutes
    Servings Prep Time
    1 1/2 cups 15 minutes
    Ingredients
    • 6-8 cloves garlic (or 1 clove of elephant garlic)
    • 1 teaspoon salt
    • 2 Tablespoons aquafaba (see http://aquafaba.com/)
    • 1 Tablespoon water
    • 1 teaspoon lemon juice (I used freshly squeezed)
    • 1 cup olive oil
    Servings: cups
    Instructions
    1. Peel and trim ends of garlic cloves and roughly chop. Place in small container if using a stick blender or in the blender if using a regular blender. Add salt, aquafaba, water, and lemon juice.
    2. Blend until the garlic, salt, aquafaba, water, and lemon juice is a thick paste. You want the garlic to be completely pureed.
    3. Once the garlic is completely pureed, continue to blend, and very slowly pour olive oil into the mixture as it blends, and the mixture will thicken. Store in the refrigerator.
    Share this Recipe
    Powered byWP Ultimate Recipe
    One clove of the elephant garlic MaryKate sent me with a steak knife for size reference
    One clove of the elephant garlic MaryKate sent me with a steak knife for size reference
    Garlic, salt, aquafaba, water, and lemon juice before blending
    Garlic, salt, aquafaba, water, and lemon juice before blending
    Garlic, salt, aquafaba, water, and lemon juice after blending
    Garlic, salt, aquafaba, water, and lemon juice after blending
    Blending garlic mixture with olive oil
    Blending garlic mixture with olive oil
    Finished toum sauce after blending
    Finished toum sauce after blending
    Toum Sauce (Lebanese Garlic Sauce)
    Toum Sauce (Lebanese Garlic Sauce)

    Garlic Sorghum Flatbread

    Although I’ve modified this recipe from Book of Yum a bit by adding garlic and scallions, I’ve got to give credit where credit is due. I’ve made flatbreads (or roti in Indian cuisine) from other recipes and have not been as successful. Although the recipe is very simple, the technique of cooking half the flour with water is what makes the resulting flatbread nicely pliable. I was able to make them very thin and wrap them around some veggies without them breaking. Plus they were really awesome just dipped in the toum sauce by themselves.

    Garlic Sorghum Flatbreads except the two I ate while cooking :)
    Garlic Sorghum Flatbread
    Print Recipe
    A simple flatbread you can use as a wrap, tortilla, or just to munch on.
    Servings Prep Time
    6-8 flatbreads 20 minutes
    Cook Time Passive Time
    3-5 minutes 10-15 minutes
    Servings Prep Time
    6-8 flatbreads 20 minutes
    Cook Time Passive Time
    3-5 minutes 10-15 minutes
    Ingredients
    • 2 cups sorghum flour
    • 2 cups water
    • 1 teaspoon salt
    • 6-8 cloves garlic or 1 clove of elephant garlic
    • 2 scallions
    • roux whisk (helpful to have)
    Servings: flatbreads
    Instructions
    1. Peel and trim your garlic. Trim the ends of the scallions and any wilted bits of green. Chop garlic and scallions very finely, you want very small pieces but not a paste. I used a manual food processor but you can do it with a knife.
    2. Measure place one cup of the sorghum flour in two bowls, so that the flour is divided to add as needed. In a sauce pan or deep skillet, add the garlic and scallions, salt, and two cups of water. Bring the water to just below a boil in the pan, and add one cup of the flour to the water in a slow stream, using the roux whisk to blend in the flour.
    3. Reduce the heat to low. Using a wooden spoon, stir the other cup of flour into the pan, until it forms a dough ball. Keep stirring and mixing until the dough forms a rubbery texture. Remove the dough and place in a heat safe bowl. Let the dough rest for 10-15 minutes or until it is cool enough to touch.
    4. Form into small balls, a little bigger than the size of a ping pong ball, and place back into the bowl. I used a gallon size freezer safe ziptop bag, with the sides cut out to roll the dough out between with a rolling pin. You could also use a tortilla press, but I don’t have one. Roll the dough out to about an 1/8th of an inch.
    5. Place a cast iron skillet over medium-low to medium heat (depends on your stove and your skillet, you may need to adjust. Cook until the texture changes on the top of the flatbread (it will look a bit dry and cracked) and until you have light brown spots on the side being cooked. Turn the flat bread and cook the other side. Repeat until all your flatbreads are cooked.
    Share this Recipe
    Powered byWP Ultimate Recipe
    Mince garlic and scallions very finely
    Mince garlic and scallions very finely
    Measure out sorghum, one cup in each bowl and get roux whisk ready
    Measure out sorghum, one cup in each bowl and get roux whisk ready
    Add water to saucepan and add garlic and water, bringing just below boiling.
    Add water to saucepan and add garlic and water, bringing just below boiling.
    Slowly add one cup of sorghum flour and mix in with whisk
    Slowly add one cup of sorghum flour and mix in with whisk
    Turn heat to low and mix in second cup with wooden spoon until it forms a rubbery dough
    Turn heat to low and mix in second cup with wooden spoon until it forms a rubbery dough
    Let dough rest in heat safe container
    Let dough rest in heat safe container
    Roll out dough between a ziptop bag with the sizes cut out once cool enough to handle
    Roll out dough between a ziptop bag with the sizes cut out once cool enough to handle
    Cook on cast iron skillet over medium heat
    Cook on cast iron skillet over medium heat
    Flatbread ready to flip (note dry texture around edges)
    Flatbread ready to flip (note dry texture around edges)
    Flatbread after flipping
    Flatbread after flipping
    Garlic Sorghum Flatbreads except the two I ate while cooking :)
    Garlic Sorghum Flatbreads except the two I ate while cooking 🙂

    Enjoy!

  • Kale-Bison Cups

    Kale-Bison Cups

    Kale-Bison Cups
    Kale-Bison Cups

    In this dish, I’ve taken a technique we got out of a Thai cookbook, where this was one of many ingredients and didn’t really shine, and made it the main flavor star of a completely different dish. What you do is chop garlic and cilantro together until it makes almost a paste, or alternately, you can grind them together in a mortar and pestle. The paste is then cooked into a dish. I’ve been messing with different iterations of this for about a month, trying to find the perfect way to feature it. I know this is a kind of odd way to feature garlic, but it is SO GOOD.

    Here, the garlic and cilantro, along with a bit of onion, flavor ground bison, which is then served in a take on the lettuce cup. I don’t like lettuce, but also, I think the earthiness of bison and kale suit each other. A little dab of something creamy — yogurt, if you can find a not-sweet one, mayo or mayo substitute, even a sour cream, if you have a safe one — brings the flavors out just a little more. This recipe is simple and straightforward, and if you’re anything like me, you might find all your recipes featuring cilantro and garlic for a while.

    cilantro garlic blending stages
    cilantro garlic blending stages

    Notice: Trying to access array offset on value of type bool in /home/maryzahc/public_html/adultfoodallergies.com/wp-content/plugins/wp-ultimate-recipe/helpers/models/recipe.php on line 254
    Kale-Bison Cups
    Print Recipe
    Servings
    9 “cups”
    Servings
    9 “cups”
    Kale-Bison Cups
    Print Recipe
    Servings
    9 “cups”
    Servings
    9 “cups”
    Ingredients
    • 1 bunch lacinto or dinosaur kale
    • 1 teaspoon oil
    • 1/4 cup onion rough chopped
    • 1/2 teaspoon kosher salt
    • 1 cup rough chopped cilantro (just chop off the top — stems and leaves)
    • 6 cloves garlic small cloves OR use less. Maybe think 2T volume of garlic cloves?
    • 1 lb. ground bison
    • freshly ground pepper to taste
    • creamy condiment, optional (e.g. mayo, sour cream, yogurt)
    Servings: “cups”
    Instructions
    1. Wash kale and shake leaves mostly dry. Microwave for 10 seconds, twice, moving the leaves around between cooking. You just want to soften and barely cook the kale leaves. Chop off the leaves where the leave starts to narrow towards the bottom, leaving the top 4 or so inches for the “cup.”
    2. Over medium heat, heat the oil, adding the onion and salt when it is hot. Stir well.
    3. Chop the garlic roughly. Add the cilantro. Keep chopping until you have a finely chopped mess where you can barely pick the garlic out of the cilantro. Alternately, you can grind these together in a mortar and pestle, but I like the chopping.
    4. Add the cilantro-garlic mess to your onion after the onion is translucent and beginning to brown. Stir well and cook for about 1 minute.
    5. Add the bison and chop/stir well, breaking up the meat. Cook until just not pink, but don’t overdo it. Drain on a paper towel lined plate. Season lightly with pepper.
    6. To serve, add the meat mixture and condiment to each kale “cup” and enjoy like a taco. For this recipe, we tried Earth Balance mayo and a Greek yogurt as condiments, and both worked well. Use whatever you like that is safe for you, or enjoy without the condiment.
    Share this Recipe
     
    Powered byWP Ultimate Recipe
  • Garlic and Onion Pakoras

    Garlic and Onion Pakoras

    Garlic and Onion Pakoras
    Garlic and Onion Pakoras

    Garlic and Onion Pakoras

    MaryKate and I were on the same wave length about our first recipe, in that garlic must be fried somehow. I’ve looked at doing pakoras several times, but hadn’t gotten around to it. I mean, fried veggie fritters with Indian spices? How can that be bad? So when MaryKate sent me some extreme elephant garlic from Seattle, I knew this would be a great use for it.

    Onion and Elephant garlic clove
    Onion and Elephant garlic clove

    Look that the elephant garlic in the picture. For scale, that onion is a bit larger than a baseball, but not as big as a softball. Crazy huge right? If you don’t have access to elephant garlic, just use an entire bulb of regular garlic. (Oh, and to resolve the unfortunate aroma later, I swished with a glass of water with a couple of tablespoons of peroxide and a drop of peppermint essential oil mixed in it, after lots of brushing teeth and tongue.)

    The garlic clove was actually large enough that I could put it through the grater on my food processor. I grated the onion, garlic and cayenne in the food processor and used my Pampered Chef ginger grater for the ginger (you could also use a microplaner).

    Onion, garlic, cayenne pepper, and grated ginger
    Onion, garlic, cayenne pepper, and grated ginger

    The batter ingredients go in the blender, and you blend before adding water, but keeping it to a thick paste.

    Batter paste ingredients in blender
    Batter paste ingredients in blender

    After you’ve made the paste, mix in the veggies and your batter for the Garlic and Onion Pakoras is ready to fry.

    complete Garlic and Onion Pakora batter
    Completed Garlic and Onion Pakora batter

    I’ve learned to deep fry in a stainless steel or cast iron pot using a thermometer. Deep fryers generally have nonstick interiors which could potentially give off fumes that would kill my parrot. Also, once you get used to it, it’s really no big deal to fry on the stove top. Just use a pot that’s nice and deep to prevent splattering. I use a Lodge cast iron wok and I love it for frying. High walls to prevent splatter, but large open surface and it uses less oil than a regular stock pot.

    Garlic and Onion Packoras being fried
    Garlic and Onion Packoras being fried

    Once they are golden brown, you want to drain off the excess oil. Conventional wisdom says its best to drain on a rack over paper towels, but…that’s just one more damn thing I’m going to have to wash, and I don’t care enough.

    Garlic and Onion Packoras draining after being fried
    Garlic and Onion Packoras draining after being fried

    Serve with ketchup or a chili sauce or you can mix up some chaat masala to sprinkle on them. Enjoy!

    Garlic and Onion Pakoras
    Garlic and Onion Pakoras

    Notice: Trying to access array offset on value of type bool in /home/maryzahc/public_html/adultfoodallergies.com/wp-content/plugins/wp-ultimate-recipe/helpers/models/recipe.php on line 254
    Garlic and Onion Pakoras
    Print Recipe
    A lovely fried garlic and onion snack or appetizer when you’re playing with deep frying.
    Servings Prep Time
    4 people 15 minutes
    Cook Time
    5 minutes
    Servings Prep Time
    4 people 15 minutes
    Cook Time
    5 minutes
    Garlic and Onion Pakoras
    Print Recipe
    A lovely fried garlic and onion snack or appetizer when you’re playing with deep frying.
    Servings Prep Time
    4 people 15 minutes
    Cook Time
    5 minutes
    Servings Prep Time
    4 people 15 minutes
    Cook Time
    5 minutes
    Ingredients
    • 1 medium onion
    • 1 clove elephant garlic (if you don’t have elephant garlic, use an entire bulb of regular garlic)
    • 1 hot pepper, destemmed and deseeded (use a jalapeno, serrano, or cayenne pepper depending on your preferred level of heat)
    • 2 teaspoons ginger grated
    • 4 Tablespoons garbanzo bean flour (besan)
    • 1 Tablespoon rolled oats
    • 1 Tablespoon rice flour
    • 1/2 teaspoon sea salt
    • 1/8 teaspoon ground turmeric
    • 1/4 teaspoon crushed red pepper
    • 1/4 teaspoon ground cumin
    • 1/4 teaspoon ground garam masala
    • 1/2 inch piece of peeled ginger
    • water
    • safe oil for frying
    • thermometer
    • stainless steel or cast iron pot
    Servings: people
    Instructions
    1. Thinly chop up the onion, garlic, and pepper, and grate 2 teaspoons of ginger. I used the grater blade in my food processor for the vegetables, and grated my ginger with a ginger grater (you could use a microplaner). If you are using a knife, wear safe for you food prep gloves to prevent you from burning your hands when chopping the pepper.
    2. In a blender, place the garbanzo bean flour, oats, rice flour, salt, turmeric, crushed red pepper, cumin, garam masala, 1/2 inch piece of peeled ginger. Blend. Add enough water, teaspoon by teaspoon to form a thick paste, scraping down the sides as necessary. Keep the paste thick as more water will be added when you add the vegetables.
    3. Add the chopped vegetables, and blend for only a few seconds, just enough to incorporate the veggies with the paste. You do not want the vegetables pureed. Empty the blender into a bowl or container and make sure the mix is well combined.
    4. Place safe oil into a stainless steel or cast iron pot, two inches deep. Heat oil until the temperature is 360°F. Using a tablespoon or small scoop, place a spoonful or scoop into the hot oil and deep fry a few minutes on each side until golden brown.
    5. Place on plate with paper towels to drain off excess oil. Serve warm with a ketchup or chili sauce, or try making up your own chaat masala mix. Enjoy!
    Share this Recipe
     
    Powered byWP Ultimate Recipe
  • Whoopie Pies – Gluten-Free with Vegan Option

    Whoopie Pies – Gluten-Free with Vegan Option

    Whoopie Pies - Gluten-Free with Vegan Option
    Whoopie Pies – Gluten-Free with Vegan Option

    To cap off our Treat. Yo. Self. January. theme, I give you a big treat, Whoopie Pies. I’m fairly certain I’ve mentioned this before, but I’m originally from Maine. The whoopie pie is the official state treat of Maine and apparently the town of Dover-Foxcroft, Maine, has hosted the Maine Whoopie Pie Festival since 2009, according to Wikipedia. I’ve seriously missed them since the onset of my dairy, egg, wheat and corn allergies.  

    My recipe uses my home rendered lard because it’s my only safe solid fat, but you can substitute it with vegetable shortening if you have one you can use safely.  There are three recipe cards listed below, one that provides the flour mixture I use in the whoopie pies, one for the frosting, and one to bake the pies themselves.  I used a Pampered Chef Easy Accent Cake Decorator to pipe the frosting into the whoopie pies, but you could just use a safe for you zip top bag with a corner cut off as well. I don’t recommend a spreader or a knife as gluten-free pies don’t have the same sturdy structure as the wheat ones do.

    Whoopie Pies – Gluten-Free with Vegan Option

    Whoopie Pie batter
    Whoopie Pie batter
    Whoopie Pie batter on parchment lined cookie sheets
    Whoopie Pie batter on parchment lined cookie sheets
    Whoopie Pies after baking
    Whoopie Pies after baking
    Lard after being whipped
    Lard after being whipped
    Vanilla Frosting after adding powdered sugar
    Vanilla Frosting after adding powdered sugar
    Whoopie Pies - Gluten-Free with Vegan Option
    Whoopie Pies – Gluten-Free with Vegan Option

    Notice: Trying to access array offset on value of type bool in /home/maryzahc/public_html/adultfoodallergies.com/wp-content/plugins/wp-ultimate-recipe/helpers/models/recipe.php on line 254
    Gluten-free, Rice-free, Potato-free Flour Mix
    Print Recipe
    Servings Prep Time
    9 cups 15 minutes
    Servings Prep Time
    9 cups 15 minutes
    Gluten-free, Rice-free, Potato-free Flour Mix
    Print Recipe
    Servings Prep Time
    9 cups 15 minutes
    Servings Prep Time
    9 cups 15 minutes
    Ingredients
    • 2 cups sorghum flour
    • 2 cups oat flour
    • 2 cups millet flour
    • 2 cups tapioca starch
    • 1 cup arrowroot starch
    Servings: cups
    Instructions
    1. Measure all ingredients and place in a large mixing bowl. Using a whisk, mix the ingredients until well combined. Place in an air tight storage container and use in baking recipes.
    Share this Recipe
     
    Powered byWP Ultimate Recipe


    Notice: Trying to access array offset on value of type bool in /home/maryzahc/public_html/adultfoodallergies.com/wp-content/plugins/wp-ultimate-recipe/helpers/models/recipe.php on line 254
    Vanilla Frosting (made with lard)
    Print Recipe
    When you don’t have any other safe solid fats and you need to make frosting somehow. If you have a safe vegetable shortening (I don’t), feel free to use it as a substitute. Makes enough for two batches of whoopie pies or cupcakes but you can also freeze it to have on hand.
    Servings Prep Time
    2 batches 30 minutes
    Cook Time
    5 minutes
    Servings Prep Time
    2 batches 30 minutes
    Cook Time
    5 minutes
    Ingredients
    • 1 cup lard or shortening (I use my home rendered lard, as store bought often has citric acid, and I have no safe shortening)
    • 4 cups powdered sugar (I make mine with my Vitamix as powdered sugar often has corn starch in it)
    • 1 teaspoon vanilla extract (I make my own with vanilla beans and vodka made from potatoes, as most commercial extract contains corn)
    • 0-4 Tablespoons water
    Servings: batches
    Instructions
    1. Measure out 1 cup of lard and place it in a stand mixer bowl. Allow your lard to come up to room temperature.
    2. Using a whisk attachment, whip the lard in a stand mixer until it doubles almost twice its size.
    3. Add powdered sugar slowly, while whipping at slow to medium speed, scraping down the sides of the mixture as needed. Add vanilla extract and blend in. If your frosting appears too thick, add a tablespoon of water at a time, mixing it in thoroughly.
    Share this Recipe
     
    Powered byWP Ultimate Recipe


    Notice: Trying to access array offset on value of type bool in /home/maryzahc/public_html/adultfoodallergies.com/wp-content/plugins/wp-ultimate-recipe/helpers/models/recipe.php on line 254
    Whoopie Pies – Gluten-Free with Vegan Option
    Print Recipe
    Traditional Whoopie Pies but free of some my allergens! While I have to use lard because I have no other safe fats, if you can use Earth Balance or a vegetable shortening, you can substitute that for the lard.
    Servings Prep Time
    12-15 whoopie pies 15 minutes
    Cook Time
    10-13 minutes
    Servings Prep Time
    12-15 whoopie pies 15 minutes
    Cook Time
    10-13 minutes
    Ingredients
    Dry Ingredients
    • 2 cups Gluten-free, Rice-free, Potato-free flour mix (see recipe in post)
    • 1/2 cup cacao powder (I do well with Wilderness Family Naturals Cacao Powder)
    • 1 tsp baking soda
    • 1 tsp baking powder (here’s a recipe for a corn-free one – http://wholenewmom.com/health-concerns/make-your-own-baking-powder/)
    • 1 tsp sea salt
    Wet Ingredients
    • 1 cup non-dairy milk (I use homemade cashew or rice milk)
    • 2 tbsp apple sauce (I use homemade, home canned applesauce)
    • 1 tsp apple cider vinegar (most with corn allergies can tolerate Bragg’s)
    • 2 tsp vanilla extract (I make my own with vanilla beans and vodka made from potatoes, as most commercial extract contains corn)
    • 1 tsp psyllium husk
    Sugar Mixture
    • 1/3 cup lard (I use my home rendered lard, as store bought often has citric acid, and I have no safe shortening)
    • 1/3 cup sugar
    • 1/3 cup brown sugar
    Frosting
    • 1 batch Vanilla Frosting (made with lard or shortening)
    Servings: whoopie pies
    Instructions
    1. Pre-heat oven to 375°F.
    2. Place dry ingredients (Gluten-free, Rice-free, Potato-free flour mix, cacao powder, baking soda, baking powder, and salt) in a large bowl and whisk together until well combined.
    3. Place wet ingredients (non-dairy milk, apple sauce, apple cider vinegar, vanilla extract, and psyllium husk) in small bowl and whisk together until well combined.
    4. Place sugar mixture ingredients (lard, sugar, and brown sugar) in stand mixer bowl and using beater attachment, beat until until creamy, scraping down sides as necessary.
    5. Add wet ingredients to sugar mixture, and beat until well combined, scraping down sides as necessary. Slowly add dry ingredients, continuing to beat until well combined.
    6. Line cookie sheets with parchment paper. Using a medium scooper or a rounded tablespoon, drop the whoopie pie batter on the parchment lined cookie sheet 2 inches apart from one another. Place in the oven and bake for 10-12 minutes if using a metal cookie sheet or 12-14 if using stoneware cookie sheets. Take out and let cool on baking racks (I just lifted up the parchment paper and moved them onto racks.
    7. While the whoopie pie halves bake and cool, make a batch of the Vanilla Frosting (made with lard or shortening) also contained in this post.
    8. Once whoopie pie halves are cool, pipe frosting onto the flat side of one pie and and put a second on top of piped frosting. It is best to pipe frosting on pie halves as gluten-free pie halves are not as sturdy as the wheat version. Enjoy!
    Share this Recipe
     
    Powered byWP Ultimate Recipe
  • Clean Fridge Grain Bowl

    Clean Fridge Grain Bowl

    Treat. Yo. Self.

    To a cleaner fridge and several healthy meals. I realize this might be a stretch in the “treat” category, but hear me out. I really LIKE vegetables, and I feel really good, both mentally and physically, when I eat a bunch of them. I’m not a fruit person, really. I love veg. But I’m also extremely lazy and sometimes don’t feel like cooking. I have the best of intentions when  I make a meal plan and go grocery shopping. At least once a week, I fail to execute the plan because: life. So when I go to make next week’s plan, there are a bunch of random leftovers to deal with.

    HERE’S HOW: grain bowls. I know these have been popular forever. Jack and I loved going to Life Alive, a Massachusetts-based, 1970s-style vegetarian restaurant that managed to stay current and super tasty, and that’s one of their specialties. Grain bowls let you use up everything in your fridge — extra rice included — so you get to feel virtuous about not wasting food AND eating your vegetables, and that is a treat for me. Your mileage may vary, but you should still try this out.

    The key to a good grain bowl is to vary your textures and add just the right amount of a good sauce. The sauce in this dish is a variation on the “Say Cheez” gravy from Jo Stepaniak’s “The Ultimate Uncheese Cookbook.” For a crunchy topper, I’ve used roasted salted pepitas. The grain is rice, the green is mostly kale, but also leftover spinach, and I’ve specifically added “1 cup of chopped vegetables” to use up anything you have on hand. If you don’t like something in this recipe? Don’t add it. Otherwise, go wild. Turn your fridge into a satisfying meal.

    All of this becomes dinner
    All of this becomes dinner

    Notice: Trying to access array offset on value of type bool in /home/maryzahc/public_html/adultfoodallergies.com/wp-content/plugins/wp-ultimate-recipe/helpers/models/recipe.php on line 254
    Clean Fridge Grain Bowls
    Print Recipe
    Servings
    4 servings
    Cook Time
    45 minutes
    Servings
    4 servings
    Cook Time
    45 minutes
    Clean Fridge Grain Bowls
    Print Recipe
    Servings
    4 servings
    Cook Time
    45 minutes
    Servings
    4 servings
    Cook Time
    45 minutes
    Ingredients
    Roasted Vegetables
    • 1 large sweet potato,
    • 1 small onion slivered*
    • 1 Tablespoon olive oil
    • 1/2 teaspoon berbere seasoning or hot spice of your choice
    Sauce
    • 1/4 cup gluten-free flour (glutinous rice flour or chickpea/gram flour recommended)
    • 1/4 cup nutritional yeast
    • 3/4 cup non-dairy milk (I use almond most of the time)
    • 1/2 cup broth or water
    • 1 Tablespoon balsamic vinegar (apple cider would be another good choice)
    • 1/2 cup white wine
    • 1/2 teaspoon garlic powder
    • 1/2 teaspoon mustard
    Sauteed Vegetables
    • 1 box mushrooms de-stemmed and broken into pieces
    • 1 teaspoon garlic minced
    • 1 cup diced random veg
    • 2 cups cooked grains (used rice here)
    • 1 bunch kale chopped (plus any leftover greens)
    Toppings
    • 1 whole avocado cut into chunks
    • 4 Tablespoons pepitas or other seed or nut of your choice
    Servings: servings
    Instructions
    1. Preheat oven to 425ºF.
    2. Toss chopped sweet potato and onion with olive oil and spicy seasoning — add more or less than I’ve called for depending on your tastes. Spread out on a baking sheet and cook for about 30 minutes.
    3. Prepare the sauce by whisking all the ingredients together. Cook over medium heat until boiling and thickened. Add more liquid if you need it to get the right consistency.
    4. With a little spritz of oil in a sautee pan, add mushrooms and cook until they release their liquid. Add the garlic and stir. Add the random vegetables, and do the same. Then add the leftover cooked grains (I used rice) to soak up that liquid as they reheat.
    5. When the rice or grain is hot, add the greens and stir until wilted.
    6. In a bowl, add the rice and veg, the roasted veg, the avocado, sauce, and nuts or seeds, if using. Stir and enjoy.
    Recipe Notes

    º

    Share this Recipe
     
    Powered byWP Ultimate Recipe