Notice: Function _load_textdomain_just_in_time was called incorrectly. Translation loading for the wp-ultimate-recipe domain was triggered too early. This is usually an indicator for some code in the plugin or theme running too early. Translations should be loaded at the init action or later. Please see Debugging in WordPress for more information. (This message was added in version 6.7.0.) in /home/maryzahc/public_html/adultfoodallergies.com/wp-includes/functions.php on line 6121
Soy-free – Page 31 – surviving the food allergy apocalypse (archive)

Tag: Soy-free

Contains no soy.

  • Maple-Glazed Homemade Breakfast Sausage Patties

    Maple Glazed Homemade Breakfast Sausage Patties
    Maple Glazed Homemade Breakfast Sausage Patties

    St. Patrick’s Day makes some of us think about dealing with the results of the excessive consumption of alcohol. When I was in college, one of my morning after cures was to head to the local IHOP (International House of Pancakes for those of you not familiar with this restaurant chain) on Storrow Drive in Boston or to a local diner, either the Grecian Yearning in Allston or Johnny’s in Newton (neither exist anymore sadly) and eat a huge greasy breakfast to neutralize all the acid in my stomach. But going to an IHOP or any other diner for that matter, is damn near impossible when you can’t have eggs or milk. So we needed recipes for the morning after, or just when you want a really huge breakfast because you really, really love breakfast.

    I was going to do one huge breakfast post, but it would be too long, too hard for you all to search for the recipes after, and posting five or so recipes in one day might be a bit much even for my Type A slightly manic personality. So I’m going to break it up into several posts for this Monday and on Monday the 25th. (You may have noticed that Mary Kate and I switch off weeks on the Monday recipe posts.)

    So without further ado, I give you the first recipe of our Hangover Breakfast series:

    Maple Glazed Homemade Breakfast Sausage Patties

    • 1 pound of ground pork (do not get anything leaner than 80%/20% or they will be dry as dust)
    • 1 teaspoon of rubbed sage
    • 1 teaspoon of Lawry’s Seasoning Salt (or any other brand of seasoning salt)
    • 1 teaspoon of Sriracha  (if you don’t have Sriracha, substitute any hot sauce, or a 1/2 teaspoon of crushed red pepper flakes)
    • 1/2 teaspoon of ground black pepper
    • a pinch of ground cloves
    • a pinch of nutmeg
    • a dash of marjoram
    • 4 Tablespoons of maple pancake syrup (You can use real maple syrup, but the fake stuff works too.  Just make sure you check labels, as many brands contain milk.)

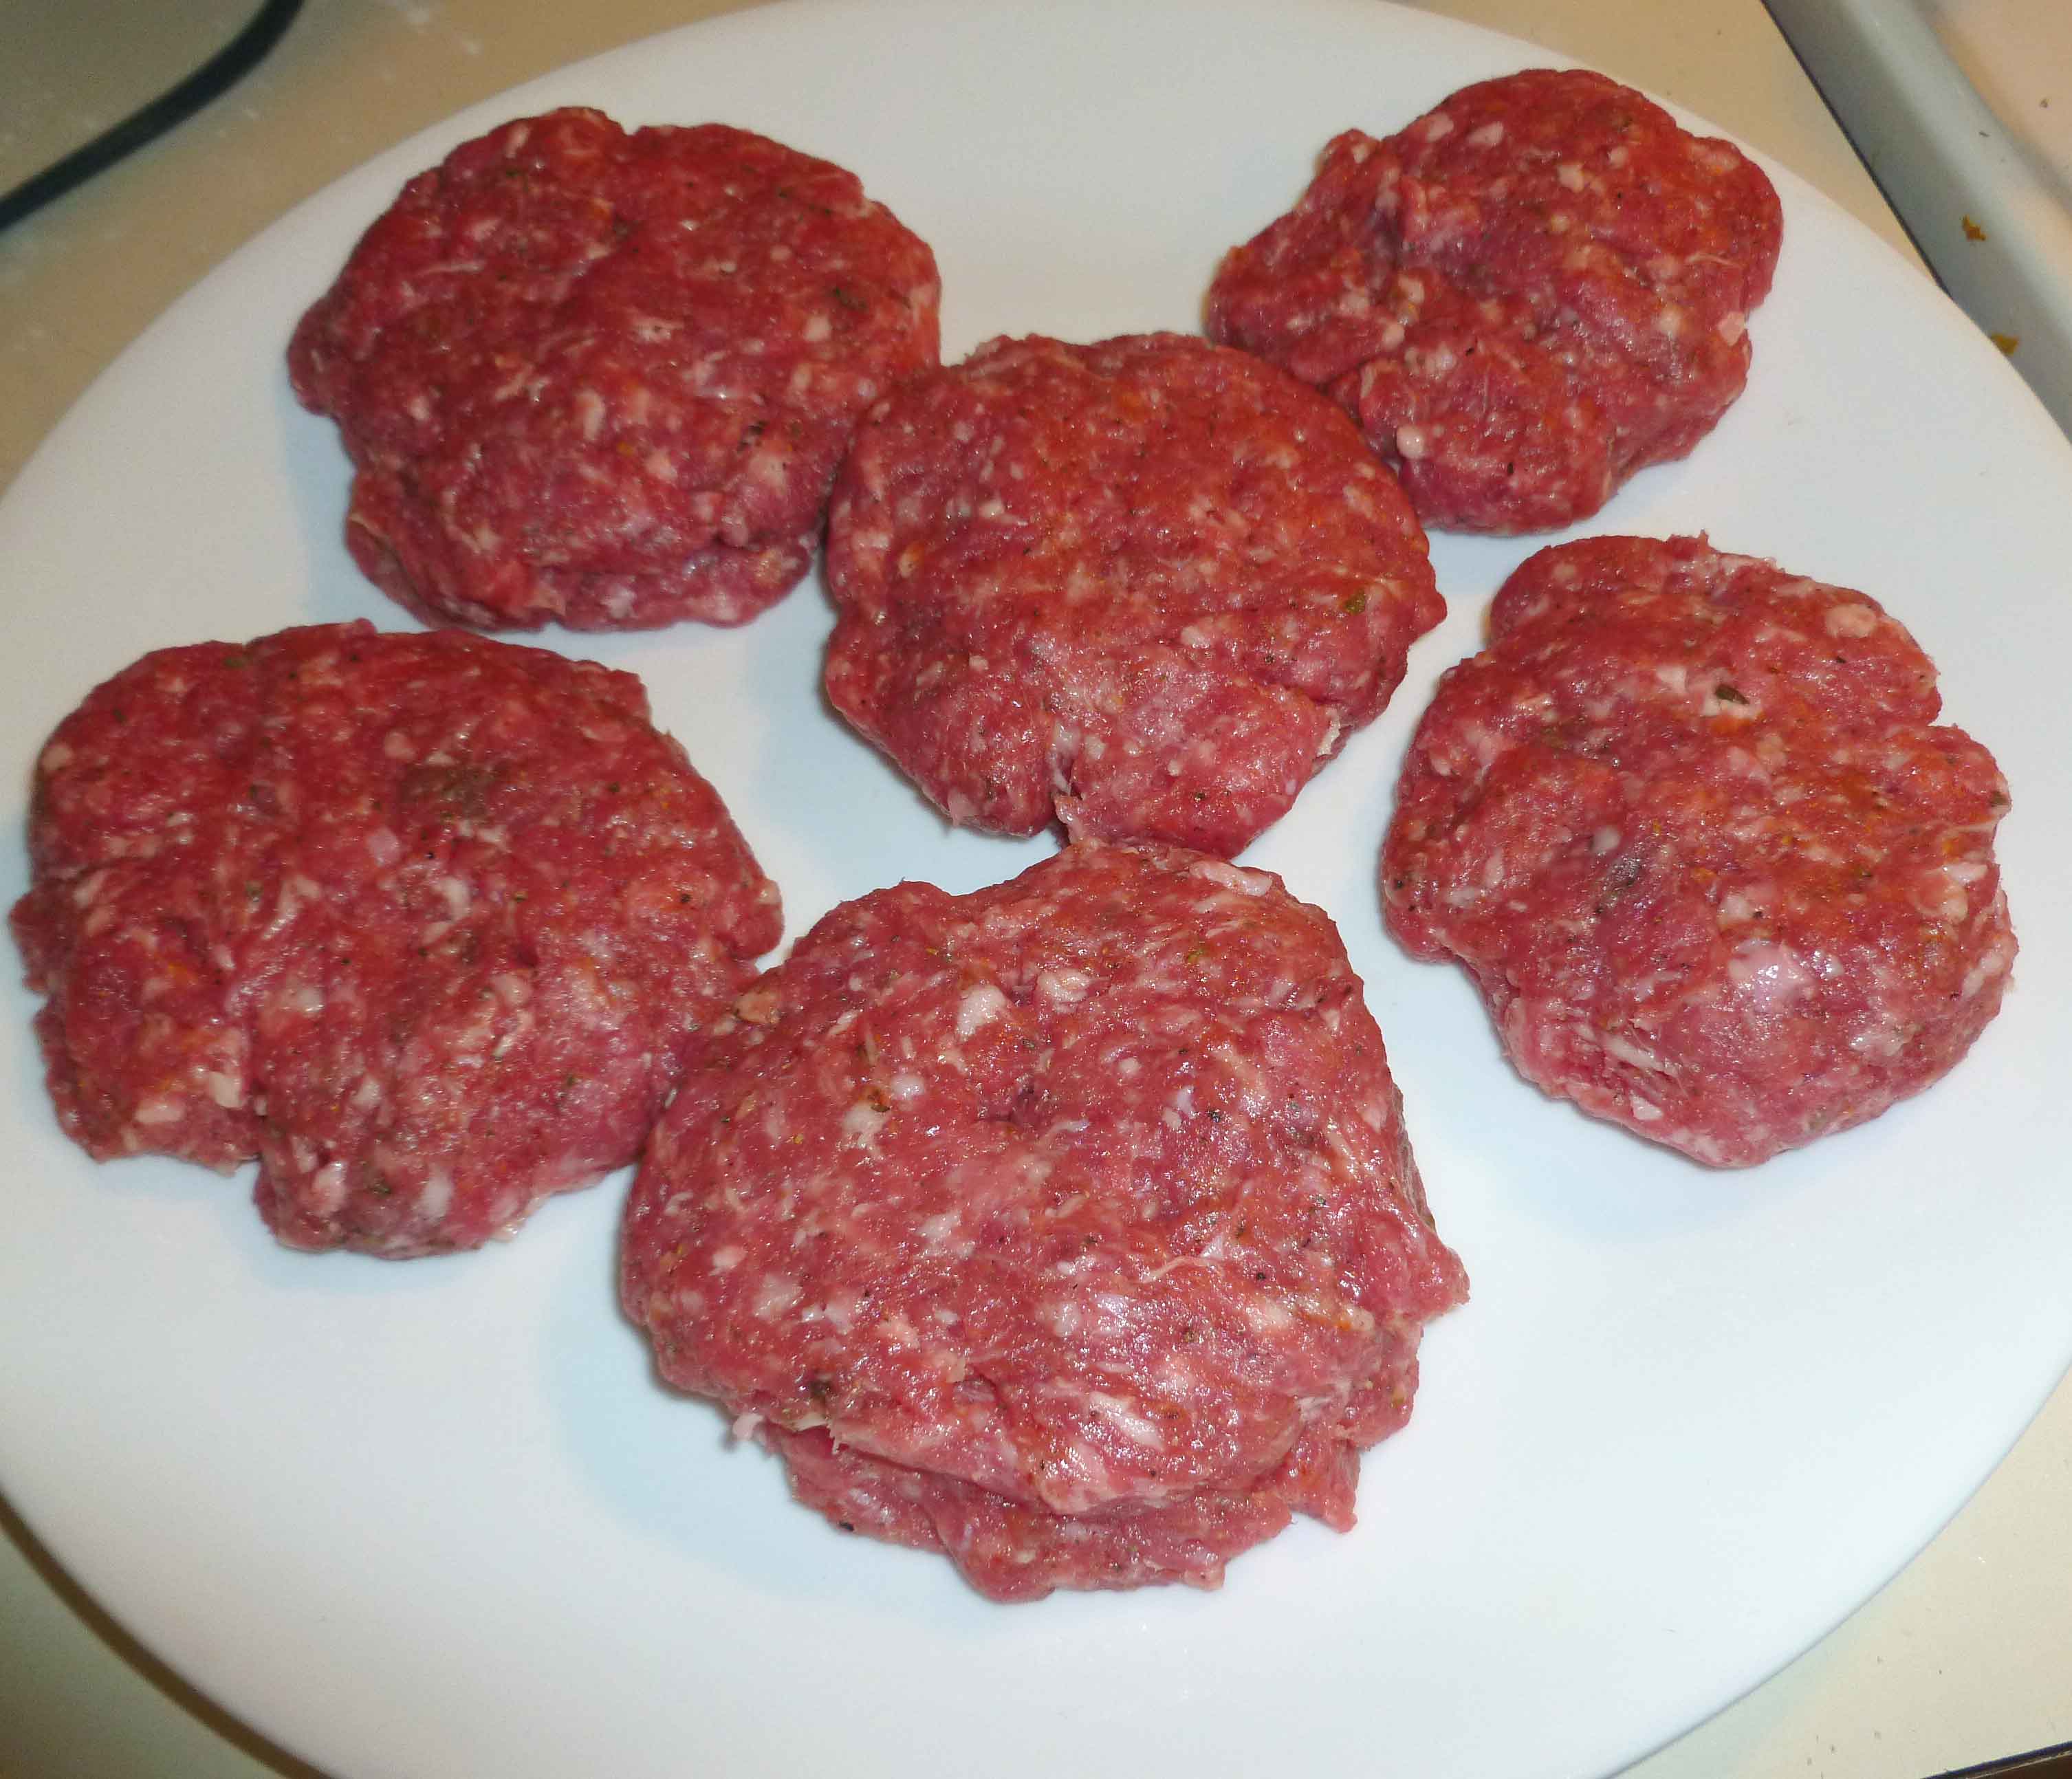
    Place pork and all ingredients except maple pancake syrup in a bowl.  Using your hands, mix all ingredients until the spices are evenly incorporated throughout the pork. (Think making a meatloaf or meatballs). Again using your hands, form ground pork into patties.  I was able to make six patties with the amount of ground pork called for in this recipe.

    Pork Mixture formed into patties
    Pork Mixture formed into patties

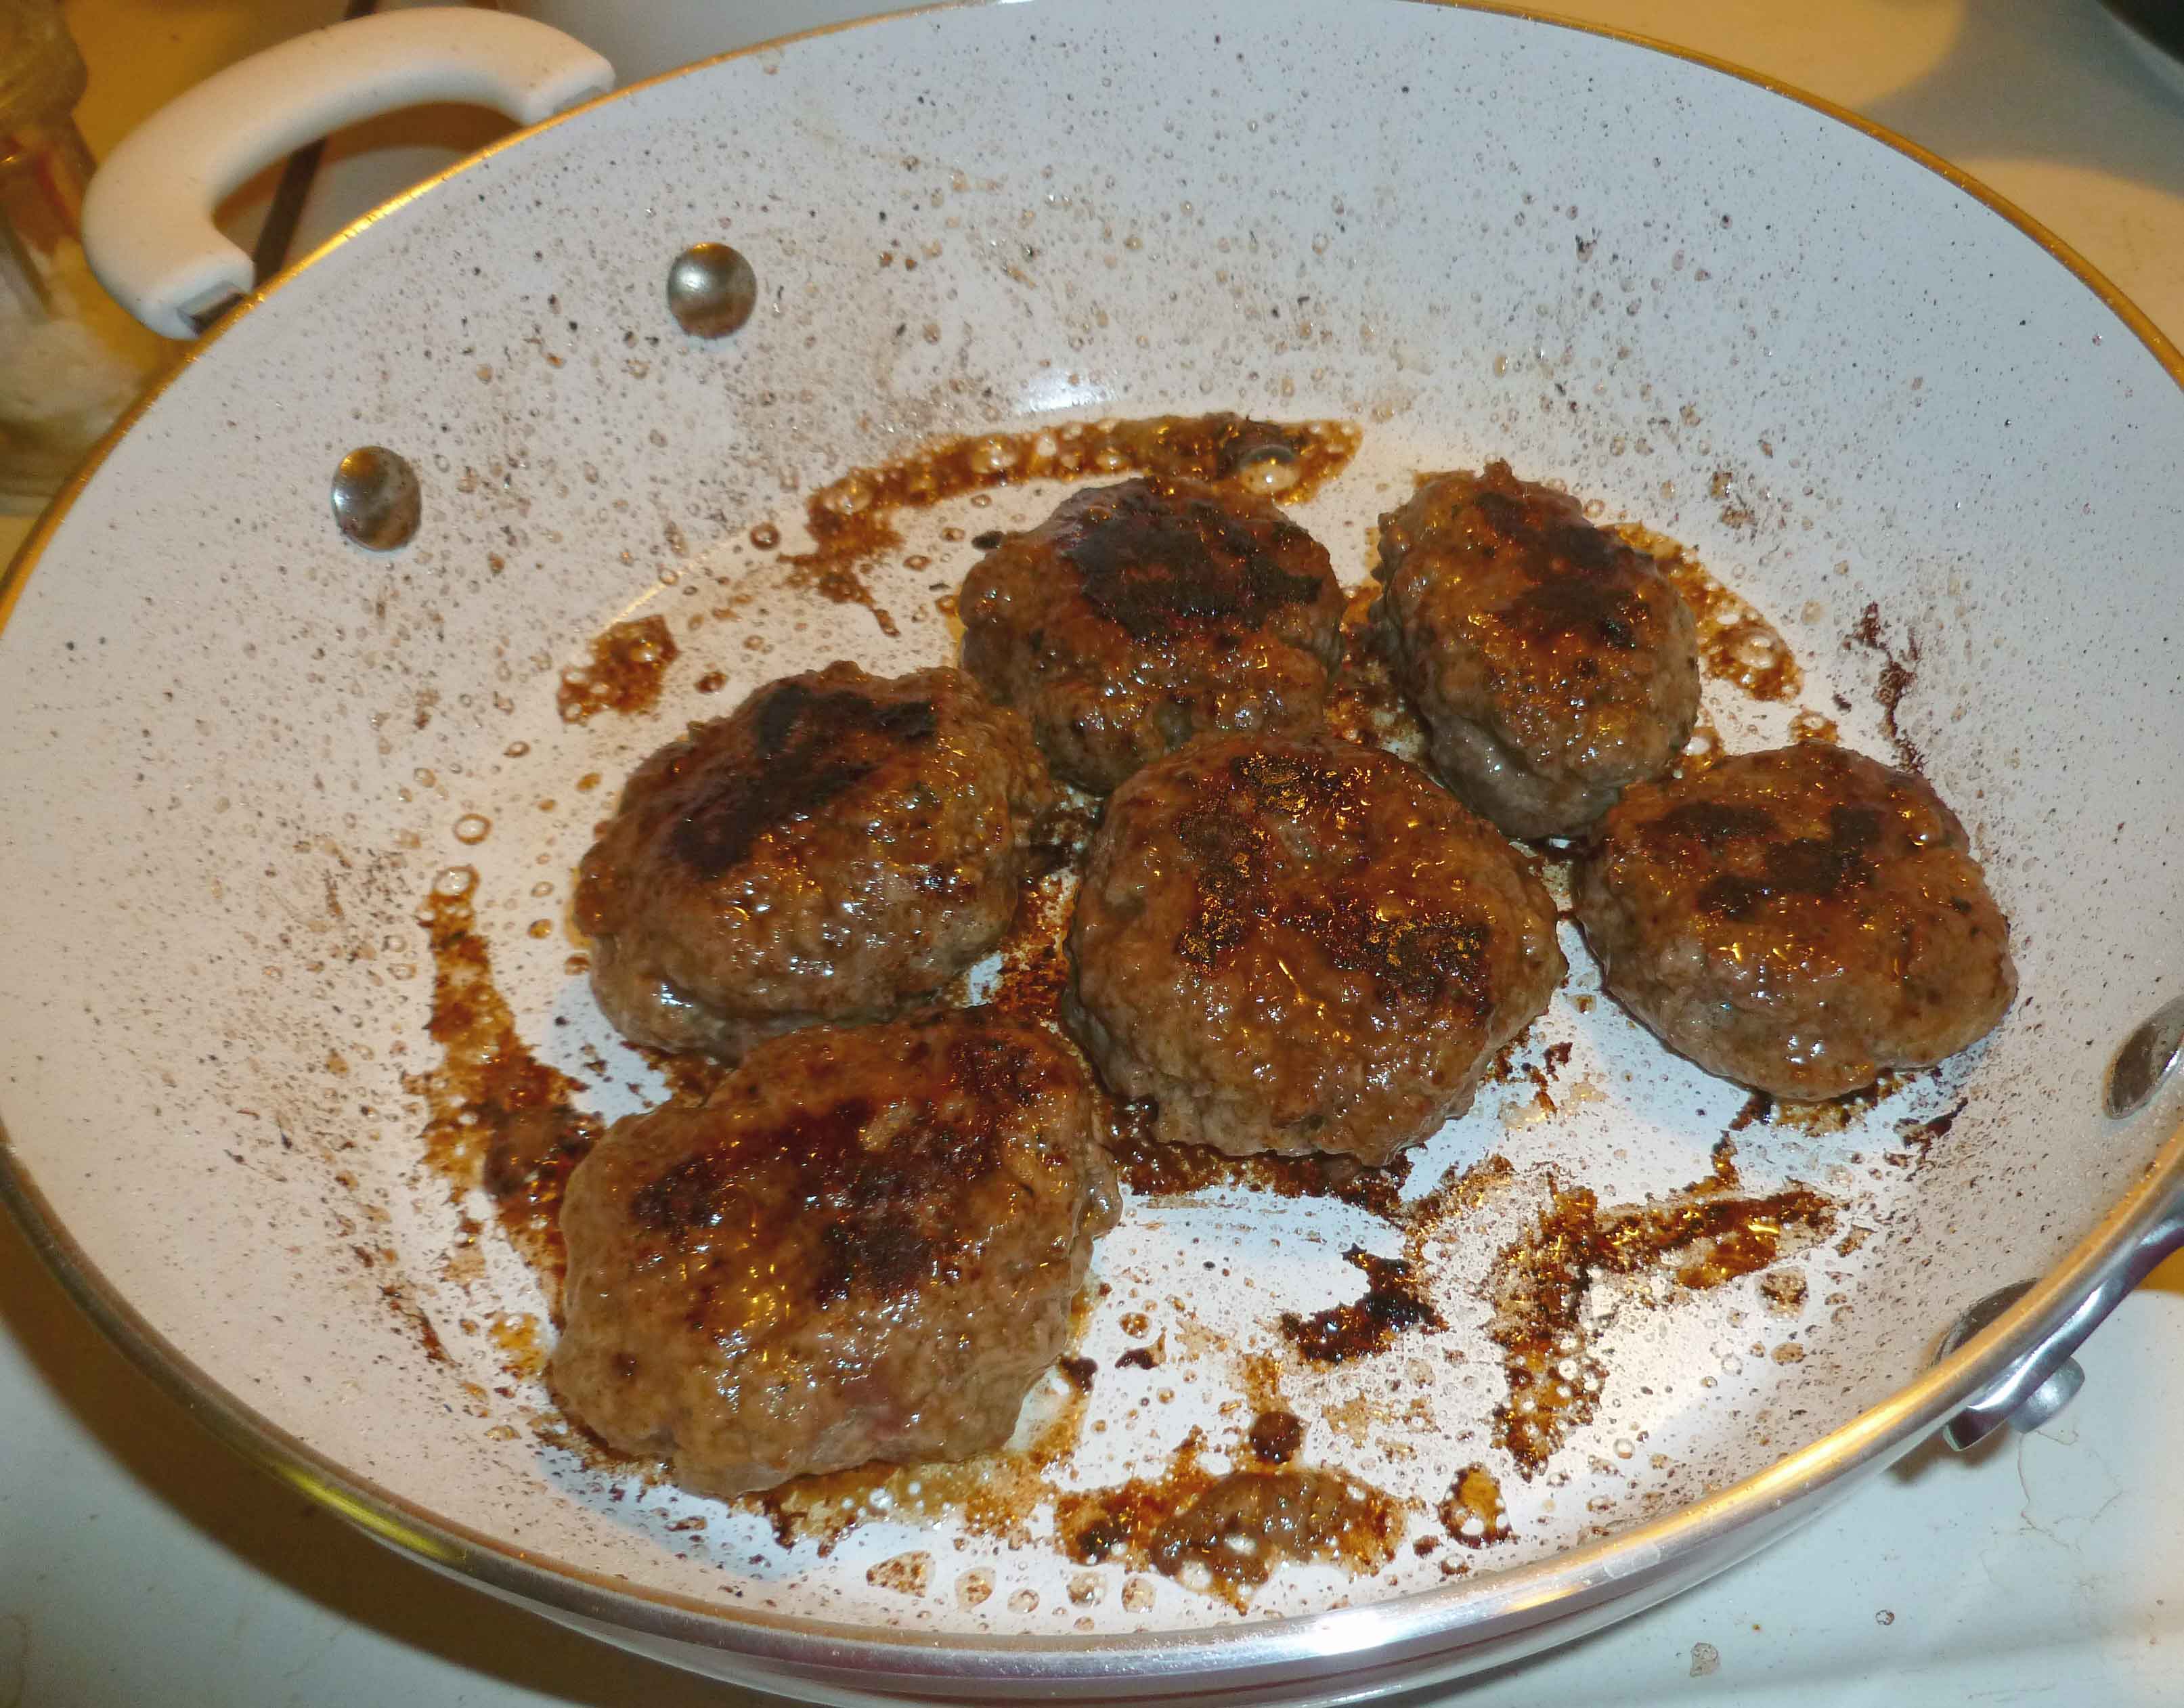
    In a large skillet, fry the patties over medium heat so that they have a nice sear on them, about 3-5 minutes per side depending on the heat of your burner.  (Pork should be cooked until the temperature reaches 160°F for food safety.)

    Patties frying in skillet
    Patties frying in skillet

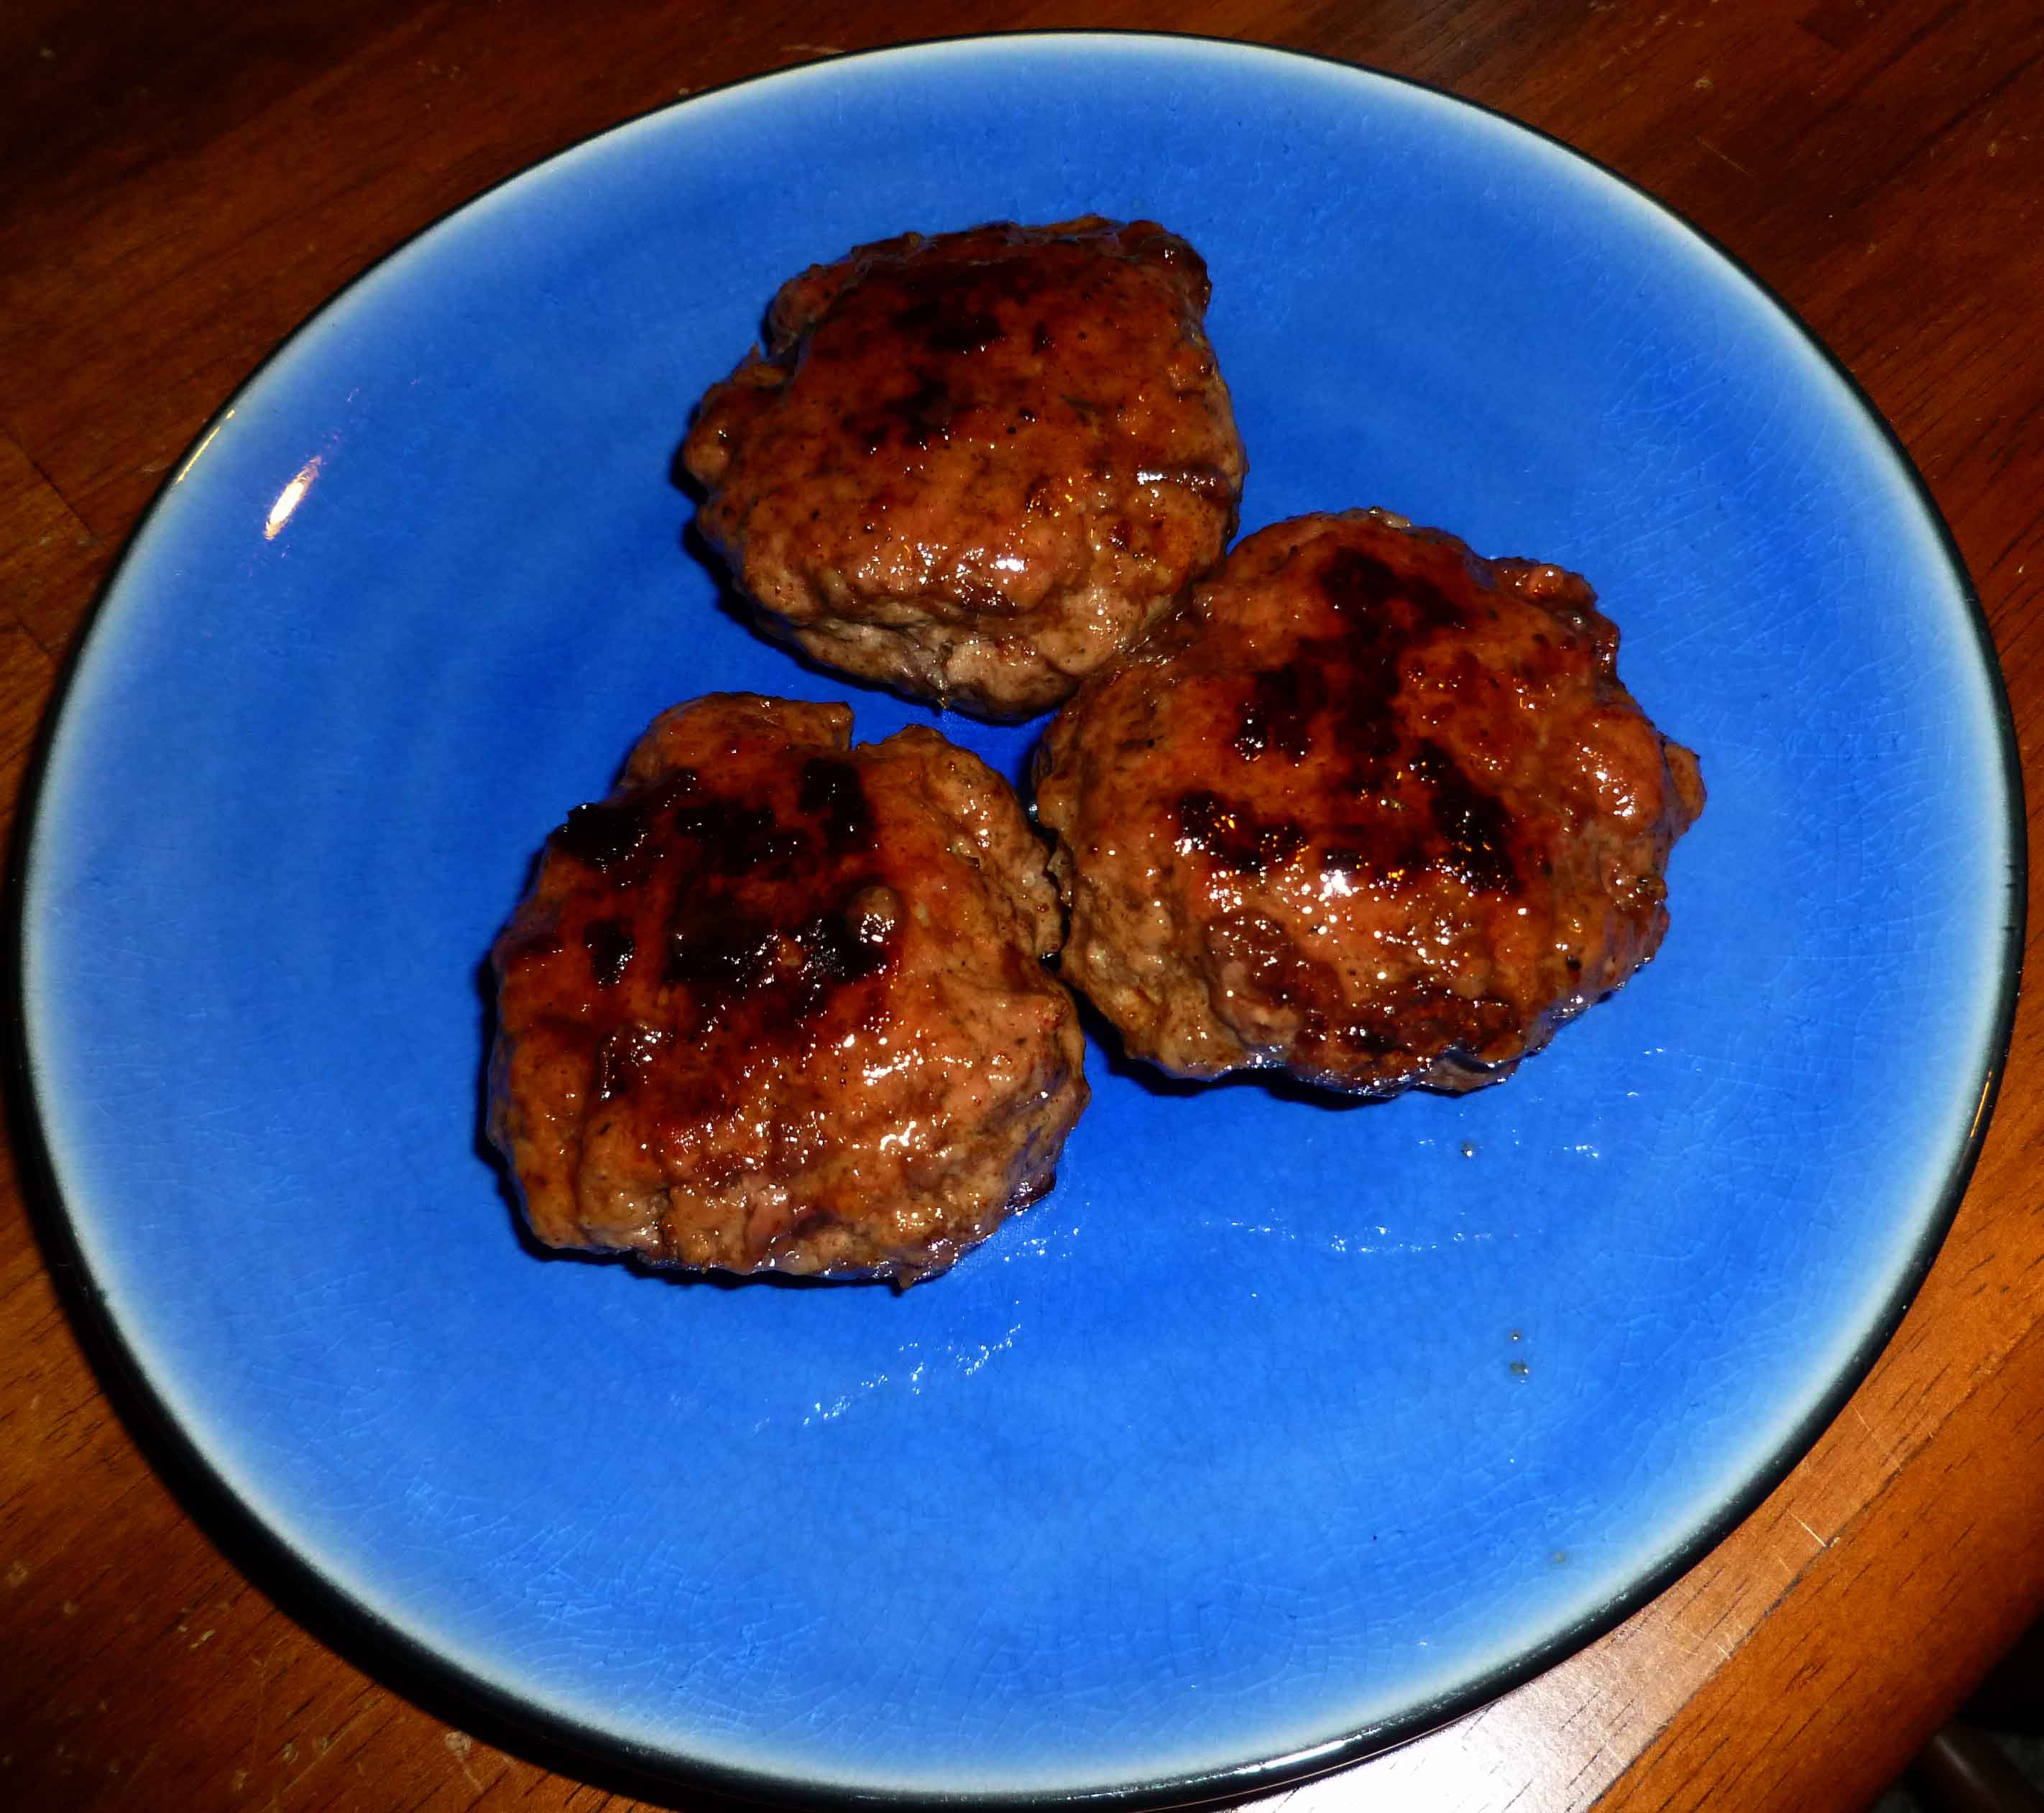
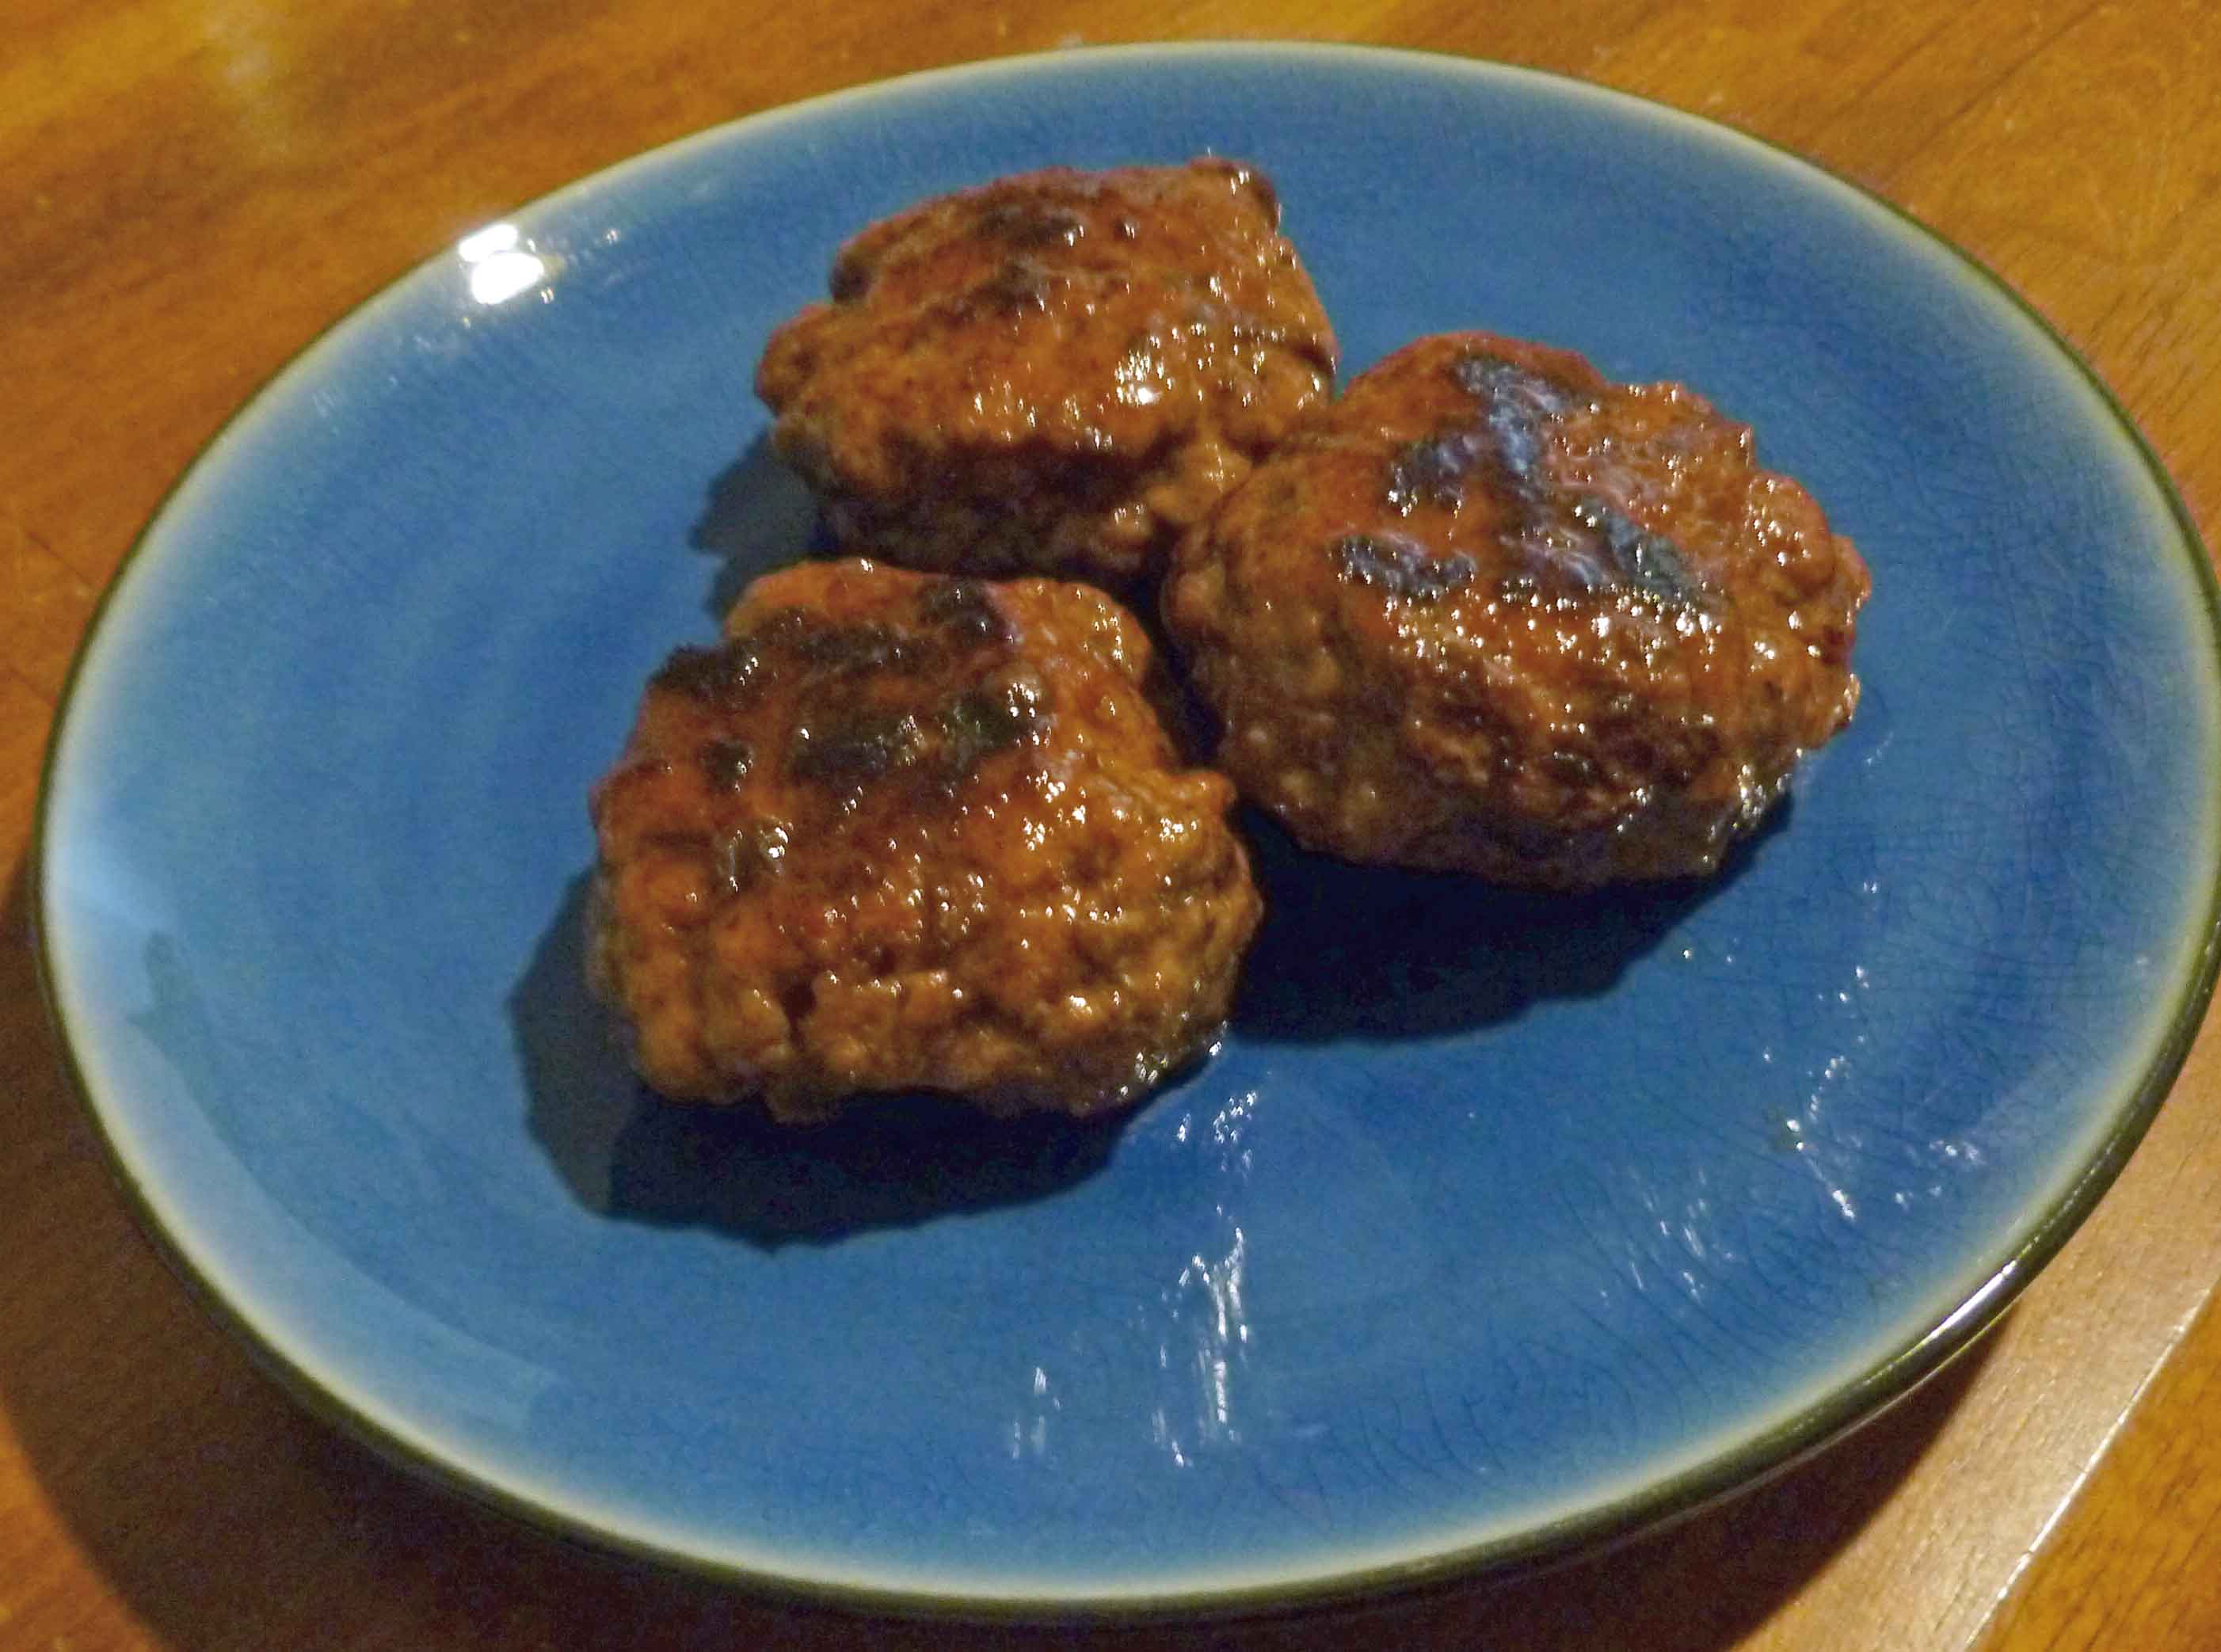
    Once the patties are cooked, add the maple pancake syrup to the skillet and heat it through, flipping patties to coat them in the syrup. Place the patties on a plate and serve. The following picture isn’t the greatest, but I think it shows the maple glaze better than the main picture above:

    Completed Glazed Patties
    Completed Glazed Patties

    Pair these with some waffles, pancakes or home fries (see our Sriracha Oven Roasted Potatoes recipe) , and enjoy!

  • Whatever Wednesday: Farmer’s Almanac Cough Syrup

    Tea & Cat
    Tea & Cat

    So my mother discovered the Farmer’s Almanac a few years ago (or possibly re-discovered, I’ve never asked — I just assumed that city kids didn’t read the Farmer’s Almanac), and this year has a page-a-day calendar version.  Despite living many states away from my mother, I always know what page-a-day she has because she mails me the ones she thinks I’ll find interesting.  So I thought I’d share this one with you all, even though it won’t work for Denise (I am somewhat sure that flax seed allergies aren’t incredibly common, but if you have one, don’t make this).

    To treat a nagging cough:

    • Boil 3T whole flax seed in 1 pint water
    • Strain
    • Stir in 3T sugar [I’d use honey]
    • Add juice of two lemons
    • Cool the mixture
    • Sip as needed

    This sounds to me as though it would work well.

    My own make at home cough syrup is a little different.  A lot of the time, I just swig a spoonful of honey.  If I’m feeling fancy or have a real cough, I will dissolve a few tablespoons of honey in a bit of boiling water, add a half shot of whiskey or brandy and a spare pinch of cayenne.  There are no real measurements, as I’ve never made this while not sick.  This works pretty well for me.

    Here’s hoping you don’t need either recipe, but if you do, they’re here for you.

  • Sizemore Family Mac n’ Cheez

    Sizemore Family Mac n’ Cheez

    Gluten and Dairy Free Mac and Cheese
    Gluten and Dairy Free Mac and Cheese

    Is there anything better than good solid comfort food?  In this dreary mid-winter, I’m drawn again to this casserole that my friend Corianne gave me back when I needed just to go dairy-free.  The recipe is her mother’s, but it seems like food is a family affair — Corianne and her sister now run the vegan Treehouse Bakery in Phoenix (ask nicely — they do gluten-free!  And if you’re in Phoenix or just a glutton for punishment, like them on Facebook to hear the list of flavors every day.  Can I highly recommend the spicy chocolate cupcakes?).

    Anyway, I’ve tweaked very few things over the years I’ve had this recipe, as it’s pretty much perfect.  It was easy to make gluten-free with quinoa pasta.

    Casserole of Awesome
    Casserole of Awesome

    Gluten-free, Soy-free, Vegan Cashew Mac and Cheese, courtesy of the Sizemore family

    • 2 quarts water
    • 1 teaspoon salt
    • 2 cups gluten-free macaroni (I recommend quinoa pasta)

    Cook mac according to package directions, to the shorter end of the cooking time.  Do not overcook!  Drain.  Pour into greased casserole dish.

    • 1 cup raw cashew pieces
    • 2 cups water

    Add to food processor and process until smooth.

    • 2 oz jar of pimentos
    • 2 Tablespoons lemon juice
    • 2 teaspoons onion powder
    • 2 teaspoons salt
    • 1 teaspoon garlic powder
    • 1/2 teaspoon dry mustard (optional — adds a tiny bit of kick)

    Add these to the cashews, and process until smooth.

    Pour sauce over mac.

    Cover and bake for 30 minutes at 350F.

    Uncover.  Top with gluten-free bread crumbs, if desired (I prefer it without, personally) and bake another 15 minutes uncovered.

    Close up Mmmmmm
    Close up Mmmmmm

    Enjoy.  I think this is best served cold, in the morning, for breakfast, with coffee.  But your mileage may vary.  I think plenty of people like their mac n’ cheez hot.


    Notice: Trying to access array offset on value of type bool in /home/maryzahc/public_html/adultfoodallergies.com/wp-content/plugins/wp-ultimate-recipe/helpers/models/recipe.php on line 254
    Sizemore Family Mac ‘n’ Cheez
    Print Recipe
    Sizemore Family Mac ‘n’ Cheez
    Print Recipe
    Ingredients
    • 2 cups gluten-free pasta (I prefer quinoa macaroni for this)
    • 4 cups water
    • 2 teaspoons kosher salt
    • 1 cup cashew pieces soaked overnight
    • 1 3/4 cups water
    • 2 Tablespoons lemon juice
    • 2 teaspoons onion powder
    • 1 1/4 teaspoons salt
    • 1 teaspoon garlic powder
    • 1/2 teaspoon dry mustard optional — adds a tiny bit of kick
    Servings:
    Share this Recipe
     
    Powered byWP Ultimate Recipe


  • Come Home to Chicken Stew

    Chicken Stew
    Chicken Stew

    Who likes coming home to dinner already made?  ME!  But hey, I’m single and I work full-time.  Wait.  I have a crock pot.  If you don’t have a house-spouse, your best friend would be the crock pot.  Plug it in as you leave, come home to dinner.  It’s happiness in an appliance.

    Feel free to mess with the vegetables — this recipe is pretty forgiving, and you can have what you like.  If you do not like parsnips, cannot find parsnips, or don’t want to go look, use potatoes instead of them.  If you’ve never had them, give parsnips a go — they’re surprising in flavor, and add something good to this stew.

    Come Home to Chicken Stew

    • 1 pound of chicken breast, cut in 1 inch cubes (could use thighs, too, if you prefer)
    • 2-3 Tablespoons all-purpose gluten-free flour mix (I used Bob’s, more or less depending on how wet your chicken is)
    • 2 teaspoons dried minced onion
    • 1/4 teaspoon thyme
    • 1 teaspoon sweet or Hungarian paprika
    • 1 teaspoon dry mustard
    • 1/2 teaspoon salt*
    • 1/2 teaspoon dill
    • freshly ground pepper, to taste

    Spray or oil your crock.  Add all the above ingredients, and mix thoroughly so chicken is coated and there’s no clumps of flour at the bottom.  If you think your stock is salty, hold off on the salt.

    Add your veg and stock:

    • 2-3 carrots, chopped
    • 2-3 small parsnips, chopped  (or potatoes, see above)
    • 3 ribs celery, chopped
    • 3 cups chicken broth or stock (check for allergens here, unless you make your own)
    • 1 teaspoon balsamic vinegar
    • 2 small or 1 large bay leaves
    • Handful of celery leaves, optional

    Cook on low 8-10 hours or high 4-5 hours.

    Come home and add 1 cup of green beans or peas, if desired, about 1 hour before serving.

    Serve with roasted potatoes, or some sort of roll or bread.

    Hot dinner
    Hot dinner

    What do you do with your crock pot?

  • Happy President's Day! All-American Chicken Ranch Burgers

    Chicken Ranch Burger
    Chicken Ranch Burger

    So Denise and I decided to go theme-ways for this particular Monday holiday.  What does the theme of “Presidents’ Day” conjure up for you?  Let me tell you, I had IDEAS.  Many of them were particularly complicated, some were elaborate, and my fridge is still full of ingredients I bought while over-thinking my options.

    What I ended up with is in homage to our sitting leader, Barack Obama, 44th president.  His love of burgers is well-documented, and our First Lady’s initiatives include promoting healthy eating partly through family time.  This is a quick, easy, and healthy weeknight burger recipe that takes about 15 minutes to prepare.  With sides, this will feed four.  Or it will feed you for a few meals.

    mmmmm
    mmmmmm

    All-American Chicken Ranch Burgers
    Makes 4 quarter pound burgers

    Preheat either indoor grill, grill pan, or cast iron skillet.

    • 1 lb. ground chicken
    • 1 teaspoon crushed garlic (2-3 cloves)
    • 2 teaspoons minced dried onion
    • 1 teaspoon dill
    • ½ teaspoon basil
    • ½ teaspoon dried red bell pepper
    • ¼ teaspoon crushed red pepper flakes (OPTIONAL! For those who like a kick)
    • 1 teaspoon kosher salt
    • 2 Tablespoons potato starch

    Grease your hands, and then mix the spice mix into the ground chicken well.  Divide into 4 balls and compact it.  This is a bit squishier than, say, beef burgers, so it doesn’t form into patties as well.  It seems to work best to leave it in a larger ball and then flatten it once you’ve put it on the heat — or automatically in a two-sided grill.  These take about 5 minutes on a George Foreman grill, and I’m guessing about 3-4 minutes per side in a skillet over medium heat.

    The two flavors of ranch dressing that these ranch burgers are missing are a hit of acid and a creaminess.  So make up for both with an avocado smash.  While the burgers are cooking, make your sauce/topping:

    • 1 ripe avocado
    • 1 lime
    • pinch of salt

    Smash avocado.  Drizzle in a bit of the lime juice to get a guacamole-type consistency.  Sprinkle on just a bit of salt.

    To make up your burger, toast whatever you’re using as a bun.  I used Deland Bakery’s Millet Potato Bread.  If you eat gluten, surely you have a favorite.  If you want a bun, Schar makes some decent ones.

    To this I added:

    • Daiya cheddar block, sliced very thin
    • raw baby spinach, about a handful
    • topped with the burger
    • and then the avocado sauce

    To continue the theme, maybe serve with broccoli, least favorite vegetable of our 41st president, George H.W. Bush?  And jelly beans for dessert, favorite candy of our 40th president, Ronald Reagan?

    Do you enjoy celebrating “minor” holidays?  How?

    (And if anyone tries these on a regular outdoor grill, please let me know how it works out!)

  • Happy President’s Day, Bread and Chocolate with Cherries

    Bread and Chocolate and Cherries
    Bread and Chocolate and Cherries

    And this is take two on cherries for our President’s day theme. Cherries go with chocolate. And there’s a place in Concord, New Hampshire that sells a pastry called Bread & Chocolate that I’ve been trying to replicate since the dairy allergy diagnosis, so I decided to add cherries to the mix this time.  This is like a jelly roll, except instead of cake and jelly or cream, you have bread and chocolate and cherries.  Although I’ve tagged a warning, just to be clear, this recipe contains wheat and gluten, and I’ve written it to be used with a bread machine.

    Bread and Chocolate with Cherries 

    • 1/4 cup of warm water (between 70ºF and 85ºF)
    • 3/4 cup of a milk alternative product of your choice (I used homemade oat milk)
    • 1 Tablespoon of Ener-G egg replacer, mixed with 6 Tablespoons of warm water
    • 1 1/4 teaspoons of salt
    • 1/3 cup and 1 teaspoon of dark brown sugar, packed firmly
    • 1/4 cup of shortening or Earth Balance Soyfree Natural Buttery Spreads
    • 2 teaspoons of cinnamon
    • 4 cups of bread flour
    • 2 1/2 teaspoons of bread machine yeast
    • 1 cup of Dole frozen Dark Sweet Cherries, chopped
    • 1 cup of Enjoy Life Mini Chocolate chips
    • 2 Tablespoons of melted Earth Balance Soyfree Natural Buttery Spreads
    Sunbeam Bread Machine
    Sunbeam Bread Machine

    Using my nicely inexpensive Sunbeam bread machine, add first three ingredients in order as listed to the bread machine pan. Then add the salt, brown sugar, shortening, cinnamon and flour to the bread machine pan, heaping the flour in a pile.

    Using a spoon, make a little indentation that you can put the yeast in, and then add the yeast.

    Ingredients in Bread Pan with Yeast in Indentation on Top
    Ingredients in Bread Pan with Yeast in Indentation on Top

    Set your bread machine menu to just make dough.  When its ready it should look something like this:

    Completed Dough in Bread Pan
    Completed Dough in Bread Pan

    Preheat oven to 375°F. Spread a little flour on your very clean counter top or on your dough mat, and dump dough on mat or counter.  Make sure you remove the paddle if it falls out of the bread pan.  Roll out dough using a rolling pin to a rectangular shape approximately 12 by 18 inches.

    Dough rolled to a rectangular shape
    Dough rolled to a rectangular shape

    Once you have rolled the dough to the correct shape, spread your chopped cherries over the surface.

    Dough with Cherries Spread over Surface
    Dough with Cherries Spread over Surface

    Then sprinkle the mini chocolate chips over the surface of the dough.

    Chocolate Chips and Cherries Spread over Surface of Dough
    Chocolate Chips and Cherries Spread over Surface of Dough

    Taking a small amount of water, dip fingers in water and run them around the edges of the dough to help it seal when you roll it up.  Take one edge of the shorter side and begin to roll it up, making sure that you seal up the edges as you go, and that the final seam is sealed by pressing the wet edges to the dough.  Carefully place the roll with the seam on the bottom on the pan you will bake it on.

    Completed Bread Roll
    Completed Bread Roll

    Taking the melted Earth Balance, brush it over the surface of the dough.

    Brushing Melted Earth Balance over Bread Roll
    Brushing Melted Earth Balance over Bread Roll

    Let dough rise for about an hour and half, until it nearly doubles in size.

    Bread Roll After Rising
    Bread Roll After Rising

    Place in oven preheated to 375°F, and bake for 30-35 minutes.  If you rolled your rectangle out a bit too wide, you’ll get the bent shape I did after baking 🙂

    Baked Bread Roll
    Baked Bread Roll

    Let cool for 30 minutes or more and then cut slices.  Enjoy!

    Bread Roll after Cutting
    Bread Roll after Cutting
  • Happy President’s Day, Can’t Tell a Lie Cherry and Chocolate Chip Quick Bread

    Can't Tell a Lie Cherry and Chocolate Chip Quick Bread
    Can’t Tell a Lie Cherry and Chocolate Chip Quick Bread

    You know how hard it is to find a food theme for President’s Day? It’s hard. Which is why I’m using cherries out of desperation, even though I was a history major and I know that story about George Washington and the cherry tree is a crock. Despite that I decided to do it up, and make two versions of a chocolate and cherry bread dish that could be breakfast and dessert. This one is gluten free, and doesn’t have all that pesky rising and all that. I couldn’t find fresh cherries, so I used frozen ones, and was surprised at the blue tones I got in the finished dish. It’s almost like it had blueberries in it. In any case, since I’m not one who has to be gluten free, and since I’m not a gluten free baking genius, I started with a recipe from the gluten-free goddess®, and modified it a bit.

    Can’t Tell a Lie Cherry and Chocolate Chip Quick Bread

    • 1 cup of sorghum flour
    • 1 cup of tapioca starch
    • 1/2 cup of millet flour
    • 2 teaspoons of baking powder
    • 1/2 teaspoon of baking soda
    • 3/4 teaspoon of xanthan gum
    • 1/2 teaspoon of salt
    • 2 teaspoons of cinnamon
    • 1/4 teaspoon of nutmeg
    • 1 cup of dark brown sugar, firmly packed.
    • 1 cup of applesauce
    • 1/3 cup of Canola oil
    • 1 1/2 teaspoons of Ener-G egg replacer, mixed with 3 Tablespoons of water
    • 2 teaspoons of vanilla
    • 1 cup of Dole frozen Dark Sweet Cherries, chopped
    • 1/2 cup of Enjoy Life Mini Chocolate chips
    • 9 inch loaf pan
    • parchment paper

    Preheat your oven to 350°, and line the loaf pan with parchment paper so that you can lift the loaf out of the pan in order to cool it.

    Loaf Pan Lined with Parchment Paper
    Loaf Pan Lined with Parchment Paper

    Place sorghum flour, tapioca starch, millet flour, baking powder, baking soda, xanthan gum, salt, cinnamon and nutmeg in a bowl (I used my KitchenAid stand mixer).  Whisk together these ingredients until they are completely mixed.  Add the brown sugar and whisk it into the other ingredients.

    Now add the applesauce, oil, Ener-G mixture, and vanilla, and beat to combine and then continue beating the mixture on medium high until the batter is smooth.

    Fold in the cherries and chocolate chips by hand with a spatula.

    Folding in Cherries and Chocolate Chips
    Folding in Cherries and Chocolate Chips
    Completed Batter
    Completed Batter

    Pour batter into the parchment lined loaf pan, scraping down the sides of the bowl and smoothing out the top of the loaf.

    Batter in Parchment Lined Loaf Pan
    Batter in Parchment Lined Loaf Pan

    Bake for approximately 65 to 75 minutes or until you can insert a tooth pick and it comes back clean, except if you hit a chocolate chip and you have chocolate chip goo.  If this happens, try again in a different place.

    Baked Loaf in Parchment Lined Pan
    Baked Loaf in Parchment Lined Pan

    Once done,  let the loaf cool for 15 minutes or so, and then use the parchment paper to lift the loaf out of the pan and onto a wire rack.  Peel down the sides of the parchment paper and let the loaf cool.

    Baked Loaf on Wire Rack with Parchment Peeled Down
    Baked Loaf on Wire Rack with Parchment Peeled Down

    Once cooled to down to slightly warm, slice yourself a piece and enjoy!

    Slice of Can't Tell a Lie Cherry and Chocolate Quick Bread
    Slice of Can’t Tell a Lie Cherry and Chocolate Quick Bread
  • Microwave Popcorn, lots and lots of flavors (and allergy-friendly!)

    Popcorn

    So this isn’t the post that was originally supposed to be here. I was supposed to have concocted this wonderful braised pork chop recipe, but Winter Storm Nemo happened and shot my plans to go to the grocery store to hell. I tried to make a go of it with what I had in the apartment, and it wasn’t bad, it just wasn’t worthy of you all. So then I was left to find something else to do at the last minute. And what else do people do when there’s no food, and you don’t feel like cooking? Microwave popcorn. Except for those of us that are dairy free, there’s no microwave popcorn that we can buy without milk or milk derivatives in it. So, the internet to the rescue! I can’t remember where I found the link on how to cook popcorn in a paper lunch bag in the microwave, but I want to thank them fervently.

    Also, for those of you who are Valentine’s Day abstainers, popcorn is a good thing to have while you do a movie marathon to ignore the fact that the rest of the planet is participating in a corporate-manufactured holiday.

    Basic Microwave Popcorn

    • ⅓ c of popping corn
    • ½ tsp of canola oil
    • ¼ tsp of Lawry’s Seasoned Salt, or Penzey’s 4/S salt.
    • 1 paper lunch bag
    • 1 piece of tape (optional) or a plastic clip like these from Pampered Chef

    Variations:

    Cajun – Replace seasoned salt with  1/4 tsp Penzey’s Spicy 4/S Salt, or Slap Ya Mama Cajun Seasoning to taste. If your Cajun Seasoning does not have salt, leave the seasoned salt in the basic recipe in as well.

    Cheez – Add 1-2 Tablespoons of nutritional yeast to the basic recipe.

    Ranch – Add 1 Tablespoon of nutritional yeast, and a dash of each of the following: garlic powder, onion powder, basil, dill weed, and red pepper flakes to the basic recipe.

    Curry – Add 1/4 teaspoon Garam Masala, and 1/4 teaspoon of curry powder to the basic recipe.  If you want to add some heat, add a dash of cayenne pepper.

    Open paper lunch bag. Add the popcorn kernels and all the seasonings to the bag. Add the oil, and then hold the bag closed and shake quickly to distribute oil and seasoning around popcorn kernels.  Either fold the top of the bag over twice, use tape, or the clip to seal the bag tightly. Put the bag in the microwave on its side. Because all microwaves are different and everyone has figured out the optimum time to nuke microwave popcorn without burning it, try it at your normal setting and see if that works, and adjust the time as needed. In my microwave, it takes 1 minute 45 seconds to pop the popcorn without burning it. Shake the bag after taking it out of the microwave and dump the popcorn in a bowl, shaking any seasonings left in the paper bag out over the popcorn.

    This would really work with any combination of seasonings you want to try. Let us know how any experiments you do work out. Enjoy!

    All the Single People!

    And for those who are single or anti-holiday, whatever your reason, here’s Mary Kate’s current V-Day At Home Alone, currently available via streaming Netflix, movie night plan:

    Thor

    Captain America

    and to remember that sometimes romance gets in the way of your future plans,

    Dr. Horrible’s Sing-Along Blog

    Anyone watching along with me?