Notice: Function _load_textdomain_just_in_time was called incorrectly. Translation loading for the wp-ultimate-recipe domain was triggered too early. This is usually an indicator for some code in the plugin or theme running too early. Translations should be loaded at the init action or later. Please see Debugging in WordPress for more information. (This message was added in version 6.7.0.) in /home/maryzahc/public_html/adultfoodallergies.com/wp-includes/functions.php on line 6121
pork – Page 2 – surviving the food allergy apocalypse (archive)

Tag: pork

  • Making Bacon, Squared (i.e. two versions)

    Home cured bacon
    Home cured bacon

    Bacon. It’s bacon, how do you live without bacon? Unfortunately, commercial bacon has dextrose, sodium erythorbate, ascorbates, and other corn ingredients. At the beginning of my corn-free life, I would cheat a bit, but then I would get a blister on my foot a couple days later, and I eventually decided that it had to go. So no bacon. For months and months. And then I started Googling how to make bacon, and looking for pins on Pinterest. It didn’t look that hard. And compared to fermenting (which I very much enjoy, so this is not a slam), it seemed much less evil scientist-bubbling concoctions, and more of a dry rub marinade in the fridge for several days longer than you would normally. What was the worst that could happen? I mean, besides making myself sick, and that was going to happen if I ate commercial bacon anyway. But I still didn’t do it because I was going to have to make a special effort to get some pork belly, and it’s not like I don’t have enough other stuff to do. But one day, Mary Kate and I were dubbing around at the Saigon Market in Nashua and we saw some pork belly all packaged up and ready to bring home. So I bought it, and I made some bacon. It was good, but I thought the recipe needed some tweaking. So I called McKinnons in Salem and ordered five pounds of pork belly. And I then played around some more.

    Now that I’m done experimenting, I’ve got two versions to share with you, one that’s a more basic cure, and one that’s a bit more savory. I like them both, but I prefer the basic cure, as I tend to be a traditionalist about my bacon.

    In all likelihood, you are going to special order the fresh pork belly. Some grocery stores may be cooperative, or you might have to go to a specialty butcher store.

    Making Bacon (two versions)

    • 2 lbs of pork belly, skin removed
    • 3 tablespoons sea salt
    • 3 tablespoons brown sugar

    For a basic cure, you will add:

    • 2 teaspoons whole peppercorns

    For a more savory cure, you will add:

    • 2 teaspoons whole peppercorns
    • 1 garlic clove, minced
    • 1 tsp rosemary
    • 1 tsp celery seed
    • 1 tsp dried thyme
    • 2 bay leaves

    Put the salt, brown sugar, and the spices for your choice of cure in a blender or food processor, with the exception of the garlic clove in the savory cure. Blend or process until the peppercorns are well ground. If you’re using the savory cure, mince the garlic clove and set it aside.

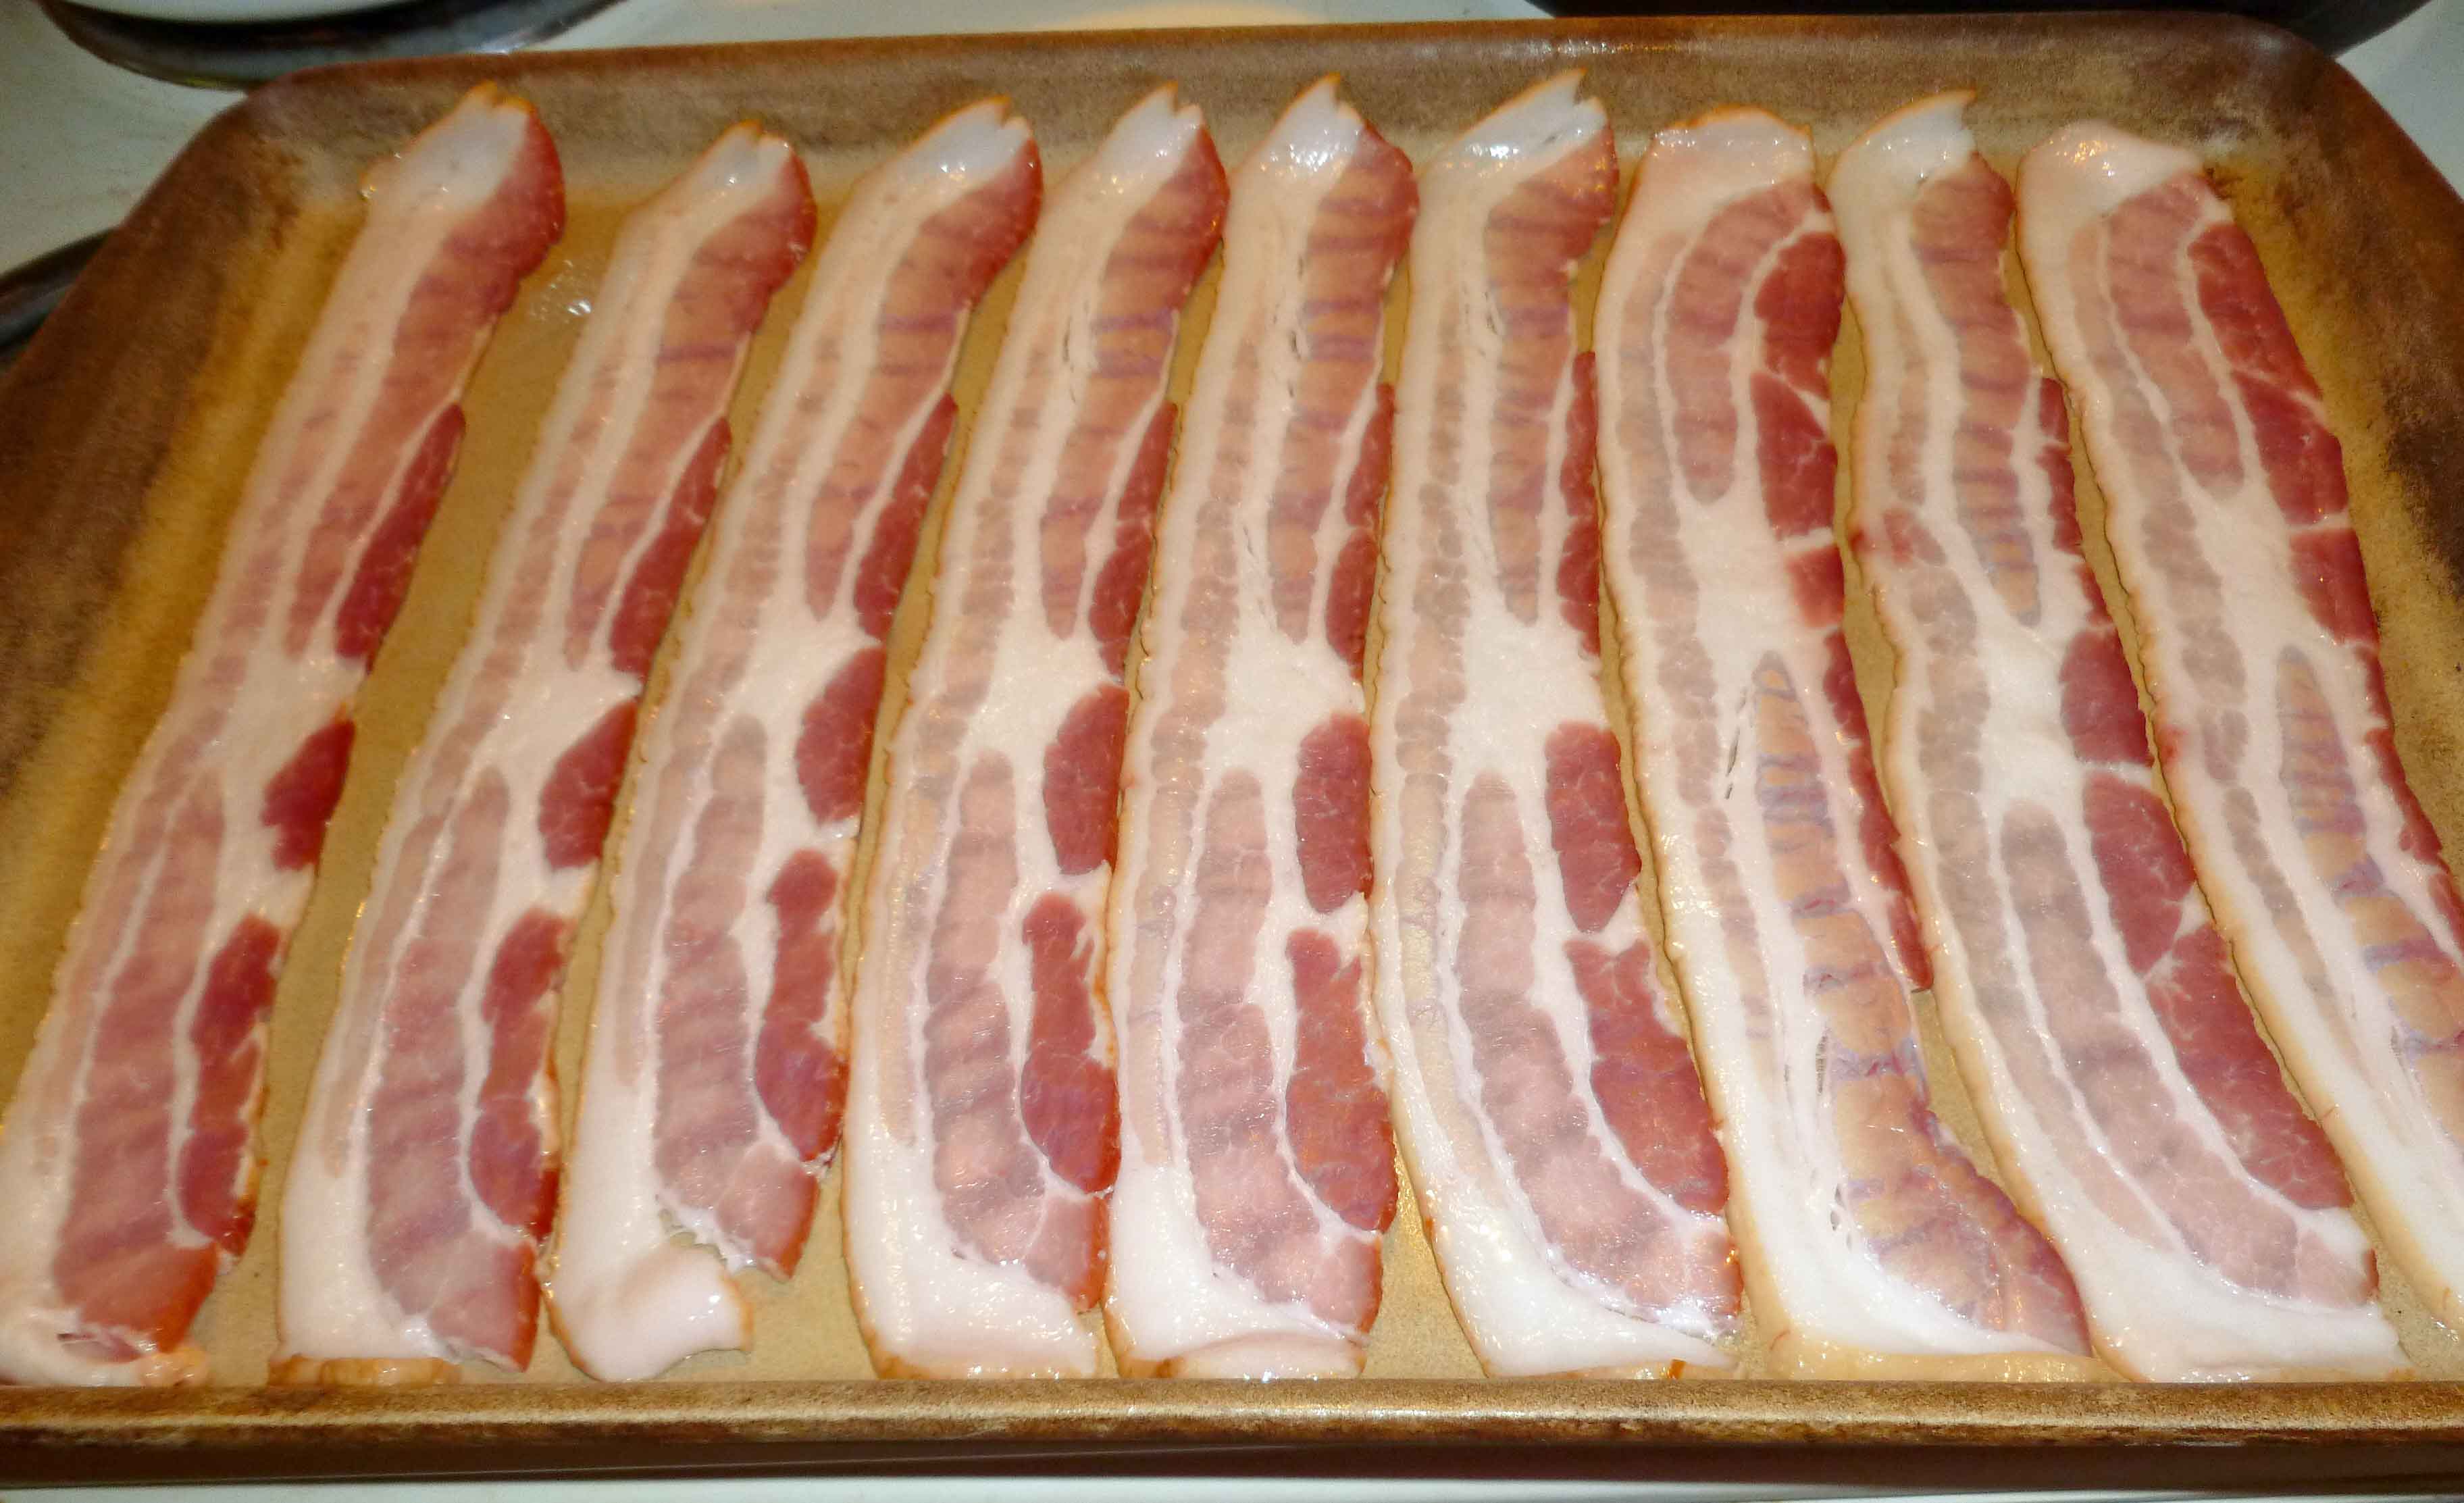
    If your pork belly still has the skin on it, as shown below, you will need to remove it. (The picture below shows five pounds of pork belly. I used it to make approximately two pounds of each bacon cure and one pound of salt pork, the recipe for which will be posted in the not too distant future.)

    Five pounds of boneless pork belly before the skin is removed
    Five pounds of boneless pork belly before the skin is removed

    Using a very sharp knife, remove the skin cutting it as thinly as you can manage. You don’t want to waste any of the pork belly.

    Removing the skin from the pork belly
    Removing the skin from the pork belly

    Once you have trimmed off the skin, your pork belly will look like the picture below:

    Pork belly with the skin removed
    Pork belly with the skin removed

    Rinse the pork belly in very cold water and pat it dry with a paper towel. If you are doing the savory cure, now is the time to mix your ground salt, sugar and spice mixture in a bowl with the minced garlic. Spread half your salt, sugar, and spice mixture on a large piece of parchment paper, a large casserole dish, or a sheet pan, whatever you have in your kitchen that’s large enough to accommodate your piece of pork belly. Place the pork belly into the salt, sugar and spice mixture, and pour the remaining mixture over the top of the pork belly. Rub the mixture all over the pork, making sure to get every inch covered.

    Put the pork belly in a 1 gallon resealable plastic bag, and add any of the excess salt, sugar, and spice mixture from your parchment paper, casserole dish, or sheet pan to the bag. Close the bag and shake it up to evenly distribute and coat the pork belly with the mixture. After shaking, try to remove as much of the air from the resealable plastic bag as you can so that the spice mixture stays on the pork belly and reseal it.

    Pork belly coated with salt, sugar, and spice mix in resealable plastic bag
    Pork belly coated with salt, sugar, and spice mix in resealable plastic bag

    Place the bag on a plate, tray or small sheet pan so that it can be placed in your refrigerator and stay level. Refrigerate for five to seven days, flipping the bag once a day, until the pork feels firm throughout. The longer you let the pork belly cure, the saltier it will be. I preferred a cure of five days.

    When the pork belly is finished curing, remove the pork belly from the resealable plastic bag and wash off the salt, sugar and spice mixture thoroughly under cold water. Pat your pork belly dry with paper towels.

    You now have a choice to make. You can slice the bacon as is and then cook it, which appears to be the closest to commercial bacon, and was often referred to as “green bacon” in recipes I saw. Or you can smoke or roast the bacon. I don’t have a smoker, so I’ve not tried smoking it. I did do one batch of the roasted bacon, but I think I prefer the green bacon.

    Green bacon:

    We got a meat slicer as a wedding gift because my husband really wanted one, so it went on the registry. It was really helpful in slicing the green bacon.

    "Green" bacon sliced
    “Green bacon” sliced

    I fried some in my cast iron skillet over medium heat, as you would normally cook bacon.  The home cured bacon seems to take longer than commercial bacon to cook.

    "Green" bacon frying in cast iron
    “Green”bacon” frying in cast iron

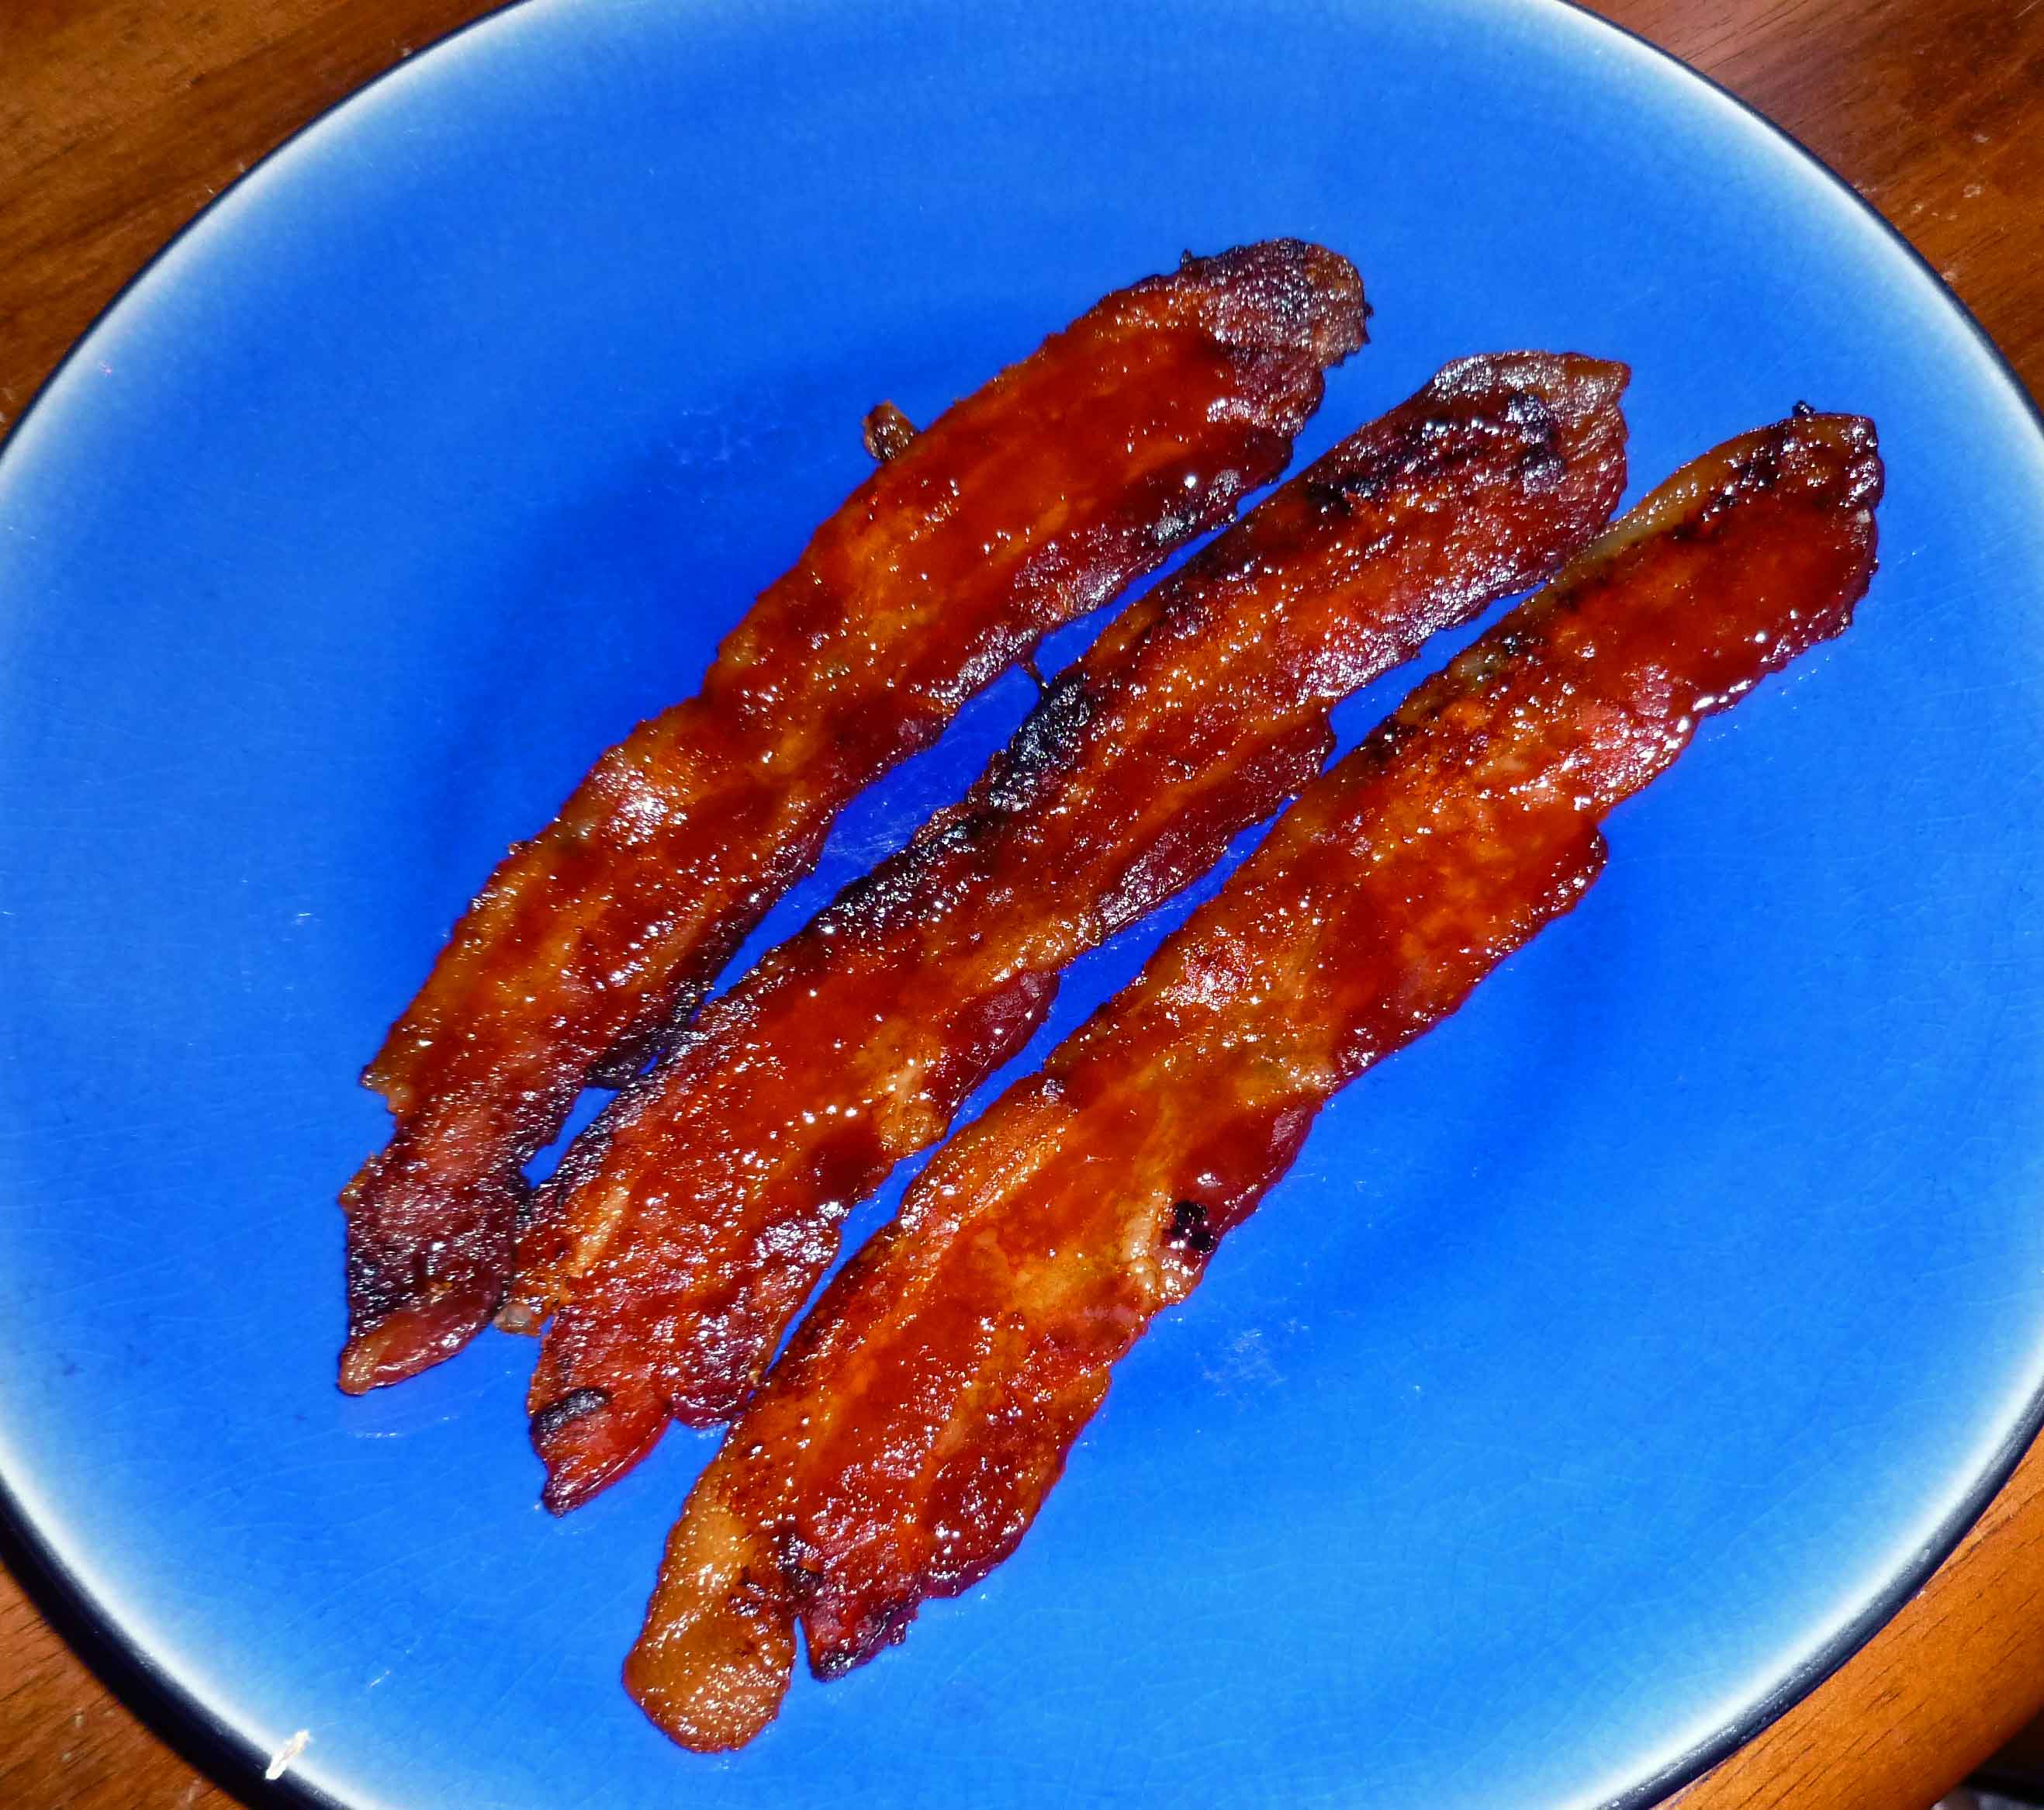
    Which results in yummy looking bacon:

    Fried "green" bacon
    Fried “green bacon”

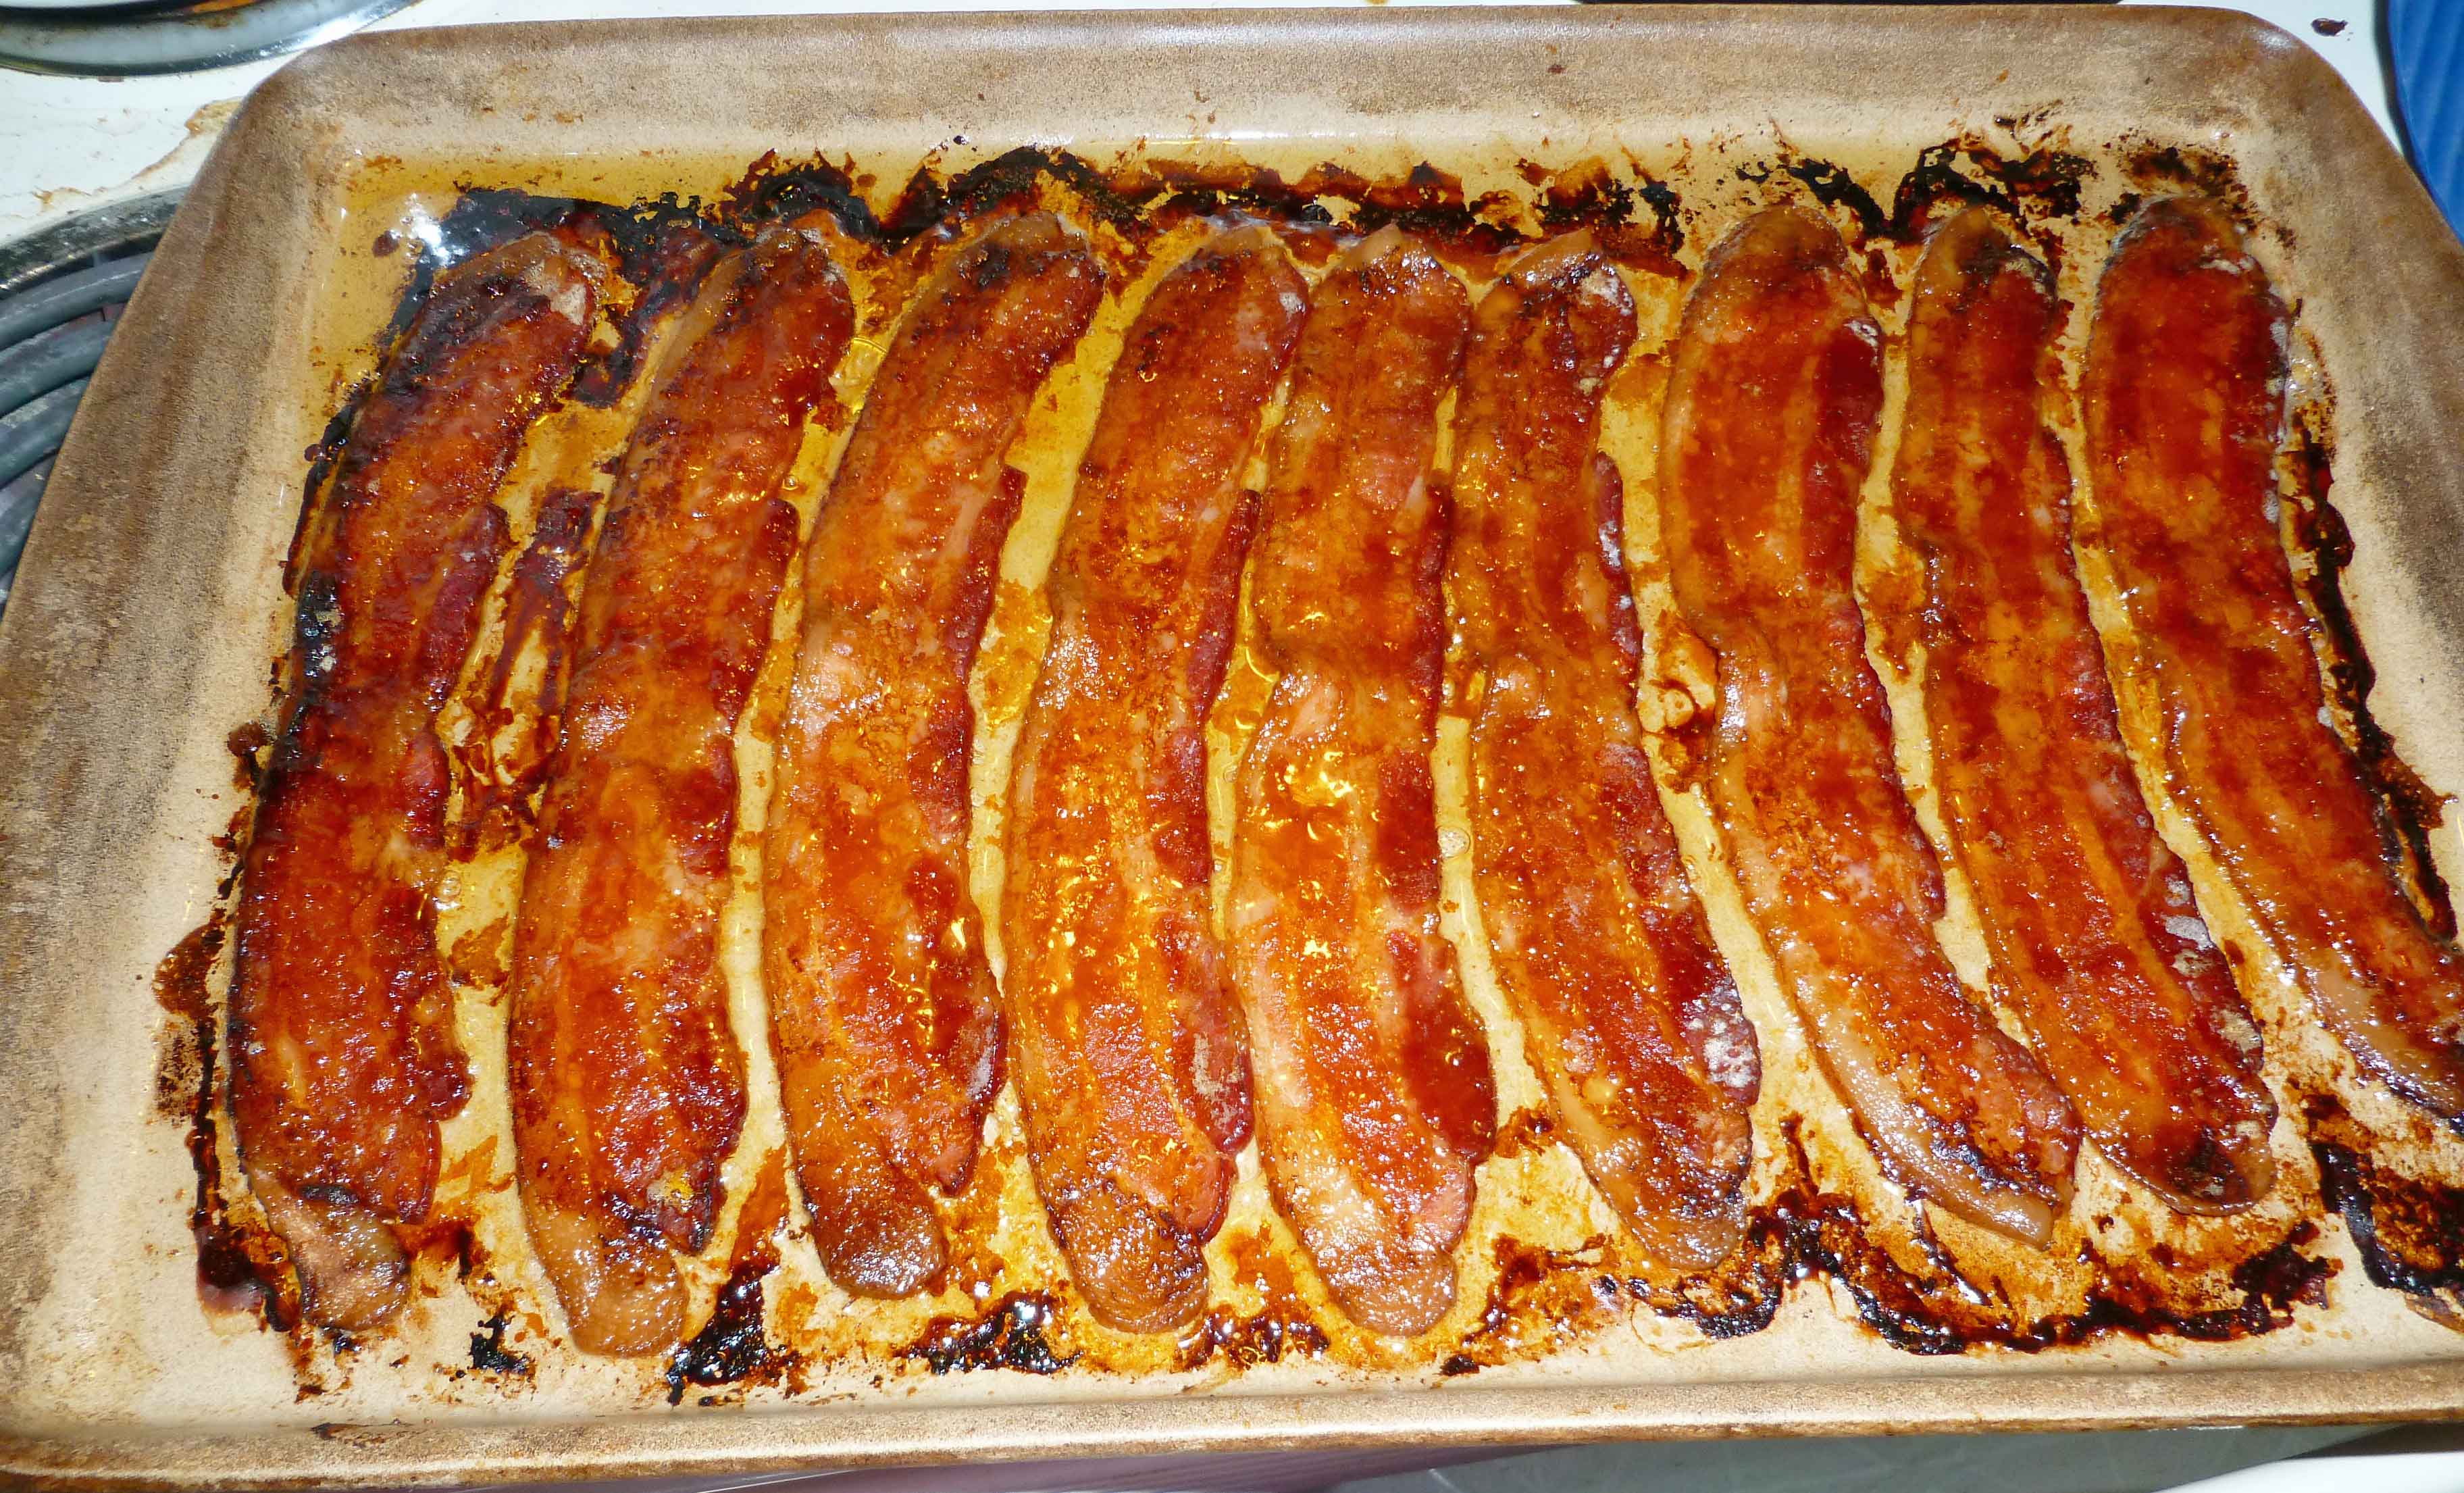
    Or you can use the oven method to cook your bacon, and you get yummy bacon too:

    "Green" bacon cooked in the oven
    “Green bacon” cooked in the oven

    Roasting the Bacon:  When your bacon has cured, and you’ve rinsed and patted it dry with paper towels, pre-heat your oven to 200°F. Place the bacon in a 9 x 13″ roasting pan and roast until you’ve reached an internal temperature of 150°F. This will take between an hour and a half and two hours.

    Bacon roasted in the oven
    Bacon roasted in the oven

    You don’t want to cook the meat, so once it reaches 150°F, remove the bacon from the oven. Let the bacon cool to room temperature. 

    Once your bacon has been roasted or smoked and has cooled, wrap it up in parchment paper and put it in the refrigerator until it has completely chilled. Once chilled, you can slice it and fry it up or use the oven method to cook your bacon. In the picture below, I used a chef’s knife and my knife skills aren’t all that great so the slices are a bit thicker than I would have liked. Which is why I decided to drag out the meat slicer in later experiments.

    Roasted bacon after chilling and slicing
    Roasted bacon after chilling and slicing

    We cooked the bacon two ways here too, frying it and using the oven method.

    Roasted Bacon, cooked two ways, fried and using the oven method
    Roasted Bacon, cooked two ways, fried and using the oven method

    Smoking the Bacon: Again, I have not tried this because I don’t have a smoker, but one of the recipes I found gives the following directions. When your bacon has cured, and you’ve rinsed and patted it dry with paper towels, smoke it over hickory or apple wood at a very low temperature until bacon reaches an internal temperature of 150°F or about three hours. Let bacon cool to room temperature. Once your bacon has been roasted or smoked and has cooled, wrap it up in parchment paper and put it in the refrigerator until it has completely chilled. Once chilled, you can slice it and fry it up or use the oven method to cook your bacon.

    My husband and I both preferred the oven method for cooking the bacon and we both preferred the “green bacon”, but you should experiment and see what you like best. Here’s a chart for how long your bacon will keep from the USDA. The bacon cures presented here would fall under “Bacon cured without nitrites.” I don’t want to weigh in on the nitrites being good or bad issue, it’s just that I can’t get seem to get my hands on curing salt that doesn’t also have corn (dextrose) in it.

    I hope this helps those of you who can’t get commercial bacon for whatever reason. Enjoy, I did 🙂

  • Spicy Green Pork Amazing (a.k.a. Pork Chile Verde) and a bonus recipe!

    Spicy Green Pork Amazing (a.k.a. Pork Chile Verde)
    Spicy Green Pork Amazing (a.k.a. Pork Chile Verde)

    So, here’s the thing.  Most of you will be able to make this recipe without making the bonus recipe for Roasted Green Tomatillo Salsa, because you’ll be able to buy safe canned green tomatillo salsa at the grocery store. With the corn allergy, I can’t because it’ll have citric acid or some other corny evil thing in it. I do have some green tomatillo salsa I canned myself earlier in the summer, but since I would end up using it all up for this one dish, and since my local grocery store had tomatillos this week, I made up a fresh batch for this recipe.  You’ll also need a 4 quart or larger crock pot for this recipe and a food processor or a blender if you’re making the salsa.

    Spicy Green Pork Amazing (a.k.a. Pork Chile Verde)

    • 3 1/2 – 4 pounds of boneless pork butt, cut into cubed pieces about 1-2″ inches square and trimmed of fat or left whole in one piece (see your options below).
    • 2 small onions or 1 medium onion, diced into half inch square pieces
    • 4 stalks of celery, cut into half inch pieces
    • 1 Italian pepper or 1 green bell pepper, de-stemmed and de-seeded and chopped into half inch pieces

      Italian Pepper, just for identification and reference
      Italian Pepper, just for identification and reference
    • 3 cups of green tomatillo salsa, either from the grocery store or using the recipe below
    • 2 cloves of garlic, minced
    • 1 1/2 teaspoons of ground cumin
    • 1 1/2 teaspoons of dried oregano
    • 1 teaspoon of ground black pepper
    • 2 Tablespoons of lemon juice
    • salt to taste when you have finished cooking

    If you have safe green tomatillo salsa you can buy, skip past this next part to the ♦ symbol below.

    Roasted Tomatillo Salsa

    This recipe is based on the Roasted Tomatillo Salsa from The Barnyard Bistro blog, but I’ve messed with it a bit and altered it for the purposes of this recipe.

    Roasted Tomatillo Salsa
    Roasted Tomatillo Salsa
    • 2 pounds of tomatillos, husked and washed
    • 2 medium onions, chopped into about half to one inch pieces
    • 2 Serrano chile peppers, de-stemmed and de-seeded and cut into halves or quarters
    • 4 cloves of garlic, trimmed of the stem end
    • 1/2 cup of tightly packed cilantro, washed and chopped
    • 1 1/2 teaspoons of salt
    • 1/3 of a cup of water.

    Place the tomatillos, the onions, the Serranos and the garlic on a large baking sheet or roasting pan that’s safe for the broiler.

    Tomatillos, Serranos, Onions and Garlic on a Baking Sheet
    Tomatillos, Serranos, Onions and Garlic on a Baking Sheet

    Turn your broiler to 500° and broil until the tomatillos are an olive green color and have browned. You may hear some of them pop, it’s okay.

    Broiled Tomatillos, Serranos, Onions and Garlic on a Baking Sheet
    Broiled Tomatillos, Serranos, Onions and Garlic on a Baking Sheet

    Once the tomatillos are done, put the roasted ingredients in a blender or food processor as well as any juices that have cooked out into your pan, making sure that you’ve de-glazed any of the good tasty browned bits too.  Add the cilantro, the salt and the water, and process. You might have to do this in batches, depending on the size of your blender or food processor.  I did.  I used a large bowl hold the batches and then mixed it altogether at the end.  This makes about 4 cups of salsa, so you’ll have enough for the recipe and some to just eat as well.

     ♦  Now that we have our safe salsa, or you’ve gotten some from the grocery store, it’s time to go onto the pork. Depending on your inclination, you can use the pork all in one piece and shred it later when it’s cooked, or you can cut into pieces about 1-2″ inches square and trim off the extra fat as you go. I cubed and trimmed my pork and removed about half a cup of extra fat. 

    On the bottom of your crock pot, place the celery and onions that you’ve cut into half inch pieces. Place either the whole piece or the cubed and trimmed pieces of boneless pork butt in the crock pot on top of the celery and onion. Place the chopped Italian or bell pepper on top of the pork.

    Pork, Italian Pepper, Onions and Celery in Crock Pot
    Pork, Italian Pepper, Onions and Celery in Crock Pot

    In a bowl, add the green tomatillo salsa, the minced garlic, the cumin, the dried oregano, the ground black pepper, and the lemon juice. and mix it thoroughly. Pour the mixture over the pork, making sure to scrape the bowl well, and get every bit into the crock pot. I also use a spatula to push the mixture down through the pork pieces if you have cubed the pork. If you like less sauce, you can cut the salsa back by a cup, but I like mine with a lot.

    Salsa Mixture over Pork, Italian Pepper, Onions and Celery in Crock Pot before cooking
    Salsa Mixture over Pork, Italian Pepper, Onions and Celery in Crock Pot before cooking

    Put the lid on your crock pot, and cook on low for 8 to 10 hours, or on high for 4 to 5 hours.

    Spicy Green Pork Amazing (a.k.a. Pork Chile Verde) after cooking
    Spicy Green Pork Amazing (a.k.a. Pork Chile Verde) after cooking

    You can serve this with safe for you tortillas (there’s a lot of recipes out there) and other fixings, or you can serve it over rice. Also, if you have a dairy free sour cream replacement product you can use, that would be great as a garnish.

    Spicy Green Pork Amazing (a.k.a. Pork Chile Verde)
    Spicy Green Pork Amazing (a.k.a. Pork Chile Verde)

    Enjoy!

  • Spicy Red Wine Cranberry Crusted Pork Loin

    Spicy Red Wine Cranberry Crusted Pork Loin
    Spicy Red Wine Cranberry Crusted Pork Loin

    So, if you’ve got leftover cranberries in the freezer from Turkey Day, this is a great way to use them up.  And it doesn’t involve turkey, which you’re probably heartily sick of at this point. I couldn’t resist adding a bit of spice to this recipe, but it’s minimal in the finished product. If spice bothers you, leave the Red Fresno pepper out of the cranberry sauce.  If you like it hotter, use a habanero.

    Spicy Red Wine Cranberry Crusted Pork Loin

    Serves about 4.

    • 1 cup of red wine
    • 1 cup of brown sugar
    • 1 Red Fresno chile pepper, de-stemmed, seeded, and minced.
    • 1 12 ounce bag of cranberries, either fresh or frozen
    • 1 1-2 pound pork loin

    Preheat your oven to 400°F.  Using an oil mister, or a bit of oil and a paper towel, grease a sheet pan.

    Wash the cranberries and pick out the soft, crushed and/or bad ones. In a small non-reactive sauce pan, add the wine, brown sugar, and minced Red Fresno chile pepper, and bring it to a boil.  Once the wine, brown sugar, and chile pepper are boiling, add the cranberries and let it come back to a boil.  Reduce to the heat to medium and boil gently for 10 minutes.  Basically you’re making red wine cranberry sauce with some chile in it.  It’s really good by itself, just saying.

    Spicy Red Wine Cranberry "crust"  for pork loin
    Spicy Red Wine Cranberry “crust” for pork loin

    Once you’ve finished the sauce, spread out a little bit of it on the pan, to match the general length and width of your pork loin, so that your pork loin will be resting in a bed of the cranberries.

    Bed of cranberries for the pork loin.
    Bed of cranberries for the pork loin.

    Place the pork loin on top of the cranberries, so that if there is a fat layer on the pork loin that the layer rests on the bed of cranberries (or remove it), and then cover the pork loin with the remaining cranberries. You’ll note I have a probe thermometer in the pork loin. It’s one of the best kitchen tools I ever bought, no more overcooked meat.

    Pork loin covered with cranberry "crust"
    Pork loin covered with cranberry “crust”

    Put the pork loin in the oven.  I set the probe thermometer for an internal temp of 161°F, which is what the FDA says is safe. The actual cooking time was about 45 minutes, but this may vary depending on the size of your pork loin and how well, or not, your oven works.  

    Spicy Red Wine Cranberry Crusted Pork Loin just out of the oven.
    Spicy Red Wine Cranberry Crusted Pork Loin just out of the oven.

    Let it rest a couple of minutes and then slice it up and serve with some of the cranberries and drippings.  It’s really yummy!

    Spicy Red Wine Cranberry Crusted Pork Loin
    Spicy Red Wine Cranberry Crusted Pork Loin
  • Simple Jambalaya Stew

    IMG_0833

    Are you sick of turkey, maybe not ready for chicken, but it’s cold outside? Maybe something completely different is in order? And it’s still really cold out?

    One of my favorite bad day “anywhere but here” fantasies involves the story my friend Jodi and I like to tell about our future retirement to New Orleans, where it is not cold (no matter what your definition of “cold” is, it’s usually warmer down there in the winter), where we’ll sit on the porch of the pink house and yell at squirrels and kids to get off the lawn. And we will eat. For all the croissants and beignets I can’t eat, there are plenty of shrimp that I can (aren’t we always pretty grateful for the food allergies we don’t have?). If you do have a shellfish allergy, consider substituting cooked chicken for the shrimp, adding it at the end and just heating it up.

    This stew is warm enough to take off the chill of a long day spent outside in the raw New England winter (well, this stew and some indoor heat), so hopefully it’ll make your winter warmer, too. Short warning — This is NOT a true traditional New Orleanian jambalaya. This is my quick tossing together of the flavors that remind me of my visits to the city.

    Simple Jambalaya (esque) Stew

    Serves 5-6

    • 1 Tablespoon oil
    • 1 1/2 cup onion, diced
    • 1/2 teaspoon salt
    • 1 bell pepper, chopped
    • 2-5 stalks celery, chopped
    • 12 oz (2 links, one package) andouille sausage, links cut in half lengthwise and then sliced
    • 1 1/2 cups brown jasmati rice**
    • 5-7 cups chicken or vegetable stock**
    • 1 Tablespoon adobo spice mix
    • 2 teaspoons tomato paste
    • 1 Tablespoon dry sherry
    • 1 lb. shrimp, raw, peeled, deveined (see note)

    Chop all the vegetables according to your likes — I like the flavor of onions and bell peppers, but in this dish, I don’t want to  taste a chunk of either at any time, so I dice those small. However, I want the crunch and flavor of celery, so I chop that in rather large pieces. I want the very flavorful sausage to flavor the entire dish, so I want them slightly smaller than the shrimp will be when cooked, and I leave the shrimp whole (but take off the tails because I don’t like to fuss — do what works for you). Try this, and then adjust it to suit your tastes.

    In a large stockpot, over medium heat, add oil and heat until shimmery hot. Add onions and salt, saute for a few minutes. Add bell pepper, stir, and again saute a few minutes. Add the celery and sausage, stir in well, then add the rice and mix to make sure it’s well-coated with the oil and vegetables. Add the chicken stock.

    **You will need to adjust the amount of stock based on the rice you choose. I prefer a brown rice in this, but I’m pretty sure that white rice would be more traditional. I used a jasmati blend (a cross of jasmine and basmati rices) because I had it on hand. It was pretty good. You want enough broth to fully cook the rice, and then a few extra cups for a good soupy finish.

    Bring the mixture to a boil and add the adobo, tomato paste, and sherry, turning down the heat to simmer over low for 30 minutes. Check to see if the rice is cooked. If it is, add the shrimp, turn off the heat, cover the pot, and let it sit covered for 15 minutes while the shrimp cooks. Taste, and adjust salt and pepper to taste. Serve warm.

    NOTE: If you do have a shellfish allergy, consider substituting chicken or leaving the shrimp out all together. The flavors will still be great.

    To reheat, go low and slow. In a large and flat saucepan, heat over low until its hot. In a microwave, short bursts and frequent stirring work best. You don’t want to overcook the shrimp, so low and slow.

    Jambalaya Stew
    Jambalaya Stew
  • Meatball Sub Meatballs

    Meatball Sub Meatballs in Marinara Sauce over Penne

    Meatball Sub Meatballs in Marinara Sauce over Penne

    As I stated a week ago in my Quick-ish Marinara Sauce post, I really miss meatball subs. Although I don’t have a safe bread or cheese, this meatball recipe gets me at least part way there.

    Meatball Sub Meatballs

    Makes about 24 large meatballs, about the size of golf balls or ping pong balls.

    • 1 pound of 80/20 ground pork
    • 1 pound of ground beef (I prefer a higher fat content for the beef as well, but that’s up to you)
    • 1 Tablespoon of ground chia seed
    • 3 Tablespoons of water
    • 1 Tablespoon of olive oil
    • 1 medium onion minced very finely
    • 1 teaspoon of salt
    • 1/2 teaspoon of ground black pepper
    • 1/2 teaspoon of oregano
    • 1/2 teaspoon of basil
    • 1/2 teaspoon of thyme
    • 1/2 teaspoon of garlic powder
    • 3/4 cup of gluten-free bread crumbs
    • a small amount of olive oil for greasing the baking sheet.

    Preheat oven to 375°F.

    Take ground pork and ground beef and crumble it into a large mixing bowl.

    In a small bowl, mix chia seed, water, and olive oil together to make a chia egg.  Set it aside.

    Mince onion and add it to the bowl with the ground pork and ground beef.

    Add the salt, ground black pepper, oregano, basil, thyme, and garlic power to the bowl, sprinkling them evenly over the beef and pork (it’ll be easier to mix it in).

    Add your bread crumbs and the chia egg, and use your hands to knead the mixture until it is thoroughly combined.

    Meatball mix after all ingredients combined
    Meatball mix after all ingredients combined

    Grease your baking sheet. Form meatballs about the size golf balls. I used a large scoop from Pampered Chef to form my meatballs, but you can use your hands instead. Place them on the baking sheet, spaced out evenly, and put them in the oven.

    Meatballs before cooking
    Meatballs before cooking

    Bake them for 30 minutes.  Once they are done (internal temp of 161°F) you can add them to sauce, or you can freeze some of them to use later.

    Meatballs after cooking
    Meatballs after cooking

    Enjoy, and if you’ve got ideas for dairy-free, egg-free, gluten-free, corn-free bread recipes, I want to hear about them!

    Meatball Sub Meatballs
    Meatball Sub Meatballs
  • Hot Italian Sausage Burgers with Peppers and Onions

    Hot Italian Sausage Burger with Peppers and Onions
    Hot Italian Sausage Burger with Peppers and Onions

    As we’ve previously discussed, since it’s summer, we need things to grill outside, which means burgers.  I made this burger because buying Italian sausage can be a tricky thing now.  Sometimes I can get some that’s allergy free and sometimes I can’t.  Also, I developed this recipe before the positive result on the allergy scratch test for onions, but since I’m still hoping the challenge will show I’m not really allergic to onions, and since many of you will still be able to enjoy it, here you go.

    Hot Italian Sausage Burgers with Peppers and Onions

    • 1 pound of ground pork (make sure your pork is not too lean or your burgers may be dry, if it is too lean, see the optional step below)
    • 1/4 teaspoon of salt
    • 1/2 teaspoon of garlic salt
    • 1/8 teaspoon of ground black pepper
    • 1 teaspoon of paprika
    • 1/4 teaspoon of cayenne
    • 1 Tablespoon of red wine vinegar
    • 1/4 teaspoon of anise seed
    • 1/4 teaspoon of fennel seed
    • 1 teaspoon of red pepper flakes
    • 2 Tablespoons of canola oil (you will use an additional teaspoon if you choose the optional step below)
    • 1 red bell pepper
    • 1 green bell pepper
    • 1 vidalia onion (or regular yellow onion is fine too)

    Place the ground pork into a large bowl.  Sprinkle salt, garlic salt, black pepper, paprika, cayenne over pork.  Pour red wine vinegar over the pork.

    Take anise seed, fennel, and red pepper flakes and grind in a spice grinder (or coffee grinder or mortar and pestle).  Take ground spice mixture and mix with oil in a small container.  Pour spice and oil mix over pork, scraping down container to make sure it ends up in pork.

    [OPTIONAL: Take a quarter to a half of the red bell pepper, green bell pepper and the vidalia onion (depending on the size of the onions and peppers, you don’t want to use so much that the burgers won’t hold together) and clean and chop them finely. Saute them in teaspoon of canola oil until the peppers are softer and the onions are just barely translucent. Remove them from heat and let them cool.  To hurry this process along, feel free to put them in the freezer for a few minutes until they are cool.  When they are, add them to the pork.]

    Mix everything into the ground pork until well blended.  The only way to do this really is with your hands.  Think meatloaf.  Cover bowl and refrigerate for 24 hours so the flavors can blend.

    On the day you intend to grill the burgers, clean and de-seed the bell peppers and cut them into slices.  Peel the onion, and slice it into slices.

    Sliced Onions
    Sliced Onions
    Sliced Peppers
    Sliced Peppers

    Wrap them up into a sealed foil packet.  Cook them on the grill in the foil packet over indirect heat. (If you want to make this and you don’t have access to a grill, you could also do them in your oven.  Preheat the oven to 4ooºF and place the packet on a cookie sheet.  Check them after twenty minutes to see if they’re sufficiently cooked.  You may need to let them go a little longer, so craft your foil packet so it’s easy to get open and seal back up. And be careful not to burn yourself with escaping steam.)

    Cooked Peppers and Onions
    Cooked Peppers and Onions

    Grill the burgers, making sure the pork is sufficiently cooked. (Or fry them in a pan if your’re cooking inside.)

    Grilled Hot Italian Sausage Burgers
    Grilled Hot Italian Sausage Burgers

    Serve with buns that are safe for your food restrictions, and the cooked onions and peppers on top.  Enjoy!

    Hot Italian Sausage Burger with Peppers and Onions
    Hot Italian Sausage Burger with Peppers and Onions
  • Year of the Snake Stir Fry

    Chinese New Year Stir Fry
    Chinese New Year Stir Fry

    For the many years where the only allergen I needed to avoid was dairy,  Asian restaurants of most types were a saving grace.  With the exception of Indian cuisine, which uses cream and butter, most cuisines of the Asian continent use little to no dairy.

    Now that there are more allergens in my arsenal, it’s not quite as simple.  But what is reasonably simple is learning to adapt recipes at home.  I like that stir fry is an excellent way to incorporate a lot of vegetables into one dish, with meat as a flavoring rather than the focus — and you can make a vegan version by either substituting tofu or seitan for the meat.  This marinade should work well for either, but I have not tried it since I can’t eat either anymore.

    Year of the Snake Stir Fry

    For marinade:

    • 1 teaspoon toasted sesame oil
    • 1 1/4 teaspoon crushed garlic (2-3 cloves)
    • 1 Tablespoon, rounded, crushed or grated ginger
    • 2 Tablespoons gluten-free tamari (soy sauce)
    • 3 Tablespoons rice wine vinegar
    • 4 Tablespoons mirin (Japanese cooking wine) or dry cooking sherry

    Add

    • 1/2 to 3/4 of a pound of thin cut pork sirloin, cut into bite-sized chunks
    • 1 cup thinly sliced onions.

    Marinate overnight.

    Get rice cooking.  I can’t give you a recipe or time — read your package or your rice cooker directions.  I am generally hopeless at cooking rice.  My Chinese ancestors would be less than best pleased.

    Stir fry with

    • 1/4 cup yellow bell pepper, sliced thin
    • 1 cup celery, chopped
    • 1 cup broccoli florets
    • 1 cup of sugar snap peas, whole
    • 1 cup of mushroom pieces, broken instead of sliced
    • 1/4 cup of celery leaves, chopped

    This makes a lot of stir fry.  I tend to stir fry the ingredients in rounds, each ingredient separately — meat first, and then through the veggies.  Strain the marinade out — you want to fry the meat, not boil it — and discard.  Stir fry until cooked through, and then remove from pan.  Cook the peppers.  Remove.  I stir fry in canola oil, and use it sparingly adding a tiny bit with each ingredient.

    Stir Fry Flavor Meld
    Stir Fry Flavor Meld

    When all your food is cooked, dump it all back in the wok, turn the burner off, and give it a few minutes to meld.

    Serve over rice. Or, you know, dump some rice in to flavor meld, too.

  • Whatever Wednesday: Bacon with Brown Sugar and Sriracha

    Bacon with Brown Sugar and Sriracha
    Bacon with Brown Sugar and Sriracha

    Before I start my rhapsody on the glories of bacon and Sriracha, let me just confess that this wasn’t my idea and isn’t my recipe, which is why we’re posting it on Whatever Wednesday.  For that we can thank Scott Hutcheson, whose recipe was provided in his blog, and then was picked up and discussed by another blog, True Laurel, where one of my friends saw it and pinned it on Pinterest. I had to try this. I’ve made some minor modifications, because I’m used to cooking my bacon in oven, I like it really crispy, and I’m way too lazy to use a baking rack and then have to wash it afterwards.  It works perfectly fine just on the baking sheet or piece of stoneware (but it does work best on the stoneware between the two), but you will want to use some tongs to remove the bacon from the baking sheet and place them on a sheet lined with paper towels to drain after baking.

    Okay, I’m beginning the rhapsody.  Two of my favorite foods in the whole world, together at last.  (Sounds like an ad for an duet album on TV when they still had ads like that right?) In any case, the guy who thought this up was a culinary genus.  It’s beyond awesome.

    Bacon with Brown Sugar and Sriracha

    • a package of Hormel’s Black Label Applewood Smoked Thick Cut Bacon
    • a bottle of Sriracha (you squeeze it onto the bacon from the bottle, using probably no more than 3 Tablespoons or so)
    • 3-4 Tablespoons of brown sugar

    Preheat your oven to 375°F.  Lay your bacon strips out carefully so they do not overlap on your baking sheet or stoneware. (I’m using the Pampered Chef large bar pan stone.

    Bacon laid out on stoneware
    Bacon laid out on stoneware

    Take your Sriracha bottle and run a line of Sriracha down each strip of bacon.

    Sriracha lines on bacon
    Sriracha lines on bacon

    Once you have the Sriracha on the bacon, take a basting brush and spread the Sriracha evenly over each strip of bacon.

    Spreading Sriracha evenly over bacon strips
    Spreading Sriracha evenly over bacon strips

    Now sprinkle the brown sugar evenly over the bacon strips.  I found it was easiest just to use my fingers to do it.

    Brown sugar sprinkled over Sriracha covered bacon
    Brown sugar sprinkled over Sriracha covered bacon

    Bake for 15-20 minutes.  Check on your bacon at about 15 minutes so it gets to the proper level of “done-ness” for you.  Again I like mine really crispy, so I’ll let mine go longer until it’s where I want it.

    Bacon just out of the oven
    Bacon just out of the oven

    Once it’s out of the oven, use a fork or a pair of tongs to lay them on some paper towels to drain away the excess bacon fat.

    Bacon on paper towels
    Bacon on paper towels

    Enjoy, it’s really, really good!