Notice: Function _load_textdomain_just_in_time was called incorrectly. Translation loading for the wp-ultimate-recipe domain was triggered too early. This is usually an indicator for some code in the plugin or theme running too early. Translations should be loaded at the init action or later. Please see Debugging in WordPress for more information. (This message was added in version 6.7.0.) in /home/maryzahc/public_html/adultfoodallergies.com/wp-includes/functions.php on line 6121
Gluten-free – Page 31 – surviving the food allergy apocalypse (archive)

Tag: Gluten-free

Contains no wheat or gluten.

  • Awesome Curry

    Chickpea Spinach Curry
    Chickpea Spinach Curry

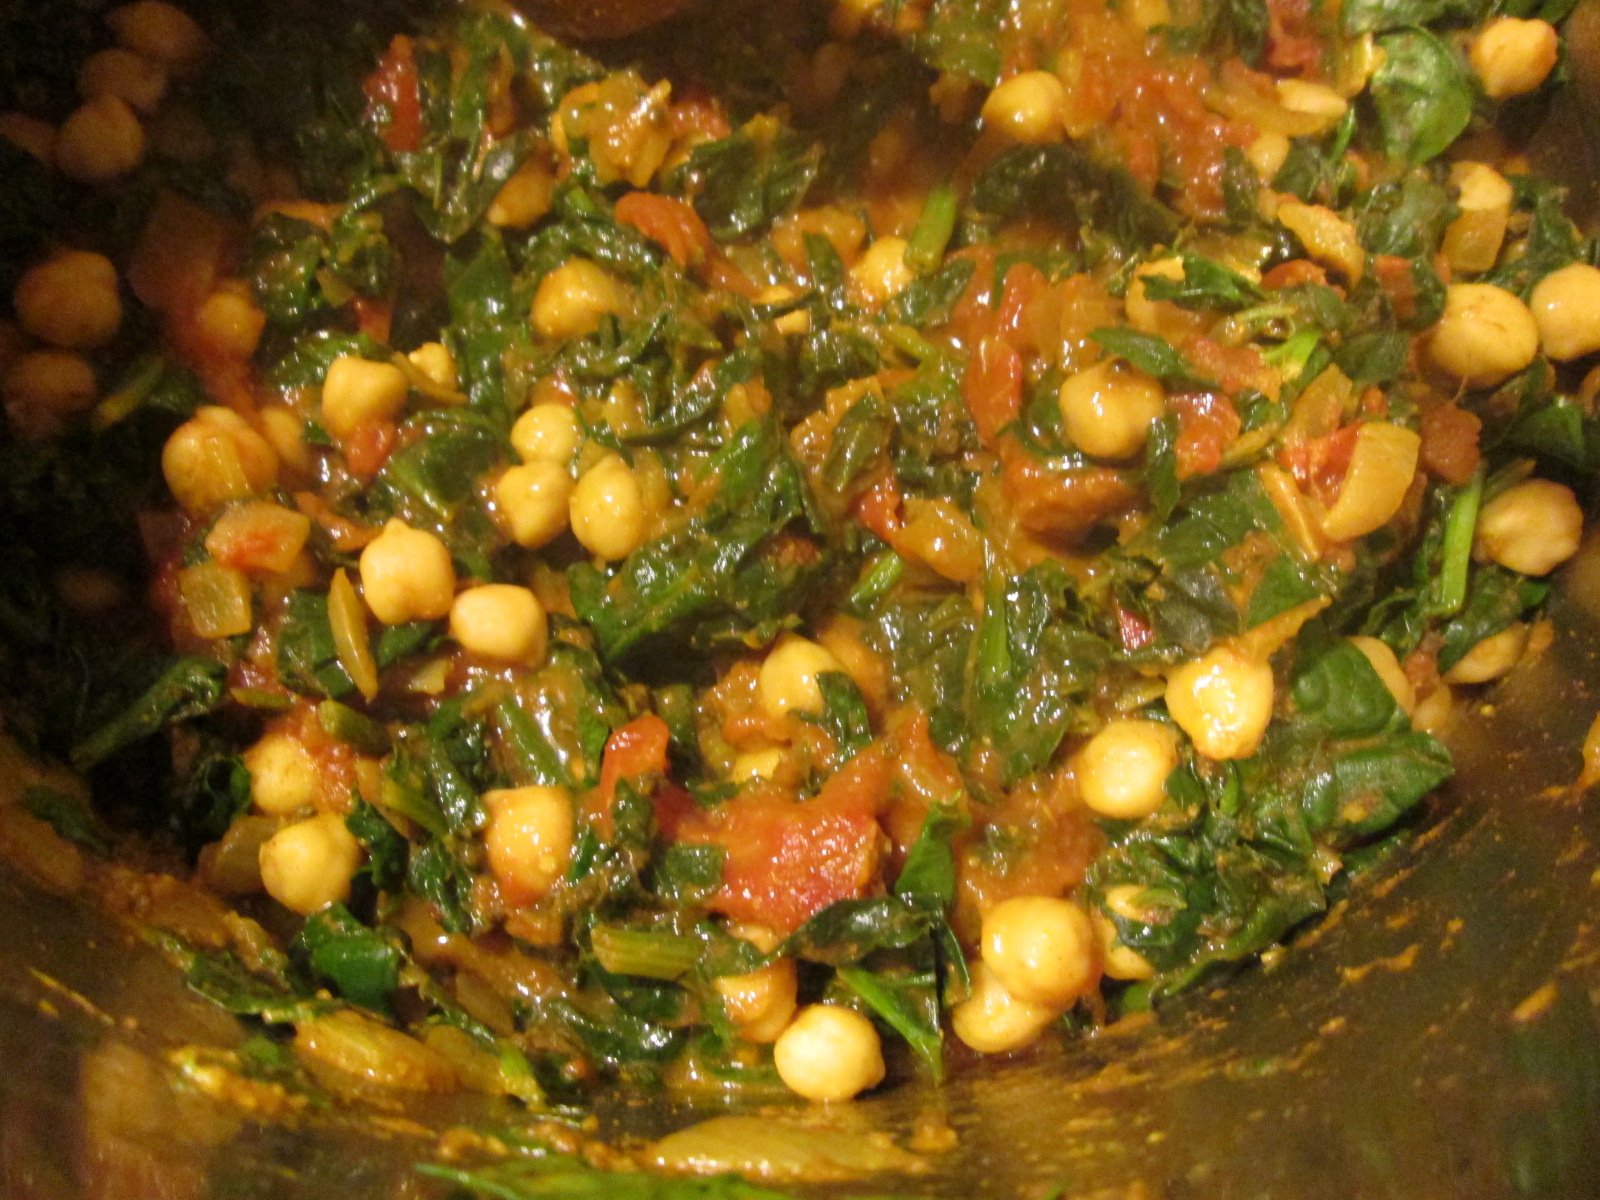
    Disclaimer: This is not an original recipe.  But it’s the best curry I’ve ever made at home, and as such, I want to share it with all of you today.  With full credit to the author and cookbook, of course.

    The Chickpea and Spinach Curry comes from one of my all-time favorite cookbooks, Isa Chandra Moskowitz’s Vegan with a Vengeance.  This is the first cookbook I purchased after my first intolerance-related diagnosis — lactose intolerance.  While I ate a strictly vegan diet for a while, and don’t at the moment, I still love vegan cookbooks.  They correlate with my preferred way of eating — heavy on the vegetables — and a good vegan cookbook relies mostly on whole foods, not processed foods.  In a completely non-compensated way, I can highly and heartily endorse this whole cookbook (though, honestly, if you’re brand new to vegan cooking, consider starting with Veganomicon, as it’s got more basic information in it and a broader range of recipes).  Most vegan cookbook authors are very aware of ingredients and a great place to learn to cook without — no matter what you’re cooking without.

    And it’s a big hit at potlucks — with vegans and omnivores alike.  The recipe below is kind of huge.  If it’s just for me, I made a half-recipe.

    So, without further ado:

    Mise en place
    Mise en place

    Chickpea and Spinach Curry, from Vegan with Vengeance by Isa Chandra Moskowitz

    Preheat a pot over medium heat.  A good Dutch oven would work, if you have one, or a large sauce pan, but to minimize the mess I generally make with cooking (and because I don’t have a Dutch oven), I use my stock pot.  When the pot is hot,  add

    • 3 Tablespoons oil (not olive, vegetable, as this is kind of hot for olive oil)
    • 2 teaspoons mustard seeds

    Cover the pot and let the seeds pop for about a minute.  They do pop, like popcorn.  It’s cool.

    Turn the heat up to medium-high. Add the following:

    • 1 large onion, chopped (about 2 cups)

    Sautee until it starts to brown — 5-10 minutes, depending on your heat level.

    Add and sautee two minutes:

    • 4 cloves garlic, minced
    • 2 Tablespoons ginger, minced or microplaned*

    Add and sautee another minute:

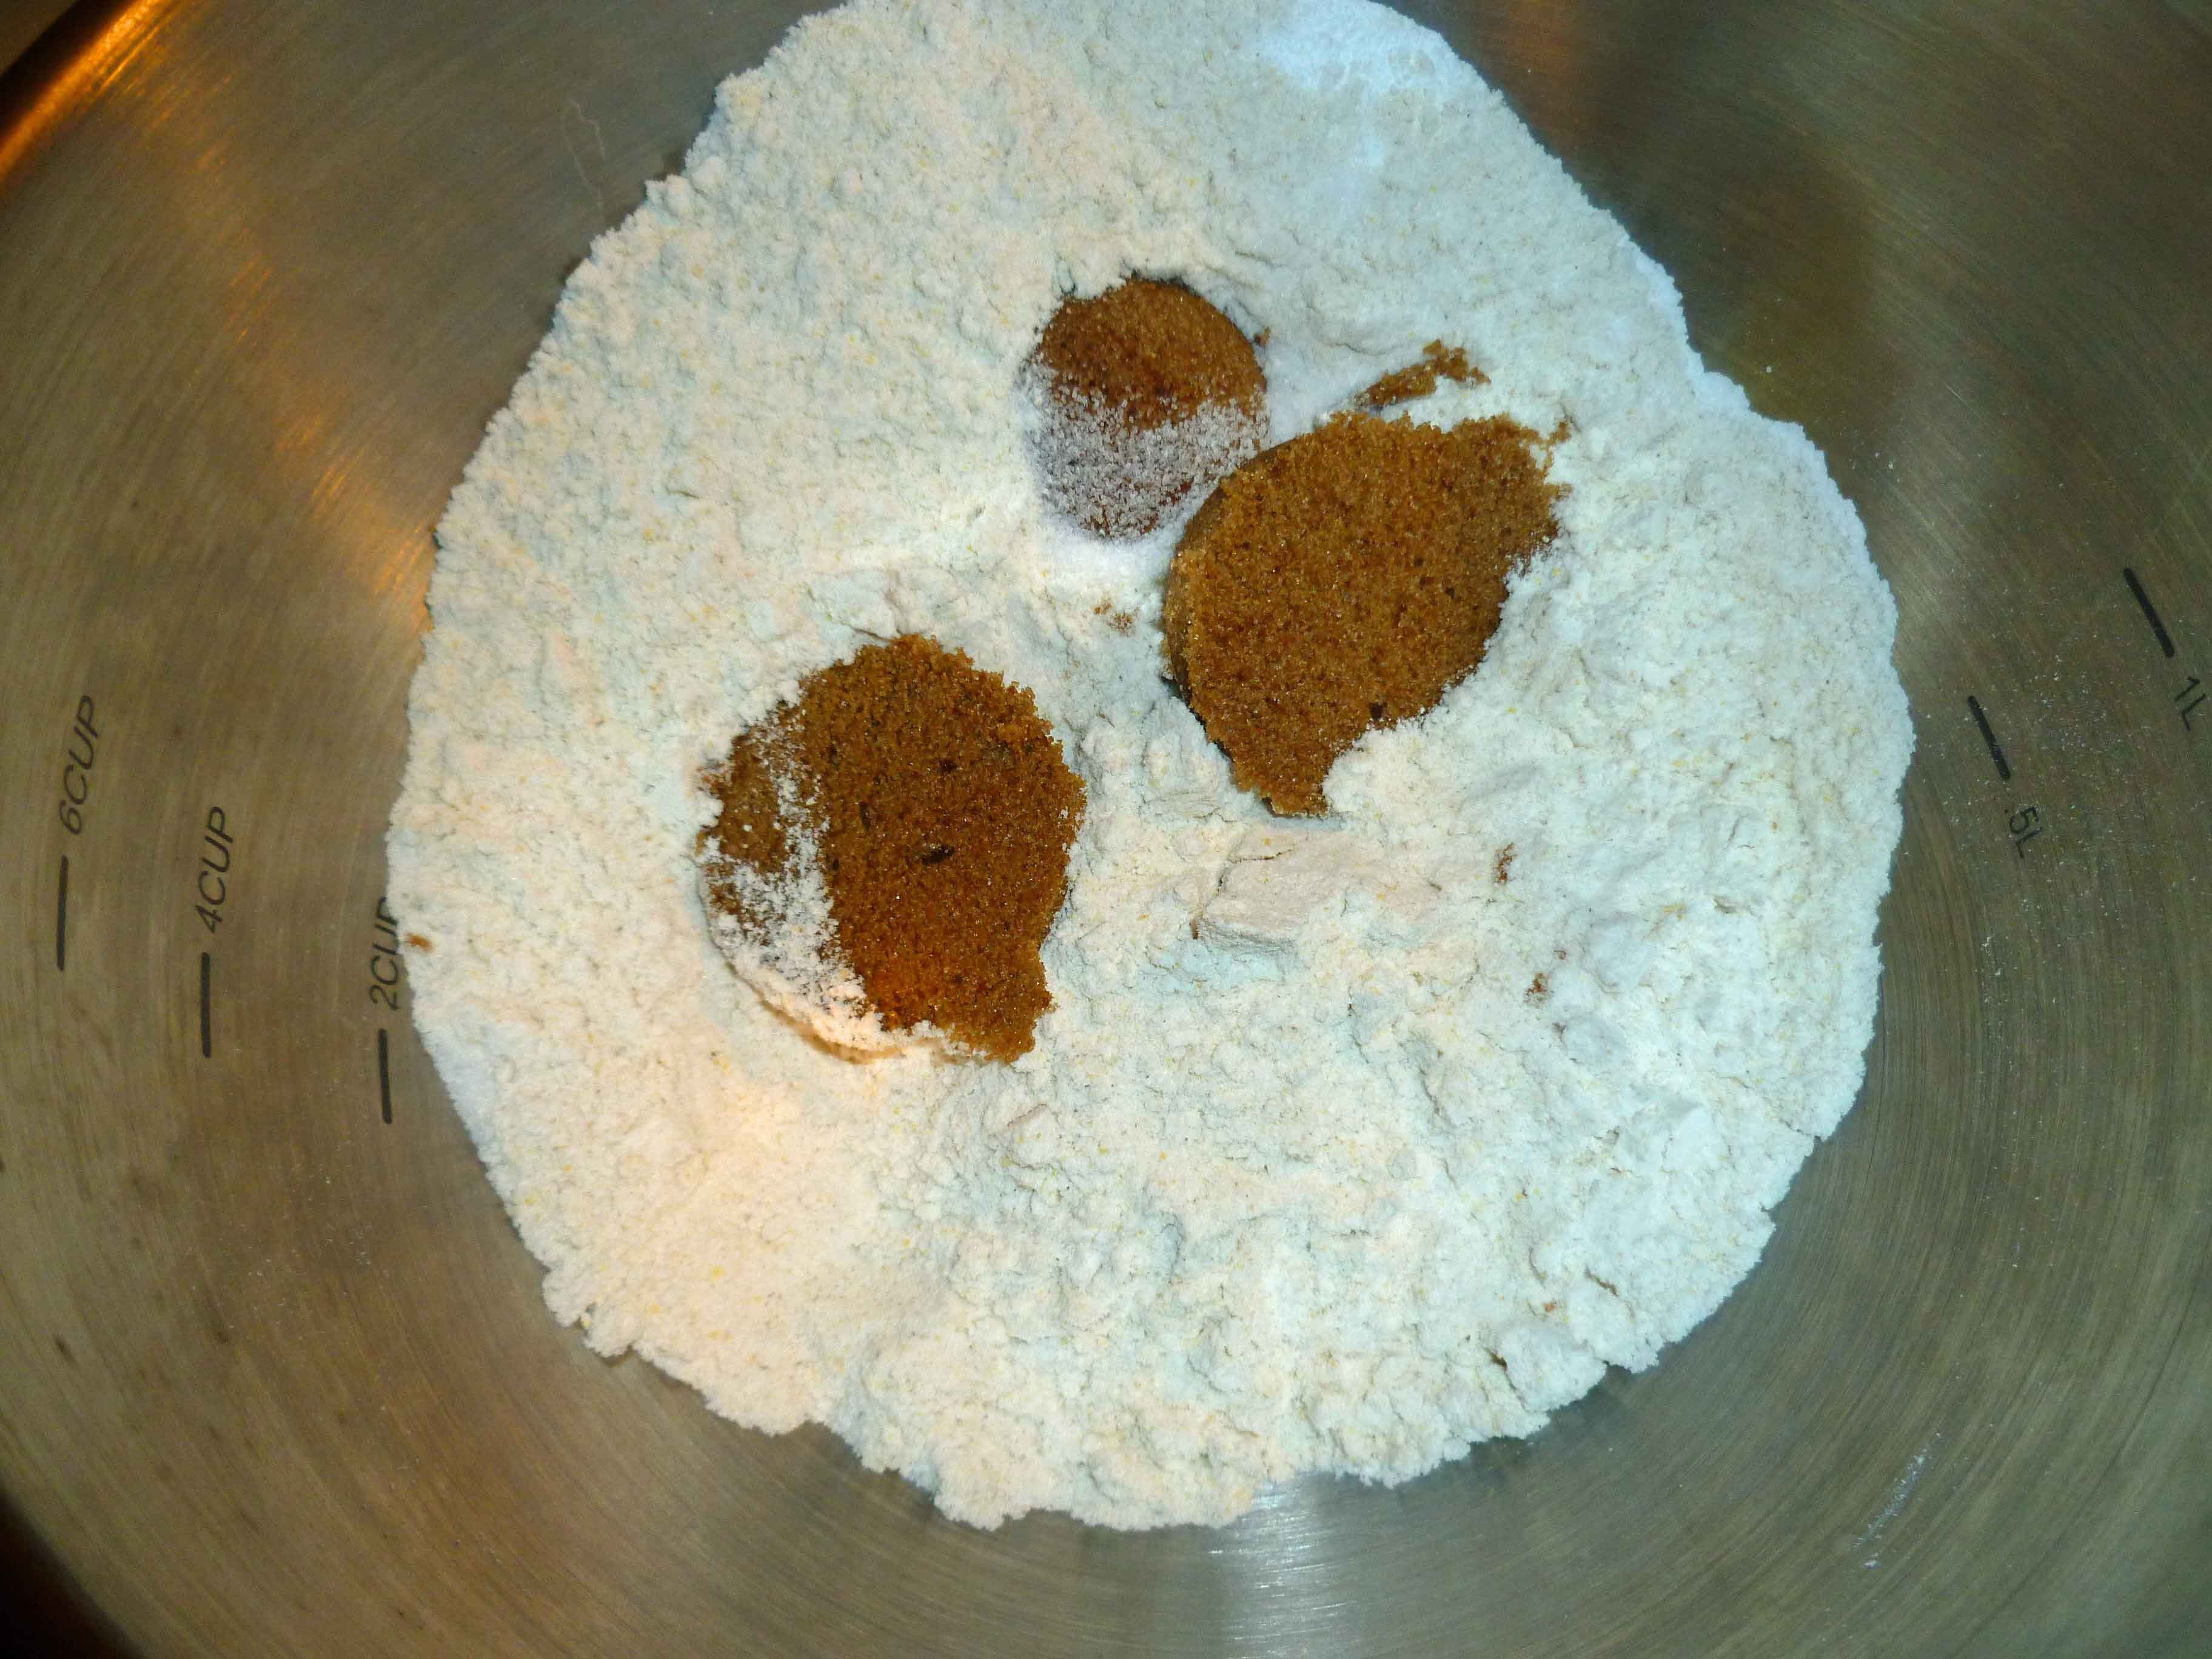
    • 3 teaspoons curry powder**
    • 2 teaspoons ground cumin
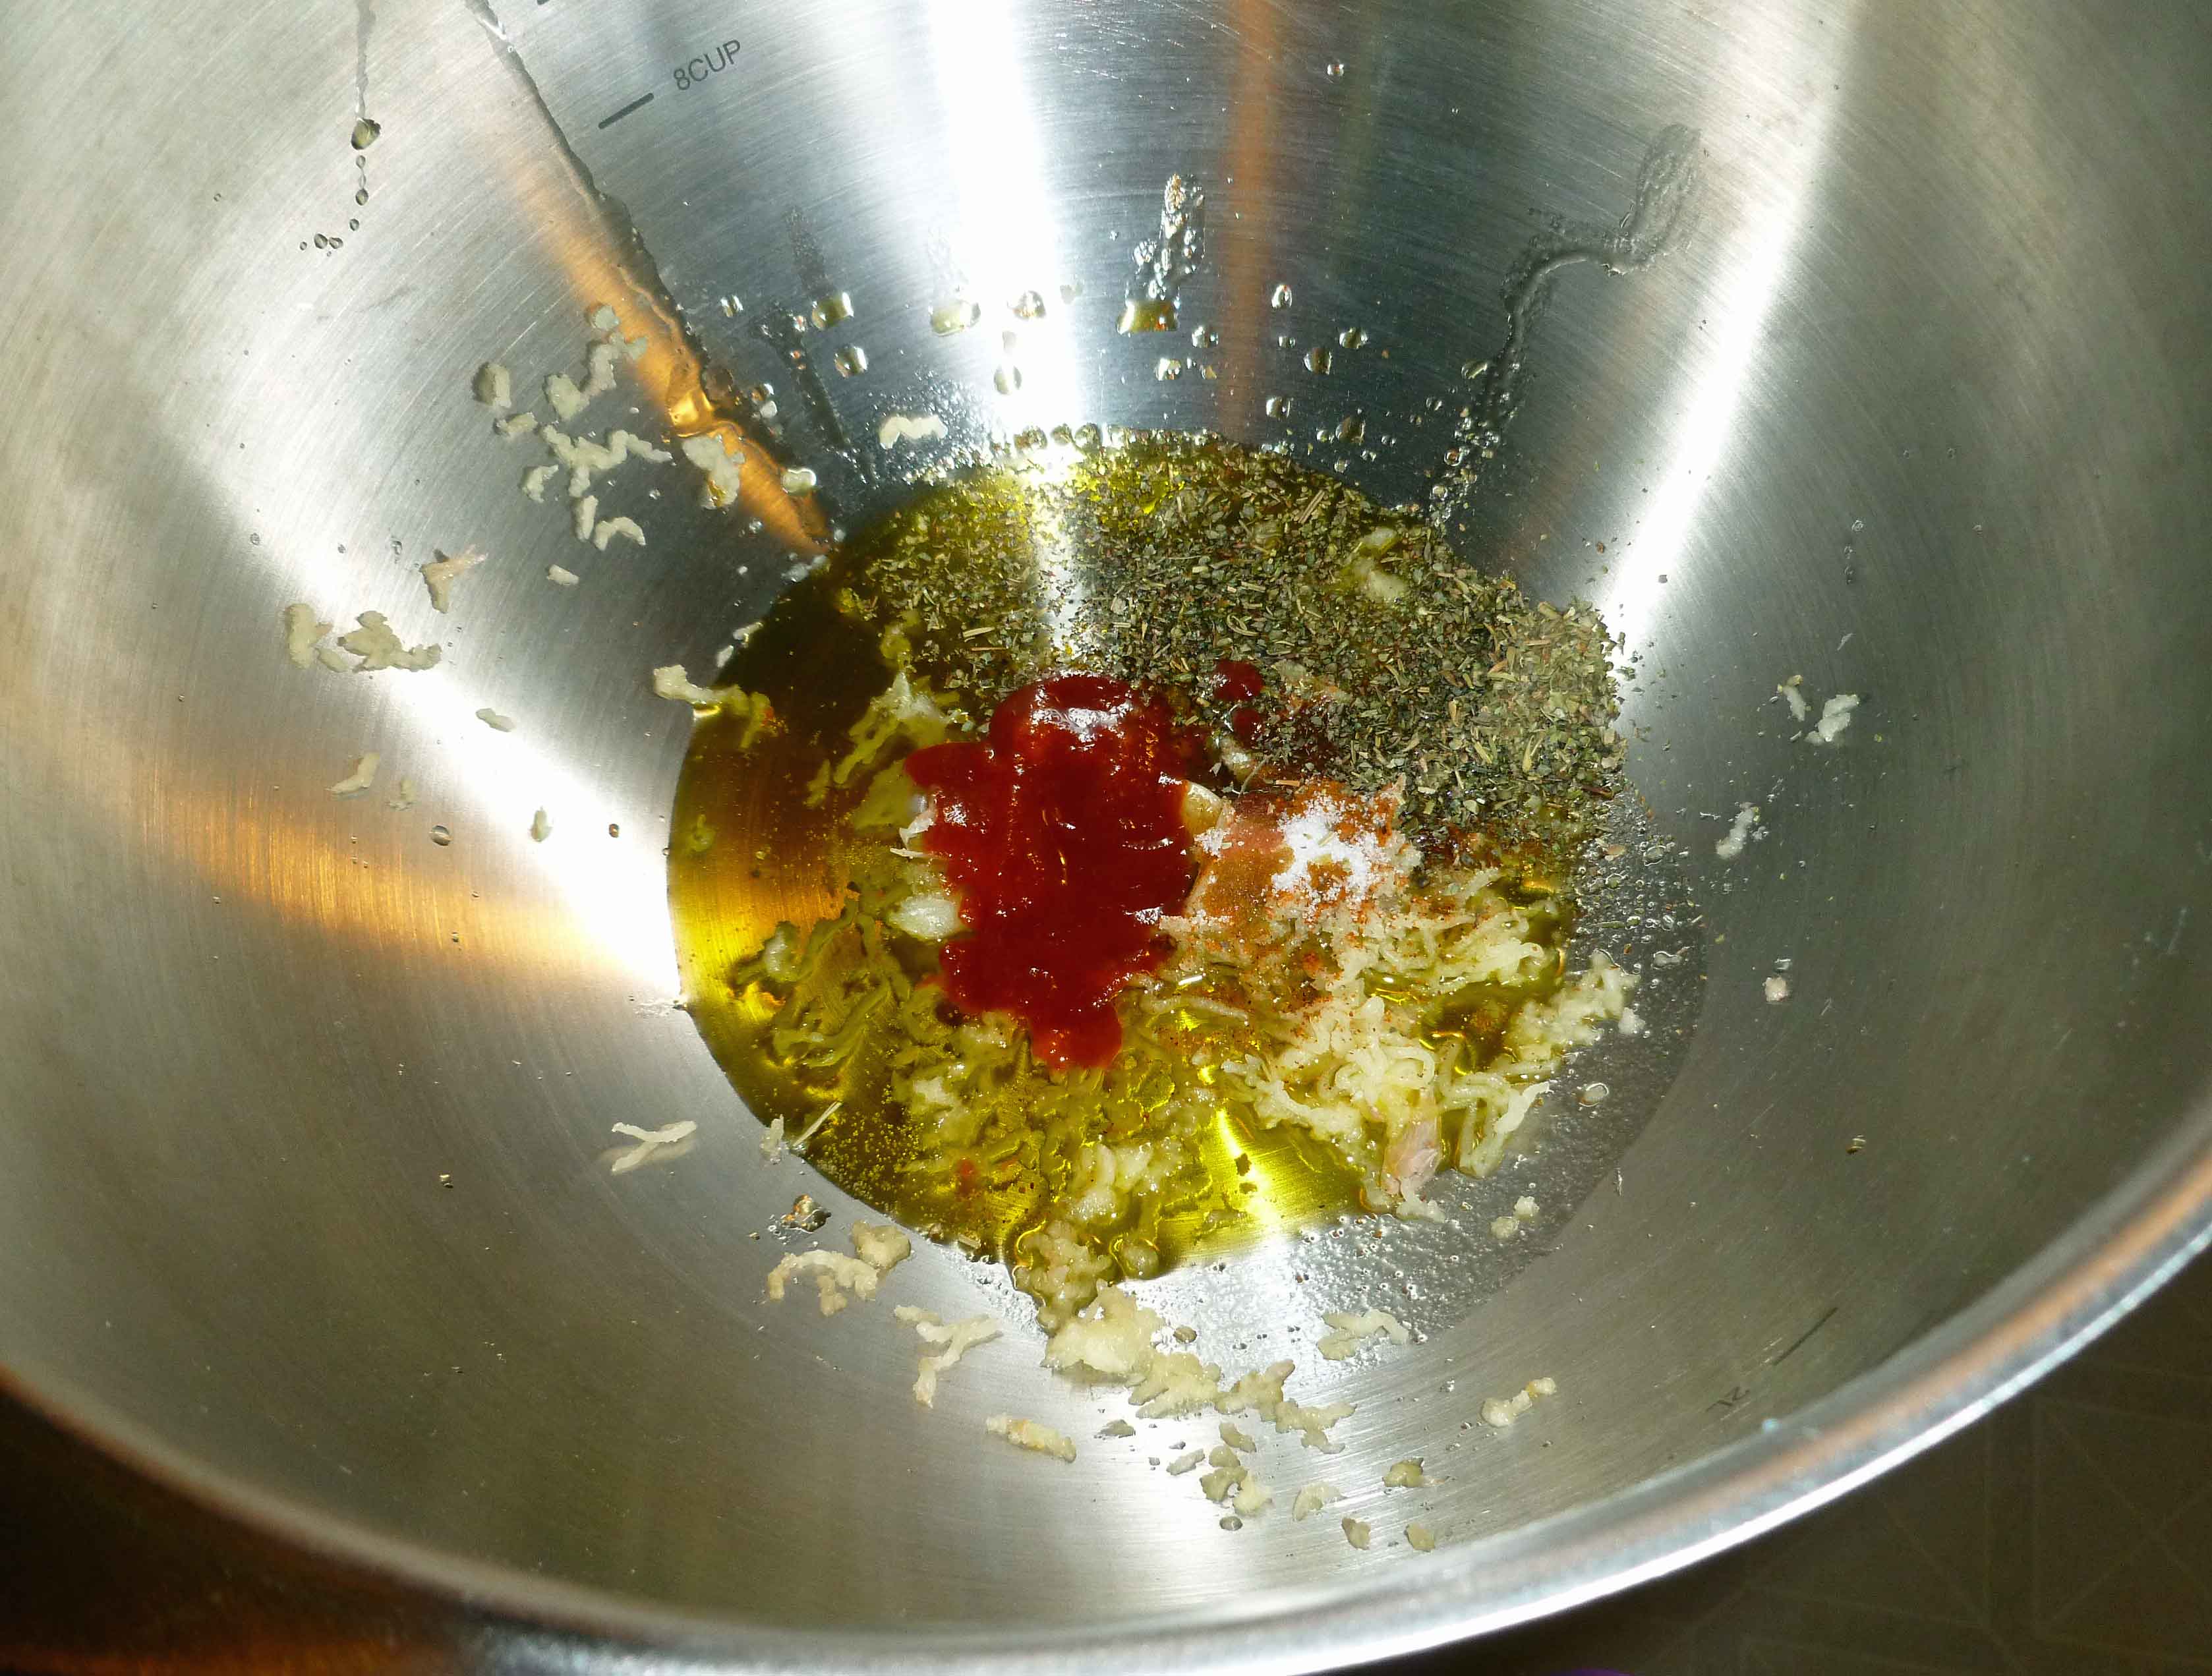
      pile o' spice
      pile o’ spice
    • 1 teaspoon ground coriander
    • 1/8 teaspoon ground cloves
    • 1/2 teaspoon ground cinnamon
    • 3 cardamom pods
    • 1/2 teaspoon salt
    • 1/4 cup of juice drained from can of diced tomatoes
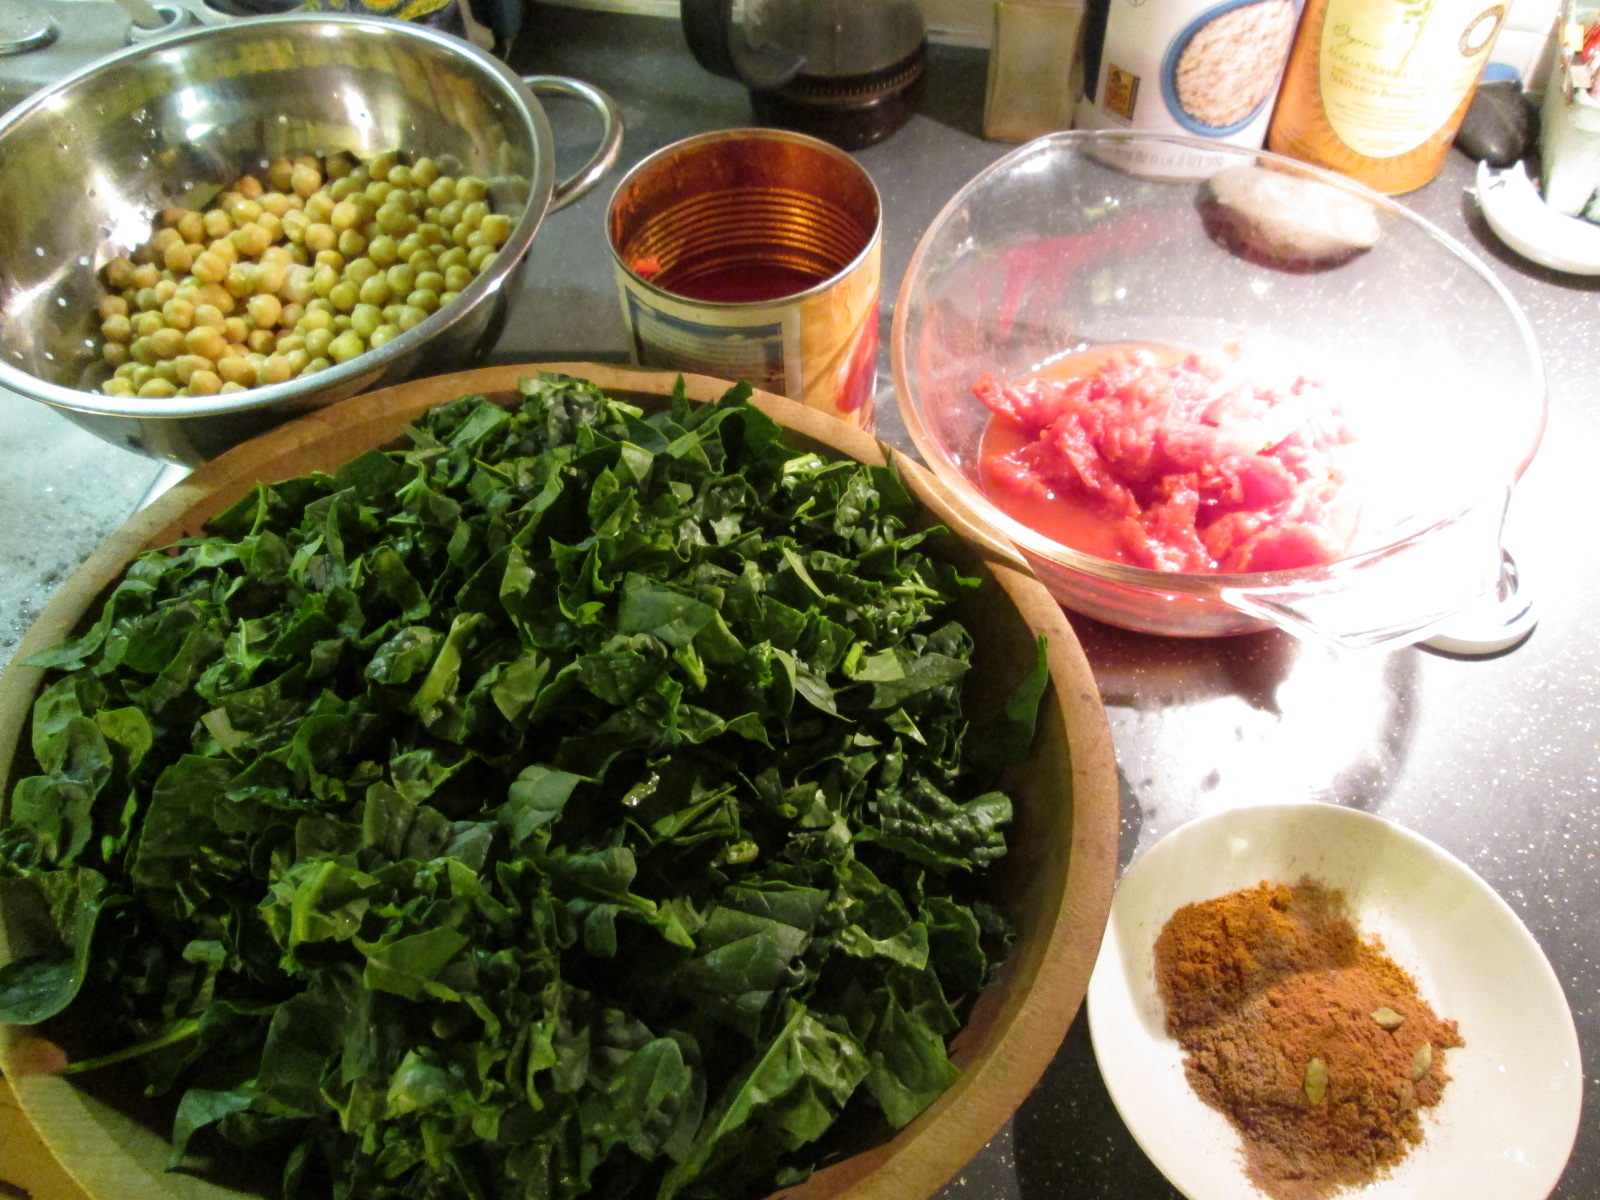
    • 14 oz can of diced tomatoes, with juice drained and reserved*

    Rinse and drain, then chop

    • 10 cups of spinach, chopped.  Yes this seems like a TON, but it really will all incorporate perfectly.  Add this in handsful, stirring each addition until wilted.

    When all the spinach is wilted, add:

    • 2 cans of chickpeas (15 oz. each), rinsed and drained (4 cups if you cook your own)

    Stir, cover and turn heat to low.  If you’re planning to make rice, start it now.  Let the stew simmer for 10 minutes.

    Uncover, stir, taste.  Adjust the seasonings if necessary (I’ve only ever needed a tiny pinch of salt), and let simmer for another 10 minutes, until its all thickened and wonderous.  Enjoy it over rice.

    *The single asterisk represents minor alterations I’ve made to the original recipe.

    **Curry powder is amazing, but it’s a blend of ground spice, so quality can vary widely.  To get a good curry, the spices must be fresh when they’re combined and reasonably fresh when you use it.  And your curry dish will only be as good as your curry spice is.  As you might already know, both of us believe the post-apocalypse relies heavily on Penzey’s Spices, based in Wisconsin.  They have a variety of curries; if you’re new to curry, try the sweet curry.  Curry is NOT inherently spicy hot, so don’t be scared if you don’t like spicy.  If you do like spicy, try the hot curry.

    So that’s the best curry I know how to make.  Let us know what you think.

  • Hot & Crazy Noodles Apocalypse Style

    Hot & Crazy Asian Noodles Apocalypse Style
    Hot & Crazy Asian Noodles Apocalypse Style

    Before the food allergy apocalypse hit, one of the things I really liked was Thai food, and one of the dishes I really enjoyed at Siam Orchid, our local Thai place, was Hot & Crazy Noodles, which is a spicy version of Pad Sei Ew (or whatever spelling variant of Thai anglicized you might find).  It’s probably a safe-ish dish for me still, but going to Thai places reminds me of all the curry and satay and other yummy dishes that I now cannot eat because of the whole coconut thing, so I just don’t go.  But I’ve been thinking a lot about it lately, so I thought I’d try to do my own version.

    Hot & Crazy Asian Noodles Apocalypse Style

    Makes 4-6 servings (if you are cooking for one or two people and don’t want tons of leftovers, cut the portion amounts in half).

    Marinade for Chicken

    Other Ingredients

    • 1 lb of sliced chicken breast
    • 8 oz of dry rice noodles (check labels, make sure only ingredients are rice and water)
    • 1 teaspoon of canola oil
    • 1-2 Tablespoons of chili oil (make sure it’s gluten free, I used Hokan Chili Oil )
    • 1 carrot, sliced thinly
    • 1 small to medium onion, sliced thinly
    • 1 cup of snow peas or sugar snap peas, washed
    • 1 small zucchini, sliced thinly
    • 2-4 stalks of asparagus, cut in bite size pieces
    • 1-2 green onions, both green and white parts, sliced
    • 2 cups of mung bean sprouts approximately
    • 2 Thai chilis
    • 2 cups of baby bok choi leaves, washed and detached from heads of baby bok choi
    • 10-15 Thai basil leaves to taste

    Sauce for Noodles

    First, mix the soy sauce and the baking soda for the chicken marinade in a small bowl and then add the sliced chicken, mixing it well.  Put it aside.

    Bring a large pot of water to a boil. Add the rice noodles and cook according to the directions on the package (mine said about 6-8 minutes). When done, drain the noodles using a colander and then place them back in the pot, tossing them with the canola oil so that they are less likely to stick together.

    Cooked and Drained Rice Noodles
    Cooked and Drained Rice Noodles

    Using some of the chili oil, coat the bottom of your wok (or skillet in my case, I know I used to have a wok, but I have no idea where it went), turn the heat to medium high and cook the chicken in batches so it fries and doesn’t just steam.  Once you have finished one batch, place it aside in a large bowl and cook then next batch, again placing it the large bowl when it’s cooked.

    Chicken cooked in batches
    Chicken cooked in batches

    Using a bit more of the chili oil if needed, start stir frying the carrot, onion, peas, zucchini, asparagus, green onion, bean sprouts, thai chili, baby bok choi leaves, and thai basil leaves in batches, adding them to the large bowl when cooked.

    Stir-fried Veggies
    Stir-fried Veggies
    Stir-fried Veggies
    Stir-fried Veggies
    Stir-fried Baby Bok Choi and Basil
    Stir-fried Baby Bok Choi and Basil

    To make the sauce for the noodles, whisk the garlic, ginger, soy sauce, Sriracha, Hoisin sauce, rice wine vinegar, corn starch, sugar and szechuan peppercorns together in a little bowl.  Using a little of the chili oil, stir fry the cooked noodles in your wok/skillet and add the sauce for the noodles, mixing well, until the noodles are hot and thoroughly coated with the sauce.

    Cooked Noodles Coated in Sauce
    Cooked Noodles Coated in Sauce

    Once the noodles are coated and nice and hot, place them in the large bowl with the other ingredients and mix all the ingredients in the bowl thoroughly.

    All cooked ingredients being mixed in bowl
    All cooked ingredients being mixed in bowl

    Once mixed, serve them immediately while they are nice and hot, and have some of the Sriracha and Hoisin available as condiments so your family and/or guests can doctor their portions to their taste.  Enjoy!

    Hot & Crazy Asian Noodles Apocalypse Style
    Hot & Crazy Asian Noodles Apocalypse Style
  • Year of the Snake Stir Fry

    Chinese New Year Stir Fry
    Chinese New Year Stir Fry

    For the many years where the only allergen I needed to avoid was dairy,  Asian restaurants of most types were a saving grace.  With the exception of Indian cuisine, which uses cream and butter, most cuisines of the Asian continent use little to no dairy.

    Now that there are more allergens in my arsenal, it’s not quite as simple.  But what is reasonably simple is learning to adapt recipes at home.  I like that stir fry is an excellent way to incorporate a lot of vegetables into one dish, with meat as a flavoring rather than the focus — and you can make a vegan version by either substituting tofu or seitan for the meat.  This marinade should work well for either, but I have not tried it since I can’t eat either anymore.

    Year of the Snake Stir Fry

    For marinade:

    • 1 teaspoon toasted sesame oil
    • 1 1/4 teaspoon crushed garlic (2-3 cloves)
    • 1 Tablespoon, rounded, crushed or grated ginger
    • 2 Tablespoons gluten-free tamari (soy sauce)
    • 3 Tablespoons rice wine vinegar
    • 4 Tablespoons mirin (Japanese cooking wine) or dry cooking sherry

    Add

    • 1/2 to 3/4 of a pound of thin cut pork sirloin, cut into bite-sized chunks
    • 1 cup thinly sliced onions.

    Marinate overnight.

    Get rice cooking.  I can’t give you a recipe or time — read your package or your rice cooker directions.  I am generally hopeless at cooking rice.  My Chinese ancestors would be less than best pleased.

    Stir fry with

    • 1/4 cup yellow bell pepper, sliced thin
    • 1 cup celery, chopped
    • 1 cup broccoli florets
    • 1 cup of sugar snap peas, whole
    • 1 cup of mushroom pieces, broken instead of sliced
    • 1/4 cup of celery leaves, chopped

    This makes a lot of stir fry.  I tend to stir fry the ingredients in rounds, each ingredient separately — meat first, and then through the veggies.  Strain the marinade out — you want to fry the meat, not boil it — and discard.  Stir fry until cooked through, and then remove from pan.  Cook the peppers.  Remove.  I stir fry in canola oil, and use it sparingly adding a tiny bit with each ingredient.

    Stir Fry Flavor Meld
    Stir Fry Flavor Meld

    When all your food is cooked, dump it all back in the wok, turn the burner off, and give it a few minutes to meld.

    Serve over rice. Or, you know, dump some rice in to flavor meld, too.

  • Whatever Wednesday: Bacon with Brown Sugar and Sriracha

    Bacon with Brown Sugar and Sriracha
    Bacon with Brown Sugar and Sriracha

    Before I start my rhapsody on the glories of bacon and Sriracha, let me just confess that this wasn’t my idea and isn’t my recipe, which is why we’re posting it on Whatever Wednesday.  For that we can thank Scott Hutcheson, whose recipe was provided in his blog, and then was picked up and discussed by another blog, True Laurel, where one of my friends saw it and pinned it on Pinterest. I had to try this. I’ve made some minor modifications, because I’m used to cooking my bacon in oven, I like it really crispy, and I’m way too lazy to use a baking rack and then have to wash it afterwards.  It works perfectly fine just on the baking sheet or piece of stoneware (but it does work best on the stoneware between the two), but you will want to use some tongs to remove the bacon from the baking sheet and place them on a sheet lined with paper towels to drain after baking.

    Okay, I’m beginning the rhapsody.  Two of my favorite foods in the whole world, together at last.  (Sounds like an ad for an duet album on TV when they still had ads like that right?) In any case, the guy who thought this up was a culinary genus.  It’s beyond awesome.

    Bacon with Brown Sugar and Sriracha

    • a package of Hormel’s Black Label Applewood Smoked Thick Cut Bacon
    • a bottle of Sriracha (you squeeze it onto the bacon from the bottle, using probably no more than 3 Tablespoons or so)
    • 3-4 Tablespoons of brown sugar

    Preheat your oven to 375°F.  Lay your bacon strips out carefully so they do not overlap on your baking sheet or stoneware. (I’m using the Pampered Chef large bar pan stone.

    Bacon laid out on stoneware
    Bacon laid out on stoneware

    Take your Sriracha bottle and run a line of Sriracha down each strip of bacon.

    Sriracha lines on bacon
    Sriracha lines on bacon

    Once you have the Sriracha on the bacon, take a basting brush and spread the Sriracha evenly over each strip of bacon.

    Spreading Sriracha evenly over bacon strips
    Spreading Sriracha evenly over bacon strips

    Now sprinkle the brown sugar evenly over the bacon strips.  I found it was easiest just to use my fingers to do it.

    Brown sugar sprinkled over Sriracha covered bacon
    Brown sugar sprinkled over Sriracha covered bacon

    Bake for 15-20 minutes.  Check on your bacon at about 15 minutes so it gets to the proper level of “done-ness” for you.  Again I like mine really crispy, so I’ll let mine go longer until it’s where I want it.

    Bacon just out of the oven
    Bacon just out of the oven

    Once it’s out of the oven, use a fork or a pair of tongs to lay them on some paper towels to drain away the excess bacon fat.

    Bacon on paper towels
    Bacon on paper towels

    Enjoy, it’s really, really good!

  • Gluten-Free and Dairy-Free Pancakes

    Gluten Free and Dairy Free Pancakes
    Gluten Free and Dairy Free Pancakes

    Welcome to another segment of our Hangover Breakfast series!  Again, I used the method that the Gluten Free Girl and the Chef have provided on their blog to make an all-purpose flour mix, to choose flours with waffles and pancakes in mind, which I posted previously (see link below).  Waffles are great, but then you have to clean the waffle maker, which you might not want to do on the morning after, or if it’s just an every day sort of breakfast.  So then, hey, pancakes!  You can also dress these up anyway you want, add blueberries, chocolate chips, apples and cinnamon, etc.  You can also make up a batch, let them cool, put wax paper in between them and put them in a container in the freezer and toast them when you want some too.

    Gluten Free and Dairy Free Pancakes

    Makes about 10 – 4 inch pancakes.

    • 210 grams of Gluten Free Flour Mix for Waffles & Pancakes (or you can try your normal gluten free flour mix)
    • 1 teaspoon salt
    • 3 Tablespoons brown sugar
    • 1 3/4 teaspoons of baking powder
    • 1 1/2 Tablespoons of ground chia seed meal
    • 4 1/2 Tablespoons of water
    • 3 Tablespoons of canola oil
    • 1 teaspoon of vanilla
    • 1 1/4 cups of rice milk (or other alternative milk of your choice)
    • some Earth Balance Soy Free Natural Buttery spread to grease your skillet with.

    Measure out flour, salt, baking powder and brown sugar and place in a bowl. Whisk ingredients together until they are well incorporated into each other.

    Dry pancake ingredients in a bowl
    Dry pancake ingredients in a bowl

    Mix ground chia seed meal and water in a container to form a chia egg, setting it aside to let it gel.

    Chia and Water to form chia egg
    Chia and Water to form chia egg

    Measure out rice milk, oil and vanilla into a container large enough to add the chia egg.  Add the chia egg and whisk it together so that chia is well incorporated into the rice milk.

    Rice milk mixture and chia egg whisked together
    Rice milk mixture and chia egg whisked together

    Pour chia and rice milk mixture into the flour mixture and whisk them together until most of the lumps are gone.

    Pancake batter after mixing dry and wet ingredients together
    Pancake batter after mixing dry and wet ingredients together

    Melt a bit of the Earth Balance, maybe half a teaspoon or so in a skillet over medium to medium high heat, depending on your burner strength.  When your skillet is hot, scoop some of the pancake batter into the skillet.  I used a Pampered Chef large scoop that holds about 3 Tablespoons of batter to portion out the pancakes into the skillet.

    Portioning out batter into skillet
    Portioning out batter into skillet

    Cook until the edges of the pancake look dry and there are bubbles in the batter.  You can use a spatula to gently lift up an edge to see how brown the pancakes are underneath.

    Pancakes just about ready to be flipped
    Pancakes just about ready to be flipped

    When they are a nice deep golden brown, flip them and cook until the other side is a nice deep golden brown. I found that I needed to cook them a bit longer than I normally would cook wheat flour pancakes, which I understand is fairly common for gluten free cooking.

    Pancakes after flipping
    Pancakes after flipping

    Enjoy them with some maple syrup and Earth Balance Soy Free buttery spread!

    Gluten Free and Dairy Free Pancakes
    Gluten Free and Dairy Free Pancakes
  • Gluten-Free and Dairy-Free Buttermilk Waffles

    Gluten Free and Dairy Free Buttermilk Waffles
    Gluten Free and Dairy Free Buttermilk Waffles

    Welcome to another segment of our Hangover Breakfast series!  Again, I used the method that the Gluten Free Girl and the Chef have provided on their blog to make an all-purpose flour mix, to choose flours with waffles and pancakes in mind, which I posted previously (see link below).  Waffles  were one of my favorite go to breakfasts after a night where I knocked a few too many back. So it seemed natural to try to recreate a waffle worthy of a morning after, or one of those lazy Sundays where you go to the diner and luxuriate in crispy waffles and way too much coffee.

    Just word to the wise, the pictures show me doing a half recipe than the one written out here.  There’s only two of us, and I was testing several other recipes at the same time, and we just couldn’t eat that much by ourselves.  So if you’re concerned that your attempt doesn’t look like mine, that’s why.  Also, you can let the waffles cool room temperature, put wax paper in between them and put them in a container in the freezer and toast them when you want some.  They’re a lot cheaper than store bought instant waffles and taste better too!

    Gluten Free and Dairy Free Buttermilk Waffles

    Makes about 6 waffles.

    • 280 grams of Gluten Free Flour Mix for Waffles & Pancakes (or you can try your normal gluten free flour mix)
    • 1 teaspoon salt
    • 3 teaspoons of baking powder
    • 2 Tablespoons brown sugar
    • 2 Tablespoons of ground chia seed meal
    • 6 Tablespoons of water
    • 2 teaspoons of vanilla
    • 1 1/2 cups of rice milk (or other alternative milk of your choice)
    • 2 Tablespoons apple cider vinegar
    • some canola oil to grease the waffle maker (I use an oil spray bottle like these, but I use the Pampered Chef version.  Any spray bottle would be much better for the environment and you don’t have to try to find a soy or dairy free version of Pam, etc.)

    Plug in waffle maker and set to highest temperature setting. Measure out flour, salt, baking powder and brown sugar and place in a bowl.  Whisk ingredients together until they are well incorporated into each other.

    Dry ingredients in a bowl
    Dry ingredients in a bowl

    Mix ground chia seed meal and water in a container to form a chia egg, setting it aside to let it gel.

    Chia and Water to form chia egg
    Chia and Water to form chia egg

    (Okay here’s where I forgot to take pictures of the next several steps.  You’d be amazed how hard it is to remember to stop to take pictures.)  Mix rice milk, vanilla, and vinegar together in a container large enough to add the chia egg.  Once the rice milk, vanilla and vinegar are well mixed, add the chia egg and whisk it together so that chia is well incorporated into the rice milk and vinegar.

    Pour chia and rice milk mixture into the flour mixture and whisk them together until most of the lumps are gone.  If your waffle maker has reached the correct heat, spray some oil on the top and bottom waffle plates, and pour some of the batter on your waffle maker.  You know your waffle maker and you’re the best judge of how much to use, but go ahead and start with half a cup and see how that goes.  Even on the highest setting, I found that these waffles still needed a little extra time to cook.  If the top and the bottom of the waffle started to separate as I very slowly tried to pull  the waffle maker lid up, I closed it back up and let them cook a little more, and then I had no problem and no mess.

    Enjoy with some maple syrup and Earth Balance Soy Free buttery spread!

  • Gluten Free Flour Mix for Waffles and Pancakes

    Gluten Free Flour Mix for Waffles and Pancakes
    Gluten Free Flour Mix for Waffles and Pancakes

    Using method that the Gluten Free Girl and the Chef have provided on their blog to make an all-purpose flour mix, I made up the following flour mix to make the waffles and pancake recipes that will be posted for our Hangover Breakfast series.  (These recipes will be posted on April 1st, keep your eyes out for them!) I used a kitchen scale and I used a glass measuring cup zeroed out on the scale thinking that I could give you the cup equivalents. The thing is, it worked out that all the amounts were not a full measurement of anything and were really weird amounts. If you’re going to do any serious gluten free baking, you probably need to get a kitchen scale. This can be used as an all purpose mix, but I chose these flours with waffles and pancakes in mind. To use a regular recipe with this mix, exchange 140 grams of this mix to every 1 cup of regular flour.

    Gluten Free Flour Mix for Waffles and Pancakes

    Makes about 3 1/2 cups of flour mix.

    • 50 grams of Oat flour
    • 50 grams of Sorghum flour
    • 50 grams of Millet flour
    • 50 grams of Masa Harina flour (a type of corn flour)
    • 150 grams of Sweet Rice flour
    • 150 grams of Potato Starch

    Measure out each of the flours carefully, and place into a large mixing bowl.  Using a whisk, mix the flours and starches together until they are very well mixed.  Store in an airtight container until you are ready to use it.  Enjoy!

  • Sriracha Oven Roasted Potatoes

    Sriracha Oven Roasted Potatoes
    Sriracha Oven Roasted Potatoes

    For the second post in our Hangover Breakfast series, what breakfast is complete without home fries?  But on the morning after (or pretty much all the time if I’m honest about it), I’m going to be pretty lazy about what I actually cook on the stove top that requires constant attention.  Therefore, I like my home fries oven roasted.

    Sriracha Oven Roasted Potatoes

    • 1/8 c. of olive oil
    • 1 Tablespoon of fresh minced garlic (3-4 cloves or go nuts)
    • 1 teaspoon of Italian Seasoning (it’s a mix of the usual suspects, marjoram, thyme, rosemary, savory, sage, oregano and basil, if you don’t have it, just use a dash of each.)
    • 1/2 teaspoon of Penzey’s Forward (if you don’t have this, use 1 teaspoon of Lawry’s Seasoning Salt or any other brand of season salt, and omit the salt below)
    • 1/2 teaspoon of salt
    • 1 teaspoon of Sriracha  (if you don’t have Sriracha, BUY SOME, or substitute any hot sauce, or if you don’t like spicy, omit it altogether)
    • 4-5 potatoes, washed and scrubbed and trimmed of any scars or bad spots, but otherwise unpeeled.

    Preheat oven to 475º degrees. Place all the ingredients except the potatoes into a bowl.

    Olive Oil and Spices in Bowl
    Olive Oil and Spices in Bowl

    Whisk oil and spices together so they are well incorporated.

    Well mixed olive oil and spices
    Well mixed olive oil and spices

    Wash, scrub and trim potatoes if you haven’t already.

    Washed, Scrubbed and Trimmed Potatoes
    Washed, Scrubbed and Trimmed Potatoes

    Cut potatoes into 3/4 inch pieces and place into the bowl with the olive oil and spices.

    Potatoes cut into 3/4 inch pieces
    Potatoes cut into 3/4 inch pieces

    Once you have finished cutting up all the potatoes, mix the potatoes with the oil and spice mixture until they are well coated.

    Potatoes coated with spice mixture
    Potatoes coated with spice mixture

    Place coated potatoes on a baking sheet in a single layer. Scrape the bowl and drizzle any of the remaining spice mixture on top of the potatoes.

    Coated Potatoes on baking sheet in single layer
    Coated Potatoes on baking sheet in single layer

    Put potatoes in preheated oven and roast for 20-30 minutes, turning occasionally to brown on all sides.

    Sriracha Oven Roasted Potatoes just out of the oven!
    Sriracha Oven Roasted Potatoes just out of the oven!

    Serve them with some sausage (see our Maple Glazed Homemade Breakfast Sausage Patties recipe), bacon, and some fresh fruit.  Enjoy!