Notice: Function _load_textdomain_just_in_time was called incorrectly. Translation loading for the wp-ultimate-recipe domain was triggered too early. This is usually an indicator for some code in the plugin or theme running too early. Translations should be loaded at the init action or later. Please see Debugging in WordPress for more information. (This message was added in version 6.7.0.) in /home/maryzahc/public_html/adultfoodallergies.com/wp-includes/functions.php on line 6121
Fish/shellfish-free – Page 26 – surviving the food allergy apocalypse (archive)

Tag: Fish/shellfish-free

  • Best Potato Soup

    Best Potato Soup
    Best Potato Soup

    This soup is very much for the potato people, my people. If you merely “like” potatoes, you will probably like this soup, but if, in your world, the potato is the pinnacle of nature’s bounty, this soup is for you. It contains other ingredients, but these serve mainly to make the potato shine in all its earthy goodness.

    If you really love the potato, make your chopped potatoes bigger — on the order of one-inch cubes, or mix larger and smaller cubes. The big chunks won’t break down as you reheat the soup. If you prefer your potatoes blend well with all the other ingredients, chop everything a little smaller. I opt for nice big chunks of all the vegetables, all of which then maintain their structural integrity and individual flavors and textures.

    The original recipe on which this soup is based is lost to the many moves of my grad school years. One of my roommates picked it up at one of our local grocery stores, in the free recipes section up front, and it was cheap and hearty, which made it a winner in our house. It still is. It bears up to some messing with, mainly on quantities and sizes of ingredients, and is easily made vegetarian, but the way I’ve written it up for you is the way I like it best.


    Best Potato Soup

    • 6 slices bacon, cooked and chopped or crumbled *(optional — leave off or use a veg substitute to make this vegetarian)
    • 2 teaspoons oil or fat, melted *(olive oil works great. I usually use bacon fat.)
    • 1/2 cup chopped onion
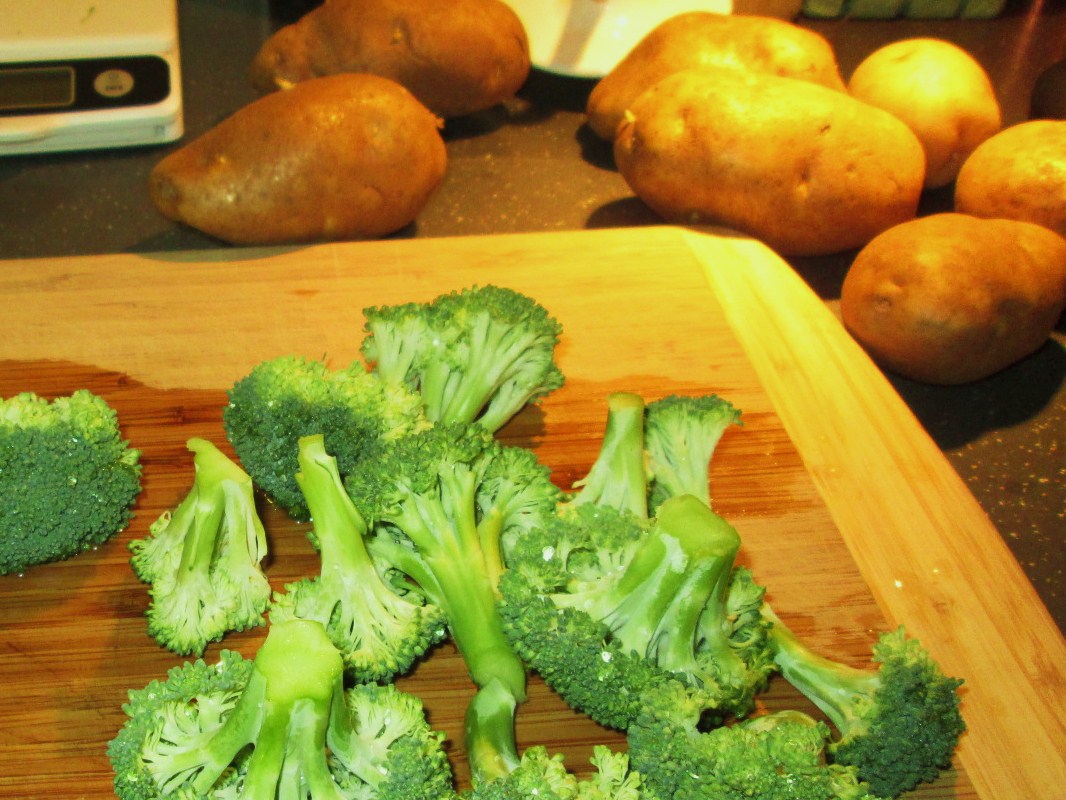
    • 1 cup chopped carrots
    • 4 stalks celery, chopped
    • 4 cups broth *(I prefer half vegetable broth, and half chicken broth, both homemade, but all of one or the other works fine.)
    • 4 cups cubed potatoes
    • 1/8 teaspoon cayenne pepper
    • salt, to taste *(probably not necessary if you are using commercial broths)
    • shredded cheddar cheese or cheddar-style vegan cheese *(Daiya is my preference)

    Heat oil in soup pot over medium heat until hot. Add onion. Cook until onion is translucent, 5 or so minutes. Add carrots, celery, broth, potatoes, and cayenne. Bring to a boil and then reduce heat to low and simmer 20 minutes or until potatoes are done. Taste, add salt if needed. Serve topped with bacon and shredded cheese, if desired.

    Best Potato Soup
    Best Potato Soup

    It really is that easy, and this soup ages very well over the next 5 days or so. The recipe easily doubles to feed a crowd (or yourself all week).

  • Killer Chocolate Fudge-y Brownies

    Killer Chocolate Fudge-y Brownies
    Killer Chocolate Fudge-y Brownies

    So Mary Kate put up a recipe for brownies a bit ago, but it had almond flour, coconut flour and coconut oil in it, which are a big no-no for me.  So I wanted to see if I could do a brownie recipe I could eat, especially with some of my new restrictions. Keep in mind for those of you who have a corn issue, that I am not that sensitive, and that I am not dealing with packaging and cross contamination issues at this point, I’m just dealing with obvious corn and derivatives, and using safe for me ingredients.

    • 2 Tablespoons of ground or milled chia seed
    • 1/3 cup and 2 teaspoons of water
    • 350 grams of Denise’s All Purpose Gluten Free Flour Mix (I used the Gluten Free Girl’s post on gluten-free holiday baking and modified it a bit – to make 500 grams of the mix, you’ll have a bit extra to use for other recipes, whisk together thoroughly 50 grams of oat flour, 50 grams of teff flour, 75 grams of sorghum flour, 25 grams of potato flour, 125 grams of sweet or glutinous rice flour, 75 grams of potato starch, 50 grams of arrowroot, and 50 grams of tapioca starch) or 2 ½ cups of All Purpose Flour if you can have wheat
    • ½ teaspoon of sea salt
    • ½ teaspoon baking powder (For corn free baking powder you can use this recipe)
    • 1 ½ cups of sugar
    • ½ cup of brown sugar
    • ¼ cup of shortening, vegan margarine, etc., whatever is safe for you, and a little bit extra to grease the pan.
    • ¼ cup of olive oil
    • ¾ cup of water
    • 1 cup of cocoa powder
    • 1 ½ cups of safe (dairy free, nut free, soy free) chocolate chips or homemade chocolate if you’re corn free (I used this recipe, but modified it to use this sugar syrup recipe instead of honey, as honey can be problematic for people allergic to corn if you don’t know whether your beekeeper is feeding his bees corn syrup or not.  Also, I used the whole batch in these brownies, so I didn’t let them cool into chocolate chips, I just put the chocolate into a heat safe bowl as described below.)
    • 1 Tablespoon of vanilla extract (Here’s a bunch of recipes for vanilla extract, make sure to use safe alcohol if corn or wheat are an issue for you. I used Luksusowa Vodka because it’s made only from potatoes, where some vodkas may also use grain or corn.)

    Preheat your oven 325°F and lightly grease a 9 by 11 inch pan with a little bit of the shortening or margarine.

    Whisk together the ground or milled chia seed and 1/3 cup and 2 teaspoons of water in a small bowl and set aside.

    In an electric mixer bowl, whisk together the flour, baking powder and salt.

    Place the chocolate chips into a large metal or glass bowl (you want it to be heat-safe).

    In a saucepan over medium heat, combine the sugar, brown sugar, shortening or margarine, oil, cocoa powder, and the water and bring it to a boil, stirring constantly.

    Melted shortening, sugar, coffee and cocoa powder in saucepan
    Melted shortening, sugar, coffee and cocoa powder in saucepan

    Once it is boiling, pour the mixture into the heat-safe bowl containing the chocolate chips, mixing it quickly so that the chocolate chips melt and combine with the mixture.

    Pour the chocolate mixture into the mixer bowl containing the flour, scraping down the chocolate mixture bowl thoroughly.  Add the chia and water mixture and the vanilla to the mixer bowl and mix on medium-high speed until the brownie batter is smooth. I used the batter beater on my KitchenAid mixer.

    Spread the batter evenly in the greased baking pan.

    Batter spread evenly in the pan
    Batter spread evenly in the pan

    Bake it in the preheated oven for 65-75 minutes. Check them using a toothpick, the toothpick should come out clean, and then remove the brownies from the oven.  Let the brownies cool completely before you cut or serve them.

    Brownies after baking
    Brownies after baking

    Some fun variations would be to mix nuts or more chocolate chips into the batter before baking, or maybe, if you like some spice, maybe a 1/2 teaspoon of cayenne pepper, or if you like less spice, a 1/2 teaspoon of cinnamon.

    Have fun with them!

    Killer Chocolate Fudge-y Brownies
    Killer Chocolate Fudge-y Brownies
  • Creamy Broccoli Soup

    Creamy Broccoli Soup
    Creamy Broccoli Soup

    I love soup season. Not only is soup just really good food, but a pot of soup makes 4-12 servings, depending on the recipe, which usually gives me lunch for the week. In one recipe. I love that.

    I’m not sure exactly what I was going for when I started working on this soup — cream of broccoli, broccoli potato, broccoli cheese, potato cheese? My notes are a little unclear. It sort of ended up being an intersection of all of them — a creamy, rich soup, with a tangy cheesiness, and lots of broccoli, which is by far one of my favorite vegetables ever. This soup is great for the cold nights we’re starting to have, and it makes about 6 servings.

    Creamy Broccoli Soup

    • 2 lbs. russet potatoes, peeled and roughly chopped
    • 1 lb. broccoli crowns, split into florets
    • 2 teaspoons salt, split
    • 1 Tablespoon sherry (could substitute red wine vinegar, but sherry’s flavor is better here)
    • 2 cups chicken or vegetable stock
    • 1/3 cup + 1/4 cup chicken or vegetable stock
    • 1 Tablespoon Earth Balance or other solid fat
    • 3 Tablespoons tahini
    • 3 Tablespoons ketchup
    • 1 teaspoon mustard
    • 6 Tablespoons nutritional yeast
    • 1 Tablespoon + 2 teaspoons lemon juice
    • 1/4 teaspoon garlic powder
    • 1/4 teaspoon salt (IF NEEDED)
    • pepper to taste
    • shredded cheddar style cheese/cheese sub of your choice, to top, optional

    Put roughly chopped potatoes in a saucepan, with water to cover, and about 1 teaspoon salt. Over high heat, boil until well done (test with a fork). Drain and mash roughly.

    In a separate pot, put broccoli florets and about 1/2 to 1 inch of water. Cover and bring to a boil.  Cook broccoli until bright green and JUST done — this takes just a few minutes. The broccoli should still be crisp, but tender. Even if you like your broccoli more well-done, take it out now — it will cook more in the soup. Immediately when done, drain into a colander and let cool. When cool enough to handle, chop it.

    Mix the potatoes, broccoli, 2 cups of vegetable stock, and sherry and set aside while you make the sauce.

    In a small sauce pan, mix the 1/3c + 1/4 cup stock, and the rest of the ingredients (minus the cheese for topping) over low heat until well combined. You may want to taste this before adding the salt, as your stock may be salty enough. I generally buy low-sodium broth or stock, though, and need this little bit of additional salt.

    Add to the pot with the rest of the ingredients, and heat over low, covered, 20-30 minutes. Add more stock if needed, and adjust the seasonings before serving, sprinkled with cheese if you like.

    Broccoli and Potatoes
    Broccoli and Potatoes
  • Baked Eggplant and Zucchini Fries with Spicy Mayo Dipping Sauce

    Baked Eggplant and Zucchini Fries with Spicy Mayo Dipping Sauce
    Baked Eggplant and Zucchini Fries with Spicy Mayo Dipping Sauce

    So my friend Mary, the kale whisper, managed to procure about 5 pounds of eggplants for me, or, in other words, a crap ton of eggplants, from her neighbor’s garden. Because she’s just that awesome and cool.  So I made and canned 5 pints of Eggplant Caponata and 6 quarts of a version of Ratatouille, but I still had some eggplant and zucchini left. So I decided to try this recipe from the Gourmande in the Kitchen, but make it dairy, egg, and almond free too, since I’m allergic to all those things, and use up the zucchini.

    Baked Eggplant and Zucchini Fries with Spicy Mayo Dipping Sauce
    • 1 small eggplant about 7 inches long, sliced into pieces about 3 inches long and about 1/3 of an inch thick
    • 1 small zucchini about 7 inches long, sliced into pieces about 3 inches long and about 1/3 of an inch thick

    First dry dredge:

    • 1/2 cup of arrowroot starch (you could also use tapioca or corn starch, but corn is out for me, since I’m allergic to it)

    Second wet dredge:

    • 2 Tablespoons of safe Adobo seasoning (If you don’t have Adobo seasoning, mix 1/8 cup of paprika, 1 1/2 Tablespoons of ground black pepper, 1 Tablespoon of onion powder, 1 Tablespoon of dried oregano, 1 Tablespoon of ground cumin, 1/2 Tablespoon of ground chipotle, and 1/2 Tablespoon of garlic powder, this makes half a cup of seasoning).
    • 2 teaspoons of salt
    • 1/3 of a cup of arrowroot starch
    • 1/3 of a cup of olive oil
    • 2/3 of a cup of water

    Third dry dredge:

    • 2 cups of gluten free bread crumbs

    Spicy Mayo Dipping Sauce:

    • 1/2 cup of Earth Balance Mindful Mayo (or other mayo that’s safe for you)
    • 1 Tablespoon of Sriracha, or your other favorite hot sauce

    Preheat your oven to 425°F.  Place a piece of parchment paper on a baking sheet and use an oil mister to spray the parchment paper.  You can skip the parchment paper, and just spray oil on the baking sheet, but it will be easier to clean up.

    Wash, trim and slice your zucchini and eggplant into pieces about 3 inches long and about a 1/3 of an inch thick.

    Sliced Zucchini
    Sliced Zucchini
    Sliced Eggplants
    Sliced Eggplants

    Place the arrowroot starch for the first dry dredge in a flat bottomed container with enough room to move the pieces around to coat.

    Arrowroot Starch - first dry dredge
    Arrowroot Starch – first dry dredge

    Place the ingredients for the second wet dredge in a shallow bottomed bowl and whisk them together.  Make sure the bowl has enough room to move the pieces around to coat them.

    Wet mixture - second dredge
    Wet mixture – second dredge

    Place the bread crumbs for the third dry dredge in a container with enough room to move the pieces around to coat.

    Dip each piece of zucchini or eggplant in the first dry dredge (arrowroot starch), then in the second wet dredge (arrowroot, water, oil and spices mix), then in the third dry dredge (the bread crumbs) and place them on the baking sheet.

    First Dredge
    First Dredge
    Second Dredge
    Second Dredge
    Third Dredge
    Third Dredge

    Once all the pieces are coated, place baking sheet in the oven and bake for 30-40 minutes until crispy.

    Fries after baking
    Fries after baking

    While your fries are baking, mix Earth Balance Mindful Mayo and your favorite hot sauce in a dipping bowl.

    Baked Eggplant and Zucchini Fries with Spicy Mayo Dipping Sauce
    Baked Eggplant and Zucchini Fries with Spicy Mayo Dipping Sauce

    Enjoy!

  • Squash and Sprout Rice Platter

    Squash and Sprout Rice Platter. Photo by J. Andrews
    Squash and Sprout Rice Platter. Photo by J. Andrews

    I started working on this particular dish about a year ago when I discovered this branch of Brussels sprouts at a Trader Joe’s and had to buy it. How do you not buy that?

    Sprouts!
    Sprouts!

    I made a lot of different Brussels sprouts recipes to use them all up, but most of them involved roasting the sprouts. There is no better way. Roasting is also really the only way to cook butternut squash, and I thought maybe these things would go together well, maybe with some rice and a sauce. I made a dressing using a magical mustard I’d brought back from Paris that was curried apricot mustard, and I’ve been trying to reproduce that flavor since. It took more than a few tries, but it was still cheaper than going back to Paris (where, I need to tell you, there is a whole store that just sells mustard. They have mustard on tap. That was absolutely a highlight of my trip.)

    I wanted to call this a pilaf, but apparently a pilaf requires the rice to be cooked in a flavored broth. This dish calls for brown rice cooked in very exciting water, but the dressing you toss everything with at the end adds plenty of flavor, and the vegetables have their own flavors — plus carmelization (i.e. oxidization of the sugars) because of the roasting. Tasty.

    Squash and Sprout Rice Platter

    Preheat oven to 450F.

    • 3/4 cup brown rice
    • 1/4 cup wild rice
    • 2 1/4 cups water

    OR

    • 1 cup brown rice
    • 2 1/4 cups water

    Cook rice however you normally cook rice. I throw it in my rice cooker. This takes about 40 minutes, and so will your vegetables, so start the rice first and then move on.

    • 1/2 lb. butternut squash, peeled* and cut into 1/2 inch cubes — about the size of playing dice
    • 1/2 lb. Brussels sprouts, ends trimmed off and any weird outer leaves removed, halved or quartered depending on your preference — make them bite-sized
    • 1 cup raw walnut halves or pieces (optional)
    • 2 Tablespoons to 1/4 cup oil of your choice (I use olive oil or safflower oil)
    • 1 teaspoon seasoned salt (I use a spicy seasoned salt, but you can use regular — whatever is your favorite)
    • 1/2 teaspoon salt

    Line three separate baking sheets with parchment paper (or don’t, but this makes clean up easier).

    Toss the squash with 1-2 Tablespoons of oil, lay out in a single layer on a baking sheet, and sprinkle with either salt, seasoned salt, or spicy seasoned salt. I prefer the latter. Throw them in the oven and set the time for 25 minutes.

    Toss the sprouts with another 1 Tablespoon of oil, lay out on the second sheet, and sprinkle with about 1/2 teaspoon salt. When the time goes off for the squash, throw the sprouts in (don’t remove the squash!) and reset the timer for 10 minutes.

    Spread the walnuts out on the third sheet. When the time goes off again, add the walnut pan to the oven and check the sprouts — remove if necessary. Set the timer for 5 minutes.

    A note for the nut allergic: The walnuts are optional in this dish!  If you aren’t allergic but just don’t like whole walnuts, chop them up some, as they do add a great flavor to this dish.

    Your total cooking time is 45 minutes. The squash gets the full amount, the sprouts about 15, and the walnuts 5. This works out perfectly in my oven, but keep an eye out, especially for the nuts.

    For the sauce:Bottles

    • 4 Tablespoons balsamic vinegar
    • 1 1/2 teaspoon molasses
    • 2 teaspoons apricot jam
    • 1/2 teaspoon curry powder (again, if you like the spice, get the spicy one)
    • 3 1/2 teaspoons Dijon mustard — grainy if you wish, but smooth works best here
    • 1 1/2 Tablespoons high-quality olive oil

    Whisk all ingredients together.

    Plate the rice, add the veggies, drizzle on the sauce, and sprinkle walnuts over the top. Dig in and enjoy.

    Squash and Sprout Rice Platter. Photo by J. Andrews
    Squash and Sprout Rice Platter. Photo by J. Andrews
  • End-of-Summer Garbanzo Chili

    End of Summer Chili
    End of Summer Chili

    Yes, I know, it’s about a week late for the end of summer, but then, the zucchini is still around, isn’t it? The zucchini lasts through the end of summer, garbanzo beans always remind me of summer salads and hummus, and the adobo seasoning and fire-roasted tomatoes taste of grilling season. This quick hot meal has some of the great flavors of summer, but is warm and filling (and made indoors).

    Adobo seasoning is one of my recent favorites, as there is a ton of flavor in it, but it’s not really spicy. There are varieties of adobo, but the one I’m referring to appears to be Puerto Rican in origin — a dry spice mix, often used to rub on meats, that consists of onion, garlic, Tellicherry black pepper, Mexican oregano, cumin, and cayenne pepper. My version is from Penzey’s Spices, but I have seen it at the grocery store, so I’m assuming it’s not too hard to find in the US. It makes almost everything better.

    End-of-Summer Garbanzo Chili

    Makes 3-4 servings, depending on how hungry you are.

    • 2 teaspoons oil
    • 3 Tablespoons chopped onion
    • 2 small zucchini, grated (“small” being about 6 inches long, 1 inch diameter — the most common size found in your average US grocery store. Honestly, a little more or less won’t hurt here.)
    • 2 oz. (1/2 half a small can) of diced jalapeños OR one fresh, diced jalapeño pepper OR a small can of green chiles (or if you’re Denise, all of the above, possibly)
    • 1 can (15 oz.) garbanzo beans, drained and rinsed
    • 1 can (15 oz.) diced tomatoes, fire-roasted if you wish
    • 1 Tablespoon adobo seasoning
    • 1/4 cup + 2 Tablespoons millet
    • 3 Tablespoons water
    • salt to taste
    Zucchini and Beans
    Zucchini and Beans

    In a pan heated over medium-low heat, add your oil to the warmed pan. When it shimmers, add the onions. I always chop whole onions, even when I need only half for a recipe, and the rest goes into a bag in the freezer just for meals like this. Add it straight from the freezer to the hot oil, but be careful of the splatters.

    Cook onion until translucent, then add the zucchini and stir until fully coated with oil and integrated with onions, a minute or two. Then add the beans, tomatoes, and adobo, stirring each into the dish. Bring to a low boil, then reduce heat and simmer 5 minutes uncovered.

    Add the millet and water, and cover, simmering another 20 minutes, covered. Check the millet to see if it’s done, and if needed, add a bit more water (go 1 Tablespoon at a time) and time (say, 5 minutes at a go). Millet should be firm, but not crunchy, when done.

    This is also good with a sprinkle of shredded Daiya mozarella on top, if you have it, but you don’t need it.

    End of Summer Chili
    End of Summer Chili
  • Meatball Sub Meatballs

    Meatball Sub Meatballs in Marinara Sauce over Penne

    Meatball Sub Meatballs in Marinara Sauce over Penne

    As I stated a week ago in my Quick-ish Marinara Sauce post, I really miss meatball subs. Although I don’t have a safe bread or cheese, this meatball recipe gets me at least part way there.

    Meatball Sub Meatballs

    Makes about 24 large meatballs, about the size of golf balls or ping pong balls.

    • 1 pound of 80/20 ground pork
    • 1 pound of ground beef (I prefer a higher fat content for the beef as well, but that’s up to you)
    • 1 Tablespoon of ground chia seed
    • 3 Tablespoons of water
    • 1 Tablespoon of olive oil
    • 1 medium onion minced very finely
    • 1 teaspoon of salt
    • 1/2 teaspoon of ground black pepper
    • 1/2 teaspoon of oregano
    • 1/2 teaspoon of basil
    • 1/2 teaspoon of thyme
    • 1/2 teaspoon of garlic powder
    • 3/4 cup of gluten-free bread crumbs
    • a small amount of olive oil for greasing the baking sheet.

    Preheat oven to 375°F.

    Take ground pork and ground beef and crumble it into a large mixing bowl.

    In a small bowl, mix chia seed, water, and olive oil together to make a chia egg.  Set it aside.

    Mince onion and add it to the bowl with the ground pork and ground beef.

    Add the salt, ground black pepper, oregano, basil, thyme, and garlic power to the bowl, sprinkling them evenly over the beef and pork (it’ll be easier to mix it in).

    Add your bread crumbs and the chia egg, and use your hands to knead the mixture until it is thoroughly combined.

    Meatball mix after all ingredients combined
    Meatball mix after all ingredients combined

    Grease your baking sheet. Form meatballs about the size golf balls. I used a large scoop from Pampered Chef to form my meatballs, but you can use your hands instead. Place them on the baking sheet, spaced out evenly, and put them in the oven.

    Meatballs before cooking
    Meatballs before cooking

    Bake them for 30 minutes.  Once they are done (internal temp of 161°F) you can add them to sauce, or you can freeze some of them to use later.

    Meatballs after cooking
    Meatballs after cooking

    Enjoy, and if you’ve got ideas for dairy-free, egg-free, gluten-free, corn-free bread recipes, I want to hear about them!

    Meatball Sub Meatballs
    Meatball Sub Meatballs
  • Pasta e Fagioli

    pasta e fagioli
    pasta e fagioli, photo by j.andrews

    Growing up, we didn’t eat a lot of pasta. Every few months, there was spaghetti and meatballs, but mostly, we had potatoes. It turns out, the rest of my cohort were eating a lot more pasta than I was, and it seems to be something of a comfort food for many people. Personally, I like it because it’s easy.

    We served a pasta e fagioli soup at a sandwich restaurant I worked at, but years ago, someone gave me a recipe for a pasta dish, not soup, that was mostly a can each of beans and tomatoes. It was easy, but kind of boring, and it seemed like something that could take on a ton more vegetables, both for health and nutrition and for color. So I started tinkering. I’ve put off putting this up on the blog since last fall, primarily because I’m still tinkering. Because of that, I’m going to give you some options and ranges on amounts of ingredients. But as we move into cooler weather (well, in New England — I guess it was 90-something in Bismarck on Friday), I am thinking of heartier meals that are still quick and make enough for leftovers.

    So here you go. If you have dried pasta, a can of beans, and a can of tomatoes, and garlic, you can make a version of this happen in about 40 minutes. The longer cooking time is because the beans begin to break down and make the sauce creamy. If you make the sauce a day or so ahead, you have an even quicker meal with a creamier sauce. If you come up with a variation you like, please share it in the comments!

    simmering bean sauce photo by j.andrews
    simmering bean sauce, photo by j.andrews

    Pasta e fagioli

    • 2 Tablespoons of olive oil, cooking grade (generally not extra virgin)
    • 1 teaspoon (2 cloves) minced garlic
    • 2 Tablespoons chopped sweet onion (optional)
    • 2-4 stalks celery, chopped
    • 1/4-1/2 of a bell pepper chopped finely (optional)
    • 1 8 oz. package of white button mushrooms, washed and broken (optional, I guess)
    • 1 8 oz can of cannellini beans, drained and rinsed
    • 1 1/2 cups of canned tomatoes, diced or roughly chopped, and their juice
    • 5-8 oz. baby spinach, roughly chopped (optional, but really good in this)
    • 1-3 Tablespoons good quality olive oil (the fancier kind you’d use for salad dressing, if you have it)
    • salt and pepper to taste
    • Pasta of your choice (I used Ancient Harvest quinoa and corn shells)

    In a large skillet, heat up your first 2 T of olive oil over medium heat. When it is shimmering hot, add the garlic and the onion (if using). Stir frequently.

    As those aromatics become translucent, add the celery and bell pepper. Stir to completely coat with oil, then add the mushrooms. You’ve broken instead of chopping the mushrooms because they hold their shape and shrink less, and this gives them more texture. Yes, I suppose these are optional, too, if you really hate mushrooms. I just find that hard to imagine (sorry, Denise).

    When the mushrooms are thoroughly wilted (that’s what they will look like), add the beans and the tomatoes, but reserve most of the tomato juice. I just scoop the tomatoes out with a slotted spoon. Stir these in will, and lower the heat to a simmer. Cook this for 15-20 minutes, stirring occasionally, then add the tomato juice, and cook another 15-20 minutes. The beans will start to break down, and this gives the “sauce” a great texture — it is very thick and chunky at this stage.

    Assuming your pasta takes about 10 minutes, start it now. Cook according to package directions, making sure to reserve some of the water when you drain it for the step below.

    At this point, add the spinach to the bean mixture, and cook until all the spinach is wilted. Decide if you want your sauce a bit thinner at this stage. If so, add from 1T to 1/4 cup of your pasta water, adding slowly and stirring until you get the desired consistency. If not, go directly to adding another 1-3 Tablespoons of good quality olive oil (the more you add, the richer it gets, just like hummus), stirring it in thoroughly. Taste your sauce and add salt (if needed) and a bit of fresh ground pepper.

    Serve sauce over pasta.

    pasta e fagioli photo by j.andrews
    pasta e fagioli, photo by j.andrews