Notice: Function _load_textdomain_just_in_time was called incorrectly. Translation loading for the wp-ultimate-recipe domain was triggered too early. This is usually an indicator for some code in the plugin or theme running too early. Translations should be loaded at the init action or later. Please see Debugging in WordPress for more information. (This message was added in version 6.7.0.) in /home/maryzahc/public_html/adultfoodallergies.com/wp-includes/functions.php on line 6121
Fish/shellfish-free – Page 25 – surviving the food allergy apocalypse (archive)

Tag: Fish/shellfish-free

  • Spicy Green Pork Amazing (a.k.a. Pork Chile Verde) and a bonus recipe!

    Spicy Green Pork Amazing (a.k.a. Pork Chile Verde)
    Spicy Green Pork Amazing (a.k.a. Pork Chile Verde)

    So, here’s the thing.  Most of you will be able to make this recipe without making the bonus recipe for Roasted Green Tomatillo Salsa, because you’ll be able to buy safe canned green tomatillo salsa at the grocery store. With the corn allergy, I can’t because it’ll have citric acid or some other corny evil thing in it. I do have some green tomatillo salsa I canned myself earlier in the summer, but since I would end up using it all up for this one dish, and since my local grocery store had tomatillos this week, I made up a fresh batch for this recipe.  You’ll also need a 4 quart or larger crock pot for this recipe and a food processor or a blender if you’re making the salsa.

    Spicy Green Pork Amazing (a.k.a. Pork Chile Verde)

    • 3 1/2 – 4 pounds of boneless pork butt, cut into cubed pieces about 1-2″ inches square and trimmed of fat or left whole in one piece (see your options below).
    • 2 small onions or 1 medium onion, diced into half inch square pieces
    • 4 stalks of celery, cut into half inch pieces
    • 1 Italian pepper or 1 green bell pepper, de-stemmed and de-seeded and chopped into half inch pieces

      Italian Pepper, just for identification and reference
      Italian Pepper, just for identification and reference
    • 3 cups of green tomatillo salsa, either from the grocery store or using the recipe below
    • 2 cloves of garlic, minced
    • 1 1/2 teaspoons of ground cumin
    • 1 1/2 teaspoons of dried oregano
    • 1 teaspoon of ground black pepper
    • 2 Tablespoons of lemon juice
    • salt to taste when you have finished cooking

    If you have safe green tomatillo salsa you can buy, skip past this next part to the ♦ symbol below.

    Roasted Tomatillo Salsa

    This recipe is based on the Roasted Tomatillo Salsa from The Barnyard Bistro blog, but I’ve messed with it a bit and altered it for the purposes of this recipe.

    Roasted Tomatillo Salsa
    Roasted Tomatillo Salsa
    • 2 pounds of tomatillos, husked and washed
    • 2 medium onions, chopped into about half to one inch pieces
    • 2 Serrano chile peppers, de-stemmed and de-seeded and cut into halves or quarters
    • 4 cloves of garlic, trimmed of the stem end
    • 1/2 cup of tightly packed cilantro, washed and chopped
    • 1 1/2 teaspoons of salt
    • 1/3 of a cup of water.

    Place the tomatillos, the onions, the Serranos and the garlic on a large baking sheet or roasting pan that’s safe for the broiler.

    Tomatillos, Serranos, Onions and Garlic on a Baking Sheet
    Tomatillos, Serranos, Onions and Garlic on a Baking Sheet

    Turn your broiler to 500° and broil until the tomatillos are an olive green color and have browned. You may hear some of them pop, it’s okay.

    Broiled Tomatillos, Serranos, Onions and Garlic on a Baking Sheet
    Broiled Tomatillos, Serranos, Onions and Garlic on a Baking Sheet

    Once the tomatillos are done, put the roasted ingredients in a blender or food processor as well as any juices that have cooked out into your pan, making sure that you’ve de-glazed any of the good tasty browned bits too.  Add the cilantro, the salt and the water, and process. You might have to do this in batches, depending on the size of your blender or food processor.  I did.  I used a large bowl hold the batches and then mixed it altogether at the end.  This makes about 4 cups of salsa, so you’ll have enough for the recipe and some to just eat as well.

     ♦  Now that we have our safe salsa, or you’ve gotten some from the grocery store, it’s time to go onto the pork. Depending on your inclination, you can use the pork all in one piece and shred it later when it’s cooked, or you can cut into pieces about 1-2″ inches square and trim off the extra fat as you go. I cubed and trimmed my pork and removed about half a cup of extra fat. 

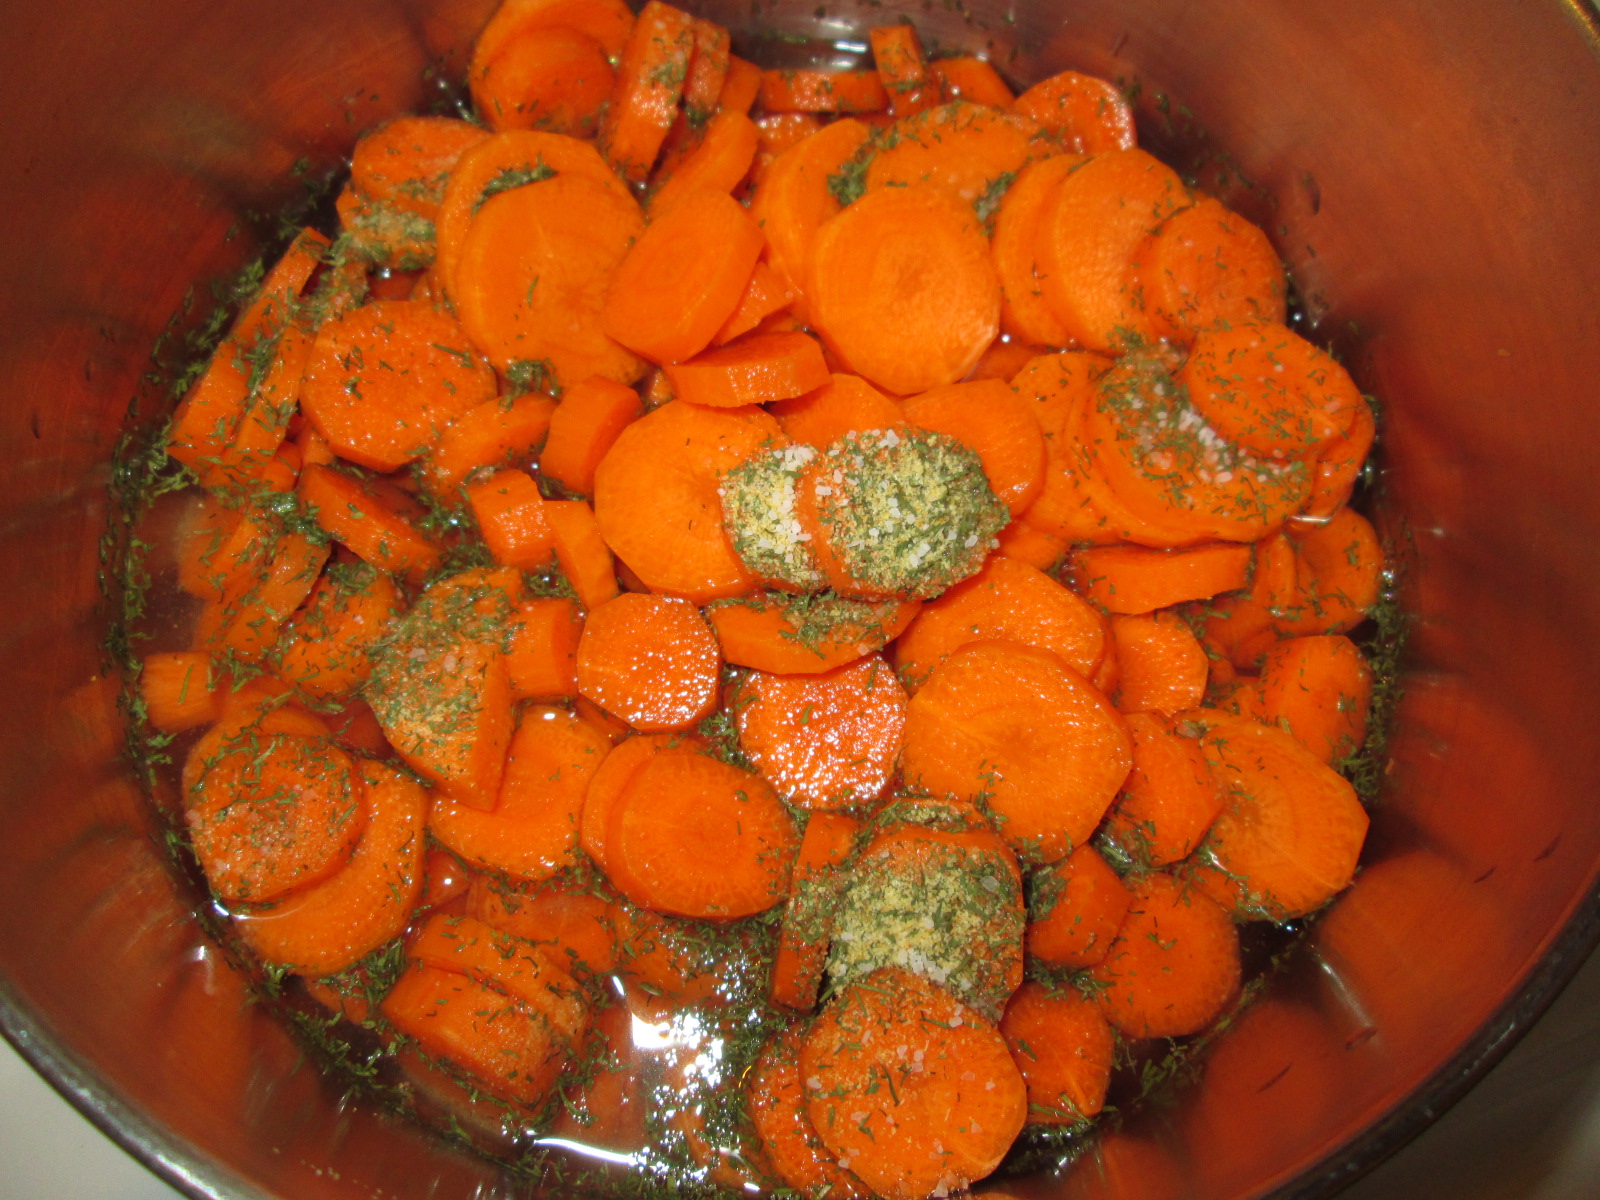
    On the bottom of your crock pot, place the celery and onions that you’ve cut into half inch pieces. Place either the whole piece or the cubed and trimmed pieces of boneless pork butt in the crock pot on top of the celery and onion. Place the chopped Italian or bell pepper on top of the pork.

    Pork, Italian Pepper, Onions and Celery in Crock Pot
    Pork, Italian Pepper, Onions and Celery in Crock Pot

    In a bowl, add the green tomatillo salsa, the minced garlic, the cumin, the dried oregano, the ground black pepper, and the lemon juice. and mix it thoroughly. Pour the mixture over the pork, making sure to scrape the bowl well, and get every bit into the crock pot. I also use a spatula to push the mixture down through the pork pieces if you have cubed the pork. If you like less sauce, you can cut the salsa back by a cup, but I like mine with a lot.

    Salsa Mixture over Pork, Italian Pepper, Onions and Celery in Crock Pot before cooking
    Salsa Mixture over Pork, Italian Pepper, Onions and Celery in Crock Pot before cooking

    Put the lid on your crock pot, and cook on low for 8 to 10 hours, or on high for 4 to 5 hours.

    Spicy Green Pork Amazing (a.k.a. Pork Chile Verde) after cooking
    Spicy Green Pork Amazing (a.k.a. Pork Chile Verde) after cooking

    You can serve this with safe for you tortillas (there’s a lot of recipes out there) and other fixings, or you can serve it over rice. Also, if you have a dairy free sour cream replacement product you can use, that would be great as a garnish.

    Spicy Green Pork Amazing (a.k.a. Pork Chile Verde)
    Spicy Green Pork Amazing (a.k.a. Pork Chile Verde)

    Enjoy!

  • Butternut Squash Soup

    Butternut Squash Soup
    Butternut Squash Soup

    If I’m completely honest, I have some mixed feelings about butternut squash. In some preparations, its earthy and fruity and warming. In others, I don’t know, but I don’t like it. For our holiday potluck, though, one of my coworkers made an apple and squash soup that was quite lovely and tasty. She share the recipe, but I ended up not really following it, tweaking the flavors to my own liking. This is a pureed soup, so a stick blender is really helpful. Though it has other uses, the stick blender shines when pureeing hot soups — and it is way easier to clean than the regular blender.

    The apples bring out the fruity quality of the squash, and I really like the flavor of butternut with some spice, so the cayenne provides a bit of heat. The use of celery leaves adds flavor and uses a typically wasted part of the vegetable. If you want to make this easy, buy peeled and cubed squash.

    Happy Squash
    Happy Squash

    Butternut Squash Soup

    • 1 Tablespoon oil (I’ve been using safflower)
    • 1 sweet white onion, quartered and sliced
    • 1 teaspoon salt
    • 20 oz butternut squash, cubed (about one medium squash, but I frequently buy it chopped)
    • 2 tart apples, peeled, cored, and quartered
    • 1 3/4 cup vegetable stock
    • 1/4 cup celery leaves, chopped
    • 1 teaspoon cardamom
    • 1/8-1/2 teaspoon cayenne

    In a large hot sauce pan, add oil and then onion and salt. Cook, stirring occasionally, until the onion begins to brown.

    Add the squash and then the apples, and cover, without stirring, cooking about 10 minutes with the lid on (steaming the squash and apples).

    Add stock and stir well. Cover, bring to a boil, and reduce the heat to low. Simmer until squash is soft and tender, 15-30 minutes, depending on the size of the squash cubes.

    Add celery leaves, cardamom, and cayenne (adjust to suit your tastes), stir, and cover again. Remove from heat and let the soup cool a bit. Using a stick blender, puree the soup — or do it in a blender or food processor, in smaller batches, being careful with the steam build-up.

    Reheat to serving temperature, or cool completely and reheat to serve the next day. The latter really allows the flavors to meld, so I’d recommend making it ahead if possible.

  • Quick Chocolate Bites

    Quick Chocolate Bites
    Quick Chocolate Bites

    So the holiday season has brought with it the groaning tables of baked goods and candies, both homemade and not, and none suitable for the food allergic. So it’s time to make your own! I’ve made a few recipes of gluten-free vegan cookies, with mixed results (all edible, none outstanding, none of the recipes my own), but cookies are time-consuming and kitchen-consuming. So are cakes and pies.

    Needing a last minute treat for the holidays, to satisfy my own sweet tooth, which spends a lot of time being teased these days, I wanted to try making truffles out of coconut milk and chocolate, with some added flavors to deepen the chocolate’s flavors. I had a great idea, but like so many great ideas, it didn’t pan out quite as planned — these didn’t set up the way I wanted them to, so I froze them. The result was a homemade version of those single bite ice cream treats that came out a few years ago.

    They are super quick to make, with most of the time involved being cooling and freezing the chocolate. The dishes involved are minimal. These should keep for a few weeks in the freezer, and some of them are going to work with me for the mid-afternoon chocolate cravings.

    Quick Chocolate Bites
    Quick Chocolate Bites

    Quick Chocolate Bites

    • 10 oz of chocolate, chopped (or use chocolate chips)
    • 13.5 oz of full-fat coconut milk (1 can)
    • 3 Tablespoons good berry jam (strawberry, raspberry, black cherry), seedless recommended (and by “good,” I mean that I generally choose jam — and many food products — by looking for the one with the fewest number of ingredients. For jam, I prefer sugar be used rather than any other sweetener, and few or no preservatives)
    • 1 teaspoon of basil, chopped finely, optional (the frozen cubes of herbs are great for recipes like this)

    Put the chocolate in a heat-safe bowl, and set aside.

    In a sauce pan, combine the coconut milk, jam, and basil, if using. Whisk together, and bring to a boil.

    Pour the boiling coconut milk mix over the chopped chocolate, and stir until chocolate is fully melted. Let the mixture cool until it’s not steaming anymore, then cover and refrigerate until fully chilled (overnight is good).

    Using a spoon or small cookie scoop, portion out approximately 1 Tablespoon dollops of the pudding consistency mixture onto a foil or parchment paper-covered cookie sheet, and freeze until solid, about an hour. Store in sealed containers or plastic bags. Use to satisfy chocolate or sugar cravings as they arise.

  • Fruit-Flavored Gummy Candy

    Fruit Flavored Gummy Candy - Two Versions
    Fruit Flavored Gummy Candy – Two Versions

    So, before the whole corn and coconut thing, I was an aficionado of fruit flavored pure sugar candy. If it had fake coloring, fake fruit flavors and was primarily made of out sugar (meaning corn syrup), then I was your girl. Skittles, Nerds, Sour Neon Gummy Worms, Sour Gummi Watermelon Slices, Jolly Ranchers, Starbursts (particularly the fave reds), Jelly Belly Sour jelly beans – anyway, you get the picture, if it was aimed at ten year old kid, I was a fan. Candy, caffeine and I had a love triangle going on while I was in college, law school and during my years of private practice. Candy was part of the fuel that I needed to get through the day while going 400 miles per hour, with generally little sleep. I seriously should have had stock in at least the top three, Skittles, Starbursts and Jolly Ranchers. At least maybe I’d have recouped some of what I was spending at Rite-Aid on candy. So you can imagine the horror when I had to give them all up.

    A few l months ago, I started making citrus extracts, lemon, lime and orange in anticipation of one day making my own safe candy. (Most extracts use corn alcohol to make the extract.  I used the zests of the citrus fruit and Luksusowa Vodka because it’s made only from potatoes, whereas some vodkas may also use grain or corn. See this post for directions.) After they were done, I let them sit for a couple of more weeks with a coffee filter over the jar to let them evaporate down a bit to try to concentrate the flavors.

    Then I started poking around for gummy recipes. I love watermelon flavored candy. I love, love, love Watermelon Jolly Ranchers, and I used to love to drink Watermelon Schnapps Pucker with Sprite because it tasted just like a Jolly Rancher, only in liquid form. Now all three of those things are off-limits. But I came across a recipe for Lemon-Watermelon Gummies so I had to try it. I’ve modified this recipe because honey can be problematic for people allergic to corn if you don’t know whether your beekeeper is feeding his bees corn syrup or not. And then I had to try it with just lemon, so I further modified things. Both versions are provided below, but I think you could do any fruit juice if safe for you (most commercial juices are not safe for people allergic to corn). The gummies themselves result in candies that taste like real fruit and aren’t as sweet as store bought gummies, but they work for me and I probably shouldn’t be eating all that sugar anyway. I’m kind of liking the lemon as an after dinner palate cleanser, as it is a very refreshing pure lemon taste that melts in your mouth. If you want them to be more sweet to match the commercially available gummies, I’d up the sugar to about 1/2 a cup total for each recipe. Try it with the lower sugar though, you may find you don’t need it 🙂

    Lemon Watermelon Gummies

    • 4 cups of peeled and cubed watermelon
    • 1/4 cup of lemon juice (or the juice of one lemon)
    • 1 Tablespoon of lemon extract
    • 8 Tablespoons of plain unflavored gelatin (I used Great Lakes Unflavored Gelatin)
    • 1/3 cup of sugar

    Place watermelon, lemon juice and lemon extract in a blender. Blend it until the watermelon is completely pulverized.  You want this as smooth as you can get it. Wish I had my friend Mary’s Vitamix for this, but my plain old blender did okay.  Using a fine wire mesh strainer, strain out any remaining pulp so that you just have juice left.

    Straining out watermelon pulp
    Straining out watermelon pulp

    After straining out the pulp, put one half of the watermelon liquid into a sauce pan with the sugar.  On medium low heat, stir until all the sugar is dissolved and then add the gelatin and whisk until it is smooth.  Remove the pan from the heat and add the remaining watermelon liquid.  Whisk again until smooth.

    Watermelon and Gelatin Mixture
    Watermelon and Gelatin Mixture

    Spray silicone molds or ice cube trays with a neutral, safe for you cooking oil. I used a light olive oil in a mister. You don’t want an oil that tastes like anything. (As a side note, apparently there is some debate about whether or not to grease silicone. I have always greased silicone baking molds with oil, shortening and margarine when I could still eat it, and have had no problems whatsoever, but I also don’t use non-stick cooking spray on them. According to this article, if you over grease when baking you may get a sticky residue that’s difficult to wash off. I had no issue cleaning these molds after this recipe, but if you do, use some baking soda with your dish washing detergent when handwashing, and it’ll likely be fine. Also, if you try doing it without oil, let me know how that goes.) Make sure your silicone mold is on a cookie sheet because you are going to move it into the fridge or the freezer and you don’t want a big mess all over your floor and counters. Carefully pour the mixture into your molds. I also ended up having enough for a a couple of gummies in a silicone ice cube tray as well.

    Watermelon Gelatin Mixture in Silicon Molds
    Watermelon Gelatin Mixture in Silicone Molds

    Put the silicone mold in the refrigerator or freezer. The gummies will set up in about 15-20 minutes in the freezer and about 30-40 minutes in the refrigerator.

    Lemon Gummies

    This version makes about half of what the Lemon Watermelon version did because that seemed like a lot of gummies of one flavor to me. If you wanted, you could replace the lemon juice with lime juice, grapefruit juice, or orange juice as well. If I did any other kind of fruit juice other than citrus, I’d probably just use 2 cups of juice and skip the water.

    • 1 cup of lemon juice (took about 3 lemons)
    • 1 cup of water
    • 2 Tablespoons and 2 teaspoons of sugar
    • 1/2 Tablespoon lemon extract
    • 4 Tablespoons of plain unflavored gelatin (I used Great Lakes Unflavored Gelatin

    Juice your lemons. After straining out the pulp, put the lemon juice into a sauce pan with the sugar. On medium low heat, stir until all the sugar is dissolved and then add the gelatin and whisk until it is smooth. Remove the pan from the heat and add the water. Whisk again until smooth.

    Lemon Gelatin Mixture
    Lemon Gelatin Mixture

    Spray silicone molds with a neutral oil as described above, and place the silicone mold on a cookie sheet. Carefully pour the mixture into your molds. 

    Lemon Gelatin Mixture in Silicone Molds
    Lemon Gelatin Mixture in Silicone Molds

    Put the silicone mold in the refrigerator or freezer. Again, the gummies will set up in about 15-20 minutes in the freezer and about 30-40 minutes in the refrigerator.

    Enjoy!

    Fruit Flavored Gummy Candy
    Fruit Flavored Gummy Candy
  • Spicy Red Wine Cranberry Crusted Pork Loin

    Spicy Red Wine Cranberry Crusted Pork Loin
    Spicy Red Wine Cranberry Crusted Pork Loin

    So, if you’ve got leftover cranberries in the freezer from Turkey Day, this is a great way to use them up.  And it doesn’t involve turkey, which you’re probably heartily sick of at this point. I couldn’t resist adding a bit of spice to this recipe, but it’s minimal in the finished product. If spice bothers you, leave the Red Fresno pepper out of the cranberry sauce.  If you like it hotter, use a habanero.

    Spicy Red Wine Cranberry Crusted Pork Loin

    Serves about 4.

    • 1 cup of red wine
    • 1 cup of brown sugar
    • 1 Red Fresno chile pepper, de-stemmed, seeded, and minced.
    • 1 12 ounce bag of cranberries, either fresh or frozen
    • 1 1-2 pound pork loin

    Preheat your oven to 400°F.  Using an oil mister, or a bit of oil and a paper towel, grease a sheet pan.

    Wash the cranberries and pick out the soft, crushed and/or bad ones. In a small non-reactive sauce pan, add the wine, brown sugar, and minced Red Fresno chile pepper, and bring it to a boil.  Once the wine, brown sugar, and chile pepper are boiling, add the cranberries and let it come back to a boil.  Reduce to the heat to medium and boil gently for 10 minutes.  Basically you’re making red wine cranberry sauce with some chile in it.  It’s really good by itself, just saying.

    Spicy Red Wine Cranberry "crust"  for pork loin
    Spicy Red Wine Cranberry “crust” for pork loin

    Once you’ve finished the sauce, spread out a little bit of it on the pan, to match the general length and width of your pork loin, so that your pork loin will be resting in a bed of the cranberries.

    Bed of cranberries for the pork loin.
    Bed of cranberries for the pork loin.

    Place the pork loin on top of the cranberries, so that if there is a fat layer on the pork loin that the layer rests on the bed of cranberries (or remove it), and then cover the pork loin with the remaining cranberries. You’ll note I have a probe thermometer in the pork loin. It’s one of the best kitchen tools I ever bought, no more overcooked meat.

    Pork loin covered with cranberry "crust"
    Pork loin covered with cranberry “crust”

    Put the pork loin in the oven.  I set the probe thermometer for an internal temp of 161°F, which is what the FDA says is safe. The actual cooking time was about 45 minutes, but this may vary depending on the size of your pork loin and how well, or not, your oven works.  

    Spicy Red Wine Cranberry Crusted Pork Loin just out of the oven.
    Spicy Red Wine Cranberry Crusted Pork Loin just out of the oven.

    Let it rest a couple of minutes and then slice it up and serve with some of the cranberries and drippings.  It’s really yummy!

    Spicy Red Wine Cranberry Crusted Pork Loin
    Spicy Red Wine Cranberry Crusted Pork Loin
  • Roasted Autumn Vegetables with a Balsamic Glaze

    Roasted Autumn Vegetables with Balsamic Glaze
    Roasted Autumn Vegetables with Balsamic Glaze

    It’s fall (I’m not discussing the “winter” word yet, although it snowed here yesterday) with all those yummy, carbohydrate-filled veggies available. This dish is pretty easy but seems complicated to those who aren’t in the know.  Also, although this may seem like a lot, it’s great as leftovers.  I even love it cold over a tossed salad a day or two later. Try it as a new side dish for Thanksgiving, or for other potlucks this winter.

    Roasted Autumn Vegetables with a Balsamic Glaze

    Serves at least 4 in generous portions.

    Balsamic Glaze:

    • I cup of balsamic vinegar (be careful, get one without caramel color, which could be dairy, wheat or corn.)
    • 1 1/2 Tablespoons of Italian Seasoning (or a bit of oregano, basil, marjoram, sage, rosemary, and thyme to add up to 1 1/2 Tablespoons)
    • 2 Tablespoons of brown sugar
    • 2 Tablespoons of olive oil

    Vegetables:

    • 2 carrots, peeled and chopped into 1 inch chunks
    • 2 small onions, peeled, cut in half and then each half cut into quarters
    • 1 sweet potato, peeled and chopped into 1 inch chunks
    • 1 small turnip (about the size of a large tomato), peeled and chopped into 1 inch chunks
    • 1/2 of a butternut squash (or 1 20 oz bag of fresh peeled butternut squash), peeled and chopped into 1 inch chunks
    • 2-3 cups of brussel sprouts, outer leaves removed if necessary and stems trimmed, and cut in half

    Preheat your oven to 400°F.  Using an oil mister, or a bit of oil and a paper towel, grease a sheet pan.

    Prepare all your vegetables as discussed above and put them in a large heat safe bowl.  You’re going to be tossing them with the glaze, so make sure you have room to stir and work. Put the bowl aside.

    Veggies in Bowl
    Veggies in Bowl

    Using a small non-reactive saucepan, add your balsamic vinegar, Italian seasoning or spices, and the brown sugar.  Over medium high heat, simmer the glaze at a low boil until the vinegar has reduced down to a slightly thicker syrupy consistency, as shown:

    Balsamic Glaze after reducing
    Balsamic Glaze after reducing

    Once the glaze has reduced down, remove it from the heat and add the olive oil.  Stir thoroughly.

    Pour the glaze over the vegetables, scraping down the sauce pan so that all the glaze ends up in the bowl.  Mix the vegetables and glaze thoroughly so that all the vegetables are coated.

    Mixing Veggies and Glaze to coat
    Mixing Veggies and Glaze to coat

    Pour the coated vegetables on the sheet pan and distribute them evenly.

    Veggies spread evenly on pan
    Veggies spread evenly on pan

    Place them in the oven and cook until the vegetables are tender, about 45 minutes to an hour depending on how large your pieces are. You might want to test them with a fork.

    Veggies after roasting
    Veggies after roasting

    Enjoy!

  • Maple Dill Carrots

    Maple Dill Carrots, close up. Photo by J. Andrews
    Maple Dill Carrots, close up. Photo by J. Andrews

    I made this recipe one day when I needed comfort food and then made it about 10 more times in the next month. Carrots and dill are just a great combination, and carrots lend themselves to sweetness. The maple is well-balanced by the garlic, and I find the combination rather addictive. I’ve tweaked the fine details of this recipe, but it’s really very forgiving, overall. It would make a good, crowd-pleasing side dish for Thanksgiving, and I have to think it might appeal to picky kids (but it has not been field tested on children, because generally people don’t offer their kids up for experimentation).

    Maple Dill Carrots

    Recipe makes ~3 servings if this is the only vegetable side dish.

    • 1 lb. carrots, peeled and sliced (go organic here if you can — they are noticeable sweeter and more carrot-y, which makes a difference in this recipe)
    • 1 teaspoon dill
    • 1/4 to 1/2 teaspoon garlic powder (adjust according to your audience)
    • 1 Tablespoon Earth Balance (or butter or margarine of your choice)
    • 1 Tablespoon real maple syrup

    Place sliced carrots in a saucepan, with water enough to boil (should basically reach the bottom of the top layer of carrots, but not completely cover them). Add dill and garlic. Bring to a boil and then simmer until carrots are soft, 5-10 minutes.

    Carrots and Spice
    Carrots and Spice

    Drain the carrots — lots of the dill and garlic drain off, but the flavor is boiled in. Add the Earth Balance and maple syrup, and purée. I use a stick blender and do a bit of a half-assed job of it (Denise calls it “rustic”) so that there are some whole carrots and some chunks in the purée. That’s just how I like it. Feel free to purée more or less, as suits your tastes.

    Serve hot. Serve often.

    Maple Dill Carrots
    Maple Dill Carrots
  • Homemade Cranberry Sauce – 4 Variations

    Homemade Cranberry Sauce - starting from upper left going clockwise, whole, jelled, orange, and apple
    Homemade Cranberry Sauce – starting from upper left going clockwise, whole, jelled, orange, and apple

    So, as some of you may remember from last year’s Turkey, Turkey Stock, and Turkey Rice Soup with Kale – Denise’s Annual Insanity, or if you know me in real life, I tend to be a lunatic about Thanksgiving. I make food in quantities and amounts that bear no rational relation to the number of people coming, and I go overboard about everything. One of those things is cranberry sauce. When I was growing up, my grandmother owned (still owns, actually) a farm which had a small lake and there were some cranberries growing in one end of it. She always made several kinds of cranberry sauce at Thanksgiving. Now the cranberry bog has been taken over by brush, but I still make multiple cranberry sauces every year. Also, it’s one of those things that looks really hard, but is a piece o’cake (if you’re not a crazed lunatic who is making 40 million other side dishes as well). I usually do the cranberry sauce a couple of days ahead, because you can, and because it needs to cool. If you want some cranberries on hand year round, buy a few bags and throw them in the freezer as is, and just use them frozen, i.e. don’t thaw them out first.

    Whole Berry Cranberry Sauce

    Whole Berry Cranberry Sauce
    Whole Berry Cranberry Sauce
    • 1 cup of water
    • 1 cup of sugar
    • 1 – 12 ounce bag of cranberries

    Wash the cranberries and pick out the soft, crushed and/or bad ones. Put the water and sugar in an nonreactive sauce pan and bring it to a boil over high heat.

    Cranberries in Sugar and Water
    Cranberries in Sugar and Water

    Once the water and sugar is boiling, add the cranberries and let it come back to a boil.  Reduce to the heat to medium and boil gently for 10 minutes.  Pour into a heat safe bowl and let cool in the fridge.

    Jelled Cranberry Sauce

    Jelled Cranberry Sauce
    Jelled Cranberry Sauce
    • 1 cup of water
    • 1 cup of sugar
    • 1 – 12 ounce bag of cranberries

    Do everything for the Whole Berry Cranberry Sauce above, except when you’ve finished boiling it gently for the 10 minutes, place a wire mesh strainer over a bowl, pour the sauce into the strainer, and use a spatula to press the sauce through it into the bowl, leaving the seeds and skin behind in the strainer.

    Using Strainer to remove seeds and skin
    Using Strainer to remove seeds and skin

    Make sure you get as much of the sauce as you can through the strainer until there’s nothing left but seeds and skin. Frankly, I almost never make this because I don’t care, and not eating the skins and seeds seems like a colossal waste, but to each their own. 

    Apple Cranberry Sauce

    Apple Cranberry Sauce
    Apple Cranberry Sauce
    • 1 cup of water
    • 1 cup of sugar
    • 1 – 12 ounce bag of cranberries
    • 1 peeled, cored and chopped apple

    Follow the directions for the Whole Berry Cranberry Sauce above, but just adding the apple at the same time as the cranberries.

    Orange Cranberry Sauce 

    Orange Cranberry Sauce
    Orange Cranberry Sauce
    • 1 cup of water
    • 1 cup of sugar
    • 1 – 12 ounce bag of cranberries
    • 1 orange, zested, and then peeled and sectioned

    Wash and scrub your orange. Zest your orange, either with a micro-planer or use a vegetable peeler to take off very, very thin strips.  Make sure there is NO white pith at all, as it will cause the sauce to be bitter.  Peel your orange and then remove the outer skin from each of the sections.

    Zest and Sectioned Orange Pieces
    Zest and Sectioned Orange Pieces

    Follow the directions for the Whole Berry Cranberry Sauce above, but just adding the orange at the same time as the cranberries. 

    Enjoy!