Notice: Function _load_textdomain_just_in_time was called incorrectly. Translation loading for the wp-ultimate-recipe domain was triggered too early. This is usually an indicator for some code in the plugin or theme running too early. Translations should be loaded at the init action or later. Please see Debugging in WordPress for more information. (This message was added in version 6.7.0.) in /home/maryzahc/public_html/adultfoodallergies.com/wp-includes/functions.php on line 6170 Chinese-inspired – surviving the food allergy apocalypse (archive)Skip to content
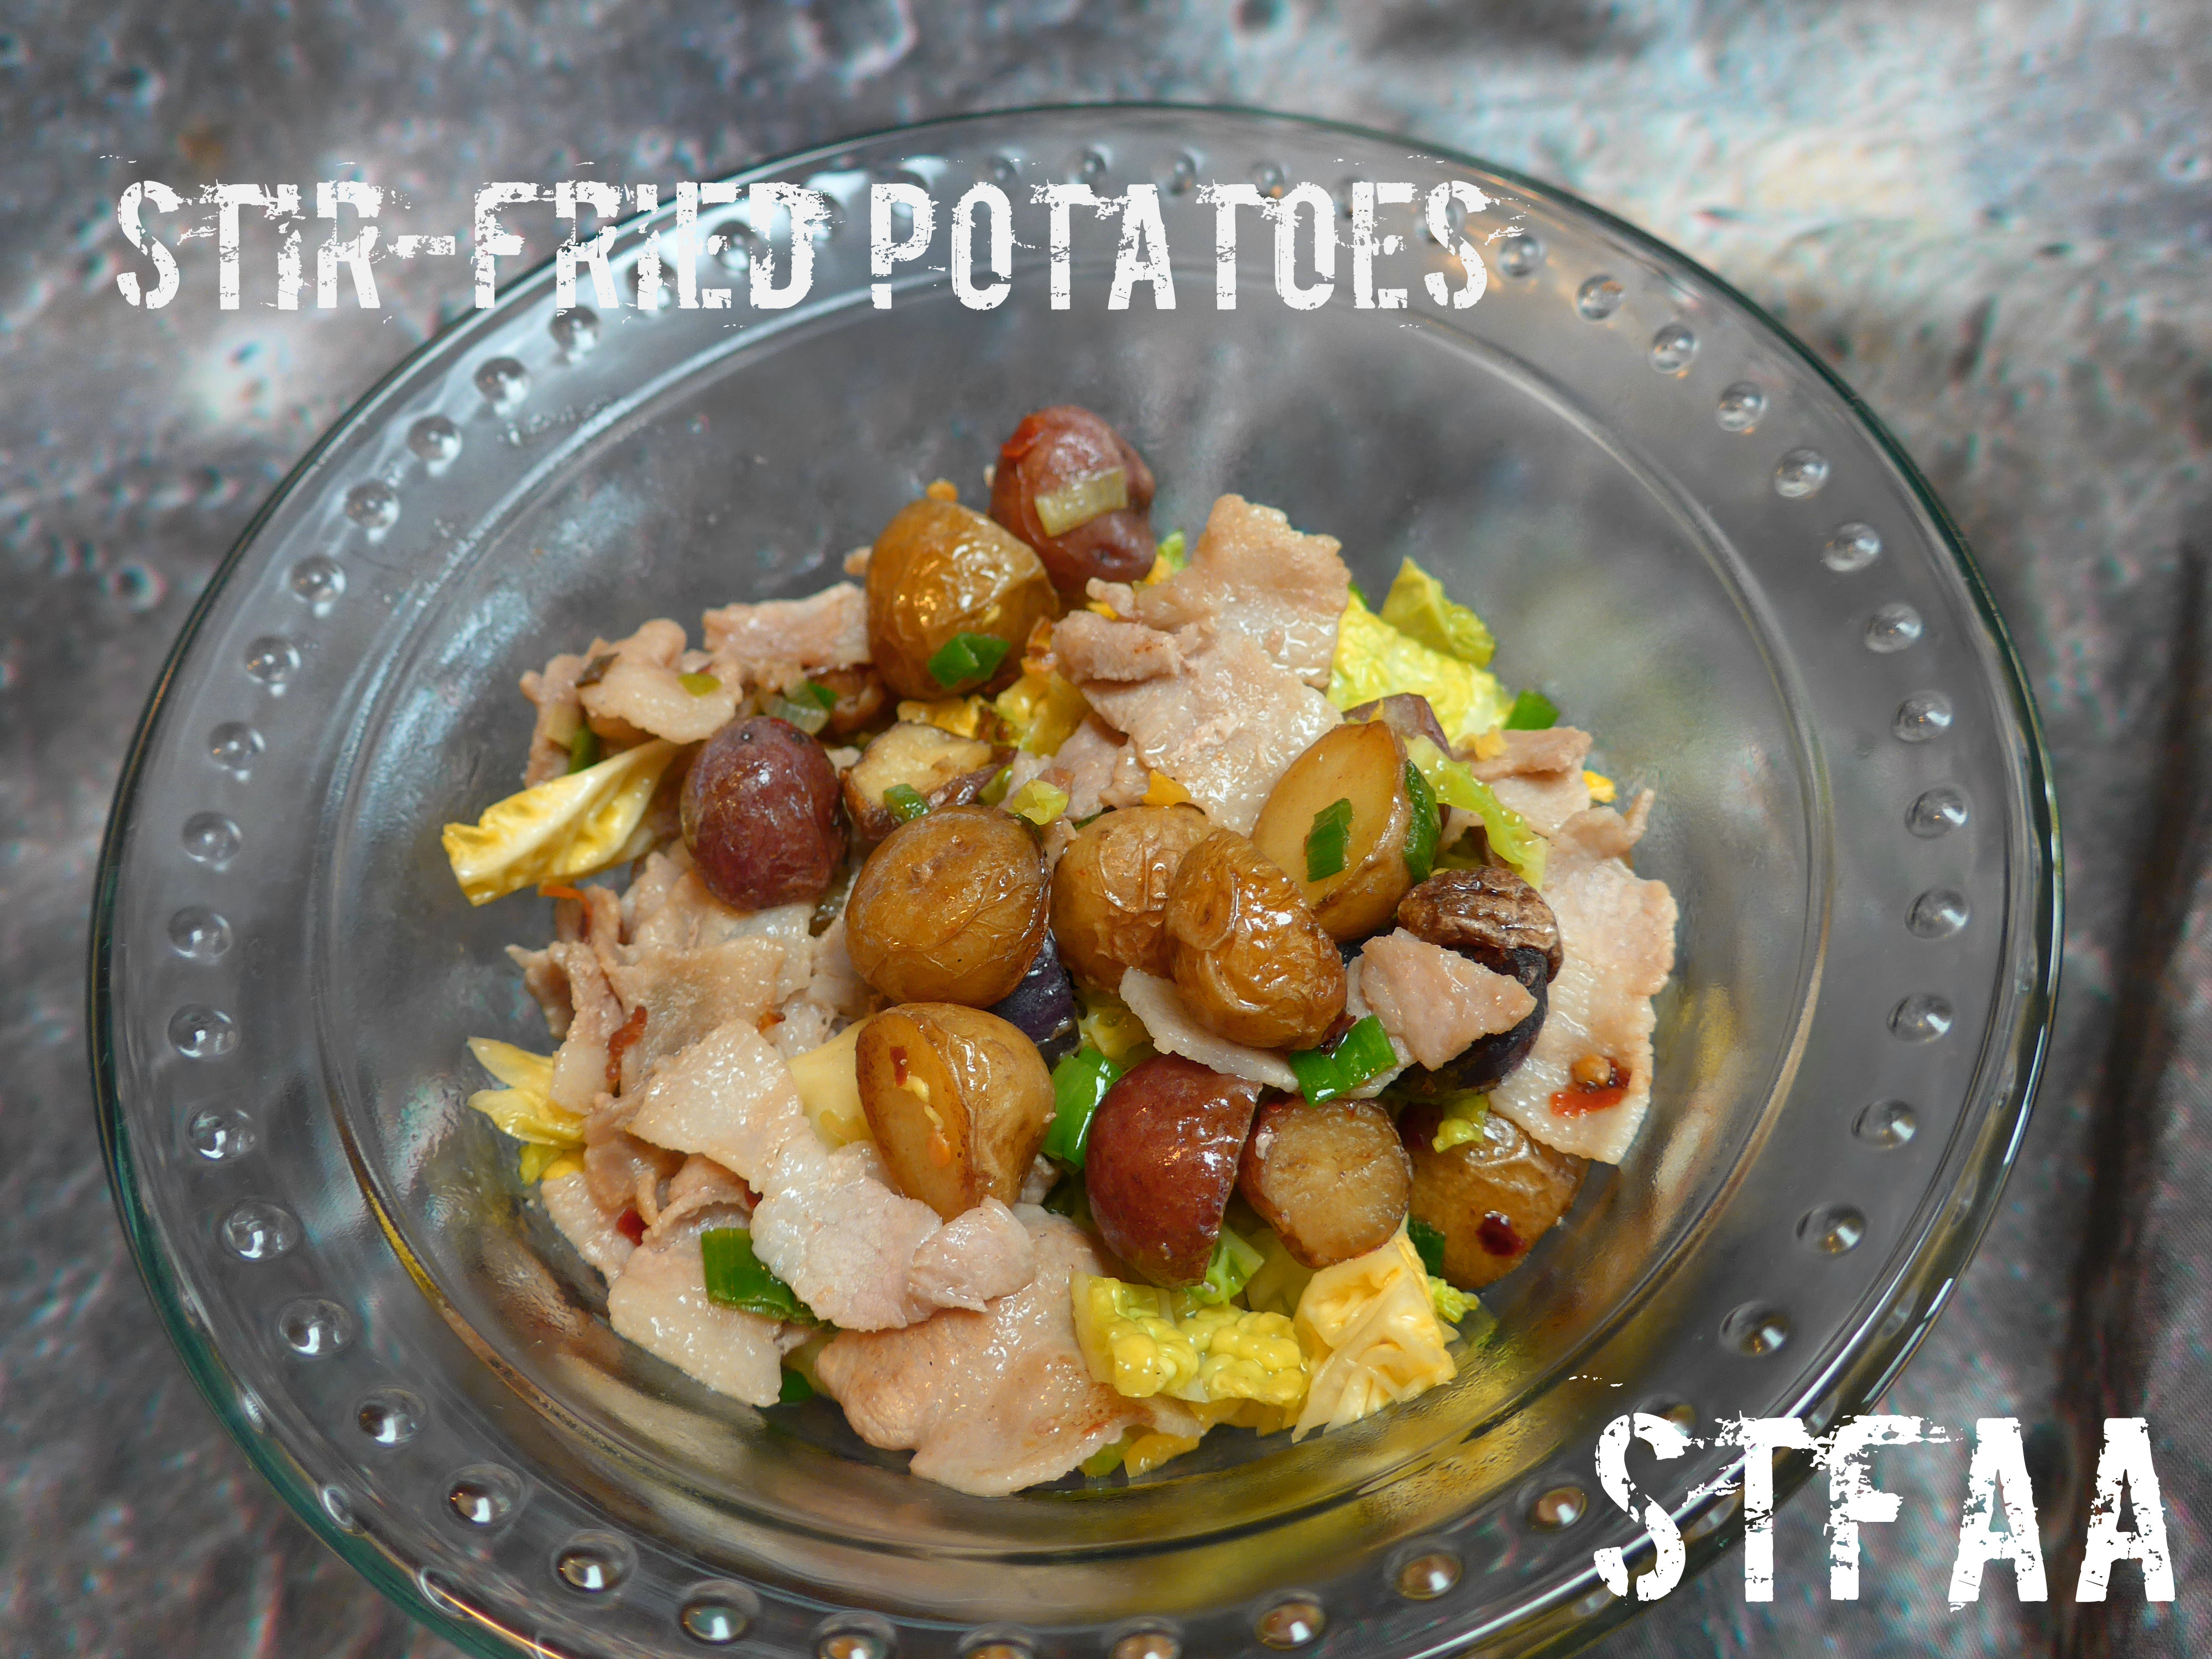
This recipe is very loosely inspired by northern Chinese Hunan province recipes for spicy potatoes. I think it was end of winter, but I just wanted hot potatoes and cabbage with pork, and this dish definitely fit the bill.
Finding the right meat was harder than I thought it would be — pork was the proper meat for the taste I was going for, but it does need to be a fatty cut. At one of our local grocers, I can get what I call “not bacon” because it looks just like bacon but isn’t. Side pork is the right cut for bacon, but this is unprocessed. It’s just the meat before it is seasoned and brined and aged or smoked or whatever you do for bacon (This. This is how you make bacon.) This cut is fatty, chewy, and with the added saltiness from tamari (the naturally gluten-free soy sauce) or amino acids, it is the perfect contrast to crunchy cabbage and creamy potatoes. Adjust the amount of pepper to suit your tastes, but go as spicy as you’ll eat it, as that’s kind of the point of the dishes that inspired this one. 1 teaspoon is about right for us.
Notice: Trying to access array offset on value of type bool in /home/maryzahc/public_html/adultfoodallergies.com/wp-content/plugins/wp-ultimate-recipe/helpers/models/recipe.php on line 254
1lb.marble potatoesor larger potatoes cut into 1/4 inch dice
3cupschopped napa or Chinese cabbage
1bunch scallionschopped, white and greens separated
1teaspoontamarior amino acids
1teaspoonred pepper flakes(or less if you would like it to be not spicy)
1Tablespoonoilmay not need this
Servings: people
Instructions
The meat in this dish is not-bacon. What I mean is that it’s side pork, and where I buy it, it comes sliced like bacon, but it hasn’t been processed into bacon. It’s just thin fatty pork, and that’s what you want for this dish. You’ll use the rendered fat, but the remaining pork is a bit chewy and wonderful.
Pre-cook your potatoes. I did this in the microwave, cooking them on high until they were fork-tender, about 8 minutes. You can also boil and drain them. Be cautious and undercook them slightly if you’re using larger cubed potatoes, as you don’t want them to fall apart as you fry them.
Chop your meat into small bite-sized pieces and cook over medium heat in a skillet or wok. When it is almost done, add the tamari and pepper flakes and stir well.
Remove cooked meat from pan to a paper towel-lined plate to drain. Leave the fat in the pan. If needed, add up to another tablespoon of oil to make about 2 Tablespoons total of oil.
Add potatoes to oil — be careful, as they are wet and will splatter a bit if you’re not careful. Stir well and then cook until they brown, 10-15 minutes.
Add cabbage and scallion whites and cook until cabbage starts to wilt.
Add the pork back, along with the scallion tops, and stir until everything is good and hot.
Hoisin sauce was just another well-loved condiment no longer within my grasp until I found a recipe and modified it to be safe for me. If you have a soy allergy (I don’t) try this with Mary Kate’s Soy-Free, gluten-free “Tamari Sauce” and let us know how it worked out for you.
Hoisin Sauce – Gluten-free with Soy-free option
Makes 1 cup.
1/2 of a 15 ounce can of Black Beans, rinsed and drained (I use my home canned, but use what’s safe for you.)
1 Tablespoon of either Sesame Oil, Chili Oil or other safe for you oil (I can’t use Sesame, so I made a homemade Chili oil with my safe oil.)
1/2 Tablespoon of minced Garlic
1/2 cup brown sugar
1/2 Tablespoon of Molasses
2 Tablespoons of Apple Cider Vinegar (Bragg’s is generally safest for those with corn allergies)
2 Tablespoons of Rice Vinegar
2 1/2 Tablespoons of Soy Sauce (I do well with San-J Tamari Gluten Free Soy Sauce, the alcohol is from cane sugar not corn, but if you can’t use soy, try Mary Kate’s recipe for a Soy-Free, gluten-free “Tamari Sauce” )
1 Tablespoon of water
1/8 teaspoon of crushed red pepper
In a food processor, purée the black beans into a fine paste. If it is too thick and doesn’t process well, add a little bit of water (1 teaspoon at a time) until you can continue to pulse the black beans. They should be puréed into mush.
In a non-reactive pan (I used an enameled cast iron pan), heat the oil until it is hot, but not yet smoking. Add the garlic and cook for about 2 minutes (don’t let it turn brown).
Once the garlic is cooked, add all ingredients to your pan and stir together really well. Bring to a boil, and then reduce heat to medium-low and simmer for 15 to 20 minutes. The sauce should coat and stick to the back of a wooden spoon when it is ready.
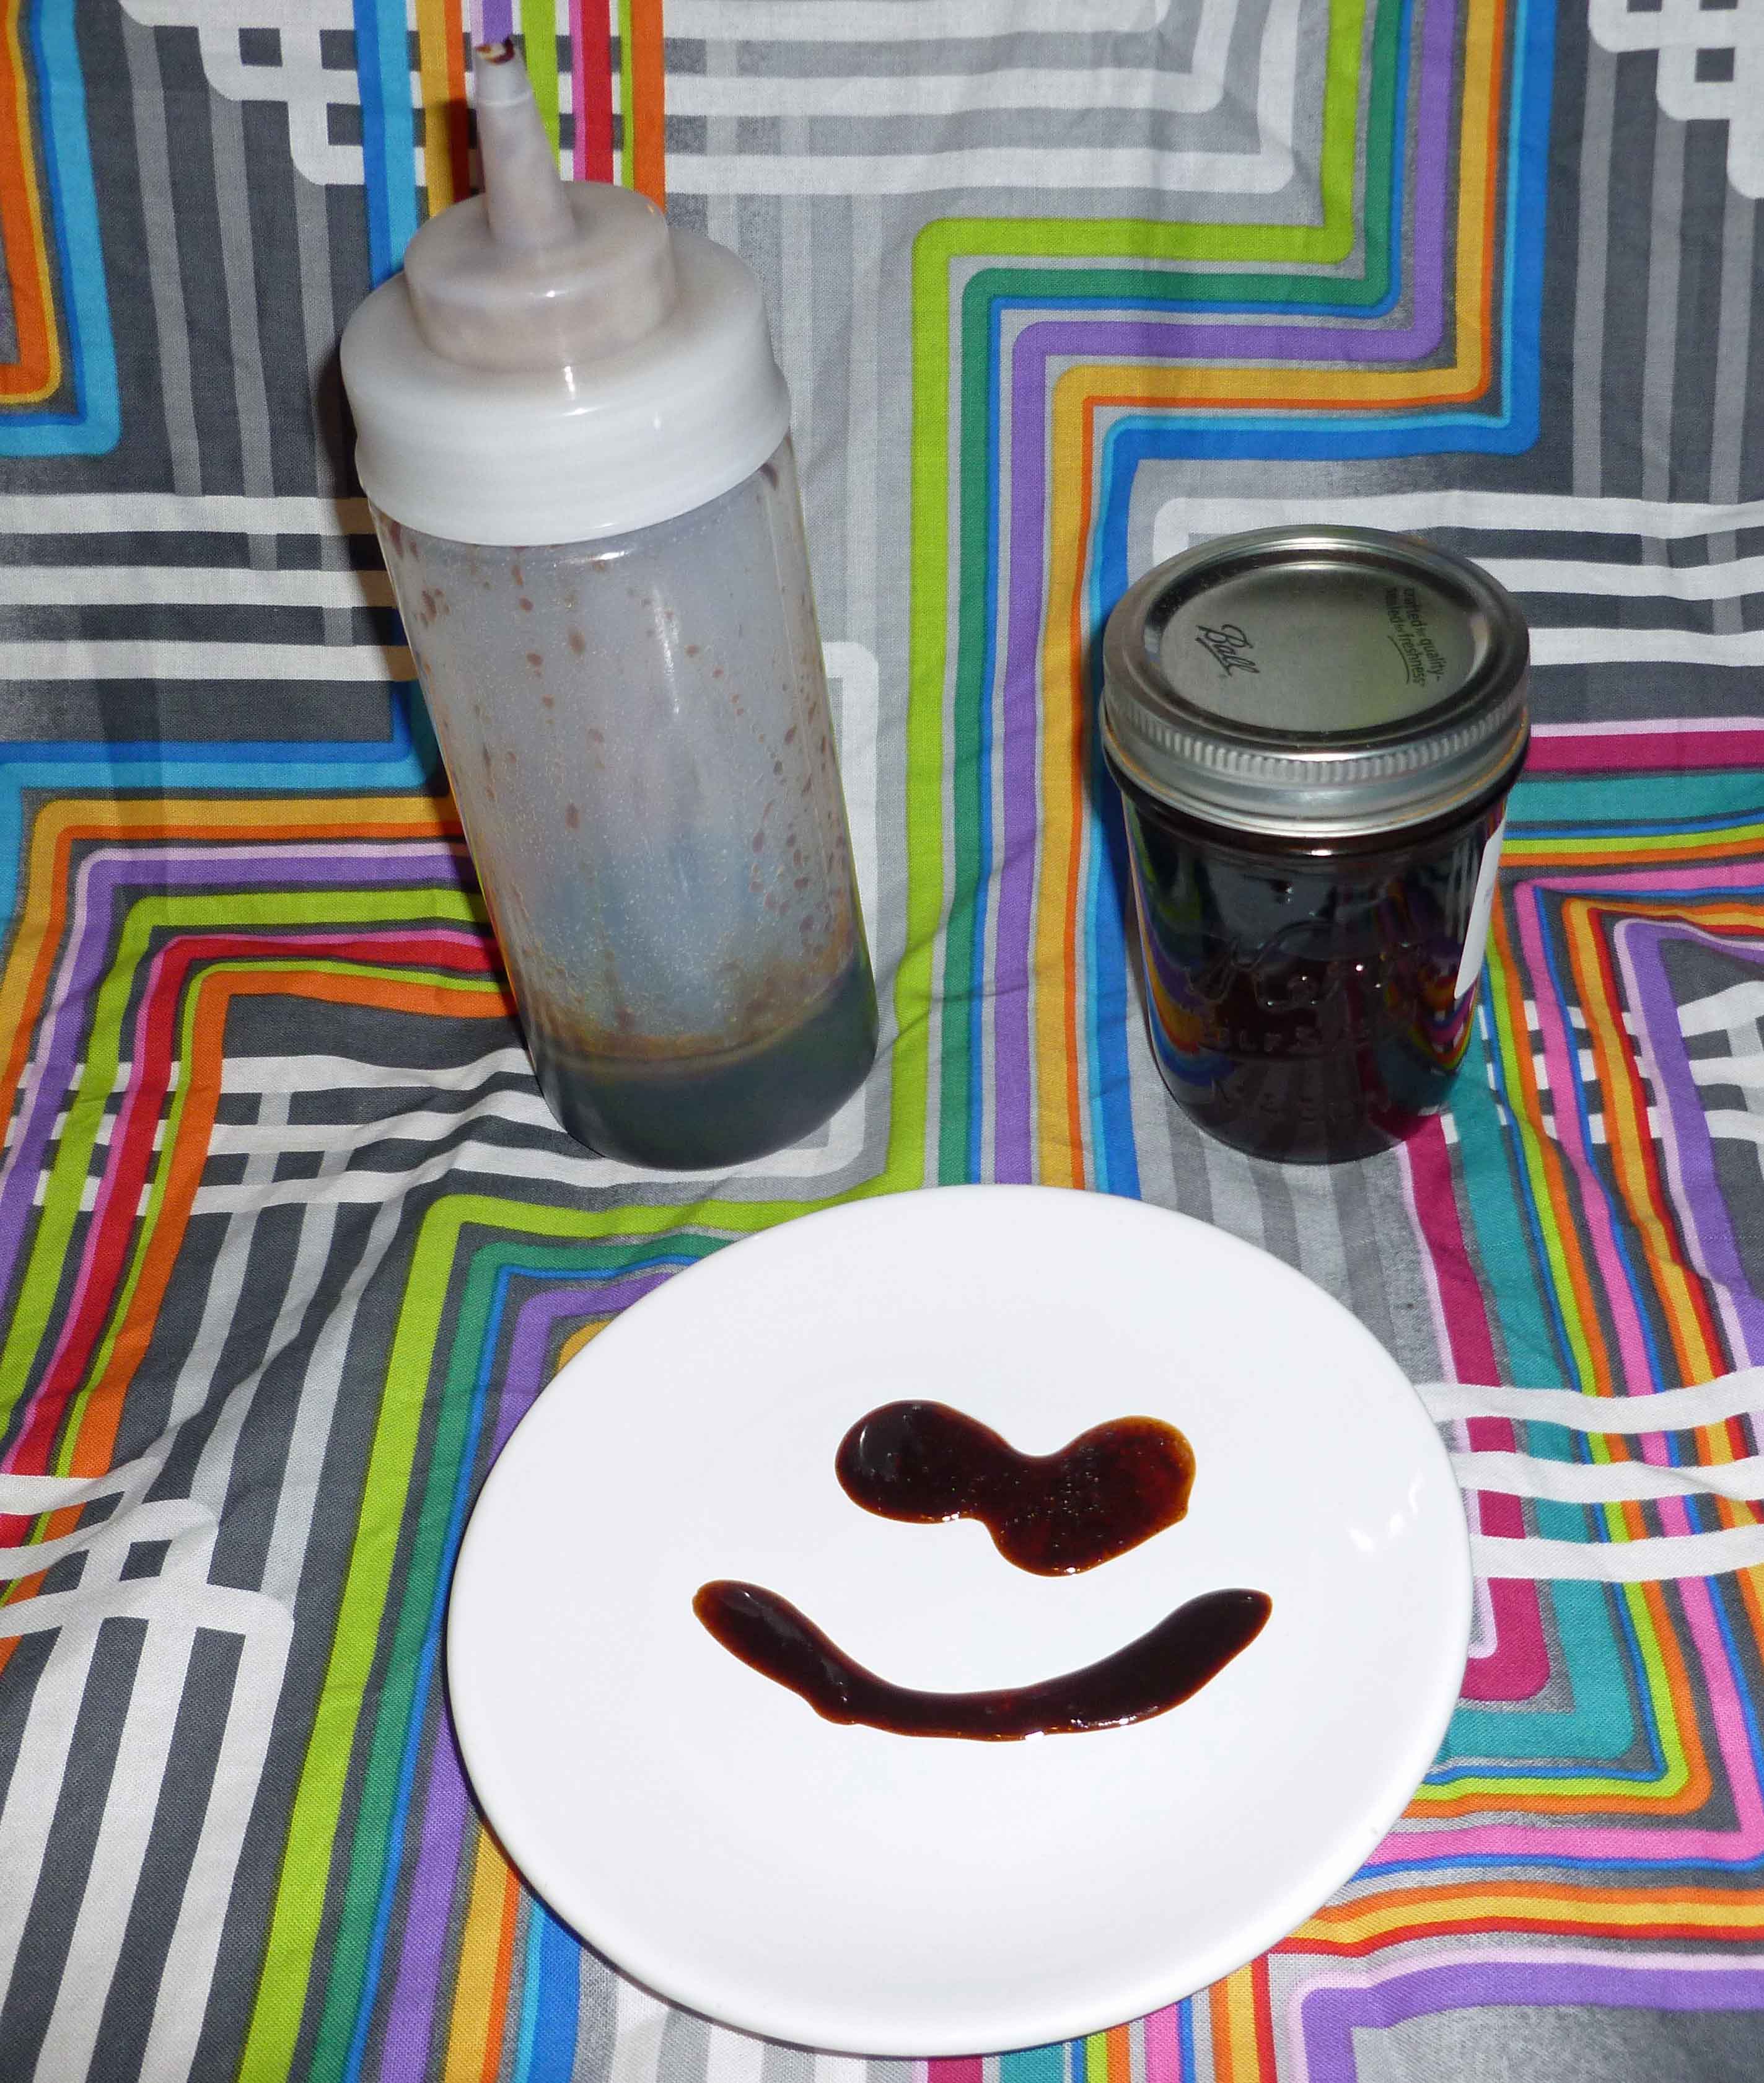
Remove from heat immediately and let it cool before placing it a container in the refrigerator. I put mine in a squeeze bottle so I can use it easily whenever I want.
Enjoy with all your favorite Asian and Asian-inspired dishes!
1 whole fresh duck (or some duck legs or breasts if you don’t want to deal with a whole duck)
1 Tablespoon of sea salt
2 teaspoons of Chinese Five Spice
a pair of good kitchen shears
roasting pan that can fit a rack in the bottom
oven safe cookie rack that fits in the roasting pan
Preheat your oven to 350°F.
Remove the giblets from the duck, and using your kitchen shears cut out the duck’s backbone, and then cut the breast down the center so you have two half pieces of the duck. I also trimmed the first two sections of wing off, as I didn’t want them to burn during the cooking process. (Save the giblets, backbone, and wing sections to make stock later, or discard if you don’t want to use them.) Trim any extra fat away from the duck, and remove any remaining quills. Using a sharp knife, score the skin of the duck, but do not cut so deep that you cut the meat.
In a large shallow bowl, mix the sea salt and Chinese Five Spice so that it is mixed thoroughly. Placing each half of the duck in the bowl one at a time and use your hands to coat both sides of the duck half with the mixture.
Place the seasoned duck halves on the rack in the roasting pan. The rack allows the duck fat to drip to the bottom, otherwise you’ll be spooning fact out as the duck cooks. (You’re also going to want to save this fat to use later, it’s a great cooking fat, especially for those of us with no safe butter, margarine, or shortening.)
Seasoned duck halves before cooking
Place the duck in the pre-heated oven and roast for about two hours, turning the duck halves every half hour. Once the duck reaches an internal temperature of 165°F, turn the oven up to 425°F for 15 minutes to really crisp up the skin.
Cooked duck halves
Remove the pan from the oven and let the duck cool enough that you can remove the meat from the bones without burning your fingers to bits. Then remove the meat from the bones. (Save the bones to make stock later, or discard if you don’t want to use them.)
Duck meat removed from the bones
You can eat this with Chinese pancakes, sliced cucumbers, scallions, and Hoisin sauce, like you would eat Peking Duck. Since I didn’t want to try to deal with coming up with a recipe for gluten-free Chinese pancakes, I used rice paper and ate the duck with lettuce, rice vermicelli noodles, sliced cucumber, sliced onion (I forgot to buy scallions), Carrot and Daikon pickle, homemade plum sauce, homemade Hoisin Sauce, and homemade Sriracha.
Enjoy!
Crispy Duck in rice paper with rice vermicelli and veggies
I have another canning inspired recipe for you. I made and canned plum sauce because I wasn’t able to find a safe commercial version for me, and because I eat a lot of Asian and Asian inspired food. Since I’ll be using this as a condiment for some of the dishes that are coming up, I decided to post a version that you can do without canning. If you want to can this recipe, it’s found in theBall Complete Book of Home Preserving on page 285 (linked to Amazon for convenience, no affiliation). I’ve cut the quantities down so that it only makes about a pint of sauce, so that you can use it before it goes bad without canning it. If I’m overestimating your potential use, you could also freeze half of it.
Plum Sauce
1/2 cup of brown sugar (make sure it’s safe for you, I corn-ed myself good by not reading labels on brown sugar once. If it says inverted sugar on it, don’t buy it if you’ve got an allergy to corn)
1/4 cup of granulated sugar
1/4 cup of apple cider vinegar (Bragg’s is generally safest for corn allergies)
3 Tablespoons of finely chopped onion
1/2 Tablespoon of finely chopped jalapeno or other green chili pepper
1/2 Tablespoon of mustard seeds
3/4 teaspoon of salt
1/2 – 1 clove of garlic (recipe converted calls for half a clove, but if you like garlic, by all means use it up)
3/4 teaspoon of fresh grated ginger
2 1/2 cups of pitted, finely chopped plums
In a large stainless steel or other non-reactive (ceramic or enamel, do not use aluminum or cast iron) pot, add the brown sugar, granulated sugar, vinegar, onion, jalapeno, mustard seeds, salt, garlic, and ginger. Bring to a boil over high heat, stirring constantly. Add the plums, and return the mixture to a boil. Then reduce the heat and boil gently stirring occasionally until the mixture is thick and syrupy, about 2 hours.
Since this recipe is not being canned, at this point you could choose to use a stick blender to puree the mixture to a smooth consistency. (Note: If you are canning the recipe, follow the directions in the Ball Complete Book of Home Preserving and do not puree the sauce. You could be risking botulism otherwise.)
Let the sauce cool, and once cool enough, place in a container in the fridge (or freeze some) to store. I usually put mine in a squeeze bottle so that I can use it like ketchup.
Before the food allergy apocalypse hit, one of the things I really liked to do was to make my own Peking Ravioli (aka Potsticker, Wonton, Gyoza, etc.) or whatever you want to call your basic Asian style dumpling. Apparently you only call them Peking Ravioli if you live in the Northeast because that was what Joyce Chen called them in her restaurant in Boston in the 1950’s–the things you learn when blogging. But in the before times, in the long, long ago, I liked to make them by buying pre-made wonton wrappers at the grocery store, which, at least for the grocery stores in New Hampshire, all contain egg. So I thought I’d try to come up with a gluten free vegan wrapper so Mary Kate could eat some too. (I can have wheat, at least for now. More food allergy testing later today. Please cross your fingers for me that they don’t find any more food allergies, and if they do, it’s an easy to avoid one like a fruit.) My gluten free vegan dough attempt was pretty much a spectacular failure, and it’s going to take some more research and some more work, but I’ll keep trying. At the same time, I had decided to try an egg free dough that I had found using all purpose flour (warning: I mean a real wheat flour) and boiling water, because I knew I was going to have too much filling, and I like to do a lot of experiments at once because you’re more likely to have at least one success. The egg-free real wheat flour version worked. Again, I promise to keep trying for a gluten free version.
Anyway, the really nice thing about this recipe is that you can make a bunch of them up, put them on parchment paper on a cookie sheet (this is prior to cooking them), making sure they don’t touch and then throw them in your freezer on the cookie sheet until they are frozen solid. Then you can pop them into a ziploc freezer bag, and you can take a few out here and there to use whenever you want, to steam, to pan-fry or to put in soup, because they’re not frozen together in a lump. It’s labor intensive for an afternoon on the weekend, but then you’ll have lots and lots of dumplings for whenever you want!
1 cup of chicken stock (check the label if using store bought)
2-3 tablespoons of sesame oil
First, if you are steaming or pan frying your dumplings and you need dipping sauce, put all the ingredients for the dipping sauce in a small bowl, whisk the ingredients together until they are well combined, and then put it aside until your dumplings are cooked. (I forgot to take a picture, sorry.)
To make the dough for the dumpling wrappers, I used my stand mixer with a dough hook, but you can just use a bowl and a spatula too. Place the flour in the bowl and mix the boiling water in slowly until the dough forms a ball. If using a mixer, continue on low speed to knead it for a few minutes. If using the low tech method, knead it with your hands for a few minutes. Shape it into a smooth ball and place it in a ziploc bag to rest a bit while you make the filling.
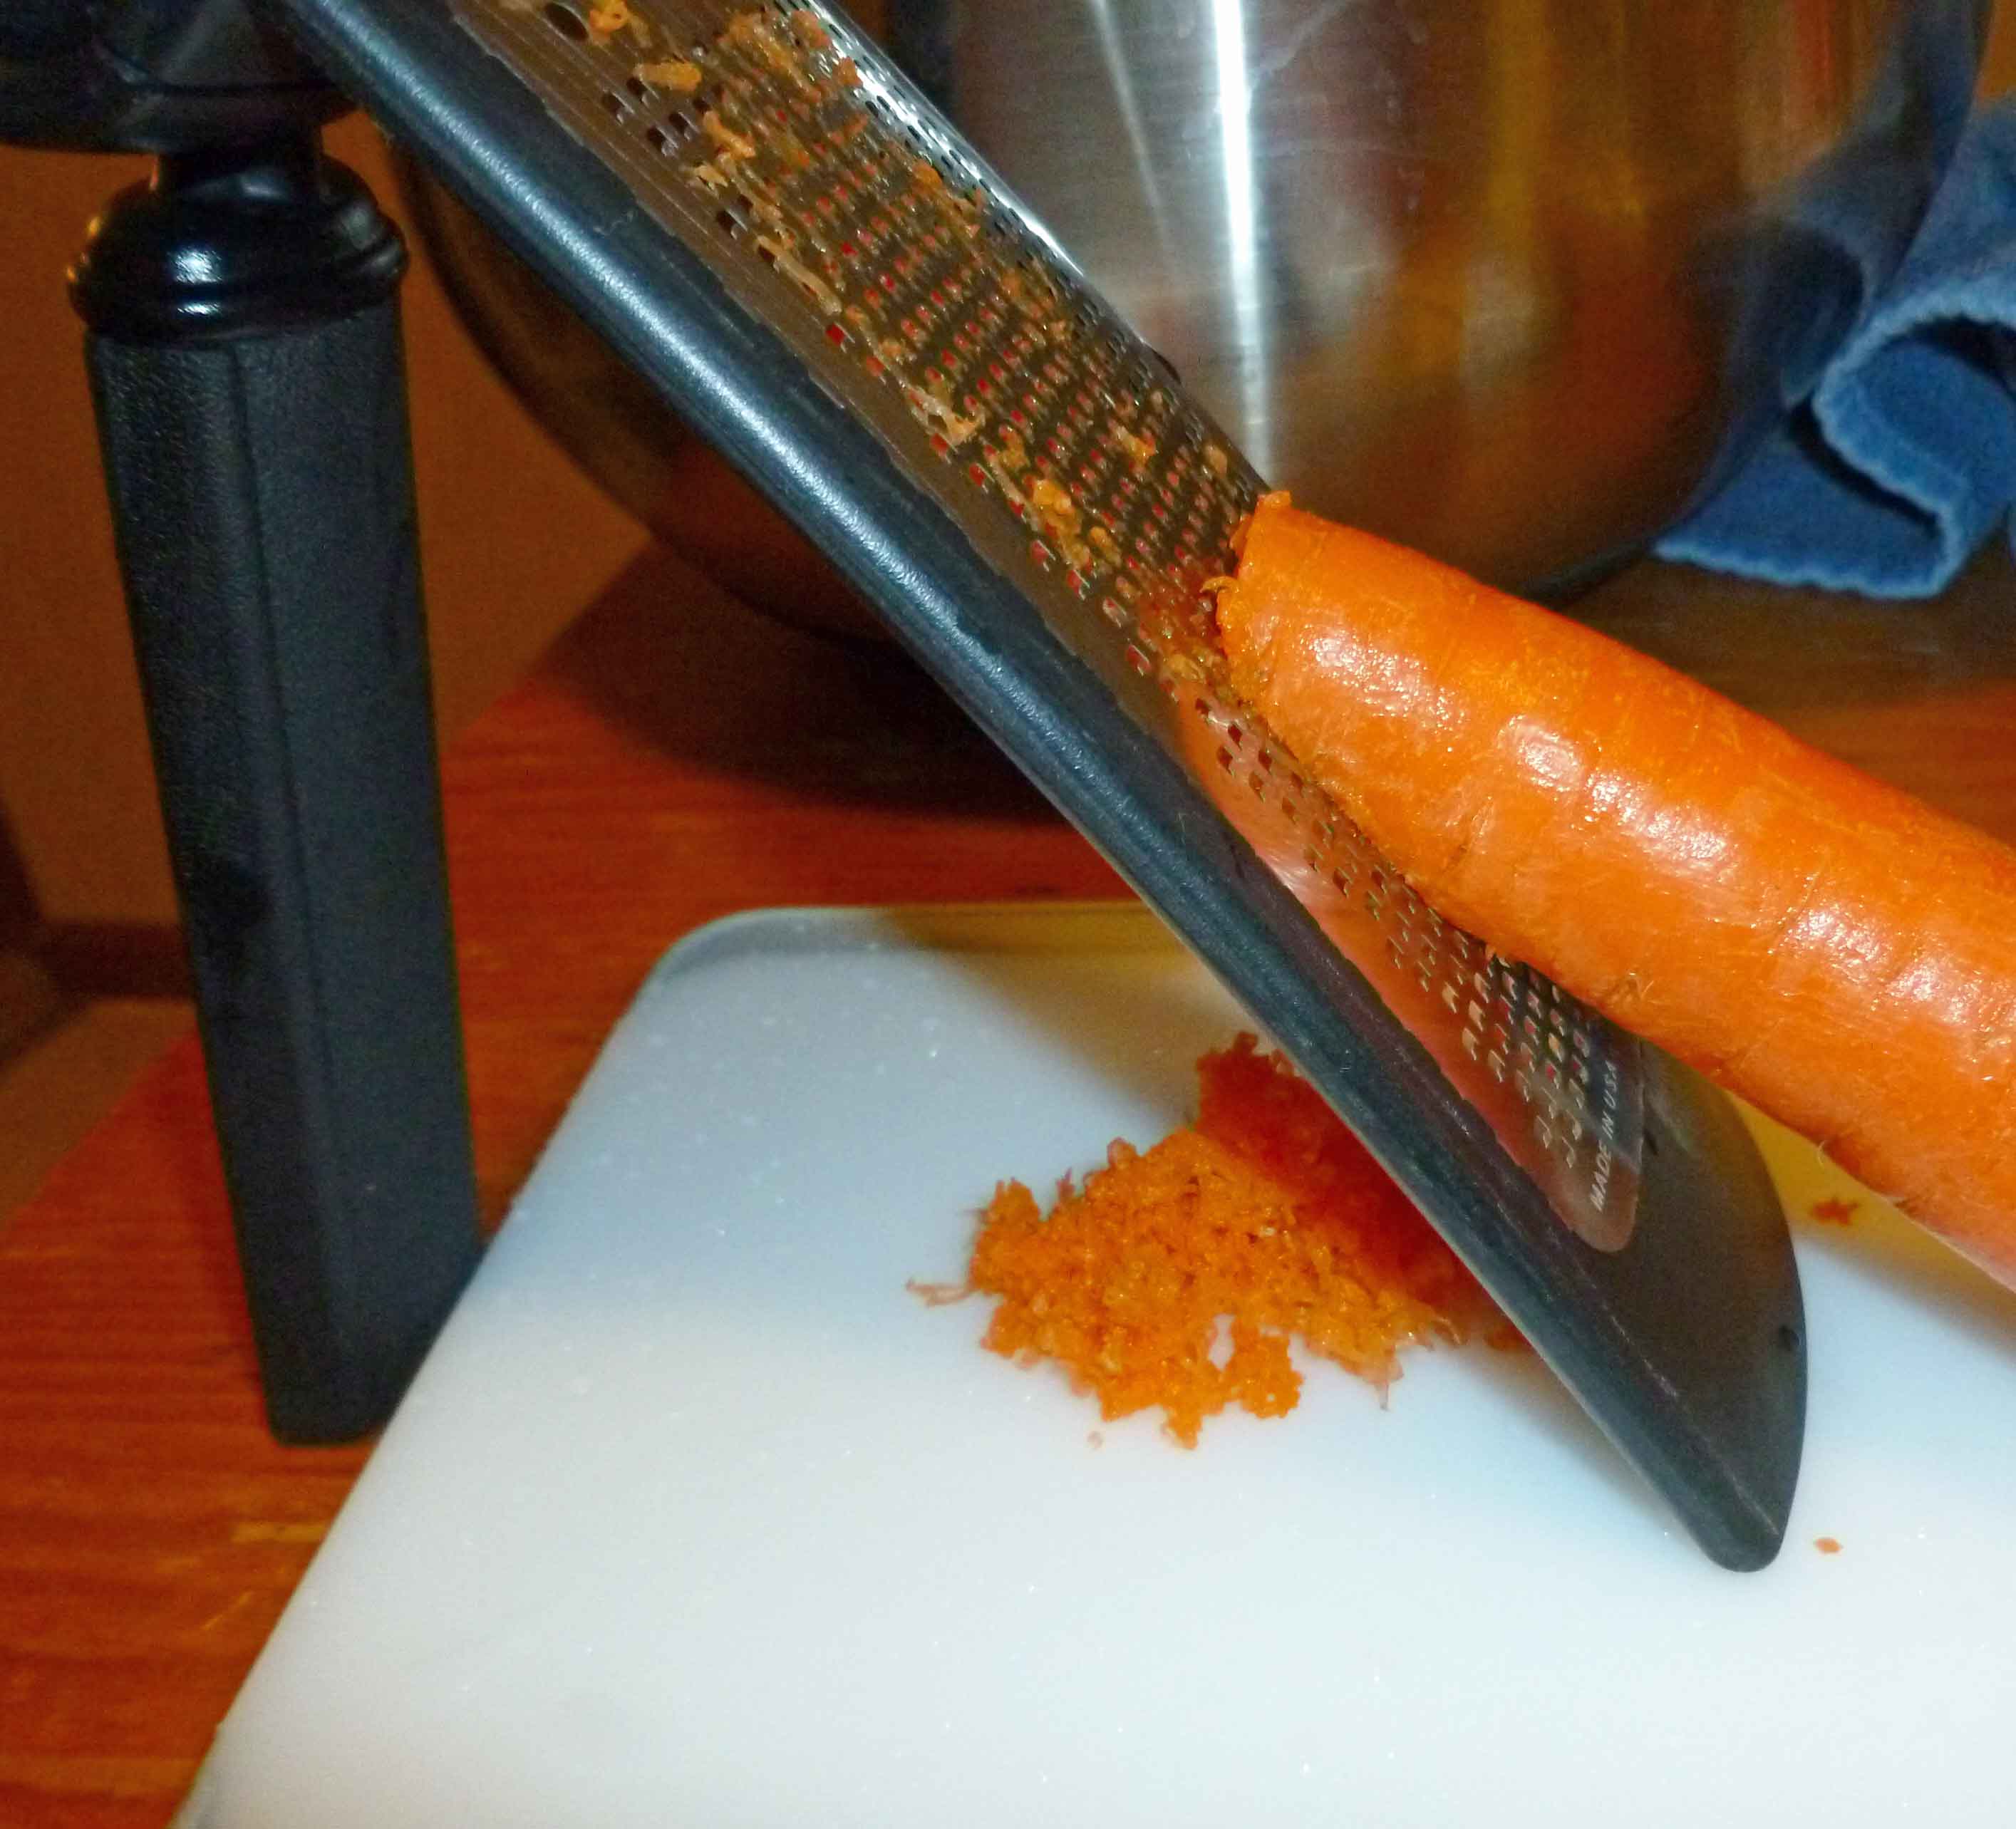
To make the filling, prepare all the ingredients if you haven’t already. I grated the carrot as finely as shown below:
Carrots grated with a Microplane fine grater
The Napa cabbage, I sliced very finely with a very sharp knife, aiming for a width of a quarter of an inch or less, and then chopped the slices into smaller pieces:
Shredded Napa cabbage in bowl with other ingredients
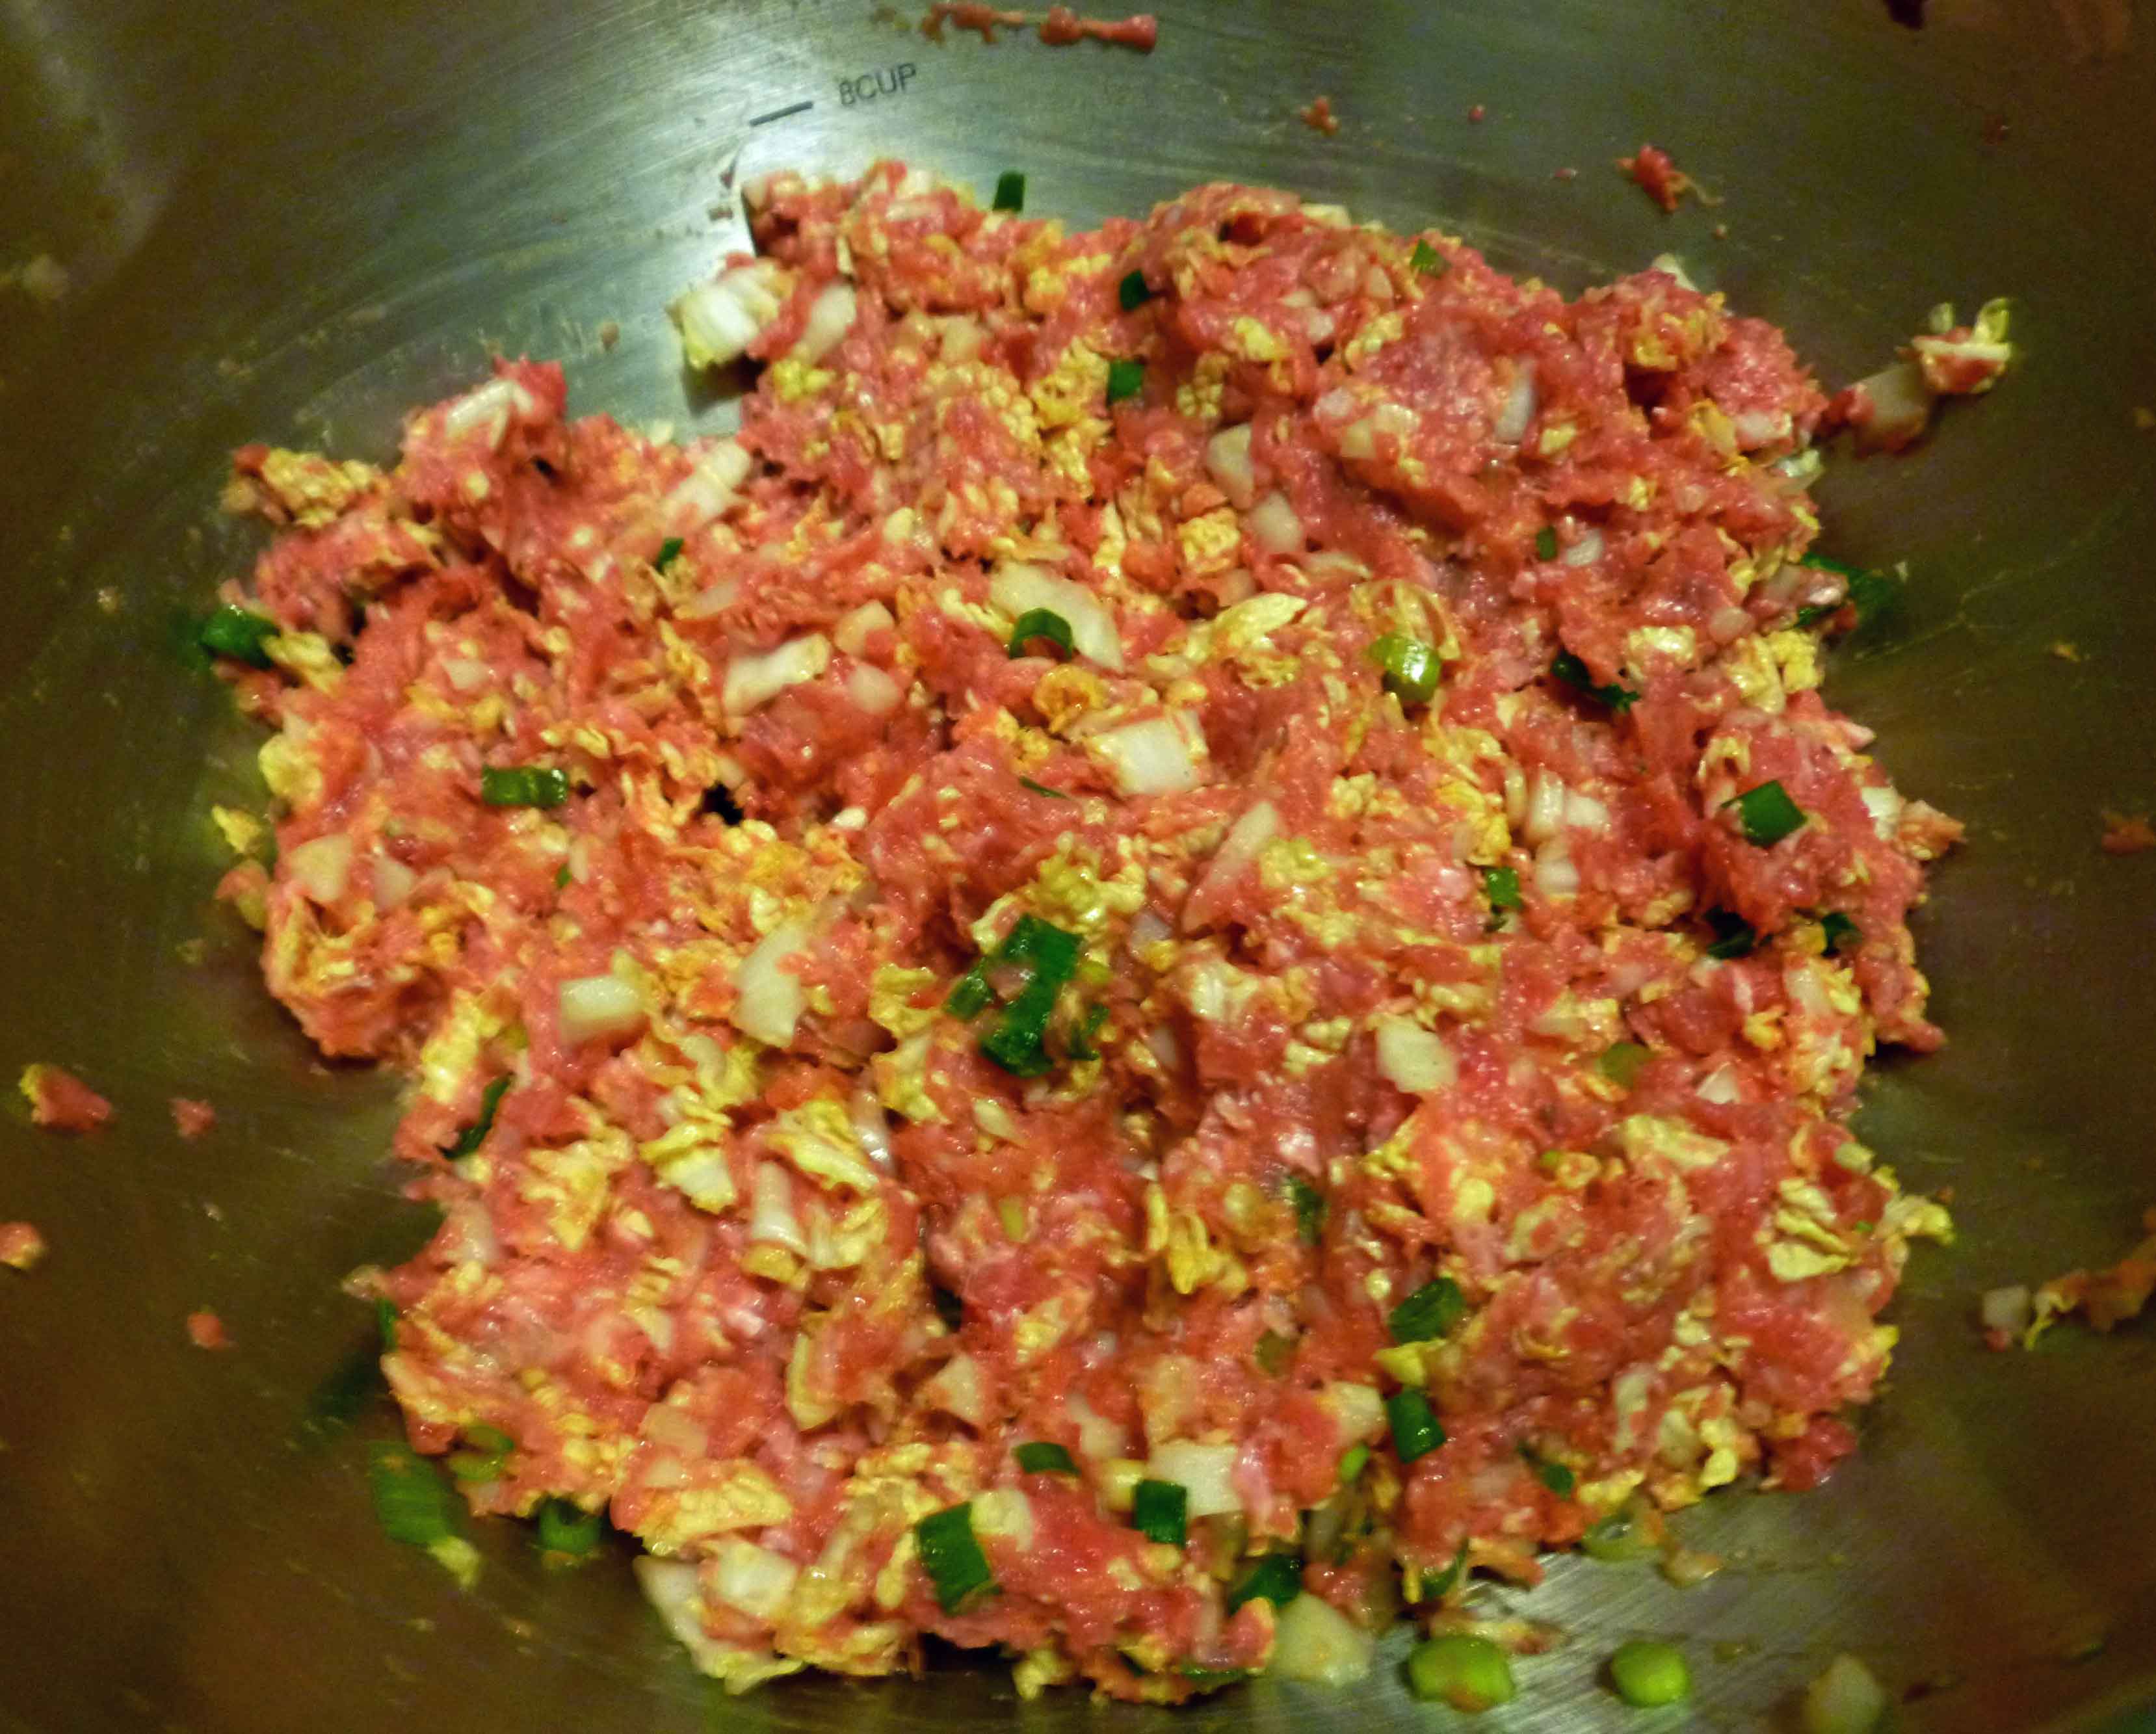
Place ground pork, garlic, carrot, ginger, green onions, Nappa cabbage, water chestnuts, soy sauce, sesame oil, rice vinegar, chili garlic sauce, cornstarch, and salt in a bowl, and mix throughly using your hands. You might want to put it in your refrigerator while you roll out the wrappers.
Pork Dumpling Filling
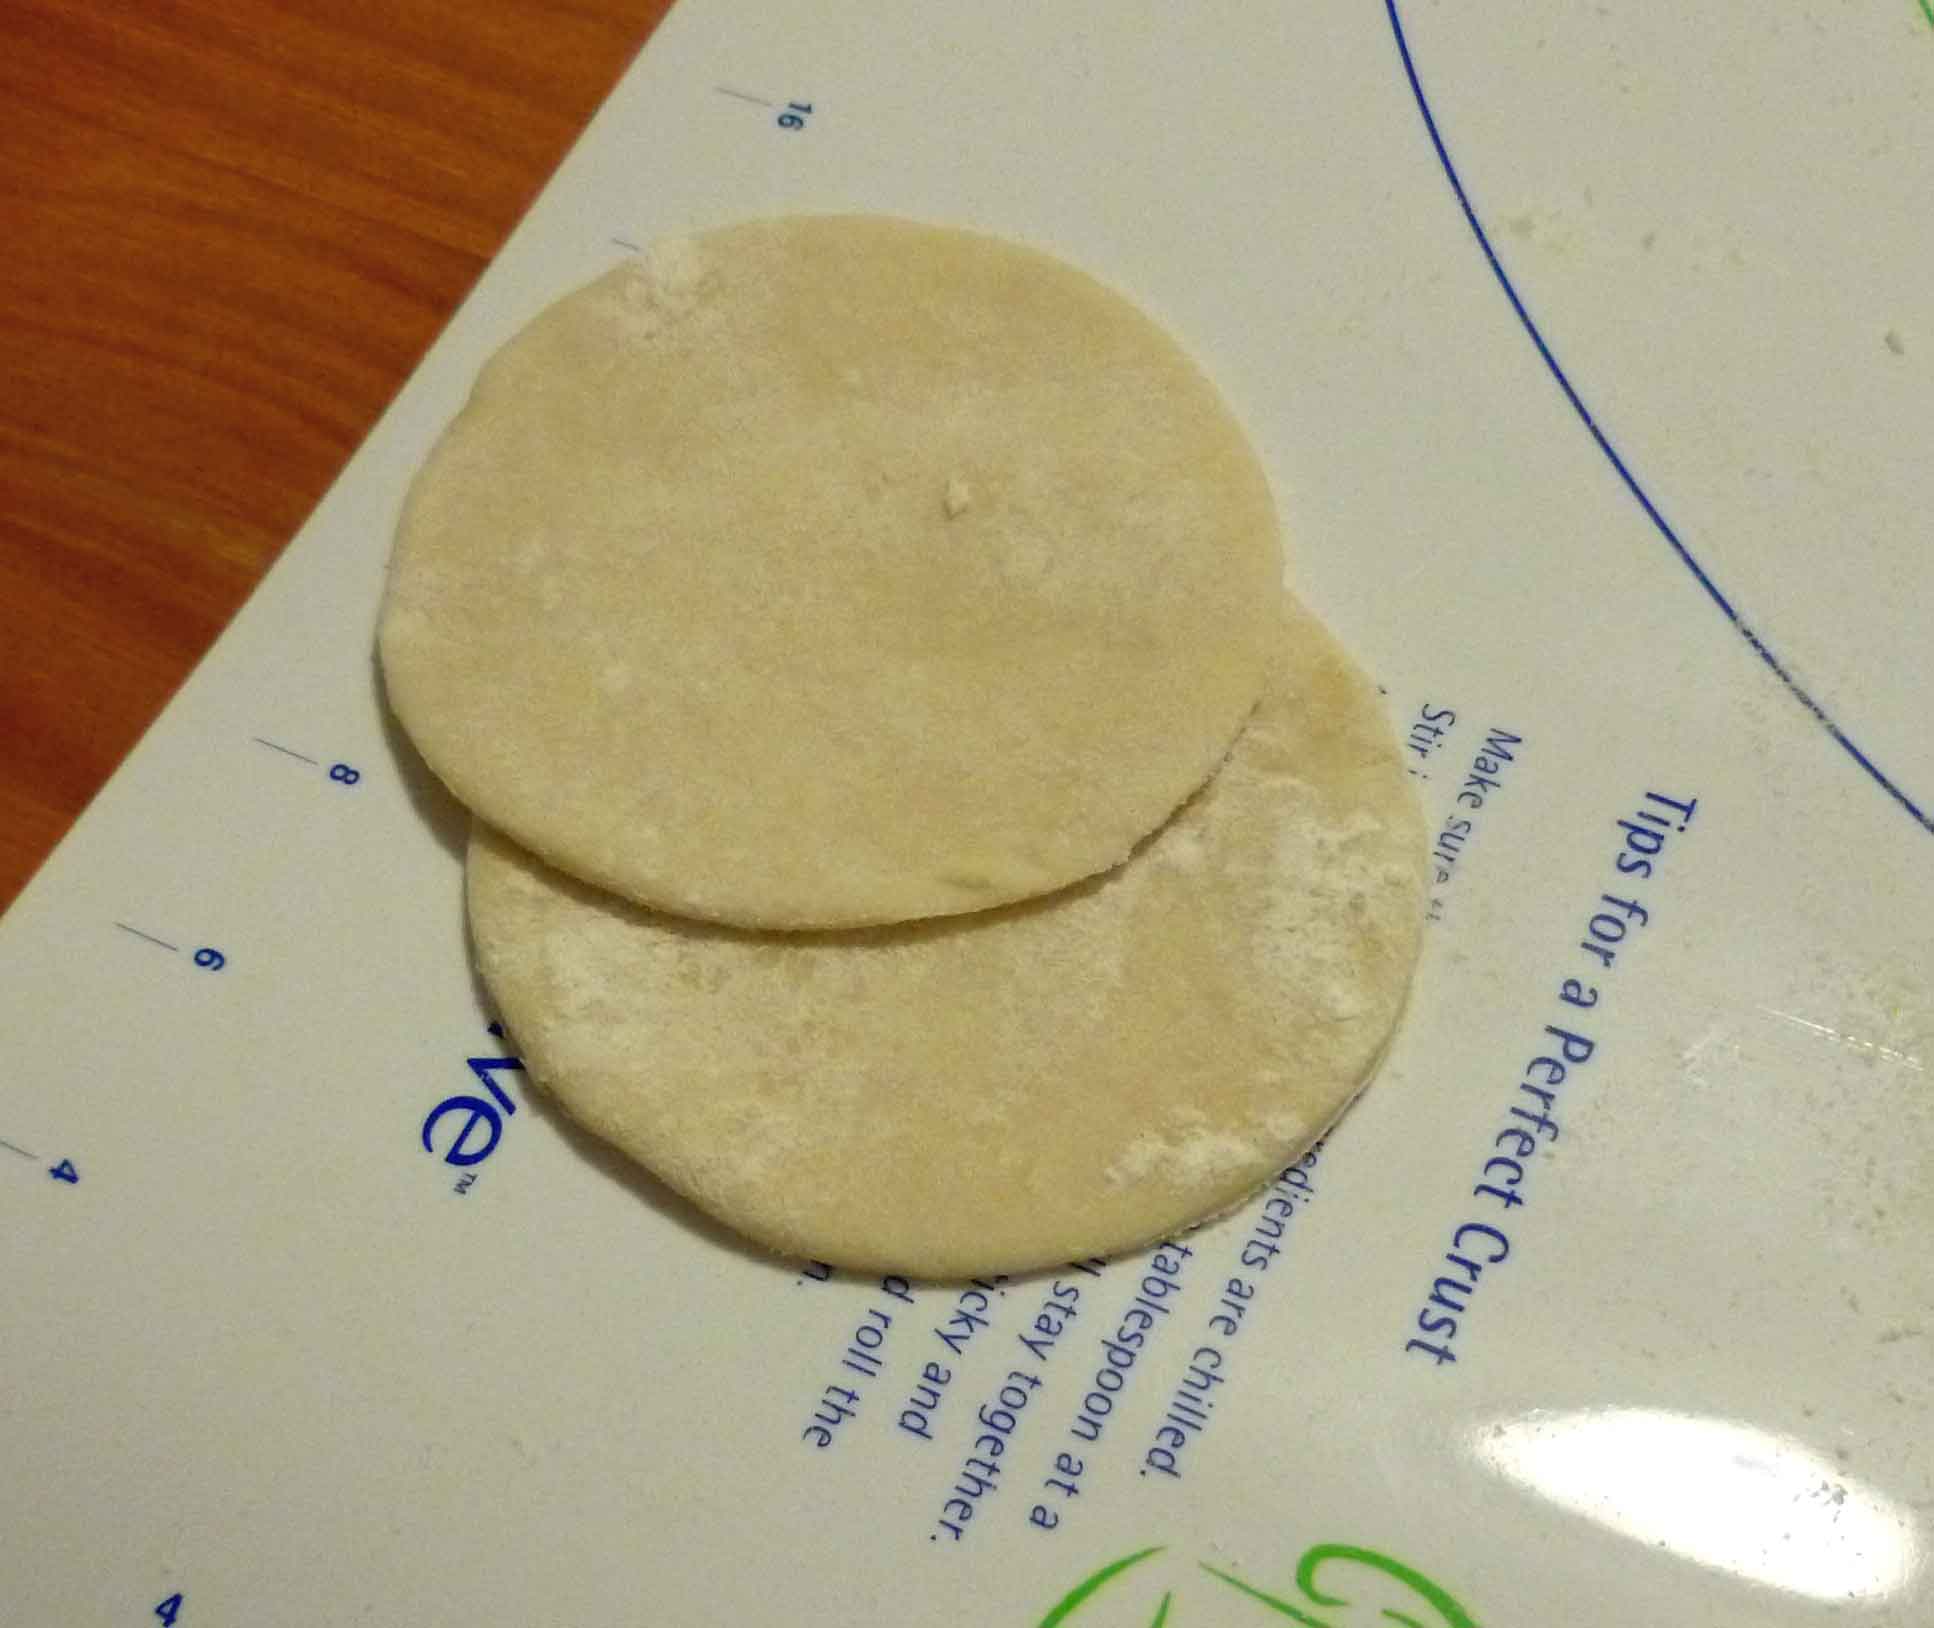
Now it’s time to make your wrappers. You can roll out your dough on a very clean counter top, a dough rolling mat, or a cutting board. I used a rolling pin and a biscuit cutter which was three inches in diameter to make the wrappers. Spread some flour over the surface of your work area. This dough is very sticky, you’re going to need quite a bit of flour for dusting, and it’s much easier to do it in small pieces. I only rolled out enough dough to cut out 2 or 3 wrappers at a time, as any larger attempts stuck to the mat too easily. Take a piece of the dough about the size of a plum, and using your flour to dust liberally, roll the dough to about an 1/8 of an inch thick and use your biscuit cutter (cookie cutter, or even a water glass in a pinch) to cut out the wrapper. Take your scraps and a bit more of the dough, and knead them together a bit and roll out a couple more wrappers. Keep doing this until all the dough is gone.
Dumpling Wrappers
Again, this dough is very sticky, make sure you dust them liberally before putting them in a pile. I didn’t and I had several wrappers stick together, which I then had to roll out again when I tried to use them.
Now it’s time to make your dumplings. I just want to say that this is a much softer dough that your usual wonton wrapper you get from the grocery store, and it’s harder to get a “pretty” result. And I’m not an expert by any means. So go check out this video by an expert for different shapes and techniques if you need a better explanation than the one I’m about to attempt. Especially once you see the picture of my completed ones below. Take a wrapper, hold it open in the palm of your hand. Place about a teaspoon or so of filling in the center of the dumpling and fold up the sides of the wrapper, pinching it shut, making little pleats if you have that kind of dexterity.
Dumplings on a sheet pan covered with parchment paper
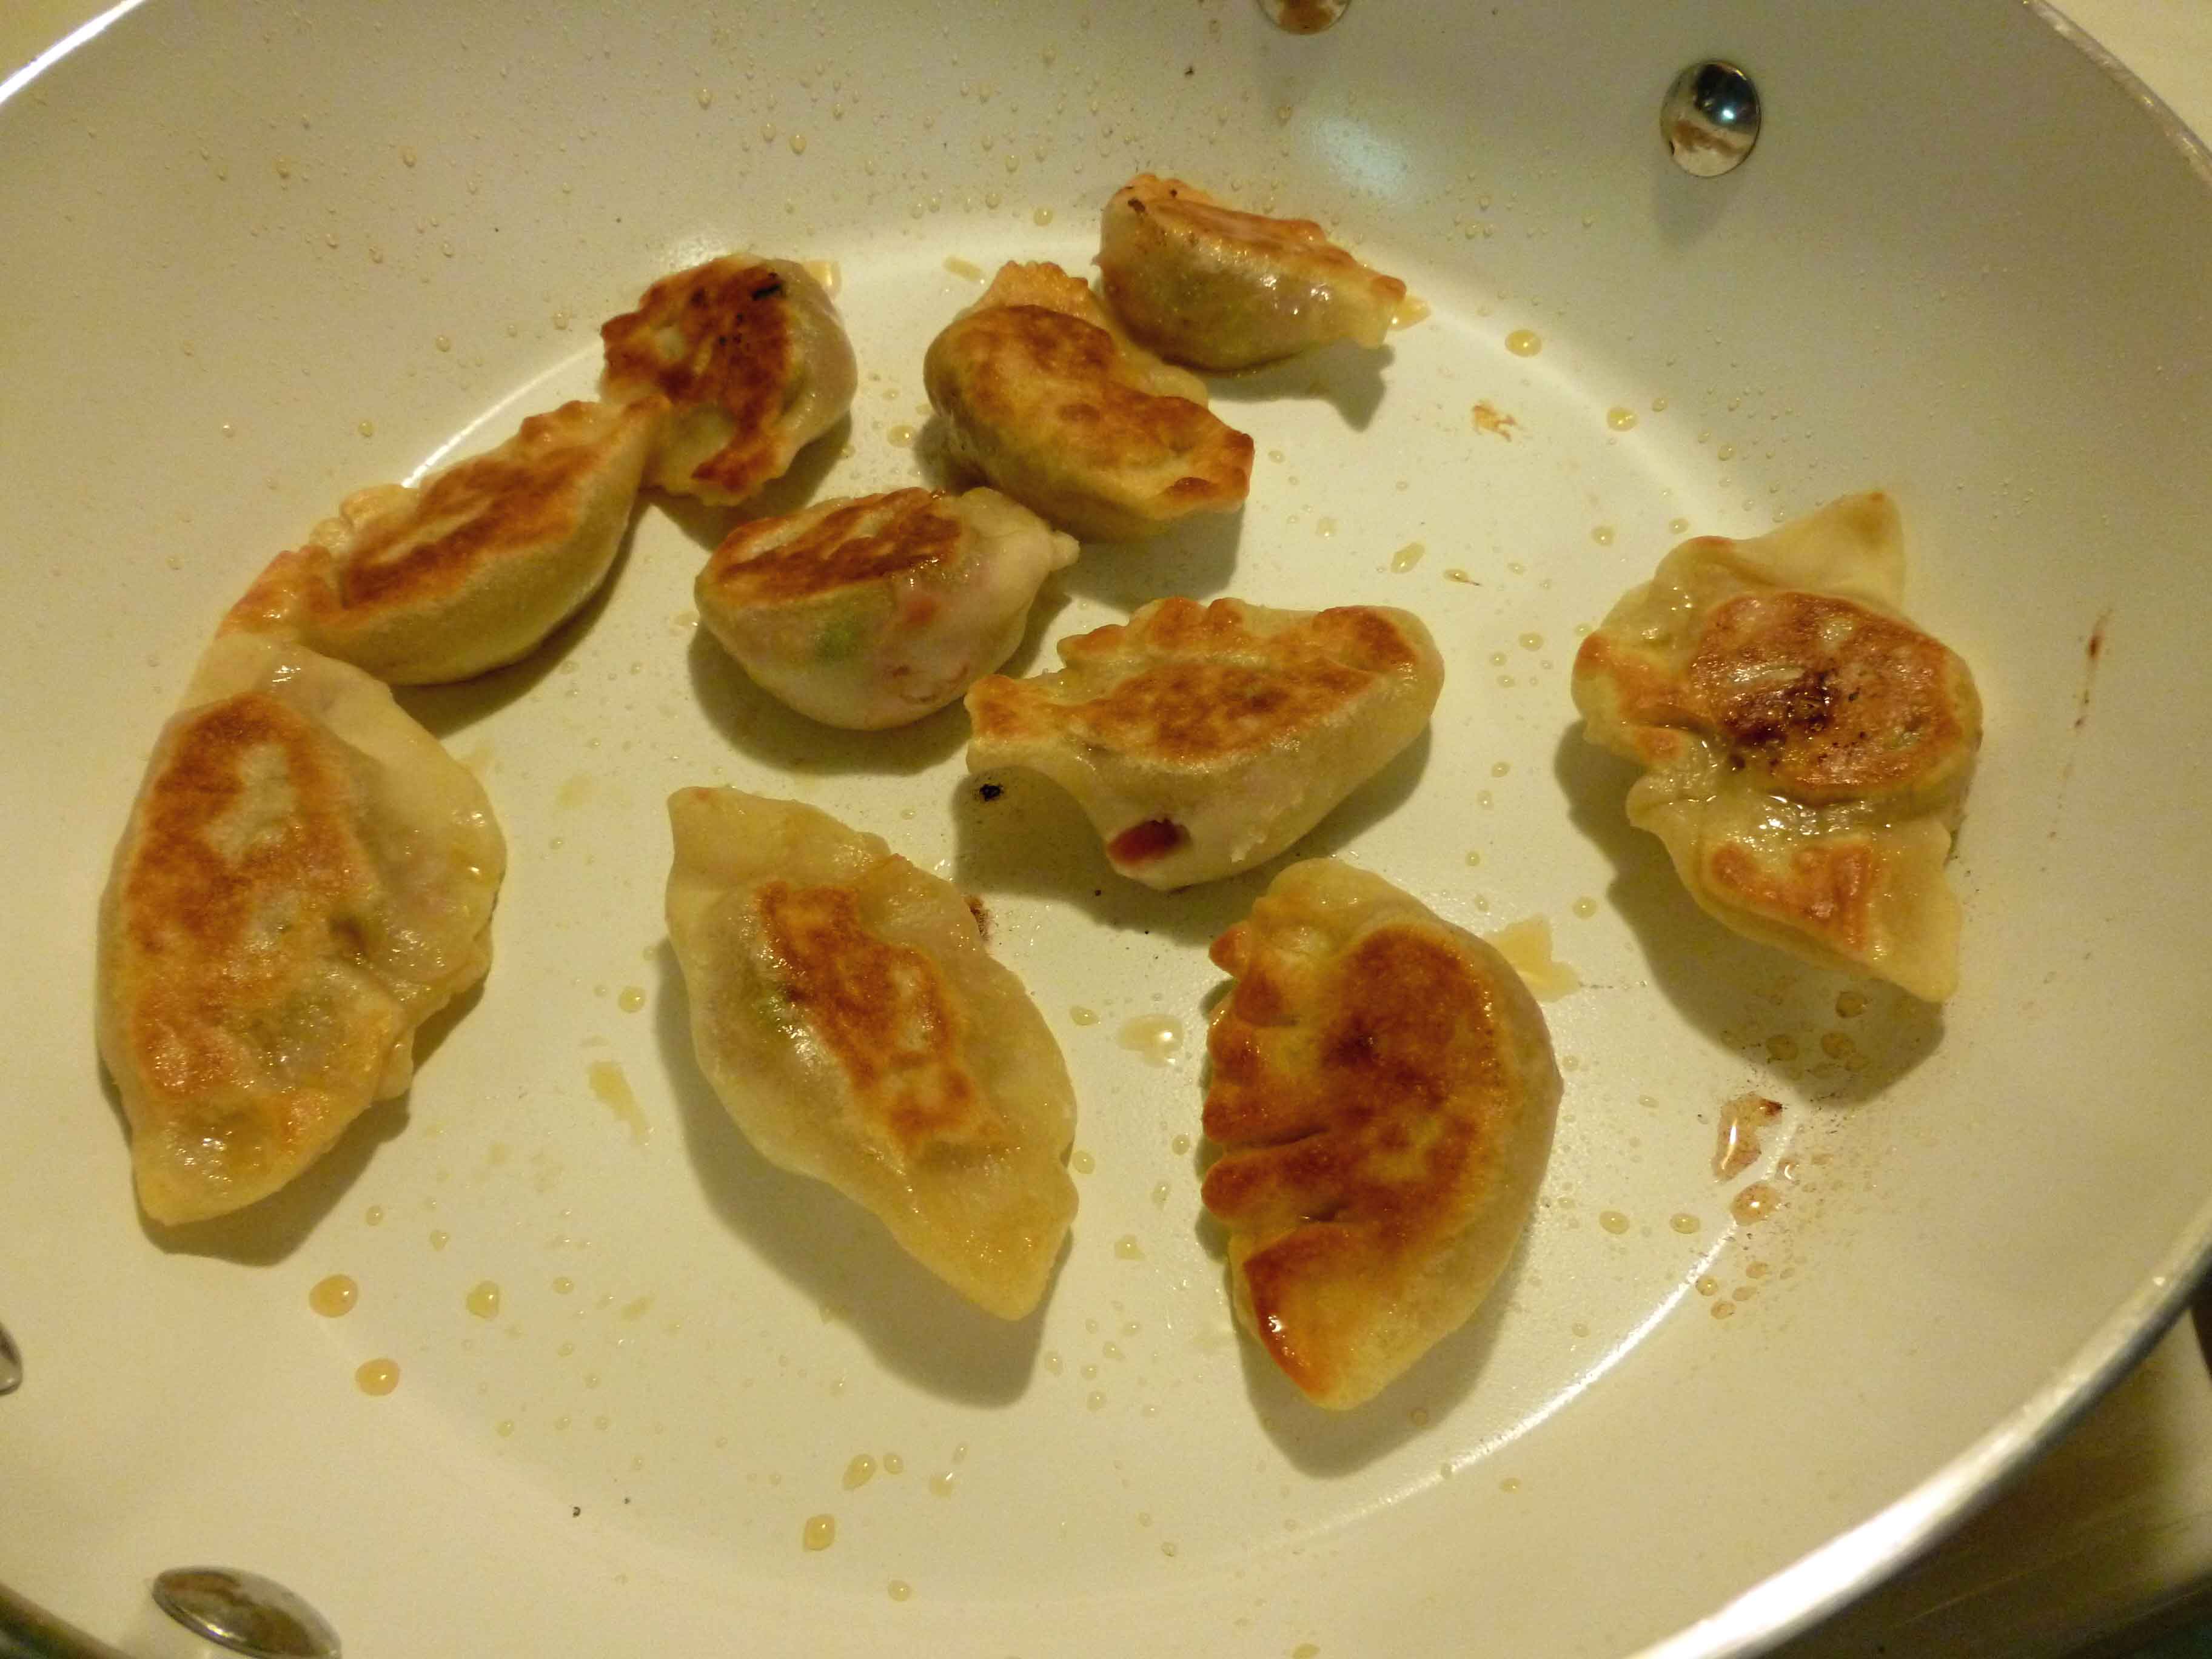
Now you get to choose how to cook them. I provide three methods below, but the first, Pan-frying, is what I used this time:
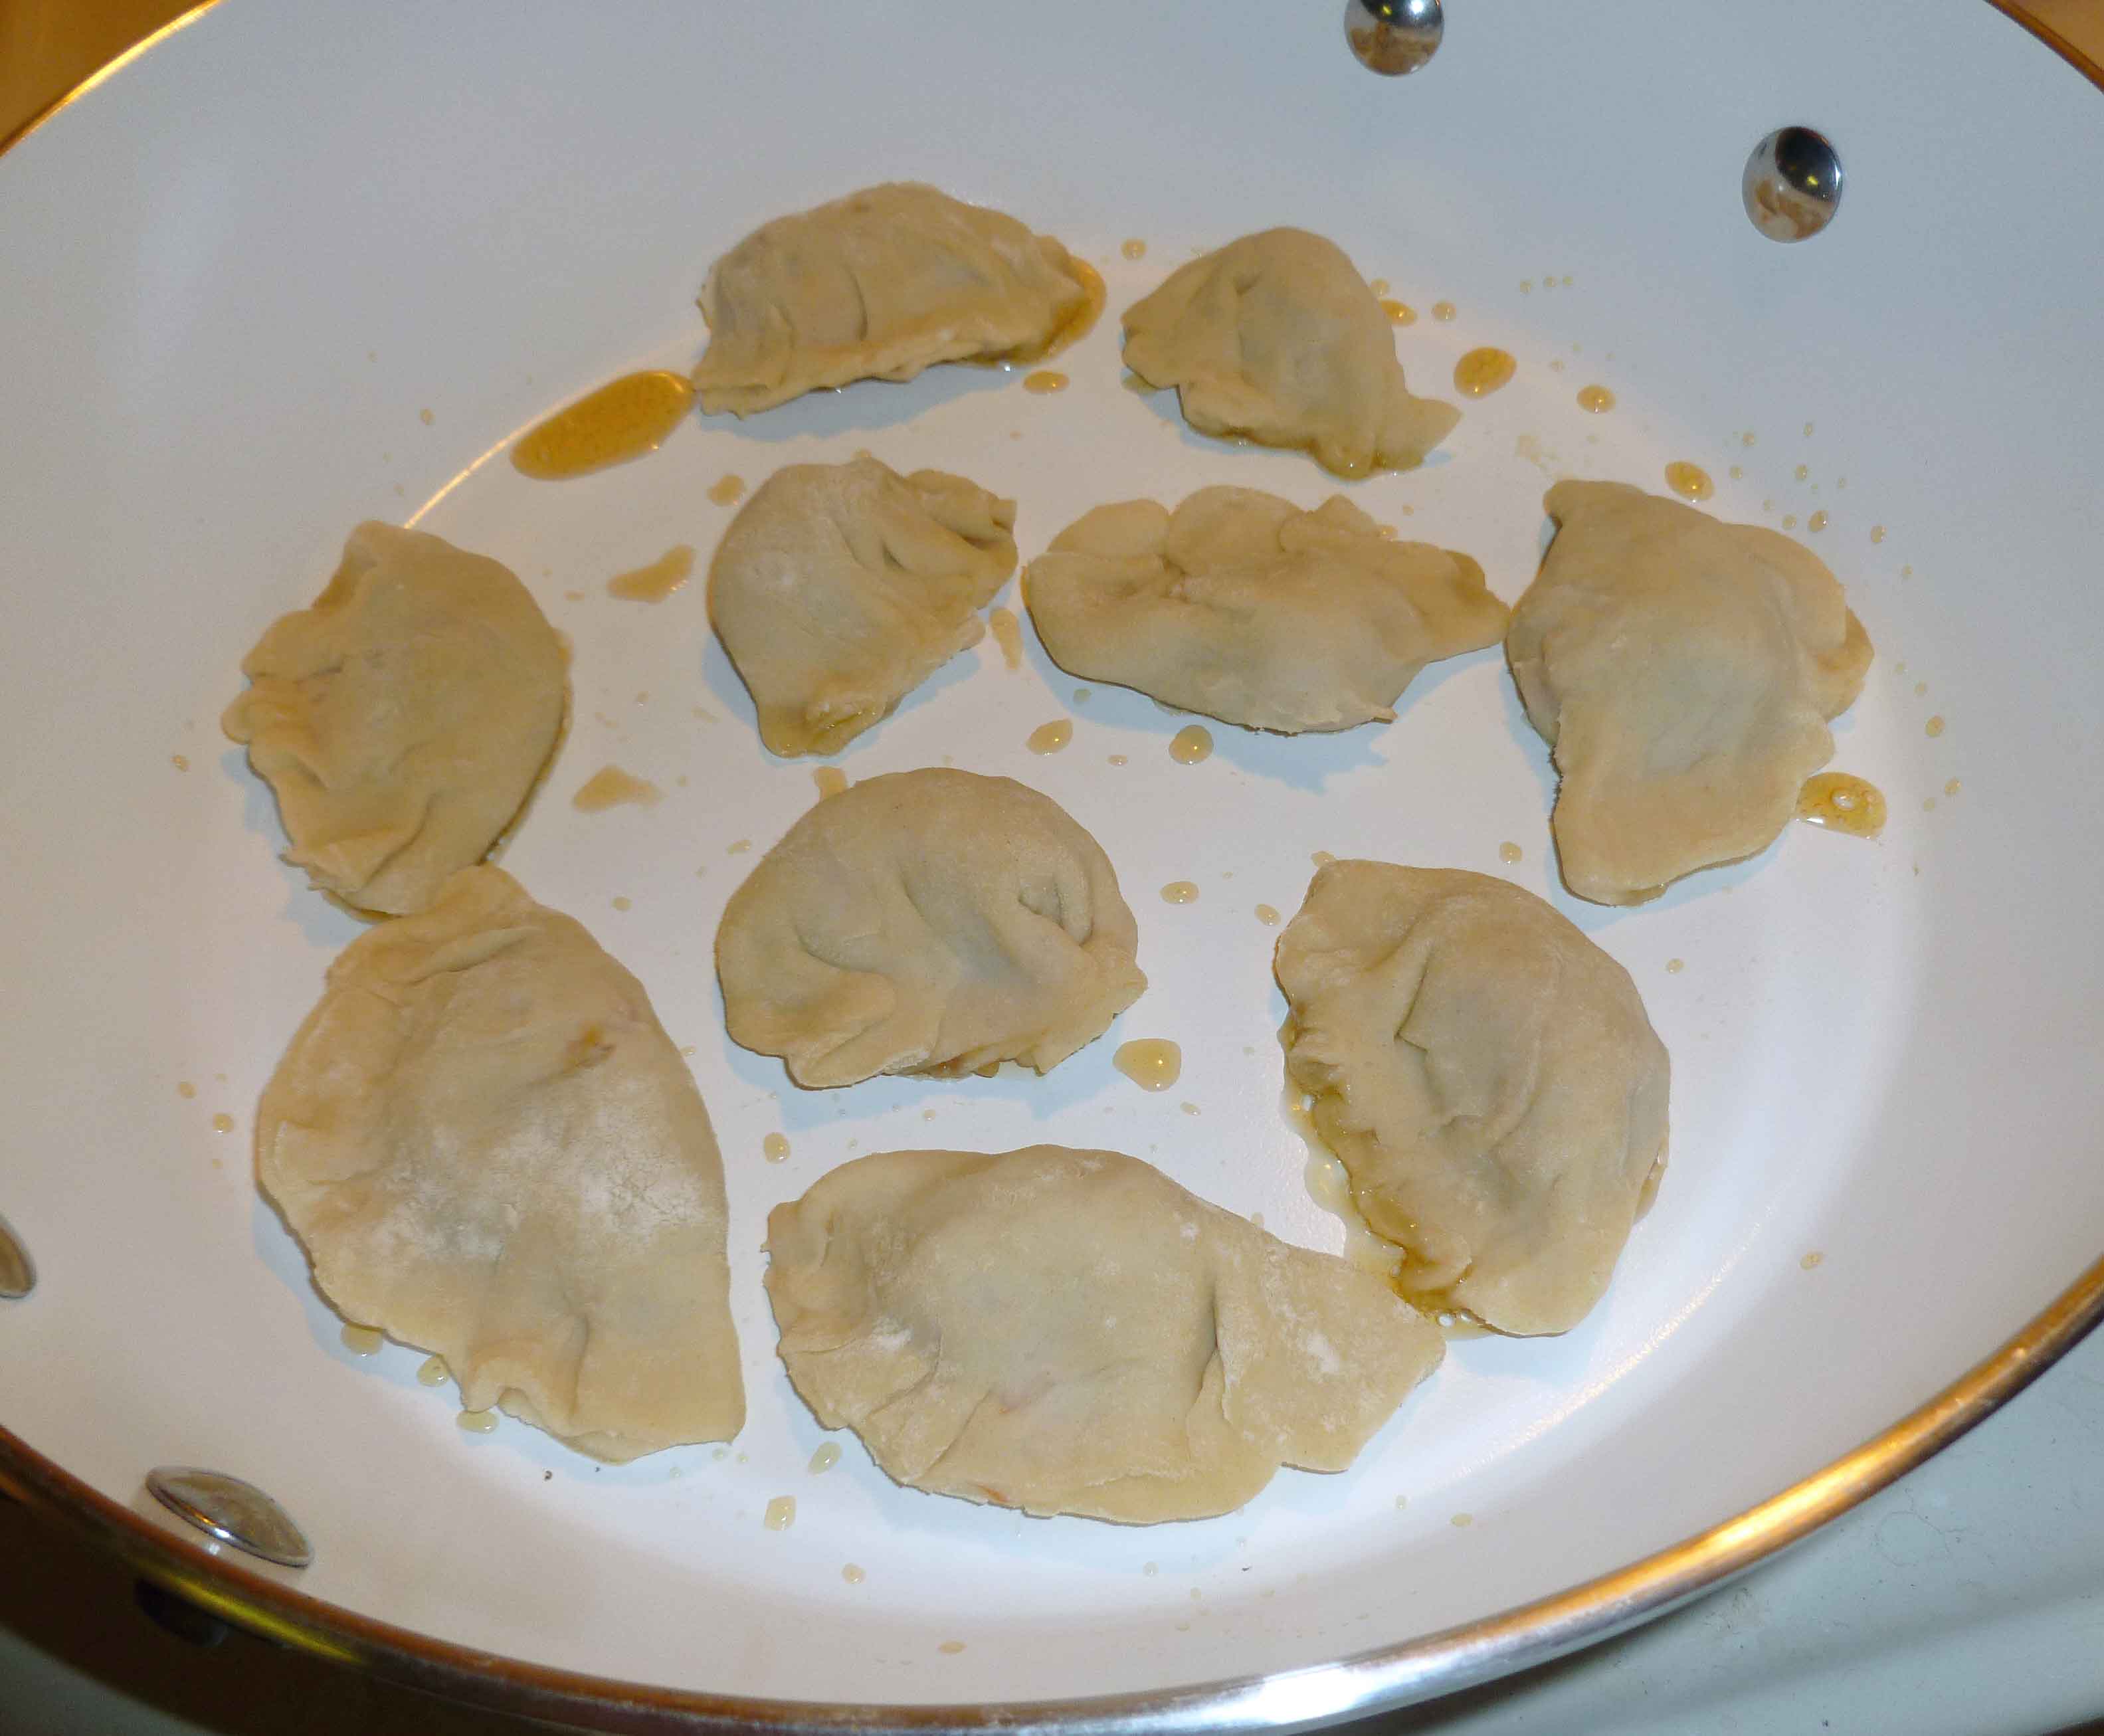
Pan-frying Dumplings: Place a little sesame seed oil in a skillet (which must have a tight fitting lid) over medium heat. Add dumplings, but so that they do not touch and have enough room to cook separately.
Dumplings properly spaced in skillet
Fry until golden brown, and then turn to fry the other side to the same golden brown color as shown below:
Dumplings fried golden brown
Once both sides are golden brown, add a quarter cup of chicken stock and put the tight fitting lid on the skillet. Continue to cook over medium heat while dumplings steam from chicken broth for another 3 – 7 minutes (depending on whether they were fresh or if they were dumplings you froze to use later) making sure to test one to see if they are done before serving. You may need to adjust your cooking times. Continue to fry and then steam dumplings in batches until you have cooked all the dumplings you intend to serve. Serve with dipping sauce.
Steaming Dumplings: Use a metal steamer basket or a bamboo steamer in an appropriate size pot with a tight fitting lid with enough water so that it will not touch the dumplings. Place the dumplings in a single layer in the steamer. Bring the water to a boil, then reduce the heat to medium and put the lid on the pot. If the dumplings are freshly made, cook for 5 minutes or so, but test one to see if they are done before serving. If you froze your dumplings to use later, don’t thaw them, but cook them for about 15 to 20 minutes, testing to see if they are done before serving. Serve with dipping sauce.
Dumplings In Soup: You can do a quick wonton soup, using some chicken broth, some green onions, some Napa cabbage, thinly sliced carrots and some of your dumplings. Bring the chicken broth to a boil, add the dumplings and carrots, and then reduce the heat to medium. When the dumplings and carrots are cooked, add the green onions, Napa cabbage and cook for a minute or two more. I like to add some white pepper or Chinese Five Spice to season it as well. This is a really quick dinner if you’re using dumplings you froze to use later, and some frozen homemade chicken stock, or a store bought version (checking the labels of course).
Hope you like these, and I will keep trying for a gluten free version I like to share.
For the many years where the only allergen I needed to avoid was dairy, Asian restaurants of most types were a saving grace. With the exception of Indian cuisine, which uses cream and butter, most cuisines of the Asian continent use little to no dairy.
Now that there are more allergens in my arsenal, it’s not quite as simple. But what is reasonably simple is learning to adapt recipes at home. I like that stir fry is an excellent way to incorporate a lot of vegetables into one dish, with meat as a flavoring rather than the focus — and you can make a vegan version by either substituting tofu or seitan for the meat. This marinade should work well for either, but I have not tried it since I can’t eat either anymore.
Year of the Snake Stir Fry
For marinade:
1 teaspoon toasted sesame oil
1 1/4 teaspoon crushed garlic (2-3 cloves)
1 Tablespoon, rounded, crushed or grated ginger
2 Tablespoons gluten-free tamari (soy sauce)
3 Tablespoons rice wine vinegar
4 Tablespoons mirin (Japanese cooking wine) or dry cooking sherry
Add
1/2 to 3/4 of a pound of thin cut pork sirloin, cut into bite-sized chunks
1 cup thinly sliced onions.
Marinate overnight.
Get rice cooking. I can’t give you a recipe or time — read your package or your rice cooker directions. I am generally hopeless at cooking rice. My Chinese ancestors would be less than best pleased.
Stir fry with
1/4 cup yellow bell pepper, sliced thin
1 cup celery, chopped
1 cup broccoli florets
1 cup of sugar snap peas, whole
1 cup of mushroom pieces, broken instead of sliced
1/4 cup of celery leaves, chopped
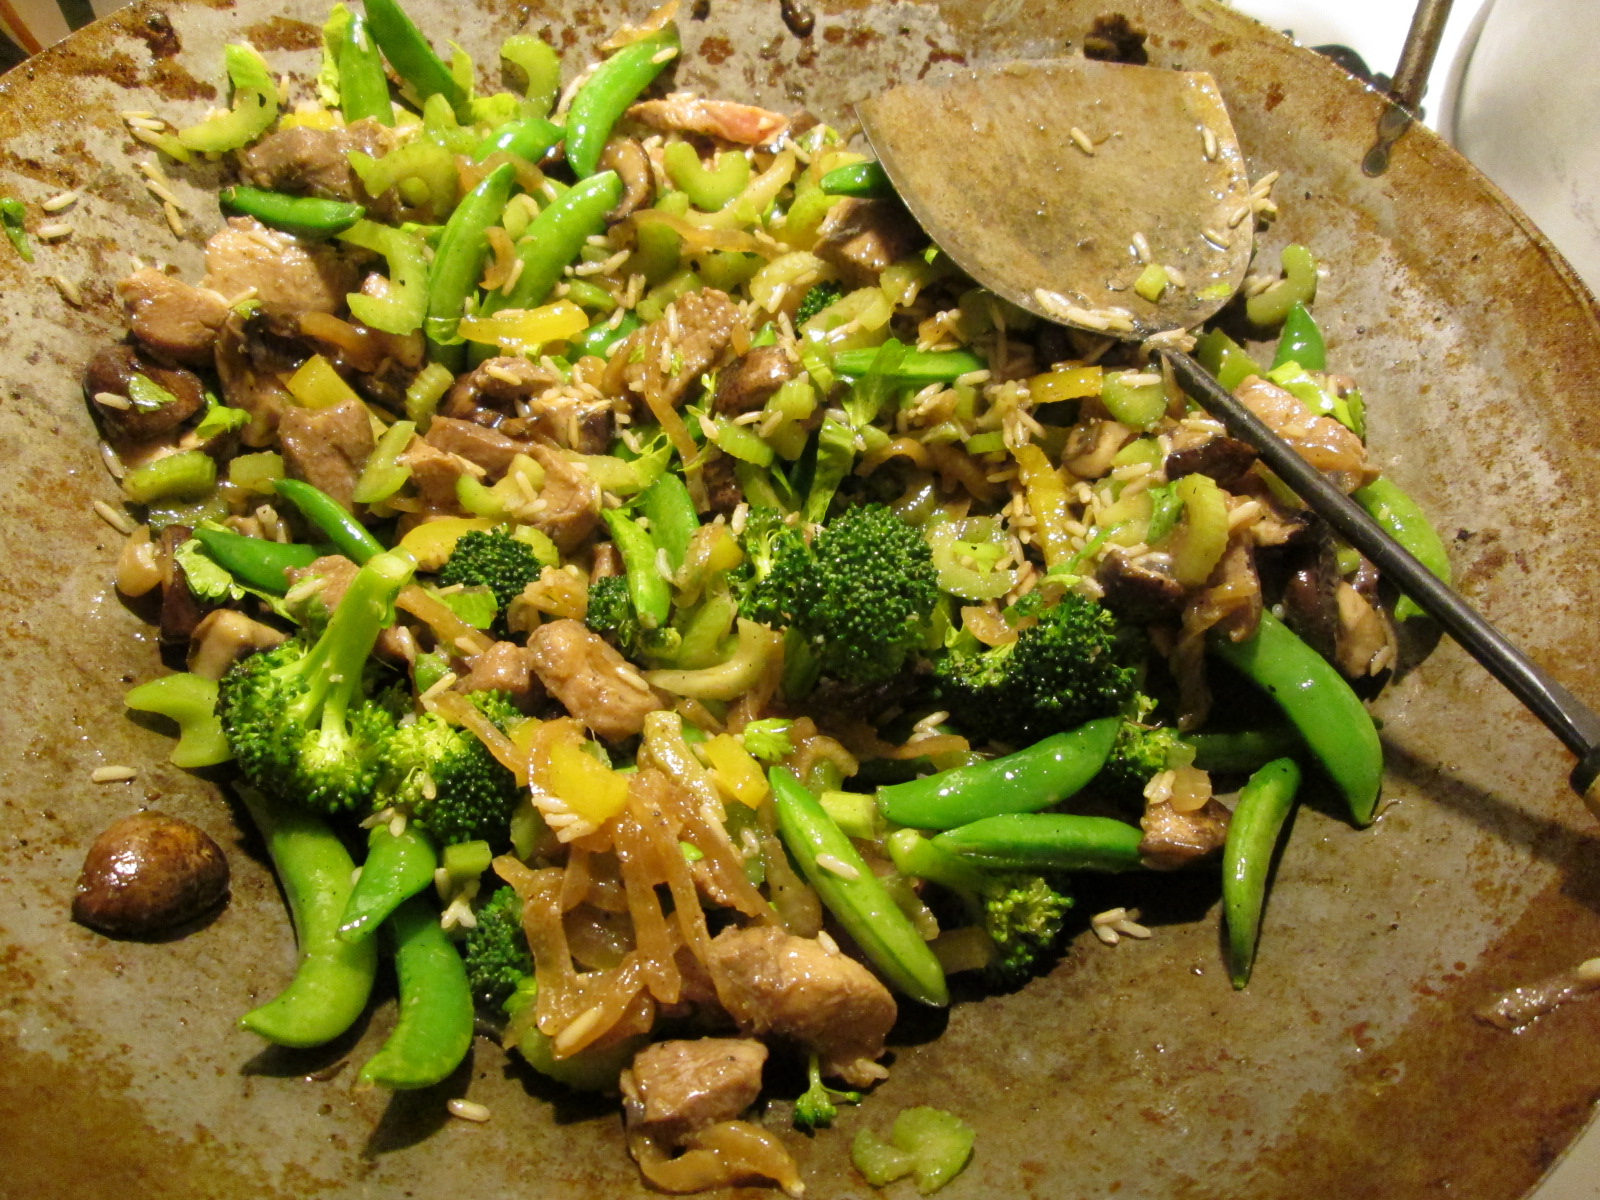
This makes a lot of stir fry. I tend to stir fry the ingredients in rounds, each ingredient separately — meat first, and then through the veggies. Strain the marinade out — you want to fry the meat, not boil it — and discard. Stir fry until cooked through, and then remove from pan. Cook the peppers. Remove. I stir fry in canola oil, and use it sparingly adding a tiny bit with each ingredient.
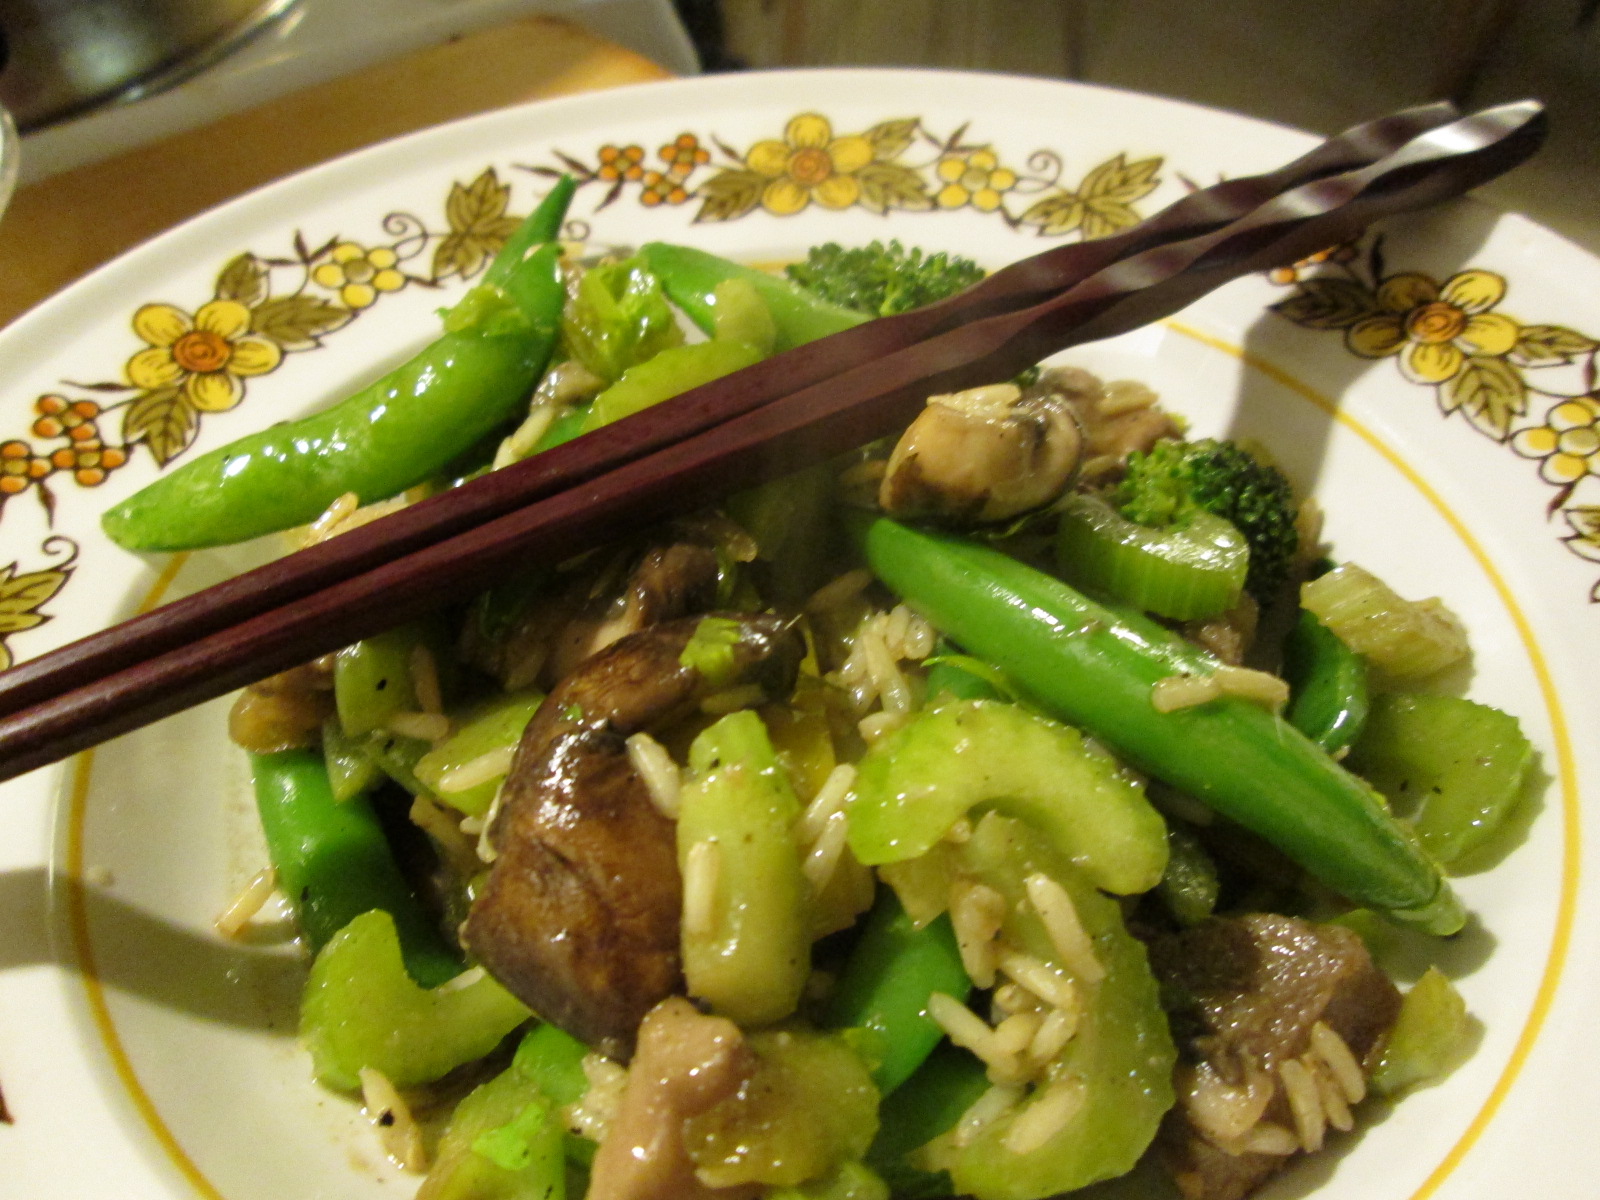
Stir Fry Flavor Meld
When all your food is cooked, dump it all back in the wok, turn the burner off, and give it a few minutes to meld.
Serve over rice. Or, you know, dump some rice in to flavor meld, too.
Bok choi is a vegetable which is high in Vitamin A, Vitamin C, and calcium, and often used in Asian cooking. For those of us who are dairy-free, vegetables high in calcium are a good thing. A relative of the turnip, bok choy has a light sweet flavor, and it’s low in calories. I developed this recipe trying to replicate a dish that my favorite local Vietnamese restaurant serves. The flavors are wonderful and I think it takes all of ten minutes to cook once your prep work is done. This is a great side dish to go with other Asian dishes, and my husband and I find it also complements a steak very well.
Garlic and Ginger Baby Bok Choi
Gather and prep the following ingredients:
1 ½ lbs of washed baby bok choi (try to get the size that’s about the length of your finger)
3 tablespoons of Earth Balance soy free vegan margarine.
3 cloves of garlic, very thinly sliced
1 ½ tablespoons of peeled and very thinly sliced fresh ginger
1 small onion, diced finely
Using a large deep frying pan with a tightly-fitted lid, melt margarine in frying pan over medium high heat.
Add onion, garlic and ginger, stirring occasionally until onion just becomes translucent.
Add bok choi to pan and mix well. Put lid on bok choi to steam for a minute or two. Stir contents, and replace lid for another minute or two. The bok choi is cooked when leaves are limp and top of stem connected to leaf begins to soften.
What are some of your favorite restaurant foods that you’d like to see us try to make allergy-free? Let us know. Also, if you try this recipe, please let us know how it worked for you.


")