Notice: Function _load_textdomain_just_in_time was called incorrectly. Translation loading for the wp-ultimate-recipe domain was triggered too early. This is usually an indicator for some code in the plugin or theme running too early. Translations should be loaded at the init action or later. Please see Debugging in WordPress for more information. (This message was added in version 6.7.0.) in /home/maryzahc/public_html/adultfoodallergies.com/wp-includes/functions.php on line 6131 chicken – surviving the food allergy apocalypse (archive)
Everything about winter here in Seattle screams “eat hot food with warming spices.” I thought I knew what I was getting into, weather-wise, as I lived in Oregon for three years. You know what Seattle has that Eugene, OR does not? WATER. Puget Sound and multiple lakes. From the hill we live on, we can see the mist rising off the water (and blowing up the hill at us). It is chilly in a very wet way.
Chicken thighs are cheaper and easier to cook without drying out than chicken breasts. But they can be greasy. So to get around that, these are cooked, cooled, and warmed again to allow for straining off most of the fat. This is either a good make ahead recipe (the night before) or make it in the morning and reheat it for dinner.
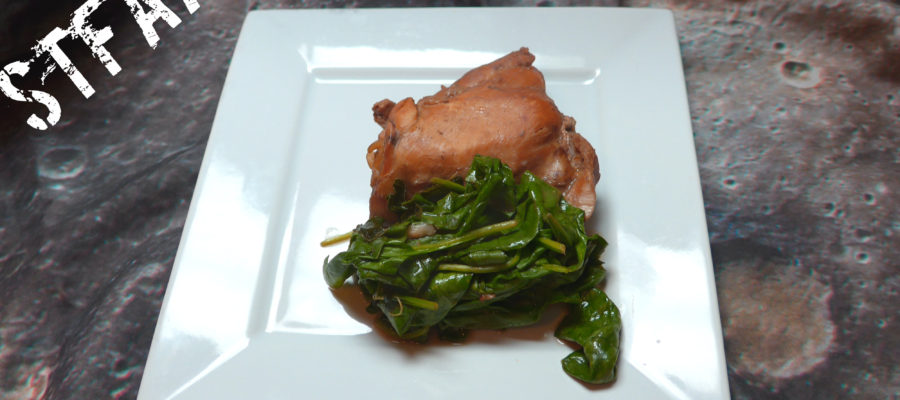
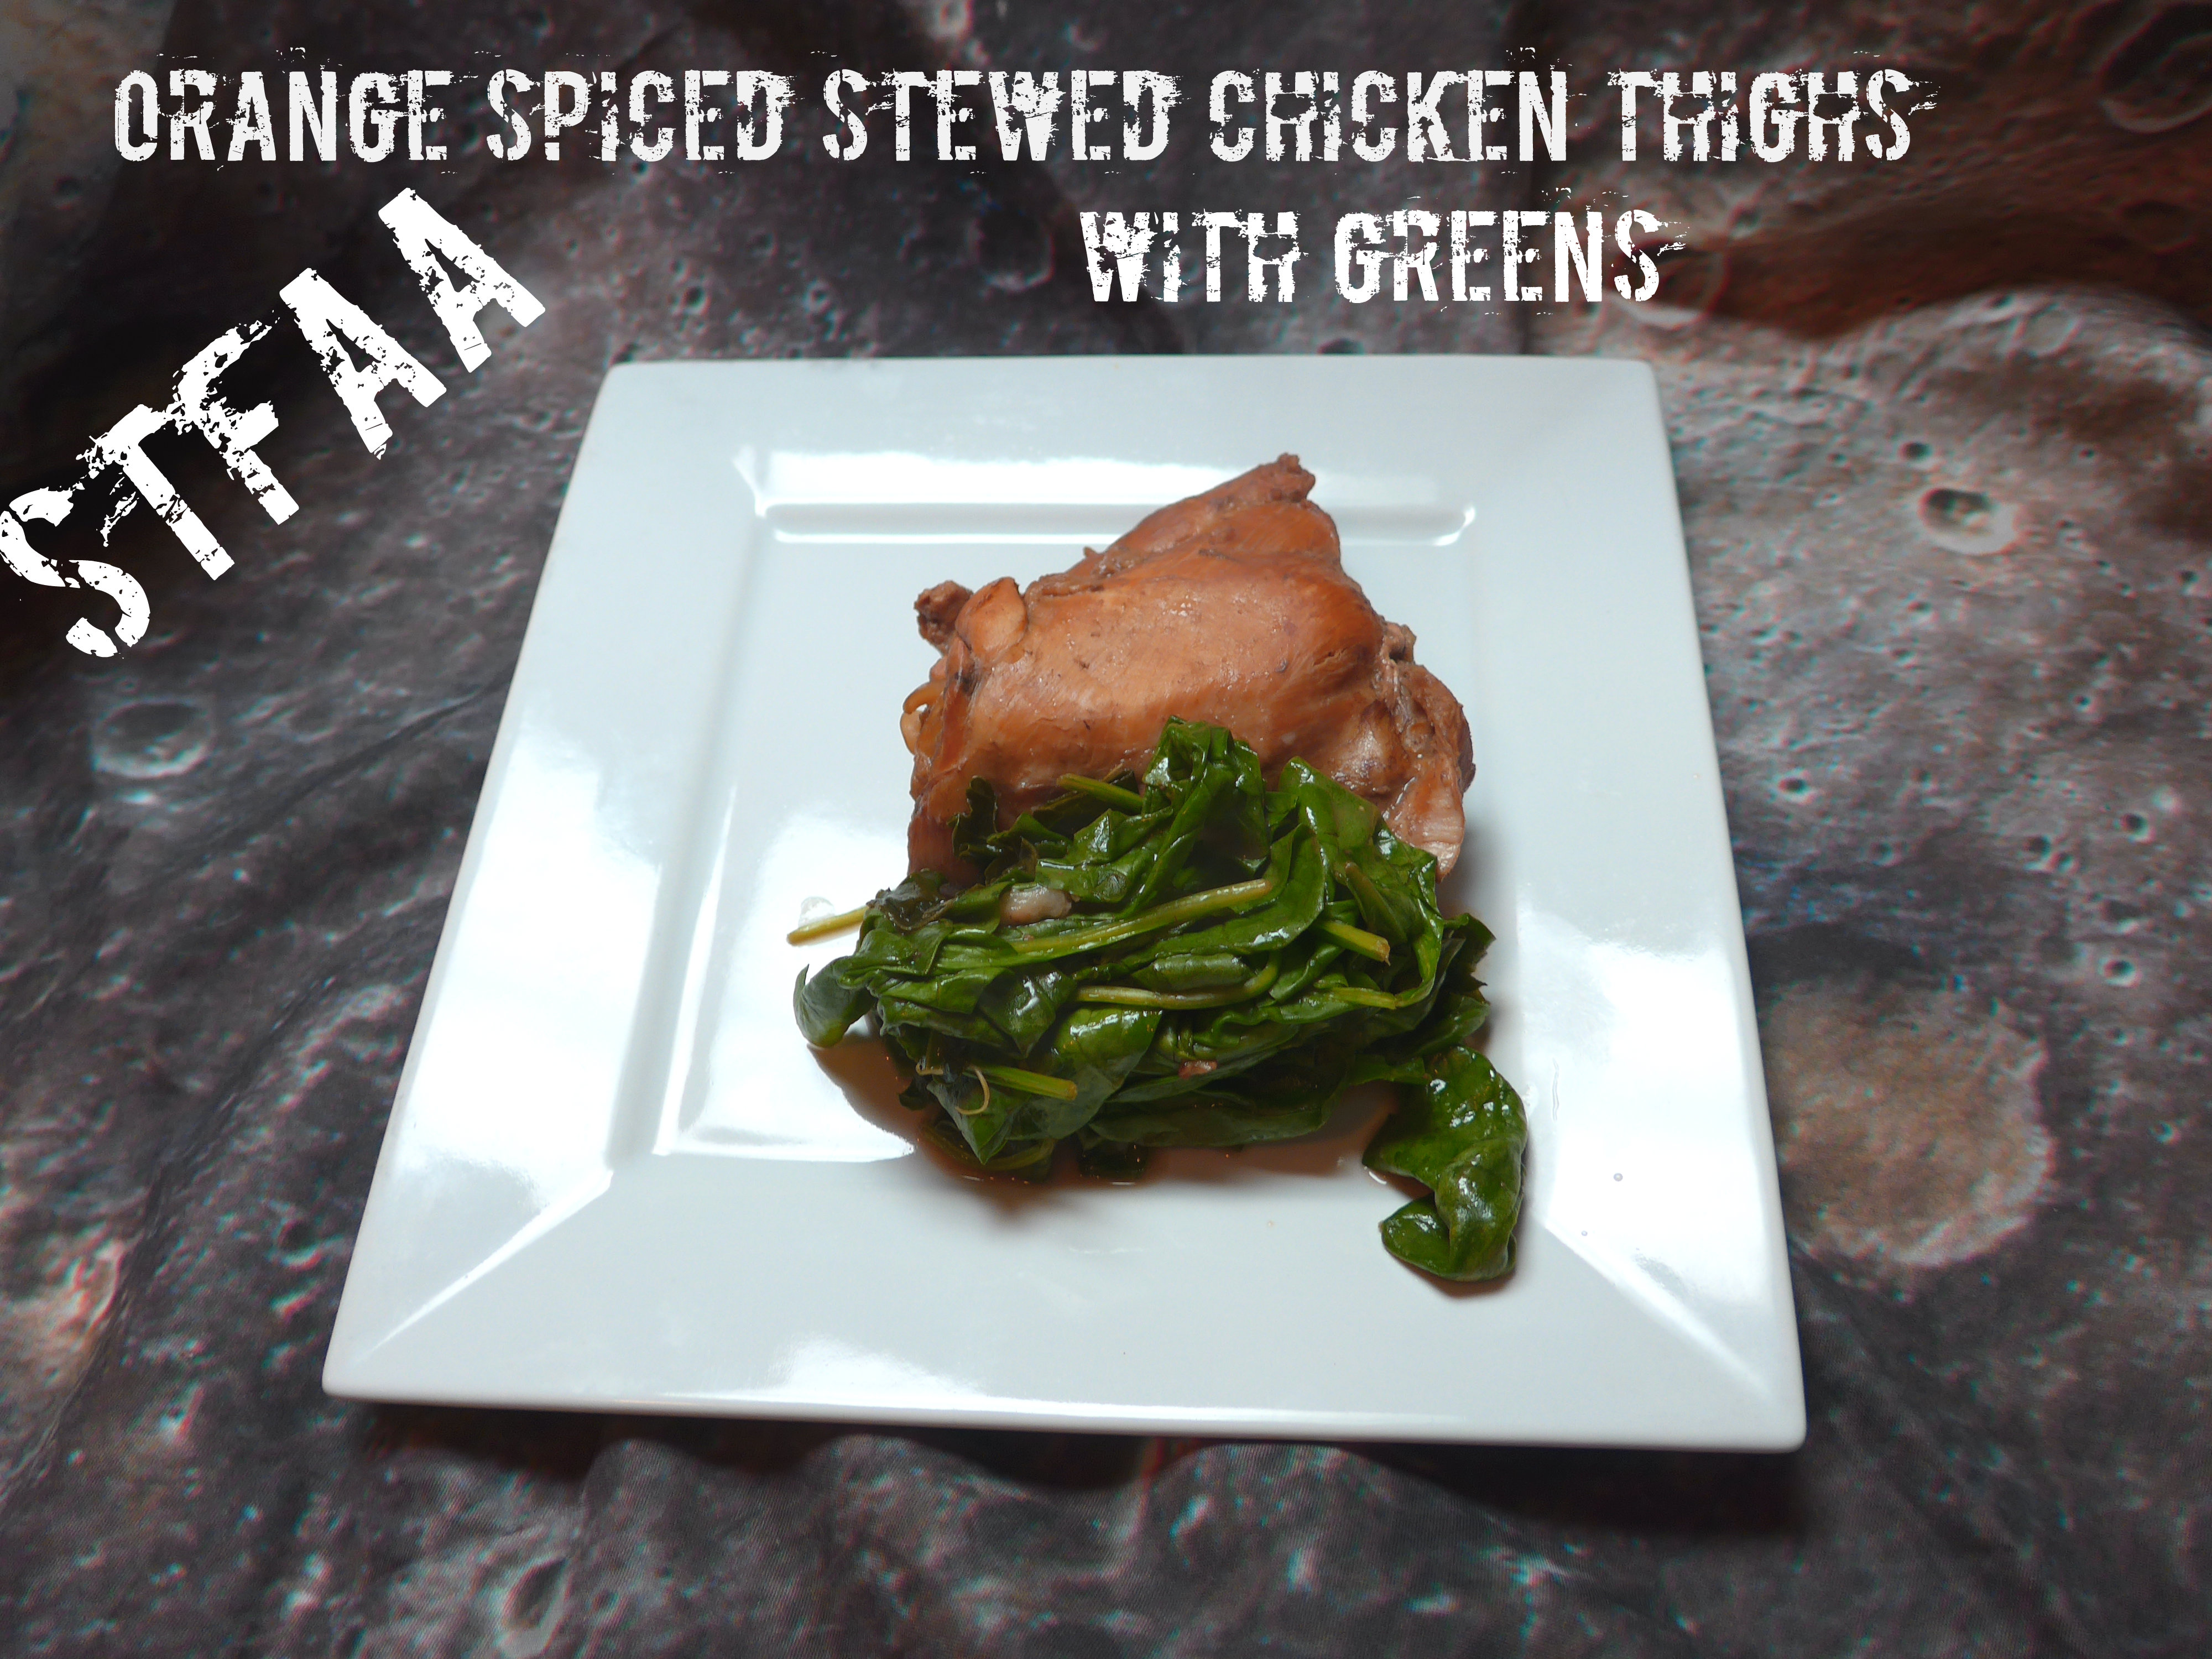
This chicken is based on wanting spice flavors and winter — and I totally understand why citrus is such a good winter flavor, as it’s great and sunny. I mixed these two up to stew chicken thighs, adding greens right at the end to absorb the flavor. I served this with a bit of dressing I’m working on, and I think mashed parsnips would also be a great side. It made for an easy Sunday dinner to start the week off warmly.
Notice: Trying to access array offset on value of type bool in /home/maryzahc/public_html/adultfoodallergies.com/wp-content/plugins/wp-ultimate-recipe/helpers/models/recipe.php on line 254
Orange Spiced Stewed Chicken Thighs
Print Recipe
This stewed chicken recipe does call for cooking, cooling, and then reheating the meat and sauce after straining or skimming off the fat. Plan accordingly.
This stewed chicken recipe does call for cooking, cooling, and then reheating the meat and sauce after straining or skimming off the fat. Plan accordingly.
1wholestar anise(or enough pieces to approximate 1)
1teaspoonwhole peppercorns
3wholecloves
3whole cardamom pods
2bagsblack tea
1cuporange juice
2poundschicken thighsbone in, skin off
freshly ground pepperto taste
2cupsmixed cooking greensroughly chopped
Servings: people
Instructions
Add water and whole spices to a large pot. Bring to a boil, then add tea bags, turn off heat, and cover. Steep 15 minutes.
Remove tea bags and whole spices. Add orange juice, bring to a boil.
Add chicken thighs, and bring again to a boil. Reduce heat to a simmer. If liquid covers the chicken only part way (likely), cook 15 minutes, covered, then flip chicken and cook for another 15 minutes, covered. Cook a final 15 minutes, uncovered.
Now remove the chicken from the juice and cool all of it for at least a few hours or overnight. This will allow you to remove the excess fat from the cooking liquid. Skim or strain it out.
Bring the cooking liquid back to a boil and then add the chicken thighs. Turning the heat down, simmer for about 15 minutes.
Add the greens (I used spinach and kale here) and cook until the greens are wilted — this will depend on your greens, but 5-15 minutes is a good guess for anything short of collard greens (don’t use collards — they require a different cooking method). Spinach, kale, and chard are all good options.
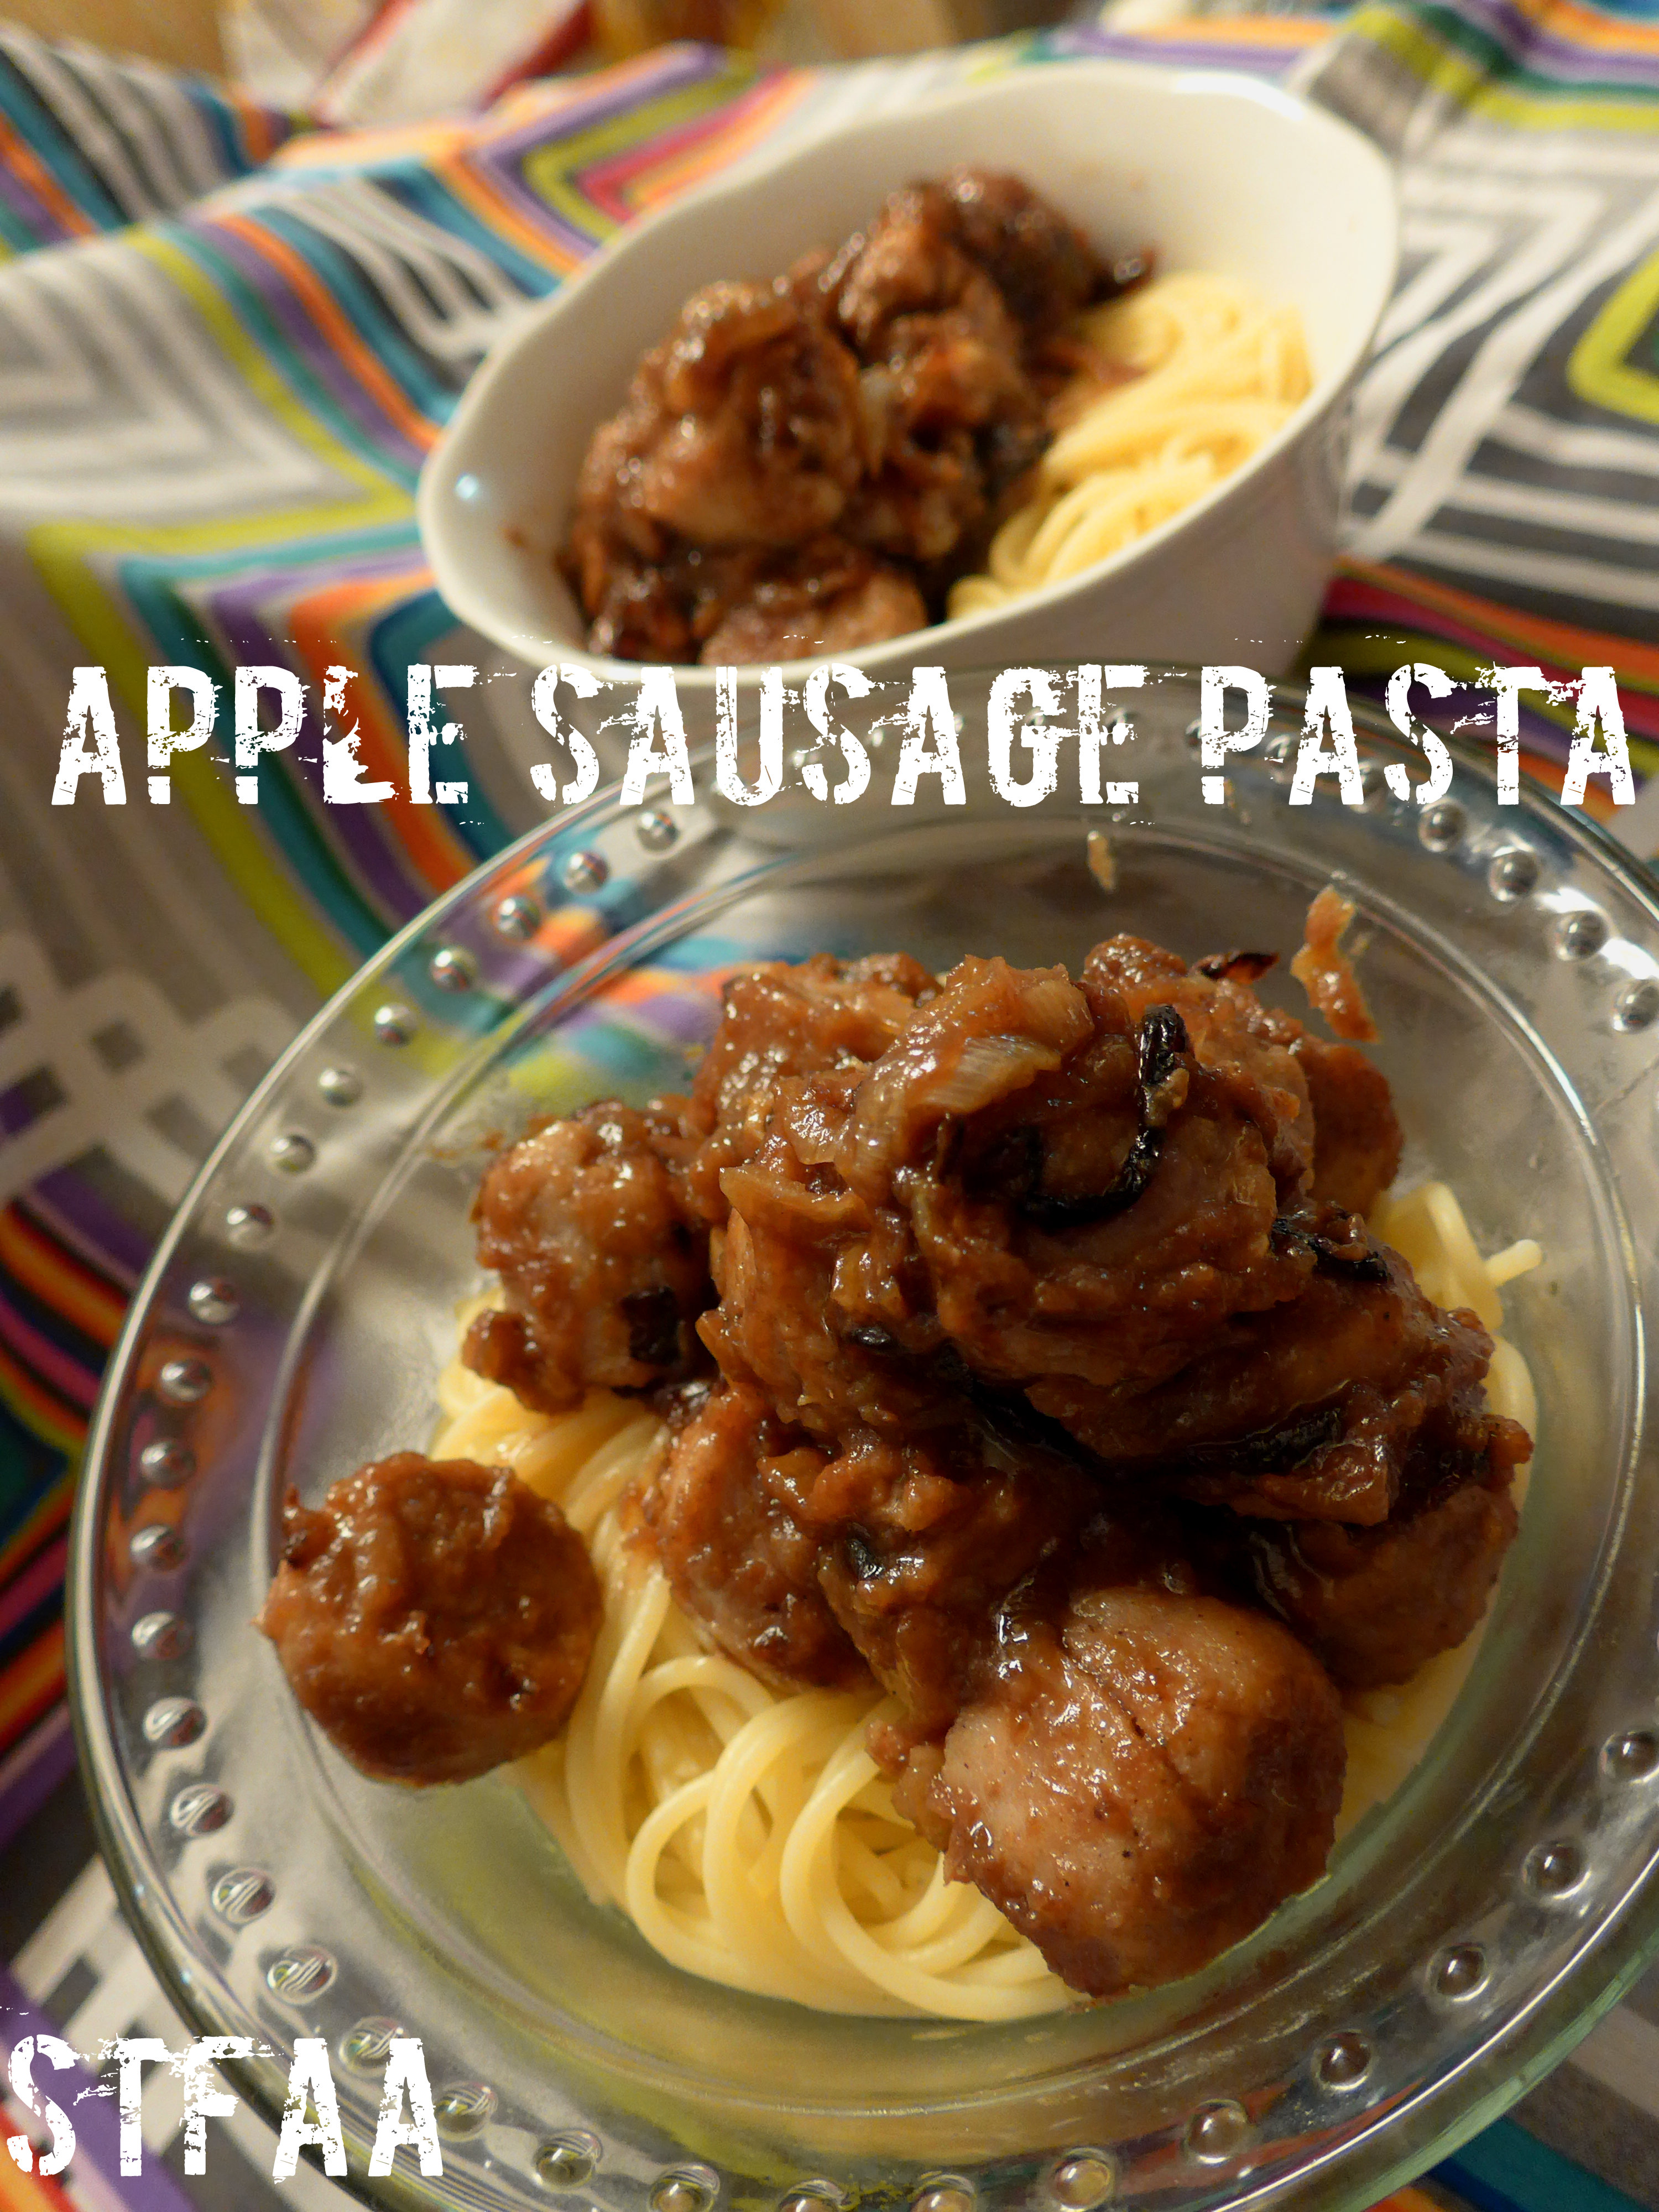
This dish is kind of an accident. I like to keep chicken sausages around as they are quick and easy for nights where I don’t really want to cook but want hot food. I started buying the apple sausages recently just for something different, and they seemed to beg for a different treatment than my normal sausages and caramelized onions. Because I had apple butter from Denise’s huge apple tree stash, I figured if I could balance the sweetness, I might have a winner. Caramelized onions, a hit of garlic and a bit of vinegar, and we have a winner. This is a really different dish — it’s not overly sweet, but it’s a different tenor from anything else I make regularly, and I like the break.
Apple Sausage Pasta Notice: Trying to access array offset on value of type bool in /home/maryzahc/public_html/adultfoodallergies.com/wp-content/plugins/wp-ultimate-recipe/helpers/models/recipe.php on line 254
Apple Sausage Pasta
Print Recipe
This sweet and savory apple-based pasta sauce is good over whatever pasta you may enjoy. Make it gluten-free by using the gluten-free pasta of your choice. This works best with a chicken and apple sausage, but would likely work great with a straightforward pork sausage as well.
This sweet and savory apple-based pasta sauce is good over whatever pasta you may enjoy. Make it gluten-free by using the gluten-free pasta of your choice. This works best with a chicken and apple sausage, but would likely work great with a straightforward pork sausage as well.
2servingspasta of your choicecooked according to package directions
Servings: large servings
Instructions
Heat olive oil in a heavy skillet over medium heat.
Add onions and stir well to coat with oil. Sprinkle with salt. Cook until caramelized, about 40 minutes, stirring about every 10 minutes. You’re looking for golden brown.
Add sliced sausages and cook for about 5 minutes until browned on one side, stir to flip around. If you need to cook your pasta and it takes about 10 minutes, start it now while the sausage browns.
Add garlic powder, apple cider vinegar, apple butter, and applesauce. Stir well until all incorporated, and turn heat down to low.
When the pasta is done, decide if you need to thin down your sauce a bit and reserve a bit of pasta water to do so. Drain your pasta and scoop the sauce over top. Mix well and enjoy.
Recipe Notes
This dish reheats pretty well, so if there’s just one of you, you now have lunch.
I’m hoping this is the last post on my slow-as-tortoises laptop; new one should ship this week!
I’m not sure why this chicken is “Caribbean,” exactly. The lime juice, maybe? What I can tell you is that this is an “old” family recipe (and by “old,” I mean my mother learned it sometime in the early-mid 1980s) and it’s a family classic. And that’s what it is called. This chicken tastes like summer to me, as we always had it in the summer. It should really be grilled for the best flavor, but be aware that a marinade with olive oil in it means FLAMES, so you’ll need to be on top of putting those out (or know that you’ll have some burned chicken skin). You could also broil it, I assume, but I have never tried this. Frankly, I think the flames are part of the fun, but I’ve been told I’m a little weird.
DON’T skip the soaking step. It seems like you could, with little change, as it’s not very long, but don’t. Somehow, this keeps the chicken incredibly moist and tasty.
Grilled Caribbean Chicken
Grilled Caribbean Chicken
1 to 1 1/4 lbs. chicken, BONE-IN, SKIN-ON. My favorite is chicken breasts, but drumsticks are also really good. Use what you like.
1/4 cup lime juice
cold water to cover
1/4 cup + 2 Tablespoons olive oil
2 Tablespoons red wine vinegar (cider vinegar will also work in a pinch)
4 cloves garlic, pressed or chopped
2-4 teaspoons salt (depends on how salty you like it — I’ve gone down to the low end and add a bit more at eating if I want it)
2 teaspoons dry oregano, crushed
1/2 teaspoon pepper, preferably freshly ground
Place the chicken in a large bowl and cover with cold water. Add the lime juice and agitate the chicken a little to make sure the water’s getting in between all of the pieces. Let sit 15-30 minutes.
Make the marinade by combining everything else — olive oil through pepper — and stirring or whisking well. Drain the chicken well and then brush or pour on about half the marinade.
Start the grill. You want medium to medium high heat, if you have a gas grill with temperature settings. For charcoal, you want a “hot” side with a three-second hand (if you can hold your hand just above the cooking grate for three seconds, you are around 300-325ºF, about right for poultry) so when your coals are ready, push them slightly to one side.
When your grill is ready, place the chicken on the grill, skin side down (or just on, if it’s drumsticks). Be ready to put out flames (a water gun is fun) or move the chicken around a bit as the oil drips down. Cook about 5 minutes, skin down, and then base your back side and flip. After another 5 minutes, move the chicken to the indirect heat side of the grill for another 5 (drumsticks) to 15 (breasts) minutes to reach an internal temperature of 165ºF. Baste again at this time (though that should be enough). Check every 5 minutes. I’d love to give you an exact grill time, but I can’t — grills vary too much.
Once your meat is done, let it rest a few minutes before cutting. It should be plenty juicy, and if you haven’t burned the skin, it should be wonderfully crispy and tasty. Actually, if you have burned the skin a bit (see the chicken breasts in the grill photo), it still tastes pretty good.
This recipe comes from two sources. First, a salad I read about on a menu and was really excited to try — until I was informed by our knowledgeable server that all the sauces and dressings at the restaurant were unsafe for me. How is it possible that not a single sauce was allergy-friendly? I don’t know. I was grateful to be steered away from food that would make me ill, and I ate my boring but properly cooked plain food instead. But I was still thinking about it, and figured I could absolutely whip up an awesome chopped salad. Secondly, after all the ingredients were chopped, it was so gorgeous that I thought I could use the “salads in mason jars” technique that is all over the food internets to make a) better photos, and b) lunch.
Keeping salad in a mason jar allows you to put the dressing on the bottom and layer the ingredients so they do not get smushed or soggy. Layer something that won’t absorb the dressing and get soggy on the bottom — I put the chicken down there. Carrots, celery, corn, bacon on top of that. Avocado under tomato (so the acid would keep the avocado green), a sprinkle of Daiya cheddar shreds (absolutely optional), and some sprouts on top. Instead of croutons, I’ve used roasted fingerling potato slices. I served it all over spinach, but use whatever greens you prefer. The dressing in this case is a super simple cilantro-lime vinaigrette, using frozen chopped cilantro (but use fresh if you’ve got it!).
Chop everything up. Add or replace ingredients as you choose — go for color. Think about your layers a bit, but layer it into jars and go to town. Lunch for days, in the time for one meal prep. It’s color, freshness, and portable flavor. This recipe makes about 4 pint jar salads (with the greens kept separate). You will likely have leftover potatoes and chicken.
Plated salad over spinach
Chopped Cobbish Salad, in a jar, gluten-free, allergy-friendly
4 teaspoons chopped cilantro (thawed, if previously frozen)
2 teaspoons dijon mustard
4 Tablespoons lime juice
6 Tablespoons best-quality olive oil
1/4 teaspoon salt
olive oil to coat
seasoned salt or spice mix of your choice
fingerling or other small potatoes, sliced thin or chopped small
chicken breast
mixed herb seasoning of your choice
6 slices bacon, cooked
3 carrots, peeled and chopped small, or shredded
3 stalks celery
1 ear corn, cooked and removed from cob, or 1/2 cup defrosted
grape or cherry tomatoes, sliced in half
1 avocado, cubed
sprouts
spinach or other greens
Can you see why this needed to be layered into a jar?
First, cook your cooked ingredients.
Roasted potatoes for “croutons”: Pre-heat oven to 425°F. Wash and slice. Toss potatoes with olive oil and sprinkle with seasoned salt or other spice of your choice. Bake 20 minutes or until crispy. I can’t tell you how many of these to make — I always make a full pan because they make great snacks.
Cook your chicken breasts. I prefer to grill them on my little electric grill, but you can always use this method.
Cook your bacon until crispy, drain and crumble.
Okay. Now on to the vegetables. You’re looking for about 1/2 a cup of each vegetable, divided up into 4 servings. Given that the corn and tomatoes are sort of pre-sized, aim to get everything else between those two sizes.
Now mix up your dressing — whisk or put all the ingredients in a jar and shake. Add about 1-2 Tablespoons of dressing to each jar, depending on how much dressing you like (and remember you’ll be putting this over additional greens). Then layer in the rest of the food. I put the sprouts on top so I could pack them in. Cap it, put it in the fridge, and look forward to your next meal. When ready to serve, I tipped the jars over and shook them a little. Put the greens down on a plate and pour over the rest of the goodies. I pulled the sprouts aside so that I could use them to swipe the rest of the dressing out of the jar.
The longest I’ve kept a jar salad around was 2 days — they might last a bit more, but I haven’t tried it yet.
Jars flipped upside down to let the dressing mix in
Here’s your thought experiment for this bright Monday: you live in New England. The snow piles are so high that you, in your sensible, fuel-efficient sedan, can’t see to turn corners. Another blizzard is predicted — the third in a few weeks — to last two days. But you live in New England, and you ignore it. Without really planning it, you get snowed in for two days. You could, were you industrious, brush the car off, shovel it out, brave the roads and hit the grocery store. Or you could scavenge in your own well-but-bizarrely-stocked kitchen and not bother to get dressed. Surely there’s enough food in there for two days.
What do you do?
You can start with soup. What I love about stock is that it’s a way to not waste bits and pieces — you get stock! This also means, though, that there is no real recipe for stock. I mean, you can write one. Wehavebefore. But this one is more of a concept than a recipe. I read something somewhere, likely on Facebook, about making stock in your crock pot. I think I may have linked it on a Friday. I mean, brilliant, right? So if you have a snow day, are not sure what to eat once you’ve demolished the leftovers in the fridge, and own a crock pot, this recipe is for you. Even if it’s not snowing. And even though this isn’t really a recipe.
Stock ingredients
Basic technique: Fill crock pot with stock ingredients. Fill with water. Cook for about a day.
But here’s what I do: I collect things in the freezer. When I roast a chicken or buy a rotisserie one, I keep any skin I don’t eat and all the bones — throw them in a bag in the freezer. Add other things you aren’t using — some leftover vegetables you don’t finish, mushroom stems, the quarter of an onion you don’t need for that recipe, the herbs you bought and don’t need all of. Don’t add celery — it just turns to mush in the freezer– and I’m not a fan of brassicas in stock at all (broccoli, cauliflower, cabbage) because they are very strong. Everything else? Fair game.
This stock I took photos of started with a chicken I cooked, leaving all the skin and bones and one whole thigh (I got sick of chicken that week). I also added a bag of “leftovers” from the freezer — mushroom stems, probably three quarters of an onion, and some peas. I did thaw these for a bit, but I’ll tell you my secret cheat for that in a minute.
To this cache from the freezer, I added everything that was still good in the fridge — a few handsful of parsley, a small bunch of thyme, a few carrots, some sad celery with the brown bits cut off, and a tablespoon or so of salt. Sometimes, I add peppercorns. Sometimes, I’ll roast some of the veg first; this adds great flavor, but it’s not necessary for good stock. If you have no fresh herbs, add some dried. I usually add a bay leaf, but I was out this time around. Thyme, basil, oregano, dill — all are good in stock. Add what sounds good. You can also add a bit of tomato paste, but this time, I had just finished a jar of pasta sauce for lunch, so I rinsed it out and added that water to the stock, too.
Pack all this in your crock. Then fill the crock with water. Put on the lid and cook. It really is that easy. Cook 4-6 hours on high (recommended if you started with anything frozen), or 8-12 on low. I’ve never overcooked stock, so I think this is a pretty forgiving recipe.
IF you have started with some frozen or partially frozen parts, here’s how to cheat — generally, crock pots don’t do well with frozen foods. They just don’t get hot enough. I thaw things for a few hours or overnight in the fridge first, but then I add a few cups of boiling water. Not starting from cold seems to help. You can also run the pot on high for the first hour and then turn it down.
When your stock is done, you want to strain out all the “stuff” you just extracted flavor from — I use a giant kitchen bowl with a colander in it. Dump the entire pot in, and then lift out the colander full of bones and vegetables.
If you plan to use plastic to store your stock, let it cool to room temp first. If you’re using jars, it works fine to pour it in hot. Stock should keep about 5 days in the fridge, and a few months in the freezer. Or, hey, get fancy and make some risotto right away with the hot stock.
Let us know if there are any particular ingredients you love in stock!
Thai food was one of the biggest losses for me. My husband and I had our first date at a Thai restaurant, and I used to get delivery there so often that the staff knew it was me just from my voice on the telephone. It was not uncommon for us to have Thai once or twice a week, especially when I was still in private practice. But Thai’s kind of hard without coconut.
This recipe’s kind of concept more than a recipe, because there are so many variables and and you can make so many curries, i.e. green, red, yellow, Massaman, etc. I used a commercial curry paste because it looked relatively safe for me, although we’ll see in the next few days whether I got corned or not (corned is like being gluten-ed but obviously with corn). However, there are tons of curry paste recipes on the internet that people can modify for their own diets, if the suggestions are not safe for you. Or you can use use a curry powder spice mix you like. I’ve also used the DIY Singapore Seasoningfrom our DIY Spice Mix Day post. Also, if you make curry paste, freeze it in an ice cube tray so you can grab a chunk when you want. You can use any meat you want, or not. You can also use whatever vegetables strike your fancy.
Quick Thai-Inspired Curry Noodle Stir Fry
Makes about 3-4 servings, depending on serving size.
1/2 of a 1 pound package of rice noodles (I used the kind that I would use for pho, but you can pick the width of rice noodle you like)
2 Tablespoons of olive oil, grape seed oil, or an oil that’s safe for you
1 cup of cashew milk or other non-dairy milk (If you can have coconut milk, by all means use it. I can’t use commercial cashew milk so I make my own, soaking 1 cup of cashews in hot water for a couple of hours, draining the water, and putting them in the blender with two cups of new water. It’ll make more than you need, but it freezes well.)
1/2 pound of beef, pork or chicken cut into stir fry sized strips (Chicken’s out for me, but if you can eat it go for it.)
3 scallions, sliced into quarter inch pieces
1/2 cup of snow peas
10-12 asparagus stalks, trimmed and cut into 1″ pieces
2 carrots, julienned
1 small onion or half a medium onion, cut in half and sliced thinly crosswise to form slices in a curved shape
1 medium bok choy (about 6-8 inches long), sliced crosswise to form small bite size pieces
2 Thai chilies, de-stemmed and sliced (optional, leave out if really spicy is not your thing)
5-6 Thai basil leaves
First up, prepare all your vegetables. Keep the bok choy or any other greens separated from the rest of the vegetables because they will cook quicker and need to be added at end. To do the carrots, I cheat and use a peeler that juliennes.
Julienne Peeler
Fill a large stock pot with water and bring to a boil. Add your rice noodles, boil for 6-8 minutes and then drain. If you’re using smaller rice noodles, you might not need as much cooking time, so check your package’s instructions. Place the noodles aside until the curry is finished.
Prepared Rice Noodles
In a large skillet, add the oil, the cashew milk, water, and curry paste or spice mix. Stir to combine over medium heat.
Curry Paste and Cashew Milk Mixture
Add your meat if you’re using it, and cook until the meat is cooked through. Then add your vegetables with the exception of the bok choy (or other green of choice).
Curry before adding greens
Cover your skillet with its lid and let it simmer for a few minutes to let the asparagus and carrots cook. Then add your bok choy and simmer until the bok choy is ready. When the bok choy is ready, mix in your Thai basil leaves.
Completed Curry/Stir Fry Thing
Place a bed of rice noodles on a plate and spoon your curry over it. If you have extra Thai basil leaves and want to be fancy, garnish your dish with them.
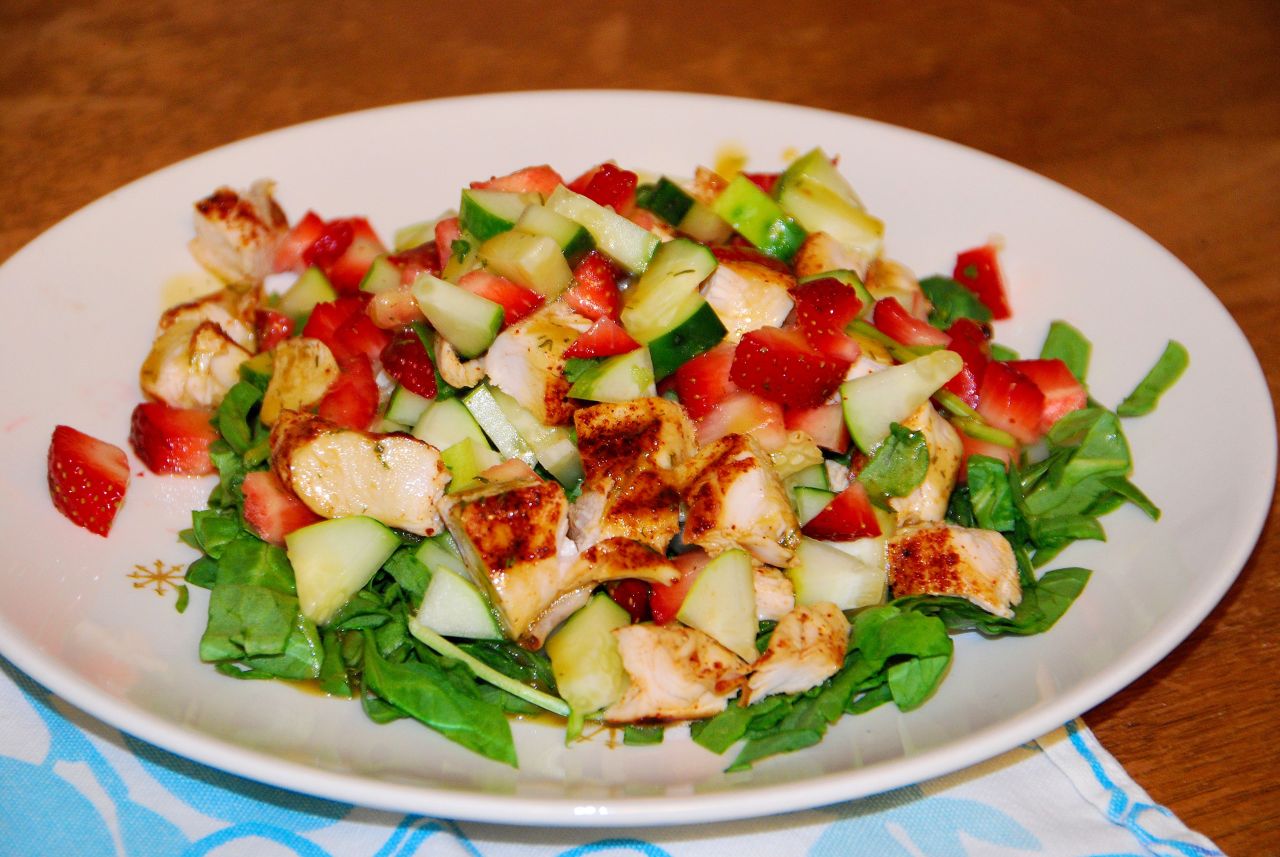
Summer Strawberry Spinach Salad, photo by J. Andrews
So far this summer in New Hampshire, we’ve had sweltering heat interspersed with rainy cool weather. Given the quick changes, it’s been hard to grocery shop effectively — who knows when it’s going to be way too hot to cook? Part of my solution has been to buy things that I can cook ahead, sometime when the heat isn’t too bad, and then use in multiple dishes. Like grilling a bunch of chicken on the indoor grill (which is relatively cool). Or roasting a bunch of veggies to eat all week. Or, sometimes, just buying something someone at the co-op made (they are good about listing ingredients).
This salad started as a “this is what’s left in the fridge” kind of meal, but I loved it and spent some time refining the elements for what I think is a pretty perfect flavor profile. The particular combination of fresh baby spinach, ripe sweet summer strawberries, crisp and fresh cucumbers, and a honey mustard dressing just works for me.
pinch or more of cayenne pepper — adjust to suit your tastes, but probably no more than 1/4 t, even if you’re Denise
Mix up the spices, and then sprinkle evenly over the chicken strips, both sides. You may have leftovers, which you can bag and save for another meal. Grill chicken until done. Cut the strips into cubes. You can use this hot, if you’ve just grilled it, or grill ahead and chill it for an even quicker weeknight meal.
Honey Dijon Dressing
1 Tablespoon Dijon mustard (I used this), (Denise has made this)
1 Tablespoon honey
1 teaspoon dried dill
1/8 teaspoon garlic powder
1 Tablespoon red wine vinegar
2 Tablespoons high-quality olive oil
Whisk first four ingredients together until the mustard and honey are smoothly blended. Then whisk in the vinegar, followed by the olive oil.
Salad Base
Two large handfuls of baby spinach, roughly chopped
1 medium cucumber, chopped
1/2 lb. strawberries, stemmed and chopped
Compose your salad by creating a bed of spinach topped by the chopped cucumber, strawberries, and chicken, drizzled with the dressing.
This amount of ingredients makes two generous salads or three slightly smaller salads, with a good bit of leftover chicken that you can use for another meal.
Hey, it’s our second burger post! I really hope you’re finding some options or getting some ideas about what to bring to barbeques this summer — or what to serve at your own.
For some reason when Denise and I were discussing burgers, I was somewhat fixated on Indian spices. I love Indian food, but there are so many allergen pitfalls when ordering out that I’m finding it easier to make my own at home — and easier now that I can run some of my cooking choices by my Indian neighbor. He approved the spice mix I’m going to give you below, so it must be good, right?
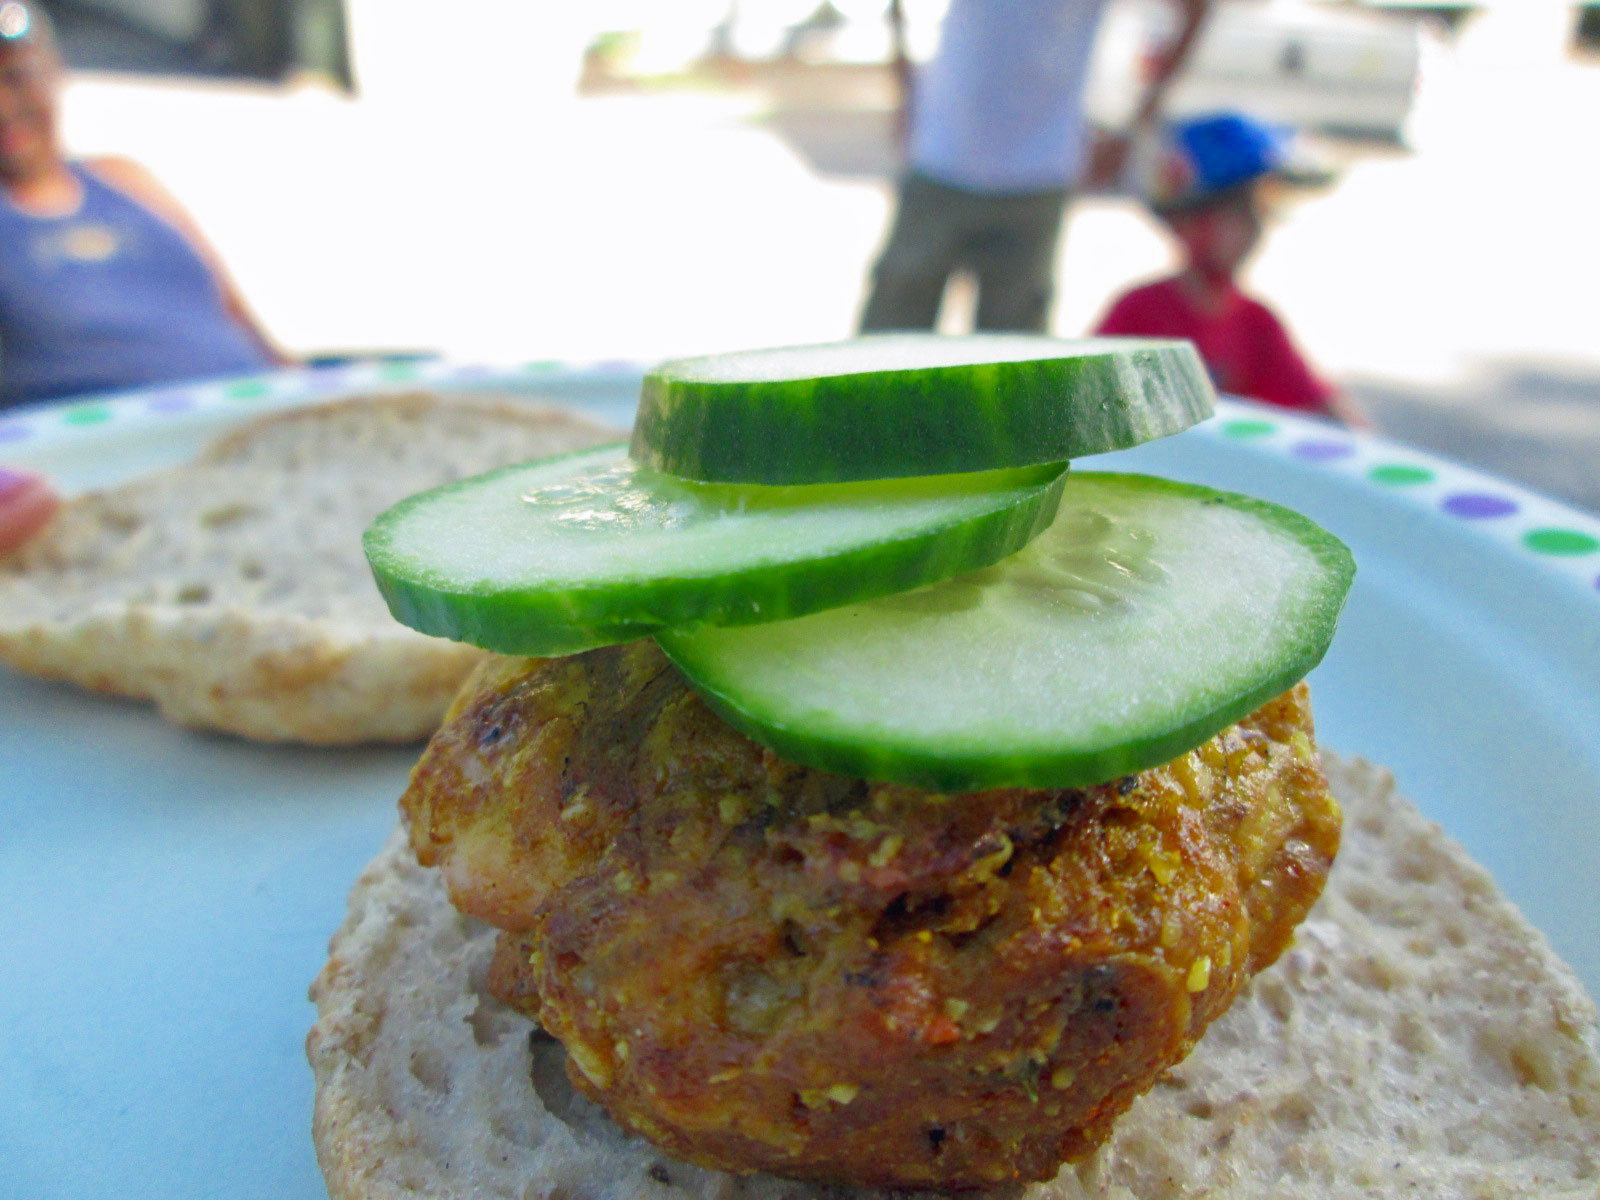
You can buy tandoori spices. Tandoori chicken is a reasonably classic Indian dish, named for the clay oven in which chicken is baked after being marinated in yogurt and spices. By briefly marinating and then grinding the chicken, adding some cashew nuts for creaminess, we can skip the yogurt part, and in this case, a grill stands in for the fancy pointy-topped oven. By making your own spice, you can more carefully control the flavor of the burger, but if you’re not up to it, not interested, or in any way disinclined, seek it out pre-blended.
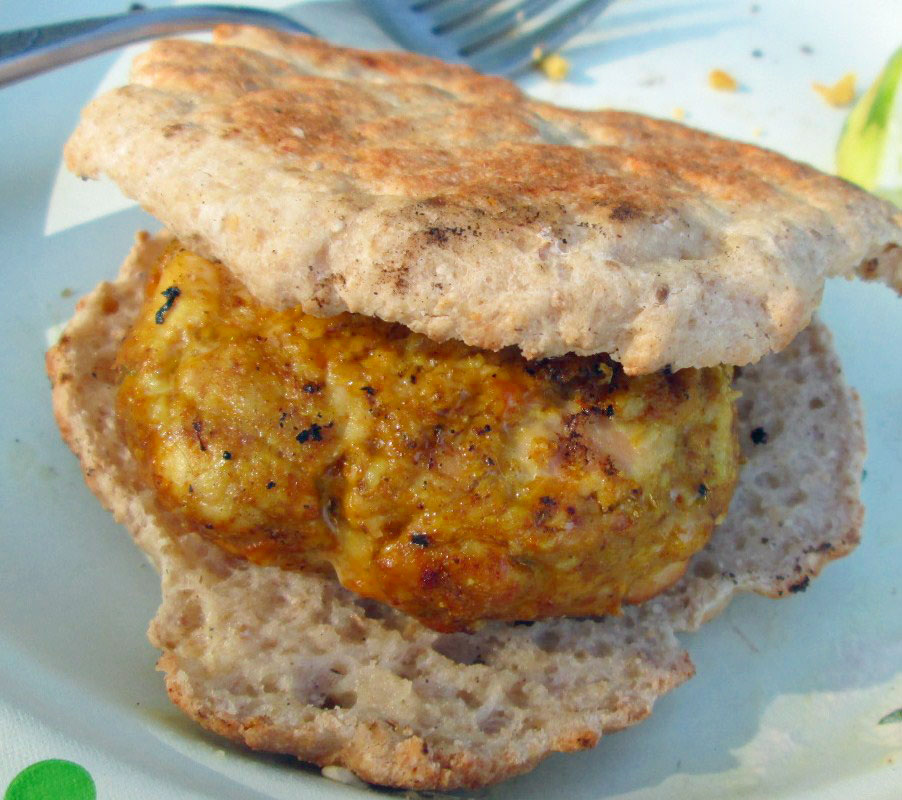
Mmmm, burger
Tandoori Chicken Burgers
Tandoori Spice — makes enough for 2-3 recipes of burgers
1 Tablespoon ground fenugreek
1 Tablespoon ground coriander
2 teaspoons onion powder
1-1/2 teaspoon cumin
1-1/2 teaspoon turmeric
1-1/2 teaspoon garlic powder
1 teaspoon cinnamon
1 teaspoon celery salt
1 teaspoon paprika (regular, not smoked)
1 teaspoon ground ginger
1/2 teaspoon freshly ground black pepper
1/2 teaspoon freshly ground nutmeg (you can buy this ground, but it’s worth it to grind your own)
1/4 teaspoon ground cloves
1/4 to 3/4 teaspoon cayenne, depending on your desire for heat, as well as spice
For Burgers:
1 lb. boneless, skinless chicken thighs
1/2 cup lemon or lime juice
1/2 cup rice wine vinegar
1/4 cup cashew pieces
zest of one lime (organic if you can get it)
2- 3 Tablespoons tandoori spice
lime wedges, for serving
First, marinate chicken thighs in the citrus juice and vinegar for about 30 minutes — if the marinade doesn’t quite cover the chicken, add water to cover.
Lay the chicken out on paper towels to drain and dry.
In your food processor, grind the cashews to a fine consistency. I find that I need to pulse my food processor, as just turning it on tends to make nut butter instead. Remove the nuts to a mixing bowl.
Grind the chicken in the food processor, then add it to the mixing bowl.
Add the lime zest and seasoning, and mix all the ingredients well. You can try using a spoon, but you really need to mix with your hands to get everything well-incorporated. Mix until you think it’s well-blended, then mix a little more. A note on the seasoning range — if you’re a lover of Indian food, or spices, or both, go all in with the 3 T measurement. If your company is a little more mixed (children, unadventurous eaters) ease them into the fun with the lower amount of spice.
Now shape the patties and lay them out on a parchment or plastic wrap covered platter and refrigerate for an hour or overnight. This recipe should make 4 regular burgers or 8 slider-sized burgers.
Grill until the interior temperature of the burger reaches approximately 160F. Serve with sliced cucumbers on a bun of your choice.