Notice: Function _load_textdomain_just_in_time was called incorrectly. Translation loading for the wp-ultimate-recipe domain was triggered too early. This is usually an indicator for some code in the plugin or theme running too early. Translations should be loaded at the init action or later. Please see Debugging in WordPress for more information. (This message was added in version 6.7.0.) in /home/maryzahc/public_html/adultfoodallergies.com/wp-includes/functions.php on line 6121
Allergy-Friendly Personal Care Products – surviving the food allergy apocalypse (archive)

Category: Allergy-Friendly Personal Care Products

Recipes and instructions for making your own allergy-friendly personal care products. These recipes will not contain dairy, eggs, gluten, wheat or hazelnuts. If we use a top 8 allergen, we will use a tag warning of its use.

  • When You’re Allergic to Conventional Feminine Monthly Supplies

    When You’re Allergic to Conventional Feminine Monthly Supplies

    Completed Reusable Cloth P
    Completed Reusable Cloth Pad

    Last week we said we’re heading in new directions with the blog. Besides the actual recipes, we said we’re going to talk about every day life issues, including how we cook, plan, and deal with personal care stuff, besides just giving you recipes. So this post is my first swing at bat. I’ve contemplating writing it for a couple of years, but I hadn’t done so because it makes me squeamish, and I just hadn’t wanted to share my own personal hell with the world. But maybe it’ll help someone else out there who is facing the same issues I do. To start, it’s just really not fun to have contact reactions to commercial feminine monthly supplies. Most of the issue for me appears to stem from my corn allergy, but it could also be related to my coconut allergy. So what do you do? There’s some other options out there, like the diva cup, but that would not be my thing (yeah, that’s putting it diplomatically). There’s some 100% organic cotton tampons without an applicator I could try, but I wasn’t a tampon user before and I’d prefer not. (Applicators are an issue due to the potential for corn or coconut in the waxes and coatings if cardboard, or the plastics themselves if not.) There’s also some organic cotton pads out there but they also state they have “plant-based” materials in the waterproof backing. While I haven’t contacted the company to inquire, “plant-based” is usually a screaming red flag for corn. Since I think they’re expensive, and I’m cheap as hell about stuff I’m going to throw out, I haven’t bothered. So I ended up looking into reusable cloth pad options.

    You can buy reusuable cloth pads on Etsy and on the internet. Some people do use reusable cloth pads because of the environment, much like some parents choose to use cloth diapers. I really was not aware this was a thing until I developed my issues. However, because some of the materials being used are not particularly safe for me (polyester and microfibers may cause skin reactions), because I can sew even though I pretty much hate it, and because I’m really cheap, I decided that if I made mine I would be in control of the materials and it would be less expensive per pad. Control was always a big issue for me, and the food allergies have made it much worse, haha!

    The first set of pads I made contained Zorb as the absorbent lining, which is made of “an optimum blend of cellulosic fibers from cotton/tencel/bamboo/other interspersed with polyester nylon.” I chose it because it’s supposed to be super absorbent compared to terry cloth, I was freaking out about not using commercial pads and worried about leaks, and I figured that it would be okay because I was encasing it in 100% pure cotton flannel. But over time, I became more concerned about the fibers working through the flannel fabric as they got itchier, and potentially escaping where seam edges opened after some wear and washing. I used them for about two years before I decided that I needed to replace them. I decided that in the next round, I would not use the Zorb, and I would use 100% cotton terry cloth layers as the core.  I did use a layer of Polyurethane Laminate on top of the bottom layer of flannel under the core to prevent leaking in the first batch of pads, but since this is a smooth fabric and does not contain loose fibers the way the Zorb does and it would be covered by the 100% cotton flannel, I decided it was an acceptable risk for the second batch as well. So far, I am much preferring the second batch I made with the terry cloth cores rather than the Zorb. They seem much less itchy. 

    I got my pattern from Nature’s Fabrics. It is a pattern for a pad with wings, and has contoured flared options and several options for the length of the pad.

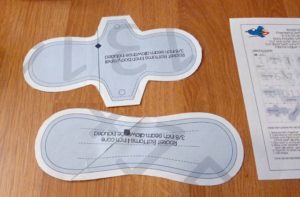
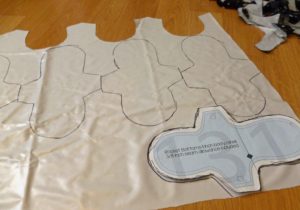
    Relevant pattern pages
    Relevant pattern pages
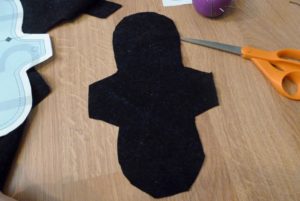
    Pattern cut out and assembled
    Pattern cut out and assembled

    I also purchased a kit to attach plastic snaps to the wings to snap them pad together around my underwear. (As a side note, I have a bunch of cloth napkins and bar towels that I decided to add snaps to them to make a roll of “unpaper” towels to put on my paper towel rack in the kitchen. Yes, most paper towels have corn in them.) You can also get refill snaps, but I had enough to do both batches of pads with a ton leftover.

    I ordered most of my fabrics from Fabric.com, no affiliation. I ordered two different colors of the flannel because it made it easier for me to tell which is the top and the bottom when dealing with the layers. You may not be so challenged. Depending on how well you lay out the pattern on the fabric, I was able to  get 18 pads out of the following fabric with a fair bit of the terry cloth left over:

    The pattern, the snaps, and the fabric ends up being about $73, depending on pricing, sales and so on, which ends up being about $4 a pad if you get 18 from your cutting layout. I’m mostly seeing prices on Etsy for around $10 bucks a pad for the length I would want. Of course, then you don’t have to spend time doing the sewing, but I’m still too cheap for that and I don’t have the control over the materials. It takes me about 14-16 hours to do a whole batch.
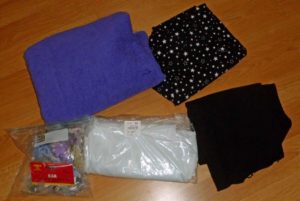
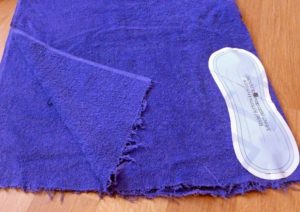
    Fabrics and snap kit
    Fabrics and snap kit

    Before starting, I washed the flannels and terry cloth so that it could shrink. I didn’t iron the fabric, because seriously, I’m making cloth pads, it’s not like anyone is going to see them. I also didn’t worry about matching colors of thread for much the same reason, and used it as an opportunity to use up a bunch of random leftover threads on bobbins from past sewing projects and free them up.

    For each pad, I cut 3 pieces of the core pattern out of the terry cloth (to be stacked together to form the core of the pad). I cut one piece of the wing pattern from each of the flannels and from the polyurethane laminate (this is not included in the pattern, I added it because I over-engineer everything). Yes, I used a sharpie to trace the pattern on the polyurethane laminate instead of pinning it because (a) I’m lazy which is why I’m not a good seamstress, and (b) it’s going inside the pad and no one is going to see it. 
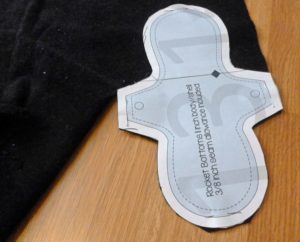
    Cutting outer winged pattern pieces
    Cutting outer winged pattern pieces
    Cutting outer winged pattern pieces
    Cutting outer winged pattern pieces
    Cutting winged Polyurethane Laminate pieces
    Cutting winged Polyurethane Laminate pieces
    Cutting core pieces in a double layer to reduce amount of cutting
    Cutting core pieces in a double layer to reduce amount of cutting
    All pieces for 18 pads cut out
    All pieces for 18 pads cut out

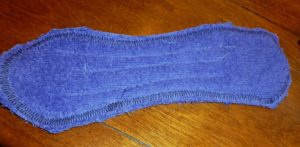
    To begin, I stacked the three core layer pieces, seamed around the seam allowance with zigzag stitch, and sewed down the middle lines in the pattern to attach the layers with straight stitch.
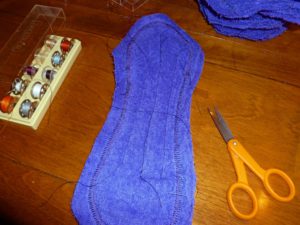
    3 core pattern pieces stacked, sewn with zig zag at seam allowance and sewn down in middle with straight stitch.
    3 core pattern pieces stacked, sewn with zigzag at seam allowance and sewn down in middle with straight stitch.
    Core layer after trimming seam allowance.
    Core layer after trimming seam allowance.

    I then trimmed the seam allowance off back to the zigzag stitch. The next step is to sew the core layer to the wrong side of the top of the pad (this is the side that will touch your skin, not your the side that touches your underwear).
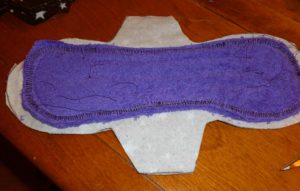
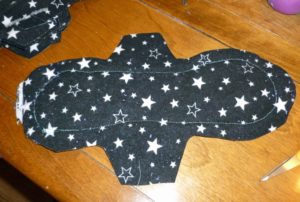
    Core layer sewn to wrong side of top pad layer
    Core layer sewn to wrong side of top pad layer
    Core sewn to wrong side of top layer of pad (right side view)
    Core sewn to wrong side of top layer of pad (right side view)

    Now I place the shiny side (right side up) of the Polyurethane Laminate on the wrong side of bottom flannel layer.
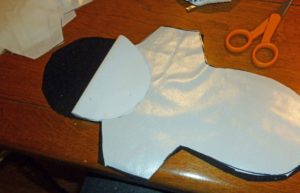
    Polyurethane Laminate place right side up (shiny side) on wrong side of bottom flannel layer
    Polyurethane Laminate placed right side up (shiny side) on wrong side of bottom flannel layer

    I then placed the right side of the top layer of the pad against the right side of the bottom pad. This leaves the Polyurethane Laminate on the outside and the core layer on the outside. Sew them together leaving one end open so that you can turn them inside out.  Once you have turned them inside out, top stitch the opening closed, tucking in the edges in the seam.
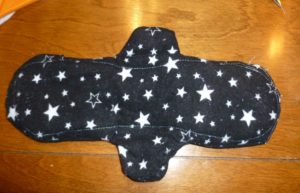
    A finished pad before adding the snaps.
    A finished pad before adding the snaps.

    Then I add the snaps.

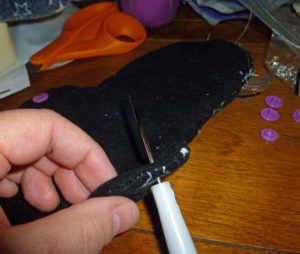
    Use the awl to poke hole, where you can insert your snaps.
    Use the awl to poke hole, where you can insert your snaps.
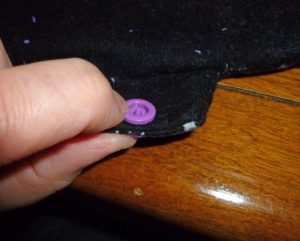
    Place the bottom and top of the snaps on each side of the fabric.
    Place the bottom and top of the snaps on each side of the fabric.
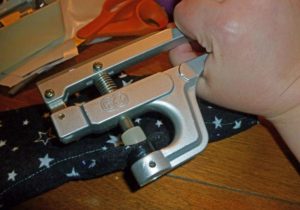
    Use the snap setting pliers to set the snap in place
    Use the snap setting pliers to set the snap in place

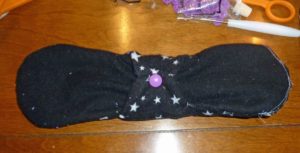
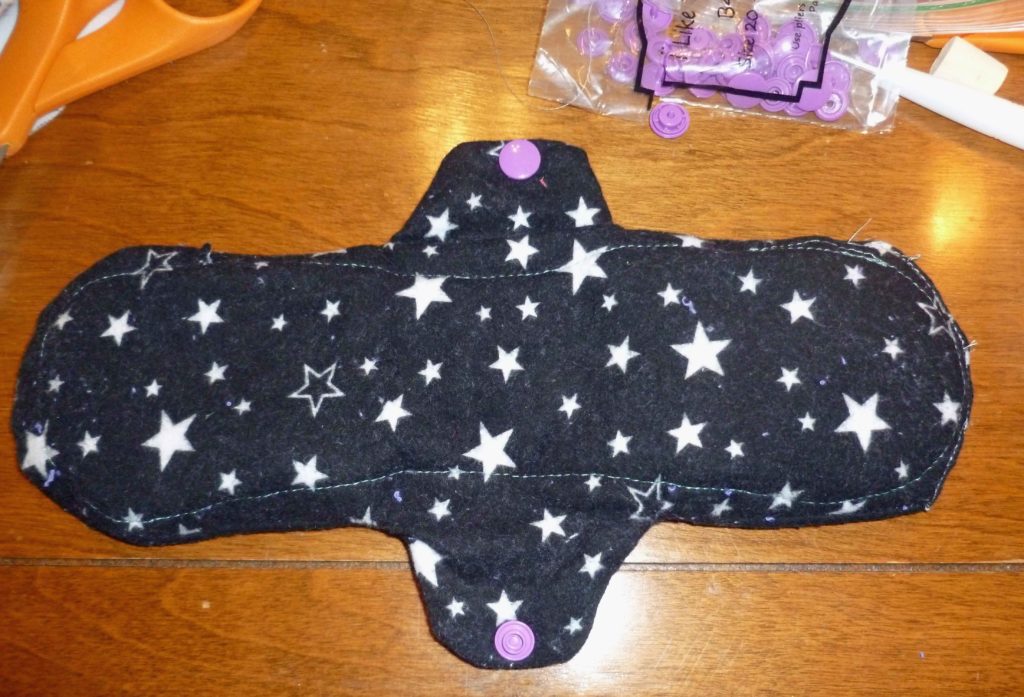
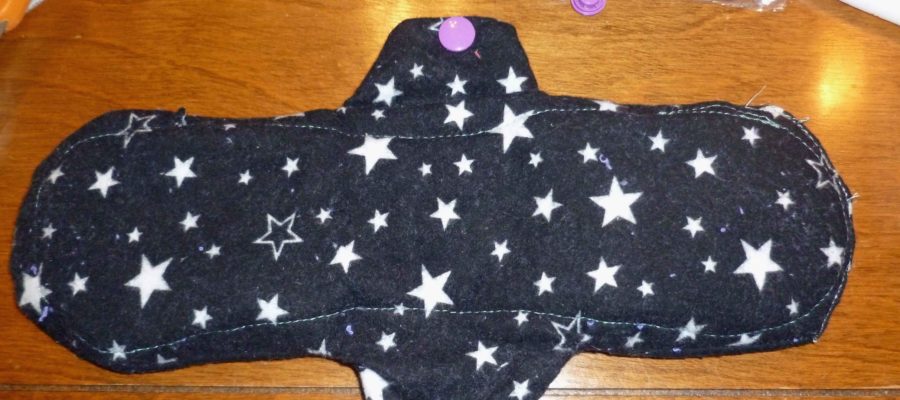
    Voila! You have a completed reusable cloth pad with snaps to hold it in place!
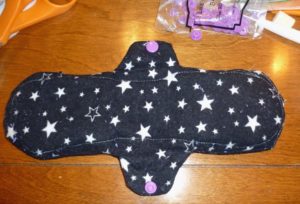
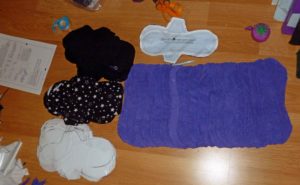
    Completed Reusable Cloth P
    Completed Reusable Cloth Pad
    Completed Reusable Cloth Pad
    Completed Reusable Cloth Pad

    To wash these, I use the soak cycle on my washing machine along with some of my homemade laundry detergent. Once that has completed, I add more laundry, more laundry detergent, and wash them in a normal cycle and dry them along with the load of laundry.

    Whatever your concerns are with conventional monthly supplies, I hope this is helpful.
     

  • WW: Homemade Tick Repellent

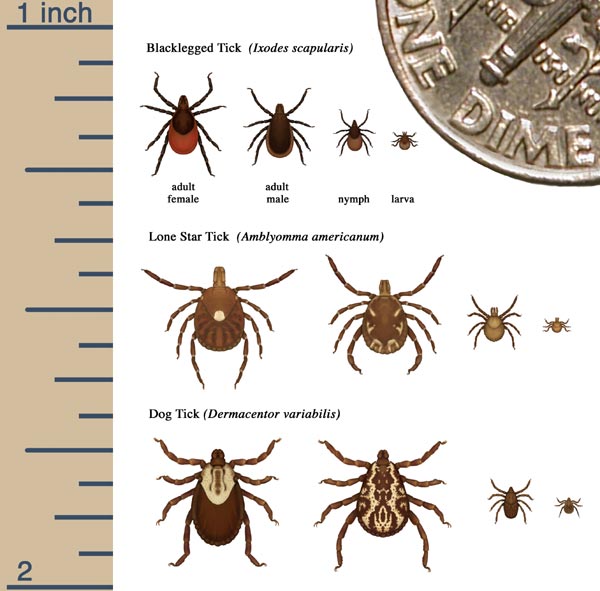
    Tick Identification chart
    Tick Identification chart

    So as many of you know, my husband and I bought a house in January so we could have a garden and grow food, have space to can and do food prep, and make all the things that I need, like soap, lard and tallow, that were really inconvenient to make in a second story balcony apartment. We now have a large garden, a huge lawn, and a lot of fruit trees.  And when spring came, we also had a crap ton of ticks.

    Because of my allergies and as I was trying to grow safe food, I didn’t want to use pesticides. I looked into diatomaceous earth, but I didn’t want to kill the bees. I looked into commercial stuff I could spray on my clothes, but they didn’t have the inactive ingredients listed, so I didn’t know if it was safe for me. I found an all-natural tick repellent at Blue Seal Feeds that used essential oils, but it had citric acid (corn) in it. I looked online for other all-natural repellents, but they had other corn or coconut derivatives. So I did a little googling, swiped some of the ingredient list from one of the all-natural repellents, and came up with a do-it-yourself version. Make no mistake, it reeks. But if I sprayed down my clothes and my rubber boots with it, I didn’t get ticks. Now, I don’t know if that was coincidence or not, but since I really don’t need Lyme disease in addition to my body deciding to be allergic to the world, I’ll keep using it. Also, if you want more information on ticks and tick-borne diseases, check out the information from the CDC.

    I used an essential oil 4 ounce spray bottle (shown only for illustration purposes, we have no affiliation with Amazon or the seller).

    Homemade Tick Repellant

    • 2 ounces of apple cider vinegar
    • 1 ounce of water
    • 20 drops of peppermint essential oil
    • 20 drops of Eucalyptus citradora essential oil
    • 15 drops of lemongrass essential oil
    • 15 drops of rosemary essential oil
    • 10 drops of tea tree essential oil

    Put all the ingredients in your 4 ounce spray bottle, put the sprayer top on and shake well.  Spray on clothes and shoes.  Make sure you don’t get it into your eyes, it would not be fun.

    It also seemed to help with the black flies, but I’ve not yet tried it with mosquitoes. When I do, I’ll let you know how it goes.

    Be safe out there!

  • UPDATED – DIY Shampoo if Allergic to Coconut on Whatever Wednesday

    Shampoo in re-purposed pump bottle


    EDITED TO ADD : Please go see the newest version of this recipe – it’s a lot better!! – UPDATED AGAIN!! DIY Shampoo if Allergic to Coconut on Whatever Wednesday

    Since publishing my DIY Shampoo if Allergic to Coconut post, I’ve made a minor change to the original shampoo recipe. When you see the change you’re going to laugh and say “Whatever Denise, like that matters.” But it makes a pretty large difference in the lathering of the shampoo, and also in moisturizing your hair.  I had a tough time over the winter with original recipe because I felt like my hair was too dry.  So I tinkered with the recipe a bit, and got something that makes a much better lather and made my hair feel great.  And so without further ado, I give you the original post, with the added ingredient underlined, italicized, and in bold:

    So here’s the thing. Being allergic to coconut is a b*tch, once you realize that coconut is in just about every cleaning product on the market. To get a list of coconut derivatives, go here, thanks to Becky at the Allergic to Coconut? blog. Due to some issues with breaking out much more than I should be at freaking *40*, I decided I wanted to try cutting out any coconut derivatives that touch my skin.

    First, most soap and shampoos contain at least one of the coconut derivatives on the list, if not five to ten of them. Most lotions, face masks, acne treatments, etc., etc., etc., contain at least one of the coconut derivatives as well. When I decided to go looking at my beauty and personal hygiene products, guess what? Every single one had coconut in them, except one lotion, and when I looked up the ingredients I didn’t recognize on that label, it turned out to be two forms of pesticide. Yippy fricking skippy.

    The first thing I did was to try to find a recipe for shampoo, because I was breaking out in my hair, which hadn’t ever been a problem before. I posted this information earlier in one of our Fabulous Friday Finds, but I’ve made some modifications.

    I found this recipe for making your own shampoo, which calls for castile soap. Just be aware that even some castile soaps, like Dr. Bonner, have coconut in them. I found a recipe for making castile soap from Kiss My Face Pure Olive Oil Soap. Kiss My Face Pure Olive Oil Soap does not have any coconut in it. I made the shampoo with some modifications and found it too drying on my hair, so I added olive oil, but found it could be a bit waxy. This time I think I have it the way I like it. I’ve been using it as a body wash as well.

    Denise’s Version of DIY Shampoo

    • 1 Kiss My Face Pure Olive Oil Soap – 8 oz bar, grated (I grated it in my food processor, dumped it out, put the blade in, put it back in the food processor and pulverized it some more.  Doesn’t take as long to dissolve in the water this way.  Make sure you clean your food processor really well afterwards.)
    • 5 cups of distilled water
    • 3 Tablespoons of grapeseed oil
    • 2 Tablespoons of castor oil
    • 1 Tablespoon of avocado oil
    • 10-15 drops of tea tree essential oil

    Grate Kiss My Face Soap.  Place in a glass or plastic container with 5 cups of distilled water.  Stir well, cover, and leave overnight.  The next day, check to see if the soap bits have completely dissolved. If not, stir again and let sit.  When the soap has completely dissolved, add, the grapeseed oil, the castor oil, the avocado oil, and the tea tree oil, and mix together.  I used a whisk, I found it incorporated the oil better.  This makes about 48 oz of shampoo.  I put half in a pump bottle (Yes, it’s a store-brand hand sanitizer bottle, reduce, reuse, recycle, remember?) in the shower and half in the fridge until I run out.  Or you could just make half the recipe 🙂

    You can use the shampoo as body wash and facial wash as well, but stay tuned for further posts on facial cleansing options.

  • Whatever Wednesday: Oil Cleansing Method

    Oil Cans, photo by Ian Britton (creative commons license)
    Oil Cans, photo by Ian Britton (creative commons license)

    About a year ago, after a lot of reading about it, I thought I’d try this “oil cleansing” thing that the internet was chittering on about.  Honestly, it seemed a little counter-intuitive, smearing oil over the grease on my face to clean it off.  I have had oily skin since I was about 11, which is when the acne started.

    I’ve tried all sorts of cleansers and acne systems, most of them harsh and annoying, with the side effects being as bad as the breakouts and just as hard to cover up.  Nothing’s ever been a miracle solution.  Since my skin was oily, I was a big fan of stripping all the oil off, using stripping cleanser followed by really harsh astringents, and ending up with tight, dry, itchy skin that was oil slicked in about an hour.  Eventually I came around to moisturizer, which did calm my skin down a bit.  The oil cleansing, though, replaces all of that.  Adjusting the formula based on the seasons has mostly eliminated the need for moisturizers, too, though I still use them occasionally.  If you do find you need a moisturizer, Denise posted a coconut-derivative-free lotion a while back.

    I use the oil cleanser in the evening to remove the makeup and daily grime, and in the morning just splash water on my face and then put on makeup like normal.  It is WAY cheaper than the rather expensive cleanser I was buying before and more effective to boot, so I am a solid convert.  I even had a test phase — last spring, I didn’t pack the oil for a trip, and by day 3, I was breaking out again.  Now I have a travel container.

    I started with all the information on the oil cleansing method on the Crunchy Betty website, and have started tweaking my own recipes from that information.  I’d suggest you do the same, but here are my recipes for a starting point.  I’ve done everything as ratios, but I would suggest starting with a small batch (maybe making 1 part a teaspoon) to see how it works for you, so that you can tweak the next one if you don’t love it.  Give it a week or two for each tweak, to see how it shakes out.

    Oil Cleansing for Winter, for Oily Skin

    • 2.5 parts castor oil
    • 1 part avocado oil
    • 1 part grapeseed oil

    I did this with 15 mL castor, 6 mL each of avocado and grapeseed, 5 drops of thyme essential oil (for acne) and 2 drops of super-strength vitamin E oil to soothe.  This mix will last me close to a month of use.

    Oil Cleansing for Summer, for Oily Skin

    • 1 part castor oil
    • 1 part grapeseed oil

    You will need a small bottle for your oil mix, as well as a stack of cotton washcloths.  I have found that some makeup stains the cloths — mascara and lipstick, in particular — but rather than bleach the cloths, I use them only for face washing and just wash them on hot.  I have two small bottles, one glass with a dropper and one plastic with a small spout that allows me to dole the oil out in drops.  This does take longer than a quick foaming face wash, but I then spend less time with concealers in the morning.

    Here’s the short version of the technique — but really, read the Crunchy Betty post.  It’s good.

    • A few drops at a time, pour oil onto clean fingertips and apply to face. (I do about 3 or 4 drops at a time, until I’ve covered my whole face.)
    • Massage into face.  I know the post says 2 minutes.  I probably don’t do it that long most nights.
    • Using hot water and a washcloth, briefly steam your oiled up face, and then massage the oil off with the cloth.
    • Pat dry or let air dry.
    • Enjoy how not oily your skin is in the morning.

    (Oh, and a bonus tip: I admit, I got this years ago from seventeen magazine — instead of using zit cream, try lemon juice.  Just a dab on a breakout.  It’s cheaper, more effective, and tastes great in iced tea. Just like the creams, it will not magically make a zit disappear.  But it will make it go away in less than half the time.)

    Have you tried oil cleansing?  How did it work for you?

  • Whatever Wednesday: Farmer’s Almanac Cough Syrup

    Tea & Cat
    Tea & Cat

    So my mother discovered the Farmer’s Almanac a few years ago (or possibly re-discovered, I’ve never asked — I just assumed that city kids didn’t read the Farmer’s Almanac), and this year has a page-a-day calendar version.  Despite living many states away from my mother, I always know what page-a-day she has because she mails me the ones she thinks I’ll find interesting.  So I thought I’d share this one with you all, even though it won’t work for Denise (I am somewhat sure that flax seed allergies aren’t incredibly common, but if you have one, don’t make this).

    To treat a nagging cough:

    • Boil 3T whole flax seed in 1 pint water
    • Strain
    • Stir in 3T sugar [I’d use honey]
    • Add juice of two lemons
    • Cool the mixture
    • Sip as needed

    This sounds to me as though it would work well.

    My own make at home cough syrup is a little different.  A lot of the time, I just swig a spoonful of honey.  If I’m feeling fancy or have a real cough, I will dissolve a few tablespoons of honey in a bit of boiling water, add a half shot of whiskey or brandy and a spare pinch of cayenne.  There are no real measurements, as I’ve never made this while not sick.  This works pretty well for me.

    Here’s hoping you don’t need either recipe, but if you do, they’re here for you.

  • DIY Lip Balm if Allergic to Coconut

    Homemade Lip Balm beginning to cool

    Guess what?  Most lip balms contain either coconut or palm too. (To see a list of coconut derivatives, go here, thanks to Becky at the Allergic to Coconut? blog).  Luckily, once have all the stuff to make the lotions, you pretty much have everything you need to make lip balm except the coloring and/or flavoring (which you can leave out if you want) and the containers.

    I had previously ordered everything I needed from Majestic Mountain Sage (no affiliation other than being a satisfied customer), but I did want containers and coloring and flavoring.  The recipe that I modified also comes from their website. I also suggest getting some plastic pipettes, it makes your life a lot easier. I ordered the small pipettes and the 20ml lip balm containers.

    Denise’s Version of Make Your Own Lip Balm 

    First of all, you can add any oil soluable lip balm colors or any of the flavor oils you want. I chose to mix equal parts of the red and blue colors, and I used the Blackberry Pomegranate flavor oil.

    • 20 grams of beeswax
    • 25 grams of shea butter
    • 15 grams of cocoa butter
    • 40 grams of avocado oil
    • 3 ml of Blackberry Pomegranate Flavor oil (I used a plastic pipette to measure this out)
    • A drop or two of the Red oil soluable lip balm color
    • A drop or two of the Blue oil soluable lip balm color
    • 7 – 20ml lip balm containers or other containers to hold completed lip balm

    Using a kitchen scale, weigh all ingredients, except the lip balm color and the flavor oil, and place in a double boiler, over medium heat.  Heat until all items are melted.  Don’t heat over direct heat, and MMS cautions that oils and wax get hot very quickly and the temperature can climb higher than you suspect. Once everything is melted, remove the double boiler from the heat and add the flavor oil, mixing well.  Then take a toothpick or a bamboo skewer, and dip the tip about a third of an inch into the red lip balm color and then stir it into the lip balm, mixing well.  Repeat with the blue lip balm color. Add tiny bits more until you get the color you want.

    Use a plastic pipette to put the mixture into the lip balm containers.  According to MMS, it’s best to always use a plastic transfer pipette, as glass droppers are cooler than the oil mixture and it will quickly solidify inside the dropper. Let the containers cool and then screw on the caps.

    Enjoy!

  • Whatever Wednesday: DIY Lotions and Lotion Bars if Allergic to Coconut

    Since most lotions contain coconut derivatives (to see a list of coconut derivatives, go here, thanks to Becky at the Allergic to Coconut? blog), and the one that I found that didn’t have any, had two ingredients that turned out to be forms of pesticide, I decided I needed to make my own if I was getting off the coconut bandwagon.

    I used a recipe from FIMBY, but modified it to make myself a body lotion and then modified it again to make a facial moisturizer.

    Denise’s Body Lotion

    First of all, you can sub out any essential oil scent you want.  I tend to use citrus and vanilla type scents because anything floral makes me sneeze. (Yes, I have a whole host of respiratory allergies too, aren’t I lucky?)  The reason I use this as body lotion is that cocoa butter is comedogenic so I’m not putting it on my face.

    • 1 1/2 ounces cocoa butter
    • 1 ounce avocado oil
    • 1 ounce apricot kernel oil
    • 1/2 ounce extra virgin olive oil
    • 1/2 ounce beeswax
    • 4 ounces distilled water
    • 1/4 teaspoon of baking soda
    • 30 drops grapefruit seed extract 
    • 10 drops grapefruit essential oil

    Weigh out the oils and beeswax, and place in a double boiler.  Melt the wax and oils over medium heat, stirring occasionally.  Once the mixture is fully melted, remove from the stove and add the water and baking soda. Mix with hand blender or mixer until creamy & thick. Stir in grapefruit seed extract and essential oil.

    Facial Lotion

    Denise’s Facial Lotion

    I don’t put any essential oil in this because I don’t want any scents on my face, although you could probably use tea tree essential oil with good result.  Shea butter is non-comedogenic, so I subbed that out for the cocoa butter.  A little of this goes a long, long way, so don’t put a lot on or you’ll be using a tissue to wipe it off.

    • 1 1/2 ounces shea butter
    • 1 ounce avocado oil
    • 1 ounce apricot kernel oil
    • 1/2 ounce extra virgin olive oil
    • 1/2 ounce beeswax
    • 4 ounces distilled water
    • 1/4 teaspoon of baking soda
    • 30 drops grapefruit seed extract 

    Weigh out the oils and beeswax, and place in a double boiler.  Melt the wax and oils over medium heat, stirring occasionally.  Once the mixture is fully melted, remove from the stove and add the water and baking soda. Mix with hand blender or mixer until creamy & thick. Stir in grapefruit seed extract.

    Gently Used, Halloween Themed Lotion Bar

    I also tried making lotion bars from Smockityfrocks.com, which are wonderful especially on your heels and feet.  I don’t think I’ll be having any problems with dry or cracked heels this winter.  I did modify the recipe slightly, by adding a little  Eucalyptus Citriodora (Lemon Eucalyptus) essential oil, and by only doing a quarter of the recipe (which still makes 3 lotion bars by the way). You could sub out the Eucalyptus Citriodora for any other essential oil that you would prefer as well.

    Modified Lotion Bars (1/4 Recipe with Essential Oil)

    • 1/4 cup of Shea Butter
    • 1/4 cup of beeswax
    • 1/4 cup of Avocado Oil
    • 1/4 teaspoon of Vitamin E Oil
    • 5 drops of Eucalyptus Citriodora (Lemon Eucalyptus) essential oil

    Measure out shea butter and beeswax and place in a double boiler over medium heat to melt the shea butter and beeswax. Once the shea butter and beeswax have melted, Stir in the avocado oil, vitamin E oil, and essential oil.  Pour into some molds (Yes, it was around Halloween when I bought my molds), tins, or lotion bar tubes.  Allow to cool.

    The best thing about all of the lotion and lotion bar recipes is that they take about 15 minutes to make.  I made each of these recipes well over a month ago and I still have tons left.  You may wish to put some of the lotions in the refrigerator.  Some of the water separated out of mine after two weeks but it still works wonders compared to commercial lotions.

    Also, I ordered most of the materials to make the lotions from Majestic Mountain Sage. Their prices are extremely reasonable, but their shipping is less so, so if you order from them, make the order worth the shipping. (No affiliation, just a satisfied customer.) 

  • WW: DIY Shampoo if Allergic to Coconut on Whatever Wednesday

    Shampoo in re-purposed pump bottle

    EDITED TO ADD : Please go see the newest version of this recipe – it’s a lot better!! – UPDATED AGAIN!! DIY Shampoo if Allergic to Coconut on Whatever Wednesday

    So here’s the thing. Being allergic to coconut is a b*tch, once you realize that coconut is in just about every cleaning product on the market. To get a list of coconut derivatives, go here, thanks to Becky at the Allergic to Coconut? blog. Due to some issues with breaking out much more than I should be at freaking *40*, I decided I wanted to try cutting out any coconut derivatives that touch my skin.

    First, most soap and shampoos contain at least one of the coconut derivatives on the list, if not five to ten of them. Most lotions, face masks, acne treatments, etc., etc., etc., contain at least one of the coconut derivatives as well. When I decided to go looking at my beauty and personal hygiene products, guess what? Every single one had coconut in them, except one lotion, and when I looked up the ingredients I didn’t recognize on that label, it turned out to be two forms of pesticide. Yippy fricking skippy.

    The first thing I did was to try to find a recipe for shampoo, because I was breaking out in my hair, which hadn’t ever been a problem before. I posted this information earlier in one of our Fabulous Friday Finds, but I’ve made some modifications.

    I found this recipe for making your own shampoo, which calls for castile soap. Just be aware that even some castile soaps, like Dr. Bonner, have coconut in them. I found a recipe for making castile soap from Kiss My Face Pure Olive Oil Soap. Kiss My Face Pure Olive Oil Soap does not have any coconut in it. I made the shampoo with some modifications and found it too drying on my hair, so I added olive oil, but found it could be a bit waxy. This time I think I have it the way I like it. I’ve been using it as a body wash as well.

    Denise’s Version of DIY Shampoo

    • 1 Kiss My Face Pure Olive Oil Soap – 8 oz bar, grated (I grated it in my food processor, dumped it out, put the blade in, put it back in the food processor and pulverized it some more.  Doesn’t take as long to dissolve in the water this way.  Make sure you clean your food processor really well afterwards.)
    • 5 cups of distilled water
    • 3 Tablespoons of grapeseed oil
    • 2 Tablespoons of castor oil
    • 10-15 drops of tea tree essential oil

    Grate Kiss My Face Soap.  Place in a glass or plastic container with 5 cups of distilled water.  Stir well, cover, and leave overnight.  The next day, check to see if the soap bits have completely dissolved. If not, stir again and let sit.  When the soap has completely dissolved, add, the grapeseed oil, the castor oil and the tea tree oil, and mix together.  I used a whisk, I found it incorporated the oil better.  This makes about 48 oz of shampoo.  I put half in a pump bottle (Yes, it’s a store-brand hand sanitizer bottle, reduce, reuse, recycle, remember?) in the shower and half in the fridge until I run out.  Or you could just make half the recipe 🙂

    You can use the shampoo as body wash and facial wash as well, but stay tuned for further posts on facial cleansing options.