Notice: Function _load_textdomain_just_in_time was called incorrectly. Translation loading for the wp-ultimate-recipe domain was triggered too early. This is usually an indicator for some code in the plugin or theme running too early. Translations should be loaded at the init action or later. Please see Debugging in WordPress for more information. (This message was added in version 6.7.0.) in /home/maryzahc/public_html/adultfoodallergies.com/wp-includes/functions.php on line 6131 All About Ingredients – surviving the food allergy apocalypse (archive)
Here’s your thought experiment for this bright Monday: you live in New England. The snow piles are so high that you, in your sensible, fuel-efficient sedan, can’t see to turn corners. Another blizzard is predicted — the third in a few weeks — to last two days. But you live in New England, and you ignore it. Without really planning it, you get snowed in for two days. You could, were you industrious, brush the car off, shovel it out, brave the roads and hit the grocery store. Or you could scavenge in your own well-but-bizarrely-stocked kitchen and not bother to get dressed. Surely there’s enough food in there for two days.
What do you do?
You can start with soup. What I love about stock is that it’s a way to not waste bits and pieces — you get stock! This also means, though, that there is no real recipe for stock. I mean, you can write one. Wehavebefore. But this one is more of a concept than a recipe. I read something somewhere, likely on Facebook, about making stock in your crock pot. I think I may have linked it on a Friday. I mean, brilliant, right? So if you have a snow day, are not sure what to eat once you’ve demolished the leftovers in the fridge, and own a crock pot, this recipe is for you. Even if it’s not snowing. And even though this isn’t really a recipe.
Stock ingredients
Basic technique: Fill crock pot with stock ingredients. Fill with water. Cook for about a day.
But here’s what I do: I collect things in the freezer. When I roast a chicken or buy a rotisserie one, I keep any skin I don’t eat and all the bones — throw them in a bag in the freezer. Add other things you aren’t using — some leftover vegetables you don’t finish, mushroom stems, the quarter of an onion you don’t need for that recipe, the herbs you bought and don’t need all of. Don’t add celery — it just turns to mush in the freezer– and I’m not a fan of brassicas in stock at all (broccoli, cauliflower, cabbage) because they are very strong. Everything else? Fair game.
This stock I took photos of started with a chicken I cooked, leaving all the skin and bones and one whole thigh (I got sick of chicken that week). I also added a bag of “leftovers” from the freezer — mushroom stems, probably three quarters of an onion, and some peas. I did thaw these for a bit, but I’ll tell you my secret cheat for that in a minute.
To this cache from the freezer, I added everything that was still good in the fridge — a few handsful of parsley, a small bunch of thyme, a few carrots, some sad celery with the brown bits cut off, and a tablespoon or so of salt. Sometimes, I add peppercorns. Sometimes, I’ll roast some of the veg first; this adds great flavor, but it’s not necessary for good stock. If you have no fresh herbs, add some dried. I usually add a bay leaf, but I was out this time around. Thyme, basil, oregano, dill — all are good in stock. Add what sounds good. You can also add a bit of tomato paste, but this time, I had just finished a jar of pasta sauce for lunch, so I rinsed it out and added that water to the stock, too.
Pack all this in your crock. Then fill the crock with water. Put on the lid and cook. It really is that easy. Cook 4-6 hours on high (recommended if you started with anything frozen), or 8-12 on low. I’ve never overcooked stock, so I think this is a pretty forgiving recipe.
IF you have started with some frozen or partially frozen parts, here’s how to cheat — generally, crock pots don’t do well with frozen foods. They just don’t get hot enough. I thaw things for a few hours or overnight in the fridge first, but then I add a few cups of boiling water. Not starting from cold seems to help. You can also run the pot on high for the first hour and then turn it down.
When your stock is done, you want to strain out all the “stuff” you just extracted flavor from — I use a giant kitchen bowl with a colander in it. Dump the entire pot in, and then lift out the colander full of bones and vegetables.
If you plan to use plastic to store your stock, let it cool to room temp first. If you’re using jars, it works fine to pour it in hot. Stock should keep about 5 days in the fridge, and a few months in the freezer. Or, hey, get fancy and make some risotto right away with the hot stock.
Let us know if there are any particular ingredients you love in stock!
Back in June, Mary Kate and Denise met up at the far side of Mary Kate’s apartment complex parking lot, with a super-long outdoor extension cord, a garage sale crock pot, a can of olive oil, some devil lye, and safety googles.
Denise and Mary Kate put safety first.
We were there to make soap. Safely outdoors, away from cars and buildings and enclosed spaces, lye and water were mixed, added to olive oil, and cooked in the crock pot until done. Or until it sorta kinda maybe looked a little bit like the pictures Denise got off the internet. Then we dumped it in a baking dish, and Denise took it to her in-laws — because soap needs to tour — before taking it home to cool completely.
Why make soap? Well, if you are Denise, there may be two soaps on the market that you might be able to use because the majority of soap is coconut oil-based. Add avoiding palm oil (because of cross-reaction possibilities with coconut allergies) and corn-derived ingredients, and good luck to you. If you’re Mary Kate, anything that involves mostly sitting around but also the possibility of destruction is good. Plus, there were safety googles.
The other reason is cost. Denise did the math when we were done: Her soap costs $26.78 for 64 oz (8 bars @ 8 oz each) which works out to 41 cents an ounce. The supplies for making this soap (not counting the equipment, which is reusable, and ran approximately $30 or so) cost $13.87 for 74.73 oz, which works out to 19 cents an ounce. It was also a few hours of fun.
Denise uses the soap for laundry detergent, dishwasher detergent, and shampoo, as well as for actual soap. This represents a significant cost savings. The olive oil soap is maybe not as pretty as commercial soap, but it works great and is gentle.
This soap is a “hot process” soap, meaning it uses heat to help the lye saponify (make into soap) the oil. There is also “cold process” soap, where time alone completes that reaction, and we do want to try that soon. The internet is full of recipes for soap, but this is the one we followed.
We made you a video. It’s really an automatic slide show of the photos we took set to music, and it runs about a minute. Enjoy (and be kind?).
Bacon. It’s bacon, how do you live without bacon? Unfortunately, commercial bacon has dextrose, sodium erythorbate, ascorbates, and other corn ingredients. At the beginning of my corn-free life, I would cheat a bit, but then I would get a blister on my foot a couple days later, and I eventually decided that it had to go. So no bacon. For months and months. And then I started Googling how to make bacon, and looking for pins on Pinterest. It didn’t look that hard. And compared to fermenting (which I very much enjoy, so this is not a slam), it seemed much less evil scientist-bubbling concoctions, and more of a dry rub marinade in the fridge for several days longer than you would normally. What was the worst that could happen? I mean, besides making myself sick, and that was going to happen if I ate commercial bacon anyway. But I still didn’t do it because I was going to have to make a special effort to get some pork belly, and it’s not like I don’t have enough other stuff to do. But one day, Mary Kate and I were dubbing around at the Saigon Market in Nashua and we saw some pork belly all packaged up and ready to bring home. So I bought it, and I made some bacon. It was good, but I thought the recipe needed some tweaking. So I called McKinnons in Salem and ordered five pounds of pork belly. And I then played around some more.
Now that I’m done experimenting, I’ve got two versions to share with you, one that’s a more basic cure, and one that’s a bit more savory. I like them both, but I prefer the basic cure, as I tend to be a traditionalist about my bacon.
In all likelihood, you are going to special order the fresh pork belly. Some grocery stores may be cooperative, or you might have to go to a specialty butcher store.
Making Bacon (two versions)
2 lbs of pork belly, skin removed
3 tablespoons sea salt
3 tablespoons brown sugar
For a basic cure, you will add:
2 teaspoons whole peppercorns
For a more savory cure, you will add:
2 teaspoons whole peppercorns
1 garlic clove, minced
1 tsp rosemary
1 tsp celery seed
1 tsp dried thyme
2 bay leaves
Put the salt, brown sugar, and the spices for your choice of cure in a blender or food processor, with the exception of the garlic clove in the savory cure. Blend or process until the peppercorns are well ground. If you’re using the savory cure, mince the garlic clove and set it aside.
If your pork belly still has the skin on it, as shown below, you will need to remove it. (The picture below shows five pounds of pork belly. I used it to make approximately two pounds of each bacon cure and one pound of salt pork, the recipe for which will be posted in the not too distant future.)
Five pounds of boneless pork belly before the skin is removed
Using a very sharp knife, remove the skin cutting it as thinly as you can manage. You don’t want to waste any of the pork belly.
Removing the skin from the pork belly
Once you have trimmed off the skin, your pork belly will look like the picture below:
Pork belly with the skin removed
Rinse the pork belly in very cold water and pat it dry with a paper towel. If you are doing the savory cure, now is the time to mix your ground salt, sugar and spice mixture in a bowl with the minced garlic. Spread half your salt, sugar, and spice mixture on a large piece of parchment paper, a large casserole dish, or a sheet pan, whatever you have in your kitchen that’s large enough to accommodate your piece of pork belly. Place the pork belly into the salt, sugar and spice mixture, and pour the remaining mixture over the top of the pork belly. Rub the mixture all over the pork, making sure to get every inch covered.
Put the pork belly in a 1 gallon resealable plastic bag, and add any of the excess salt, sugar, and spice mixture from your parchment paper, casserole dish, or sheet pan to the bag. Close the bag and shake it up to evenly distribute and coat the pork belly with the mixture. After shaking, try to remove as much of the air from the resealable plastic bag as you can so that the spice mixture stays on the pork belly and reseal it.
Pork belly coated with salt, sugar, and spice mix in resealable plastic bag
Place the bag on a plate, tray or small sheet pan so that it can be placed in your refrigerator and stay level. Refrigerate for five to seven days, flipping the bag once a day, until the pork feels firm throughout. The longer you let the pork belly cure, the saltier it will be. I preferred a cure of five days.
When the pork belly is finished curing, remove the pork belly from the resealable plastic bag and wash off the salt, sugar and spice mixture thoroughly under cold water. Pat your pork belly dry with paper towels.
You now have a choice to make. You can slice the bacon as is and then cook it, which appears to be the closest to commercial bacon, and was often referred to as “green bacon” in recipes I saw. Or you can smoke or roast the bacon. I don’t have a smoker, so I’ve not tried smoking it. I did do one batch of the roasted bacon, but I think I prefer the green bacon.
Green bacon:
We got a meat slicer as a wedding gift because my husband really wanted one, so it went on the registry. It was really helpful in slicing the green bacon.
“Green bacon” sliced
I fried some in my cast iron skillet over medium heat, as you would normally cook bacon. The home cured bacon seems to take longer than commercial bacon to cook.
Roasting the Bacon: When your bacon has cured, and you’ve rinsed and patted it dry with paper towels, pre-heat your oven to 200°F. Place the bacon in a 9 x 13″ roasting pan and roast until you’ve reached an internal temperature of 150°F. This will take between an hour and a half and two hours.
Bacon roasted in the oven
You don’t want to cook the meat, so once it reaches 150°F, remove the bacon from the oven. Let the bacon cool to room temperature.
Once your bacon has been roasted or smoked and has cooled, wrap it up in parchment paper and put it in the refrigerator until it has completely chilled. Once chilled, you can slice it and fry it up or use the oven method to cook your bacon. In the picture below, I used a chef’s knife and my knife skills aren’t all that great so the slices are a bit thicker than I would have liked. Which is why I decided to drag out the meat slicer in later experiments.
Roasted bacon after chilling and slicing
We cooked the bacon two ways here too, frying it and using the oven method.
Roasted Bacon, cooked two ways, fried and using the oven method
Smoking the Bacon: Again, I have not tried this because I don’t have a smoker, but one of the recipes I found gives the following directions. When your bacon has cured, and you’ve rinsed and patted it dry with paper towels, smoke it over hickory or apple wood at a very low temperature until bacon reaches an internal temperature of 150°F or about three hours. Let bacon cool to room temperature. Once your bacon has been roasted or smoked and has cooled, wrap it up in parchment paper and put it in the refrigerator until it has completely chilled. Once chilled, you can slice it and fry it up or use the oven method to cook your bacon.
My husband and I both preferred the oven method for cooking the bacon and we both preferred the “green bacon”, but you should experiment and see what you like best. Here’s a chart for how long your bacon will keep from the USDA. The bacon cures presented here would fall under “Bacon cured without nitrites.” I don’t want to weigh in on the nitrites being good or bad issue, it’s just that I can’t get seem to get my hands on curing salt that doesn’t also have corn (dextrose) in it.
I hope this helps those of you who can’t get commercial bacon for whatever reason. Enjoy, I did 🙂
I know. It’s spring. Or, rather, “spring.” The thing is? It’s still pretty cold here, and on top of that, damp. So, basically, it’s still soup weather, and rather than being cranky about it, let’s just make some good veggie stock to cook up some of the vegetables that might, in a perfect world, soon be coming out of the ground. Or, maybe, going into the ground. Man, this whole seasonal blah is really not inspiring me! But I’m hungry, and soup is good.
So. Soup stock. As with Denise’s Roasted Beef Stock, this vegetable stock gets a lot of its flavor from caramelizing the sugars in the vegetables by roasting them first. Deglazing the roasting pan with white wine or sherry adds a little extra hit of flavor, but if you don’t have or don’t want to use alcohol, water will work. Just make sure to scrape the bits up really well — there’s flavor in there.
This stock can be the base for pretty much any soup, though if you’re going for a specific flavor profile, consider that when choosing your herbs. I’ve given very specific measurements here because part of the reason we’re posting basics like stock is that we know that some people have always purchased stock, either in bouillon cubes or in boxes or cans. Allergies take away that option (damn allergies) or make it difficult, so if soup stock is part of your learning curve, we’ve got it covered. BUT. Stock is inherently flexible, so feel free to play with the recipe. You do not need exactly what I’ve used, and the measurements are overly precise (unnecessarily so) just in case you’re a newbie and want that. I weighed everything that was roasted, just for you, and since I was doing that, did metric and US weights. I don’t actually know metric measurements otherwise, so they aren’t included other than that. Sorry about that.
A note on ingredients and prep: in a stock, you’re extracting flavor. So you want the best produce you can buy, and you want to alter it as little as possible. Because of this, when possible, I buy organic vegetables to roast, and I wash them well. I don’t peel them. Chop them roughly, and remove only parts that are bad or brown, and any parts that might burn (onion skin).
Ungarnished Broth. Photo by Jack Andrews
Roasted Vegetable Stock
There are two sets of ingredients in this recipe. The first set get roasted. The second set go straight into the stock pot.
Roasted Ingredients
To go into the oven:
7 carrots (9.5 oz, 269g)
7 stalks of celery, plus core (15 oz, 425g)
2 apples (12 oz, 345g)
1 onion (8.5 oz, 237g)
4 large shallots (1 lb., 453g)
a handful of garlic cloves, about half a head on a typical US-sized clove (2 oz, 64g)
1/4 to 1/3 cup olive oil
1/2 Tablespoon salt
1/4 cup of white wine, red wine, sherry, or water (reserved — use this after roasting)
Preheat your oven to 400°F.
Chop the carrots and celery into about 1 inch chunks — remove any greenery from carrots, and remove and reserve all the celery leaves (see below). Quarter the apples and remove the part of the core containing the seeds. Quarter the onion and halve each quarter — remove all the papery skin. Same with the shallots (note — I used shallots here because they looked good at the store when I was buying the veg — you could just use another onion or two here, but less in weight than shallots, as shallots are milder). Remove the skin on the garlic cloves.
Place all the veg in a baking pan or roasting pan with sides, metal is preferred. Douse them with olive oil and salt, and turn everything around in the oil until it’s well-coated.
Put the pan in the oven and set the timer for 30 minutes. You’ll need an hour, possibly an hour and a half to get a good caramelized brown all over all your veg, so plan accordingly. Check every 30 minutes, and beware of sticking your head close to the oven as you open it — there’s a lot of steam in there. And yes, I forget that every.single.time.
Now, your second set of ingredients for the stock — the ones that do not get roasted.
Into the stockpot:
another handful of garlic cloves
all of the celery leaves — don’t waste them!
1/2 a bunch of parsley
3-4 sprigs of dill, or another fresh herb that looks good at your store and is soup-appropriate (rosemary, basil, oregano, thyme — all would be good options)(optional, but adds freshness)
2 bay leaves
2 teaspoons dried thyme
1 Tablespoon whole peppercorns (this does NOT make your stock hot — the peppercorns aren’t broken, so most of the oil stays in, but it adds a nice flavor) (if you are Denise and you’re making this, you would likely add dried chilies here instead, but those will be hot — if that’s your thing, do it!)
about 10 cups of water
Get all this (MINUS the water) ready in your pot while everything else roasts.
When the roasting is done, scrape the roasted veg directly into the stockpot. Deglaze your pan with your water or wine by pouring the cold liquid on the hot pan and using that to scrape up all the roasted bits stuck to the pan. Add that to the stock pot.
Then add water, enough cover all the stuff in the pan by about two inches. Bring this to a boil, then reduce and simmer for 30-45 minutes.
Strain out and discard the vegetables and herbs, and either use it to make soup right away, or store it. This should keep in the fridge for about a week, or store it in the freezer. With 10 cups of water, I got not quite 3 full quart jars of stock.
Whatever Wednesday: The citrus is in. Go eat it all.
THE CITRUS IS IN!
I assume, given that I’m in New England, that if the citrus is here, the citrus is everywhere (at least in the USA). I’m also assuming that there is some left. My fridge looks like I bought it all. In the photo, blood oranges, cara cara oranges, Meyer lemons, and some limes. I’m not sure what the limes are for, honestly, given that I bought the lemons. But limes were on the shopping list, so I bought them, too. This is a great time to make some fruit-flavored gummy candy.
So far, I’ve baked fish with a cara cara orange (not highly recommended) and baked some shrimp with Meyer lemon (really good). I’ve had a lot of lemon water, and made a strawberry and blood orange smoothie for magical amounts of vitamin C. Blood oranges really are amazing, and I can highly recommend them as both seasonal and gorgeous to eat. Oh, and they’re pretty allergen-free.
Strawberry and blood orange smoothie
(Yes, that’s a Grumpy Bear glass. It suited the mood of the day — until I was done with the smoothie.)
So most of you know by now, since I’ve (Denise) complained mightily, the whole corn allergy thing sucks. And some of you might have wondered why we haven’t added a corn-free tag to the recipes we’ve posted since the corn thing went down. The short answer is, it’s just too hard, and there’s too much cross-contamination for those who are super sensitive, and I can’t be responsible for that. The longer answer is a bit more complicated than that.
Since I got the positive scratch test, I’ve been researching how to deal with a corn allergy. And I’ve been in overdrive since I failed the corn challenge. Here’s the thing, corn is in everything and it’s not required to be labeled at all, and some people have reactions just to the cross contamination of other ingredients being processed in the same factory or mill, what it’s waxed or gassed or sprayed or washed with, or any other number of things. Here’s the list of corn derivatives. Check out this page Where’s the Corn in Foods? from the Corn Allergy Girl, where corn can be hiding in daily life in New to Corn Allergy from Corn Free Lifestyle, and a post about how corn gets into meat during processing and otherwise, Corn-tamination Series: Avoiding Corn in Meat again from the Corn Allergy Girl. I’m not even going to get into the medications, household products, personal care products or cleaning products issues. Furthermore, the cross contamination issues are huge for super sensitives and many people can’t handle products that I am still using at this point. Like fresh vegetables from the grocery store, because they’re waxed with a corn derived wax, or sprayed with ethylene gas. Also, many people have difficulty finding safe flours and oils even if there is no corn contained in the product, like sorghum flour or olive oil because of cross contamination in processing. And everyone seems to have a different level of sensitivity, with some people falling on the corn-lite side of the spectrum meaning they can tolerate more than most, and the super sensitives who may have only a few safe foods they can eat. If you’ve got a corn allergy, you might want to check out the Corn Allergy and Intolerance group on Facebook and/or Delphi Avoiding Corn forums to get advice about products and what others have had reactions to.
At this point, I’m simply not comfortable labeling a recipe corn-free unless it really is truly corn-free, and honestly, in our food supply at this current time, that’s damn near impossible. So basically that’s why you aren’t going to see a corn-free tag on our blog. My (Denise’s) recipes will not have any obvious corn ingredients, but since I can’t guarantee that the ingredients I’m using are safe for everyone with a corn allergy, we’re not going to tag recipes as corn-free. Also, since Mary Kate can eat corn, and her diet is limited enough, her recipes may still contain corn. So I guess what I’m saying is, do what’s right for you, and use safe ingredients you can tolerate. Be careful out there.
Since we’ve focused this month on recipes inspired by cuisine from the continent of Asia (I know, we never said there was a theme, but there was. We’re wily like that.), I thought tea would make another good subject for another research-based (some might say “nerdy”) post. Tea is the second most popular drink in the world. In the world, people — second only to water. I know I’m part of that statistic. I was only an occasional tea drinker until graduate school. You know what’s colder than a New England winter? A Pacific Northwest winter. I know, the thermometer says it’s warmer, but it’s wet and sinks into your bones. So you drink hot beverages — coffee, hot chocolate, and TEA.
And why not? Tea, at its root, is an easy drink to make — pour hot water over some leaves. It works with a variety of leaves, in fact, giving us tea (leaves from the camellia sinesis plant) and tisanes, which are commonly called “herbal teas” in the US.
The Miracle of Green Tea
I would guess that most people drink tea because they like the taste — and there are so many varieties that I imagine nearly anyone can find something that they enjoy. But tea has been used for centuries as part of Traditional Chinese Medicine, and Western medicine is now studying the potential health benefits of tea. One meta-study (review of all the other studies to gather the data in a single place for analysis) assembled the following list of tea’s benefits:
Recent human studies suggest that green tea may contribute to a reduction in the risk of cardiovascular disease and some forms of cancer, as well as to the promotion of oral health and other physiological functions such as anti-hypertensive effect, body weight control, antibacterial and antivirasic activity, solar ultraviolet protection, bone mineral density increase, anti-fibrotic properties, and neuroprotective power.
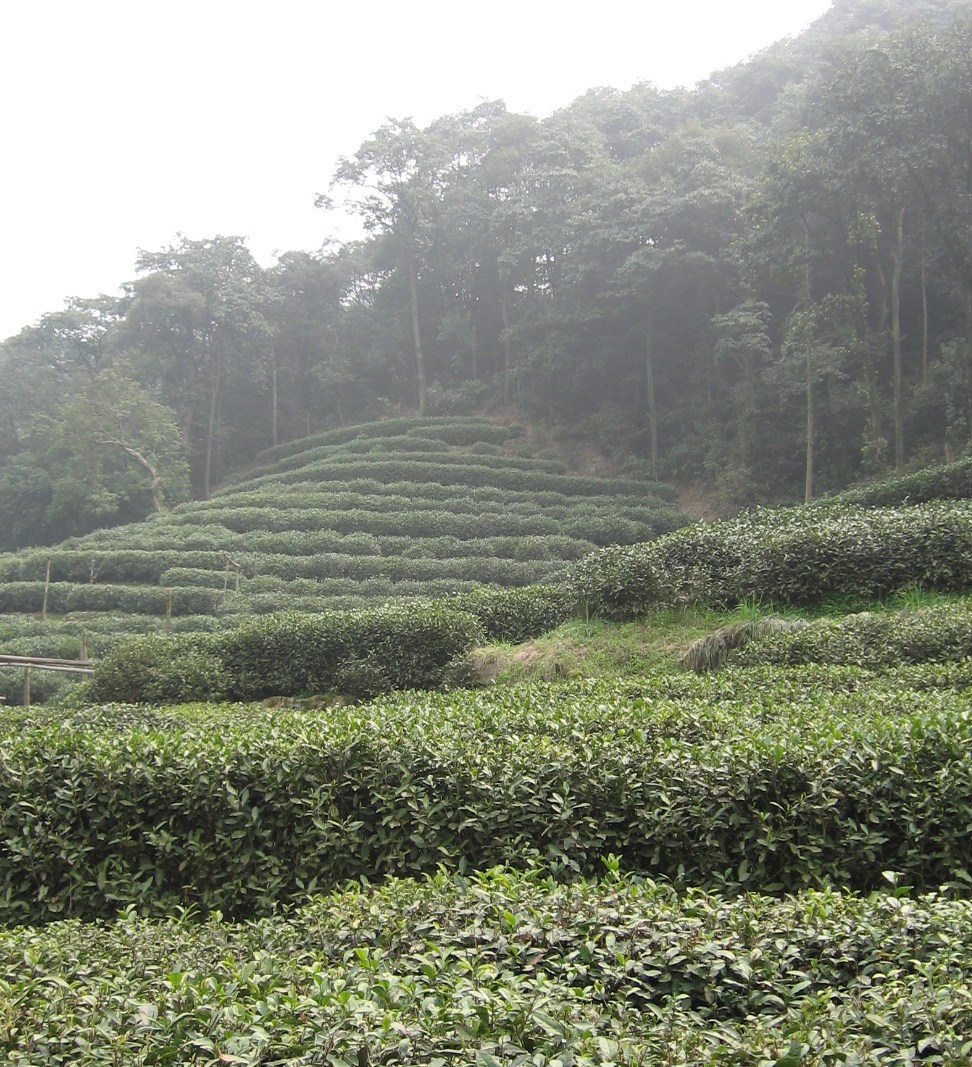
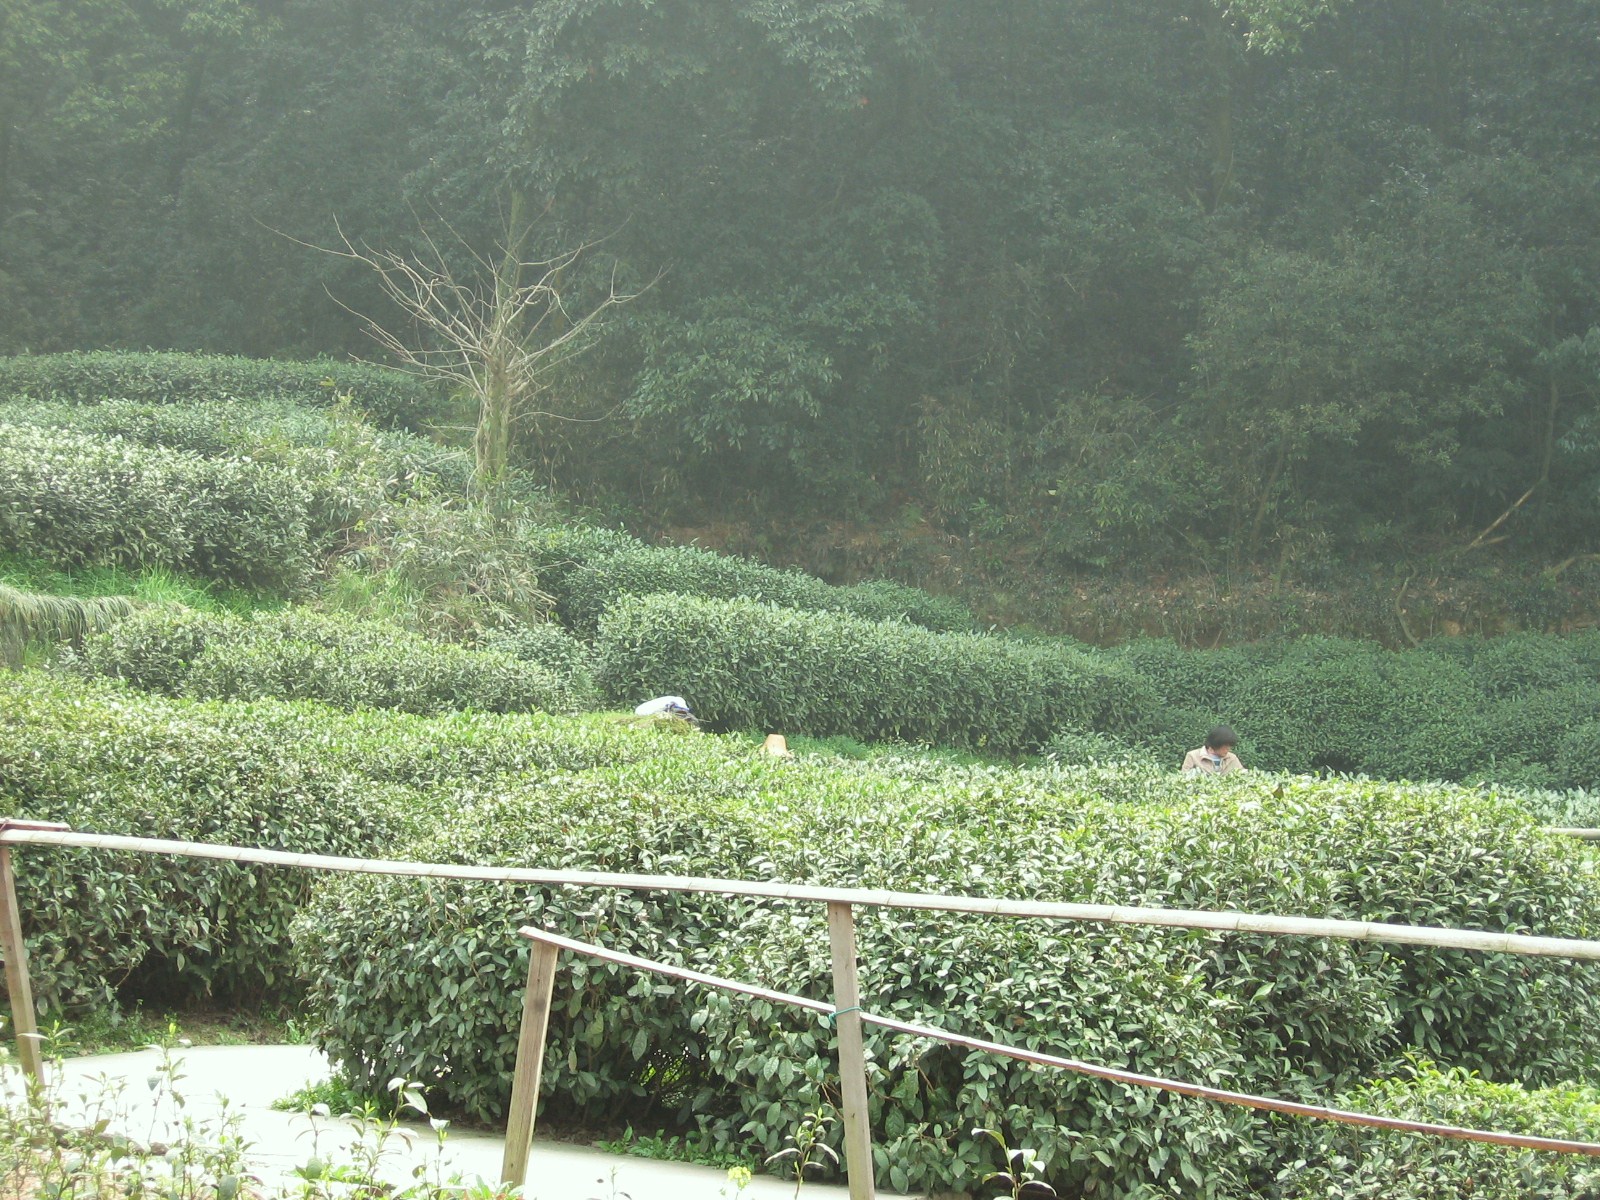
But what IS tea? Tea is the leaves or leaf buds of the camellia sinesis plant, which, left to its own devices becomes a tree, but is generally kept pruned to about waist-height for ease of harvesting. Tea is harvested by hand, with the leaves being picked every few weeks. The earliest harvests are generally the most prized, and different seasons produce different teas.
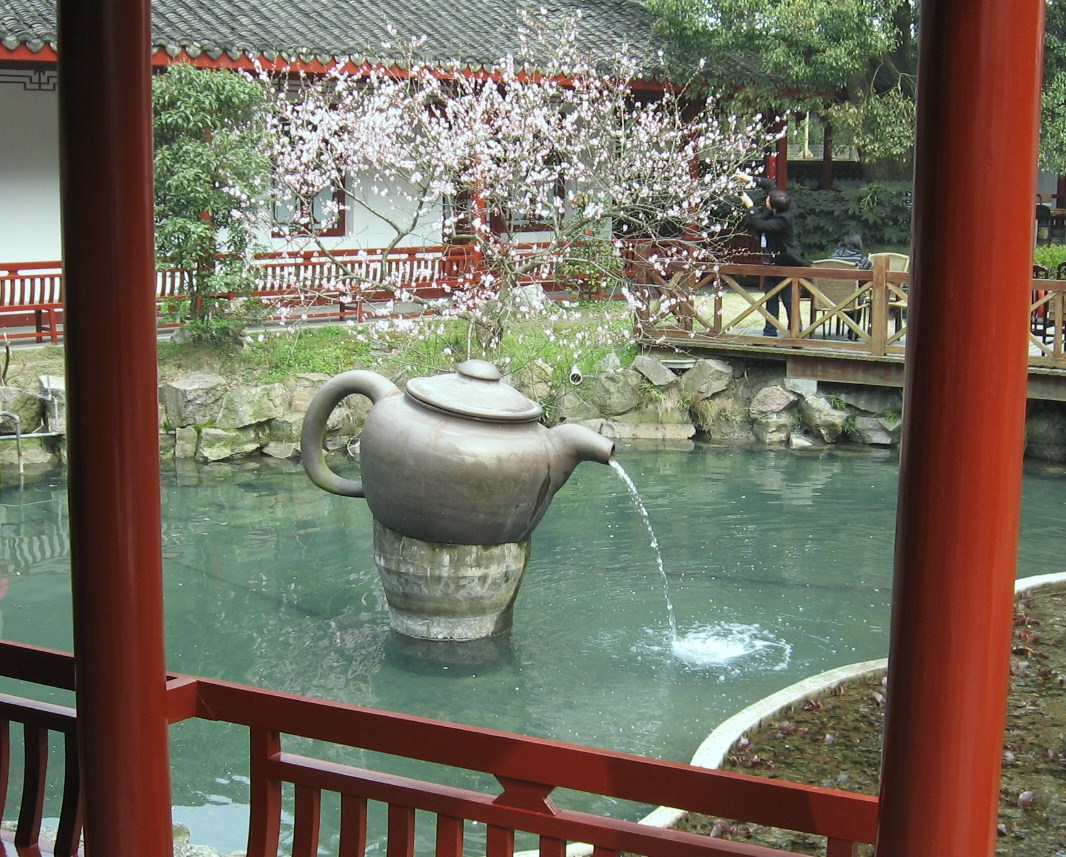
In 2009, I took a trip to China, and we visited a tea plantation near Suzhou, site of all the photos I’ve punched into this post. At the plantation, we were ushered into a lovely building, with a courtyard teapot fountain (top photo) and a tea tasting room that looked out over the bushes. All the tea here is picked by hand and processed (dried) on site. They produced 4 grades of tea, and the top two (Empress and Grade A) are never exported. Quality tea leaves like these can be re-used up to 5 times, so about all day.
Chinese Tea Plantation, near Suzhou
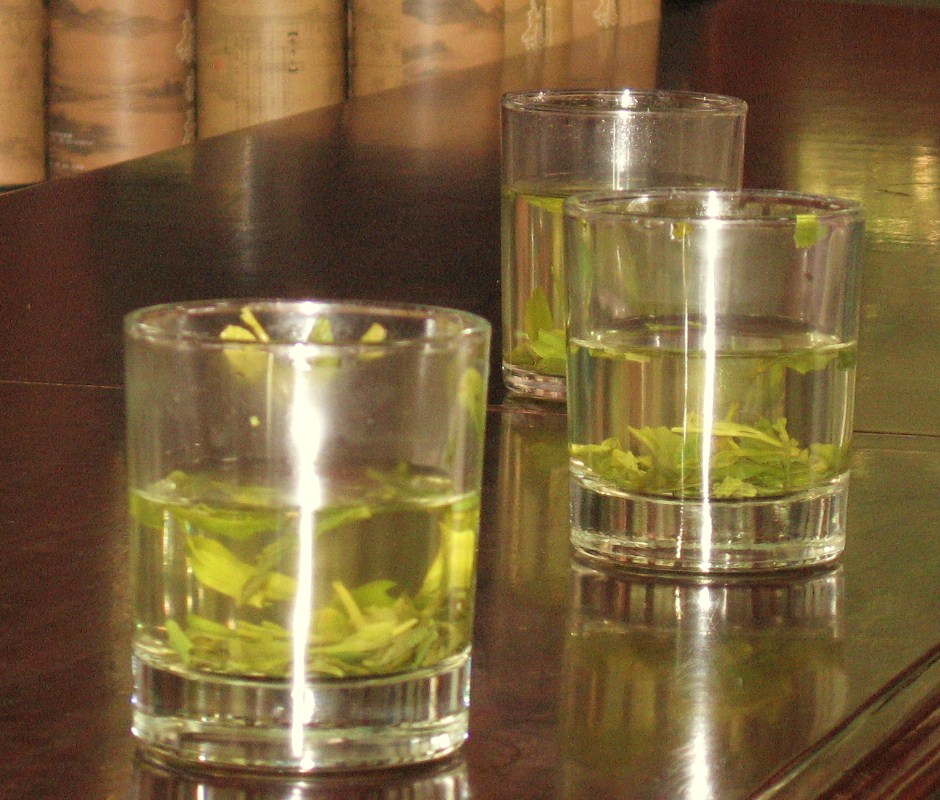
Tea is native to China, and the Chinese drink their tea green — unoxidized. Tea was oxidized and compressed for trade, but the Chinese traders considered this an inferior version of the drink. Tea hit a cultural high point during the Tang Dynasty (618-907 CE), when it was used for social ceremonies as well as in Buddhist ceremonies. Lu Yu wrote what may be the first tea manifesto, in which tea appreciation, using Taoist and Buddhist principles, could enhance one’s life — help you live your philosophy, and enjoy the moment. To this end, specialized tea wares, including ceramics, began to be developed Japanese Buddhist monks studying in China at this time discovered tea and its ceremonies, which they brought back to Japan.
As Japan’s tea culture flourished, the Manchu or Qing Dynasty in China changed the ethnicity and dominant traditions of the ruling classes. The Manchu were the primary market for the “inferior” oxidized teas that earlier Chinese dynasties traded at the borders — the precursor to what we know as black tea. They drank their tea dark, strong and with milk — fermented mare’s milk. This is the tea culture that the British Empire first encountered, and explains the popularity of black tea with milk as tea spread to Europe.
Boston Tea Clipper — click image for original site
Tea spread first to Europe, and then to England, which is how it becomes part of the story of the US. The first sale of tea in London was in 1658, and tea became a fixture of British life when Charles II married Portuguese Princess Catherine of Braganza, a tea drinker. Chinese tea was traded through the Dutch, who had a monopoly on tea, and even when the Chinese began to trade directly with British merchants, it wasn’t enough. Tea was popular everywhere, including in the British colonies, including the one Denise and I both live in now.
The 1773 Boston Tea Party, besides being an important historical landmark event, seems to be a high point for high school history, given how well it is remembered (I vaguely remember a re-enactment class, and I grew up in the South. If you ever get a chance, go to the Old South Meeting House re-enactment in Boston — it’s worth the trip.) The really short version? The colonists were tired of being taxed by the British, and began to boycott their imports. The Dutch were more than happy to sell their tea without a tax, so to undercut them, the British decided to empty some warehouses of tea at low cost to the colonists. The colonists? Didn’t take the bait. They asked the governor to send the three ships back to England without unloading. When the governor refused, the Sons of Liberty, dressed as Native Americans, boarded the ships and dumped the tea overboard.
Tea bushes, near Suzhou, China
Tea was also the beginning (and end result) of another war — the Opium Wars of 1839-1842 in which British traders tried to make back the money they paid the Chinese for tea by importing Indian opium into China. China lost, and badly, not only paying for the war, but giving Hong Kong to the British. Remember when Hong Kong was “repatriated,” if that’s the right term? In 1997? All over TEA.
Tea Tasting Room. Please ignore the blurred faces– none of these people asked to be on the internets.
As part of the great sales pitch at the tea tasting room in Suzhou, we were given tea to taste, but also demonstrations of green tea’s detoxifying power — but wait, it also absorbs fat! And this dirt in the water! According to my journal notes, green tea steam can be a great eye moisturizer (I had forgotten all this, but allergy season is a great time to test it out), and green tea bags can be used to absorb fat in a soup stock (I never tried this either, but there’s no time like the present).
Fresh tea leaves contain about 4% caffeine, and scientists have speculated that it may be a chemical defense system for the plant. Tea also contains flavinoids, vitamins, and polysaccharides, as well as amino acids. One of these amino acids is L-Theanine, an amino acid that naturopaths say stress depletes in your body, but which provides a calm, alert, and focused mental state. I want a calm, alert, and focused mental state, don’t you? That may be why I drink so much tea.
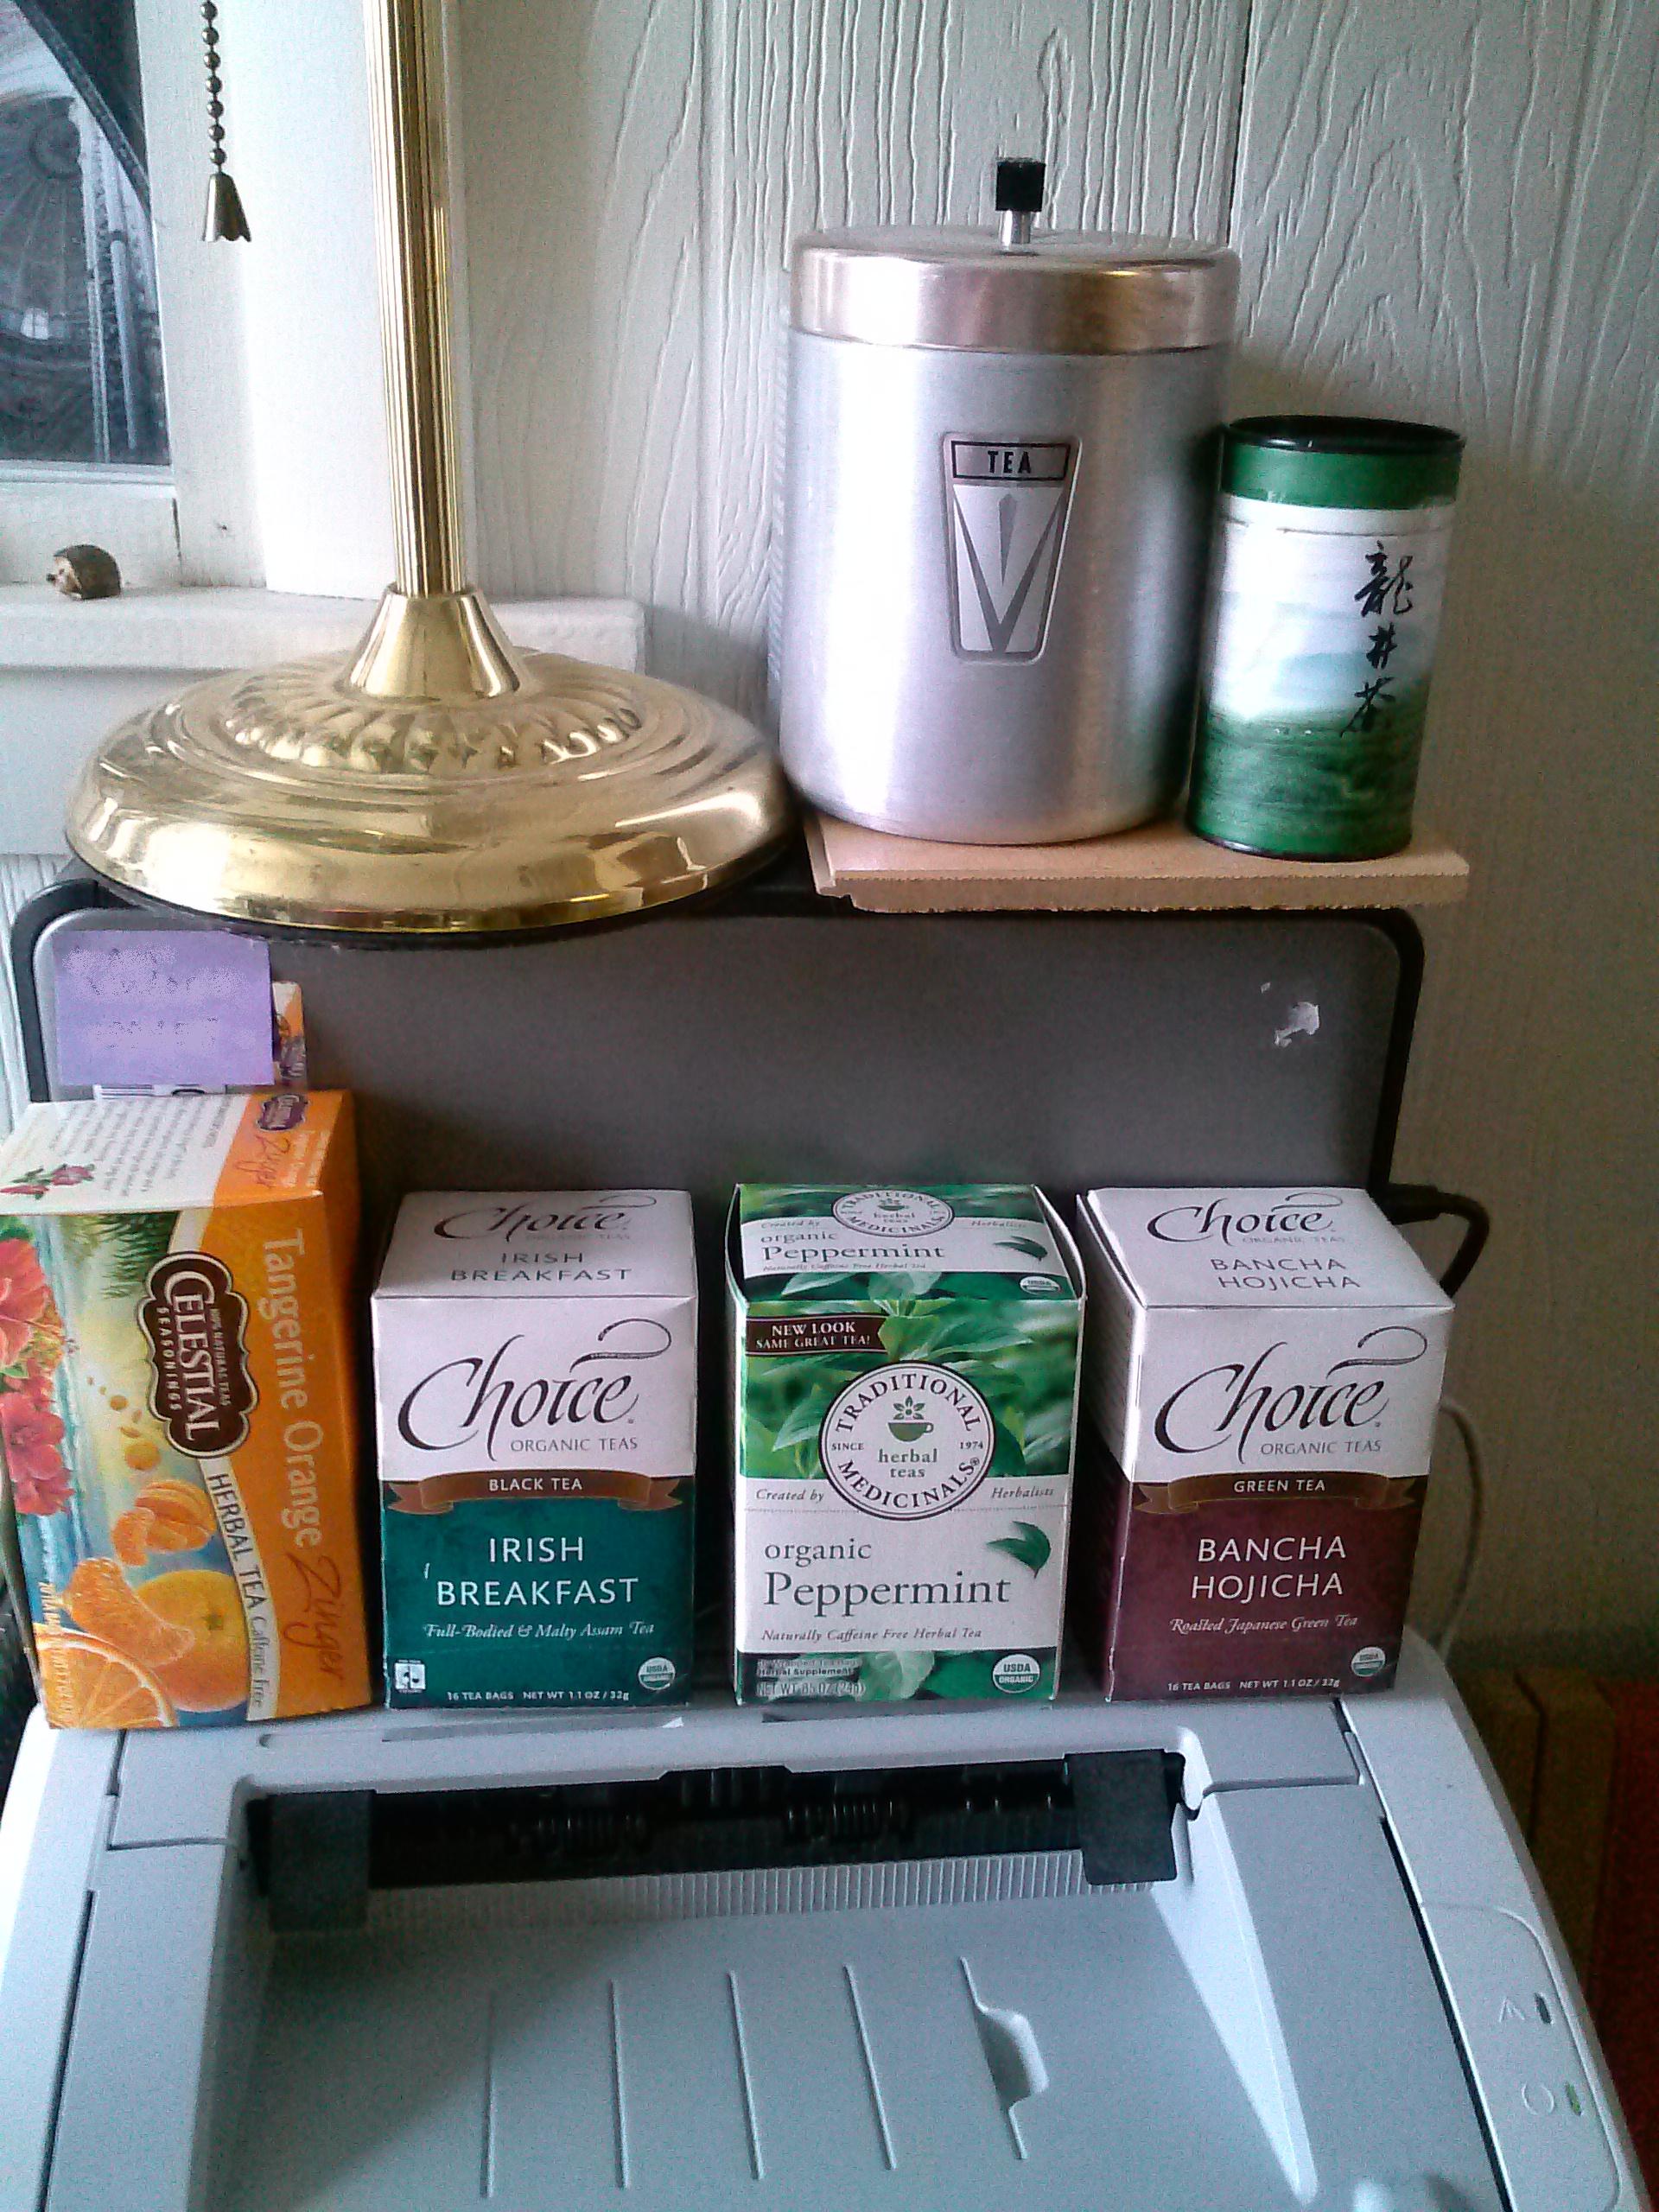
Office Tea Stash (does not include additional plain black tea and a few others in the closet)
Given all this, what teas do I drink? I admit that, lovely as loose tea is, it’s not my go-to tea method. I usually have tea bags in my purse (always) or carry-on bag (when flying). The photo above is just my collection of teas at work, where they take up valuable real estate on the printer. The small green canister up there was the last bit of tea from my trip to China, and the aluminum canister holds all the many assorted teas and tisanes I’ve collected over time. The boxes include two tisanes — a Celestial Seasonings Tangerine Zinger and a peppermint, which is great for all the digestive fun that can come with food allergies and intolerances. The two teas are Irish Breakfast and Bancha Hojicha. Bancha hojicha is a toasted/roasted Japanese green tea better known in my office as “magic tea,” as it was introduced to me as a hangover cure (my hangover was from benedryl, sadly, but you know what? It works, so it IS magic). I did look up Irish Breakfast tea versus English Breakfast tea — both are black tea blends, they are just different blends. The internet consensus seems to be that IB is stronger than EB, possibly with higher concentrations of Assam tea (Indian tea).
Starting with Lu Yu, there have been many theories and philosophies on how to make the best, most perfect, most enlightening cup of tea. There is an actual international standard for making tea for tasting — ISO 3103. (Wikipedia link –the official ISO is a pay-to-read site). Green tea should be steeped in water just under boiling, not quite boiling, as it can become bitter — this seems to be even more true with the lesser quality leaves that tend to be found in mass produced green tea bags. At home, I admit, I like the ritual of my tea kettle, but I rarely make a pot of tea. At work, I use the hot water spigot, and it’s even less ritualistic, but I’m in it for the taste.
So. Tea. Do you drink it? What do you love? What did I miss that you still want to know? Please ask. I probably read about it and just couldn’t fit it in.
The very first known instance of the word maple (though, at the time it was “mapul”) was in Chaucer’s The Knight’s Tale in Canterbury Tales where it is just part of a list of all the trees in the woods. Maple trees (genus: Acer, Latin for sharp, as in the points of the leaves — related to the base word for “acerbic), are all over the northern hemisphere, and are one of the foliage trees that bring the leaf peppers up to New Hampshire, Vermont, Ontario and Quebec.
But for all that, as pretty as a maple can be in full autumnal bloom, the real genius of the genus maple is the sugar maple that brings us this glorious Maple Weekend in New Hampshire.
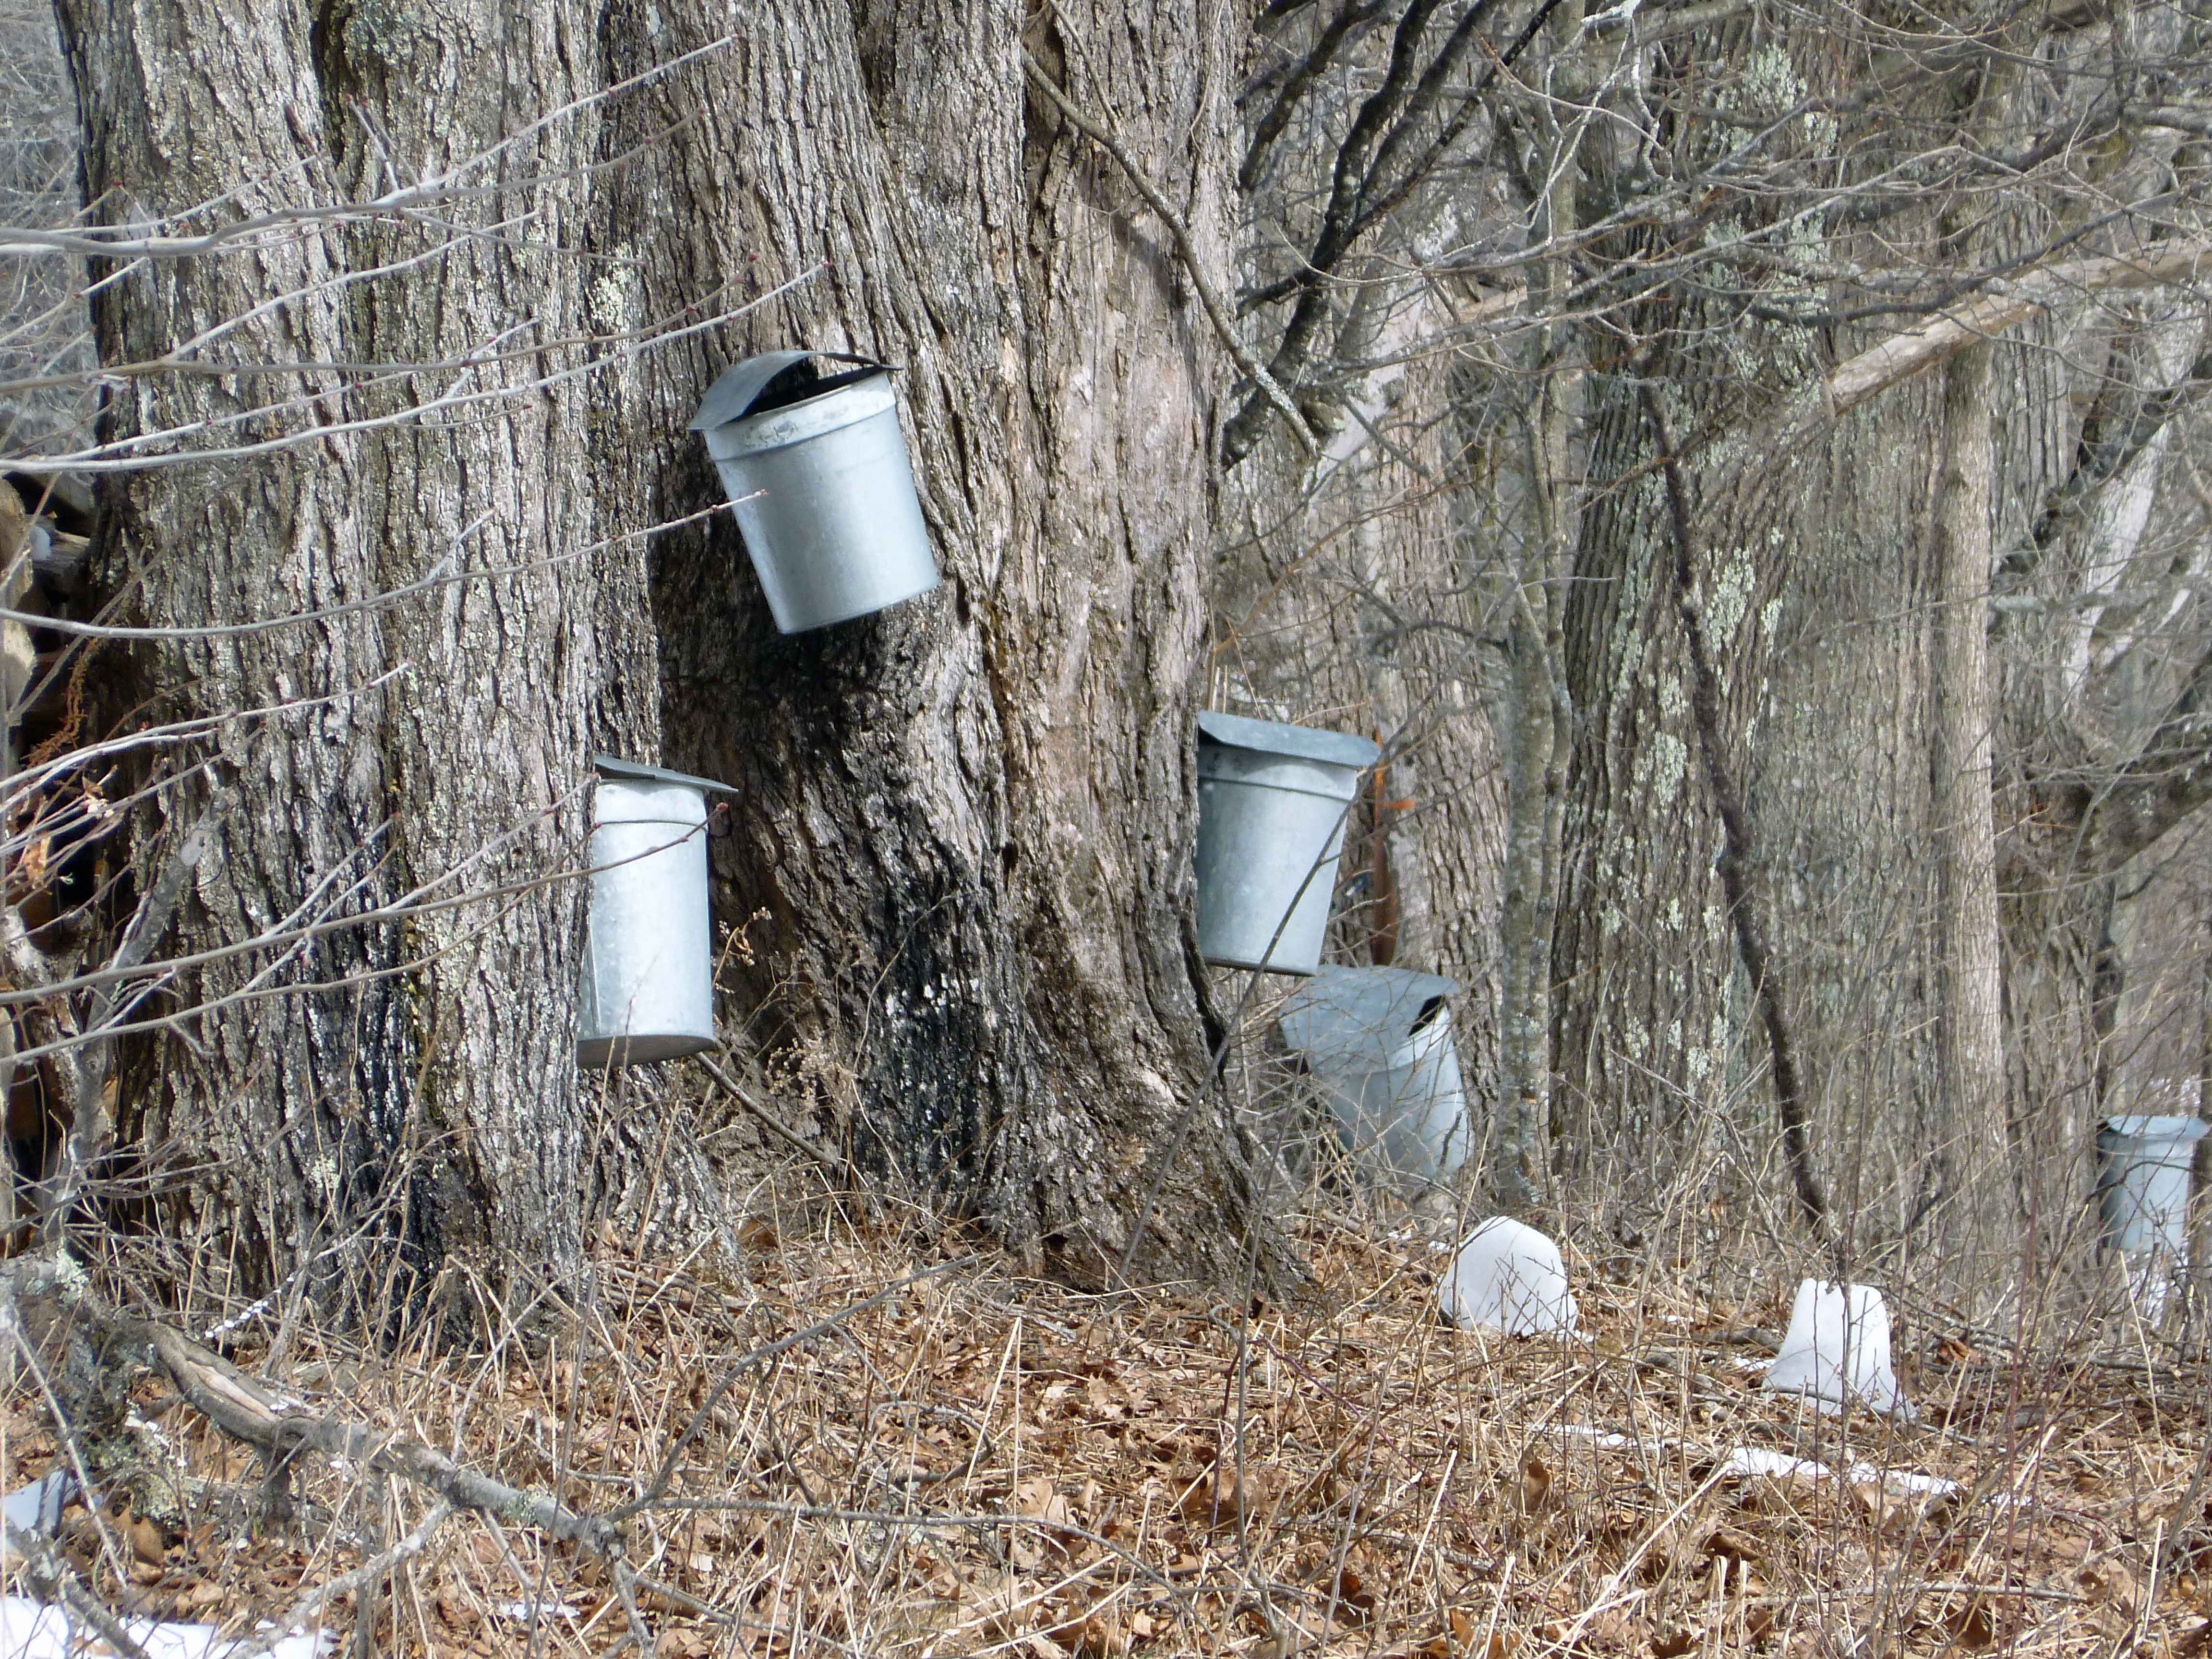
Old-School Sap Buckets
Knowledge of the hidden treasure in the maple tree predates European settlement on the North American continent — French explorer Jacques Cartier mentions the trees in a 1540 report, and mentions of the “distilled sap” are found by 1606 in the writings of Canadian explorers. It seems, though, that the native people of these areas mostly went beyond syrup to sugar, which makes sense, as anyone who’s tried to take gifts of maple syrup home on a plane could attest. Maple sugar is much easier to transport, being dry and compact.
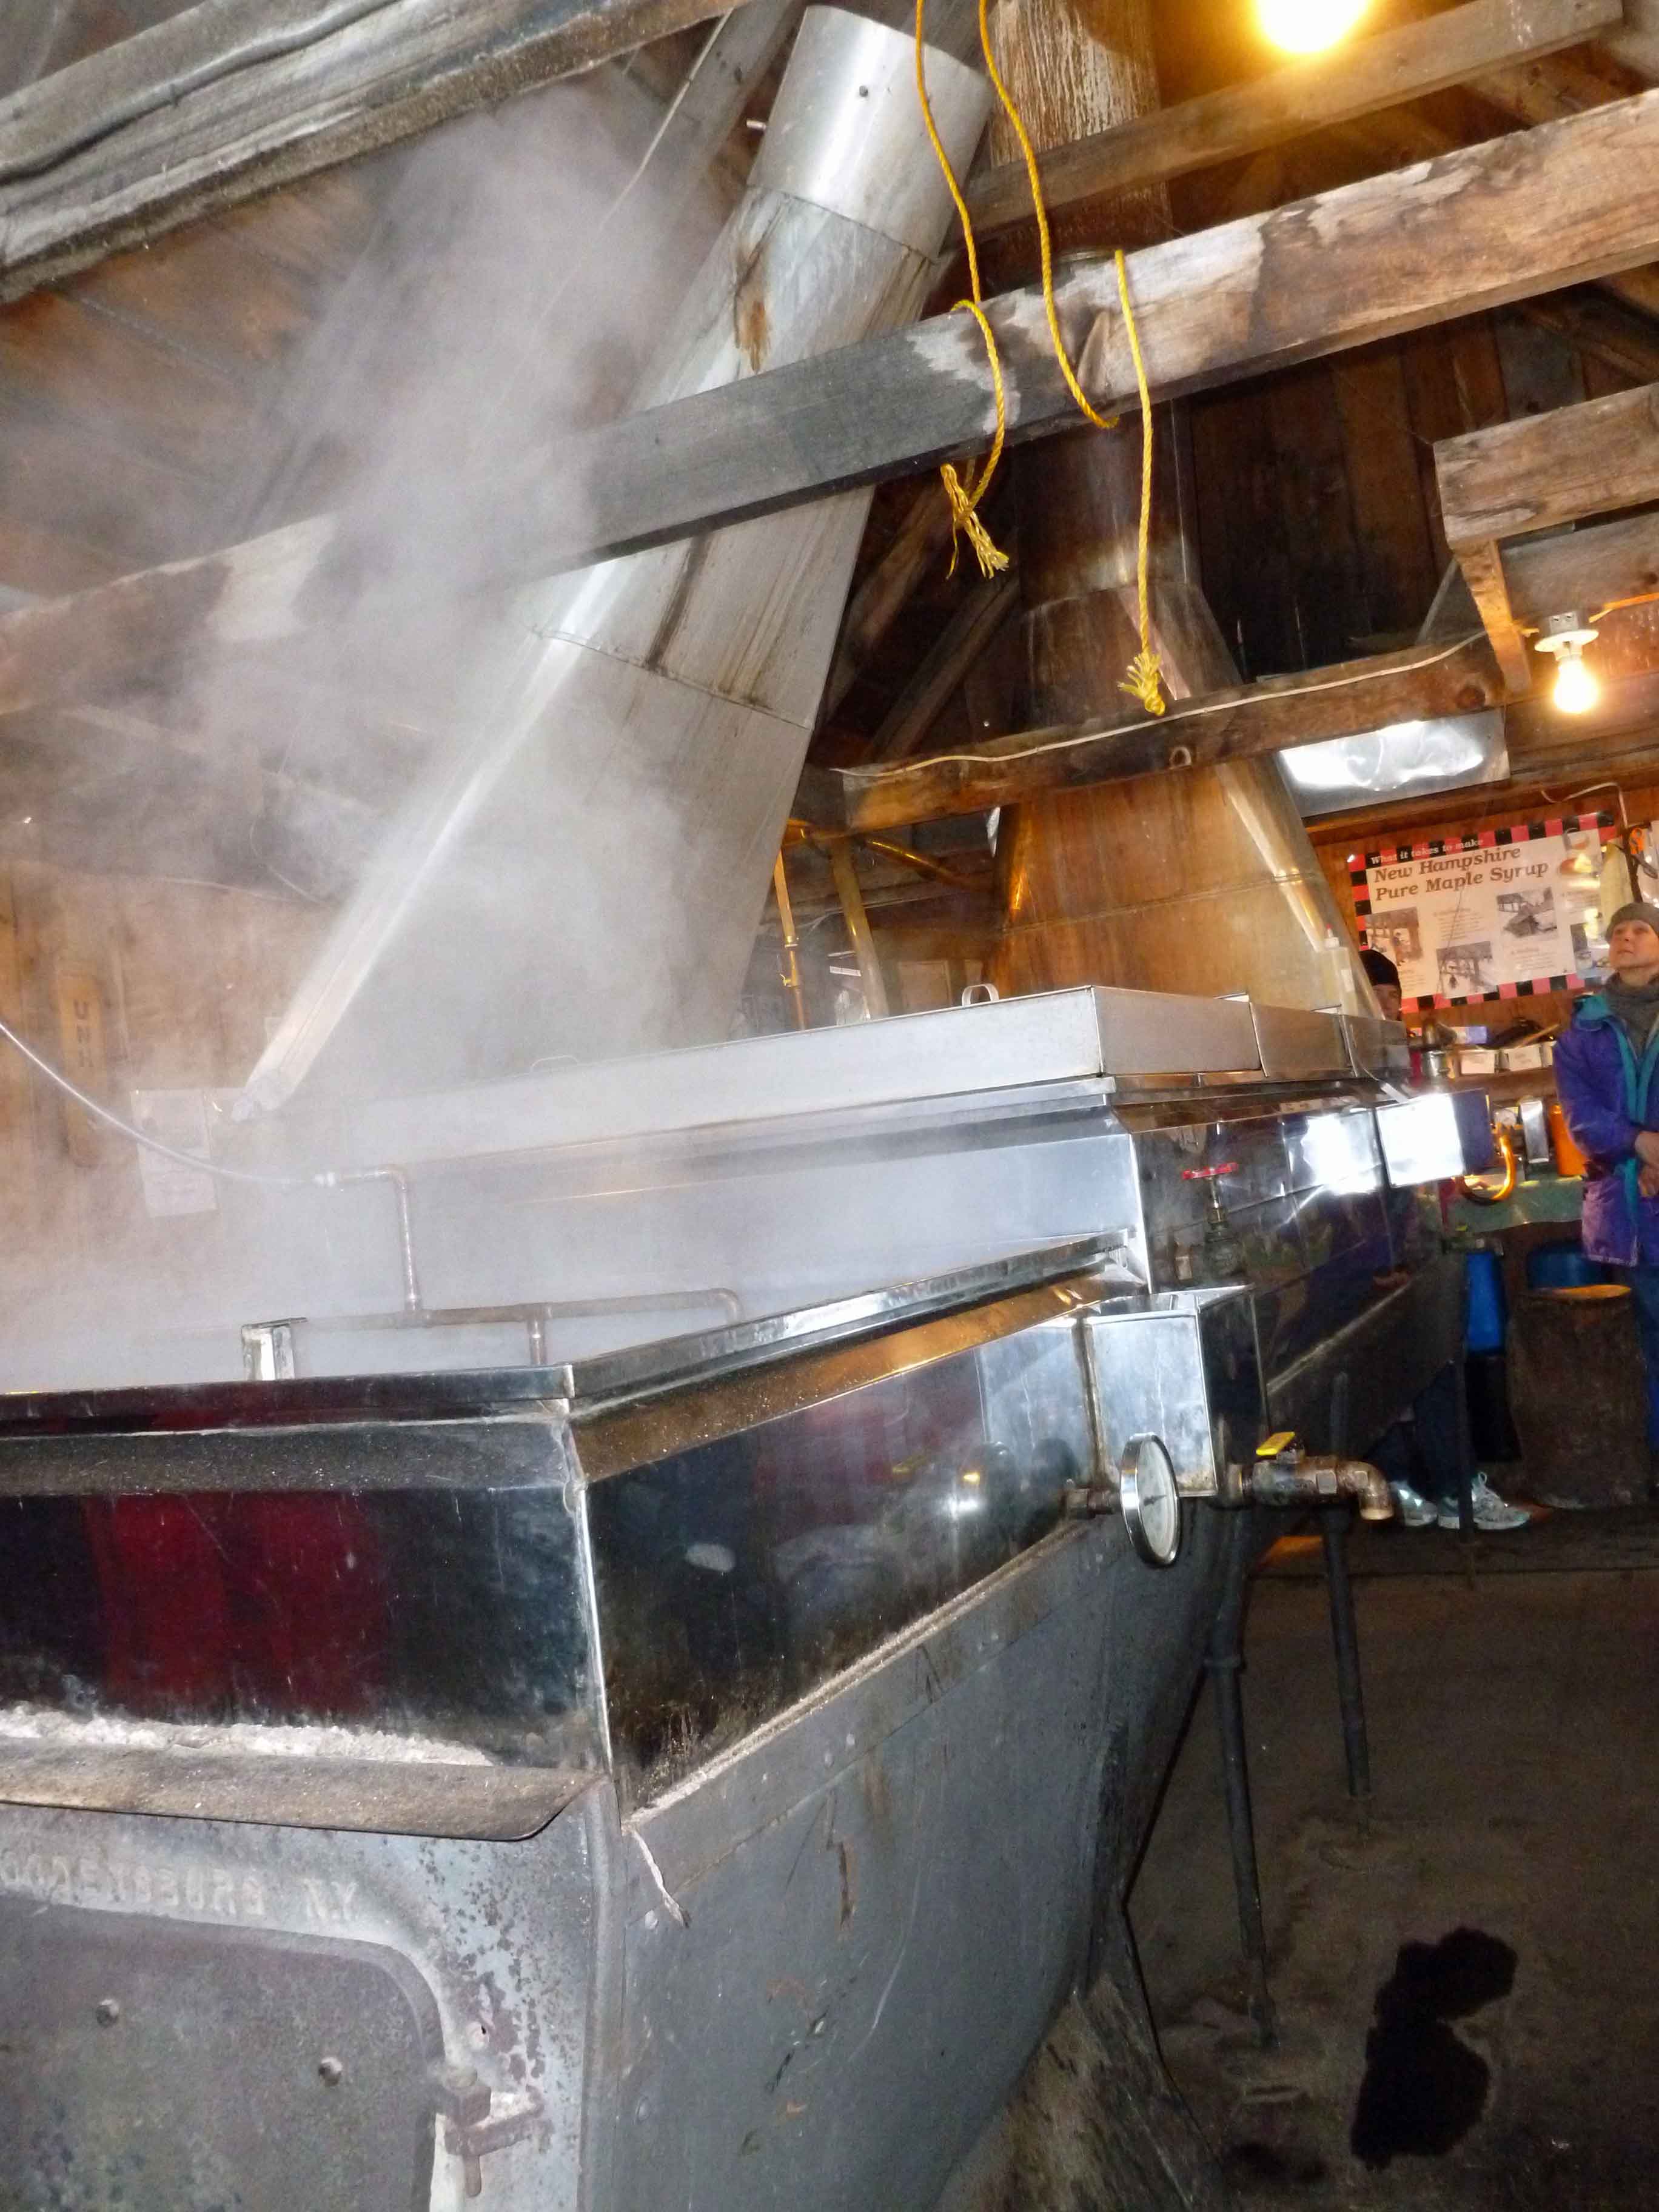
evaporation
The process of making syrup and sugar from maple sap pretty much boil down to the same thing — the removal of water from the sap. Accounts vary on exactly how much sap is needed to make syrup, but it’s something around 40 gallons of sap boiling down to a gallon of syrup. Concentrate it down to dry sugar and you can see why maple sugar has a rather high price tag. But it didn’t always. Maple sugar was promoted by abolitionists as a great local alternative to slave-produced cane sugar. (Does this particular line of reasoning strike anyone else as rather modern? The more things change…) When cane sugar was taxed as an import, maple sugar and cane sugar were about the same price, but by the end of the 19th century, producers in New England were producing primarily syrup, not sugar, from their maple sap.
Over the years, technology has refined the processing of maple, with the current high-end technology being reverse osmosis — the removal of about 75% of the water from the sap before it is boiled into syrup, reducing the processing time considerably. Some sugar shacks are running r.o., but not all of them. The one we visited was doing it old school, just wood fire and long boiling.
All the technology in the world can’t make the weather behave, though, and 2012, which was remarkably warm, was a bad year for maple syrup production, reducing output everywhere but Maine. New Hampshire still produced 76,000 gallons of maple syrup, but that was down from 120,000 gallons in 2011. Can you imagine 120,000 gallons of maple syrup? Are you imagining a giant vat of syrup right now? I am. Apparently, though, this weather’s been pretty great for maple sap, so we were promised a good Maple Weekend.
Sap Tree
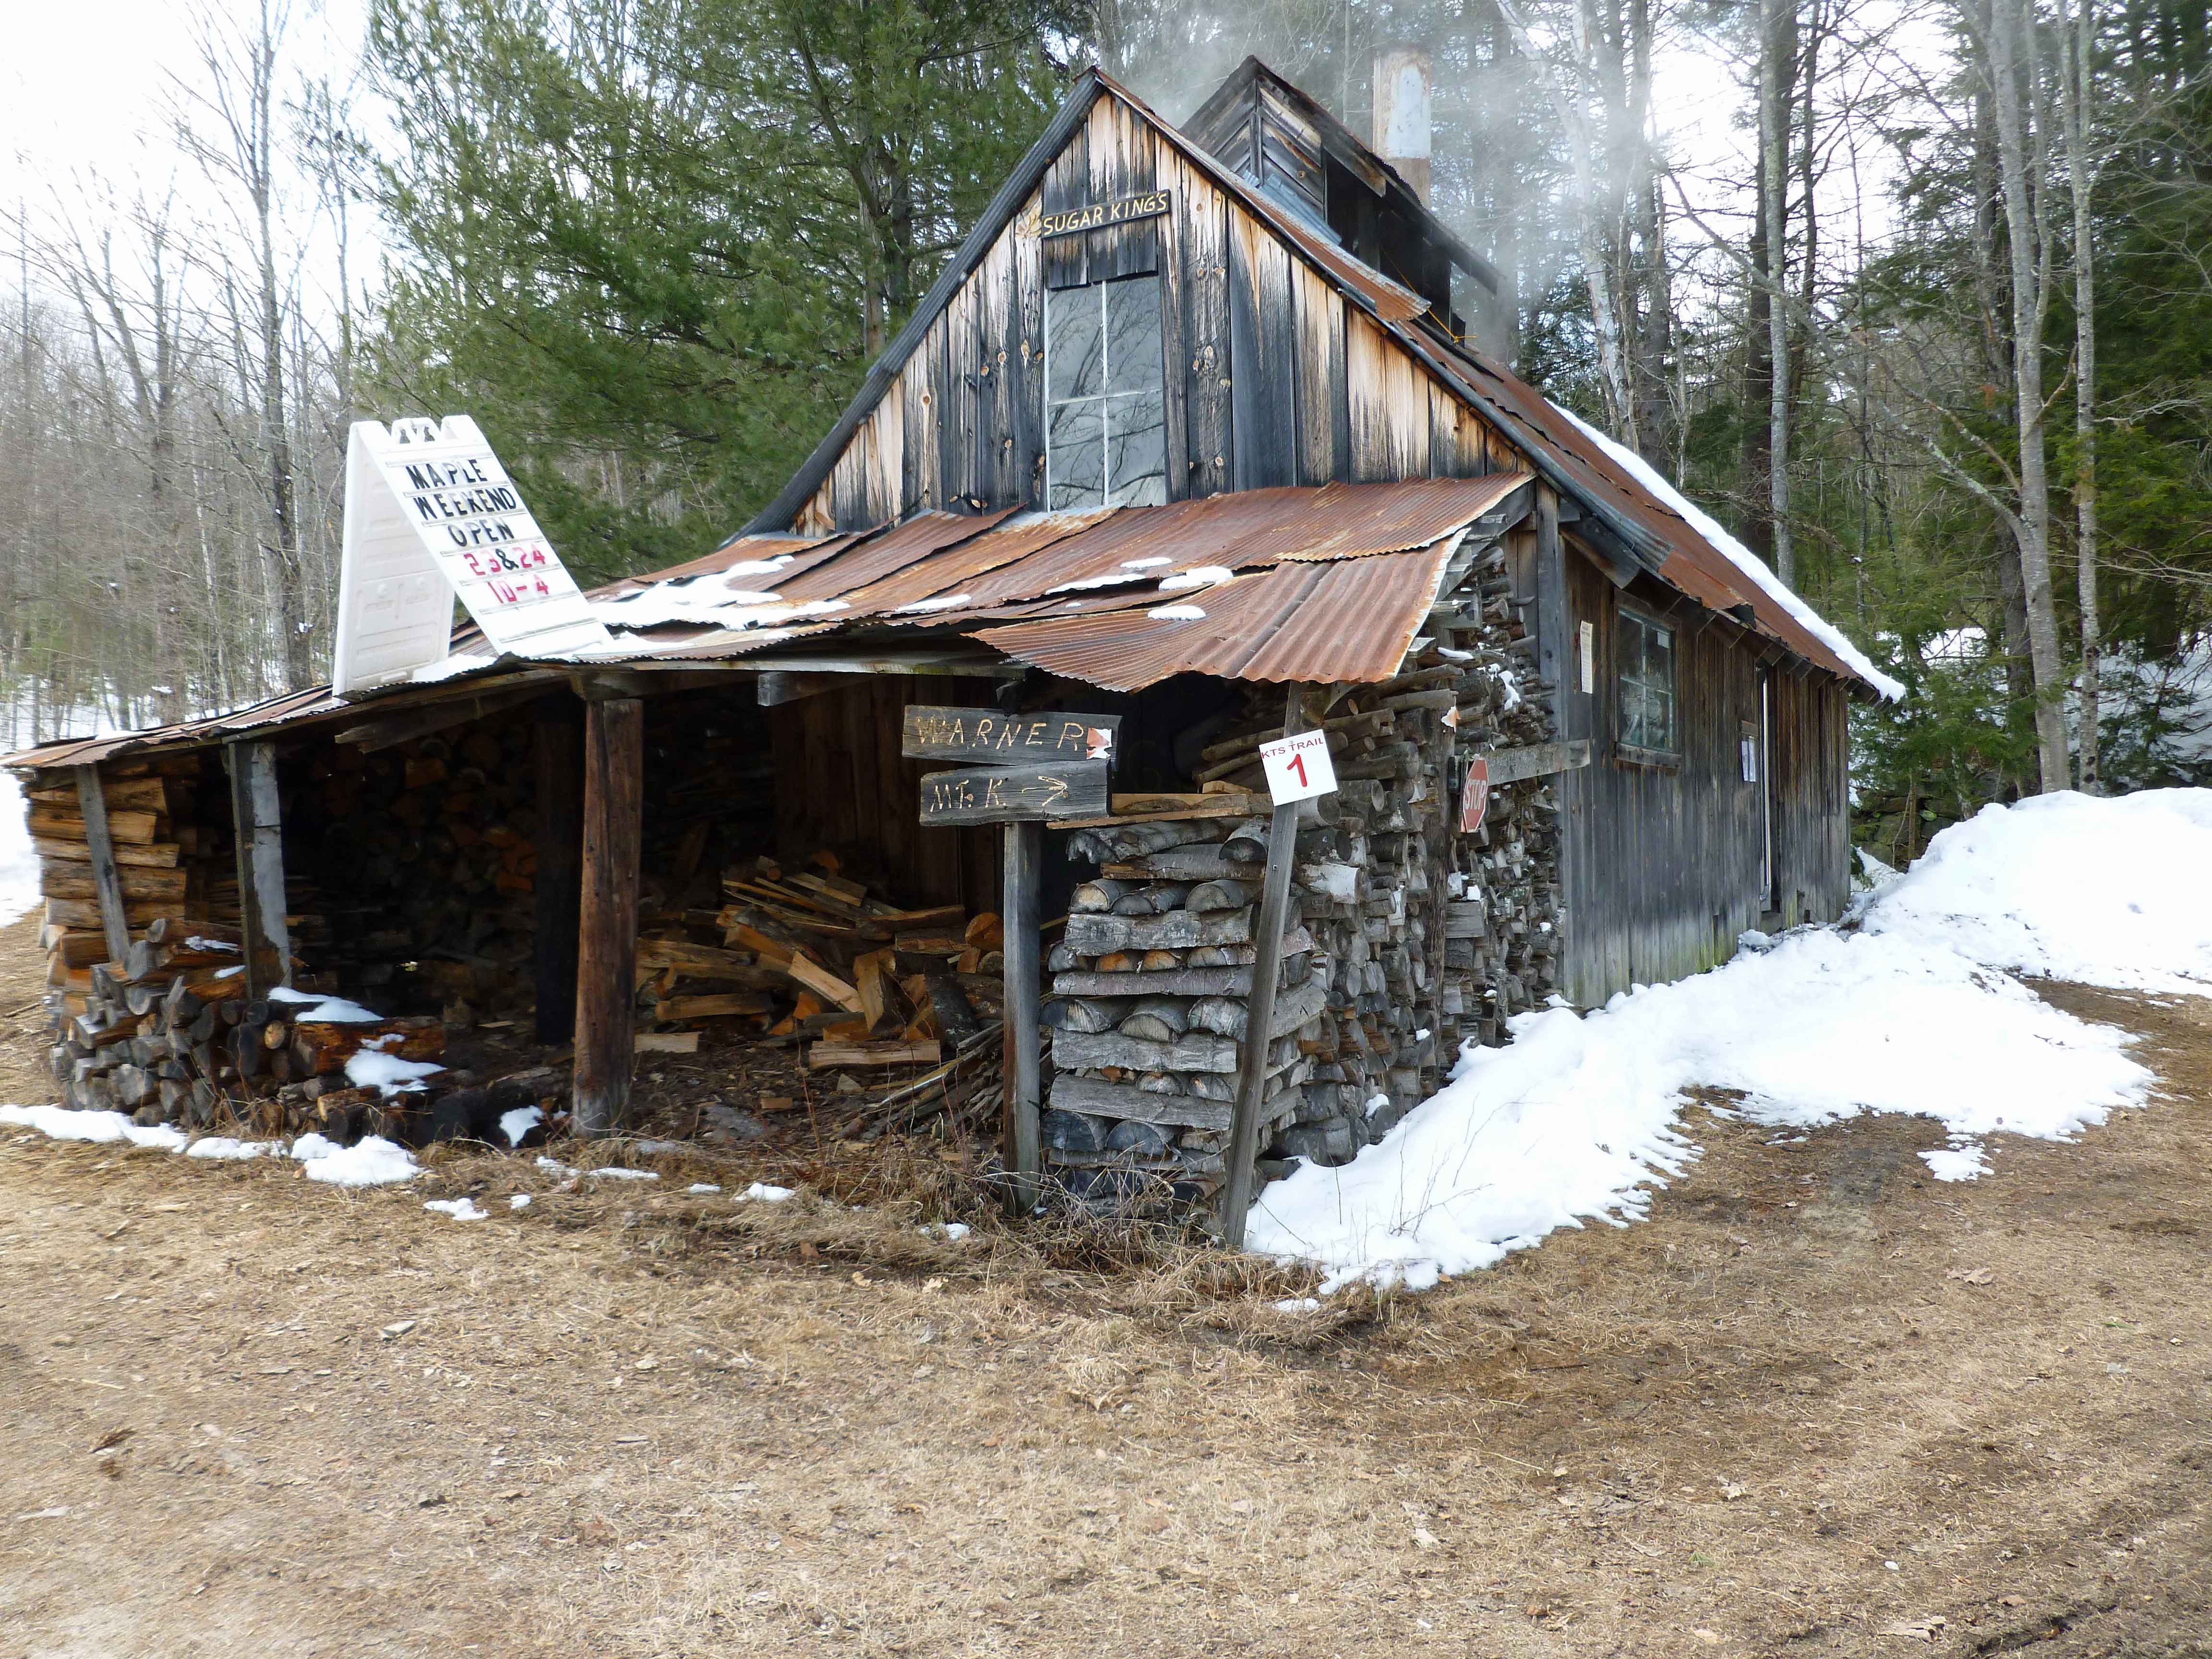
Denise and I drove out to Warner to the Courser Farm Sugar Shack, which has apparently been open since 1957. Have you ever been to a sugar shack? It’s a fun winter experience — they really are shacks, with all the ventilation that the word implies, and specifically chimneys and vents up top. You can see a working shack as you approach — the steam and smoke give them away. Inside, they are remarkably cozy, especially on Maple Weekend — you’ll likely be handed a small cup with a shot of syrup in it, still warm, as you enter. The owners and likely a neighbor or two will be hanging out and chatting, keeping the fires going, watching the sap become syrup. They smell pretty amazing, too — sweet, though not quite syrupy, tinged with wood smoke.
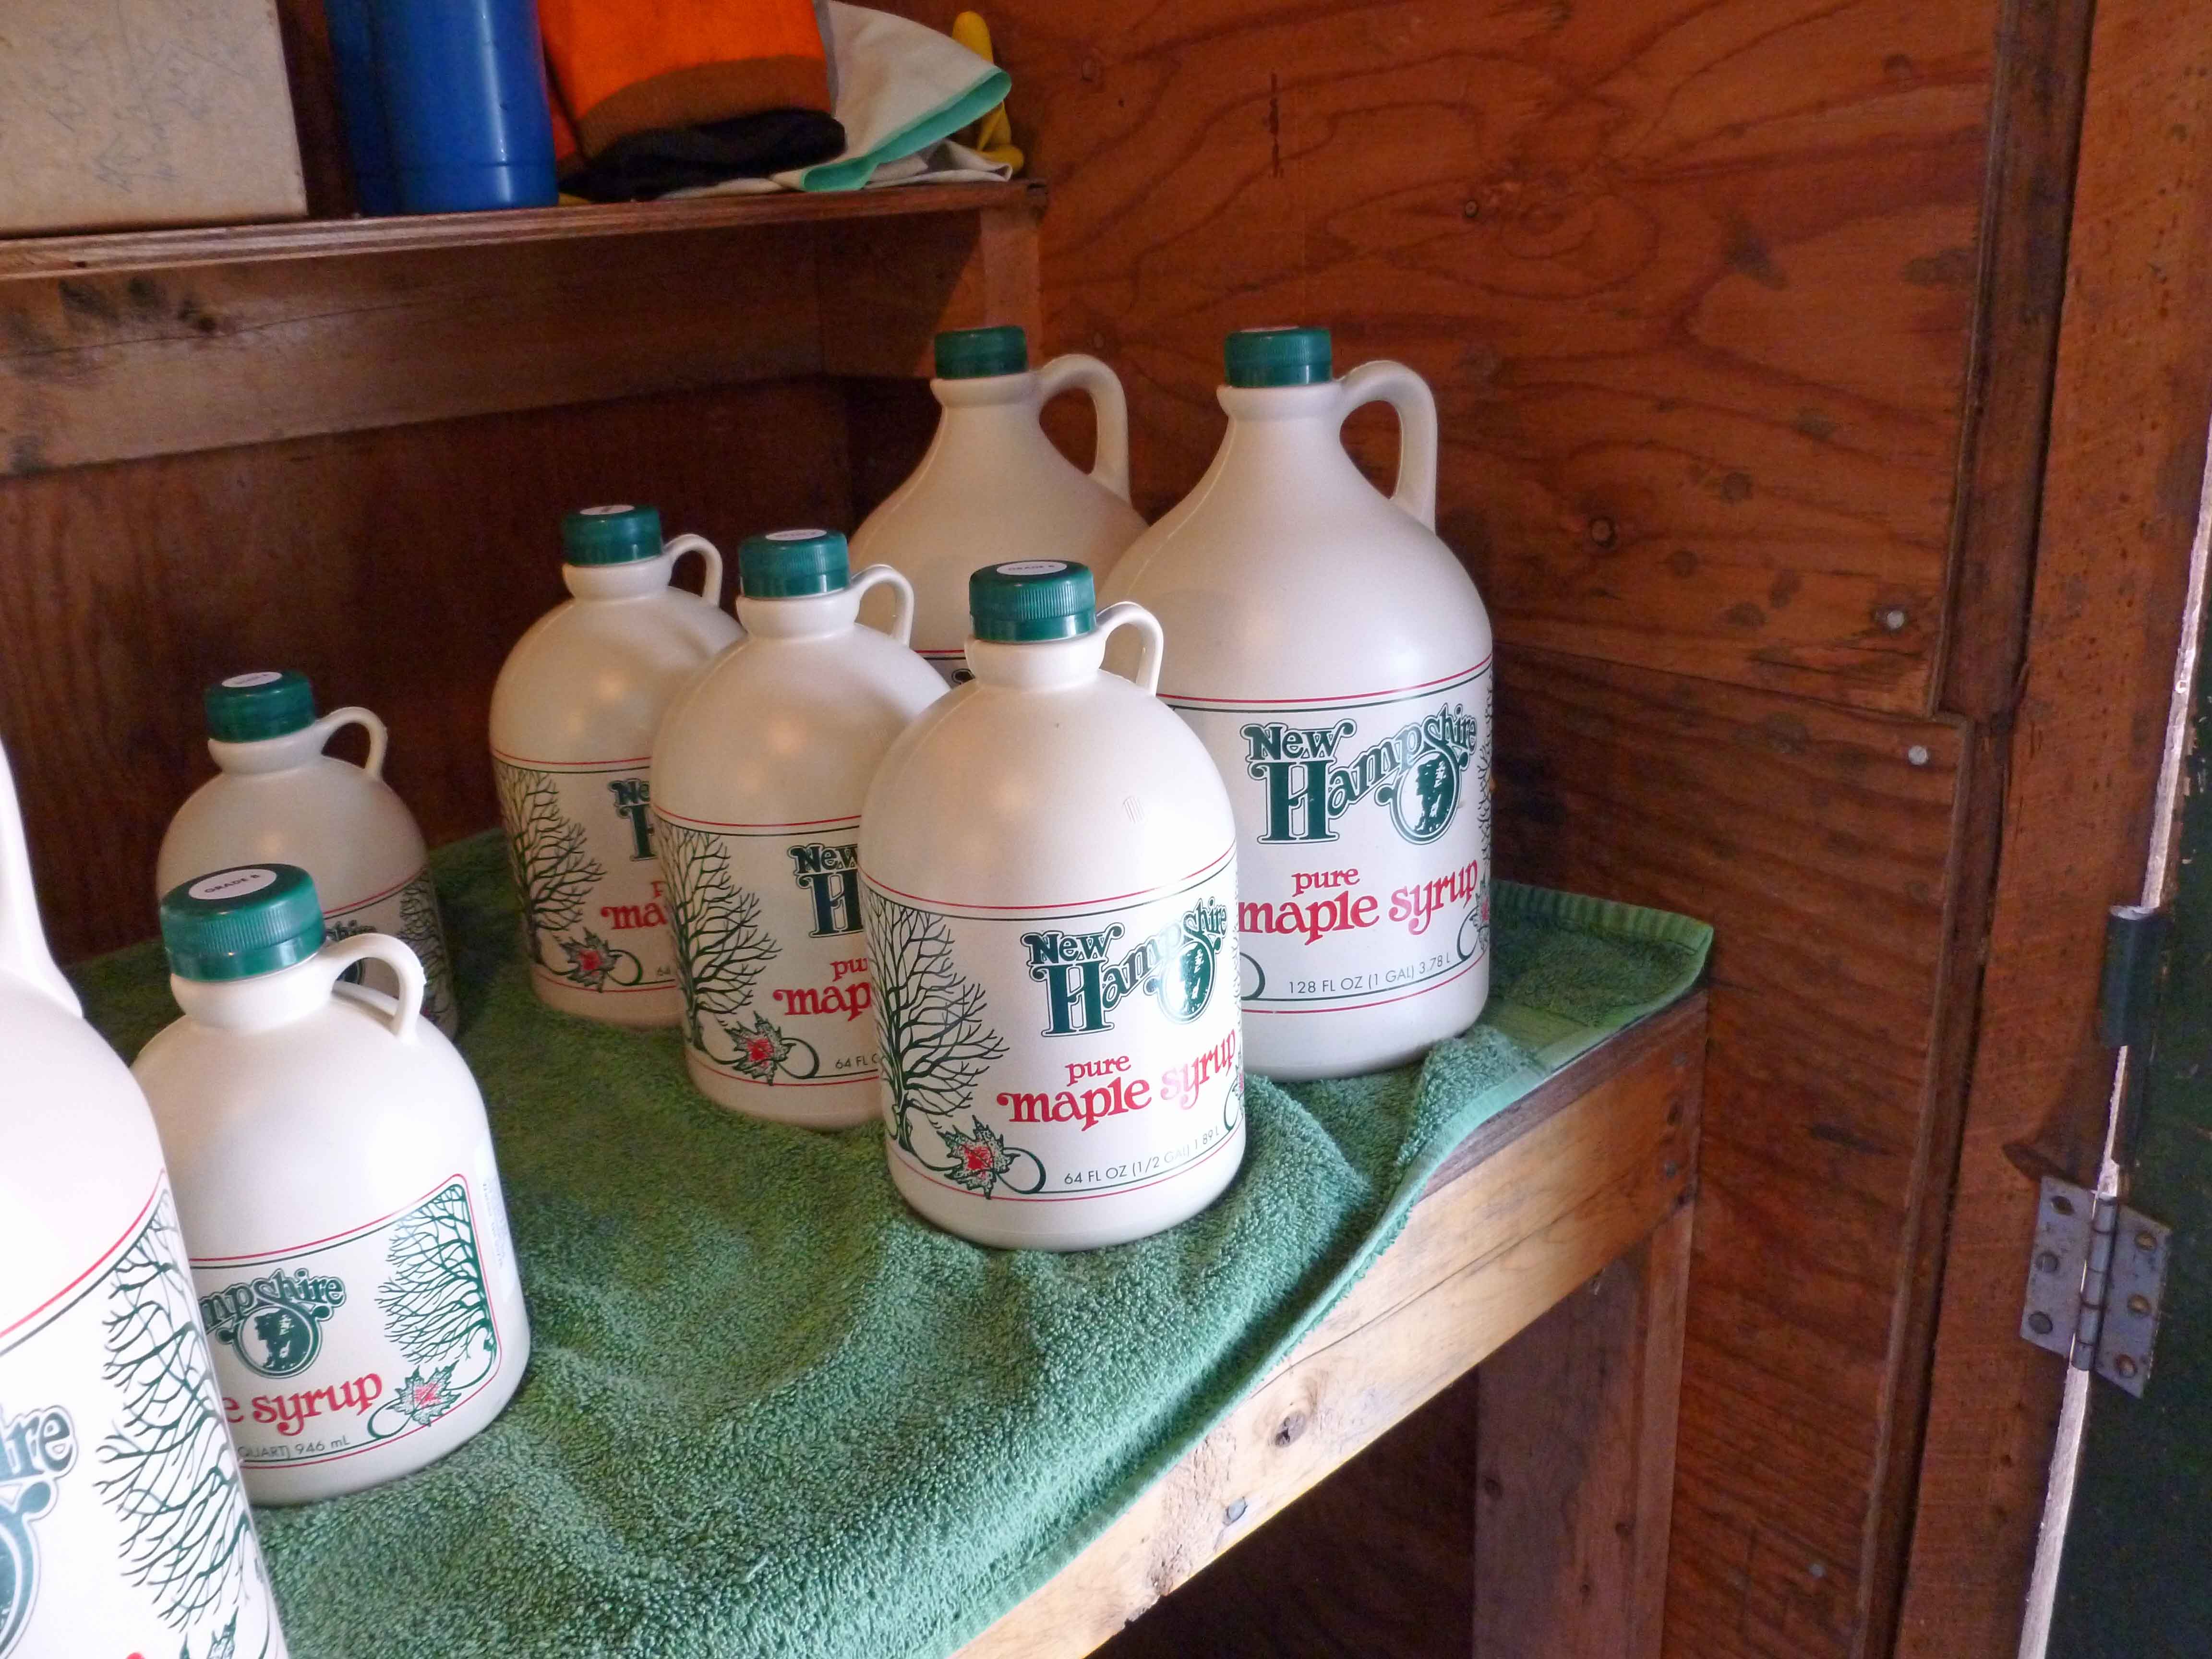
Maple syrup is graded — both by color and letter. Syrup gets darker as the season goes on (from light to medium to dark amber) and grade B is the end of the season, recommended mostly for cooking.
If you want to visit a sugar shack, and you live in the northern tier of North America, look at your local agricultural department’s website. So far as I can tell from a quick search, you can get locally-made maple syrup as far west as Wisconsin, as well as all over New England.
So you’ve got your syrup. What do you do with it now? Maple syrup is a common liquid sweetener in vegan baking and cooking, making a good substitute for honey. If you’re feeling really industrious, try making maple cream from your syrup. It’s labor-intensive, but if you’ve never had it? It will blow your mind. Honestly, though, I think it’s best straight up over pancakes or waffles. I will warn, though, that it’s addictive — once you’ve gone to pure maple syrup rather than “pancake syrup,” you will be hard-pressed to go back. Try it out with Denise’s recipes for gluten-free pancakes and waffles!
Want to learn how to tap a tree in your backyard? Start here.