Notice: Function _load_textdomain_just_in_time was called incorrectly. Translation loading for the wp-ultimate-recipe domain was triggered too early. This is usually an indicator for some code in the plugin or theme running too early. Translations should be loaded at the init action or later. Please see Debugging in WordPress for more information. (This message was added in version 6.7.0.) in /home/maryzahc/public_html/adultfoodallergies.com/wp-includes/functions.php on line 6131 Snacks – Page 2 – surviving the food allergy apocalypse (archive)
Snack [snak], noun: a small portion of food or drink or a light meal, especially one eaten between regular meals. c.1400, “a snatch or snap” (especially that of a dog), from snack (v.). Later “a snappish remark” (1550s); “a share, portion, part” (1680s; hence old expression go snacks “share, divide; have a share in”). Main modern meaning “a bite or morsel to eat hastily” is attested from 1757. Snack bar is attested from 1923. Commercial plural form snax attested from 1942 in the vending machine trade. These recipes will not contain dairy, eggs, gluten, wheat or hazelnuts. If we use a top 8 allergen, we will use a tag warning of its use.
I have a dehydrator! One of Denise’s friends is clearing things out, I guess, and when she asked if I wanted a dehydrator, I jumped on it. I’ve tried some straight up fruit so far, but I was most excited about making jerky and home-made fruit rollups, as well as drying some of my herbs this summer.
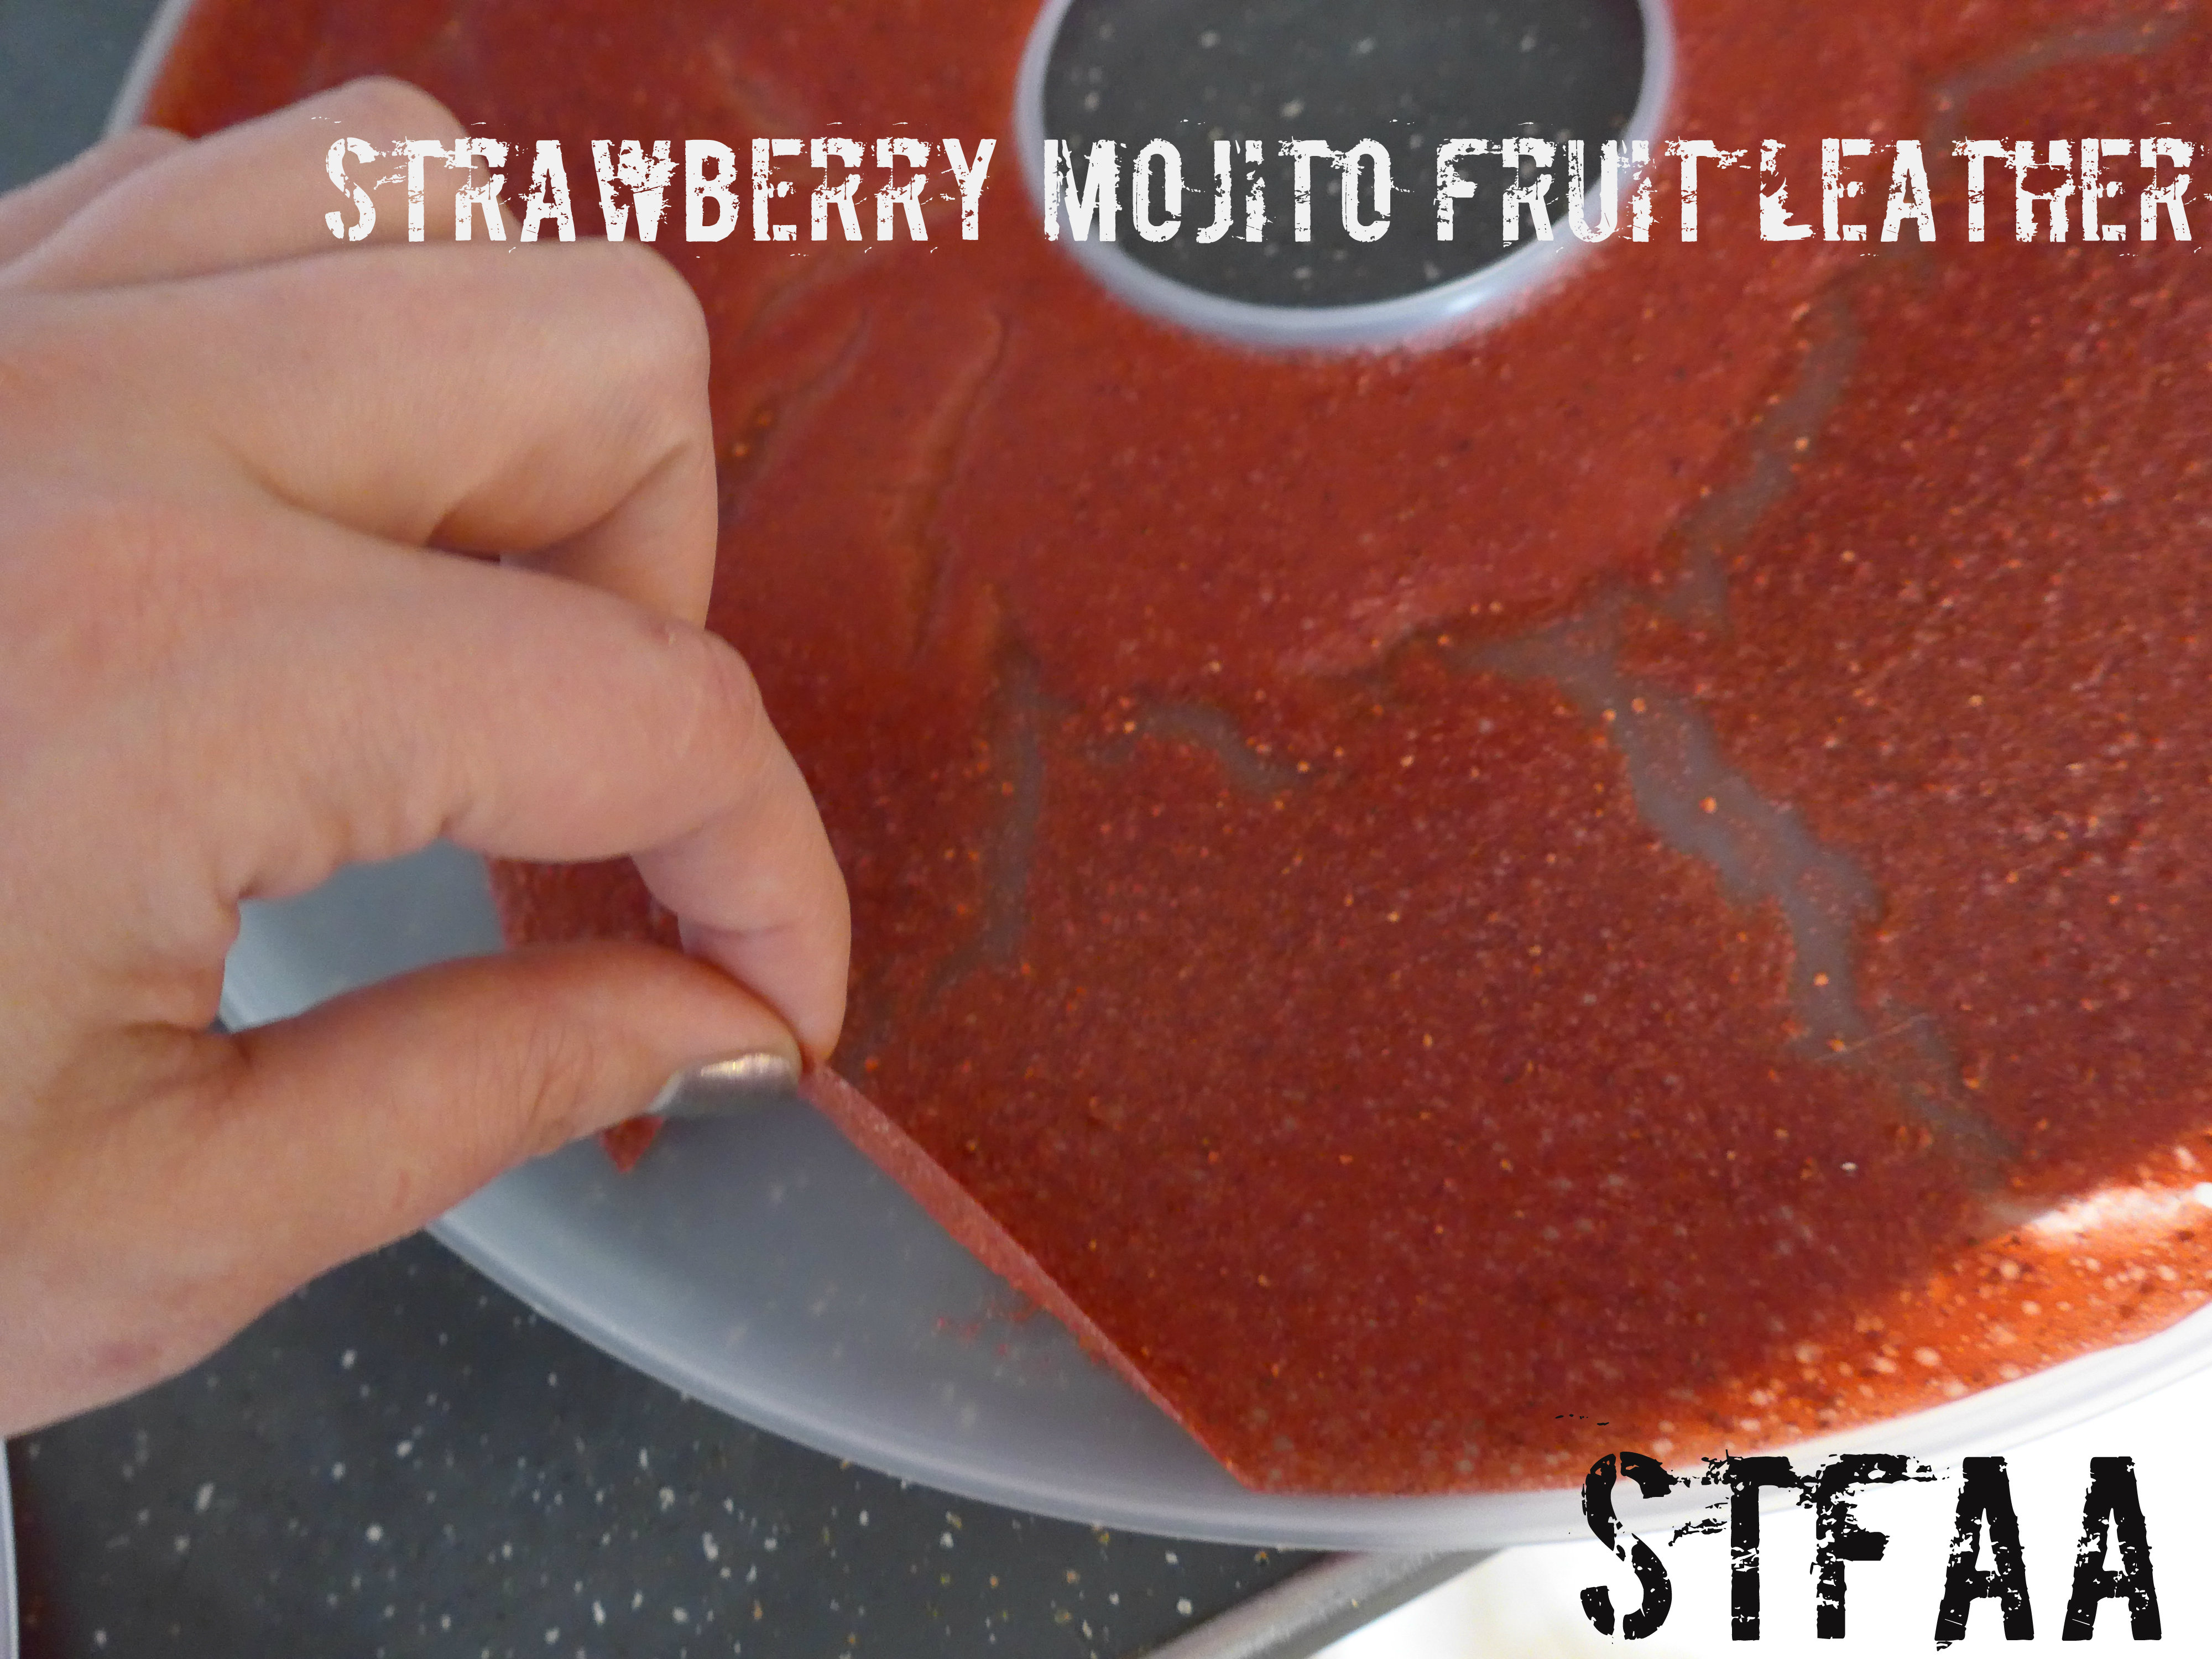
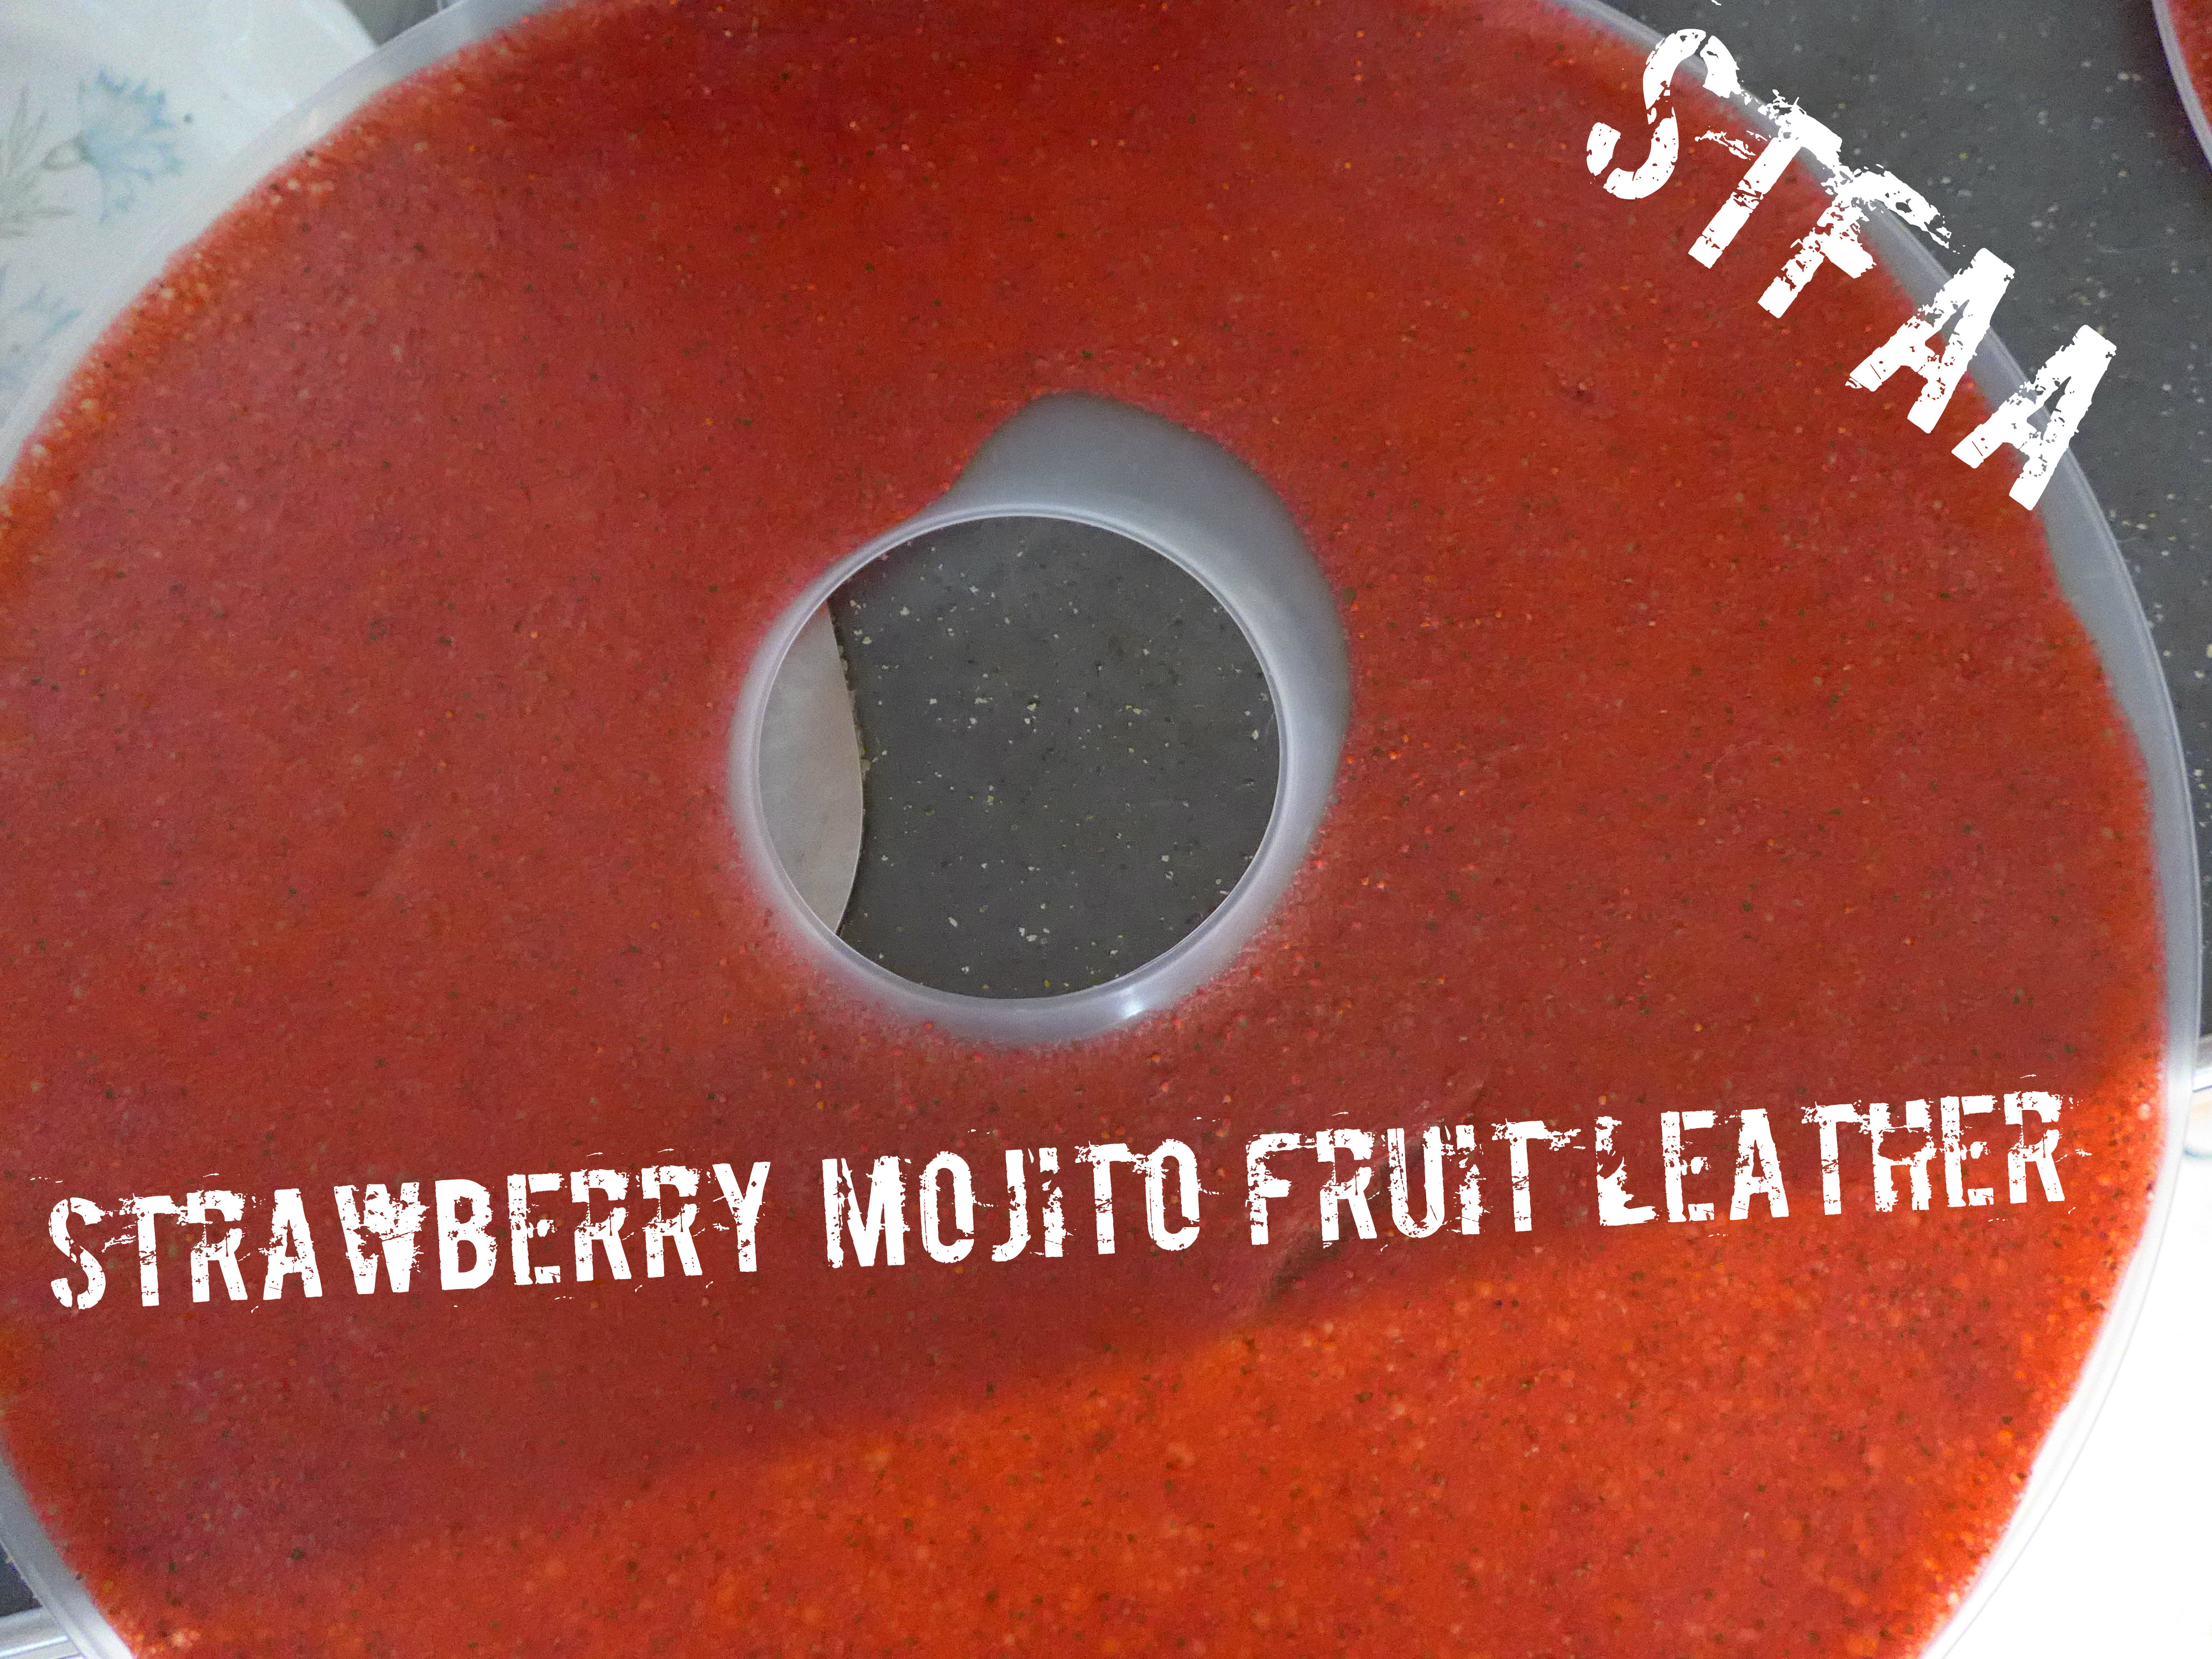
I really like fruit leather as a snack. It’s almost as good as candy, and I had some ideas. First up: strawberry mojito. This is a super easy recipe — IF you have a dehydrator. If you don’t and want to try making these, ask around and see if you can borrow one. It takes about 8 hours to dehydrate these. You will need the liquid trays. This recipe is scaleable — I’m writing it for ONE dehydrator tray, but you’ll run it with four trays (at a minimum). Try other flavors, increase it by 4, or add other food to the other trays.
AGAIN: THIS MAKES ONE TRAY. Scale up as needed, or try your own flavors.
Strawberry Mojito Fruit Leather
Strawberry Mojito Fruit Leather
1 pound of strawberries, washed, with hulls and stems removed
1/4 cup lime juice, fresh squeezed
1 Tablespoon, packed, mint leaves, chopped finely
Puree all ingredients in a blender or food processor. Pour slowly into dehydrator tray and tilt, if needed to spread it out. Dehydrate at medium (140ºF) for 8-10 hours (it may take longer if it’s humid.)
Peel and eat. Will keep for about 2 weeks in airtight containers, maybe slightly longer. I wrapped mine in plastic wrap so that I’d get the experience of peeling them off the wrap — part of the remembered joys of fruit rollups.
My apologies for the rather dull photos. I didn’t check them this time around and by the time I noticed all my “pretty” photos were blurry, I’d eaten all the fruit leather. They tasted great.
I know that most of you know that granola bars have an unearned reputation as magically healthy. Like most things, they have some benefits, some downsides, and it all depends on a) what goes in them and b) how you define “healthy.” I’m not focused on healthy here, though, so if that’s why you want a granola bar, move on. It also has tree nuts and almonds, so apologies to the nut allergic people out there.
What I wanted was something like the granola bars of my later childhood — something that’s basically a candy bar, but with a certain crunch and an airy mouthfeel — plus, dipped in chocolate. Just because. I’m not going to try to explain random cravings; I just cook them. We occasionally had these instead of cookies in our packed lunches, and for some reason, they remind me of this time of year — summer isn’t here, but you know it’s coming.
I started this recipe off to use up a box of Environkidz Chocolate Koala Crisp. (Link informational, not affiliate). I am not a big cereal eater, but I go through phases where I like to eat it as a snack — this wasn’t the right texture or size for that, so it had been sitting on my shelf for a bit. But it was perfect for the main filler in this snack bar — it’s crunchy, airy, and just a bit chocolatey. Any crunchy cereal in small bits will work, so whatever is safe for you, buy that. I would consider using the Erewhon Crispy Brown Rice Cereal, (again, not an affiliate link) as that’s what I generally buy when I want actual cold cereal. But I’ve only made this with Koala Crisp, as I wanted to use that up, and I’d consider buying it again to make these bars.
To the cereal, I added a bunch of trail mix staples — coconut, almonds, and dried cherries. (Note: dried cranberries or raisins work better, as they are smaller and don’t mess up the overall texture. But I just like dried cherries better.) As an adult, I wanted a little more variety of taste and texture than the kiddy granola bar I remember (but still with chocolate on). Make a sticky sauce (this is messy, I know. Sorry. It works.) and then add chocolate. Ka-blam. Childhood snack. Maybe healthier, maybe not, but it’s safe for me.
Crispy Cereal Bars — first without chocolate, then with, then sliced
Cereal Snack Bars
NOTE: dried shredded coconut appears on the ingredients list TWICE. This is not a mistake. I just find it less confusing to list it twice than tell you you need x amount, divided. This is not the sweetened coconut flakes — you could try that, but I think it would be too sweet. This is just pure dried/dessicated shredded coconut, which is wonderful.
1 cup crispy cereal
1/4 cup shredded coconut
1/4 cup smallish dried fruit (I used cherries)
1/4 cup thinly-sliced almonds (could also use chopped, but not whole — they won’t blend in)
3 dates, pitted (about 50g)
2 Tablespoons shredded coconut
2 Tablespoons coconut oil
4 Tablespoons brown rice syrup
1 cup chocolate chips (brand that’s safe for you)
Prepare an 8×8 inch baking pan by cutting a sheet of parchment that will fit in it. Don’t worry about being exact — just make sure you have enough to cover the bottom and sides when it’s filled.
Mix the dry ingredients (cereal, coconut, dried fruit, almonds) in a bowl.
In a food processor, add the dates, 2T shredded coconut, coconut oil (this can be solid, it’s fine), and brown rice syrup. They are in that order because you can use the same tablespoon if you do them in this order (the coconut oil will help the brown rice syrup not stick). Pulse it until the dates are chopped up well, then just blend. You will likely need to scrape the sides a few times, as this is really sticky. I’d suggest a silicone spatula, if you have one, and be careful not to cut it on the blades (I’ve lost a few this way).
Add the wet ingredients to the dry. It will take a little work to get this out of the food processor. Again, the silicone spatula is the least sticky thing I’ve tried. Using the spatula, mix the wet and dry ingredients. Mostly, this is like kneading bread — bring up a scoop of the dry ingredients and sort of press them into the mass stuck into your sticky goo from the food processor. I am assuming that if you keep working at it, this will eventually incorporate everything. I’ve never managed to do that — I just grease up my hands with a bit of coconut oil and mix with my hands after a bit. It works fine.
When you have a mostly solid mass of sticky bar ingredients, dump it into your prepared pan and press it down. I don’t worry too much about making it exactly fill the corners — the rustic edges make it look handmade! But always feel free to be more precise than I am.
Put this in the fridge to set, maybe 15 minutes or so.
Melt the chocolate. The microwave is easiest (20 second intervals, stirring), but I don’t own one, so I use my double boiler. Originally I had planned to dip each bar in the chocolate, but I realized that the easiest way would be to pour a layer of chocolate onto the whole pan, let it set, and then cut the bars. So do this — it is WAY less messy than dipping and it wastes less chocolate.
Let the chocolate set, then cut into bars. These keep best in an airtight container in the fridge.
When Mary Kate and I began to plan the cookout we held several weeks ago (grilling, friends and lots o’ posts for the blog, what could be better?), we started with thinking about what ingredients were in season and could be grilled. We wanted to do a dessert, but I couldn’t figure out anything with my restrictions by the time we were solidifying the menu. I had seen a recipe for peach salsa for canning, but I wondered what it would be like grilled instead, because it would bring out the sweetness of the peaches and combine it with some lovely caramelized, smokey flavors. So we tried it. It’s good. And for those of you that can’t have chips like me (the corn chips are only to make the picture pretty in my case, although Mary Kate can eat them), this salsa is really good on pork chops as a sauce. You could also use it as a marinade or a glaze on pork or chicken, depending on how finely you chop the ingredients or just put it in the blender for a peach barbecue sauce. This is a low heat salsa, so don’t be afraid because I’m posting it. For the chili heads, don’t worry, I’ve got a hot sauce coming up in few weeks that blows my head off, and will have appropriate warnings.
Grilled Peach Salsa
1 pound of peaches, grilled
1 small red red onion, grilled
1/2 of a orange bell pepper, grilled (If you don’t know what to do with the half of orange bell pepper you’ll have left over, de-stem and de-seed it, put it in a freezer zip top bag and put it in your freezer. Peppers need no additional prep to freeze. Use it the next time you make a soup, stew, chili or marinara sauce.)
2 jalapeno peppers, grilled
1/2 of a bulb of garlic, with top cut off and with most of the outer layer peels removed (Grill the whole bulb and put the remainder in the fridge to use for mashed potatoes or something else where roasted garlic would be awesome)
1/2 tablespoon of olive oil or other safe-for-you oil
1/4 cup of white wine vinegar
2 Tablespoons brown sugar
1/2 teaspoon of ground cumin
1/8 teaspoon of ground cayenne pepper
**Please keep in mind as you look at the pictures that I was cooking a whole lot of other things the day we were grilling, so the pictures do not reflect the correct amounts of the ingredients shown, or may show additional ingredients. Also, my original recipe made a holy ton of salsa, so we cut the ingredients in half for the purposes of this post.
De-stem and de-seed your peppers.
Peppers de-stemmed and de-seeded – Photo by J. Andrews
Place the peppers on the grill and grill until they get a bit tender and have a bit of char on them.
Peppers on the grill – Photo by J. AndrewsPeppers and Garlic on the grill – Photo by J. Andrews
Take your garlic bulb, slice off the top so that the cloves are exposed a bit (see the picture and description in our previous Grilled Salsa recipe), and place it on some aluminum foil large enough to wrap the garlic in as shown in the picture above. Drizzle the olive oil over your garlic bulb, and wrap the aluminum foil around it and place it on the grill. Roast the garlic until the cloves are cooked and mushy.
Trim and peel your onion and then slice it in about half to one inches slices and place on the grill. Grill until you have a bit of char, and the onion is tender. (Ours were a bit more charred probably than strictly necessary, we were having issues with the grill, totally user error.)
Sliced Onions – Photo by J. AndrewsSliced onions on the grill – Photo by J. AndrewsSliced onions on the grill just before they got a bit too done – Photo by J. Andrews
Cut your peaches in half and remove the pit. On some of them I had to cut the peaches in quarters to get the pit out, but it’ll still work, it’s just halves are a little easier to manipulate on the grill. Place the peaches on the grill and grill until they are a bit more tender and have some nice charring on the outside.
Peaches in halves and quarters – Photo by J. AndrewsPeaches on the grill – Photo by J. Andrews
Once all your grilled ingredients are cooked, squeeze out the roasted garlic from the cloves, and put the garlic, peppers, onions, and peaches in a blender or food processor, and process until chopped to the level of chunkiness that you like. I used the manual food processor from Pampered Chef because I wouldn’t have to truck everything back inside or find an electric outlet (no affiliation, I just like it). You are likely going to have to process in batches. Place all the chopped ingredients in a large bowl and add the white wine vinegar, brown sugar, cumin and cayenne pepper. Mix thoroughly.
Completed Grilled Peach Salsa – Photo by J. Andrews
I don’t know that I was aware that beef jerky was a commercial product until college. It pretty much showed up in the Westerns I was forced to watch as a kid, in pioneer books, and about once a year out of the oven, right before the oven got cleaned. Homemade beef jerky was a tradition. Once, my mother tried to send me some in grad school. As far as I can tell, the delivery person literally kicked the package into my tiny mailbox, shattering the protective jar into a whole batch of fantastic jerky. I still mourn that poor jar of wasted tasty goodness (that was, I think, about 15 years ago).
Thinking about food for road trips and vacations, hikes or picnics, jerky is a pretty good staple. If it got people out to the Plains or the west coast by wagon train, it can probably get you through a long drive or a weekend at a remote cottage, and it’s definitely an airport security-safe food. I will say I have no idea how long this is shelf-stable, but I’m pretty sure that the last jar was hidden for a few months at home. So at least a few months?
Jerky is pretty easy to make. It’s a bit time-consuming, but most of that is just waiting around and doing nothing. My plan usually starts with throwing a frozen flank steak in the fridge to thaw all day while I’m at work. That night I make the marinade and slice the meat. The next morning, I stir/flip the meat in the marinade. When I get home from work, I throw it in the oven. So, yeah, it’s a two-day process, but maybe 45 minutes of that 48 hours is active work. One pound takes up about one oven rack, so if you like this, it’s easily doubled without overloading your oven. Know that you will likely need to and want to clean your oven afterward.
This is a variation on our family recipe, altered to removed the soy and a few other ingredients that can be problematic with allergies. If you can have soy, you can use it here — remove all other salt in the recipe; if you need to be gluten-free, use GF tamari, but to me it tastes quite a bit saltier than regular soy sauce. Adjust accordingly. I have not tried this with coconut aminos, but let me know how it works if you do. You will want to make the faux soy sauce (linked below) beforehand if you’re using it, but it does not take long.
Jerky in process. It isn’t pretty, but it tastes good.
Homemade Beef Jerky
1 lb. flank steak
1/2 cup dry sherry or dry wine
1/2 cup faux soy sauce (I used this recipe without the fish sauce and with a bit more salt, closer to 1/2 teaspoon, but I was doing it by taste at that point)
1 Tablespoon natural sugar (regular table sugar will work, but unprocessed sugarcane adds better flavor, likely from the natural molasses content)
2 teaspoons garlic powder
1 teaspoon onion powder
1 teaspoon dry mustard powder
1/2 teaspoon celery salt (use crushed celery seed if you are using soy sauce or tamari)
1 teaspoon lime juice (lemon is probably okay, I just have a lot of limes right now)
1/2 teaspoon hot sauce of your choice (absolutely optional)
salt to taste
Freeze your meat for at least an hour. Alternately, take meat from the freezer and let thaw about 8 hours in the fridge. Having partially frozen flank steak will allow you to cut it more thinly and evenly.
Trim the fat from the flank steak. Then slice into approximately 1/8-inch slices, with the grain of the meat. Or, you know, do your best to slice it thinly, period, and call it “hand-cut” and “artisinal.” This is what I do.
In a glass baking dish, combine the ingredients for the marinade and whisk or stir with a fork until the sugar is dissolved thoroughly. Taste it and adjust the salt. You want this marinade to be salty, but not overly so. Your jerky will be less salty than the marinade.
Add the meat strips and stir to fully coat and mostly submerge. Cover and refrigerate at least overnight (again, I usually do overnight, stir, and most of the next day — that’s just how it works in my schedule).
Lay your meat out directly on the oven rack.
Turn your oven down to the lowest setting (mine goes down to 170°F), and leave the oven cracked. Let the jerky dry out for 5-7 hours — you probably know what jerky should look and feel like, so test it at 5 hours. 6 usually works for how I cut the meat and how my oven works. After one or two batches, you’ll know where this stands for you, too.
Remove jerky to an airtight container, glass if you have it, and travel on.
Beef Jerky is ready for its close up. Photo by J. Andrews
Macadamia-Pistachio-Cherry Raw Balls. Photo by J. Andrews
Apologies to the nut-allergic. These are not for you. Come back next week for a nut-free recipe? For those of you who can have nuts, these are for you.
I rely on a few travel snacks to get me through times when emergency rations are necessary. Lärabars are one of those snacks, and I usually have one in my bag (as well as a few at the office). But because they are “emergency” food that I eat several times a month, I frankly get a bit bored of the few flavors I like. I wanted to see if I could make something along the same lines, using things I had in the house, and have some snacks for this week at work. Dried fruit and nut things have a good combination of sugar, protein and fat that, for me, at least, makes for a good snack that knocks down hunger for an appropriate amount of time. You know, until your next snack. I eat on the hobbit schedule.
Between occasional trips to Trader Joe’s and our local natural foods store, I have a great selection of seeds, nuts, and dried fruits. Sometimes they get used for cookies or oatmeal toppings or an attempt at trail mix (which I always think I’m going to like more than I actually do), but mostly, buying them sounds like a good idea. I pulled everything out of the cabinet for taste-testing before deciding on this combo of macadamia nuts, pistachios, and cherries, with some dates and cacao nibs thrown in. The macadamias and pistachios are pretty creamy, and the cherries are tart, and the combination works out well.
My version might not be fully raw — I don’t know how the cherries or dates were dried — but if that’s important for you, find raw versions.
Macadamia-Pistachio-Cherry Raw Balls. Photo by J. Andrews
Macadamia-Pistachio-Cherry Raw Balls
makes 16
1/4 cup raw pistachios, shelled
1/2 cup raw macadamia nuts
2 pitted Medjool dates
1/4 cup dried Montmorency cherries (pretty sure any dried cherries will work, but I like the tartness of these)
2 Tablespoons raw cacao nibs
Rough chop the pistachios in the food processor, and set aside.
Add the macadamia nuts and the Medjool dates to the food processor, and process until you’ve made a nut butter. Add the cherries, and pulse them into the mixture. Add the pistachios back in, and the cacao nibs. Pulse to mix.
Dump the mixture out onto a sheet of parchment paper and knead it together. Chill at least 10 -15 minutes in the fridge, wrapped tightly in the parchment. Roll into balls, about 1/2 a Tablespoon each. Store tightly covered in the fridge.
1/4 cup of Denise’s All Purpose Gluten Free Flour Mix (I used the Gluten Free Girl’s post on gluten-free holiday baking and modified it a bit – to make 500 grams of the mix, you’ll have a bit extra to use for other recipes, whisk together thoroughly 50 grams of oat flour, 50 grams of teff flour, 75 grams of sorghum flour, 25 grams of potato flour, 125 grams of sweet or glutinous rice flour, 75 grams of potato starch, 50 grams of arrowroot, and 50 grams of tapioca starch) or use a safe for you commercial gluten free all purpose flour.
1/4 cup of brown rice flour
1/4 teaspoon of salt
1/4 teaspoon of ground chia seed
1 teaspoon of Italian Seasoning mix or (or a bit of oregano, basil, marjoram, sage, rosemary, and thyme to add up to 1 teaspoon)
2 teaspoons of olive oil or a safe oil for you
4 Tablespoons of water.
Preheat oven to 375°F.
Put all dry ingredients in a bowl and whisk to combine.
Dry ingredients in bowl
Then add the oil and water and mix with a silicone spatula until the dough holds together in a ball.
Dough after adding wet ingredients and mixing
Flatten the ball to a frisbee-like shape, and then place it on a sheet of parchment paper.
Dough in Frisbee shape on parchment paper
Place another sheet of parchment paper over the dough and roll out the dough between the two sheets to about an eighth of an inch.
Dough being rolled between two sheets of parchment paper
Peel off top layer of parchment, and use a knife to cut lines in the dough (don’t cut through parchment). The picture shows that I used a ravioli cutter to get the squiggly lines, but at the end it started getting clogged and stopped doing the squiggly lines because it all gummed up in the wheel, which was a pain to clean. Which is why I suggest a knife.
Dough after rolling and cut up into cracker size pieces
Transfer the parchment with the dough on it to a sheet pan.
Dough and parchment paper on sheet pan
Bake for 15-20 minutes. Leave the crackers on the pan to cool. Once completely cool, transfer to an airtight container to store, or just eat them all. That’s a viable option too. Enjoy!
So the holiday season has brought with it the groaning tables of baked goods and candies, both homemade and not, and none suitable for the food allergic. So it’s time to make your own! I’ve made a few recipes of gluten-free vegan cookies, with mixed results (all edible, none outstanding, none of the recipes my own), but cookies are time-consuming and kitchen-consuming. So are cakes and pies.
Needing a last minute treat for the holidays, to satisfy my own sweet tooth, which spends a lot of time being teased these days, I wanted to try making truffles out of coconut milk and chocolate, with some added flavors to deepen the chocolate’s flavors. I had a great idea, but like so many great ideas, it didn’t pan out quite as planned — these didn’t set up the way I wanted them to, so I froze them. The result was a homemade version of those single bite ice cream treats that came out a few years ago.
They are super quick to make, with most of the time involved being cooling and freezing the chocolate. The dishes involved are minimal. These should keep for a few weeks in the freezer, and some of them are going to work with me for the mid-afternoon chocolate cravings.
Quick Chocolate Bites
Quick Chocolate Bites
10 oz of chocolate, chopped (or use chocolate chips)
13.5 oz of full-fat coconut milk (1 can)
3 Tablespoons good berry jam (strawberry, raspberry, black cherry), seedless recommended (and by “good,” I mean that I generally choose jam — and many food products — by looking for the one with the fewest number of ingredients. For jam, I prefer sugar be used rather than any other sweetener, and few or no preservatives)
1 teaspoon of basil, chopped finely, optional (the frozen cubes of herbs are great for recipes like this)
Put the chocolate in a heat-safe bowl, and set aside.
In a sauce pan, combine the coconut milk, jam, and basil, if using. Whisk together, and bring to a boil.
Pour the boiling coconut milk mix over the chopped chocolate, and stir until chocolate is fully melted. Let the mixture cool until it’s not steaming anymore, then cover and refrigerate until fully chilled (overnight is good).
Using a spoon or small cookie scoop, portion out approximately 1 Tablespoon dollops of the pudding consistency mixture onto a foil or parchment paper-covered cookie sheet, and freeze until solid, about an hour. Store in sealed containers or plastic bags. Use to satisfy chocolate or sugar cravings as they arise.
So, before the whole corn and coconut thing, I was an aficionado of fruit flavored pure sugar candy. If it had fake coloring, fake fruit flavors and was primarily made of out sugar (meaning corn syrup), then I was your girl. Skittles, Nerds, Sour Neon Gummy Worms, Sour Gummi Watermelon Slices, Jolly Ranchers, Starbursts (particularly the fave reds), Jelly Belly Sour jelly beans – anyway, you get the picture, if it was aimed at ten year old kid, I was a fan. Candy, caffeine and I had a love triangle going on while I was in college, law school and during my years of private practice. Candy was part of the fuel that I needed to get through the day while going 400 miles per hour, with generally little sleep. I seriously should have had stock in at least the top three, Skittles, Starbursts and Jolly Ranchers. At least maybe I’d have recouped some of what I was spending at Rite-Aid on candy. So you can imagine the horror when I had to give them all up.
A few l months ago, I started making citrus extracts, lemon, lime and orange in anticipation of one day making my own safe candy. (Most extracts use corn alcohol to make the extract. I used the zests of the citrus fruit and Luksusowa Vodka because it’s made only from potatoes, whereas some vodkas may also use grain or corn. See this post for directions.) After they were done, I let them sit for a couple of more weeks with a coffee filter over the jar to let them evaporate down a bit to try to concentrate the flavors.
Then I started poking around for gummy recipes. I love watermelon flavored candy. I love, love, love Watermelon Jolly Ranchers, and I used to love to drink Watermelon Schnapps Pucker with Sprite because it tasted just like a Jolly Rancher, only in liquid form. Now all three of those things are off-limits. But I came across a recipe for Lemon-Watermelon Gummies so I had to try it. I’ve modified this recipe because honey can be problematic for people allergic to corn if you don’t know whether your beekeeper is feeding his bees corn syrup or not. And then I had to try it with just lemon, so I further modified things. Both versions are provided below, but I think you could do any fruit juice if safe for you (most commercial juices are not safe for people allergic to corn). The gummies themselves result in candies that taste like real fruit and aren’t as sweet as store bought gummies, but they work for me and I probably shouldn’t be eating all that sugar anyway. I’m kind of liking the lemon as an after dinner palate cleanser, as it is a very refreshing pure lemon taste that melts in your mouth. If you want them to be more sweet to match the commercially available gummies, I’d up the sugar to about 1/2 a cup total for each recipe. Try it with the lower sugar though, you may find you don’t need it 🙂
Lemon Watermelon Gummies
4 cups of peeled and cubed watermelon
1/4 cup of lemon juice (or the juice of one lemon)
Place watermelon, lemon juice and lemon extract in a blender. Blend it until the watermelon is completely pulverized. You want this as smooth as you can get it. Wish I had my friend Mary’s Vitamix for this, but my plain old blender did okay. Using a fine wire mesh strainer, strain out any remaining pulp so that you just have juice left.
Straining out watermelon pulp
After straining out the pulp, put one half of the watermelon liquid into a sauce pan with the sugar. On medium low heat, stir until all the sugar is dissolved and then add the gelatin and whisk until it is smooth. Remove the pan from the heat and add the remaining watermelon liquid. Whisk again until smooth.
Watermelon and Gelatin Mixture
Spray silicone molds or ice cube trays with a neutral, safe for you cooking oil. I used a light olive oil in a mister. You don’t want an oil that tastes like anything. (As a side note, apparently there is some debate about whether or not to grease silicone. I have always greased silicone baking molds with oil, shortening and margarine when I could still eat it, and have had no problems whatsoever, but I also don’t use non-stick cooking spray on them. According to this article, if you over grease when baking you may get a sticky residue that’s difficult to wash off. I had no issue cleaning these molds after this recipe, but if you do, use some baking soda with your dish washing detergent when handwashing, and it’ll likely be fine. Also, if you try doing it without oil, let me know how that goes.) Make sure your silicone mold is on a cookie sheet because you are going to move it into the fridge or the freezer and you don’t want a big mess all over your floor and counters. Carefully pour the mixture into your molds. I also ended up having enough for a a couple of gummies in a silicone ice cube tray as well.
Watermelon Gelatin Mixture in Silicone Molds
Put the silicone mold in the refrigerator or freezer. The gummies will set up in about 15-20 minutes in the freezer and about 30-40 minutes in the refrigerator.
Lemon Gummies
This version makes about half of what the Lemon Watermelon version did because that seemed like a lot of gummies of one flavor to me. If you wanted, you could replace the lemon juice with lime juice, grapefruit juice, or orange juice as well. If I did any other kind of fruit juice other than citrus, I’d probably just use 2 cups of juice and skip the water.
Juice your lemons. After straining out the pulp, put the lemon juice into a sauce pan with the sugar. On medium low heat, stir until all the sugar is dissolved and then add the gelatin and whisk until it is smooth. Remove the pan from the heat and add the water. Whisk again until smooth.
Lemon Gelatin Mixture
Spray silicone molds with a neutral oil as described above, and place the silicone mold on a cookie sheet. Carefully pour the mixture into your molds.
Lemon Gelatin Mixture in Silicone Molds
Put the silicone mold in the refrigerator or freezer. Again, the gummies will set up in about 15-20 minutes in the freezer and about 30-40 minutes in the refrigerator.