Notice: Function _load_textdomain_just_in_time was called incorrectly. Translation loading for the wp-ultimate-recipe domain was triggered too early. This is usually an indicator for some code in the plugin or theme running too early. Translations should be loaded at the init action or later. Please see Debugging in WordPress for more information. (This message was added in version 6.7.0.) in /home/maryzahc/public_html/adultfoodallergies.com/wp-includes/functions.php on line 6170 Desserts – Page 5 – surviving the food allergy apocalypse (archive)Skip to content
Dessert /dɪˈzɜːt/, noun: the sweet, usually last course of a meal. These recipes will not contain dairy, eggs, gluten, wheat or hazelnuts. If we use a top 8 allergen, we will use a tag warning of its use.
This recipe is part of my campaign to get some candy back in my life, although in all likelihood, at a much reduced rate of intake than was so prior to the corn thing. To start out with, I used a recipe for No Corn Syrup Lollipops from Snappyliving.com, but since I can’t use artificial flavoring or vegetable food coloring (problematic for people allergic to corn), I modified the recipe to use fruit juice and my homemade extracts to give the lollipops their flavor. (Most extracts use corn alcohol to make the extract. I used the zests of the citrus fruit and Luksusowa Vodka because it’s made only from potatoes, whereas some vodkas may also use grain or corn. See this post for directions.) The color is naturally occurring from the carmelization of the sugars and lime juice together. It’s best to have a candy thermometer to use to make this recipe.
Lime Lollipops
2 cups of sugar
2/3 cups of lime juice (about 3-4 limes)
1/8 teaspoon of cream of tartar
1 Tablespoon of lime extract
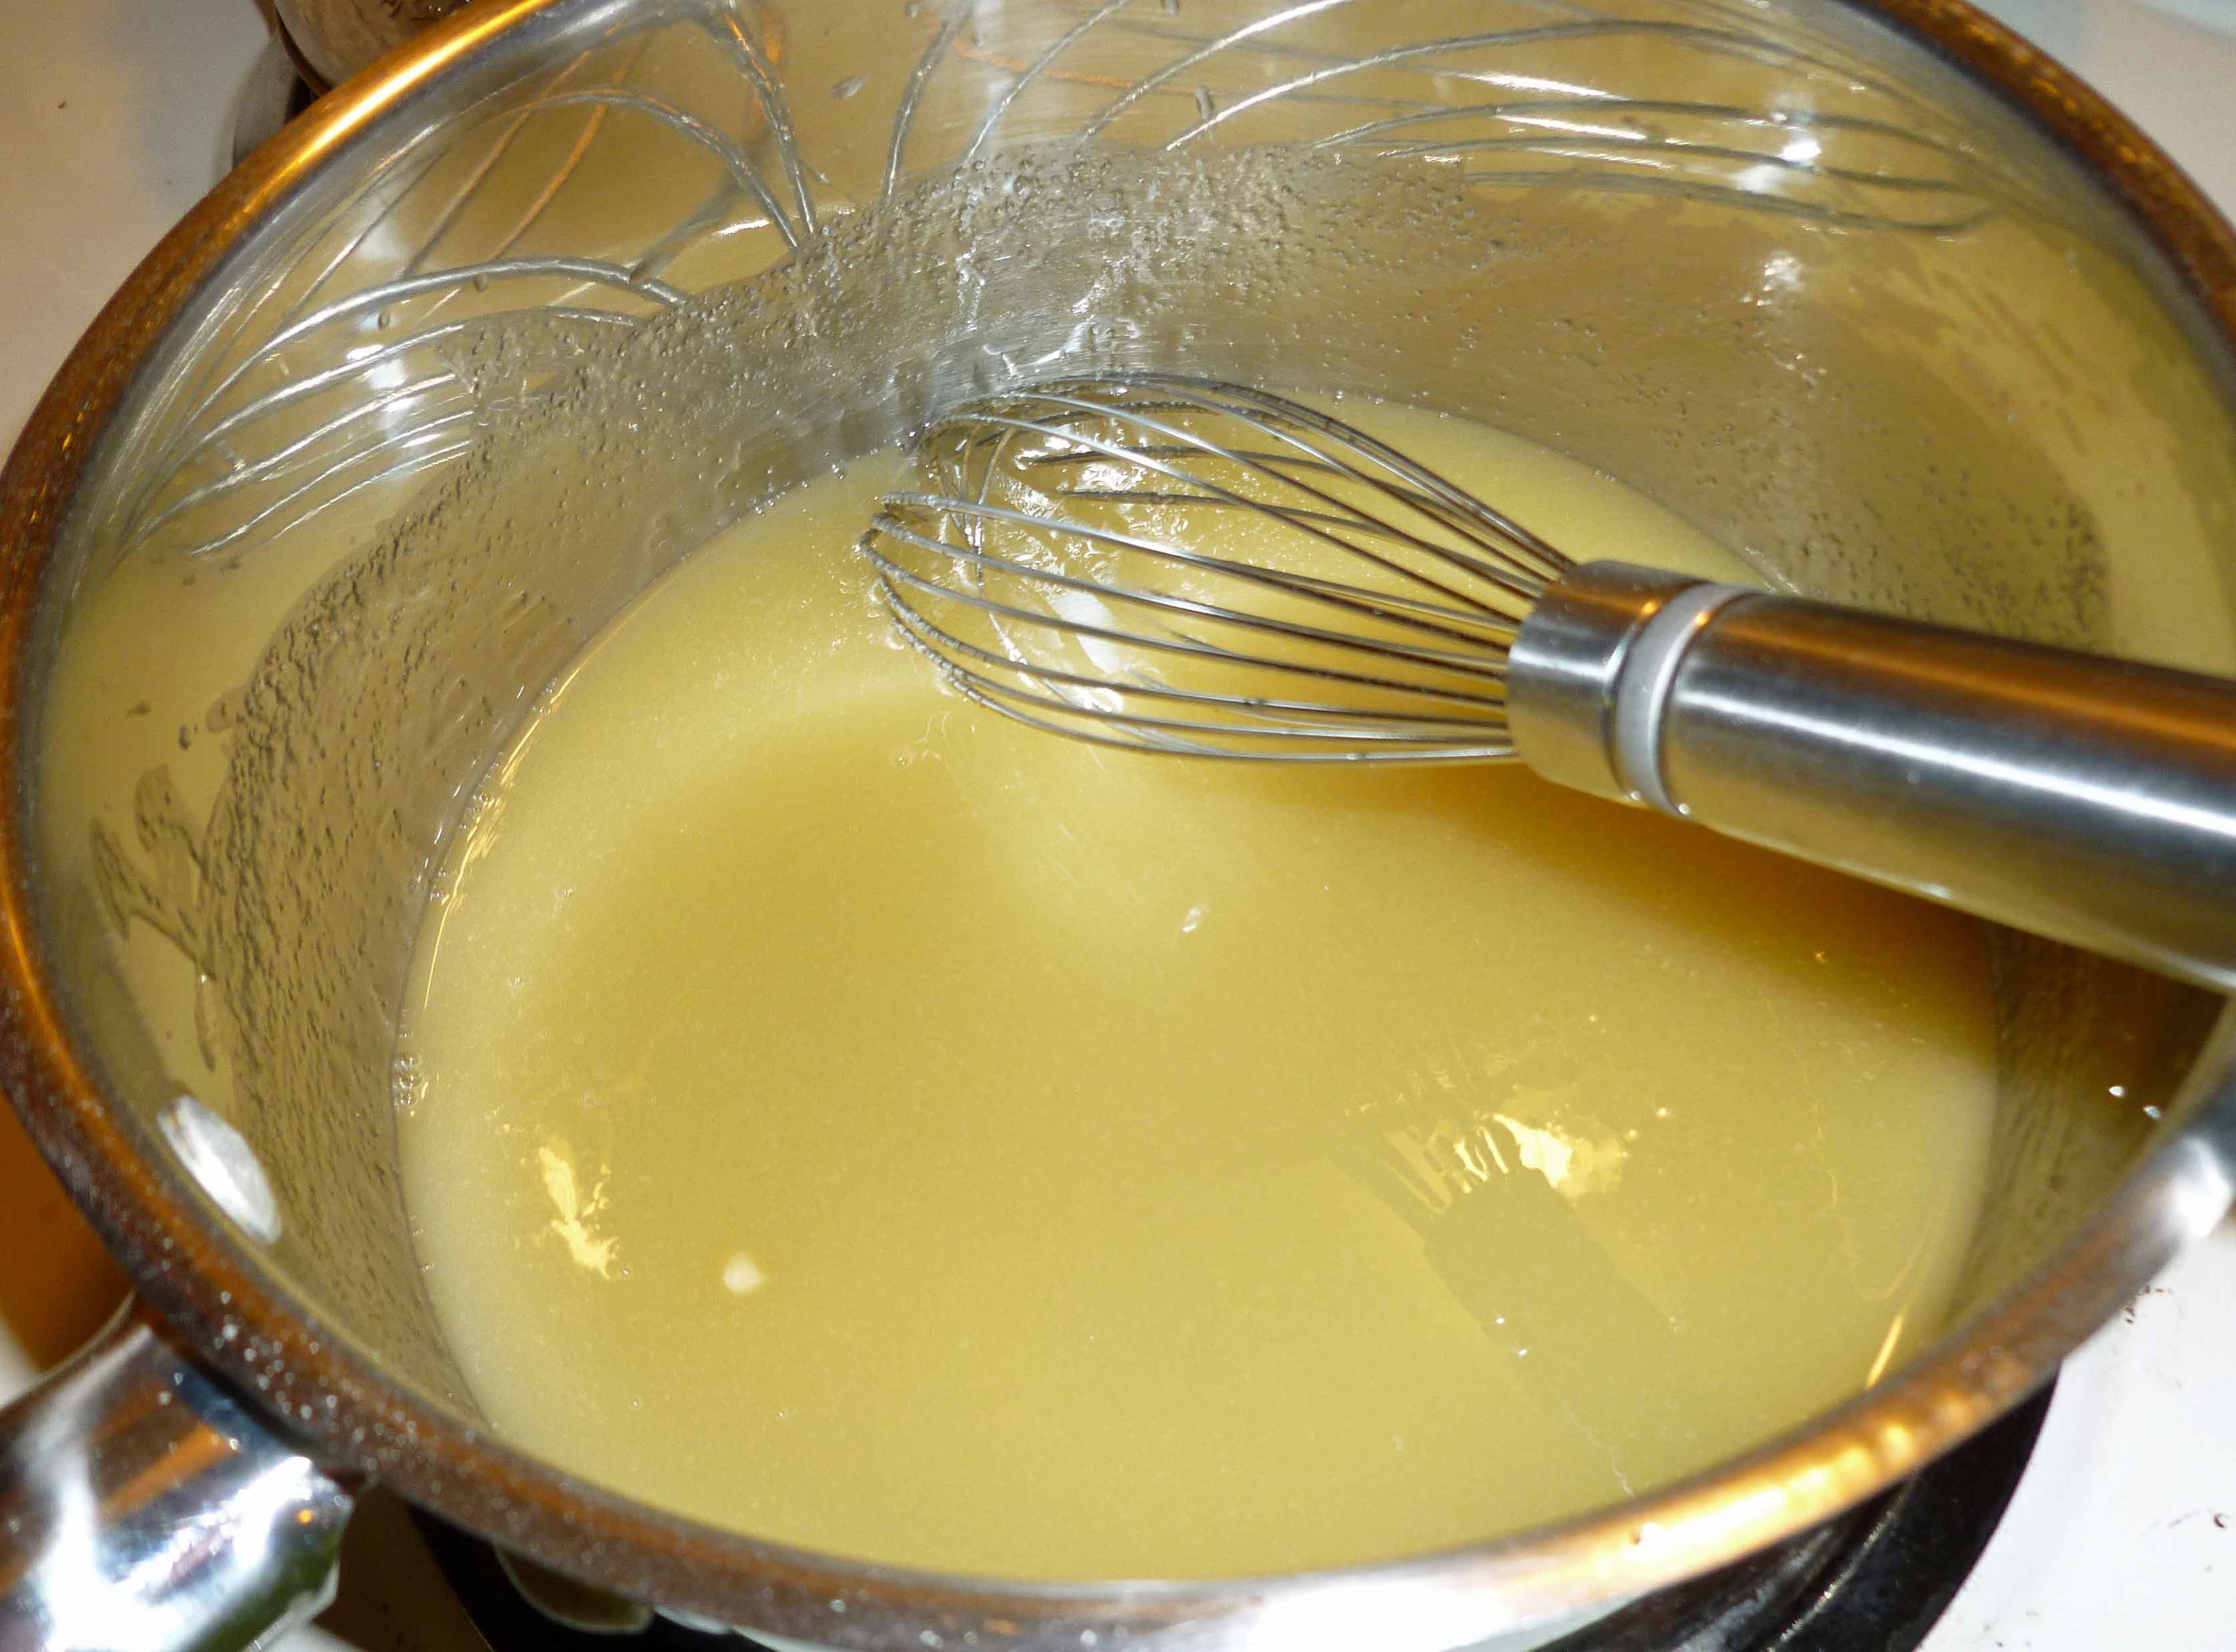
Put the sugar, lime juice, cream of tartar, and lime extract in a sauce pan with a candy thermometer. Over medium heat, stir until the sugar is dissolved.
Candy Mixture before boiling
Bring the heat to medium high, and continue to stir, boiling the mixture until it reaches 290°F, or until it forms a hard bead when dropped in cold water.
Candy mixture boiling
Spray silicone molds or ice cube trays with a neutral, safe for you cooking oil. I used a light olive oil in a mister. You don’t want an oil that tastes like anything. Carefully pour the mixture into your molds and add Popsicle sticks, as the mixture hardens enough to hold the sticks in position.
Candy in Silicone Muffin tray with Popsicle sticks
Let them cool overnight before taking them out of the molds. If not properly hardened, they stick to everything like cement. Ask me how much fun it was to get them off the plate below, once I was done taking the picture…Enjoy!
So the holiday season has brought with it the groaning tables of baked goods and candies, both homemade and not, and none suitable for the food allergic. So it’s time to make your own! I’ve made a few recipes of gluten-free vegan cookies, with mixed results (all edible, none outstanding, none of the recipes my own), but cookies are time-consuming and kitchen-consuming. So are cakes and pies.
Needing a last minute treat for the holidays, to satisfy my own sweet tooth, which spends a lot of time being teased these days, I wanted to try making truffles out of coconut milk and chocolate, with some added flavors to deepen the chocolate’s flavors. I had a great idea, but like so many great ideas, it didn’t pan out quite as planned — these didn’t set up the way I wanted them to, so I froze them. The result was a homemade version of those single bite ice cream treats that came out a few years ago.
They are super quick to make, with most of the time involved being cooling and freezing the chocolate. The dishes involved are minimal. These should keep for a few weeks in the freezer, and some of them are going to work with me for the mid-afternoon chocolate cravings.
Quick Chocolate Bites
Quick Chocolate Bites
10 oz of chocolate, chopped (or use chocolate chips)
13.5 oz of full-fat coconut milk (1 can)
3 Tablespoons good berry jam (strawberry, raspberry, black cherry), seedless recommended (and by “good,” I mean that I generally choose jam — and many food products — by looking for the one with the fewest number of ingredients. For jam, I prefer sugar be used rather than any other sweetener, and few or no preservatives)
1 teaspoon of basil, chopped finely, optional (the frozen cubes of herbs are great for recipes like this)
Put the chocolate in a heat-safe bowl, and set aside.
In a sauce pan, combine the coconut milk, jam, and basil, if using. Whisk together, and bring to a boil.
Pour the boiling coconut milk mix over the chopped chocolate, and stir until chocolate is fully melted. Let the mixture cool until it’s not steaming anymore, then cover and refrigerate until fully chilled (overnight is good).
Using a spoon or small cookie scoop, portion out approximately 1 Tablespoon dollops of the pudding consistency mixture onto a foil or parchment paper-covered cookie sheet, and freeze until solid, about an hour. Store in sealed containers or plastic bags. Use to satisfy chocolate or sugar cravings as they arise.
So, before the whole corn and coconut thing, I was an aficionado of fruit flavored pure sugar candy. If it had fake coloring, fake fruit flavors and was primarily made of out sugar (meaning corn syrup), then I was your girl. Skittles, Nerds, Sour Neon Gummy Worms, Sour Gummi Watermelon Slices, Jolly Ranchers, Starbursts (particularly the fave reds), Jelly Belly Sour jelly beans – anyway, you get the picture, if it was aimed at ten year old kid, I was a fan. Candy, caffeine and I had a love triangle going on while I was in college, law school and during my years of private practice. Candy was part of the fuel that I needed to get through the day while going 400 miles per hour, with generally little sleep. I seriously should have had stock in at least the top three, Skittles, Starbursts and Jolly Ranchers. At least maybe I’d have recouped some of what I was spending at Rite-Aid on candy. So you can imagine the horror when I had to give them all up.
A few l months ago, I started making citrus extracts, lemon, lime and orange in anticipation of one day making my own safe candy. (Most extracts use corn alcohol to make the extract. I used the zests of the citrus fruit and Luksusowa Vodka because it’s made only from potatoes, whereas some vodkas may also use grain or corn. See this post for directions.) After they were done, I let them sit for a couple of more weeks with a coffee filter over the jar to let them evaporate down a bit to try to concentrate the flavors.
Then I started poking around for gummy recipes. I love watermelon flavored candy. I love, love, love Watermelon Jolly Ranchers, and I used to love to drink Watermelon Schnapps Pucker with Sprite because it tasted just like a Jolly Rancher, only in liquid form. Now all three of those things are off-limits. But I came across a recipe for Lemon-Watermelon Gummies so I had to try it. I’ve modified this recipe because honey can be problematic for people allergic to corn if you don’t know whether your beekeeper is feeding his bees corn syrup or not. And then I had to try it with just lemon, so I further modified things. Both versions are provided below, but I think you could do any fruit juice if safe for you (most commercial juices are not safe for people allergic to corn). The gummies themselves result in candies that taste like real fruit and aren’t as sweet as store bought gummies, but they work for me and I probably shouldn’t be eating all that sugar anyway. I’m kind of liking the lemon as an after dinner palate cleanser, as it is a very refreshing pure lemon taste that melts in your mouth. If you want them to be more sweet to match the commercially available gummies, I’d up the sugar to about 1/2 a cup total for each recipe. Try it with the lower sugar though, you may find you don’t need it 🙂
Lemon Watermelon Gummies
4 cups of peeled and cubed watermelon
1/4 cup of lemon juice (or the juice of one lemon)
Place watermelon, lemon juice and lemon extract in a blender. Blend it until the watermelon is completely pulverized. You want this as smooth as you can get it. Wish I had my friend Mary’s Vitamix for this, but my plain old blender did okay. Using a fine wire mesh strainer, strain out any remaining pulp so that you just have juice left.
Straining out watermelon pulp
After straining out the pulp, put one half of the watermelon liquid into a sauce pan with the sugar. On medium low heat, stir until all the sugar is dissolved and then add the gelatin and whisk until it is smooth. Remove the pan from the heat and add the remaining watermelon liquid. Whisk again until smooth.
Watermelon and Gelatin Mixture
Spray silicone molds or ice cube trays with a neutral, safe for you cooking oil. I used a light olive oil in a mister. You don’t want an oil that tastes like anything. (As a side note, apparently there is some debate about whether or not to grease silicone. I have always greased silicone baking molds with oil, shortening and margarine when I could still eat it, and have had no problems whatsoever, but I also don’t use non-stick cooking spray on them. According to this article, if you over grease when baking you may get a sticky residue that’s difficult to wash off. I had no issue cleaning these molds after this recipe, but if you do, use some baking soda with your dish washing detergent when handwashing, and it’ll likely be fine. Also, if you try doing it without oil, let me know how that goes.) Make sure your silicone mold is on a cookie sheet because you are going to move it into the fridge or the freezer and you don’t want a big mess all over your floor and counters. Carefully pour the mixture into your molds. I also ended up having enough for a a couple of gummies in a silicone ice cube tray as well.
Watermelon Gelatin Mixture in Silicone Molds
Put the silicone mold in the refrigerator or freezer. The gummies will set up in about 15-20 minutes in the freezer and about 30-40 minutes in the refrigerator.
Lemon Gummies
This version makes about half of what the Lemon Watermelon version did because that seemed like a lot of gummies of one flavor to me. If you wanted, you could replace the lemon juice with lime juice, grapefruit juice, or orange juice as well. If I did any other kind of fruit juice other than citrus, I’d probably just use 2 cups of juice and skip the water.
Juice your lemons. After straining out the pulp, put the lemon juice into a sauce pan with the sugar. On medium low heat, stir until all the sugar is dissolved and then add the gelatin and whisk until it is smooth. Remove the pan from the heat and add the water. Whisk again until smooth.
Lemon Gelatin Mixture
Spray silicone molds with a neutral oil as described above, and place the silicone mold on a cookie sheet. Carefully pour the mixture into your molds.
Lemon Gelatin Mixture in Silicone Molds
Put the silicone mold in the refrigerator or freezer. Again, the gummies will set up in about 15-20 minutes in the freezer and about 30-40 minutes in the refrigerator.
So Mary Kate put up a recipe for brownies a bit ago, but it had almond flour, coconut flour and coconut oil in it, which are a big no-no for me. So I wanted to see if I could do a brownie recipe I could eat, especially with some of my new restrictions. Keep in mind for those of you who have a corn issue, that I am not that sensitive, and that I am not dealing with packaging and cross contamination issues at this point, I’m just dealing with obvious corn and derivatives, and using safe for me ingredients.
2 Tablespoons of ground or milled chia seed
1/3 cup and 2 teaspoons of water
350 grams of Denise’s All Purpose Gluten Free Flour Mix (I used the Gluten Free Girl’s post on gluten-free holiday baking and modified it a bit – to make 500 grams of the mix, you’ll have a bit extra to use for other recipes, whisk together thoroughly 50 grams of oat flour, 50 grams of teff flour, 75 grams of sorghum flour, 25 grams of potato flour, 125 grams of sweet or glutinous rice flour, 75 grams of potato starch, 50 grams of arrowroot, and 50 grams of tapioca starch) or 2 ½ cups of All Purpose Flour if you can have wheat
½ teaspoon of sea salt
½ teaspoon baking powder (For corn free baking powder you can use this recipe)
1 ½ cups of sugar
½ cup of brown sugar
¼ cup of shortening, vegan margarine, etc., whatever is safe for you, and a little bit extra to grease the pan.
¼ cup of olive oil
¾ cup of water
1 cup of cocoa powder
1 ½ cups of safe (dairy free, nut free, soy free) chocolate chips or homemade chocolate if you’re corn free (I used this recipe, but modified it to use this sugar syrup recipe instead of honey, as honey can be problematic for people allergic to corn if you don’t know whether your beekeeper is feeding his bees corn syrup or not. Also, I used the whole batch in these brownies, so I didn’t let them cool into chocolate chips, I just put the chocolate into a heat safe bowl as described below.)
1 Tablespoon of vanilla extract (Here’s a bunch of recipes for vanilla extract, make sure to use safe alcohol if corn or wheat are an issue for you. I used Luksusowa Vodka because it’s made only from potatoes, where some vodkas may also use grain or corn.)
Preheat your oven 325°F and lightly grease a 9 by 11 inch pan with a little bit of the shortening or margarine.
Whisk together the ground or milled chia seed and 1/3 cup and 2 teaspoons of water in a small bowl and set aside.
In an electric mixer bowl, whisk together the flour, baking powder and salt.
Place the chocolate chips into a large metal or glass bowl (you want it to be heat-safe).
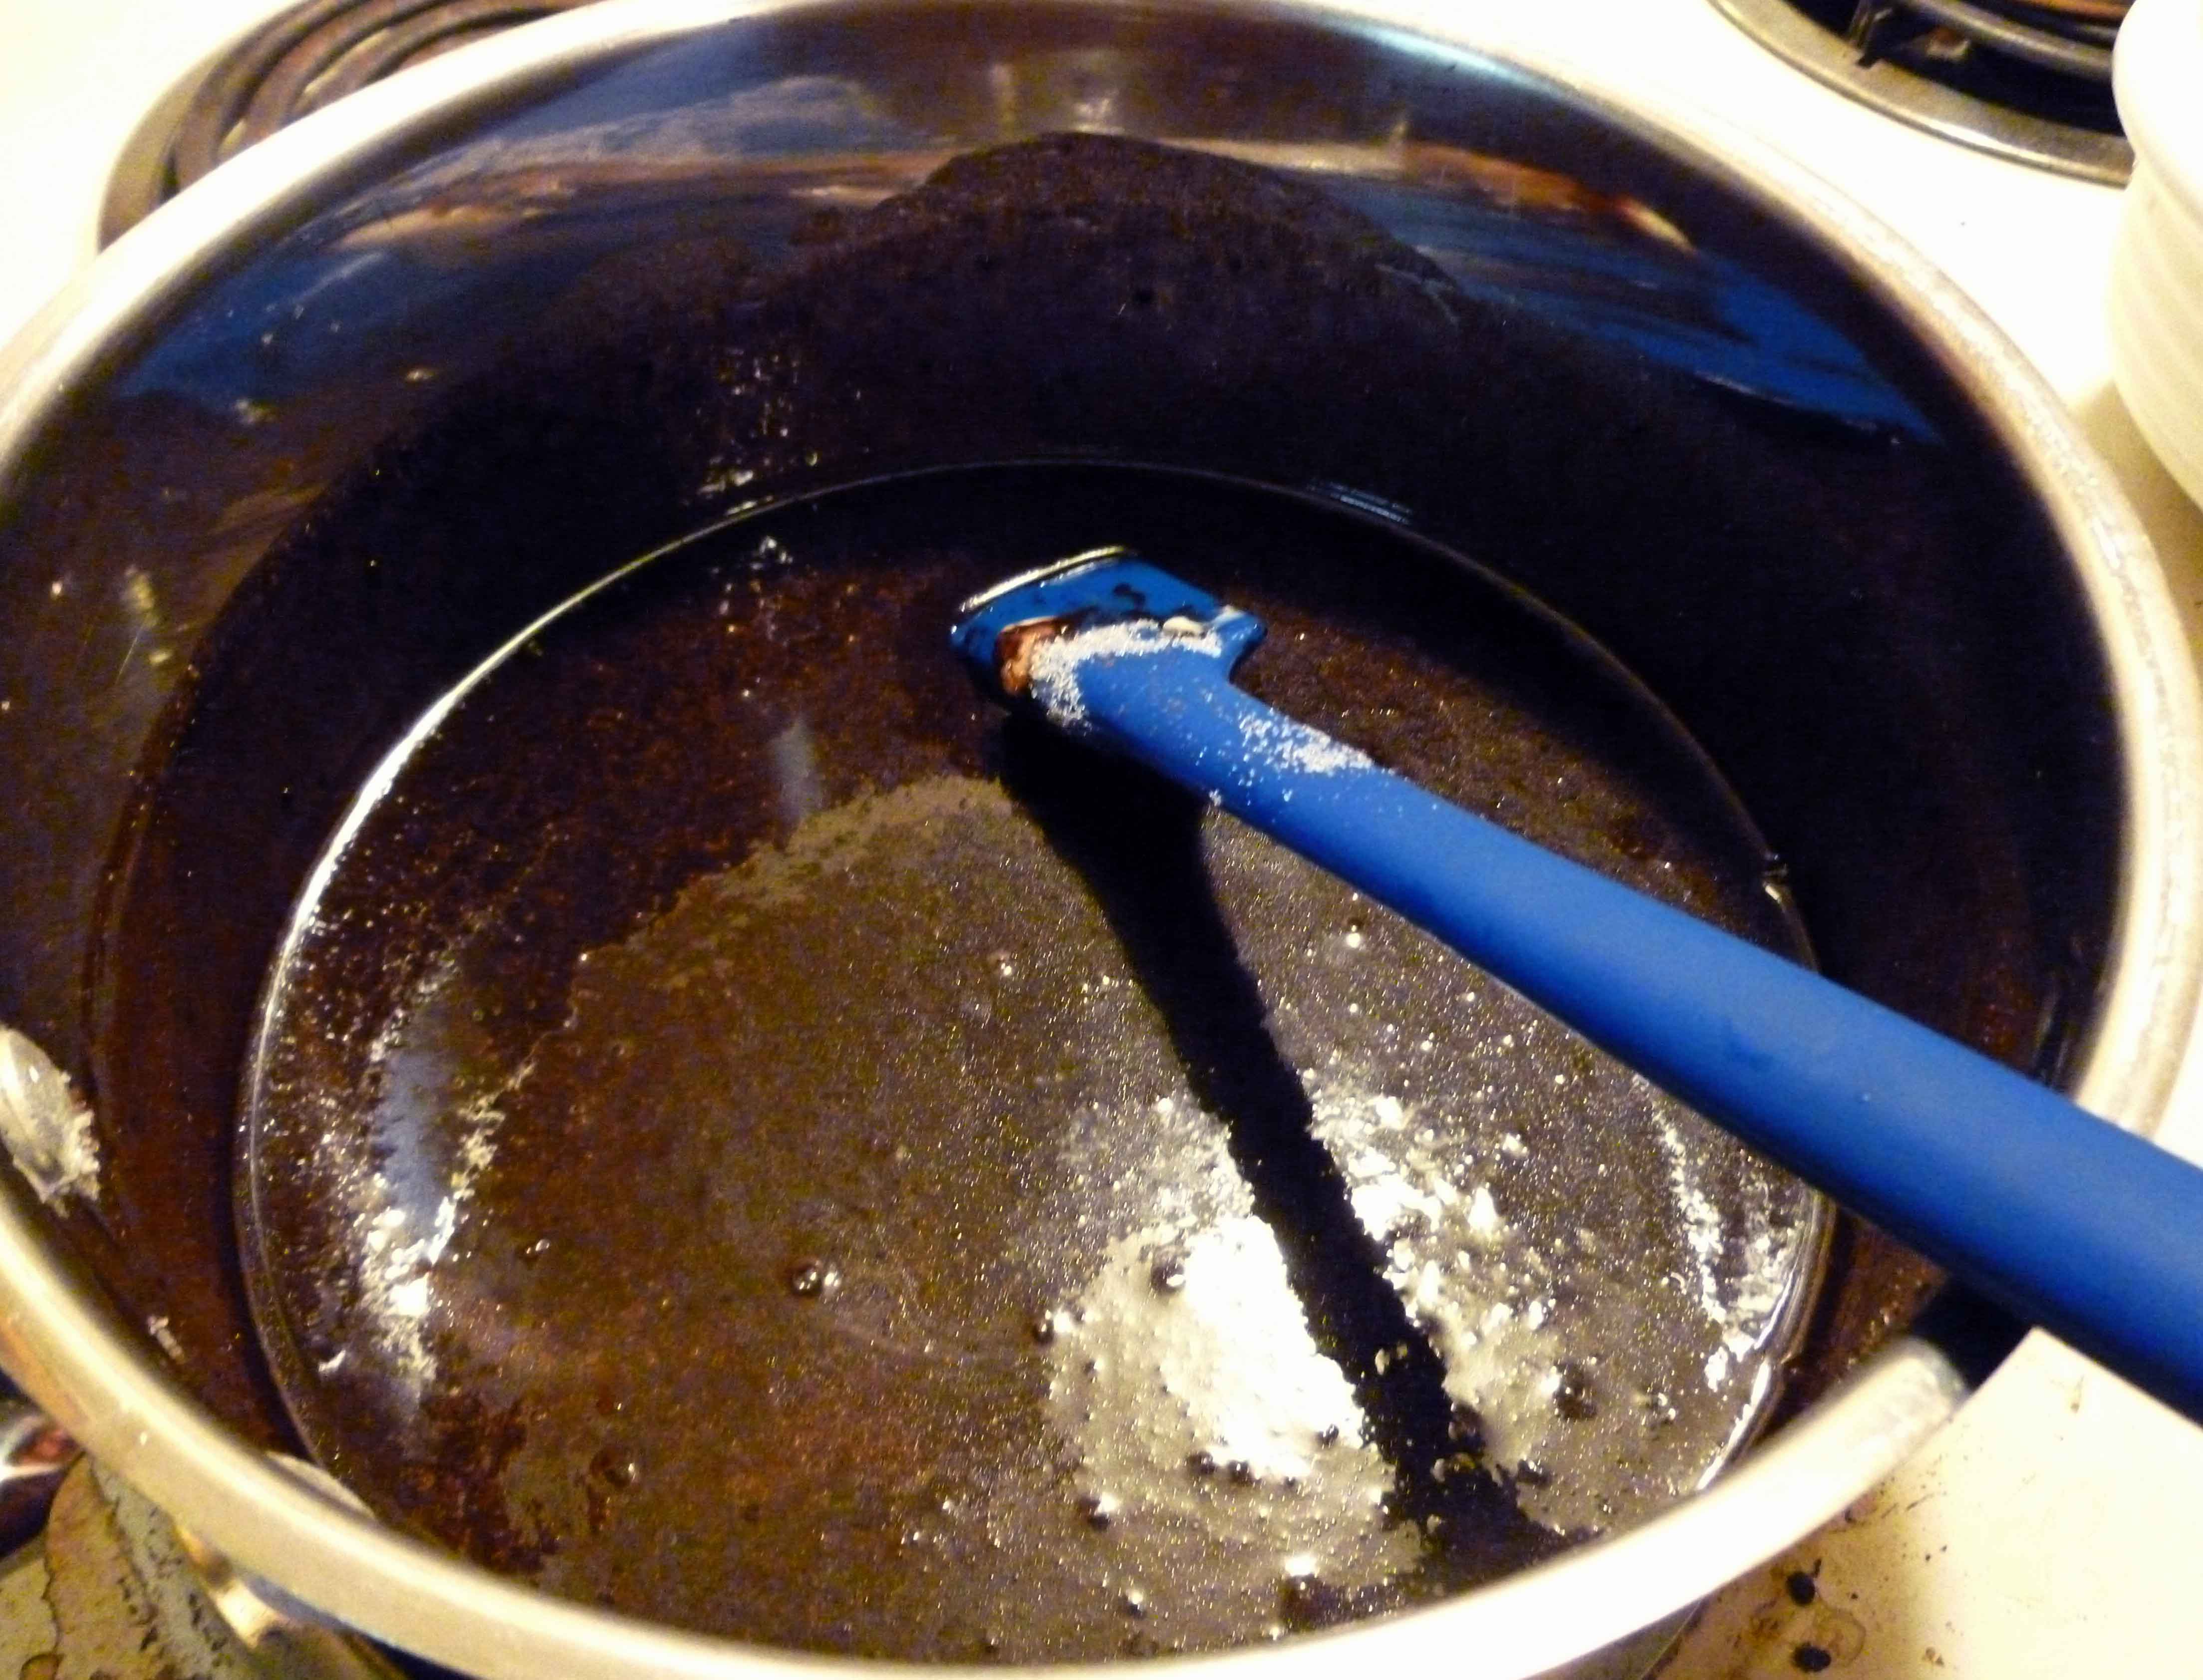
In a saucepan over medium heat, combine the sugar, brown sugar, shortening or margarine, oil, cocoa powder, and the water and bring it to a boil, stirring constantly.
Melted shortening, sugar, coffee and cocoa powder in saucepan
Once it is boiling, pour the mixture into the heat-safe bowl containing the chocolate chips, mixing it quickly so that the chocolate chips melt and combine with the mixture.
Pour the chocolate mixture into the mixer bowl containing the flour, scraping down the chocolate mixture bowl thoroughly. Add the chia and water mixture and the vanilla to the mixer bowl and mix on medium-high speed until the brownie batter is smooth. I used the batter beater on my KitchenAid mixer.
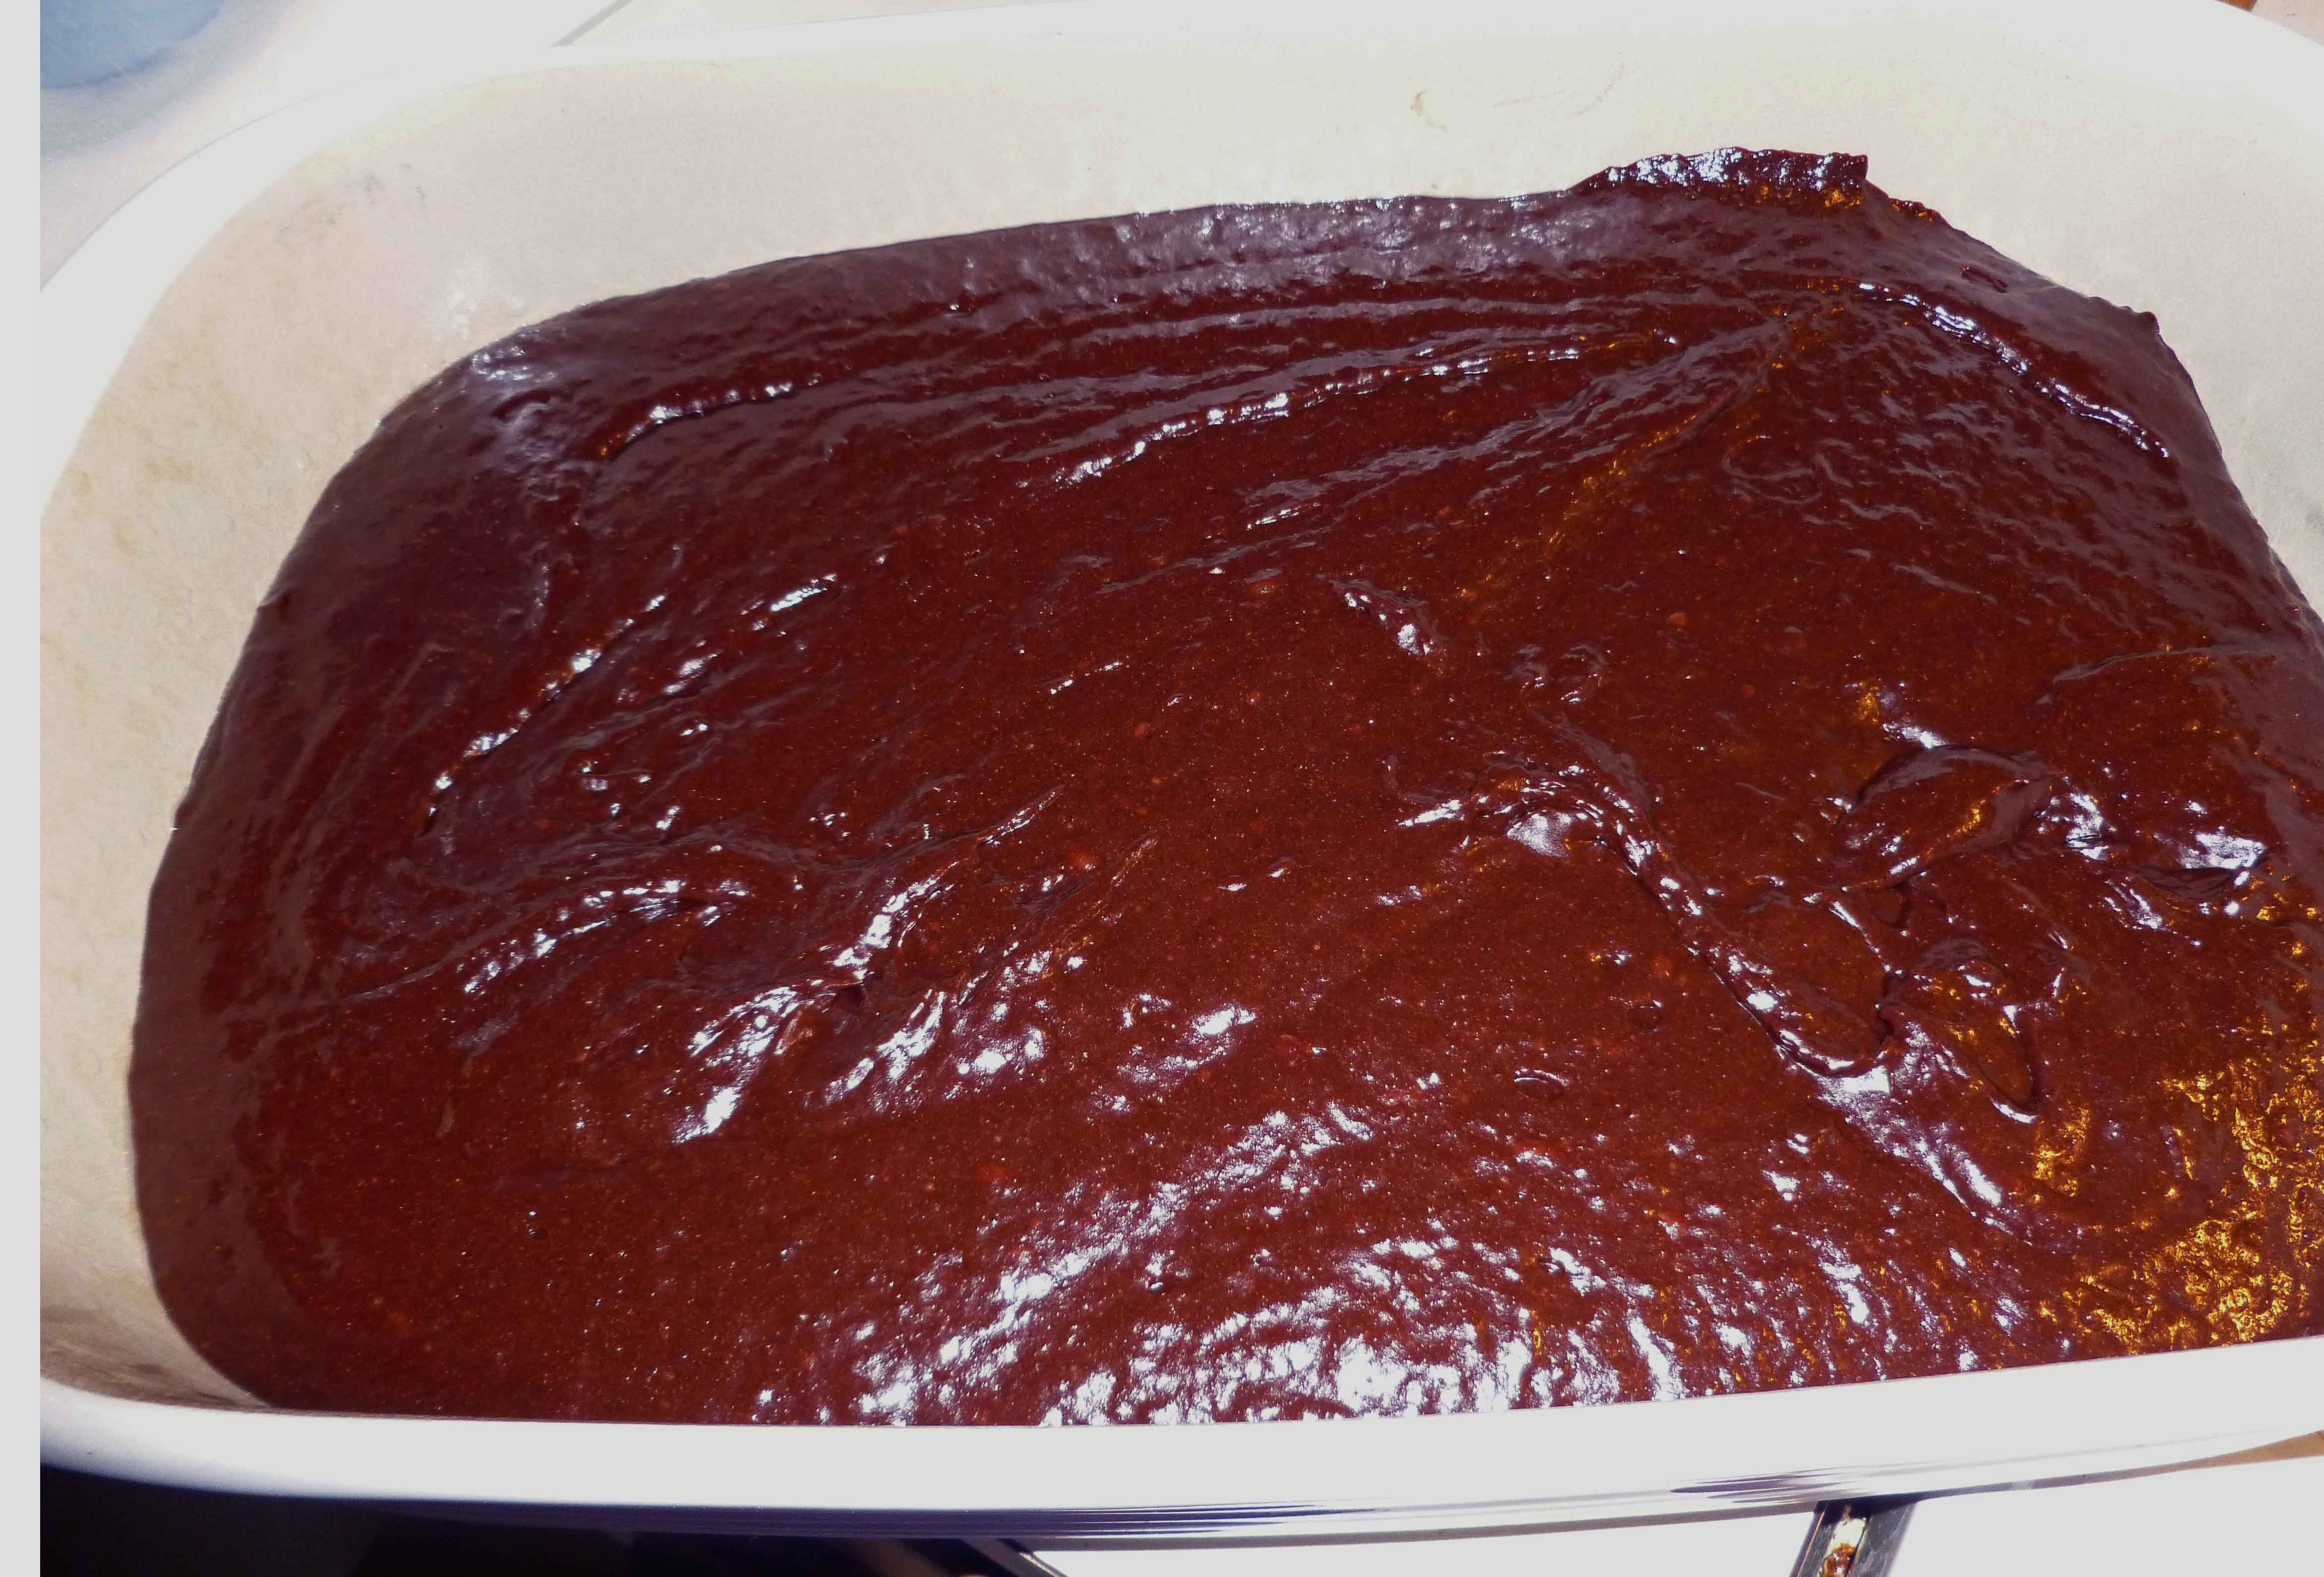
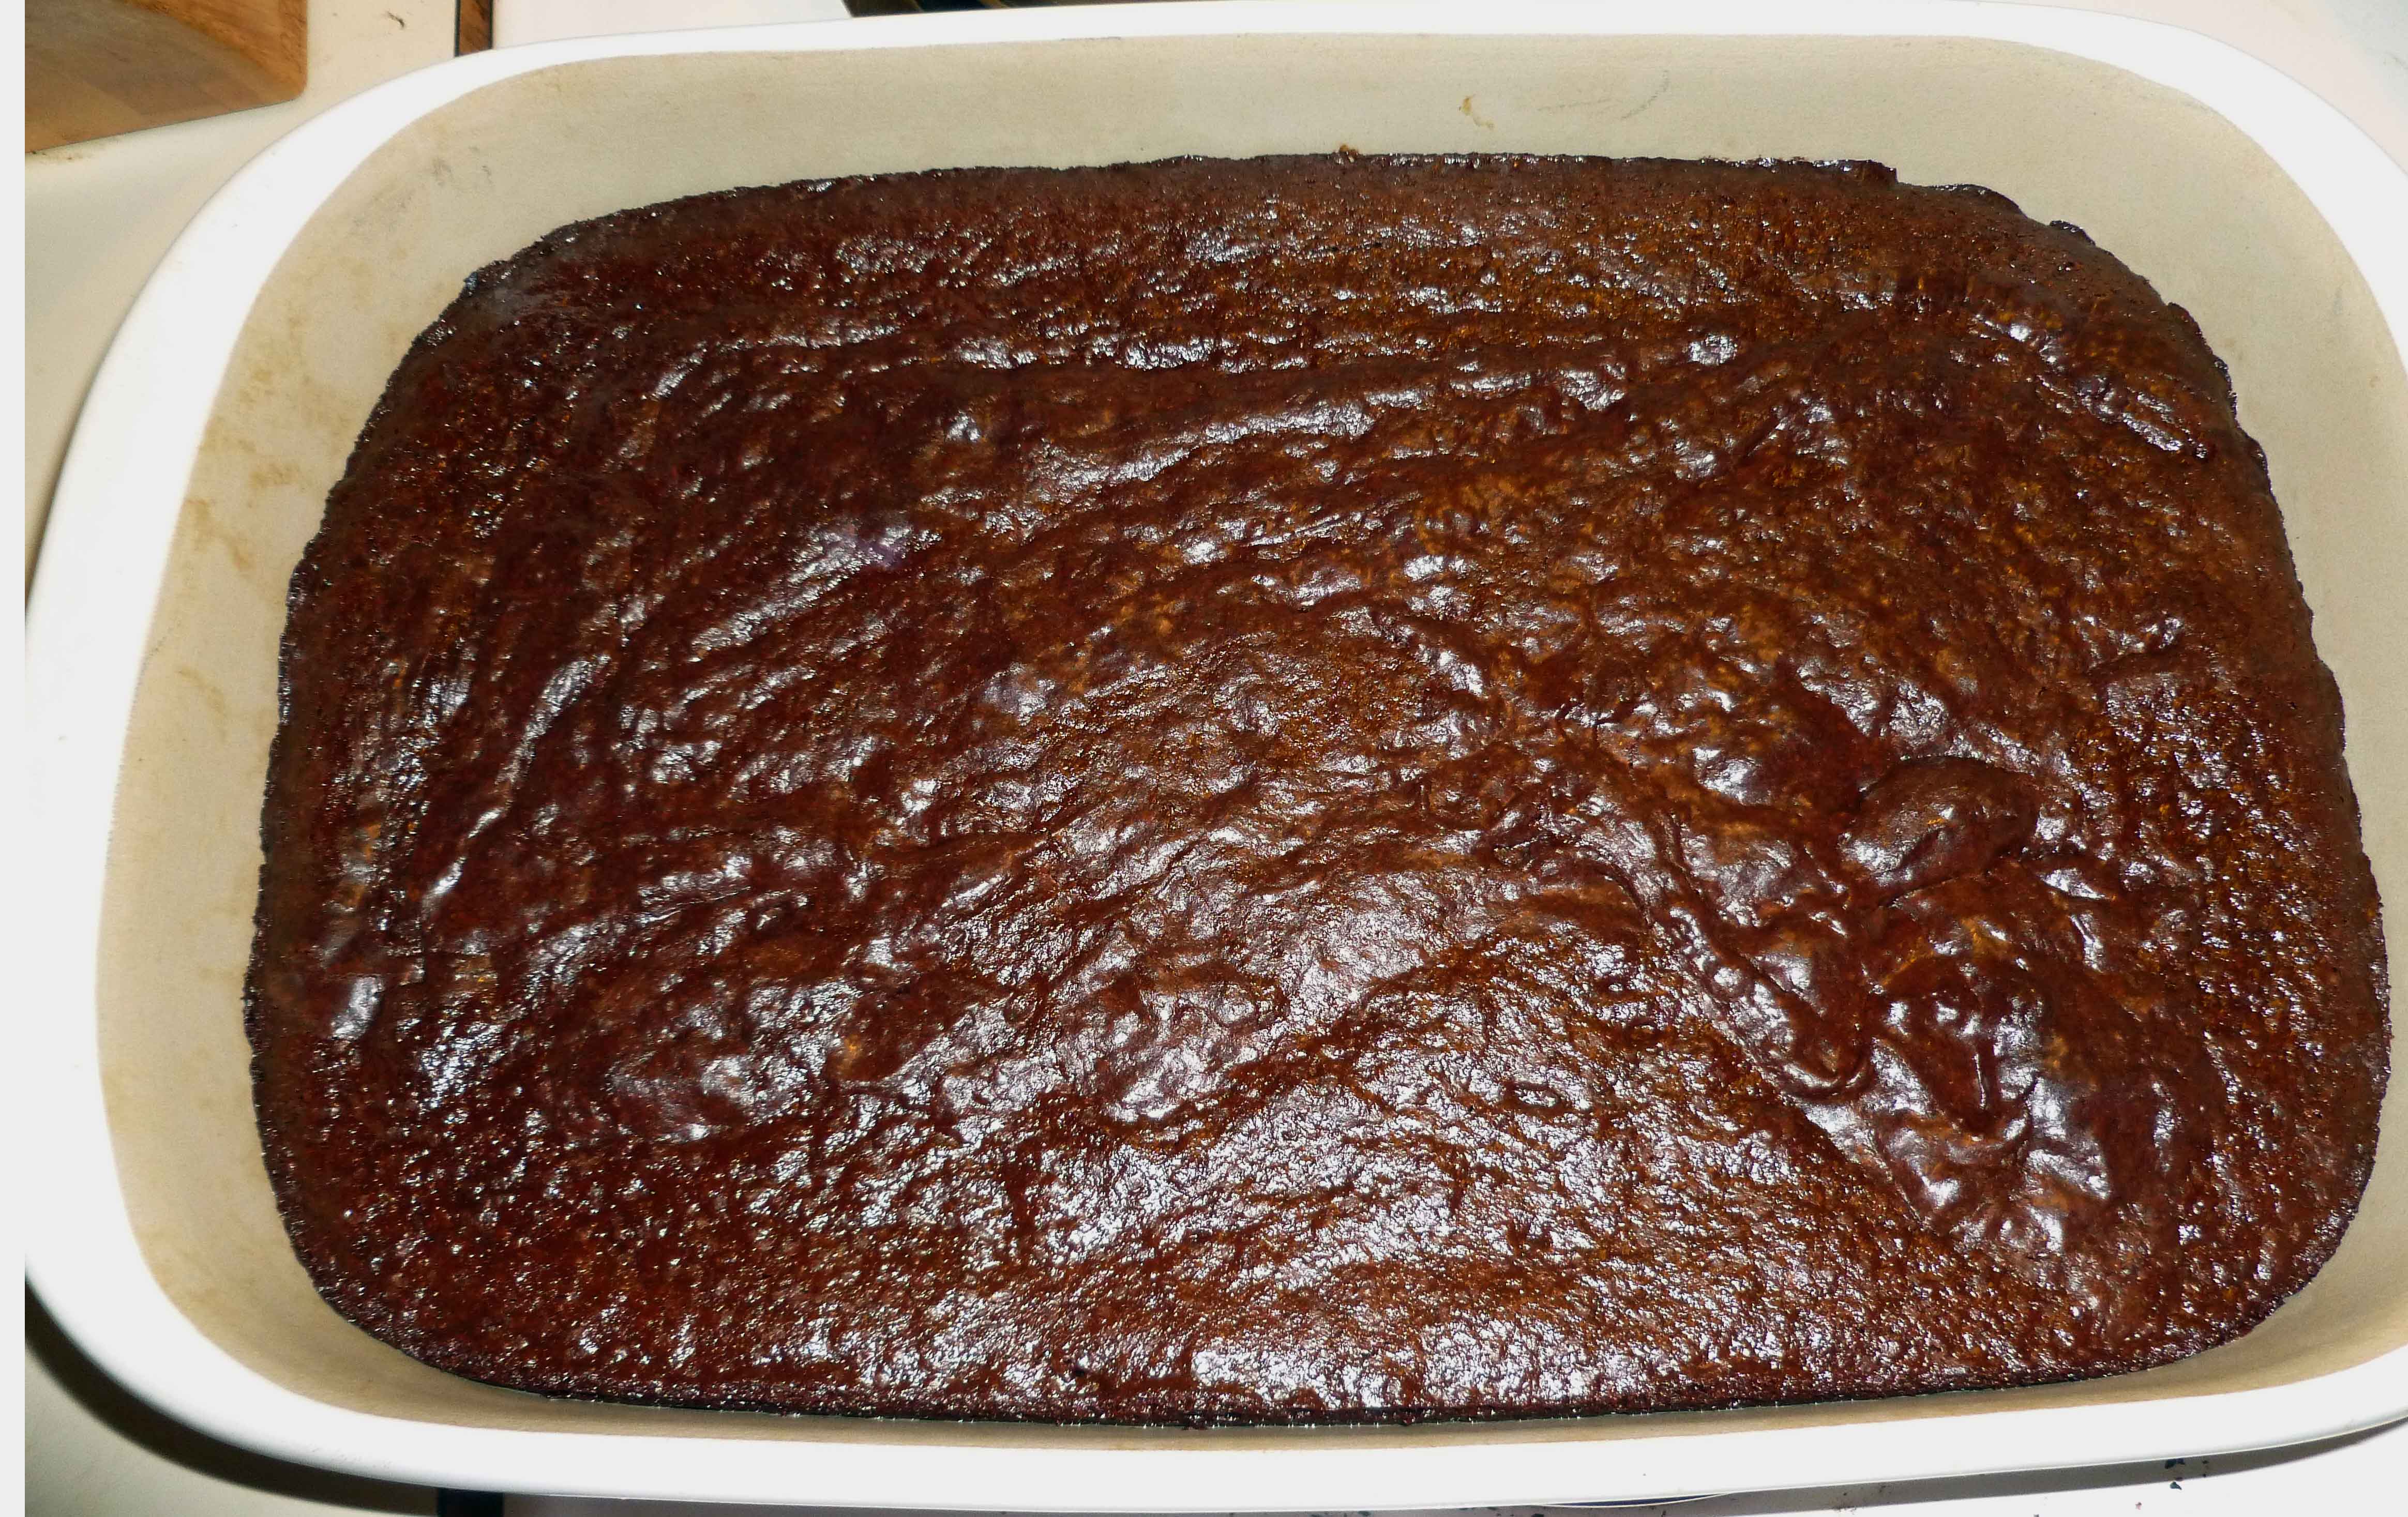
Spread the batter evenly in the greased baking pan.
Batter spread evenly in the pan
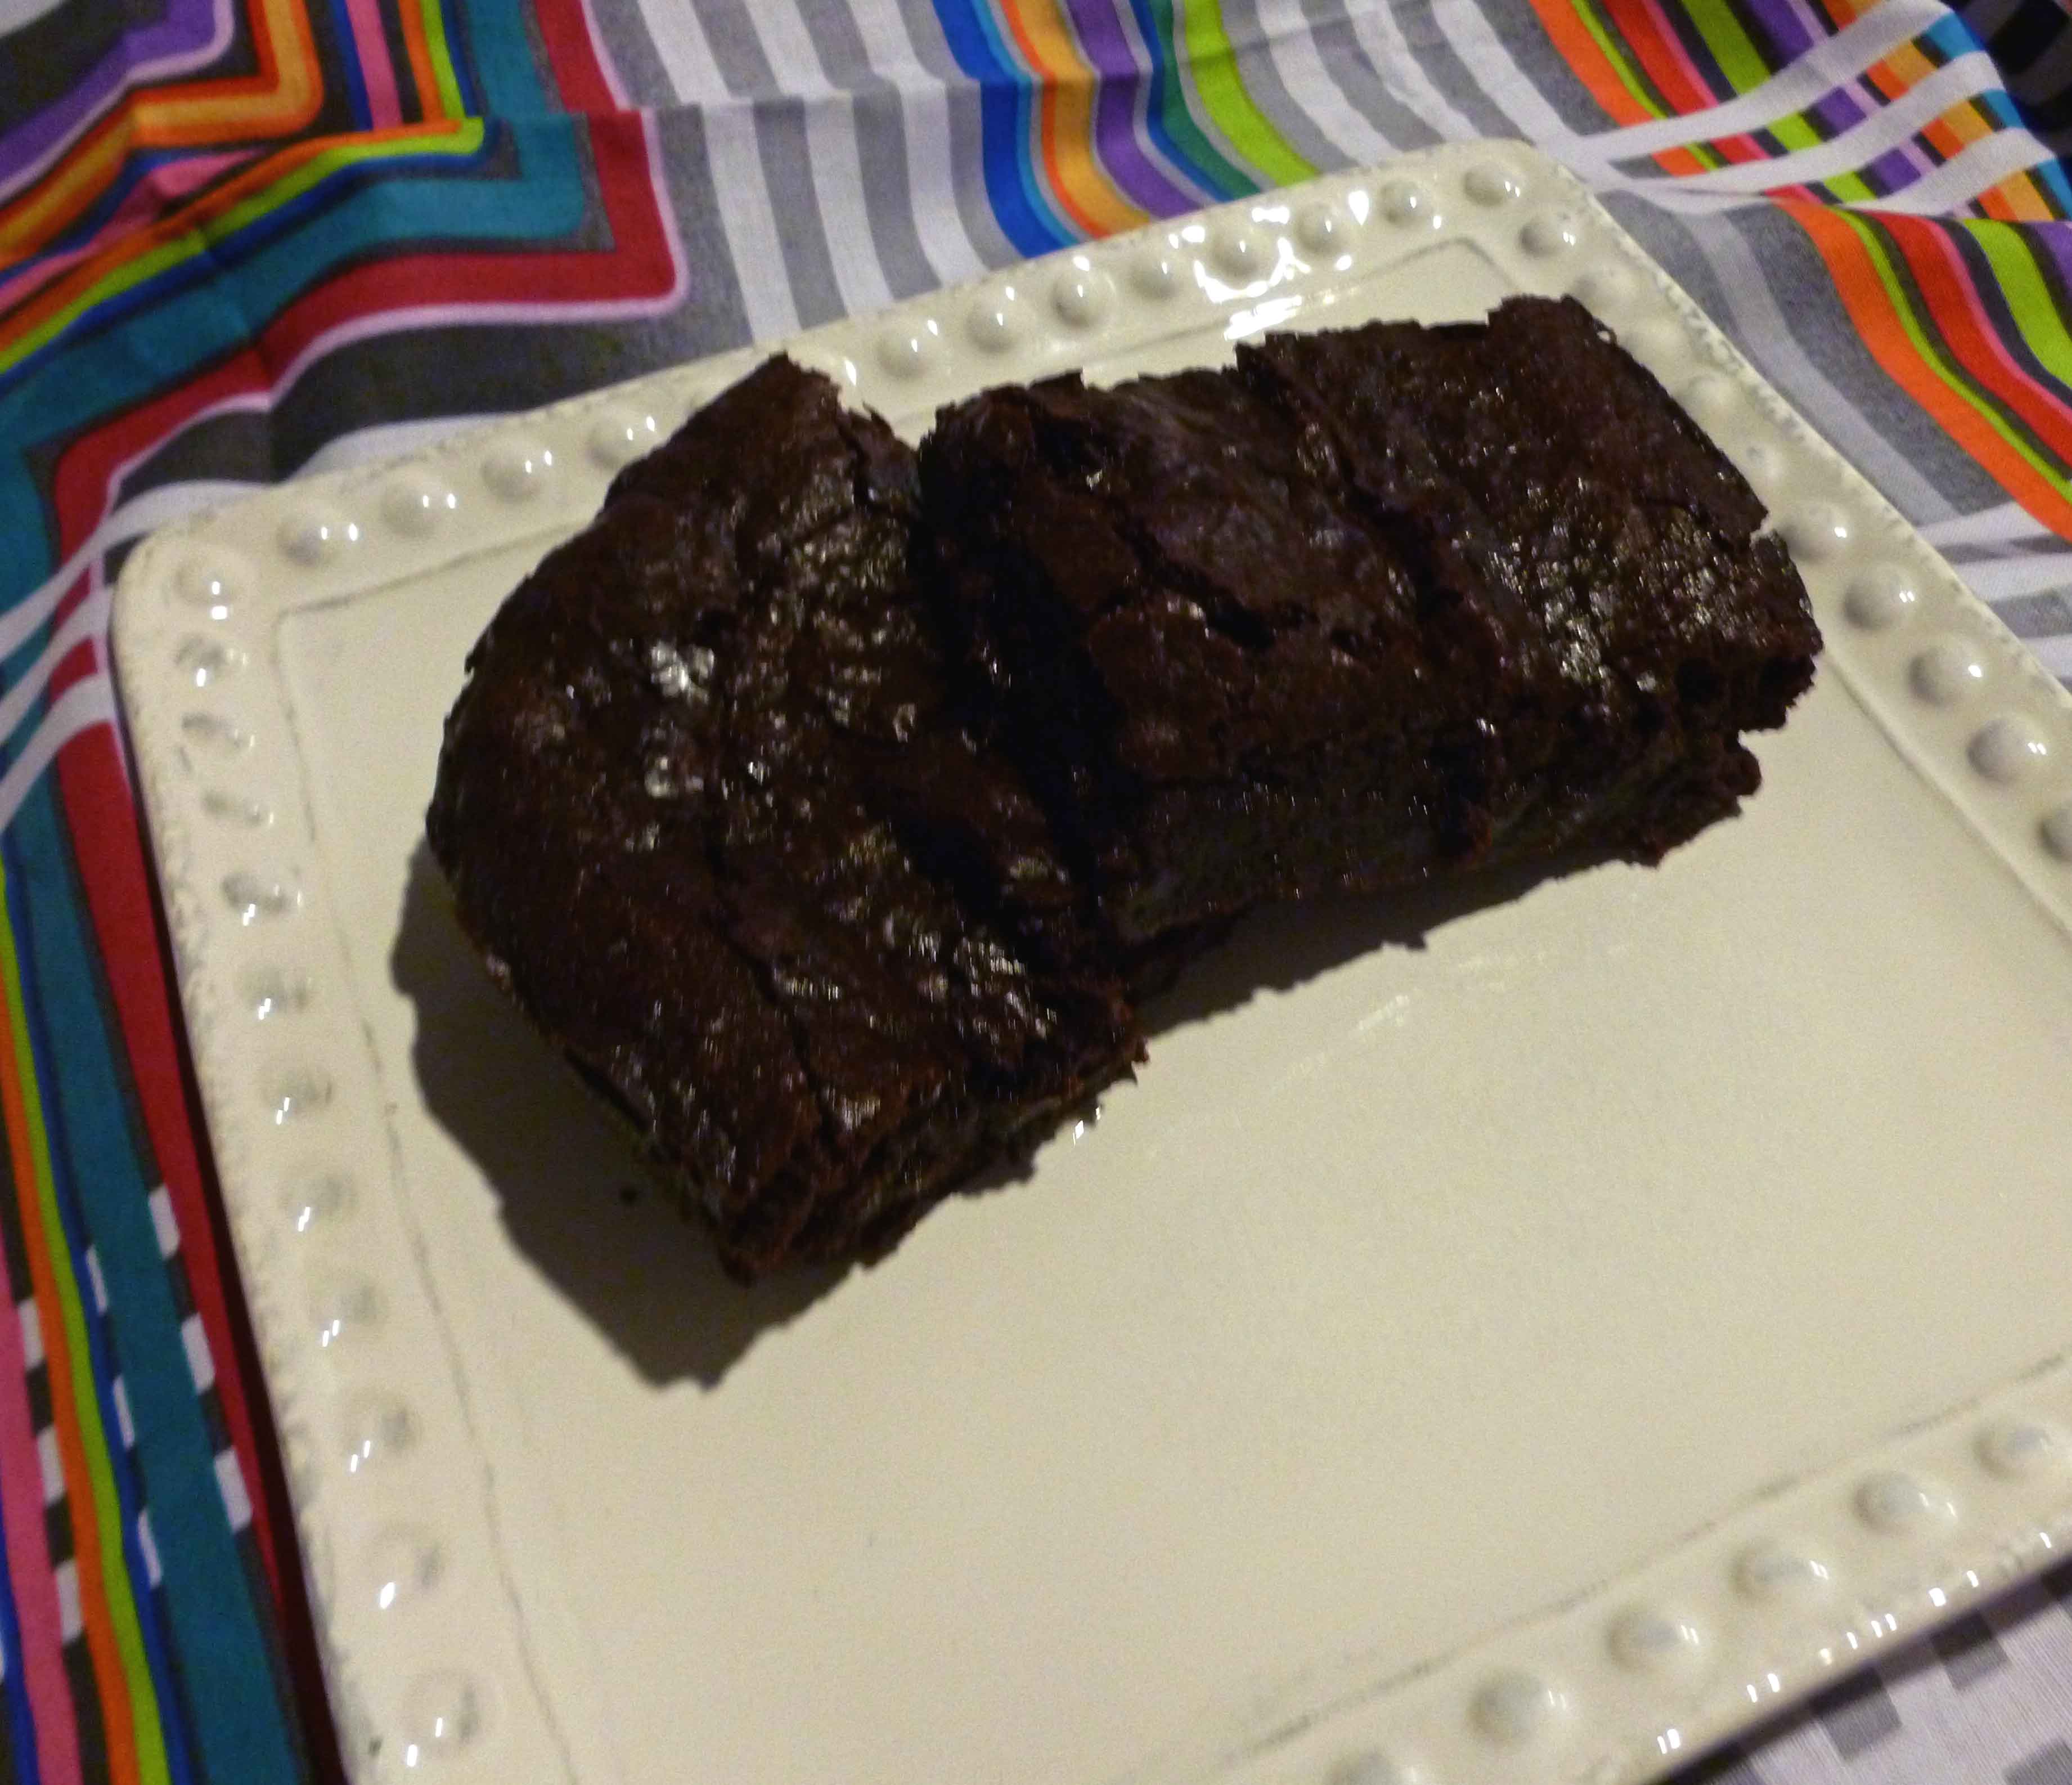
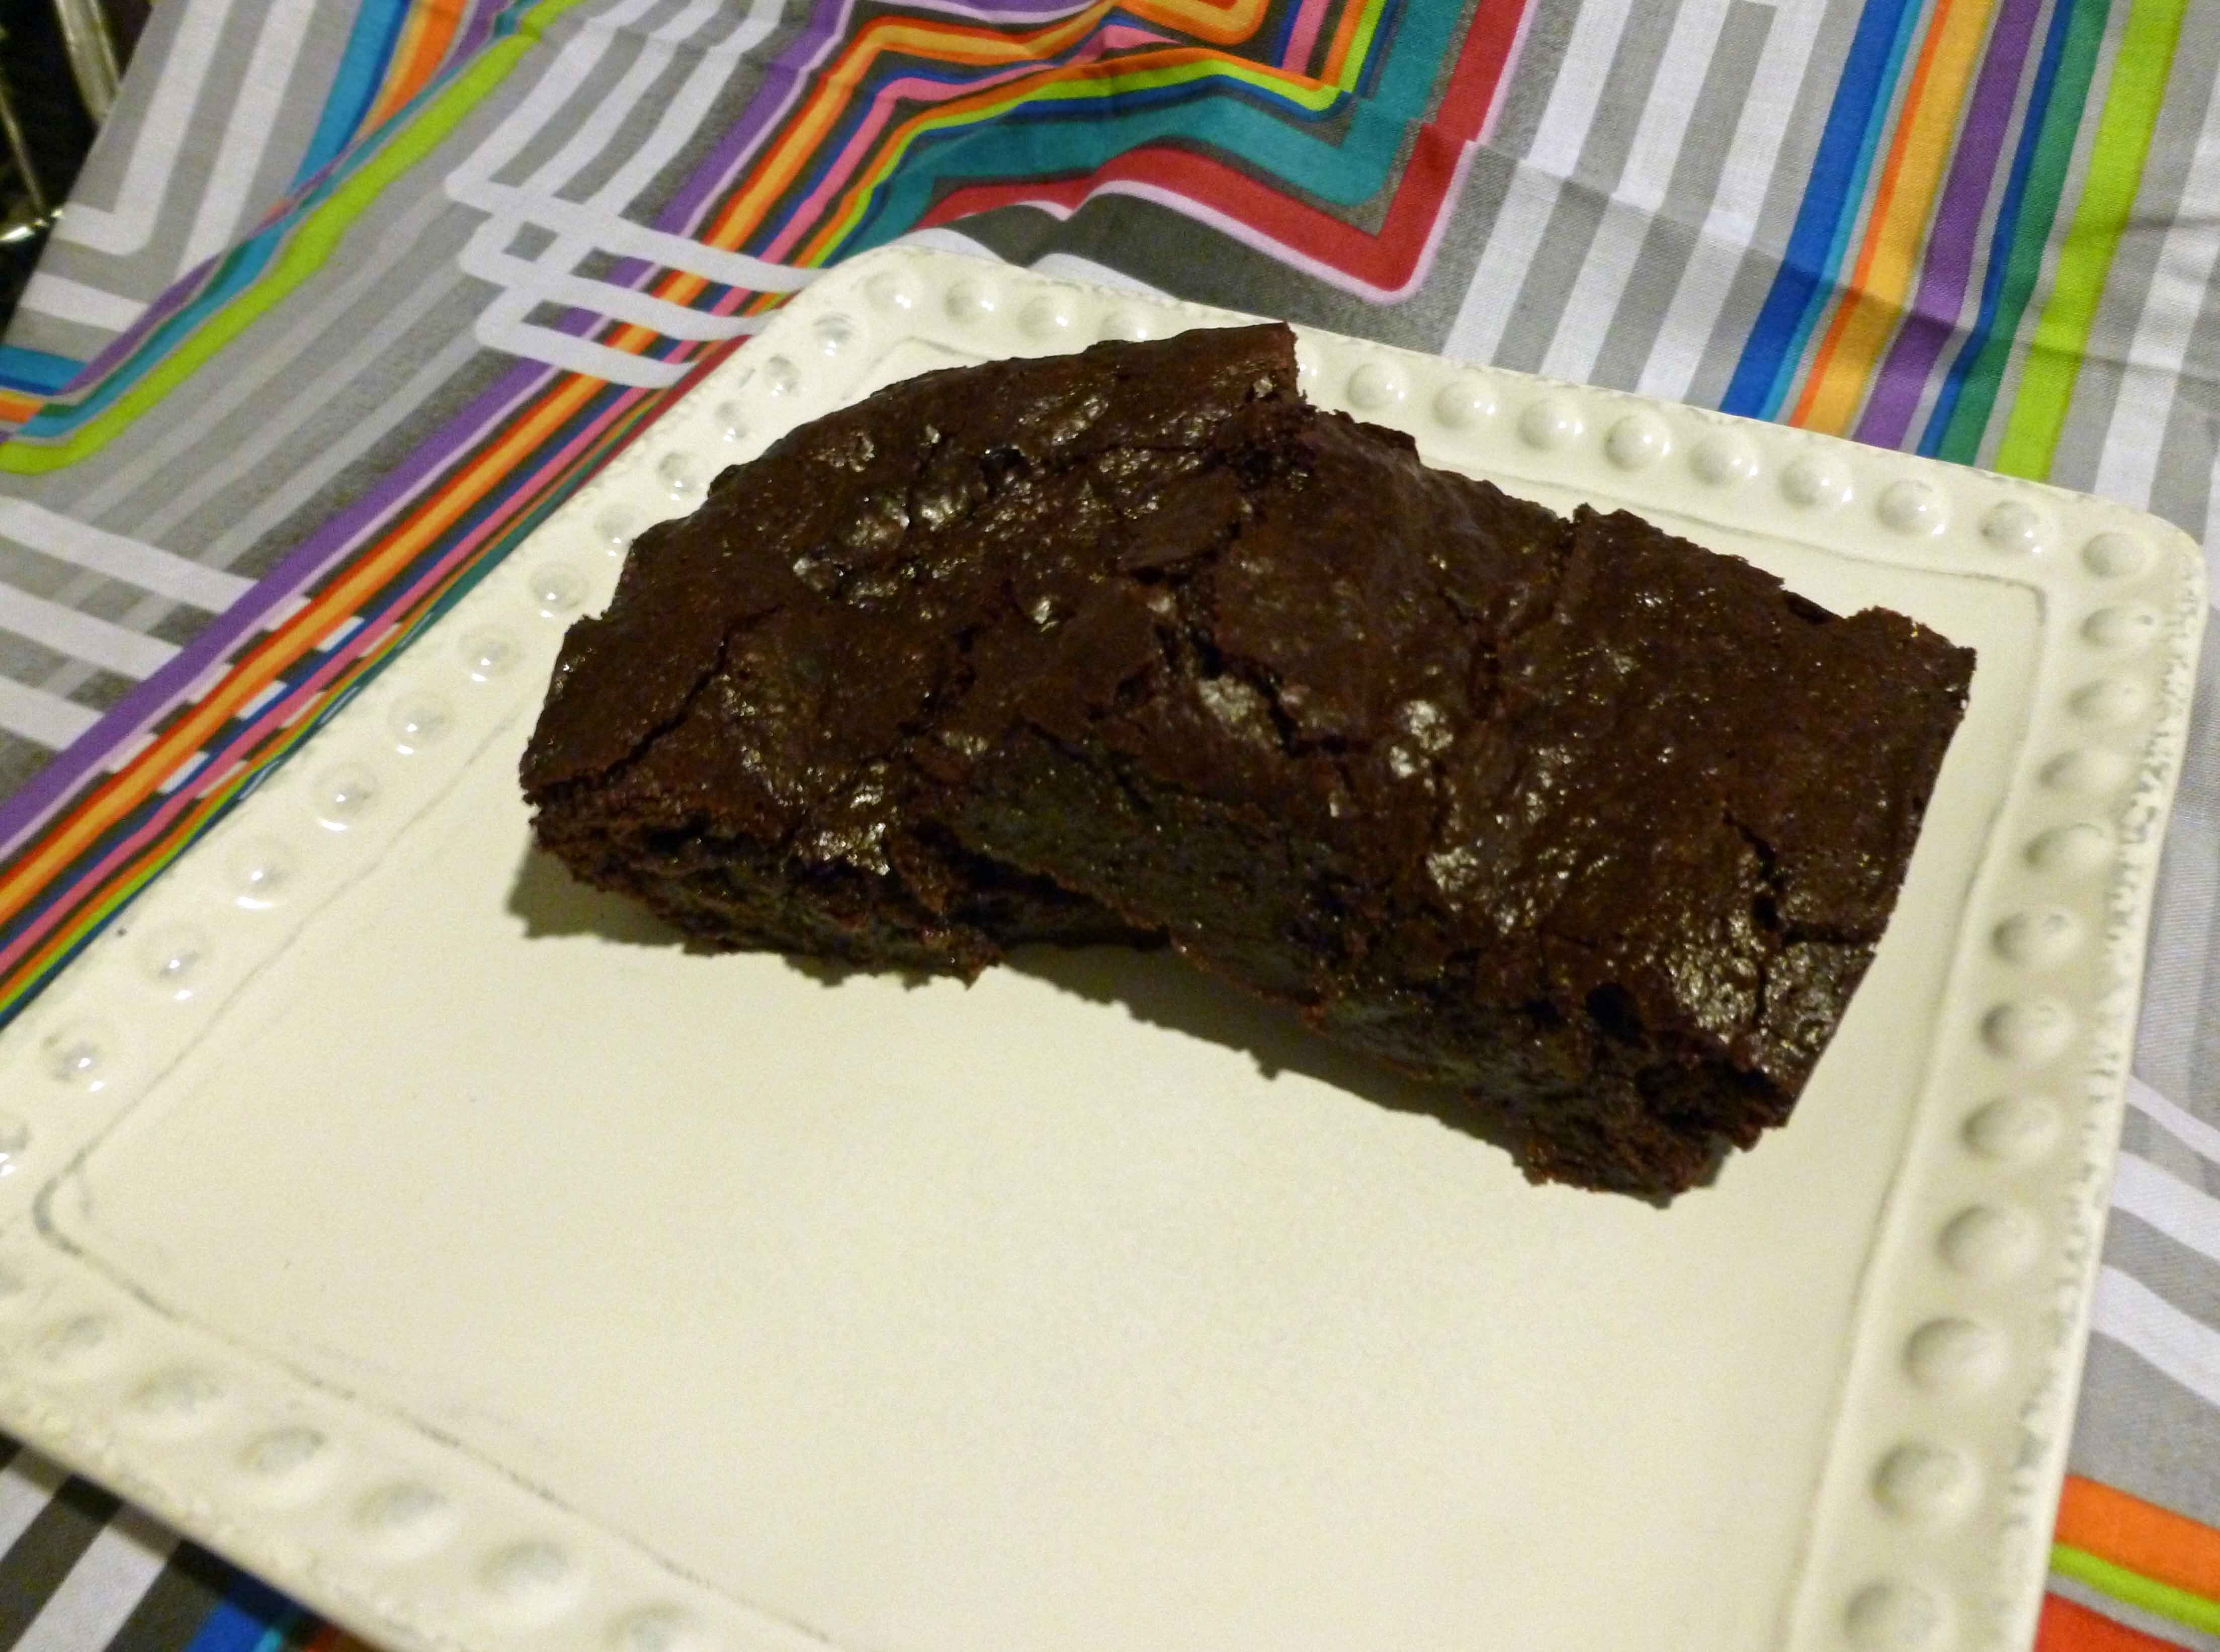
Bake it in the preheated oven for 65-75 minutes. Check them using a toothpick, the toothpick should come out clean, and then remove the brownies from the oven. Let the brownies cool completely before you cut or serve them.
Brownies after baking
Some fun variations would be to mix nuts or more chocolate chips into the batter before baking, or maybe, if you like some spice, maybe a 1/2 teaspoon of cayenne pepper, or if you like less spice, a 1/2 teaspoon of cinnamon.
When we were trying to think up something festive for this holiday week, we considered that ice cream seemed the best way to go. July 4th is a barbeque holiday, yes, (though why independence and charred tubes of mystery meat are so closely inter-related I will never understand), but we’ve covered barbeque pretty well up to now, and thought dessert was more appropriate. And it’s summer. So, ICE CREAM!
This was intended, originally, to be an ice cream recipe, but it ended up being more of a frozen pudding somehow. Which, what do you do with frozen pudding? Make popsicles, of course.
This is a plan ahead recipe! There are two pieces that need to sit OVERNIGHT, two separate nights, and then things need to freeze. We just want you to know, because, sometimes, maybe, people don’t read all the directions first. Not that we would ever start a recipe without reading all the directions…
This uses homemade cashew milk (I’m not actually sure there is a commercial version, but if there is, it’s probably expensive), so you will need to soak the cashews overnight. The water will look sort of scummy afterwards. Don’t worry! This is normal, and you’re getting rid of it anyway.
The next overnight is cooling your ice cream/frozen pudding mixture. The last is freezing your pops. So here you go.
What do you do with frozen pudding? Make a fudgesicle. Duh.
Cashew-Chocolate Pudding Popsicles
1 1/4 cup cashew pieces, soaked overnight
1 1/4 cup water
Blend to death in a blender — seriously, just turn it on and let it go for 5 minutes or so. You will not be straining this, so you want it smooth. This should yield 2 cups or more of cashew milk — you need 2 cups for the recipe. Use the rest for coffee.
2 cups cashew milk, 1/4 cup of this set aside
1 Tablespoon + 1 teaspoon arrowroot starch/powder
3/4 cup sugar
1/4 cup cocoa powder
3 oz dark chocolate (check this for allergens)
1 oz food-grade cocoa butter
1 Tablespoon vanilla
Mix the arrowroot and the 1/4 cup cashew milk and set aside.
In a sauce pan over medium-low heat, mix the rest of the cashew milk, sugar, cocoa, dark chocolate, and cocoa butter. Melt the solids, whisk them in, and cook, whisking often, until the mixture reaches a low boil. Do not turn up the heat to achieve the boil. This takes time!
When the mixture is boiling, remove from the heat. Whisk in the arrowroot mixture and the vanilla.
Cool overnight in the fridge.
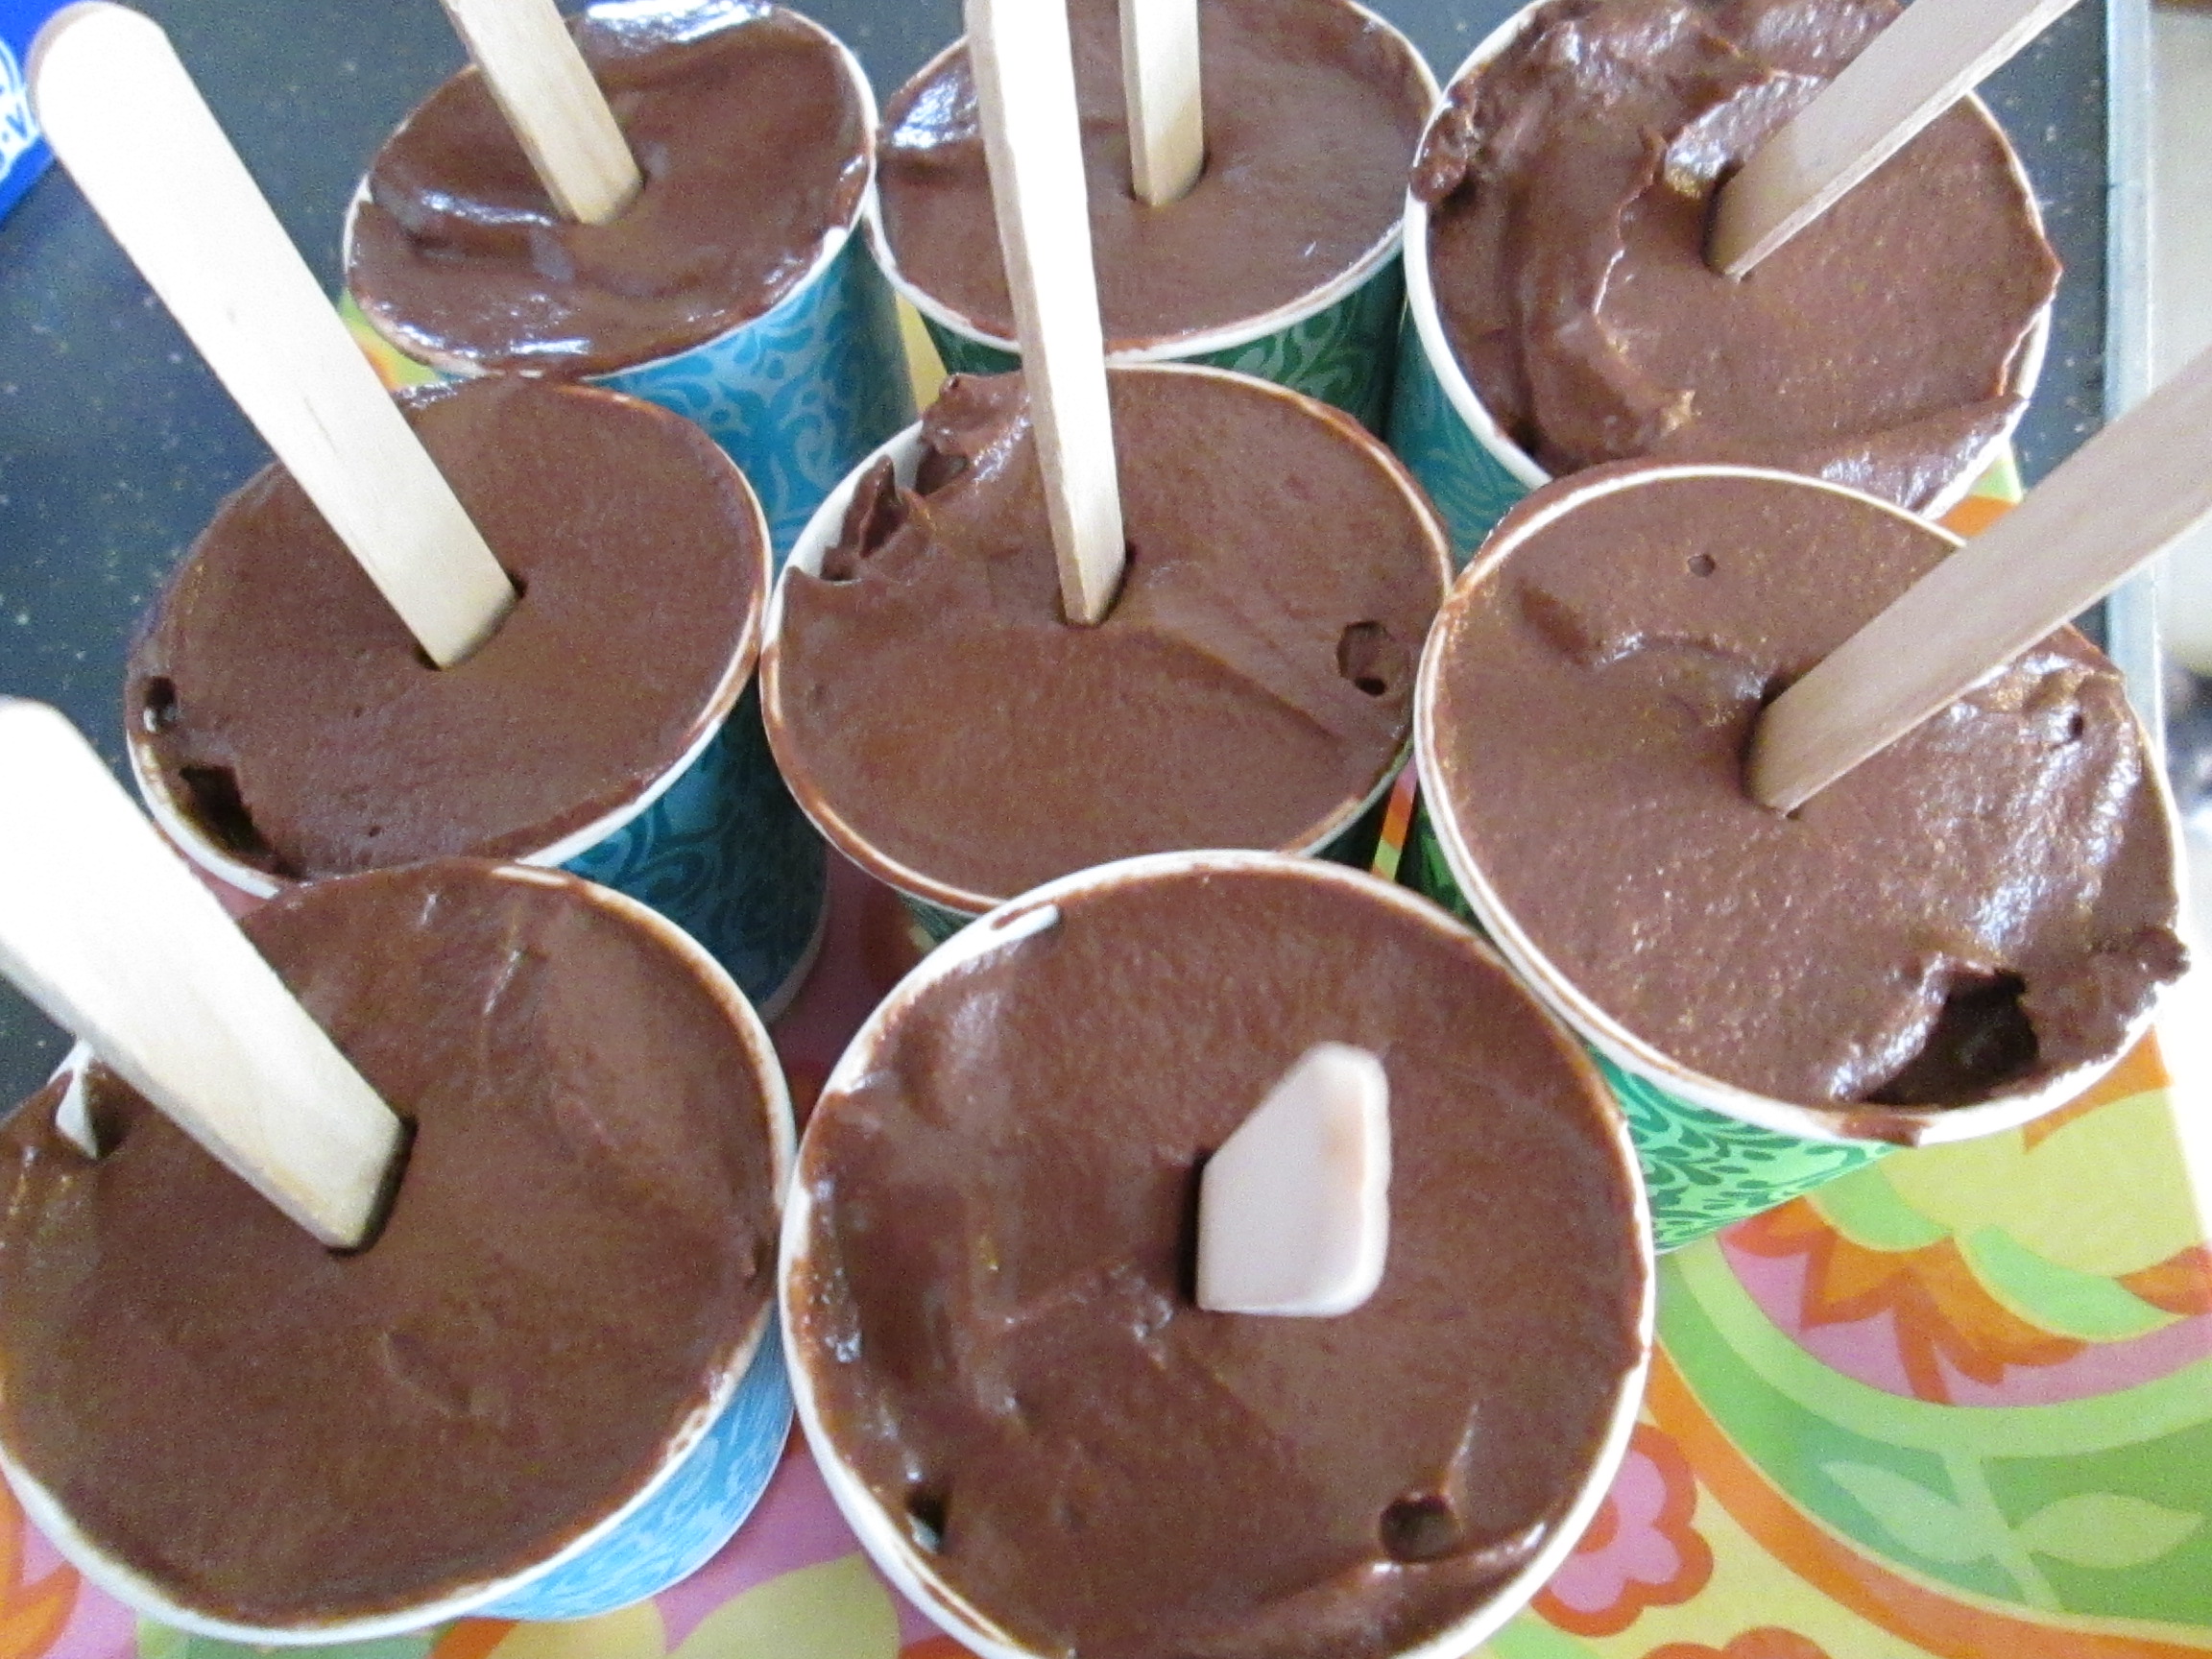
Now from here you can go one of two ways. We put this through the ice cream maker, following the maker’s instructions, and then decided it was better as pops. It’s likely that you can skip this step, but let’s be honest — some of us are a little superstitious, and since it worked right the first way (going through the ice cream maker), that’s how we did it.
Now for the pops, we used Dixie bathroom paper cups, 3 oz. each, leftover from a party we had last year, and they seemed to be the perfect size for this rich treat — no one really wanted a larger pop, and they do melt reasonably fast. If you have popsicle molds, give them a try, but we recommend the little cups. Perfect portions, and easy removal — just tear the cup off. Fill it to the top and add a popsicle stick (it’s thick enough to stay standing straight).
Makes about 12 pops, give or take a few, depending on how much of the pudding/frozen pudding you taste first.
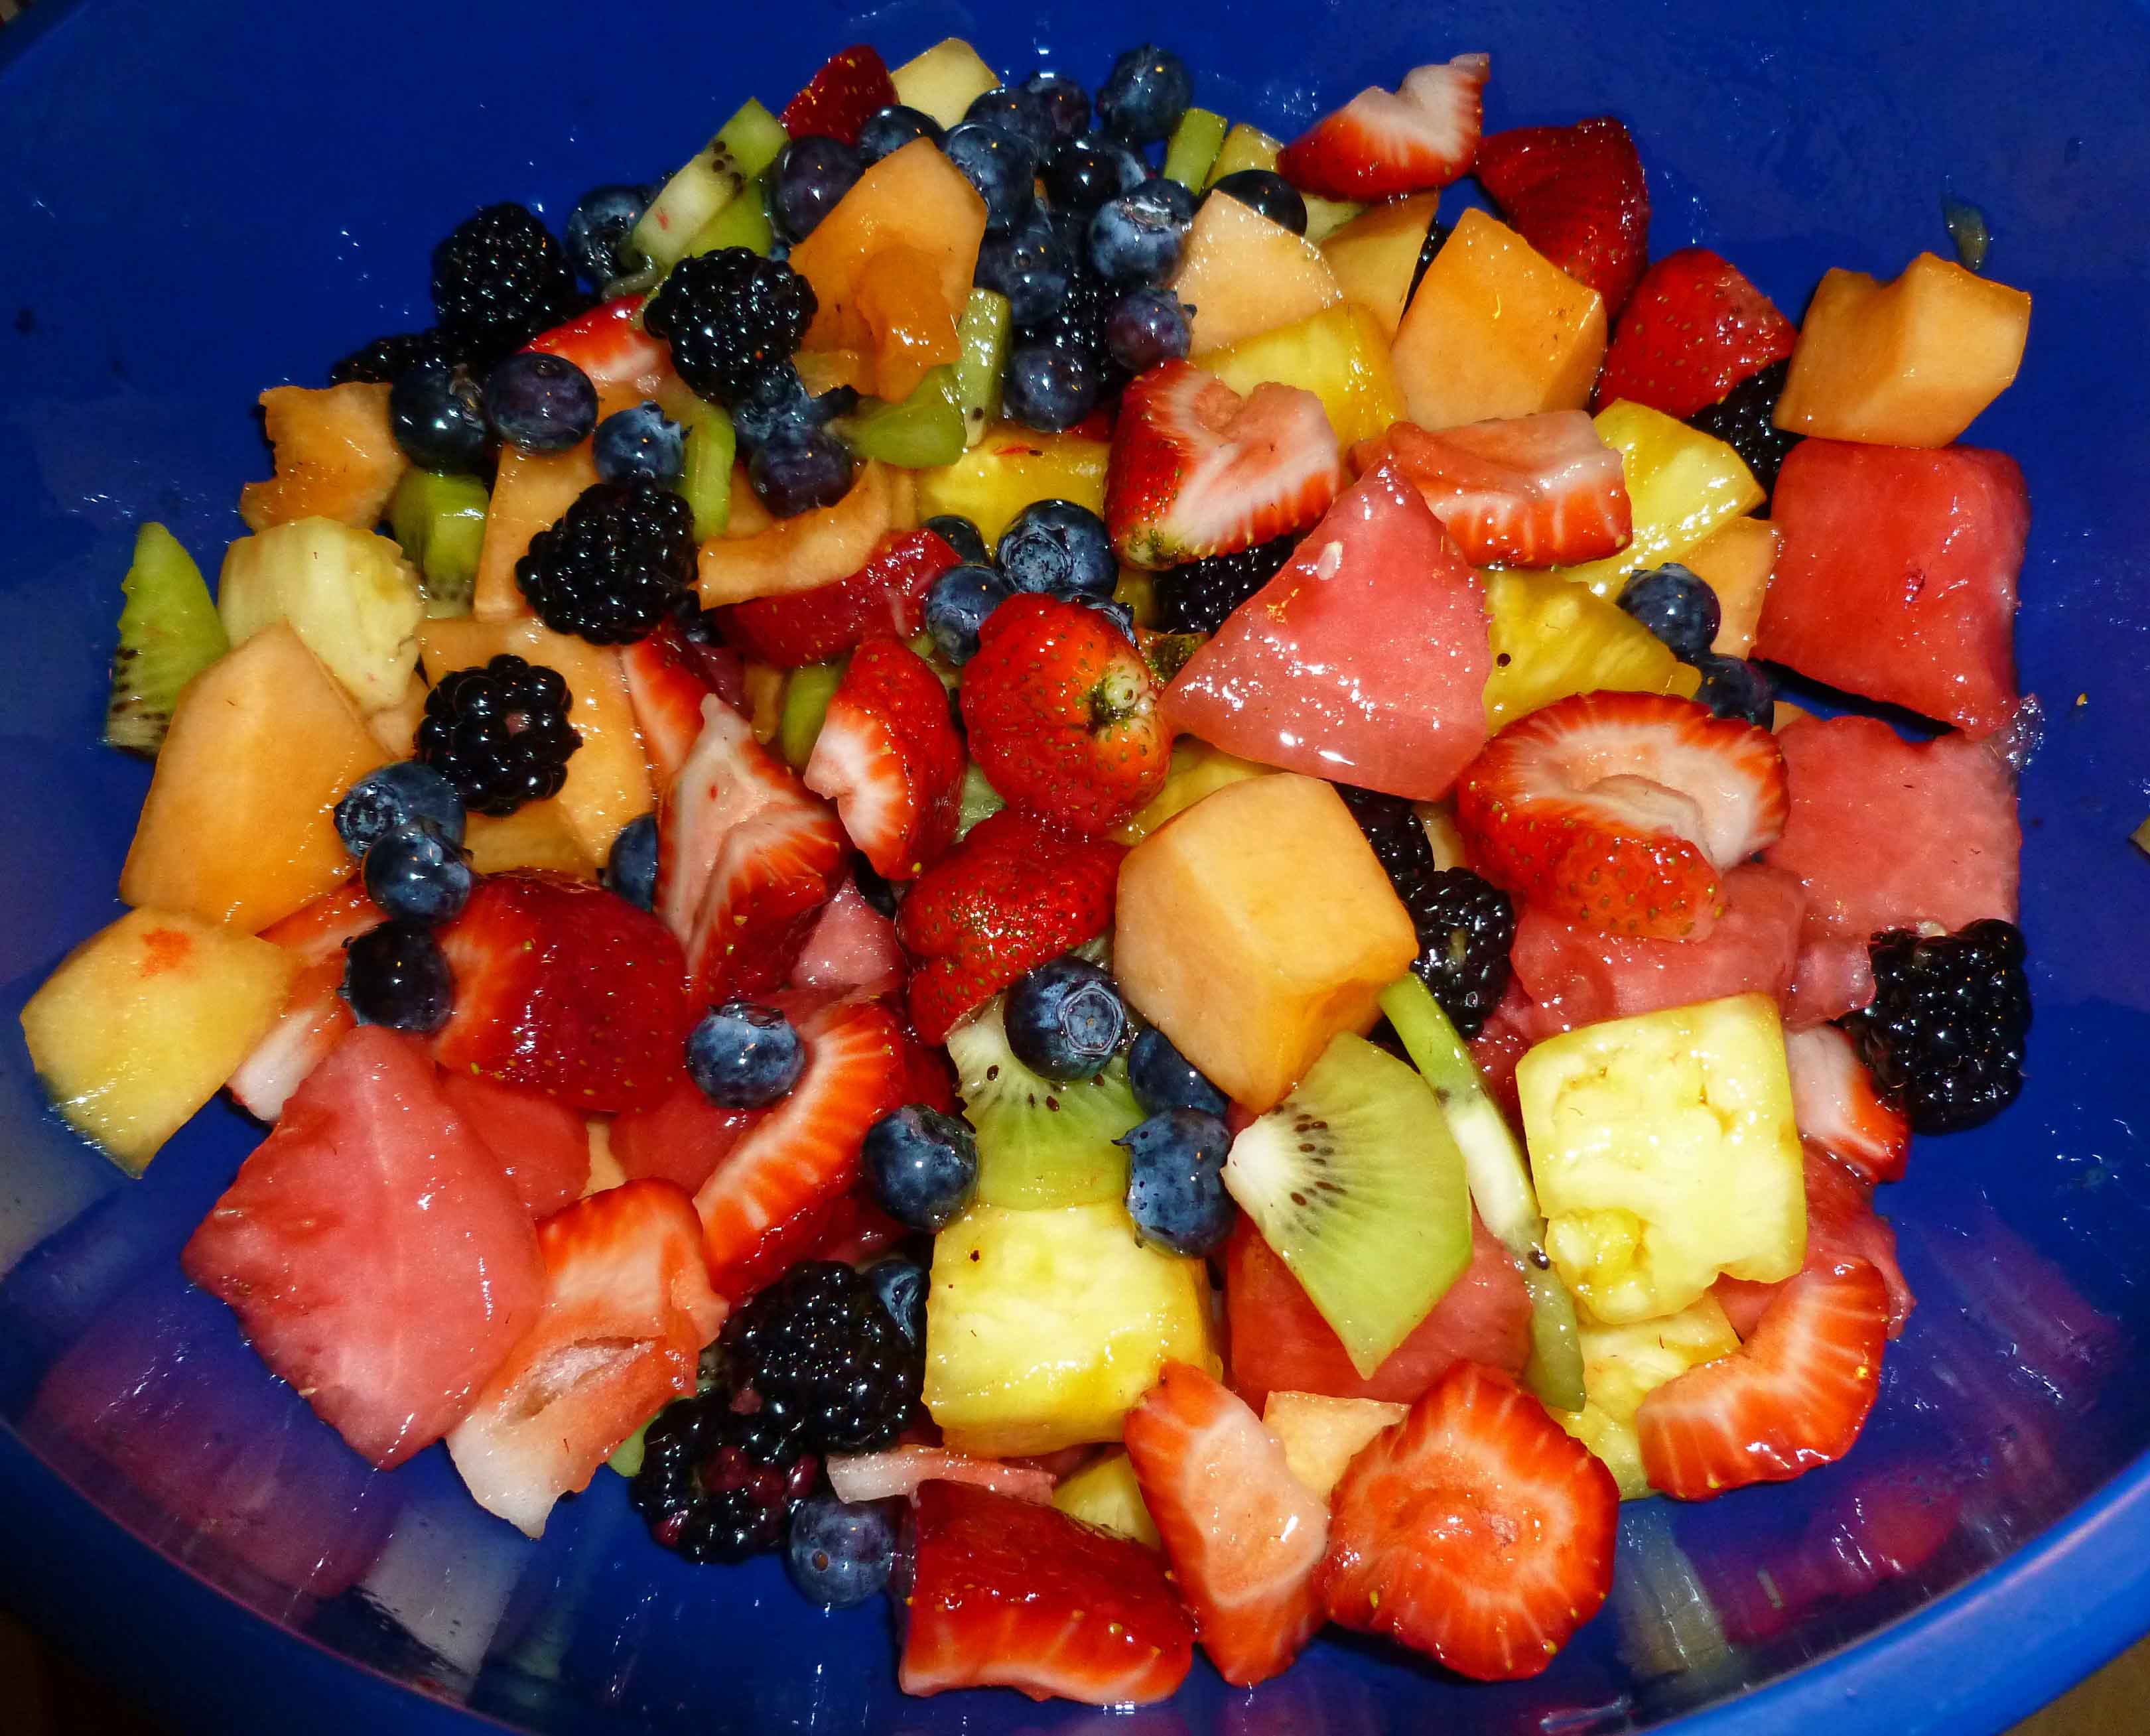
So, last weekend it snowed in New Hampshire, and this weekend it’s been 95°F all weekend. Hilarious. I don’t handle the heat well, if at all, nor do I handle the crazy freaking changes well. The humidity and corresponding air quality in New Hampshire has been known to send me right into an asthma attack. We’ve got the air conditioners cranked, but I don’t want to heat the apartment up any more than necessary, so we’ve been eating salads and fruit. And since it’s the time of year that you might be heading to potluck type gatherings, here’s a spruced up fruit salad you can take with you. Also, this can be made much much easier by doing what I did and buying a fruit tray and some berries and using it, so you don’t have to peel melons and pineapple. You can do it the night before and let the dressing soak in, but it’s yummy either way.
Margarita Tropical Fruit Salad
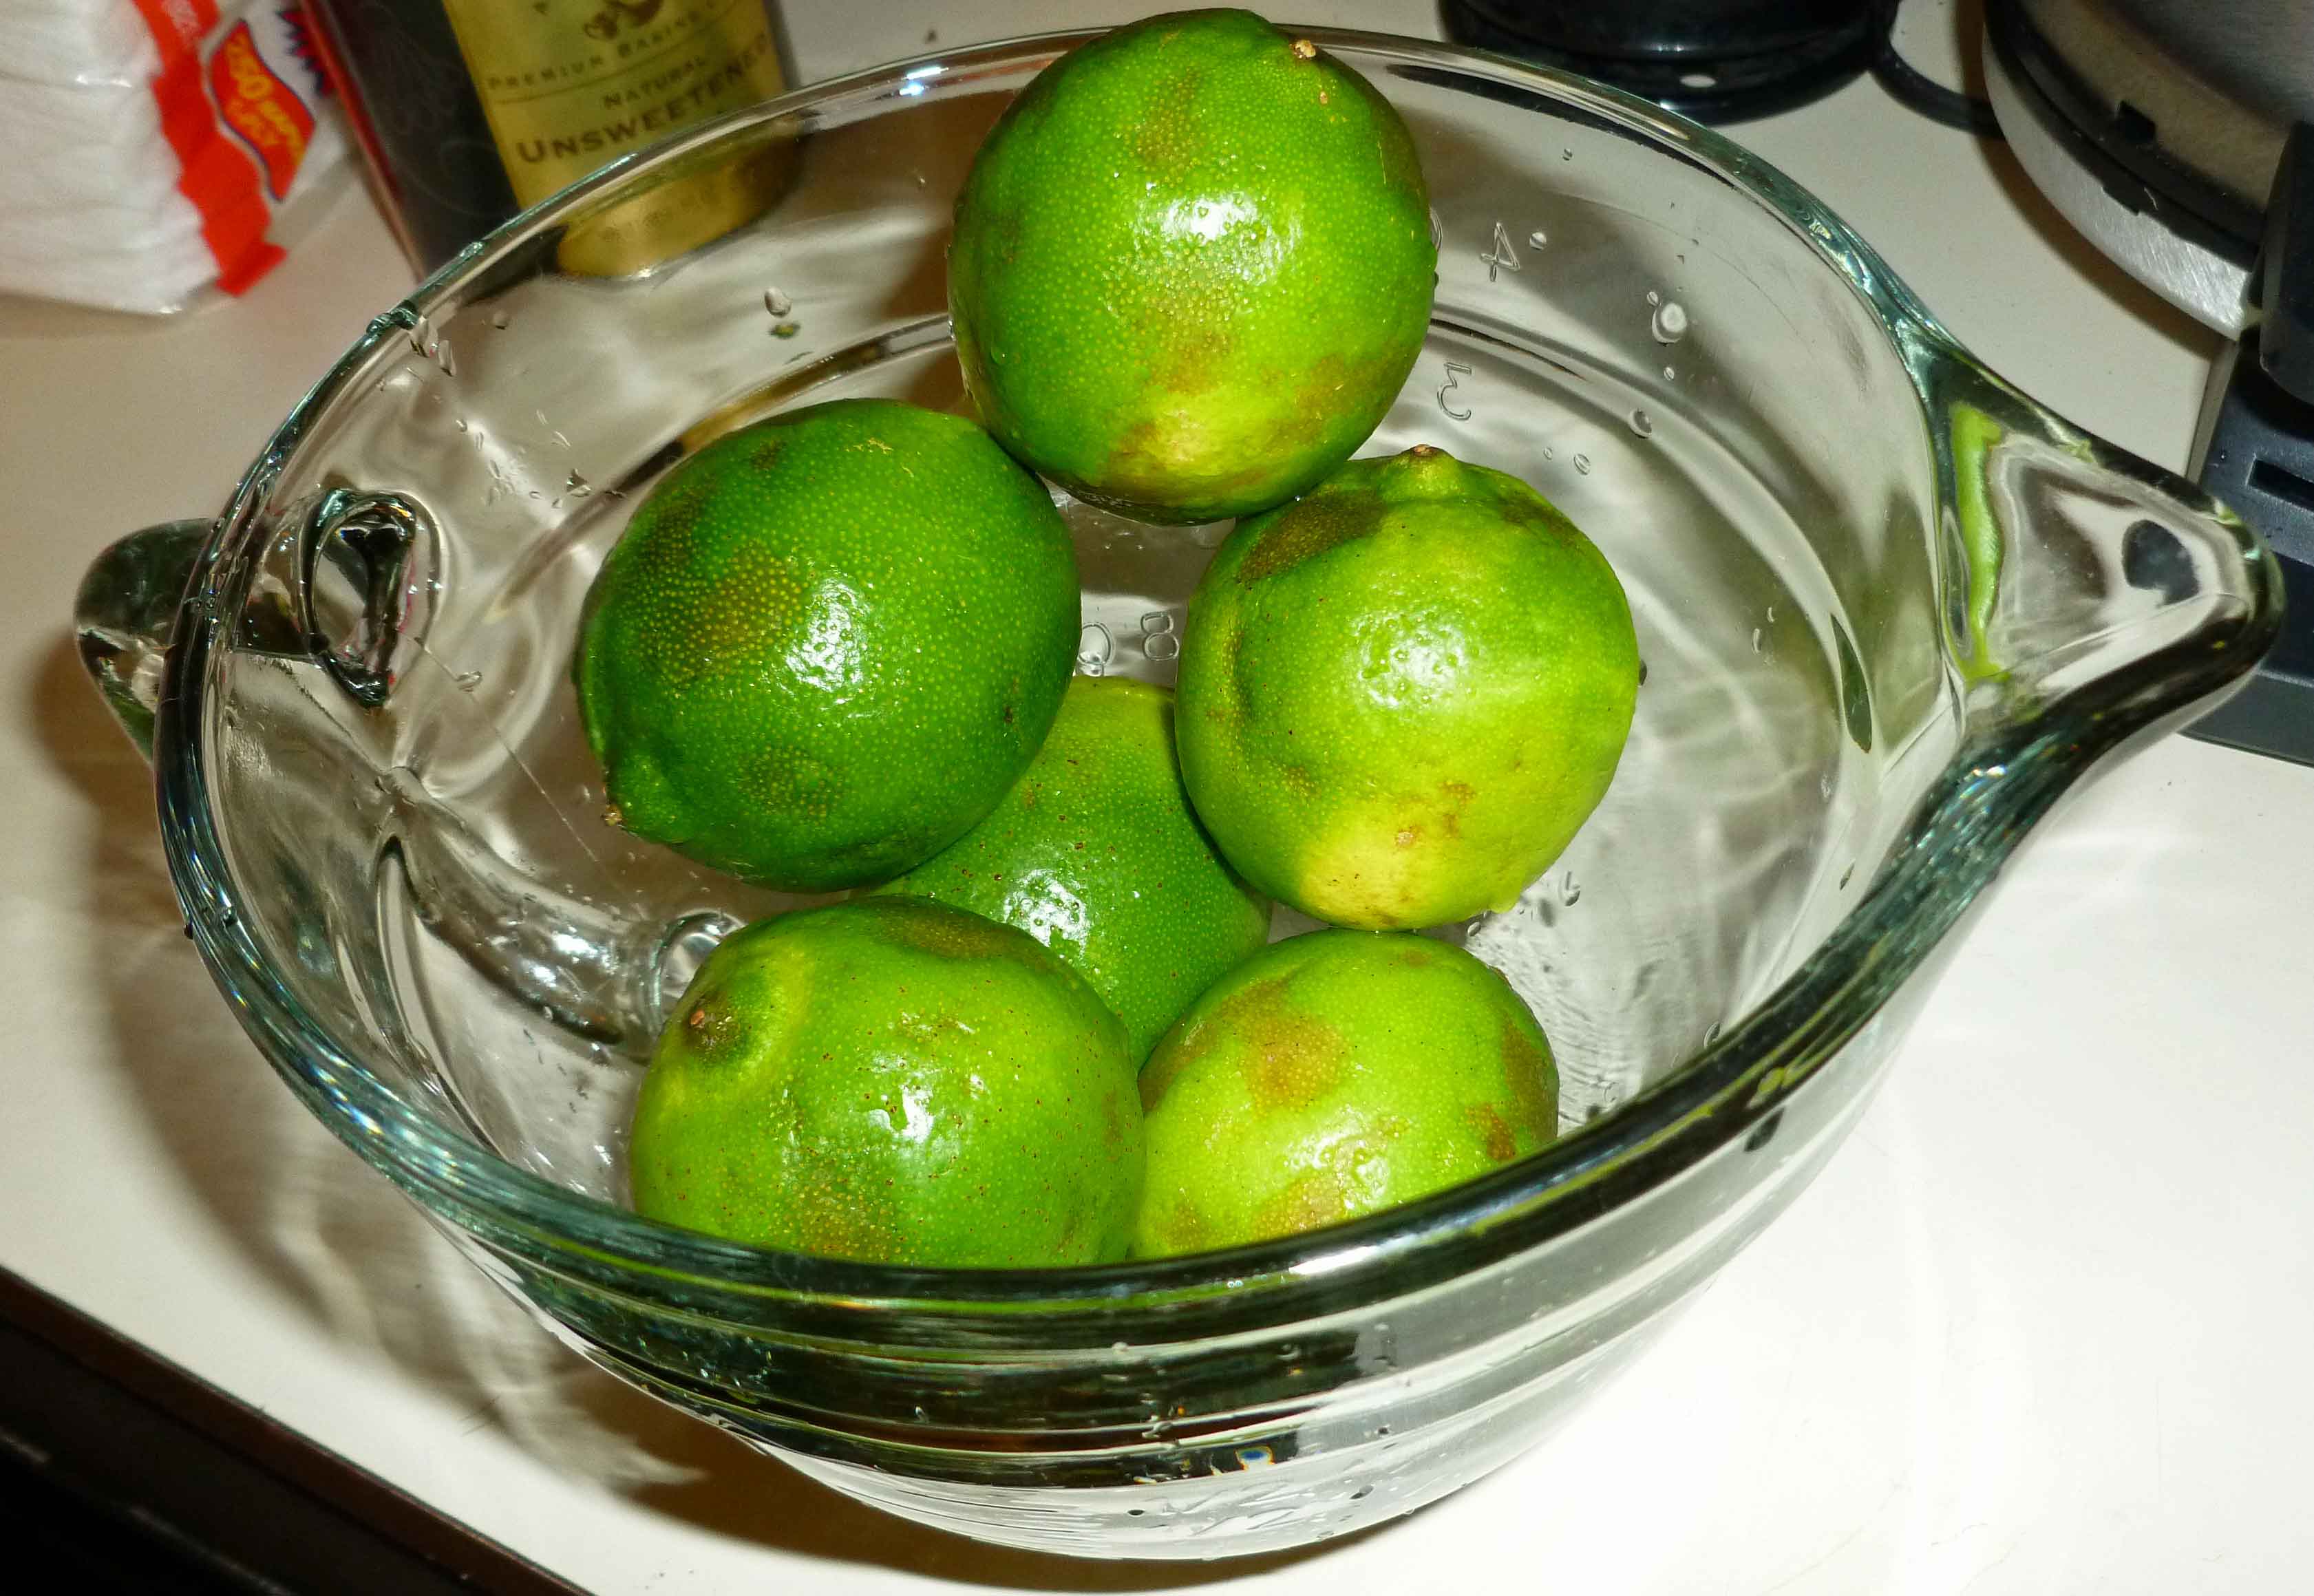
1/2 cup of freshly squeezed lime juice (about 4-5 limes)
1/2 cup of agave syrup
1/2 cup of tequila
2 1/2 teaspoons of arrowroot
2 Tablespoons of water
About 6-8 cups of fruit cut in bite size pieces, filling a large salad bowl. The mixture is up to you, but I used cantaloupe, watermelon, strawberries, pineapple, kiwi, strawberries, blueberries, and blackberries.
First, wash your limes carefully under hot water to get rid of the wax they put on them. To get the most juice out of them, I’ve found two tips that really help. Put your limes in a microwave safe container and nuke them on high for one minute.
Limes in microwave safe bowl
Then put them on a cutting board, and using the palm of your hand roll the limes back and forth, putting enough pressure on them so that you can feel the lime squeeze against the board, but not enough so you break the lime against the cutting board. Now juice your limes.
Denise awkwardly rolling limes with her left while she takes pictures with her right
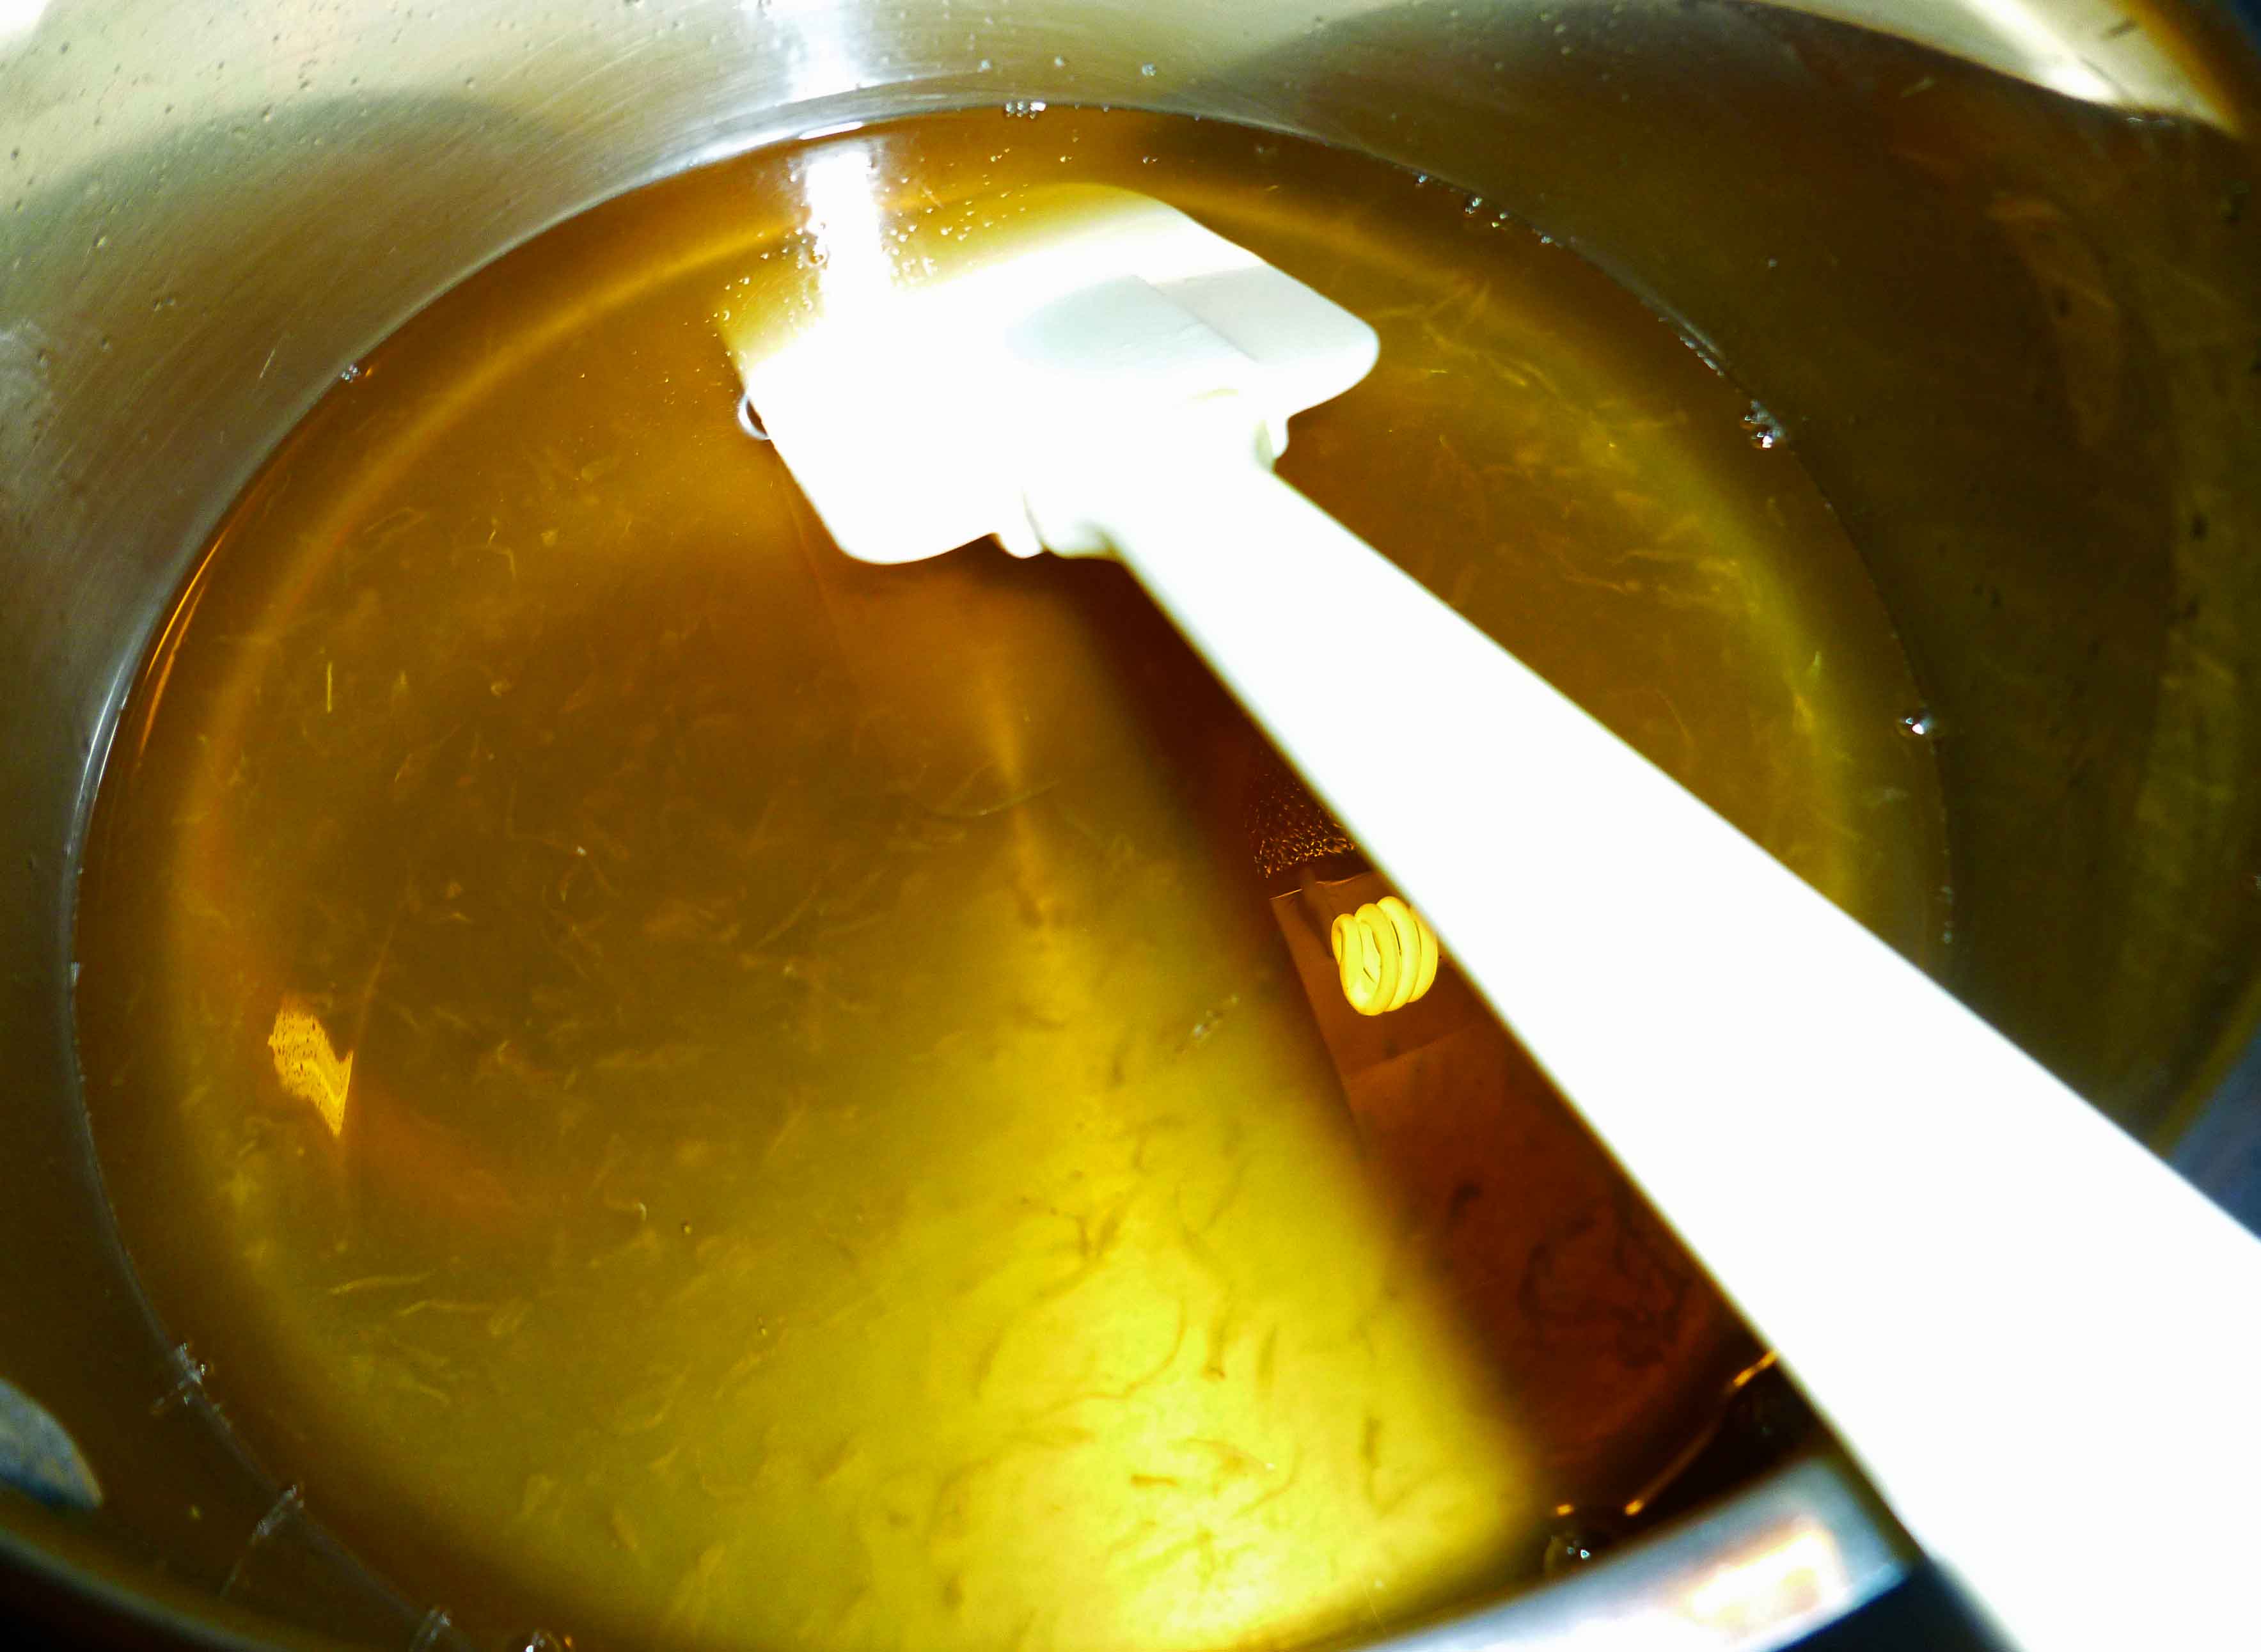
Make sure you don’t have any seeds in with the lime juice and pour it into a sauce pan. Add the agave syrup and the tequila to the sauce pan, mix until thoroughly combined, and then bring it to a boil for about two minutes. Turn the heat to low, and in a small container (I used a glass measuring cup) mix the arrowroot and water together. Pour the water and arrowroot mixture into the sauce pan, stirring quickly so that it doesn’t clump. Turn to medium low heat and let it simmer for 15 minutes or so, and then remove from the heat.
Agave Lime Tequila dressing in sauce pan
When the agave lime tequila dressing has cooled (you can cheat by sticking it the freezer for a few minutes if you need to), pour it over the cut fruit and toss to combine. Enjoy!!
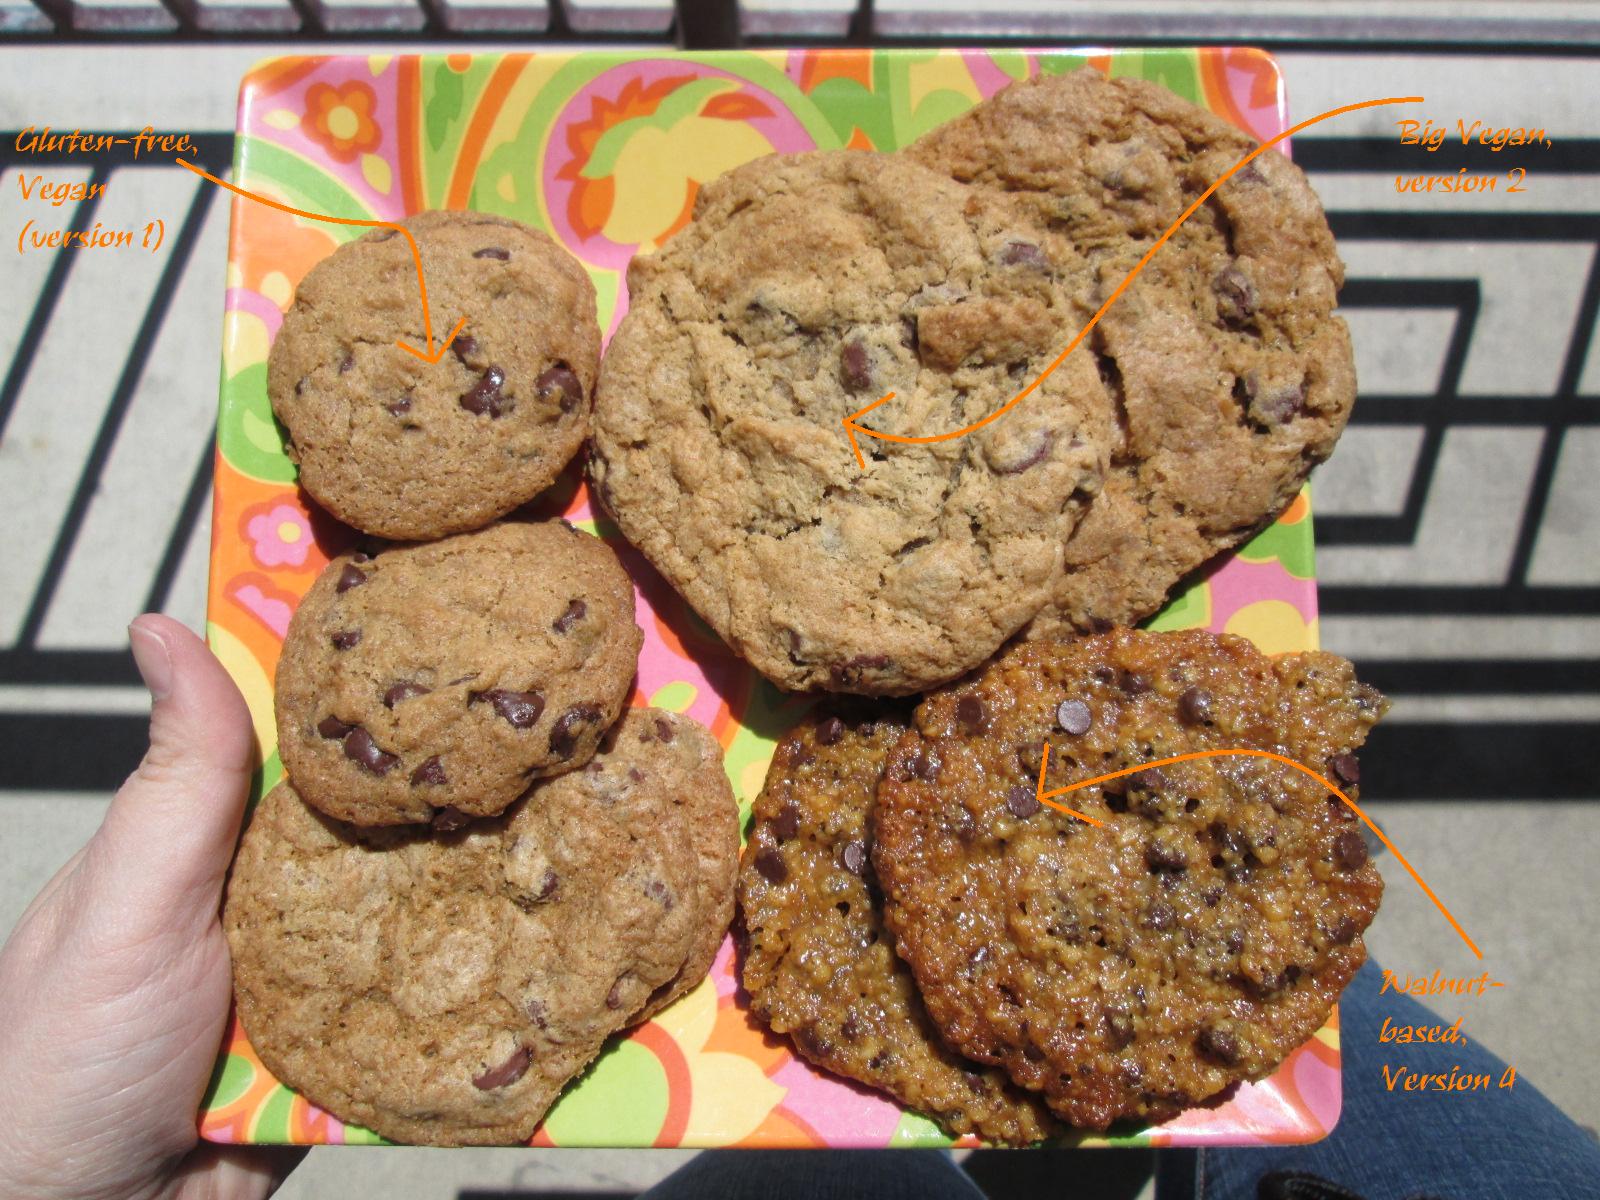
Plate of Chocolate Chipped Goodness — from top left, vegan GF, vegan, walnut
Because it’s Earth Day, and it’s our 100th post, we thought we should make cookies. Because cookies are round, like the Earth. And because making cookies and giving them to people makes you a hero. Or just sharing — you don’t have to give them all away, promise. You can eat them, too. Cookies are happiness, right?
Well, cookies are often not even close to happiness when you’re an allergen sufferer. If you have adult-onset allergies, you might remember making the classic Tollhouse cookie — wheat flour, eggs, butter, chocolate chips that contain milk. The recipe itself is almost a list of allergens. But it doesn’t have to be! We’re here to show you a few ways (but not quite 100).
The following recipes — there are 4 — are all variations on the chocolate chip cookie. The first two are classic; the very first is completely allergen-free — gluten-free, egg-free, dairy-free, nut-free, vegan. The rest are also vegan (no dairy, no eggs), but the second recipe contains gluten, and the last two contain nuts. One of these is bound to work for you. Read on for the details.
Vegan Gluten-free Chocolate Chip Cookies
Gluten-Free and Allergen-Free Chocolate Chip Cookies, Version 1
allergen-free.
Makes about 50-60 cookies using approximately 1 Tablespoon of dough for each cookie.
2 Tablespoons of ground chia seed meal
6 Tablespoons of water
315 grams of the Glutenfreegirl’s All Purpose Gluten Free Flour Mix for Cookies (see recipe here, I made a half batch and it was enough for this with 185 grams left over – I don’t know if this would work with other commercial gluten free mixes but if you want to try it, I’m using 140 grams to the cup so if you’re using cups because your mix is a 1:1 ratio, it’s 2 1/4 cups)
1 teaspoon of baking soda
1 teaspoon salt
1 cup of Soy-free Earth Balance (if you can have soy, 2 sticks Earth Balance buttery spread)
3/4 cup of brown sugar, packed
3/4 cup of granulated sugar
1 Tablespoon of vanilla extract
2 cups of allergen-free chocolate chips (Enjoy Life chocolate chips recommended)
Preheat your oven to 375°F.
In a small container mix ground chia seed meal and water thoroughly. Set aside until needed to let it gel.
Then measure out the Gluten Free Flour Mix for Cookies, salt, and baking soda and place in a bowl. Whisk ingredients together until they are well incorporated into each other, and set aside until its needed.
Using your mixer (preferably a stand mixer) beat the Earth Balance, sugar, brown sugar, and vanilla in a large bowl until it’s creamy, scraping down the sides as needed to make sure that all the ingredients are completely mixed together. The reason that you are using cold Earth Balance right out of the fridge is that (a) if you have a KitchenAid or other stand mixer it’ll take the punishment and beat the Earth Balance when it’s cold anyway, and I am way too impatient to wait to soften anything and doing it in the microwave is always a disaster, (b) Earth Balance seems to have a much lower melting point that regular margarine or butter, so you’re giving yourself a fighting chance to have your dough stay doughy when you’re waiting to bake cookies in multiple batches in the oven, and (c) I think it makes the cookies crispier, but I have no empirical evidence for that really.
Add one half of the chia mixture and beat it well to mix it in completely, again scraping down the sides as needed. Add the second half of the chia mixture and do the same.
Gradually add the Gluten Free Flour Mix for Cookies while beating well, again scraping down the sides as needed, until all of it is incorporated into the dough. Using a spoon, mix in the chocolate chips. (You don’t want to use the mixer because it’ll mash the chocolate chips into little bits.)
Drop dough (I used a scoop that holds one tablespoon) onto ungreased baking sheets. I used Pampered Chef stoneware so if you’re using a metal pan you may need to adjust the baking time. Gluten free baking takes longer than regular baking so even though these cookies are 1/3 the size of the other recipe I did with regular flour, they take just as long or longer to cook. Bake for 15-17 minutes (using the stoneware, I baked them for 17 minutes for the best results, with metal sheet pans, try the lower end of the range, but watch your cookies).
Once you have taken them out of the oven, let them cool on the baking sheet for 2-4 minutes or so to let them set up a bit, and then using a spatula, remove the cookies to a cooling rack to finish cooling. Enjoy!
Chocolate Chip Cookies – Vegan (not GF)
Classic Vegan Chocolate Chip Cookies, Version 2
contains gluten.
Makes about 20 three inch cookies using approximately 3 Tablespoons of dough for each cookie. (I like big cookies. If you like smaller cookies, use 1 Tablespoon of dough and adjust the cooking time to about 10 minutes, and you’ll get 5 dozen cookies).
2 Tablespoons of ground chia seed meal
6 Tablespoons of water
2 1/4 cups of all purpose flour
1 teaspoon of baking soda
1 teaspoon salt
1 cup of Earth Balance Natural Buttery Spread Soy Free or 2 sticks of Earth Balance Vegan Buttery Sticks, COLD
3/4 cup of brown sugar, packed
3/4 cup of granulated sugar
1 Tablespoon of vanilla extract
2 cups of vegan or allergy free for you chocolate chips (Enjoy Life chocolate chips recommended)
Preheat your oven to 375°F.
In a small container mix ground chia seed meal and water thoroughly. Set aside until needed to let it gel.
Then measure out flour, salt, and baking soda and place in a bowl. Whisk ingredients together until they are well incorporated into each other, and set aside until its needed.
Using your mixer (preferably a stand mixer) beat the Earth Balance, sugar, brown sugar, and vanilla in a large bowl until it’s creamy, scraping down the sides as needed to make sure that all the ingredients are completely mixed together. The reason that you are using cold Earth Balance right out of the fridge is that (a) if you have a KitchenAid or other stand mixer it’ll take the punishment and beat the Earth Balance when it’s cold anyway, and I am way too impatient to wait to soften anything and doing it in the microwave is always a disaster, (b) Earth Balance seems to have a much lower melting point that regular margarine or butter, so you’re giving yourself a fighting chance to have your dough stay doughy when you’re waiting to bake cookies in multiple batches in the oven, and (c) I think it makes the cookies crispier, but I have no empirical evidence for that really.
Add one half of the chia mixture and beat it well to mix it in completely, again scraping down the sides as needed. Add the second half of the chia mixture and do the same.
Gradually add the flour mixture while beating well, again scraping down the sides as needed, until all the flour is incorporated into the dough. Using a spoon, mix in the chocolate chips. (You don’t want to use the mixer because it’ll mash the chocolate chips into little bits.)
Drop dough (I used a scoop that holds three tablespoons) onto ungreased baking sheets. I used Pampered Chef stoneware so if you’re using a metal pan you may need to adjust the baking time. Bake for 15-17 minutes (using the stoneware, I baked them for 17 minutes for the best results, with metal sheet pans, try the lower end of the range, but watch your cookies).
Once you have taken them out of the oven, let them cool on the baking sheet for 2-4 minutes or so to let them set up a bit, and then using a spatula, remove the cookies to a cooling rack to finish cooling. Enjoy!
Almond-based Chocolate Chipper
Almond-based Chocolate Chip Cookies, Version 3
contains nuts. Makes about 16 cookies.
Preheat oven to 350F
1 1/4 cup almond meal/ground almonds
1/4 teaspoon salt
1/4 teaspoon cinnamon
1/2 cup allergen-free chocolate chips (Enjoy Life mini chocolate chips recommended — mini chips are best in this)
2 Tablespoons oil (I used canola — use what you like for baking, but if using coconut, melt it first)
1/4 cup agave syrup
2 teaspoons vanilla extract
Whisk almond meal, salt, cinnamon, chips, and coconut, if using, together in a medium bowl.
Whisk oil, agave, and vanilla together in a small bowl. It will be tempting to skip this step and just add the wet ingredients into the dry, but don’t. The oil mixed into the syrup will make it mix smoother in the end.
Mix the wet ingredients into the dry with a rubber spatula. You will have a pretty thick dough, but mix until there are no dry spots.
Drop by the tablespoon onto a cookie sheet lined with parchment paper. You don’t really need to space these, as they do not spread out. Bake for 12 minutes, until slightly browned on the bottom (baking time on a metal cookie sheet). Rest them on the cookie sheet for 3 minutes or so before CAREFULLY cooling completely on a wire rack. Be careful — these cookies are a little… loose. These cookies are MUCH better completely cooled — the flavors are muddled when warm. Enjoy!
Walnut-based Chocolate Chippers
Walnut-based Chocolate Chip Cookies, Version 4
contains nuts. Makes about 12-16 cookies.
Preheat oven to 350F.
1 1/4 cups ground walnuts (I have not seen walnut meal for sale. Pulse them in a food processor.)
1/4 teaspoon salt
1/2 cup mini chocolate chips (Enjoy Life recommended)
Whisk together the walnuts, salt, and chocolate chips.
Whisk together the oil, syrup, and vanilla. This will take a minute, as the brown rice syrup is thick, but it will come together. (A measuring tip — measure out the oil into the 1/3 cup measuring cup. Swirl it around before dumping it in the bowl, and then use that cup to measure the syrup, and it will come right out.)
Add the wet ingredients to the dry and mix with a rubber spatula.
Drop 1 Tablespoon scoops onto a baking sheet lined with parchment paper, about 1 inch apart. Bake 12-17 minutes or until cookies have spread and edges begin to brown (baking time on a metal sheet). Let rest only a few minutes on the cookie sheet before removing to a wire rack to cool. Unlike the almond-based cookies, these are even better warm. Enjoy!
Cookies from King Arthur GF box mix
If you are newly gluten-free, don’t want to buy 100 spendy new flours and want to make cookies, try the King Arthur box mix. It is a box mix, so it’s not as great as making them from scratch, but it is good. And early successes in gluten-free baking are worth it.
We hope that our happy 100th post has inspired you to venture up the cookie tree. You know, the tree that the elves live in? If you have no elves, you’ll have to bake your own cookies, but we promise, if we can do it, you can do it. Your friends will love you for it.
Got a favorite recipe? Tried one of ours and liked it? We’d love to hear from you.
And this is take two on cherries for our President’s day theme. Cherries go with chocolate. And there’s a place in Concord, New Hampshire that sells a pastry called Bread & Chocolate that I’ve been trying to replicate since the dairy allergy diagnosis, so I decided to add cherries to the mix this time. This is like a jelly roll, except instead of cake and jelly or cream, you have bread and chocolate and cherries. Although I’ve tagged a warning, just to be clear, this recipe contains wheat and gluten, and I’ve written it to be used with a bread machine.
Bread and Chocolate with Cherries
1/4 cup of warm water (between 70ºF and 85ºF)
3/4 cup of a milk alternative product of your choice (I used homemade oat milk)
1 Tablespoon of Ener-G egg replacer, mixed with 6 Tablespoons of warm water
1 1/4 teaspoons of salt
1/3 cup and 1 teaspoon of dark brown sugar, packed firmly
1/4 cup of shortening or Earth Balance Soyfree Natural Buttery Spreads
2 teaspoons of cinnamon
4 cups of bread flour
2 1/2 teaspoons of bread machine yeast
1 cup of Dole frozen Dark Sweet Cherries, chopped
1 cup of Enjoy Life Mini Chocolate chips
2 Tablespoons of melted Earth Balance Soyfree Natural Buttery Spreads
Sunbeam Bread Machine
Using my nicely inexpensive Sunbeam bread machine, add first three ingredients in order as listed to the bread machine pan. Then add the salt, brown sugar, shortening, cinnamon and flour to the bread machine pan, heaping the flour in a pile.
Using a spoon, make a little indentation that you can put the yeast in, and then add the yeast.
Ingredients in Bread Pan with Yeast in Indentation on Top
Set your bread machine menu to just make dough. When its ready it should look something like this:
Completed Dough in Bread Pan
Preheat oven to 375°F. Spread a little flour on your very clean counter top or on your dough mat, and dump dough on mat or counter. Make sure you remove the paddle if it falls out of the bread pan. Roll out dough using a rolling pin to a rectangular shape approximately 12 by 18 inches.
Dough rolled to a rectangular shape
Once you have rolled the dough to the correct shape, spread your chopped cherries over the surface.
Dough with Cherries Spread over Surface
Then sprinkle the mini chocolate chips over the surface of the dough.
Chocolate Chips and Cherries Spread over Surface of Dough
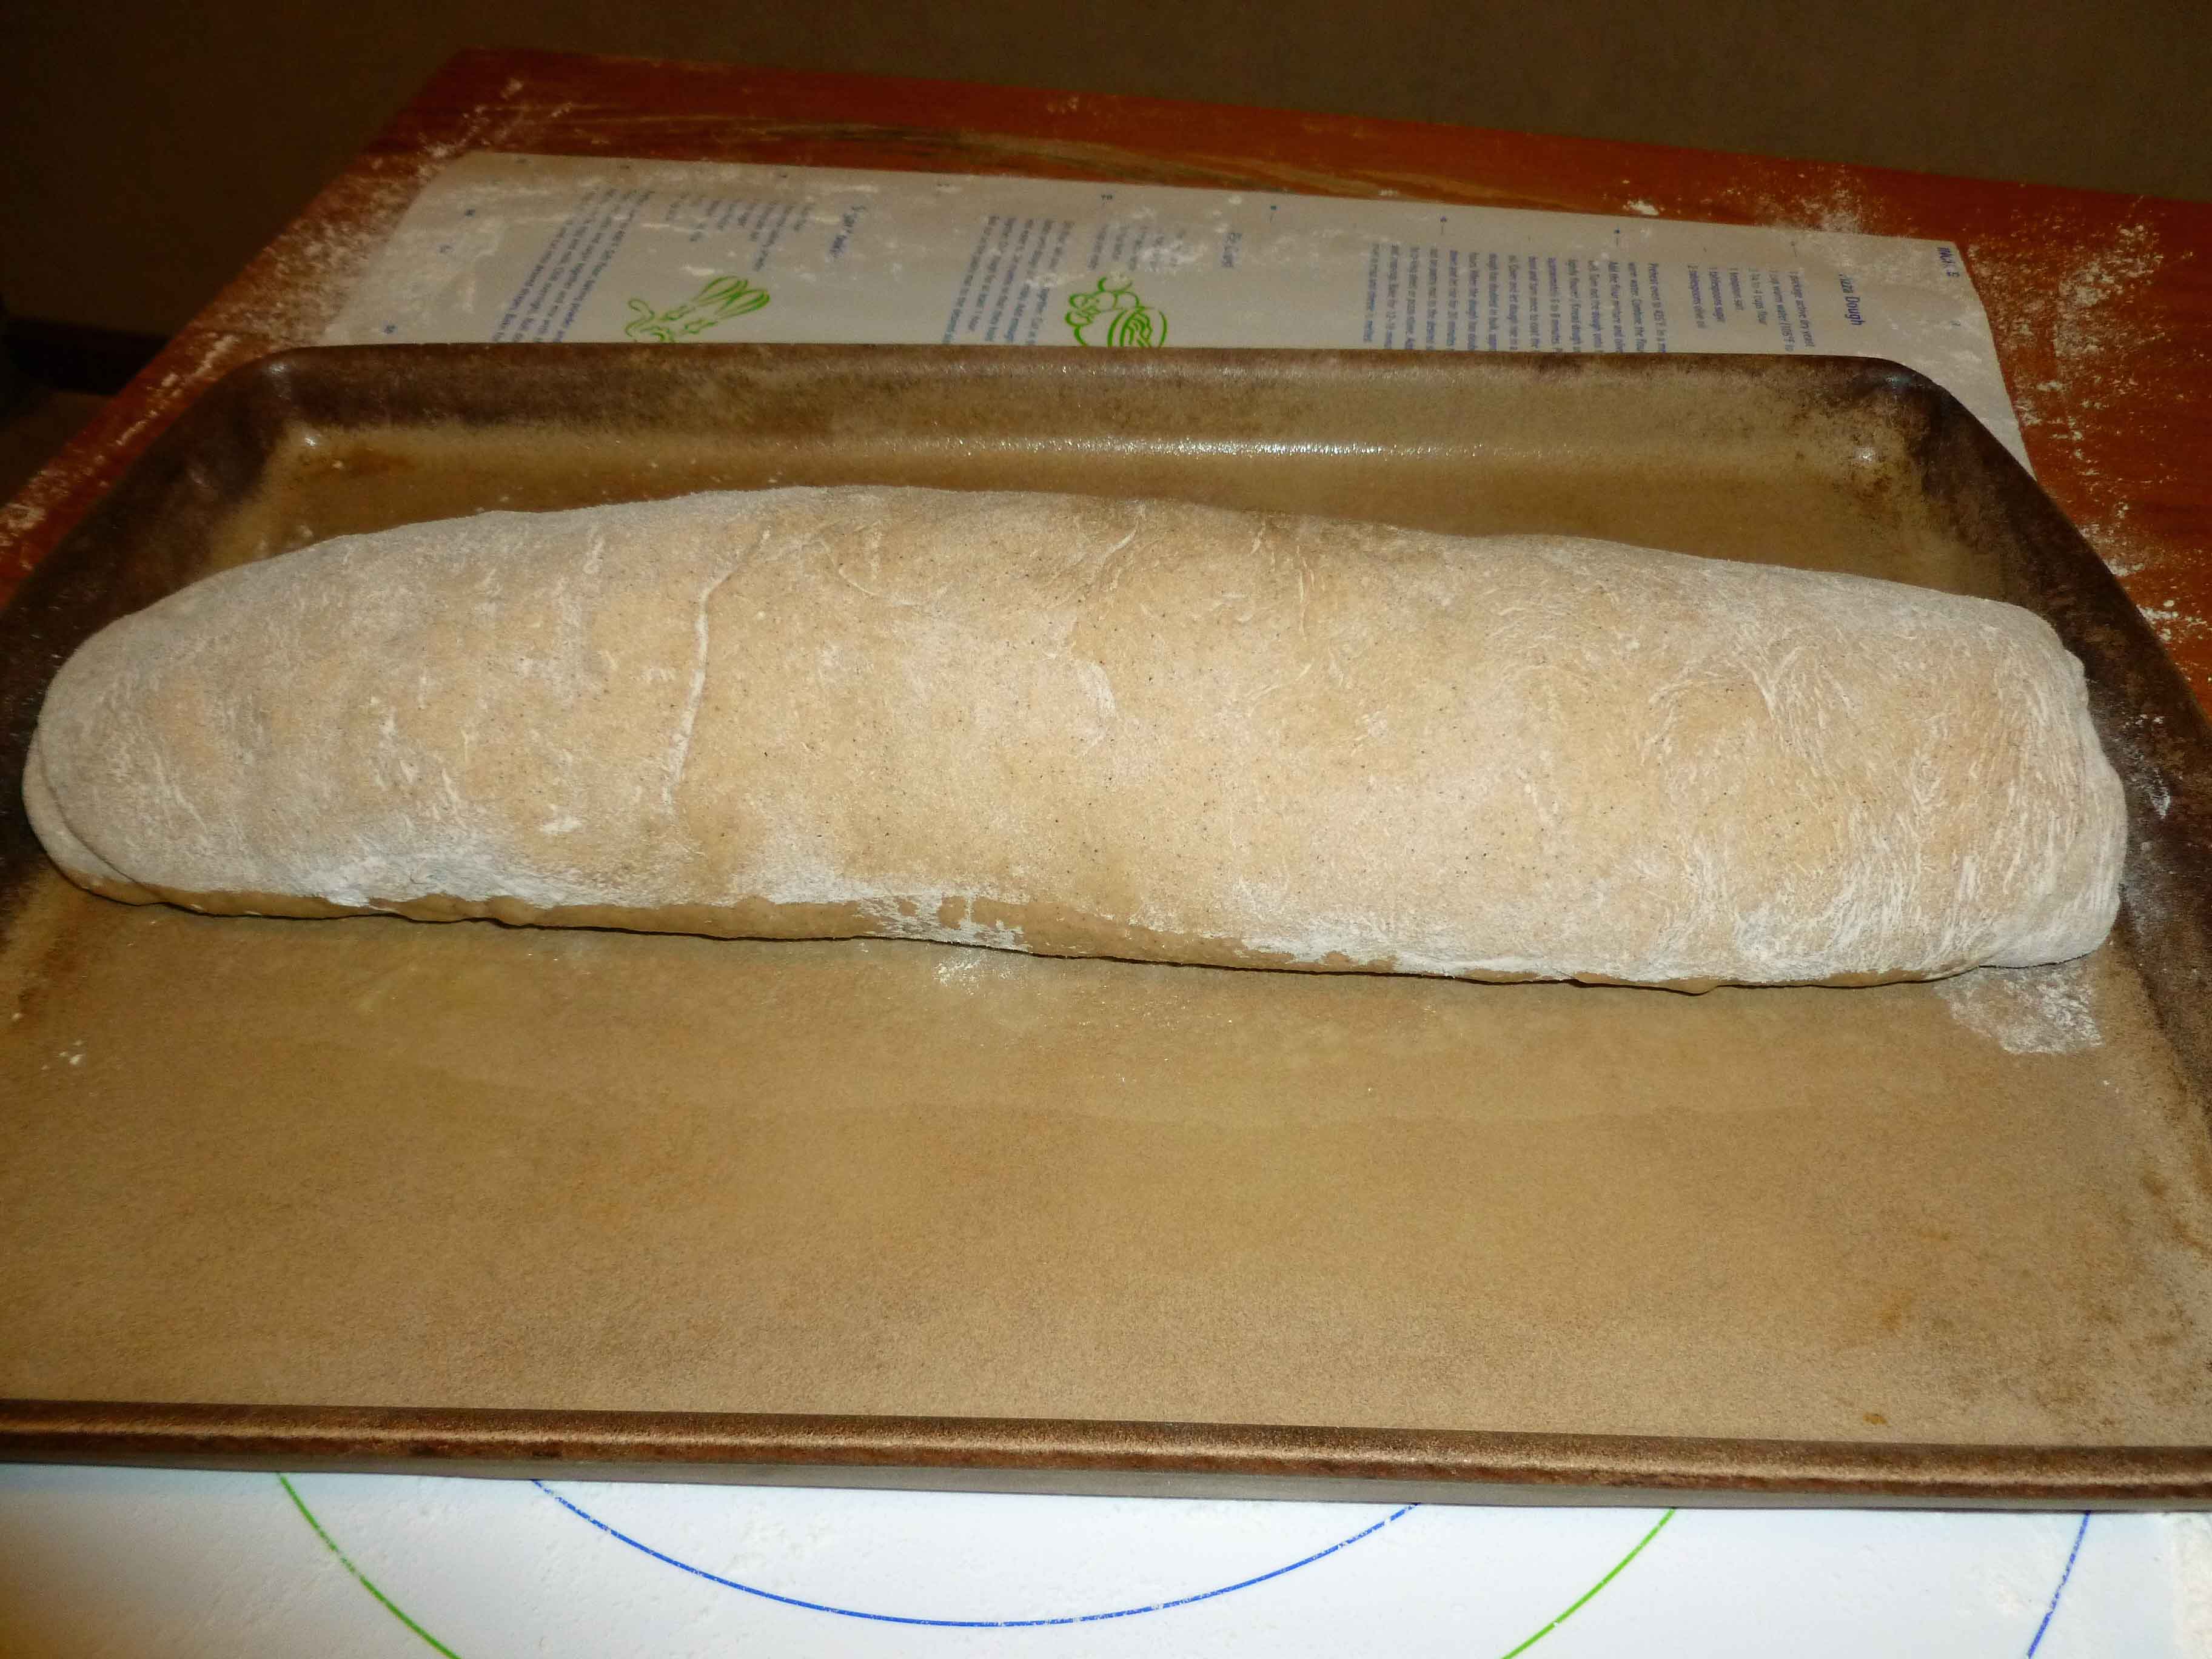
Taking a small amount of water, dip fingers in water and run them around the edges of the dough to help it seal when you roll it up. Take one edge of the shorter side and begin to roll it up, making sure that you seal up the edges as you go, and that the final seam is sealed by pressing the wet edges to the dough. Carefully place the roll with the seam on the bottom on the pan you will bake it on.
Completed Bread Roll
Taking the melted Earth Balance, brush it over the surface of the dough.
Brushing Melted Earth Balance over Bread Roll
Let dough rise for about an hour and half, until it nearly doubles in size.
Bread Roll After Rising
Place in oven preheated to 375°F, and bake for 30-35 minutes. If you rolled your rectangle out a bit too wide, you’ll get the bent shape I did after baking 🙂
Baked Bread Roll
Let cool for 30 minutes or more and then cut slices. Enjoy!