Notice: Function _load_textdomain_just_in_time was called incorrectly. Translation loading for the wp-ultimate-recipe domain was triggered too early. This is usually an indicator for some code in the plugin or theme running too early. Translations should be loaded at the init action or later. Please see Debugging in WordPress for more information. (This message was added in version 6.7.0.) in /home/maryzahc/public_html/adultfoodallergies.com/wp-includes/functions.php on line 6131 denisedaniel – Page 16 – surviving the food allergy apocalypse (archive)
Spicy Green Pork Amazing (a.k.a. Pork Chile Verde)
So, here’s the thing. Most of you will be able to make this recipe without making the bonus recipe for Roasted Green Tomatillo Salsa, because you’ll be able to buy safe canned green tomatillo salsa at the grocery store. With the corn allergy, I can’t because it’ll have citric acid or some other corny evil thing in it. I do have some green tomatillo salsa I canned myself earlier in the summer, but since I would end up using it all up for this one dish, and since my local grocery store had tomatillos this week, I made up a fresh batch for this recipe. You’ll also need a 4 quart or larger crock pot for this recipe and a food processor or a blender if you’re making the salsa.
Spicy Green Pork Amazing (a.k.a. Pork Chile Verde)
3 1/2 – 4 pounds of boneless pork butt, cut into cubed pieces about 1-2″ inches square and trimmed of fat or left whole in one piece (see your options below).
2 small onions or 1 medium onion, diced into half inch square pieces
4 stalks of celery, cut into half inch pieces
1 Italian pepper or 1 green bell pepper, de-stemmed and de-seeded and chopped into half inch pieces
Italian Pepper, just for identification and reference
3 cups of green tomatillo salsa, either from the grocery store or using the recipe below
2 cloves of garlic, minced
1 1/2 teaspoons of ground cumin
1 1/2 teaspoons of dried oregano
1 teaspoon of ground black pepper
2 Tablespoons of lemon juice
salt to taste when you have finished cooking
If you have safe green tomatillo salsa you can buy, skip past this next part to the ♦ symbol below.
2 medium onions, chopped into about half to one inch pieces
2 Serrano chile peppers, de-stemmed and de-seeded and cut into halves or quarters
4 cloves of garlic, trimmed of the stem end
1/2 cup of tightly packed cilantro, washed and chopped
1 1/2 teaspoons of salt
1/3 of a cup of water.
Place the tomatillos, the onions, the Serranos and the garlic on a large baking sheet or roasting pan that’s safe for the broiler.
Tomatillos, Serranos, Onions and Garlic on a Baking Sheet
Turn your broiler to 500° and broil until the tomatillos are an olive green color and have browned. You may hear some of them pop, it’s okay.
Broiled Tomatillos, Serranos, Onions and Garlic on a Baking Sheet
Once the tomatillos are done, put the roasted ingredients in a blender or food processor as well as any juices that have cooked out into your pan, making sure that you’ve de-glazed any of the good tasty browned bits too. Add the cilantro, the salt and the water, and process. You might have to do this in batches, depending on the size of your blender or food processor. I did. I used a large bowl hold the batches and then mixed it altogether at the end. This makes about 4 cups of salsa, so you’ll have enough for the recipe and some to just eat as well.
♦ Now that we have our safe salsa, or you’ve gotten some from the grocery store, it’s time to go onto the pork. Depending on your inclination, you can use the pork all in one piece and shred it later when it’s cooked, or you can cut into pieces about 1-2″ inches square and trim off the extra fat as you go. I cubed and trimmed my pork and removed about half a cup of extra fat.
On the bottom of your crock pot, place the celery and onions that you’ve cut into half inch pieces. Place either the whole piece or the cubed and trimmed pieces of boneless pork butt in the crock pot on top of the celery and onion. Place the chopped Italian or bell pepper on top of the pork.
Pork, Italian Pepper, Onions and Celery in Crock Pot
In a bowl, add the green tomatillo salsa, the minced garlic, the cumin, the dried oregano, the ground black pepper, and the lemon juice. and mix it thoroughly. Pour the mixture over the pork, making sure to scrape the bowl well, and get every bit into the crock pot. I also use a spatula to push the mixture down through the pork pieces if you have cubed the pork. If you like less sauce, you can cut the salsa back by a cup, but I like mine with a lot.
Salsa Mixture over Pork, Italian Pepper, Onions and Celery in Crock Pot before cooking
Put the lid on your crock pot, and cook on low for 8 to 10 hours, or on high for 4 to 5 hours.
Spicy Green Pork Amazing (a.k.a. Pork Chile Verde) after cooking
You can serve this with safe for you tortillas (there’s a lot of recipes out there) and other fixings, or you can serve it over rice. Also, if you have a dairy free sour cream replacement product you can use, that would be great as a garnish.
Spicy Green Pork Amazing (a.k.a. Pork Chile Verde)
So, before the whole corn and coconut thing, I was an aficionado of fruit flavored pure sugar candy. If it had fake coloring, fake fruit flavors and was primarily made of out sugar (meaning corn syrup), then I was your girl. Skittles, Nerds, Sour Neon Gummy Worms, Sour Gummi Watermelon Slices, Jolly Ranchers, Starbursts (particularly the fave reds), Jelly Belly Sour jelly beans – anyway, you get the picture, if it was aimed at ten year old kid, I was a fan. Candy, caffeine and I had a love triangle going on while I was in college, law school and during my years of private practice. Candy was part of the fuel that I needed to get through the day while going 400 miles per hour, with generally little sleep. I seriously should have had stock in at least the top three, Skittles, Starbursts and Jolly Ranchers. At least maybe I’d have recouped some of what I was spending at Rite-Aid on candy. So you can imagine the horror when I had to give them all up.
A few l months ago, I started making citrus extracts, lemon, lime and orange in anticipation of one day making my own safe candy. (Most extracts use corn alcohol to make the extract. I used the zests of the citrus fruit and Luksusowa Vodka because it’s made only from potatoes, whereas some vodkas may also use grain or corn. See this post for directions.) After they were done, I let them sit for a couple of more weeks with a coffee filter over the jar to let them evaporate down a bit to try to concentrate the flavors.
Then I started poking around for gummy recipes. I love watermelon flavored candy. I love, love, love Watermelon Jolly Ranchers, and I used to love to drink Watermelon Schnapps Pucker with Sprite because it tasted just like a Jolly Rancher, only in liquid form. Now all three of those things are off-limits. But I came across a recipe for Lemon-Watermelon Gummies so I had to try it. I’ve modified this recipe because honey can be problematic for people allergic to corn if you don’t know whether your beekeeper is feeding his bees corn syrup or not. And then I had to try it with just lemon, so I further modified things. Both versions are provided below, but I think you could do any fruit juice if safe for you (most commercial juices are not safe for people allergic to corn). The gummies themselves result in candies that taste like real fruit and aren’t as sweet as store bought gummies, but they work for me and I probably shouldn’t be eating all that sugar anyway. I’m kind of liking the lemon as an after dinner palate cleanser, as it is a very refreshing pure lemon taste that melts in your mouth. If you want them to be more sweet to match the commercially available gummies, I’d up the sugar to about 1/2 a cup total for each recipe. Try it with the lower sugar though, you may find you don’t need it 🙂
Lemon Watermelon Gummies
4 cups of peeled and cubed watermelon
1/4 cup of lemon juice (or the juice of one lemon)
Place watermelon, lemon juice and lemon extract in a blender. Blend it until the watermelon is completely pulverized. You want this as smooth as you can get it. Wish I had my friend Mary’s Vitamix for this, but my plain old blender did okay. Using a fine wire mesh strainer, strain out any remaining pulp so that you just have juice left.
Straining out watermelon pulp
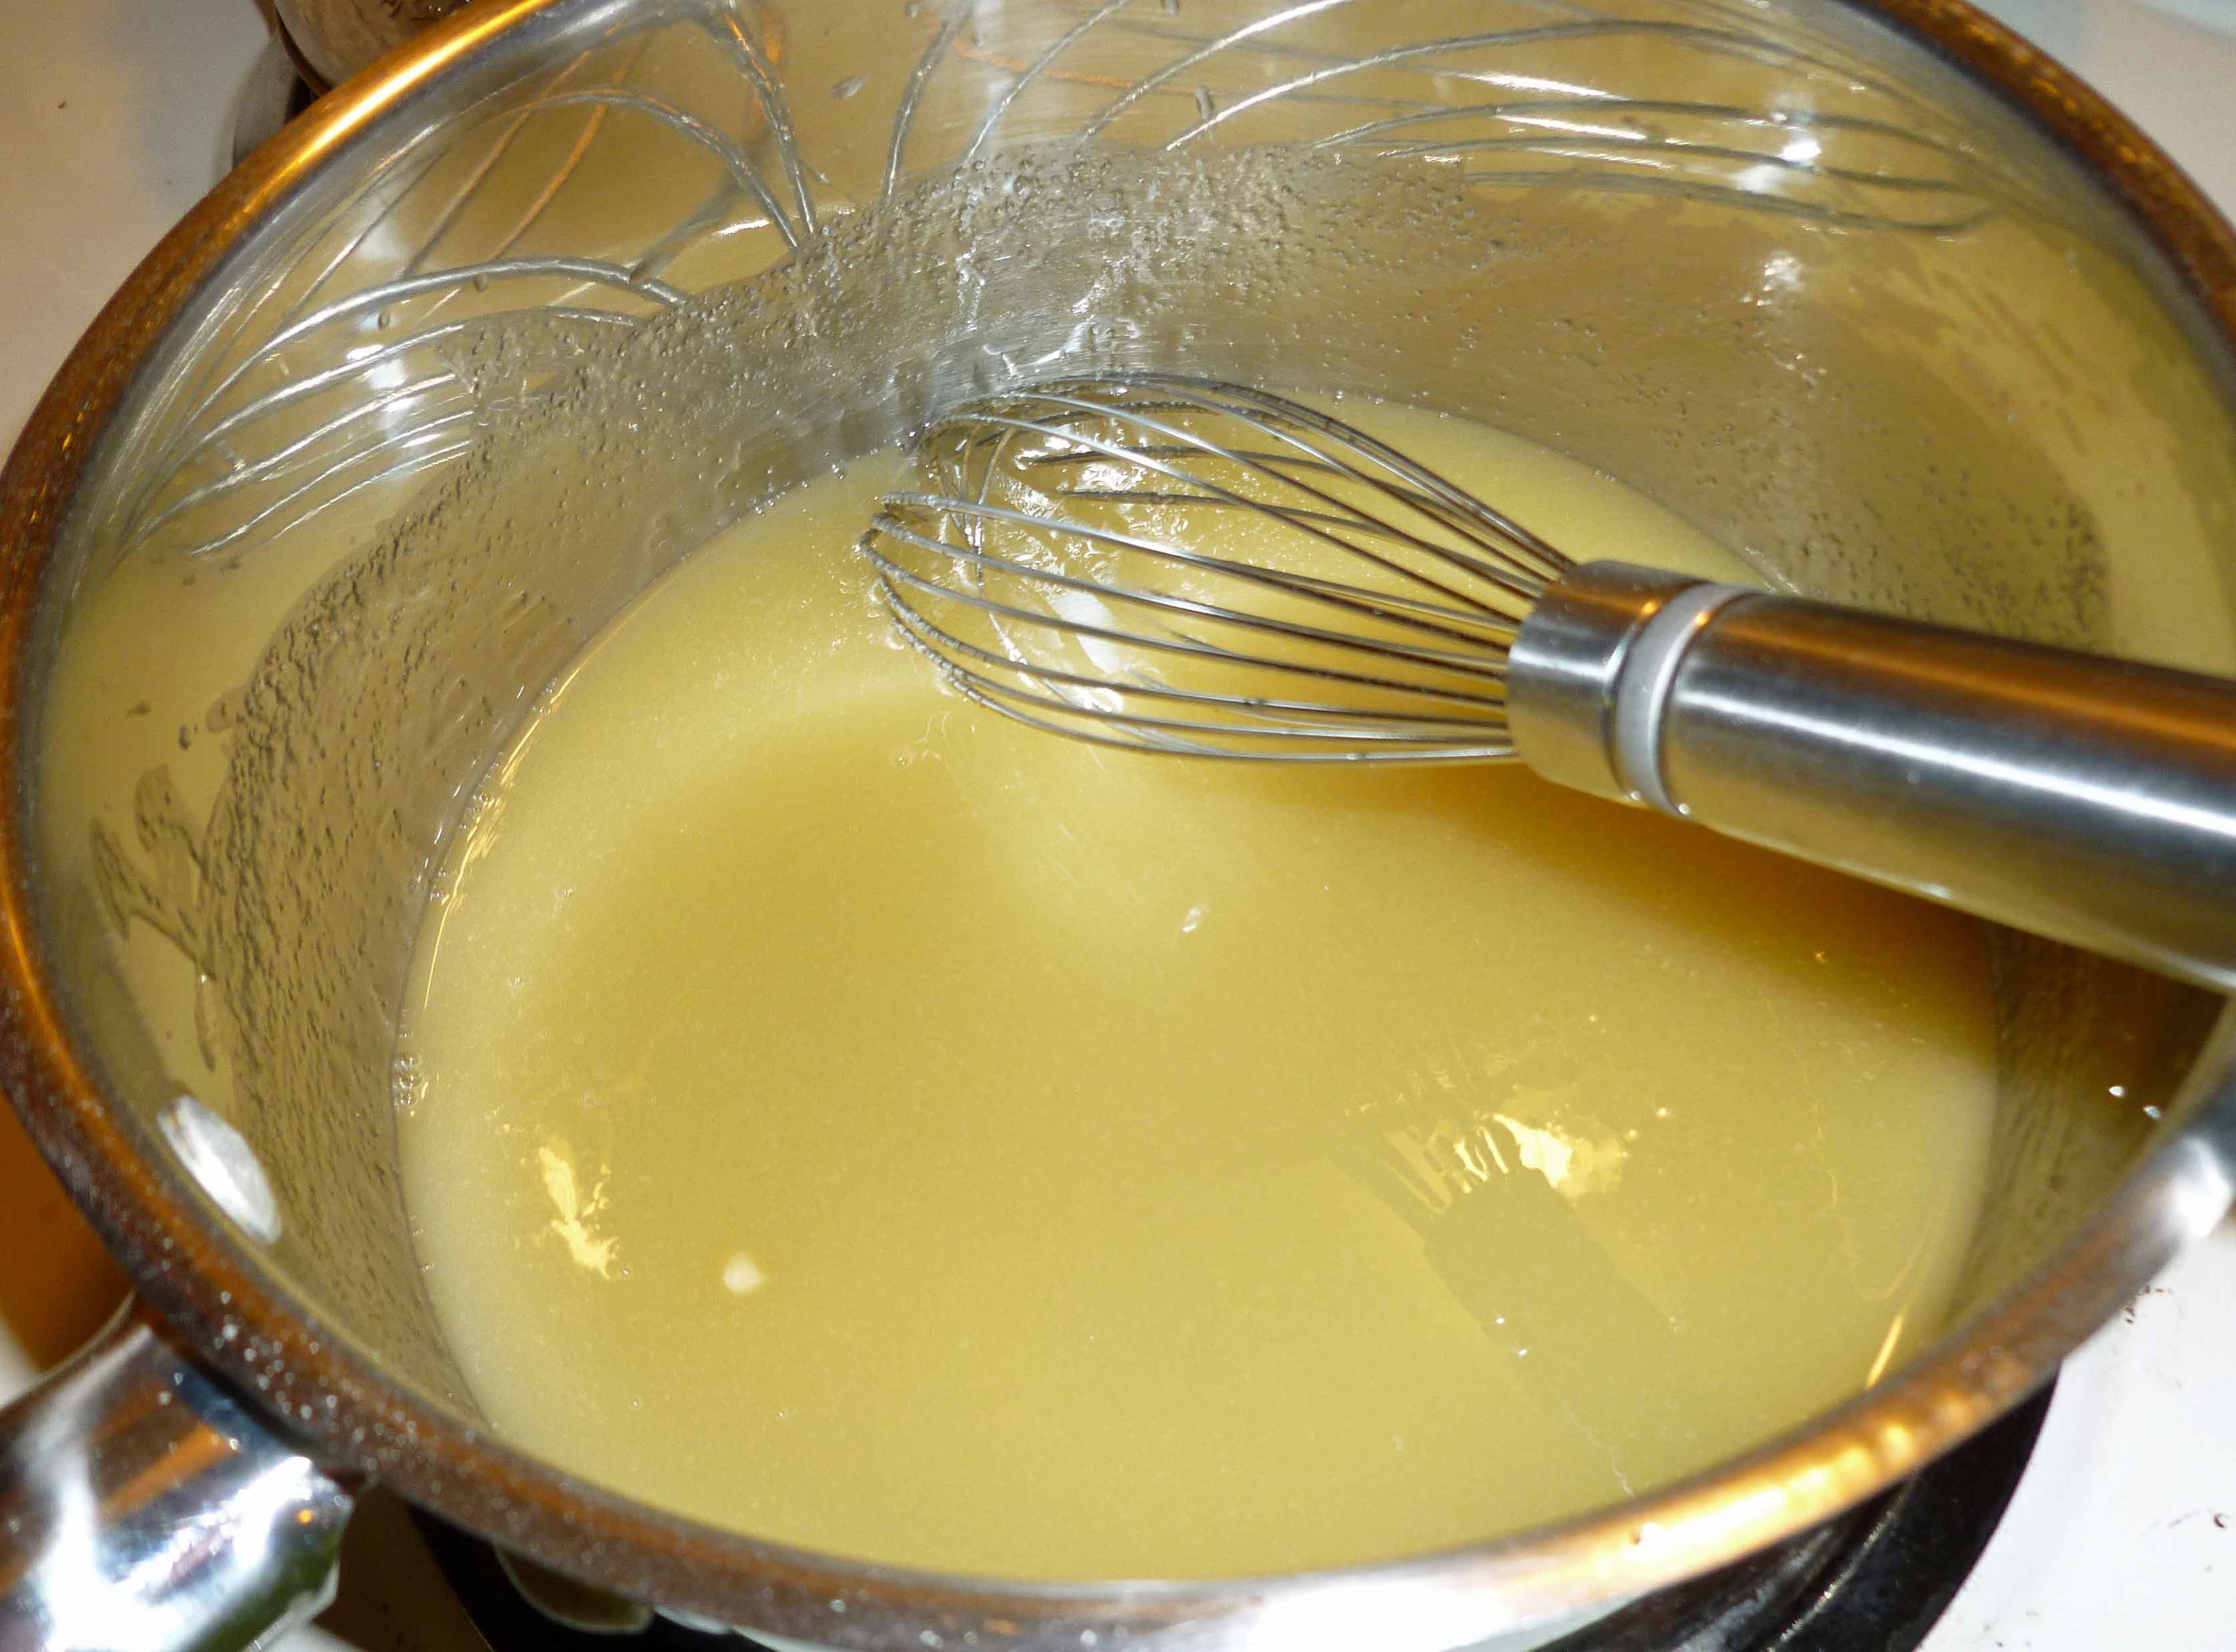
After straining out the pulp, put one half of the watermelon liquid into a sauce pan with the sugar. On medium low heat, stir until all the sugar is dissolved and then add the gelatin and whisk until it is smooth. Remove the pan from the heat and add the remaining watermelon liquid. Whisk again until smooth.
Watermelon and Gelatin Mixture
Spray silicone molds or ice cube trays with a neutral, safe for you cooking oil. I used a light olive oil in a mister. You don’t want an oil that tastes like anything. (As a side note, apparently there is some debate about whether or not to grease silicone. I have always greased silicone baking molds with oil, shortening and margarine when I could still eat it, and have had no problems whatsoever, but I also don’t use non-stick cooking spray on them. According to this article, if you over grease when baking you may get a sticky residue that’s difficult to wash off. I had no issue cleaning these molds after this recipe, but if you do, use some baking soda with your dish washing detergent when handwashing, and it’ll likely be fine. Also, if you try doing it without oil, let me know how that goes.) Make sure your silicone mold is on a cookie sheet because you are going to move it into the fridge or the freezer and you don’t want a big mess all over your floor and counters. Carefully pour the mixture into your molds. I also ended up having enough for a a couple of gummies in a silicone ice cube tray as well.
Watermelon Gelatin Mixture in Silicone Molds
Put the silicone mold in the refrigerator or freezer. The gummies will set up in about 15-20 minutes in the freezer and about 30-40 minutes in the refrigerator.
Lemon Gummies
This version makes about half of what the Lemon Watermelon version did because that seemed like a lot of gummies of one flavor to me. If you wanted, you could replace the lemon juice with lime juice, grapefruit juice, or orange juice as well. If I did any other kind of fruit juice other than citrus, I’d probably just use 2 cups of juice and skip the water.
Juice your lemons. After straining out the pulp, put the lemon juice into a sauce pan with the sugar. On medium low heat, stir until all the sugar is dissolved and then add the gelatin and whisk until it is smooth. Remove the pan from the heat and add the water. Whisk again until smooth.
Lemon Gelatin Mixture
Spray silicone molds with a neutral oil as described above, and place the silicone mold on a cookie sheet. Carefully pour the mixture into your molds.
Lemon Gelatin Mixture in Silicone Molds
Put the silicone mold in the refrigerator or freezer. Again, the gummies will set up in about 15-20 minutes in the freezer and about 30-40 minutes in the refrigerator.
So, if you’ve got leftover cranberries in the freezer from Turkey Day, this is a great way to use them up. And it doesn’t involve turkey, which you’re probably heartily sick of at this point. I couldn’t resist adding a bit of spice to this recipe, but it’s minimal in the finished product. If spice bothers you, leave the Red Fresno pepper out of the cranberry sauce. If you like it hotter, use a habanero.
Spicy Red Wine Cranberry Crusted Pork Loin
Serves about 4.
1 cup of red wine
1 cup of brown sugar
1 Red Fresno chile pepper, de-stemmed, seeded, and minced.
1 12 ounce bag of cranberries, either fresh or frozen
1 1-2 pound pork loin
Preheat your oven to 400°F. Using an oil mister, or a bit of oil and a paper towel, grease a sheet pan.
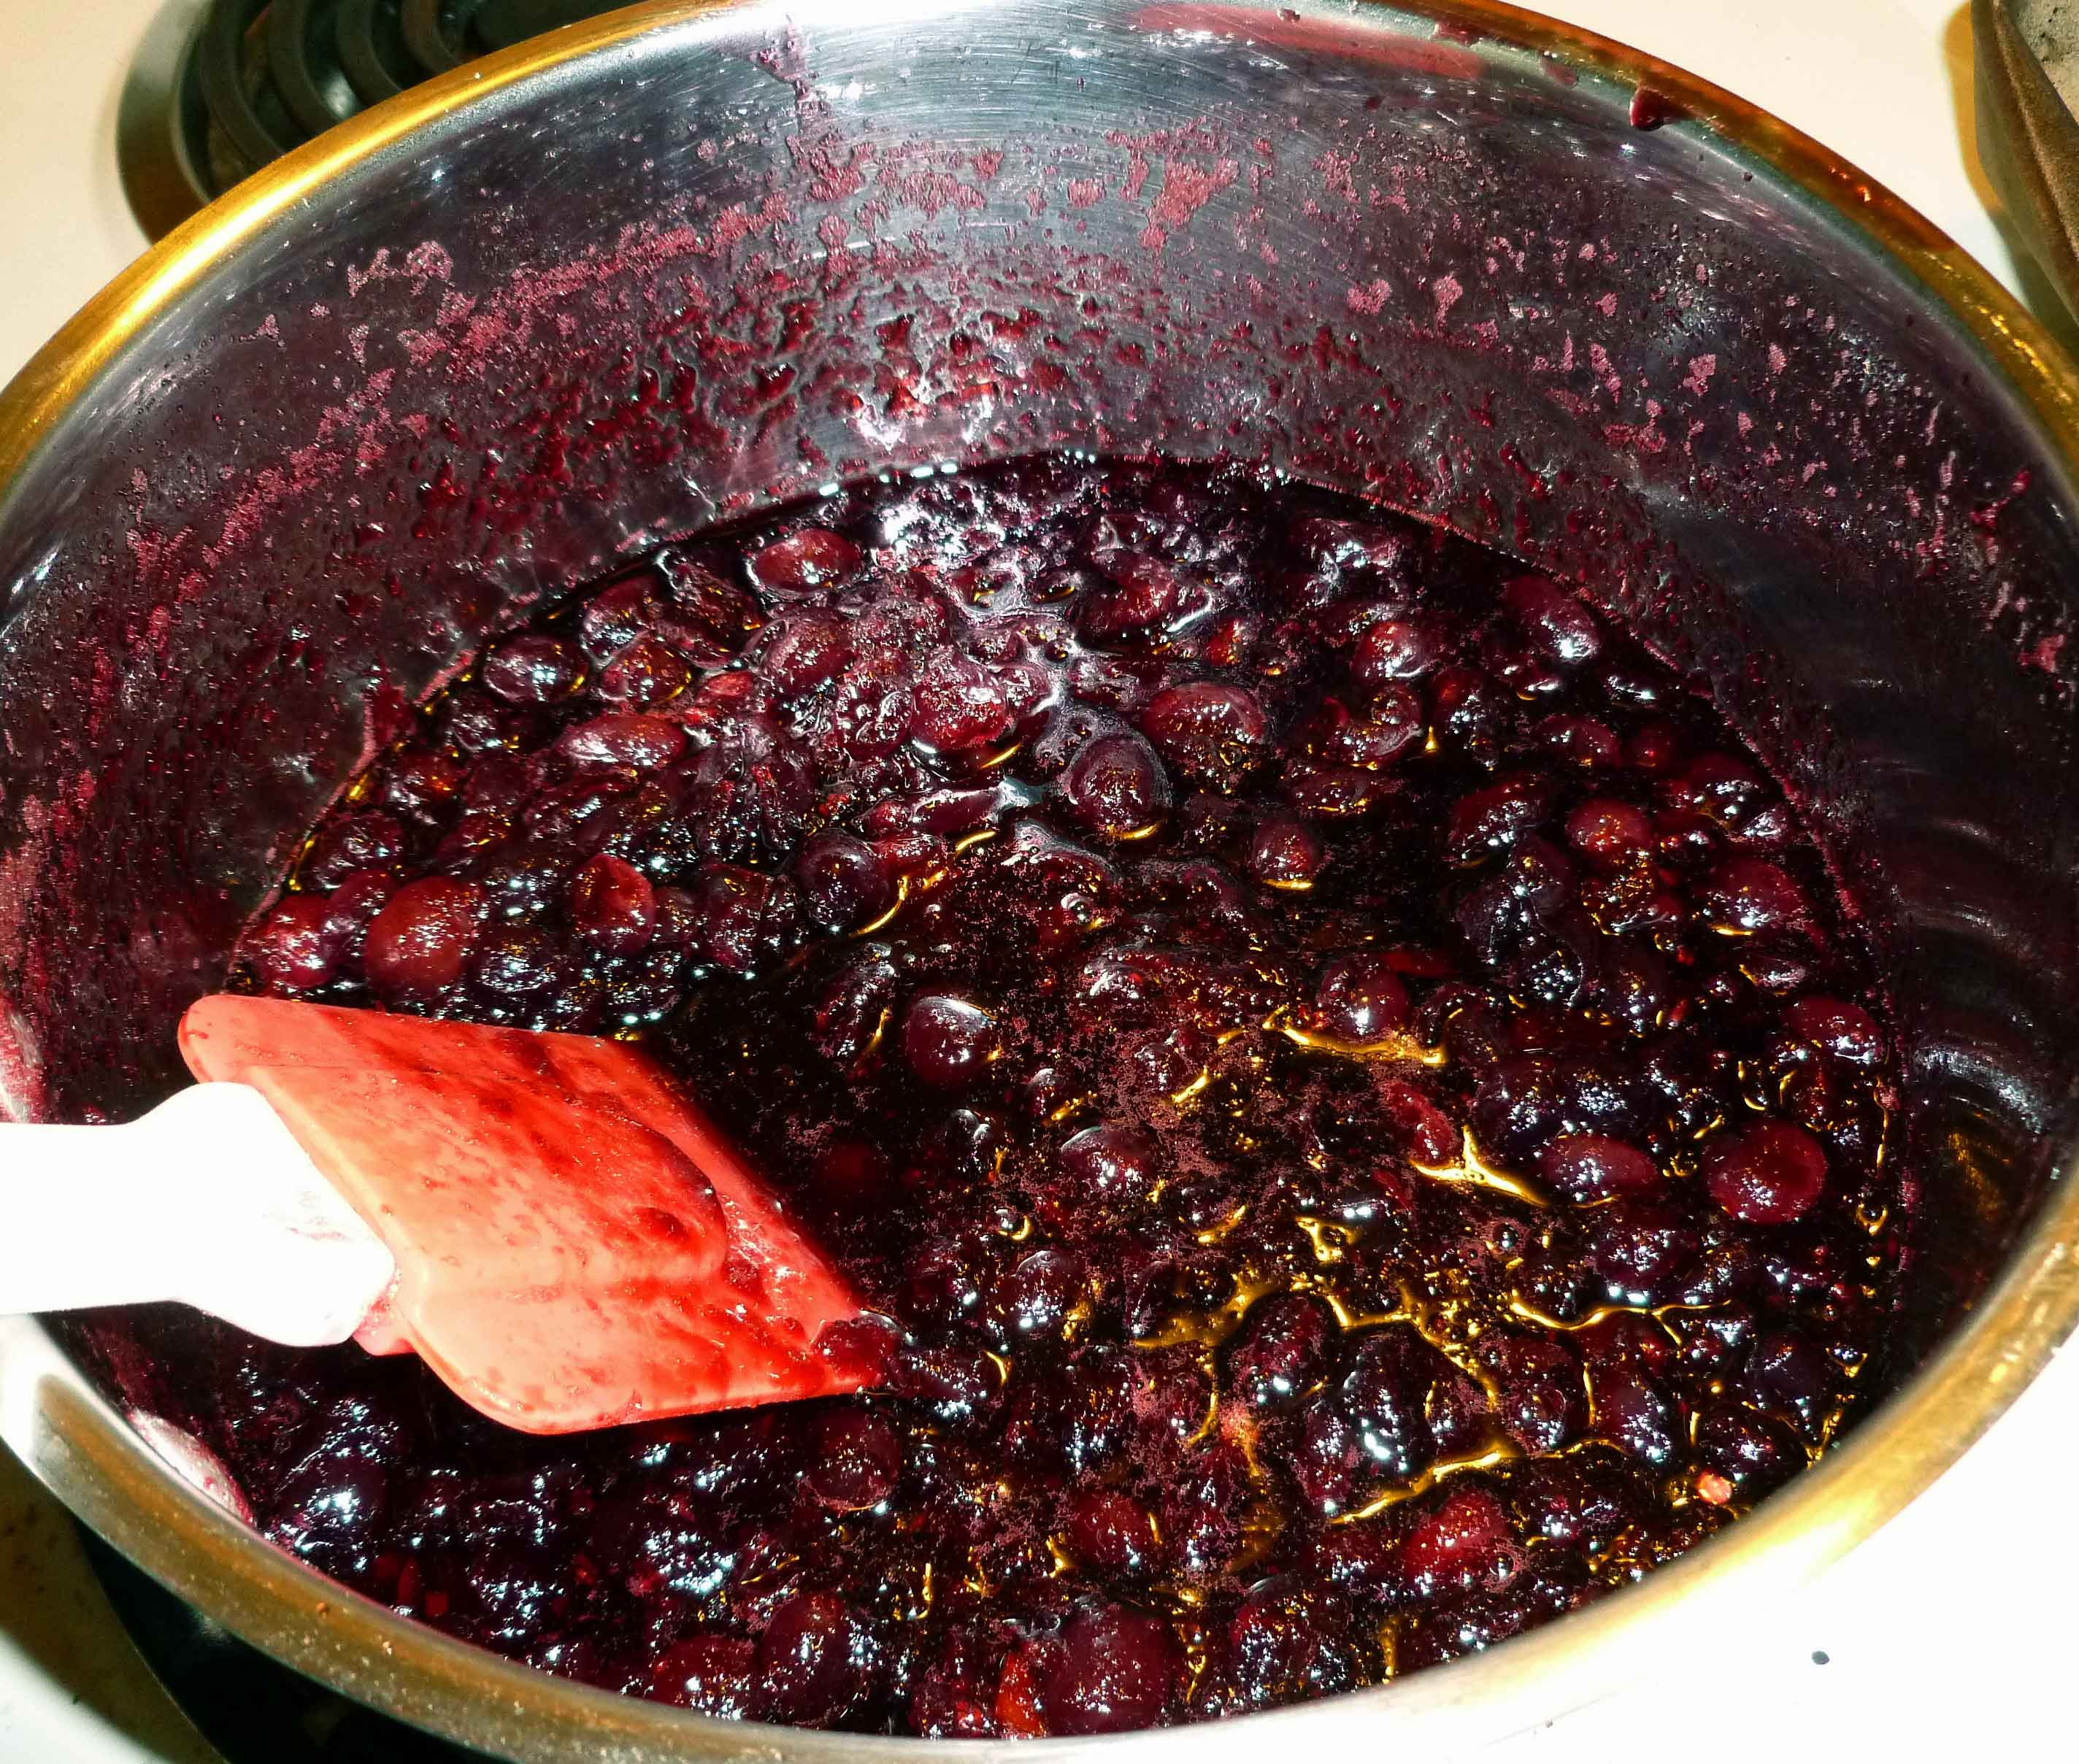
Wash the cranberries and pick out the soft, crushed and/or bad ones. In a small non-reactive sauce pan, add the wine, brown sugar, and minced Red Fresno chile pepper, and bring it to a boil. Once the wine, brown sugar, and chile pepper are boiling, add the cranberries and let it come back to a boil. Reduce to the heat to medium and boil gently for 10 minutes. Basically you’re making red wine cranberry sauce with some chile in it. It’s really good by itself, just saying.
Spicy Red Wine Cranberry “crust” for pork loin
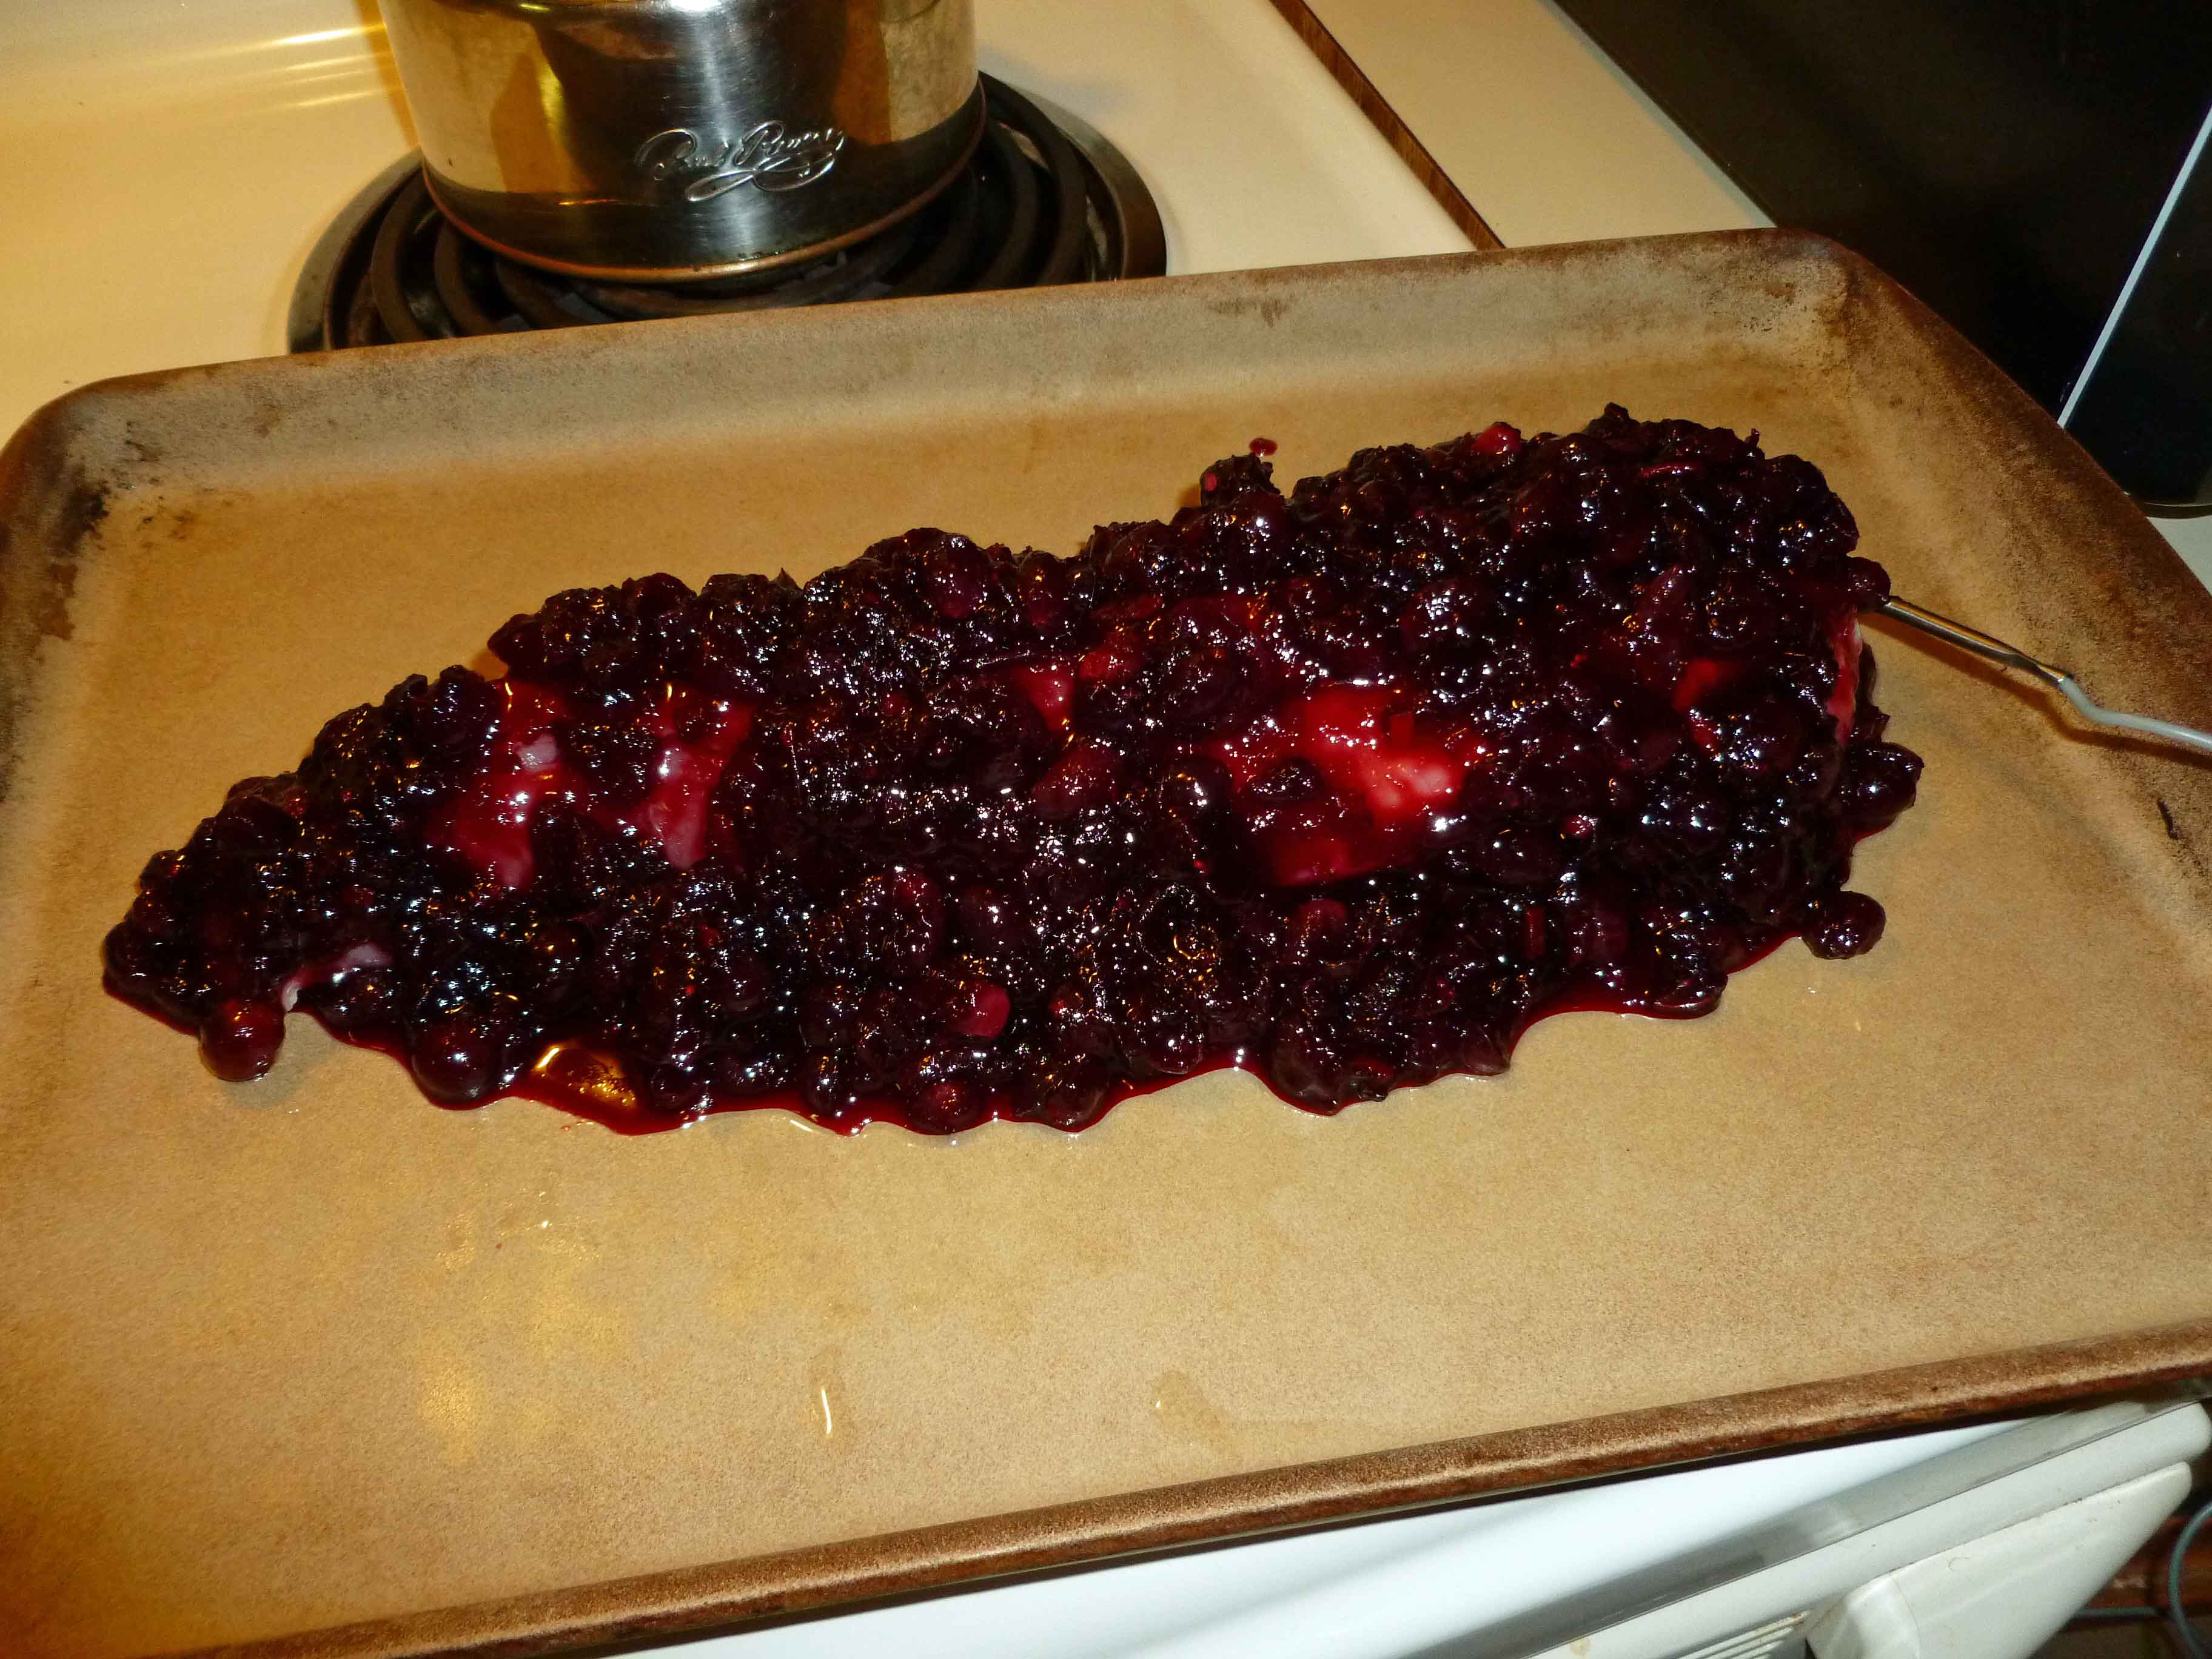
Once you’ve finished the sauce, spread out a little bit of it on the pan, to match the general length and width of your pork loin, so that your pork loin will be resting in a bed of the cranberries.
Bed of cranberries for the pork loin.
Place the pork loin on top of the cranberries, so that if there is a fat layer on the pork loin that the layer rests on the bed of cranberries (or remove it), and then cover the pork loin with the remaining cranberries. You’ll note I have a probe thermometer in the pork loin. It’s one of the best kitchen tools I ever bought, no more overcooked meat.
Pork loin covered with cranberry “crust”
Put the pork loin in the oven. I set the probe thermometer for an internal temp of 161°F, which is what the FDA says is safe. The actual cooking time was about 45 minutes, but this may vary depending on the size of your pork loin and how well, or not, your oven works.
Spicy Red Wine Cranberry Crusted Pork Loin just out of the oven.
Let it rest a couple of minutes and then slice it up and serve with some of the cranberries and drippings. It’s really yummy!
It’s fall (I’m not discussing the “winter” word yet, although it snowed here yesterday) with all those yummy, carbohydrate-filled veggies available. This dish is pretty easy but seems complicated to those who aren’t in the know. Also, although this may seem like a lot, it’s great as leftovers. I even love it cold over a tossed salad a day or two later. Try it as a new side dish for Thanksgiving, or for other potlucks this winter.
Roasted Autumn Vegetables with a Balsamic Glaze
Serves at least 4 in generous portions.
Balsamic Glaze:
I cup of balsamic vinegar (be careful, get one without caramel color, which could be dairy, wheat or corn.)
1 1/2 Tablespoons of Italian Seasoning (or a bit of oregano, basil, marjoram, sage, rosemary, and thyme to add up to 1 1/2 Tablespoons)
2 Tablespoons of brown sugar
2 Tablespoons of olive oil
Vegetables:
2 carrots, peeled and chopped into 1 inch chunks
2 small onions, peeled, cut in half and then each half cut into quarters
1 sweet potato, peeled and chopped into 1 inch chunks
1 small turnip (about the size of a large tomato), peeled and chopped into 1 inch chunks
1/2 of a butternut squash (or 1 20 oz bag of fresh peeled butternut squash), peeled and chopped into 1 inch chunks
2-3 cups of brussel sprouts, outer leaves removed if necessary and stems trimmed, and cut in half
Preheat your oven to 400°F. Using an oil mister, or a bit of oil and a paper towel, grease a sheet pan.
Prepare all your vegetables as discussed above and put them in a large heat safe bowl. You’re going to be tossing them with the glaze, so make sure you have room to stir and work. Put the bowl aside.
Veggies in Bowl
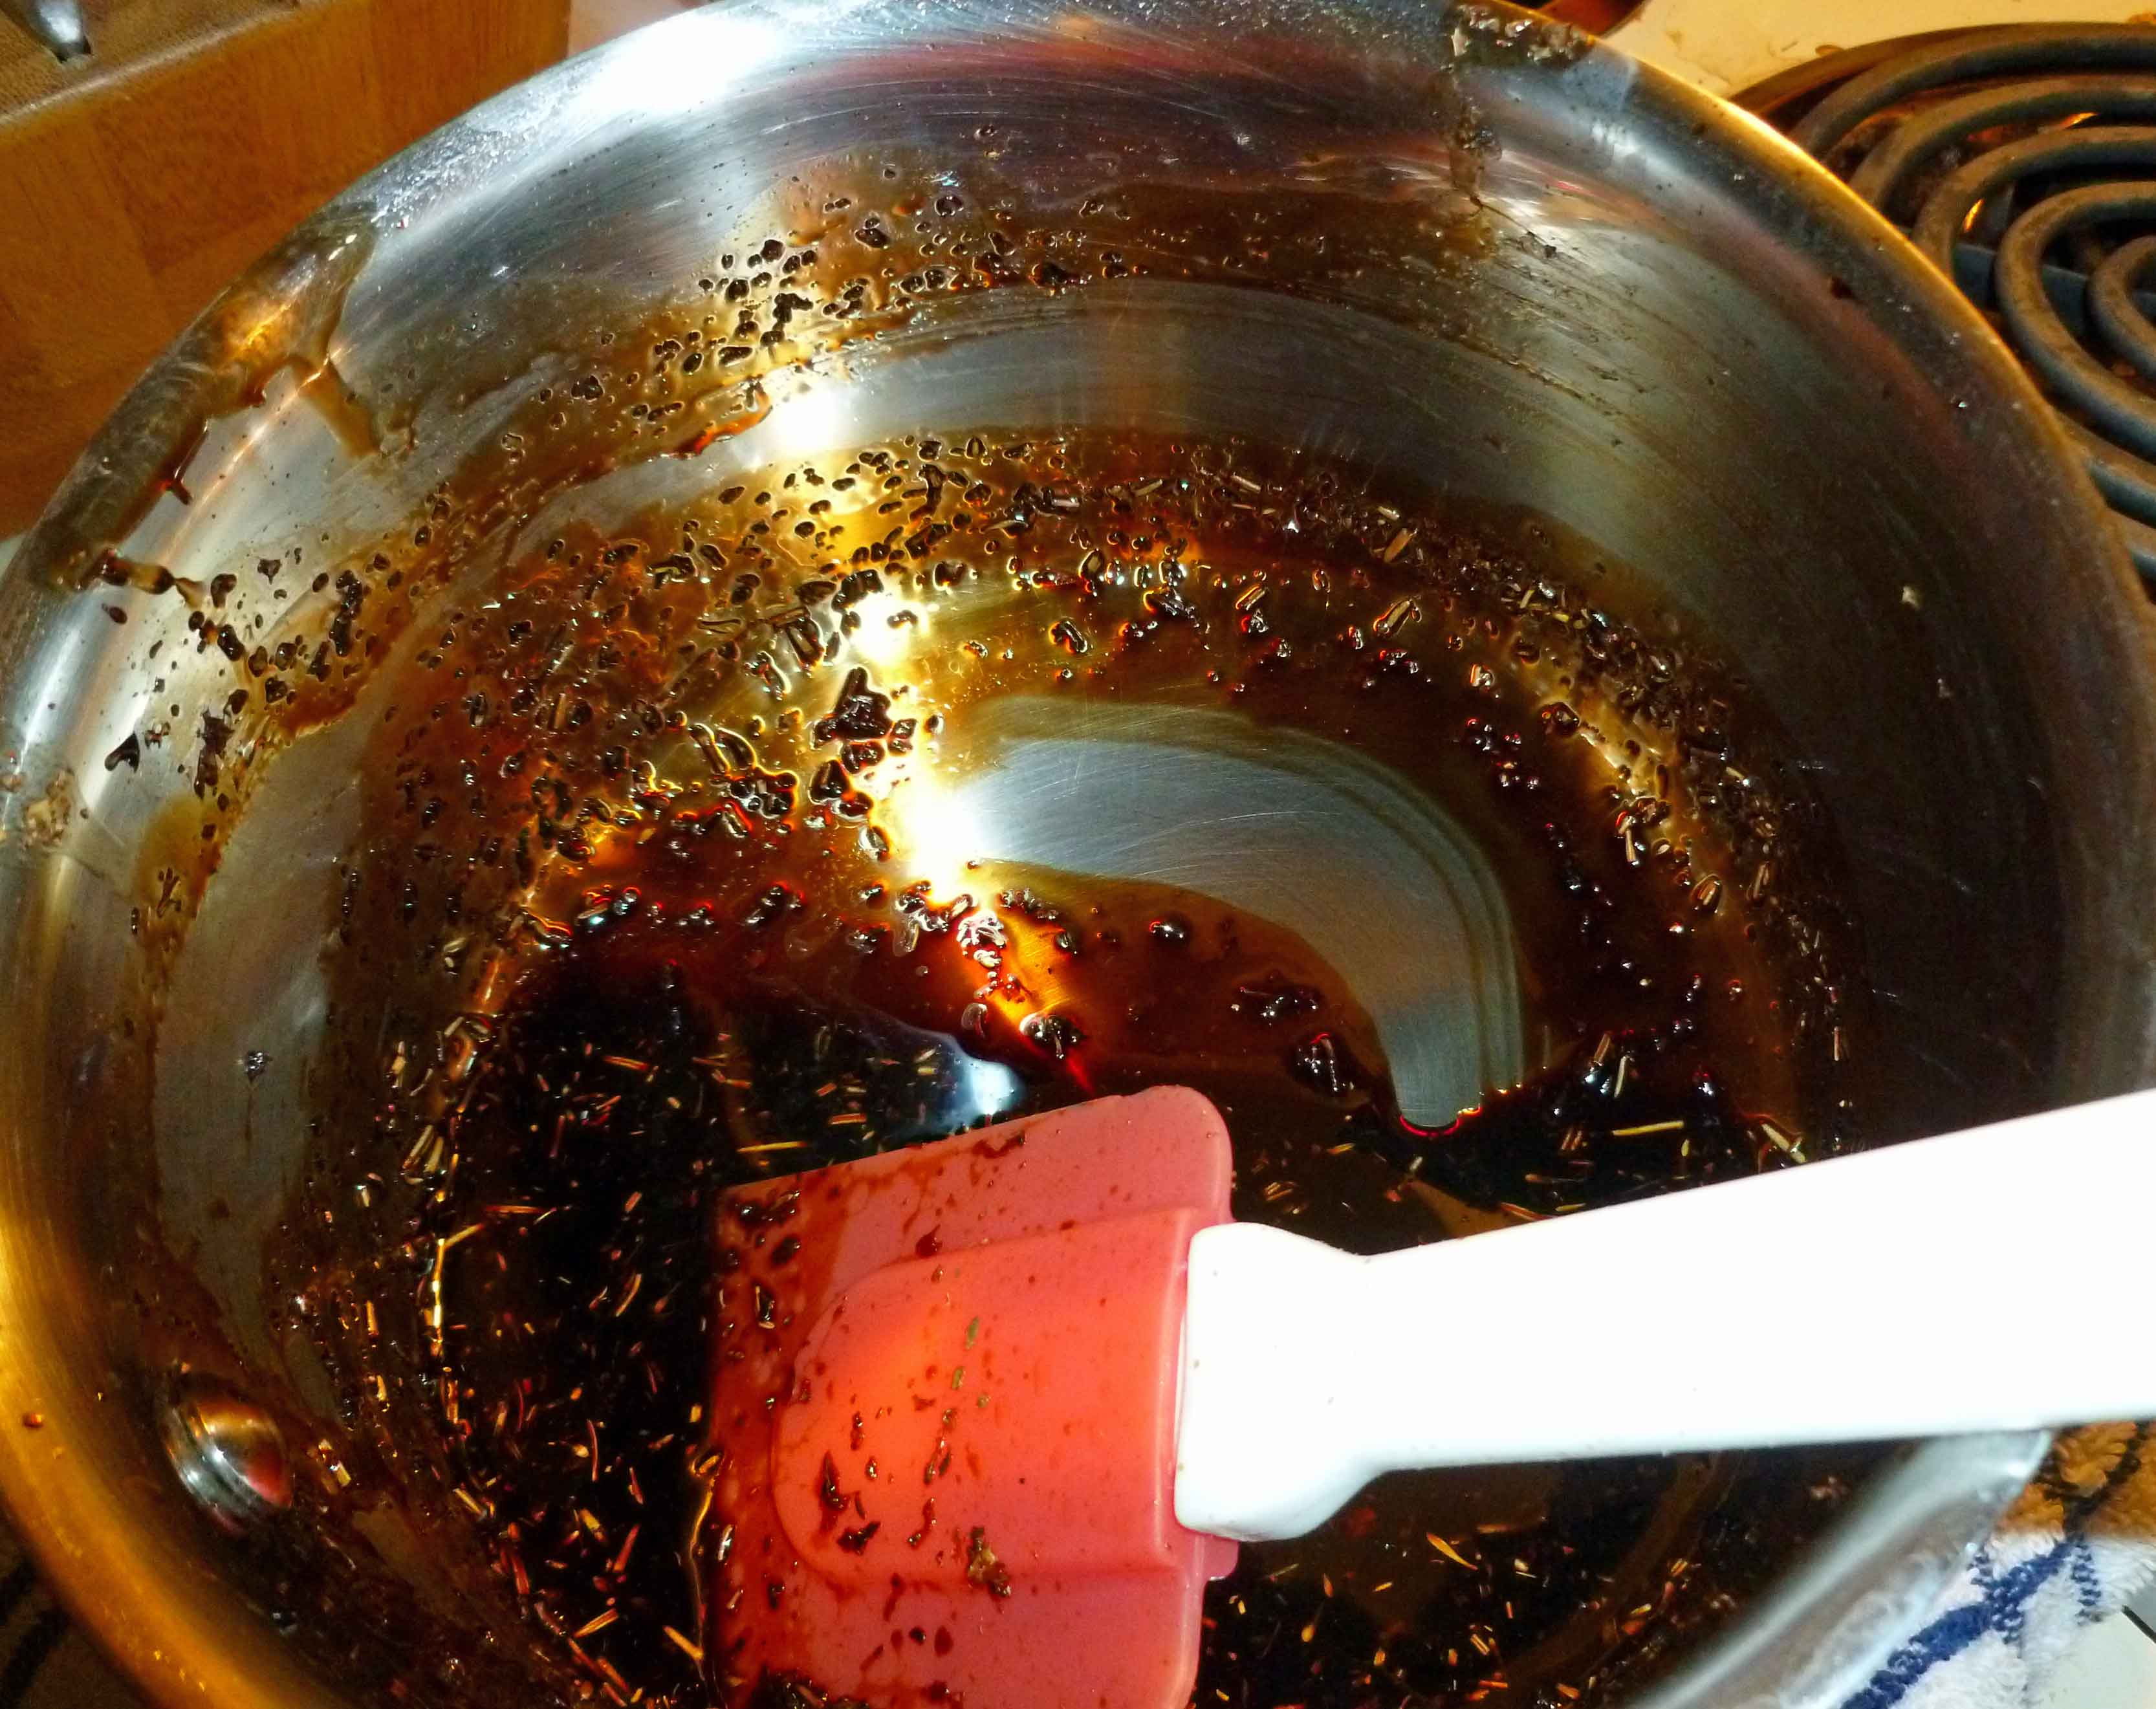
Using a small non-reactive saucepan, add your balsamic vinegar, Italian seasoning or spices, and the brown sugar. Over medium high heat, simmer the glaze at a low boil until the vinegar has reduced down to a slightly thicker syrupy consistency, as shown:
Balsamic Glaze after reducing
Once the glaze has reduced down, remove it from the heat and add the olive oil. Stir thoroughly.
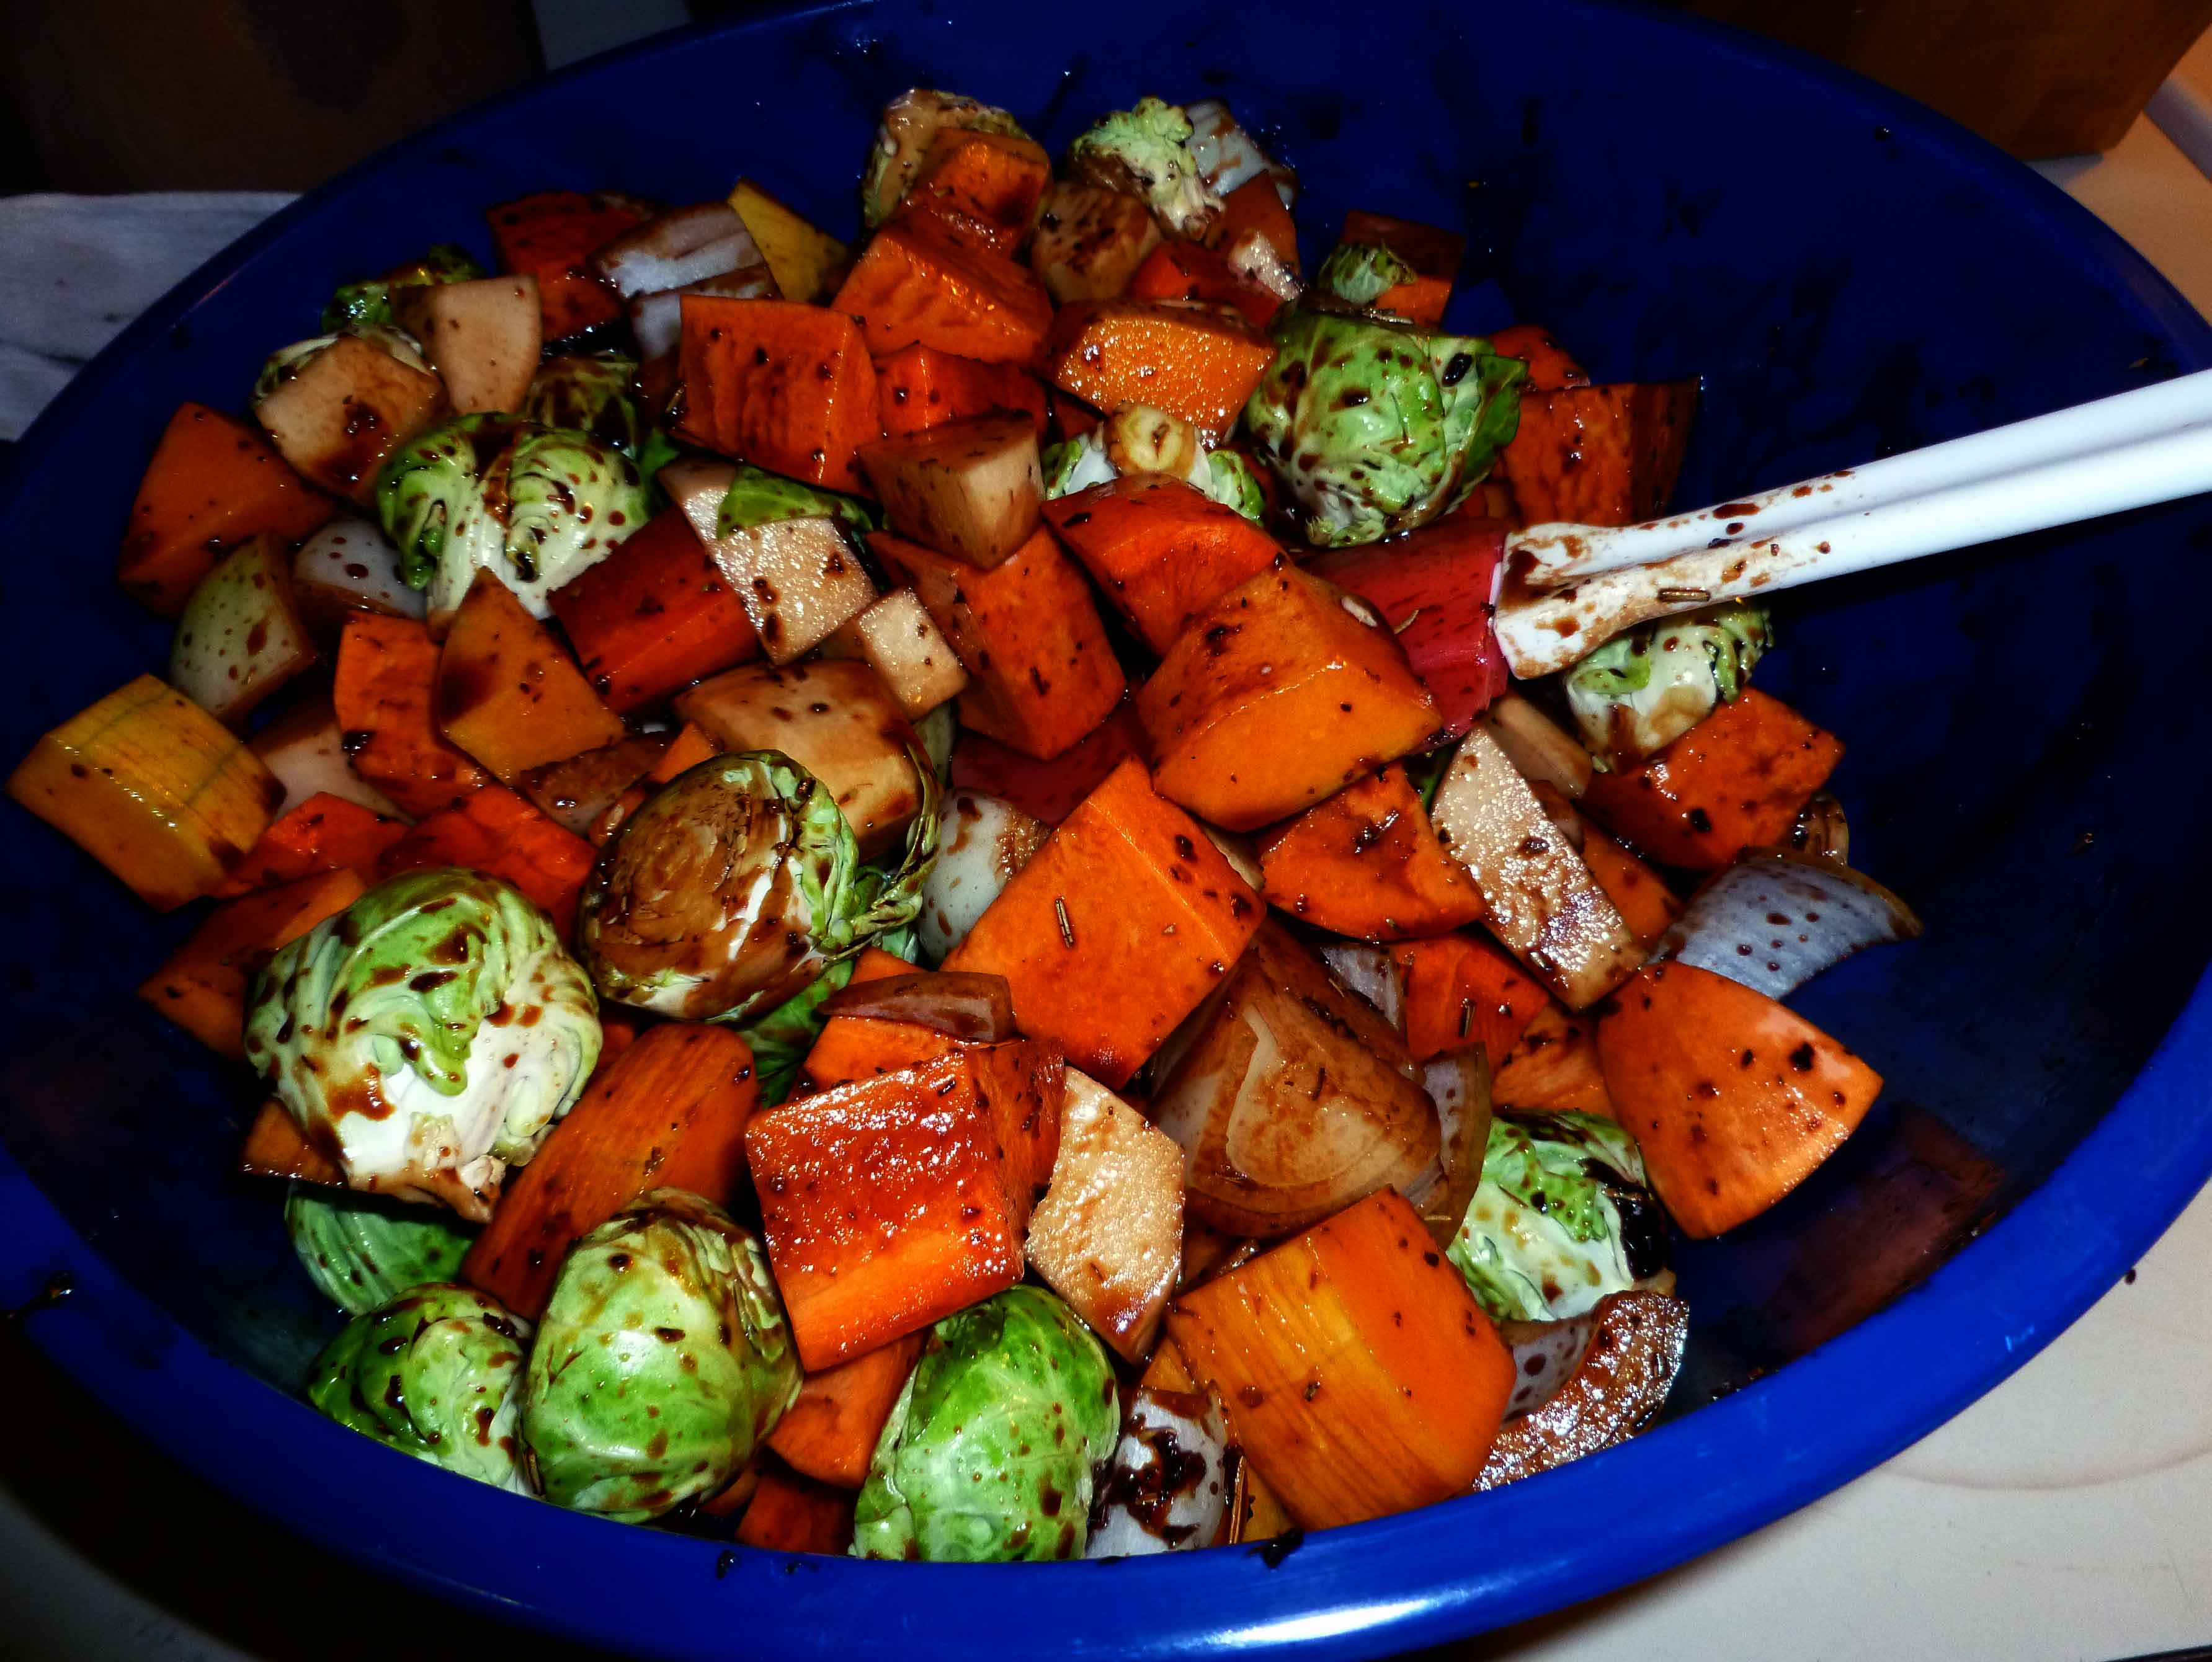
Pour the glaze over the vegetables, scraping down the sauce pan so that all the glaze ends up in the bowl. Mix the vegetables and glaze thoroughly so that all the vegetables are coated.
Mixing Veggies and Glaze to coat
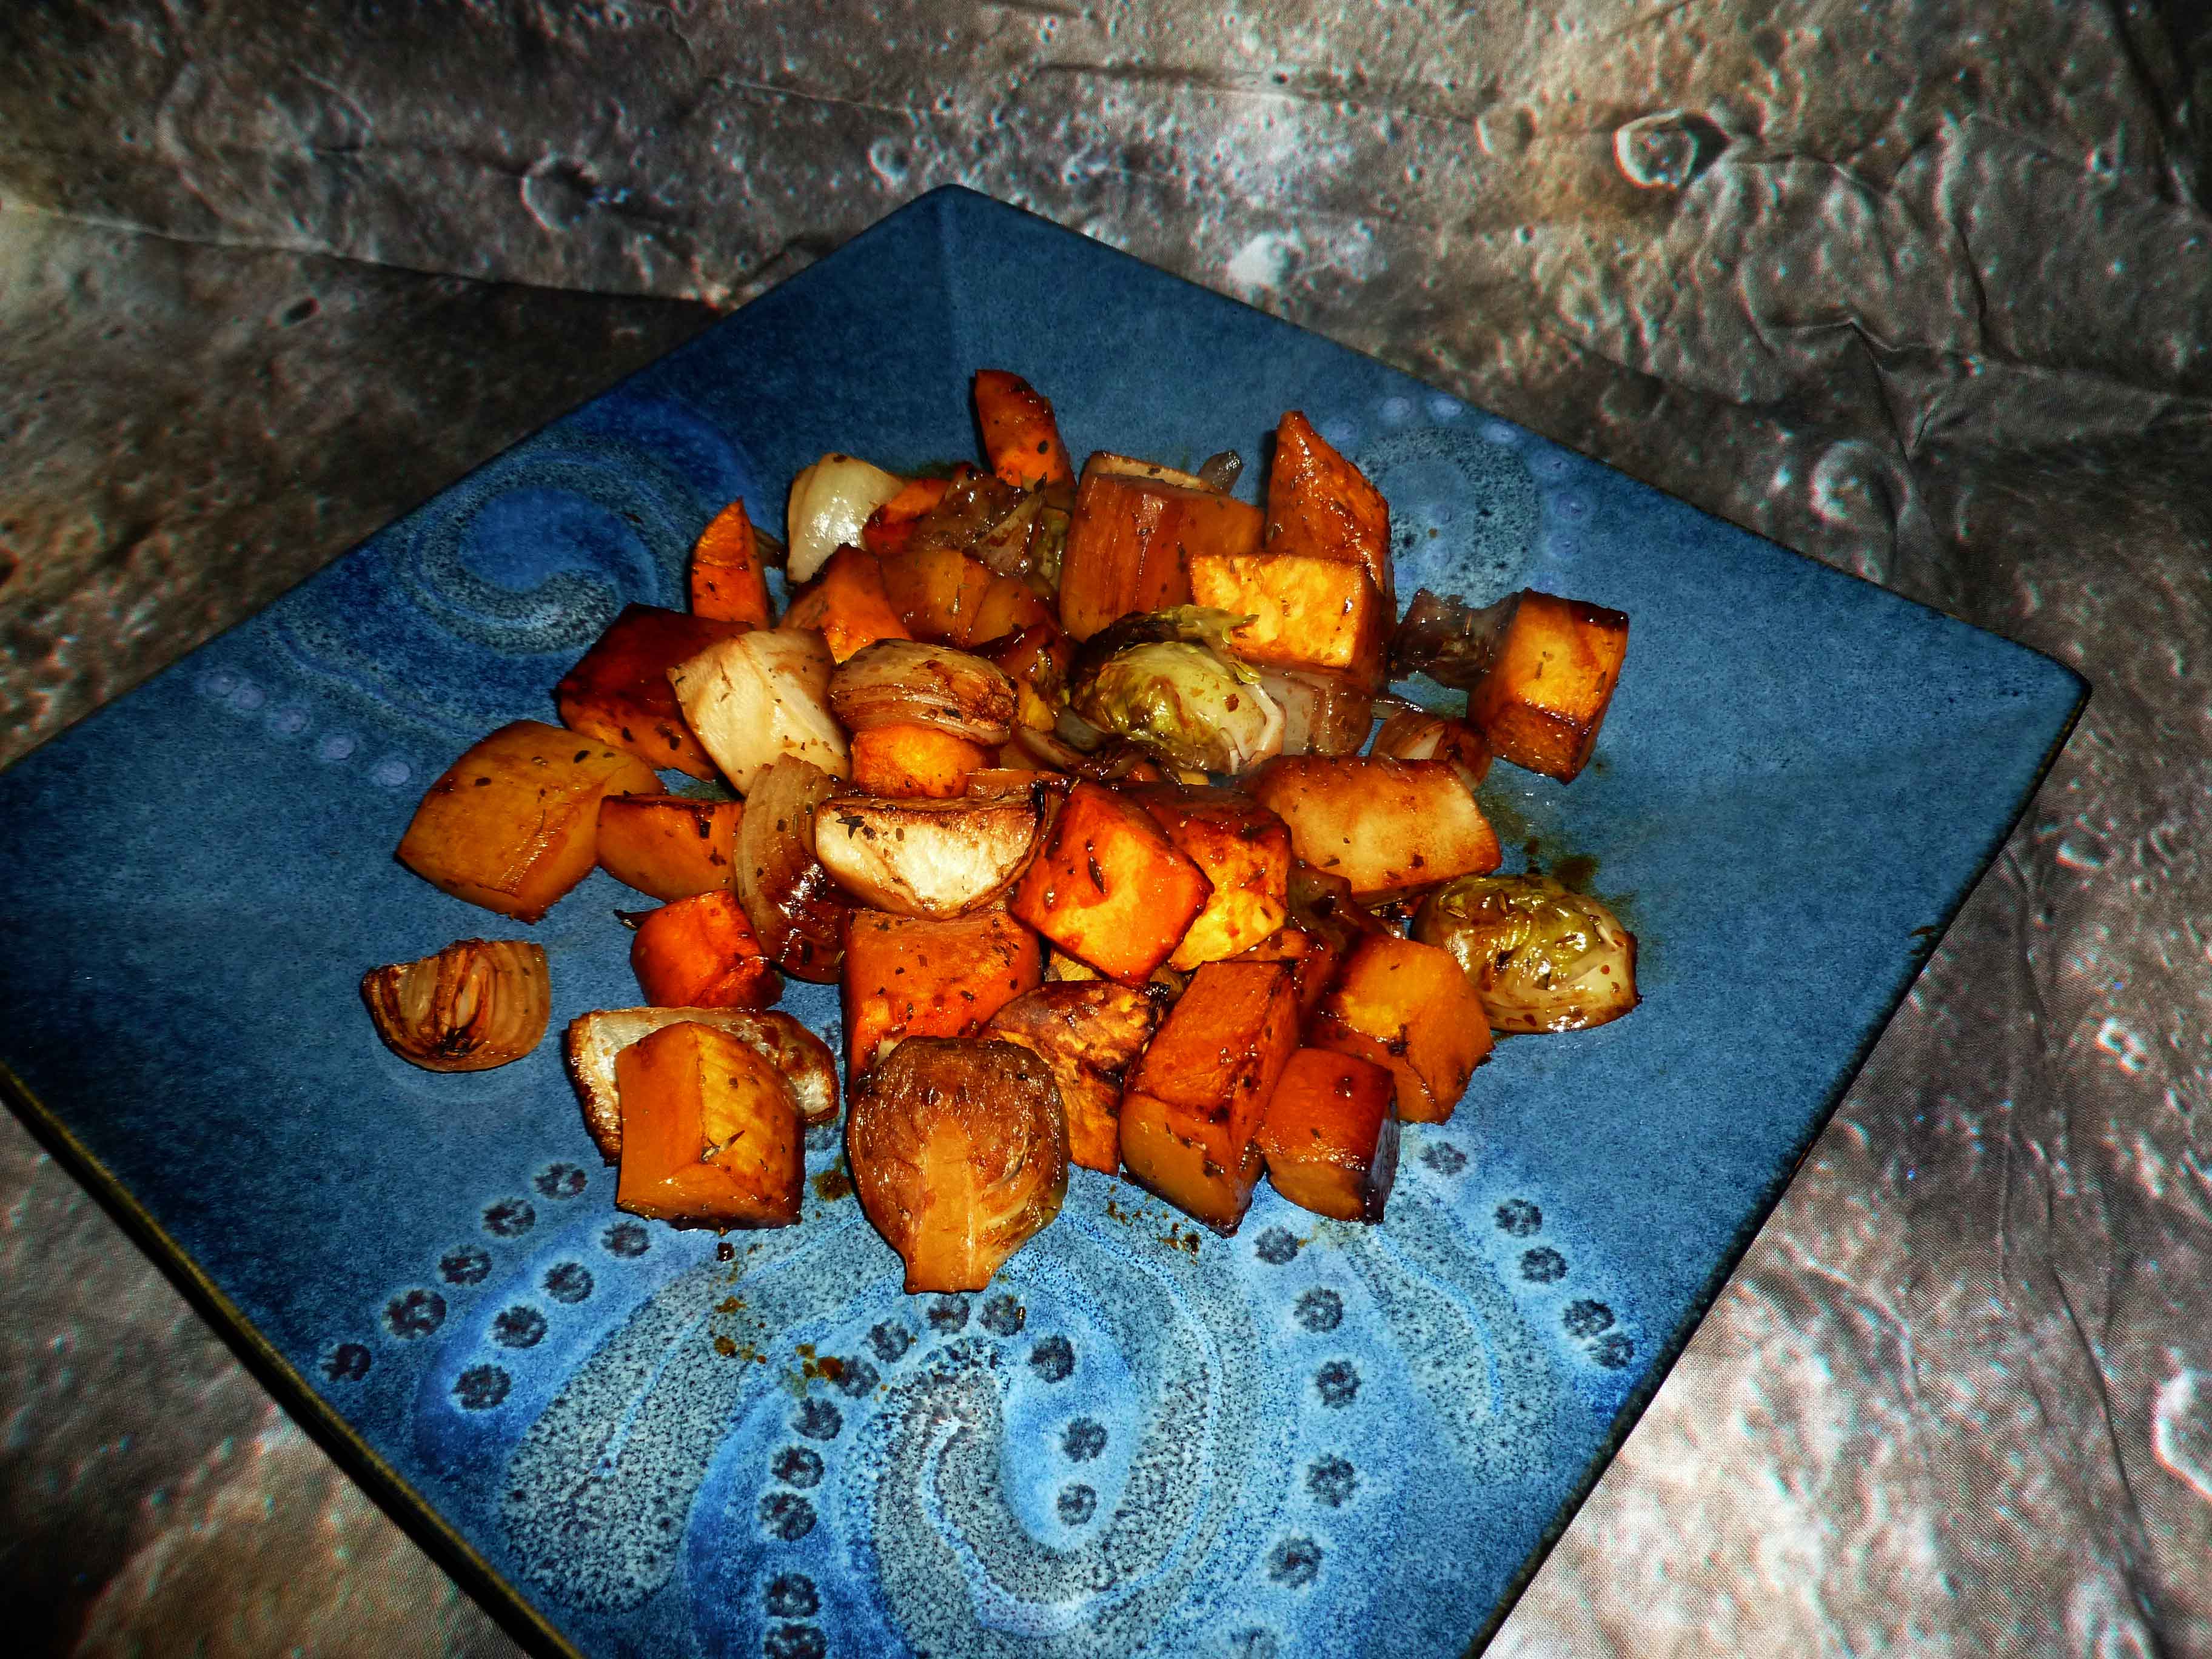
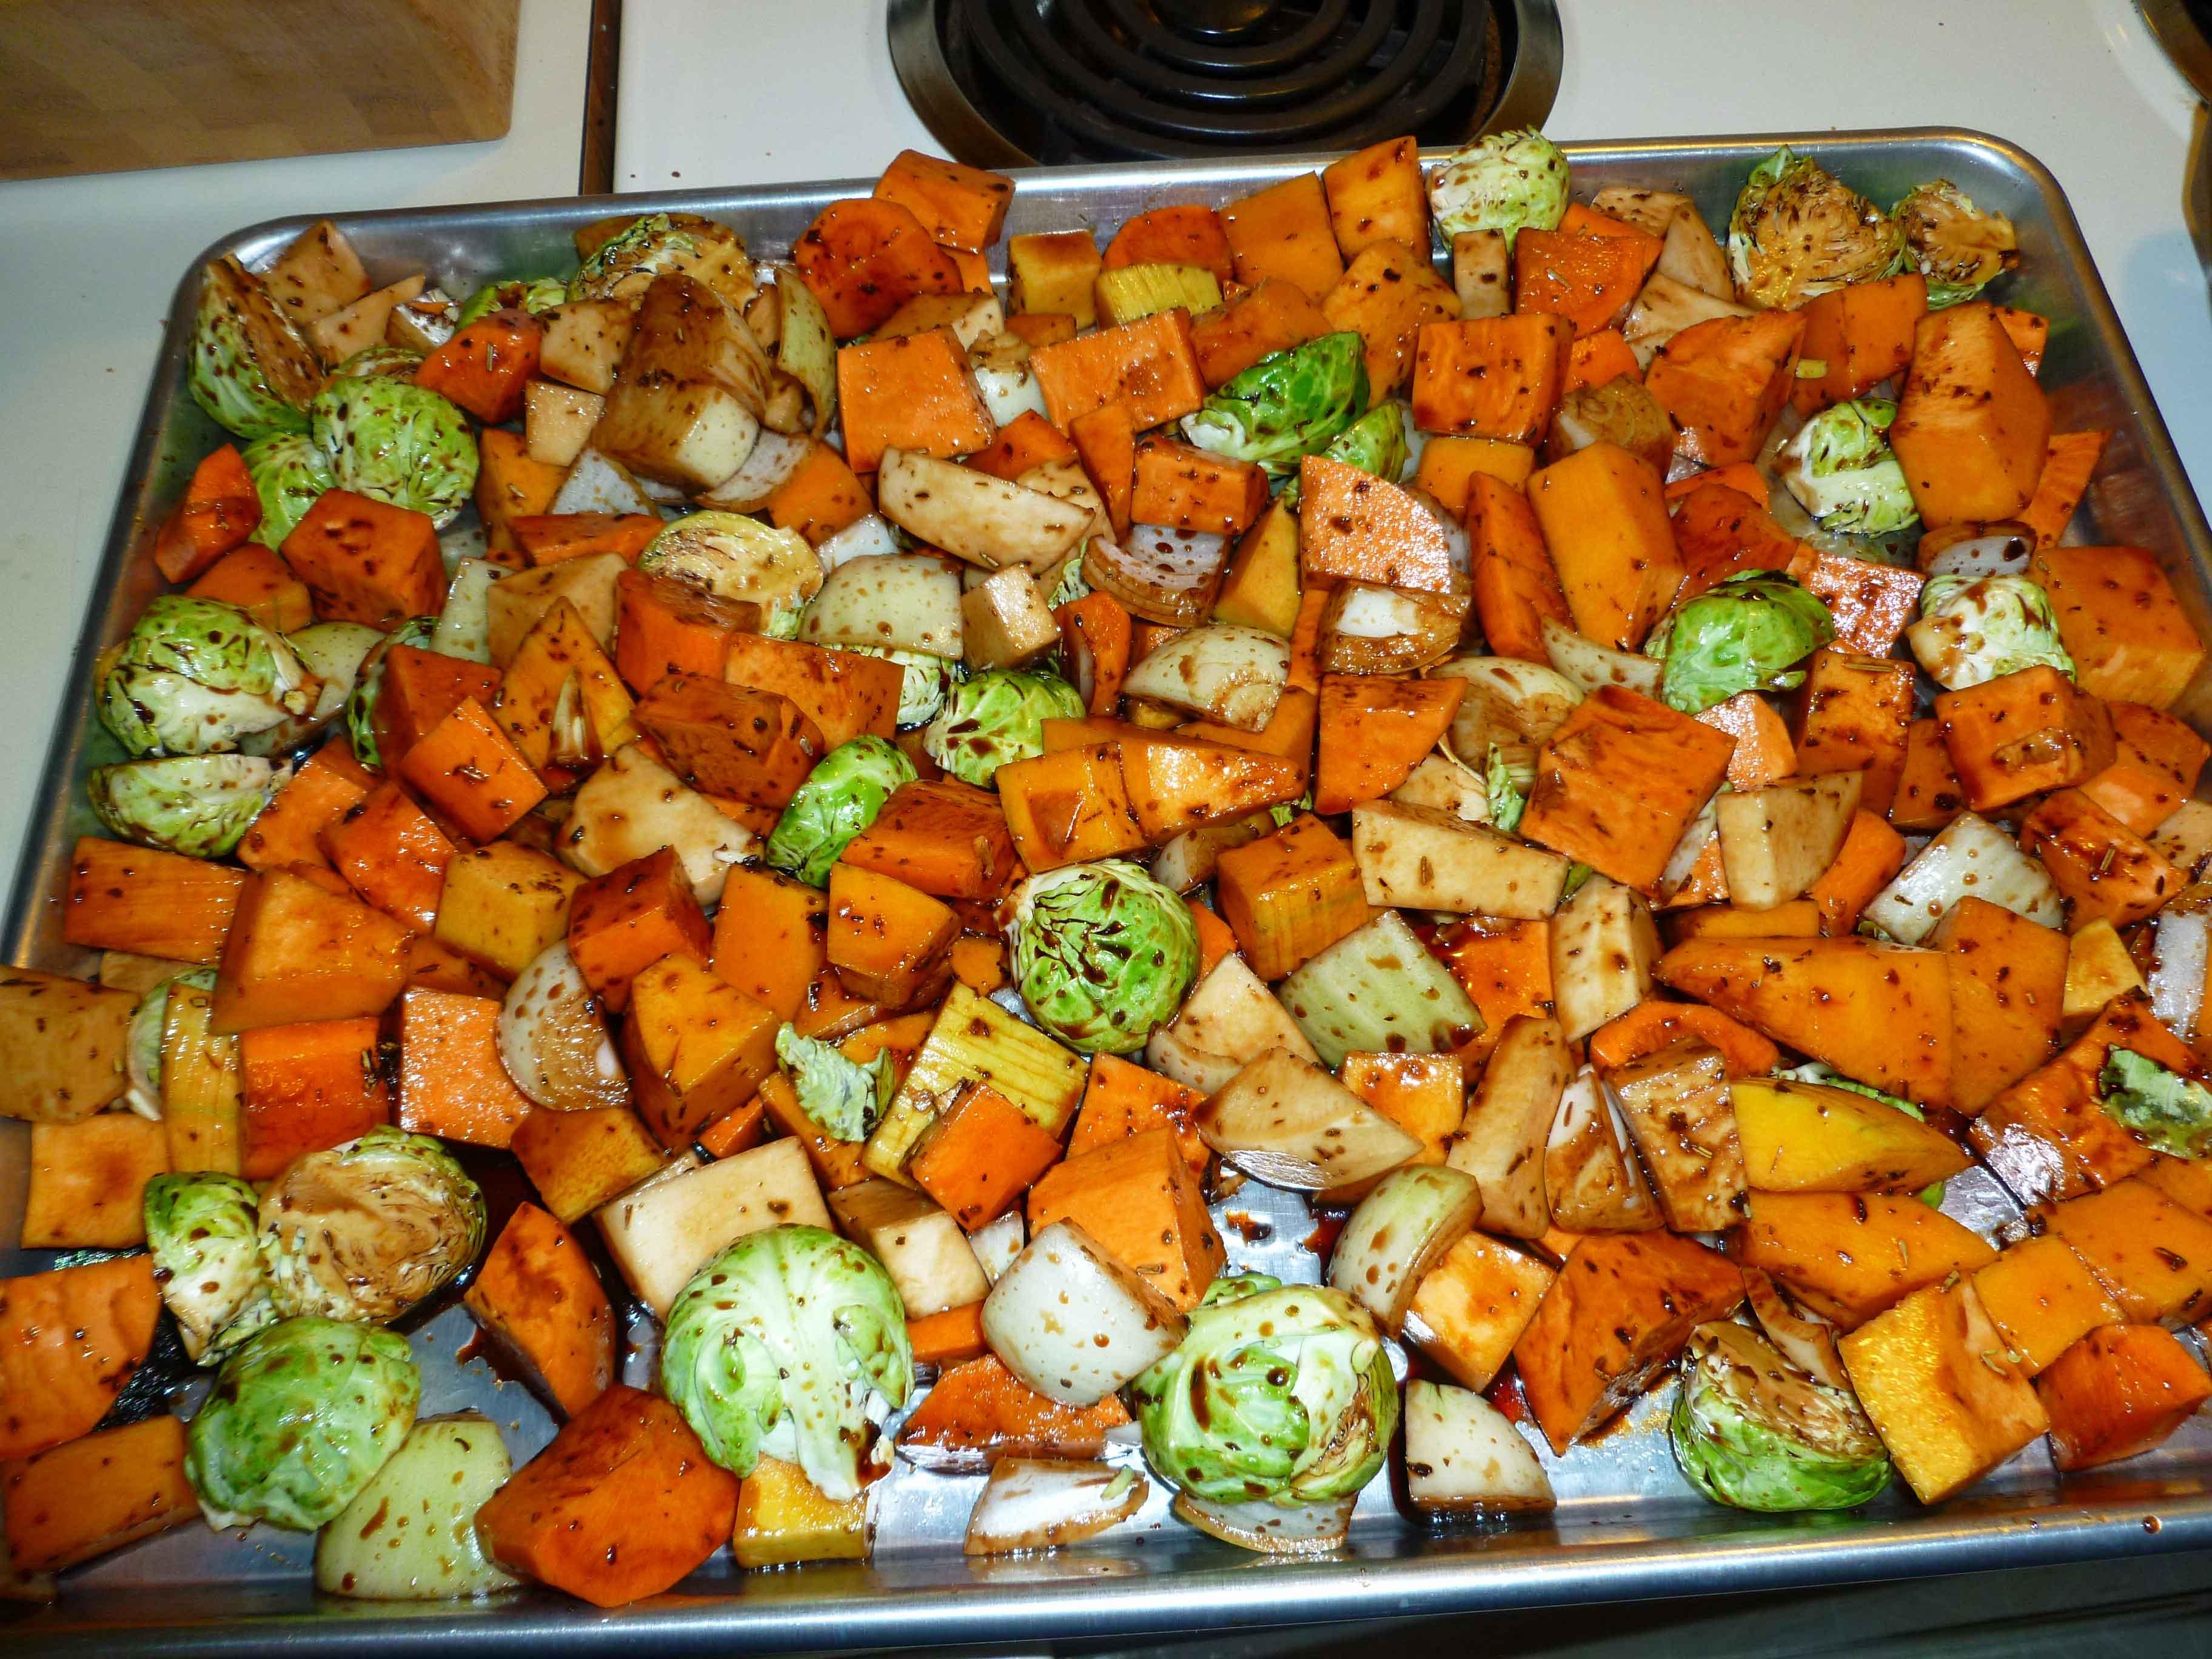
Pour the coated vegetables on the sheet pan and distribute them evenly.
Veggies spread evenly on pan
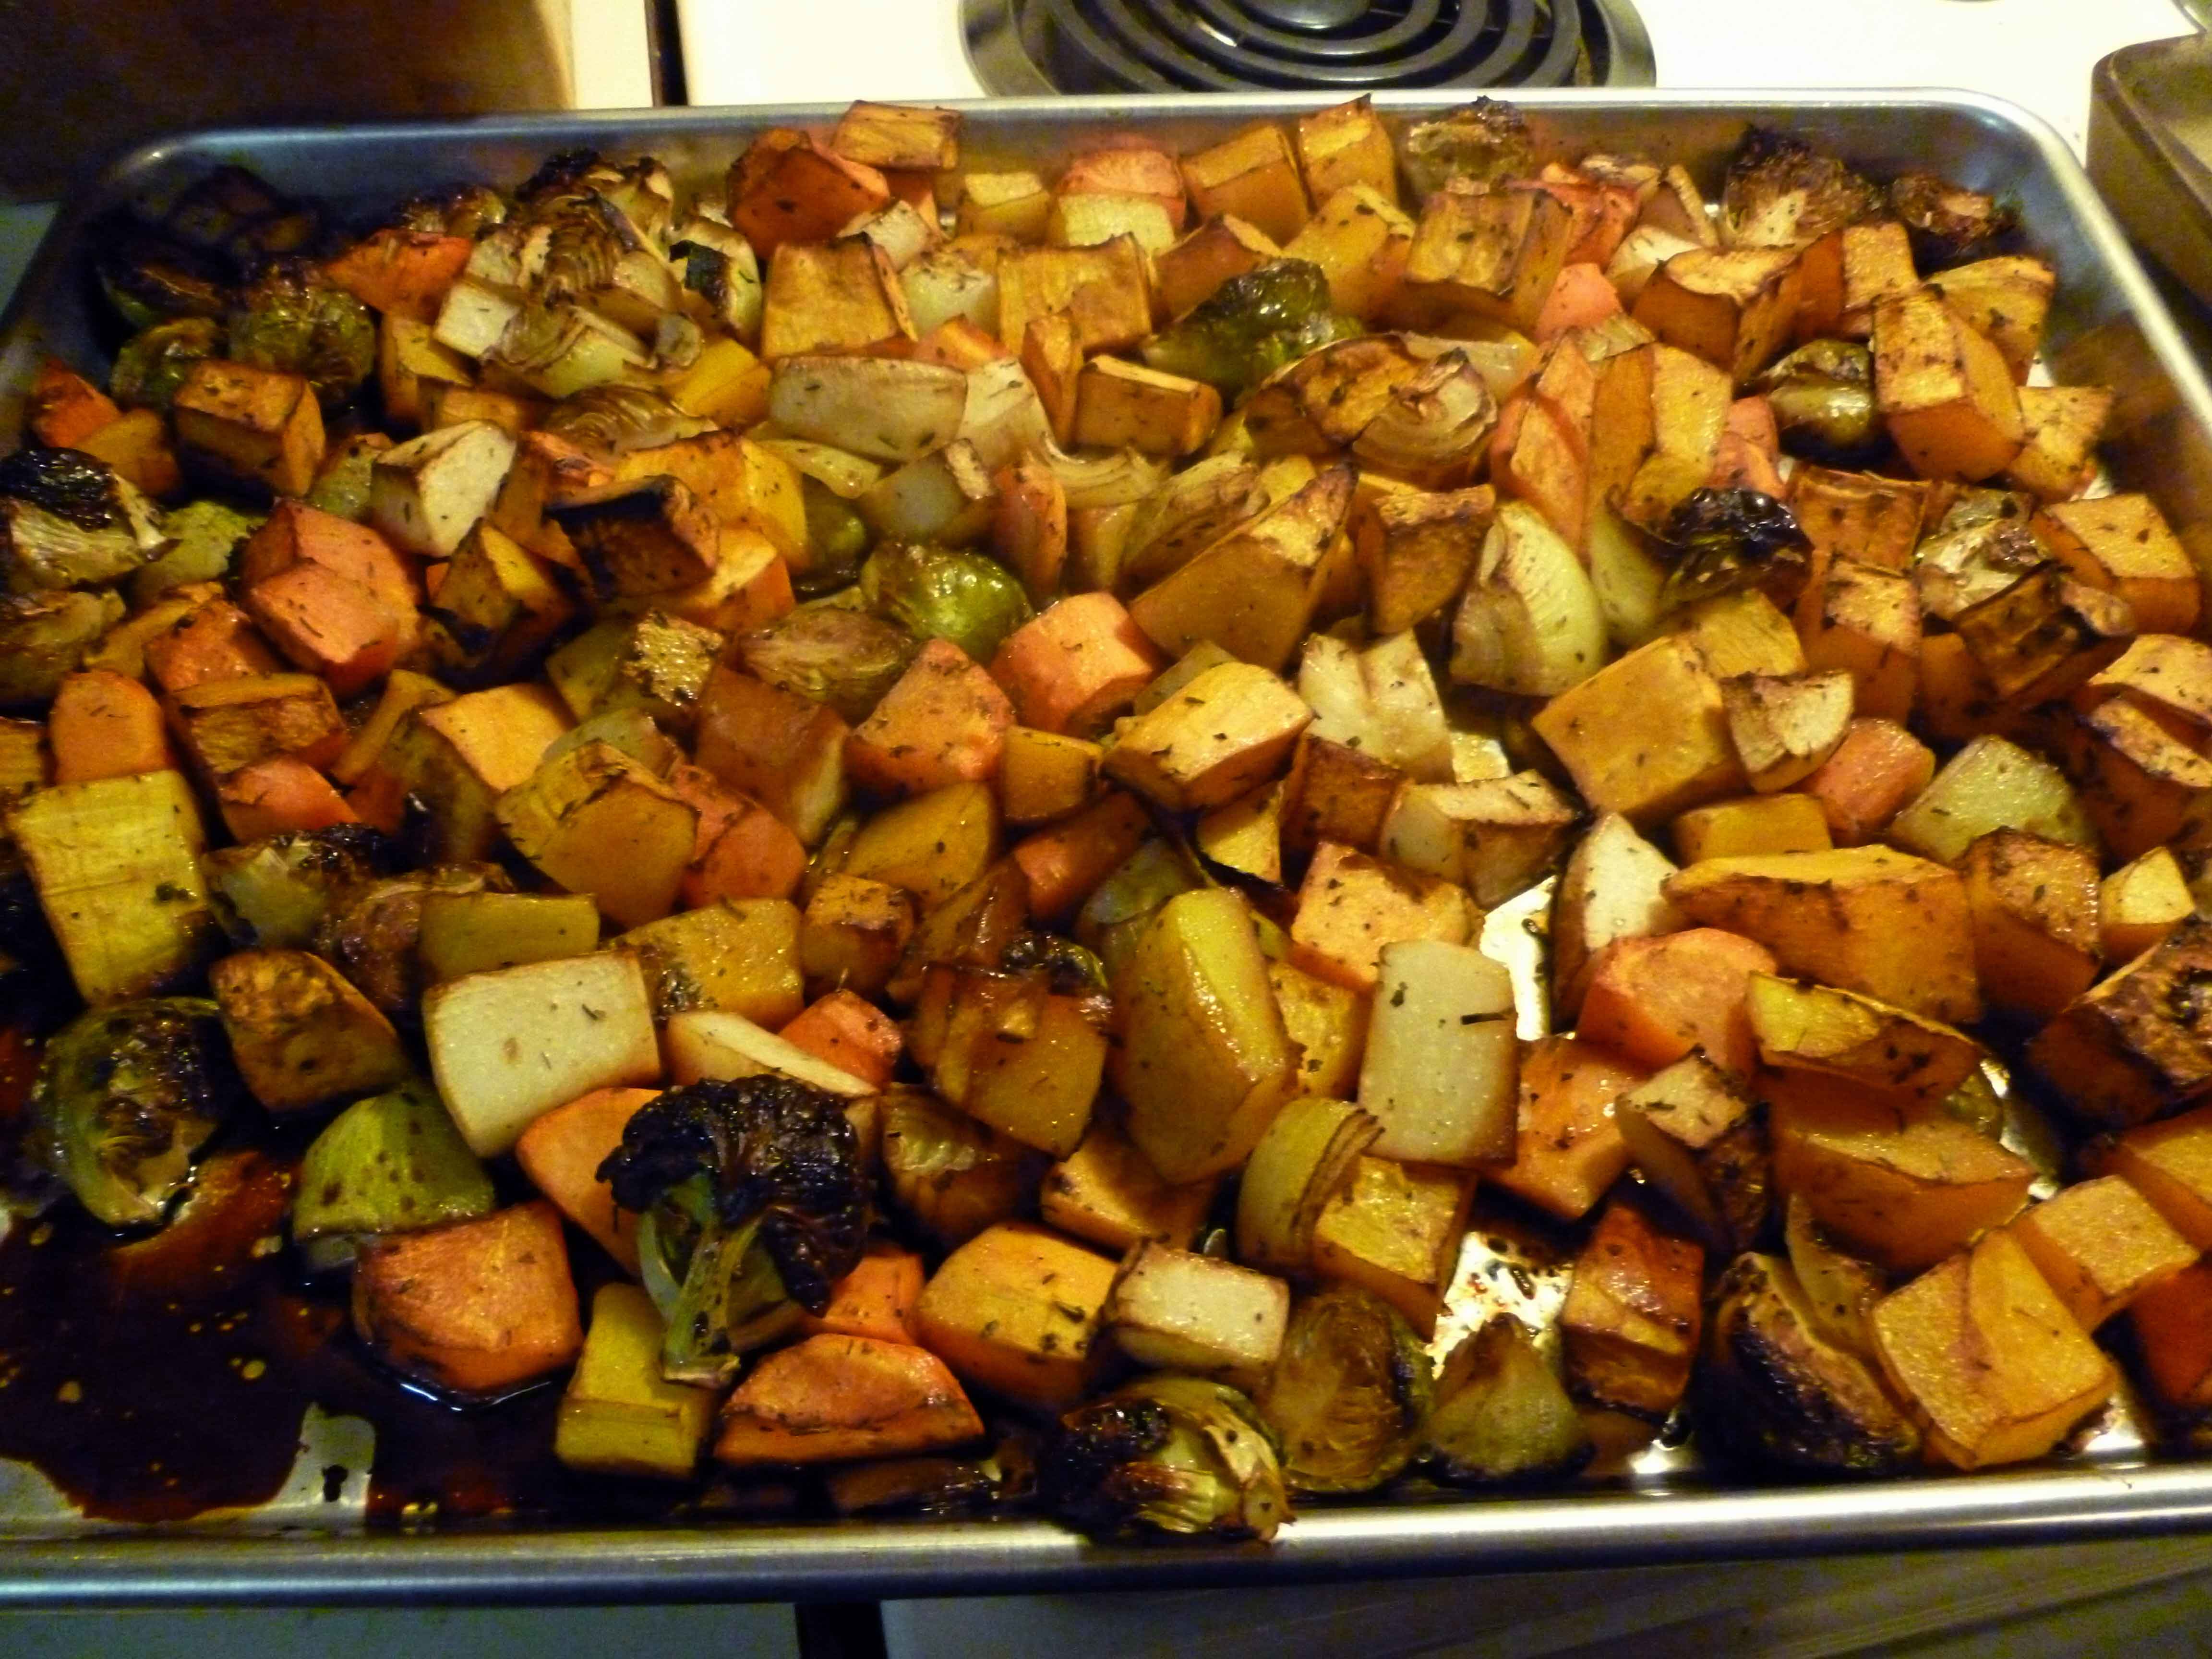
Place them in the oven and cook until the vegetables are tender, about 45 minutes to an hour depending on how large your pieces are. You might want to test them with a fork.
Homemade Cranberry Sauce – starting from upper left going clockwise, whole, jelled, orange, and apple
So, as some of you may remember from last year’s Turkey, Turkey Stock, and Turkey Rice Soup with Kale – Denise’s Annual Insanity, or if you know me in real life, I tend to be a lunatic about Thanksgiving. I make food in quantities and amounts that bear no rational relation to the number of people coming, and I go overboard about everything. One of those things is cranberry sauce. When I was growing up, my grandmother owned (still owns, actually) a farm which had a small lake and there were some cranberries growing in one end of it. She always made several kinds of cranberry sauce at Thanksgiving. Now the cranberry bog has been taken over by brush, but I still make multiple cranberry sauces every year. Also, it’s one of those things that looks really hard, but is a piece o’cake (if you’re not a crazed lunatic who is making 40 million other side dishes as well). I usually do the cranberry sauce a couple of days ahead, because you can, and because it needs to cool. If you want some cranberries on hand year round, buy a few bags and throw them in the freezer as is, and just use them frozen, i.e. don’t thaw them out first.
Whole Berry Cranberry Sauce
Whole Berry Cranberry Sauce
1 cup of water
1 cup of sugar
1 – 12 ounce bag of cranberries
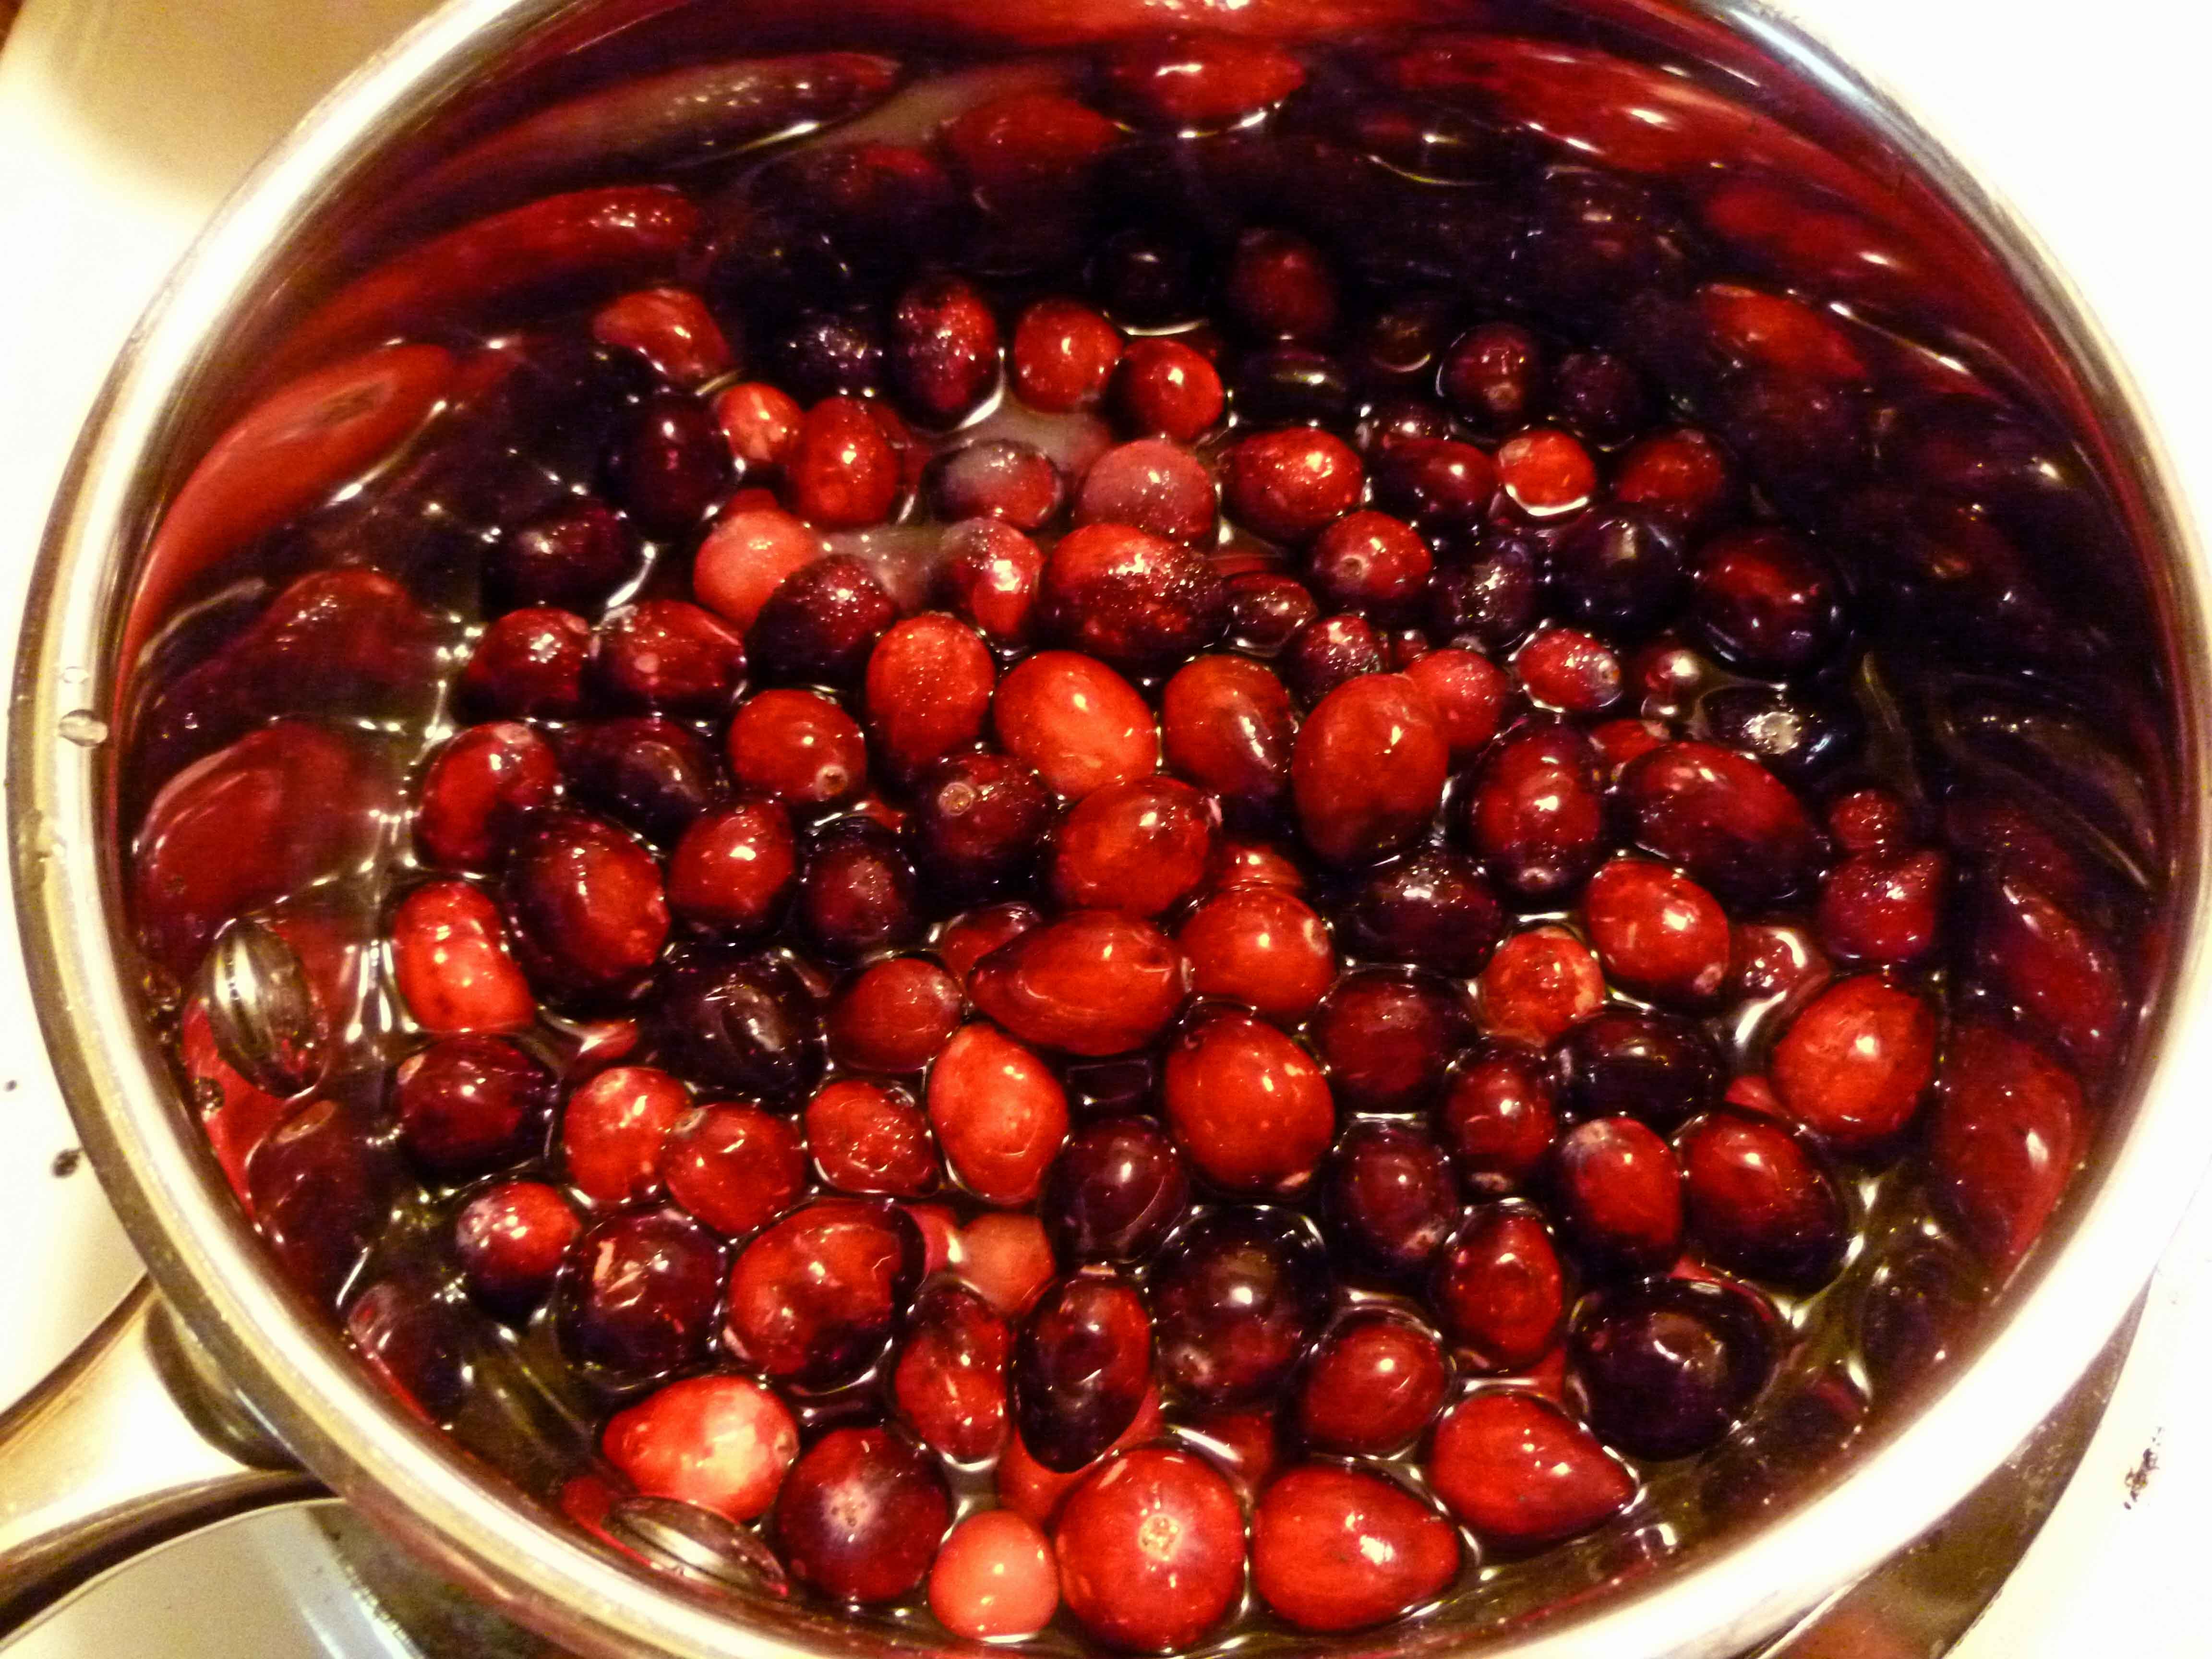
Wash the cranberries and pick out the soft, crushed and/or bad ones. Put the water and sugar in an nonreactive sauce pan and bring it to a boil over high heat.
Cranberries in Sugar and Water
Once the water and sugar is boiling, add the cranberries and let it come back to a boil. Reduce to the heat to medium and boil gently for 10 minutes. Pour into a heat safe bowl and let cool in the fridge.
Jelled Cranberry Sauce
Jelled Cranberry Sauce
1 cup of water
1 cup of sugar
1 – 12 ounce bag of cranberries
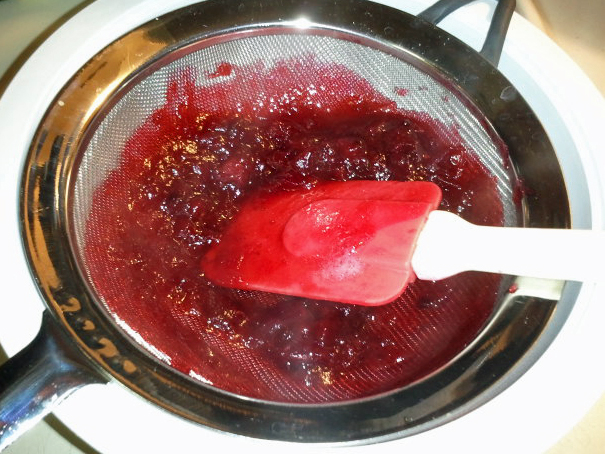
Do everything for the Whole Berry Cranberry Sauce above, except when you’ve finished boiling it gently for the 10 minutes, place a wire mesh strainer over a bowl, pour the sauce into the strainer, and use a spatula to press the sauce through it into the bowl, leaving the seeds and skin behind in the strainer.
Using Strainer to remove seeds and skin
Make sure you get as much of the sauce as you can through the strainer until there’s nothing left but seeds and skin. Frankly, I almost never make this because I don’t care, and not eating the skins and seeds seems like a colossal waste, but to each their own.
Apple Cranberry Sauce
Apple Cranberry Sauce
1 cup of water
1 cup of sugar
1 – 12 ounce bag of cranberries
1 peeled, cored and chopped apple
Follow the directions for the Whole Berry Cranberry Sauce above, but just adding the apple at the same time as the cranberries.
Orange Cranberry Sauce
Orange Cranberry Sauce
1 cup of water
1 cup of sugar
1 – 12 ounce bag of cranberries
1 orange, zested, and then peeled and sectioned
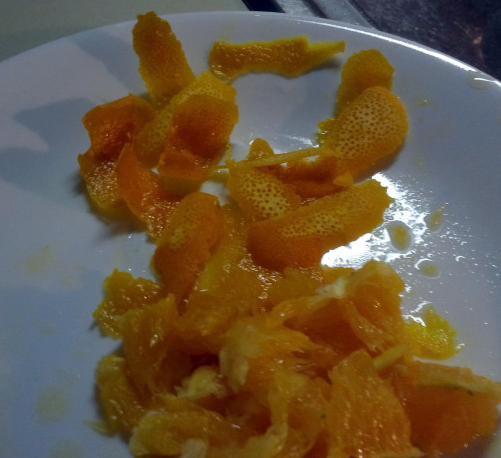
Wash and scrub your orange. Zest your orange, either with a micro-planer or use a vegetable peeler to take off very, very thin strips. Make sure there is NO white pith at all, as it will cause the sauce to be bitter. Peel your orange and then remove the outer skin from each of the sections.
Zest and Sectioned Orange Pieces
Follow the directions for the Whole Berry Cranberry Sauce above, but just adding the orange at the same time as the cranberries.
“Every year is getting shorter, Never seem to find the time” – Pink Floyd
I could do a food allergy parody of Simon & Garfunkel’s Hazy Shade of Winter or Pink Floyd’s Time, but that would take an awful lot of effort and creativity, and frankly, I don’t have time as you will soon see from this post.
When I first went off milk, hazelnuts and scallops, I thought my life was difficult and I had to make a lot more from scratch, but there were some dairy replacement products I could buy. Then when I had to remove egg, coconut, almonds, clams, crab, and flax in addition, I was pretty annoyed and I had to make a lot more from scratch. I thought my life had gotten exponentially harder again. But frankly, with adding corn, wheat, chicken and sunflower (based on a recent near anaphylaxis reaction to sunflower oil, still needs some verification, but I’m kinda afraid to test due to the severity of the reaction) to the mix most recently, I didn’t know how good I had it back then. At least back then I could buy vitamins, condiments, food in jars, pickles, food in cans, some vegan dairy replacement products, soda, candy, fruit juice, baking powder, vanilla and other extracts, vegan margarine, hot dogs, some broths, soup stock or bouillon, salad dressings, some convenience foods and some deli meats.
I live in a second story two bedroom apartment in the largest city in New Hampshire. You’d think I lived on a farm with the number of jars of canned food and condiments, empty jars, the pressure and water bath canners, and the other cooking equipment in this apartment. Why, you ask? Because of the corn allergy, I can’t have anything with citric acid, xanthan gum, distilled white vinegar, and about 5 single spaced typed pages of other corn derivatives. I am something of a foodie and a chili head and/or hot sauce junkie, so the thought of having to eat nothing but salad or steamed fresh veggies (I’ll save the “why frozen foods can be bad for someone with a corn allergy” explanation for later) and beef or pork for the rest of my life was fairly disturbing. As a result, I’ve had to learn to make and safely store and/or preserve the things I still want to eat. So far, this has meant learning to can (both the water bath and pressure canning methods), pickle, and ferment; making other things that everyone takes for granted; and making my own milks out of oats, rice, and cashews.
So since June, I have made and canned the following things, modifying the recipes to replace distilled white vinegar for either safe-for-me apple cider vinegar, white wine vinegar or rice vinegar:
Jalepeno Hot Sauce
Essential Habanero Hot Sauce
Djion Style Mustard
Peach Citrus Ginger Soda Syrup
Dill Pickle Sandwich Slices
Chili Garlic Sauce
Sweet Pickle Relish Recipe
Traditional Bread & Butter Pickles (spicy version)
Dill Pickle Relish
Thai Hot and Sweet Dipping Sauce
Garlic Dill Zucchini pickles
Vietnamese Carrot & Daikon pickle
Strawberry Citrus Soda Syrup
Hoisin sauce
Sushi ginger
Plum sauce
Dilly beans
Vegetable Stock
Cherry Pomegranate Lime Soda Syrup
Peach Citrus Soda Syrup
Beef Bone Broth
Ketchup
Marinara sauce
Hot Pepper Pickle Mix
Banana Peppers Pickled
Tomatillo Salsa
Green Cayenne Hot Sauce
Barbecue Sauce
Green Chili Garlic Sauce
Honeyed Cayenne Chilis
Spicy Tomato Salsa
Kidney beans (I can use dry beans, but that means I have to remember to soak them ahead of time, and I really wanted some “convenience” foods)
Boston Baked Beans
Eggplant Caponata
Ratatouille
Black beans
She Simmers Hot Sauce
Yellow Hot Dog Mustard
Classic Dijon Mustard
Garbanzo beans
When I do a batch I’m generally canning between 5-9 pints of something, although the some of the pasta sauces are in quart jars. It’s my hope and intention that when I can something, I do enough that I won’t have to do it again for a while. I’m hoping to get a year out of the condiments, but the food items will last for less time. The soda syrups get me though maybe a month and a half out of each batch. I may have to decide at some point whether the time involved to make fruit soda syrups is worth it, and decide whether to make huge batches of homemade ice tea instead, since I won’t just drink water apparently. The time involved for making each of the items above depends on the level of preparation and the canning method required, so it ranges from about an hour and half at the minimum to about five hours at the maximum. I’ve been keeping track of everything I’ve made on a spread sheet so that I can figure how how long it takes to use something up. Eventually after I ‘finish’ making everything I want to have available on hand, I want to be able to figure out how many weekends a month I will have to continue canning to keep everything in stock.
Also since June, I’ve tried fermenting the following things, because I either still wanted to eat them, or because I need probiotics, because there are no safe vitamins anymore:
Sriracha (two versions, made one with cider vinegar and one with rice vinegar because I was afraid I won’t be able to get the peppers in winter and because I wanted to see if I liked the rice vinegar one better)
Sauerkraut (two batches, although in my overly warm apartment it takes about a week to two weeks rather than four to six)
Kombucha (my apartment was just too hot, so this was a fail)
Water Kefir (my apartment was just too hot, so this was a fail)
Green Cayenne Tabasco style sauce
Red Cayenne Tabasco style sauce
Habanero Tabasco style sauce
Also since June, I’ve made the following things because I can’t buy the commercial products anymore, or because I’m trying to make something else I can’t have anymore:
Vanilla extract
Lemon extract
Lime extract
Orange extract
Mint extract
Baking powder
Vegan margarine (which was a major fail)
Various gluten free flour mixes
Various spice mixes to replace commercial versions of things I can’t have anymore
Chocolate
Various salad dressings
Various attempts at gluten-free, corn-free, dairy-free and egg-free bread (all of which have been a fail)
Cashew milk
Oat milk
Rice milk
Notwithstanding the above, I am also making my own laundry detergent and shampoo, which, admittedly, I was doing before the corn thing went down, but is still annoying. Prior to the corn thing, I was also making lotions and lip balm, but now those recipes are unsafe, and I’ve got to do some research to make new corn-free versions. Also, don’t forget to factor in all the research time it has taken me to find safe versions of certain recipes, and figure out my reality as to what things I need to avoid. We’re talking hours and hours on allergy sites, canning sites, blogs, Pinterest, and so on. Other than this blog, my writing (I was working on revising my first novel) has ground to a screaming halt, my knitting time has been drastically curtailed, and I missed the summer. I spent almost every weekend canning things or making things, and sometimes weeknights too. I’ve been at a dead run since June.
So here’s the thing I guess I want to say about time. I’m still figuring it out and sometimes it sucks. To feed yourself safely, the reality is that you’re going to spend way more time to feed yourself than you did before you had the allergy, and that’s just the way it is. I went through a mourning period for convenience foods and for being able to eat like everyone else can, every single time I had to eliminate more foods and that’s normal. Mourn, vent, cry, scream, but the fact of the matter is, you’re going to have to get over it and do what you need to do, or eat the same boring crap for the rest of your life. And you can decide to eat the same boring crap for the rest of your life if you want to do that. I just couldn’t stomach it (no pun intended, haha).
Here’s some stuff I’ve figured out:
Research, research, research. Know what you can eat and what you can’t. You don’t want to waste time making something only to find out that there’s something in it that makes you sick because you didn’t recognize the name of something in one of your ingredients as being your allergen, or that there’s likely cross contamination because of processing.
Plan, plan, plan. Every social event that you attend is going to take thought and planning. Maybe you’ll have to find out if there’s safe food there, maybe you’ll have to bring your own, or maybe you’ll have to plan to eat before you go or eat after you go to the event. Everything you want to make at home will take planning if you have to make ingredients ahead of time in order to make the actual thing. For instance, if you want to use vanilla extract, you need to steep the vanilla beans in safe alcohol for 4-6 weeks before it’s ready to use. I’ve wanted to try to make candy for months, but I’m still working on my lemon, lime, orange and mint extracts. There are still some things you can be spontaneous about for food and some that you can’t. Figure out what are the ingredients/foods/cleaning products that you use regularly, that you can’t buy commercially and that you need to have on hand as a general proposition. Research, figure out a way to make them, and then keep an eye on the amounts you have as you use it. If you’re running out, make it ahead of time before you do. For example, my shampoo takes 24-48 hours to make. If I run out, that means I have to wait at least that long to have shampoo because I can’t buy it. Don’t run out. Plan ahead.
Make big batches. It’s a lot easier to make a big batch of something once than to make a lot of smaller batches of something, as long as you can use it before it spoils, and as long as you have room to store it. (Which is why I’m canning instead of freezing, in addition to the fact that we lose power most winters for at least once for 3-4 days in a row and I lose all the food in the freezer.) For example, when I make laundry detergent, I have to use my food processor to grind up the soap, and that means I’m going to have to wash the food processor exceedingly thoroughly. It makes more sense to make up 3 to 4 batches of the stuff and wash the food processor once than to wash it 3 to 4 times for single batches.
Make big batches, part II. If you make stuff you can either freeze or can, and you put the leftovers in single serve containers, guess what? You have some convenience food! Woo hoo! It’ll be there for emergencies, such as when you forgot to plan, make stuff ahead, or when you’re just so sick of cooking you’ll kill someone if you have to make one more thing.
Buy what you can in bulk amounts. If you have storage space, if you can use it before it spoils, and if you have the money, buy what you can in larger amounts. I’m talking mostly dry goods, such as flour, rice noodles, rice, dried beans and peas, etc. If because of your allergies, you have to make trips to multiple stores to get your groceries, the fewer trips you have to make, the more time you save.
Think about buying appliances or tools that make your life easier and save you time. Sometimes your pocket book can limit your options here, but the thing is, your time is precious too, and for most of us, this is a permanent lifestyle change whether we like it or not. My food processor, Kitchen Aid mixer, and my All American Pressure Canner are all expensive tools, but save me a lot of time, or save me from making something from scratch and/or losing stuff in the freezer when I lose power and from having to make stuff again. Someday, I’m going to have a performance blender like a Vitamix or a Blendtec, but right now, other things are a priority for my hard earned cash.
Anyway, that’s all I have for words of wisdom right now. If you have ideas for saving time, please let me know. I seriously need all the help I can get.
So Mary Kate put up a recipe for brownies a bit ago, but it had almond flour, coconut flour and coconut oil in it, which are a big no-no for me. So I wanted to see if I could do a brownie recipe I could eat, especially with some of my new restrictions. Keep in mind for those of you who have a corn issue, that I am not that sensitive, and that I am not dealing with packaging and cross contamination issues at this point, I’m just dealing with obvious corn and derivatives, and using safe for me ingredients.
2 Tablespoons of ground or milled chia seed
1/3 cup and 2 teaspoons of water
350 grams of Denise’s All Purpose Gluten Free Flour Mix (I used the Gluten Free Girl’s post on gluten-free holiday baking and modified it a bit – to make 500 grams of the mix, you’ll have a bit extra to use for other recipes, whisk together thoroughly 50 grams of oat flour, 50 grams of teff flour, 75 grams of sorghum flour, 25 grams of potato flour, 125 grams of sweet or glutinous rice flour, 75 grams of potato starch, 50 grams of arrowroot, and 50 grams of tapioca starch) or 2 ½ cups of All Purpose Flour if you can have wheat
½ teaspoon of sea salt
½ teaspoon baking powder (For corn free baking powder you can use this recipe)
1 ½ cups of sugar
½ cup of brown sugar
¼ cup of shortening, vegan margarine, etc., whatever is safe for you, and a little bit extra to grease the pan.
¼ cup of olive oil
¾ cup of water
1 cup of cocoa powder
1 ½ cups of safe (dairy free, nut free, soy free) chocolate chips or homemade chocolate if you’re corn free (I used this recipe, but modified it to use this sugar syrup recipe instead of honey, as honey can be problematic for people allergic to corn if you don’t know whether your beekeeper is feeding his bees corn syrup or not. Also, I used the whole batch in these brownies, so I didn’t let them cool into chocolate chips, I just put the chocolate into a heat safe bowl as described below.)
1 Tablespoon of vanilla extract (Here’s a bunch of recipes for vanilla extract, make sure to use safe alcohol if corn or wheat are an issue for you. I used Luksusowa Vodka because it’s made only from potatoes, where some vodkas may also use grain or corn.)
Preheat your oven 325°F and lightly grease a 9 by 11 inch pan with a little bit of the shortening or margarine.
Whisk together the ground or milled chia seed and 1/3 cup and 2 teaspoons of water in a small bowl and set aside.
In an electric mixer bowl, whisk together the flour, baking powder and salt.
Place the chocolate chips into a large metal or glass bowl (you want it to be heat-safe).
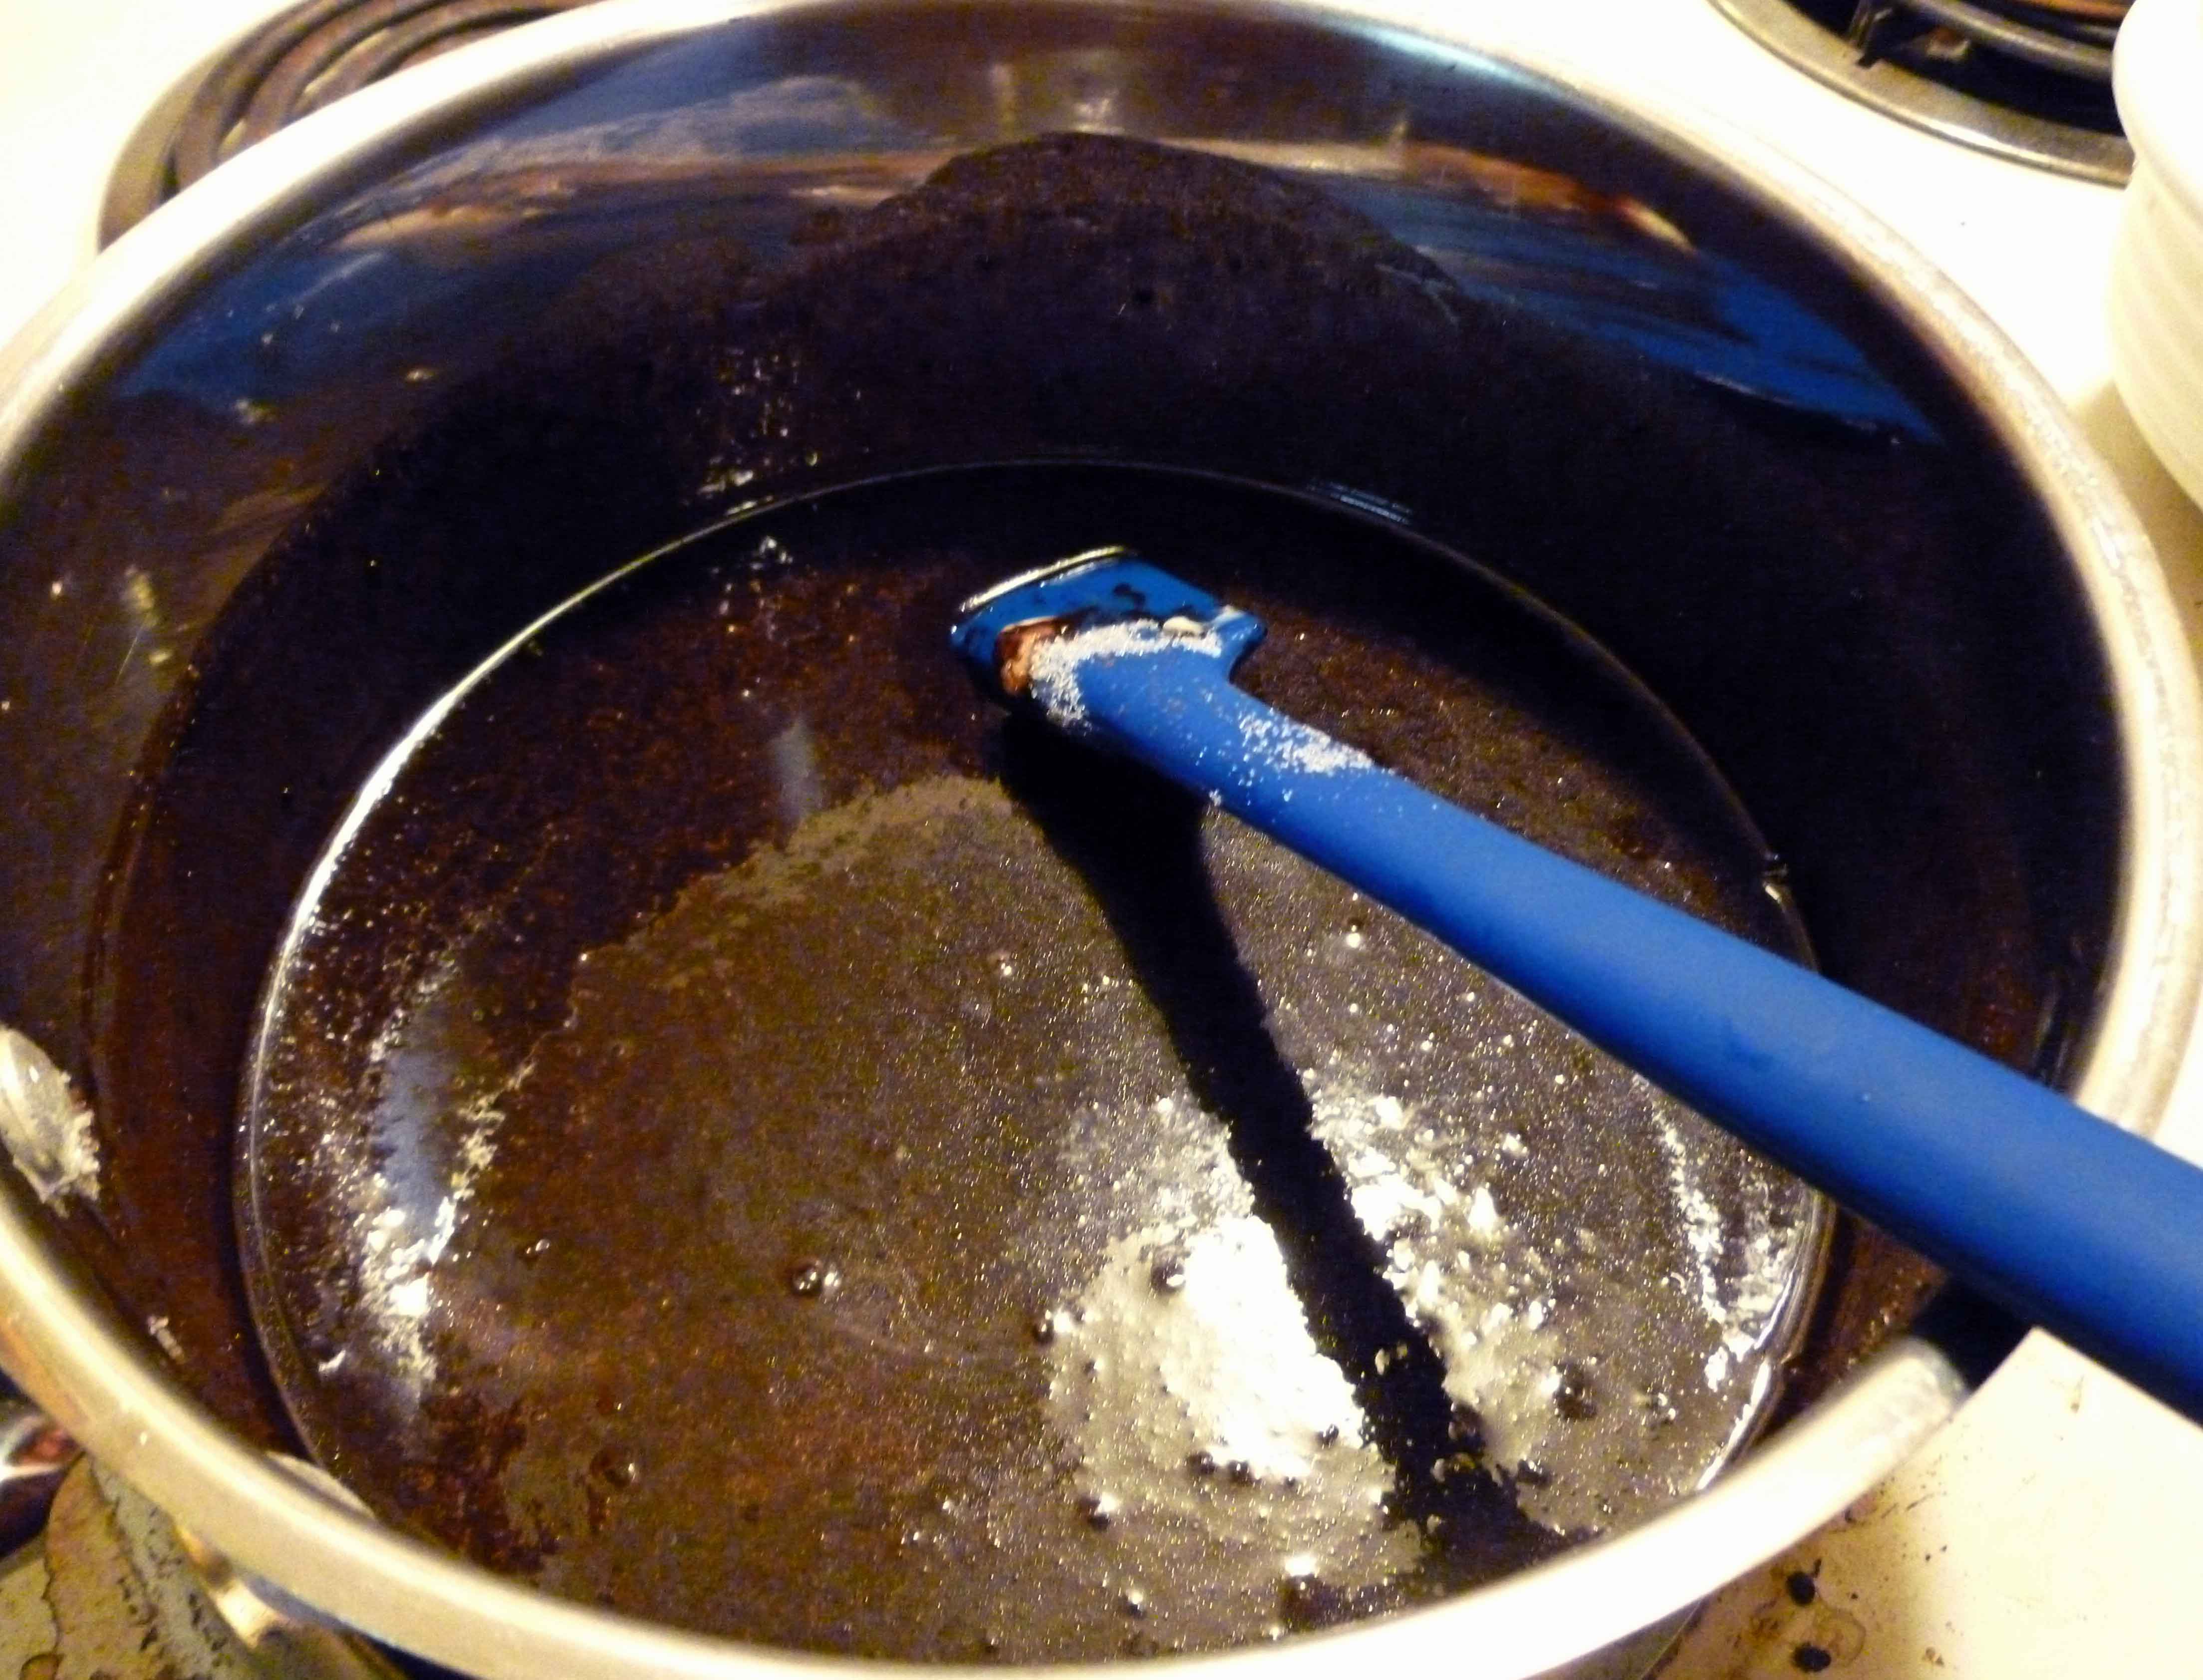
In a saucepan over medium heat, combine the sugar, brown sugar, shortening or margarine, oil, cocoa powder, and the water and bring it to a boil, stirring constantly.
Melted shortening, sugar, coffee and cocoa powder in saucepan
Once it is boiling, pour the mixture into the heat-safe bowl containing the chocolate chips, mixing it quickly so that the chocolate chips melt and combine with the mixture.
Pour the chocolate mixture into the mixer bowl containing the flour, scraping down the chocolate mixture bowl thoroughly. Add the chia and water mixture and the vanilla to the mixer bowl and mix on medium-high speed until the brownie batter is smooth. I used the batter beater on my KitchenAid mixer.
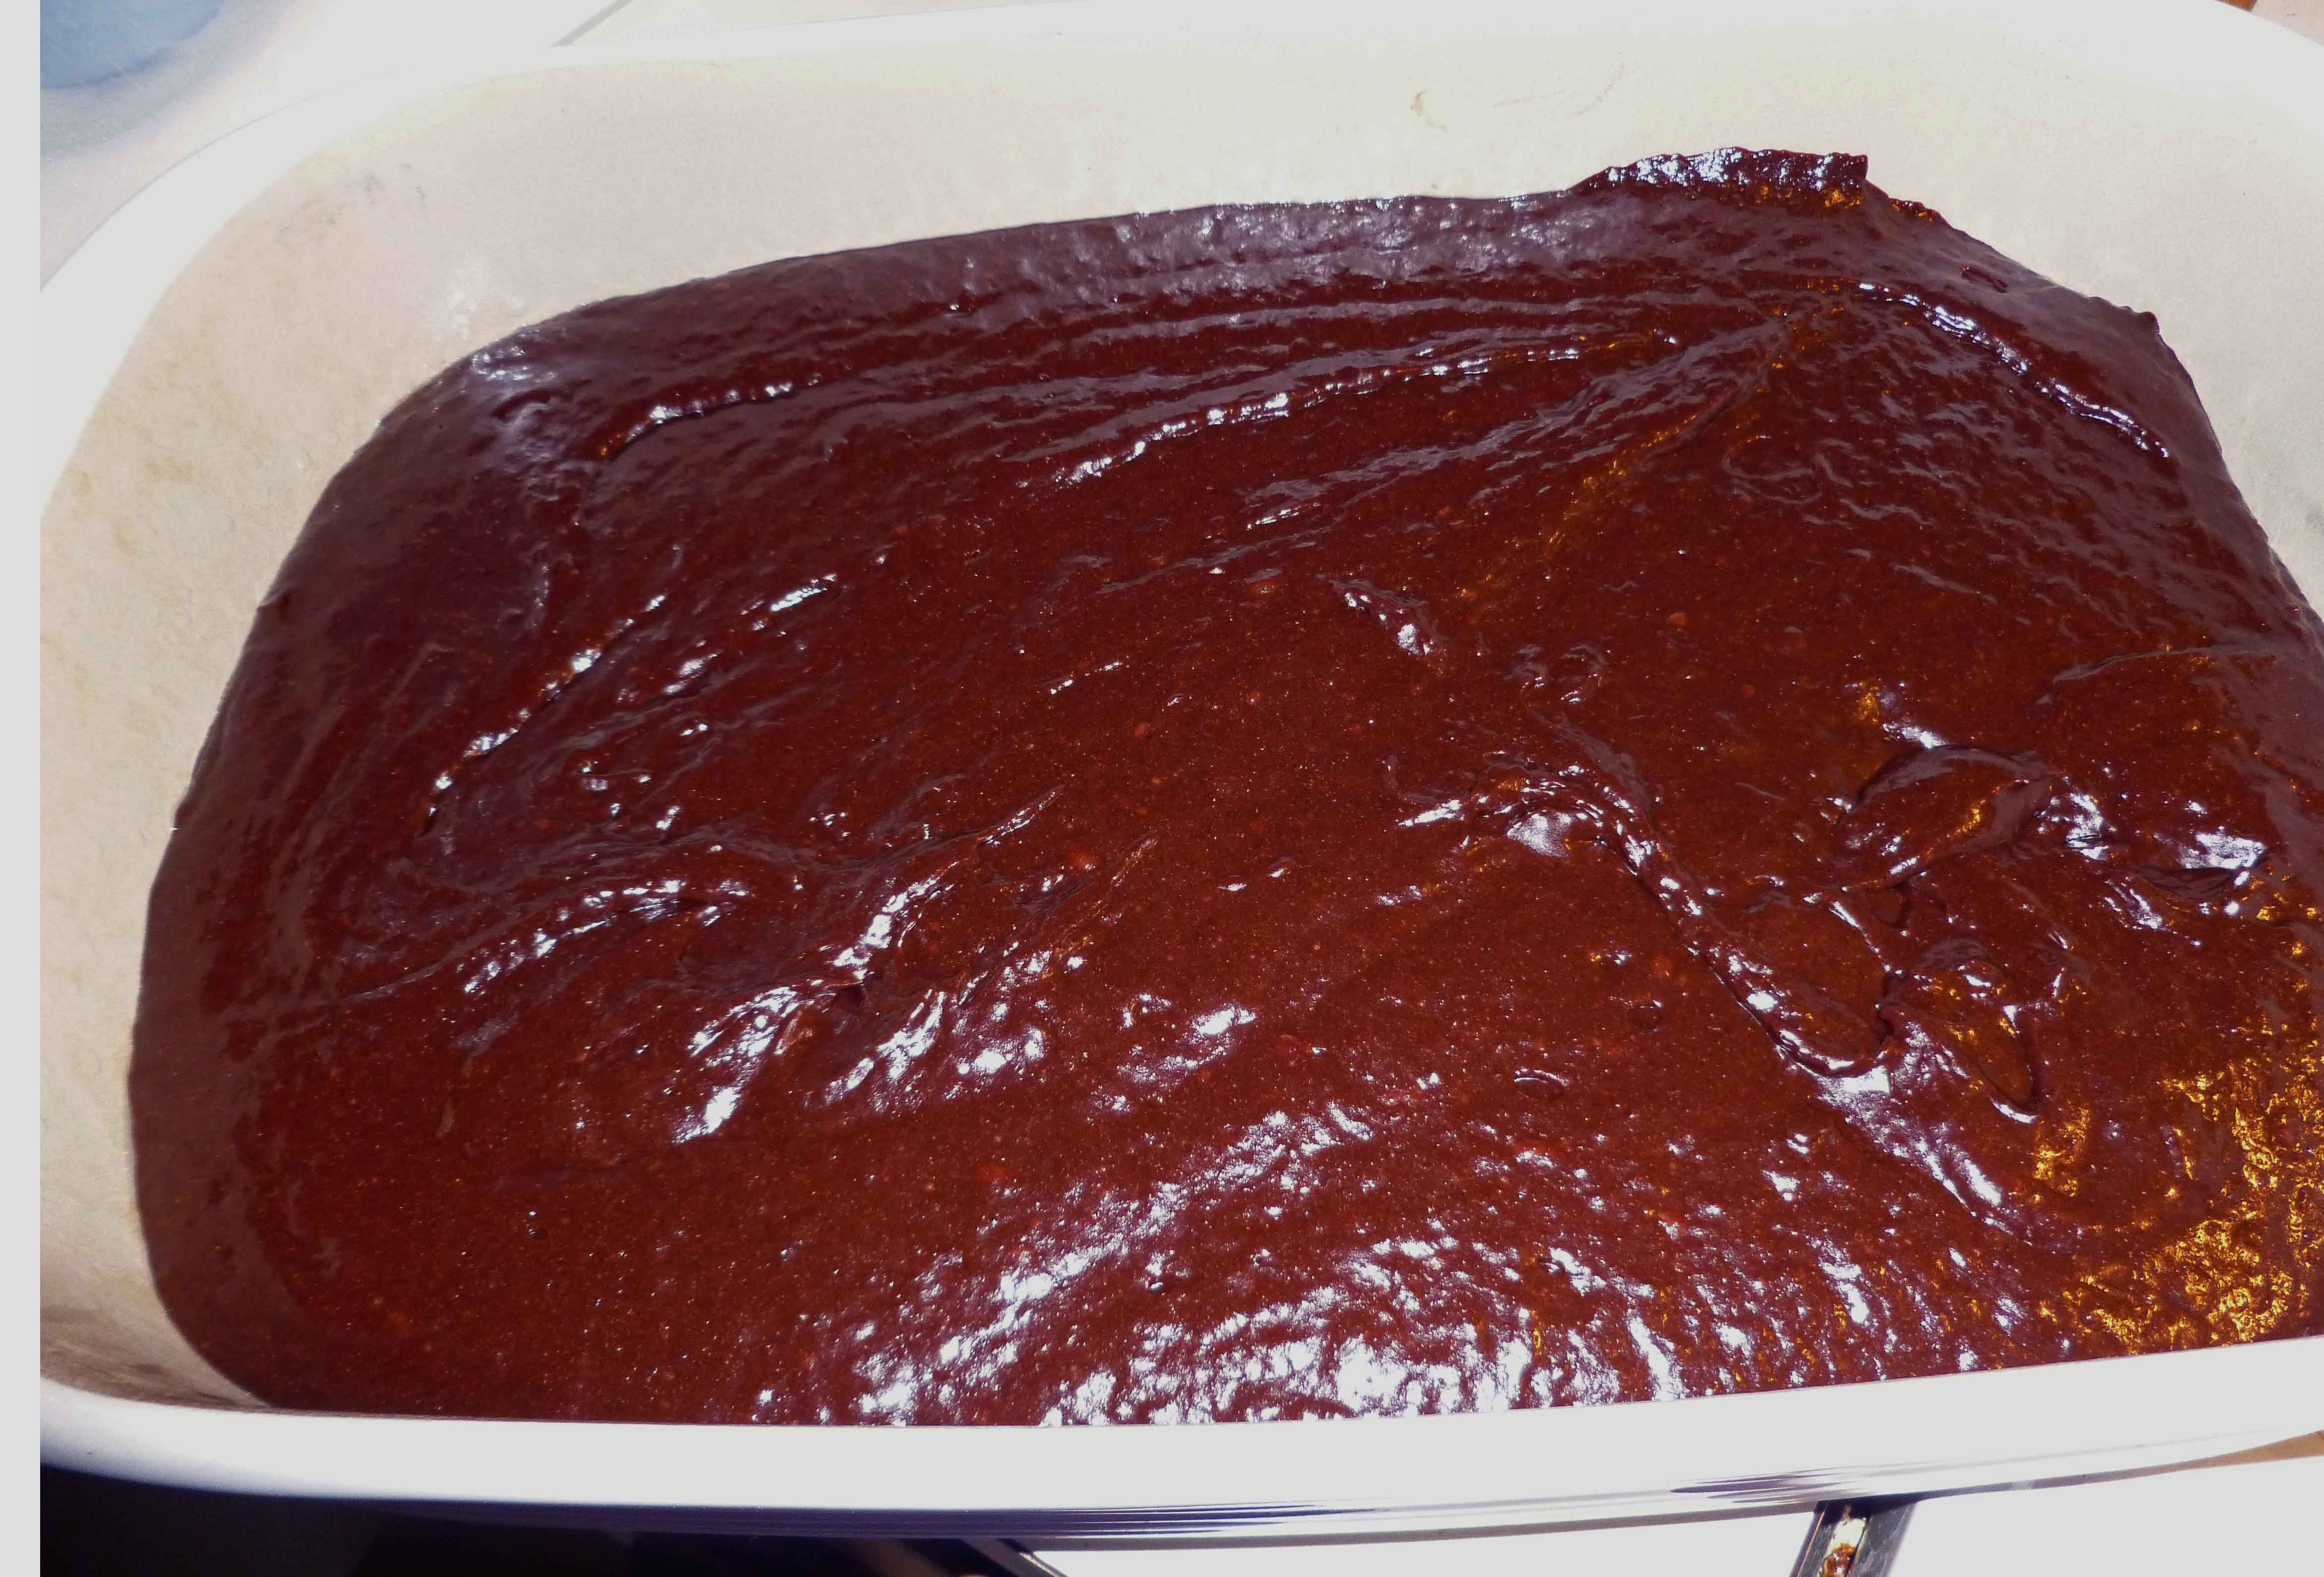
Spread the batter evenly in the greased baking pan.
Batter spread evenly in the pan
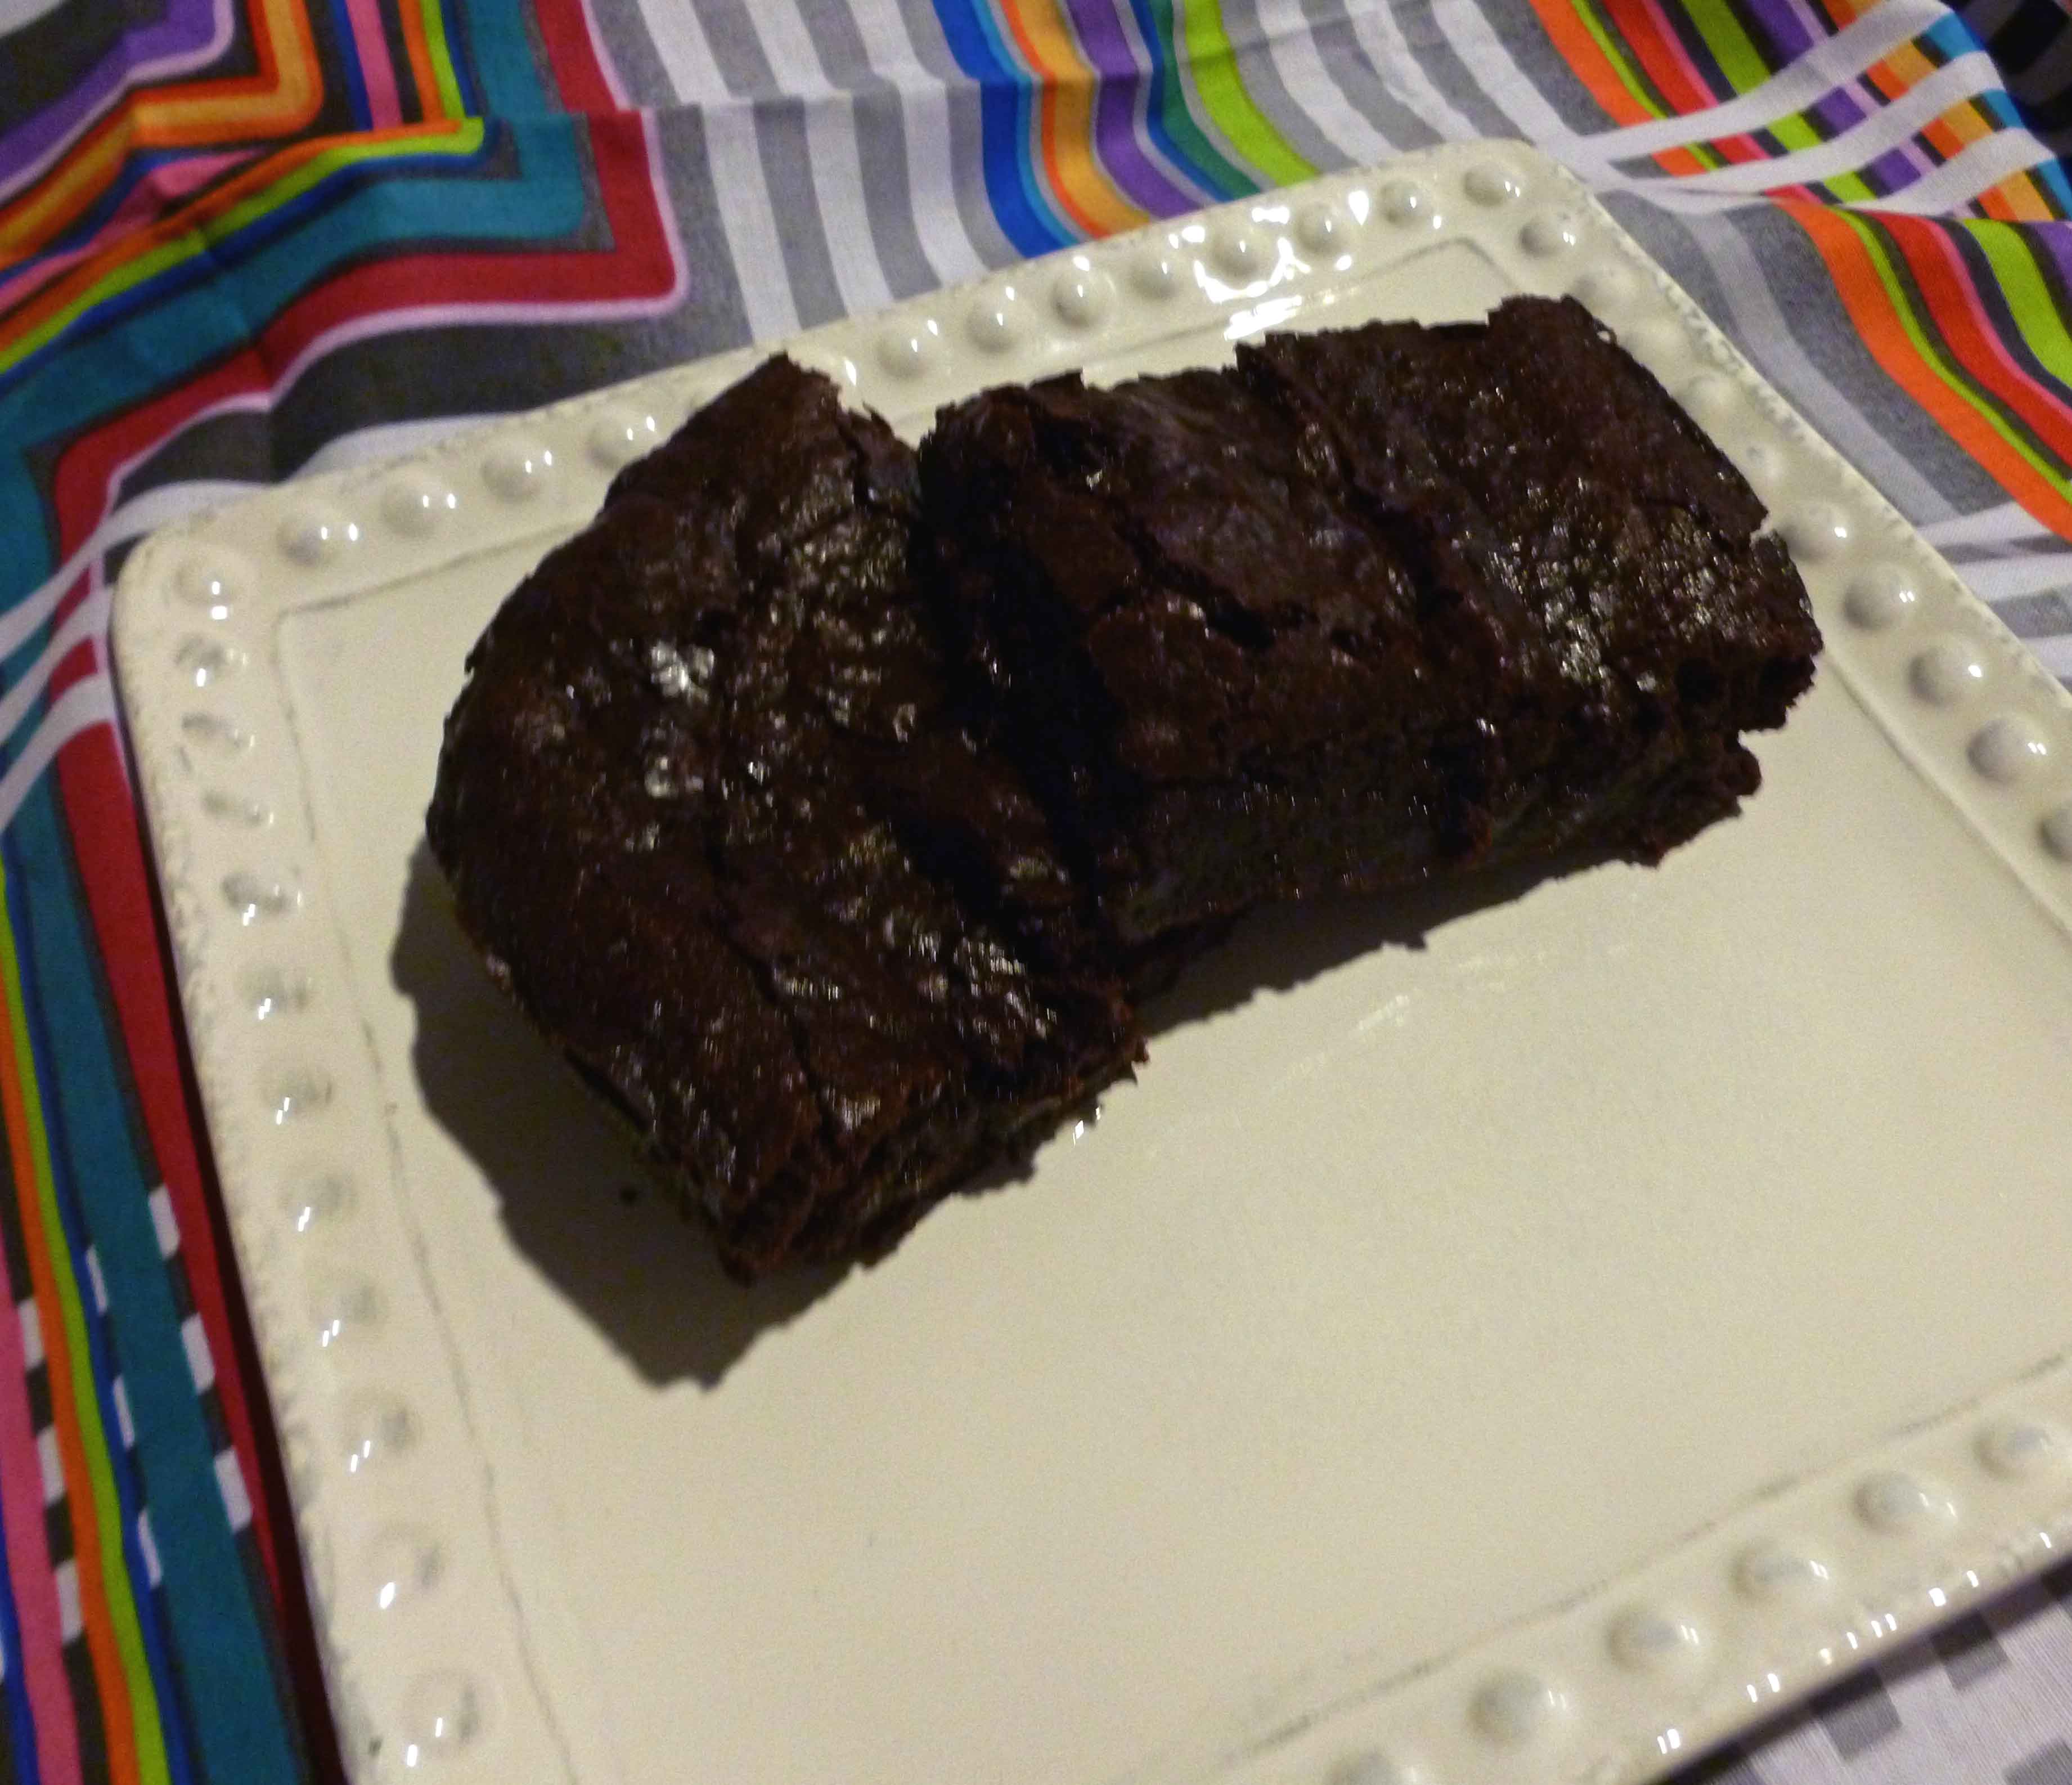
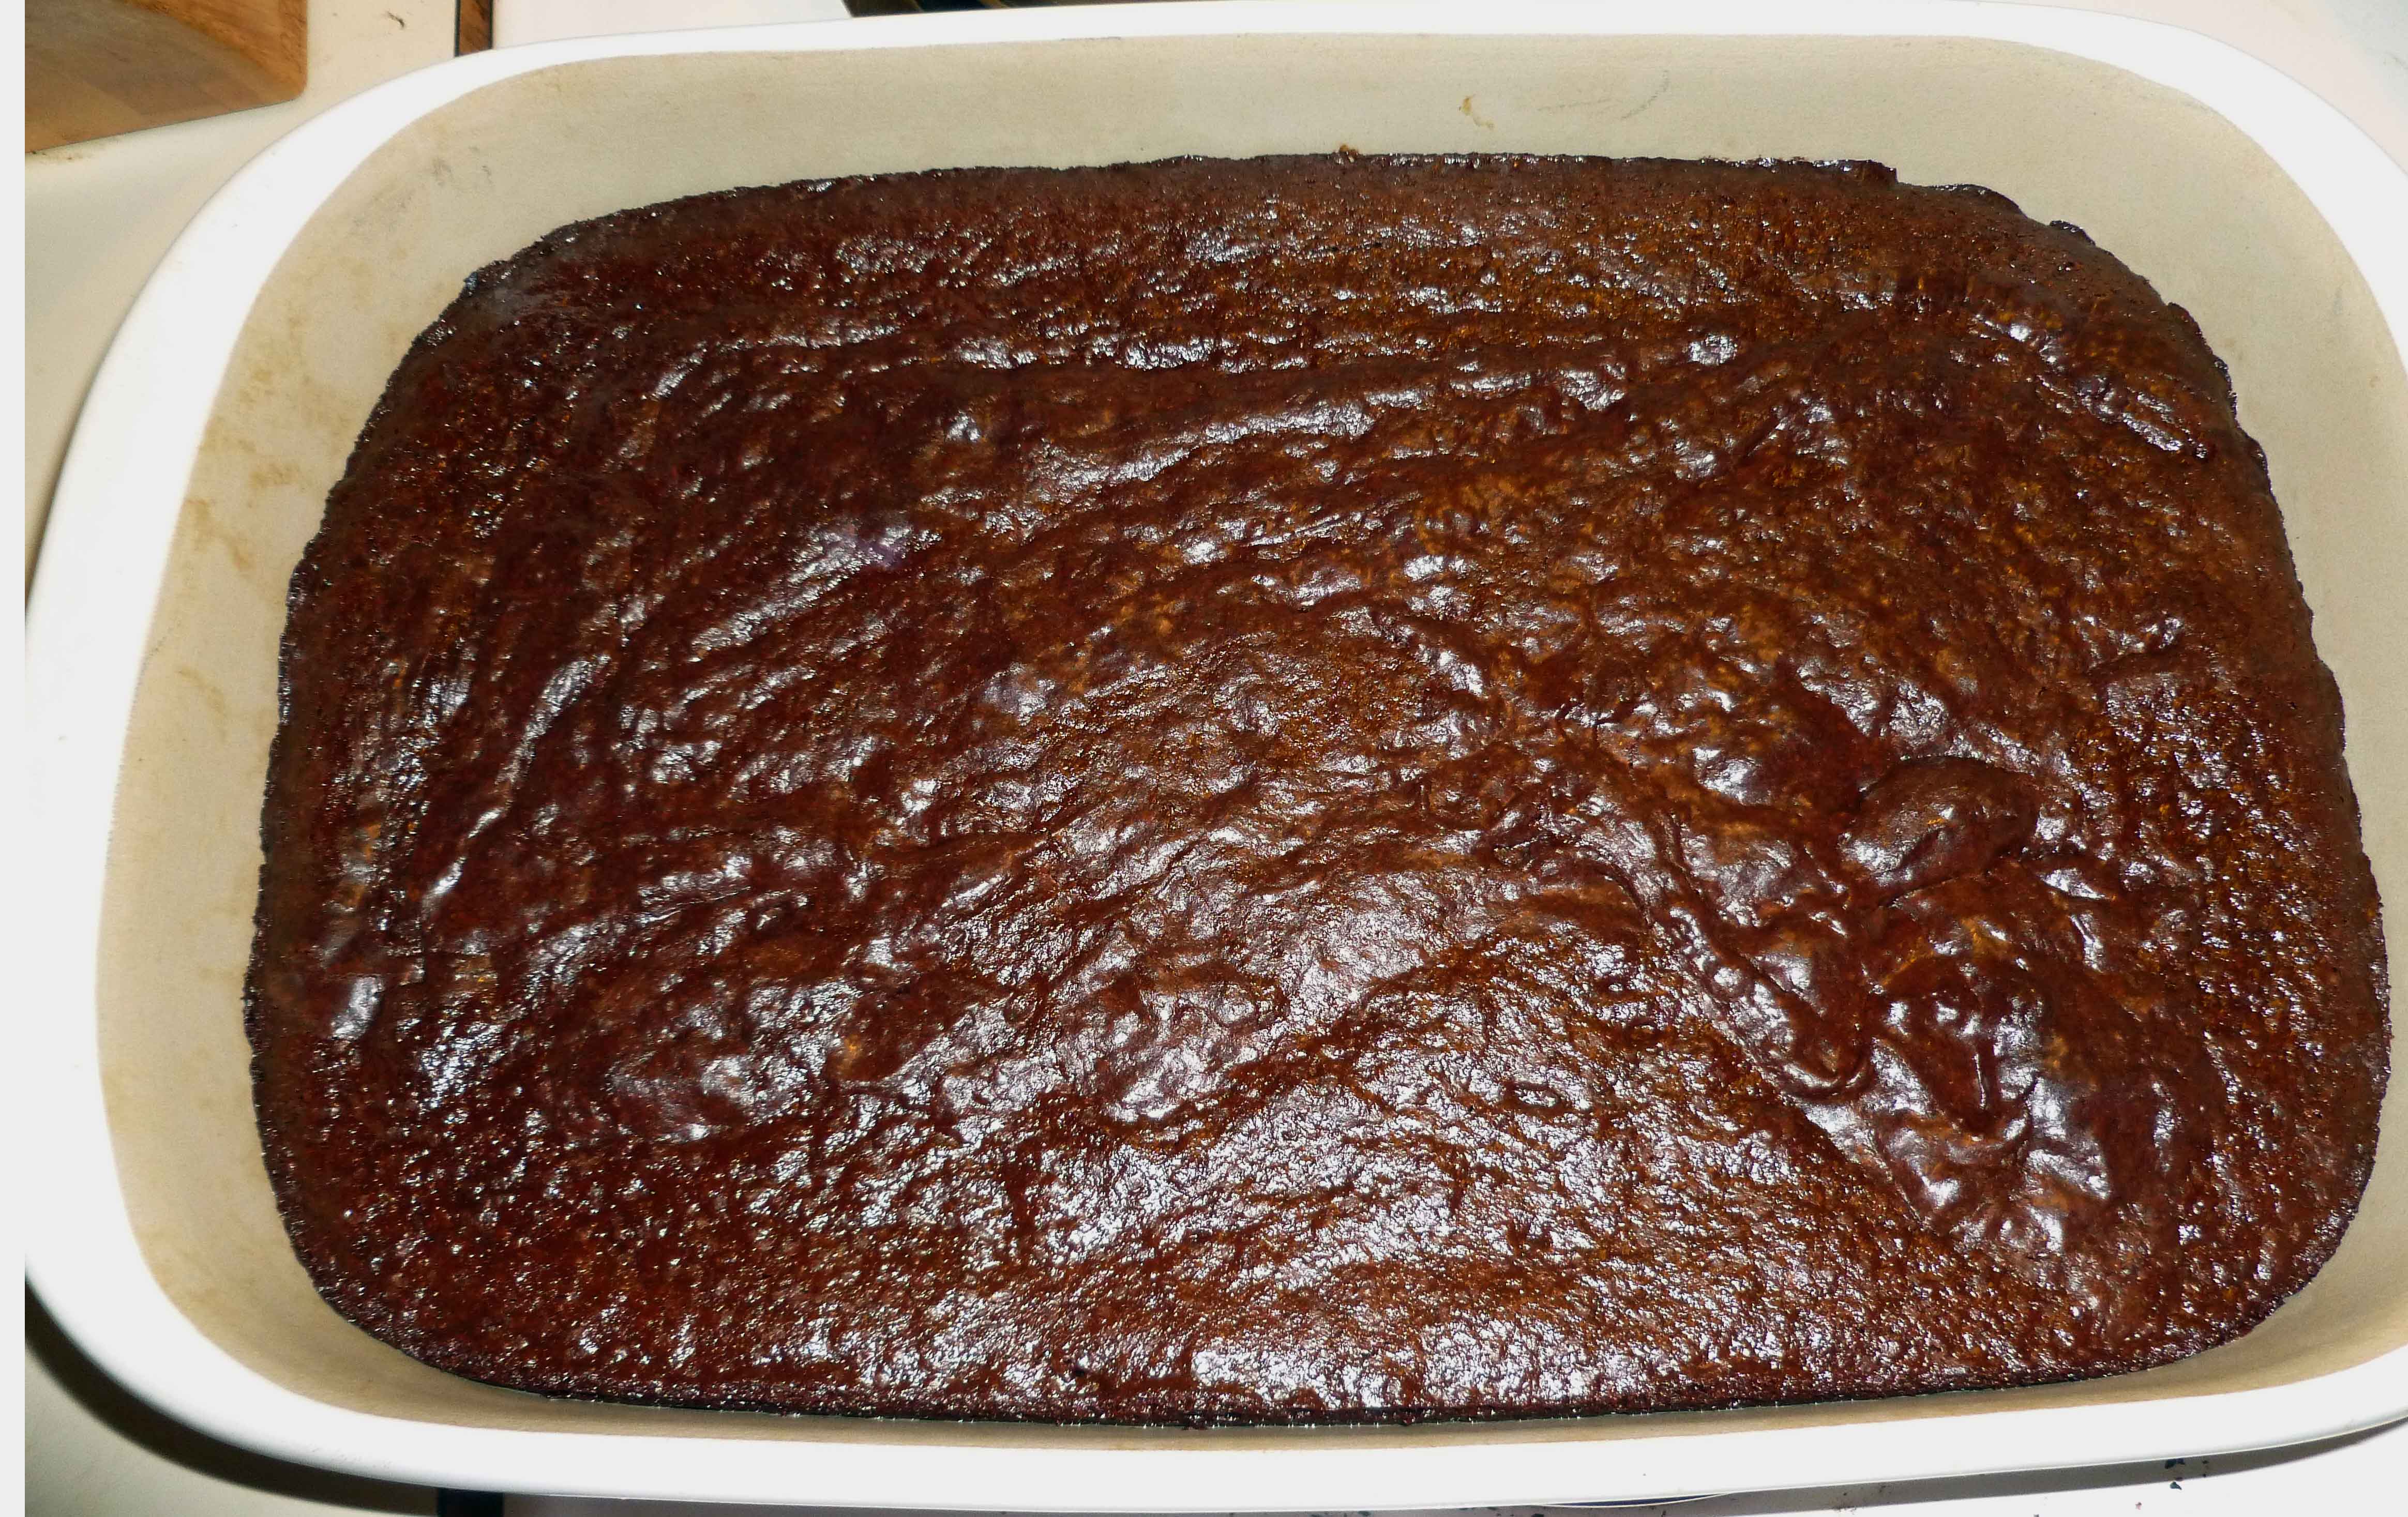
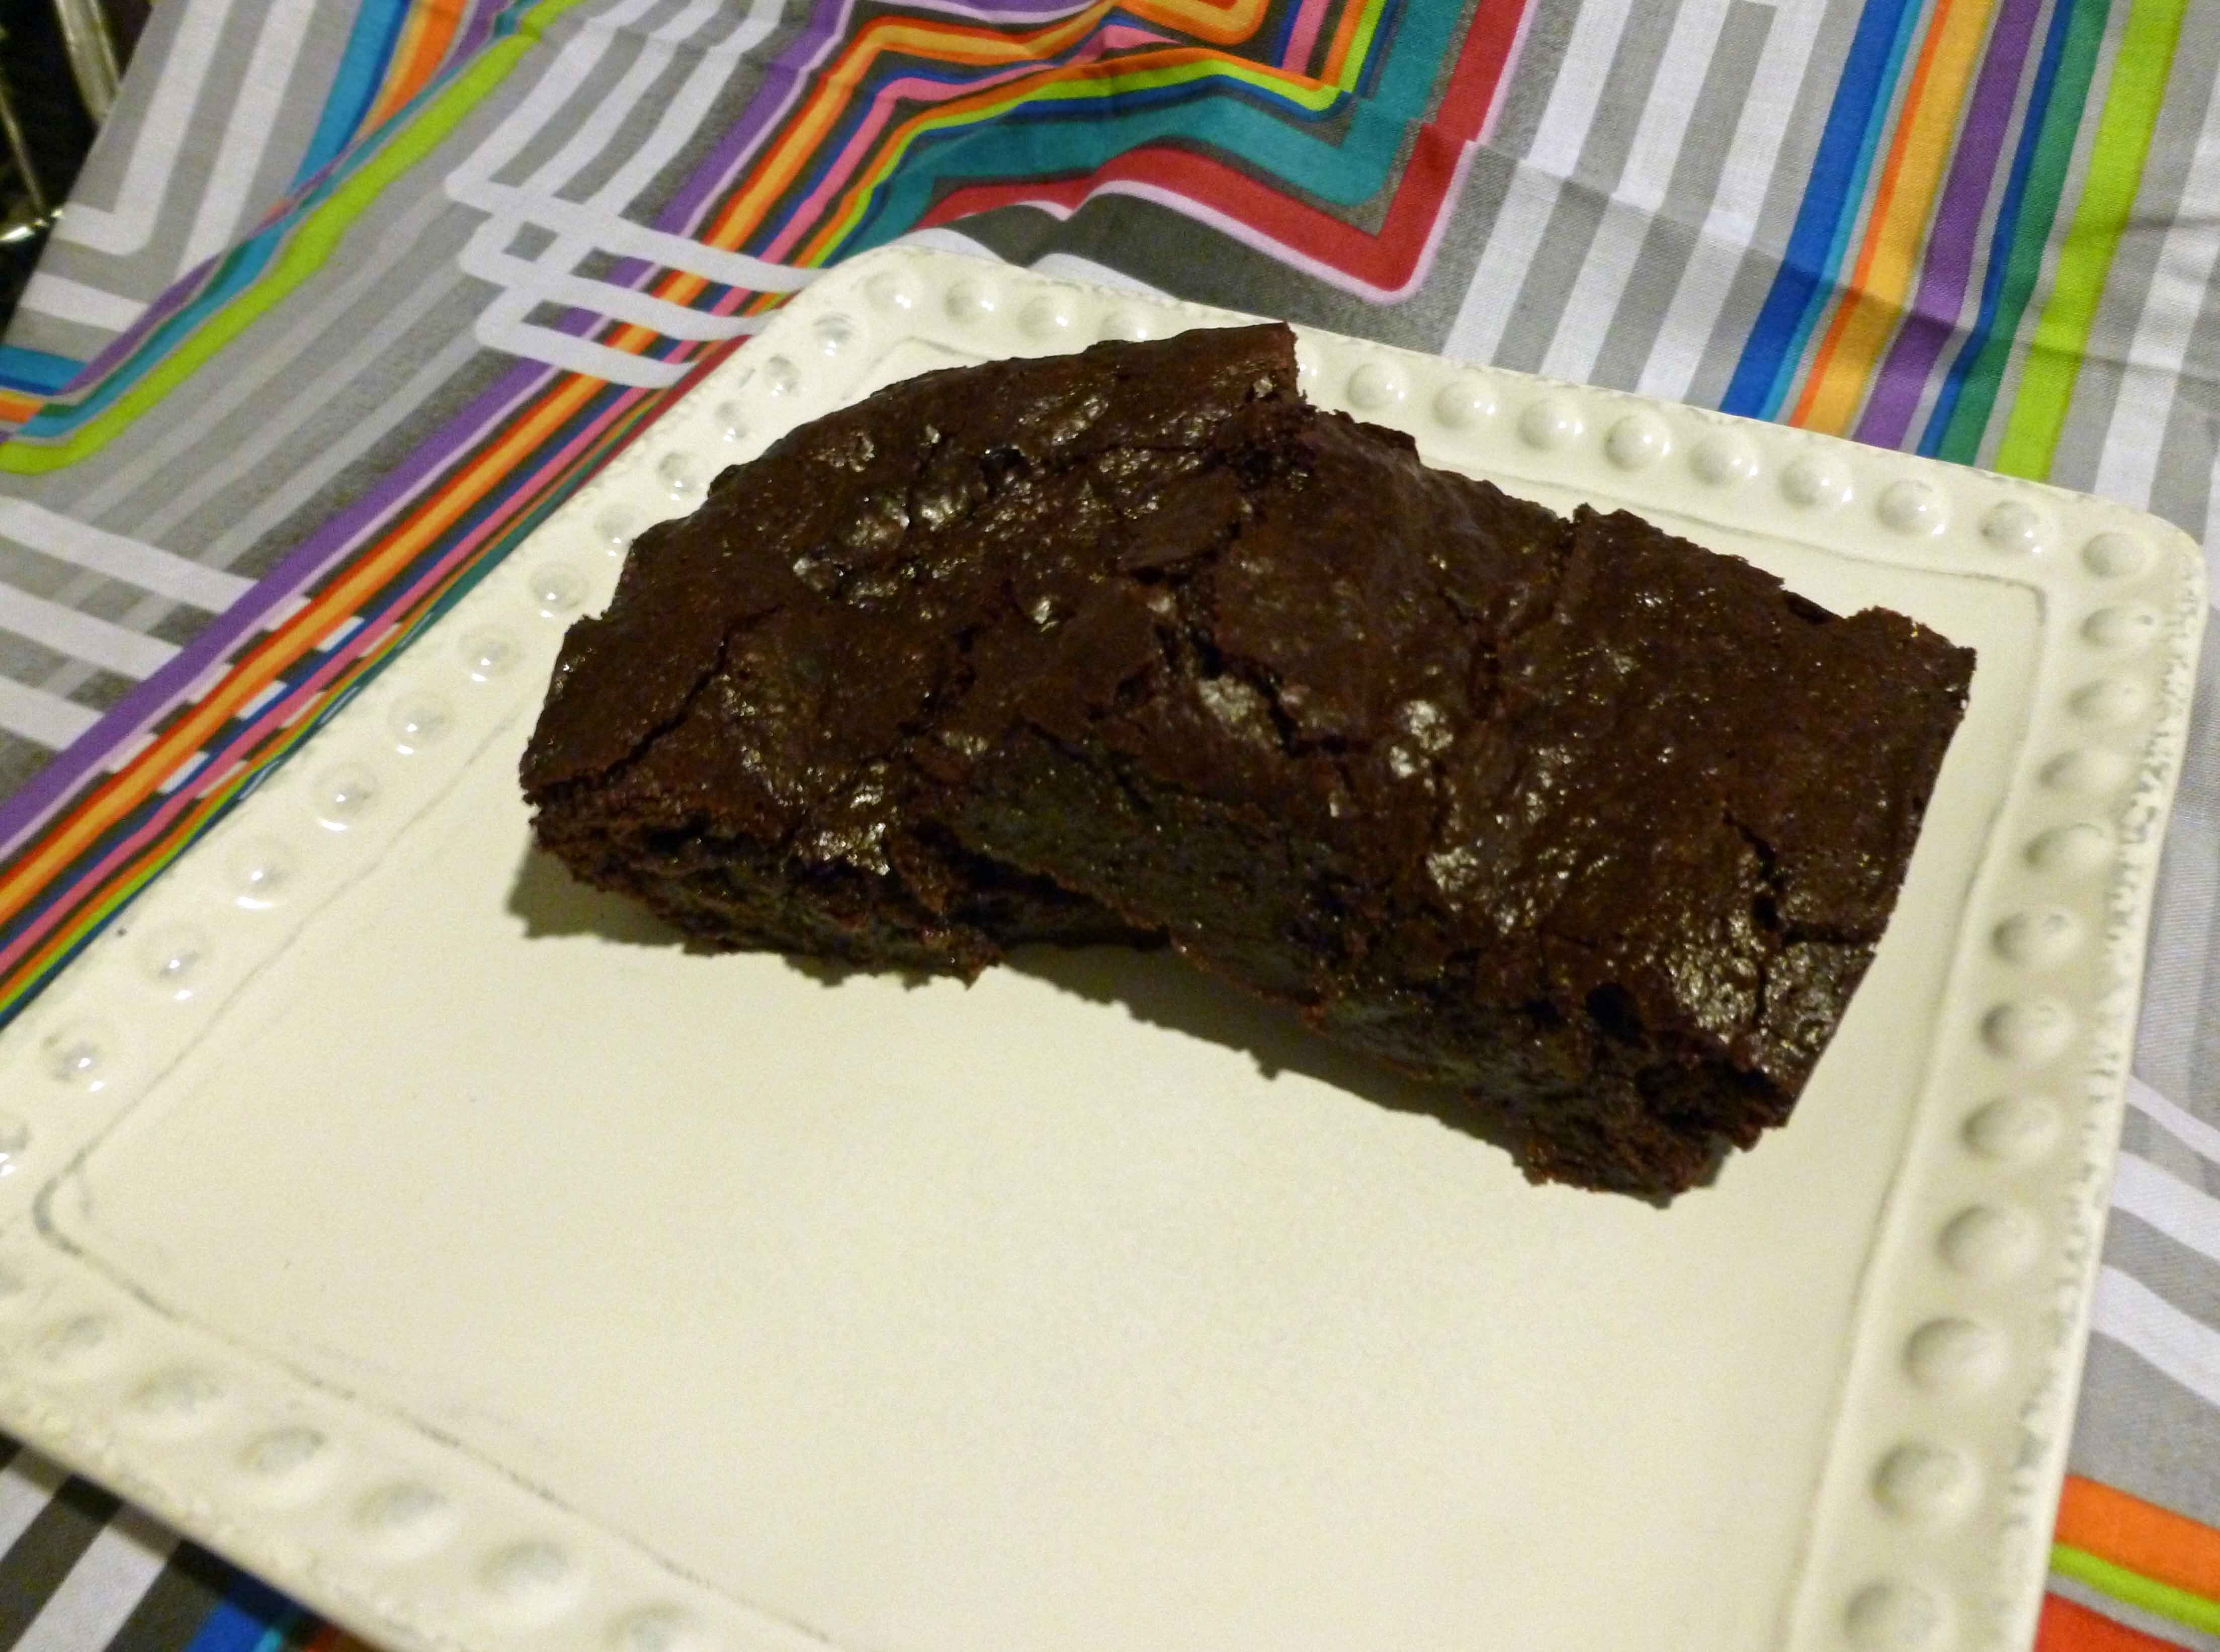
Bake it in the preheated oven for 65-75 minutes. Check them using a toothpick, the toothpick should come out clean, and then remove the brownies from the oven. Let the brownies cool completely before you cut or serve them.
Brownies after baking
Some fun variations would be to mix nuts or more chocolate chips into the batter before baking, or maybe, if you like some spice, maybe a 1/2 teaspoon of cayenne pepper, or if you like less spice, a 1/2 teaspoon of cinnamon.
Baked Eggplant and Zucchini Fries with Spicy Mayo Dipping Sauce
So my friend Mary, the kale whisper, managed to procure about 5 pounds of eggplants for me, or, in other words, a crap ton of eggplants, from her neighbor’s garden. Because she’s just that awesome and cool. So I made and canned 5 pints of Eggplant Caponata and 6 quarts of a version of Ratatouille, but I still had some eggplant and zucchini left. So I decided to try this recipe from the Gourmande in the Kitchen, but make it dairy, egg, and almond free too, since I’m allergic to all those things, and use up the zucchini.
Baked Eggplant and Zucchini Fries with Spicy Mayo Dipping Sauce
1 small eggplant about 7 inches long, sliced into pieces about 3 inches long and about 1/3 of an inch thick
1 small zucchini about 7 inches long, sliced into pieces about 3 inches long and about 1/3 of an inch thick
First dry dredge:
1/2 cup of arrowroot starch (you could also use tapioca or corn starch, but corn is out for me, since I’m allergic to it)
Second wet dredge:
2 Tablespoons of safe Adobo seasoning (If you don’t have Adobo seasoning, mix 1/8 cup of paprika, 1 1/2 Tablespoons of ground black pepper, 1 Tablespoon of onion powder, 1 Tablespoon of dried oregano, 1 Tablespoon of ground cumin, 1/2 Tablespoon of ground chipotle, and 1/2 Tablespoon of garlic powder, this makes half a cup of seasoning).
2 teaspoons of salt
1/3 of a cup of arrowroot starch
1/3 of a cup of olive oil
2/3 of a cup of water
Third dry dredge:
2 cups of gluten free bread crumbs
Spicy Mayo Dipping Sauce:
1/2 cup of Earth Balance Mindful Mayo (or other mayo that’s safe for you)
1 Tablespoon of Sriracha, or your other favorite hot sauce
Preheat your oven to 425°F. Place a piece of parchment paper on a baking sheet and use an oil mister to spray the parchment paper. You can skip the parchment paper, and just spray oil on the baking sheet, but it will be easier to clean up.
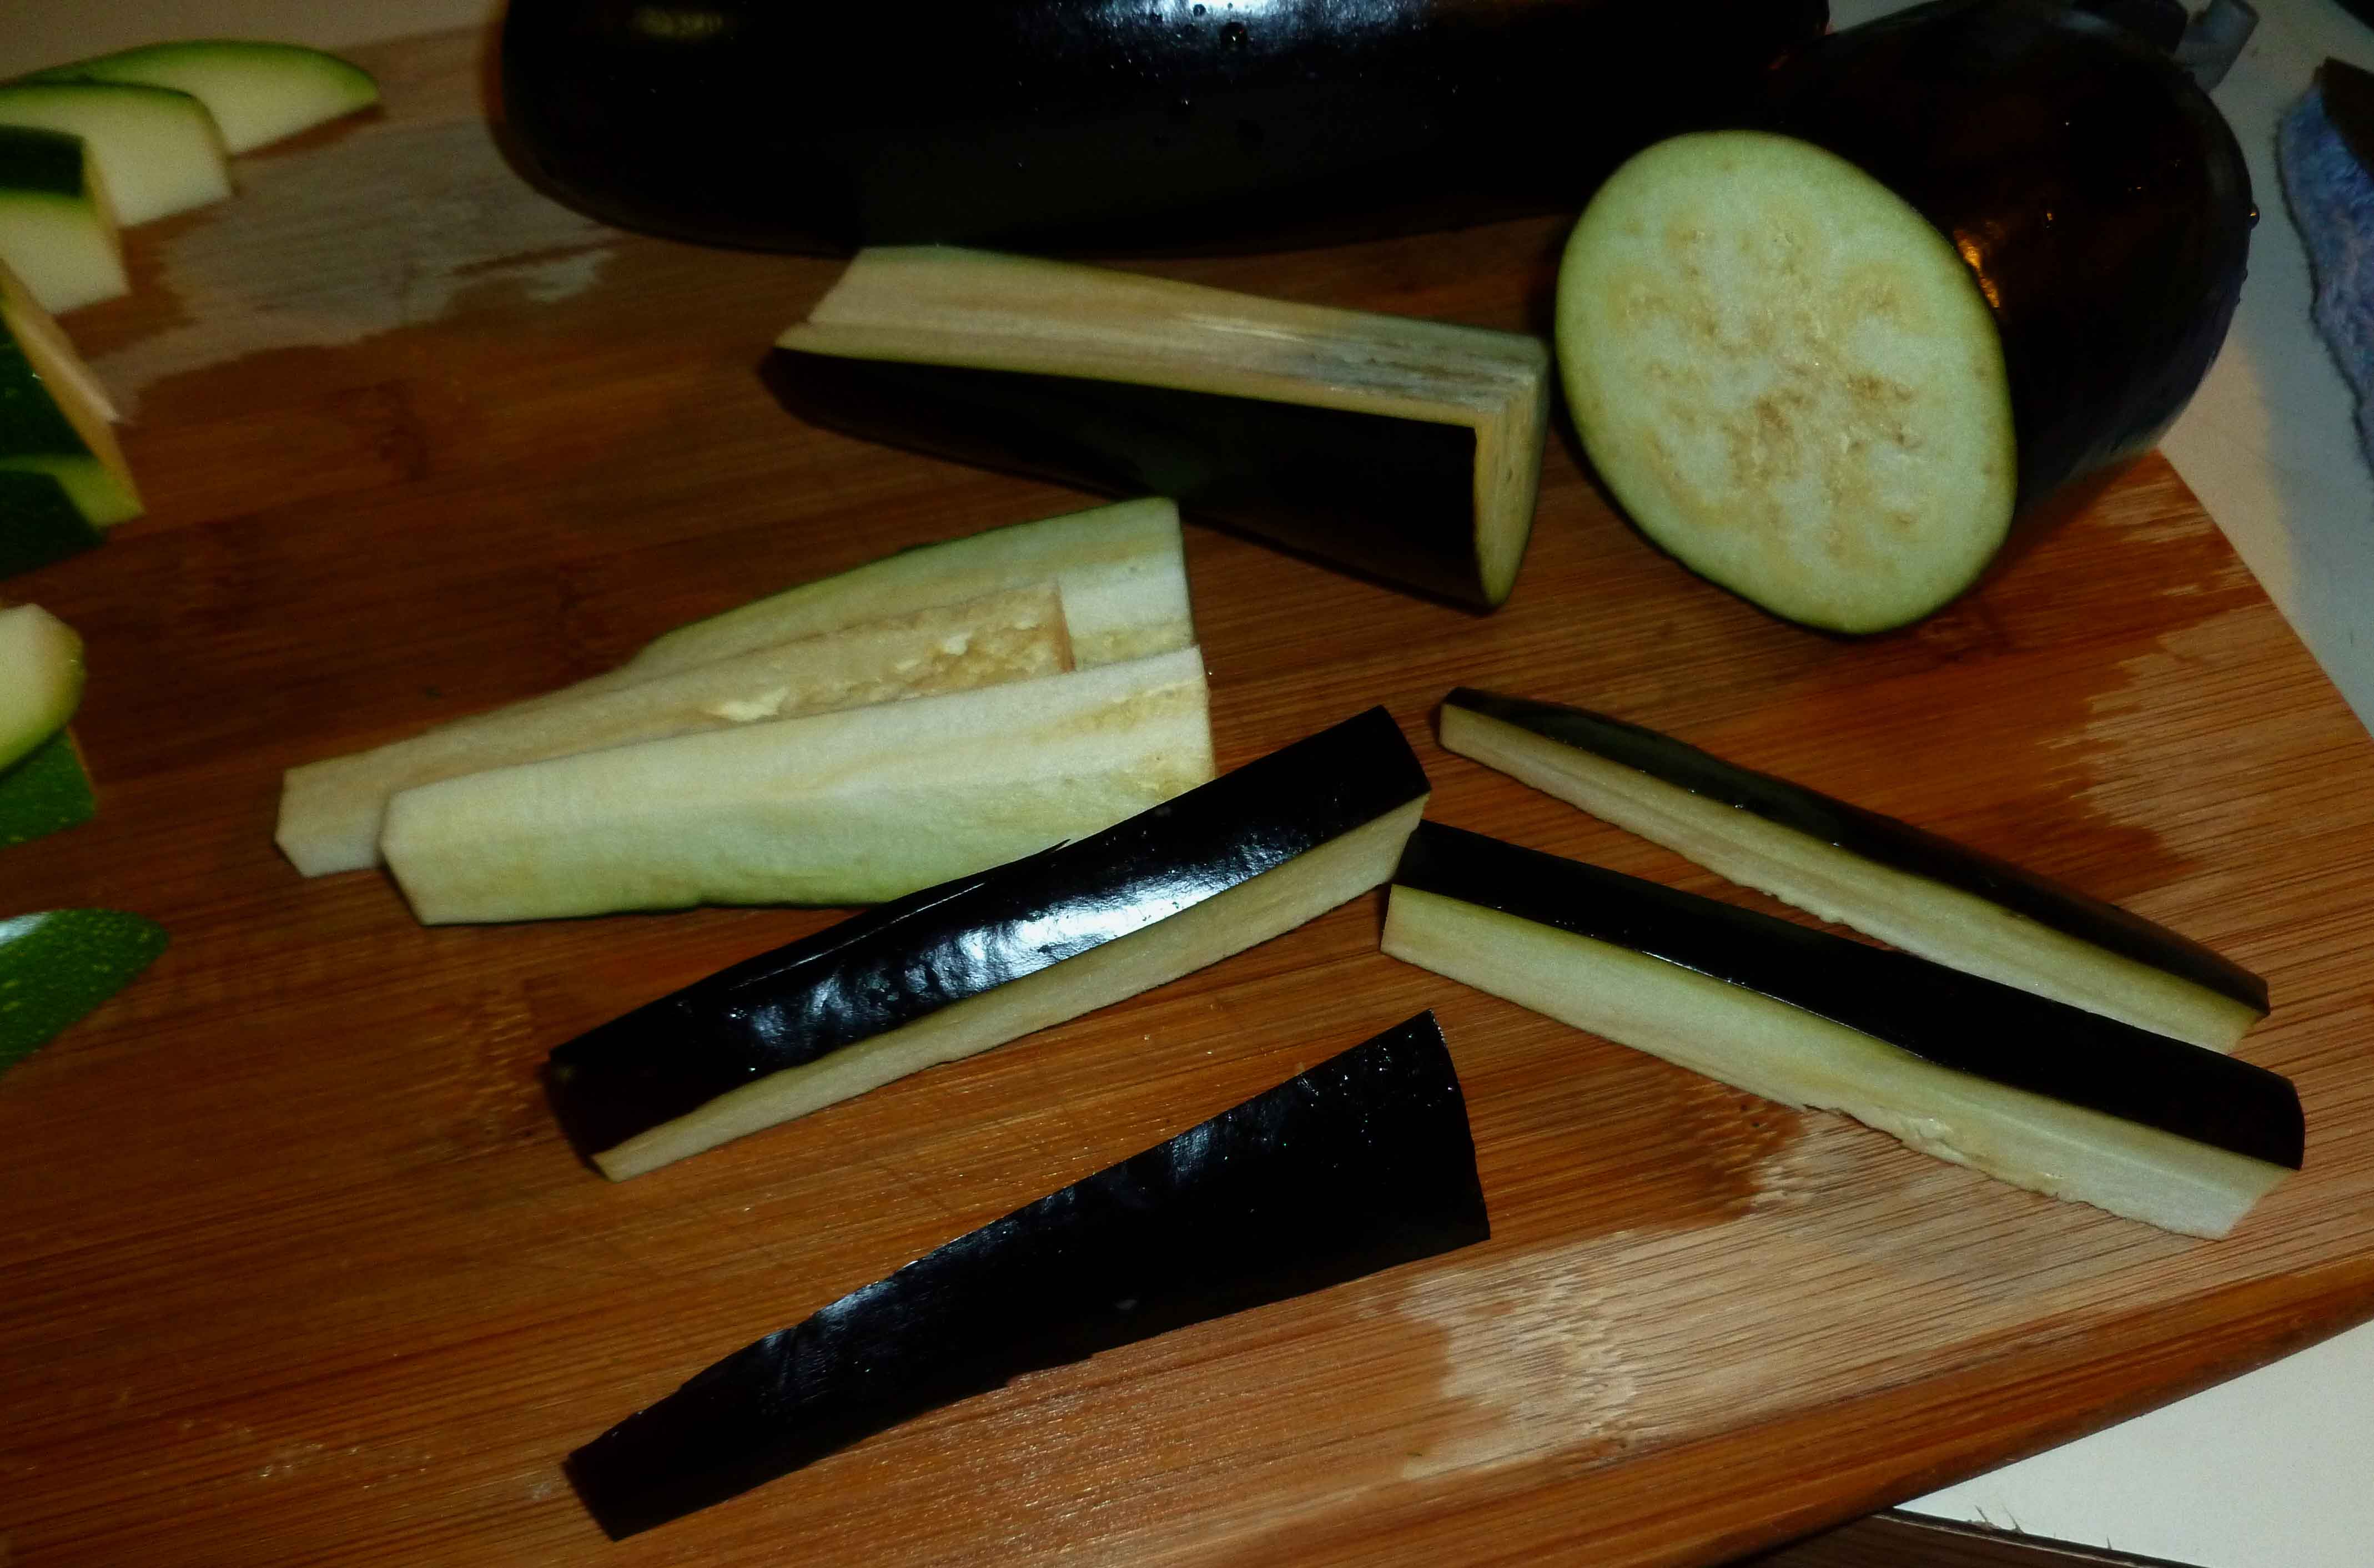
Wash, trim and slice your zucchini and eggplant into pieces about 3 inches long and about a 1/3 of an inch thick.
Sliced ZucchiniSliced Eggplants
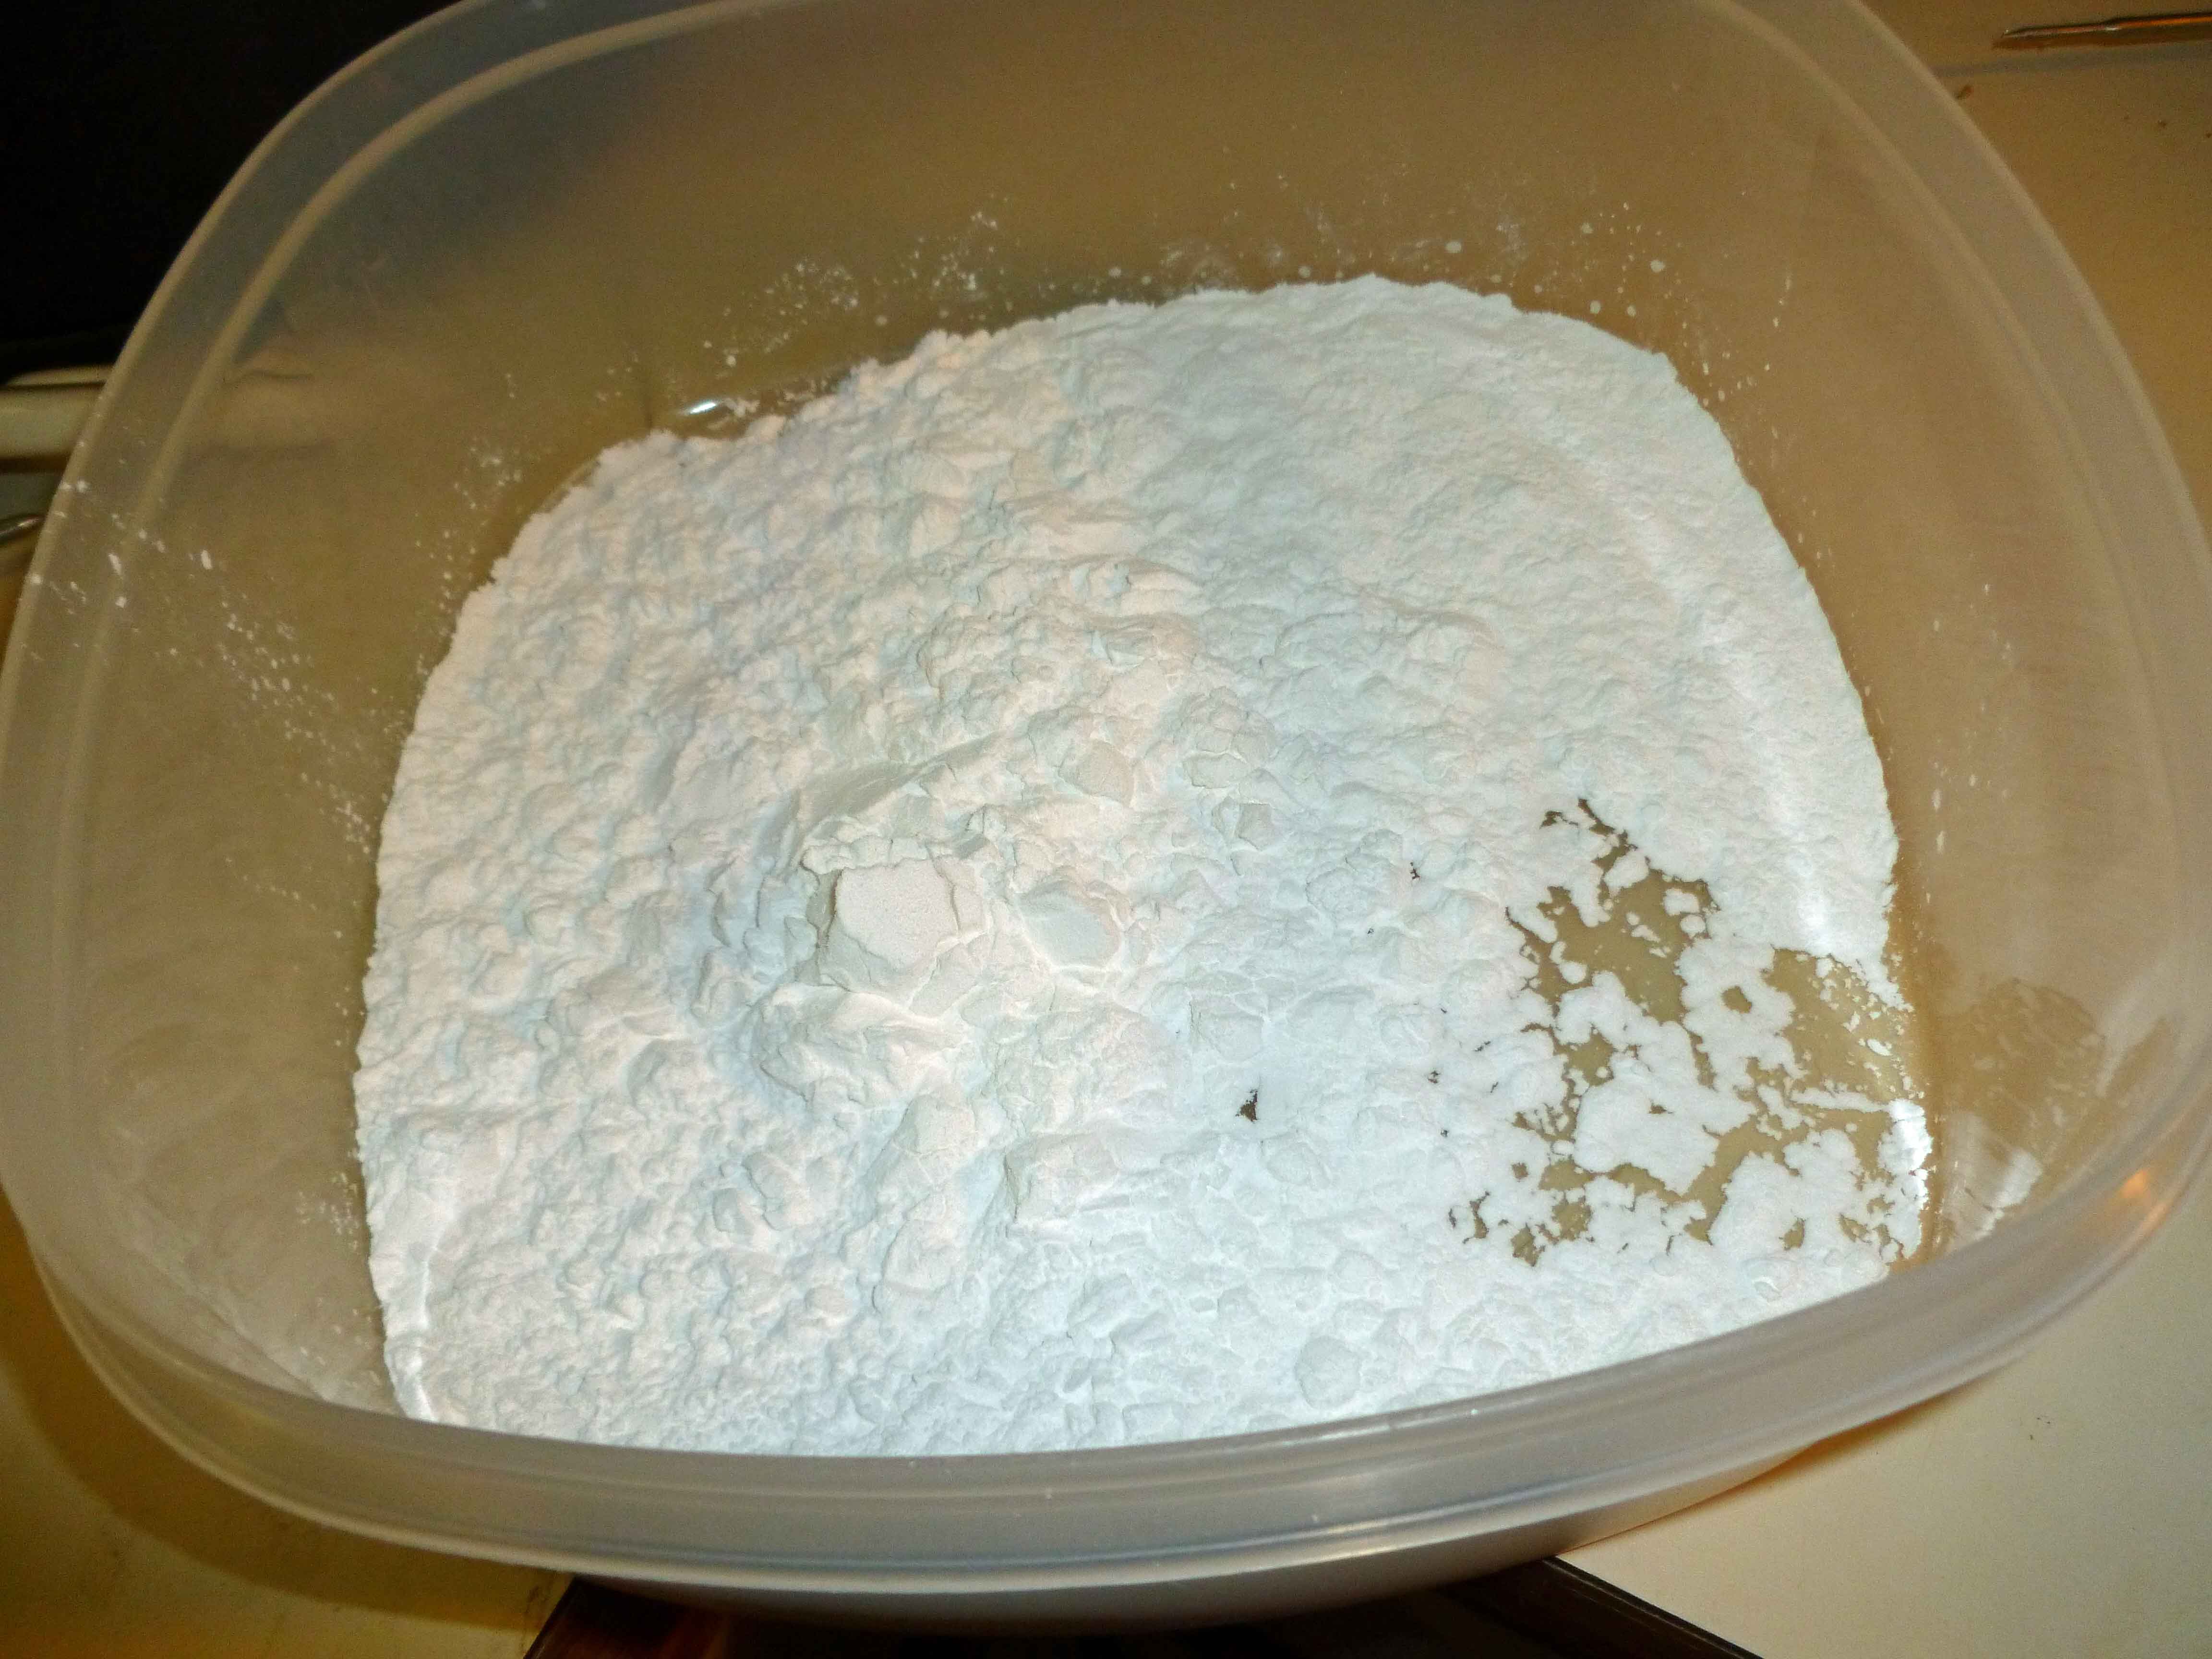
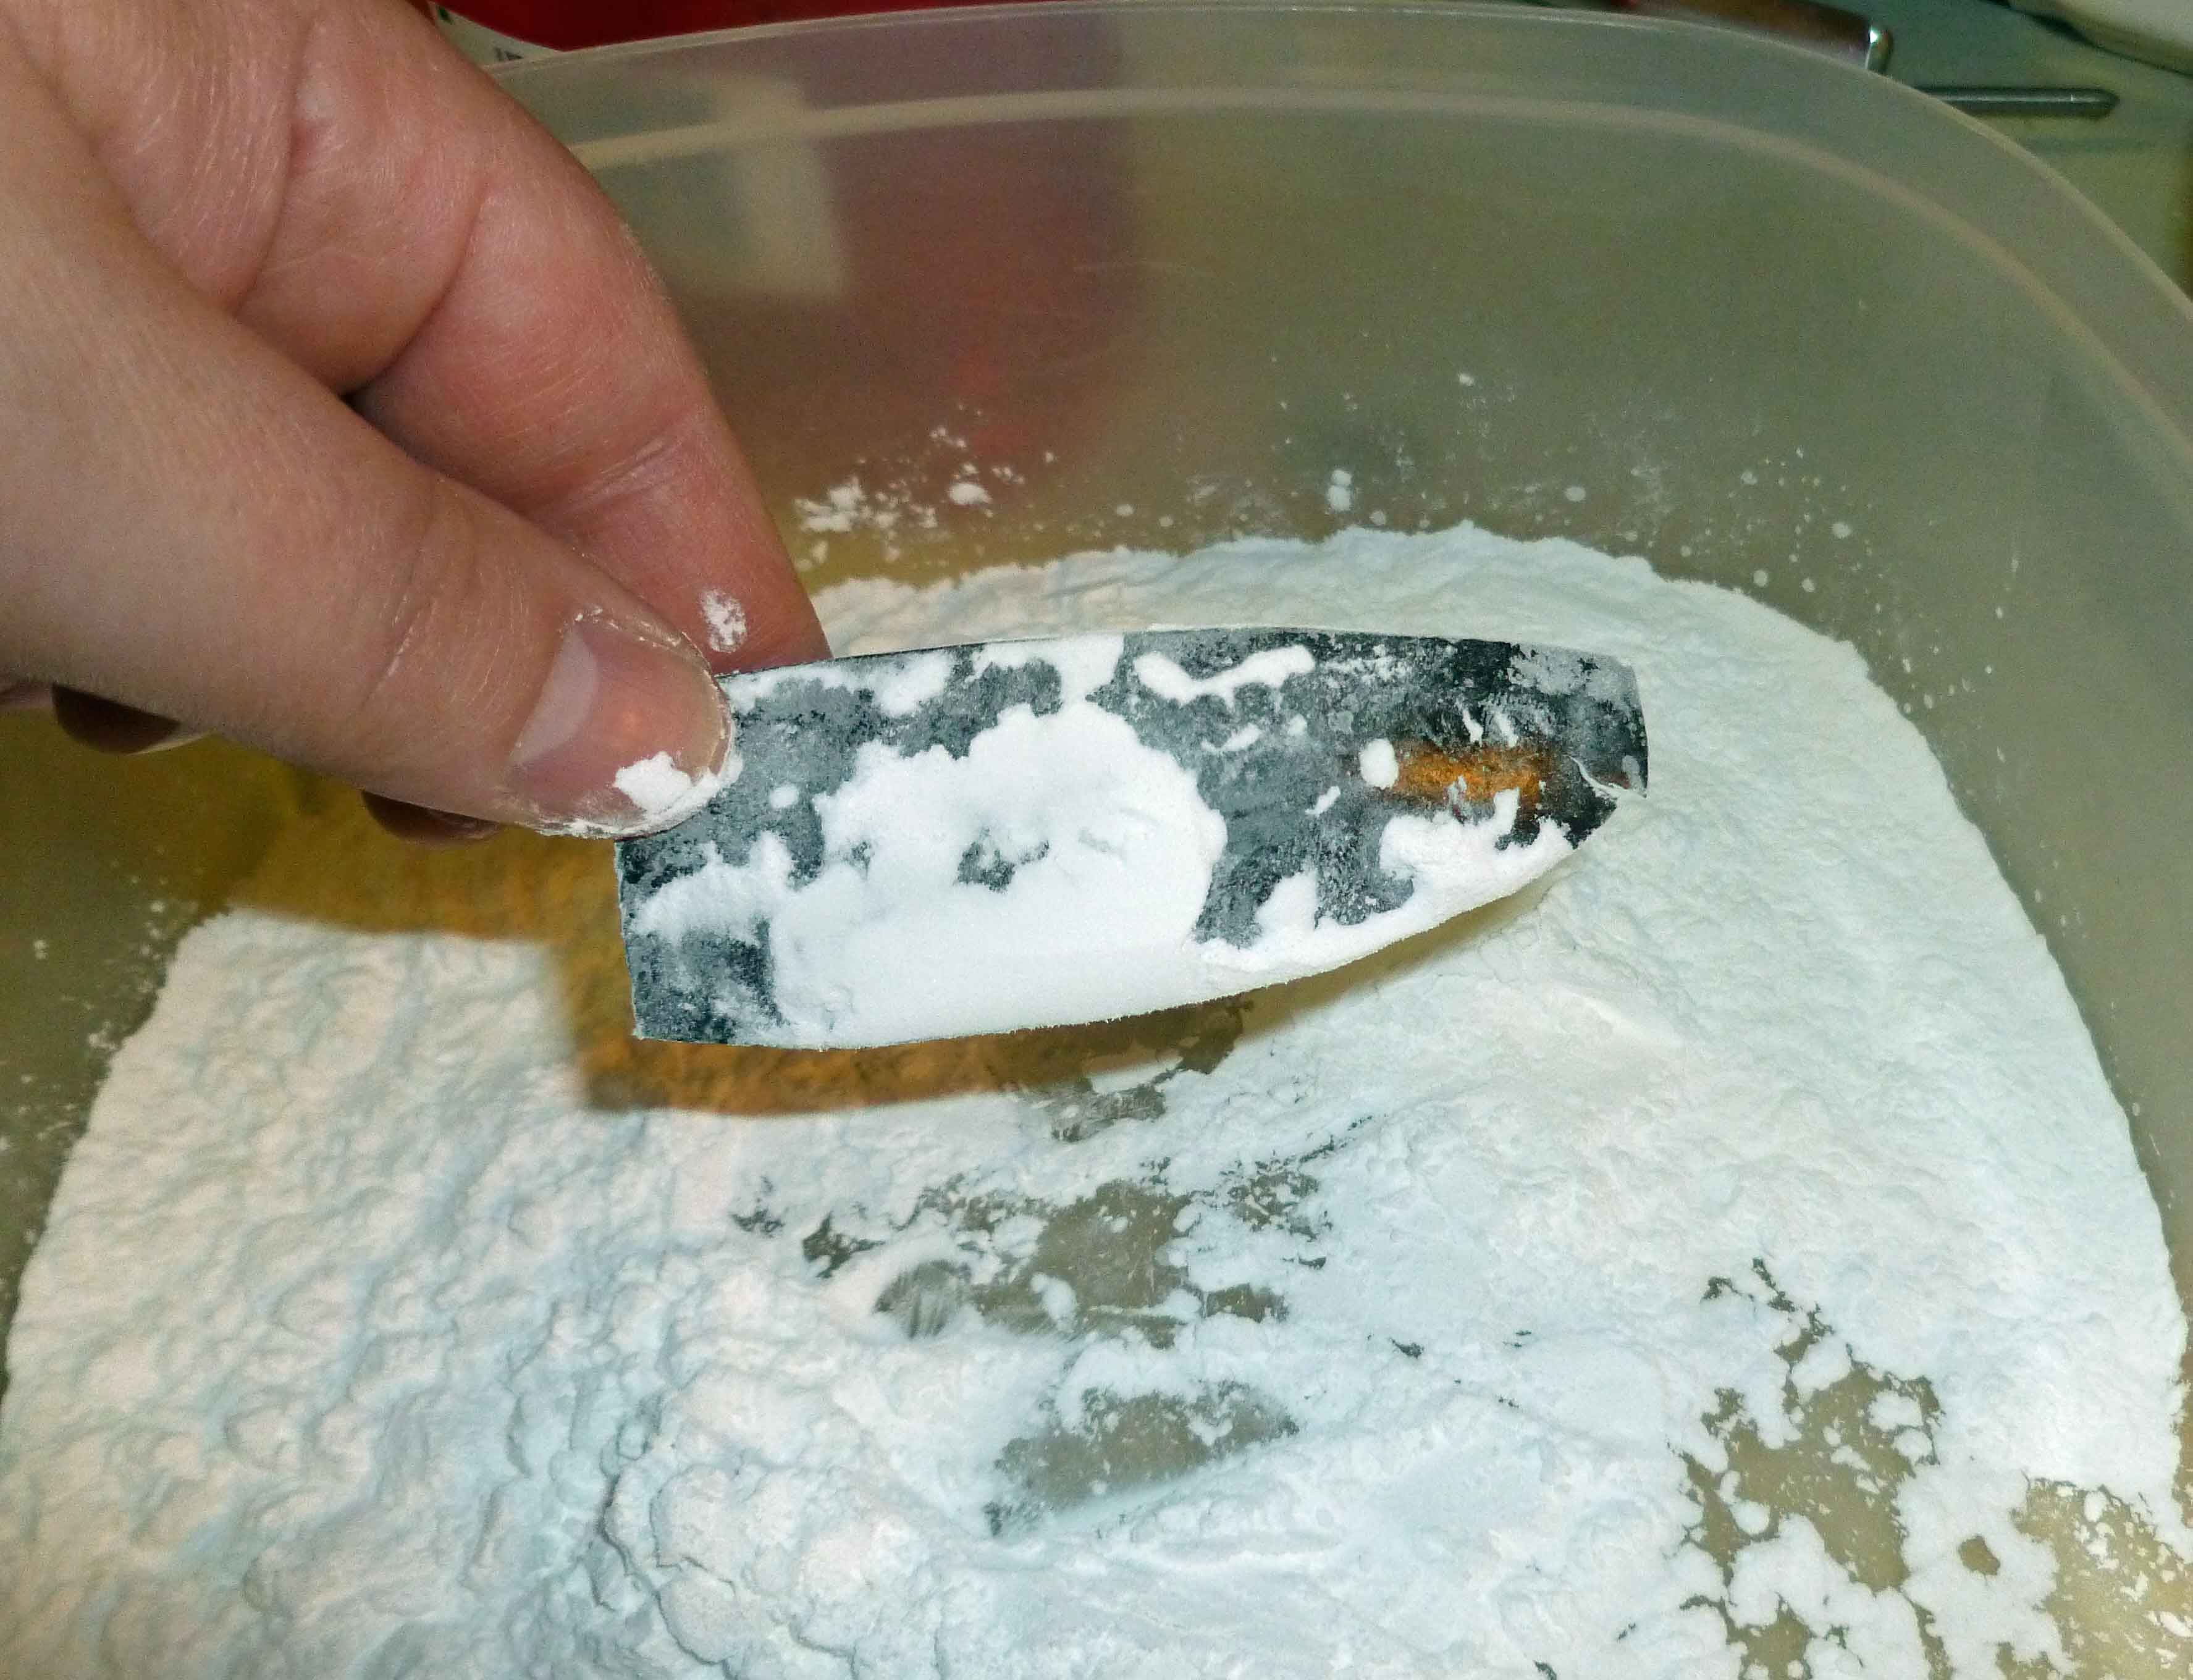
Place the arrowroot starch for the first dry dredge in a flat bottomed container with enough room to move the pieces around to coat.
Arrowroot Starch – first dry dredge
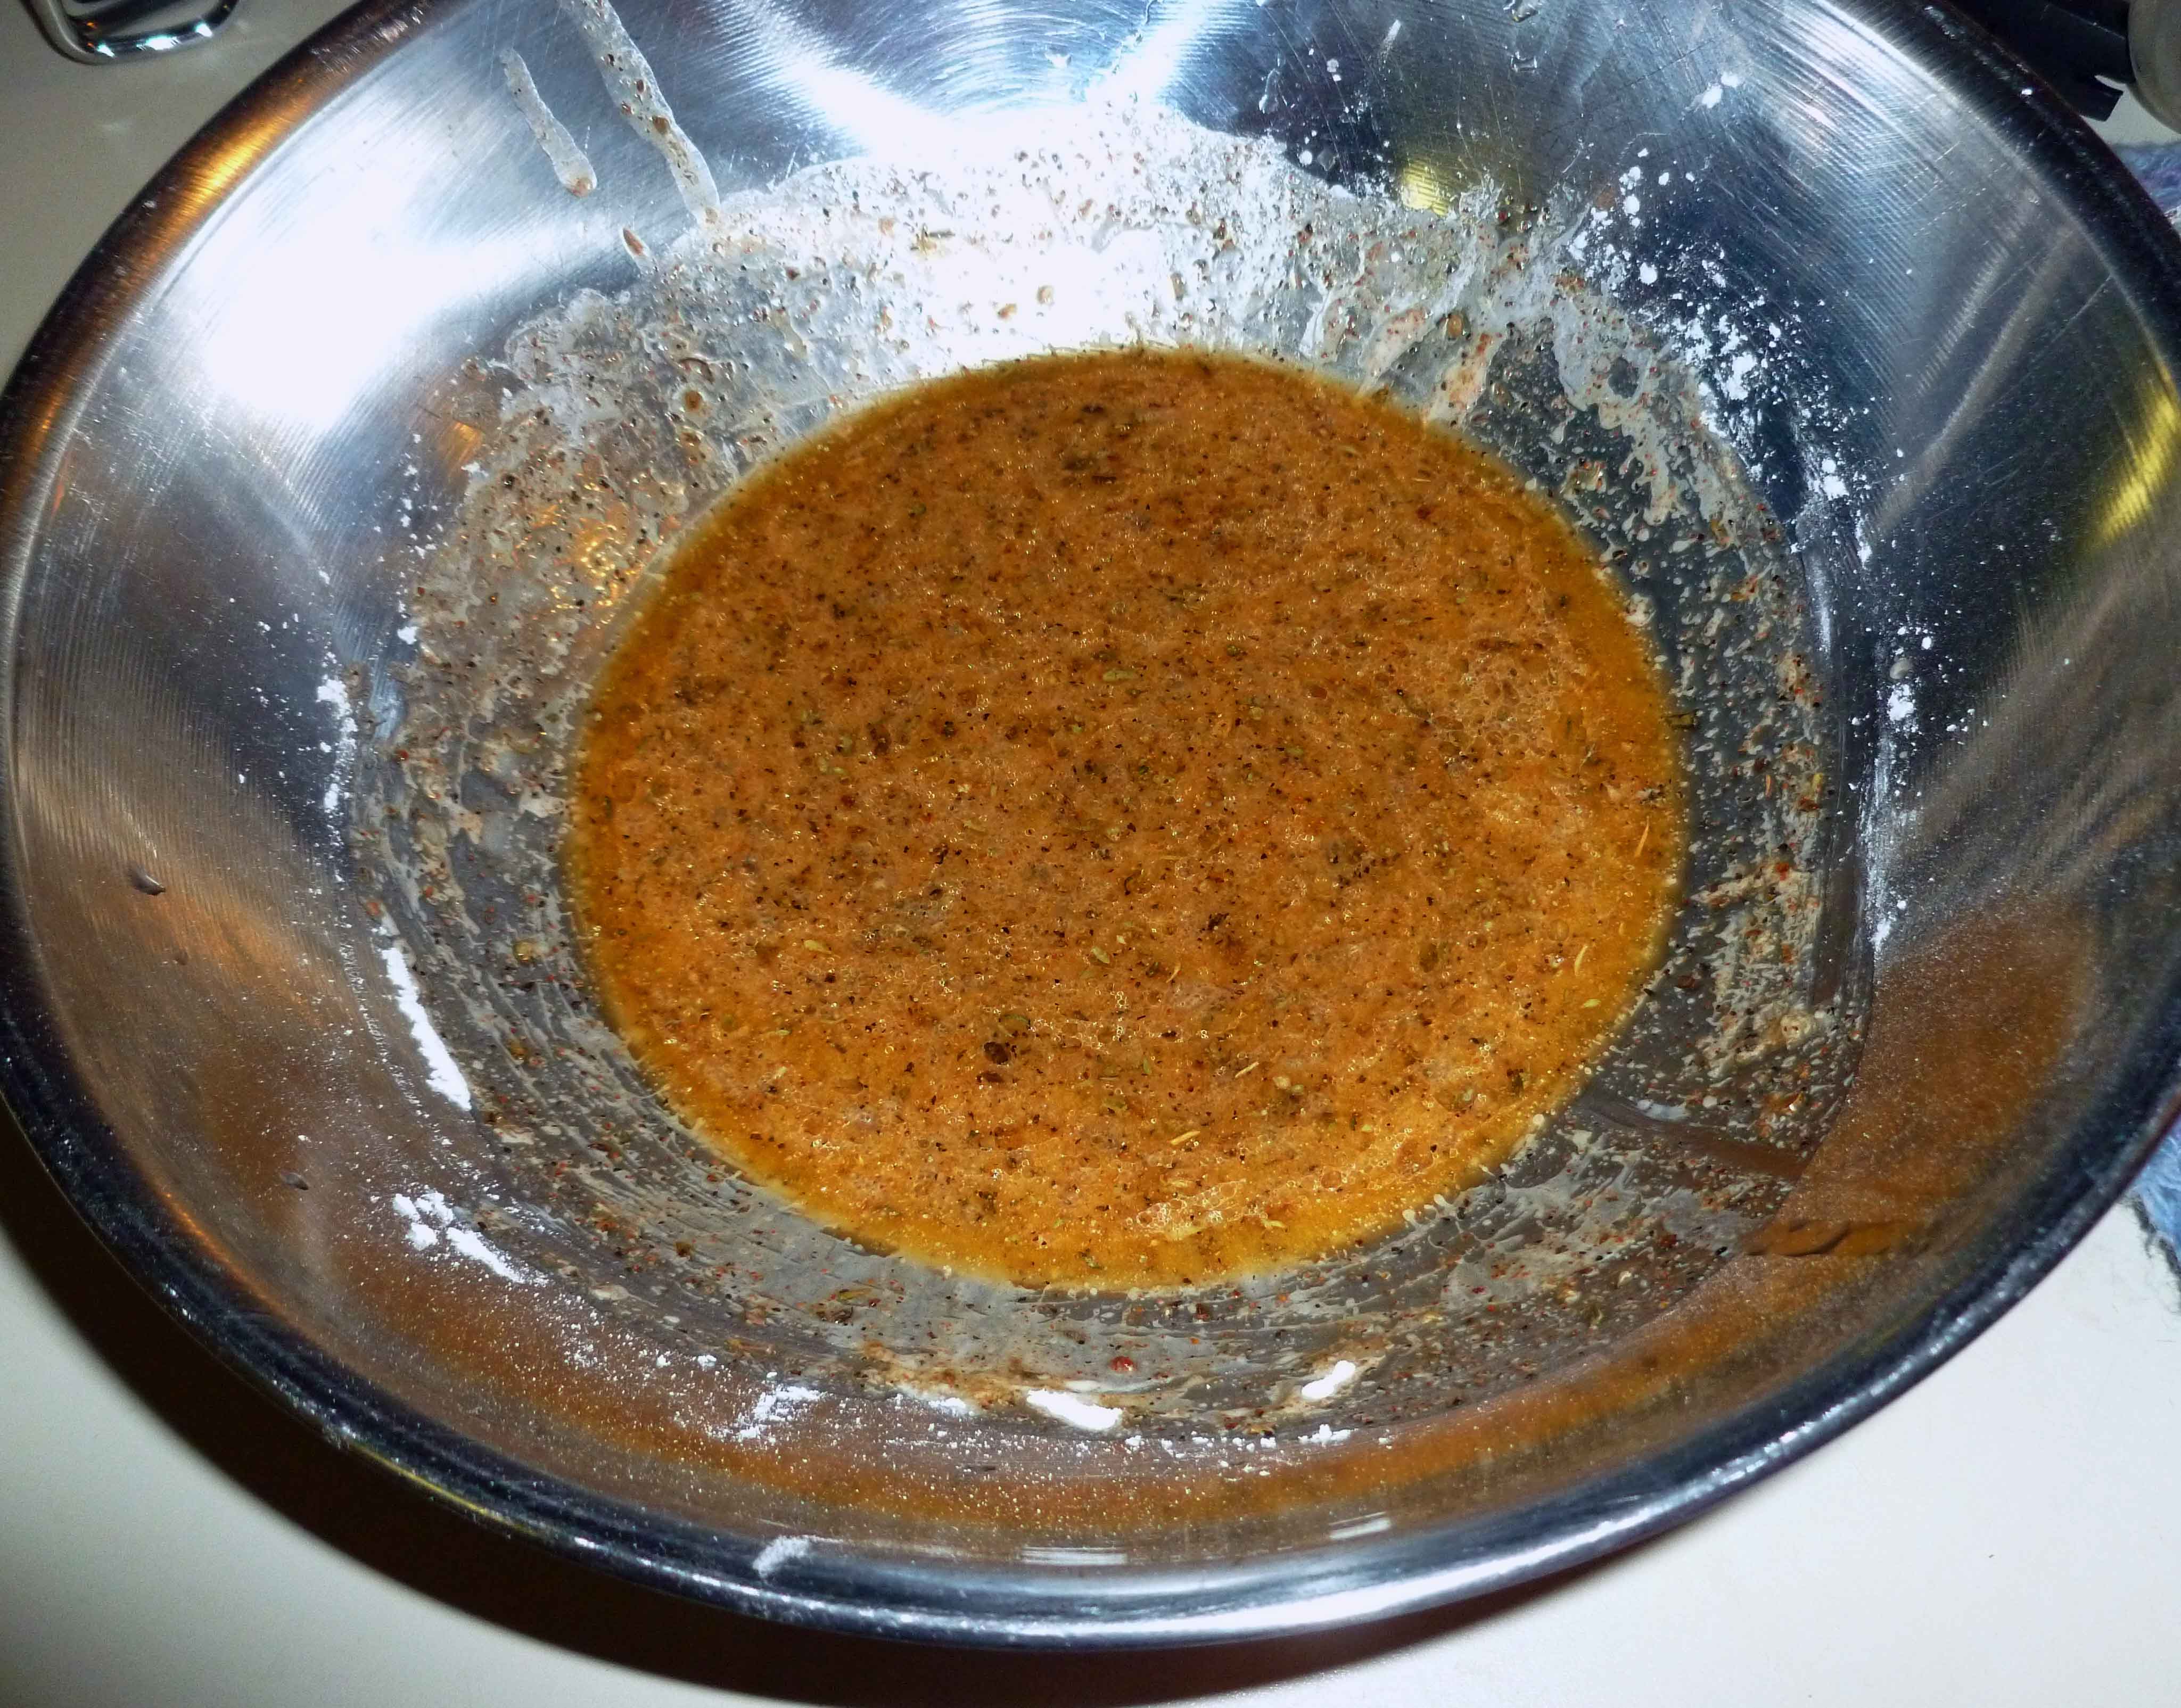
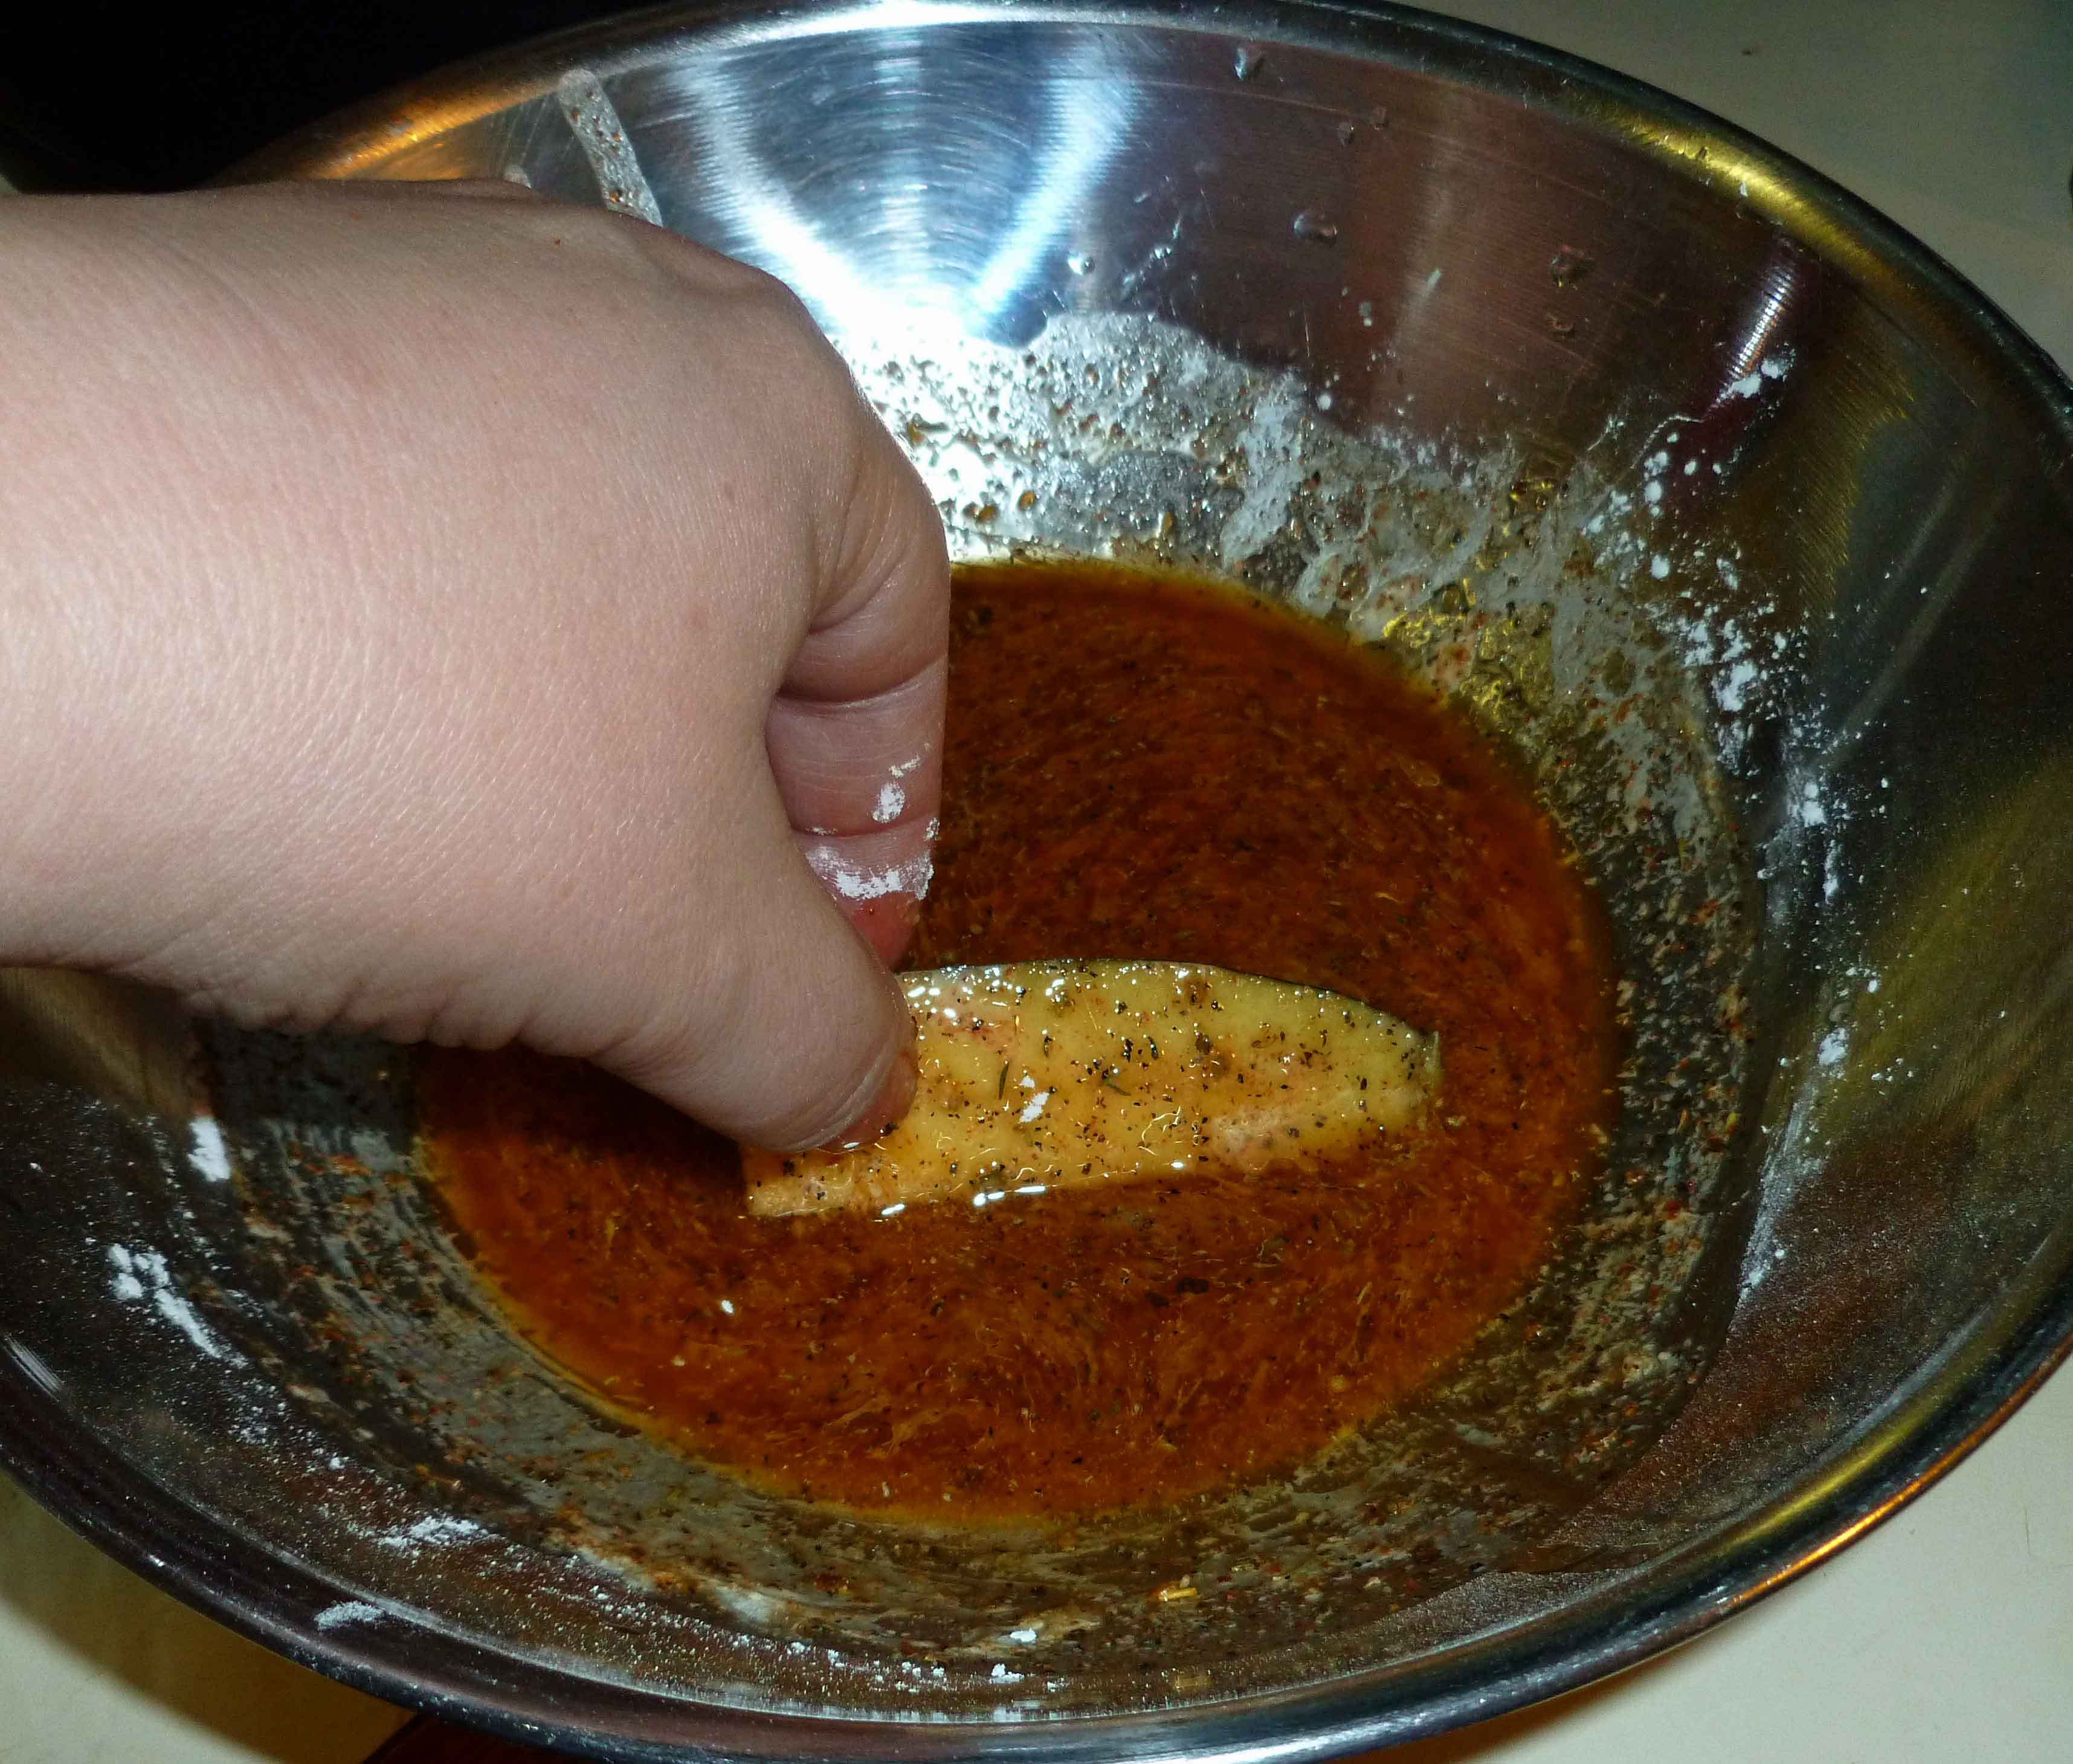
Place the ingredients for the second wet dredge in a shallow bottomed bowl and whisk them together. Make sure the bowl has enough room to move the pieces around to coat them.
Wet mixture – second dredge
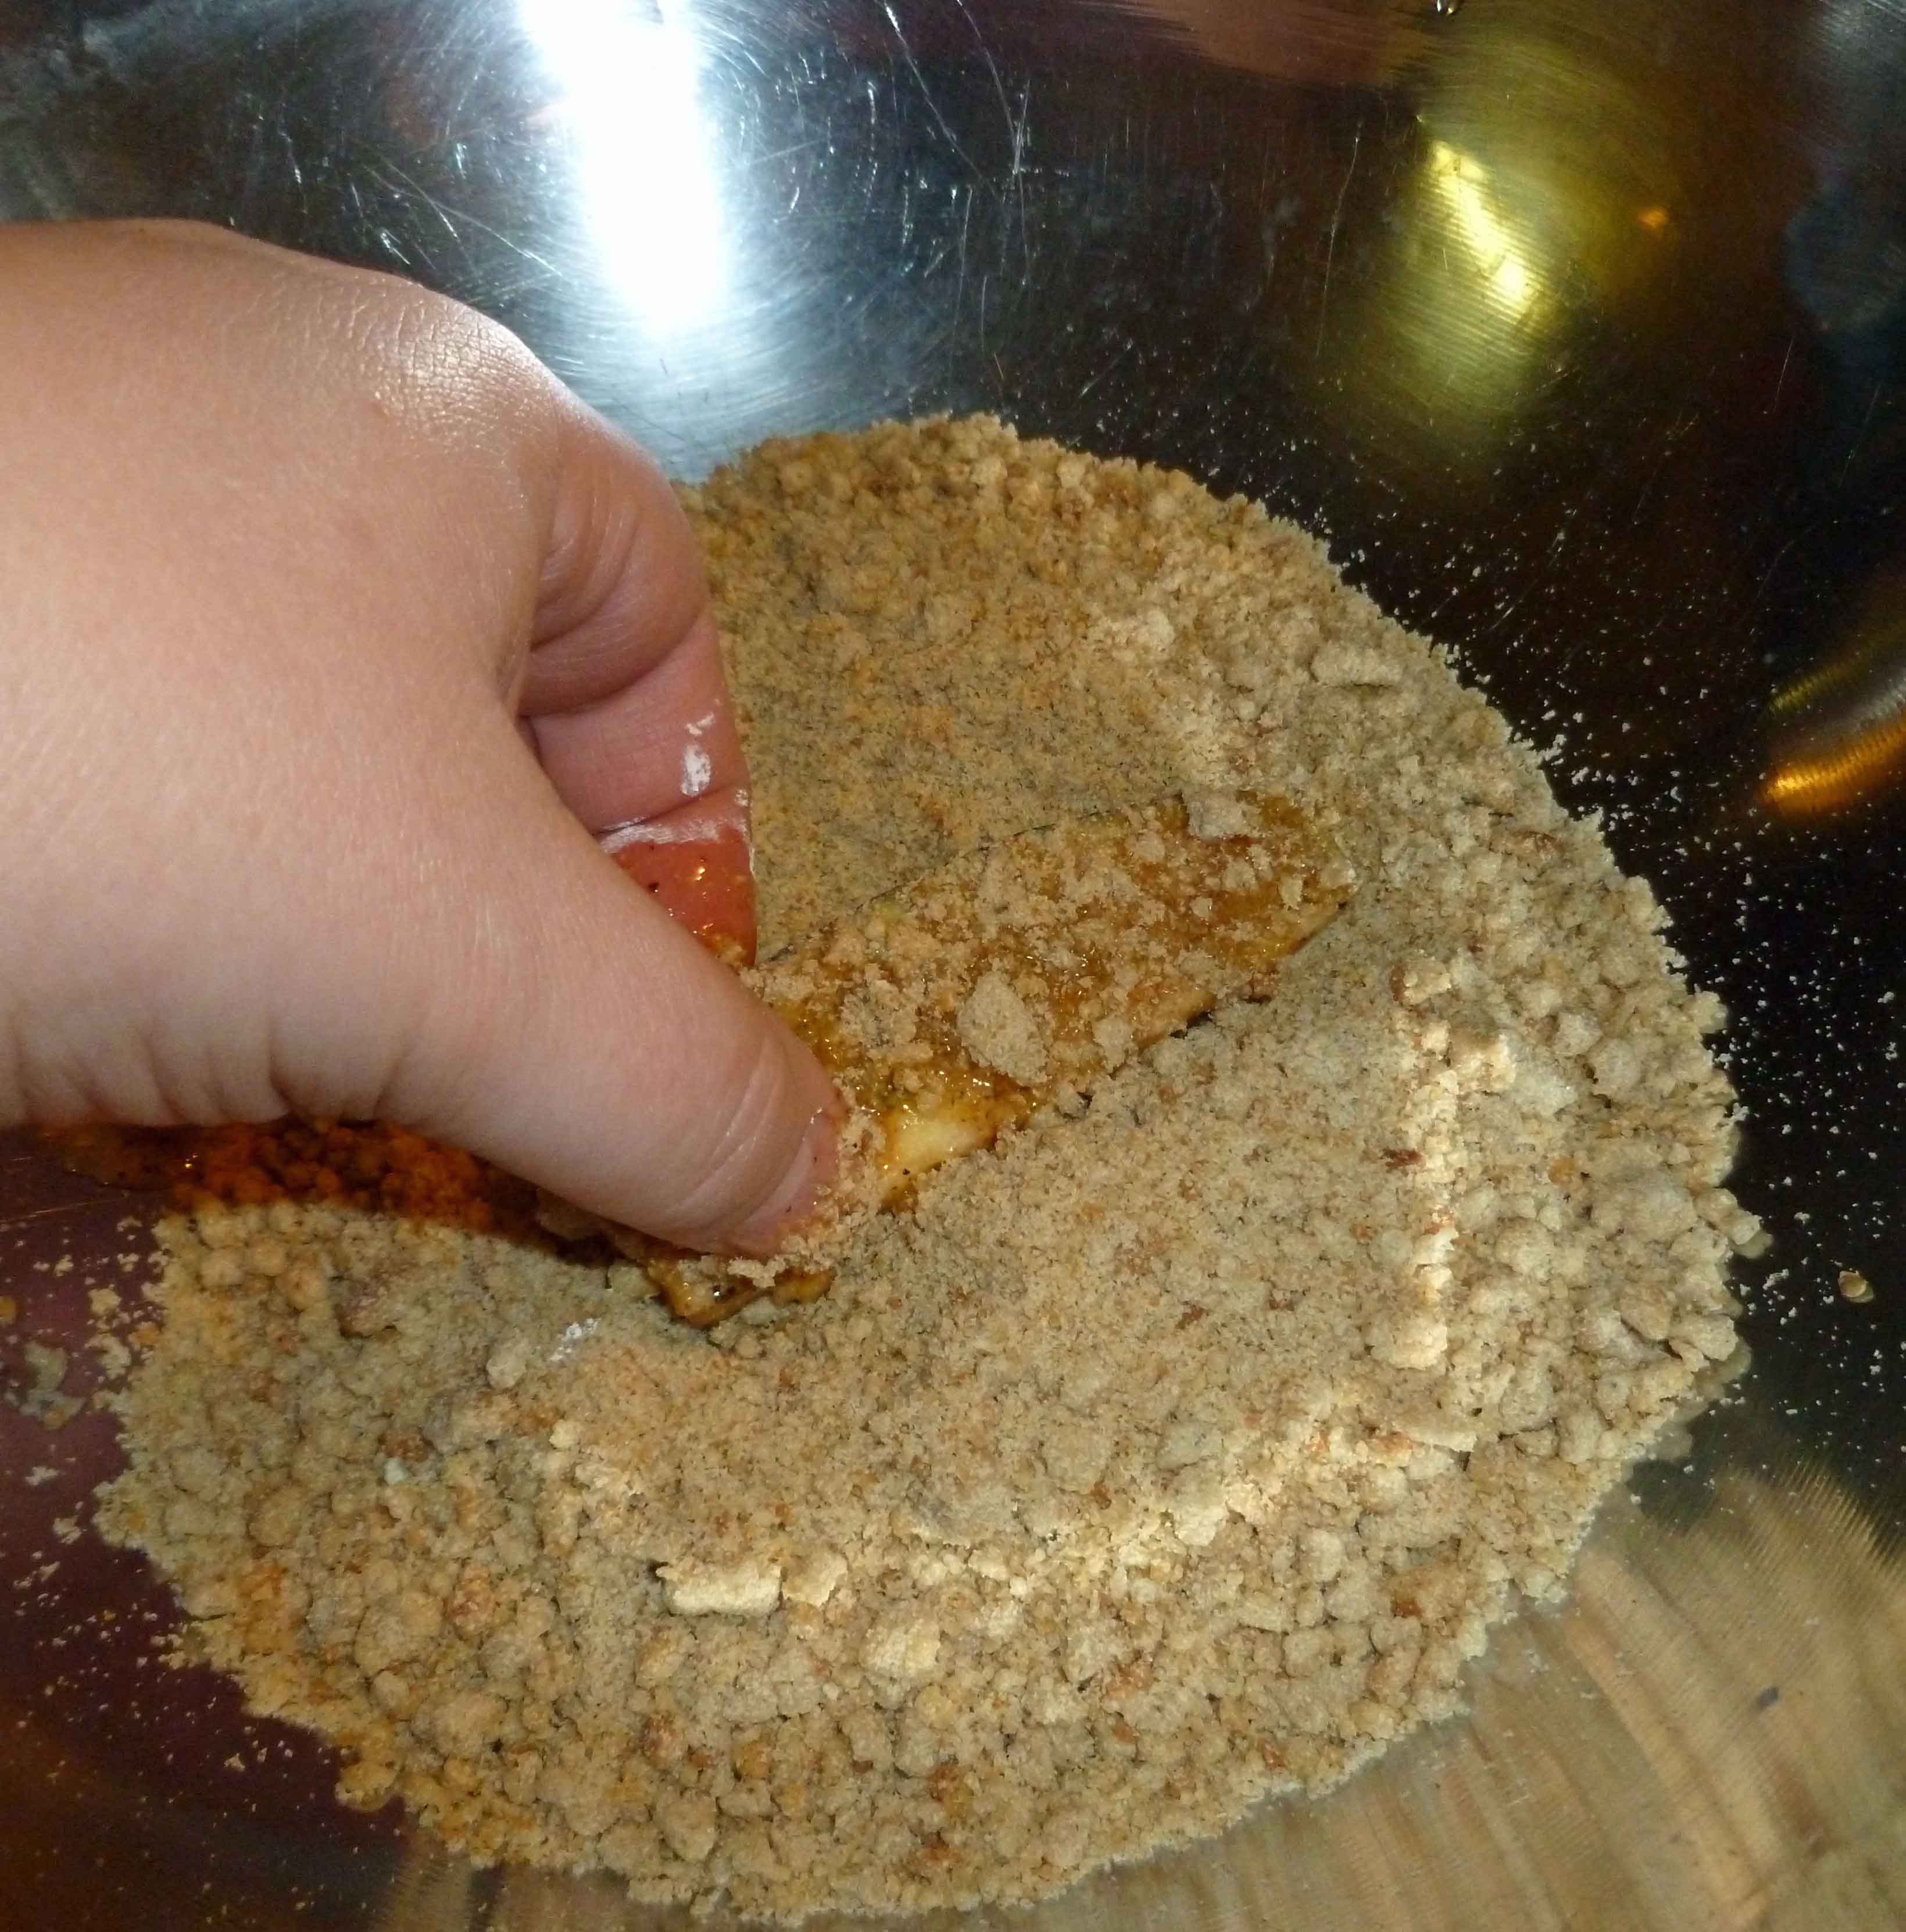
Place the bread crumbs for the third dry dredge in a container with enough room to move the pieces around to coat.
Dip each piece of zucchini or eggplant in the first dry dredge (arrowroot starch), then in the second wet dredge (arrowroot, water, oil and spices mix), then in the third dry dredge (the bread crumbs) and place them on the baking sheet.
First DredgeSecond DredgeThird Dredge
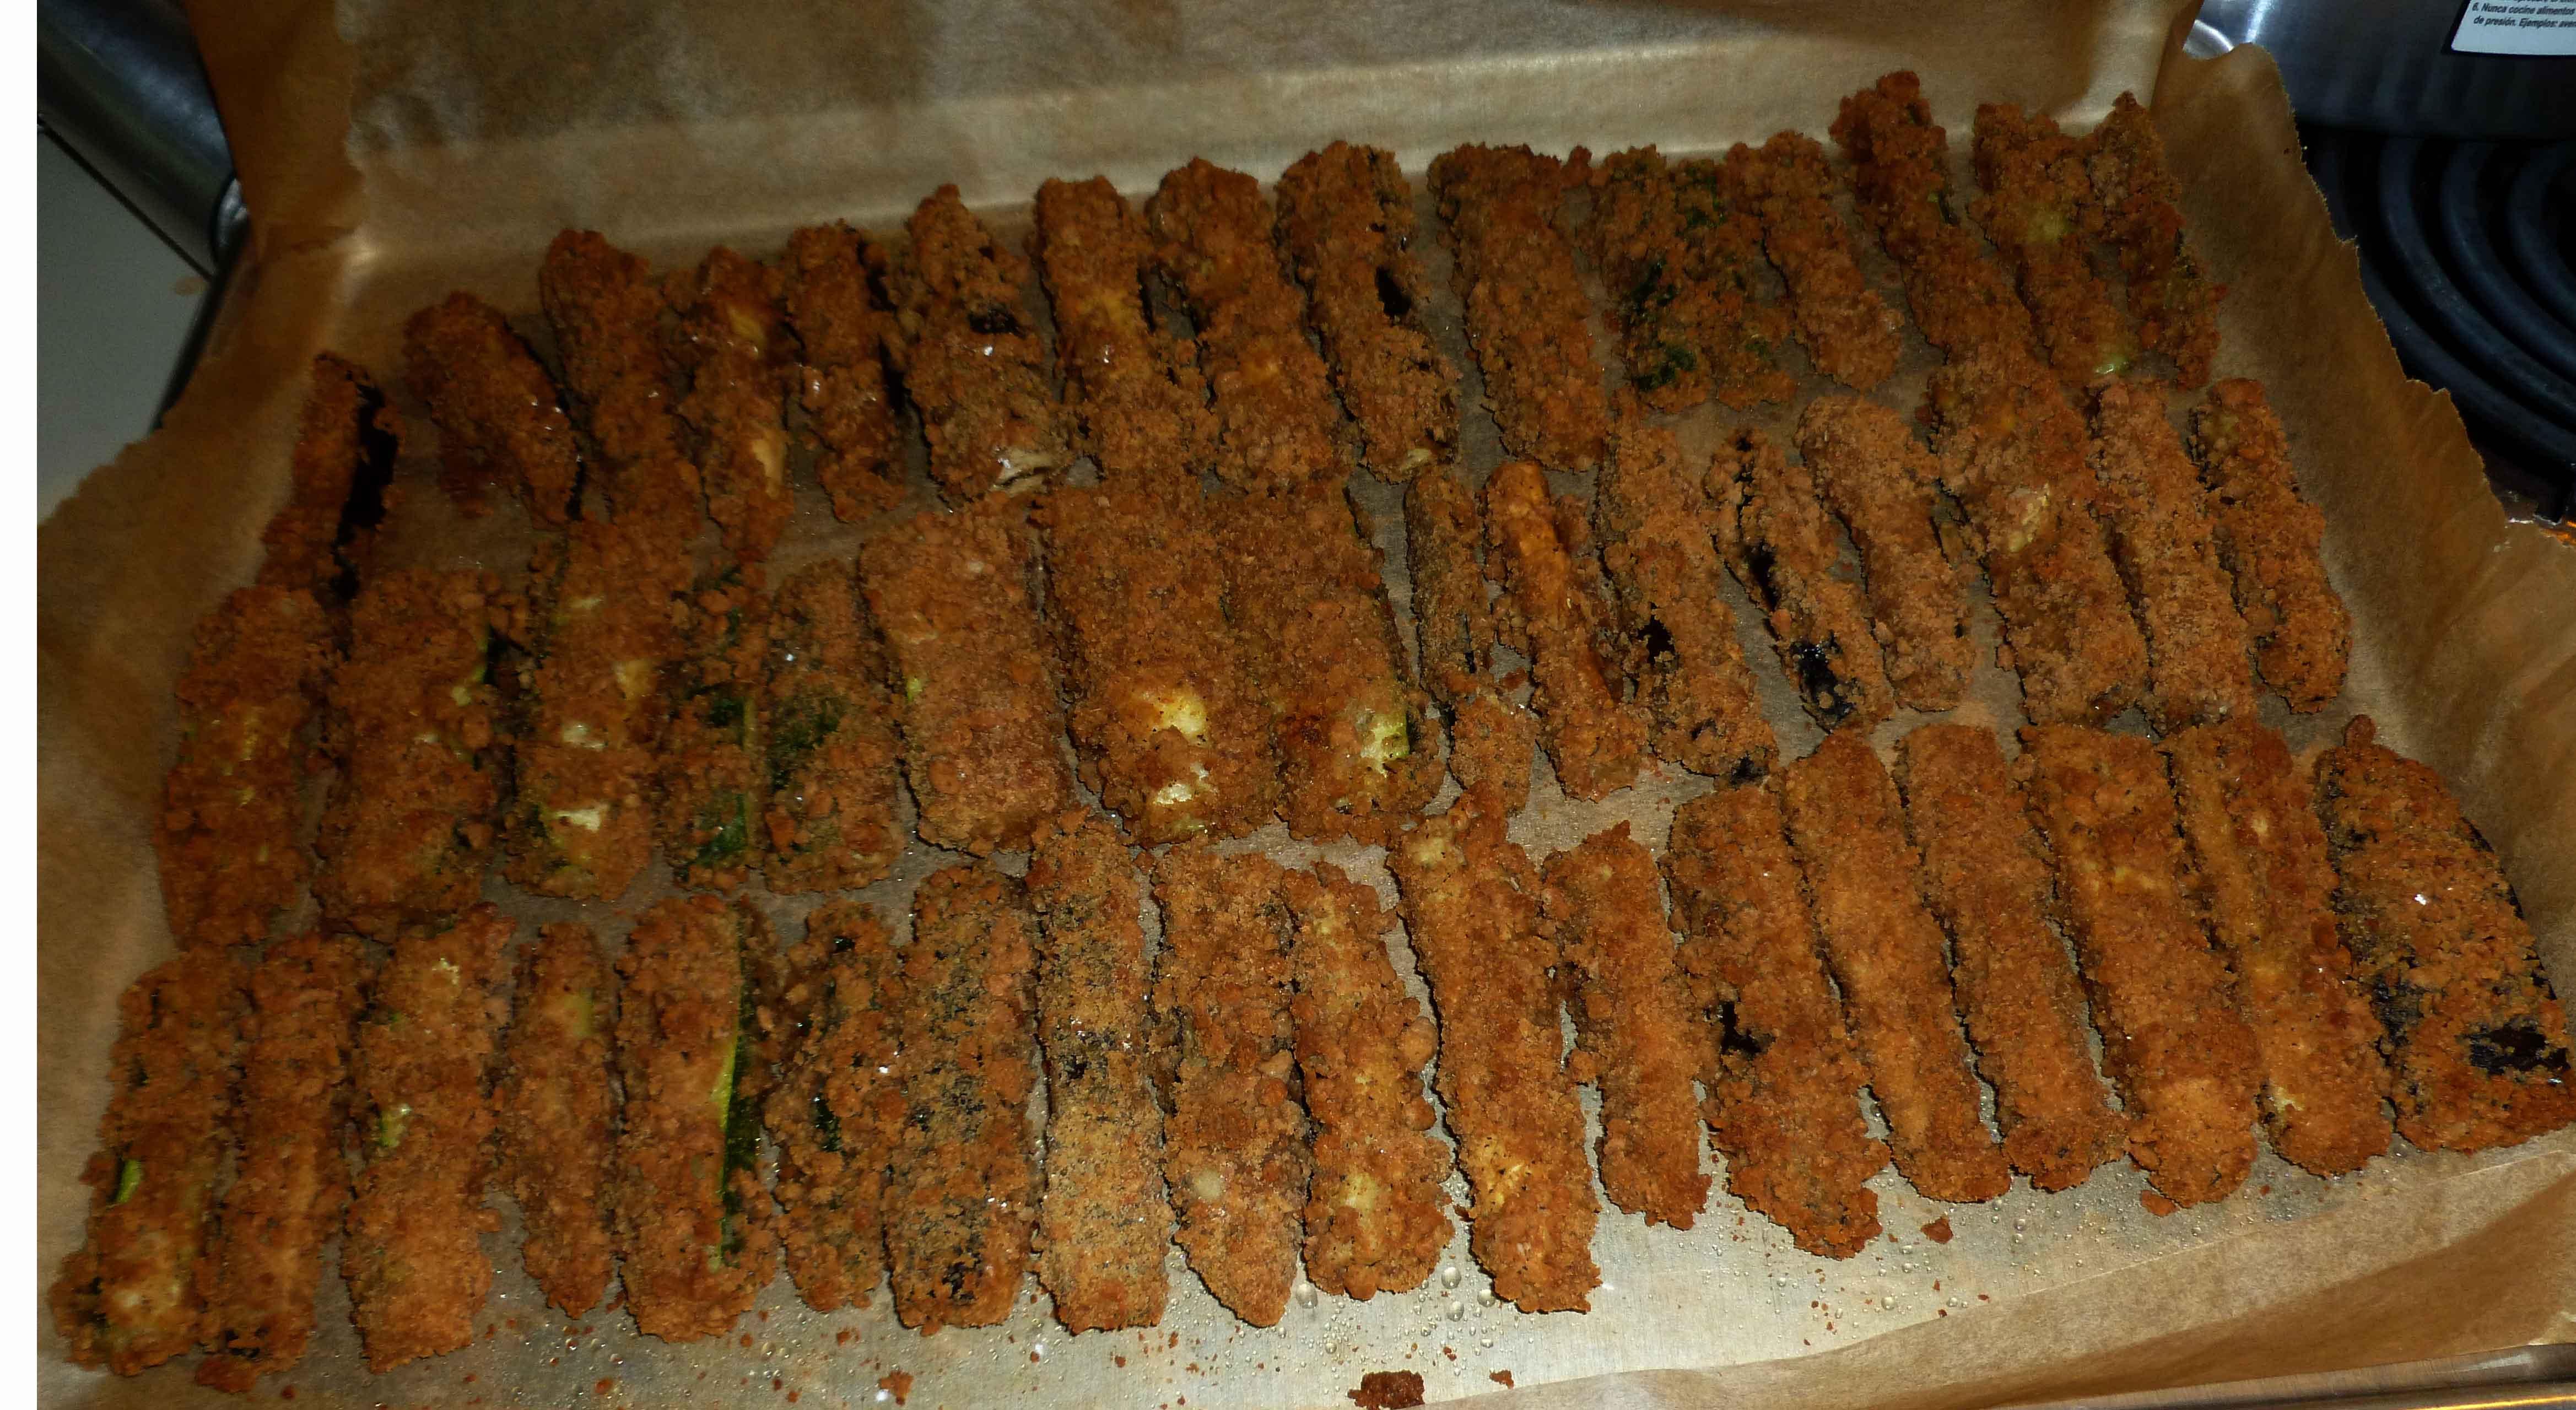
Once all the pieces are coated, place baking sheet in the oven and bake for 30-40 minutes until crispy.
Fries after baking
While your fries are baking, mix Earth Balance Mindful Mayo and your favorite hot sauce in a dipping bowl.
Baked Eggplant and Zucchini Fries with Spicy Mayo Dipping Sauce