Notice: Function _load_textdomain_just_in_time was called incorrectly. Translation loading for the wp-ultimate-recipe domain was triggered too early. This is usually an indicator for some code in the plugin or theme running too early. Translations should be loaded at the init action or later. Please see Debugging in WordPress for more information. (This message was added in version 6.7.0.) in /home/maryzahc/public_html/adultfoodallergies.com/wp-includes/functions.php on line 6131 November 2017 – surviving the food allergy apocalypse (archive)
Chocolate Pudding, Vegan and Gluten-Free with Vegan Whipped Topping, also gluten-free
Well, it’s our last Element of our Element theme month post, Air! Let’s face it, my air options were fairly limited, unless I wanted to get all lawyerly and make up an argument about why some ingredient was air related. And so as not to subject you all to that, I made a chocolate pudding dessert with a whipped topping because it incorporates air. I’m pretty pleased with how both came out, and I’m thinking that in future I could blind bake a pie crust, cook the pudding a little longer and have a chocolate cream pie.
I didn’t take in process photos of the pudding because it’s pudding and most people have a fair amount of experience what pudding is supposed to look like. So the in process photos focused on the Vegan Whipped Topping so you’d know what each stage looks like. Also, you want to make the Vegan Whipped Topping just before serving, as it does start getting liquid-y after time passes, although it can be re-whipped. Also you can also use a torch to caramelize the topping if you want.
Chocolate Pudding, Vegan and Gluten-Free with Vegan Whipped Topping, also gluten-free
Chocolate Pudding with Whipped Topping, both Vegan and Gluten-Free!
2/3cupcacao powder(I do best with Wilderness Family Naturals)
5Tablespoonstapioca starch
1cup sugar
1/4 teaspoonsalt
1Teaspoon vanilla extract(I make my own with vanilla beans and vodka made from potatoes, as most commercial extract contains corn)
Servings: servings
Instructions
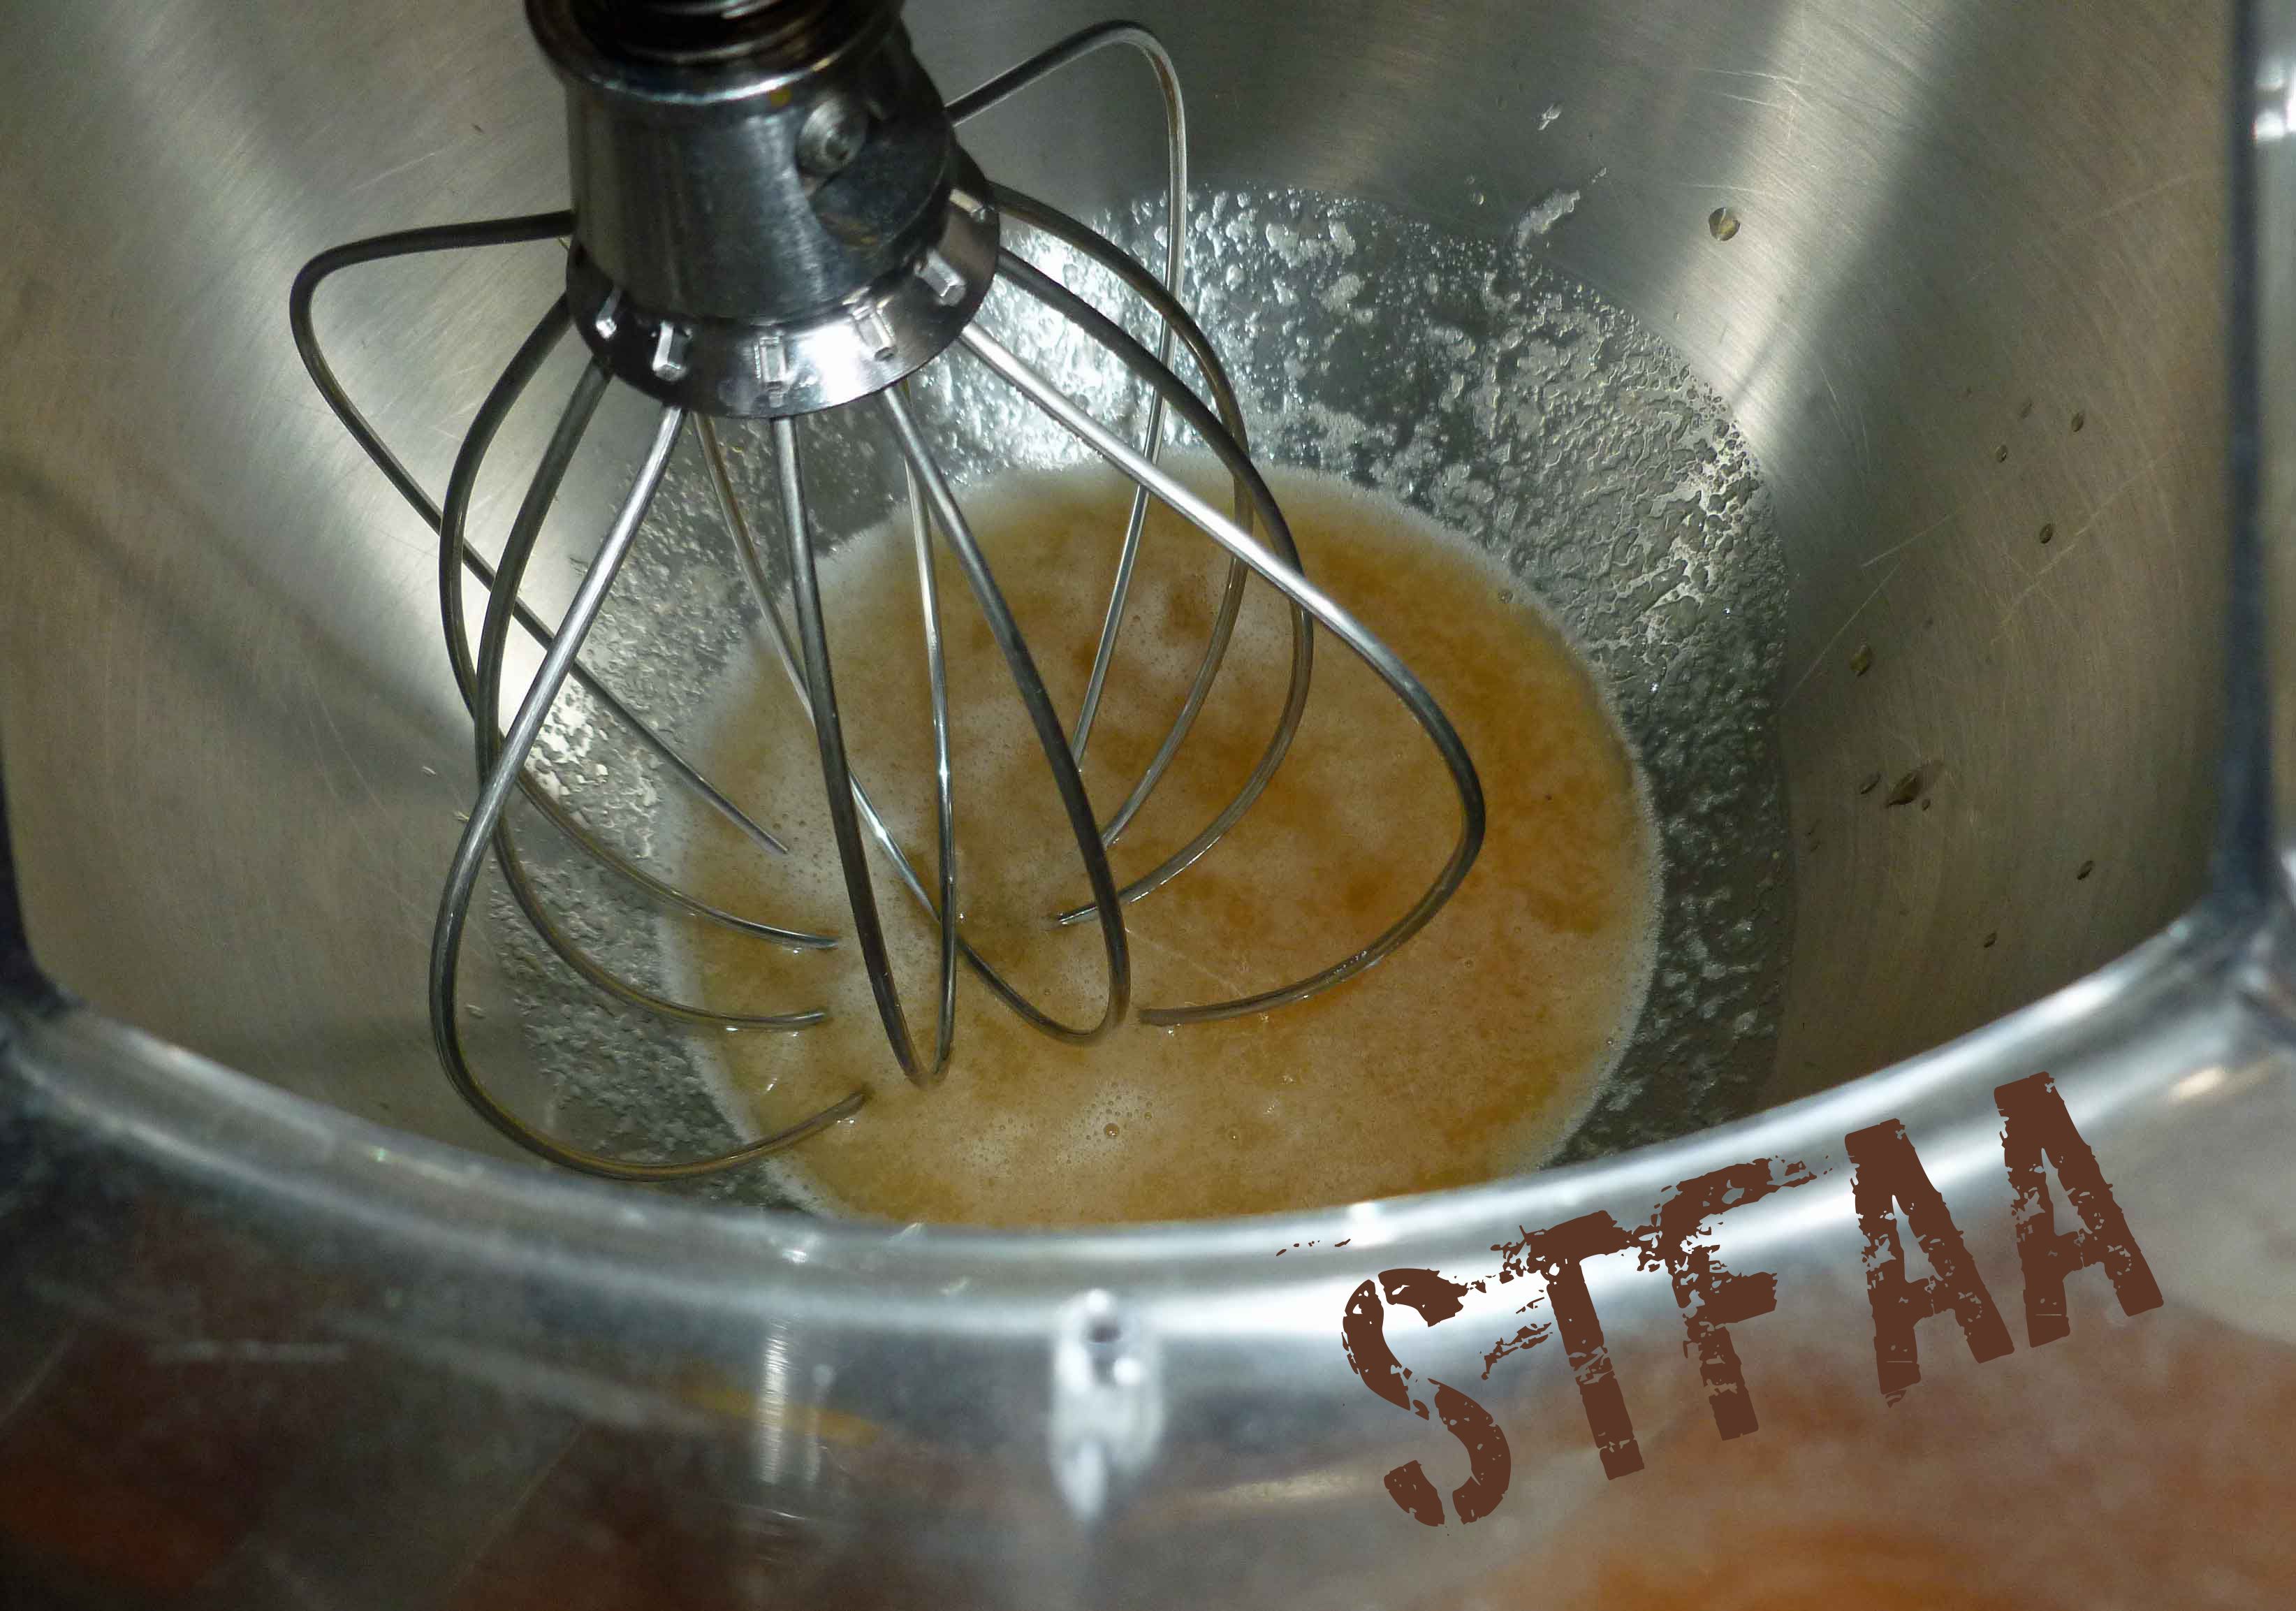
Place all ingredients except vanilla extract in a large saucepan, and whisk them together, until completely mixed with no or very few lumps.
Bring to a boil over medium heat, stirring constantly, until the mixture thickens to a pudding consistency. Remove from heat, add vanilla extract, and stir it in. You may wish to pour the pudding into individual serving dishes to cool at this point, or place it in a large bowl. Place the pudding in the refrigerator to cool (at least six hours or so).
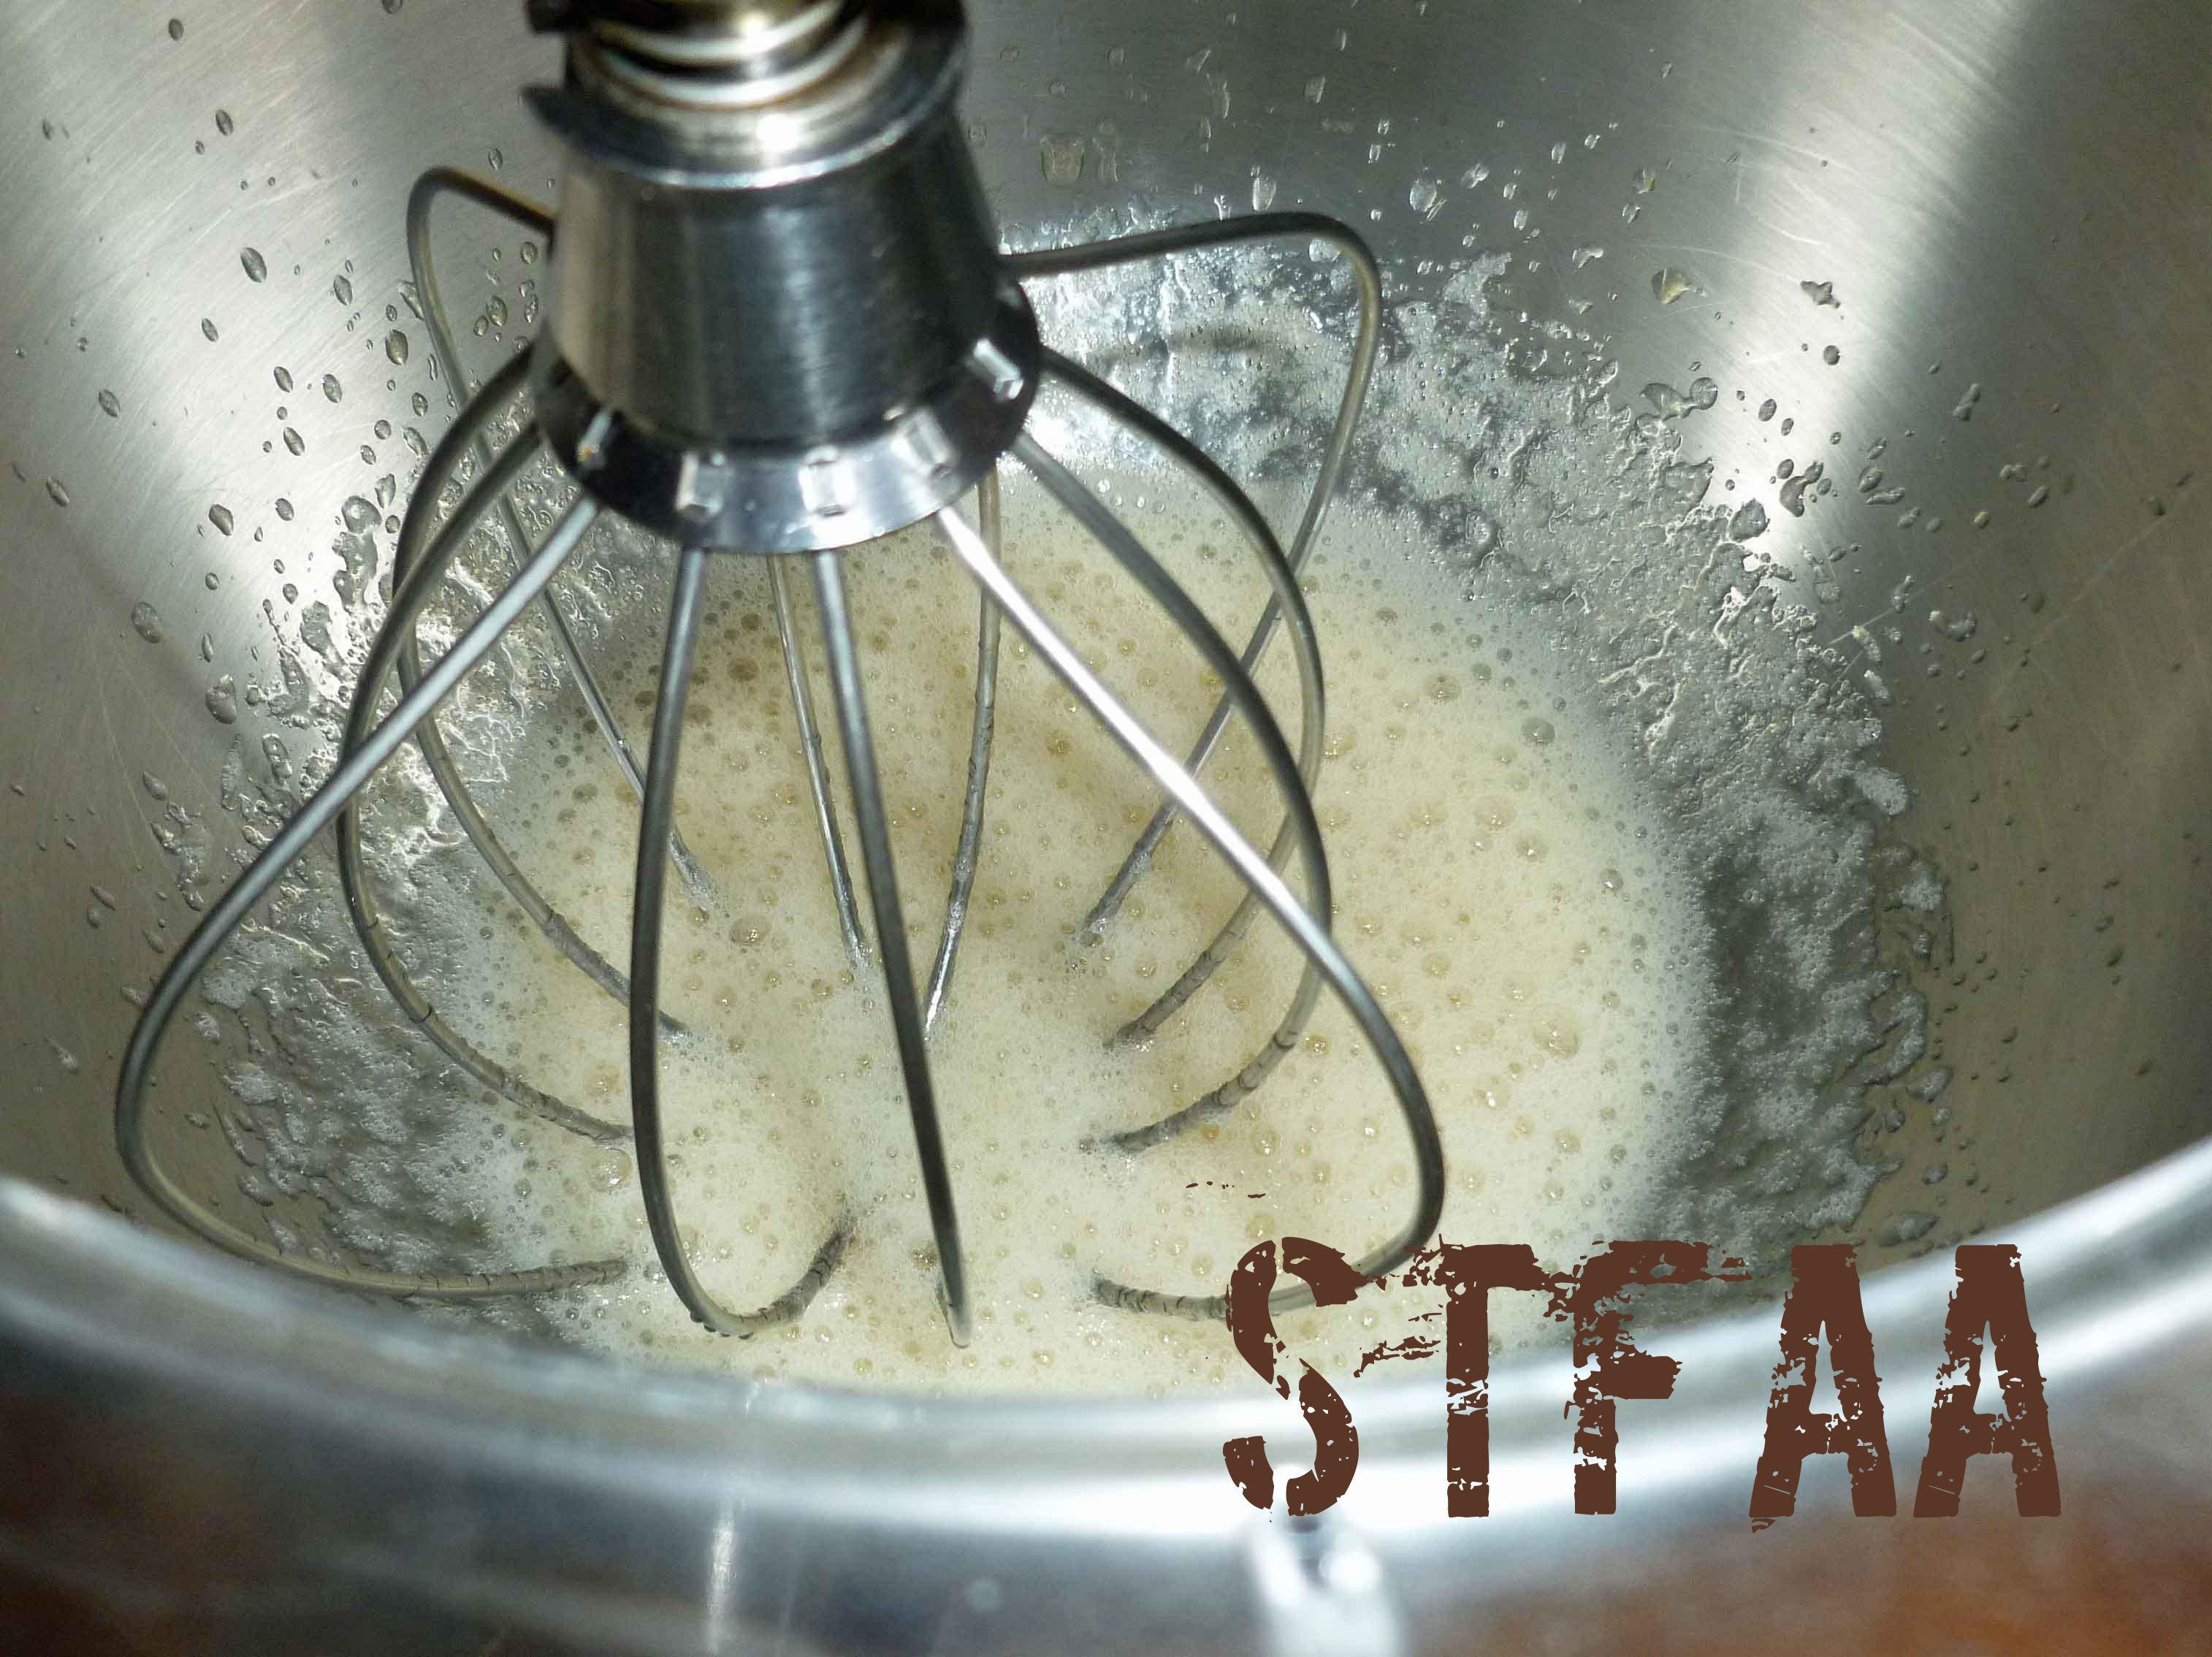
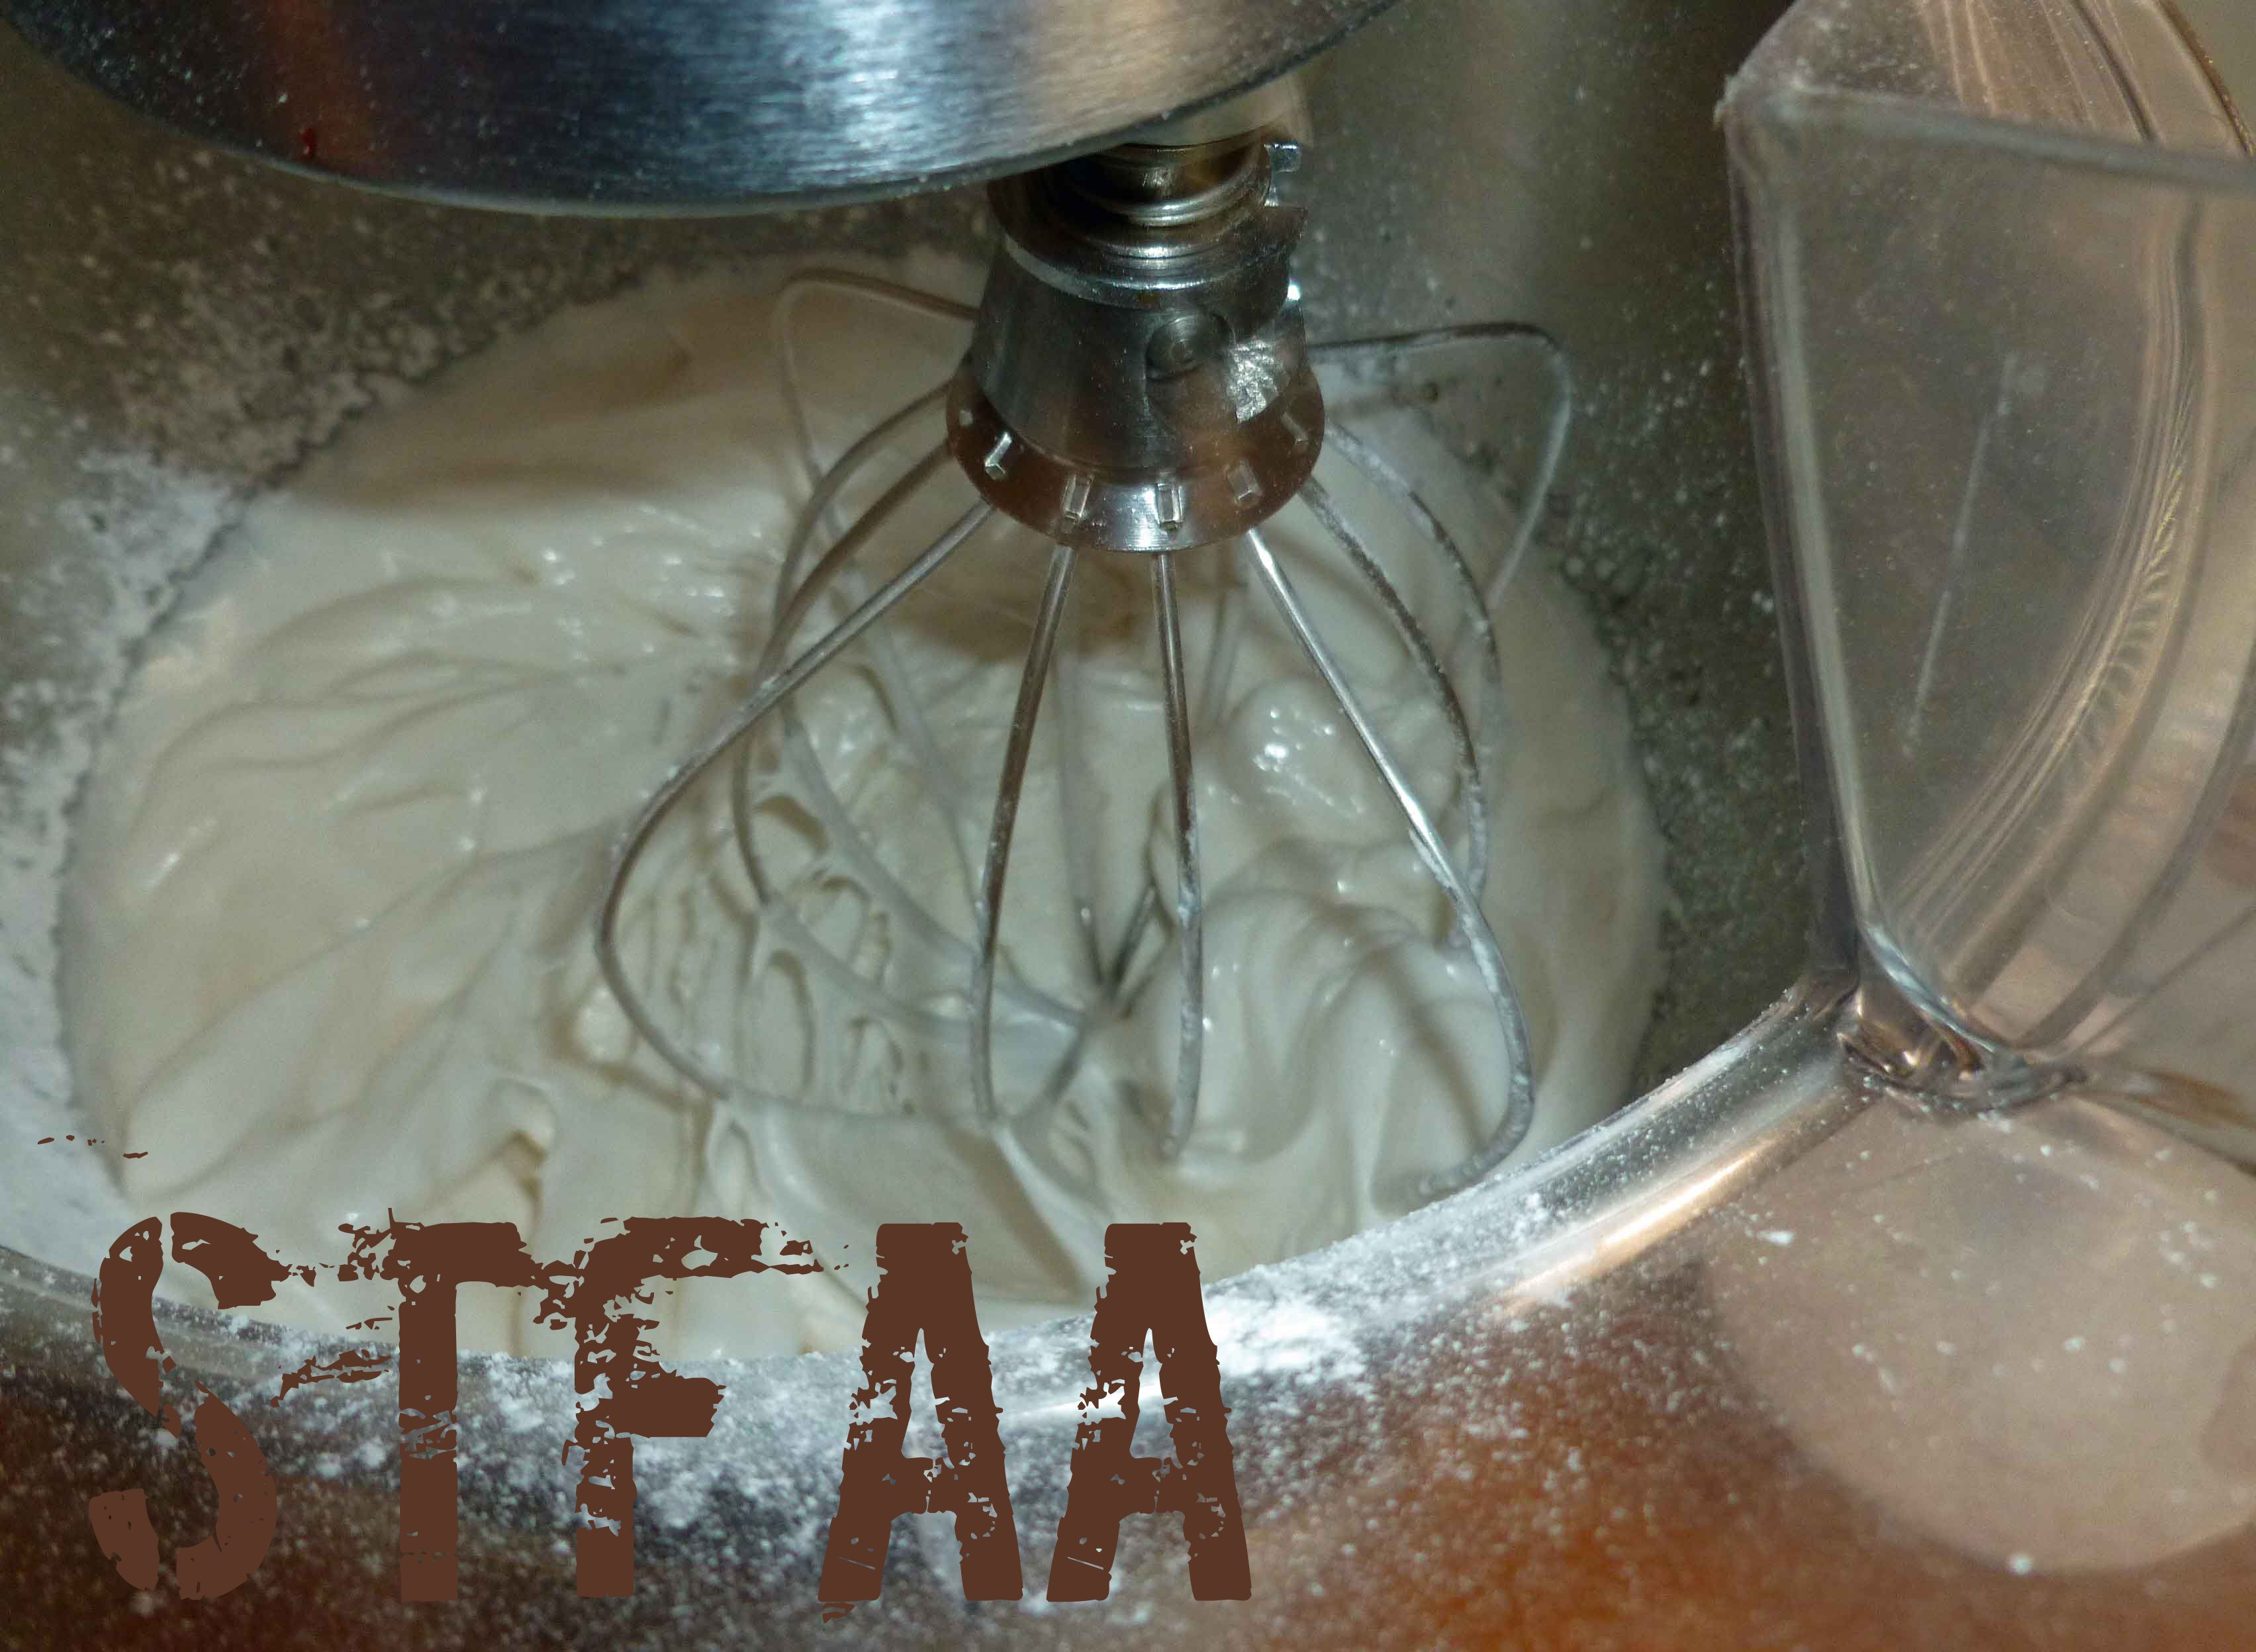
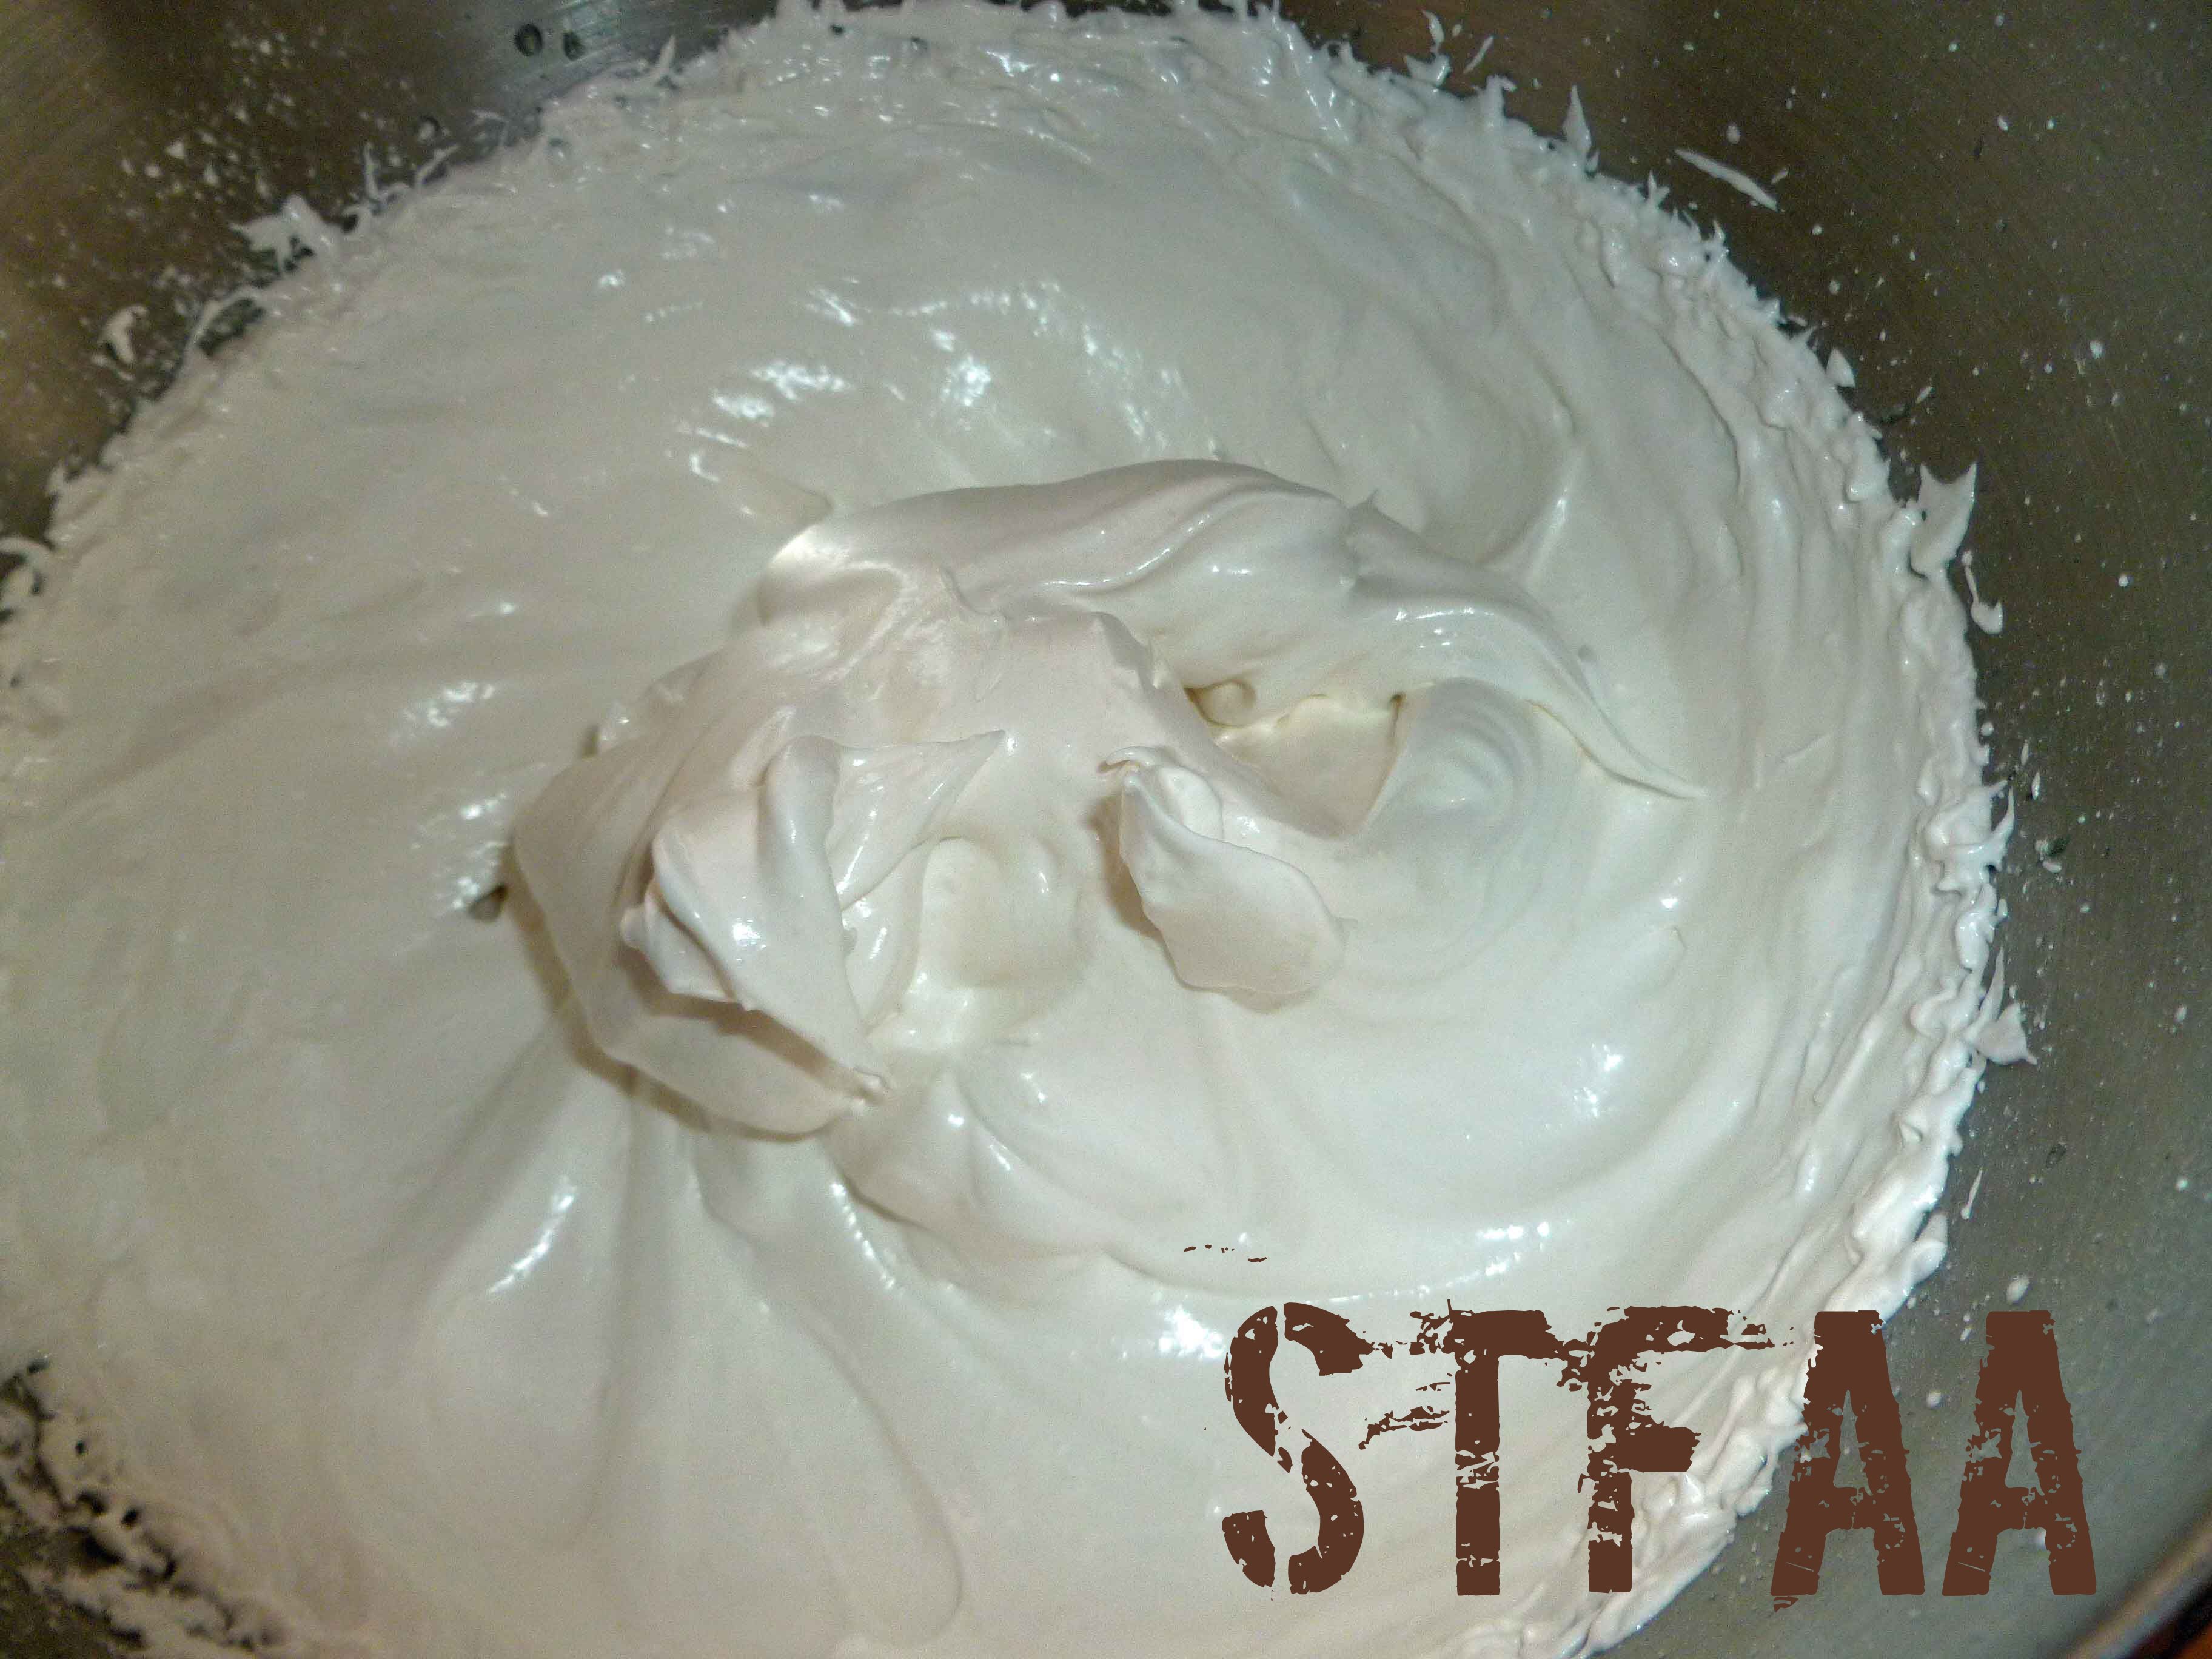
Aquafaba, cream of tartar, and vanilla extract before mixingAquafaba mixture when frothy enough to start adding sugarAquafaba mixture when all sugar is added but still needs beatingVegan Whipped Topping with stiff peaks
1/2cupaquafaba(the liquid from a can of garbanzo beans, see aquafaba.com)
1teaspoonvanilla extract(I make my own with vanilla beans and vodka made from potatoes, as most commercial extract contains corn)
1/4teaspooncream of tartar
3/4cup powdered sugar(if you are allergic to corn, you can make your own with 2 cups of sugar, a tablespoon of tapioca starch, and a blender)
stand mixer
Servings: cups
Instructions
Place whisk beater on your stand mixer. Make sure mixer bowl is clean, as any oil can cause problems with the aquafaba whipping. I wipe my bowl out with Bragg’s apple cider vinegar before starting to make sure there is no oil residue.
Place the aquafaba, vanilla extract, and cream of tartar in your stand mixer’s bowl. Beat on high for 1 minute until it starts to get frothy. Add the sugar a spoonful at a time while the mixer is running, very, very slowly. Continue to beat until stiff peaks are formed, this may take 5 to 10 minutes or so, depending on your mixer.
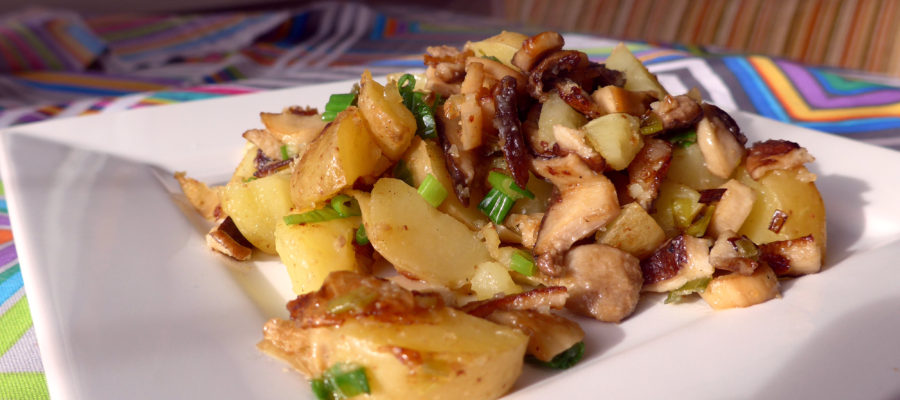
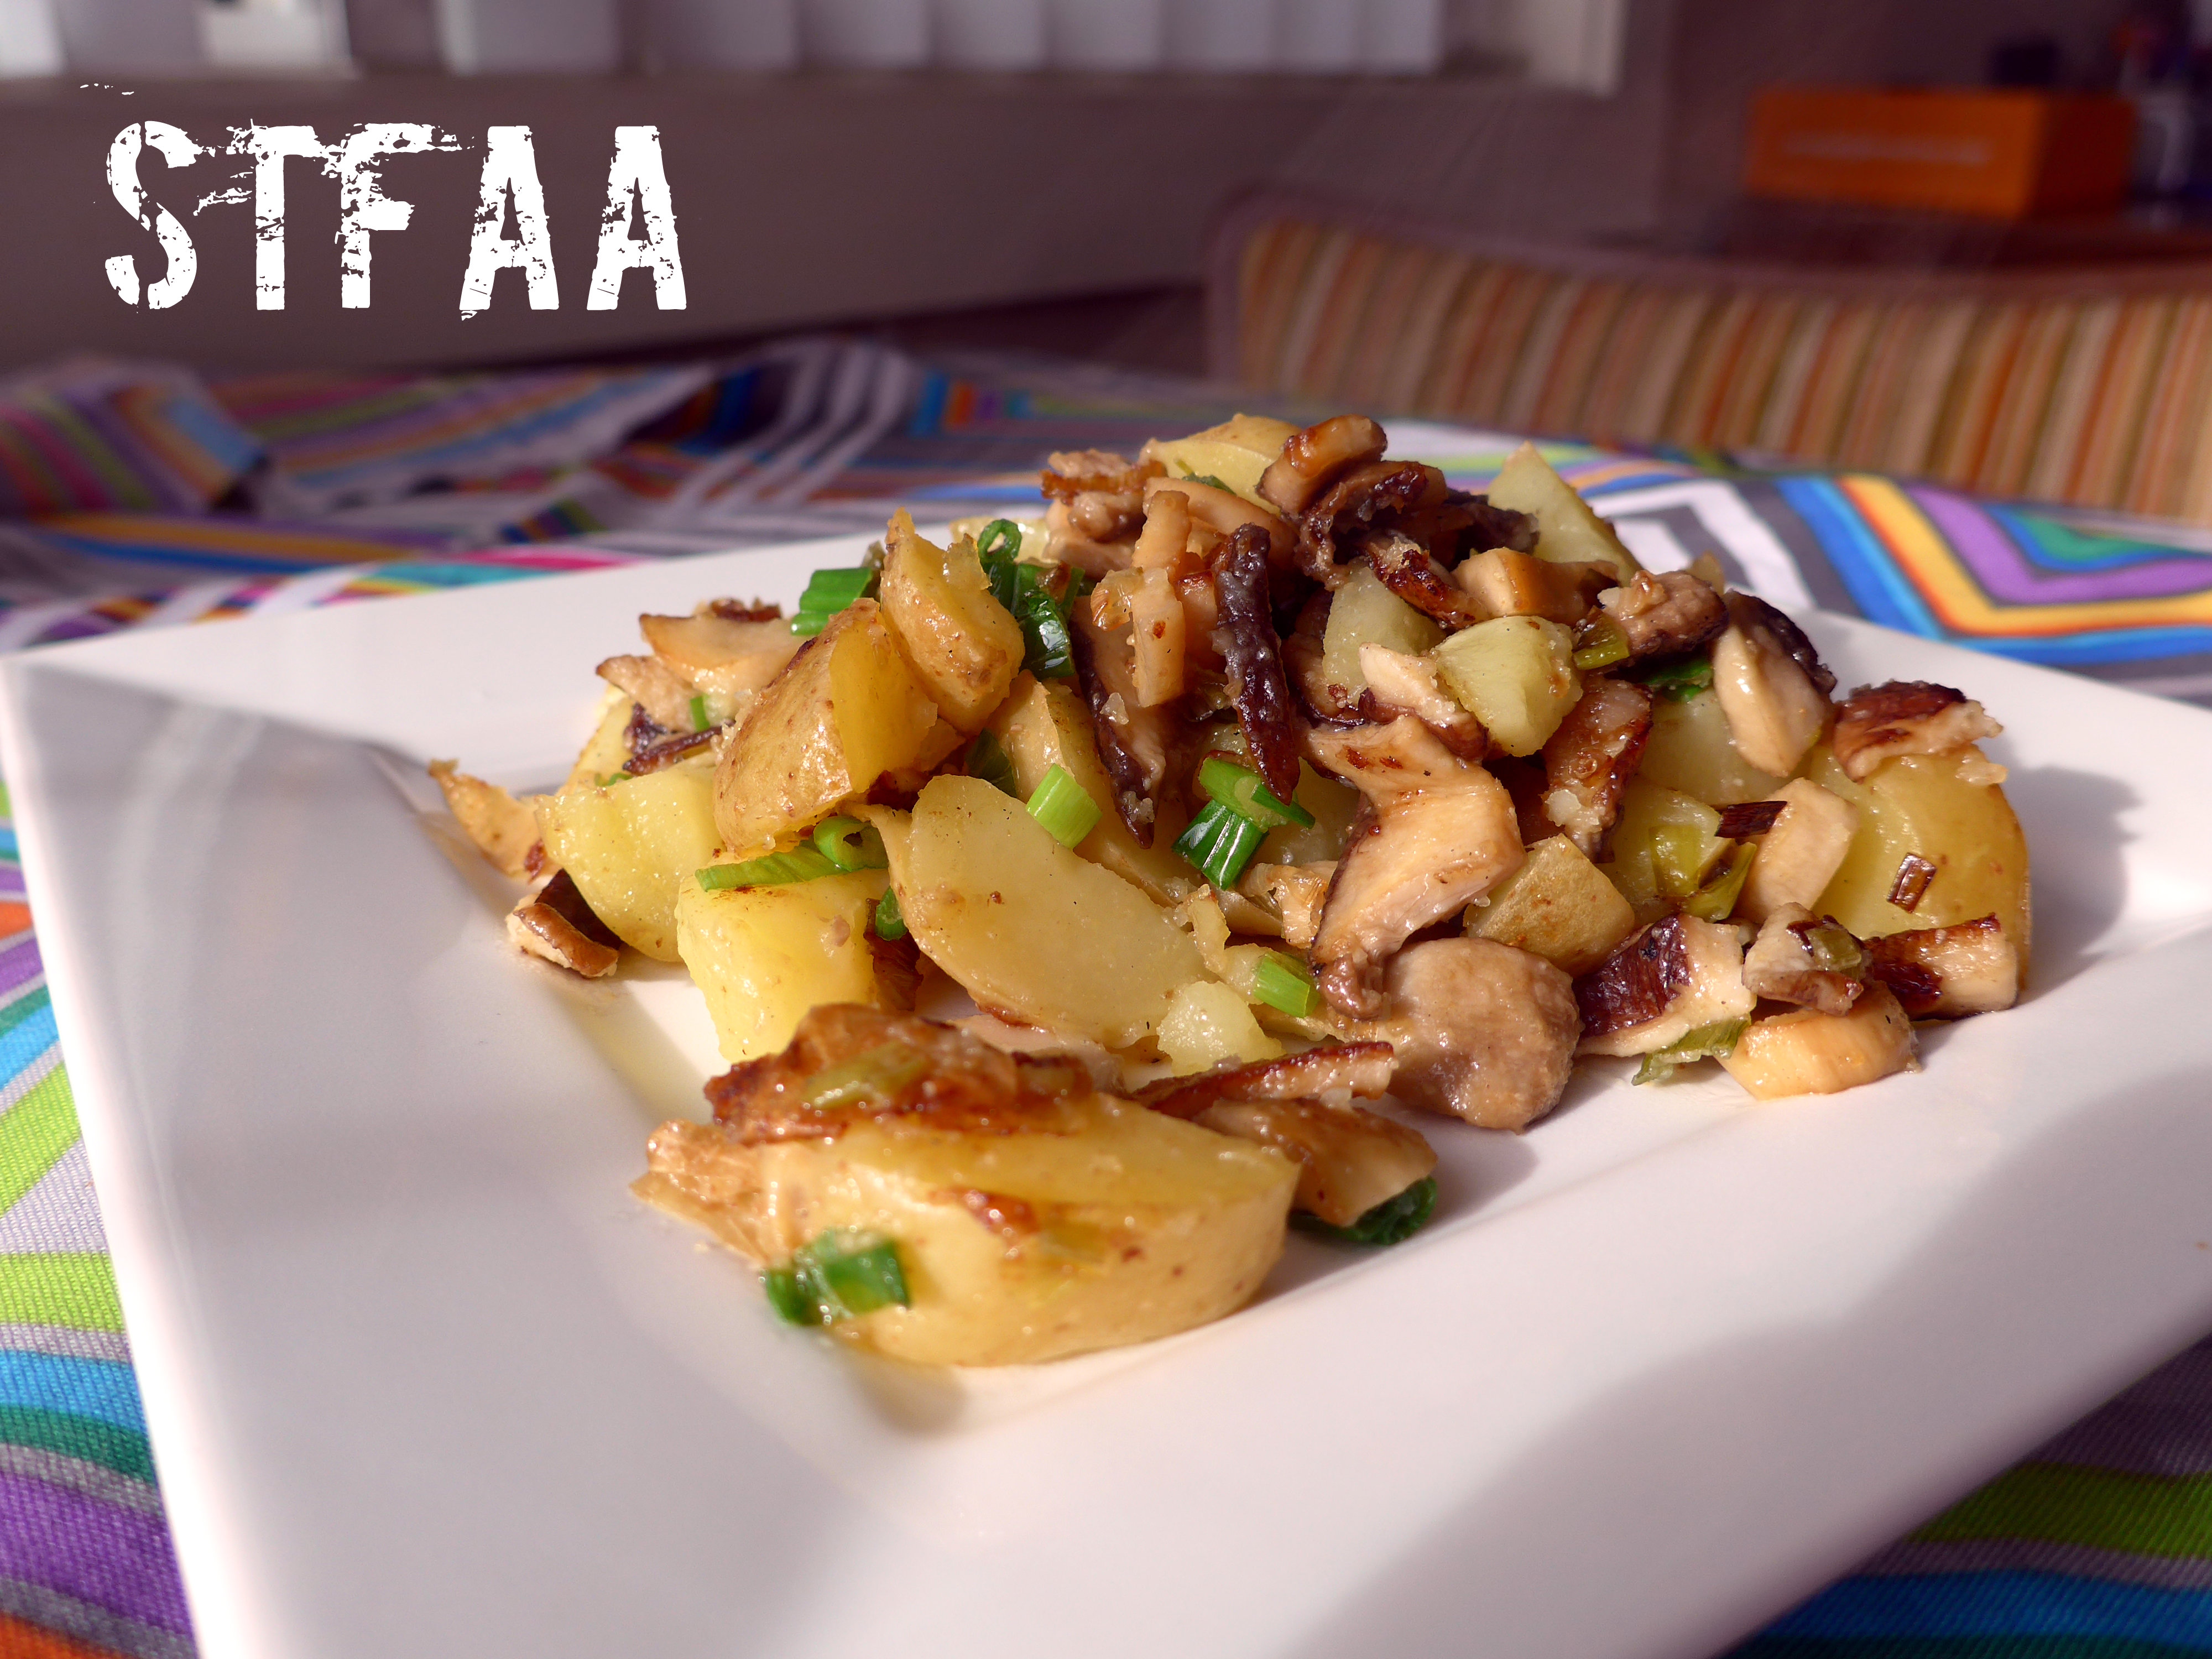
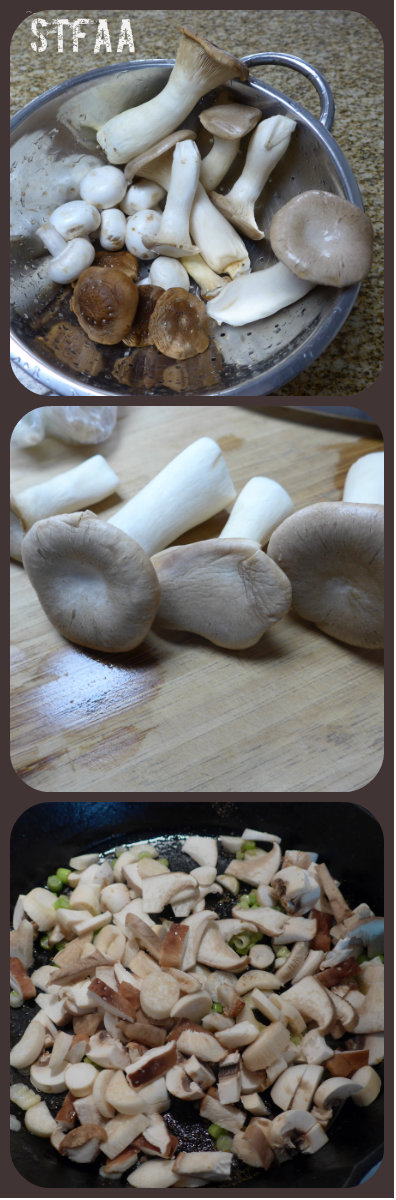
So for the “earth” side of our elements challenge, I knew from the start that I’d be using mushrooms, the earthiest food I love (and that Denise hates). Adding to the incentive, it’s mushroom “season” in the Pacific Northwest, meaning even our normal grocery stores have chanterelles (though at great cost)! I did not use chanterelles in this dish, just because I think they would be lost a bit on the mix and they are too spendy for that. (If you haven’t had chanterelles, you probably either don’t like mushrooms or haven’t been in the PNW during fall — they are amazing, and worth the price IF they are fresh.)
The mixed mushrooms I used here included mainly easy-to-find grocery store mushrooms. I used cremini (often sold as “baby bellas”), a few leftover white button mushrooms, some shitakes, and some king oyster mushrooms, my newest favorite. You can use whatever is available to you that you like, but if you see the king oysters, try them. They have a great texture for stir fry and sauteing. Check out this list of mushrooms and maybe try a new one in this recipe.
I also used my personal perennial favorite ingredient for all things: potatoes. They are grown underground, so they are definitely “earthy” too, right? If you can get them, yukon gold potatoes are my favorite for hash because of their texture. Any waxy potato (yellow or red) will work, but the textures will vary subtly. In this hash, I’ve parboiled the potatoes before frying them. I used a trick I learned in the Farm to Table Asian Secrets cookbook: adding vinegar to the boiling water helps the cooked potatoes hold together when you cut them after boiling.
For this recipe, you’ll need a pot to boil the potatoes in and a skillet. You should have plenty of time to clean and chop your mushrooms while the potatoes cook, and then time to chop the cooked potatoes while the mushrooms cook. I’ve done the hash over medium heat because I don’t want to burn things, but if you’re brave, a higher heat will give you more sear on the vegetables, more like a professional kitchen and better taste. Let me know if you do it that way.
For me, this is ultimate comfort food. First, potatoes are my go-to comfort food, but crisping them in oil and mixed with mushrooms, I also feel fancy and indulgent.
Notice: Trying to access array offset on value of type bool in /home/maryzahc/public_html/adultfoodallergies.com/wp-content/plugins/wp-ultimate-recipe/helpers/models/recipe.php on line 254
2Tablespoonvinegarany kind works — don’t use anything expensive here!
1Tablespoonsalt
1Tablespoonoilmaybe a little more
2cupsmixed fresh mushrooms
5scallions
1/2teaspoongarlic powder
2teaspoons oil(not a repeat ingredient!)
Servings: servings
Instructions
Wash potatoes and put in large sauce pan with water, vinegar, and salt. Bring to a boil and then turn down to a low boil. Cook potatoes until tender (can you stab a knife into them? Then they are done.) This will vary depending on the size of your potatoes, but texture-wise, boiling them whole is the right call.
Wash and dry mushrooms. How you do this depends on the mushroom, but with most of them I just run them under water and rub the visible dirt off with my fingers and then path them dry with a towel or paper towel. Chanterelles, I soak and swirl for a few minutes.
Chop mushrooms or break into bite-sized pieces.
Chop scallions and separate the whites from the greens. Light green goes with white. You will cook the whites and use the greens as garnish.
Add 1T of oil to your skillet over medium heat. Add the garlic powder to it and the onion whites, stirring well. When it is shimmery, add the mushrooms and stir well to coat with the oil. If you need to, add a bit more oil to fully coat the mushrooms, but stir them well first.
Cook mushrooms, stirring frequently but not constantly, for up to 10 minutes. They will start to brown and smell very earthy — that’s what you’re looking for.
While they cook, drain and cool the potatoes enough to touch. I lay them out on the cutting board to cool. Chop them into hash-sized pieces. Think dice.
Push the mushrooms aside and dump the potatoes into the center of the pan. Add about 2 teaspoons of oil, and stir just the potatoes until the oil is coating them. Spread them out, mostly piling the mushrooms on top. Let them sit and cook for about 5 minutes, and then stir and cook for a bit more — as much time as you can give them to crisp up and meld with the mushrooms.
Just before taking the hash off the heat, stir in the scallion greens and taste. Add salt and pepper if needed. Serve hot.
So, it’s still the Elements theme month. (Yes, I know, what were we thinking?!) We decided that I would do Fire for obvious reasons. I am to spicy food as MaryKate is to potatoes. I have a dried chili collection. Before the corn allergy hit, I had a commercial hot sauce collection, with about 20 or so bottles in the fridge. Now my collection is all homemade! Fire was always going to be my baby when we came up with this wacky theme month.
One of the hot sauces in my late, dearly lamented commercial hot sauce collection was Cholula Chili Lime hot sauce. It was lovely. It was great on anything, fried foods, grilled meats, tacos, in salsa, etc. So since MaryKate very generously shipped me three different kinds of chili peppers from a farmers market in Seattle at the end of September and I had set some of them up to ferment, I decided that this would be one of hot sauces I’d try to replicate. I used the Targu Mures peppers, which is a rare small hot Paprika type pepper from Transylvania, and is about the size of an Serrano pepper, close to a Cayenne pepper in heat, and bright red. But you could use any red chili that strikes your fancy or heat tolerance.
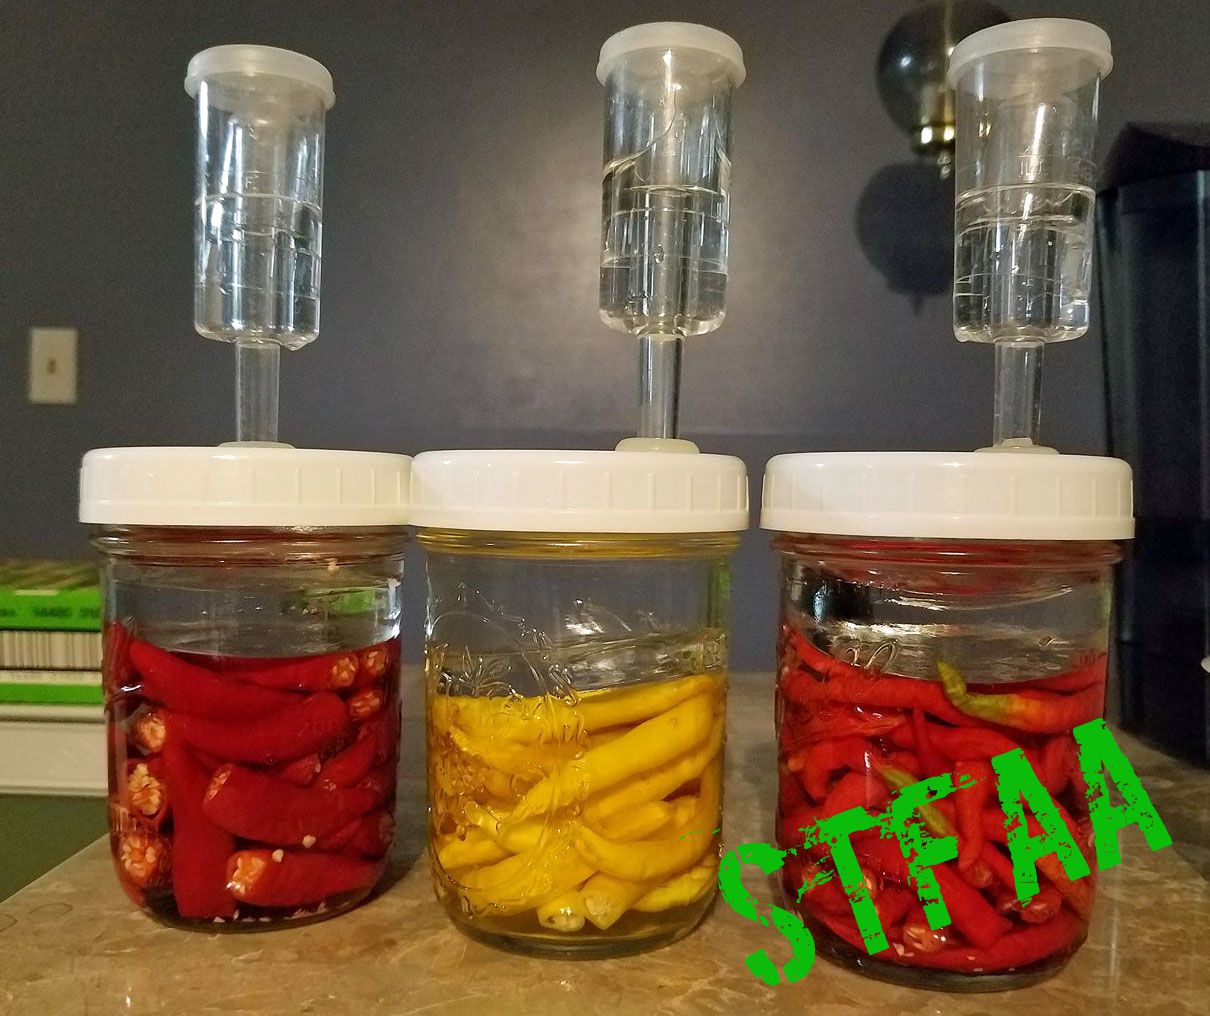
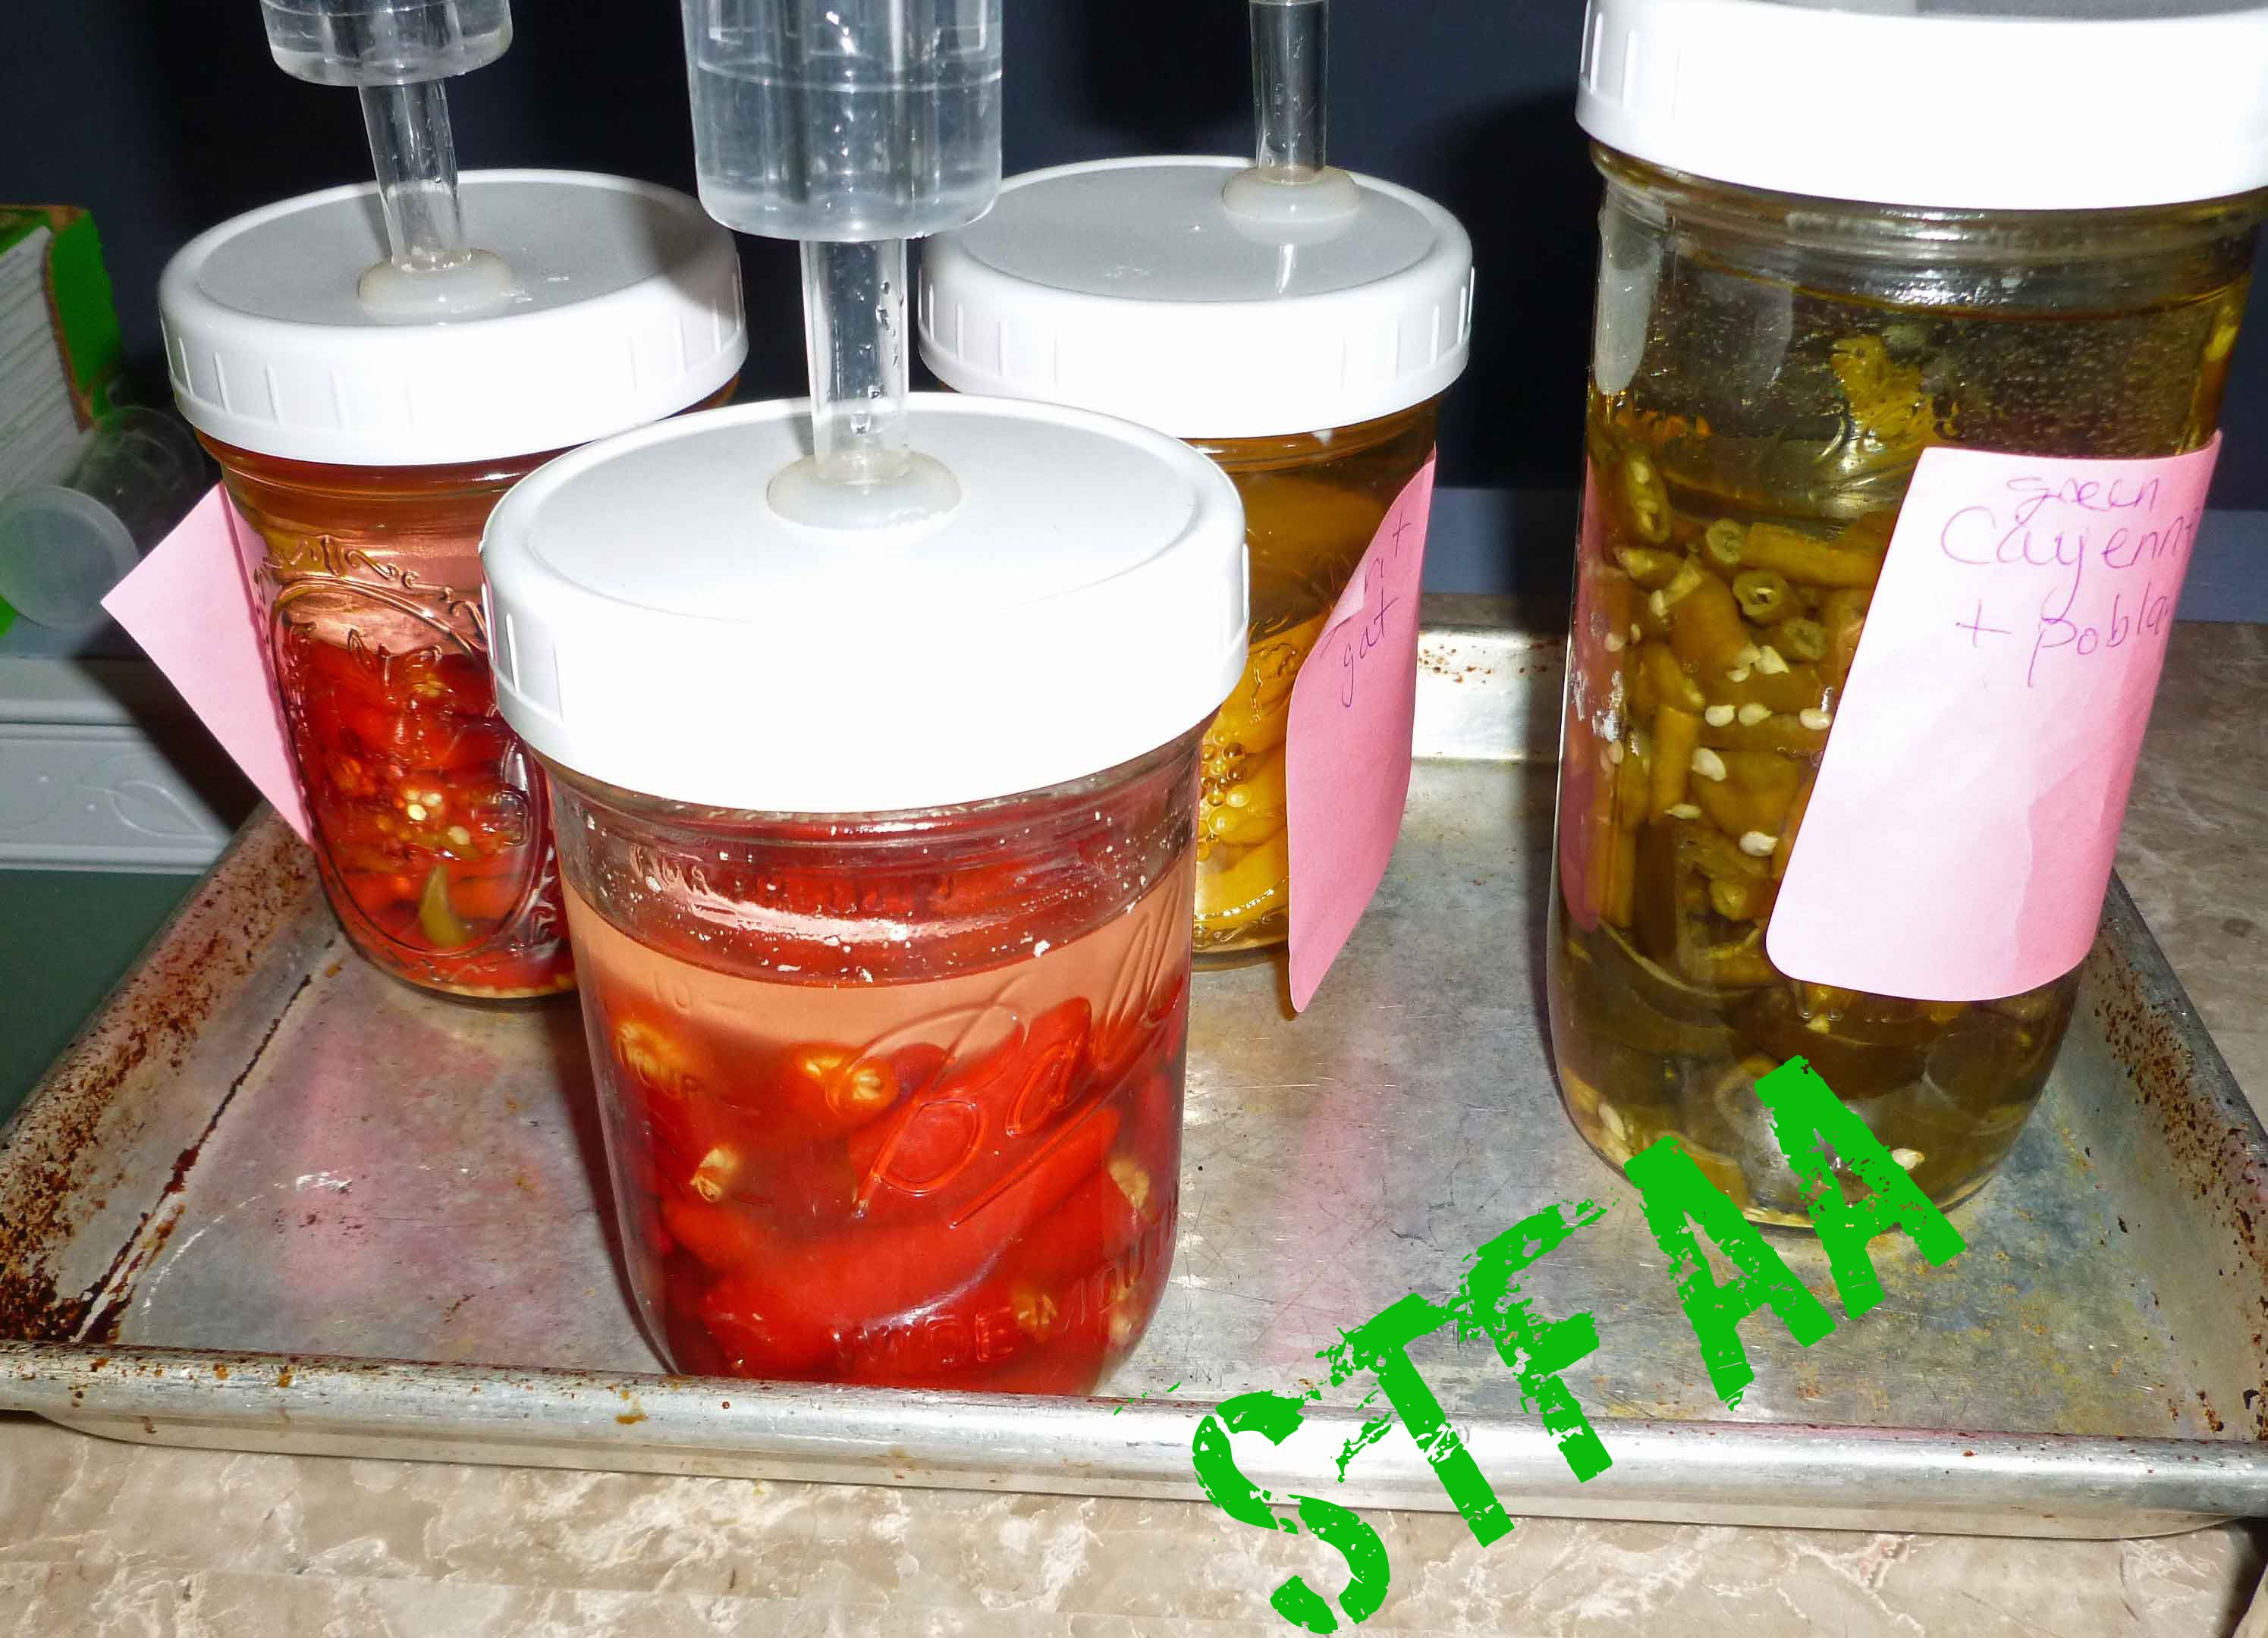
I had to learn to ferment when I lost corn because I wasn’t sure how I could manage without hot sauce. You can make hot sauce without fermenting, but if you want a Tabasco or Sriracha style sauce, fermenting is necessary. Fermenting is easier than it looks. You don’t really need airlock lids for your mason jars but it makes your life a lot easier because you don’t have to babysit the ferments. The airlock allows the carbon dioxide that builds up from the fermenting processing to be expelled, without allowing fresh air that could have yeast or mold spores to get in. Releasing the carbon dioxide is important because if you have the lid of a mason jar tightly sealed, the glass can crack under pressure and let pepper juice leak all over your counter. Ask me how I know. You can get the lids online, if you do a search a bunch of options will pop up, or you can commit to “burping” your ferments every day. Some people use a non-latex nitrile medical glove over the top of the jar and put a pin prick in a finger, but I’m not so sure about doing that in the context of a corn allergy, therefore I use the airlock lids as showing in the pictures below. You do need to make sure that the peppers stay under the brine, so I use either glass fermentation weights or smaller 4 ounce jars that I can fill with brine and weigh down the peppers in my wide mouth pint or quart jars. If the peppers rise above the brine, you are risking mold and spoilage.
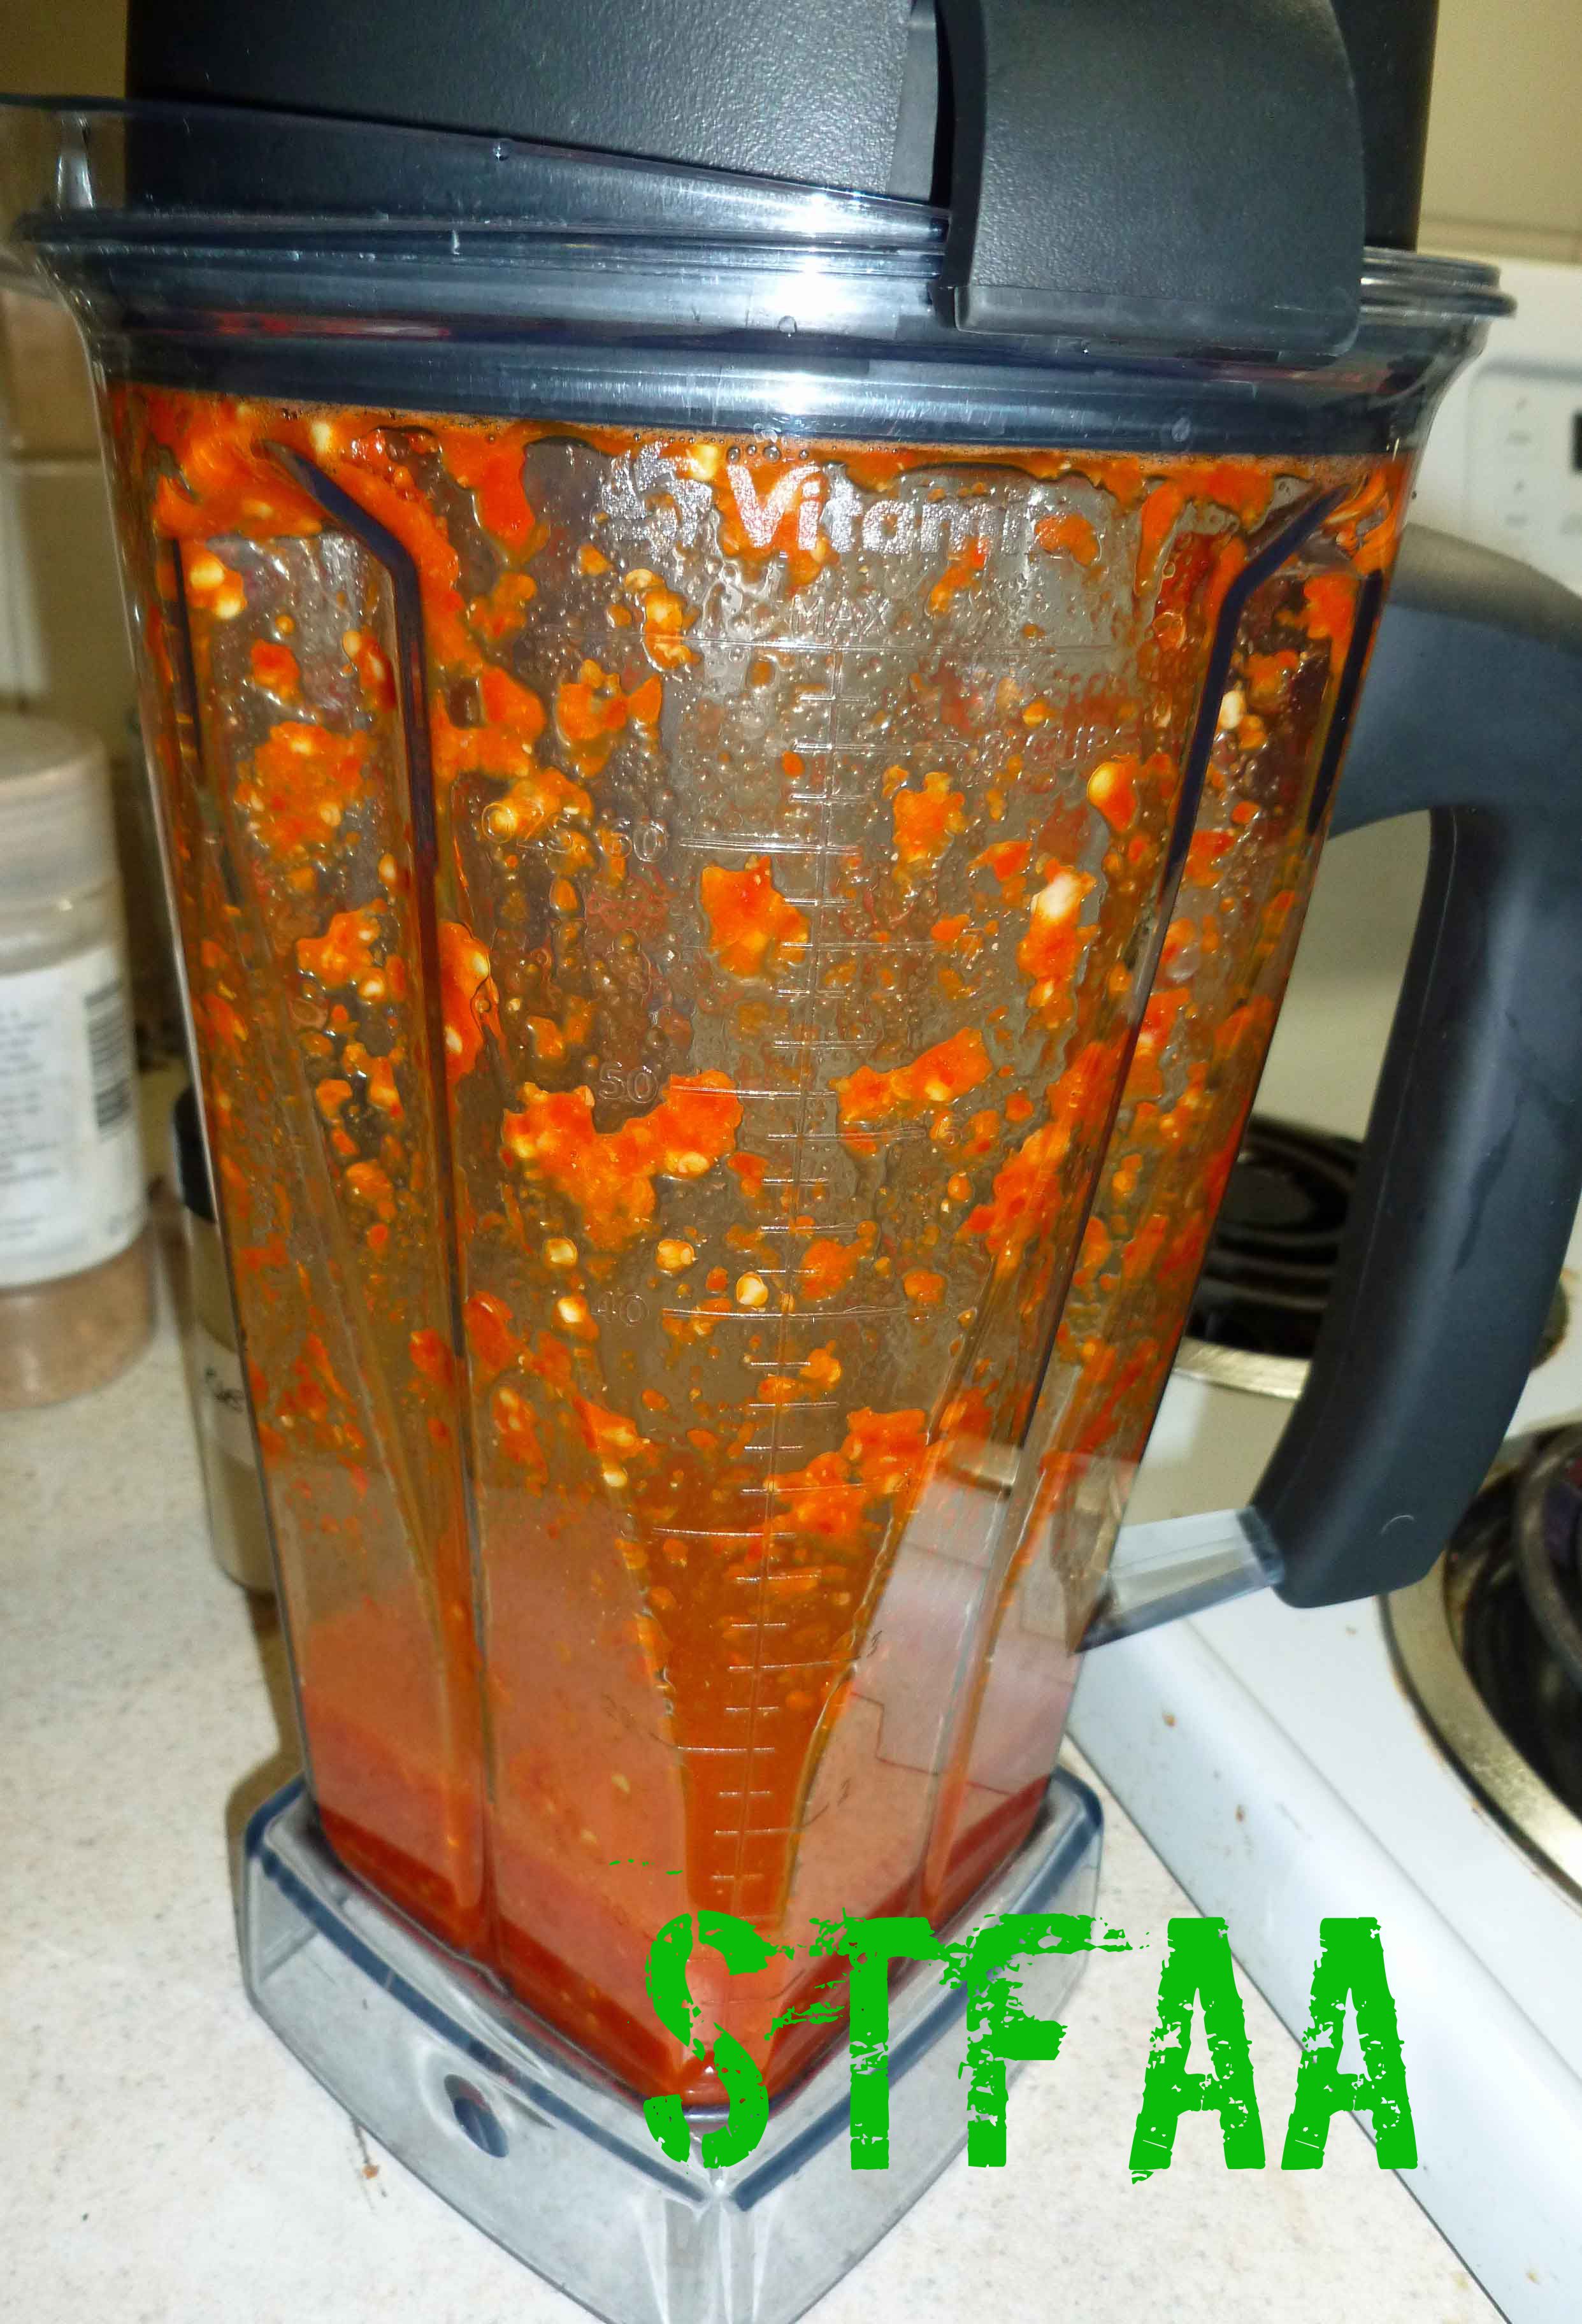
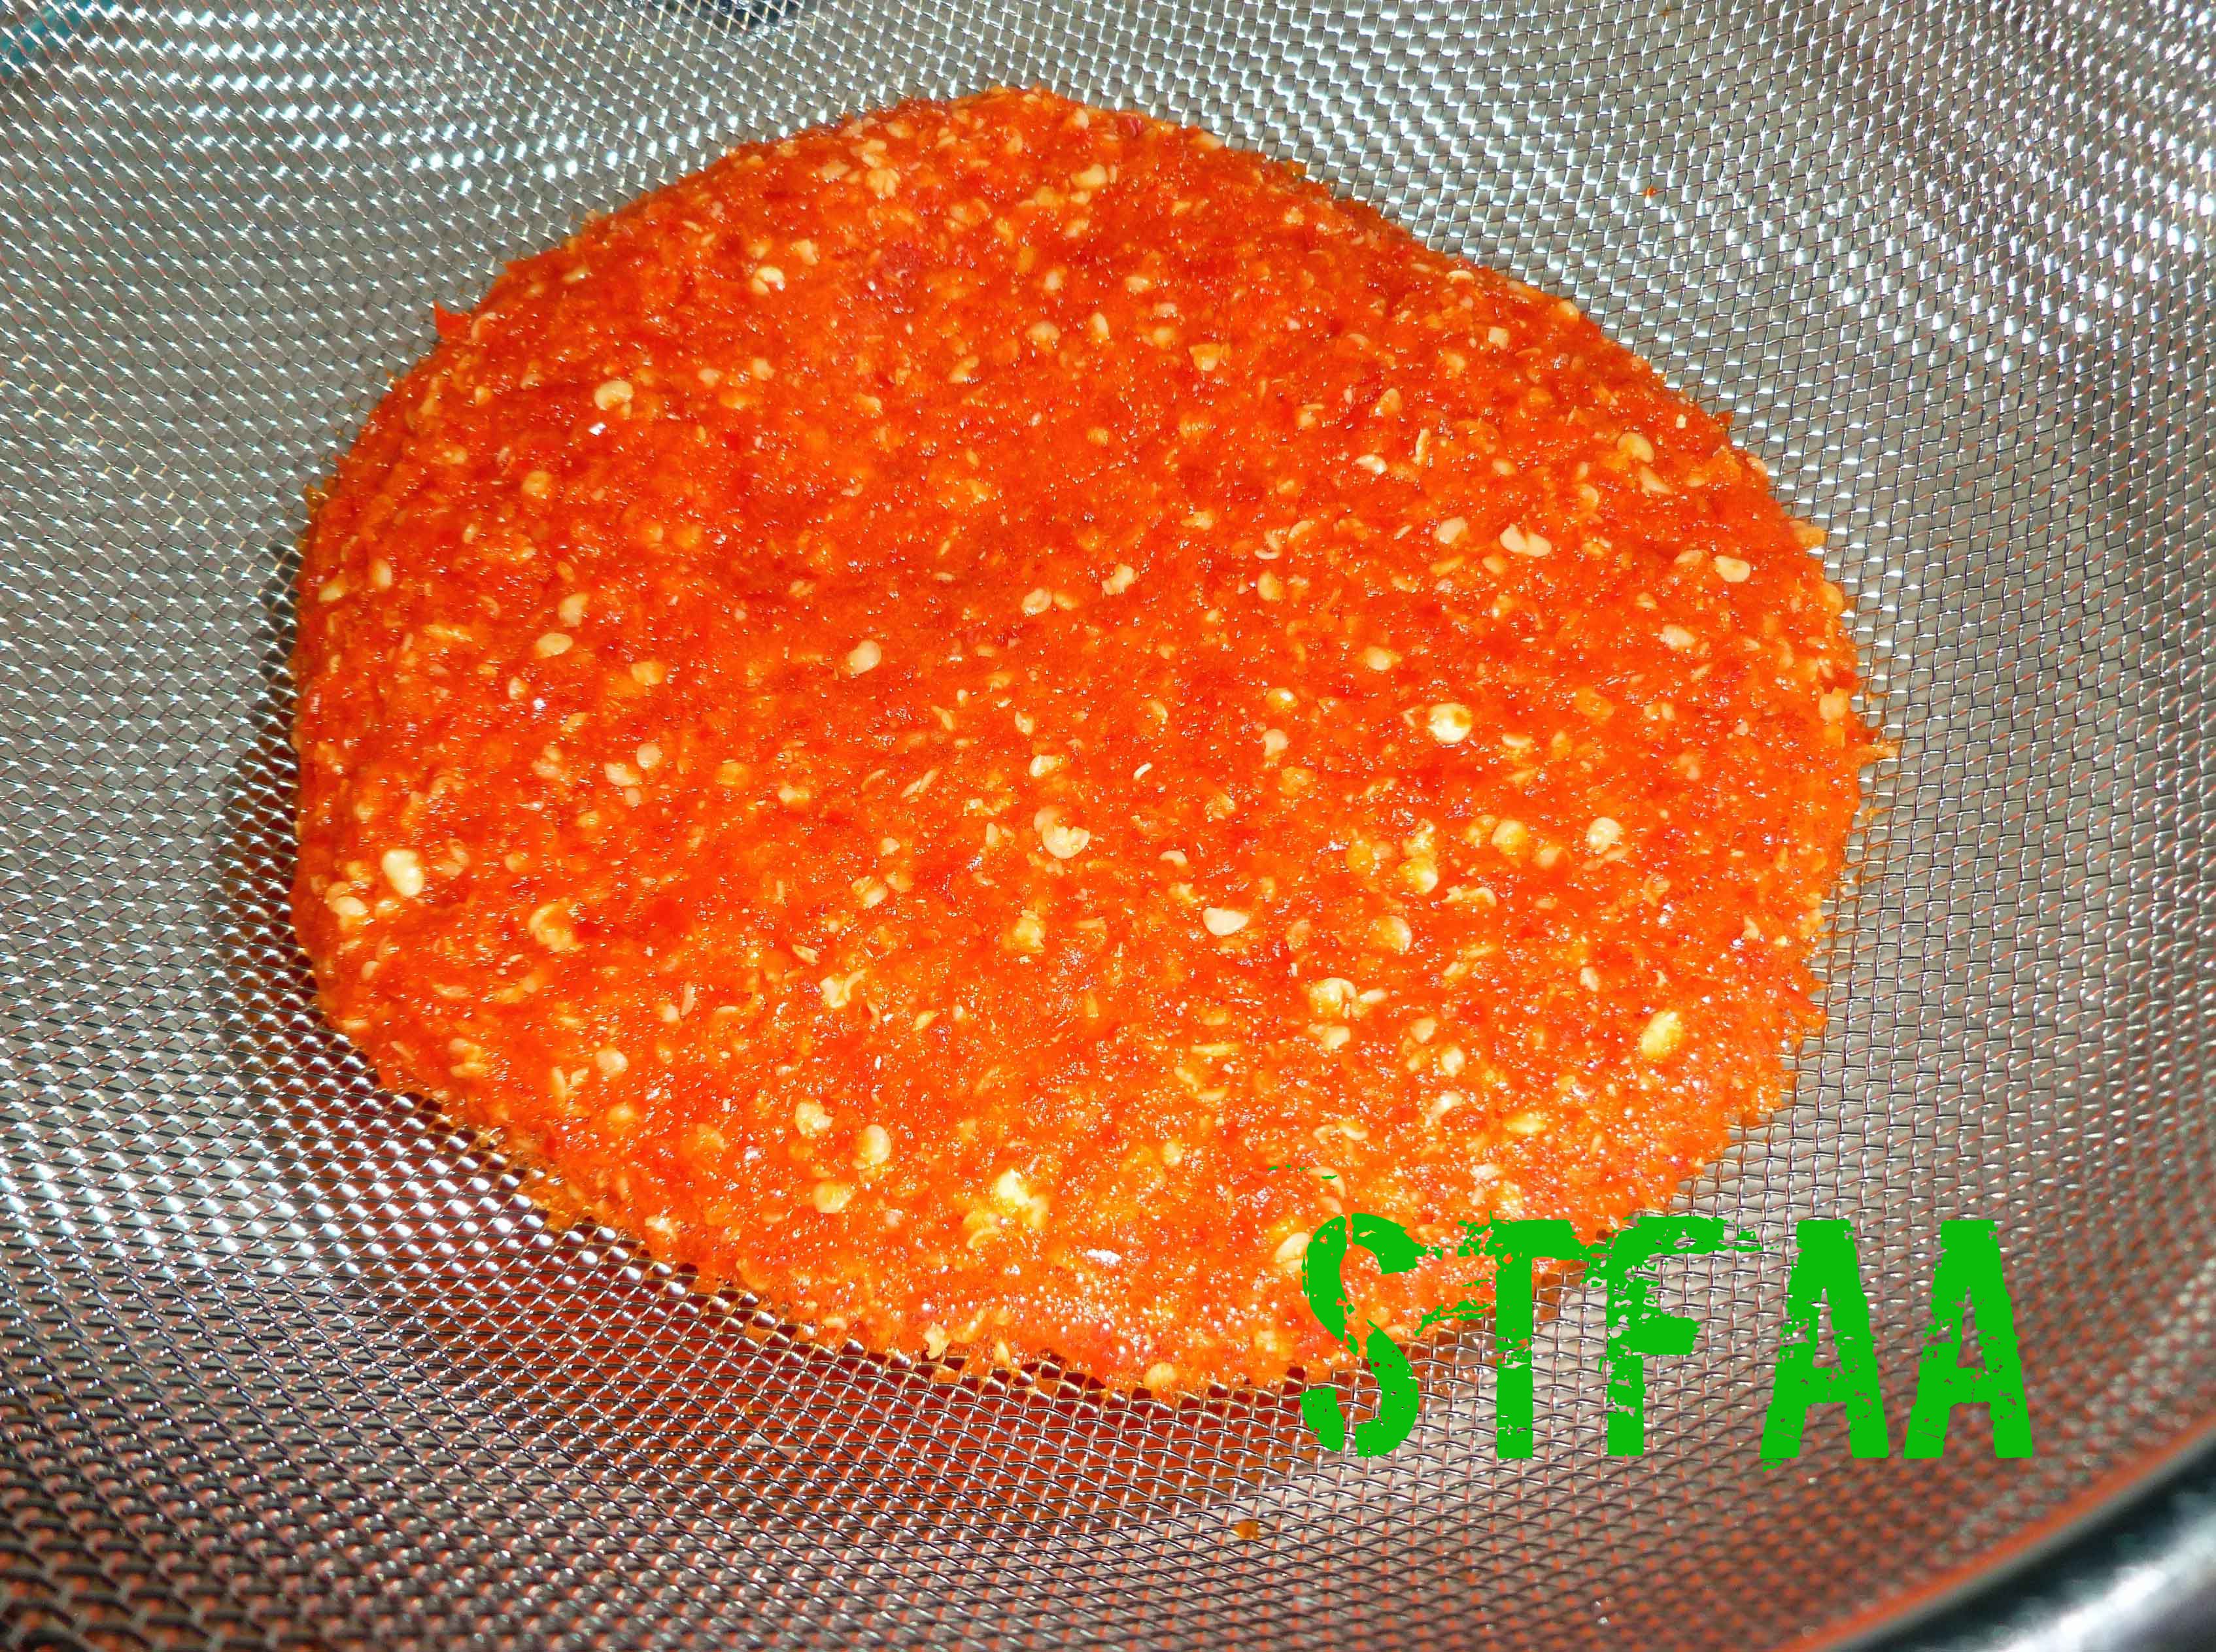
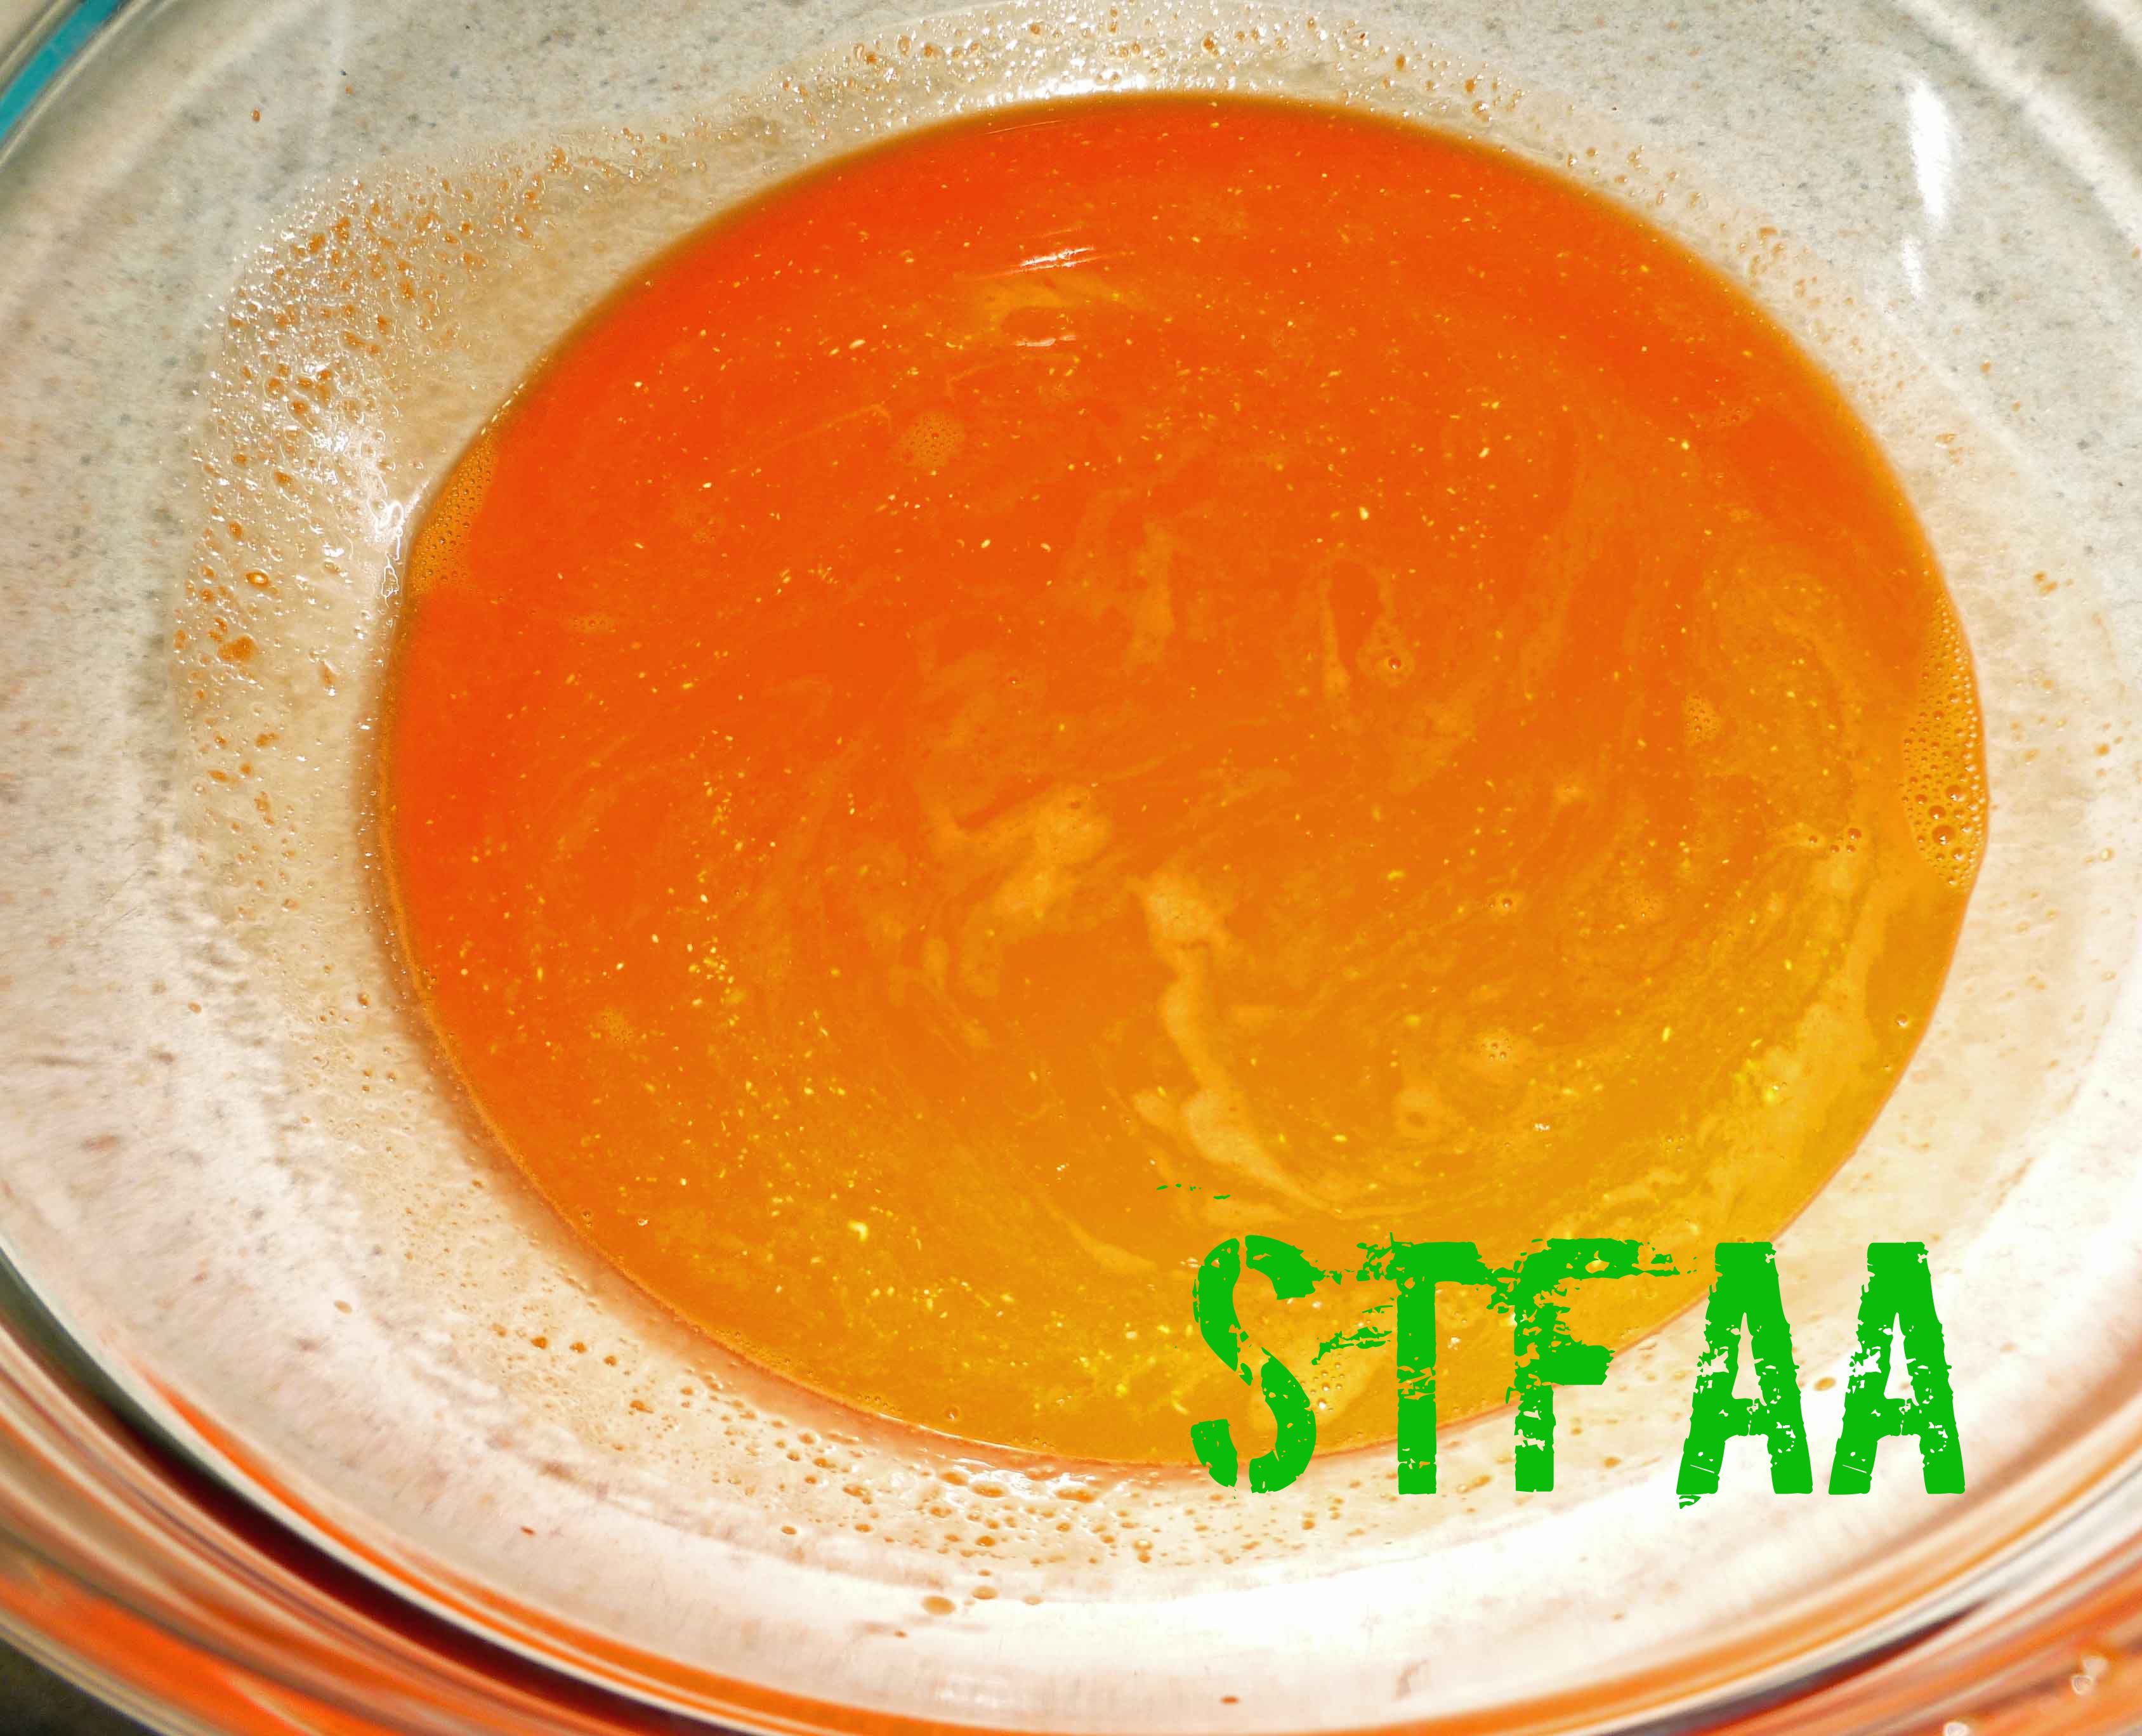
Hot peppers at the beginning of the fermenting processHot peppers at the end of the fermenting process, about 4 weeksPeppers after blendingPeppers being strainedPeppers after seeds and skins strainedCompleted Chili Lime Hot SauceChili Lime Hot Sauce
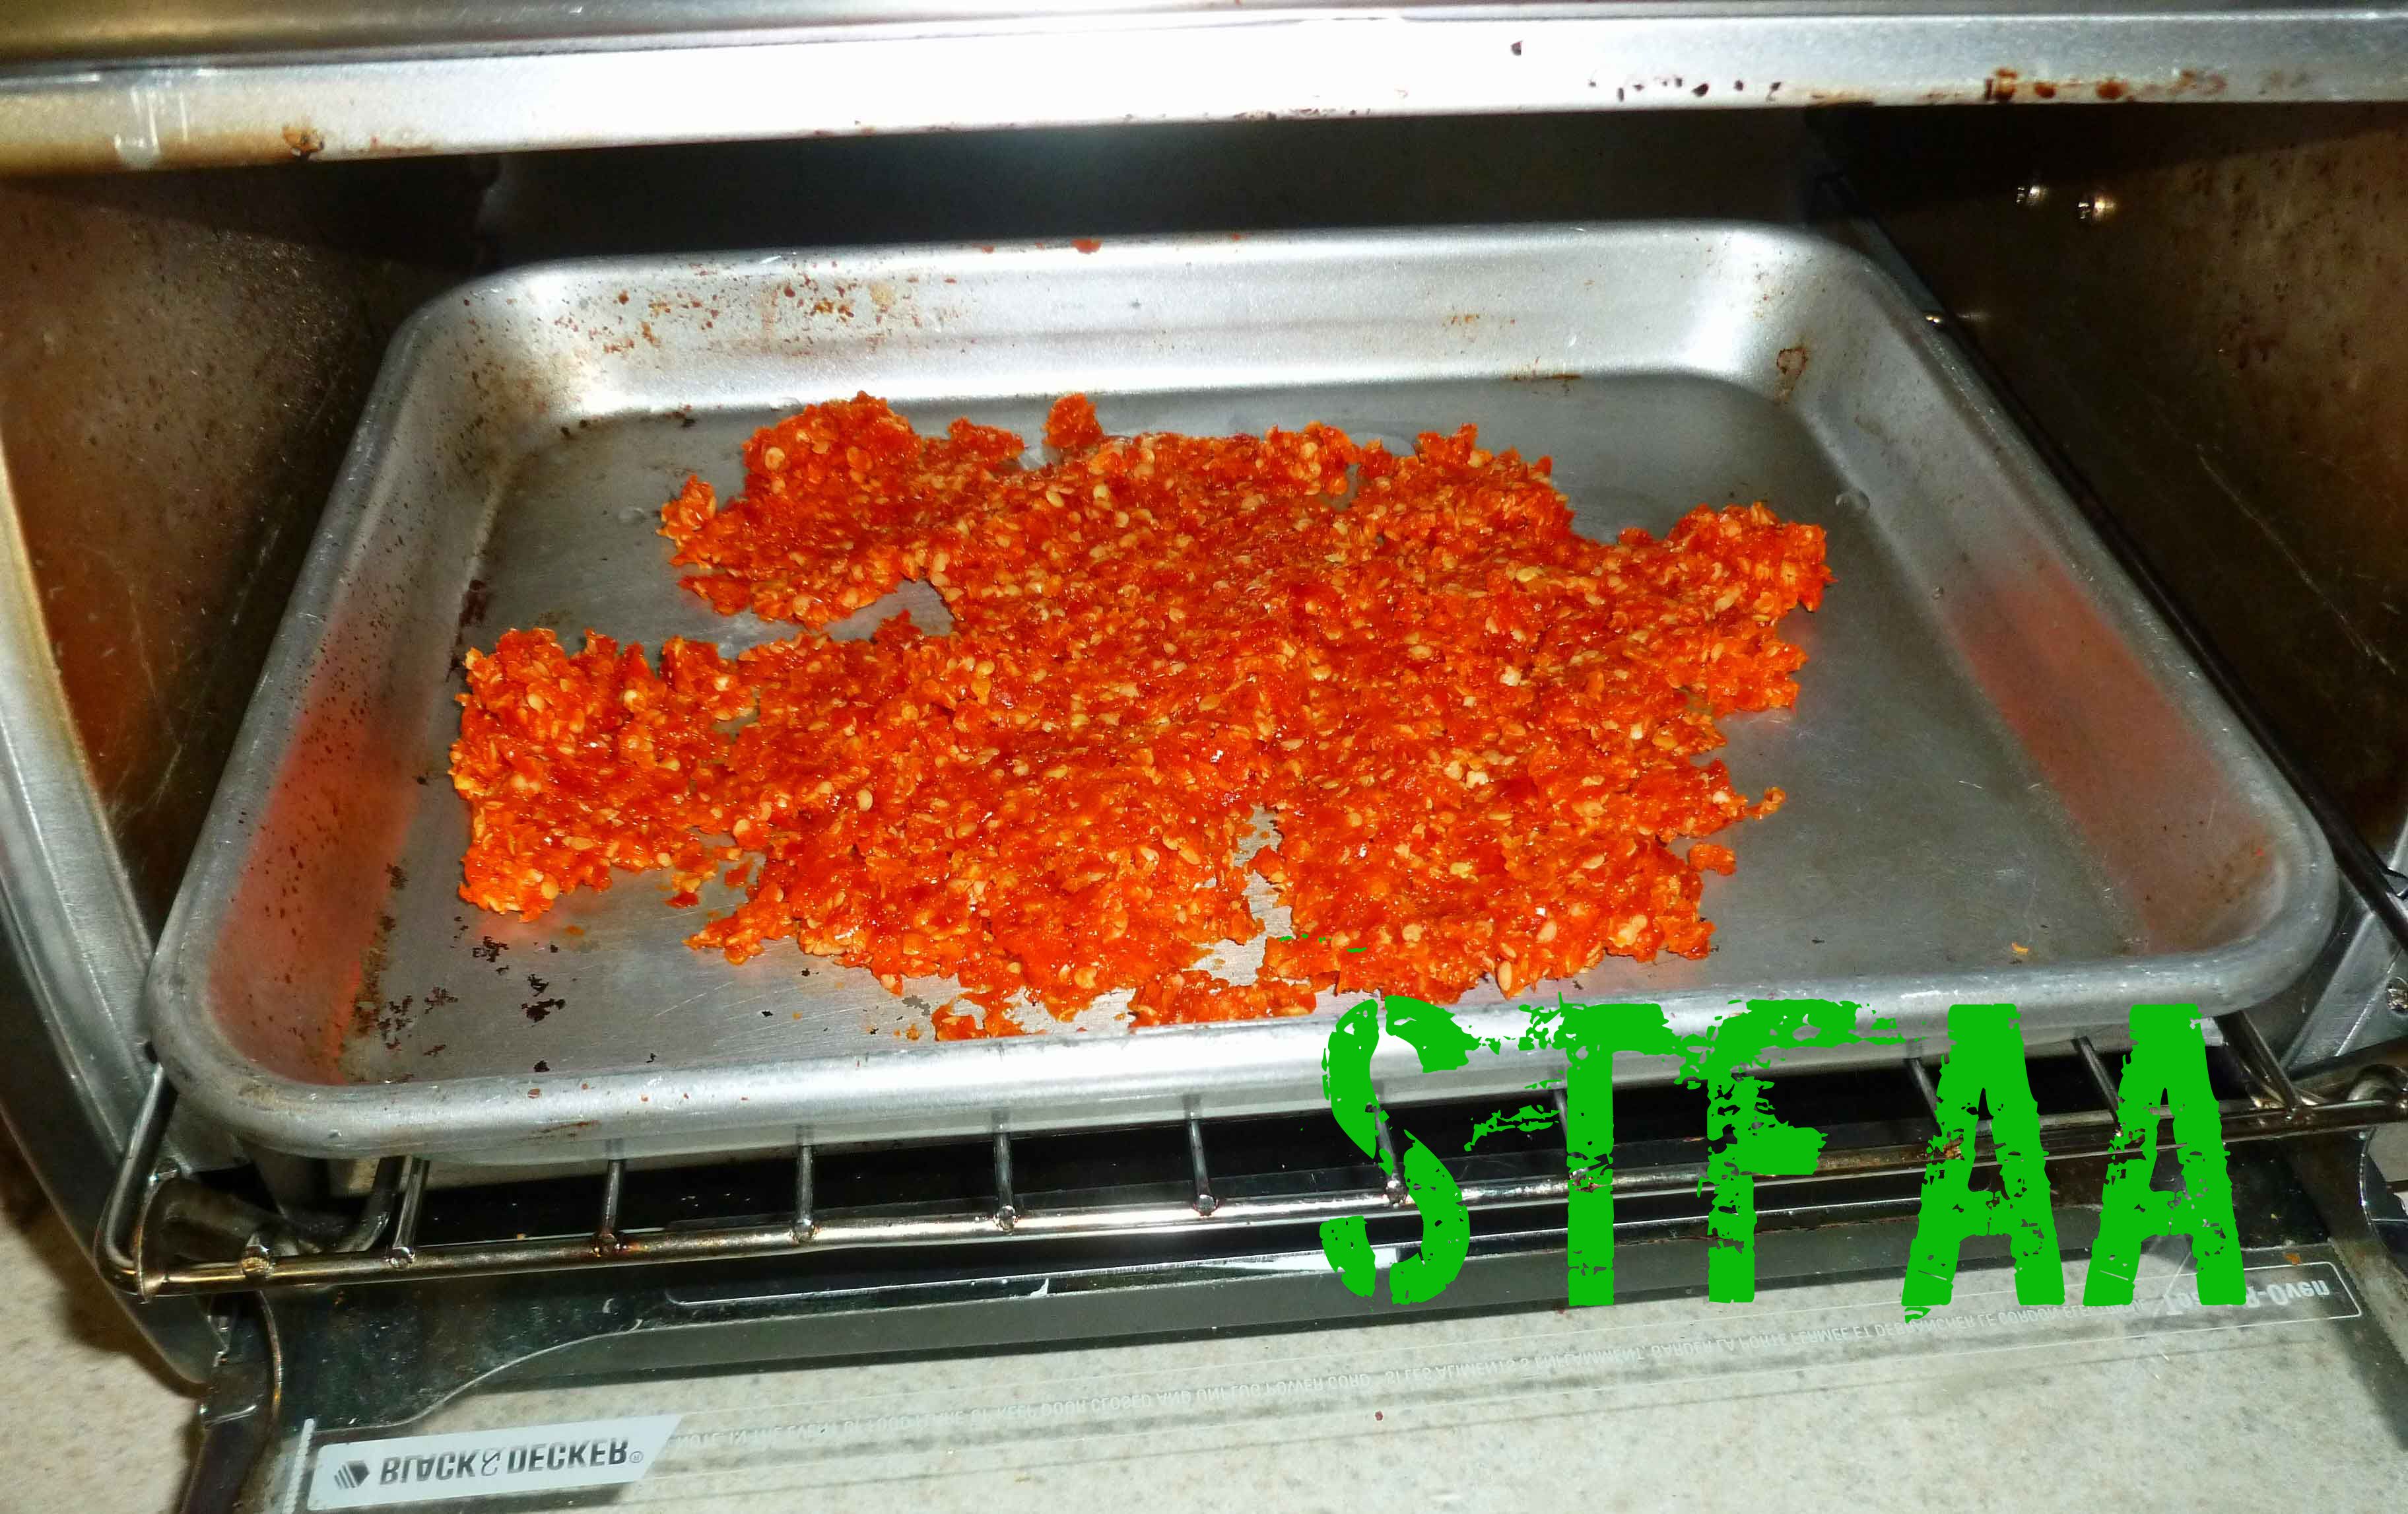
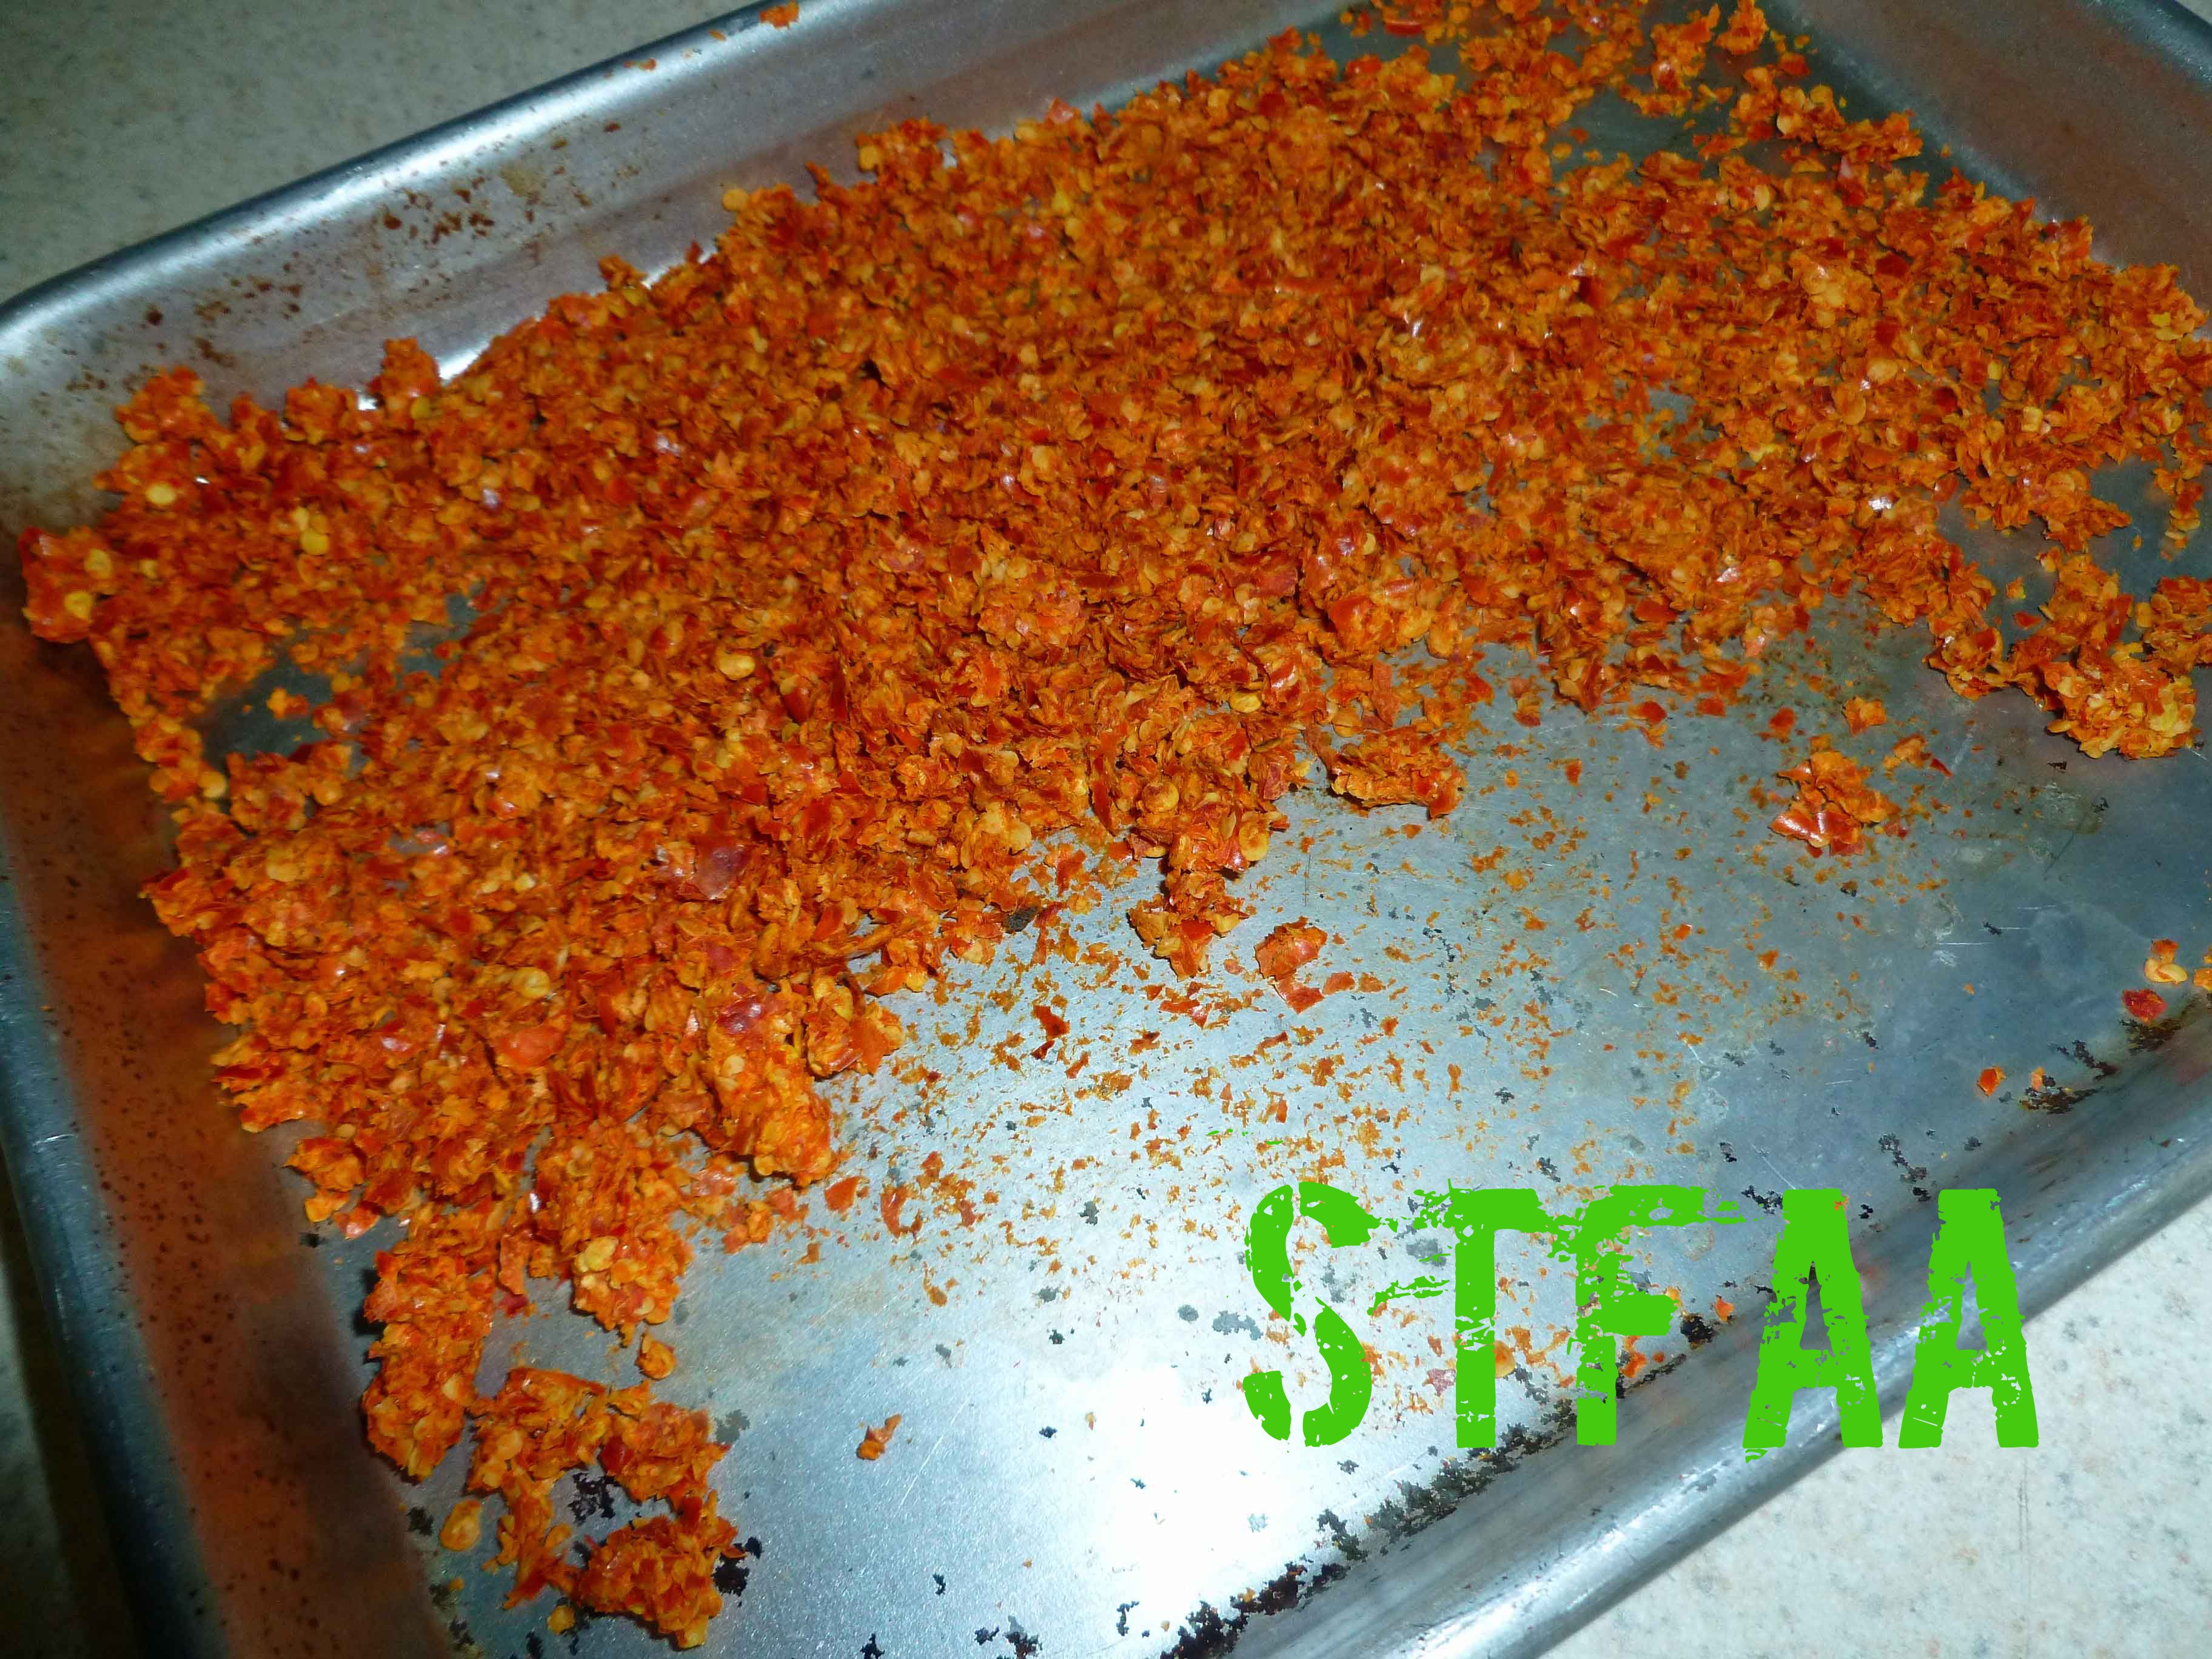
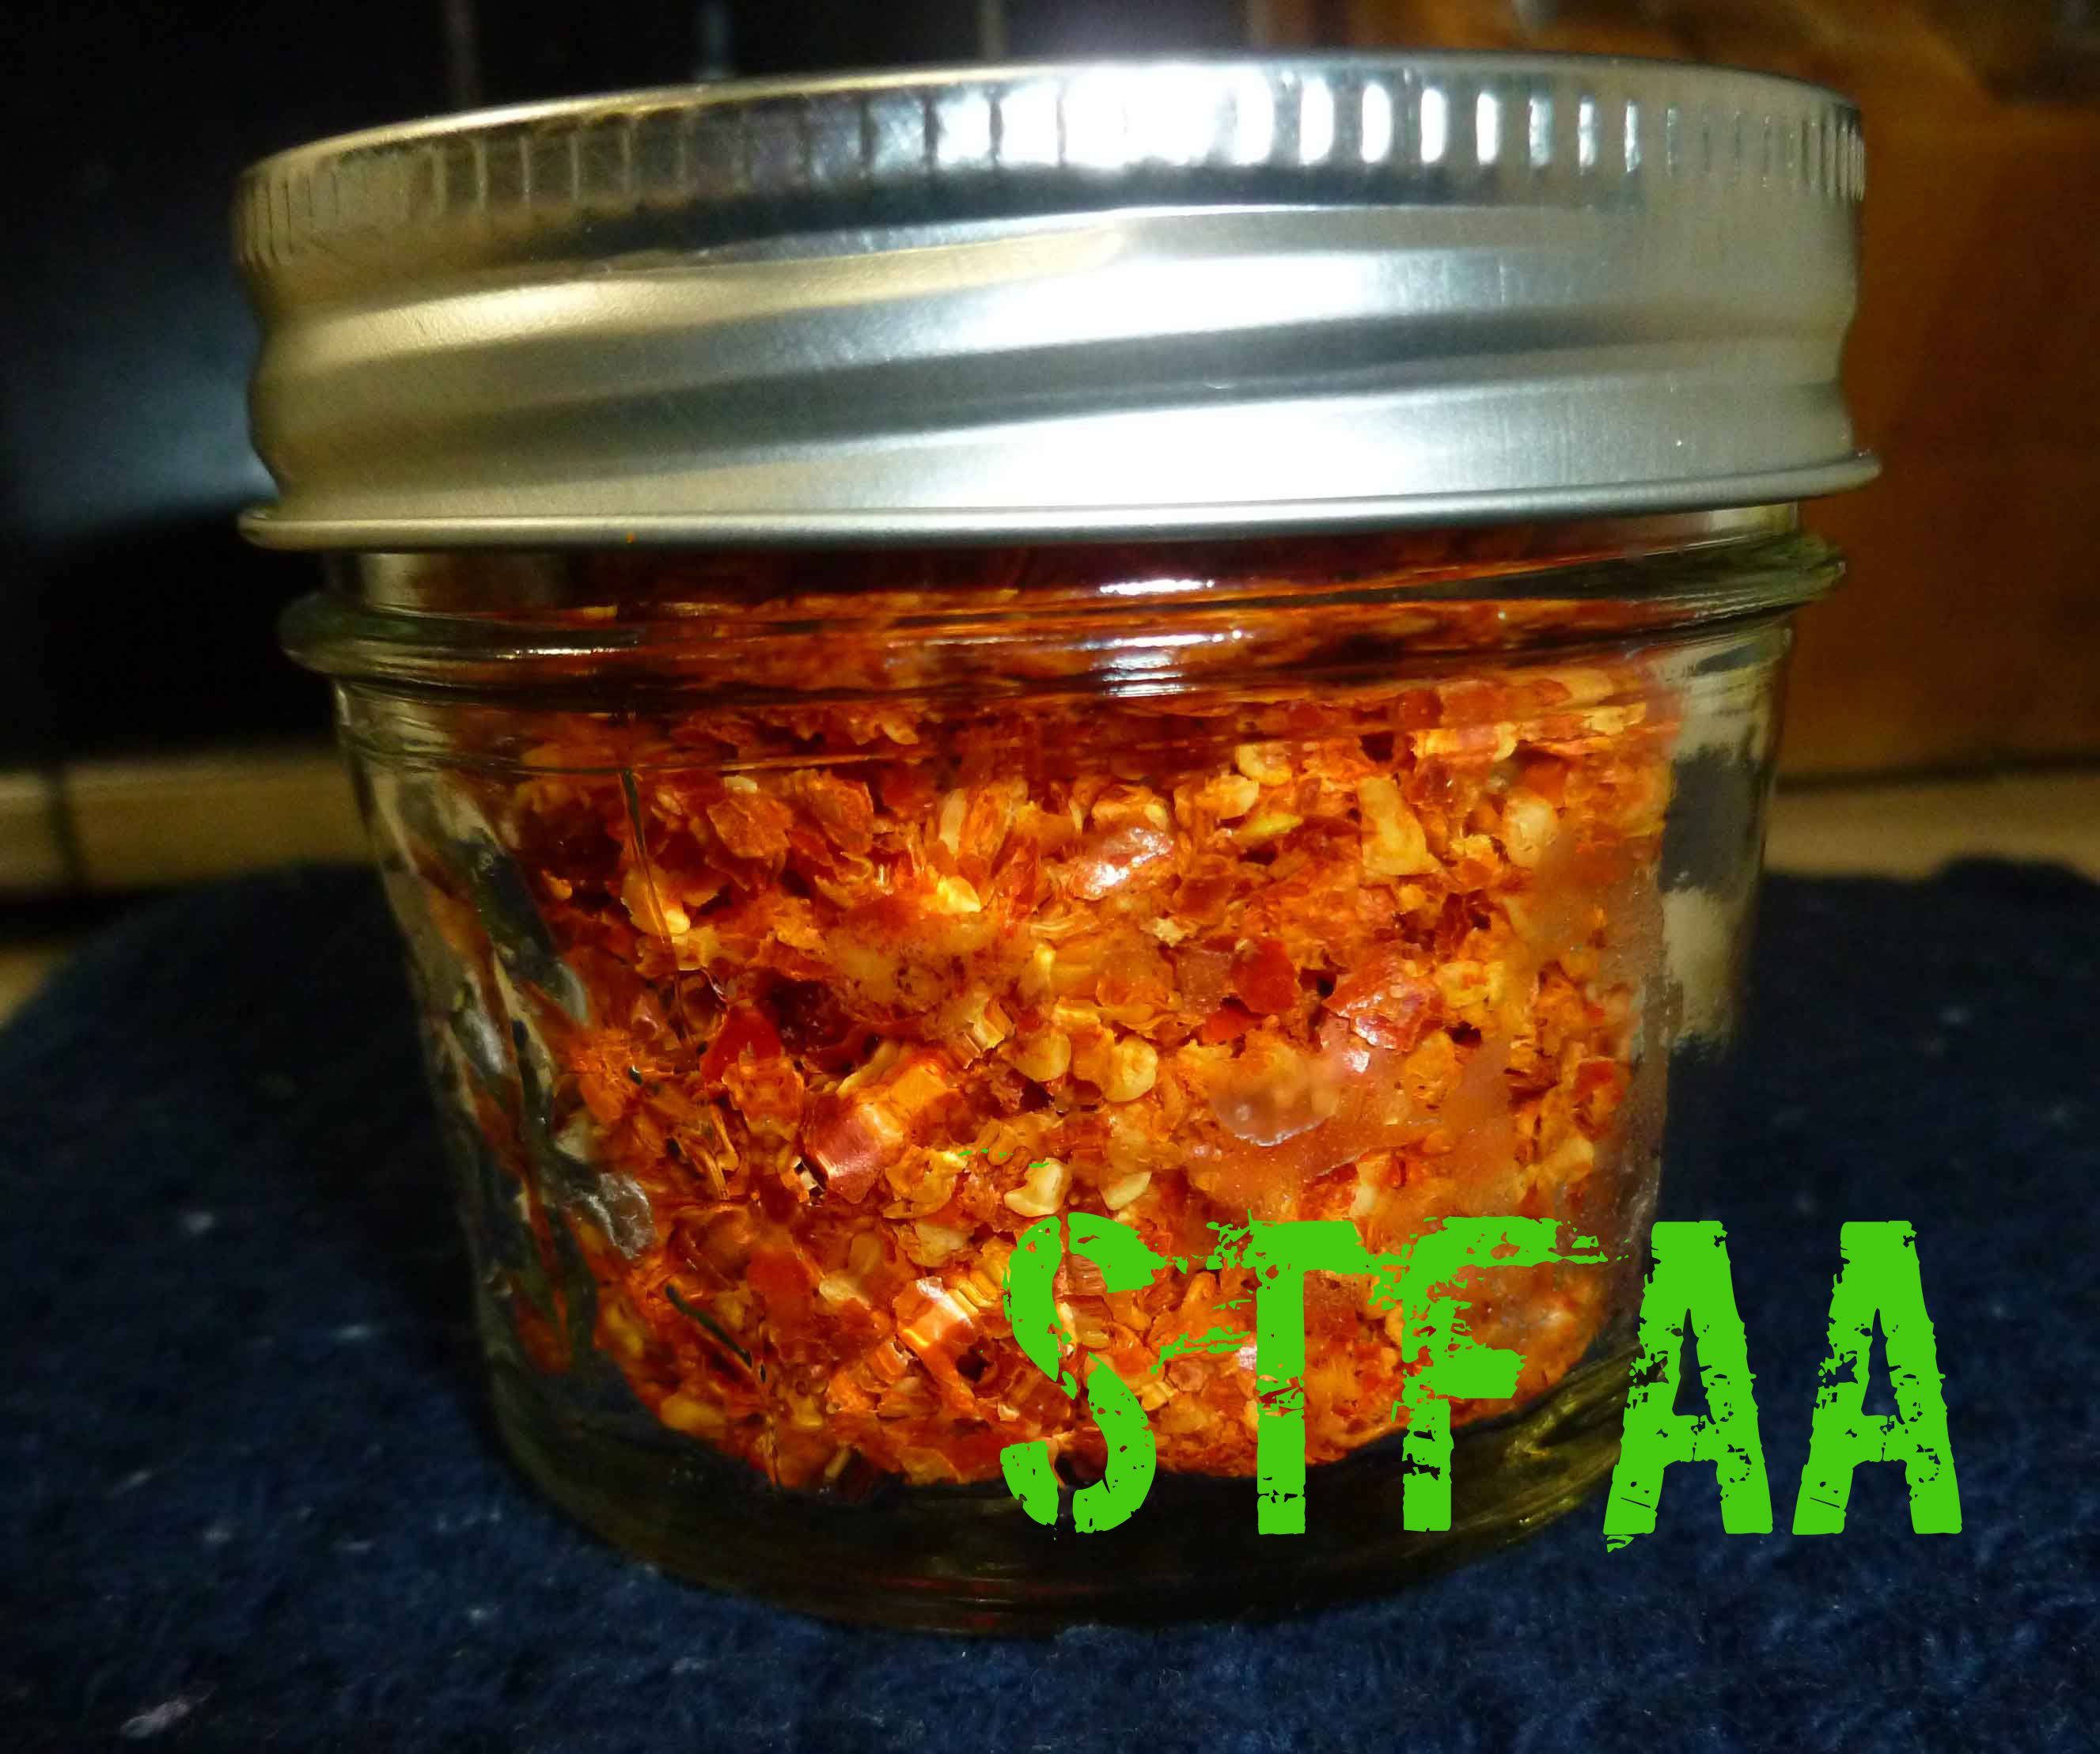
The other nice thing about making hot sauce is that you get two products for one. When you strain out the skins and seeds during the process, you can dry them in the oven or the dehydrator and get a nice crushed pepper mix to use in other spice mixes, rubs, or other recipes. No waste!
Wet chili skin and seeds going into a toaster ovenChili flakes (skins and seeds after drying)Crushed red pepper
Chili Lime Hot Sauce
Print Recipe
A hot sauce reminiscent of one of Denise’s commercial favorites in the time before corn.
1quart spring water(not tap water, it will interfere with fermentation)
1.8ouncessea salt
Hot Sauce Ingredients
1cup hot red chili peppers(I used Targu Mures, but you can use Fresno, Red Jalapenos, etc.)
4ouncestomato paste(I used my homemade tomato paste)
1clovegarlic
3limes, juiced and divided
1Tablespoonbrown sugar
1teaspoon brown sugar
1/4teaspoonsalt
Servings: ounces
Instructions
Fermenting the Peppers
Make brine by mixing spring water and salt in a container until salt is dissolved.
Wash peppers and cut the stems off so that the seed cavity is visible. Placed washed peppers in pint jar and add glass weight or 4 ounce jar. Add brine until the weight is covered with brine by at least half an inch, or cover with brine and add 4 ounce jar full of brine to weight down peppers making sure that all peppers are submerged in brine. Place airlock on jar and add brine to airlock to seal.
Let ferment for 2 to 4 weeks at room temperature, checking daily to make sure the brine levels are okay. You may need to add brine as time goes on as the peppers must stay submerged at all times. If the peppers do not stay submerged, they could develop mold and you’ll need to throw it out and start all over.
Making the Hot Sauce
Once your peppers are fermented, remove the airlock and and glass weight or glass jar. Drain brine. Place the peppers in a blender with the garlic clove and the juice of 1 lime.
Blend until the peppers are pureed, but not until the seeds have disappeared if you have a high performance blender. You want to leave the seeds whole enough to strain out.
Once you have pureed your peppers, place the puree in a fine mesh strainer over a bowl and use a spatula or the back of a spoon to press the liquid in your puree into the bowl, leaving the seeds and skins of the peppers behind. (Hint: dehydrate the seeds and skins remaining in the oven at the lowest temperature you can or in a dehydrator to make crushed red pepper to use in other recipes).
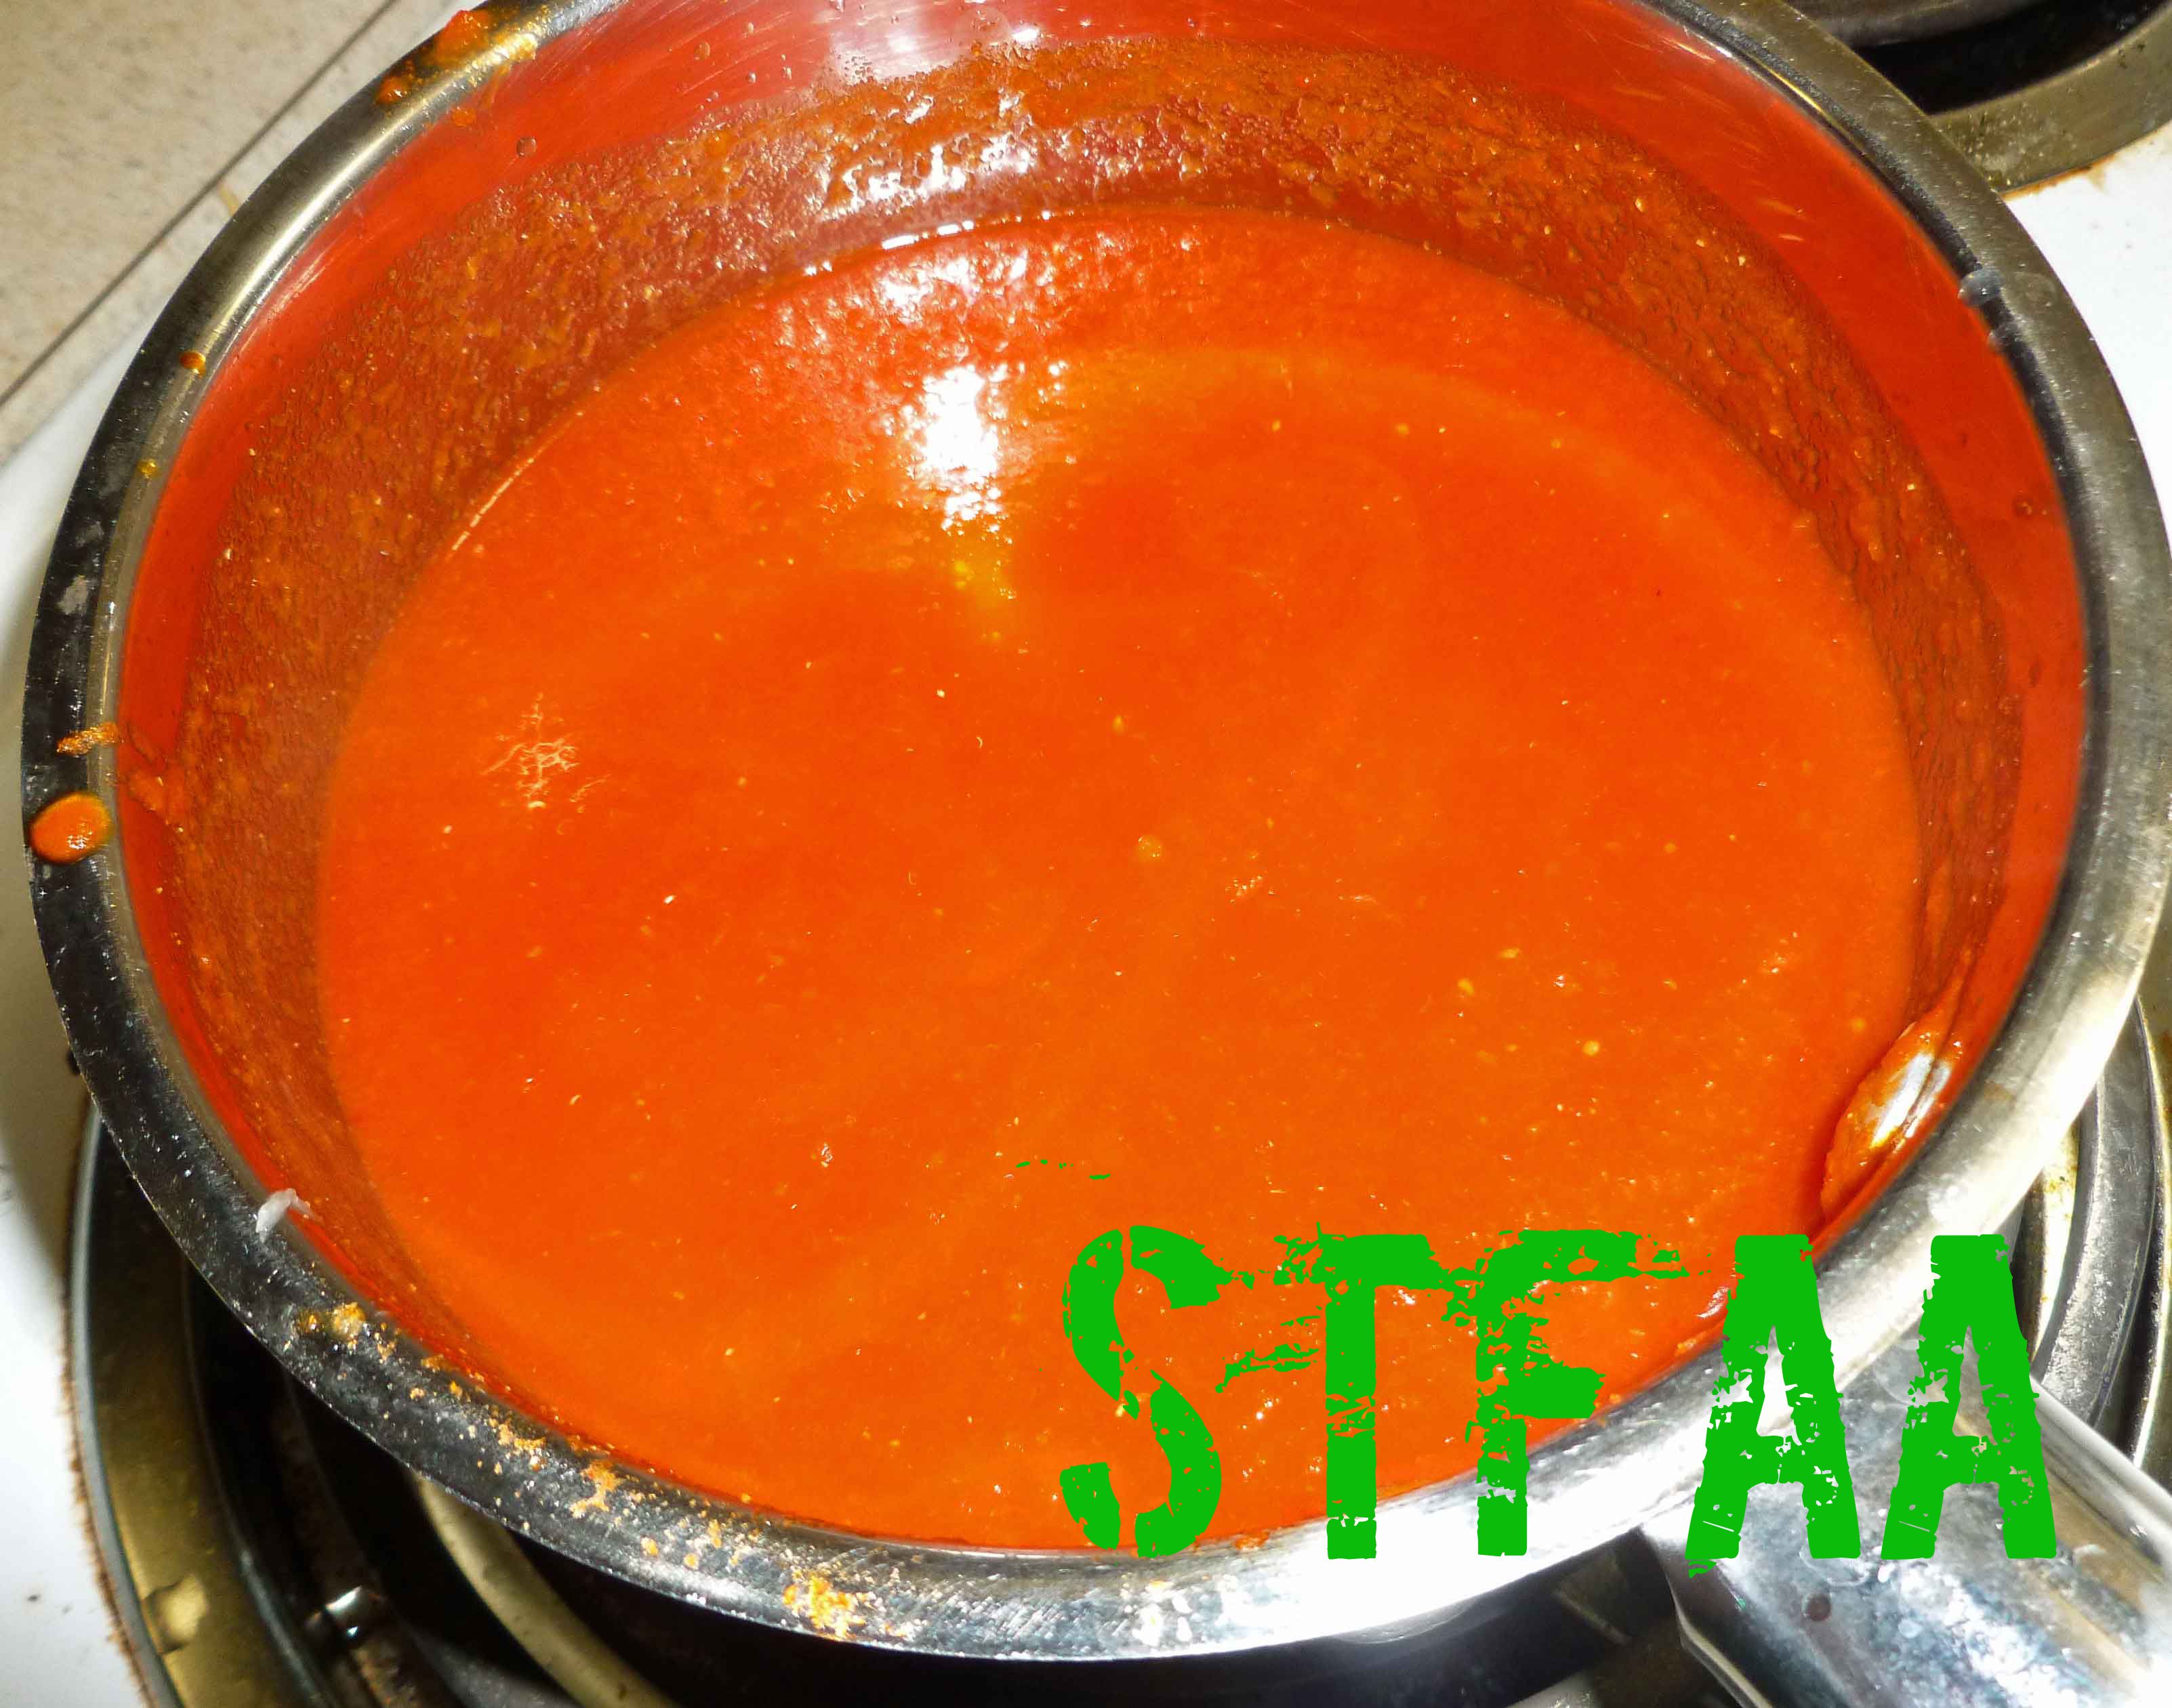
Place the strained puree in a sauce pan, with the juice of the remaining two limes, the tomato paste, the brown sugar, and the salt. Mix well and bring to a gentle boil over medium heat, and continue to gently boil stirring occasionally for 2 to 3 minutes. You can add additional sugar or salt to taste, if necessary.
Remove the sauce from heat and let cool before placing it a container to store in the refrigerator. Use it on everything.
It’s Elements Month! Yeah, you read right. Elements. Earth, Fire, Air, and Water. Four Mondays in November, four elements to be inspired by. Why not?
This year, we made a plan via Skype — monthly themes to inspire us. We used to get together more often to plan our editorial calendar, but now we do it via Skype, bi-coastally. It is distinctly possible that we were a little loopy by the time we got to November, so here you have ELEMENTS MONTH.
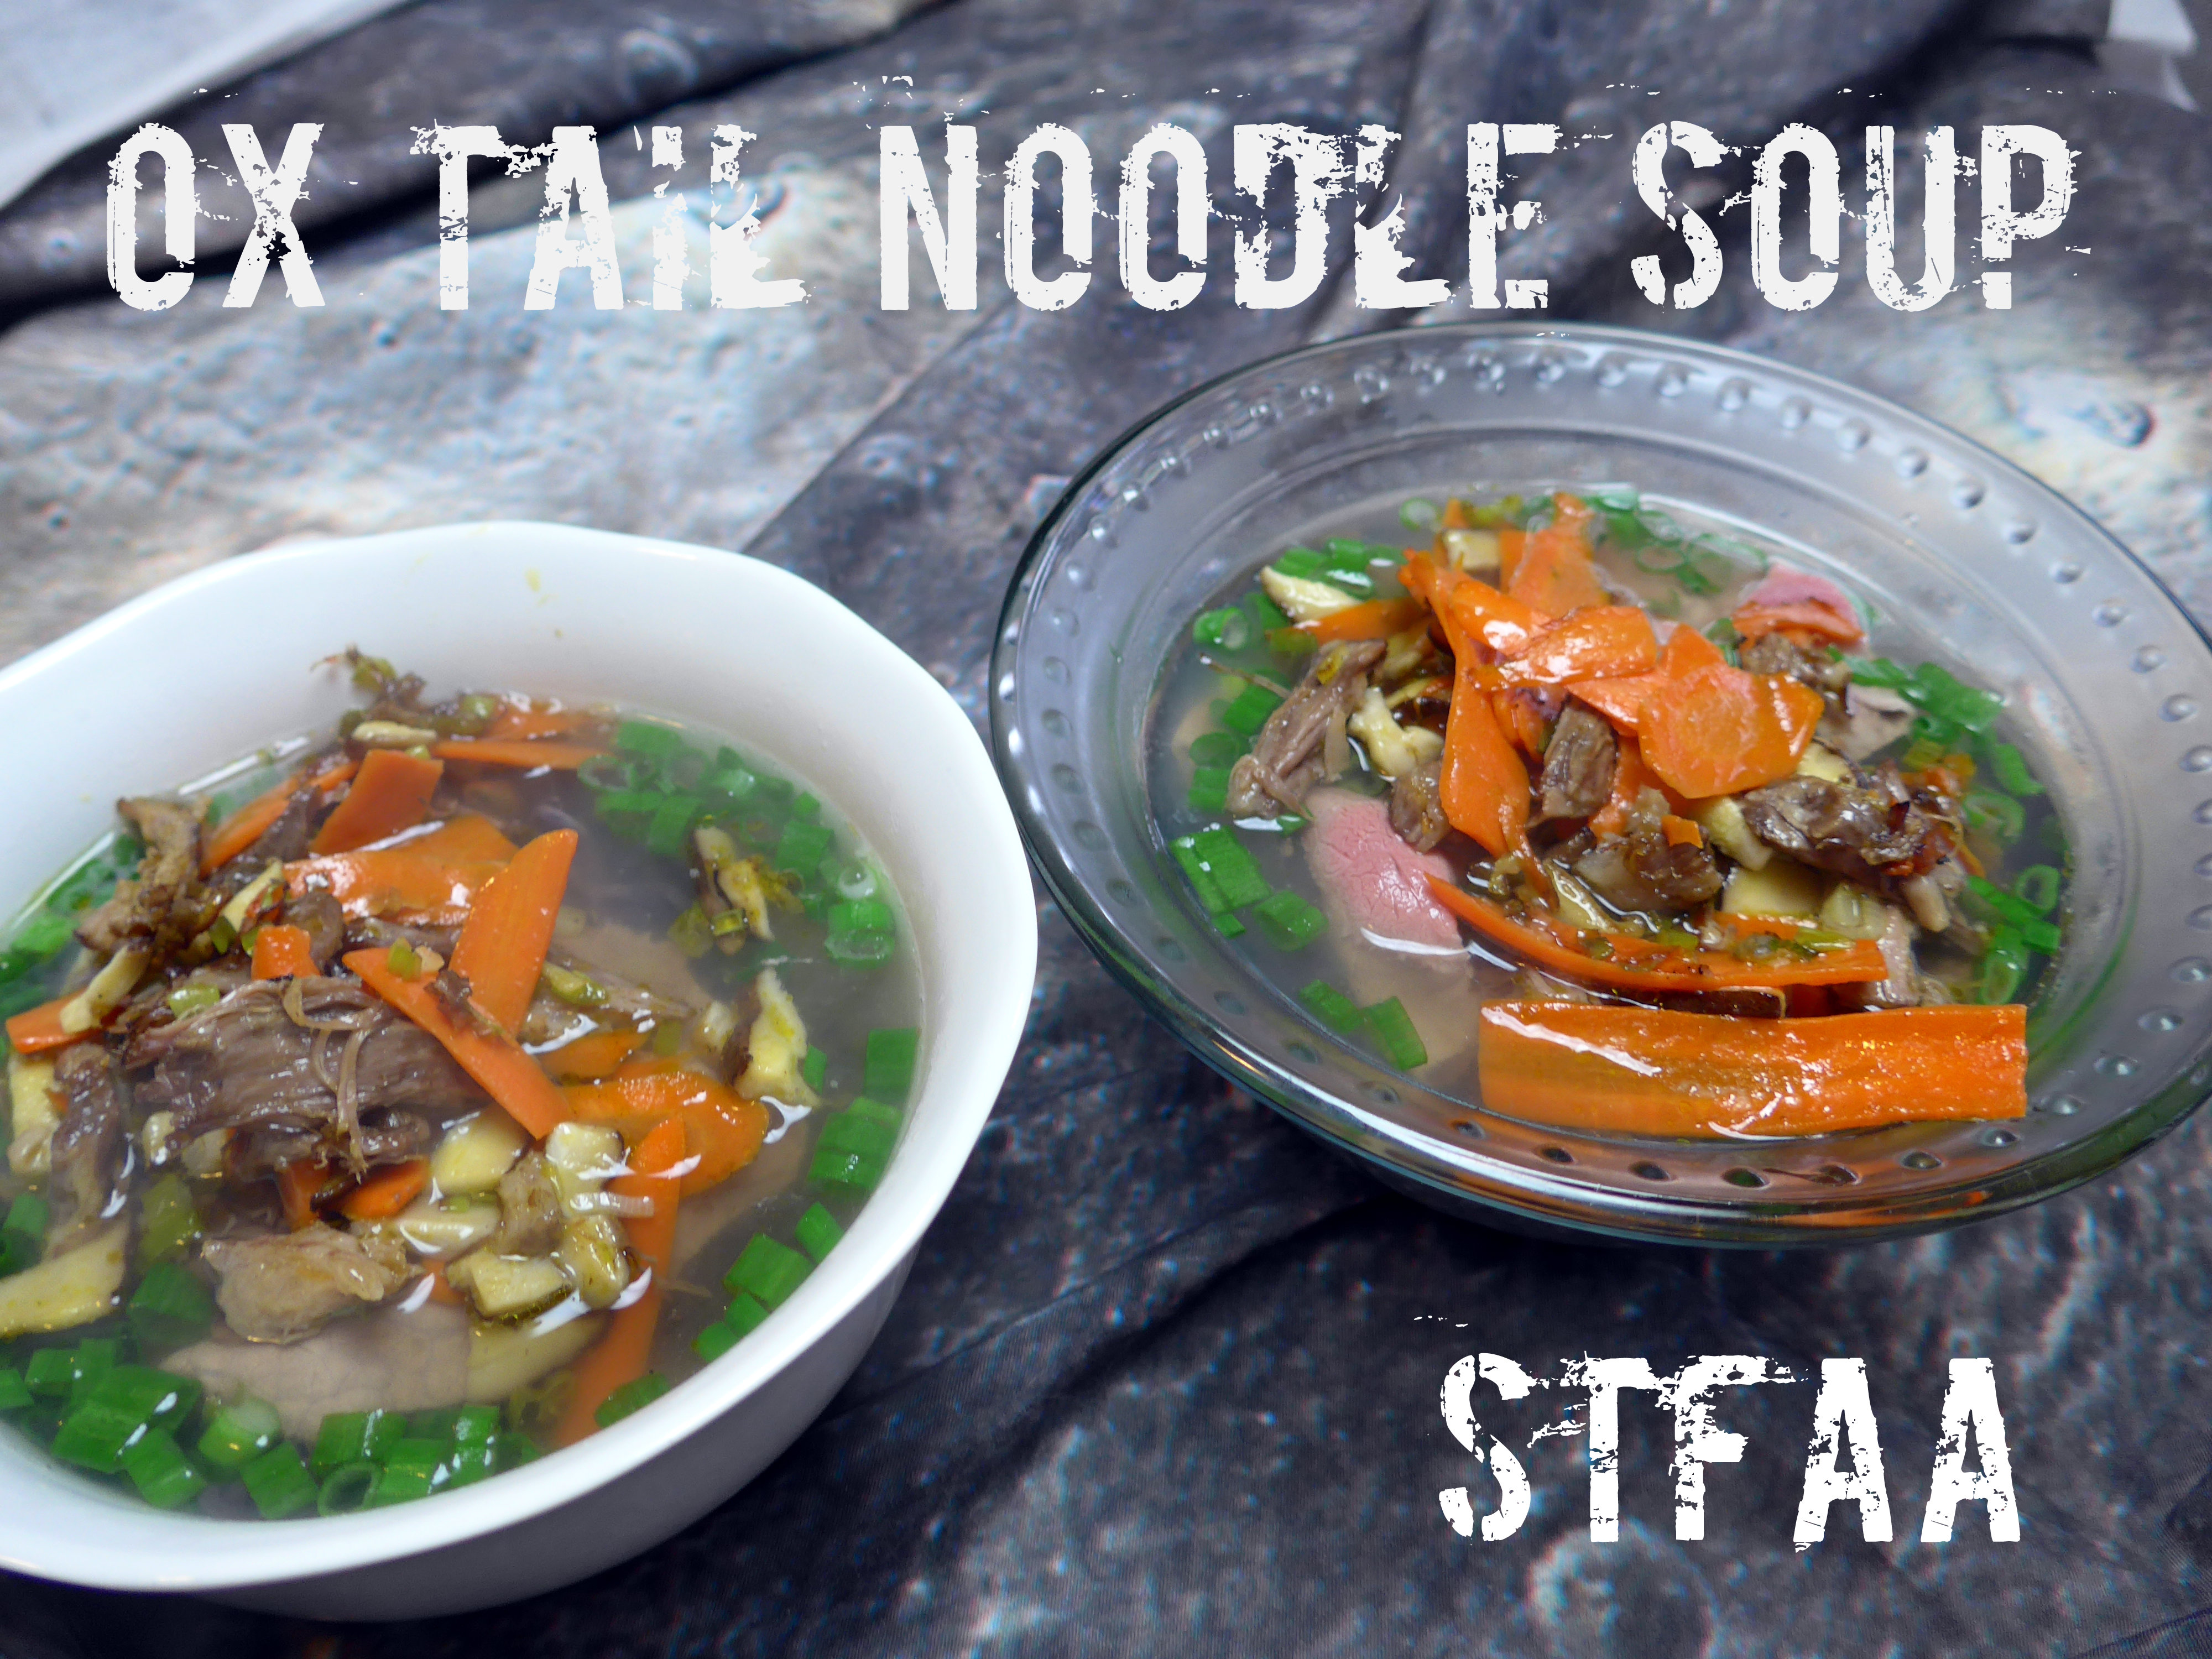
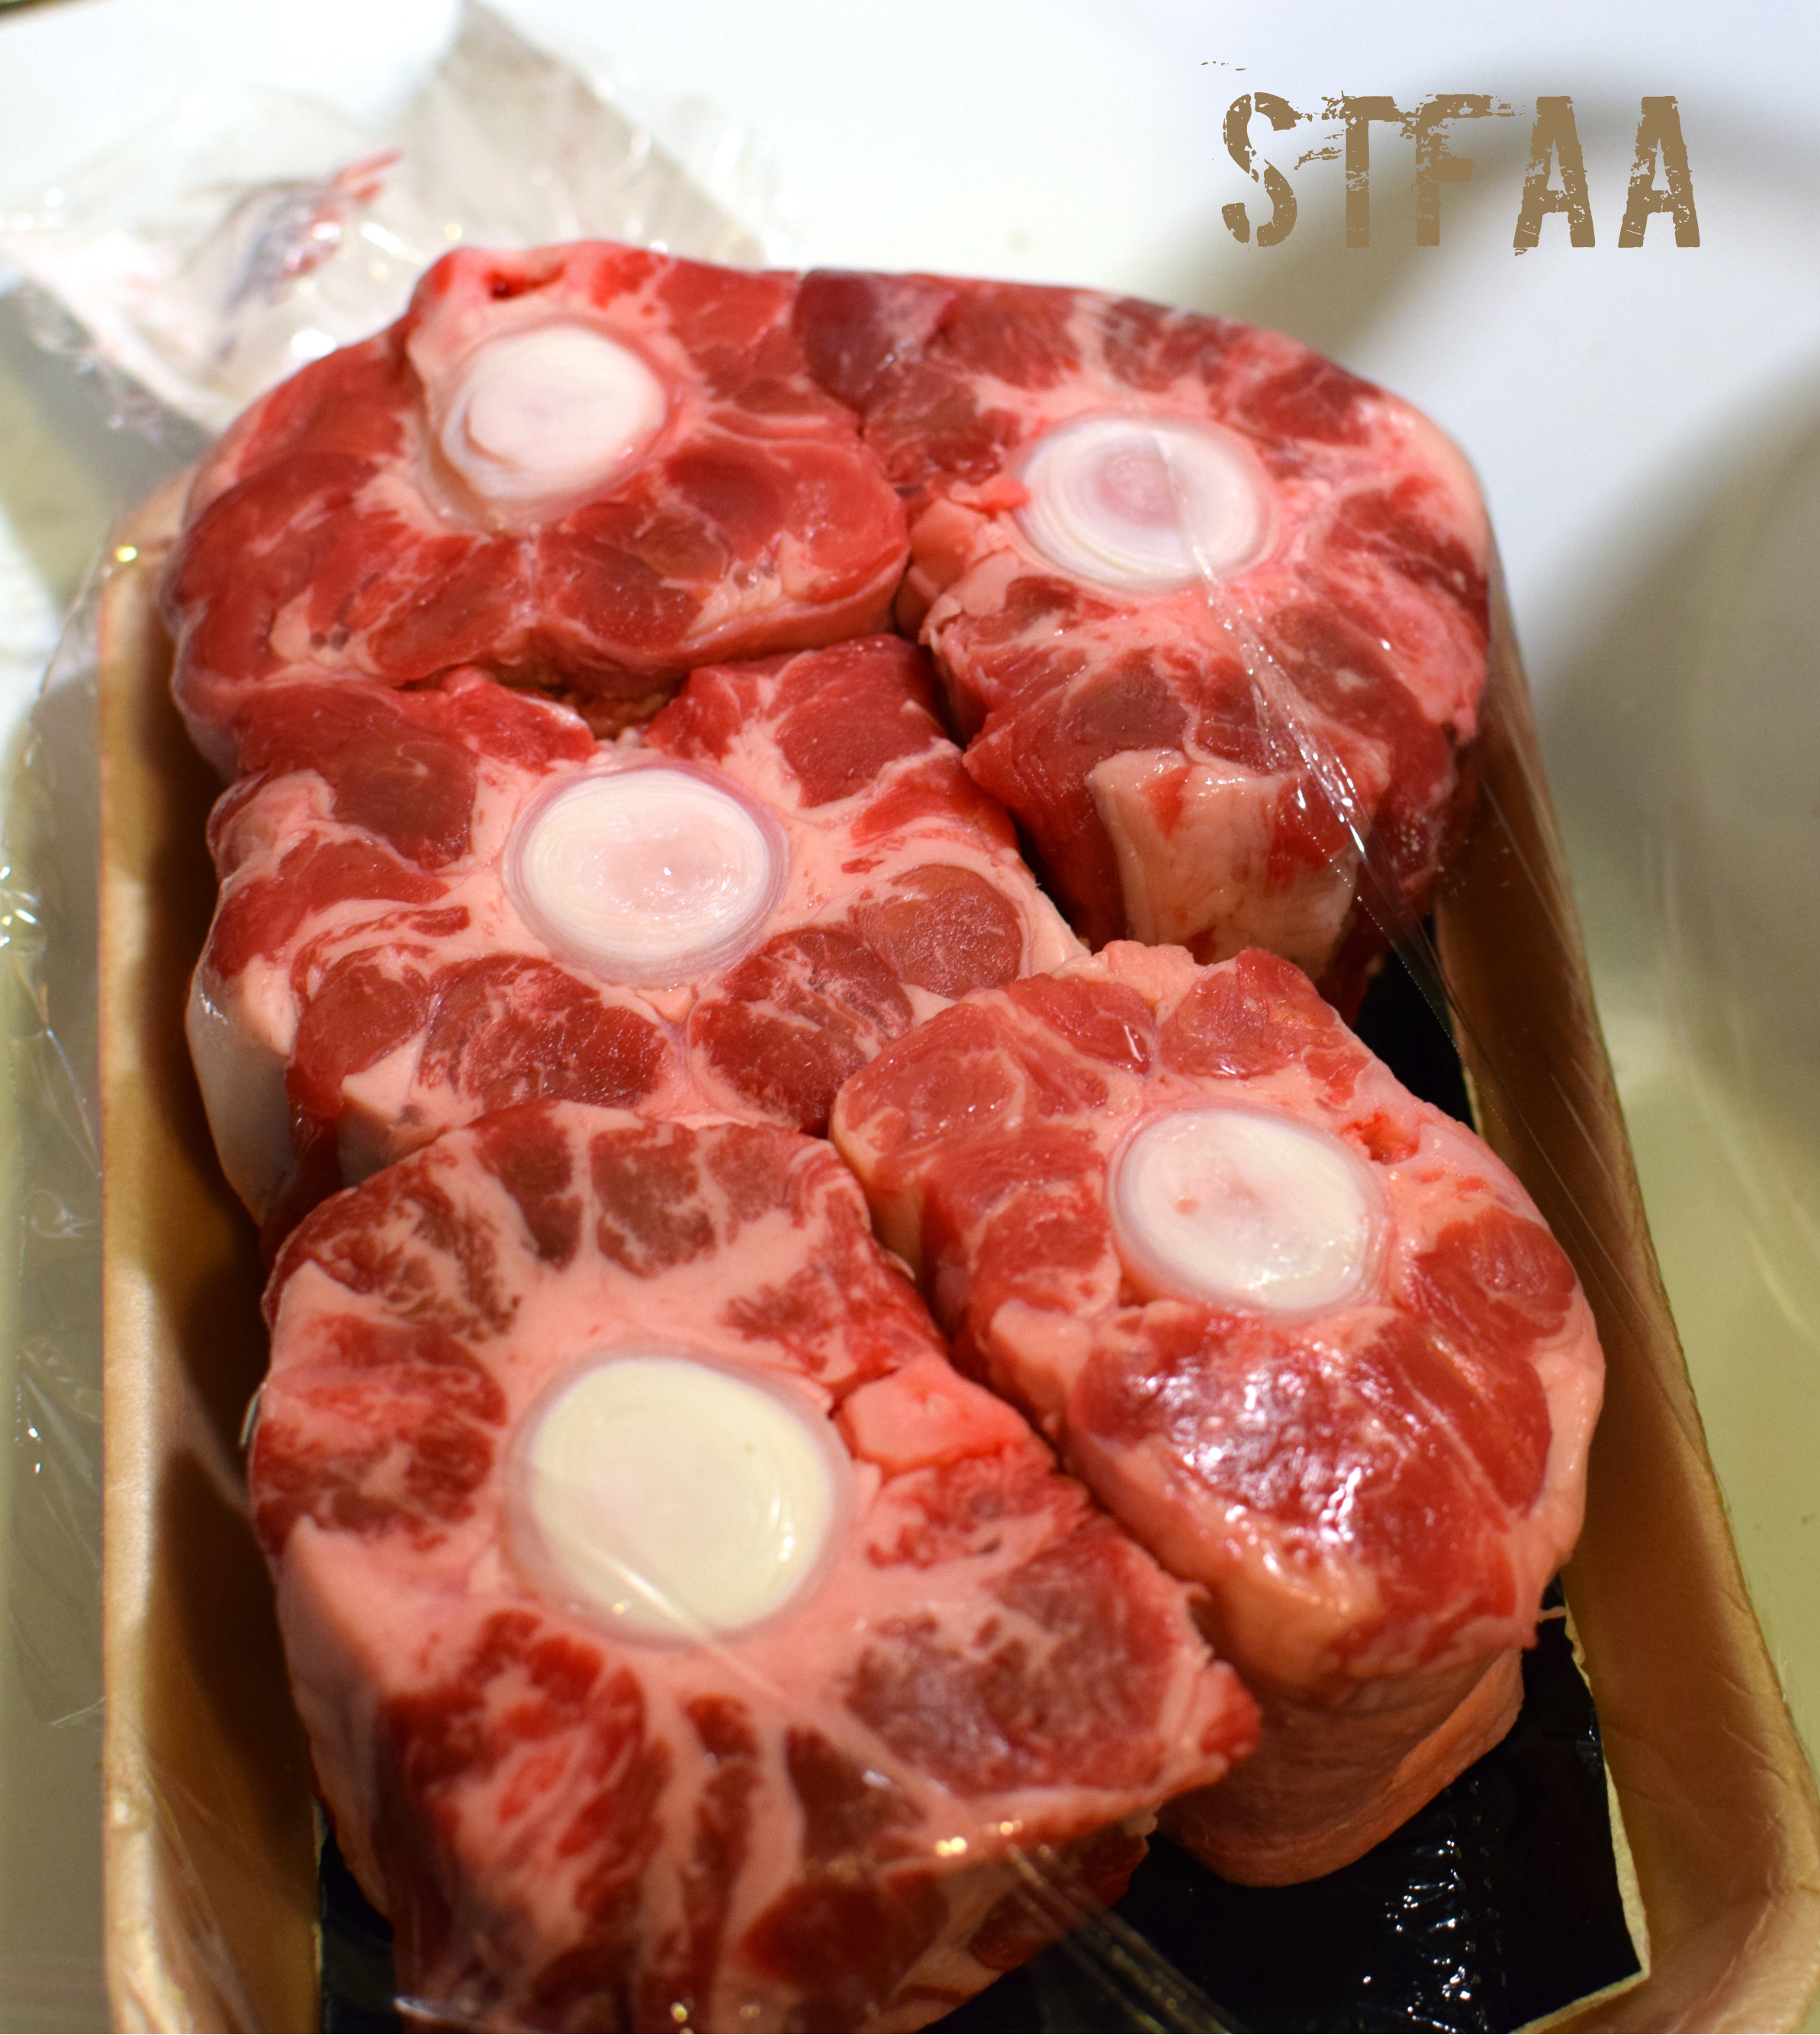
I’m kicking it off with water. After all, Cancer is a water sign, right? Plus it’s November and it snowed all weekend and we are ready for soup. I was inspired by a broth my friend Ann told me about which basically used time to extract maximum flavor from ox tails, an excellent flavoring bone that has some good tender meat on it as a bonus, and a few simple vegetables. This broth is easy, but it takes time. You should definitely make it ahead of when you want to use it. Ox tails should be available from most butchers and many grocery stores can get them or have them in the back. Ask.
Oxtails
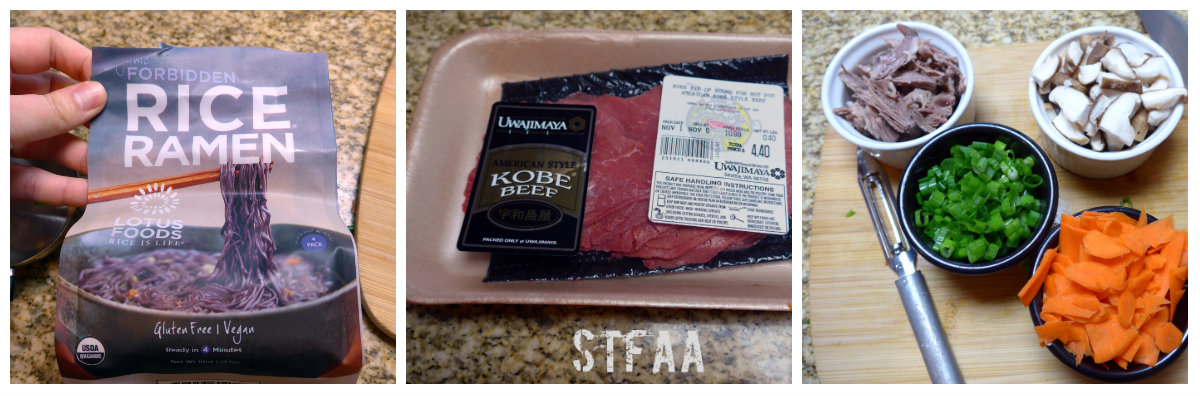
The only other “special” ingredient would be the thinly sliced beef, something I’ve gotten used to being able to get — raw meat sliced as thinly as cold cuts wasn’t something I’d seen on the east coast, but it means that the broth’s heat will cook it as part of your soup and it adds a whole other dimension to the soup. If you can’t get it, skip it, but it is worth trying to find or cut on your own.
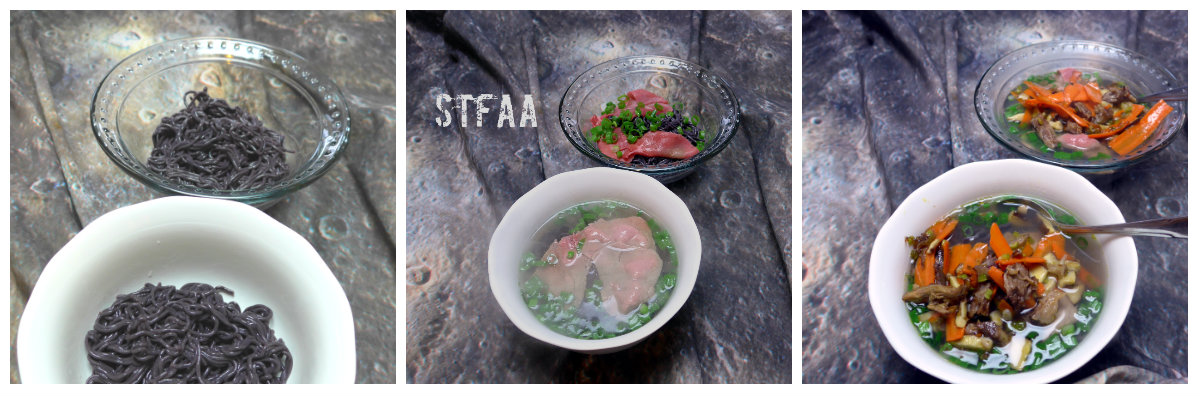
Ramen, Thinly-sliced Beef, Toppings
Oh! The noodles! I’ve found gluten-free ramen noodles at a few places in Seattle, including Whole Foods, the Capitol Co-op, and a few natural food stores. The ones in this dish are forbidden rice noodles. If you can’t find gluten-free ramen, I’d suggest using rice noodles of some sort, but not gluten-free spaghetti. Most grocery stores carry pad thai rice noodles in their “Asian foods” section, and those will work okay.
This recipe is two parts — first, you make the broth, which should be done at least the day before. Then you use the broth to make soup. The broth is incredibly simple, but takes about 4 hours to make just because you simmer everything forever. The soup is actually kind of complicated, as I spent a lot of last month learning about ramen, and I’ve used that knowledge here. For traditional ramen, the broth, noodles, and soup toppings are all cooked separately. I’ve used that here to make a soup with a great variety of textures — but know that this is a soup that you might want to just take your time and enjoy making as well as eating. Don’t try it on a work night or when you’re rushed.
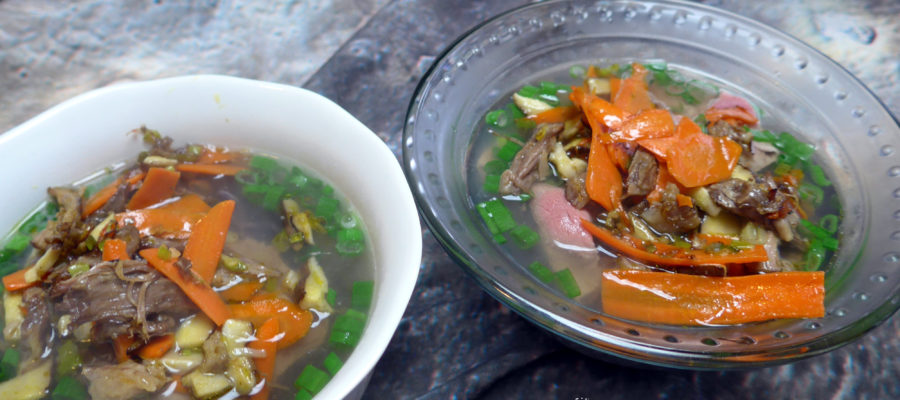
As I’ve said in the recipe, this soup will be made in two pots and a skillet, all at once, and I’ve tried to give you good instructions to get through that if you’re not used to 3 things going at once. The soup comes together in layers, as shown below, and that gives you a variety of textures.
Soup steps: first, noodles. Second, raw beef and scallions. Third, broth. Fourth, skillet of toppings. Notice: Trying to access array offset on value of type bool in /home/maryzahc/public_html/adultfoodallergies.com/wp-content/plugins/wp-ultimate-recipe/helpers/models/recipe.php on line 254
Ox Tail Noodle Soup
Print Recipe
Broth recipe probably makes about 5 servings, but this soup less than half. Use the rest for drinking, cooking grains, or more soup.
4scallionsthinly sliced, whites and greens separated
2carrotssliced as thinly as possible
5shitake mushroomschopped
pinchsalt
1/2cupox tail meatpulled from bone, excess fat and cartilege removed
3slicessteakthinly sliced for hot pot – optional but awesome.
1lemoncut into quarters
Servings: bowlsn
Instructions
Ox Tail Broth
Put the ox tails in a large stock pot and cover with cold water by about 1 inch. Add a generous pinch of salt. Put over low heat, about 2 on my electric stove. NOTE — it will take more than half an hour for the water to simmer. Low and slow is how the flavor comes out.
Meanwhile, prep the vegetables. Wash the tomato, carrot, and celery. Chop the carrot and celery really roughly — about 2 inch segments. Leave the tomato whole. Pull all the parsley leaves off the stalks and discard the stems. Peel and quarter the onion.
When the water has reached a steady simmer, add all the veg. Simmer for three hours. If it gets foamy, skim it.
Cool and remove the ox tails to store separately. Remove the vegetables and discard. Store the broth in the fridge overnight.
Ox Tail Noodle Soup
You will need three cooking pots for this. One for boiling enough water to cook the noodles. One for heating your broth. One skillet for cooking your soup toppings. Figure out which burners will work best for this setup before you start, as you’ll be using all of them at once.
Get the broth started. You want to reheat this on low until it’s about boiling, so it will take a while.
First, do all your veggie prep. Chop the scallions and separate the green and white parts (light green goes with the white). Chop the mushrooms, slice the carrots as thinly as possible. Remove the meat from the ox tails — you will likely need to cut the fat off the outside, and watch out for the cartilage on the inside — remove that.
Add about half of the green parts of the scallions to the broth. Measuring here is really not important. Eyeball it.
You can either skim the fat off the soup and use that to fry up the veg, or use a fat of your choice. Put this in your skillet over medium heat.
Next, start the noodle water. Use however much water your package directions show.
When you skillet and fat are hot, add the onions and stir for several minutes until translucent.
Next add the carrots and mushrooms and stir well. Add a generous pinch of salt. Wait until the mushrooms have wilted and given off their liquid before you start the noodles.
Cook your noodles according to the package directions.
Right before the noodles are done, add the ox tail meat to the skillet and stir well.
Drain your noodles and set up your bowls.
Here’s how your bowls go:
Add noodles at the bottom.
Add a thin layer of your raw beef. This will be cooked by the broth.
Add your broth.
Add the toppings from the skillet.
Add a squeeze of lemon over everything.
Enjoy.